


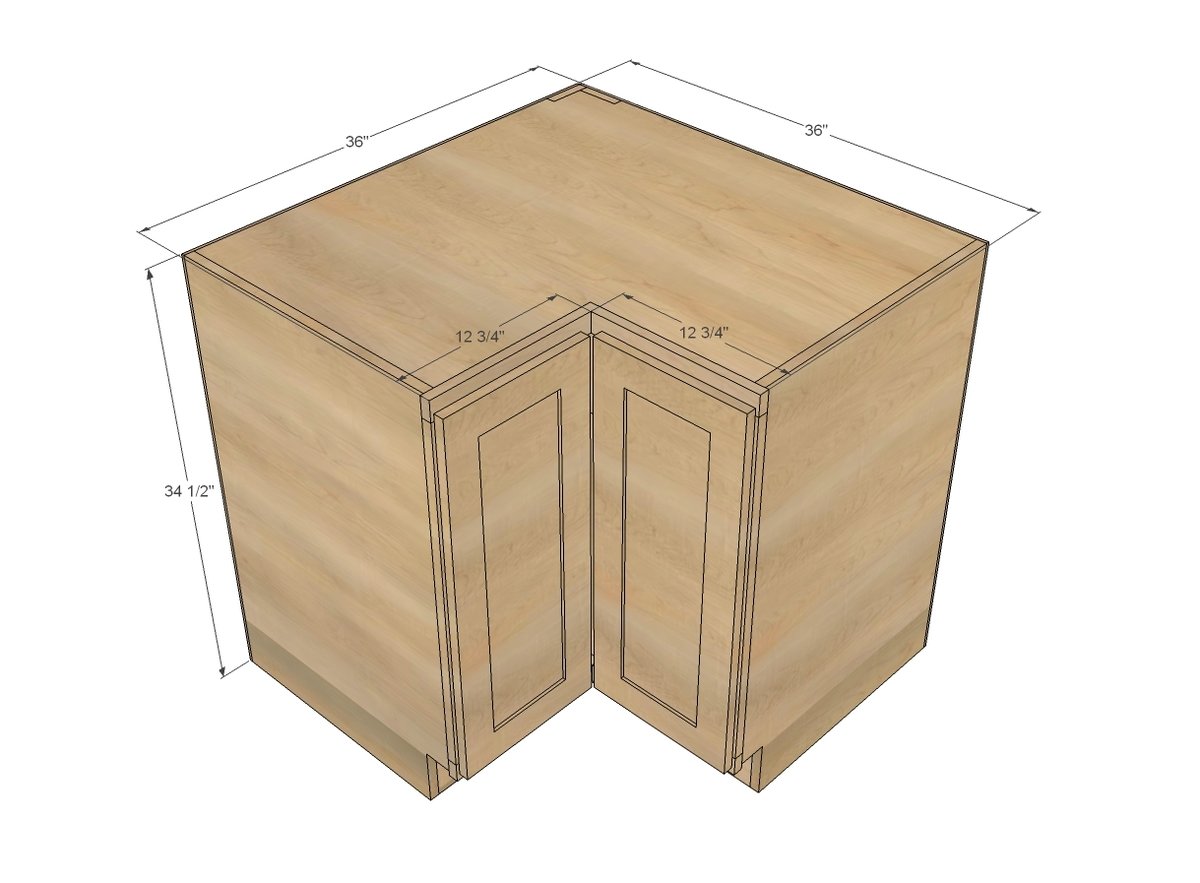
Easier to build 36" corner base kitchen cabinet plans from Ana-White.com
Remember when we made this 36" corner base cabinet?
After building it, the Ram and I both agreed, we need to check into Overbuilder's Rehab .... seriously, we got issues. I've seen corner cabinets with cardboard tacked to the back that worked out just fine.
Now putting 3/4" plywood on the back of a corner cabinet could be a really good idea if the cabinet was for example the start of a peninsula, the end of a row of cabinets, or you were placing a very heavy countertop on top.
But for our purposes, we could have gotten away with a lesser cabinet.
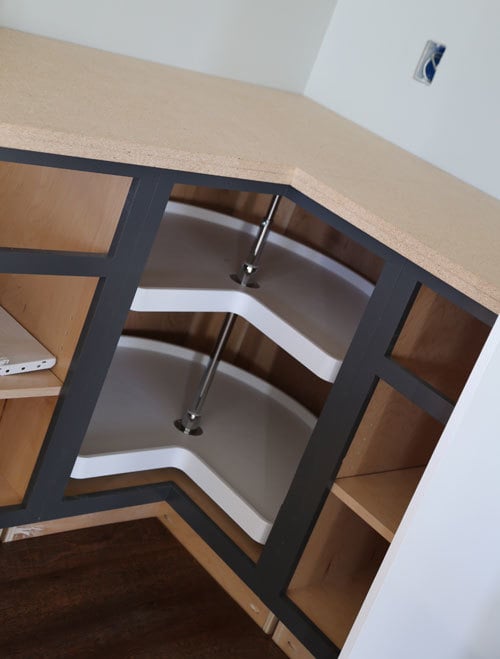
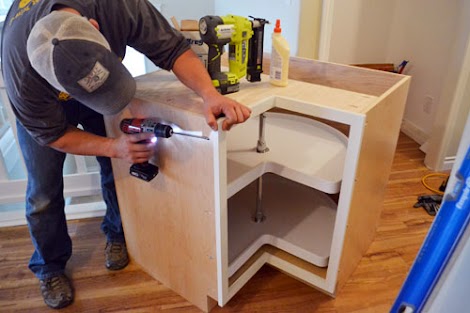
So now that we (and by we of course I mean the Ram and Grandpa Tim - I'm still home with baby) are starting work on the other side of the Momplex, first up is a 36" base corner kitchen cabinet. And this time, we simplified.

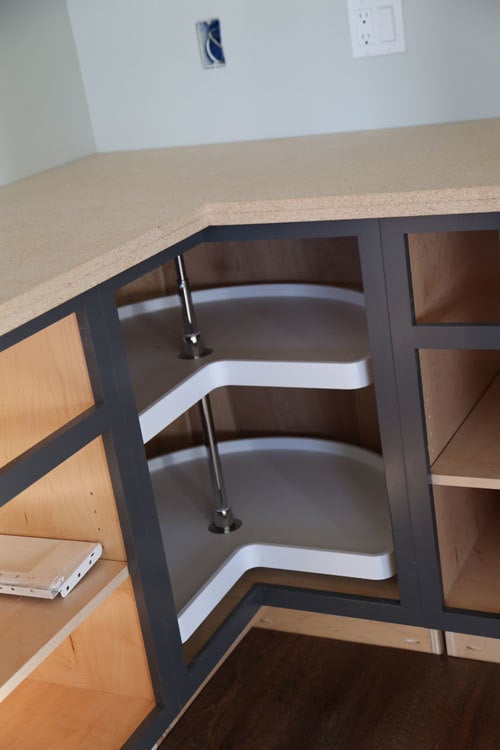
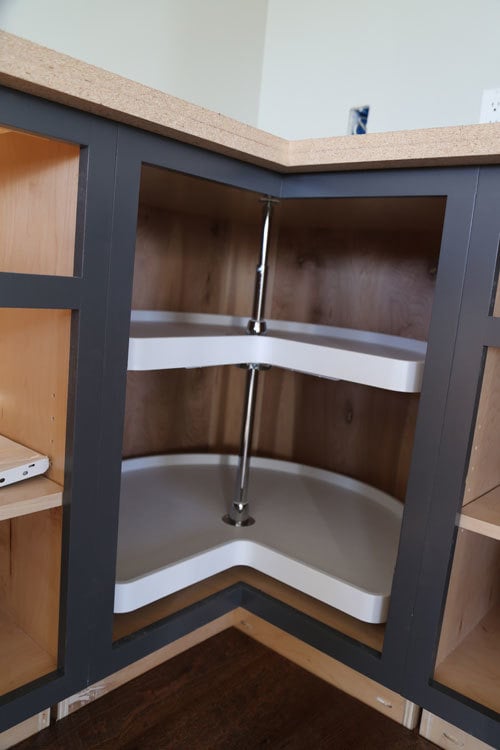
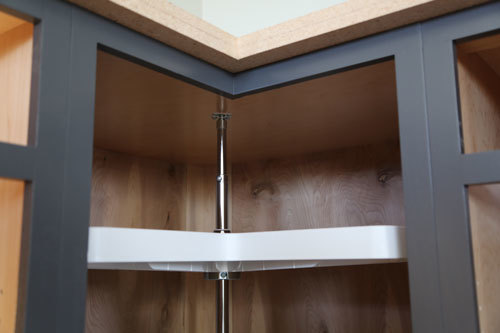
Grandma who likes to sew really loves her lazy susan, so we went ahead and kept that for the shelving inside the cabinet.
But inside is a little different. The tops and bottoms are both made of finished plywood (see step 1 on how to get all the 3/4" plywood pieces on one sheet of plywood).

And the back is 1/4" plywood - to match the rest of the cabinets.
Check out the plans for this easier to build 36" base kitchen corner cabinet below, and also the original plans here.

And also check out the tutorial on adding hinges and doors to this cabinet here.
And also a base cabinet building tutorial by the man himself:
Thanks so much for reading - hope you find this plan useful!
XO Ana + Fam
Preparation
1 - sheet 3/4" plywood (we used prefinished PureBond in Maple)
1 - sheet 1/4" plywood (we used prefinished PureBond in Maple)
scrap 3/4" plywood for supports
10 feet of 1x2s in hardwood to match doors (we used poplar for a paint grade finish)
2 - 3/4" plywood @ 34-3/4" x 34-3/4" (top and bottom)
2 - 3/4" plywood @ 34-1/2" x 22-1/4" (sides)
2 - 1x4s or scrap plywood pieces @ 34-1/3" long (back supports)
1 - 3/4" plywood @ 5" x 15" (bottom support)
1 - 3/4" plywood @ 5" x 34-3/4" (support support)
2 - 1/4" plywood @ 34-1/2" x 35-1/2" (back)
FACE FRAME
2 - 1x2 @ 27"
2 - 1x2 @ 13-1/2"
2 - 1x2 @ 12-3/4"
DOOR SIZE FOR FULL OVERLAY
11-5/8" x 28-1/2"


Please read through the entire plan and all comments before beginning this project. It is also advisable to review the Getting Started Section. Take all necessary precautions to build safely and smartly. Work on a clean level surface, free of imperfections or debris. Always use straight boards. Check for square after each step. Always predrill holes before attaching with screws. Use glue with finish nails for a stronger hold. Wipe excess glue off bare wood for stained projects, as dried glue will not take stain. Be safe, have fun, and ask for help if you need it. Good luck!
Instructions
Step 1

You can get all the pieces cut from a single sheet of plywood if you are careful. I'd cut the bottom off first for the two sides at 34-1/2", and then cut the two side out of the remaining pieces. You'll have to use your jigsaw to cut the toekicks and inside corner of the top and bottom. See step 2 and 3 for sizes on the top, bottom and sides.
Step 2

The back corner of the top and bottom needs to be notched out for the back supports. We used the scrap piece of plywood from ripping the sides (about 3-1/2" wide) for these pieces, but you could also use 1x4 boards. Notch out with a jigsaw to fit the boards.
Step 3

TIP: Before assembly, drill 3/4" pocket holes on outsides of sides, top and bottom for attaching face frame in later steps.
Attach top and bottom to sides, leaving a 5" gap underneath bottom shelves.
Step 4

Attach back to the top and bottom, leaving a 5" gap underneath bottom shelf.
Step 5

Step 6

Attach 1/4" plywood to back with finish nails and glue - we use 3/4" finish nails.
Step 7

Build the face frame separately, and then attach to front of cabinet. Note that the face frame overextends the sides of the cabinet by 1/4".
Step 8

We used full overlay doors - here's the sizes we ordered.
It is always recommended to apply a test coat on a hidden area or scrap piece to ensure color evenness and adhesion. Use primer or wood conditioner as needed.
Comments
JoanneS
Mon, 02/03/2014 - 17:01
Love this plan!
So exciting to see the Momplex kitchens! I'm definitely with you on the occasional bouts of "over-building." Hubby sometimes teases me, "Even if the house falls down, that shelf will still be standing!" hee hee :) Love the simpler plan for this corner. I have one of those flimsy ones with the circular interior wall. I so wish it were like this one! The original had the doors attached to the front of the lazy susan. Can't tell you how many times I caught my fingers in there before finally removing it and replacing the doors. I left the interior open to stand up cookie sheets and big cutting boards. After building a pantry and island inspired by your plans, there was plenty of storage in our kitchen so we could use that corner for stand-up storage.
Loving the glimpses of the finishes too! Does this side of the Momplex have the same type of floating floors? The cabinet color is great too - what is the name of the color you used?
Looks fab! :)
jaimecostiglio
Mon, 02/03/2014 - 18:58
Grey base cabinet color?
Ana I'd love to know what color you painted those base cabinets? Please say Iron Mountain? I'm smack in the middle of painting our kitchen cabs, uppers white and bases iron mountain but now I'm thinking I love your choice. Please share!
TGRIFF
Fri, 09/18/2015 - 19:11
The Cut
Yo mention that all the pieces can be cut from a single sheet of plywood. It appears one of the cust has to be started in the center, how do you get it started in the middle?
Thanks,
Tyson
JohnRR
Wed, 12/02/2015 - 07:34
Plunge cut in the 'vertical'
Plunge cut in the 'vertical' section with your circular saw. Finish the cut with a jigsaw
Branatly03
Thu, 03/17/2016 - 10:05
Is a scaled down version possible?
Hello
Im currently reconfiguring my kitchen cabinets. I have a "corner spot" where I'd like to have a corner base like this one but the opening is much smaller than 36"....more like 28". Im just wondering how a more narrow version would work??
Even if I cant have the lazy susan inside I'd still like to have the corner unit with regular shelves.
mtsandager
Sat, 09/24/2016 - 08:52
Finish PureBond??
I'm working with pre finished PureBond plywood and was wondering if this is something I still need to put a sealer on? polyurethane?
thanks for the help and the wonderful plans!