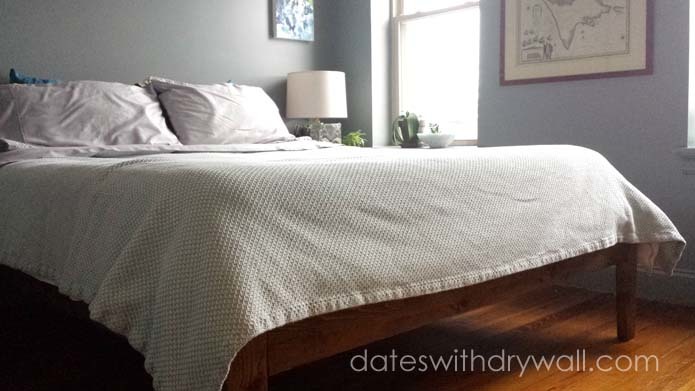


A simple, queen-sized, mid-century inspired platform bed made from inexpensive lumber. For more details and other projects, check out our blog: http://dateswithdrywall.com!
Preparation
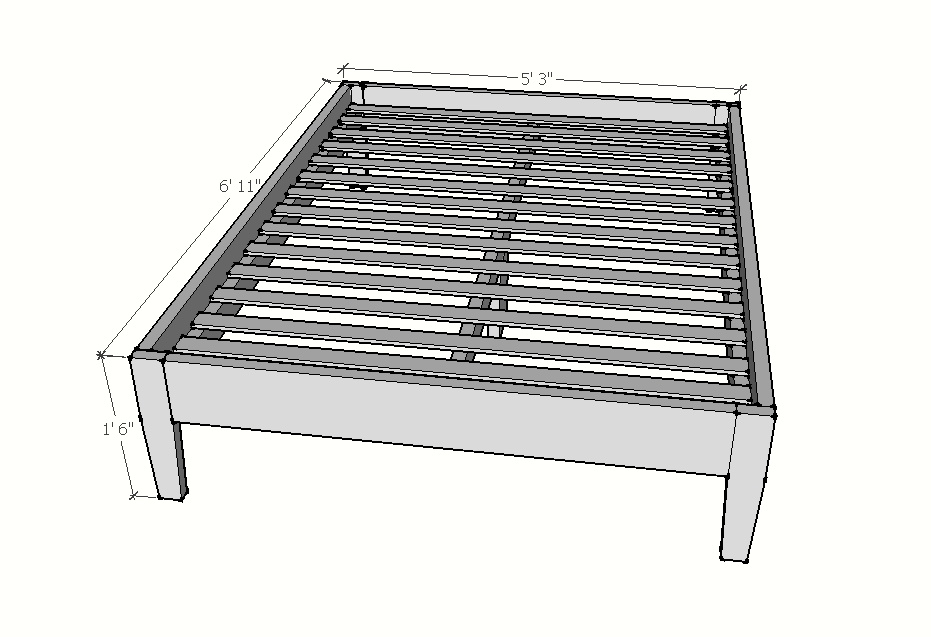
2"x4"x10' (x3)
2"x8"x8' (x2)
2"x8"x10' (x1)
1"x3"x8' (x15)
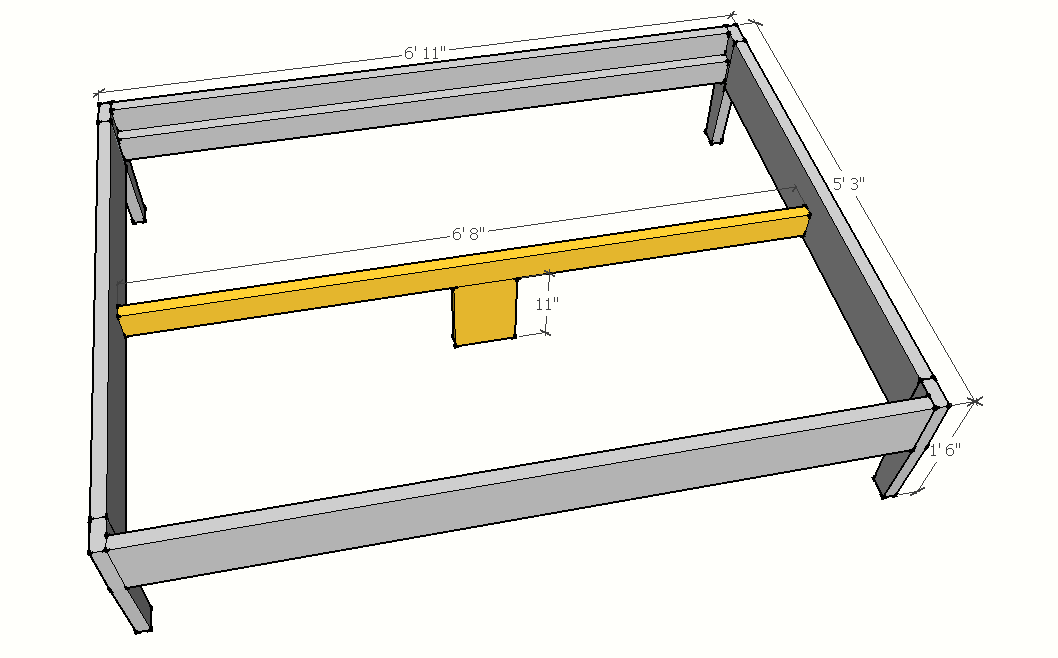
2"x4"x8's into 6'8" (x3) and 18" (x4)
2"x8"x8' into 6'8" (x2) and 11" (x1)
2"x8"x10's into 4'8" (x2)
1"x3"x8's into 5' (x15)


Please read through the entire plan and all comments before beginning this project. It is also advisable to review the Getting Started Section. Take all necessary precautions to build safely and smartly. Work on a clean level surface, free of imperfections or debris. Always use straight boards. Check for square after each step. Always predrill holes before attaching with screws. Use glue with finish nails for a stronger hold. Wipe excess glue off bare wood for stained projects, as dried glue will not take stain. Be safe, have fun, and ask for help if you need it. Good luck!
Instructions
Step 1
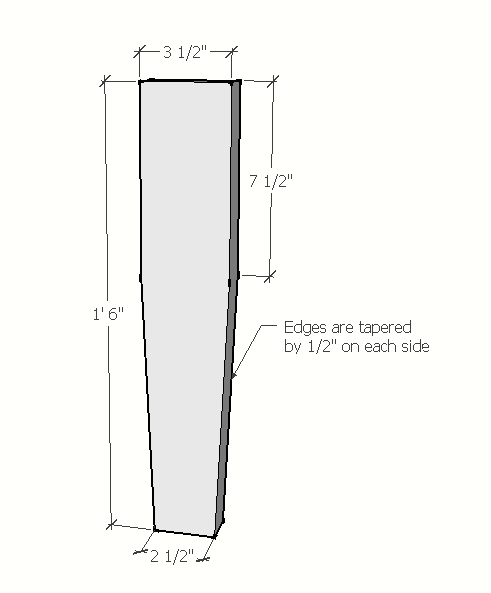
For tapered legs, use a tapered leg jig on your table saw (you can purchase a jig, or rig one up yourself like we did here: http://dateswithdrywall.com/our-diy-mid-century-inspired-bed/). For our bed, we tapered each side by half an inch at each end, starting 7.5 inches from the top of the leg to accommodate the bed frame sides (which are made of 2"x8"s).
Step 2
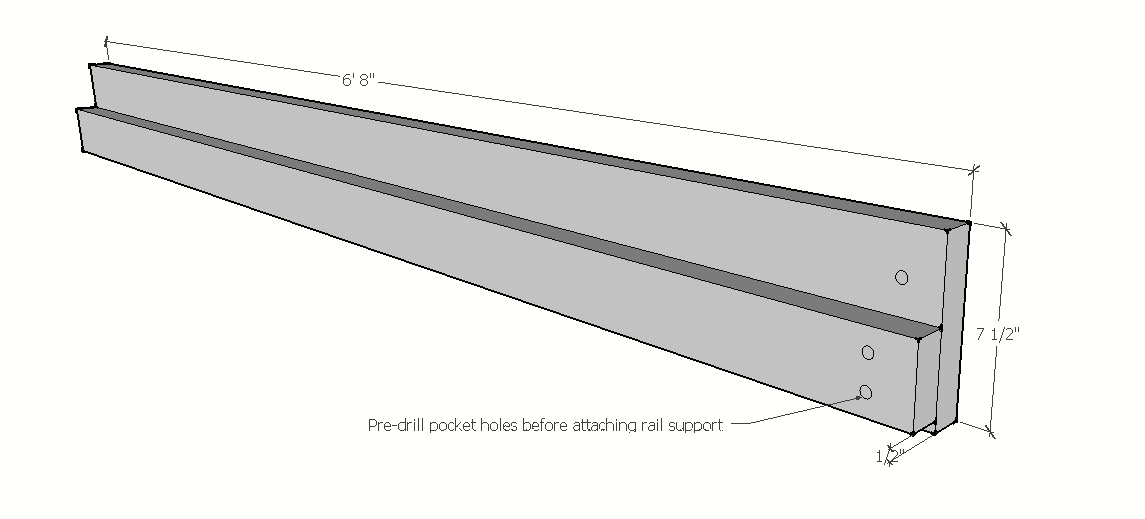
After all four legs were tapered, we pre-finished the legs and frame sides (all the 2"x8"s) by carefully sanding/sanding/sealing with polurethane and letting the finishes dry per manufacturer's instructions. Then, we pre-drilled pocket holes in both ends of unfinished 2"x4"s and finished 2"x8"s, before attaching them together using construction adhesive and 2.5" wood screws spaced about 2" apart. The 2"x4"s will form the supports for bed slats, and are attached .5" from the bottom of each 2"x8". We did this for each side (left and right), making sure to arrange them so that the best-finished sides of our 2"x8"s were exposed on the outsides.
Step 3
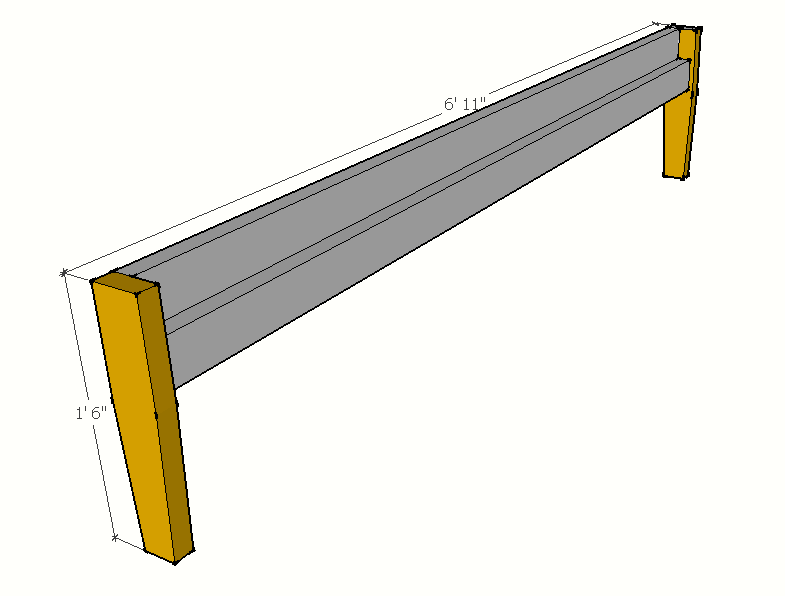
We attached tapered legs to each end of the two (left and right) frame sides. We found it easiest to do this step upside down, so we could properly align the top of each leg with the top of the frame side while screwing 2.5" pocket screws into our pre-drilled holes.
Step 4
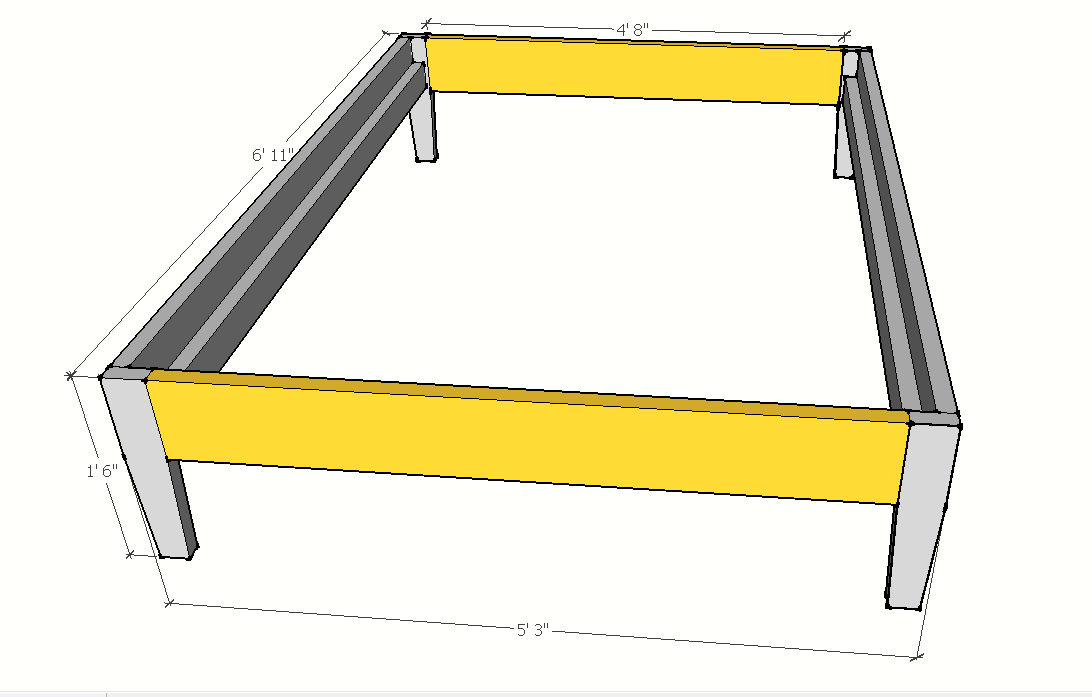
Next we attached the top and bottom 2"x8"s, again after pre-drilling pocket holes for each. We did this step upside down, also, because it became even tougher to keep our edges properly aligned.
Step 5
Step 6

Finally, we added fifteen unfinished 1"x3" slats as mattress support (you could use as few as thirteen of them, but we added a few for extra comfort). Each slat was evenly spaced and secured to the left, right, and center slat supports with wood screws.
It is always recommended to apply a test coat on a hidden area or scrap piece to ensure color evenness and adhesion. Use primer or wood conditioner as needed.

Comments
jmwittig
Tue, 02/18/2014 - 13:17
Mid-Century Platform bed
Are these plans for a Queen bed? Thanks for clarifying!
In reply to Mid-Century Platform bed by jmwittig
DatesWithDrywall
Tue, 02/18/2014 - 14:41
Yes they are, sorry about
Yes they are, sorry about that! I updated the description to clarify, too...
viridiana
Thu, 04/17/2014 - 23:30
hola
Como unimos el paso 4?
WakingJoaquin
Wed, 01/13/2016 - 04:45
A good question
Viridiana asked, how do we join the sides to the head and foot boards? The sketchup drawing shows pre-drill markers on the side boards, but not the head and foot boards. What would be the most stable place to use the kregg jig?