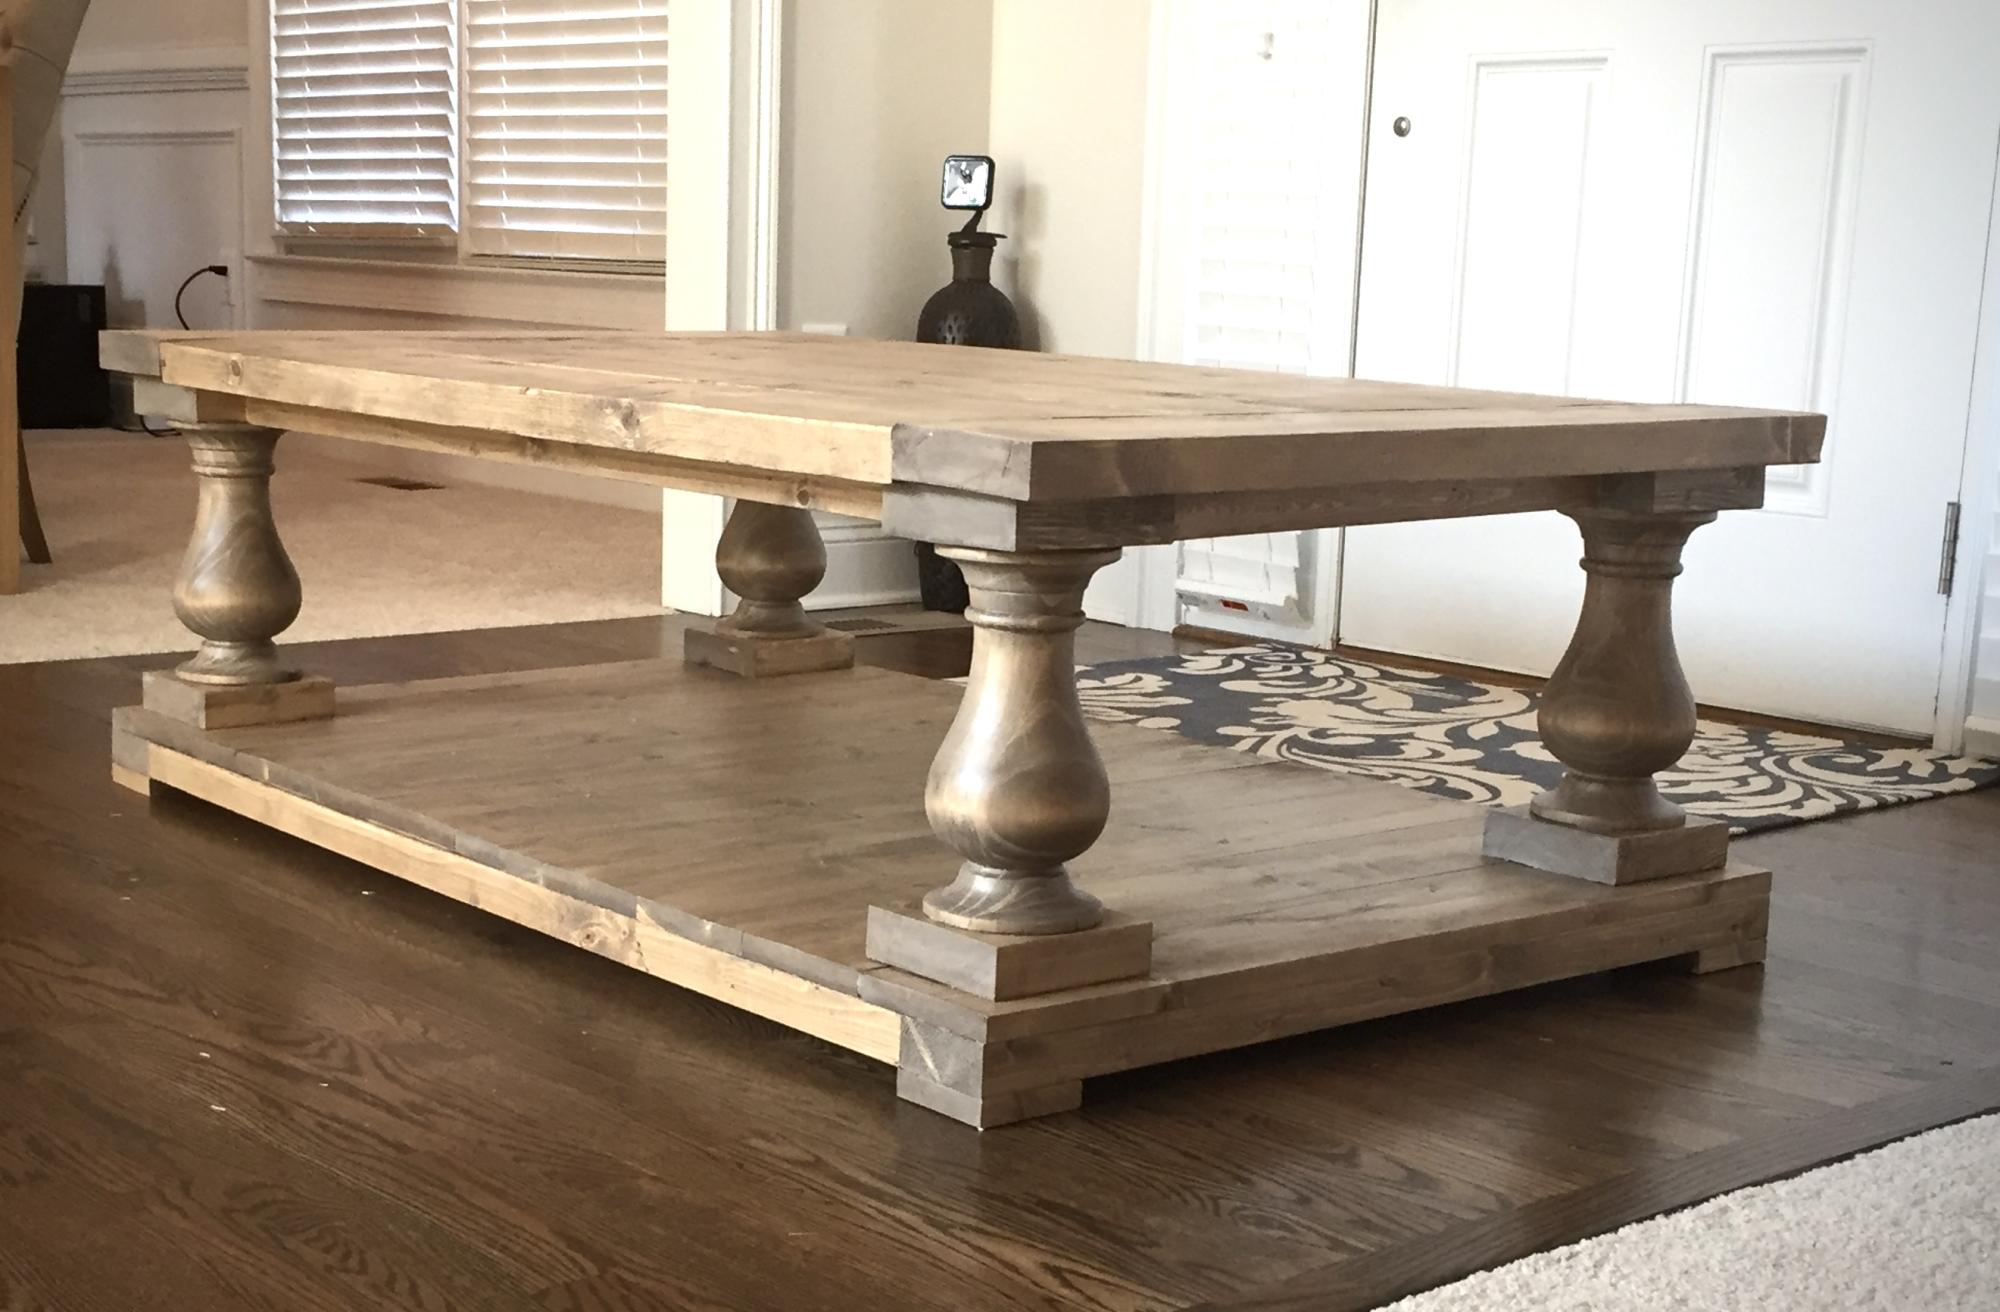


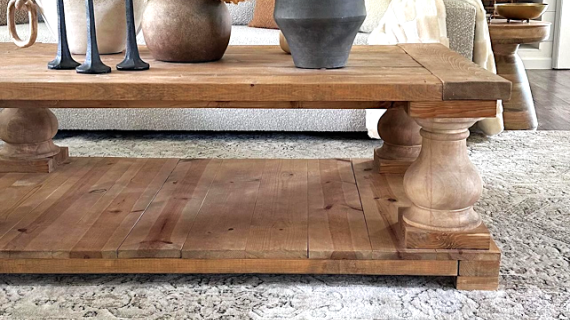
DIY balustrade coffee table inspired by Restoration Hardware coffee table. Save hundreds by building yourself! Free step by step plans with diagrams, shopping and cut list from Ana-White.com

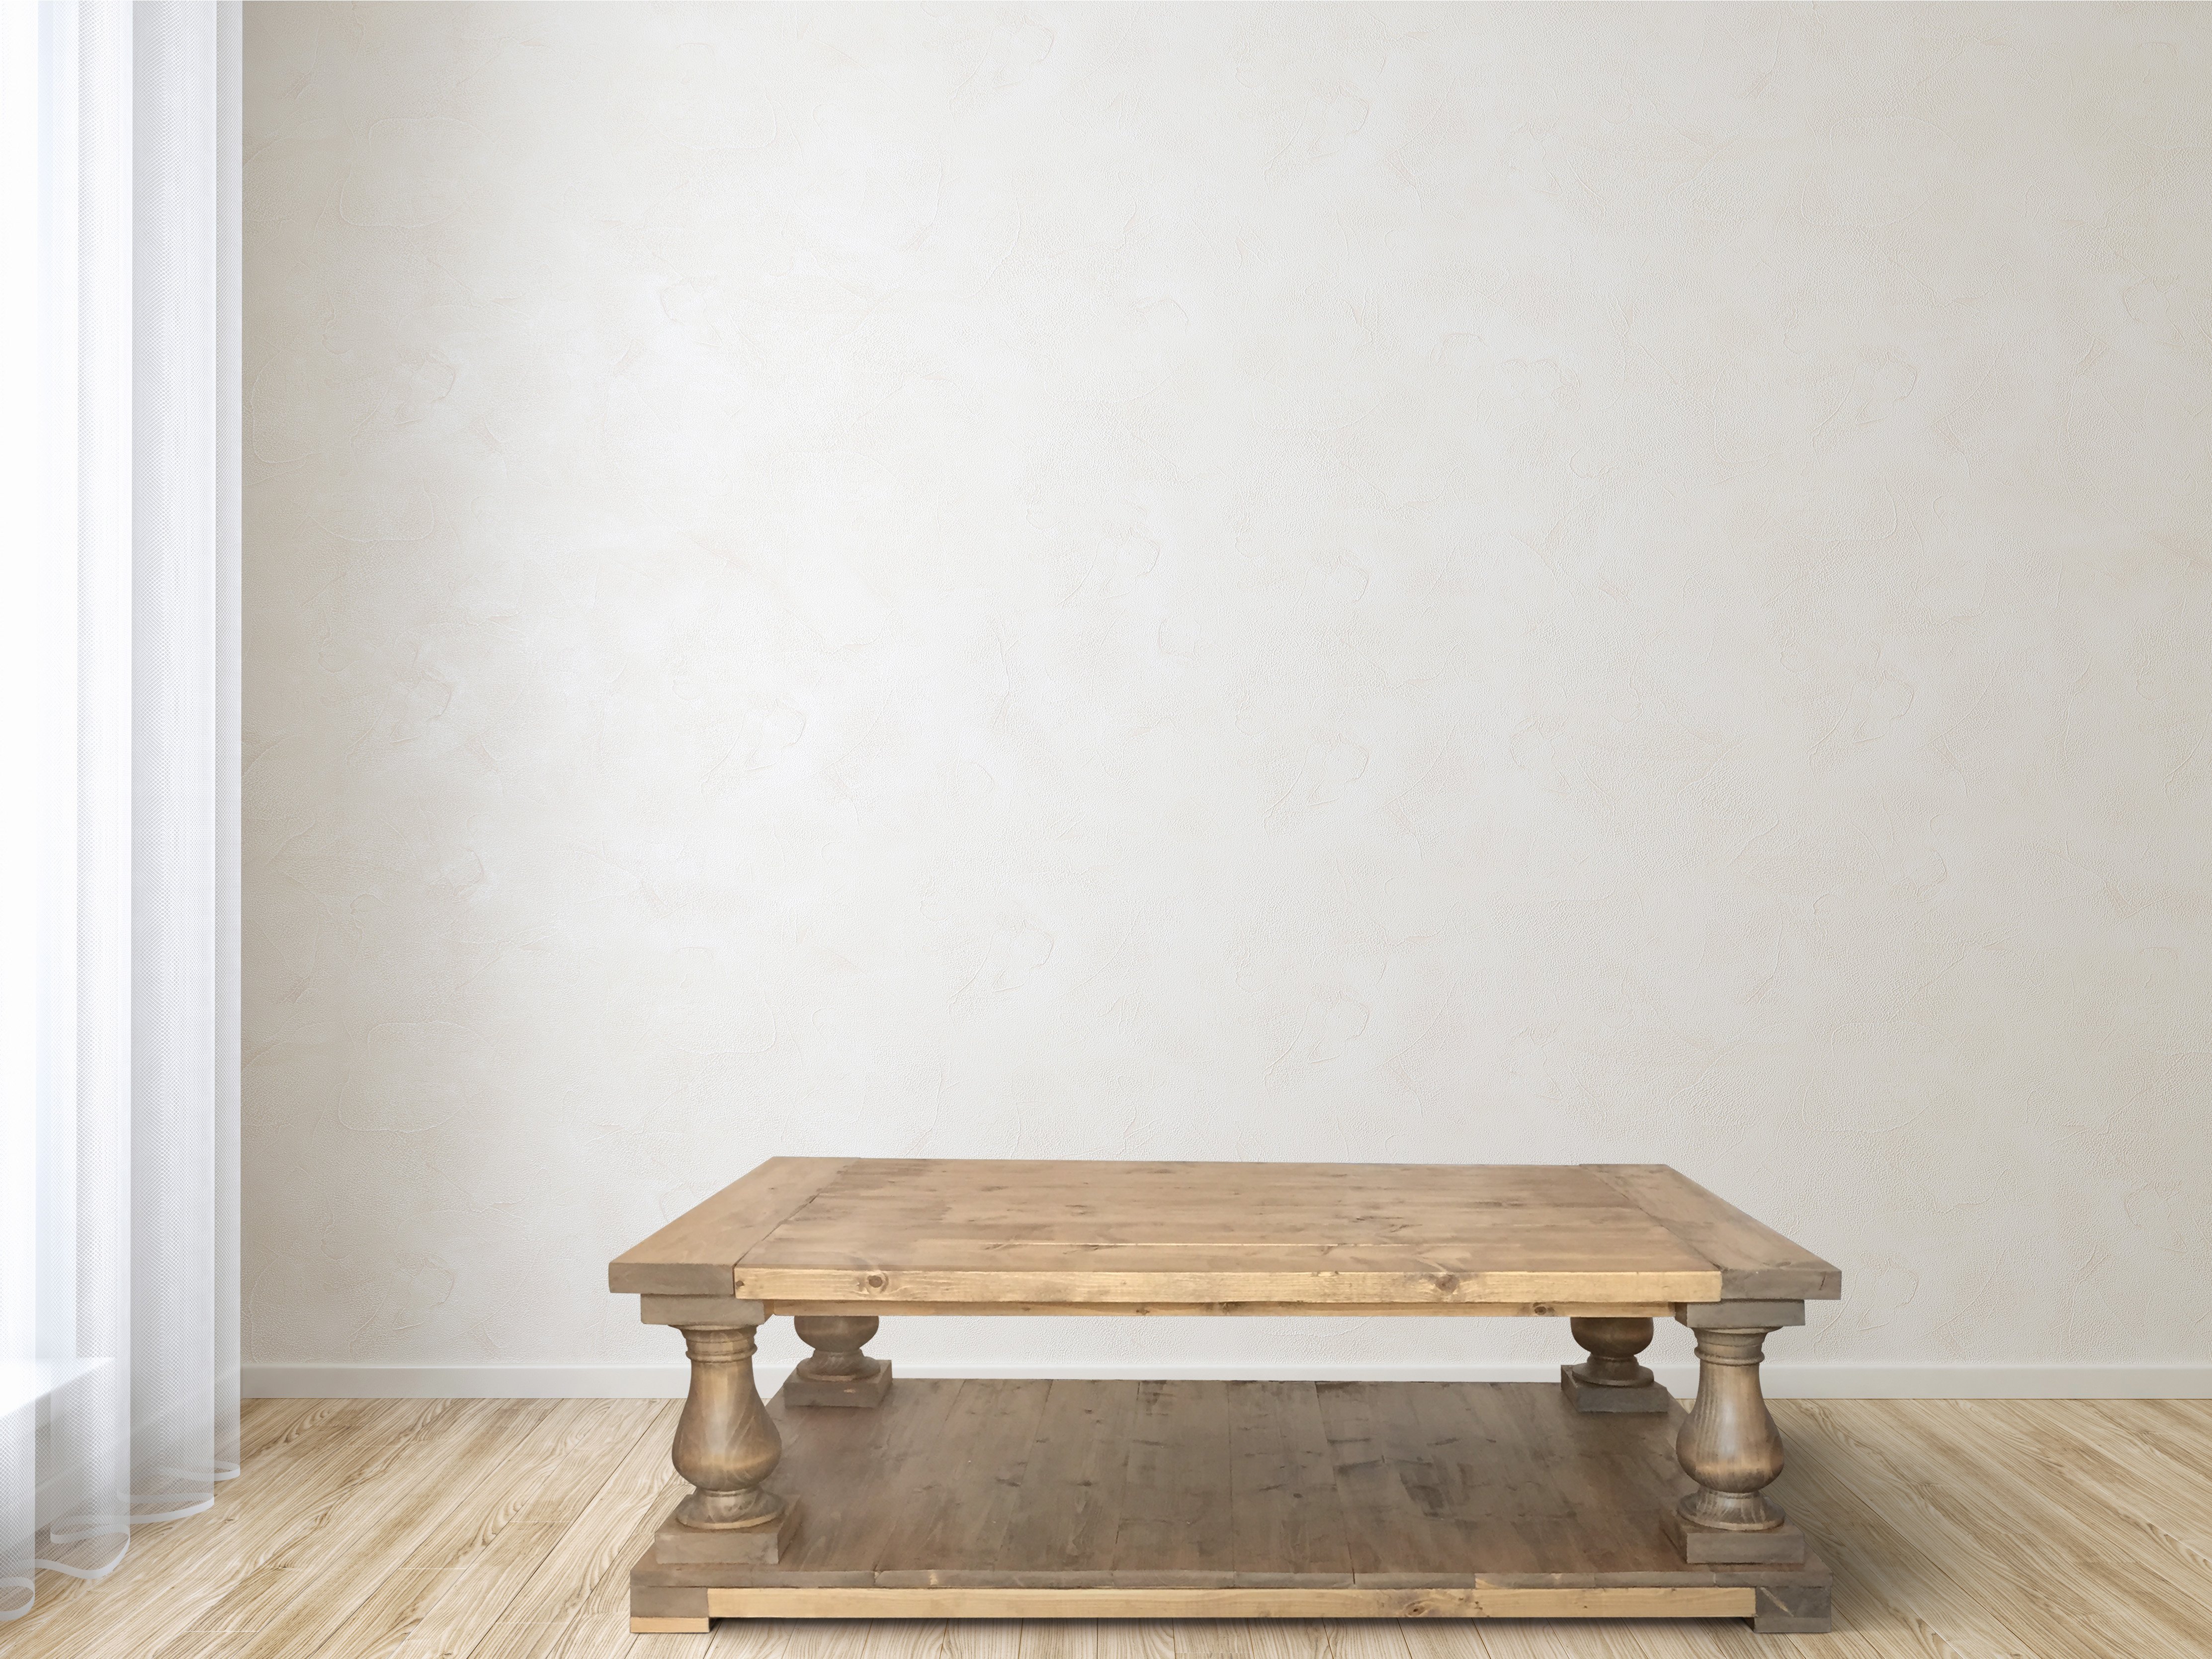
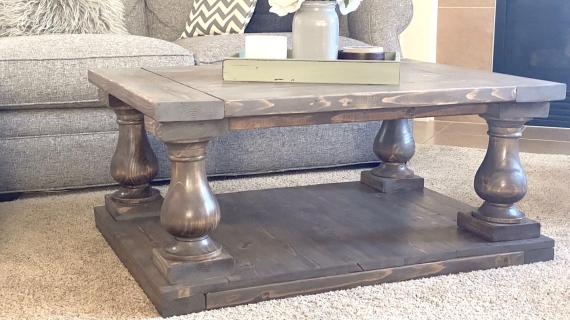
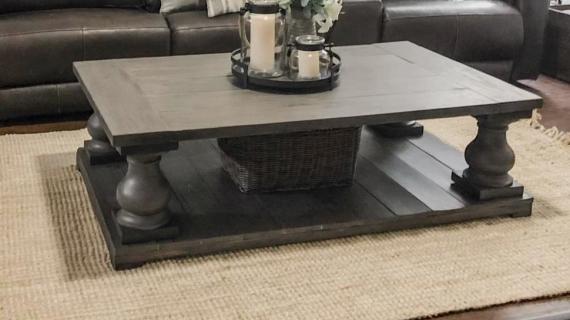
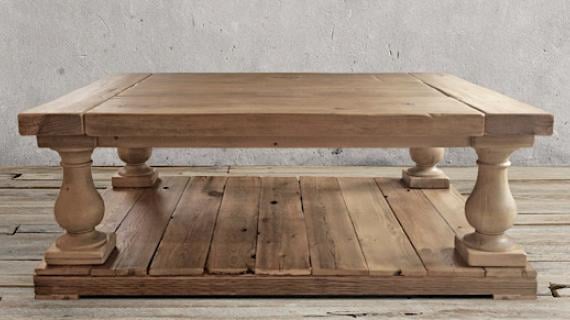
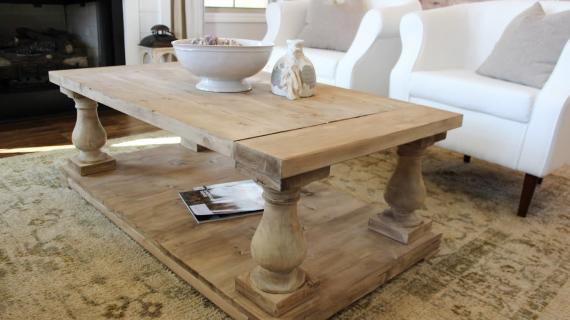
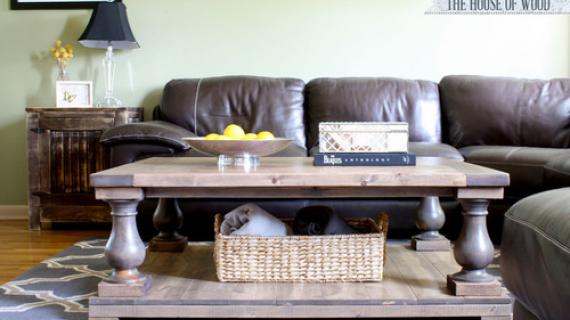
My good friend Jen from House of Wood asked me to team up with her to build her parents a new coffee table. She loved the look of Restoration Hardware's Balustrade Coffee Table, and wanted to use a similar style leg.
The folks at Osborne Wood were kind enough to create a custom leg (now available for sale) and worked with us to make the leg as affordable as possible.
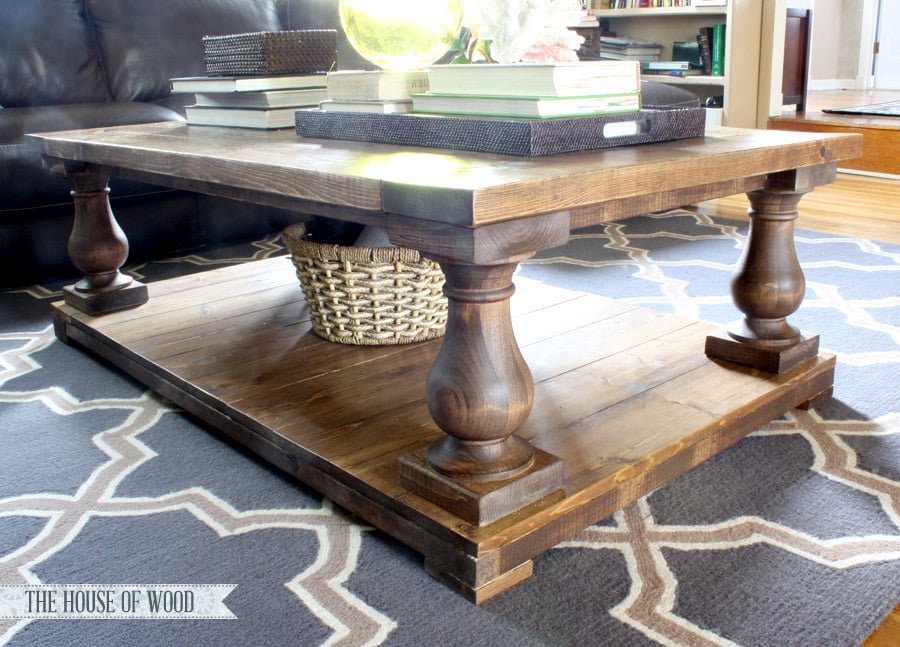
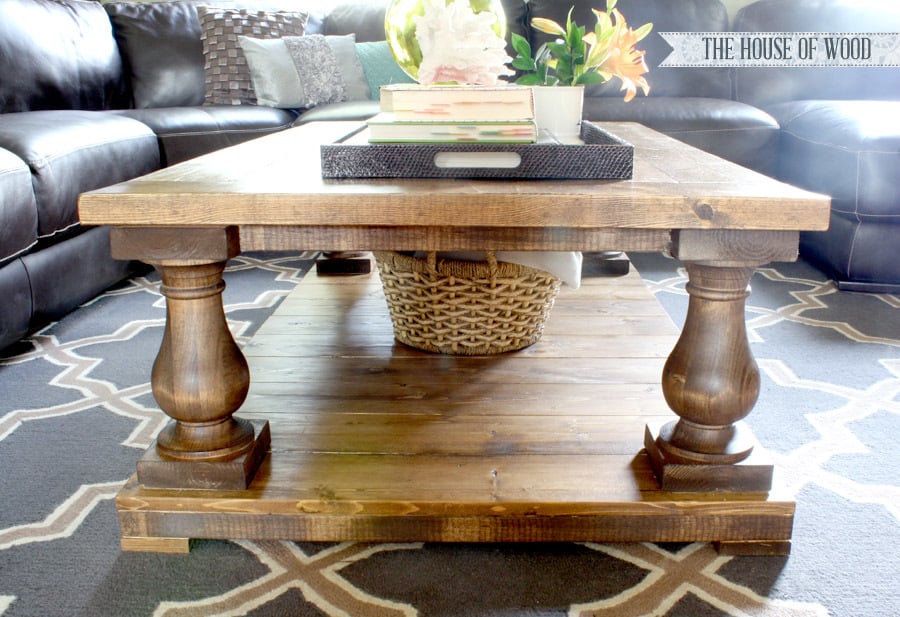
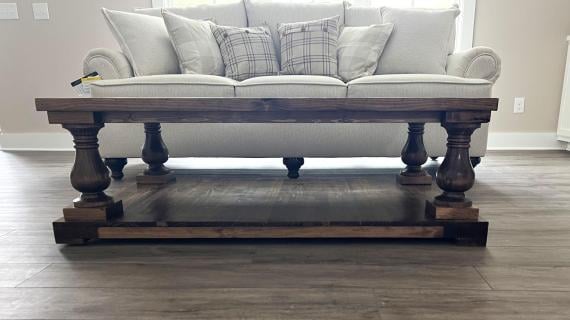
Just add a top and bottom ...

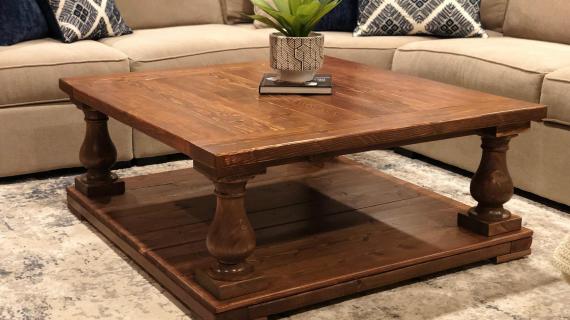
And you've got yourself a beautiful custom coffee table!

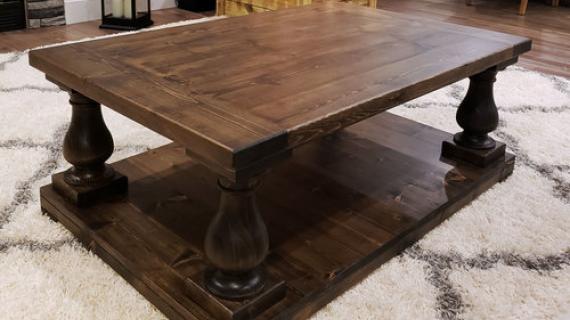
Here's from Jen: "It was an easy build… took about 6 hours to build and then 3 days to finish. It turned out really well! Total cost was $95 for lumber and supplies, plus $28/leg. Not a bad project for a couple hundred bucks! Especially when RH sells theirs for $1700."
Jen is sharing her building post here, so please, take a second and stop over and check out lots more photos and tips!
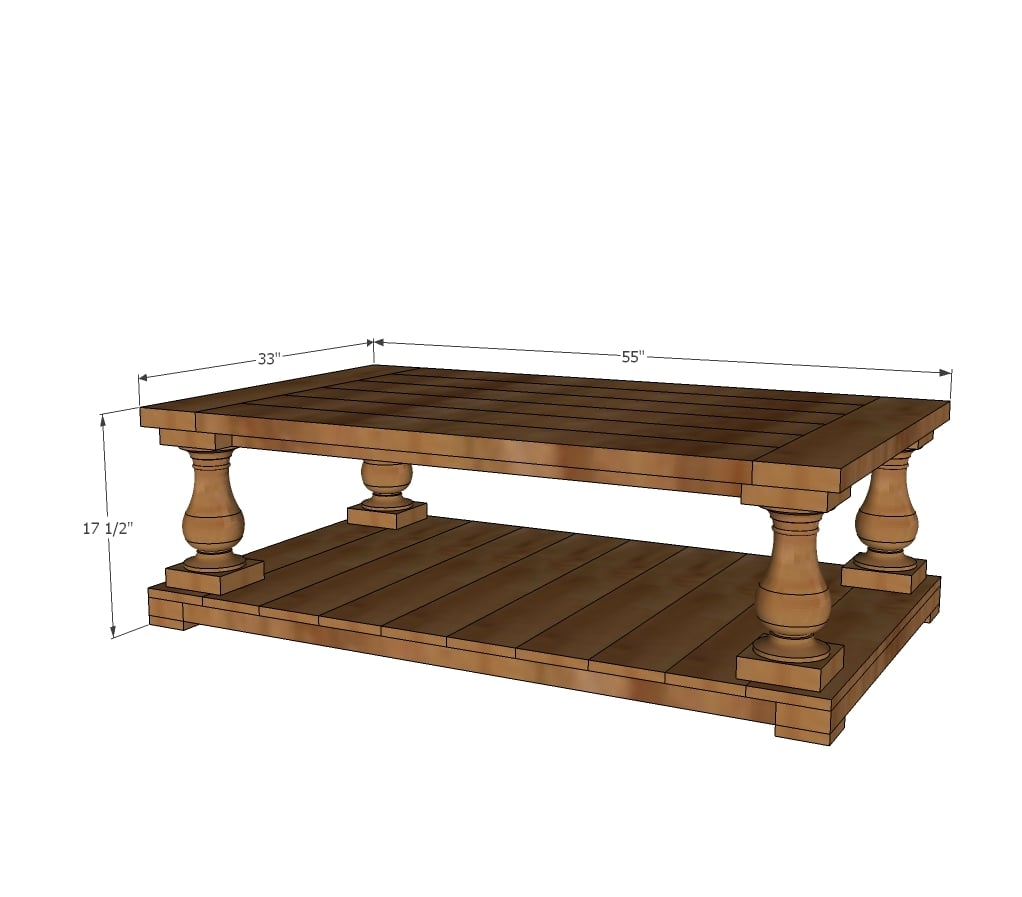
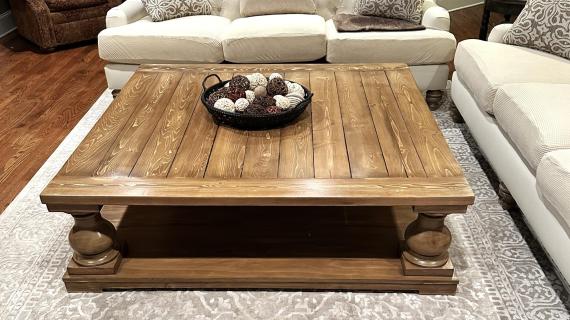
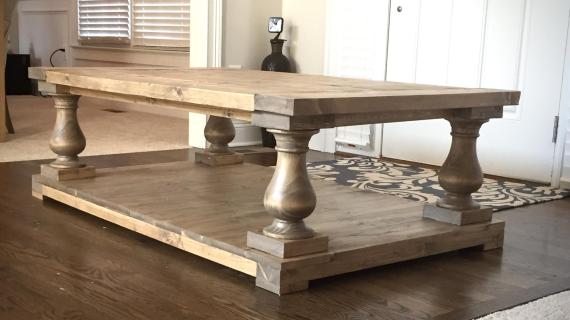
Balustrade Coffee Table Plans
The plans for this coffee table follow. Please share a photo when you are done, we love seeing your projects!
Pin for Later!

Preparation
- 5 - 1x6 @ 6 feet long
- 4 - 2x4 @ 8 feet long
- 1 - 1x4 @ 15” long
- 4 - 2x6 @ 8 feet or stud length
- 4 - turned pillars (Jen used these from Osborne Wood)
- 1-1/4” and 2-1/2” pocket hole screws
- 2” or longer wood screws nails for nailing on feet
- 10 - 1x6 @ 33” long
- 2 - 2x4 @ 33” long
- 2 - 2x4 @ 48” long (may need to be cut to fit)
- 4 - 1x4 @ 3-1/2” long
- 8 - 2x6 @ 5-1/2” long
- 2 - 2x4 @ 20” long
- 2 - 2x4 @ 42” (may need to be cut to fit)
- 2 - 2x6 @ 33” long 6 - 2x6 @ 44” long


Please read through the entire plan and all comments before beginning this project. It is also advisable to review the Getting Started Section. Take all necessary precautions to build safely and smartly. Work on a clean level surface, free of imperfections or debris. Always use straight boards. Check for square after each step. Always predrill holes before attaching with screws. Use glue with finish nails for a stronger hold. Wipe excess glue off bare wood for stained projects, as dried glue will not take stain. Be safe, have fun, and ask for help if you need it. Good luck!
Instructions
Step 1

Start by building the bottom shelf with pocket holes. TIP: I like to cut all my shelf boards a tad long, then join the boards and trim down the tabletop with a circular saw.
After building it, take a second to measure the size of the shelf (1x6 boards can vary in width) - so you may need to adjust some of your cuts or cut as you go.
NOTE: You may wish to attach legs (step 5) before moving on to hide screw holes underneath.
Step 2

Frame up the bottom supports and attach to bottom shelf.
Step 3

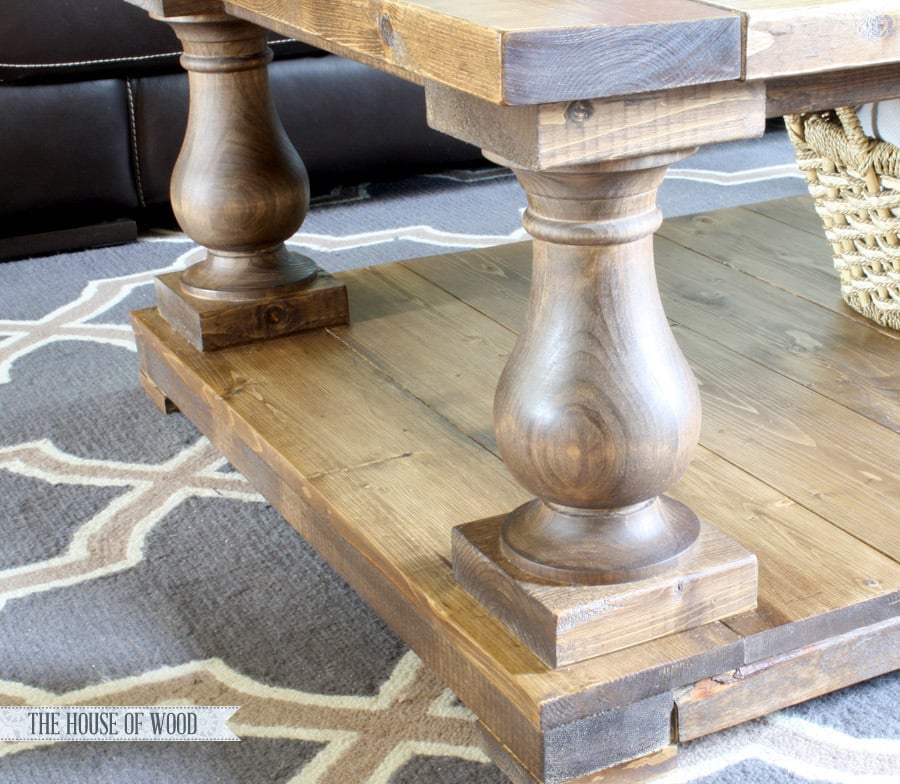
Nail and glue the feet on at the bottom shelf corners. You can use 1-1/4" - 2" long nails.
Step 4

Attach the 2x6 blocks to the tops and bottoms of the legs.
Step 5

Step 6

Attach legs together with pocket holes placed on top.
Step 7

Build the tabletop first, then attach to top of coffee table through the boards added in step 6 and legs.
Step 8

For finishing details and building photos, please visit Jen at House of Wood.
It is always recommended to apply a test coat on a hidden area or scrap piece to ensure color evenness and adhesion. Use primer or wood conditioner as needed.
Comments
birdsandsoap
Mon, 05/05/2014 - 13:10
Nice!
I love the balustrades. Such a substantial looking piece! great finish too!
givehugsprn
Mon, 05/05/2014 - 20:22
I have been wanting to build
I have been wanting to build this table since I saw it in the RH store! It is going to be my next project. I will be ordering the legs this week...Im so excited!!! Thanks so much for all you do!
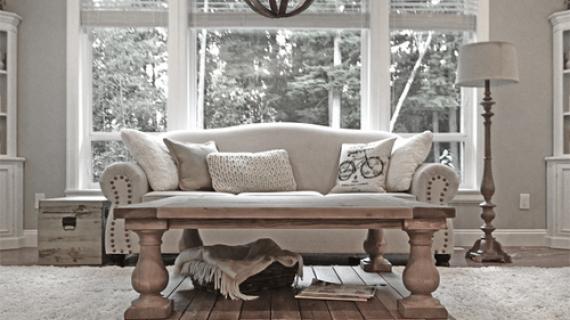
Any way you can be talked into plans for the matching side table? http://media.restorationhardware.com/is/image/rhis/prod2500085?$l-pd1$&…
In reply to I have been wanting to build by givehugsprn
JenWoodhouse.com
Tue, 05/06/2014 - 19:12
LOVE that side table!
Omgosh, that is beautiful! Ana, wanna hack it? ;)
RusticRoosterW…
Sun, 06/07/2015 - 06:00
Leg selection and top width
This is a beautiful table and a customer recently approached me about building it. My first question is did you use the "Knotty Pine" leg or another one? Secondly my local Home Depot and Lowes doesn't have the best "premium" 2x4's and I was thinking about using the 1x6 Select Pine boards for the top and putting a 2x4 apron around the under side for the look of the desired thickness. Has anyone done this? The 1x6 Select Pine is just a much nice piece of wood vs the premium 2x4's. Thanks again for all your great pieces!
In reply to Leg selection and top width by RusticRoosterW…
RusticRoosterW…
Sun, 06/07/2015 - 06:04
clarification
I'm sorry I meant to say a 2x8 or 2x10 apron underneath instead of the 2x4 thus moving it forward to the front edge. I'd probably add a support running across the middle of the bottom side of the table top to add stability to the 1x6 top.
Awfenske
Sun, 11/22/2015 - 18:06
Pocket hole screw patterns
I don't have any furniture building experience and I'm wondering, in Step 1, how many screws do I need on each board? How far apart should they be from each other, and how close to the edges?
tmeierkids
Tue, 09/19/2017 - 12:11
matching end table for RH balustrade table?
is there any plans available for the matching side/end table for this?
len1011
Tue, 03/06/2018 - 09:54
Wood stain
What wood stain was used for this project?
jsto4
Tue, 03/31/2020 - 17:43
What stain was used for this…
What stain was used for this project?
MeinsHaus
Fri, 01/22/2021 - 16:20
How exactly do you put the…
How exactly do you put the bottom shelf (step1) and top together? I've never built anything before, but am tired of the quality of whats available for my budget. I want sturdy real wood furniture that's going to stand up to the beating my family is going to give it but that's also not going to break the bank. No need to spend $1000s on a coffee table that's going to fit my sofa/couch and room.