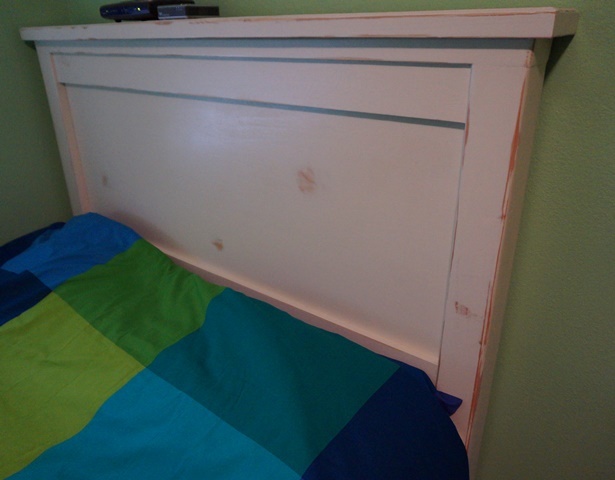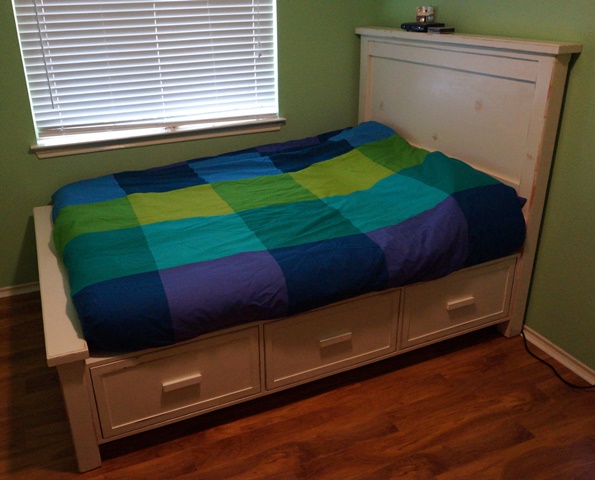
I built this Farmhouse Storage Bed with Storage Drawers for my youngest son. I wanted this bed to be for our current use (for my son and when my parents come a visit) but also I wanted deeply for this to be an heirloom that he would carry with him in his life.
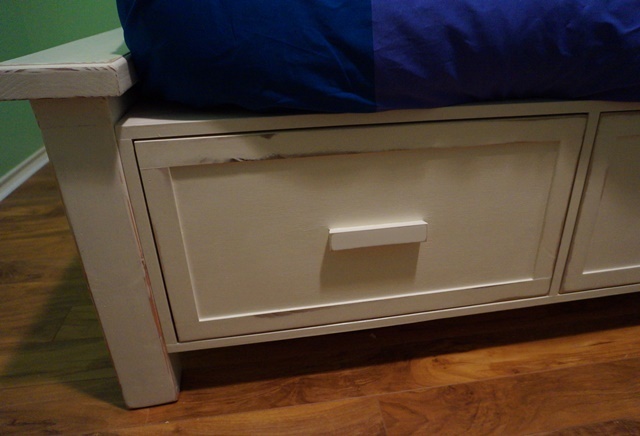
I worked on it a bit at a time for about three weeks. I probably put 50 or so hours into it and I learned a lot. I used redwood 4x4 posts for the head and foot board, cabinet grade plywood, and reclaimed poplar for the trim and handles on the drawers.
I sealed the drawers and drawer boxes with my own version of "Wipe on Poly" that I mixed myself. I painted the bed with eggshell white paint that I bought a while back to repaint our ceilings with when Hurricane Ike came through. I sanded back portions of the bed to make it look distressed and then sealed the whole thing (bar the portions I already sealed) with clear semi gloss polycrylic.
My thinking was that I would have the color I wanted and yet seal the whole bed including the portions I distressed making the look rather permanent and tough for a child under 10.
I plugged all of the pocket holes that I used and sanded them flush as well as using edge banding on the drawers and the bases so that they looked like solid wood. These two alterations to Ana's plans added some time to be sure - but I was really happy with the result.
Ana, I wanted to thank you personally for putting these plans together and encouraging others to try their hand and building furniture. I had build a lot of other woodworking projects before but nothing of this scale. It went VERY smoothly with few hiccups and came together, essentially, like I wished it would.
I plan on making more things in the plans soon, including a loft bed for my other son, and will post them here when I do.