

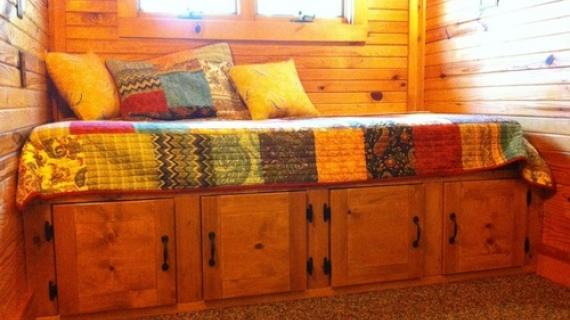
DIY rustic storage bed from ana-white.com
My deepest apologies for website issues this morning (or afternoon if you don't live in Alaska). We've grown, both traffic-wise and content wise (almost 1000 plans!!!) and we've reached that point where our site just badly needs a technical upgrade. Know that we are working diligently to improve issues with the site and expect an improved user experience within the month. Thank you so much for your patience with the site. It is much appreciated.
---
Happy Friday folks!!!
Am I the only one out there that cleaned my room as a kid by stuffing everything under the bed???
Anyone???
Between me and you, somedays I still wish I could just stuff it all under the bed. Or look the other way when Grace does.
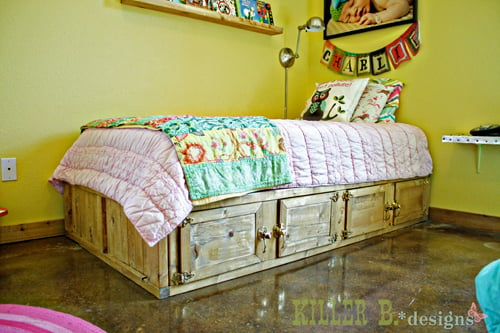
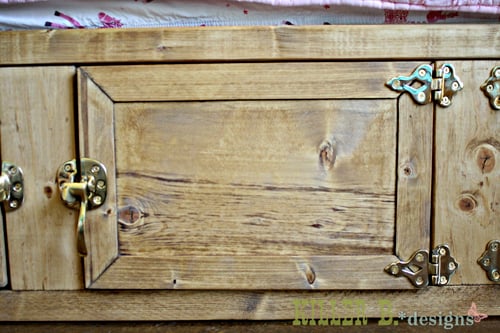
So when my dear friend Brooke from Killer B. Designs wanted to collaborate with me on a storage bed, styled like this one from Restoration Hardware Baby and Child, but with access to the entire under bed area (partioned off of course so it's not a black hole of toys under there), the inner stuffer and pile-er in me had to say YES!!!
Never mind that Brooke is mommy-extraordinare to two beautiful little ladies, Brooke whipped out not just one beautiful and rustic storage bed,

But two!!!

Want to see more of this awesomeness? Brooke has posted lots more photos, finishing details, and that hardware on her blog - go check it out!
And of course, the plans follow!
Have a great weekend!
XO Ana + Family
PS - Want to build but just don't have the tools?

We are giving away this tool package!
Preparation
7 - 2x2x8
1 - 2x4x10
4 - 1x3x8
1 - 1x12x8
1 - 1x12x4
1 - 1x8x8
7 - 1x3x8 furring strips for slats
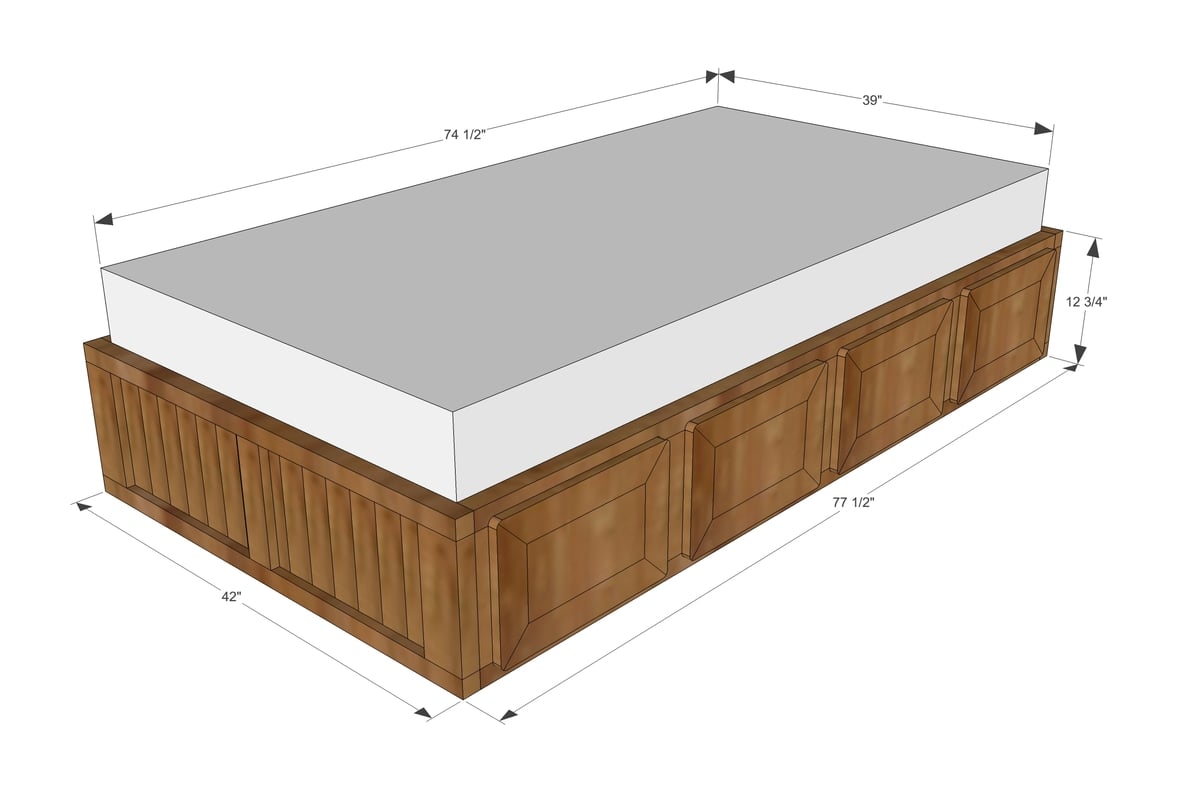
8 - 2x2 @ 42"
10 - 2x4 @ 9 3/4"
30 - 1x3 @ 9 3/4"
4 - 2x2 @ 74 1/2"
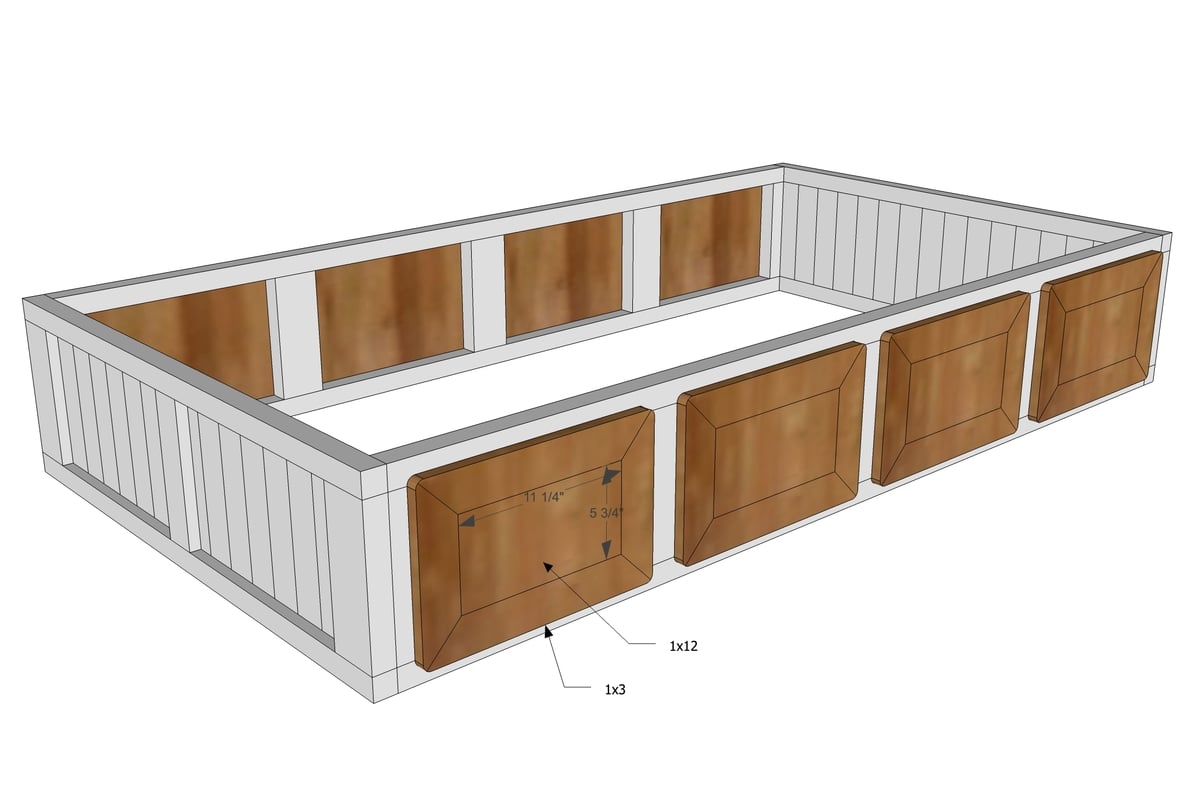
2 - 1x12 @ 19 1/8"
1 - 1x12 @ 74 1/2"
16 - 1x2 @ 15" cut on a 45 degree angle, long point to long point
16 - 1x2 @ 9 1/2" cut on a 45 degree angle, long point to long point
8 - 1x8 cut down to 12" x 6 1/2"
14 - 1x3 slats @ 39"


Please read through the entire plan and all comments before beginning this project. It is also advisable to review the Getting Started Section. Take all necessary precautions to build safely and smartly. Work on a clean level surface, free of imperfections or debris. Always use straight boards. Check for square after each step. Always predrill holes before attaching with screws. Use glue with finish nails for a stronger hold. Wipe excess glue off bare wood for stained projects, as dried glue will not take stain. Be safe, have fun, and ask for help if you need it. Good luck!
Instructions
Step 1
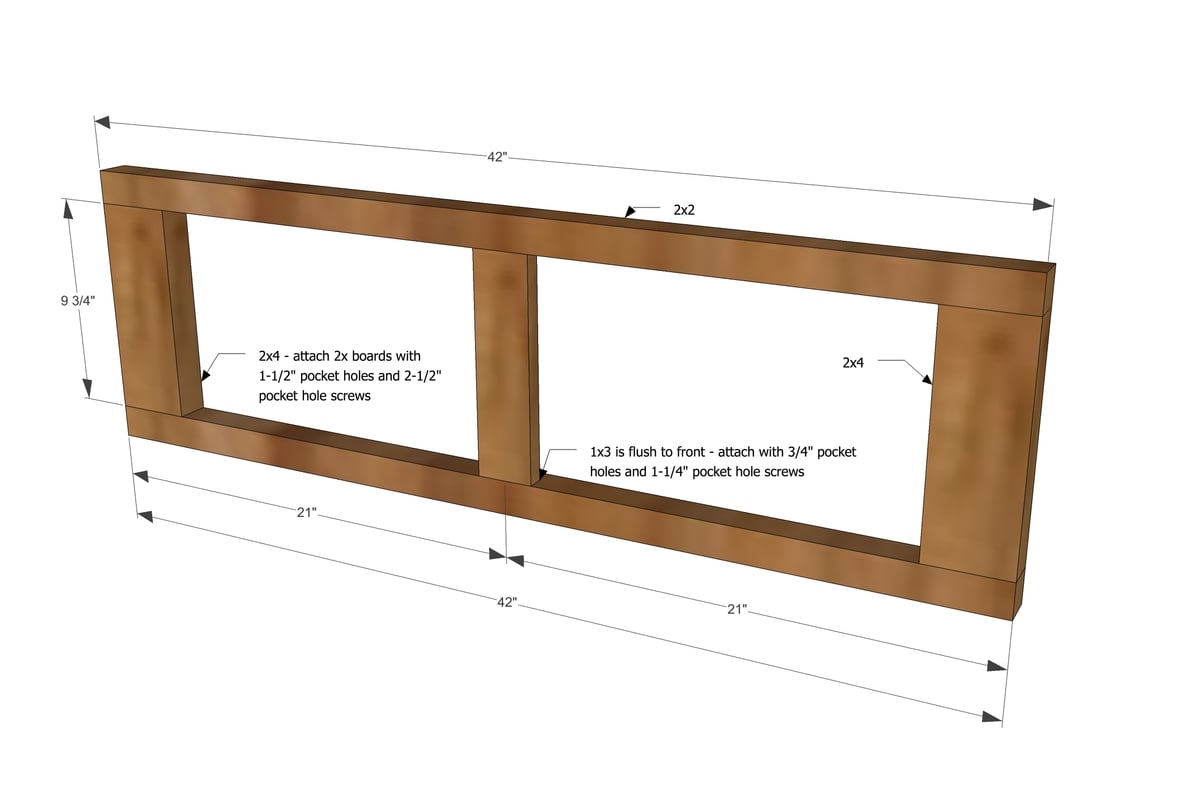
Build two of the ends as shown in diagram.
Step 2

Attach slats to back side. Start on outside and work inward - if you end up with a gap, the center board will cover it :)
Step 3

Next, frame out the two sides.
Step 4
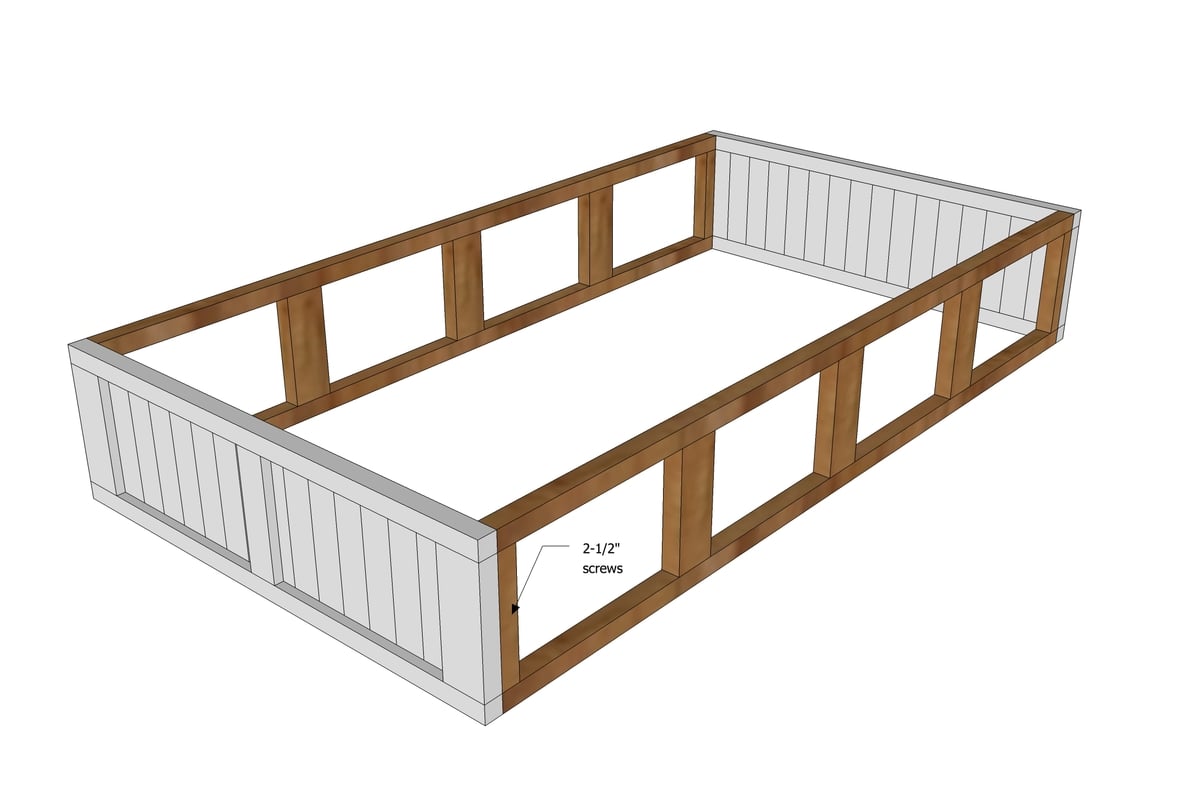
Attach the two side frames to the end panels.
Step 5
Step 6
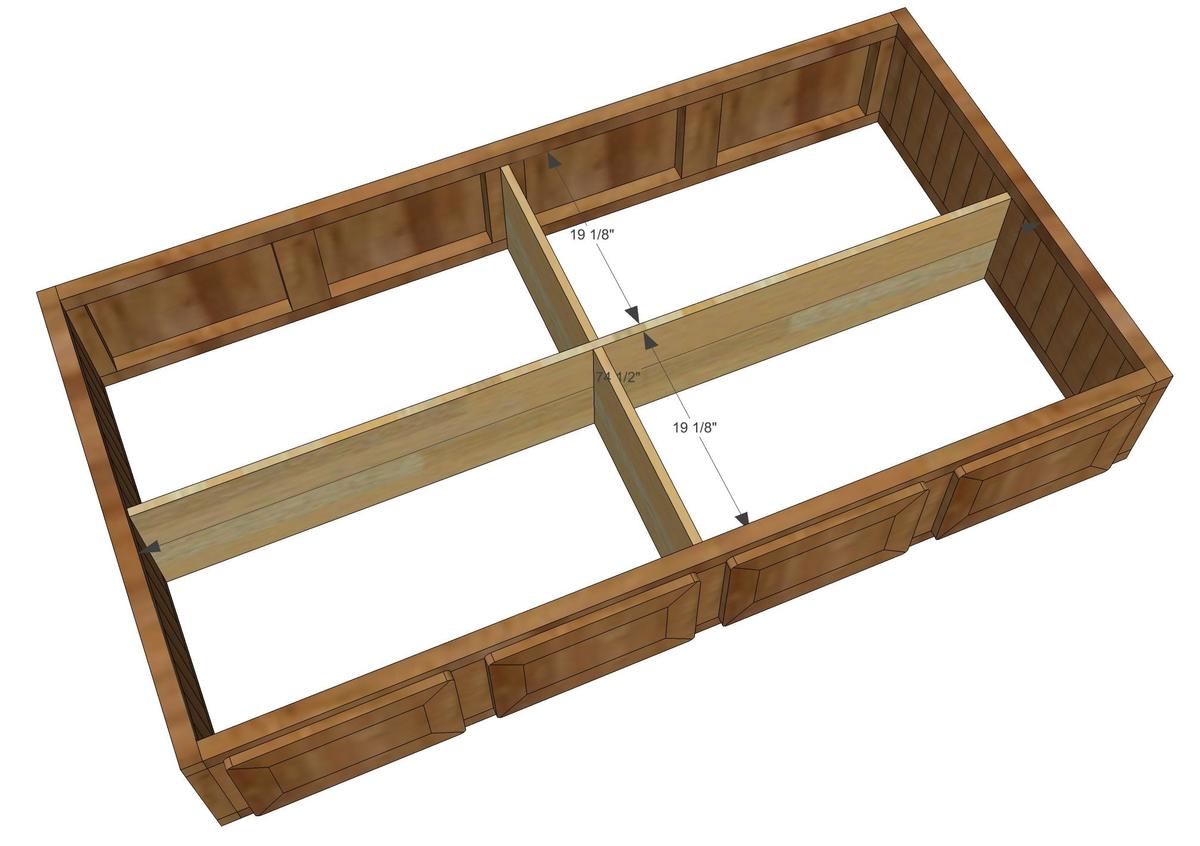
Section off the inside of the bed with 1x12s (or you could use 2x12s for additional support. If you don't have a pocket hole jig, get one, but for now, you can offset the center joint so you can attach from the outside easily.
Step 7
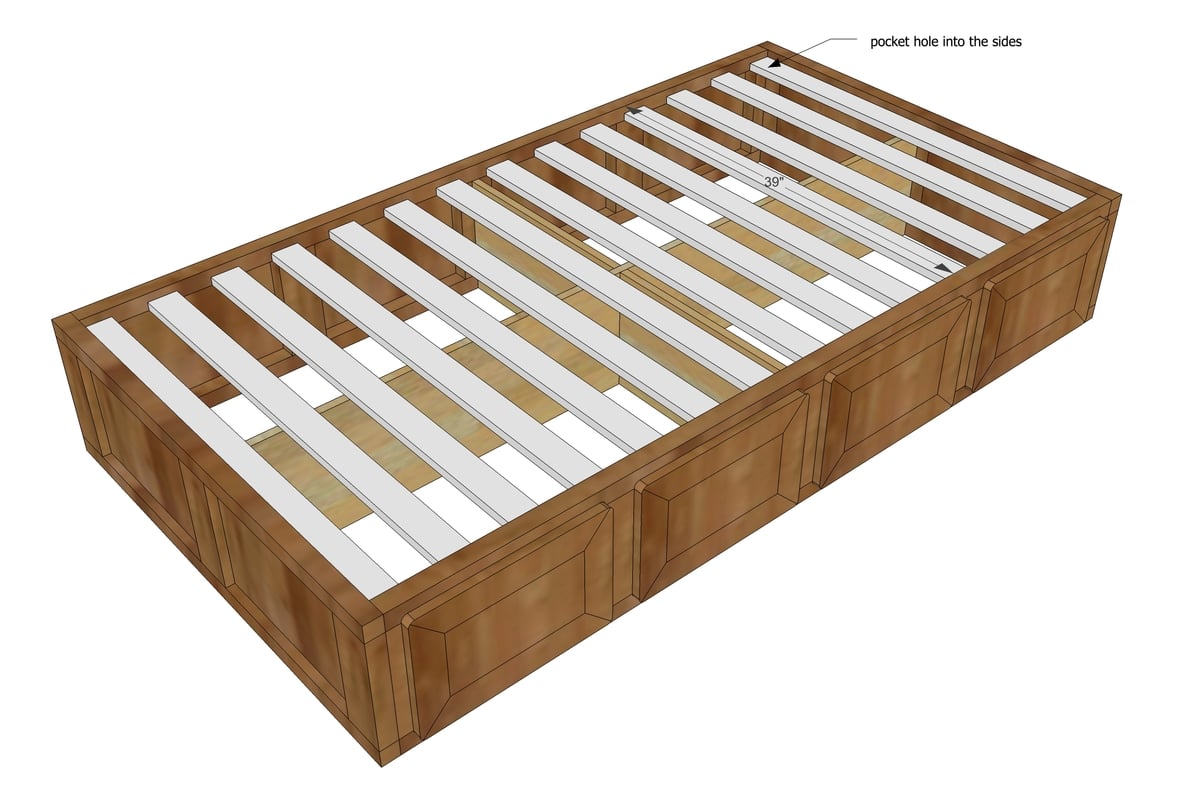
Attach slats on top of partitions. Attach to sides of bed as well with 3/4" pocket hole and 1-1/4" pocket hole screws (only need one per slat). You could also screw from outside or attach a small cleat underneath slats and rest slats on top (2x2 recommended).
It is always recommended to apply a test coat on a hidden area or scrap piece to ensure color evenness and adhesion. Use primer or wood conditioner as needed.


Comments
Momma Eva
Sat, 08/16/2014 - 22:04
Queen size storage bed?
Hi Ana, just finished making my 7 y.o. Daughter a loft bed with two book shelves. Now it is on to making a bed for my youngest. I have a new queen bed mattress set for her and due to the bedroom size and logistics, I would like to make her a storage bed to fit her queen set. Can I safely make this into a queen without taking away the security? I would happily make another loft bed for her, but don't know how to make it so it will support the weight of the queen. You see, I can't just toss the money we spent on her queen mattresses out the window. Any advice would be appreciated.
Brittney Durkin
Thu, 08/28/2014 - 11:50
beautiful bed
I love this bed frame and would love to make it for my sons room my only problem is his bed is a full.Is there any way you could post a lumber and cut list for a full size bed?
vgreeninger
Sun, 01/18/2015 - 05:42
I think I am missing
I think I am missing something... I don't see where the extra 4-2x2 @ 42" or the 8-1x8 cut down goes. I'm modifying this for 2 projects: 1) a kitchen bench seat with doors and 2)a rustic coat rack/boot bench. I can't wait to try it. Only problem is I don't have a Kreg gig :( Why do you use that instead of a biscuit cutter
Cwoodman
Sun, 07/03/2016 - 11:50
Bed
Bed