Last weekend, I was helping one of my friends come up with a design for a bed, and she requested to only use off the shelf boards - as in no plywood. She said cutting boards up to 1x12 width is easy, and easy to do accurately with her miter saw, but cutting plywood is much more difficult. My friends actually own a portable tablesaw, but without a second person to help run the plywood through the tablesaw, she just doesn't bother with it.
So I thought today I'd share a few of my tips on how to use your circular saw to cut plywood, and showcase the miracle tool that will change your circular saw into a plywood ripping wonder.
Use the Right Blade
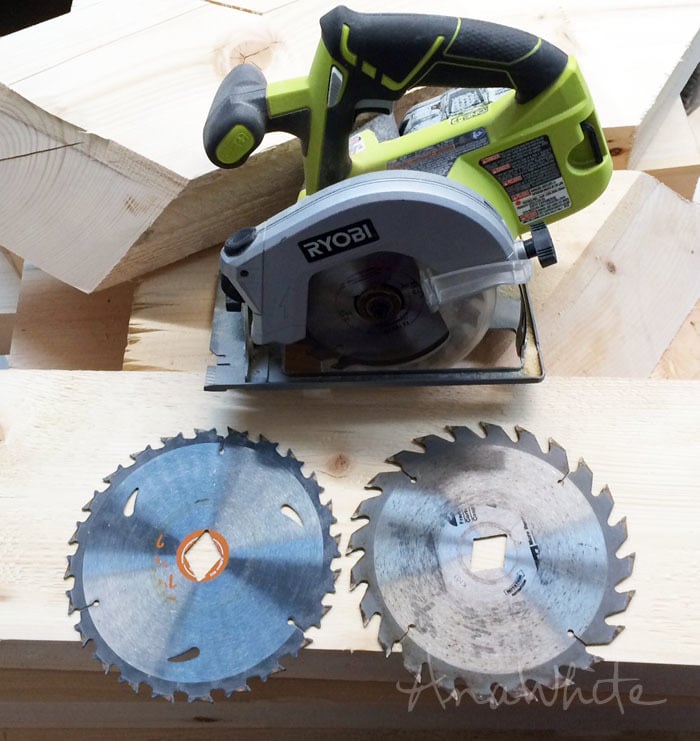
The best tip I can give you is to first upgrade to the right blade. Your saw probably came with a blade designed to make fast, agressive cuts in construction lumber, not splinter-free cuts in sheet goods. So, pick up a carbide-tipped blade that’s designed for making fine cuts. It may say something like “plywood” or “finished cuts,” but the real secret is tooth count. A higher tooth count will give you a smoother cut. Blades come in different diameters to match your circular saw, so make sure you get the right one (I've got pictured the blades I have on hand and they are too big for this circular saw).

Finished Side Down
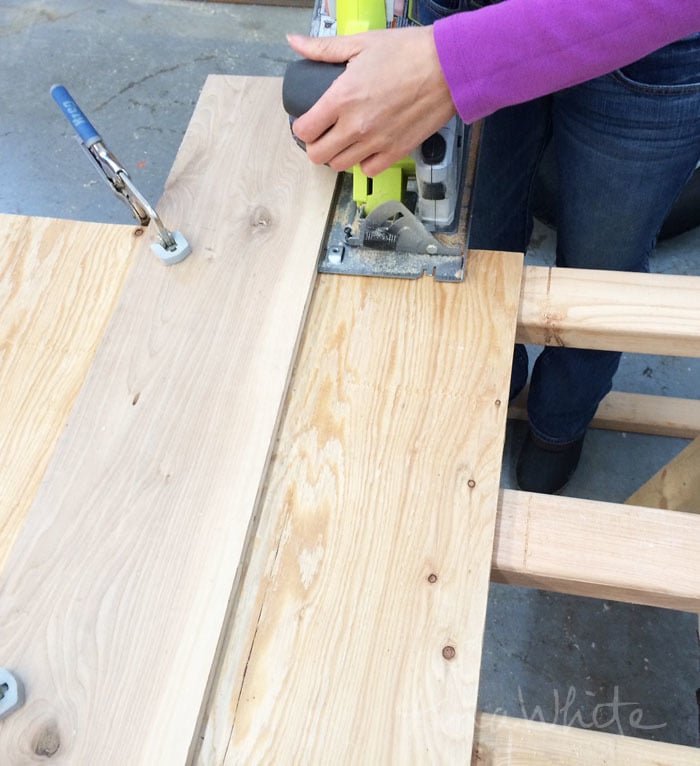
Next, make sure you properly orient the sheet as you’re cutting. A circular saw cuts on the up stroke. That means the blade enters the wood from below, and exits at the top. That’s where most tear out occurs. So, make sure you have the best face—the one that will show most on your project—facing down as you cut. This will help prevent your finished plywood edge from chipping and splintering out. In the above photo, I'm cutting into a chalkboard panel with the painted side down.

Adjust Your Saw Blade Depth
Adjust your circular saw cutting depth to be just below the material. I do about 1/4" - so for ripping 3/4" thick plywood, I set my blade to about 1" depth.
Cut on Foam
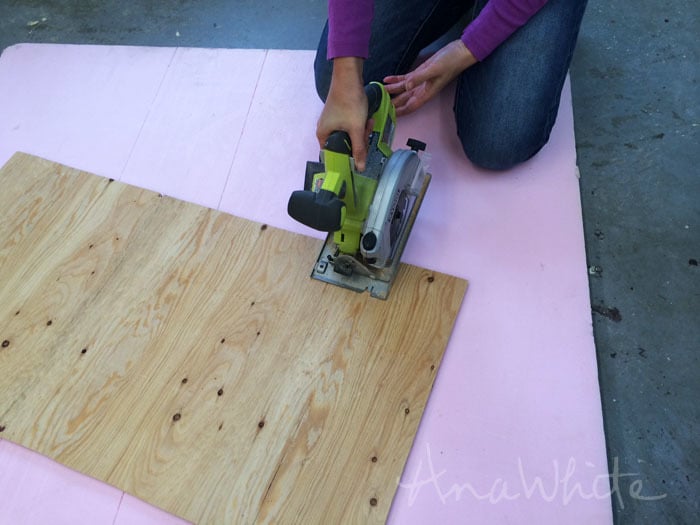
Of all the tips I can give you, this one helped me the most.
I keep a piece of rigid foam board in my workshop. When I cut plywood, I place the plywood on top of the foam, and cut right into the foam. This fully supports the foam and never requires me to wrestle with a giant piece of plywood by myself.
I've been using the same piece of foam for about seven years. At this point, it's been broken up into smaller pieces, but it's still going.
You can also use 2x4s on sawhorses (my husband prefers this method) - especially in you are in production mode.

Using a Guide
It is very important to get accurate, straight cuts. When I need a perfect cut with a circular saw, I use a guide.

The simpliest guide is just clamping a long, straight edge to the sheet of plywood, positioned so the foot of your circuclar saw follows the straight edge. Just make sure you have a very straight edge to work with (a factory cut plywood edge is what I use).
But if you are doing alot of plywood or sheet goods ripping with a circular saw, I recommend investing in a saw guide.
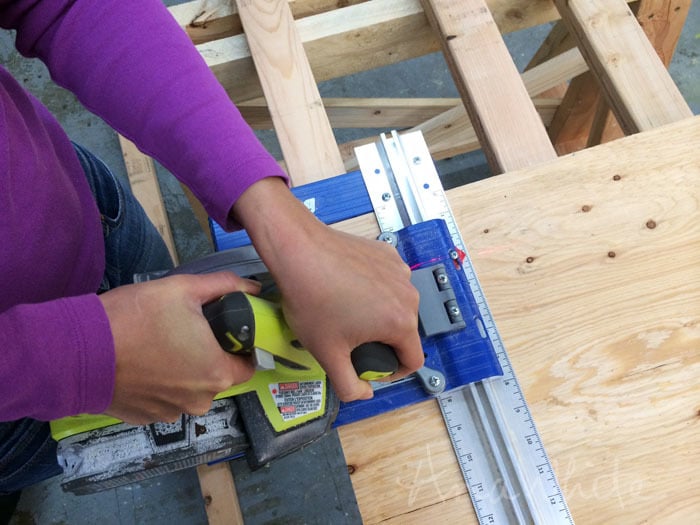
The one I use and love is the Kreg Rip-Cut™ . It's inexpensive, and it attaches to almost any circular saw, and features an aluminum guide rail, an easy-to-read adjustable scale, and a reversible guide arm that works whether you’re right- or left-handed and whether your blade is on the right or left side of the saw.

It’s an incredibly easy, precise, and affordable way to break down large panels for almost any project.
Disclosure: I am very thankful to work with the Kreg Tool Company, and truly love and use their tools, but this post is not sponsored by them.
Comments
EmH-C
Tue, 04/05/2016 - 06:58
Great advice
Thank you so much for your nice clear advice. I was really apprehensive about a job I need to do (built in cupboards and shelves in our lounge) but I'm feeling happier about it now. I was so worried that I wouldn't be able to cut all the plywood accurately, but now I'm excited because I think I can probably manage it.
TheHLT
Sat, 06/04/2022 - 16:59
Great information
Great information Ana. I love your common sense tool use instructions.
TaraB
jmw341
Tue, 02/20/2024 - 16:01
This is so helpful! I have…
This is so helpful! I have struggled with my confidence using the circular saw and this is going to help me so much!