Hi everyone! Hope you had a great weekend!
We've been busy with projects, and will be sharing those with you shortly - can't wait, there's some good ones coming soon!
In the meantime, we'd like to get all of the cabin posts out before the show airs this fall. We don't have an air date yet, as soon as we do I will let you know.
In our last cabin post, we finished up the timberframe raising.

Today, I'll show you how we did two things - enclosed the upstairs ceiling with a finished wood, and also added structure to the timberframe.

By this time, our baby had gotten used to napping just about anywhere. Here he is waking up from one of his jobiste naps.

We started with open beams, spaced about 3-4 feet appart (no more than 4 feet as this is the max span of 2x6 tongue and groove). We purchased locally milled Alaska spruce in 2x6s - I love that the great majority of our cabin is made of locally milled lumber. Build local!

Here's the tongue and groove boards we will be using.

We set up a cutting station on one of the decks, and just hauled a bunch of the tongue and groove boards up on the deck to cut. That sounds simple enough, but each of the boards is 18 feet long, so we really had to think about process - where to set the boards so they can easily be moved on to the saw.
We also set up a quick sanding station, and sanded any rough boards on the ground before passing up to the roof.

We started at the bottom, and worked upward,

Nailing the tongue and groove boards to the tops of the timberframe with a pneumatic nailer.

We used the boards we installed first to stand on and place more of the tongue and groove boards, working up the roof line.
On the straight sections of roof, this went really fast. The cuts didn't even have to be super precise, because we ran the tonge and groove (where we could) a little long, and then went back and trimmed the edges up with a circular saw (will get to that in a minute).

One thing I want to point out is we had to somehow bring the vapor barrier up from the walls to enclose the top of the tonge and groove. We did this by stopping the tongue and groove at the wall, and pulling the vapor barrier up through. Then we just added more tongue and groove on the other side of the vapor barrier. This wasn't hard to do, but it definitely took some thinking and remembering that we had to do it.

When we got to the valleys, things slowed down a little because we had to start cutting angles on the ends of the tongue and groove. It was as simple as setting the saw to the valley angle and cutting - but since it mattered which end was cut, and which way the tongue or groove was laid, I found myself getting mixed up more than a few times.

Especially when we went to work on the other side of the valley where everything is the opposite.

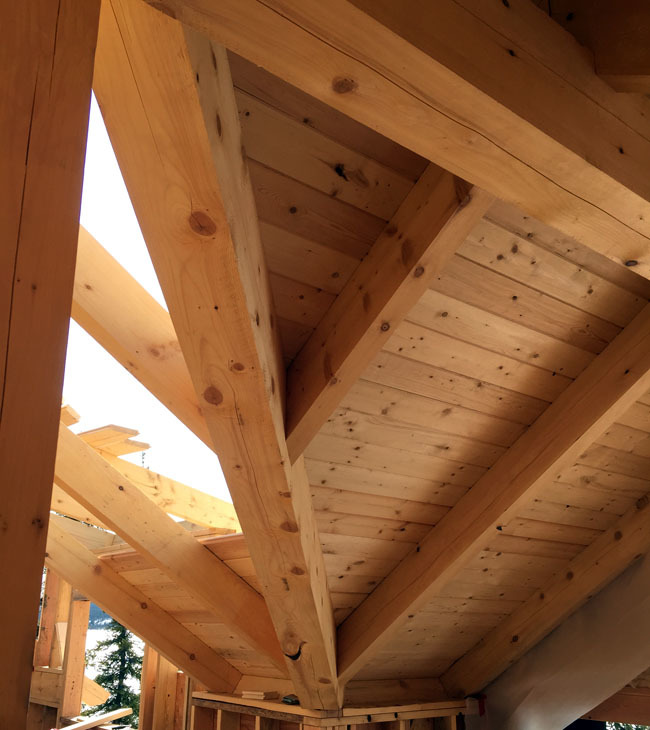
Since we are working on top of the roof, there was flexibility in the cuts - the beams hide all the joints.

Isn't that beautiful?
There were 11 different sections of roof to tackle on the cabin. We worked in sections, the lower roofs first, and then upward.

I never felt right about being on the roof, even on the lower pitches. But the hubs didn't seem to mind it, and we all agreed this beat hanging drywall overhead with a ladder inside. What a pain that would have been!

Doing the finished roof this way was nice for a few reasons - you could just hand material up from the outside (as opposed to threading each board through the interior of the cabin), gravity worked in your favor, so you could just set your boards in place and nail down, and ask anyone who has ever hung a ceiling - it's alot of work holding a drill or nailgun over your head for hours on hours a day.

And the view is alot nicer too!

I was a little sad to see the bright blue sky get covered by the ceiling, bu the wood ceiling is just beautiful!

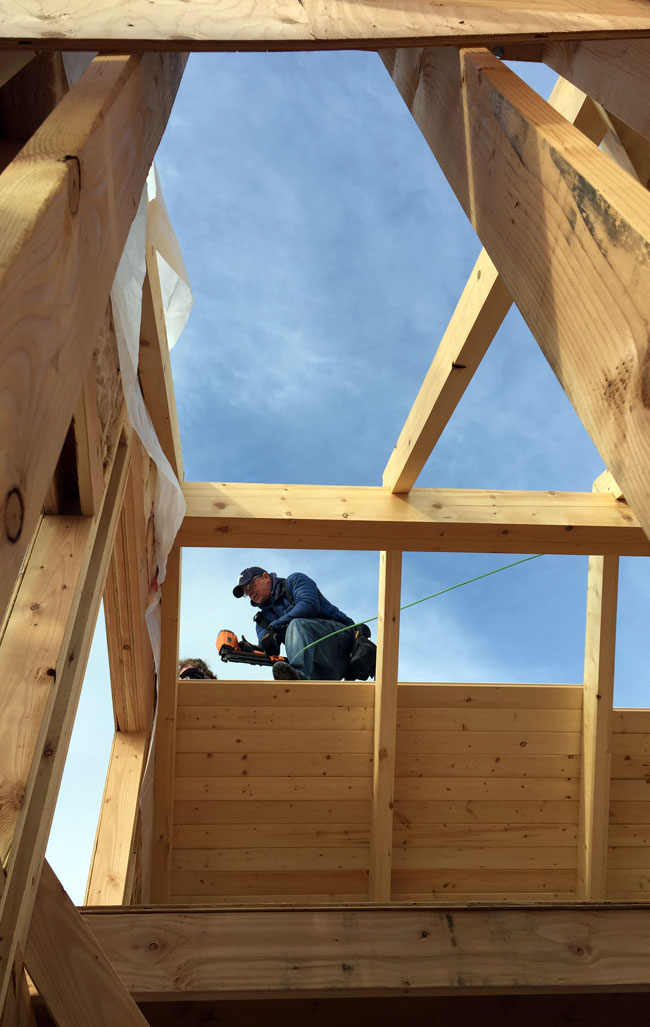
The final section of roof was the front porch. See how the boards are all cut long and way off?

After all the tonge and groove was on, this crazy guy harnessed off and trimmed all the gable ends with a circular saw.

After all the tongue and groove was up, we applied Ice and Water Shield over top of the tongue and groove to protect it. Since the snow was about gone at this point, we were just so relieved to have the cabin dried in before it might rain on us.

We spent about 3 to 4 days total doing the tongue and groove on the ceiling. It was a huge task, but all in all, probably easier than some of the alternative ways to finish out a ceiling like this one. And I'd argue there isn't a more beautiful way.
But we are far from done of the roof just yet. We will spend days and days up there, insulating the roof. We'll show you how to do that soon enough.
Build on! Ana + Crew
Comments
trojan24man
Wed, 08/05/2015 - 06:34
House is really coming together.
It looks incredible with the roof on. I like how the baby treats it like it's just another day.