

Rooms stack so kids can make their own dollhouse! DIY Plans by ANA-WHITE.com
I can't even handle how cute today's project is!
Happy Friday, Happy Handbuilt Holiday 2015! Just seven gift plans left until Christmas!

Make sure you take a second to check out the plans Jaime from That's My Letter and I have shared so far!
I'm especially excited about today's new gift plan!!!

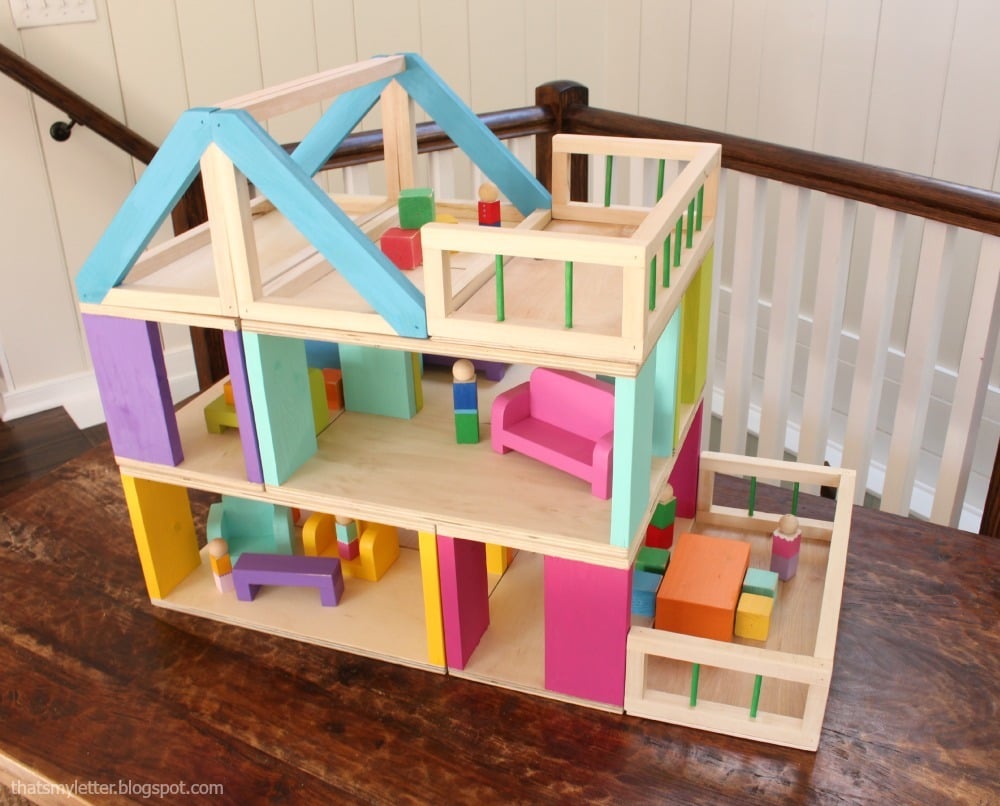
It's a dollhouse!

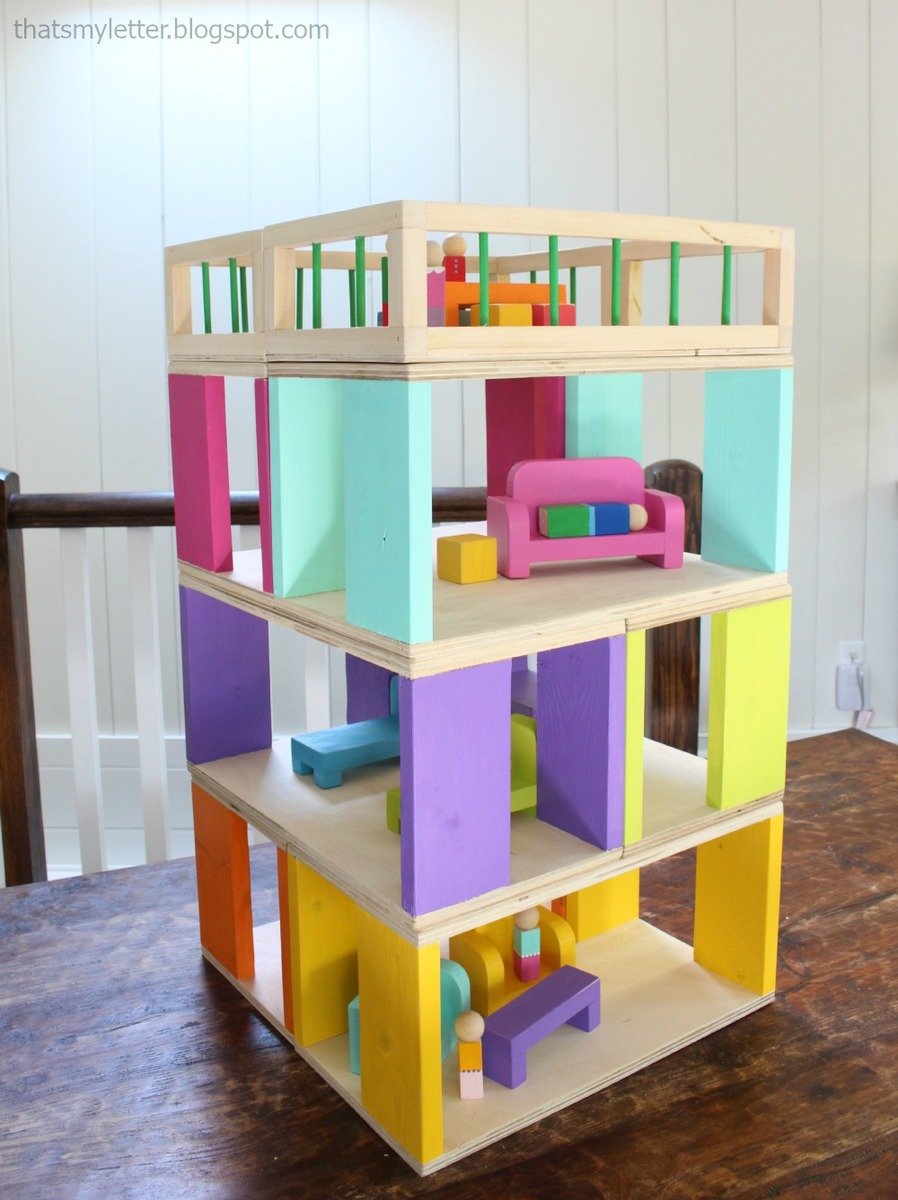
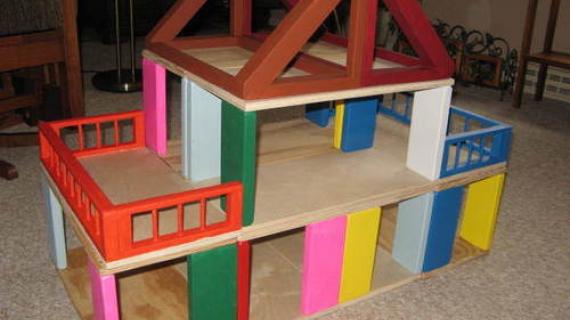
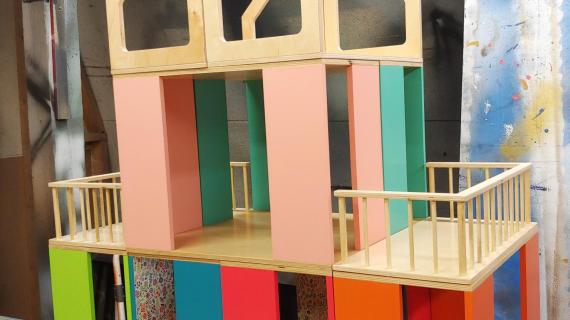
Oh, wait! Now it's a high rise unit with a roof top deck!

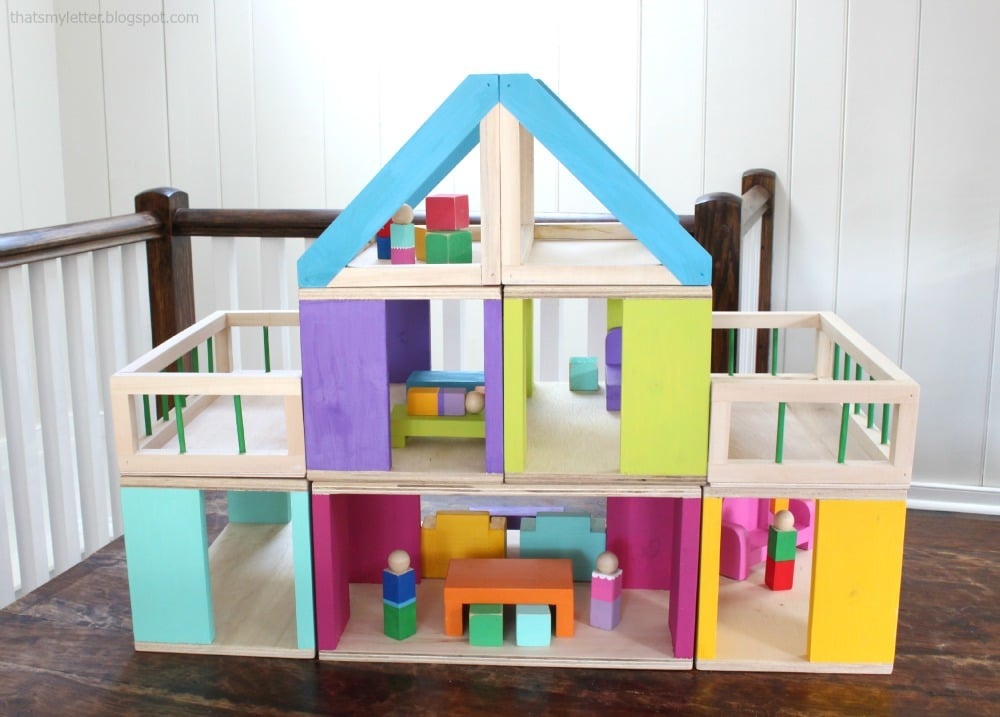
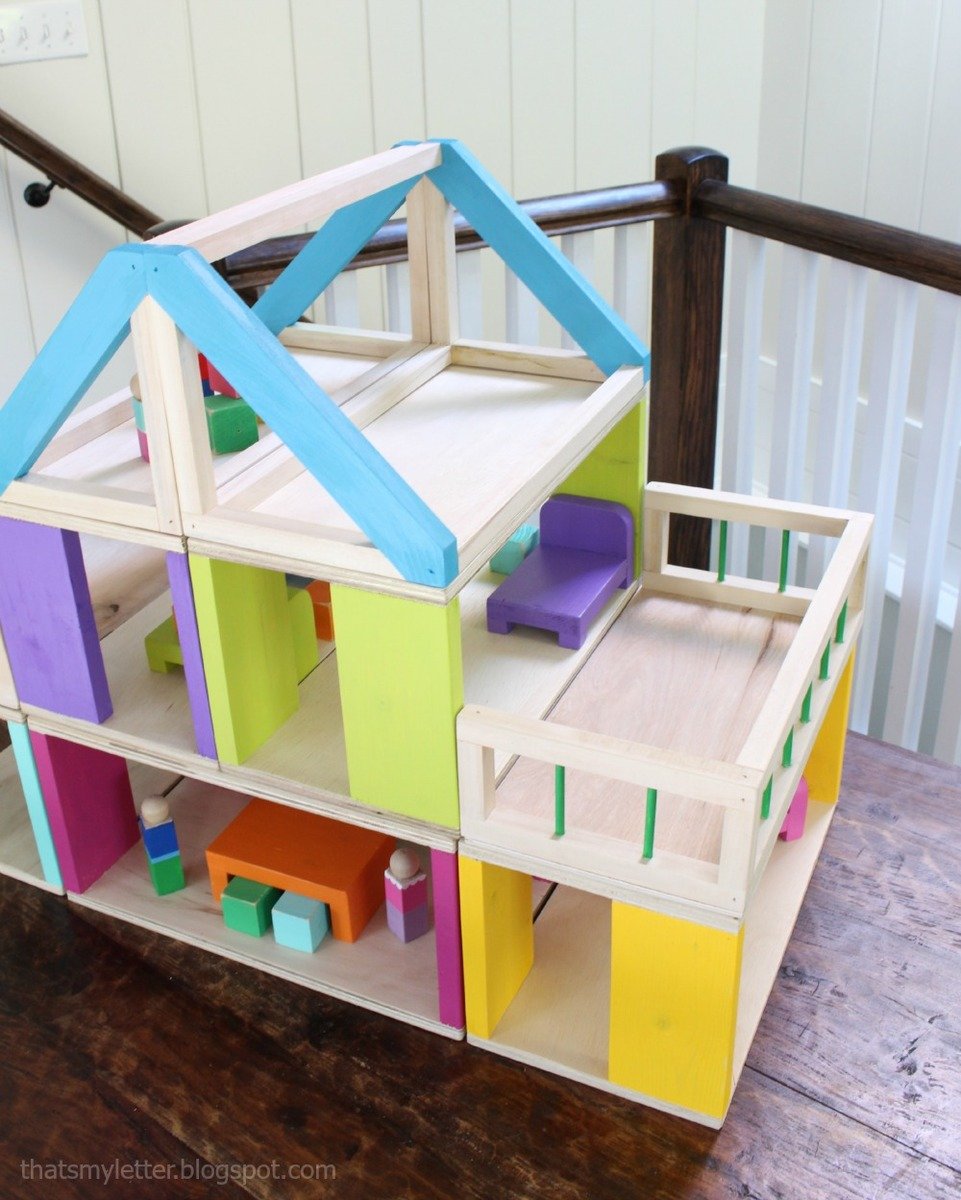
Let's make it a country manor now!
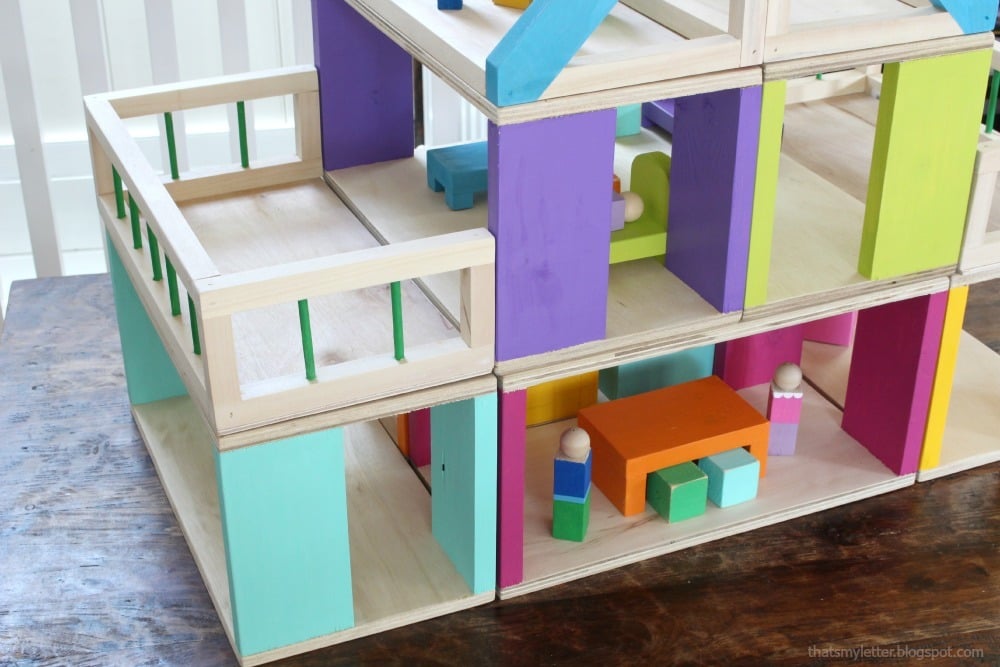
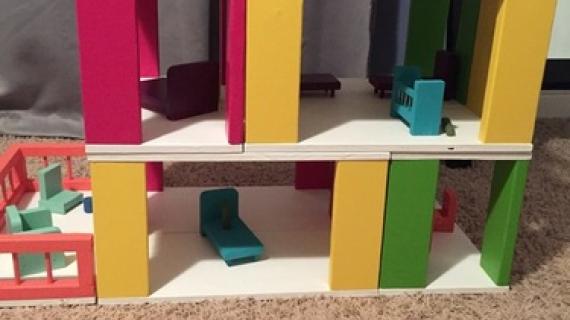
This dollhouse is made up of modular components - rooms, roofs, and decks - that you can build out of simple materials! The dollhouse parts stack so your child can configure and reconfigure. They could even use the rooms as small houses when playing town. I know my children would love this too!
What makes this dollhouse so cute is the furnishings!
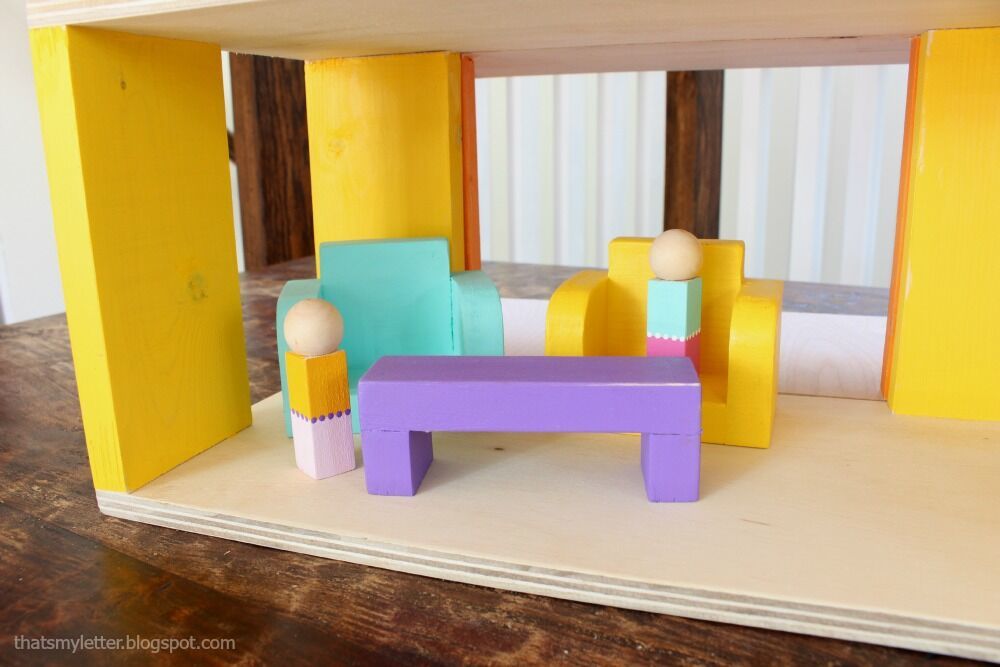
Of course, Jaime MADE all of these pieces out of scrap wood!

Jaime was so kind to put together full tutorial with plans for each of these pieces!
So you ready to build this? Here's what to do -
1. Check out Jaime's build post with dollhouse furnishing plans right now. Lots more detail photos and building tips and tricks!
2. Come back here and grab the free plans below (if this is the homepage you'll need to click READ MORE below)
Go make a house! And make sure you share all the custom mods you do - I just can't wait to see how you make yours too!
XO Ana + Friends
CLICK HERE TO READ JAIME'S BUILD POST WITH DOLLHOUSE FURNITURE PLANS
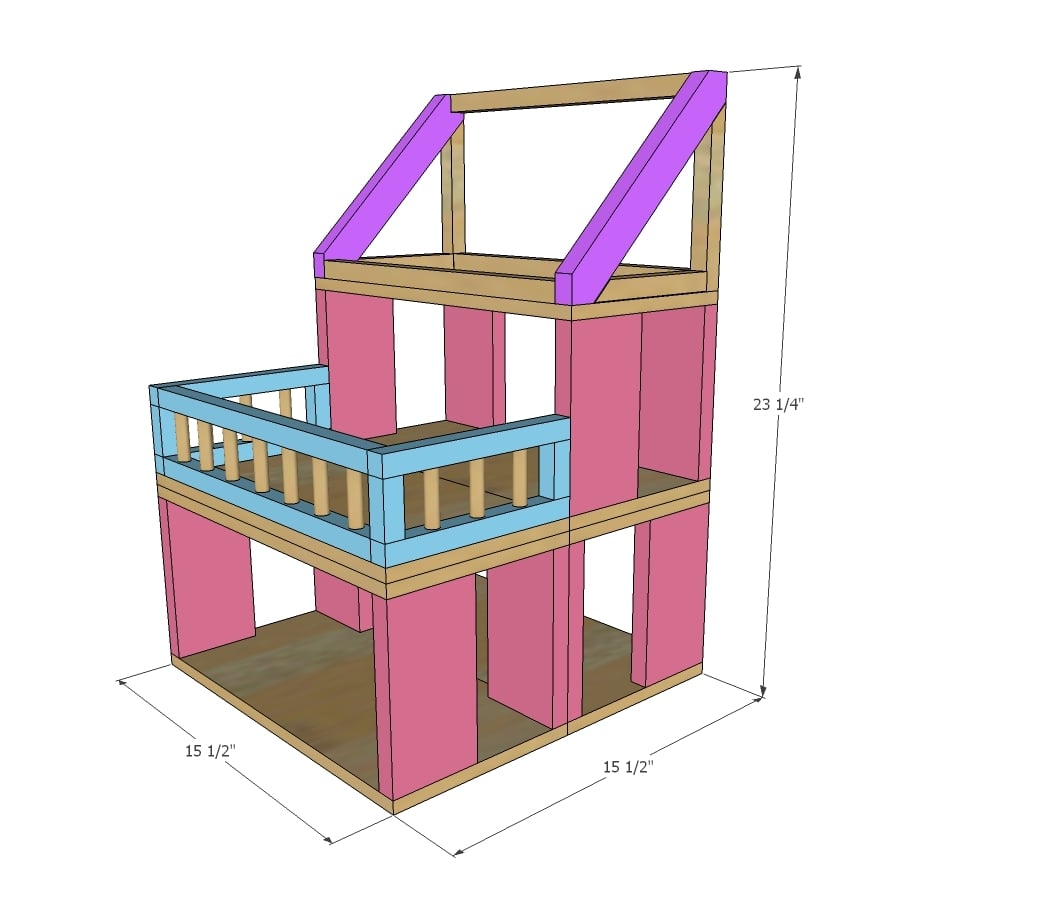
Preparation
1/2" plywood, ripped into strips 7-3/4" wide
3/4" x 3/4" moulding
1x4 boards or other 1x material
1x2 boards (for roofing)
1/4" wood dowels (for railing)
Amount of materials will depend on number of components built
ROOM
2 - 1/2" plywood @ 7-3/4" x 15-1/2"
4 - 1x4 @ 7-3/4" (can use any 1x material here)
DECK
1 - 1/2" plywood @ 7-3/4" x 15-1/2"
2 - 3/4" x 3/4" moulding piece @ 14"
4 - 3/4" x 3/4" moulding piece @ 7-3/4"
4 - 3/4" x 3/4" moulding piece @ 2"
wood dowels @ 2-1/2"
ROOF
4 - 3/4" x 3/4" moulding piece @ 14"
2 - 3/4" x 3/4" moulding piece @ 6-3/4" with one end cut at 45 degrees, long point measurement
2 - 3/4" x 3/4" moulding piece @ 6" with one end cut at 45 degrees, long point measurement
2 - 1x2 @ 11" with ends cut to point at 45 degrees (see in diagrams)


Please read through the entire plan and all comments before beginning this project. It is also advisable to review the Getting Started Section. Take all necessary precautions to build safely and smartly. Work on a clean level surface, free of imperfections or debris. Always use straight boards. Check for square after each step. Always predrill holes before attaching with screws. Use glue with finish nails for a stronger hold. Wipe excess glue off bare wood for stained projects, as dried glue will not take stain. Be safe, have fun, and ask for help if you need it. Good luck!
Instructions
Step 1

The rooms are the simplest to build. Just glue and nail or screw the plywood to the 1x pieces.
TIP: Paint 1x pieces before assembly.
Step 2
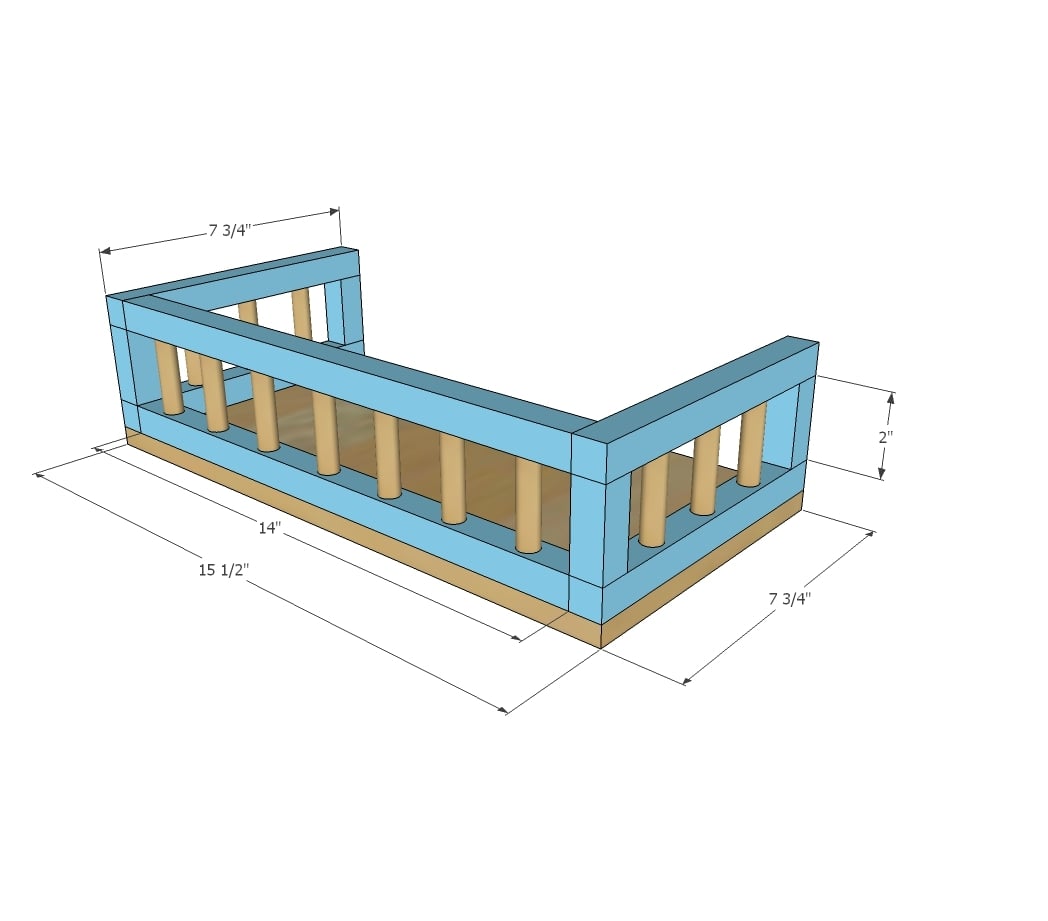
Drill the dowels into the railings 1/4" deep. Glue in place. Glue and nail railings together and to bottom plywood piece with 1-1/4" brad nails.
Step 3

Nail and glue the roof pieces together. Set next to rooms to make sure the roof pieces are square.

It is always recommended to apply a test coat on a hidden area or scrap piece to ensure color evenness and adhesion. Use primer or wood conditioner as needed.
Comments
TwoCuteKids
Fri, 10/30/2015 - 12:20
Great idea!
This looks like so much fun! Going to raid the scrap pile to see if I can make a modular "cabin" for my sons hunting men. They have been borrowing sisters Loving Family house, not cool when you're 8!
handmadewithash
Fri, 10/30/2015 - 20:16
This is really awesome. I
This is really awesome. I think this year is the best one yet for the handmade holidays series. I really look forward to the project reveal each week! :)
gabrielronald
Wed, 03/09/2016 - 00:51
Truly best work by woodwork
Really the work behind this is a genius place, i am giving warm explaination to her that she work very hard to build a doll house by wood work.
robin phillips…
Fri, 12/25/2015 - 19:20
Green materials to build this dollhouse?
Hello, I'd love to make this but would like to figure out a green/no-voc alternative to the plywood flooring used. I know there is a brand called Purebond but I've not heard great reviews about it & it's not easily accessible for me.
Any other ideas to replace the plywood??
thanks!
robin phillips…
Fri, 12/25/2015 - 19:22
Green materials to build this dollhouse?
Sorry if this is a dupe - my isp is twitchy & I didn't see this post display:
Hello, I'd love to make this but would like to figure out a green/no-voc alternative to the plywood flooring used. I know there is a brand called Purebond but I've not heard great reviews about it & it's not easily accessible for me.
Any other ideas to replace the plywood??
thanks!
sweet2ndchance
Sun, 12/27/2015 - 15:43
Plywood Alternatives
Not sure what you've heard about Purebond but my only complaint is that it's pretty expensive. It's so much easier to work with though that I just wait until I have the money to buy another sheet of Purebond. It is literally the only plywood I like to use on furniture-type projects anymore. But if you really just want an alternative to plywood for this dollhouse, you can get a 1x8 and adjust your measurements unless you happen to find one that's exactly 7 3/4" wide or get a 1x10 use a table saw (easiest way) or a circular saw (a little more difficult than a table saw but not impossible) to cut it down to 7 3/4" wide. good luck
mdiaz
Wed, 05/15/2019 - 15:22
Screws instead of Brad Nails
I know this is a super old post, but hopefully someone can answer. I don't have a brad nailer, so I am wondering, if I use screws, what size would you recommend?
amerk906
Mon, 08/03/2020 - 19:58
Barbie House Dimensions?
Love this idea and was planning on making it for my girls but looks small for their Barbies. Thinking I might be able to adjust the dimensions? Been comparing to other Barbie house plans and thinking adding 3-5” on each side might work (would have to draw it out to be exact). Anyone try this?