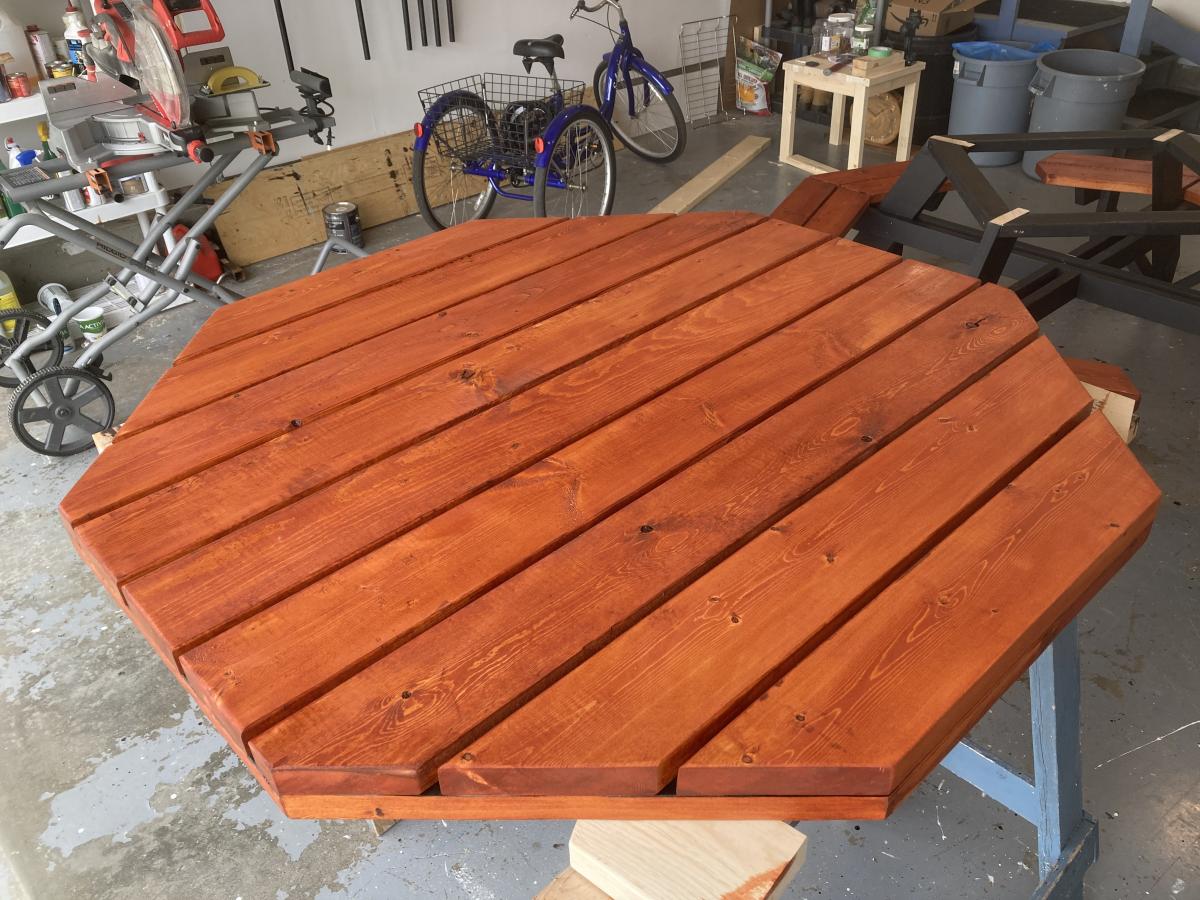
Octagaon Picnic Table
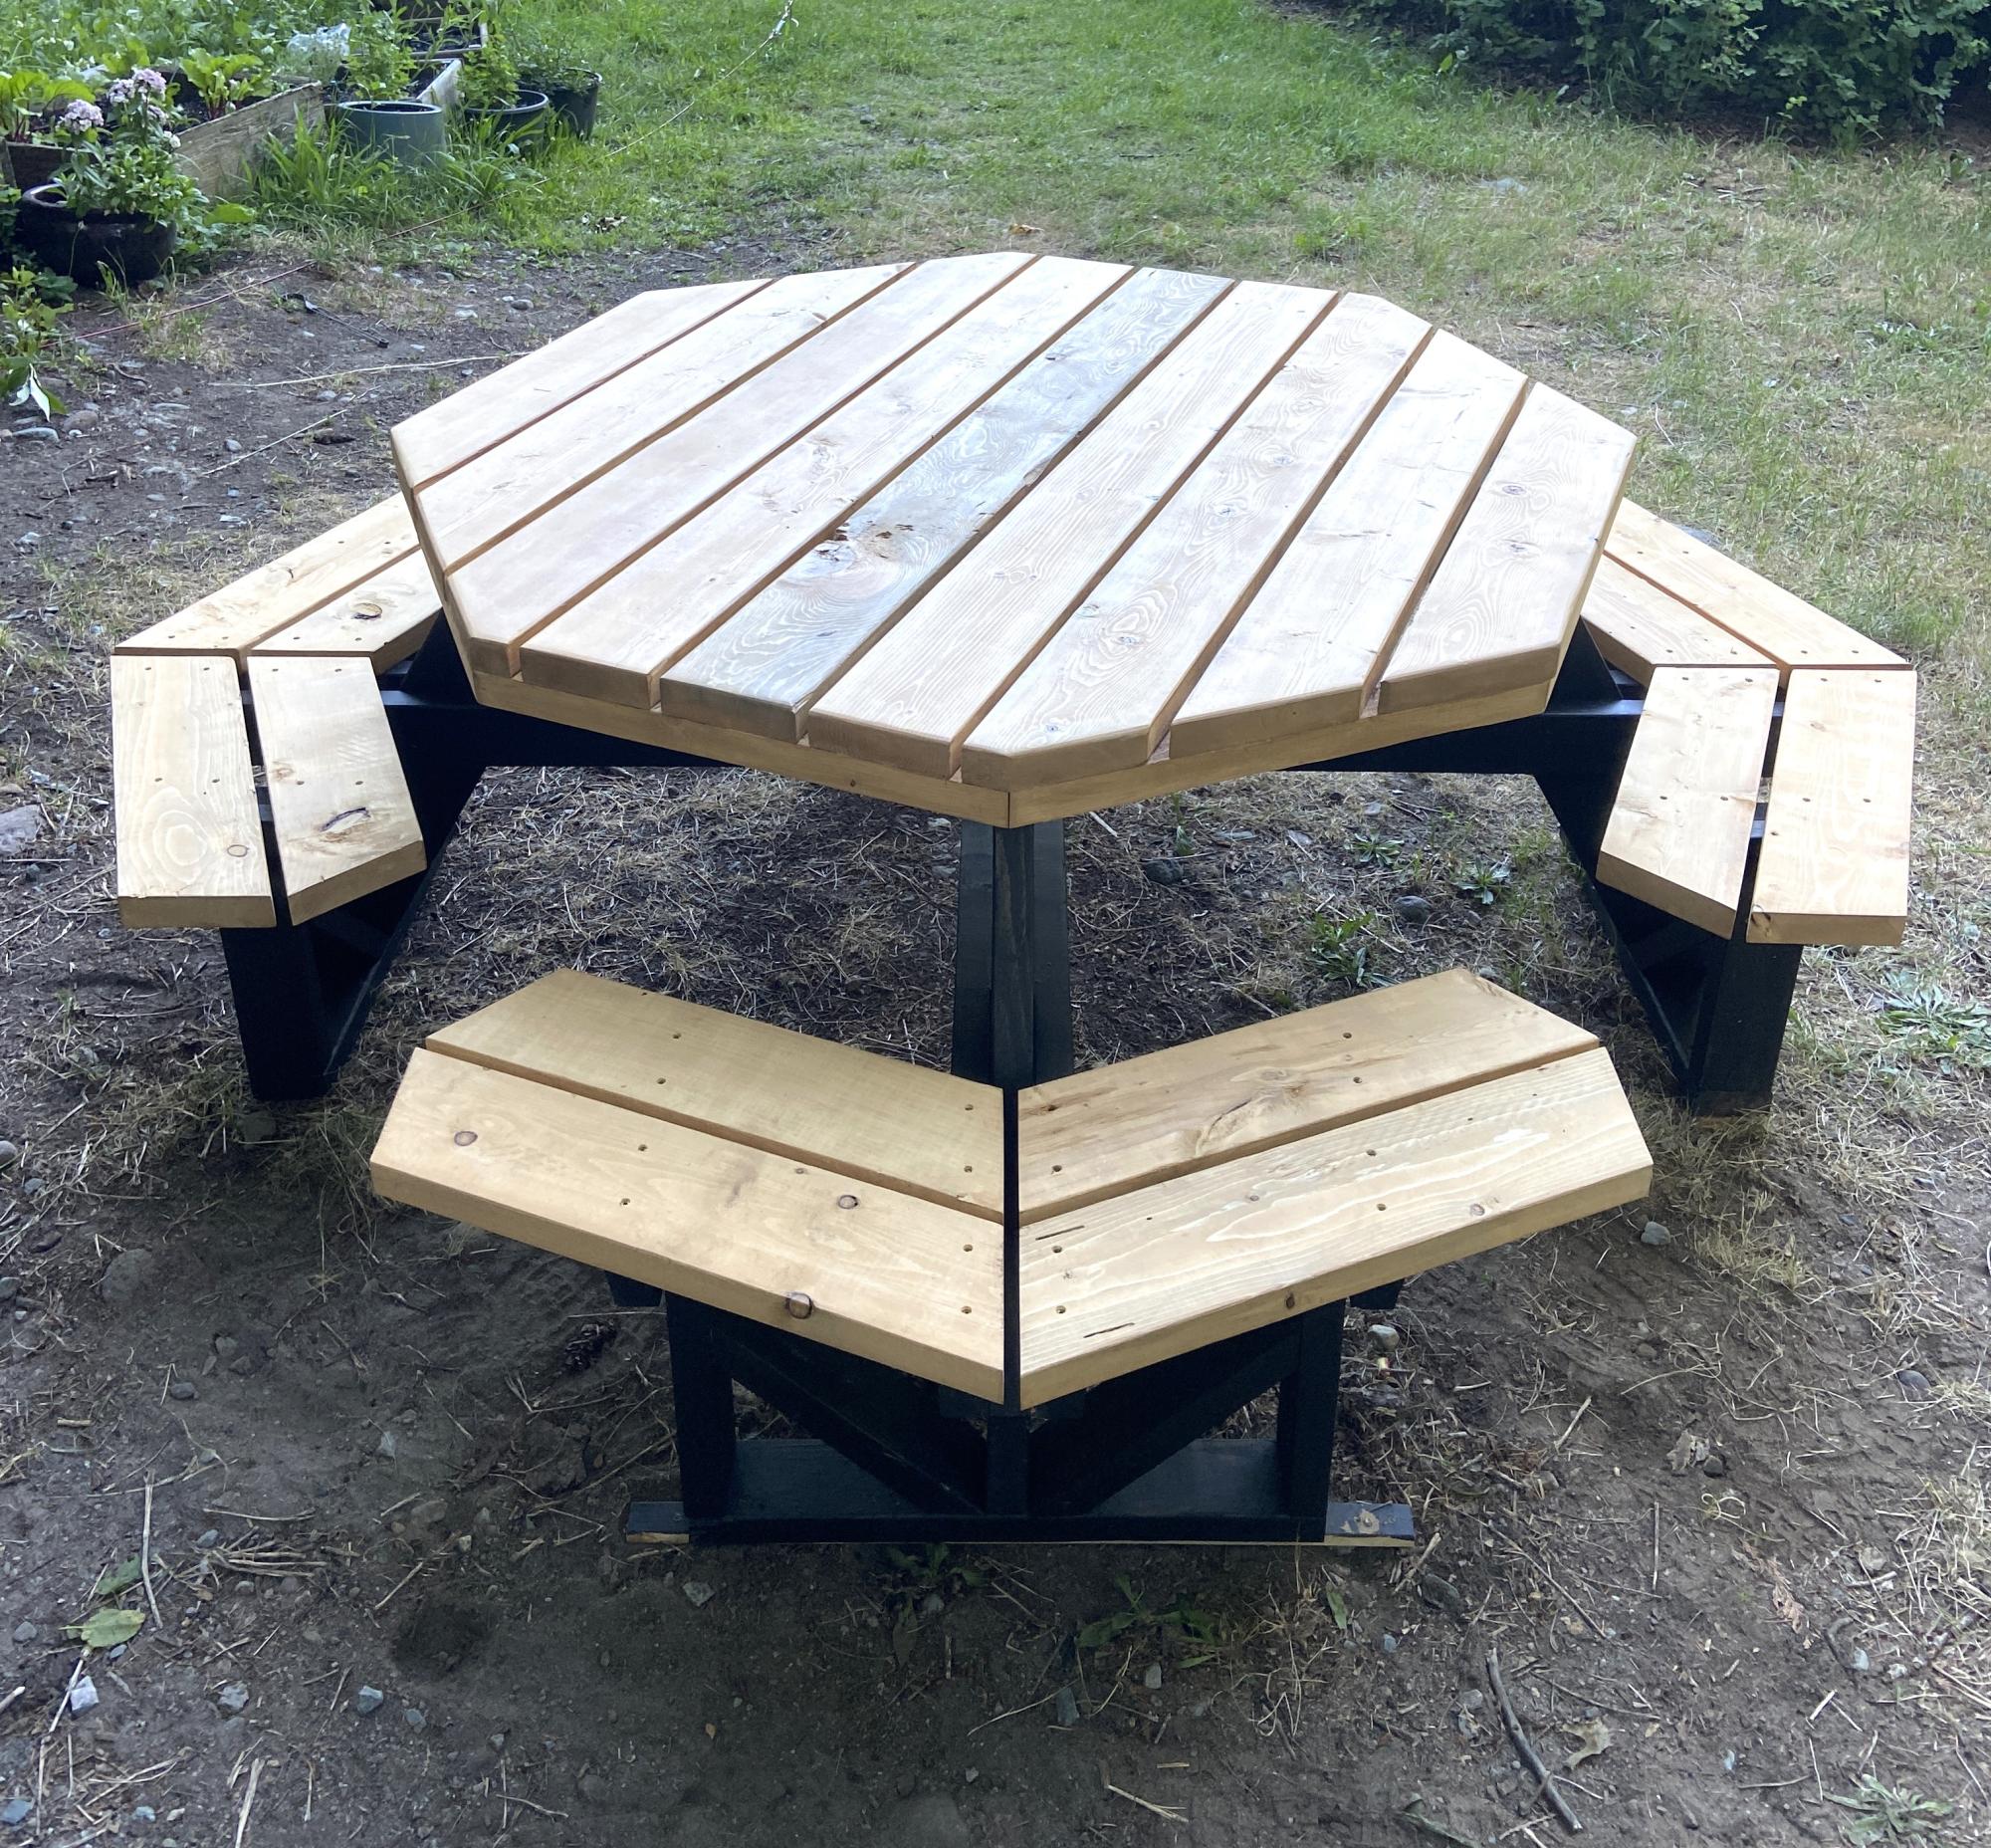
Octagon picnic table! Built exactly to plan. This challenged my carpentry skills but I managed to pull it off all by myself. Great plans easy to follow and a great design! Would build again!
Built from Plan(s)
Octagon picnic table! Built exactly to plan. This challenged my carpentry skills but I managed to pull it off all by myself. Great plans easy to follow and a great design! Would build again!
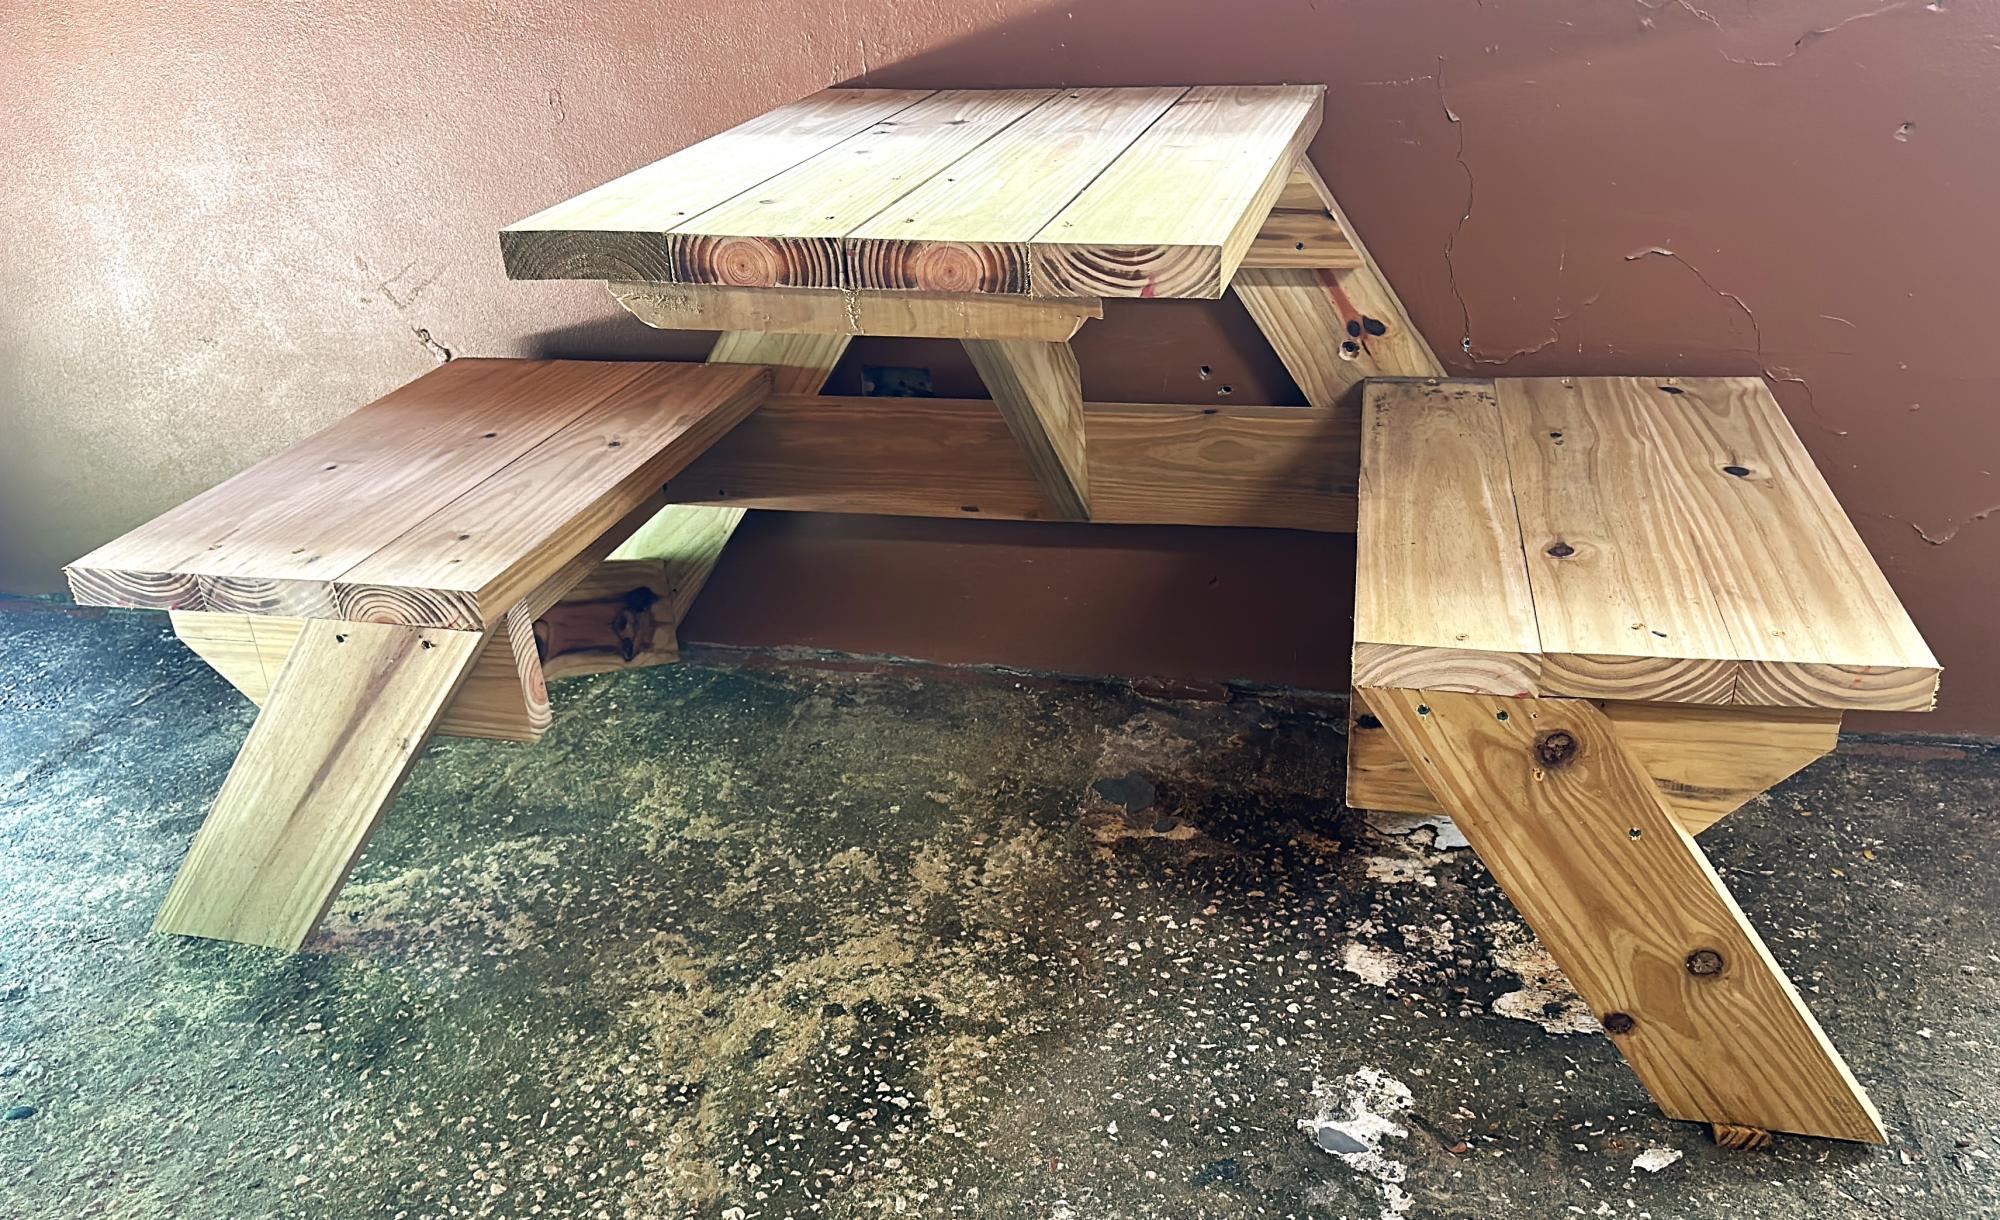
Made 2 of these for my coffee shop in Puerto Rico. Easy instructions. Thank you!
Javiel Cardona
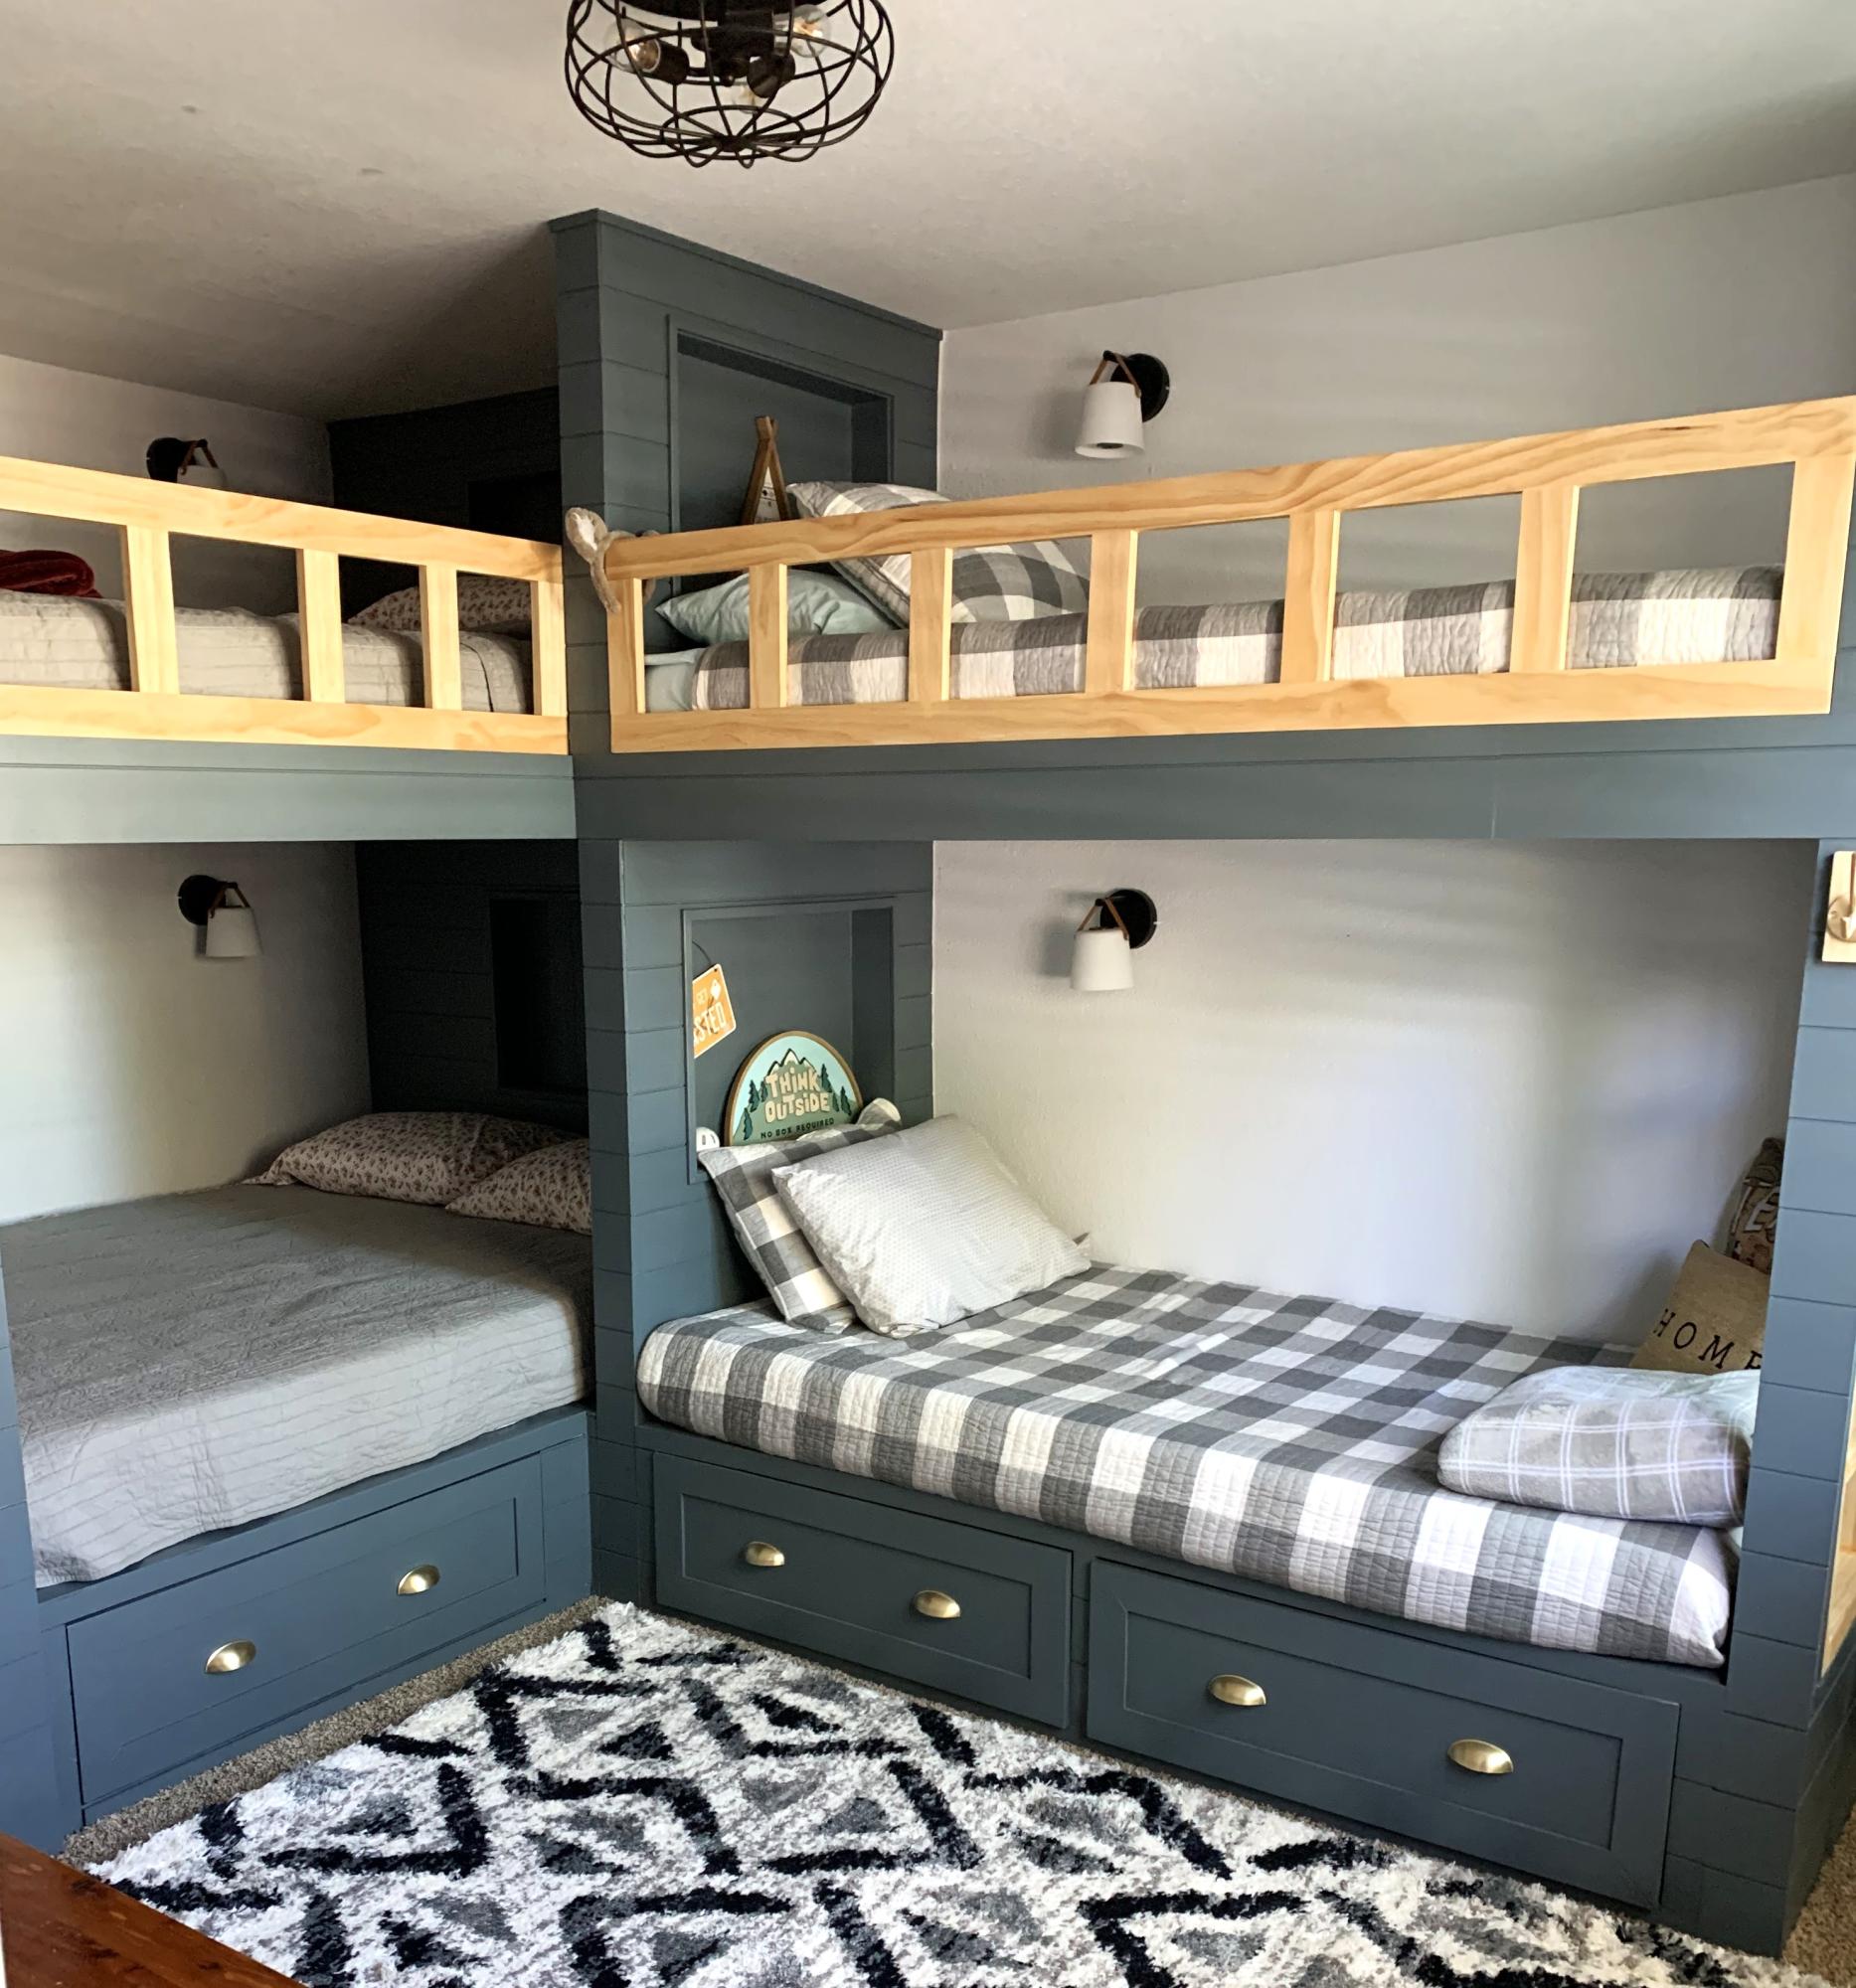
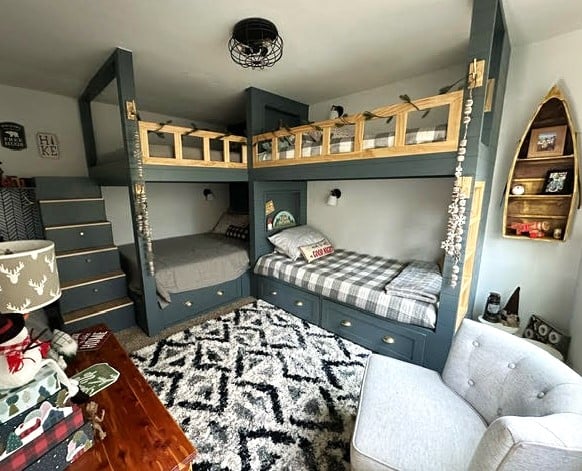
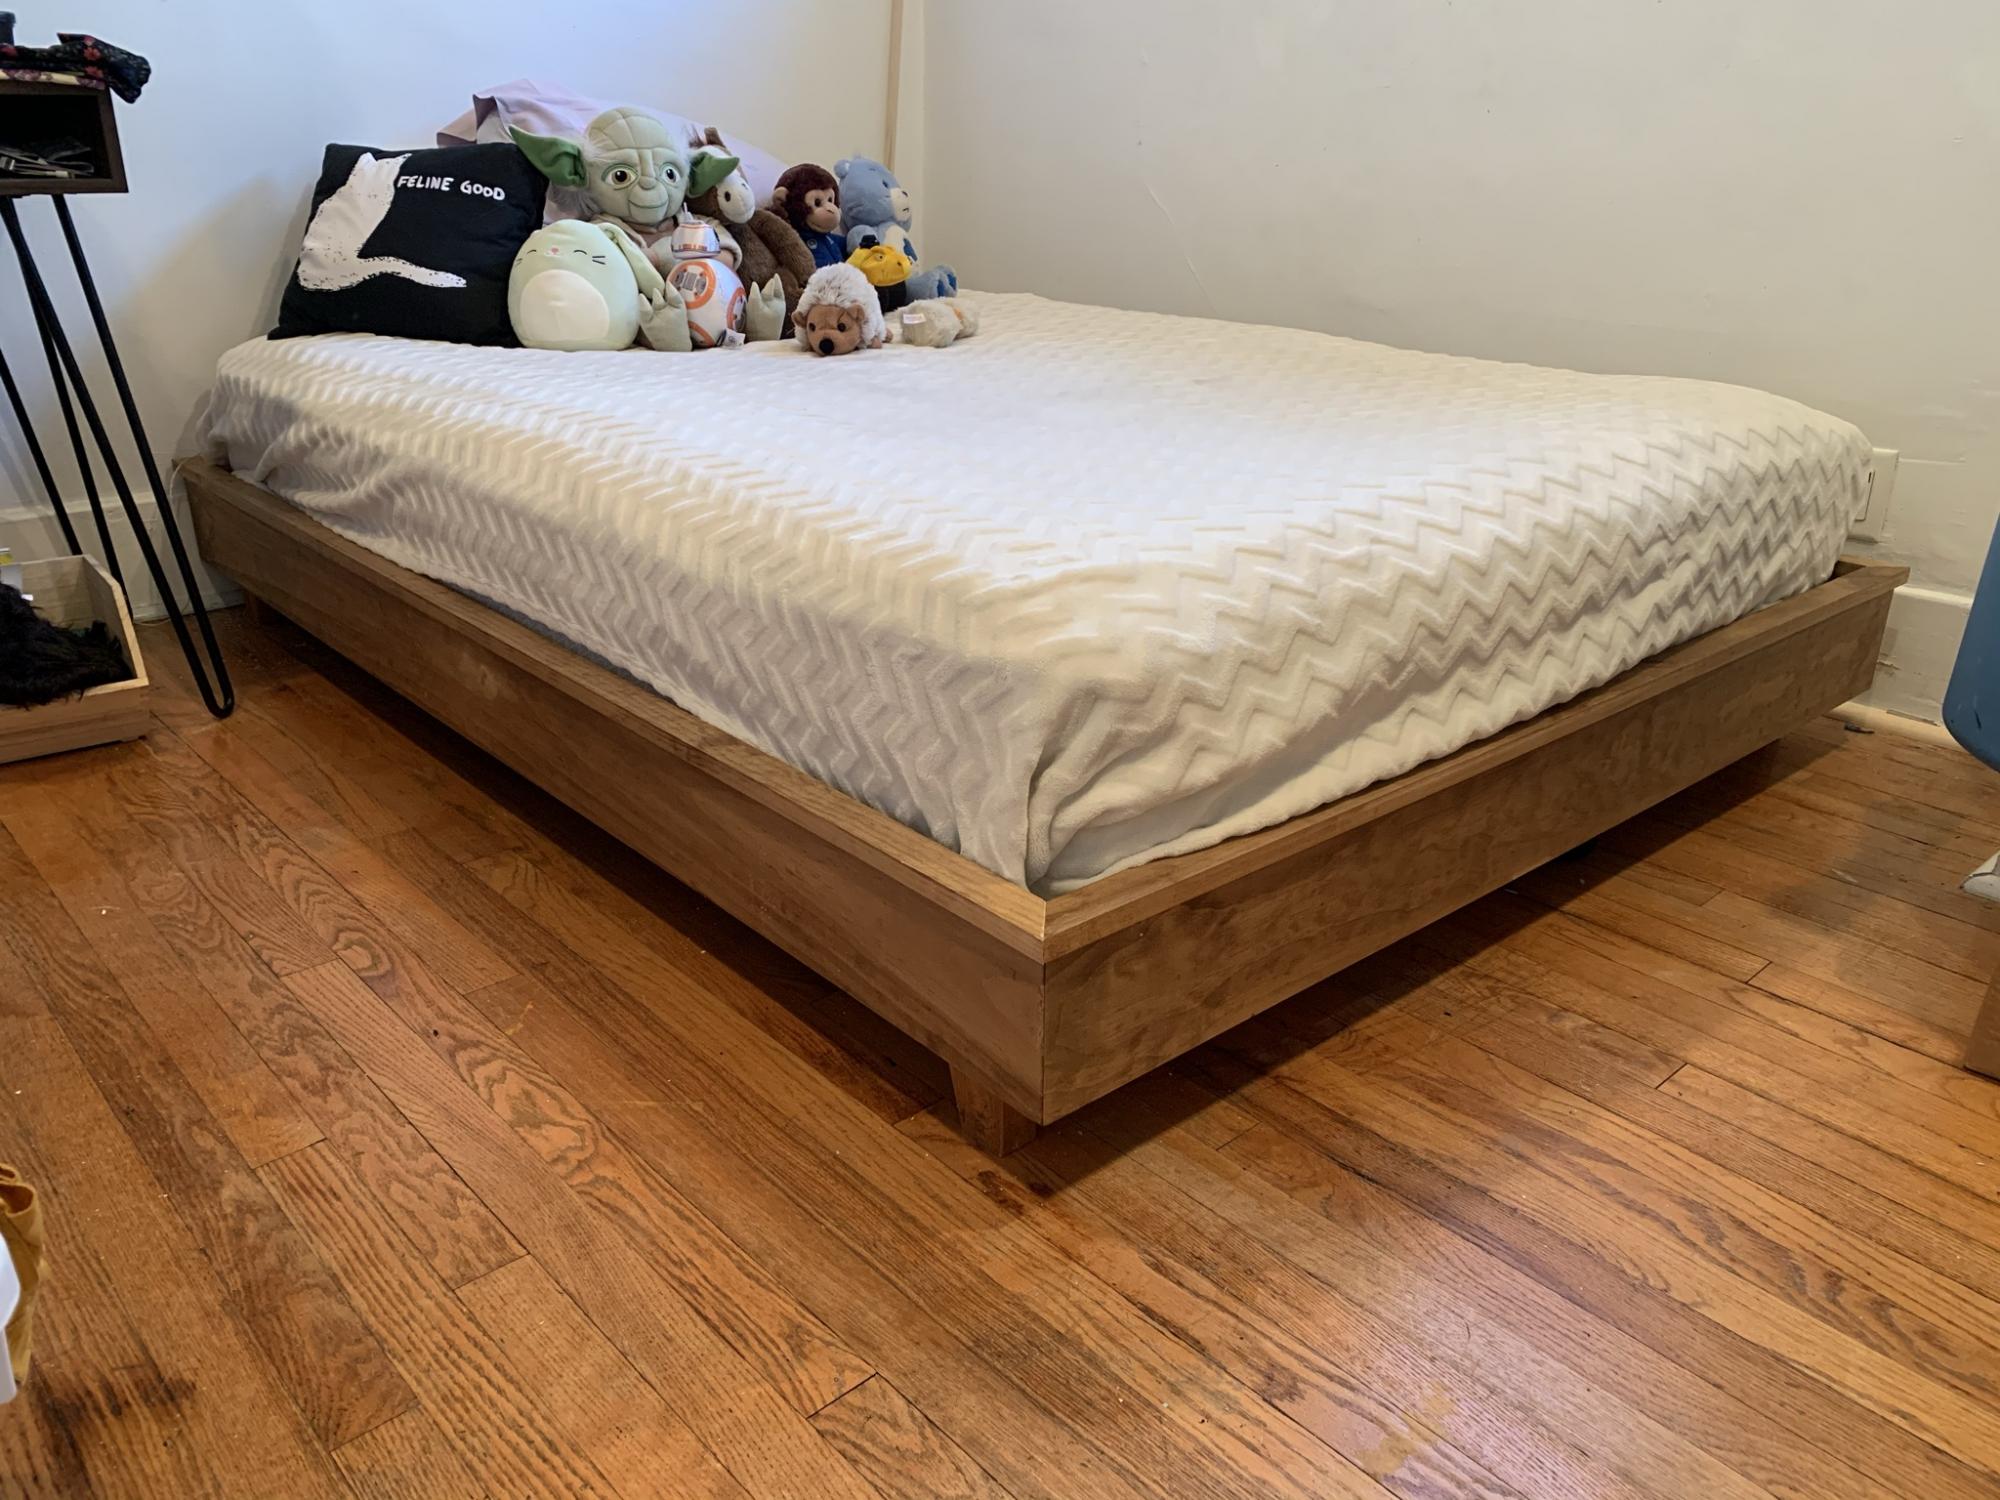
The queen and twin bases were base on your twin bed with storage. Pretty easy to do. This is my first time doing anything this big. I live in a four season resort town and needed beds for heads for ski season.
Debbi H - IG - callintn
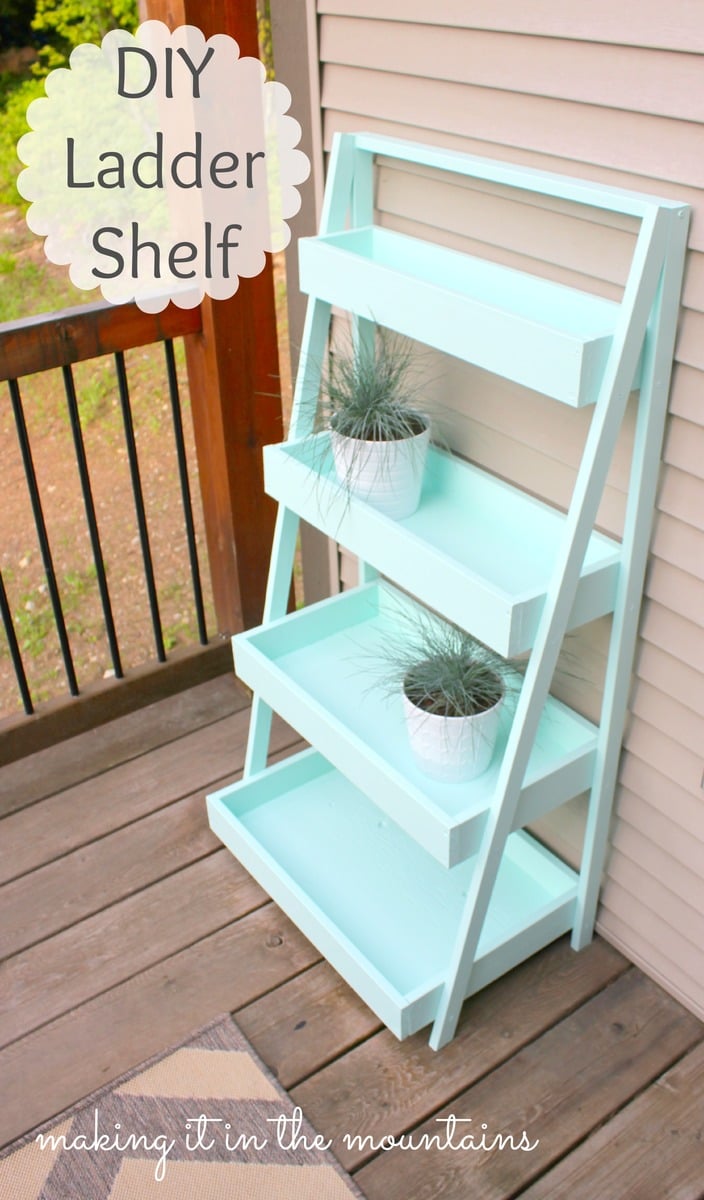
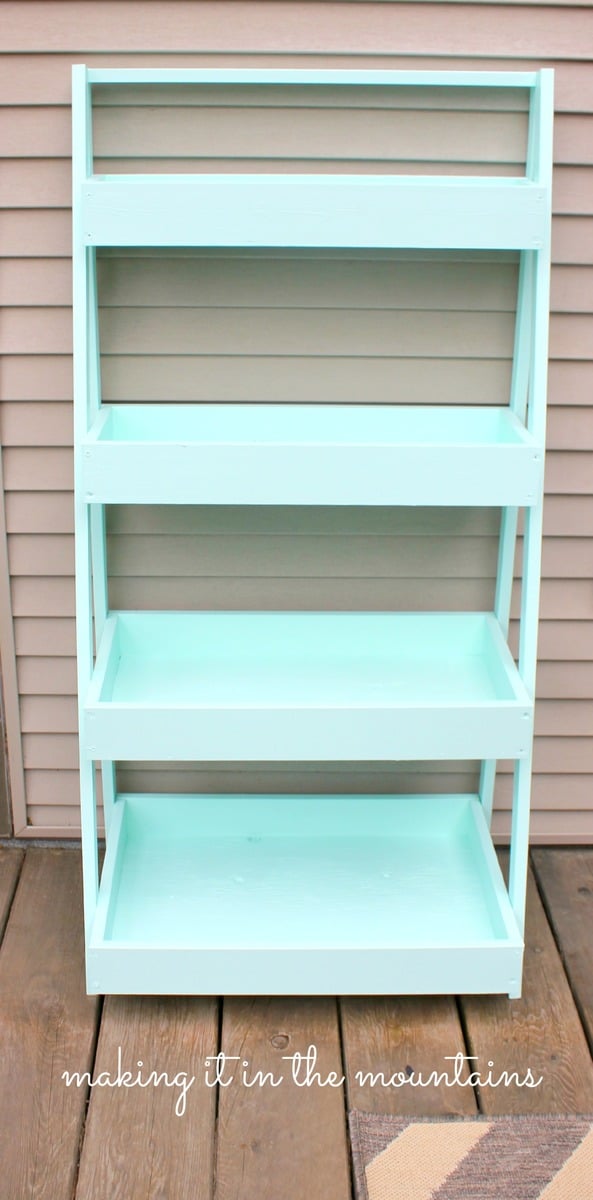
DIY Ladder Shelf to use as a plant stand on our courtyard deck.
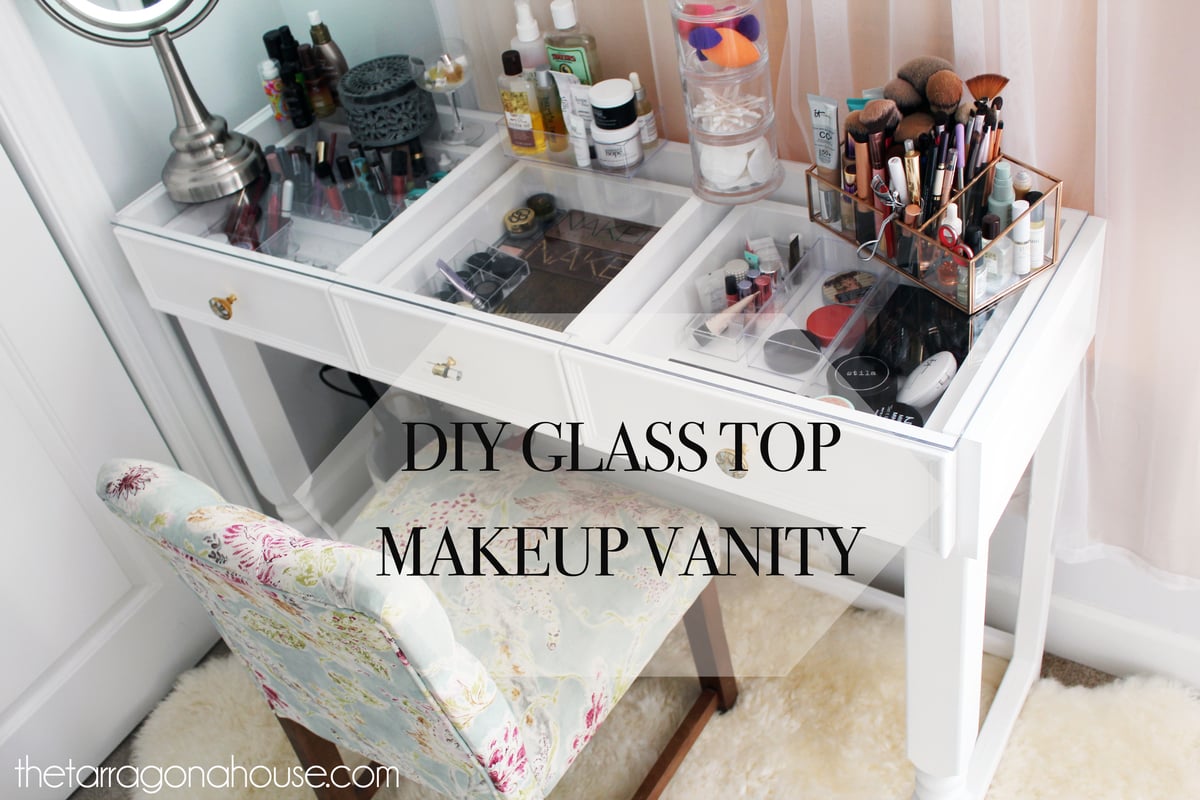
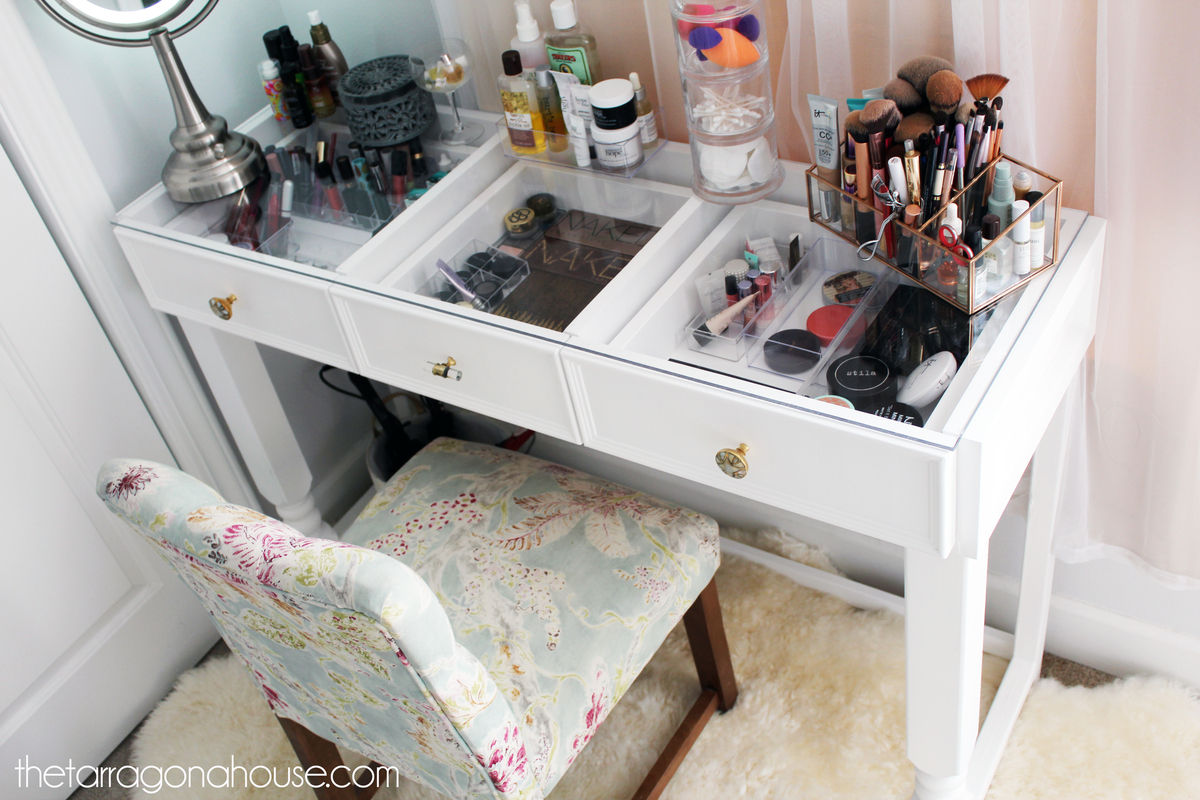
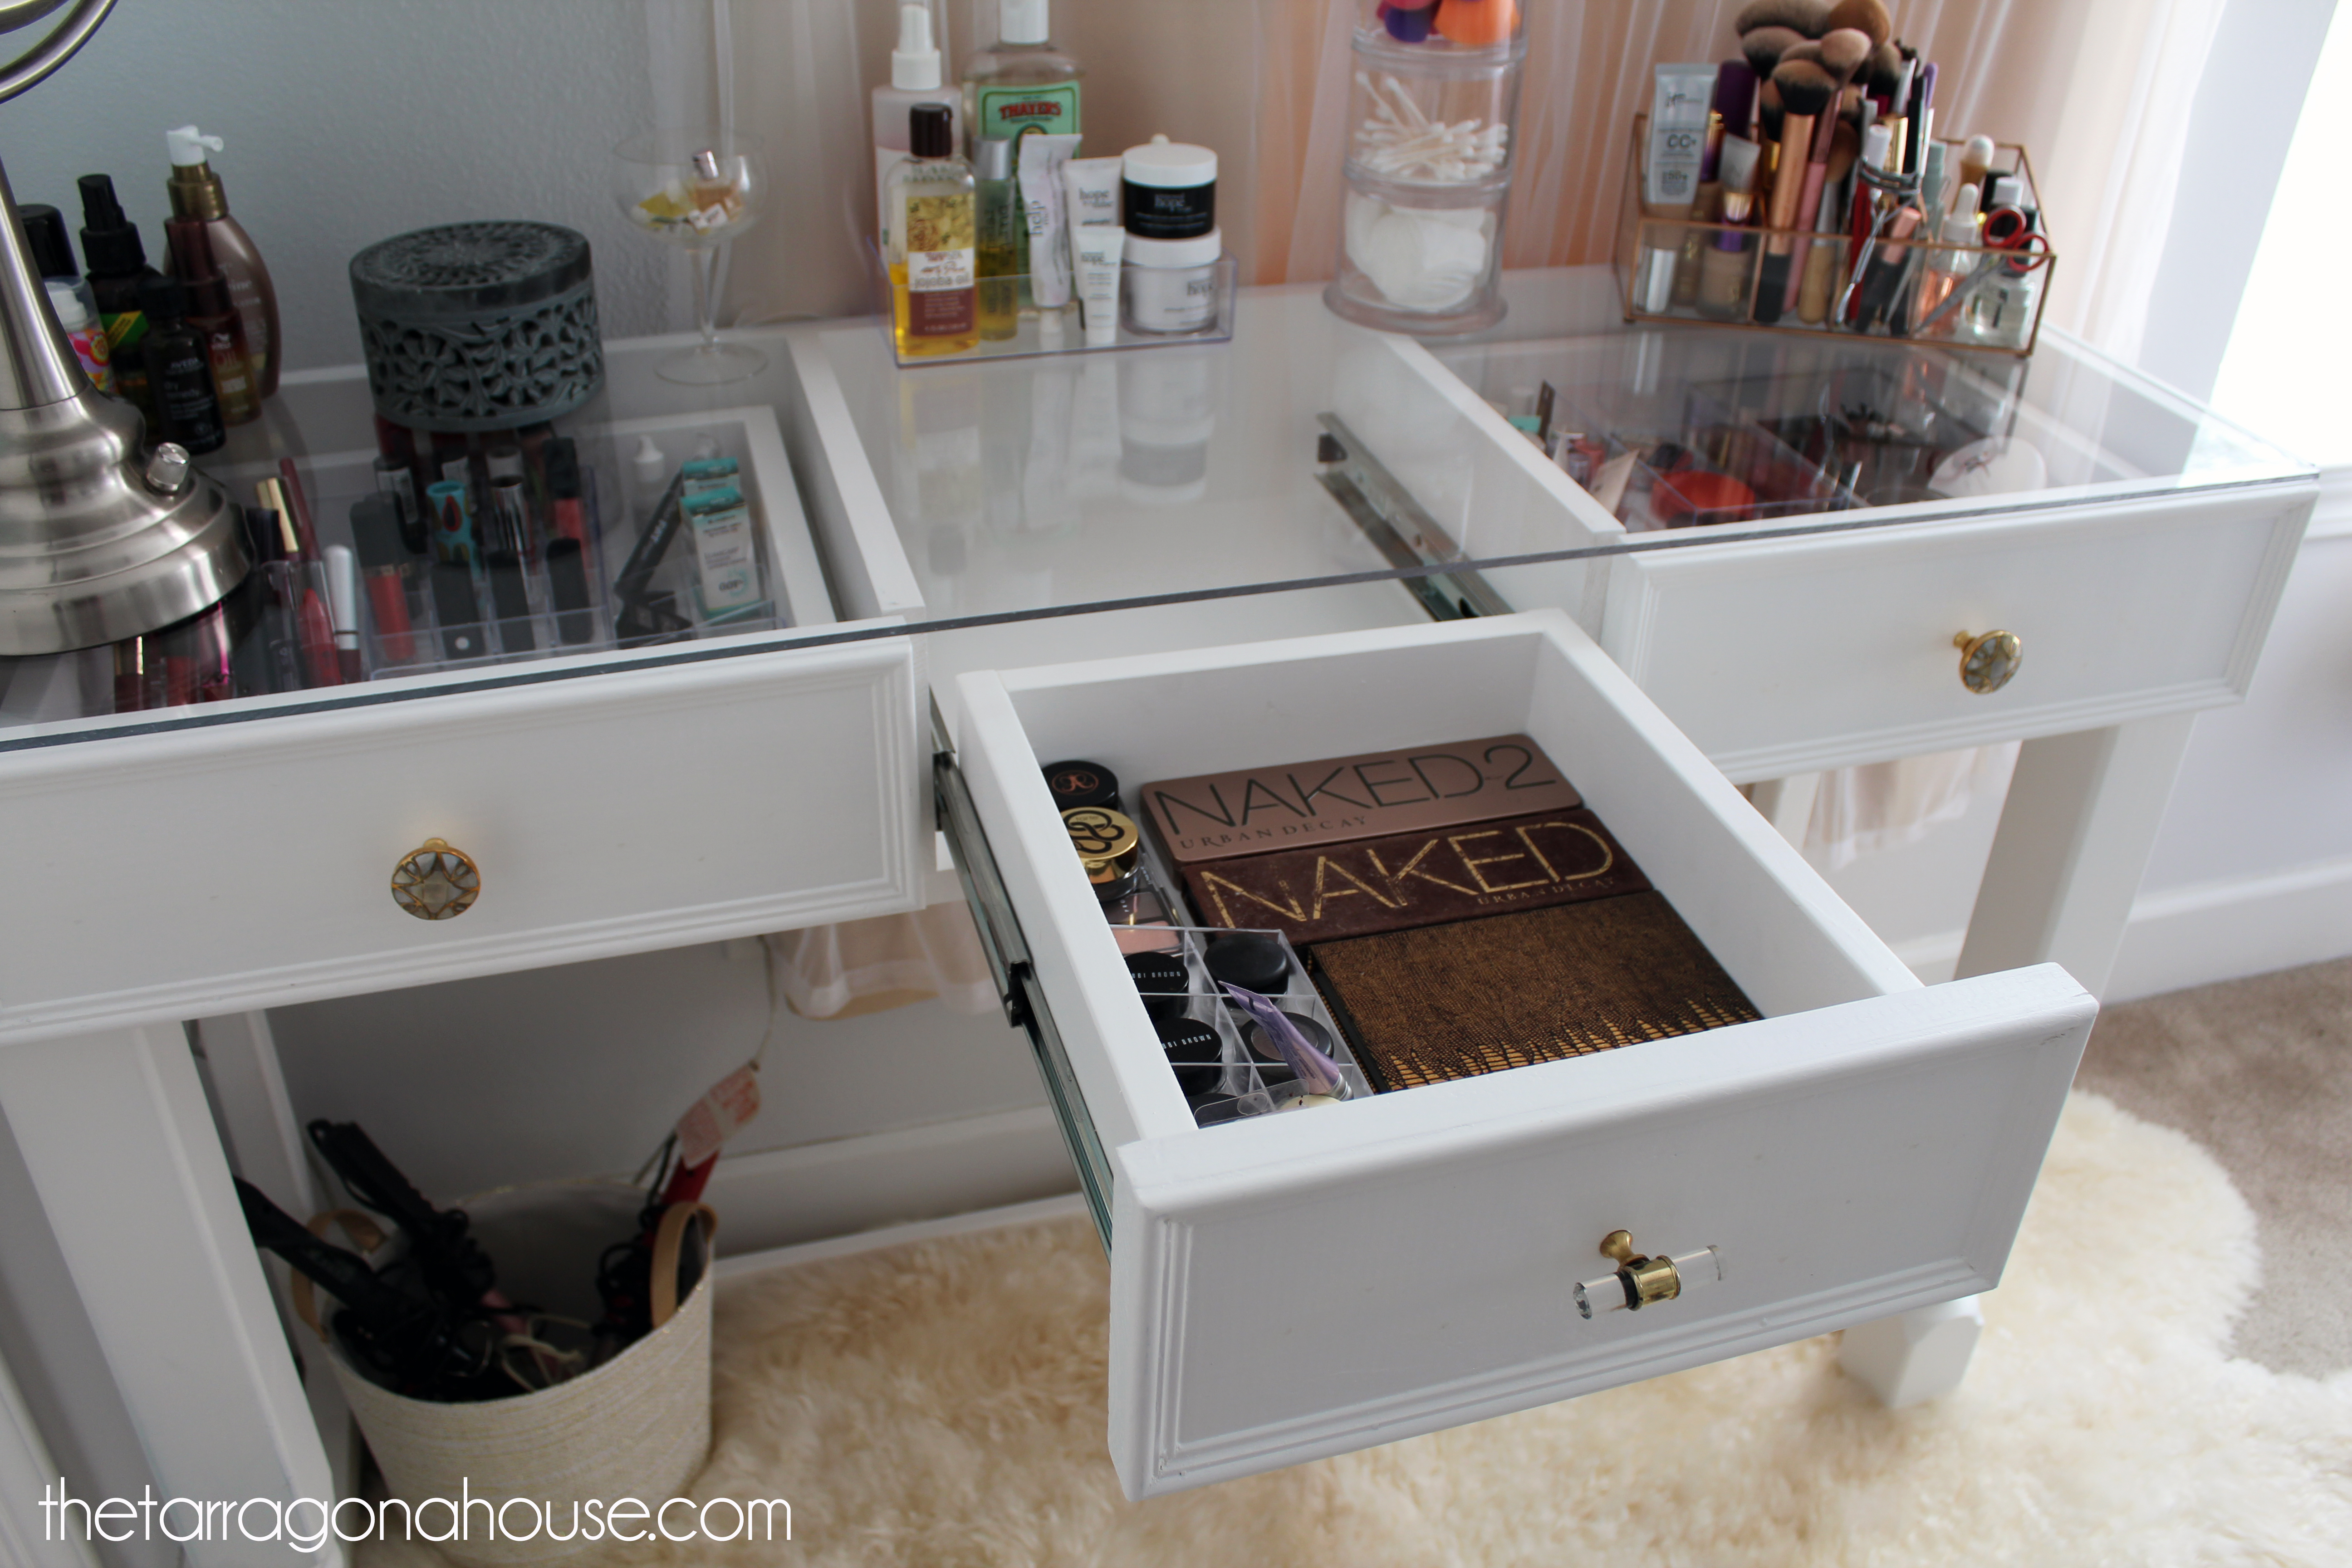
For anyone who is interested in building their own glass-top vanity with pull-out drawers :)
Sun, 11/29/2020 - 01:27
Hi Ana, where can I find the instructions for this project?
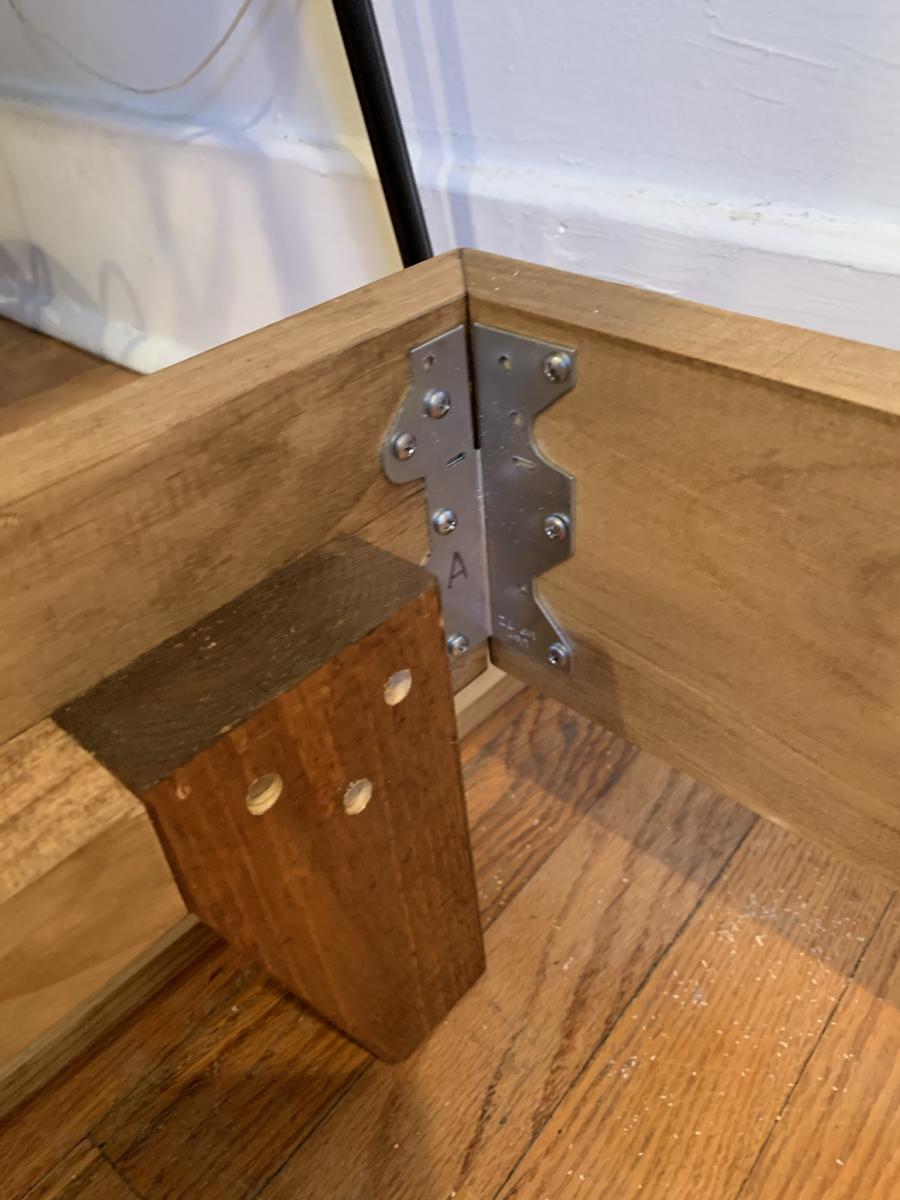
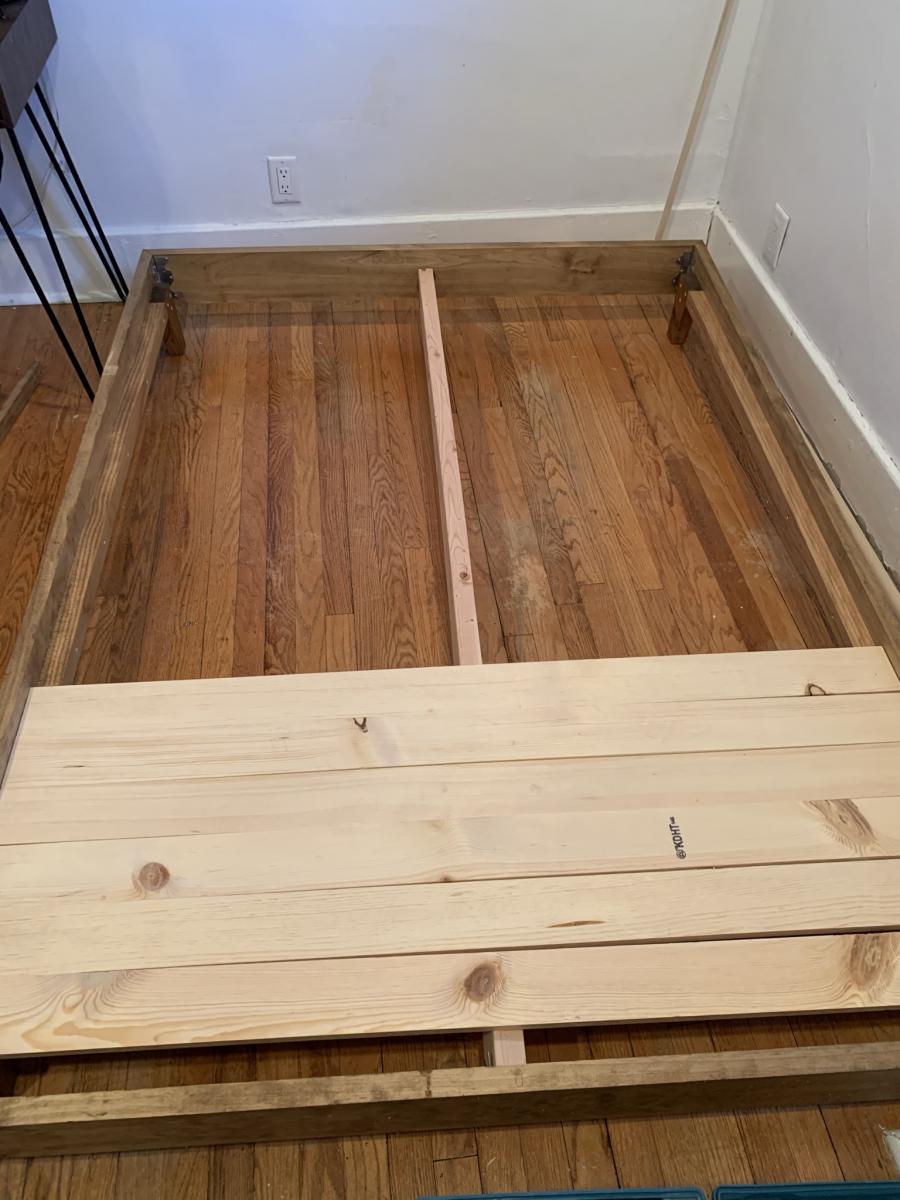
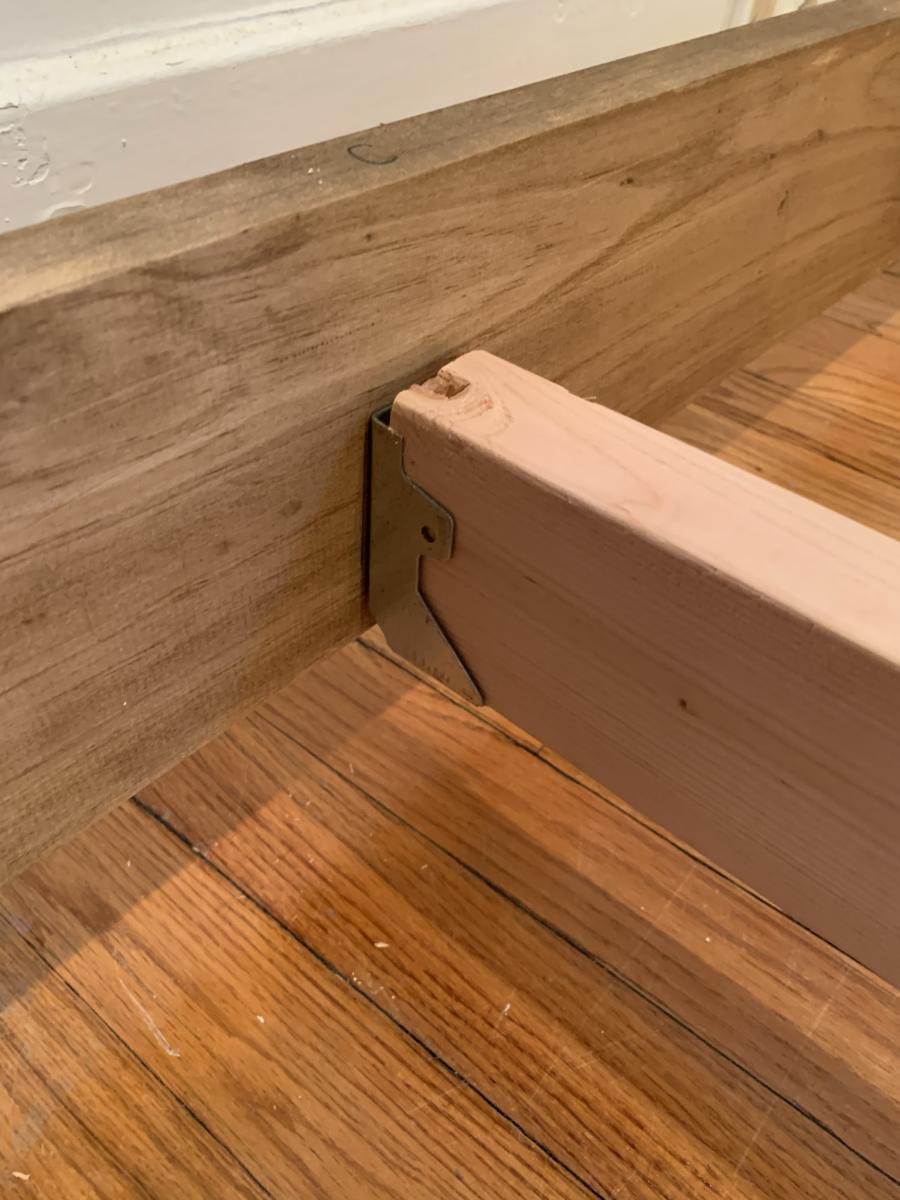
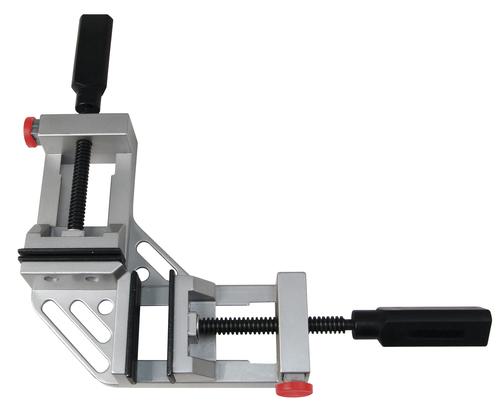
We have built this plan twice for our two daughters (Full size mattresses). A similar bed frame at Pottery Barn Teen would have easily set us back about $1500 so these bed plans are truly a blessing! After no luck with a Wayfair wrought iron knockoff bed frame (loud and squeaky!!) we decided to give an Ana White plan a go. So glad we did! We did modify the plans slightly. We mitered all corners and stained all components with a Varathane Golden Oak before final assembly. Although I own and use a Kreg Jig, we wanted the frame to be easily disassembled. We opted for corner braces secured with 6, 1" cap head wood screws per corner (3 per side). Keep in mind miter corners can be a bit tricky but definitely possible with a little patience. PLEASE NOTE: when cutting miters, you will need to account for an additional 4" OD from Ana's written plans. Each 90 degree angle is approximately 2" long. So, if cutting the 75" length( for the mattress length) the miters will be 2" long on each end making the OD length 79". Whether you are going with Miters or butt joints, I would also highly recommend a right angle clamp (Top/Bottom) used during assembly. It is extra expense but so worth the investment!

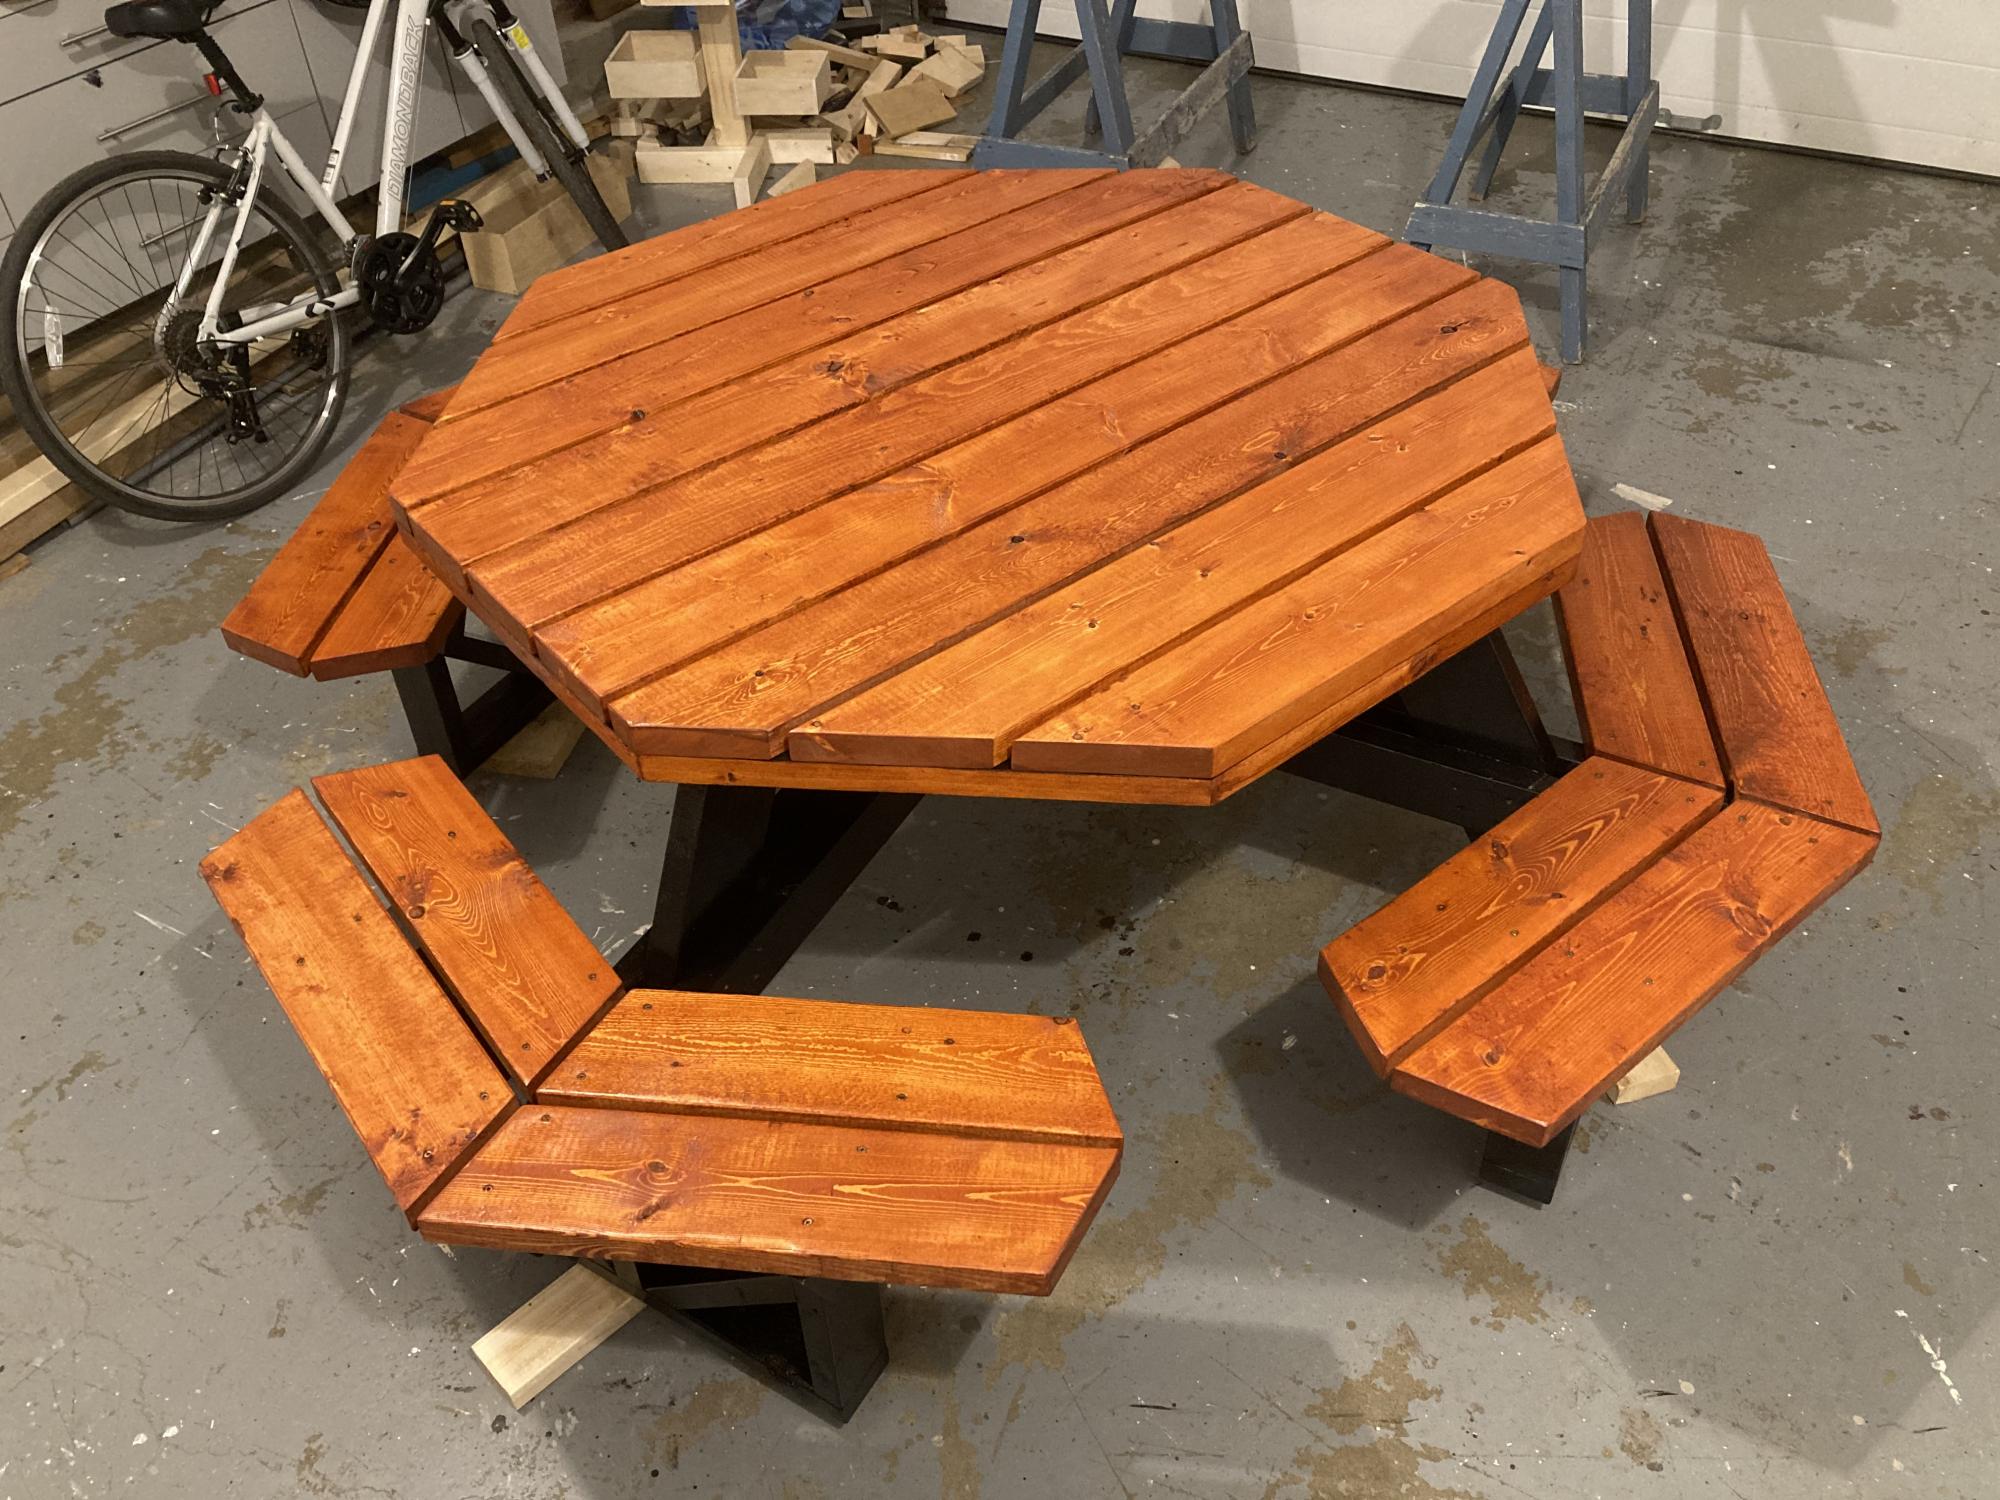
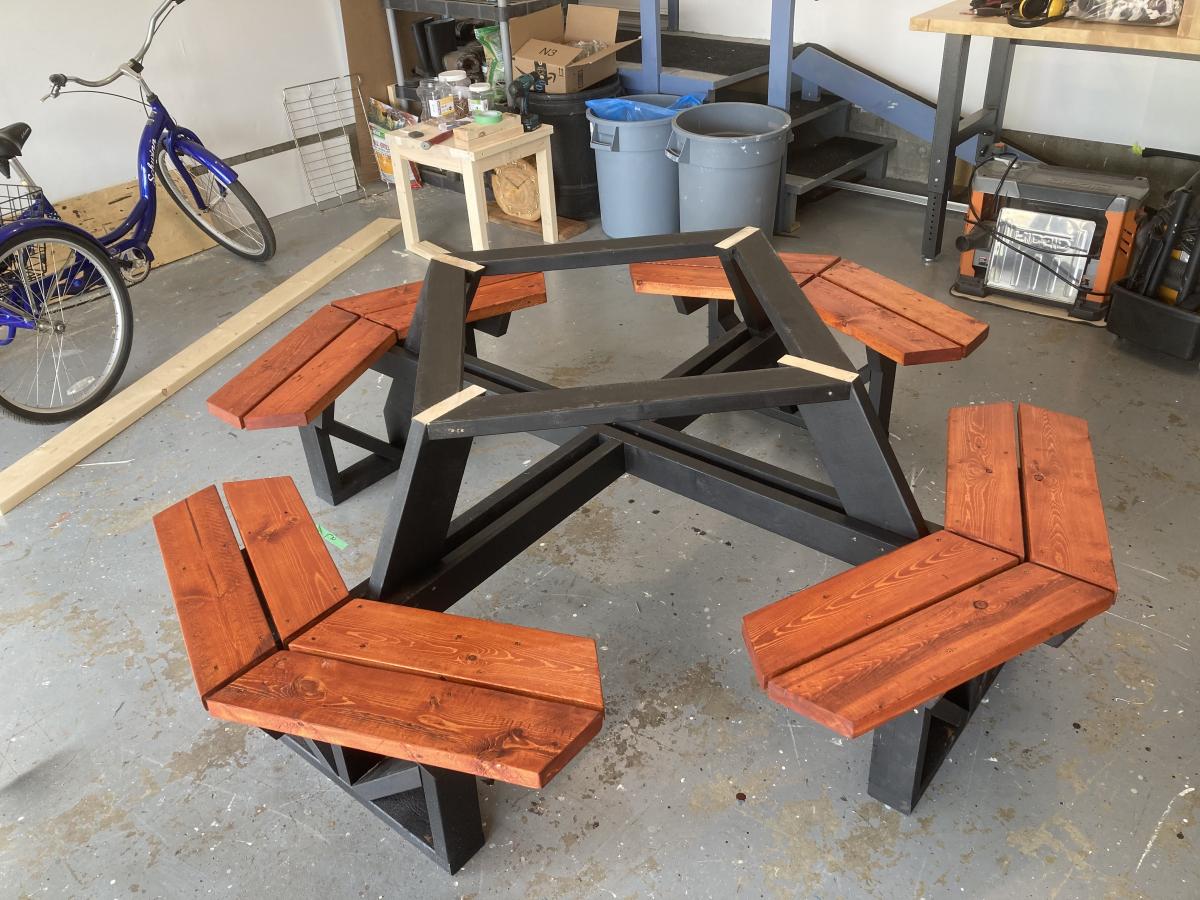
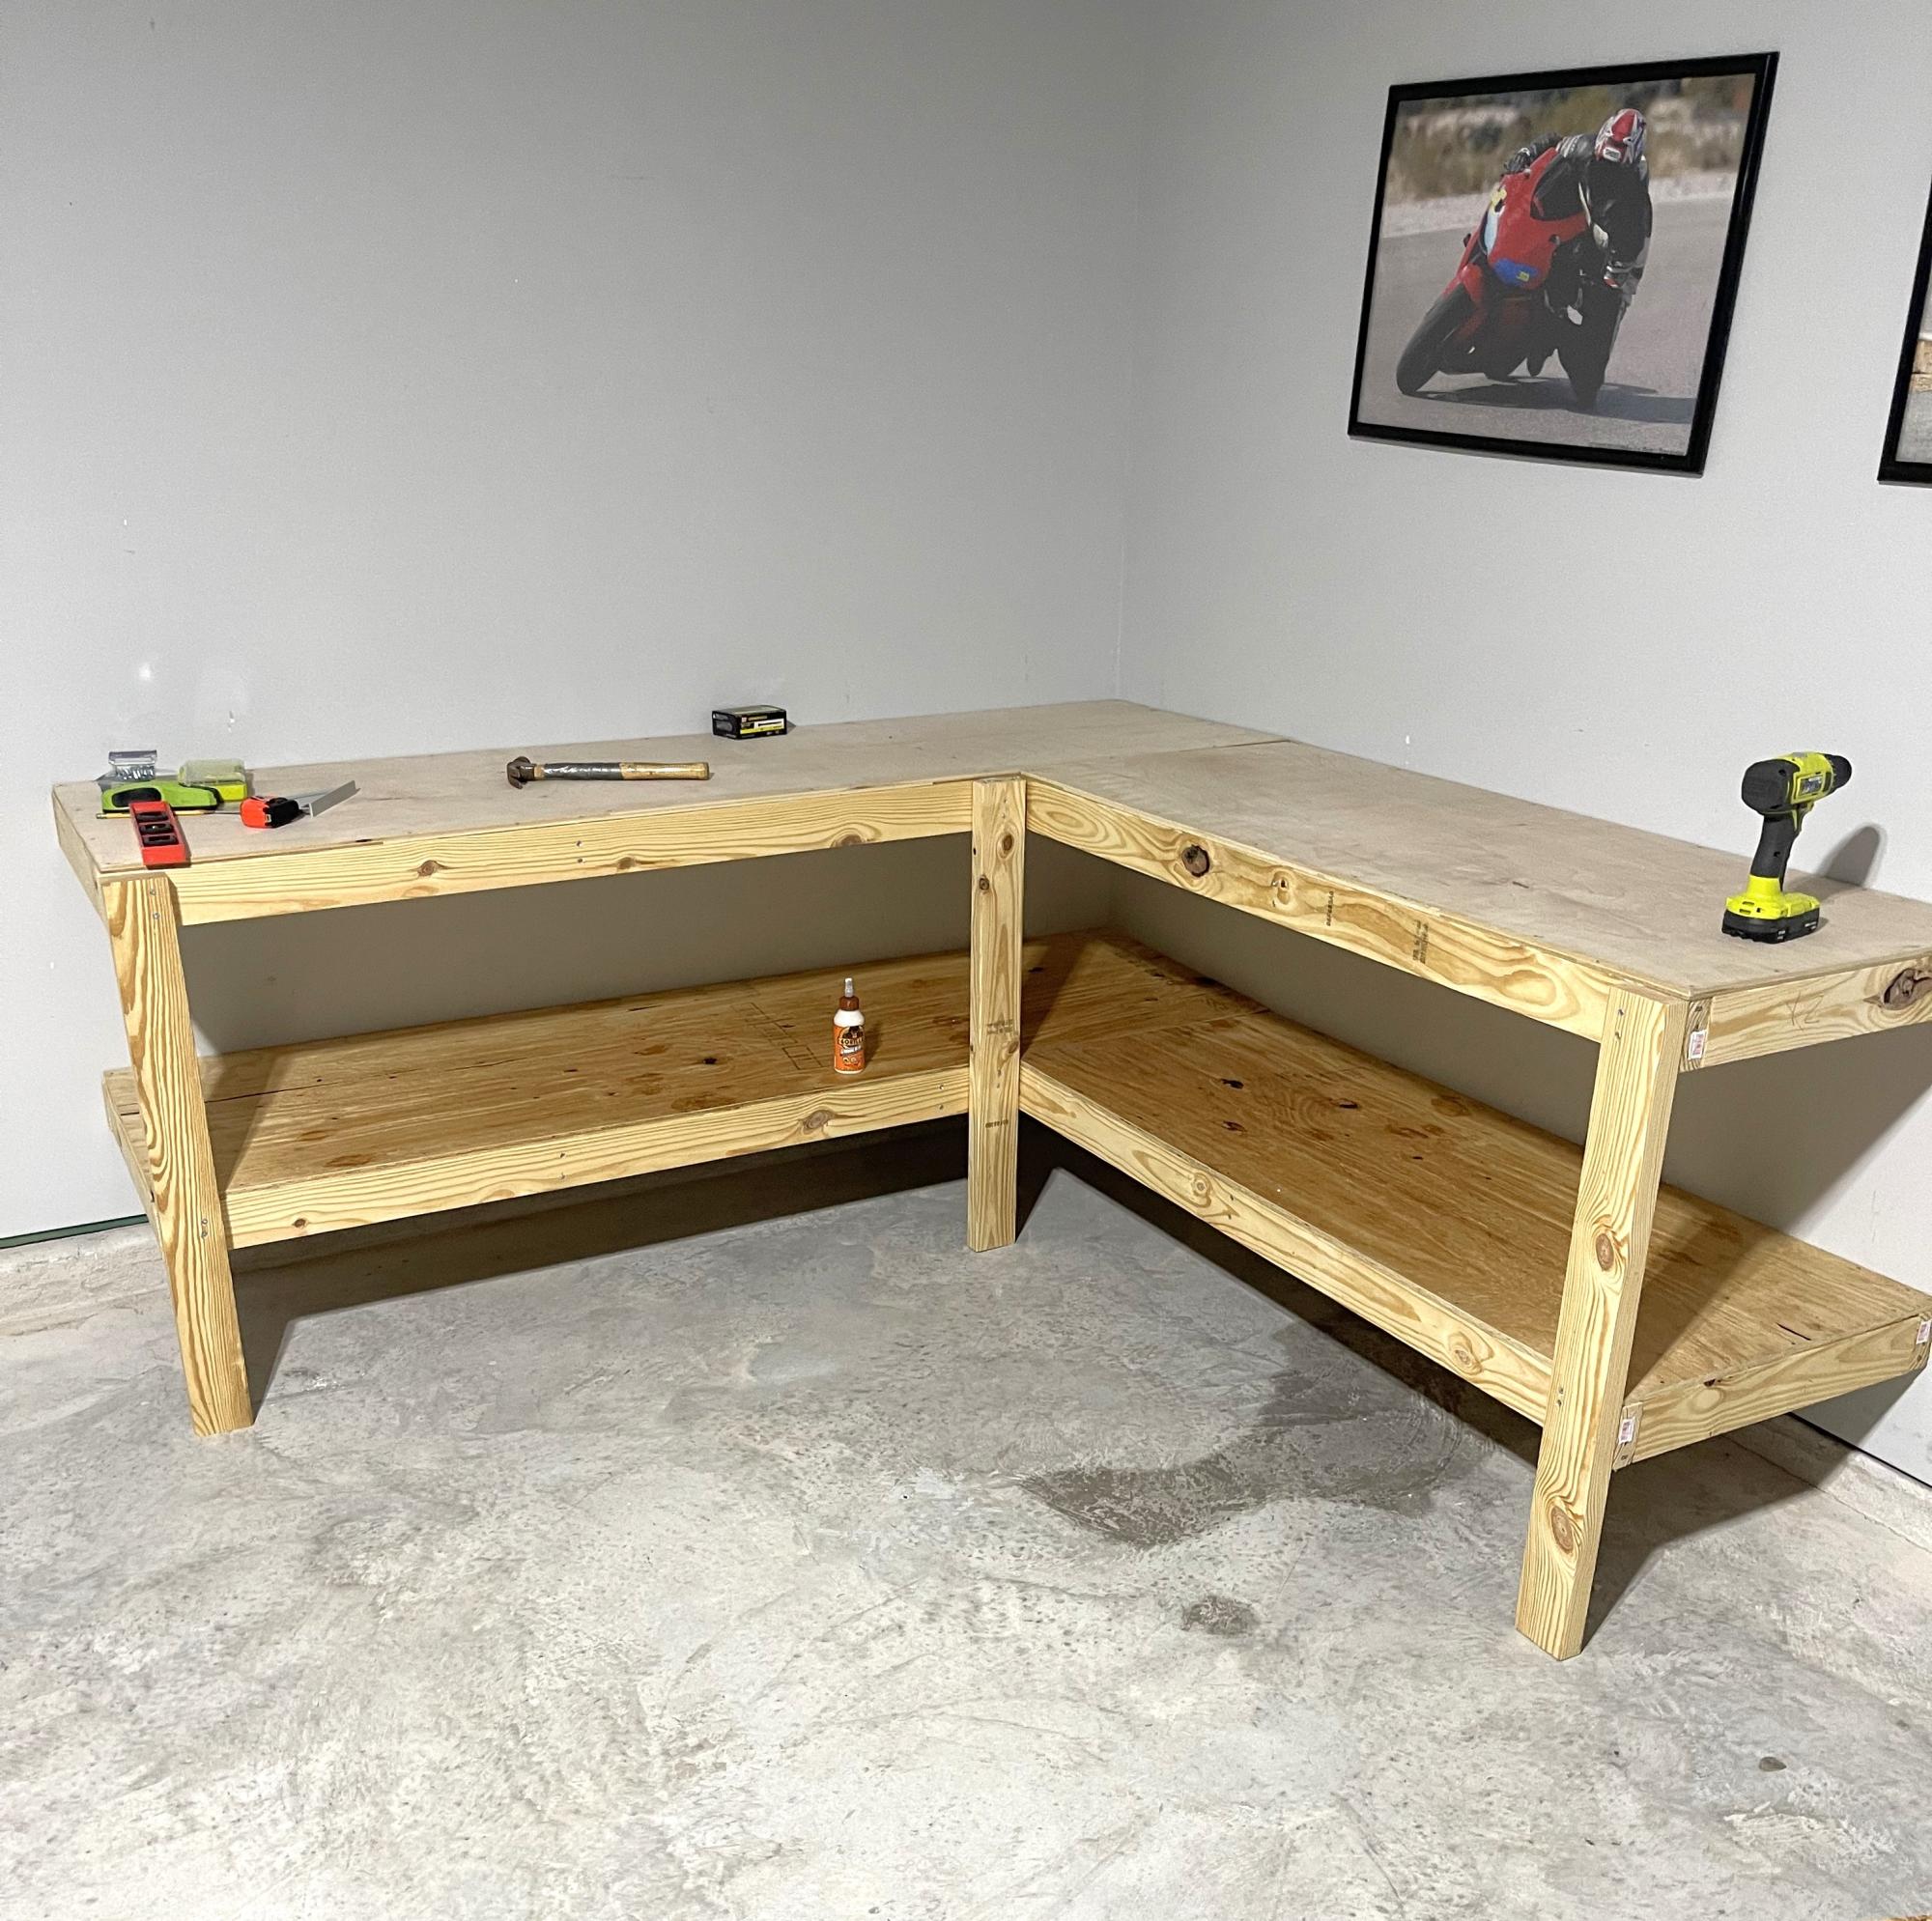
To say this was a complicated build is an understatement. Lots of pieces, lots of different angles and lots of screwing it together. It was really tough to keep everything perfectly square but in the end it turned out well. It is a very heavy table. I want to get it outside on a sunny day for some photos.
Sat, 05/29/2021 - 10:33
A picnic table that will last! Love your finish choices, thank you for sharing:)
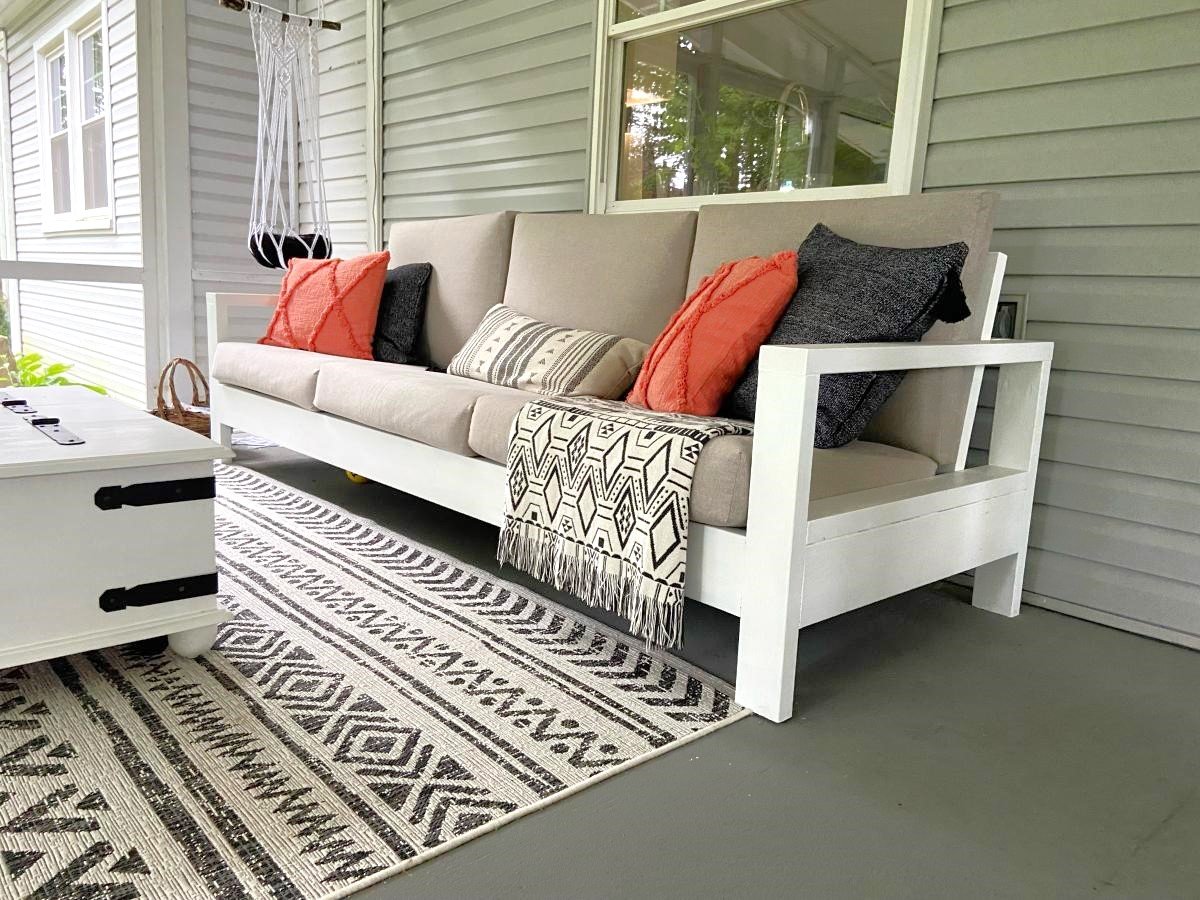
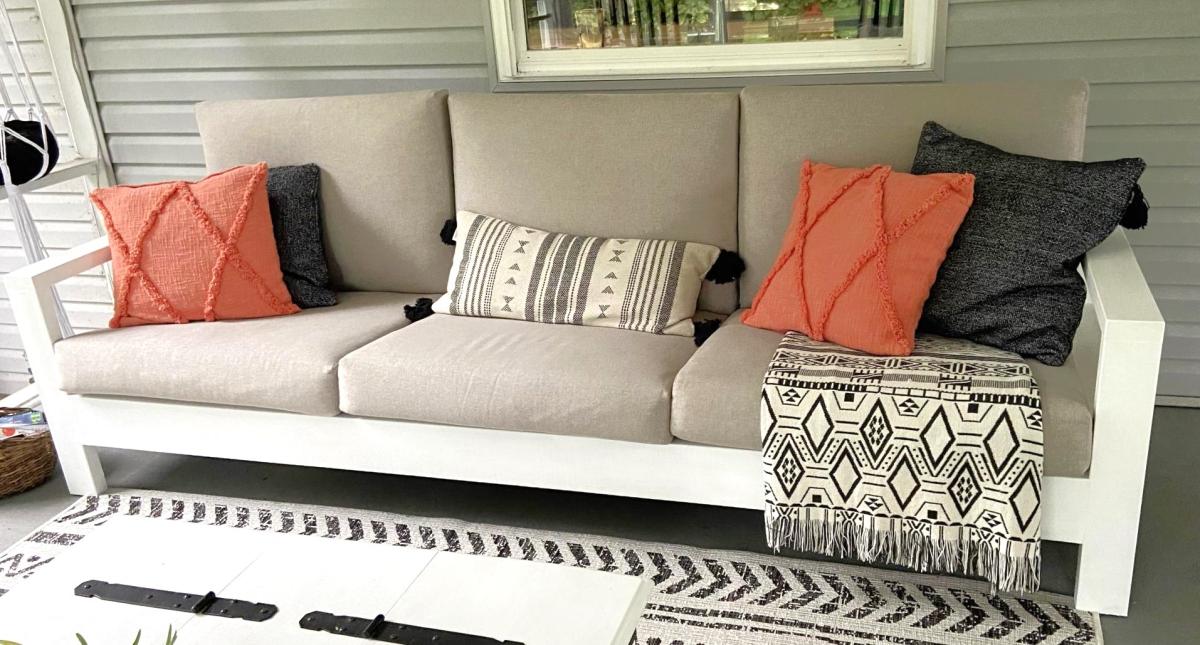
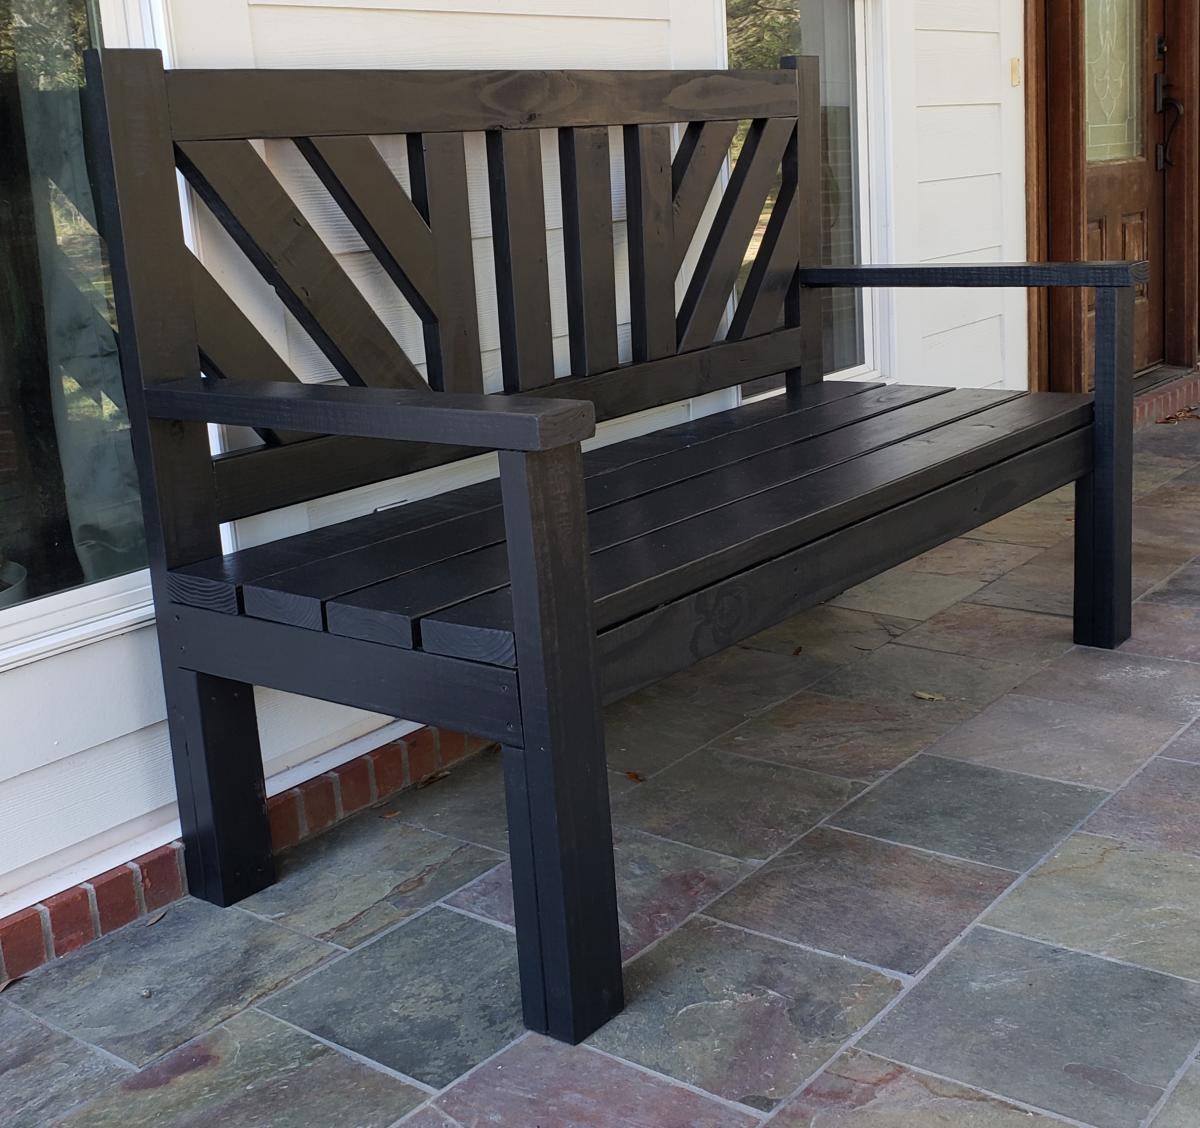
This was our first big project with our Kreg Jig. We adapted the plans to make the sofa 8' long. On Friday night, my husband did all the cuts and I pre-painted everything. With the help of our son, we had the whole sofa built in a few hours on Saturday morning. I puttied the visible holes, did a second coat of paint, and made custom cushions. The plans were very easy to follow. I followed the others' advice about pre-painting and assembling the back on a perfectly level surface. It came out better than I expected and it's super comfortable!
Sun, 04/10/2022 - 10:33
Thank you for sharing, it looks amazing! Would love to hear how you made the cushions.:)
Mon, 04/11/2022 - 07:44
I want the plans for this one! I like this style a lot better. I really like how the bottom cushions are at a slant. I suck at modifying plans.
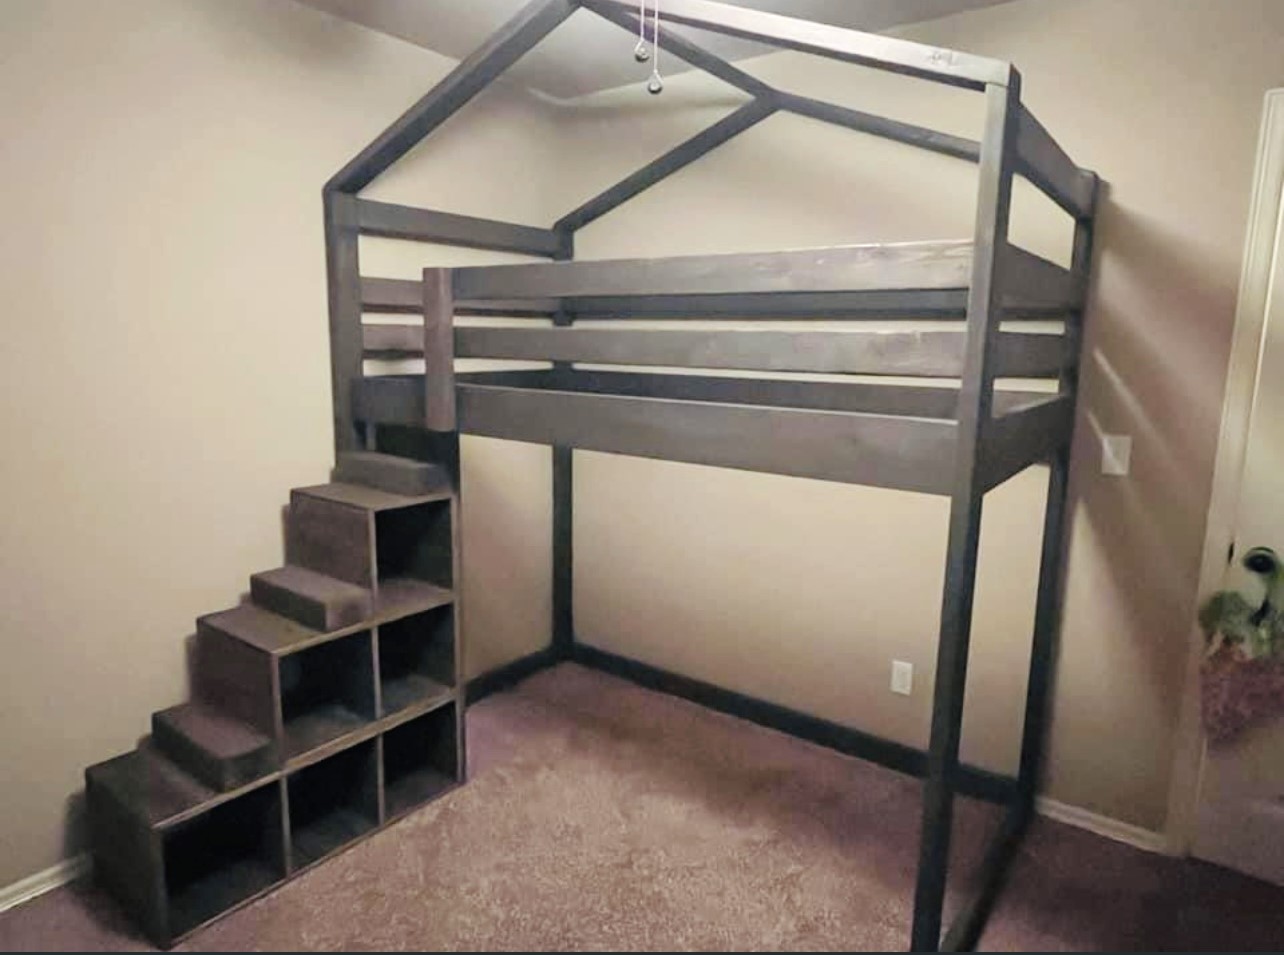
Modified the junior loft plan to add a house design element and storage stairs, by Amy Mott
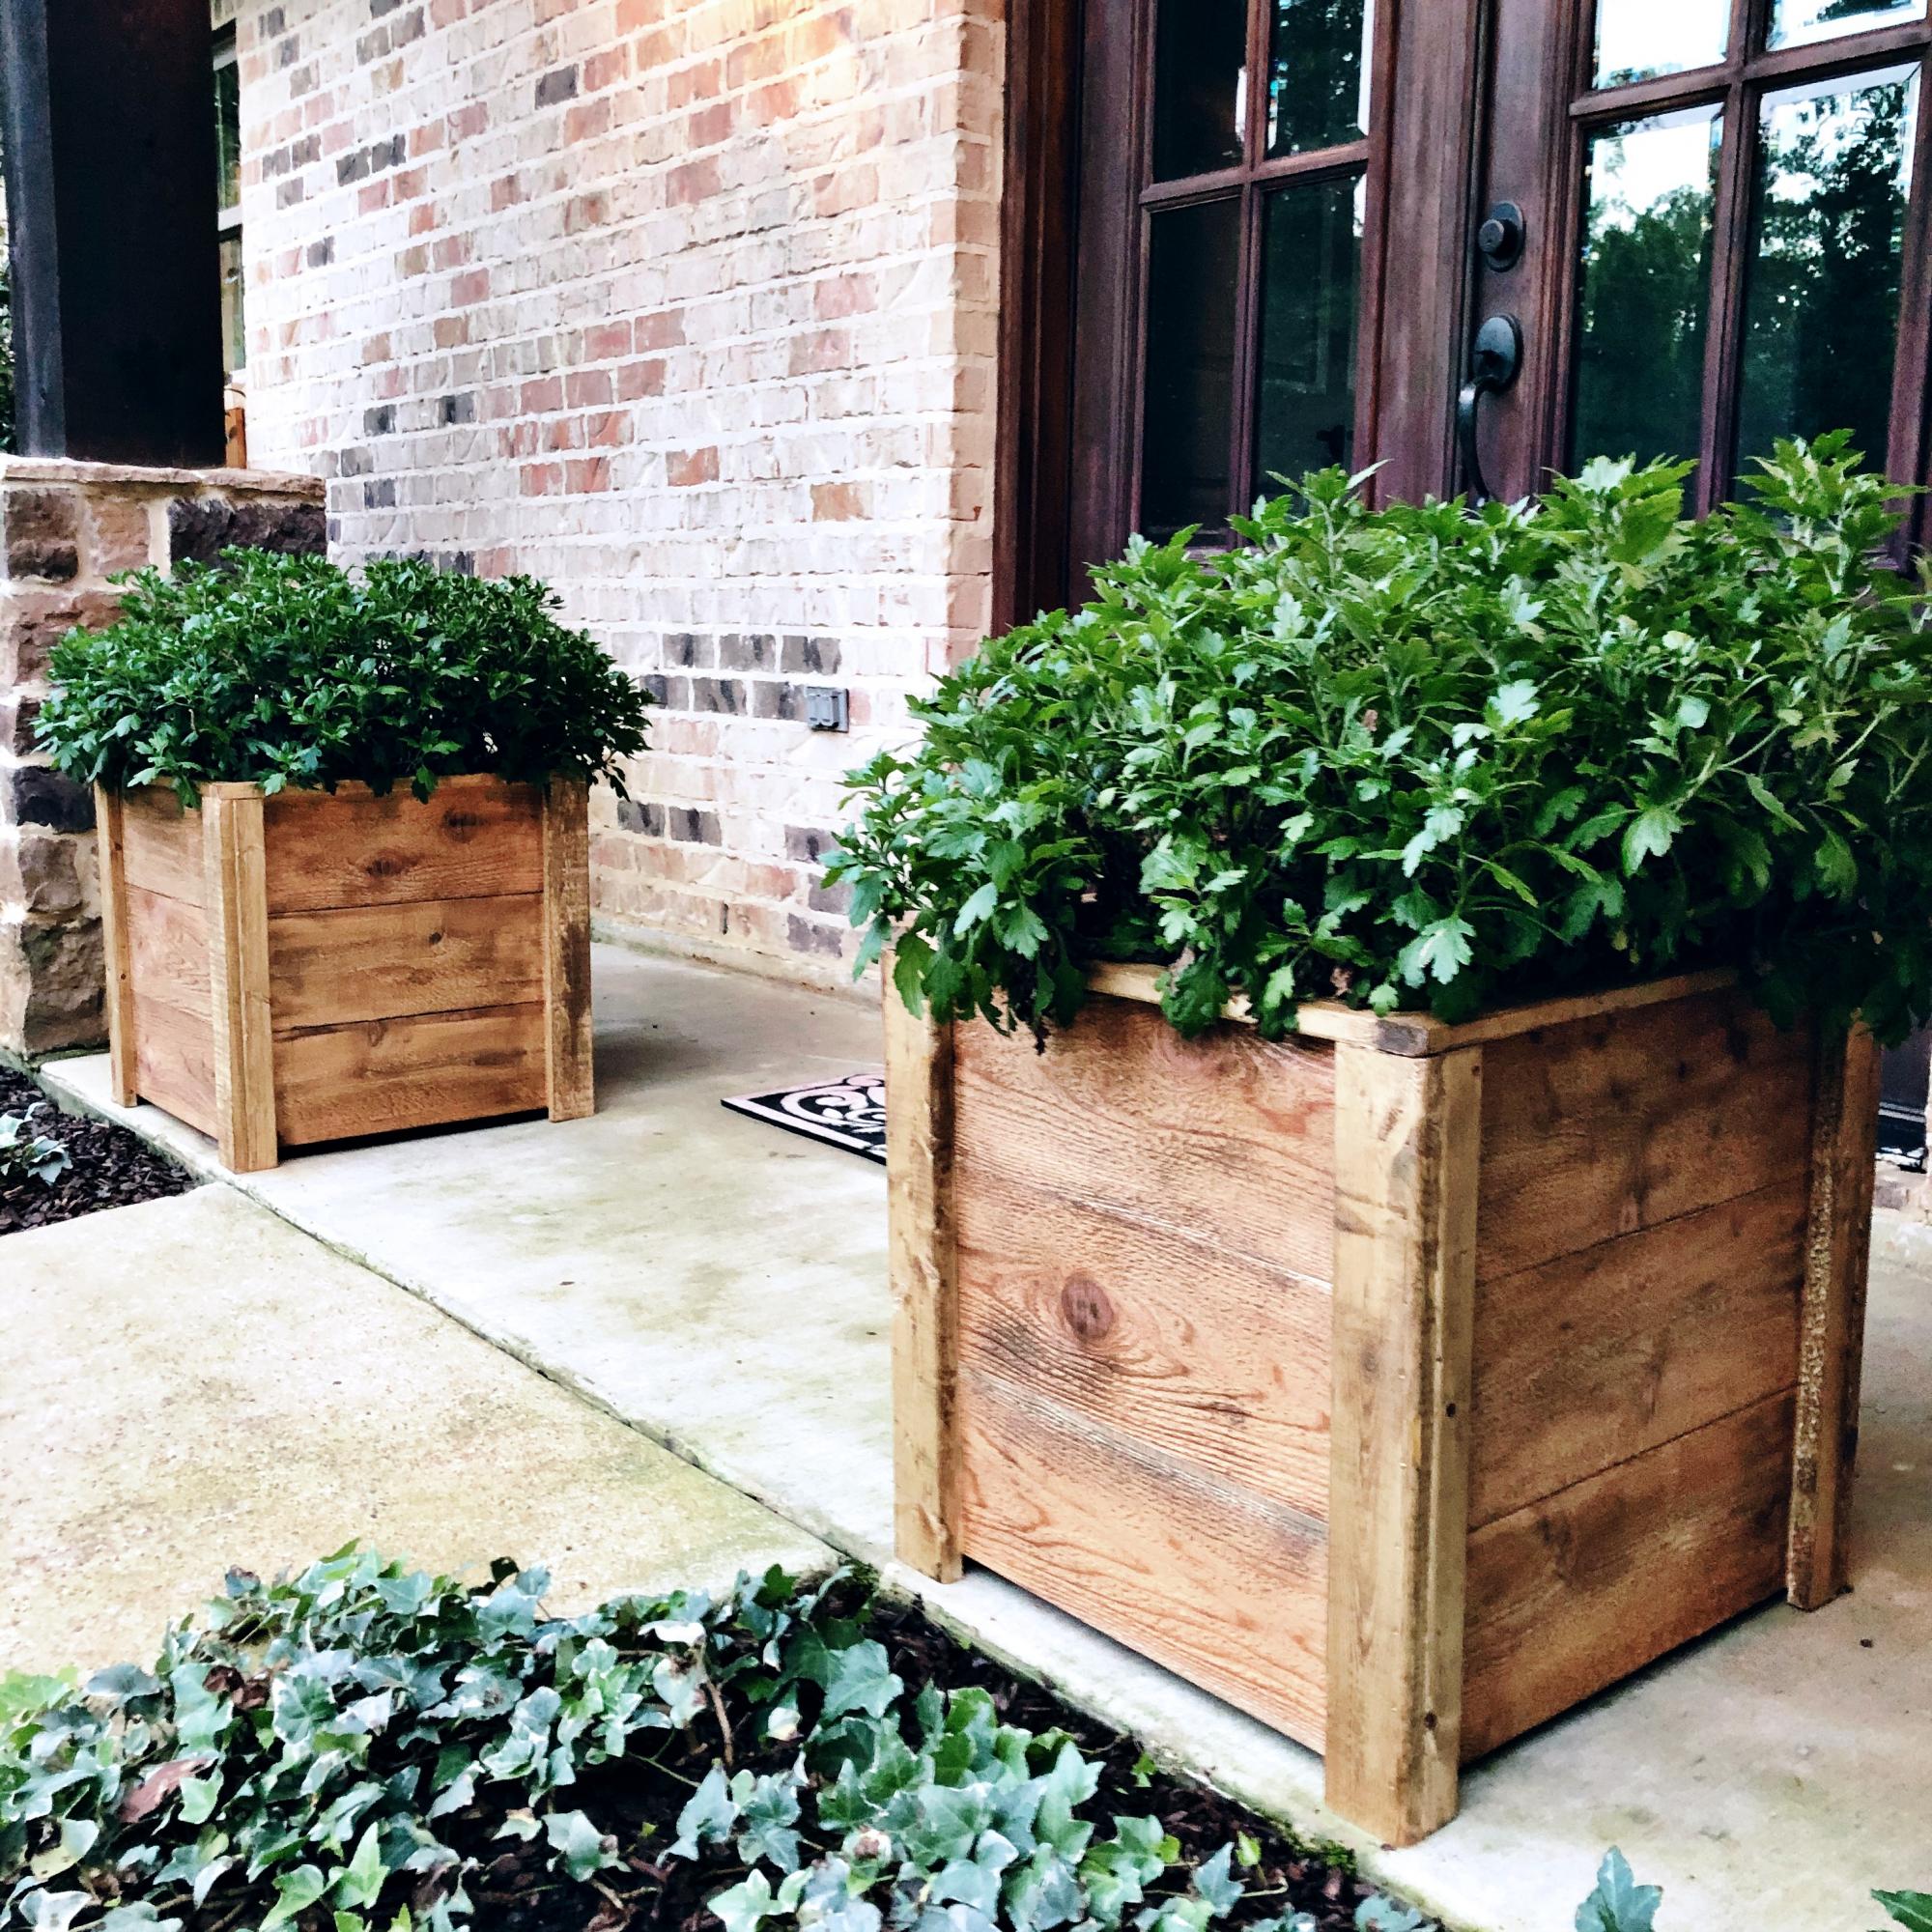
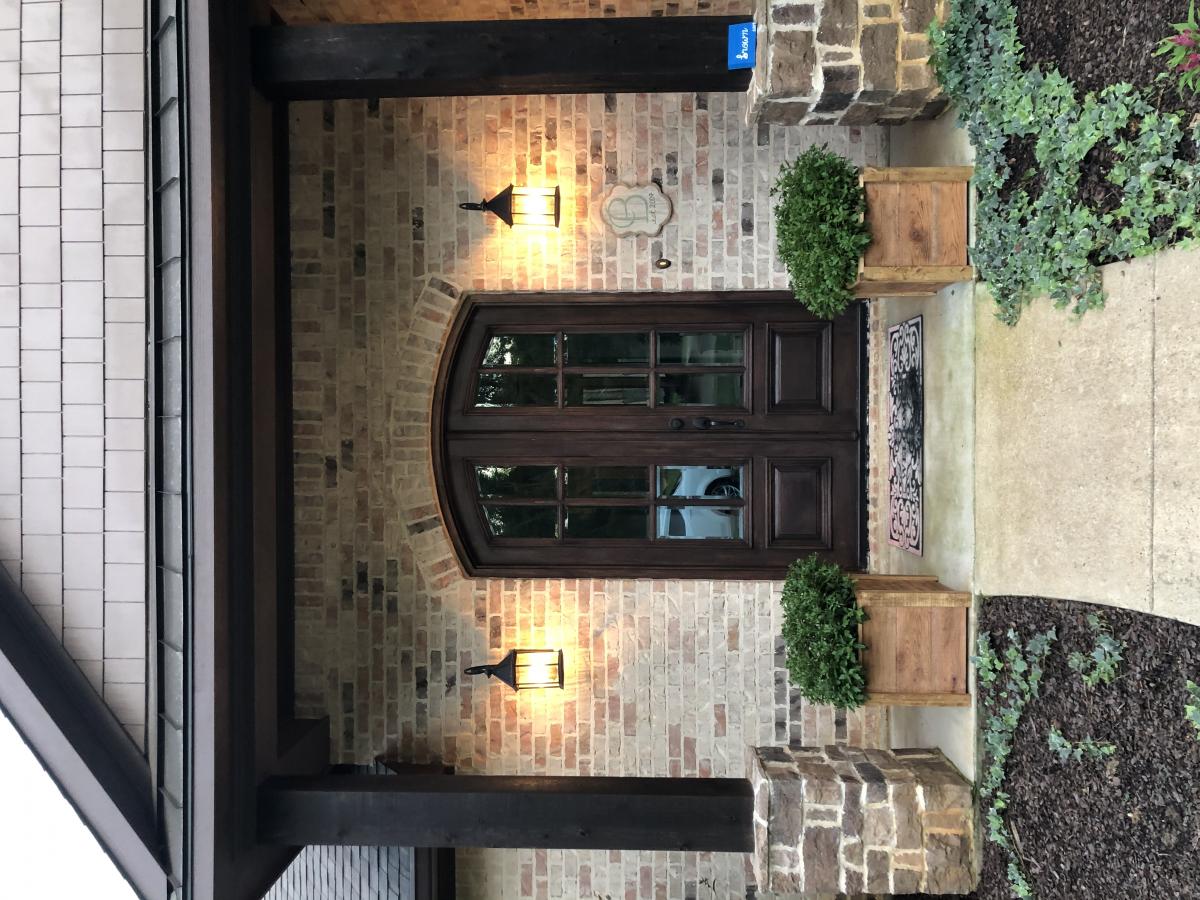
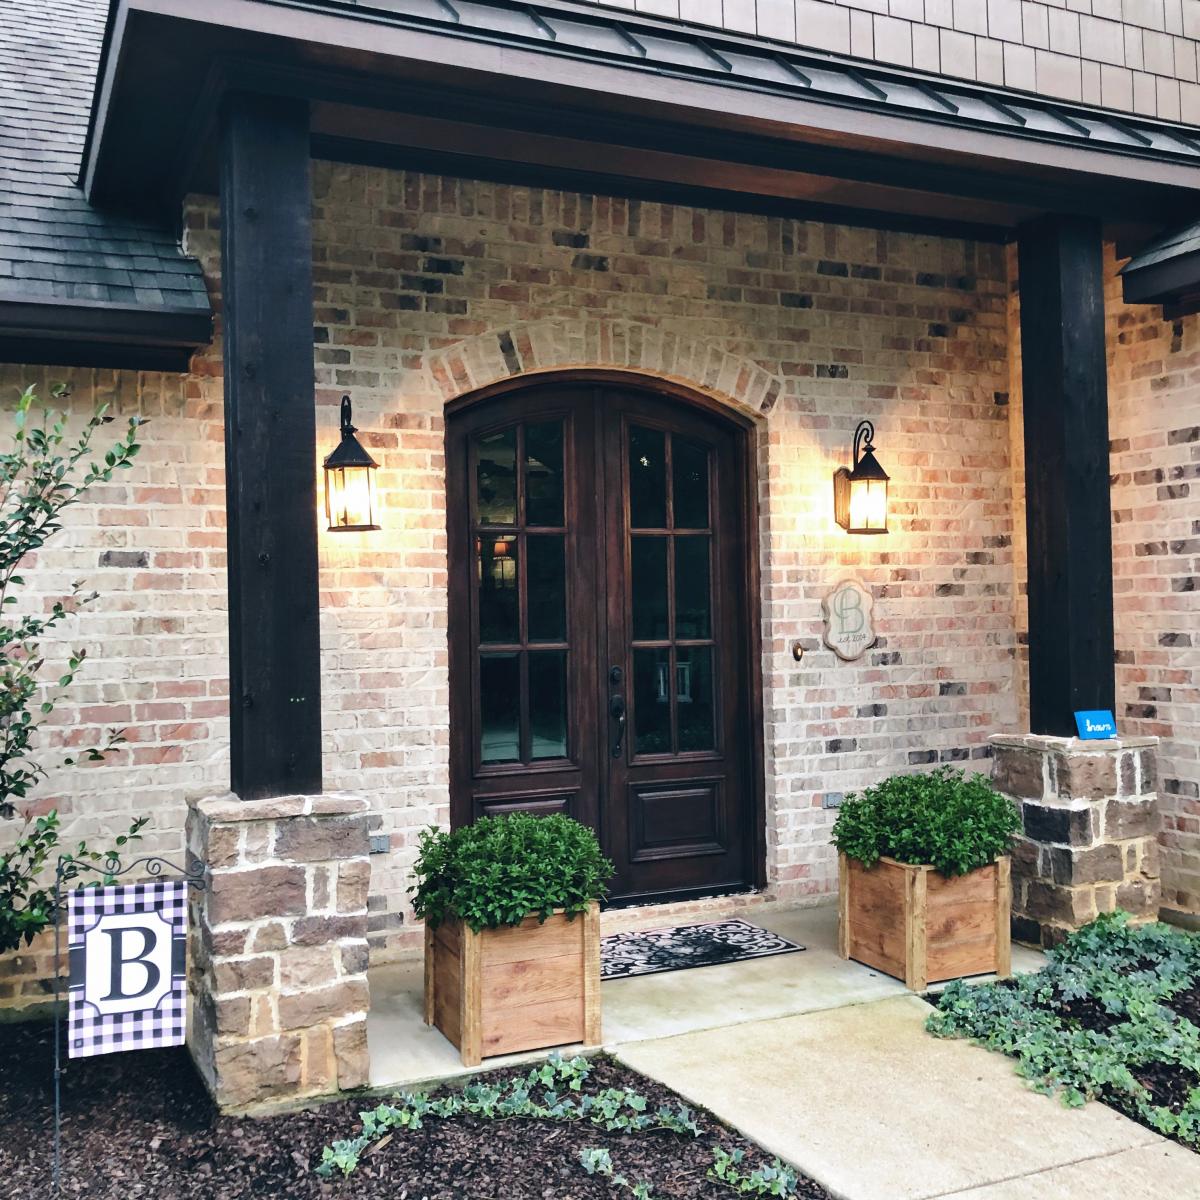
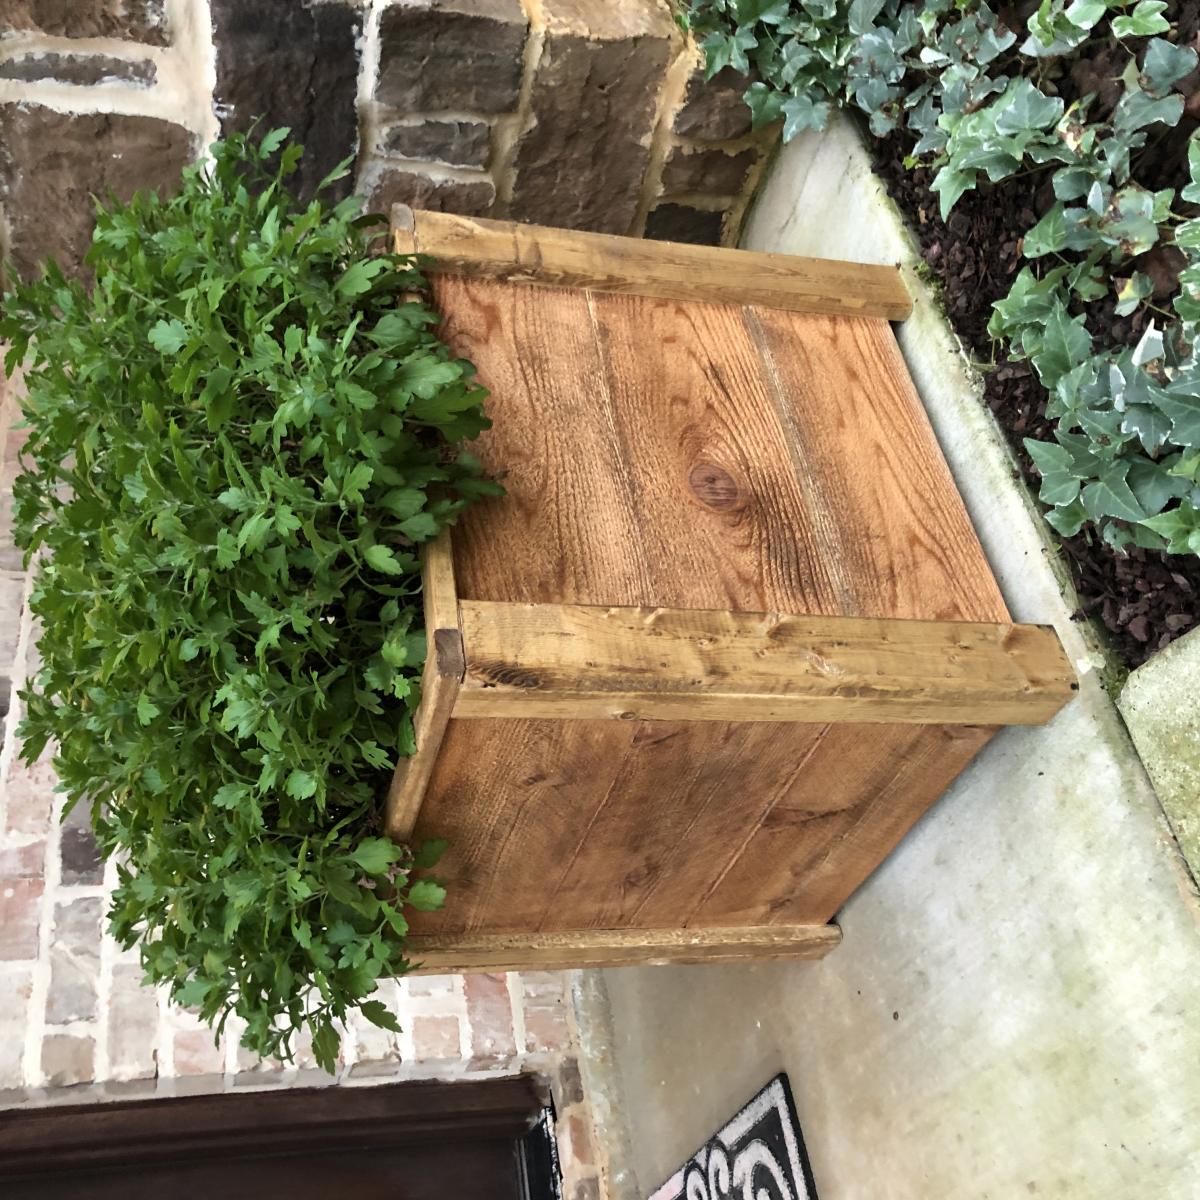
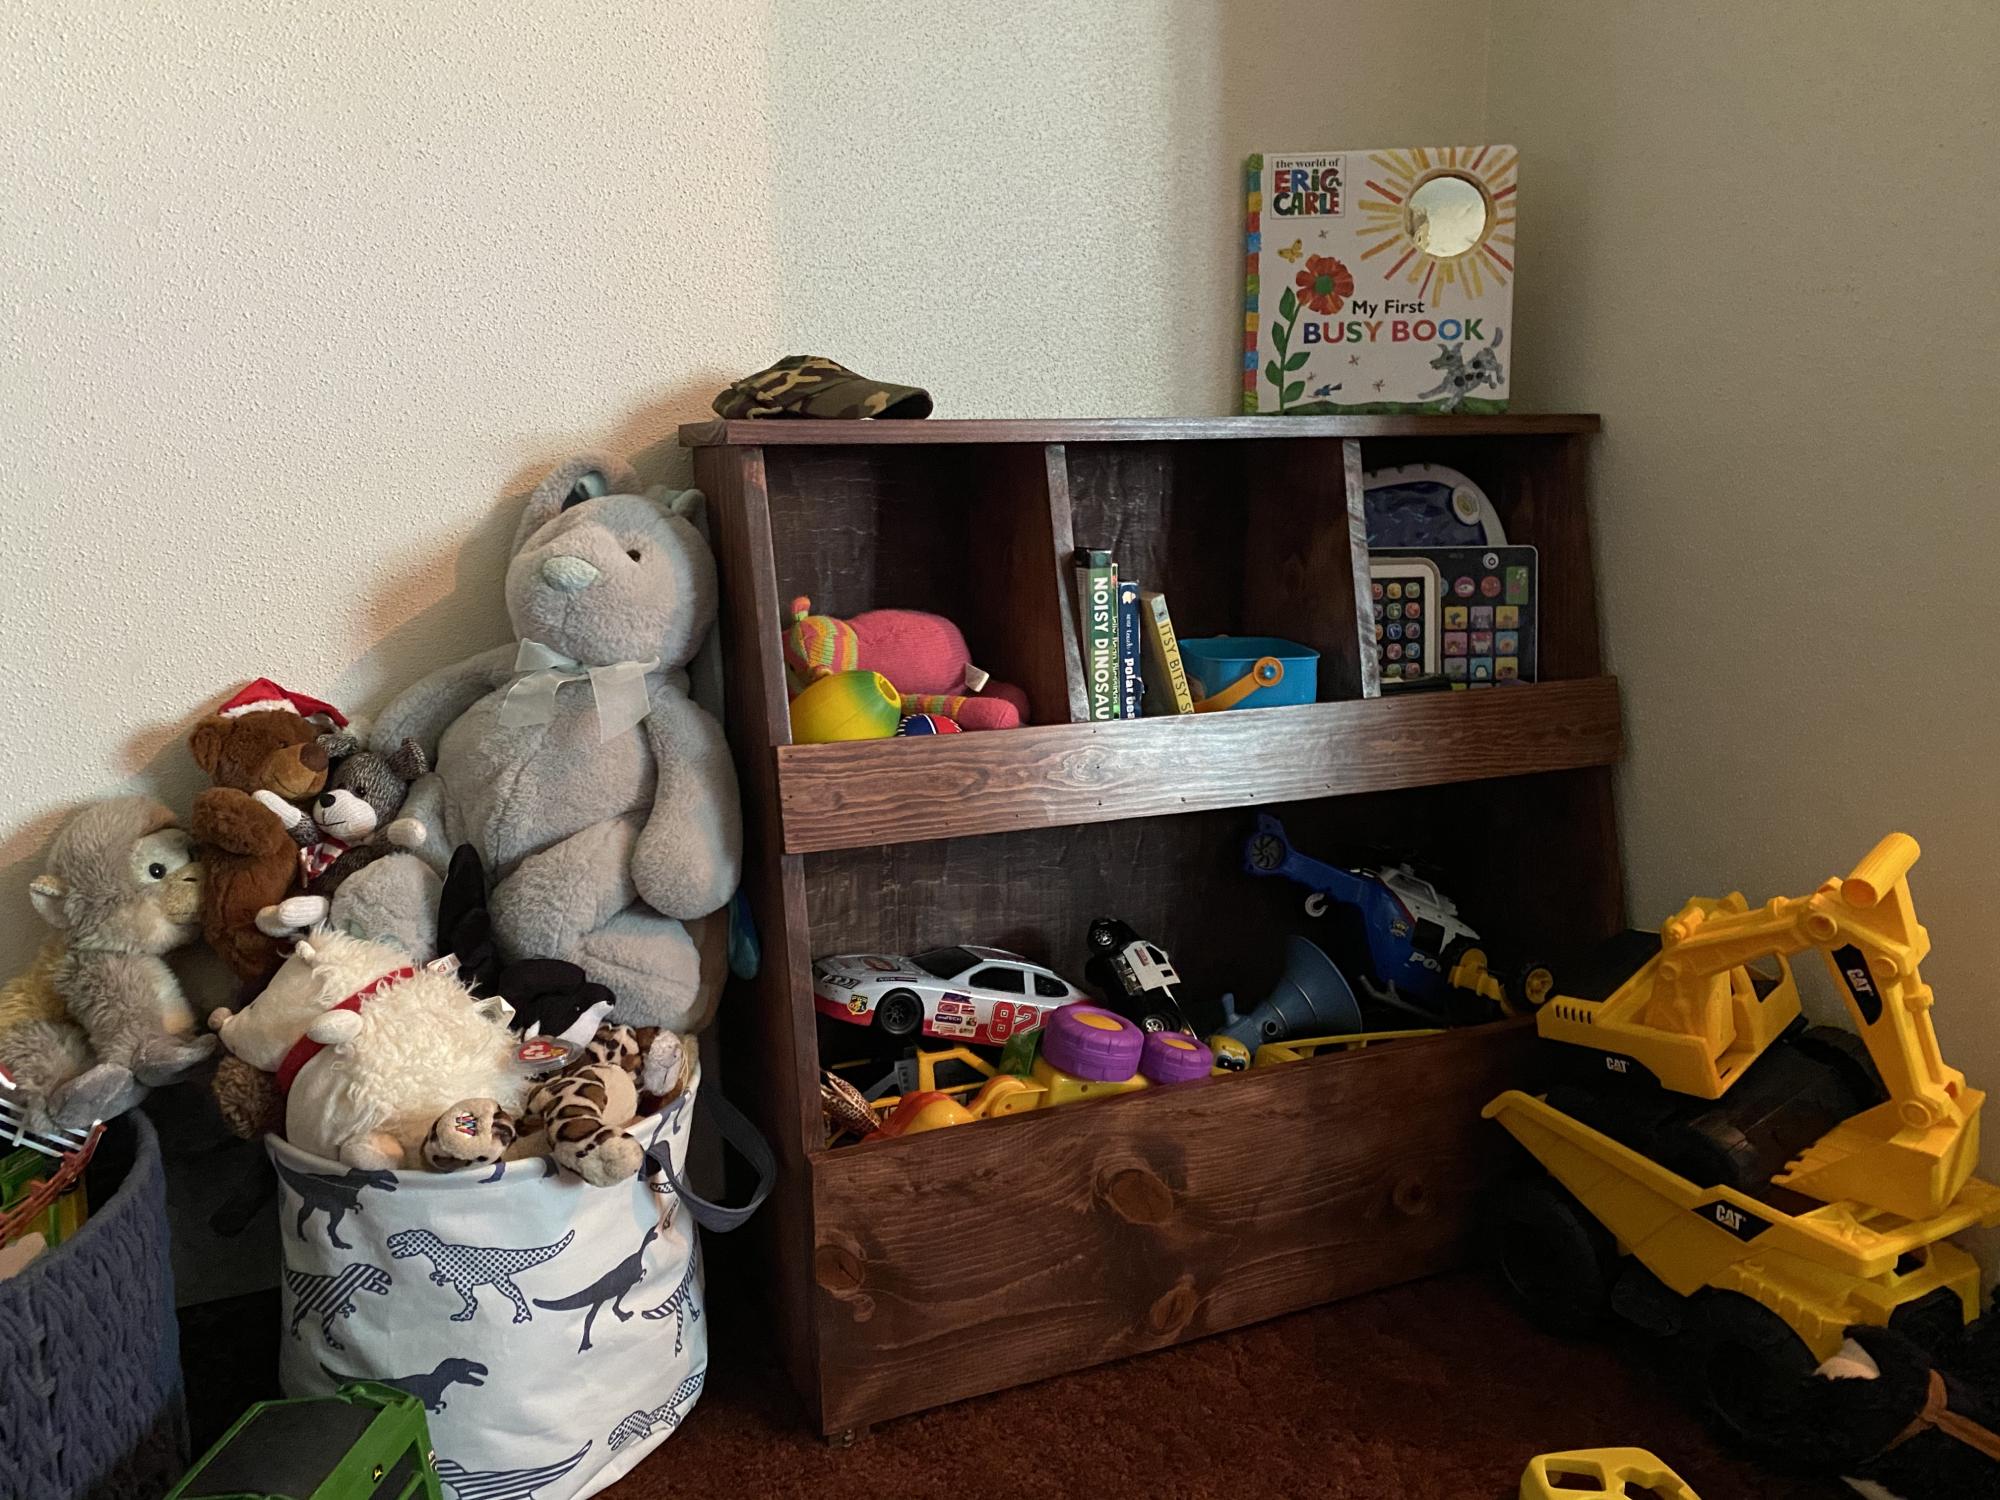
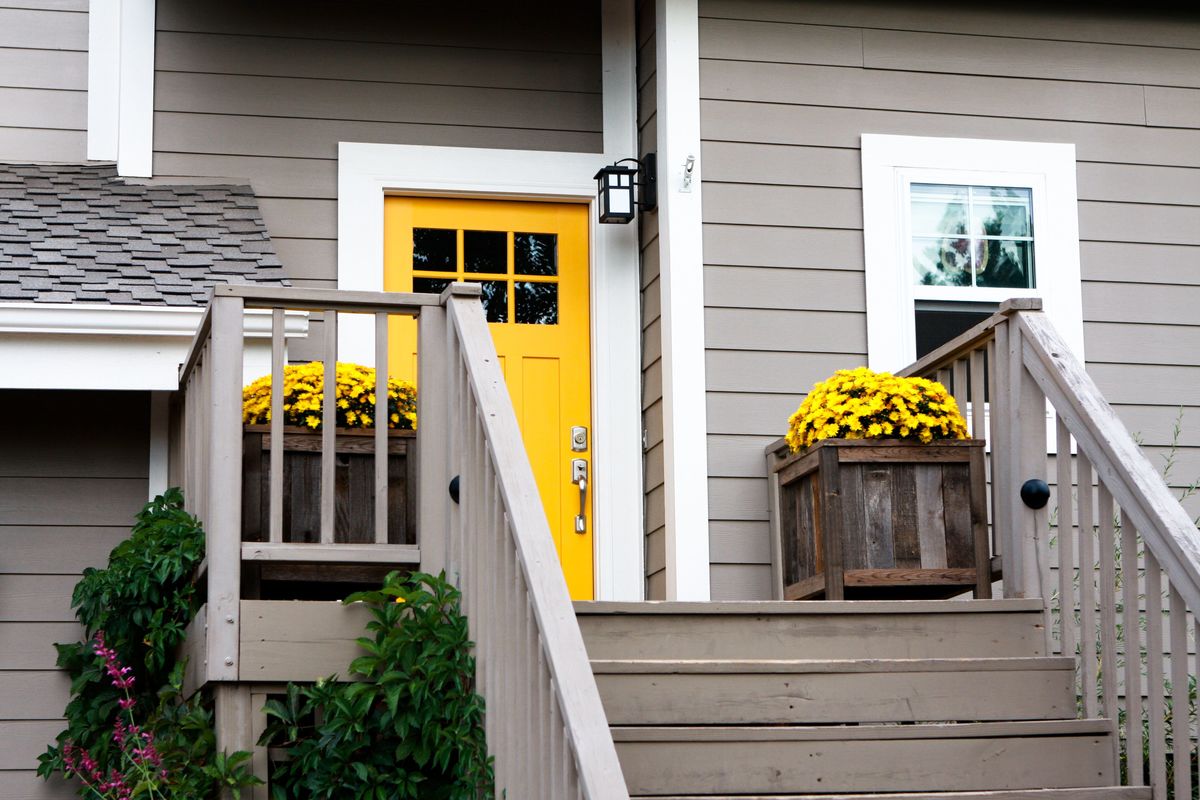
These were a quick weeknight build! And.... My very first “all by myself” build! I’m really proud of how they turned out and love how much style they add to my front porch!

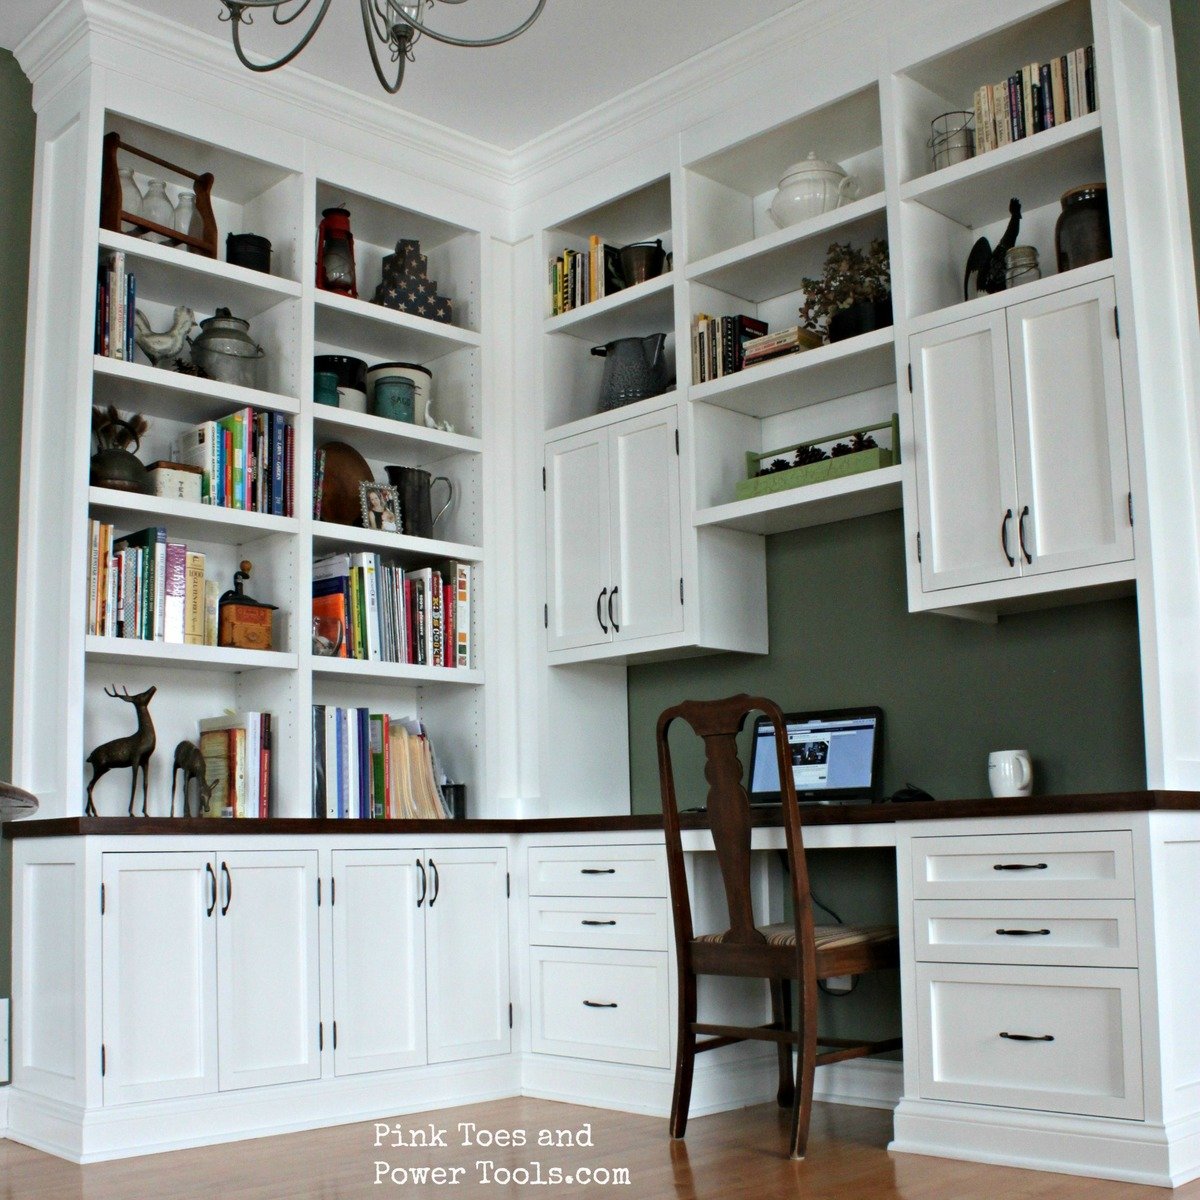
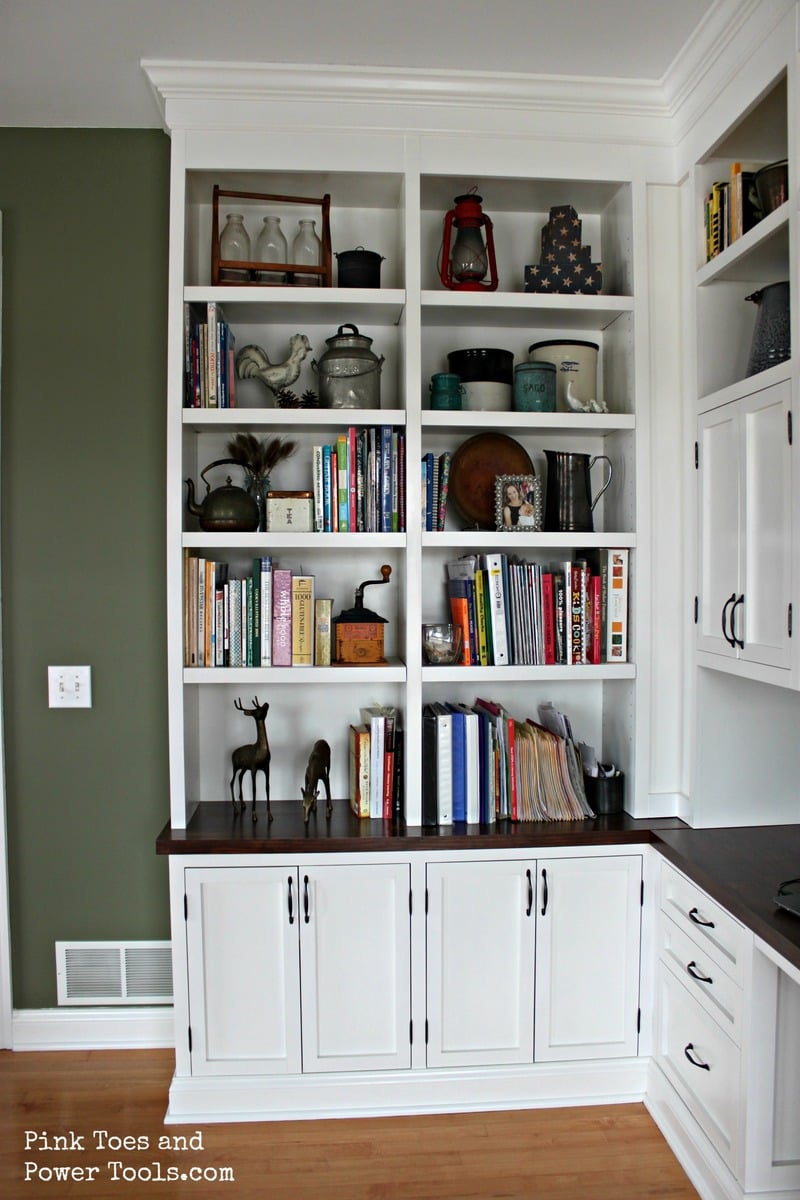
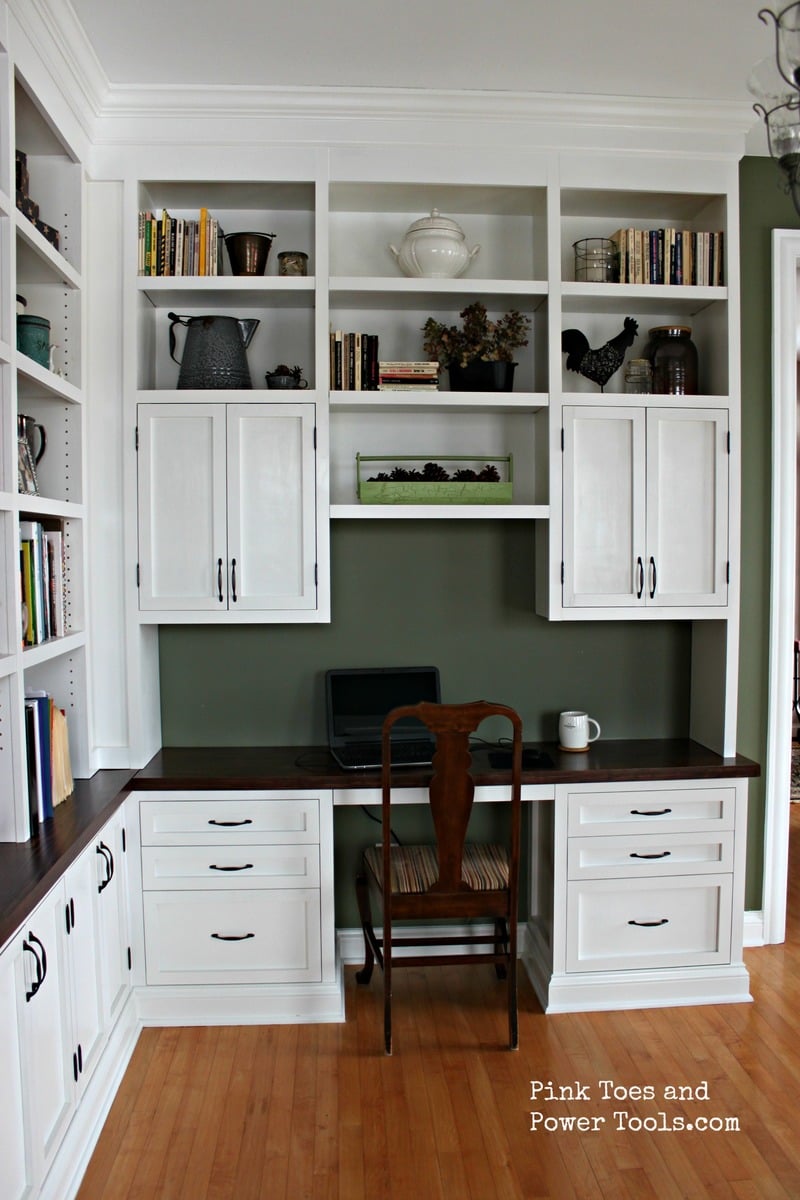
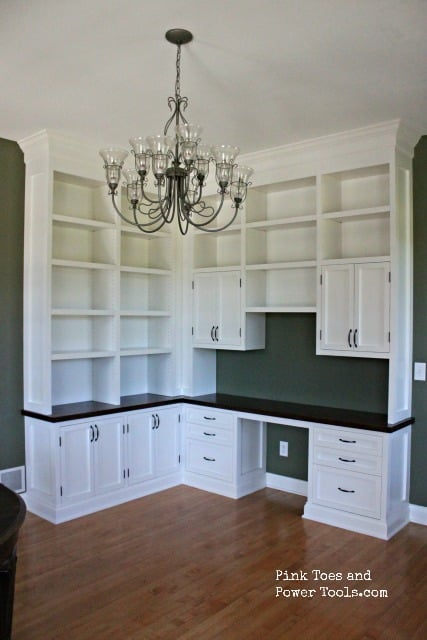
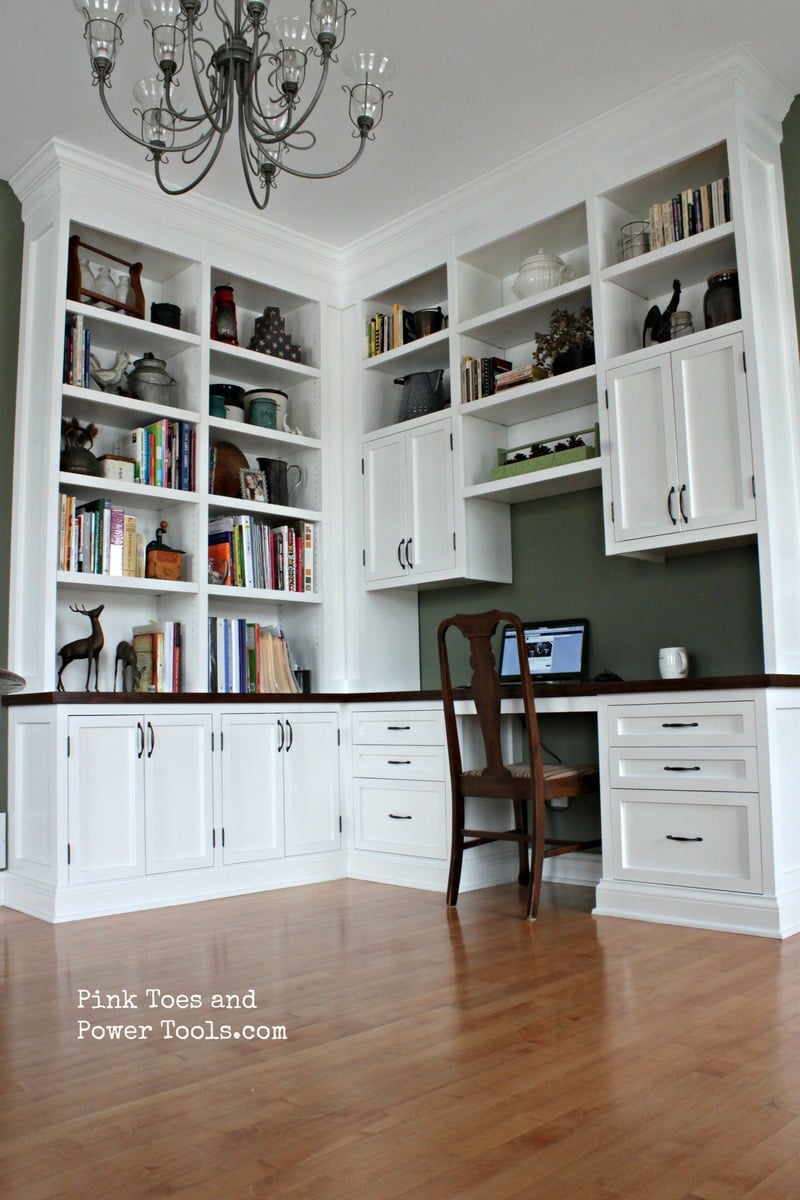
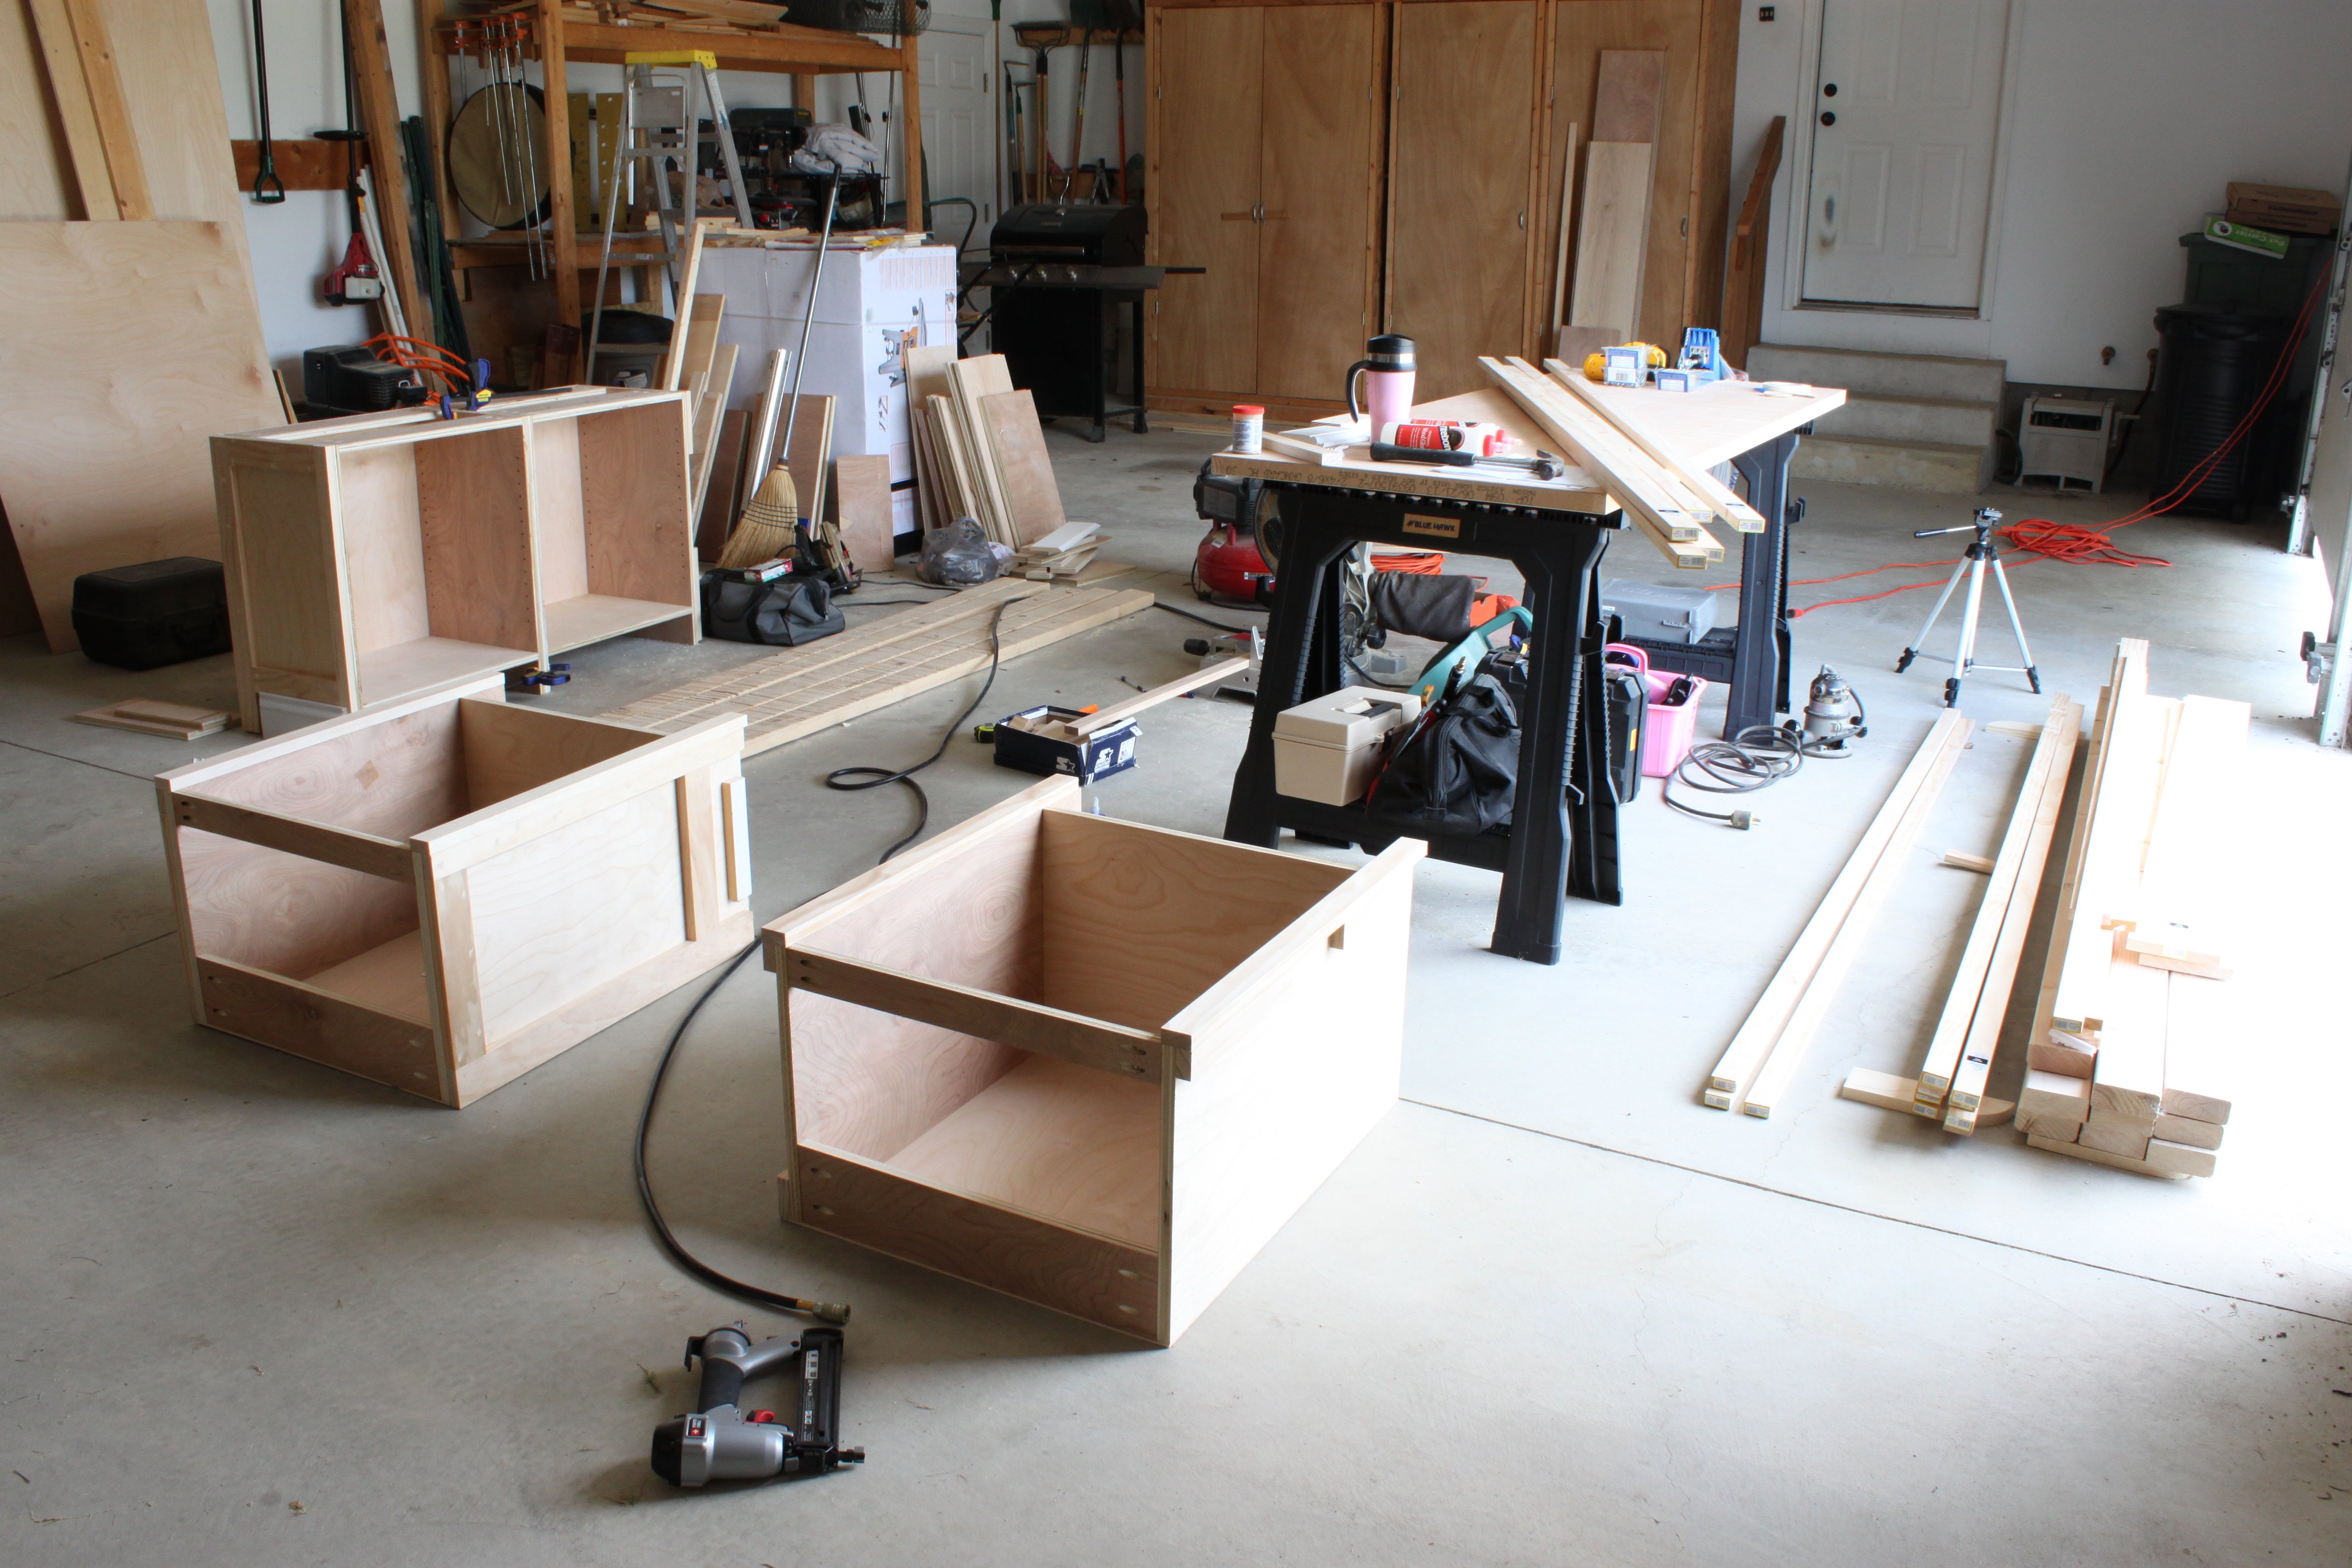
I didn't really follow any specific plan from Ana to build this project (I've become better at creating my own plans after putting together several of Ana's project plans--I owe Ana big time for getting me started in building!), but I did study her kitchen cabinet plans in order to put this together. Up until now I've done mostly stand-alone projects and this was more like a small kitchen plan than anything I've done before. This took a LOT of time to complete, but it has been a fantastic addition to our home for organization and aesthetic appeal.
It is constructed of plywood and pine faceframes. I used a Kreg Jig to construct most of it, including the drawer and door fronts. The desktop has a 3/4" plywood base with a pine edge-glued panel on top of that with a pine edging.
The estimated time investment was way more than 20 hours! It took every minute of free time for 2.5 months to complete this. But I was working alone, so you can cut that down significantly with help ;)
The link to my blog about this project contains links to all the posts I wrote up during this build.

My wife wanted a portable farmhouse style rustic dining table that she could take to photoshoots and other events. I started with a top made with 2x6s and make the legs with 4x4s and the rest with 2x4s. Stain is dark walnut with a clear coat on top.
The legs are attached with door hinges and can fold into the top for more portable use. There is also a board that can be inserted in the bottom slots so that when in use the legs can not fold in.
So far the rustic dining table is working out great, although this table is VERY HEAVY and needs 2-3 strong people to carry it around. I have also made a lighter version using 1x6 tops and all 2x4 frame and legs.
Photos courtesy of Jennifer Blair Photography Designed by Amber Veatch Designs


Wed, 06/12/2013 - 04:15
Oh I really hope that you are able to put these modified plans up!!! A foldable farmhouse table.... what will they think of next!

Sat, 10/22/2016 - 12:25
Stunningly beautiful! Thank you for sharing and inspiring!
Sat, 10/22/2016 - 17:21
I cannot find the plans for the tiny house drawers any where. Can someone please point me in the right direction. Thank you!

I took what was a single cabinet and doubled it.

I used untreated pine for this project and painted with benjamin moore exterior paint.
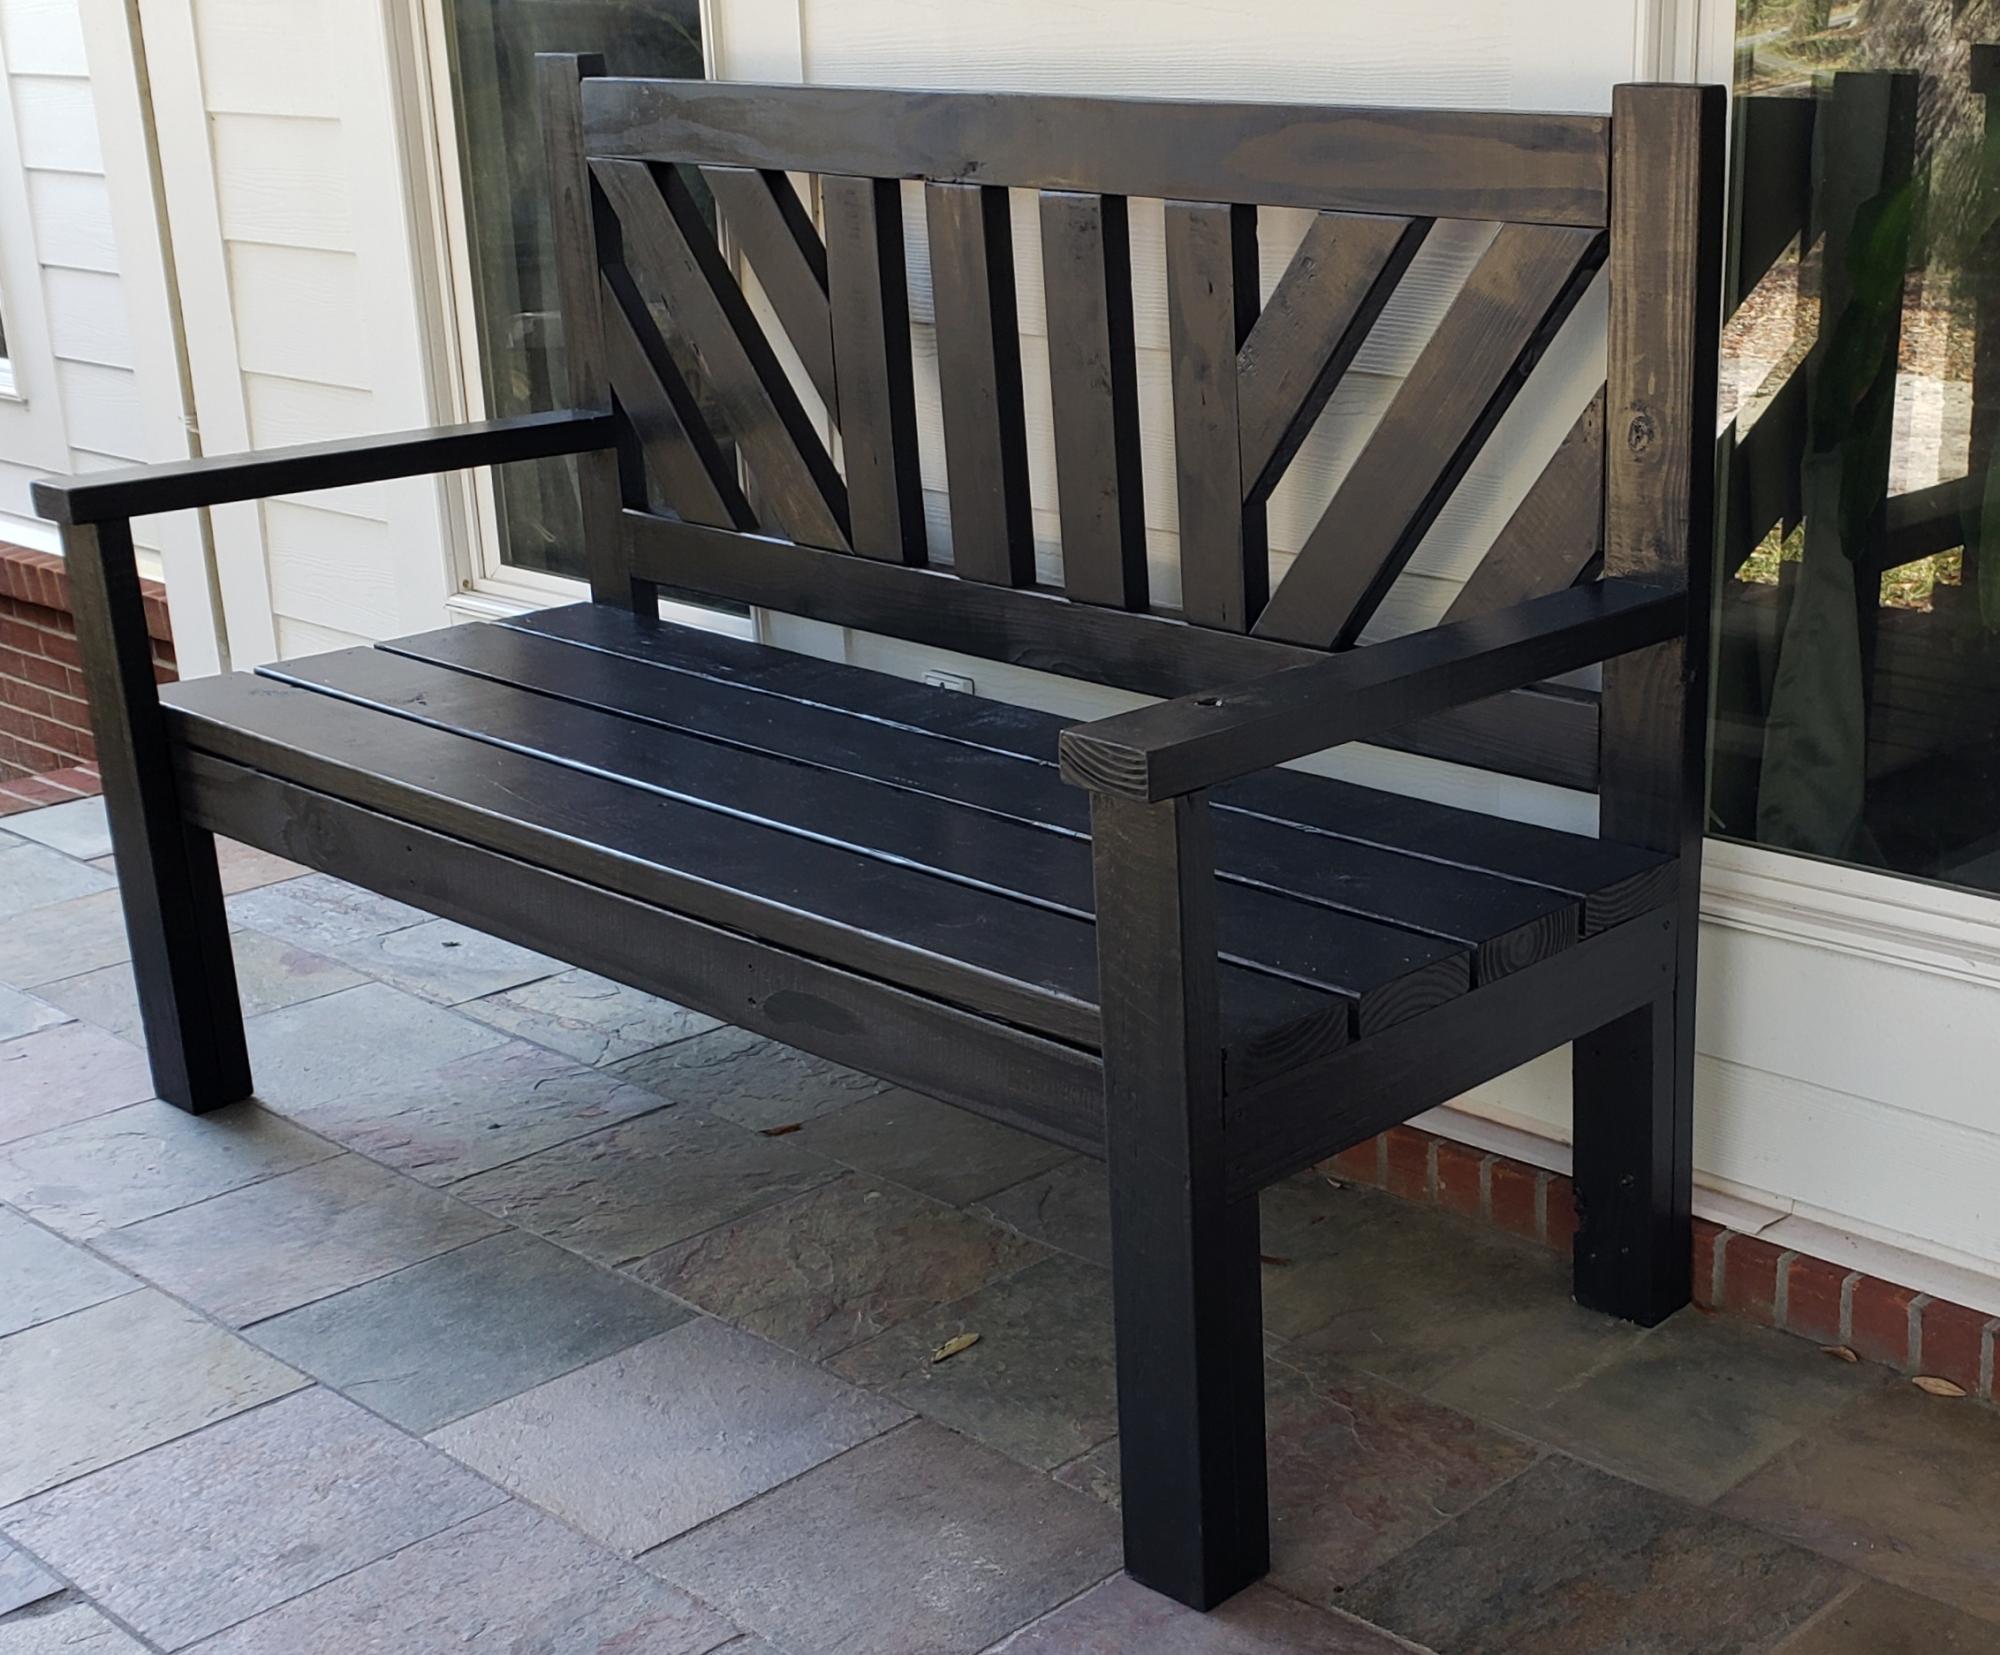
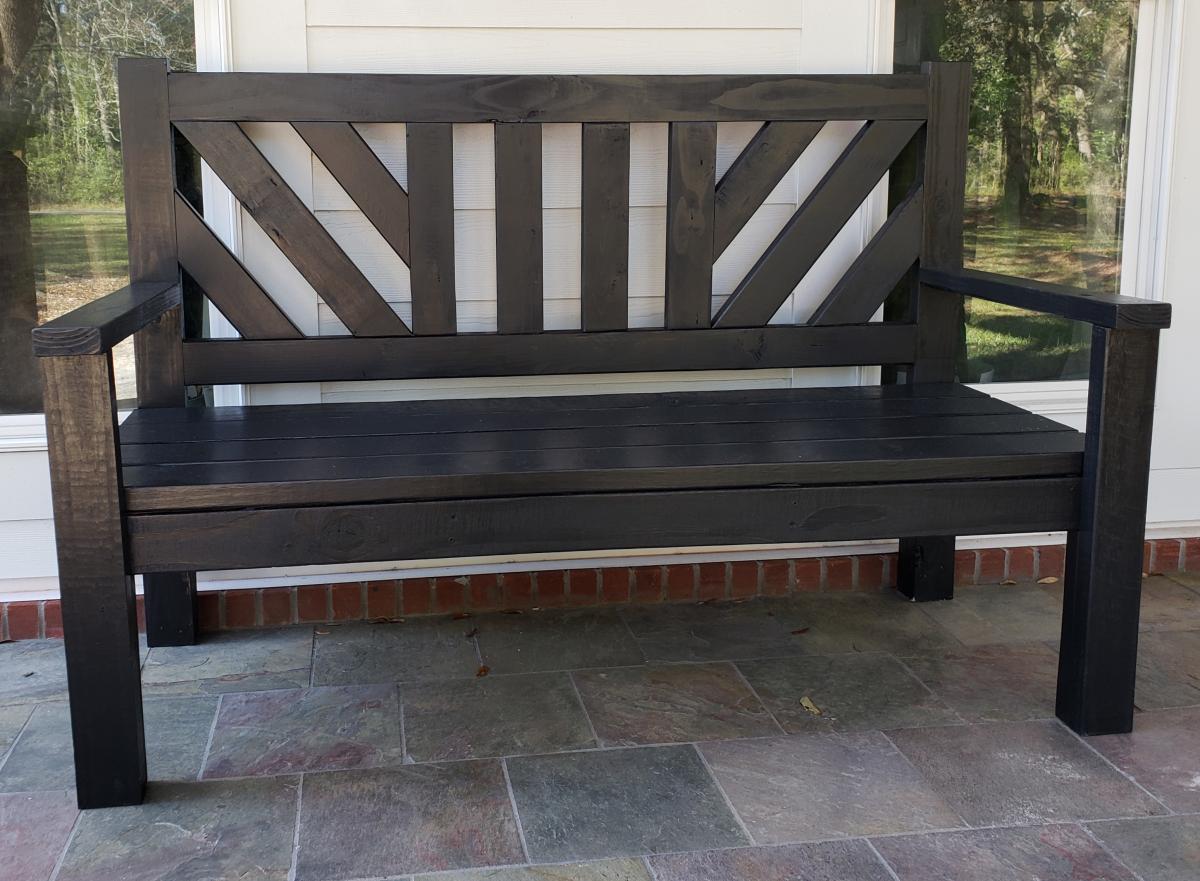
I modified the back a little and I love how it turned out. I also added an extra brace against the back of each leg that fits under the seat for more support.
Very easy to build. I love the plan.
This design turned out to be perfect! It was super simple and easy to build! Easy to follow plans! Great beginner project!

I built a big kids see saw using 2x6's all around with a 2x8 seat. The center post is 30"h.


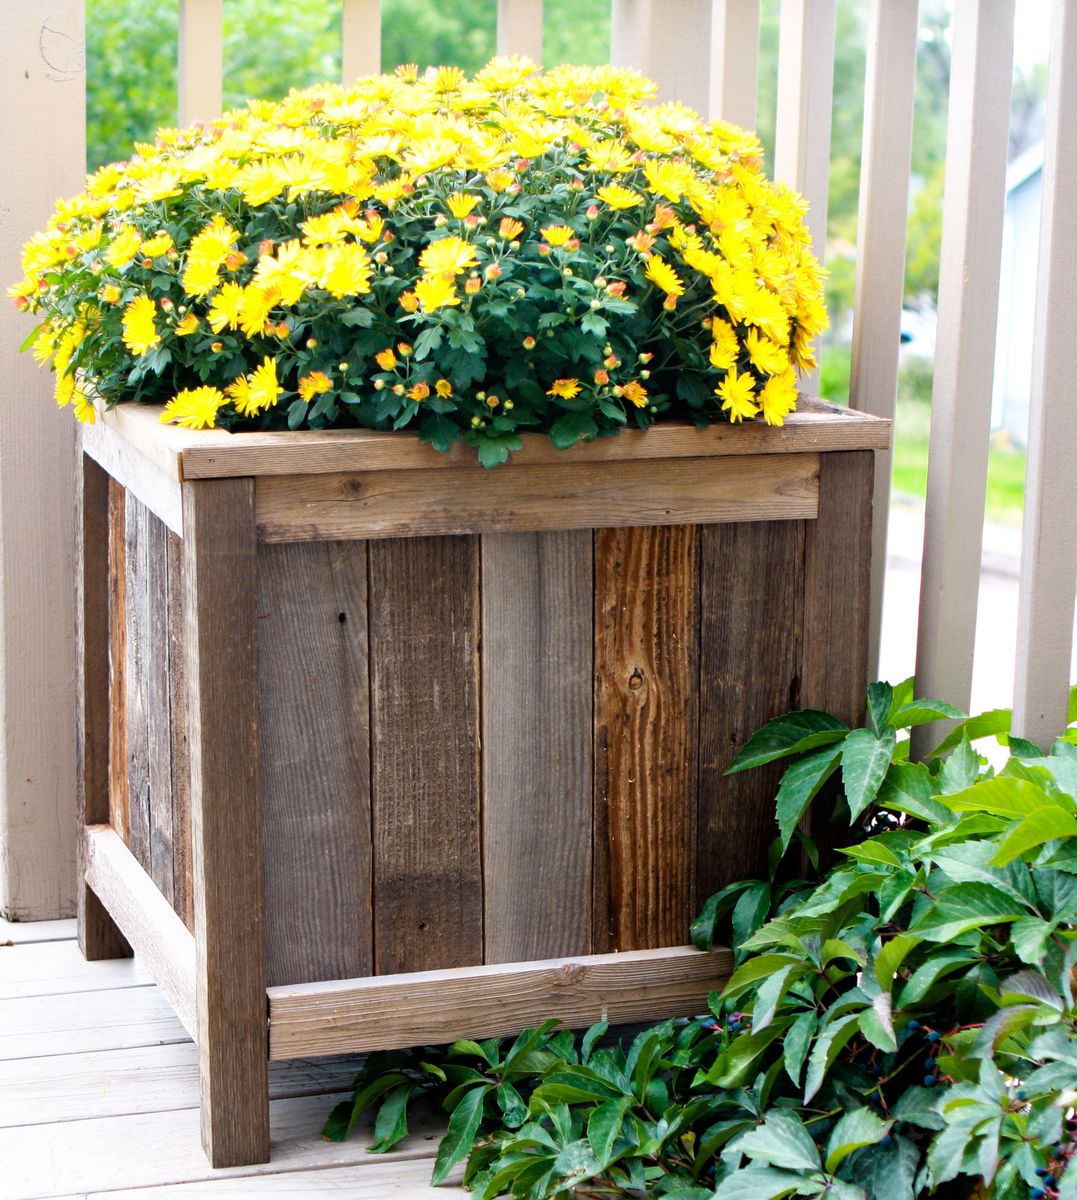
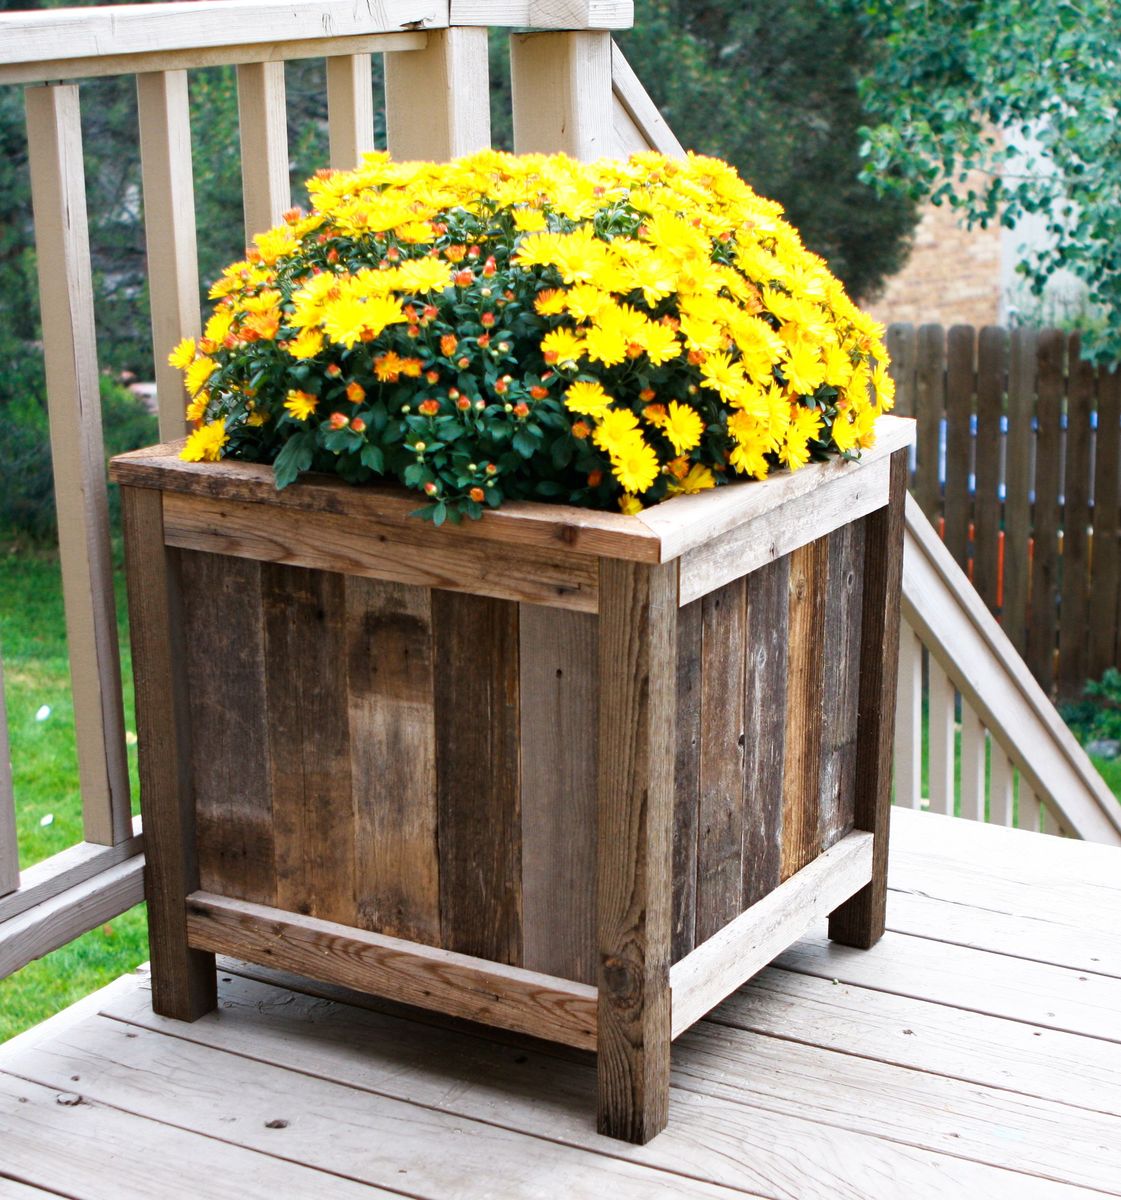
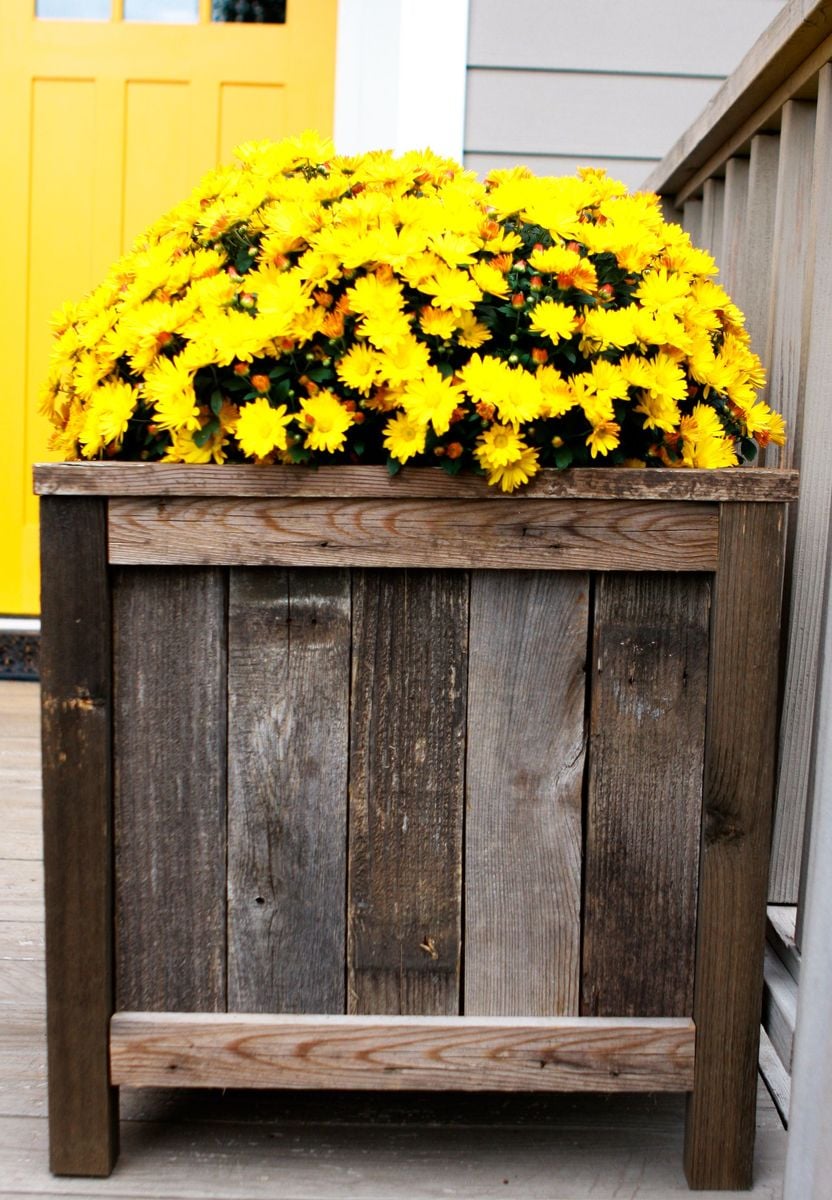
I built Ana's under $20 cedar planters for free. Or, almost free! I had to buy some more wood glue, but I had some of the wood on hand and took some from a friend's pile of old fence wood. It took me about five hours to build both planters from start to finish. See the blog link below for more info.


Tue, 09/08/2020 - 16:12
This is great. I just tore down my old fence and have tons of old cedar pickets. I want to make some planters for my new patio.
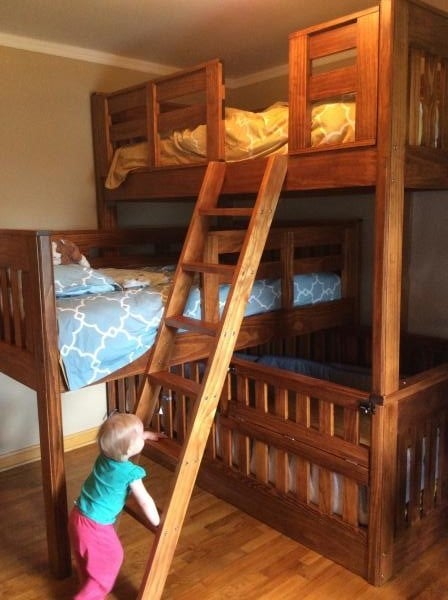
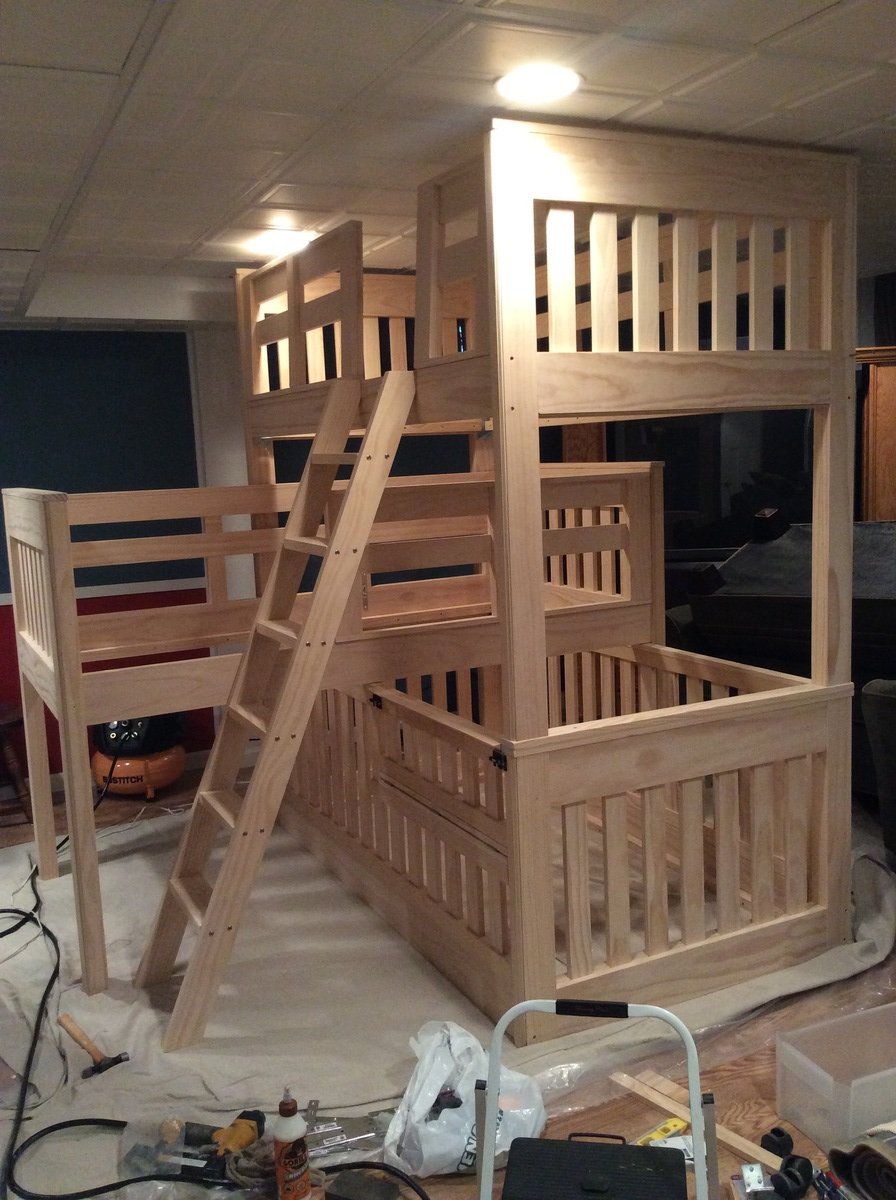
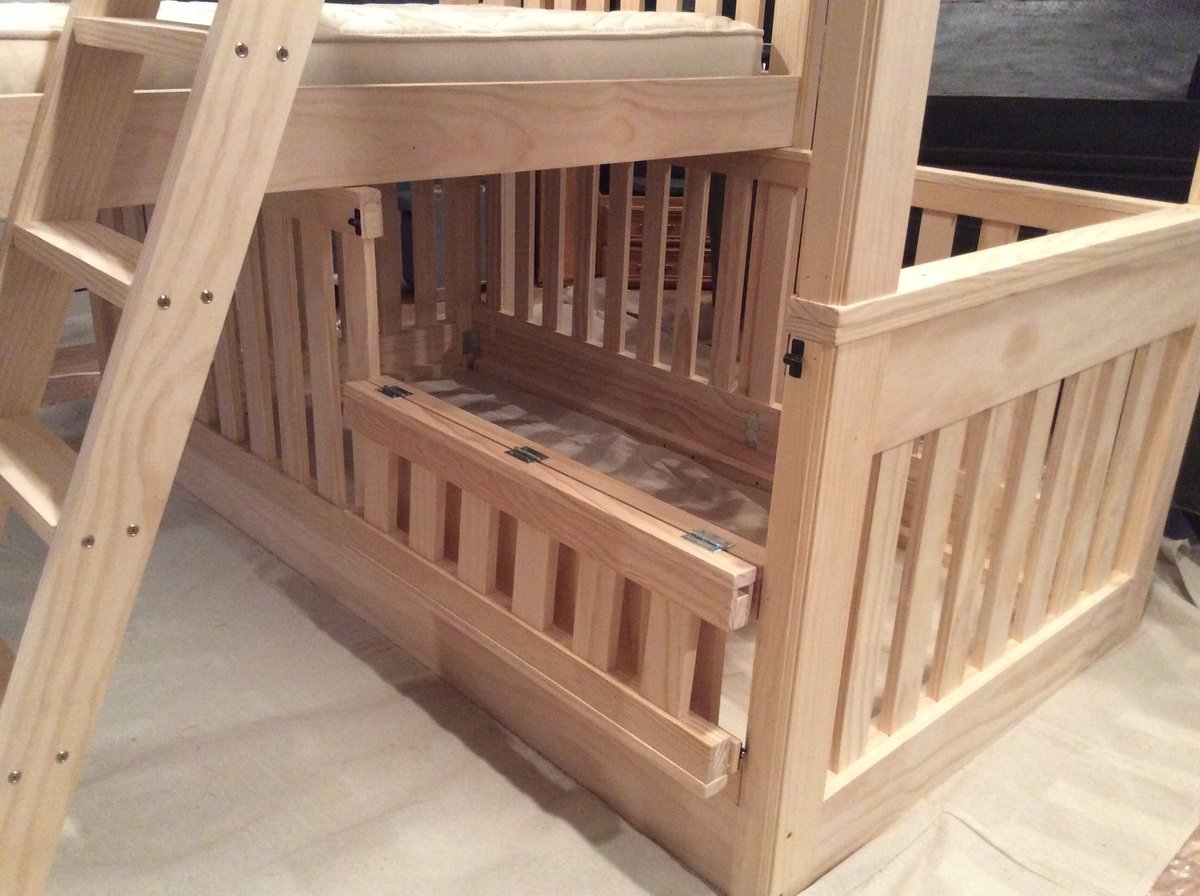
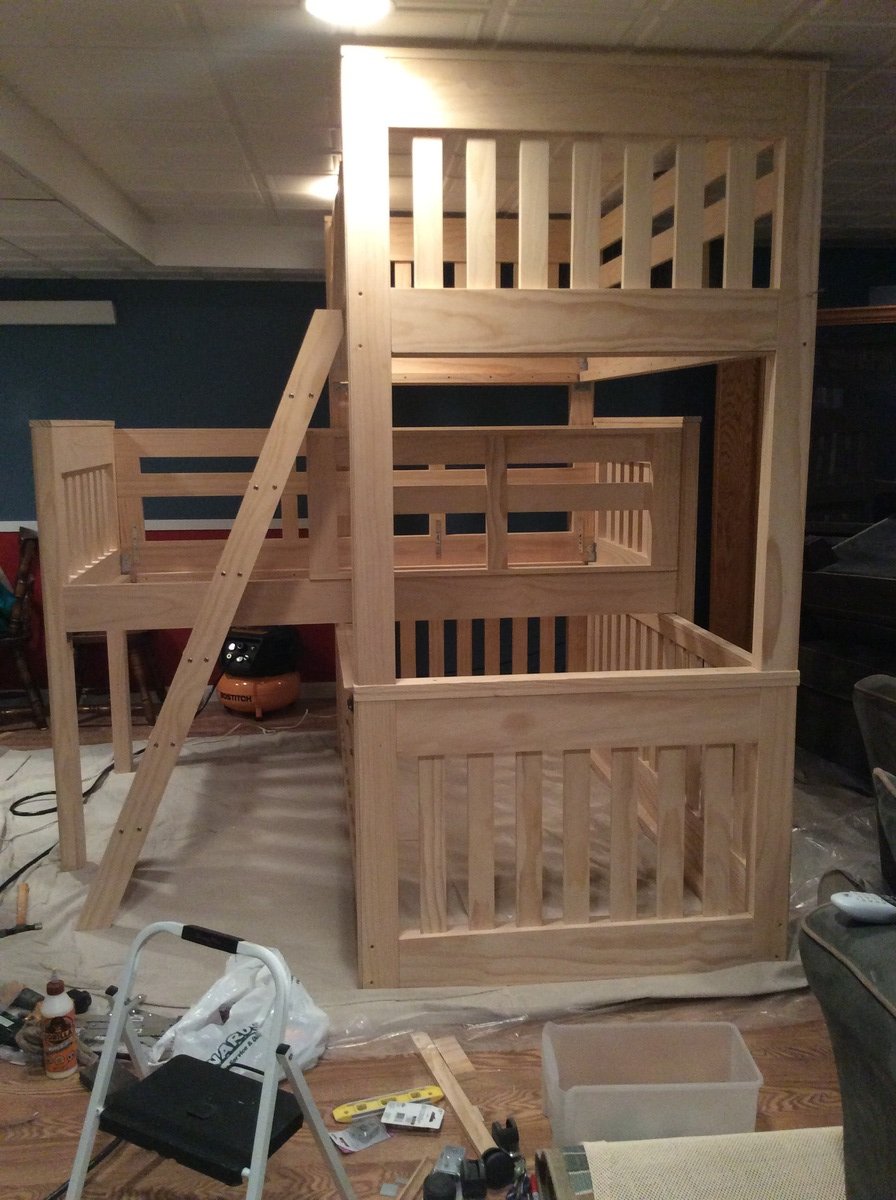
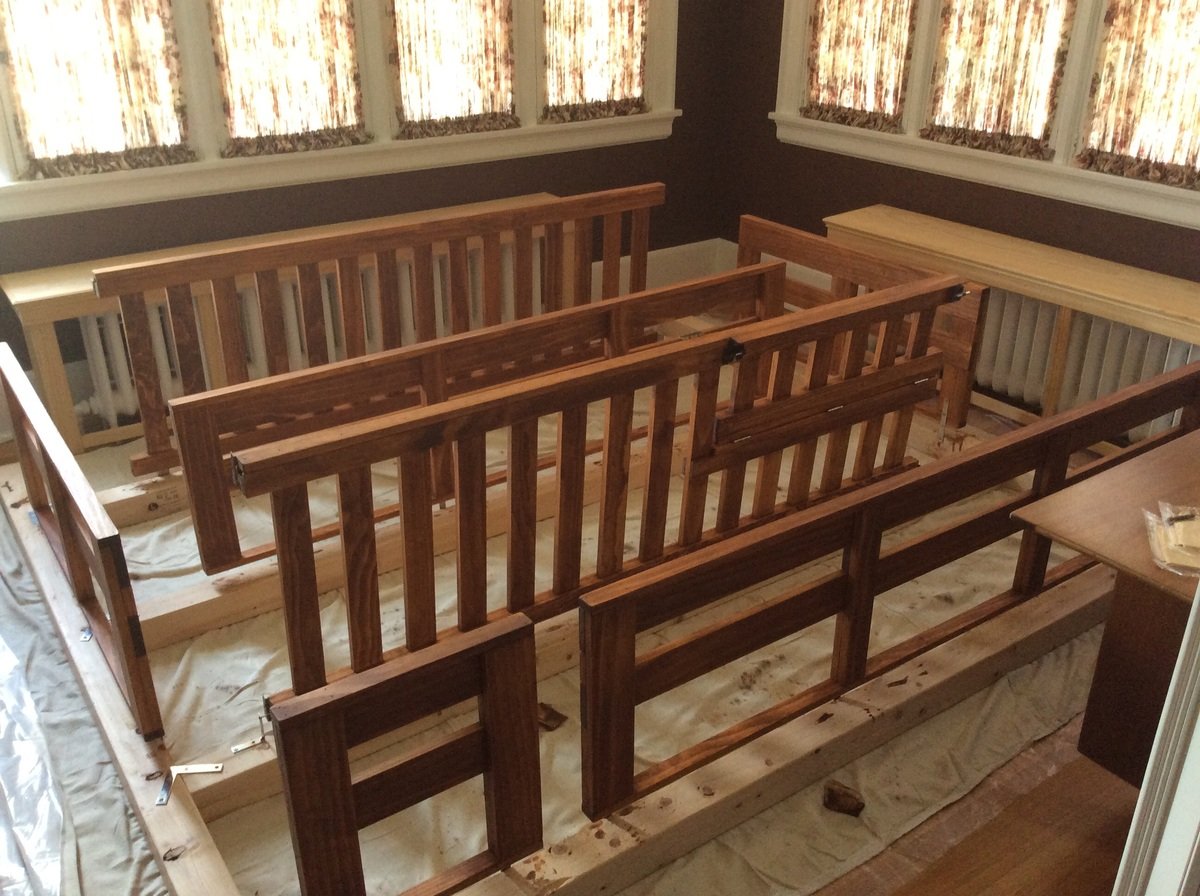
We needed beds for 3 children, one of which is 14 months old, in a small bedroom and with the simple bunk bed plan to start with I came up with this. The kids love it, although it took the 14 month old a few tries before she accepted the change from her regular crib in another room to this crib/bed and sharing a room with her siblings. Now it's all good!
The beds can also be used separately. The top bunk and the middle bunk will stand 30 inches off the floor when used as separate beds, so like loft beds with storage space underneath for a dresser, reading nook, toys, etc. All side safety rails can be removed for unstacked beds as I finished them all separate from the beds. The bottom "crib" bed side rails can also be removed for single bed. At this point it would just sit on the floor as a single bed also but I may come up with some sort of feet to get it up off the floor when the time comes. They really wanted this set of bunks to be able to be used separately also. The fold-down portion of the "crib" side rail was designed to give easier access for changing sheets, etc. for the "crib". This "crib" bed also uses a regular twin mattress.

Wed, 11/23/2016 - 08:45
I have three boys (youngest is 10 months right now) and we're getting these built for us this summer. How did the baby take to it? Also, How tall was the bunk. I'm thinking about ceiling height.
Fri, 05/01/2020 - 12:50
Thank you for this idea! We have special needs son who won't stay in bed unless he has a rail. Now that he is 7 this might work. Keep him with his brother in the same room too.
The link for the plans is not the same bunk bed. Is there another set of plans or do I need to just improvise based on the photos?
Thanks again!

Completed Modern Craft Table! We tweaked the plans a bit because I was looking for a larger table top. The top now measures 48" x 76". We simply did this by adding an extra set of cubbies to the other side of the shelves. Absolutely LOVE how this turned out! All I need now is 4 counter height stools built and lots of shelves to complete my craft room! Will be sure to post those once they are completed!
Thu, 11/17/2011 - 01:10
Darn I was so excited to see you craft table! I apologize that your brag post did not show images. If you can send me images at knockoffwood(at)gmail.com I'd be happy to post. Thanks so much for submitting a brag post. Ana
Sun, 03/04/2012 - 07:31
I LOVE LOVE LOVE your craft table. I want one! Looks like my husband wil have to get busy! Thanks for sharing!
Kristina
Houston, TX
Tue, 05/29/2012 - 00:05
This is great!! I am planning something similar, but what is your idea or the plan you used for the middle support to keep it from sagging over time? My idea is to run another cubby in the middle from side to side. What do you think?
Mon, 01/21/2013 - 09:54
I love the modern craft table, just what I have been looking for, do you share instructions, dimensions, etc.? thanks, Laura
Thu, 05/12/2016 - 15:14
I'm loving this and would love to have FIL build it for me but the plans look like its for the regular modern craft table but not the tweaked? Also is there support for the middle? Can you send me a link for the tweaked supply list please, can't seem to find it. Love what you do!
Awesome and easy build! Thank you!
Awesome project

