Community Brag Posts

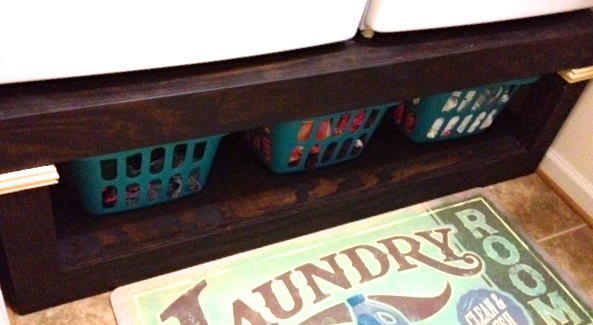
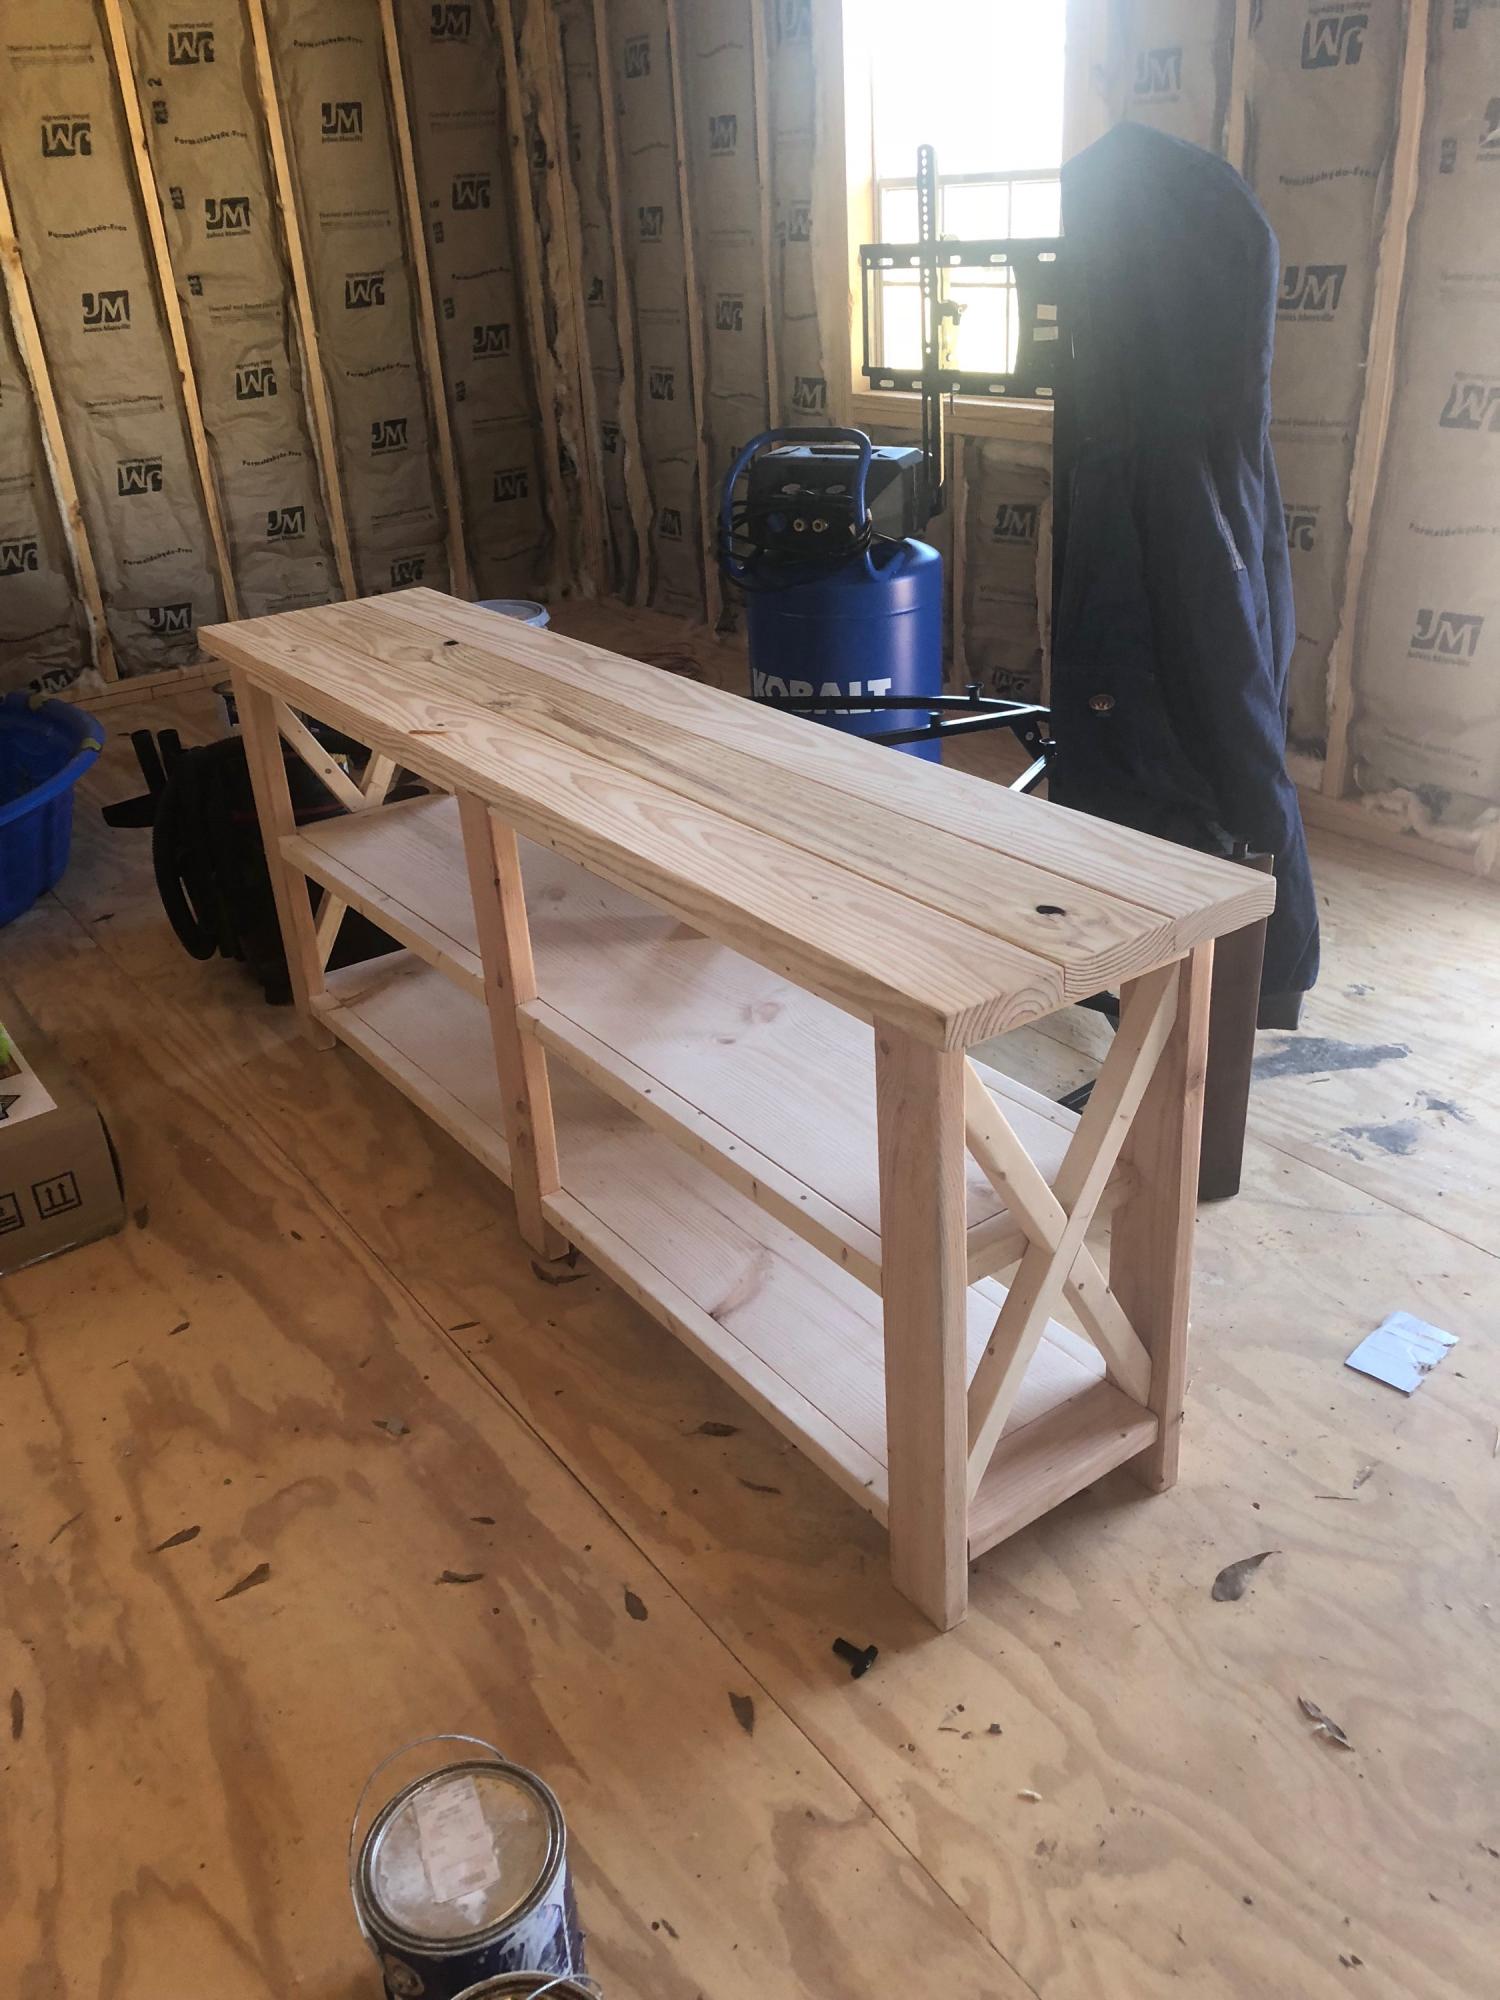
Revised : Sausha's Washer/Dryer Pedestals

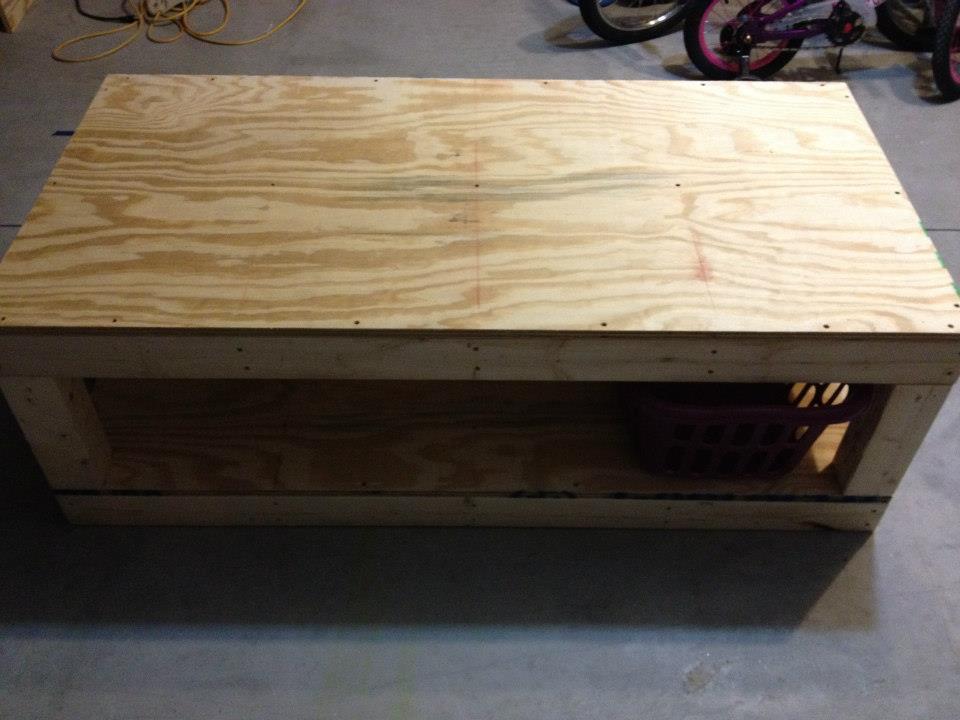
We had to shorten the length to 57" for this project to fit our space of 60", due to baseboards and shoe molding. It was just a few inches too large to fit through our doorway, which we also could have adjusted if we'd have thought ahead! I was worried that the 3 small baskets wouldn't fit with our plan but they fit perfectly, Especially if you push them back from the edge a bit.

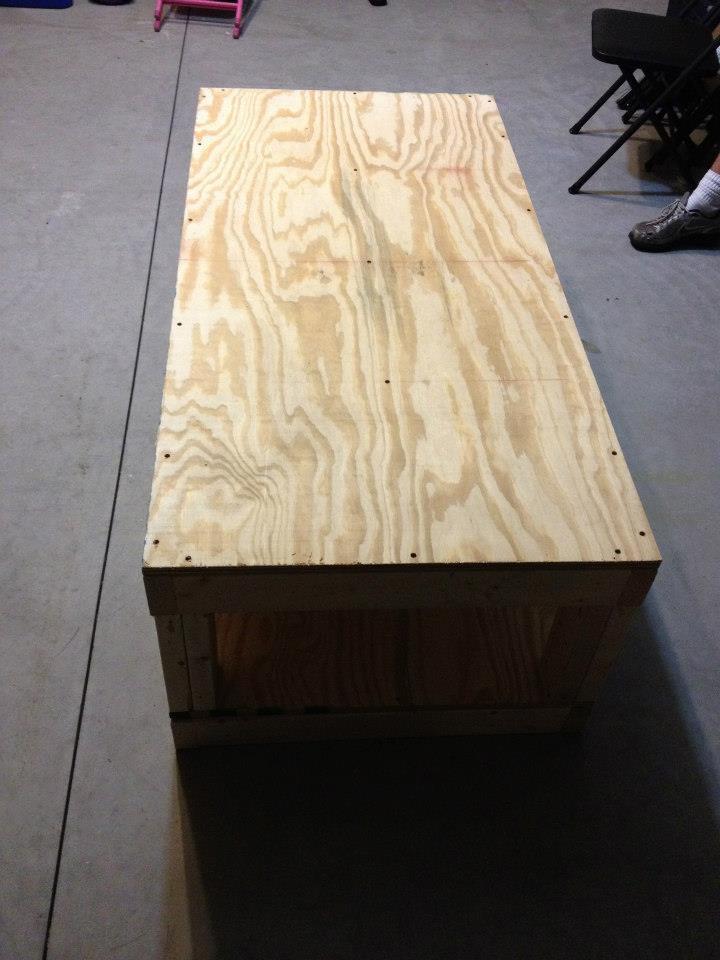
Overall cost was around $120, the screws were around $20 b/c you have to get a box each of 2" and 3" length. We weren't able to get any "untreated" 4x4's at our Lowe's so we opted for the 2x4's sandwiched together- worked just fine.
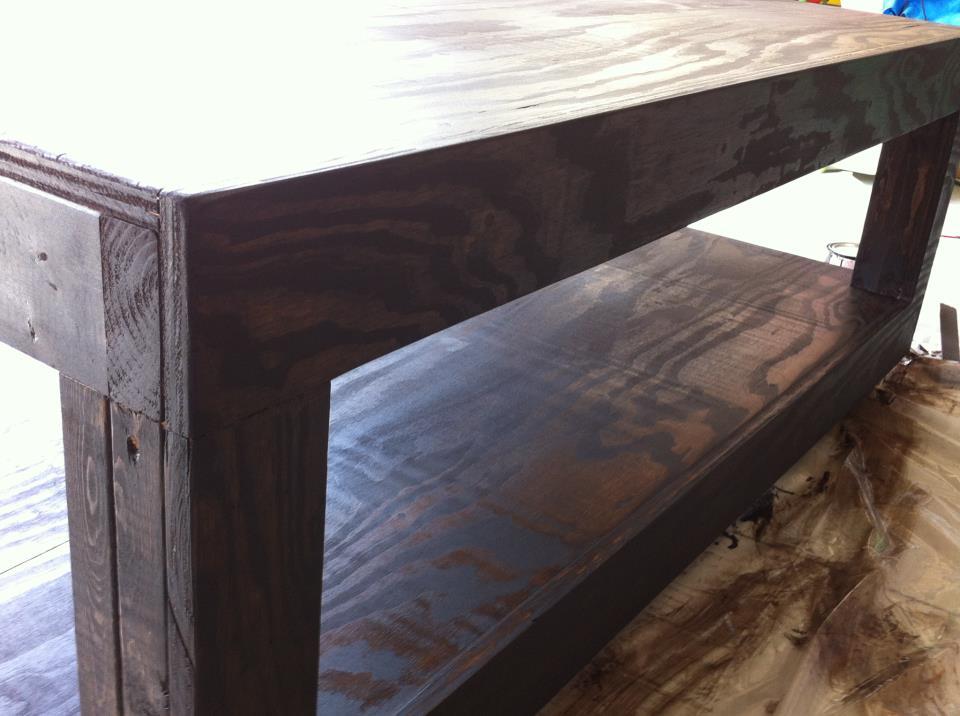
Due to such a tight space, we only faced the front of the pedestal with the plywood, but I would have liked to do the whole thing- it would've made the molding much easier to square up!
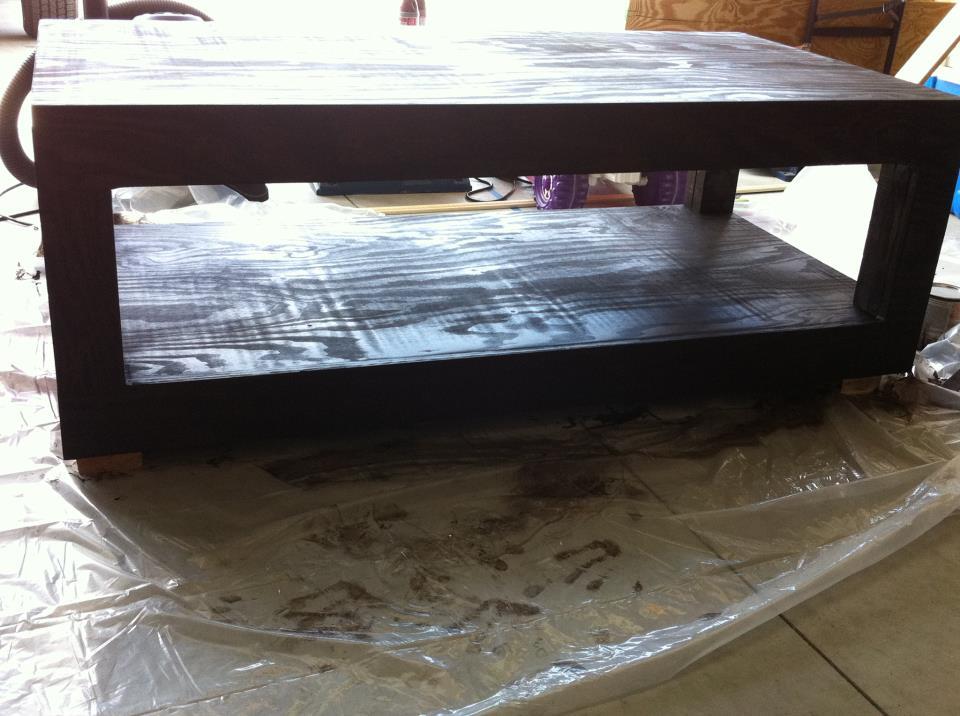
I'm a much happier Homemaker with this in place! No more moving baskets around to open the dryer door! Thanks so much for sharing this with us, now onto the loft bed!

Estimated Time Investment
Day Project (6-9 Hours)
Finish Used
"Kona" Rustoleum wood stain
Recommended Skill Level
Beginner

Dog Crate / End Table

Submitted by kristine on Sun, 08/26/2012 - 15:46

The husband and I have been very inspired by the awesome women (and men) on this site that have created their own pieces of furniture. They all look so amazing! So the husband wanted to give it a shot and try creating this dog crate / end table as his first ever project. Now mind you, he hasn't done any sort of woodworking since wood shop class in high school... and that was at least a decade ago.

I have to say that I'm quite proud of the hubby's first finished project! Although, he did mess up a bit with the table top being an inch too short width wise. I really didn't want him to create another one because that would mean I would have to stain another one and I really REALLY do not want to stain again! So we compromised and ended up gluing a thin wood trim on the side end of the table top to cover up the mistake.

Built from Plan(s)
Estimated Time Investment
Weekend Project (10-20 Hours)
Finish Used
minwax stain in mission oak, behr semi-gloss paint in a light grey color, and wax
Recommended Skill Level
Starter Project

Comments

Double Pedestal Farmhouse Table

Submitted by thesloans on Fri, 01/04/2013 - 11:06

My hubby took the plans from the Triple Pedestal Farmhouse Table and altered it to make it just over six feet. It is perfect and accommodates our smaller dining area space.

Built from Plan(s)
Estimated Cost
$70
Estimated Time Investment
Weekend Project (10-20 Hours)
Finish Used
Early American (1 coat), matte clear coat (2 coats)
Recommended Skill Level
Intermediate

Comments

freefromburdens

Wed, 10/09/2013 - 10:14

Hi. I went to martha.anna blog. This is the comment she posted on the dimensions.

From martha.anna:
I've had many emails and inquiries about the dimensions of this table. So, here's what I've been sharing with everyone...

Our dining room is 11 x 10 and there is a lot of room around it to fit in a hutch and still walk around easily. (Just for size reference.)

The overall length of the table is 6' 4.5". It is such an odd measurement so that the strips of board (1x6) on the tabletop would look in proportion. They are 33" long (the 1x6).

The beam across the bottom is 55.5" from outside edge to outside edge and my husband left 1/2" showing.

The pedestals are 10.5" from the end of the table.

Phew! I hope all of the information helps everyone out there! :)

Glittergrlss

Sat, 11/16/2013 - 09:27

Hi there what would the revised materials needed list be? Also did u notify the benches? Do u have the dimension on that? My step dad is building this for me it's my job to get plans and supplies. Thank you for your help I appreciate it!!

freefromburdens

Mon, 01/13/2014 - 14:20

Oh my. After several months I'm able to get all the material needed to do this table. I did the legs a couple of months ago. Now it's time to complete the rest. Hopefully, I can do it in a day's time - hopefully :).

tdkdpt

Fri, 01/12/2018 - 09:04

Ill be making this table whcih is in the same design as the original triple pedestal table but Ill be making it smaller. Are you able to give me the measurements for this modified table? Do I make my top first and then the pedestals? I feel like if I make the same pedestals, then Im forced to make this a 40" wide table, and I only want it about 35-37".


Thanks!

Custom Dog Kennel

Submitted by Anonymous (not verified) on Sat, 04/29/2017 - 17:35

Why not treat your furry best friend like part of the family with a high end custom dog crate. This is an easy way to hide those ugly wire crates while providing another table space. Also has a top that opens up for easy access cleaning. More pictures of my work is available at:

https://www.facebook.com/Deezknotswoodworking/

Or on
PINTEREST: Ngo DIY Furniture


DIMENSIONS
4ft long X 2ft wide X 32" high 

Estimated Cost
$250
Estimated Time Investment
Week Long Project (20 Hours or More)
Finish Used
Rustoleum Oil Base Flat white, Varathane Ebony stain, Varathane Polyurethane Matte
Recommended Skill Level
Intermediate

All Season Stand

Followed the plans pretty much to the letter, made the sign reversible so it works for summer or winter.
3d printed the words instead of cutting out or purchasing wooden letters

Estimated Cost
20
Estimated Time Investment
Afternoon Project (3-6 Hours)
Recommended Skill Level
Beginner

Comments

Lemonade Stand

Submitted by Anonymous (not verified) on Mon, 06/12/2017 - 07:42

My daughters decided they wanted to do a lemonade stand at their Nana's yard sale.  I'm a beginner when it comes to woodworking projects so when I came across Ana's plans for the fence picket lemonade stand, I just HAD to give it a try!  This was a fun project and the plans were extremely helpful and straight-forward.  I would definitely recommend if anyone is looking for a cute lemonade stand for their kiddos!  Side note - my girls raised $75 for the Alex's Lemonade Stand Foundation to help fight childhood cancer! So proud! 

Built from Plan(s)
Estimated Cost
$30
Estimated Time Investment
An Hour or Two (0-2 Hours)
Finish Used
Minwax Dark Walnut stain with Sherwin Williams Alabaster dry brushed over the top once stain dried.
Recommended Skill Level
Starter Project

Rustic Bench as Wedding Guestbook

Having already built a rustic bench to go with my Farmhouse Table, I knew it would be the perfect guest "book" bench for my wedding. For only $15 (I had the lumber for the top on hand), and the help of all my bridesmaids during my bachelorette weekend, we built this bench in just about an hour. Everybody had a hand in it, which makes it even more meaningful. It sits at the foot of the Farmhouse Bed my husband and I built from reclaimed barnwood from my father. I love that we have something so hand-made and sentimental to commemorate our wedding celebration. It makes me smile every time I look at it!

Estimated Cost
$15
Estimated Time Investment
An Hour or Two (0-2 Hours)
Finish Used
I sanded the entire bench with 80,150,200. I primed the entire bench (including the underside, just to cover all my bases) then painted 2 coats of semi gloss white, sanding with 200 between coats. To make the center design, I printed out my art onto computer paper, covered the back with graphite (just scribbling with a pencil) then taped it to my bench. Trace the outline of your art with a pencil and a firm hand. When you remove the paper, you'll see the outline of your design. I traced it with silver paint pen, then filled it in. After I had all my signatures I sealed the top with two coats of Mod Podge (but polycrylic would probably work too).
Recommended Skill Level
Starter Project

Rustic X Console

Submitted by srodge1 on Mon, 10/04/2021 - 19:47

Built this for some dear friends ... turned out so pretty.

Built from Plan(s)

Comments

DIY Bathroom Vanities

Submitted by Anonymous (not verified) on Sun, 04/24/2022 - 11:18

Perfect vanities! When I couldn’t find exactly what I was looking for, I searched online for vanity plans and thankfully your site and these vanities popped up. I love all the storage with these, so much better than ANYTHING pre built we looked at online. We had seen vanities that I was going to settle for but they were around $3,000, and I didn’t love them, so my husband said he could build something and this was the result using your plans. I am so thankful and the whole project was a fraction of the cost! I stained them with a vinegar and steel wool stain with poly over it. I couldn’t be more grateful for you and your generosity of plan sharing. Thank you!

Built from Plan(s)

Comments

Petite Planters for the Potager

Submitted by JoA on Mon, 08/19/2013 - 06:23

After building a large planter from Ana's plans and my salvaged fence wood I thought 2 smaller planters for the entrance to our kitchen garden would be nice. The complete instructions are on my blog, Let's Face the Music. Jo

Built from Plan(s)
Estimated Cost
$12 each
Estimated Time Investment
Day Project (6-9 Hours)
Finish Used
Benjamin Moore Exterior Semi-gloss in Bunker Hill Green over exterior primer.
Recommended Skill Level
Beginner
Seasonal And Holiday

Kitchen Cabinet

Submitted by rjustice21 on Thu, 09/26/2013 - 09:18

My wife and I needed space in our kitchen to store various items. This cabinet works perfectly for that purpose.

Built from Plan(s)
Estimated Cost
$100
Estimated Time Investment
Weekend Project (10-20 Hours)
Finish Used
Dark Red paint. I am not sure of the name.
Recommended Skill Level
Beginner

Comments

mybartmart

Fri, 09/27/2013 - 21:17

That paint colour is beautiful. As is the pantry, very well done. I wish you could find out the name and brand of the colour. It is stunning.

mybartmart

Fri, 09/27/2013 - 21:17

That paint colour is beautiful. As is the pantry, very well done. I wish you could find out the name and brand of the colour. It is stunning.

Entertainment center!

This was a fun project to build. I did change somethings around. I used plexiglass on all doors instead of plywood and it turned out great. Took a lot longer than planned but in the end it was worth it!

Estimated Cost
$400-$450. I lost track of how much it cost because of multiple trips to lowes. The plexiglass added $120 to it. I ended up with lots of scraps of plexiglass though.
Estimated Time Investment
Week Long Project (20 Hours or More)
Finish Used
Espresso minwax and semis gloss satin poly
Recommended Skill Level
Advanced

2x4 Loft Bed

Submitted by Anonymous (not verified) on Mon, 11/06/2023 - 11:04

I added support for more weight by adding a 2x4 on the inside of the four legs. This way, I have the entire frame supported by screws AND 2x4, so I can rest easy.

Rebecca Nemeth

Modern slatted bench

Submitted by Whimwhams on Mon, 06/27/2016 - 11:51

I made this for my sister the day before her house warming party. It was a pretty easy build. I used wood glue and 2" nails. Using a nail gun, this came together pretty quickly. I do wish that I had wide enough clamps to hold everything in place while it dried, because there were a few gaps due to some imperfect boards. I used 104" stud length boards, so I only need to purchase 7 instead of 9. this was enough to make the cuts for the top and both leg pieces from each board. the price was the same and we had limited space in our van for boards, so this was a better option for us. I used a sprayer hooked up to an air compressor to apply the stain and was able to get in between the slats fine with this method, brushing over it as I sprayed. Luckily I chose the same color as her deck not knowing, so it matches great. Now I need to make one for myself! :)

Estimated Cost
$40
Estimated Time Investment
Afternoon Project (3-6 Hours)
Recommended Skill Level
Starter Project

Cedar Planter with X Trellis

I made this project to add a little life to the front a flip house I just finished.  I had an awkward spot, and I was able to easily modify this plan to fit the space.  Thank you for the inspiration!

Built from Plan(s)
Estimated Cost
$30
Estimated Time Investment
Afternoon Project (3-6 Hours)
Finish Used
Minwax Special Walnut
Recommended Skill Level
Beginner

My version of the small chicken coop

Submitted by Anonymous (not verified) on Wed, 09/07/2016 - 12:58

Plans for this coop were fantastic. It was a lot of work, but really fun to build.  As hard as I tried to keep the cost down, it cost probably close to $300 in materials, but it is well worth it compared to the quality of similar priced premade coops.  I did not want the garden bed, so I enclosed the run fully with hardware cloth. I also added a 2" lip around the cutout in the floor so they wouldn't push all of the bedding down the hole. 

Estimated Cost
~$300
Estimated Time Investment
Weekend Project (10-20 Hours)
Recommended Skill Level
Intermediate

Comments

Lady Goats

Wed, 09/07/2016 - 13:17

I just got your email and had to run over to check it out. Looks great!! That was a great idea to add the lip to the opening (am I weird for not using bedding in the coop? We just have the painted floor that we scoop out every day). 

The red roof and the flower box are making me swoon <3

Shiplap Bathroom - DIY Vanity

Submitted by Anonymous (not verified) on Tue, 10/11/2016 - 13:52

It had come time to renovate our powder room bathroom. We were on a tight budget so we decided to build our own vanity & add a little twist to it! We splurged on the granite countertop, vessel sink  and faucet. Thanks to Ana White we built our vanity for less than $10! The plans were easy to follow . . . .we are so proud of our wood vanity!  link to our blog: http://www.houseofrumours.com/shiplap-powder-room-diy-vanity/


Estimated Cost
$10
Estimated Time Investment
Afternoon Project (3-6 Hours)
Finish Used
none. slightly sanded and used wood oil.
Recommended Skill Level
Beginner

Tapered planter

Submitted by Anonymous (not verified) on Mon, 07/13/2020 - 07:40

Next time, I will cut the 1x2 and 1x3 at the 5 degree angle to match the top and bottom planes...
Thanks for the idea! It is great

Built from Plan(s)
Estimated Cost
30.00
Estimated Time Investment
An Hour or Two (0-2 Hours)
Finish Used
Sanded with 80 grit and clear polyurethane
Recommended Skill Level
Beginner
Back