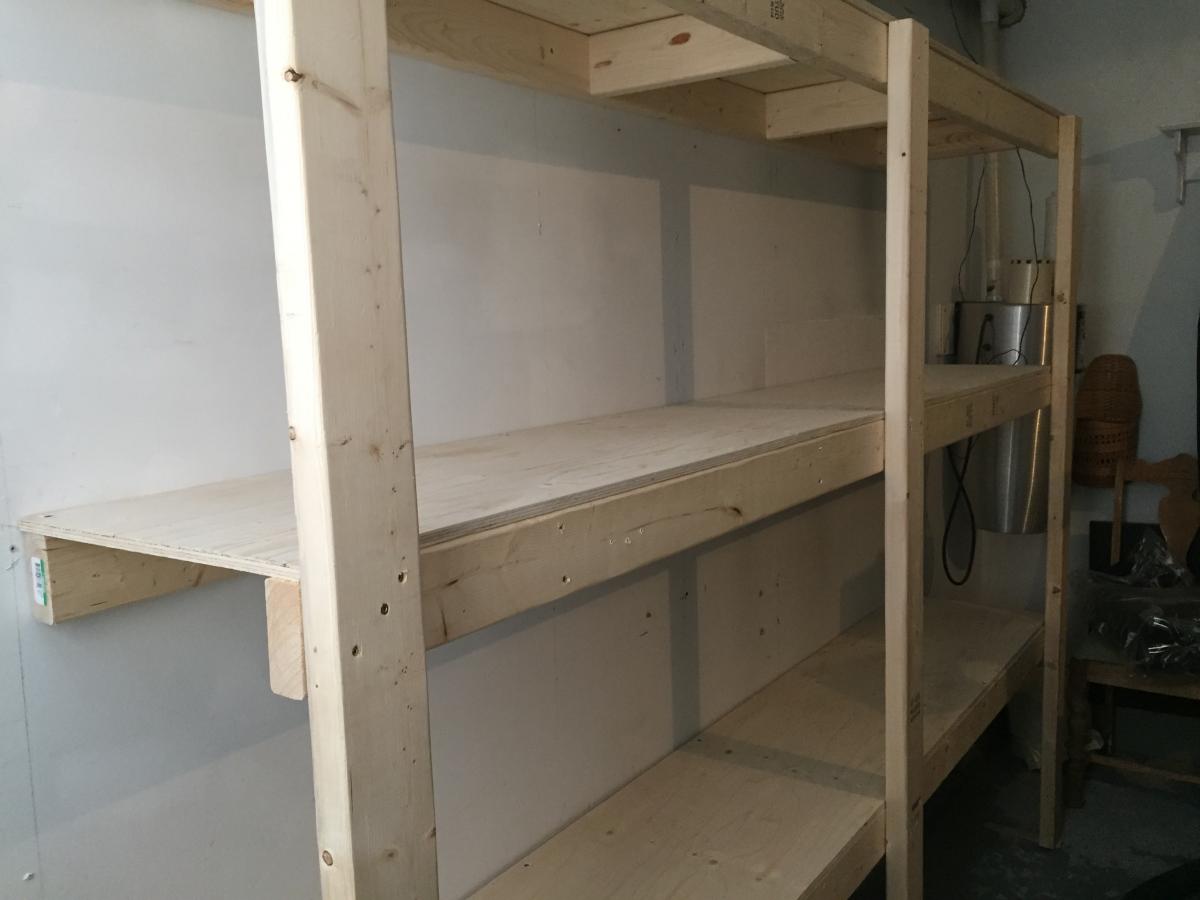
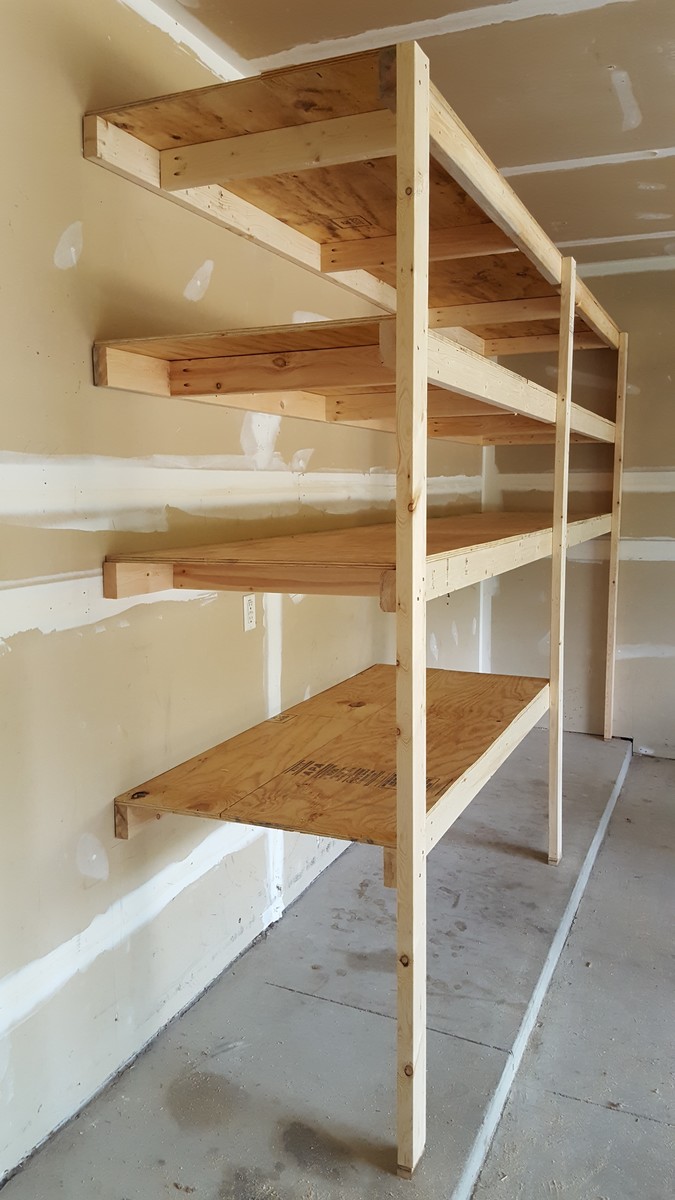
Garage shelving
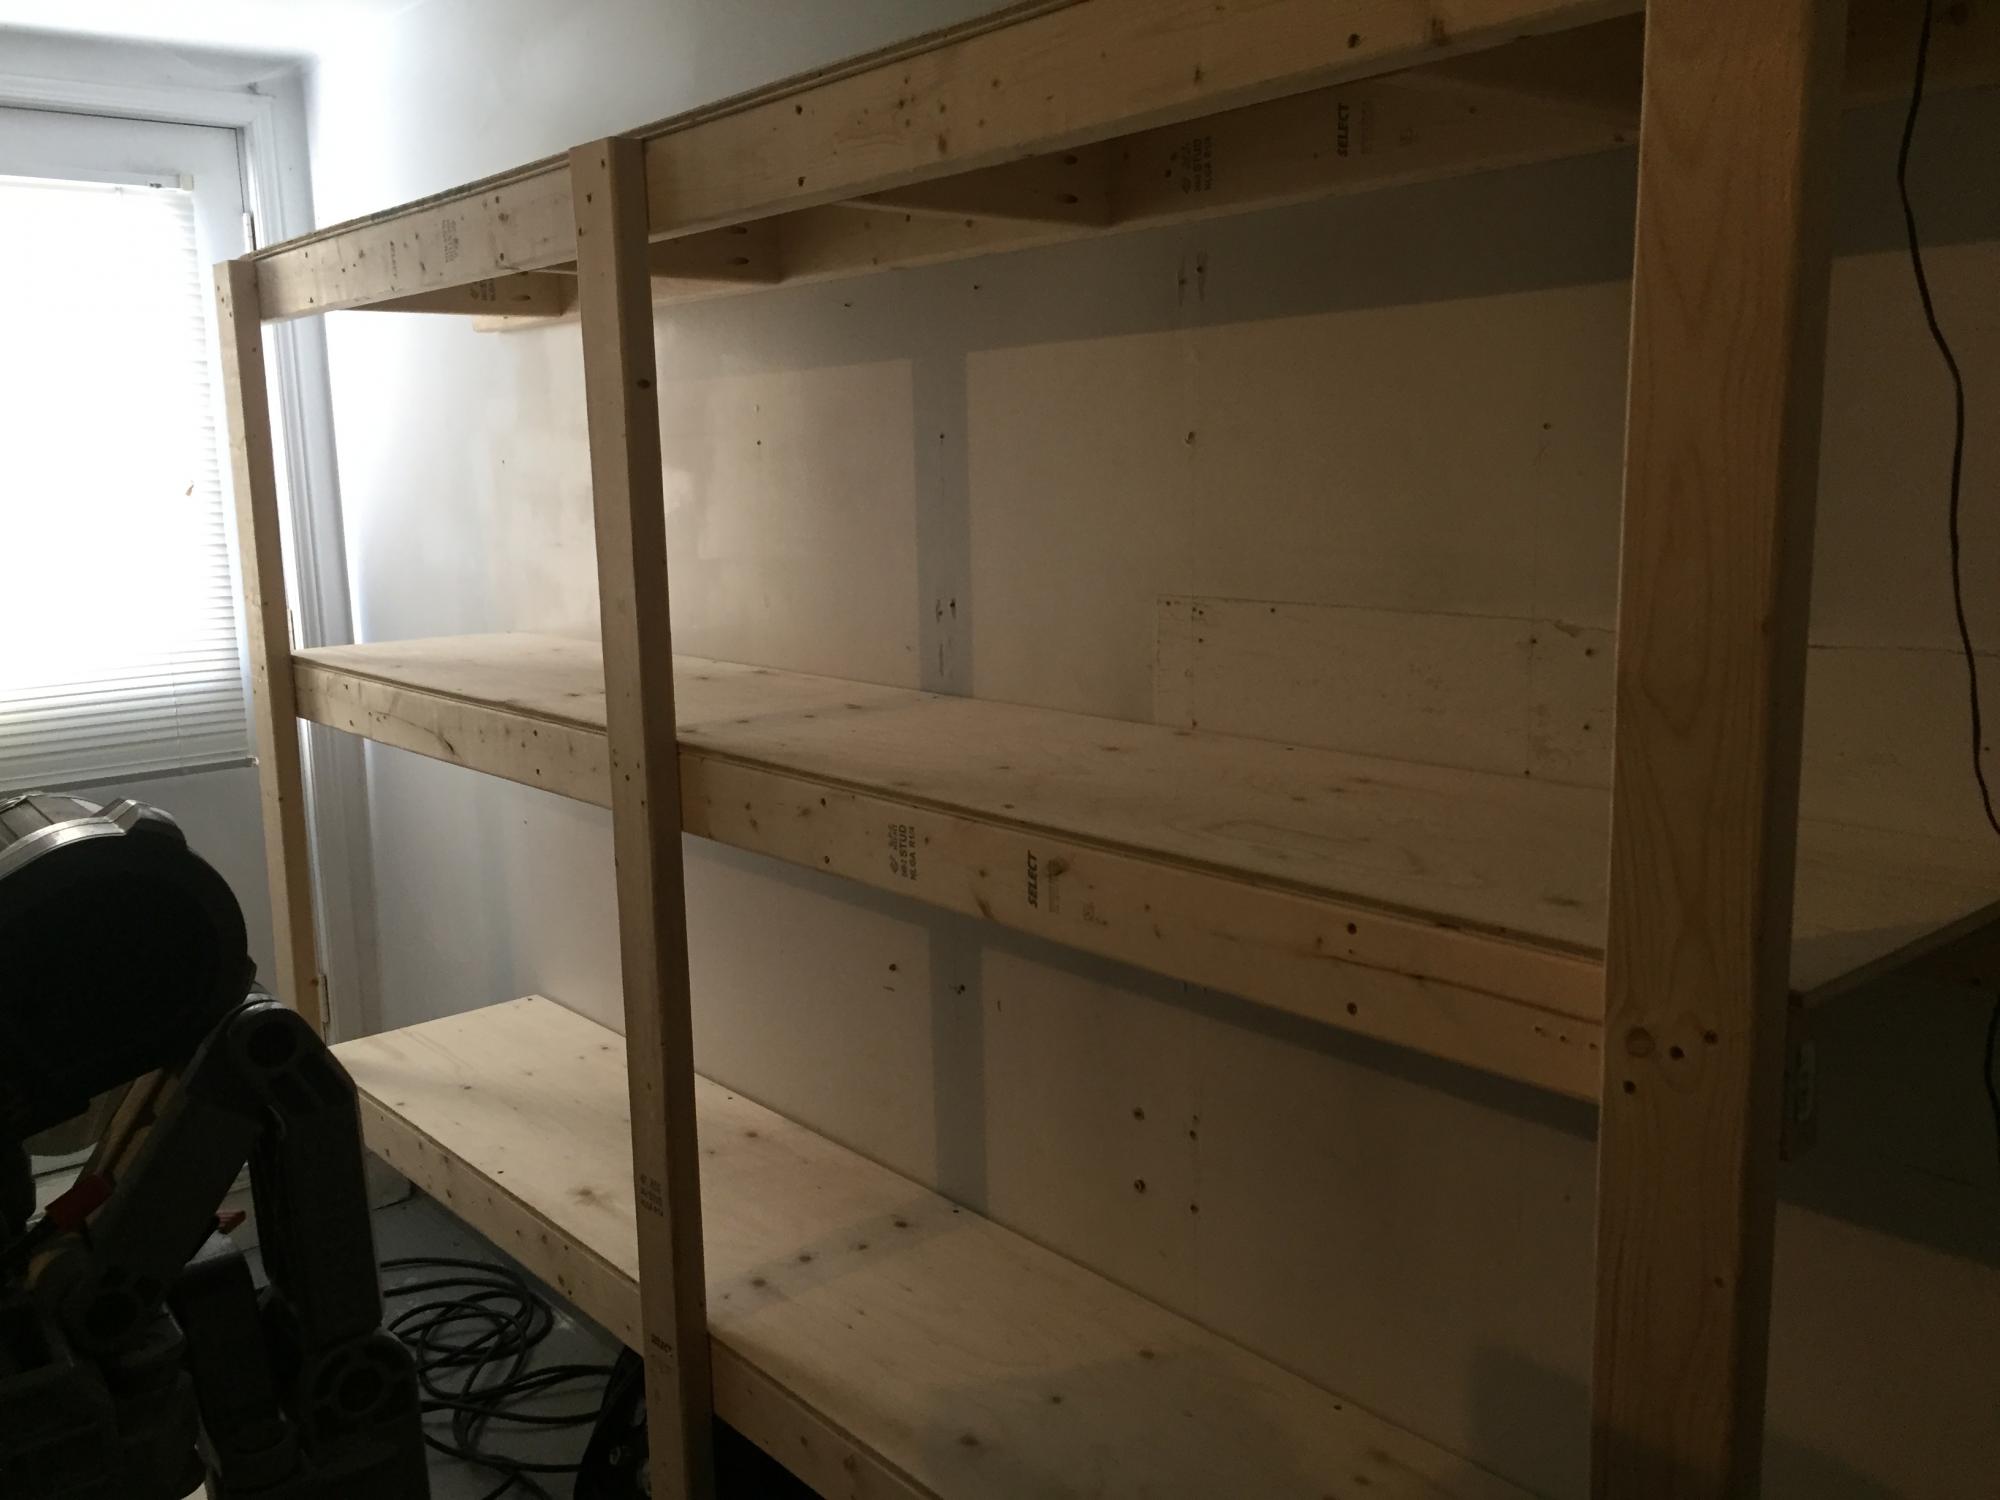
These shelving were great for our garage storage.
Built from Plan(s)
Finish Used
None
Recommended Skill Level
Beginner
These shelving were great for our garage storage.
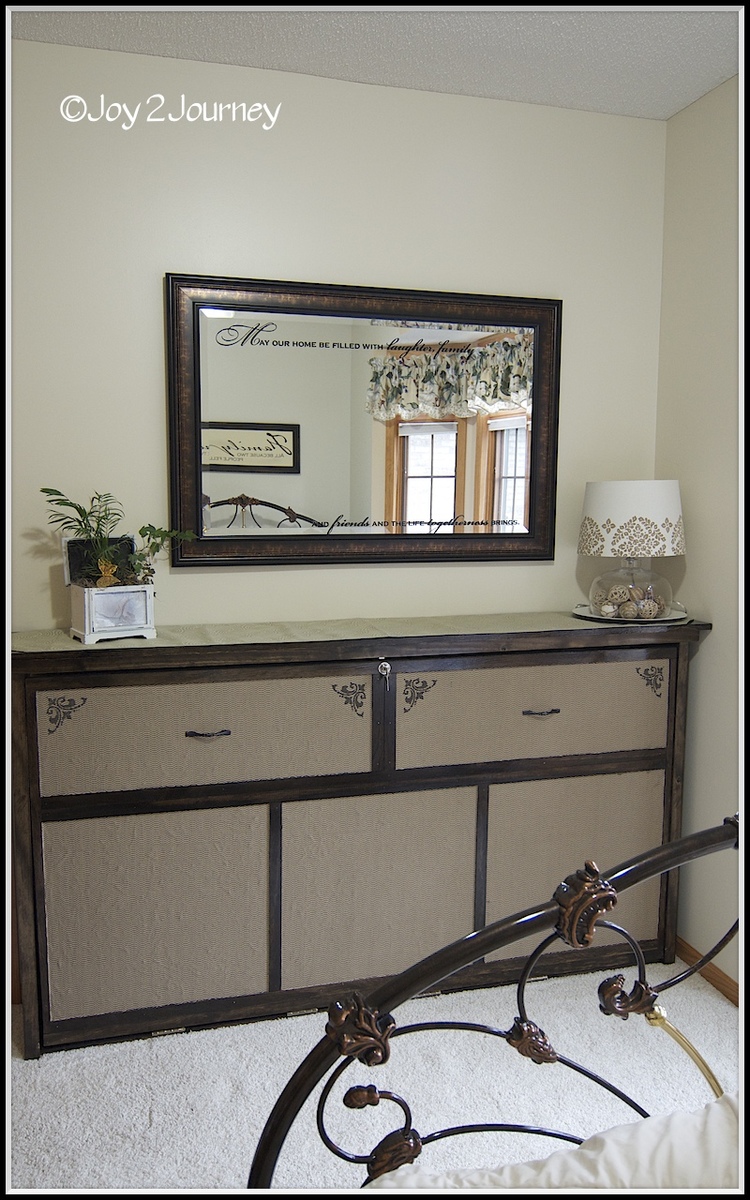
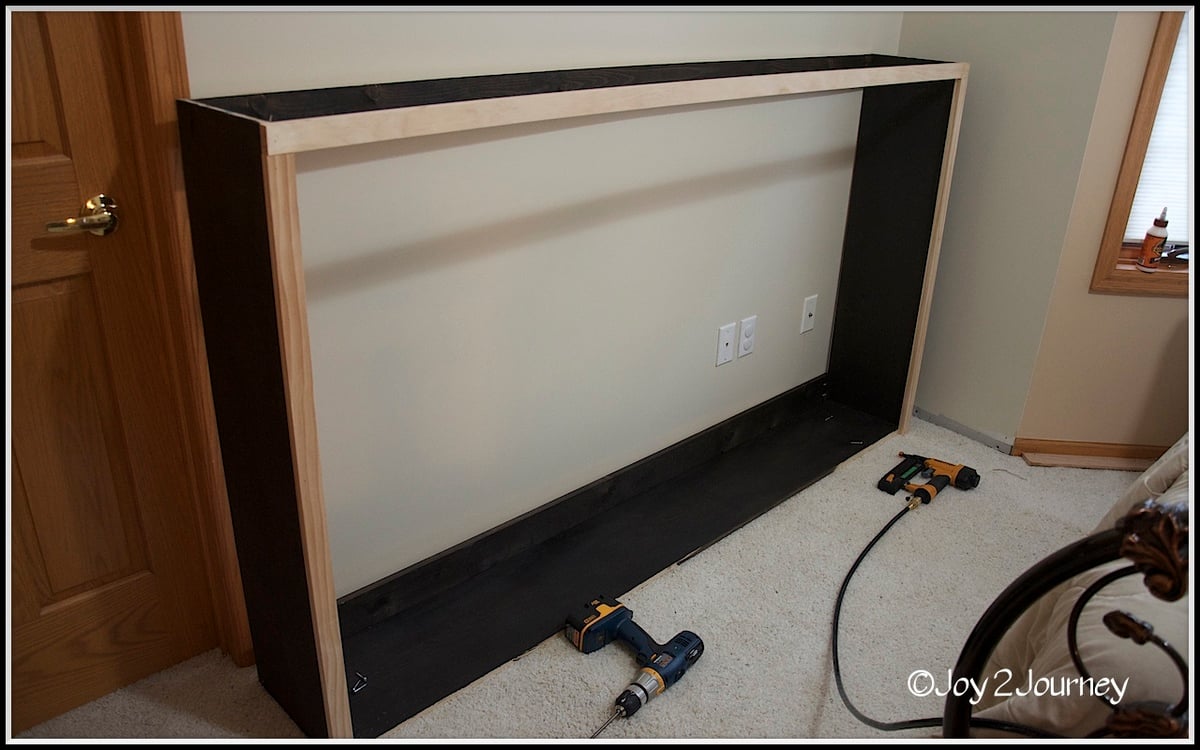
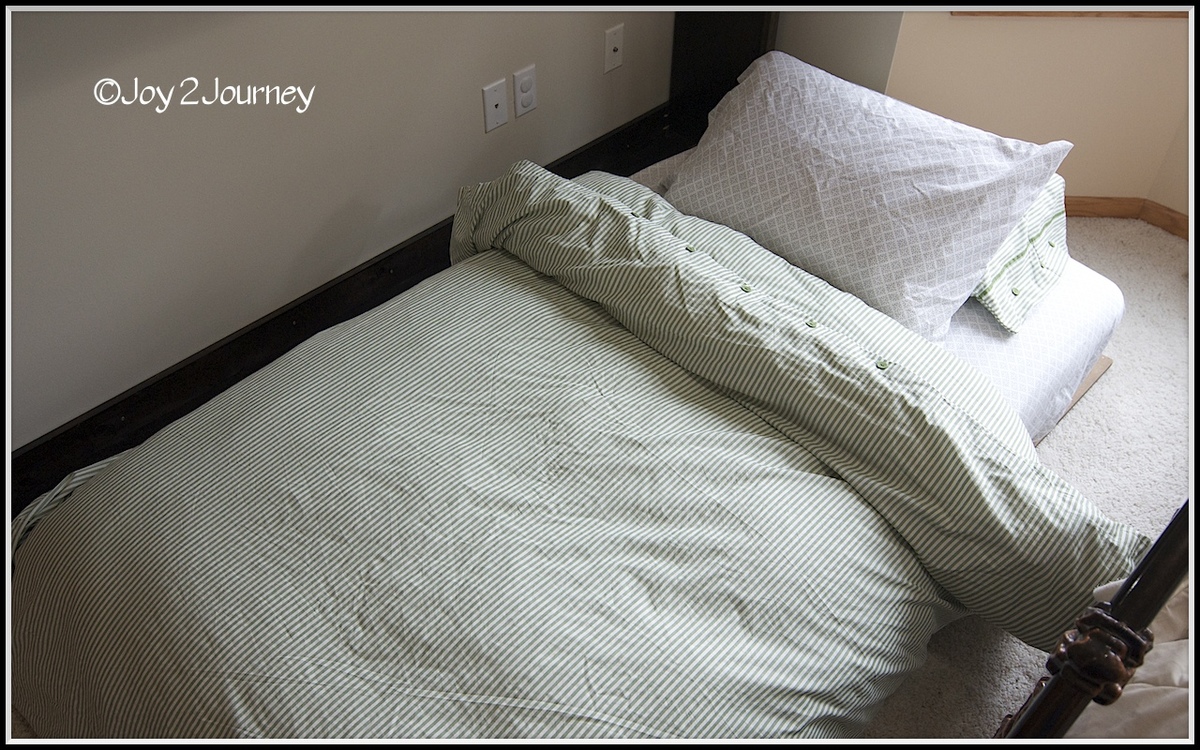
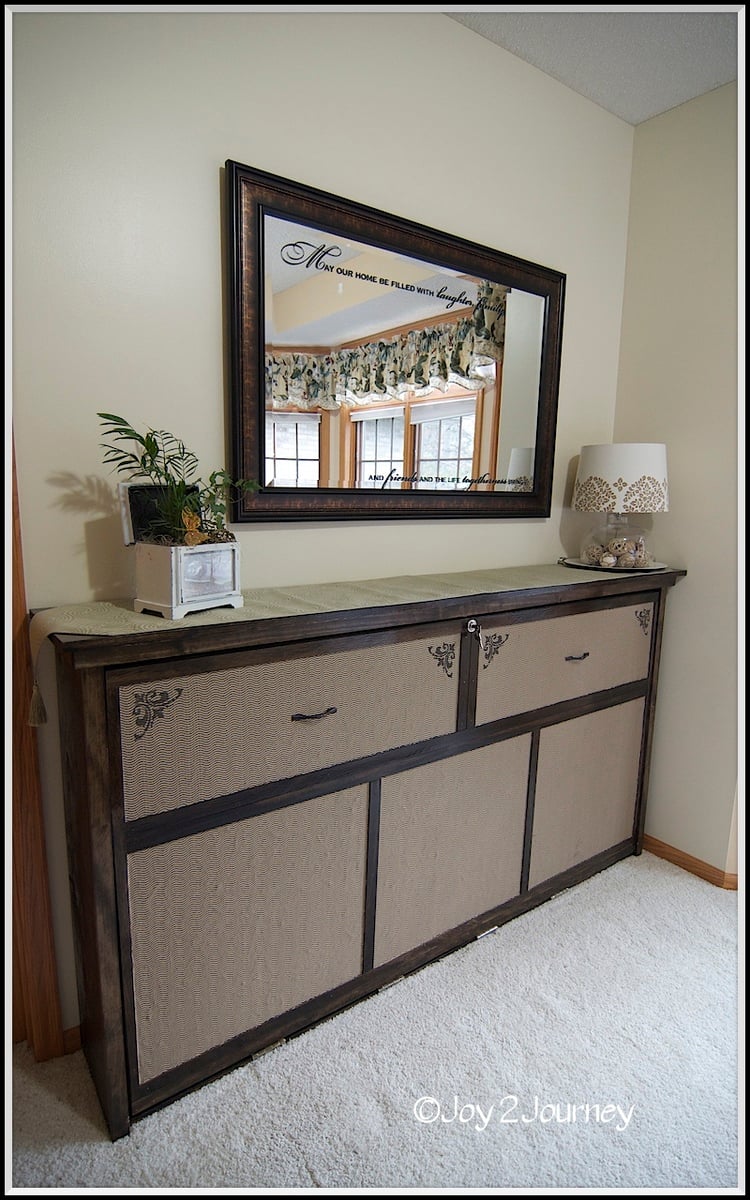
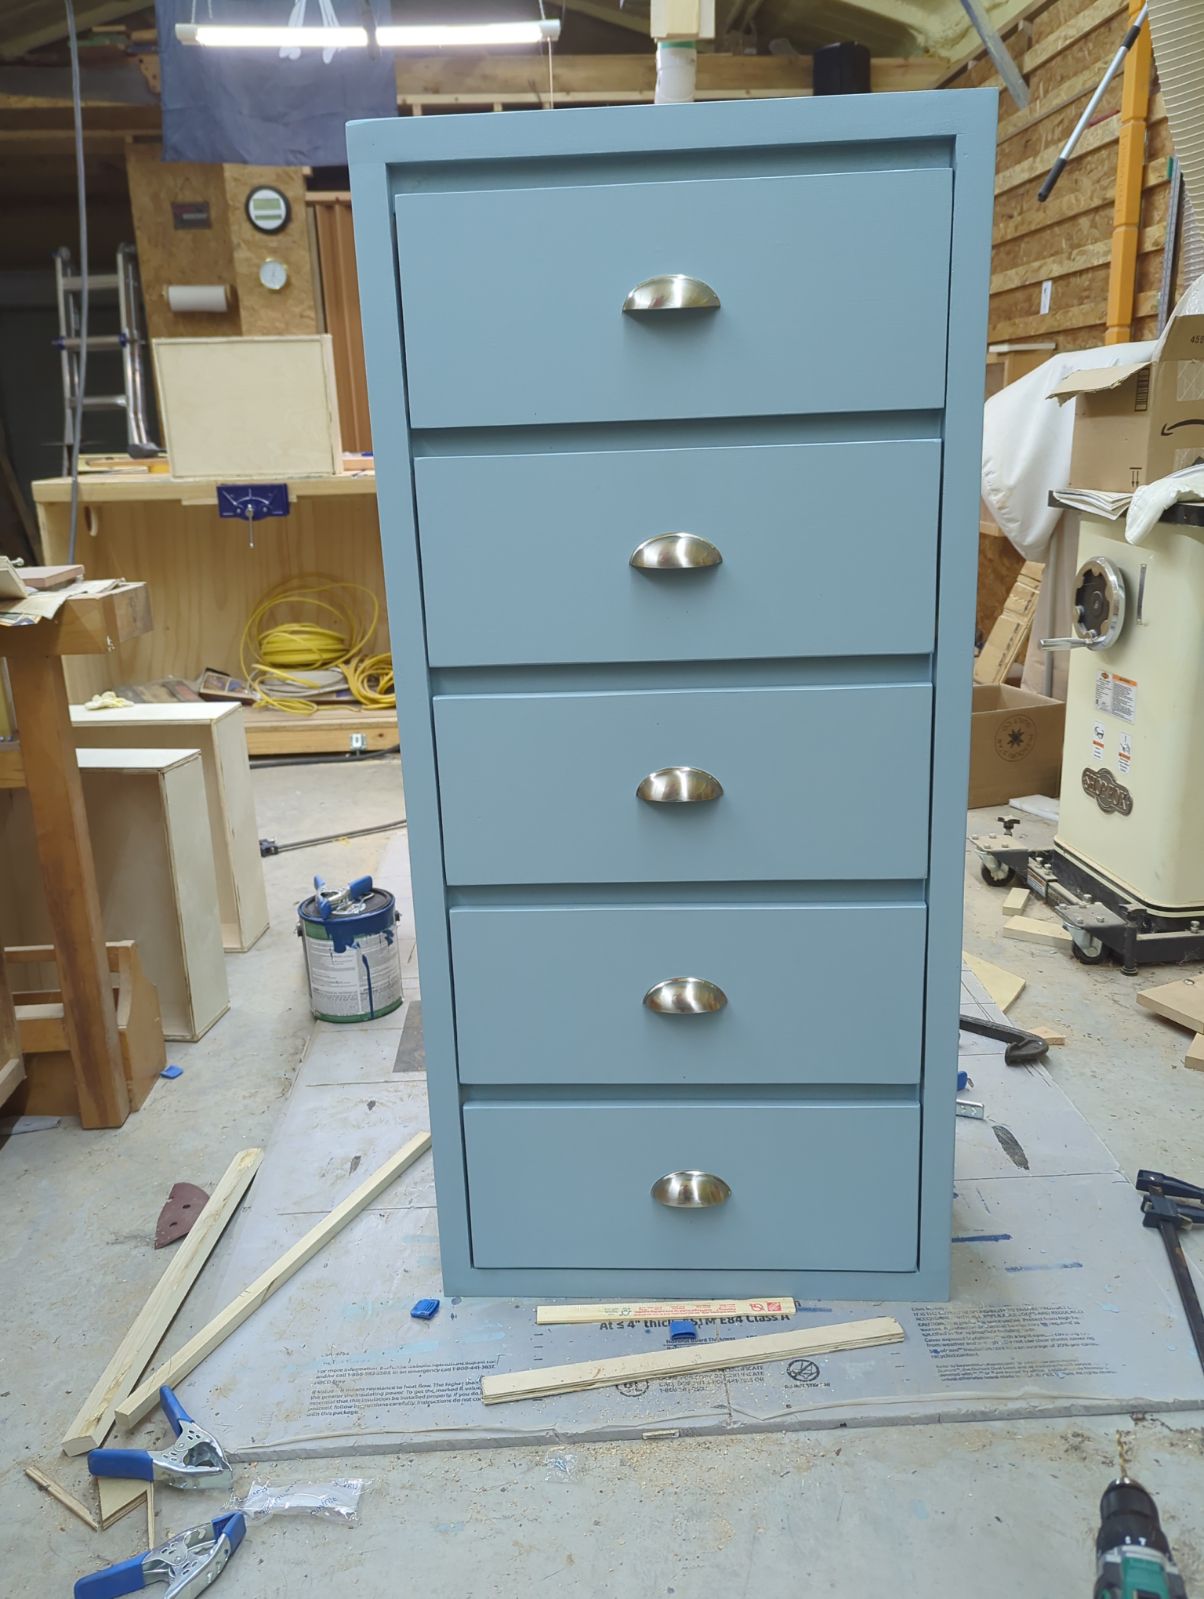
I used the Murphy Bed Plan that Ana had on her website. I modified it so that it would look more like a dresser and would fit into the space that I have. It is perfect and I have used it myself just to see if it was comfy. It was!!! :)
This project took me longer to do as I had a creativity issue that you can read about here .. http://joy2journey.blogspot.com/2012/04/m-is-for-murphy-bed-its-finishe…


Sun, 04/15/2012 - 11:37
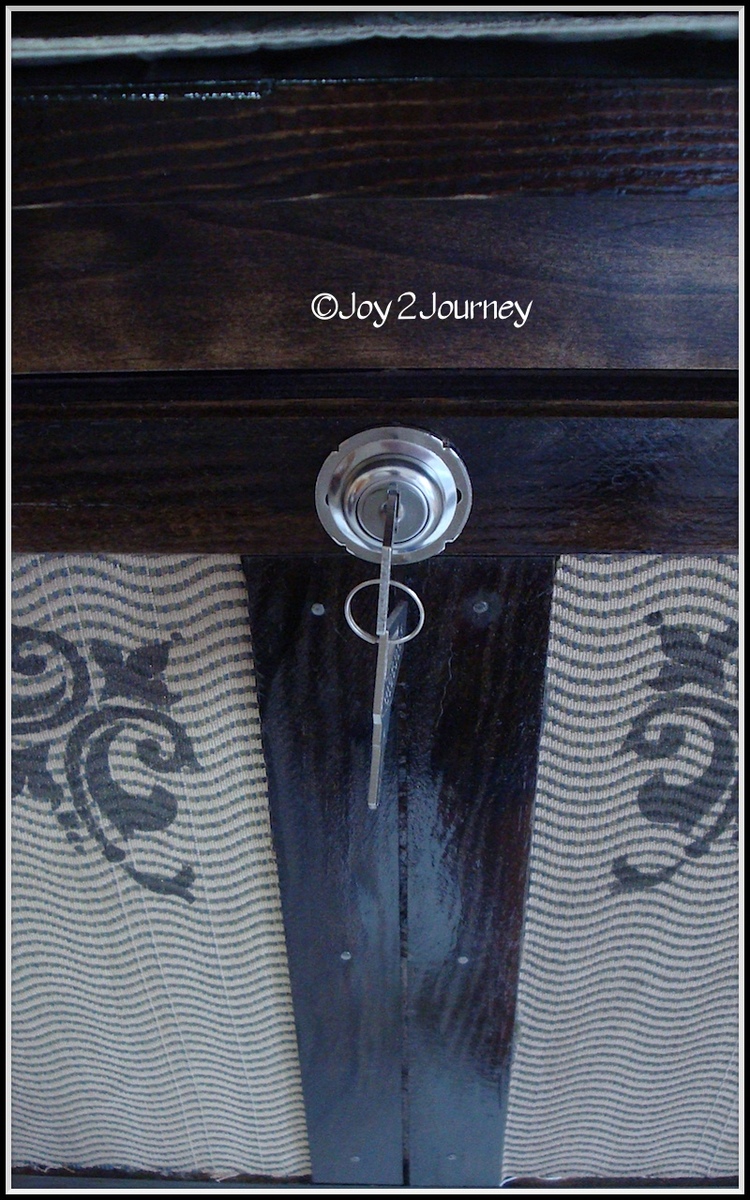
What an amazing job! Really looks just like a dresser. The lock closure is a great idea for keeping it securely closed. Beautiful finish, and the fabric and stencils are so creative!

In reply to Amazing job! by JoanneS
Sun, 04/15/2012 - 11:54
I was afraid little hands would pull it open ... hence the idea of a lock. Now I just have to spray paint it to have it blend in :)
bj
Fri, 12/14/2012 - 03:36
Things derived in this material will surely have some impact on the process of making of a classical overview. You should bookmark this page and http://allfreepapers.blogspot.com for the future. The question about it is a very important for the contemporary society. They have become proclaimed national standards recently.
Wed, 02/13/2013 - 11:42
Just curious did you buy the jig called for? If not what did you use instead? Camille
Wed, 01/08/2014 - 12:28
You did a fabulous job on your murphy bed. Good to know it can be made horizontally too. Thanks for the inspiration! =]
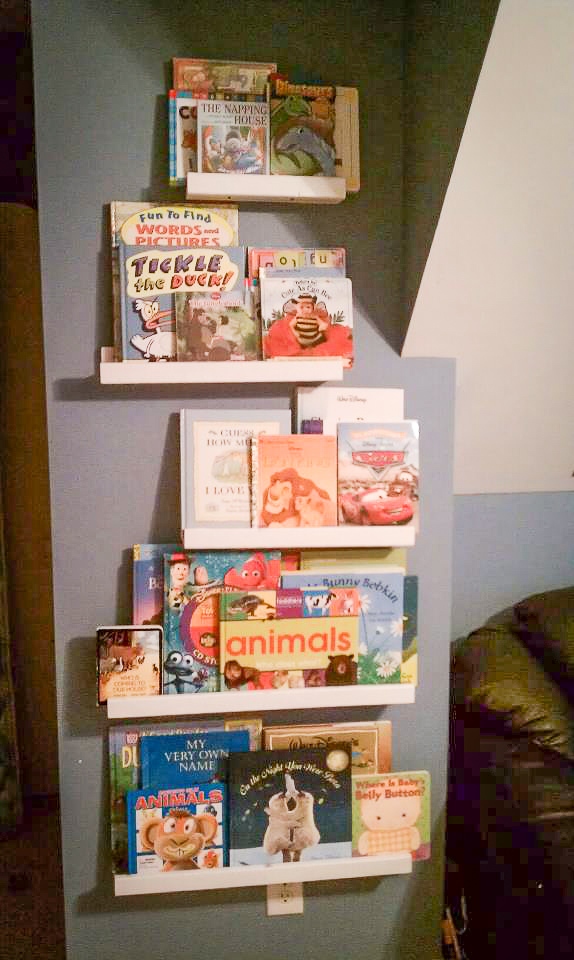
This project only cost me about $5 which is unbelievable. I had a small wall that was useless in the playroom so Ana gave me the perfect idea with her 10 dollar ledges. I love them! I am new at the Kreg jig and I didn't know what screws to use or how deep to make the holes at first so i'm learning! My husband even liked them so much he wants me to make some for his garage(man-cave) which is a huge complement...
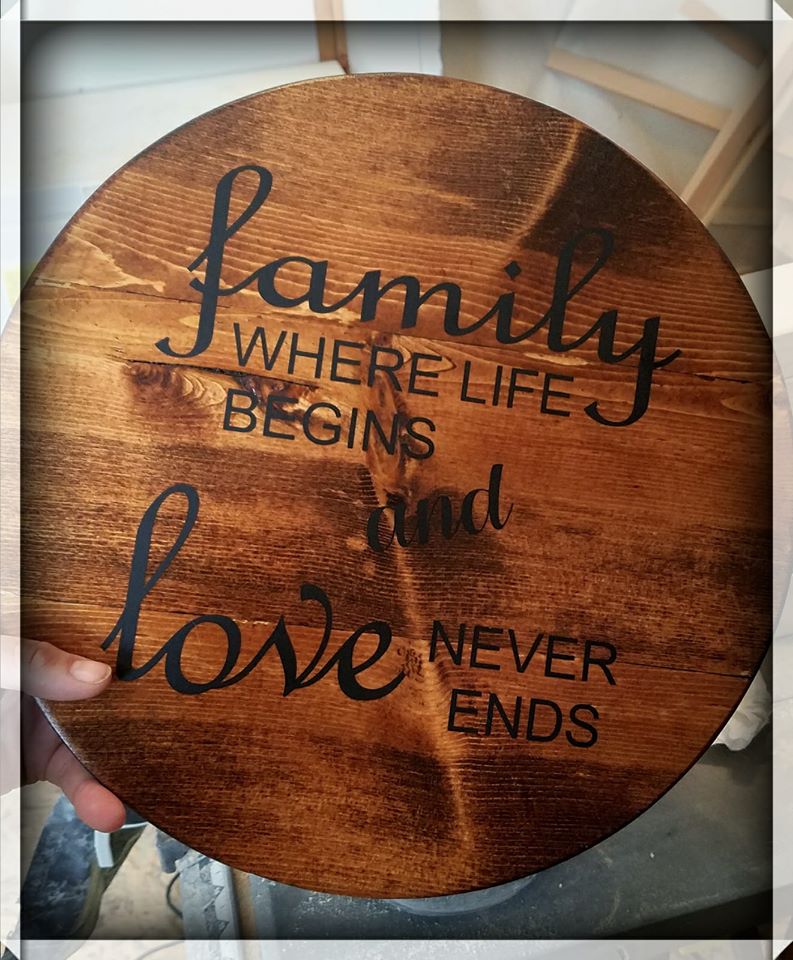
Used a Milescraft Circle Guide to cut the circle, then stained in Minwax Honey and used a Silhouette Cameo for the vinyl wording.
My 16-year-old son is home every other day for school with an on-line course he is taking. We started working on projects we both wanted to learn from cooking to woodworking projects. This is the very first project we made. We are both very proud and pleased with the simple directions, minimal tools required, and beautiful results. We used an early American stain and lacquer finish. We have received many compliments on it. Thank you for giving us something to build our relationship and home with.
Elizabeth
Mon, 09/25/2023 - 09:23
Thank you for sharing, I love hearing about the time spent together and the project looks amazing!
It took about 2 hours to build it. We have a large family, so we put 2 extra legs on each, just in case. We had problems with the hinges. I think we bought 3 or 4 different hinges before we found something that worked for us. But the end result was wonderful!
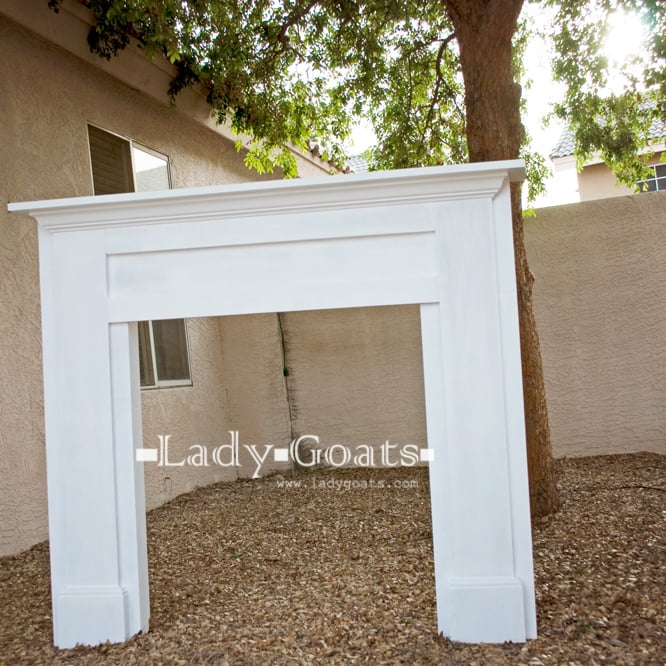
Built a fireplace using Mimi's Faux Mantle plans - I think it turned out great!
Built from Purebond plywood because I can't find straight boards in bigger sizes in my area (EVER!) and used fir 1x's for everything else.
Finished with three coats of Behr paint/primer in ultra white. I will not buy Behr again. Personal preference.
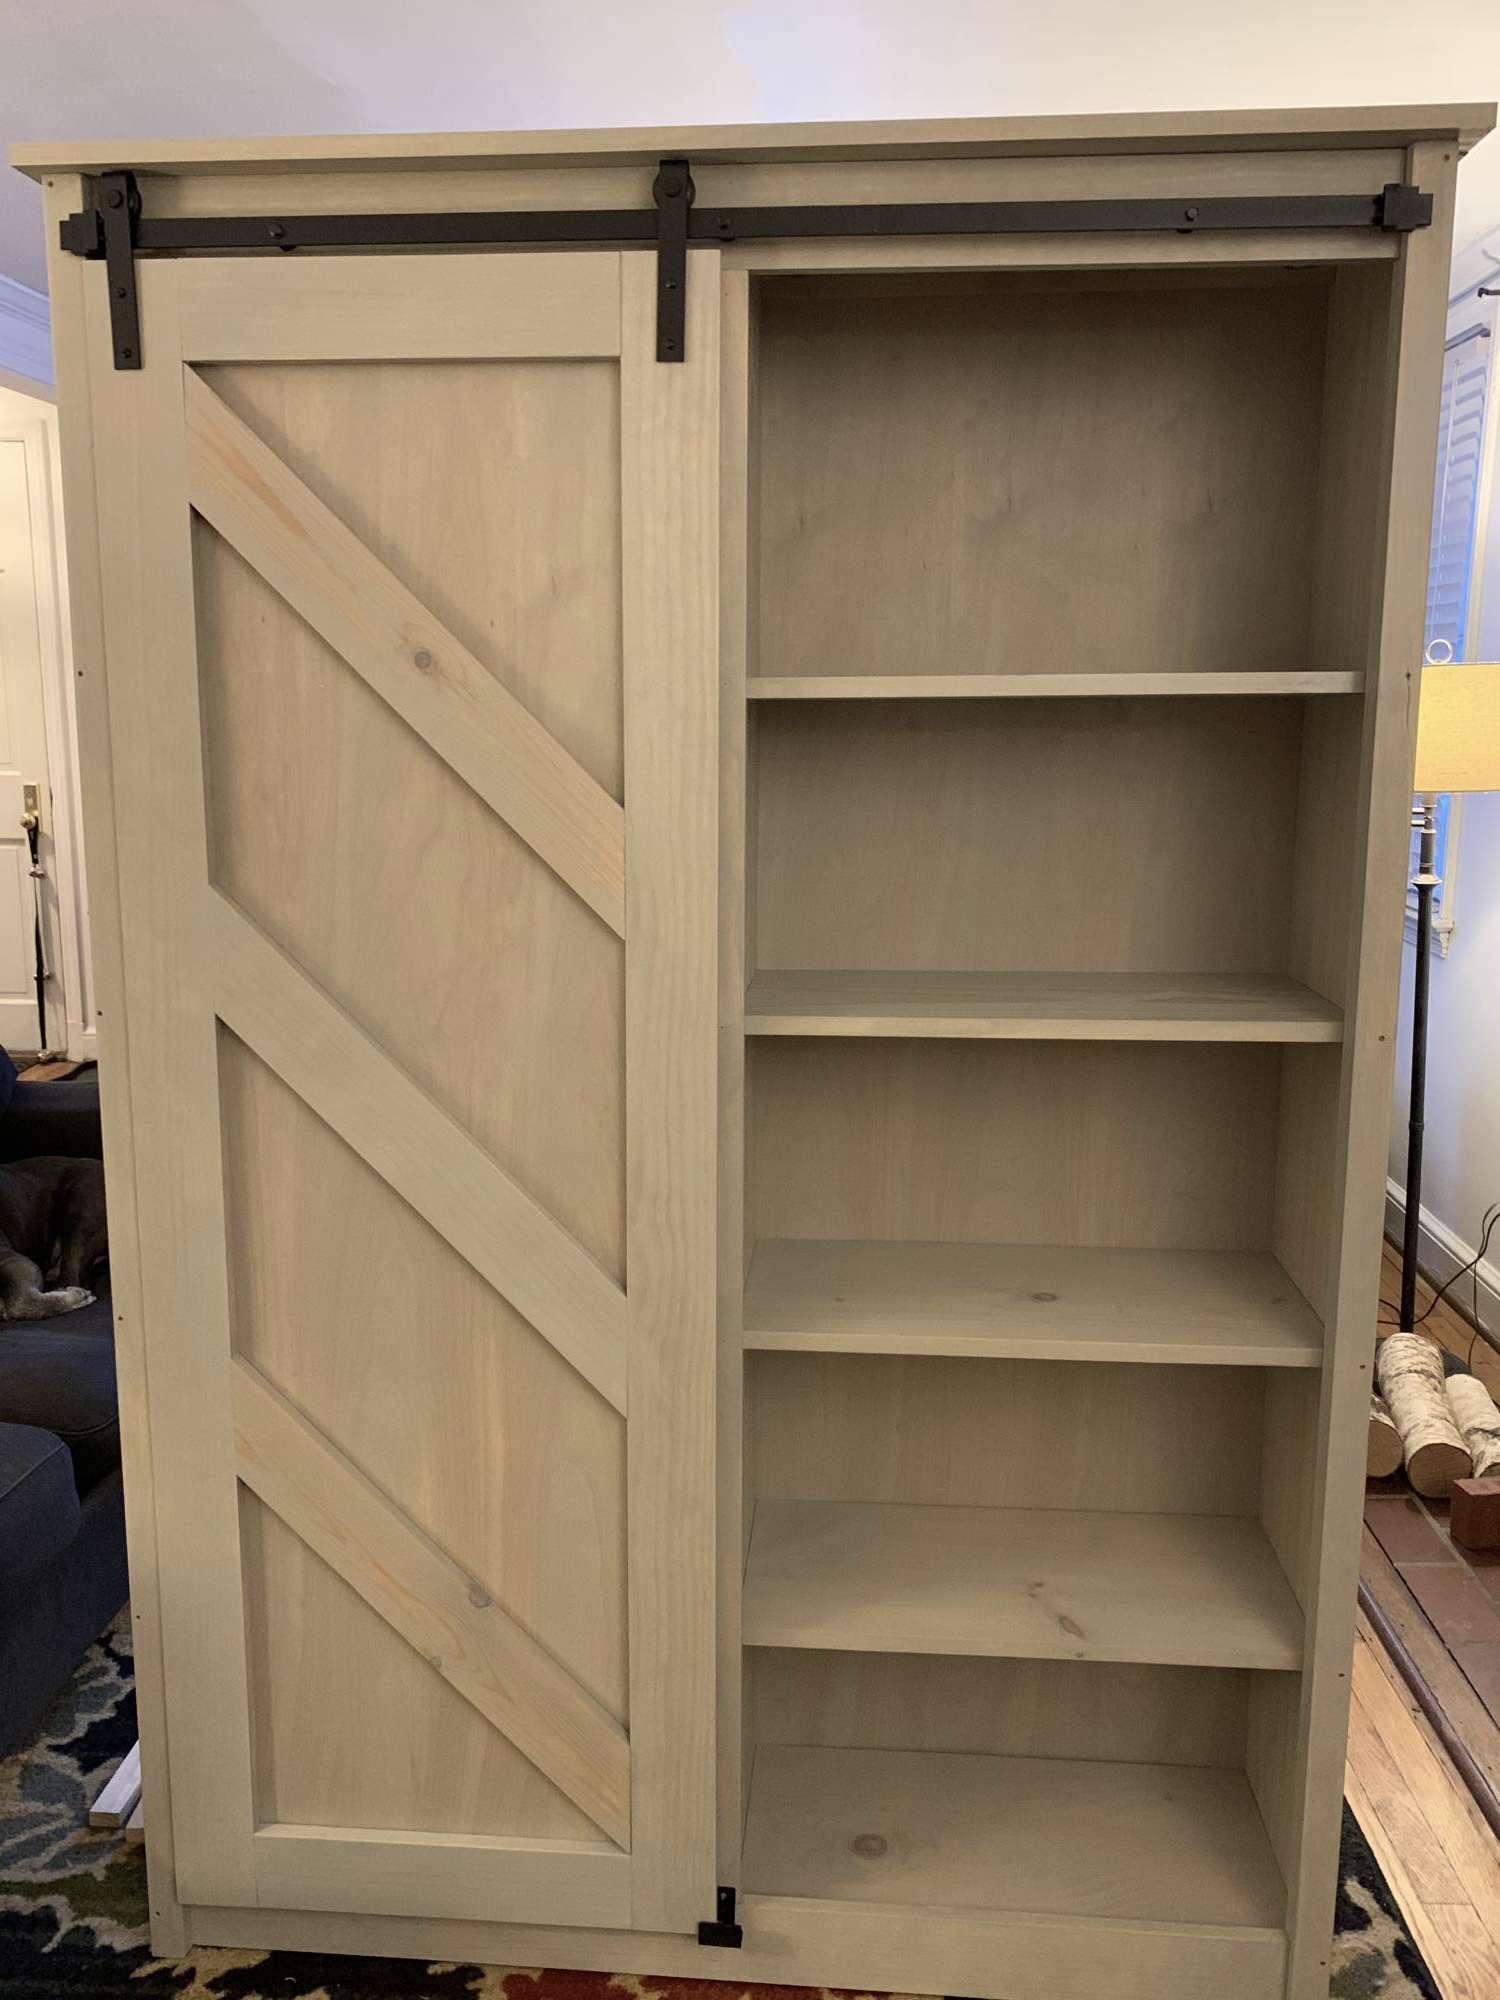
This took a lot of time and money but I like the way it looks. We have 4 kitchen cabinets and one drawer and no room for more so storage is tight.

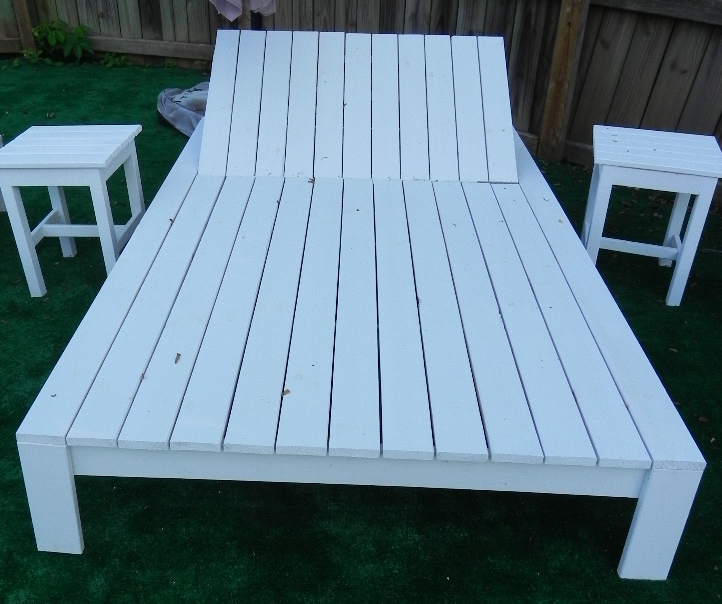
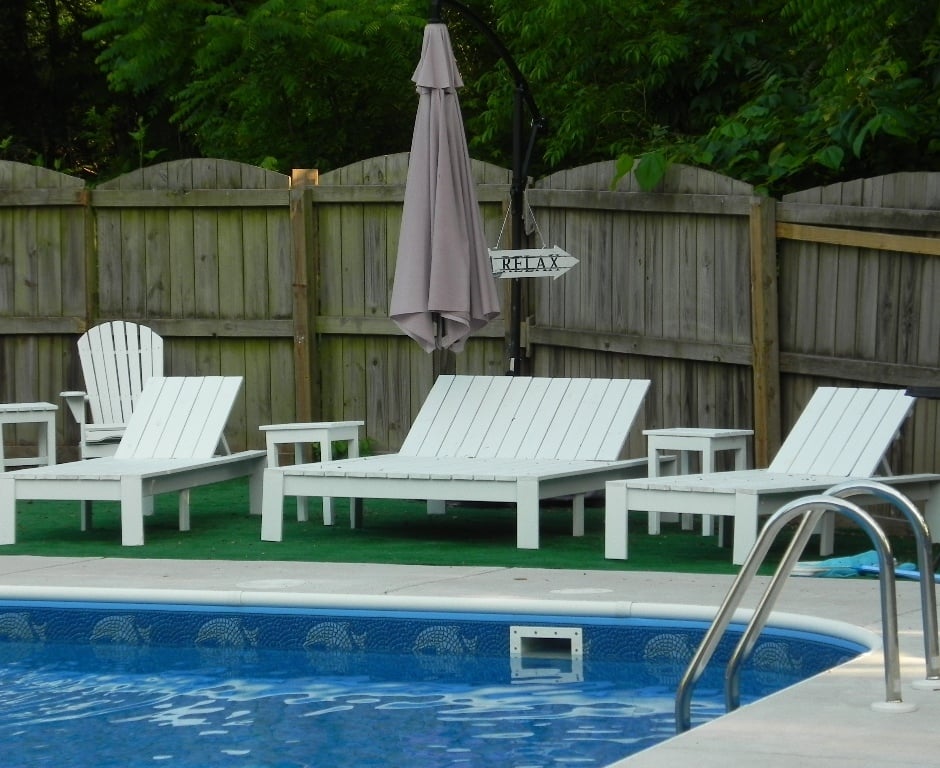
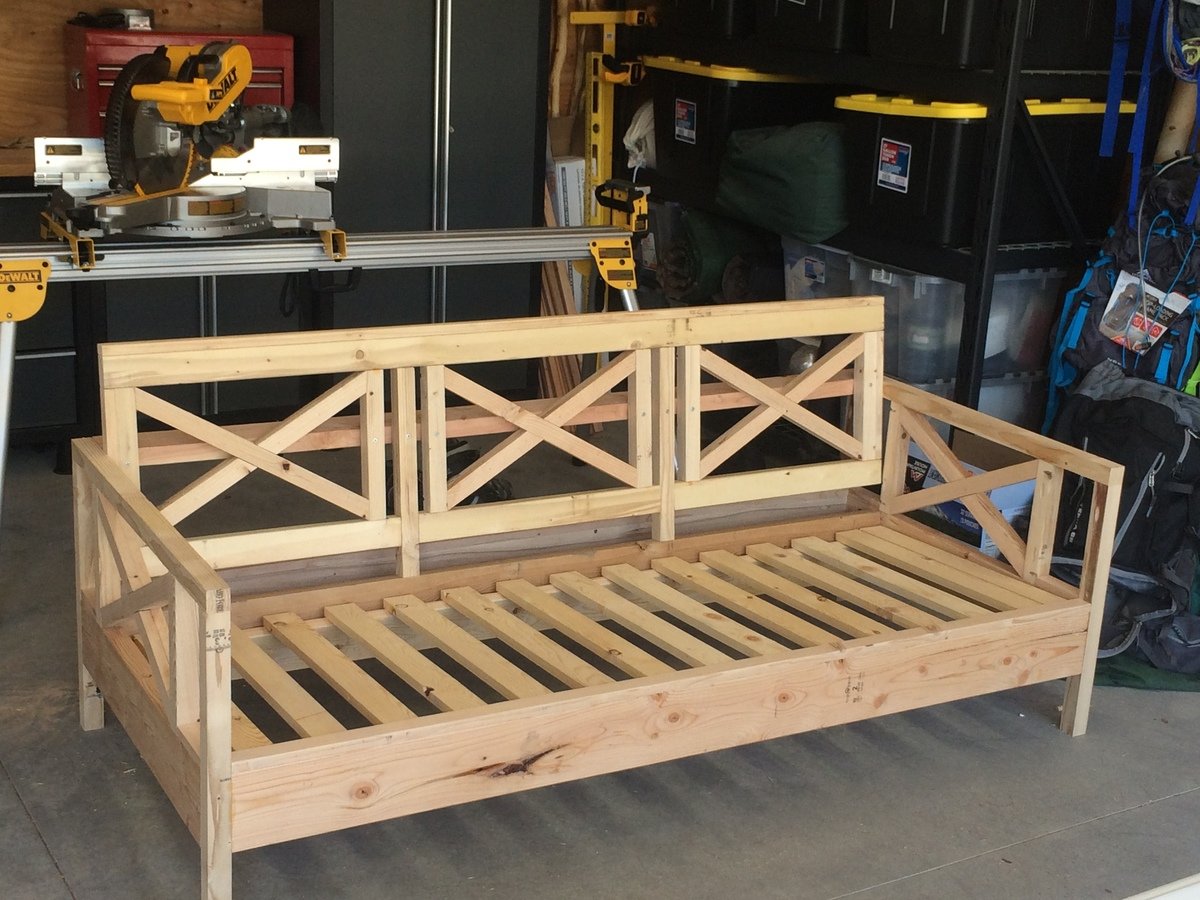
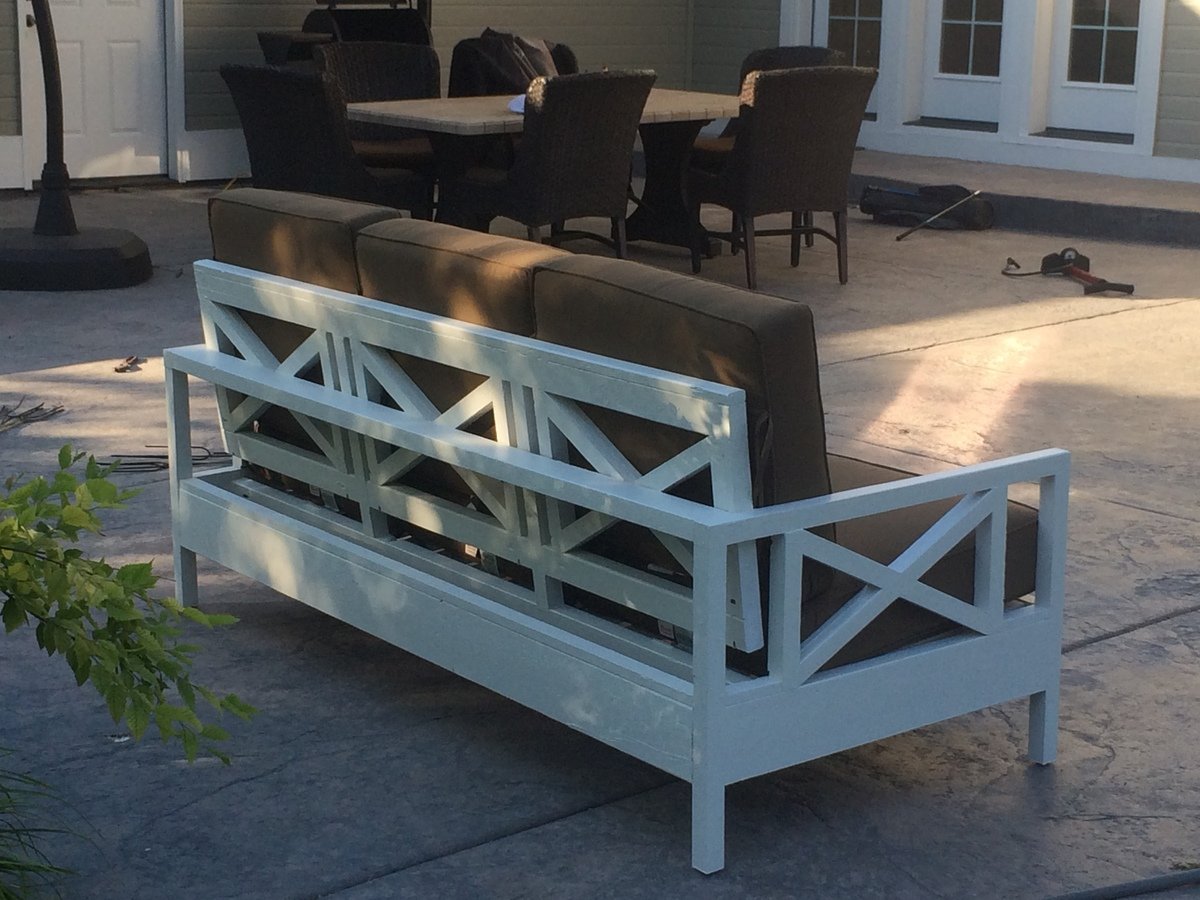
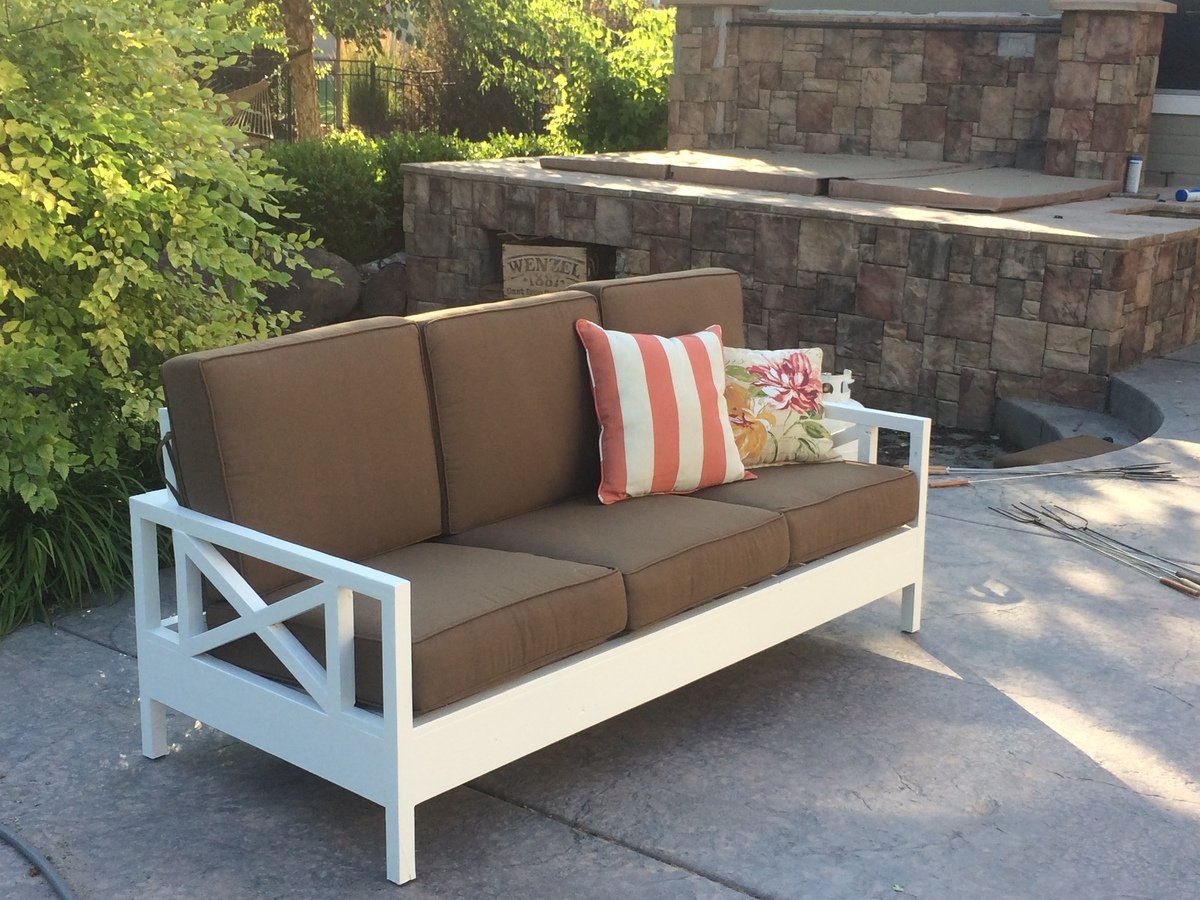
My wife loves the X pattern of the Weatherly Sofa, but wanted the tilted back from the Simple White Outdoor Sofa. This was our best of both worlds effort!
Tue, 06/11/2019 - 05:25
Can you share where you got your cushions please?
A Christmas gift for my G- kid!!!!
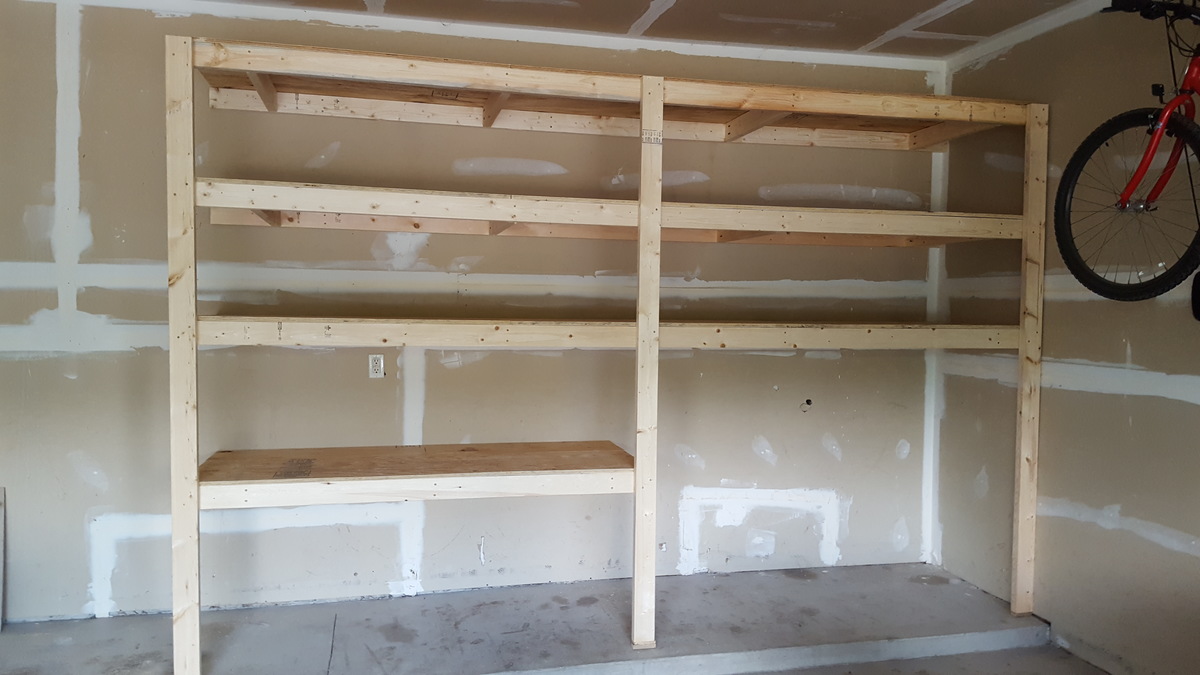
I am a beginner diy'er and this was one of my first projects. Also it was my first time using the Kreg jig and I loved it! My shelving system was around 8 feet tall, 12 feet wide and 30 inches deep. I added some extra cleats to support my deeper shelves (30") and also used thicker (5/8") plywood. This was a fun and easy project to do! Thanks so much!
Our 4x4 Truss Beam Table made by my husband for our new house. Stain is Minwax slate gel stain.
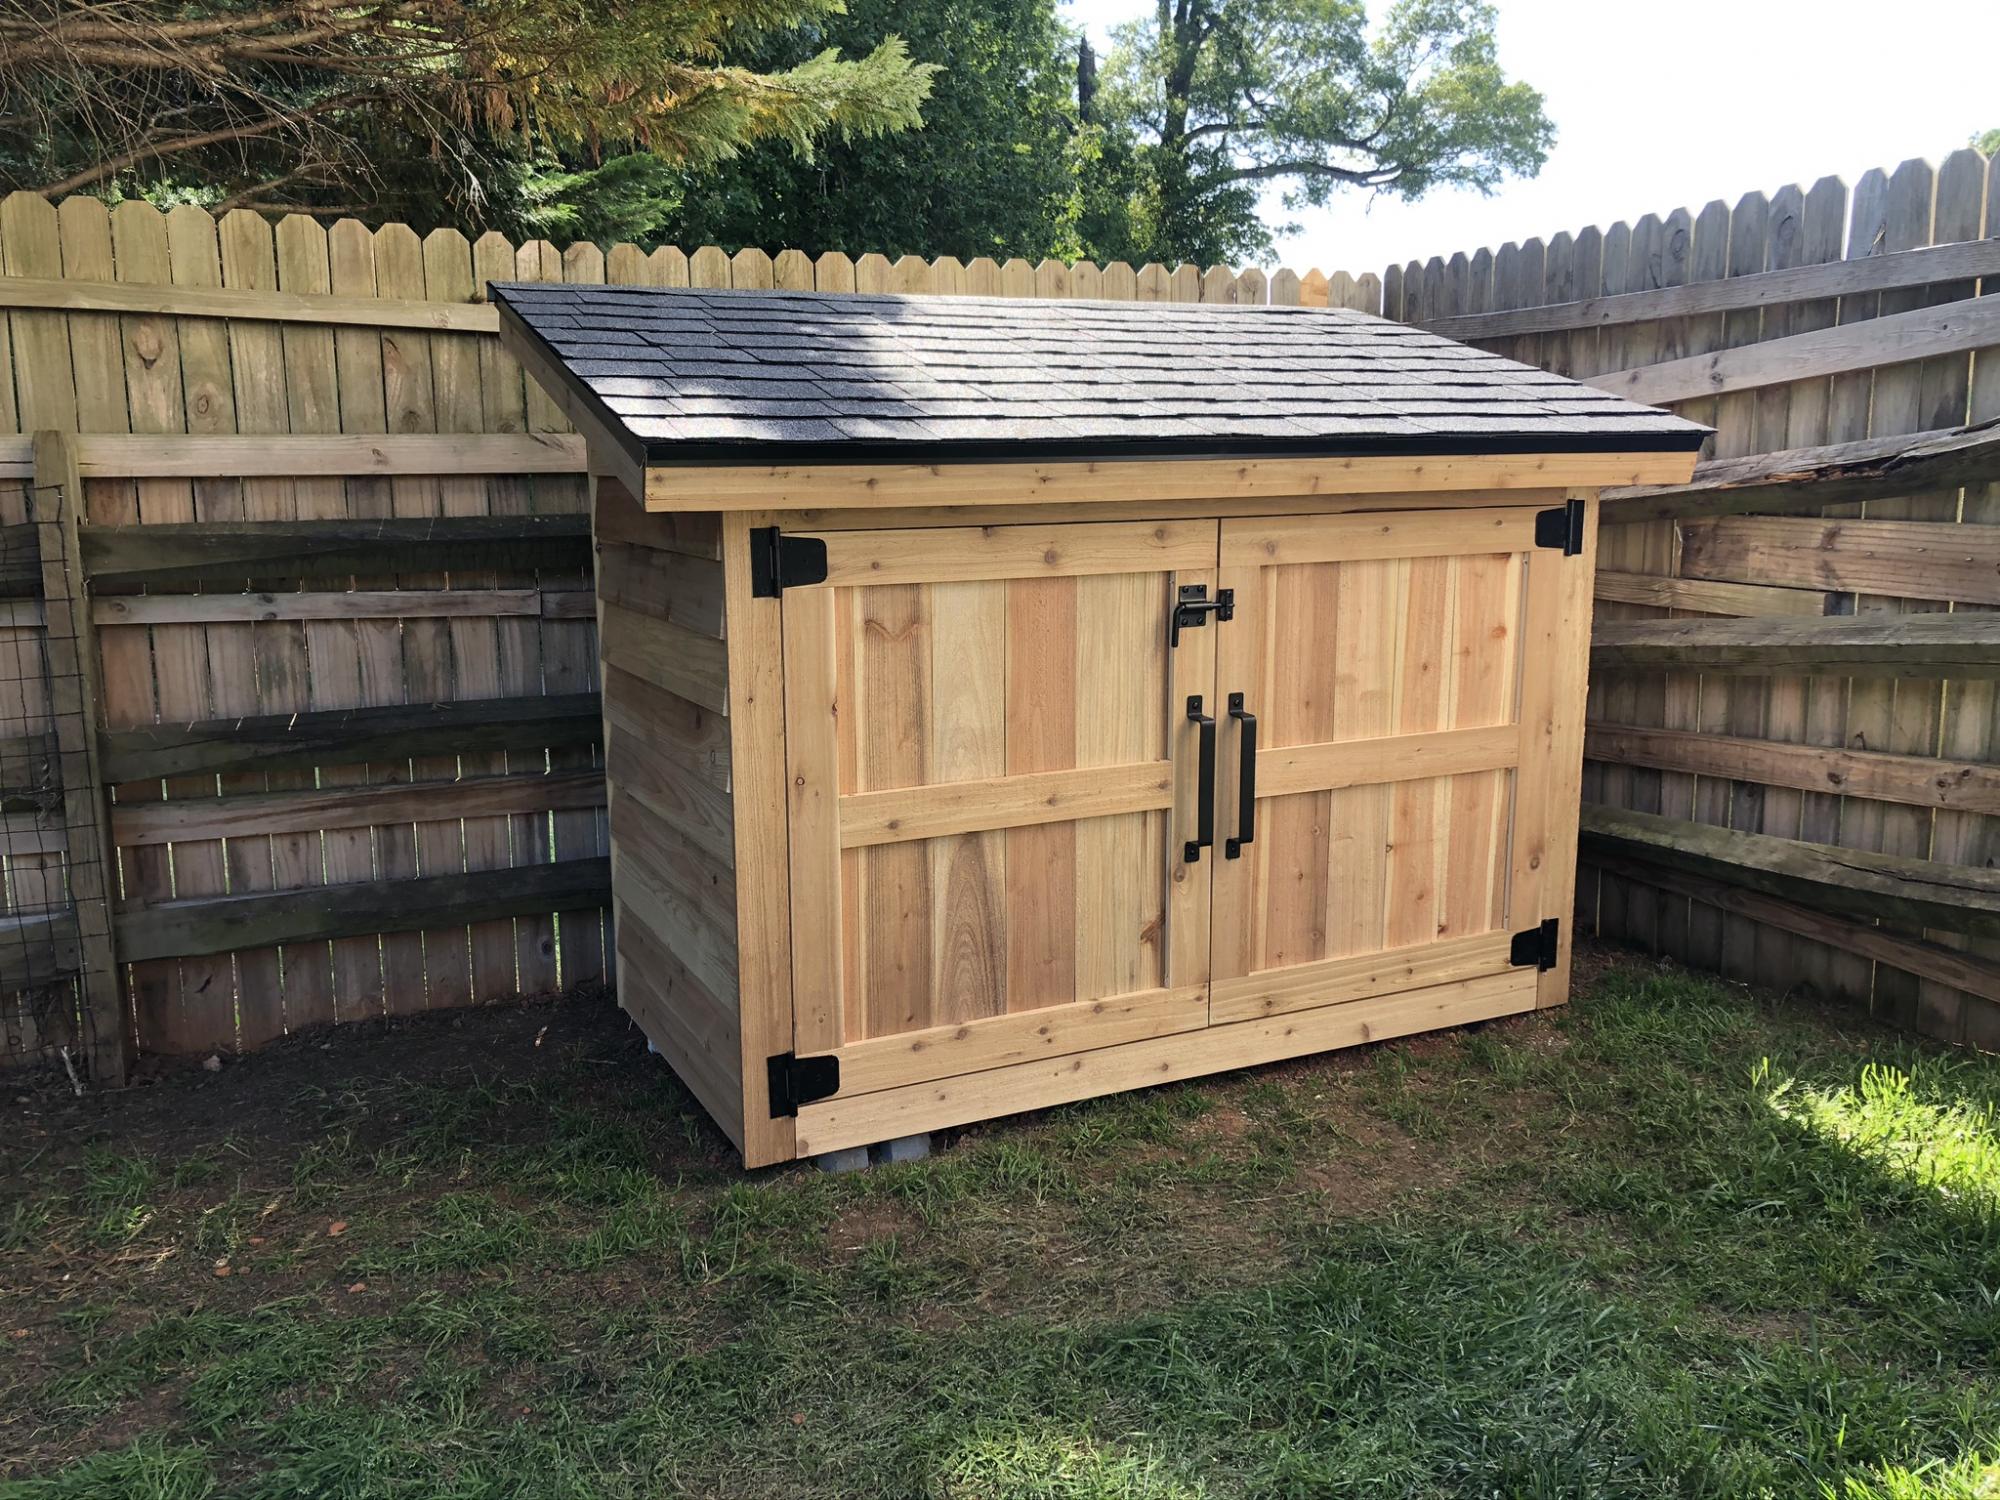
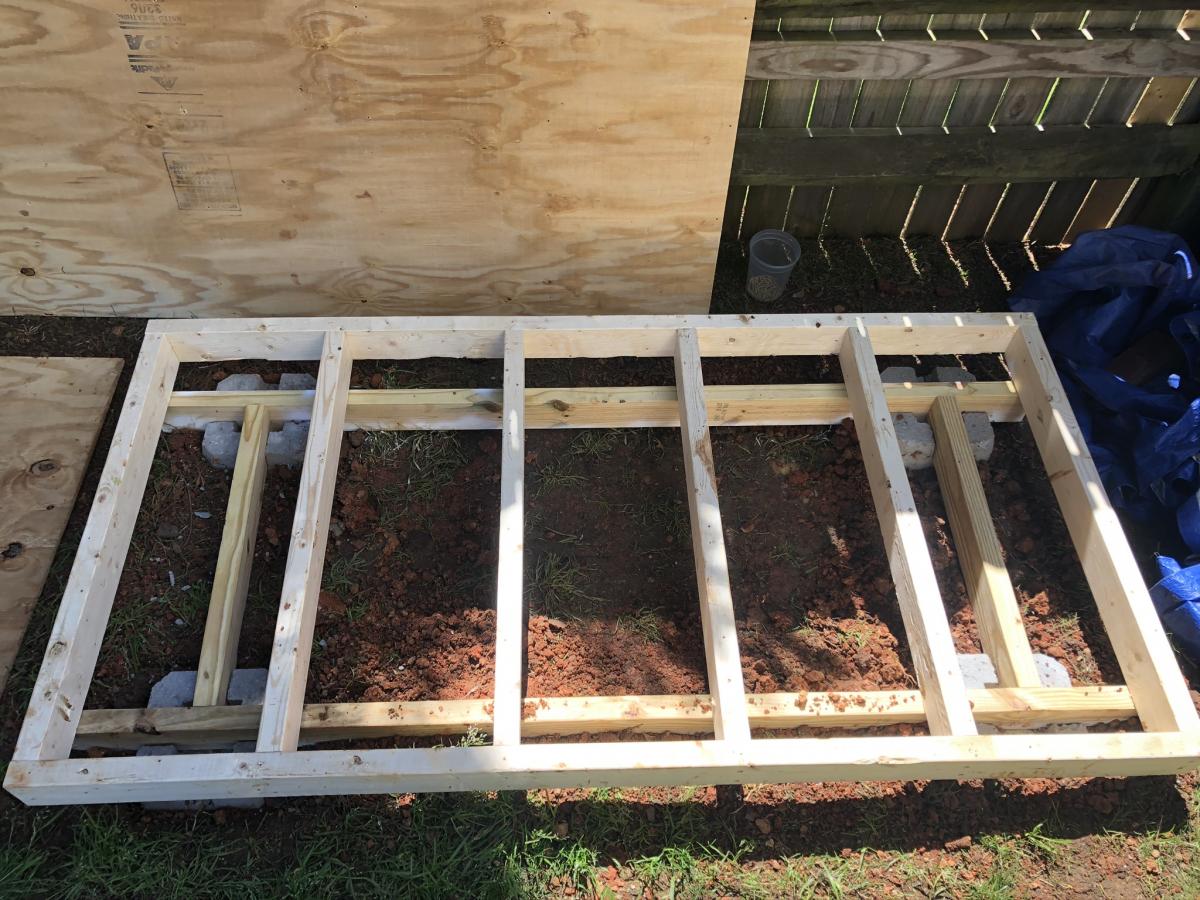
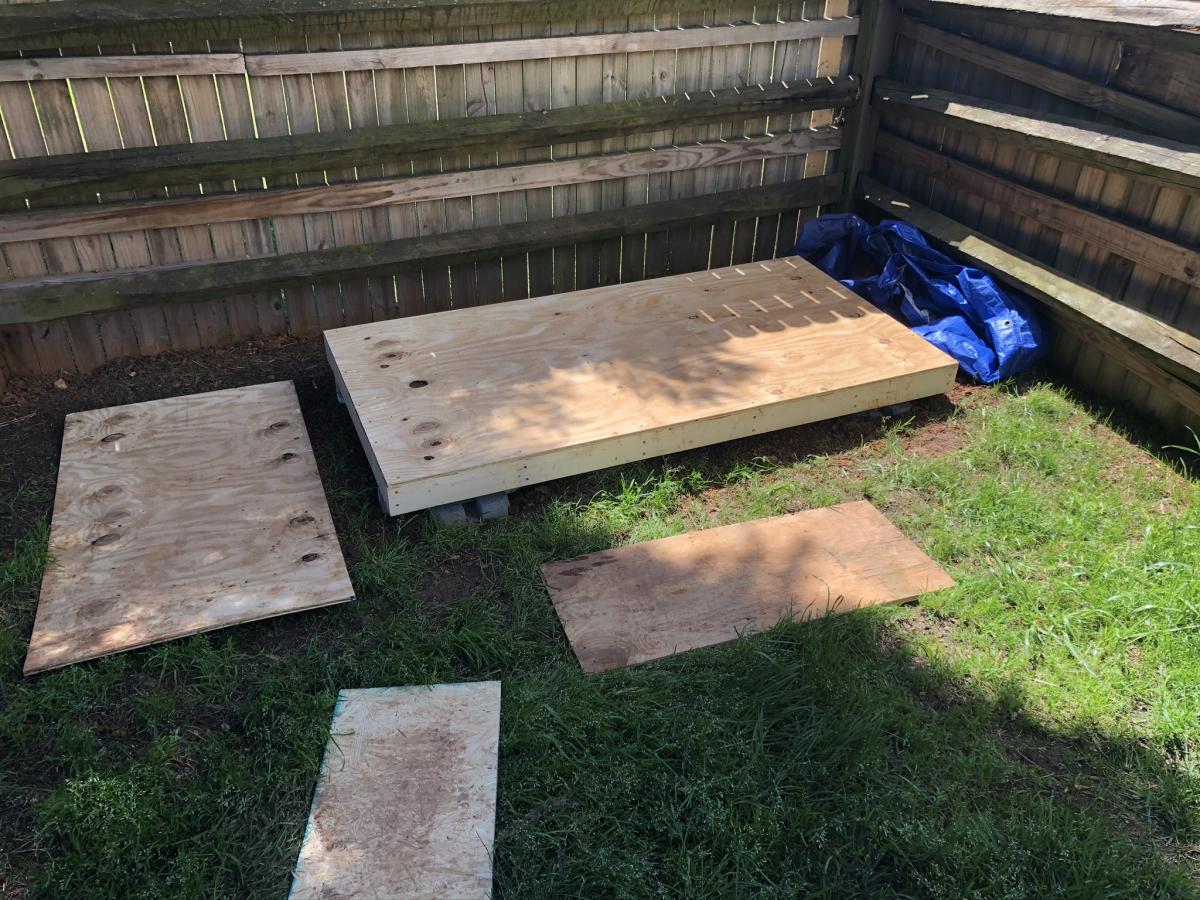
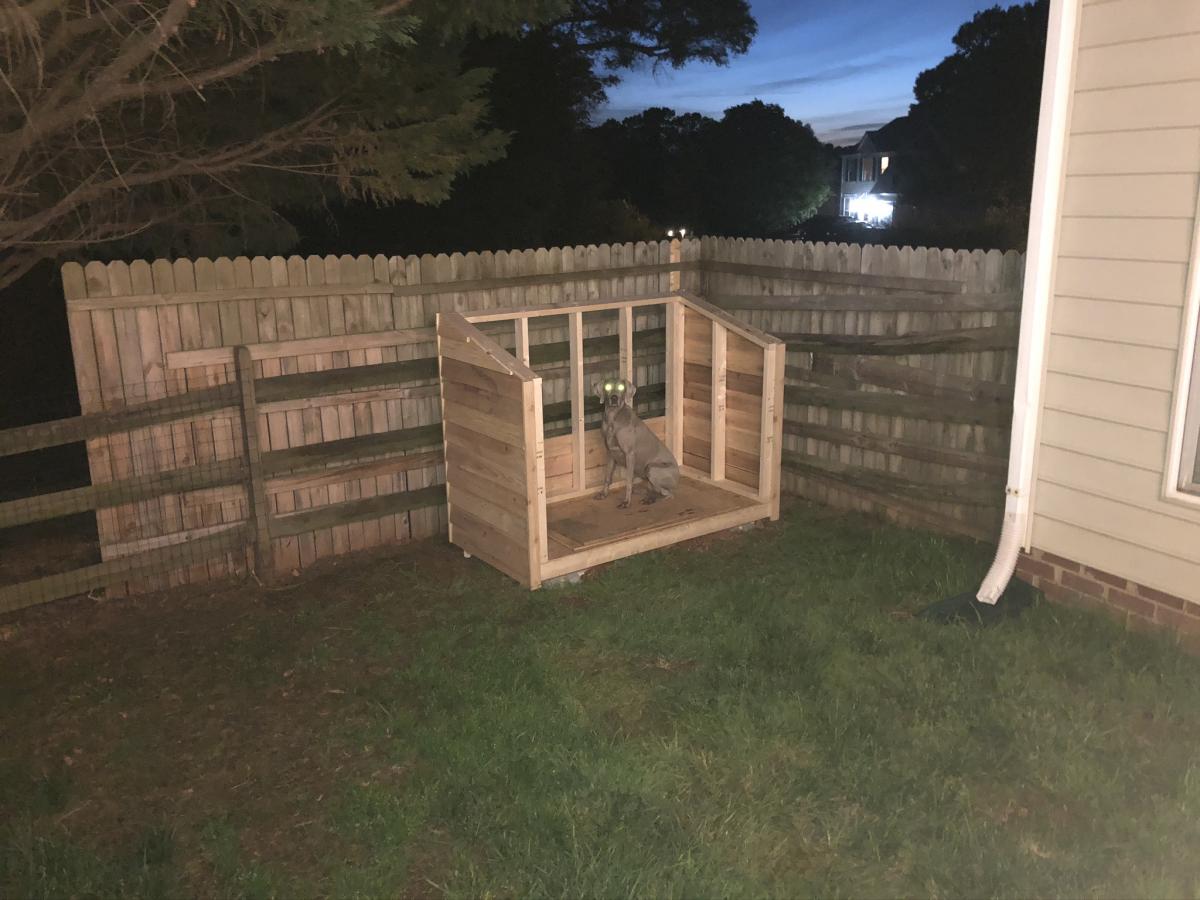
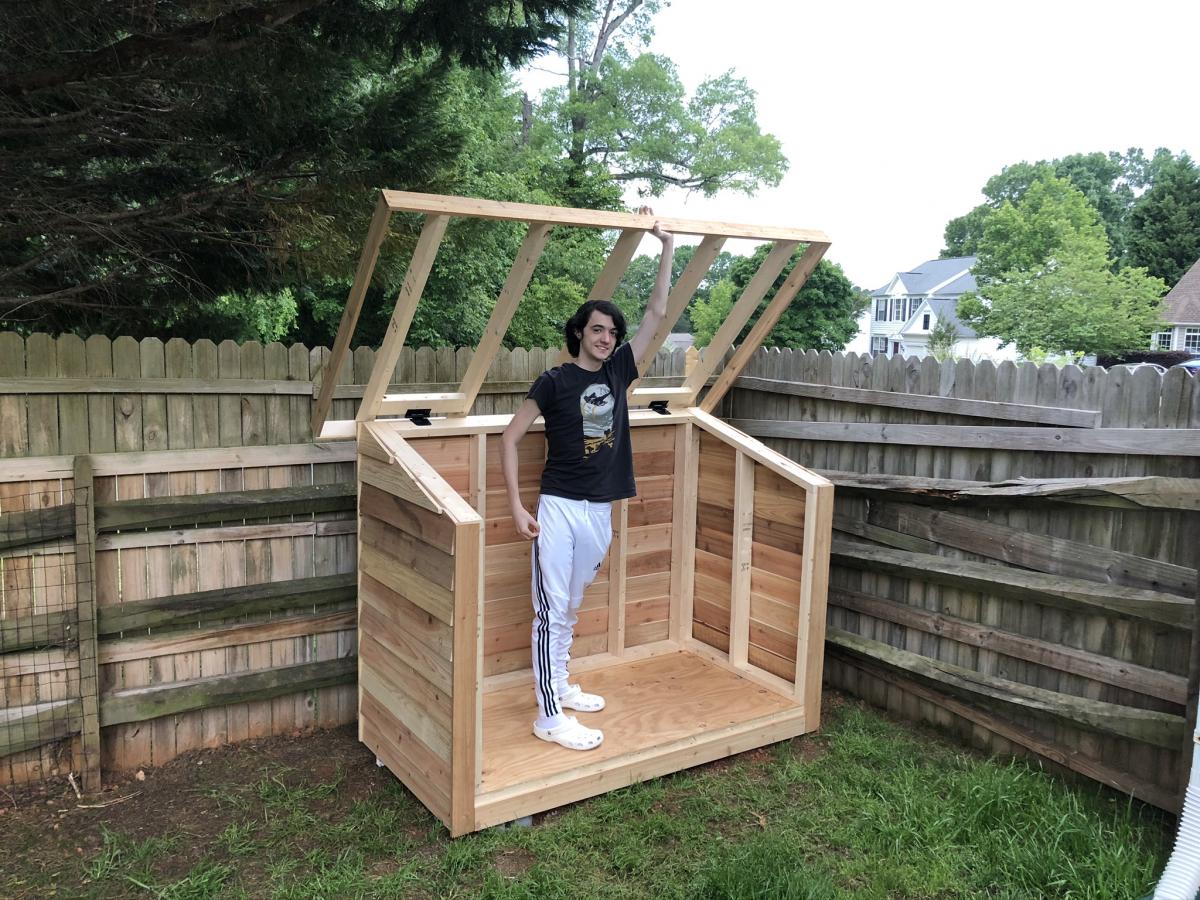
We wanted a shorter version, so that it would hide behind this fence. I just needed somewhere to store lawnmower, wheelbarrow, and a few yard supplies. I started putting the roof on hinges, but the gas struts couldn't support the 170 pound roof. So it's fixed in place (stronger structure anyway). That's why I went with 2x4's for the framed walls instead of 2x2's.


Thu, 06/11/2020 - 17:15
Very Nice modification. Two thumbs up! May I please ask you for the dimensions of the shed?
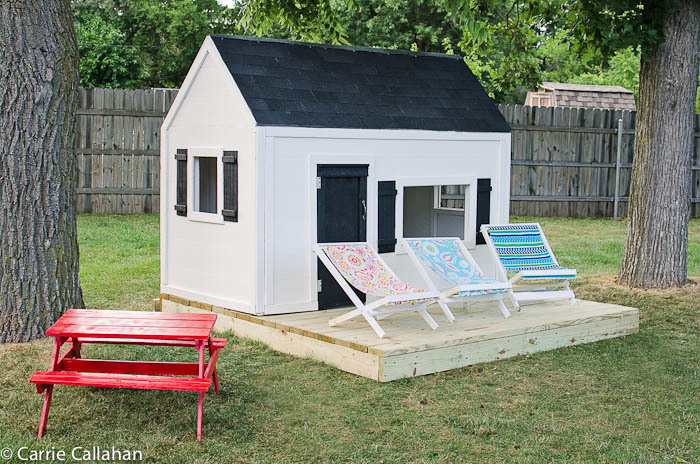
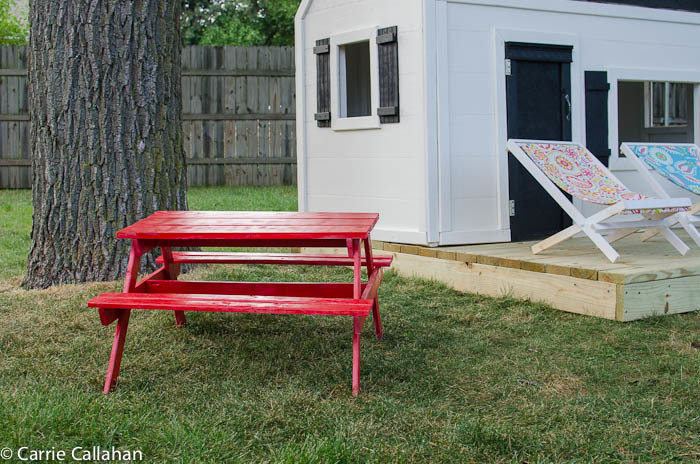
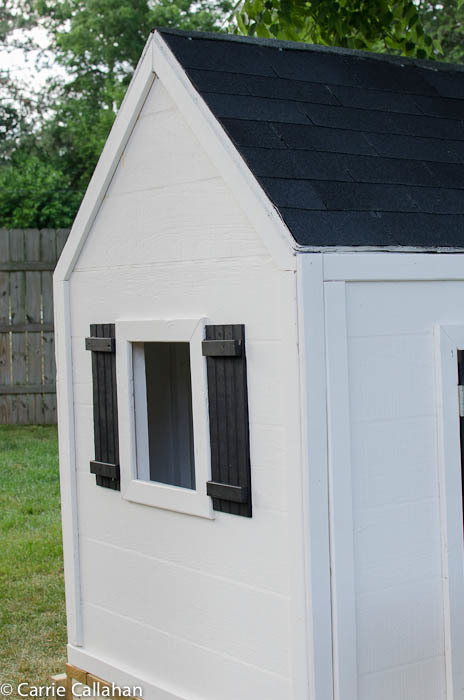
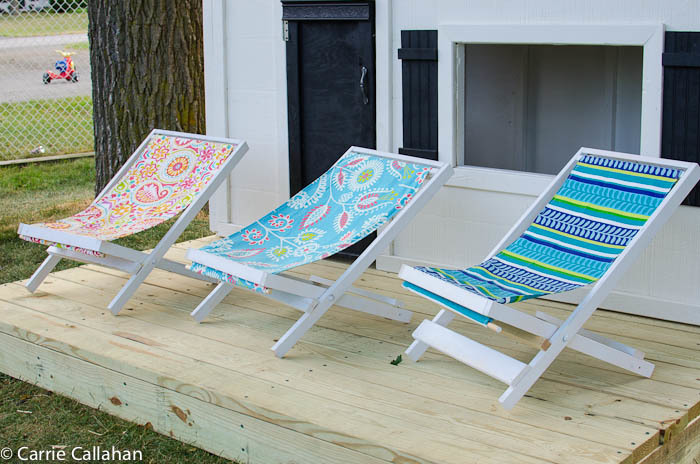
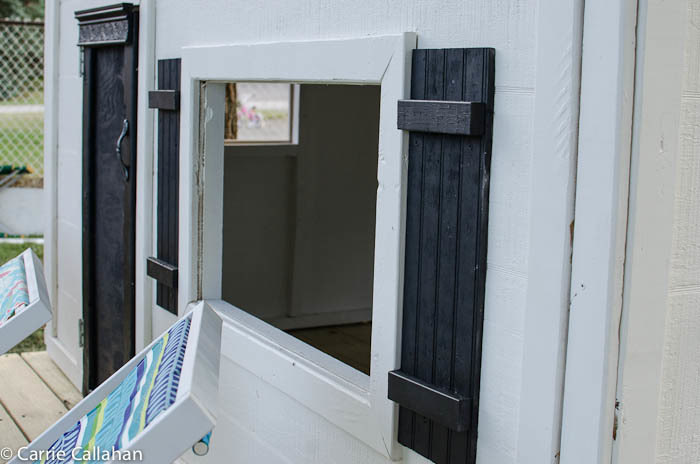
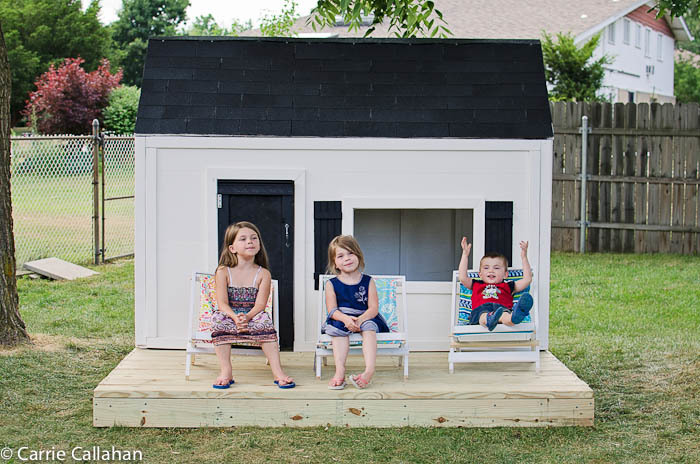
I went a little out of control on the week of the 4th of July - I set out to build a picnic table, 4 sling chairs, a deck and a playhouse - and I did!!!! I owe Ana a great debt of gratitude for these amazing plans and empowering me to do it! I built the picnic table and the sling chairs as I was waiting for primer and paint to dry on the frame, inside and outside of the house. For the shutters - I scrounged around the garage and found some leftover wainscoting, and put a leftover 1x2 on them. The door frame wasn't straight - so I added a piece of leftover trim from my daughters bed I built. My only next step is curtains for the windows. I even moved the full kitchen set I built the kids a few christmas's ago into their. They have only been playing with it for 2 days and I can't drag them out of it!!!
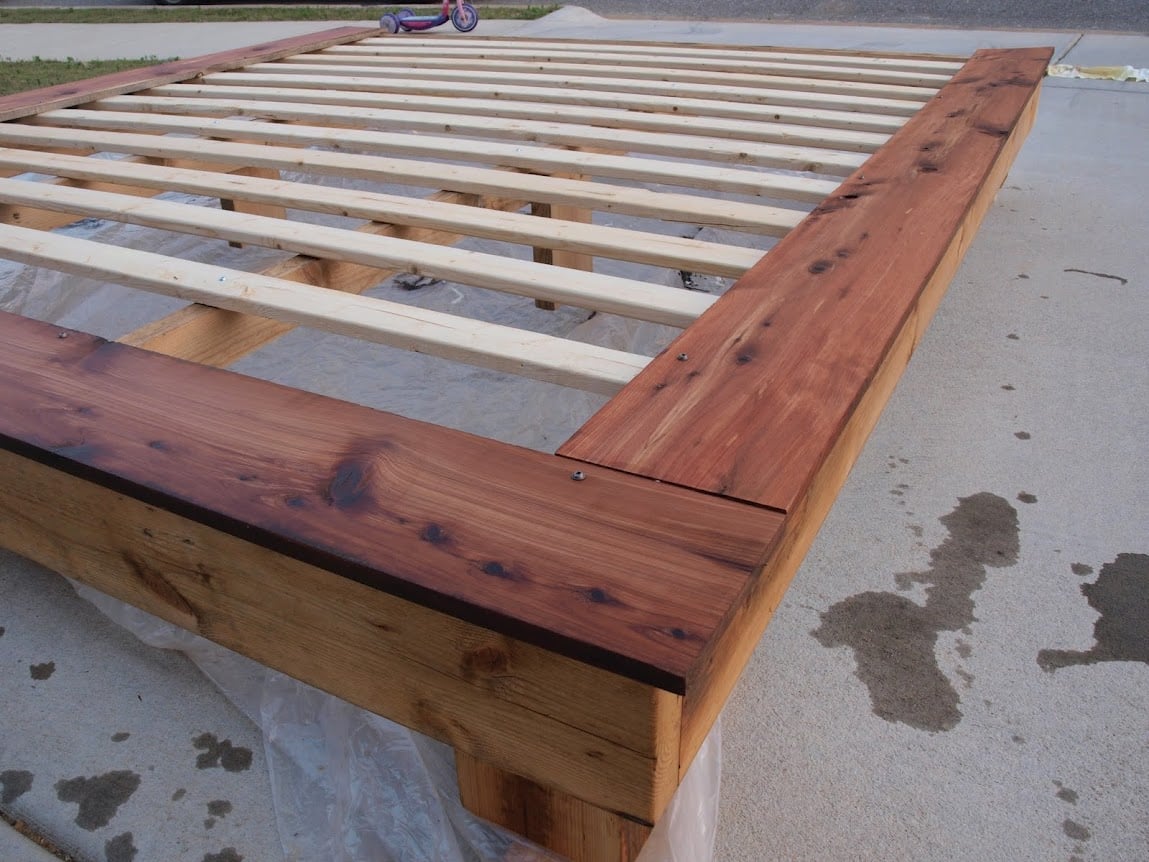
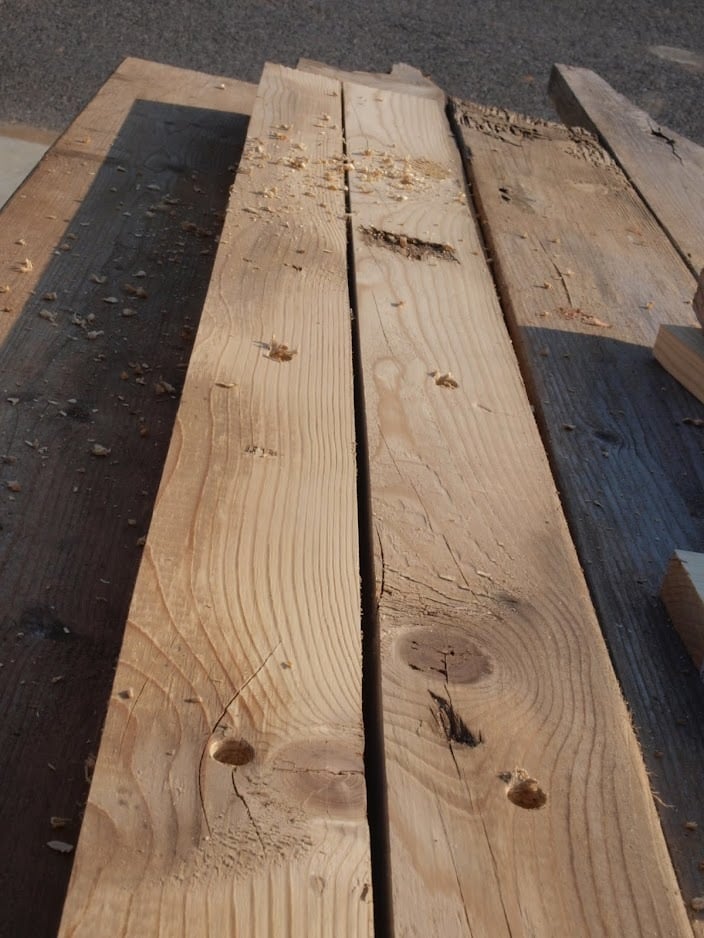
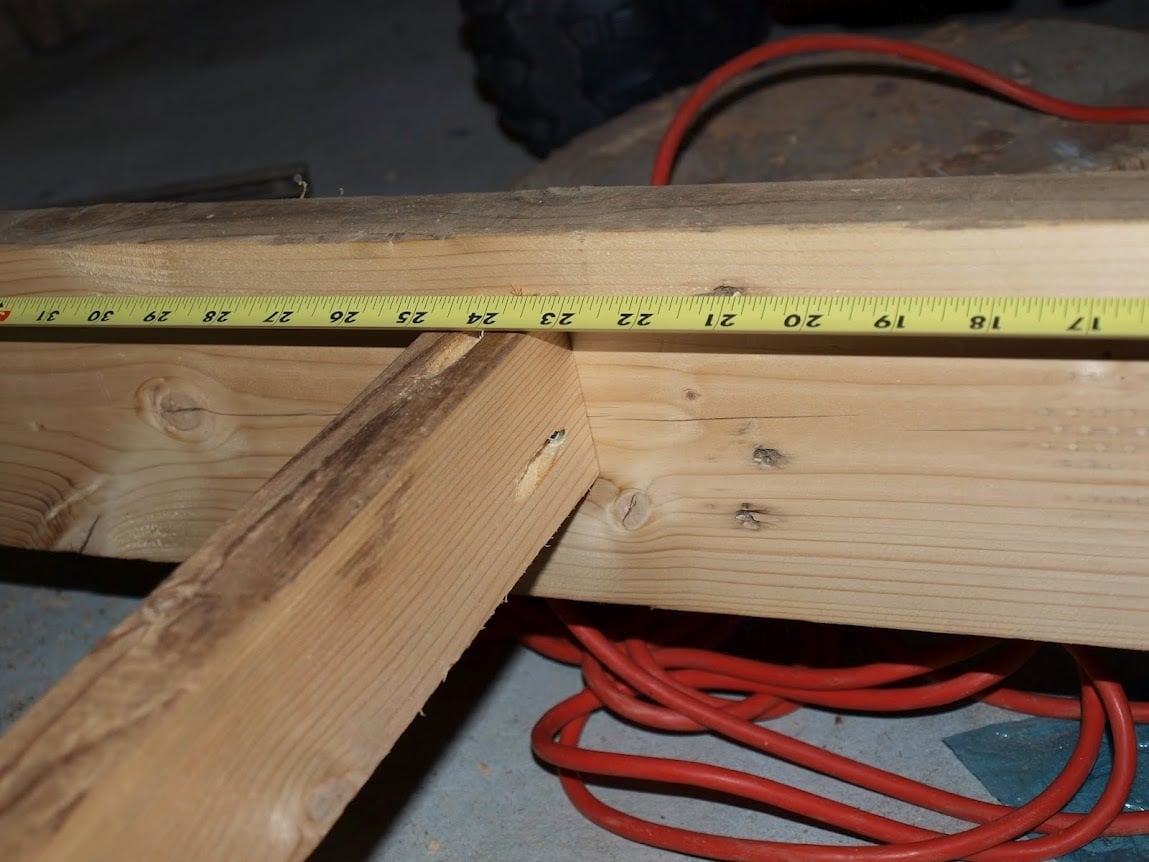
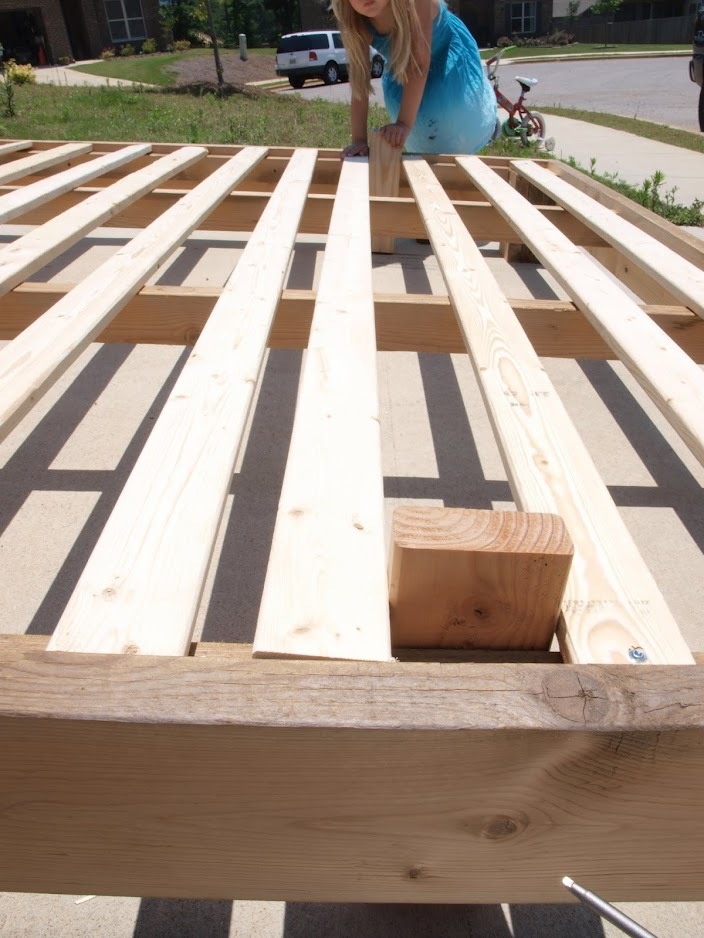
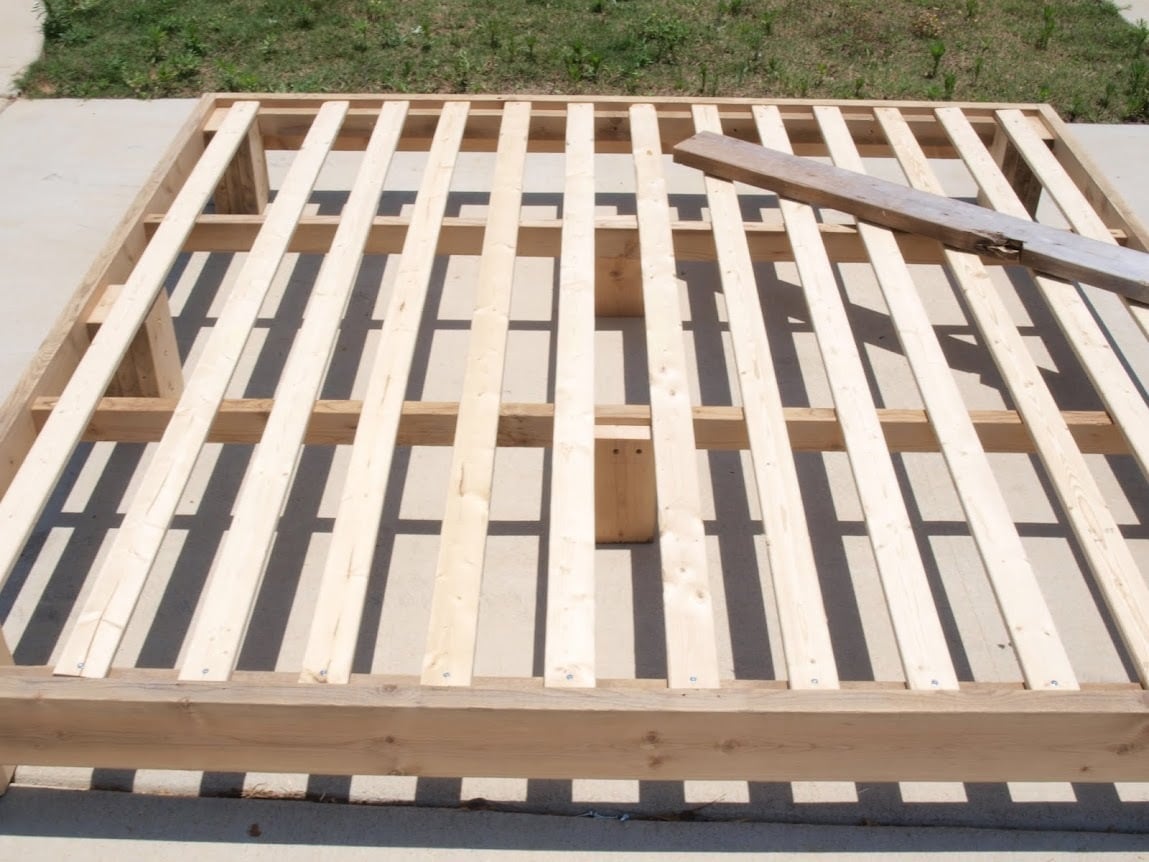
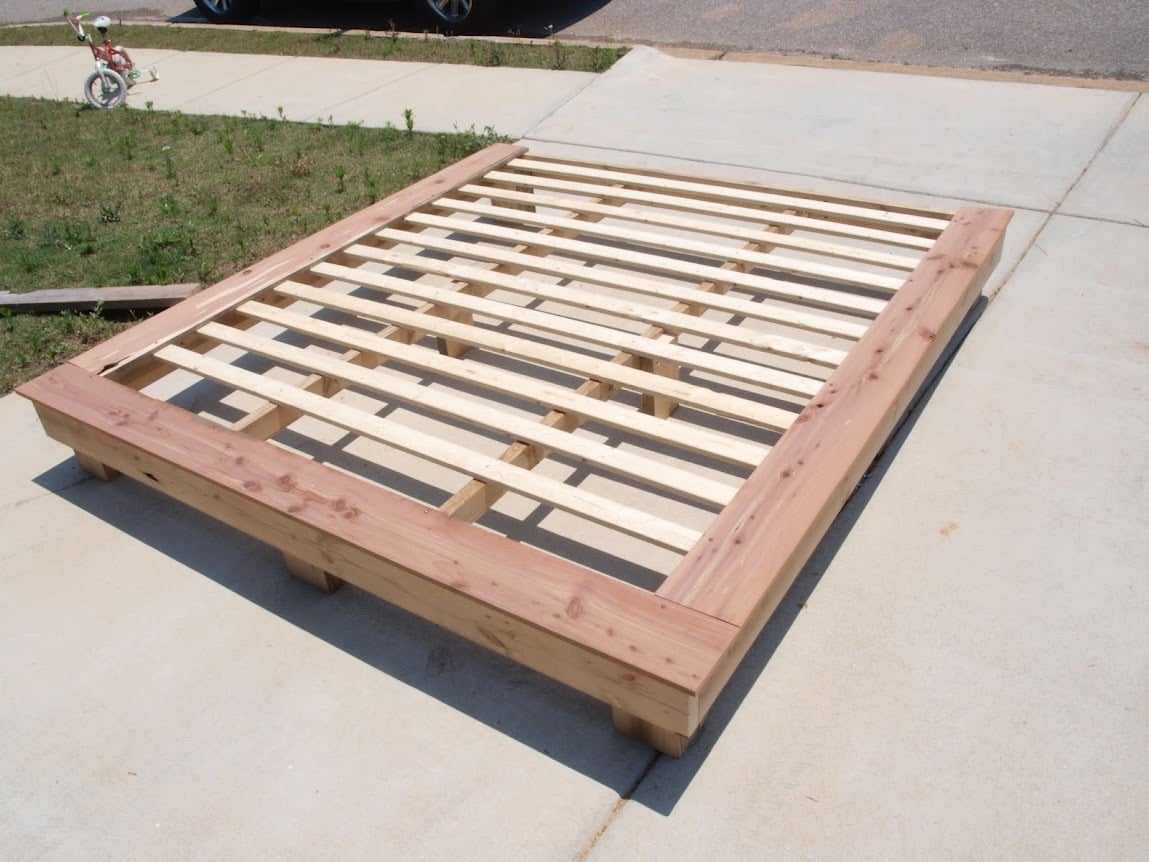
I based my bed off of the Fillman Platform Bed plans. Just bumped the dimensions up to fit my mattress and added the mid supports. The frame was built using 2x6 boards taken from a fallen barn. I ripped 2 2x6 boards down the center to make the the supports for the slats. My feet are 3 2x6's screwed together and then attached to the frame. Next time I will cut a notch out of the feet so that I can rest the bed on them and then try to find some old lag bolts to attach them to the bed. The frame was put together using a Kreg Jig. I put the Cedar boards on to dress the front and sides up some and to help keep the slats from showing when the sheets were tucked in. My finish is 1 coat of Linseed Oil and 2 coats of Teak Oil.
Let me know if you have any further questions on this build. As soon as I find some doors I will be building a head board for this bed.

My daughter loves this! And now I have to make one for my youngest! Instead of rope I used 3/8" Bungee Shock Cord. I used one long piece and threaded it through the screw eyes. I put the screw eyes in the top, middle and bottom.
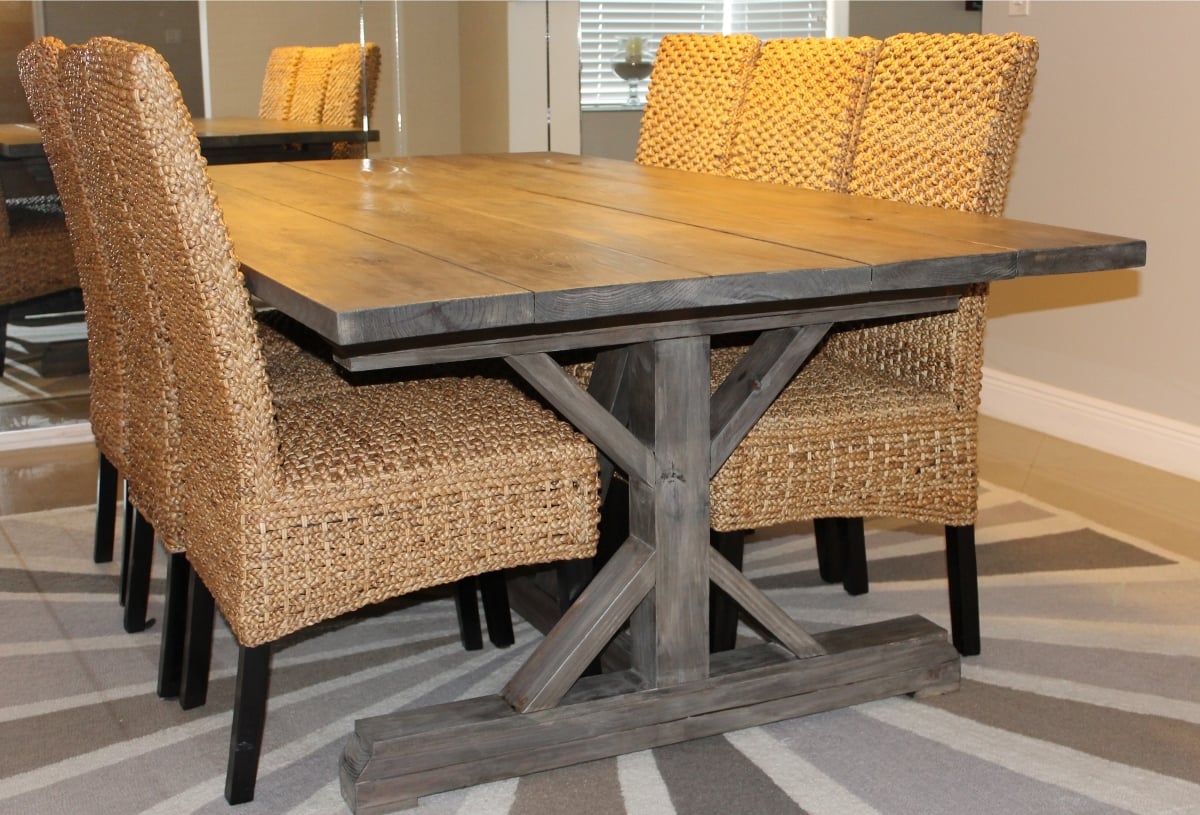
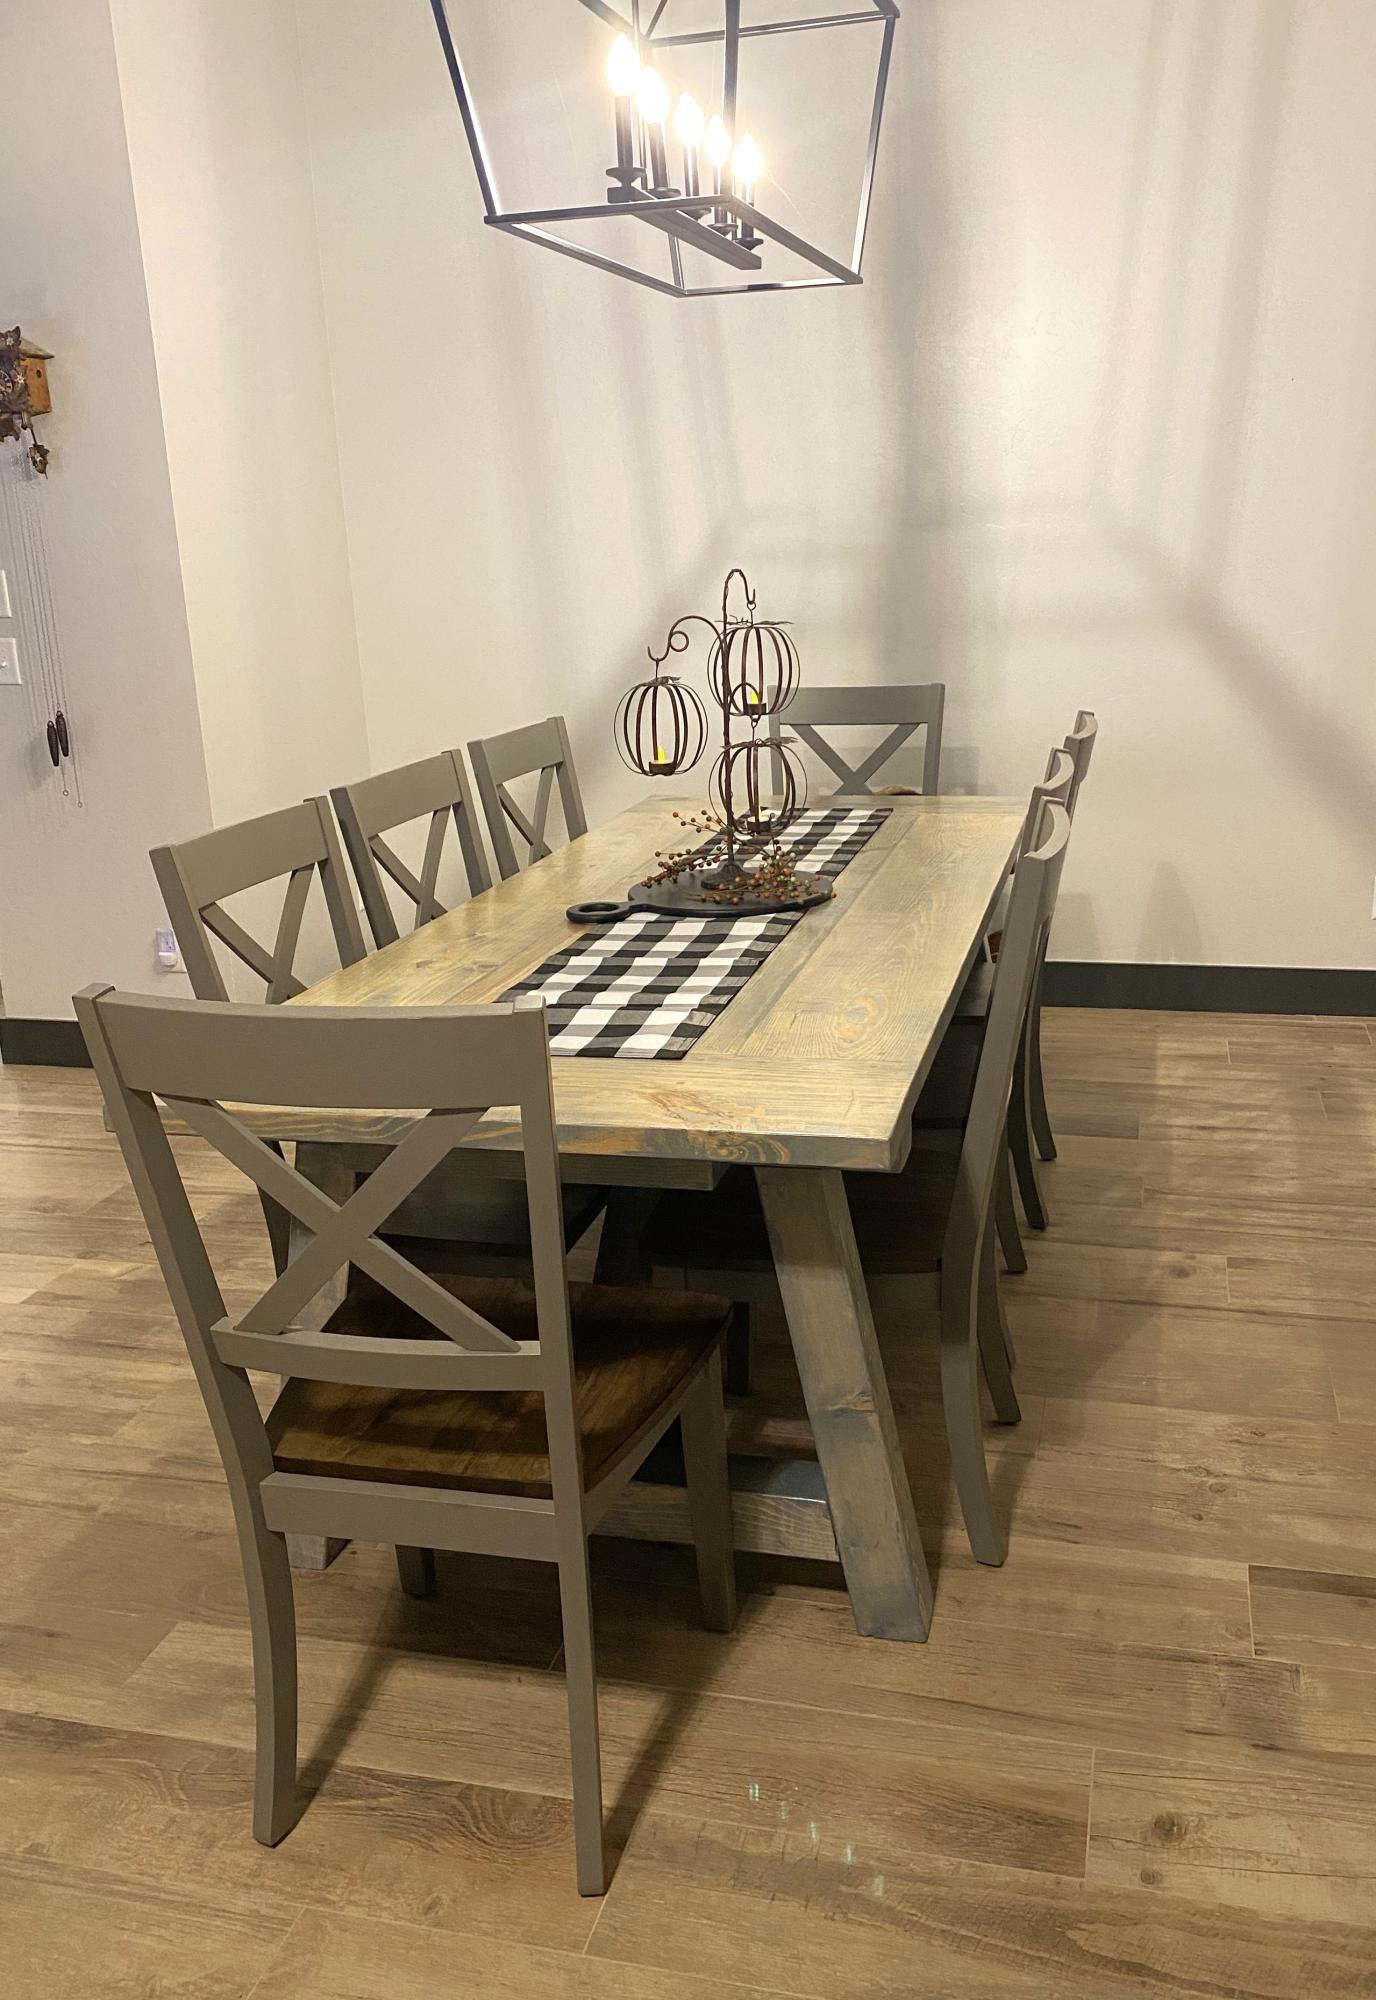
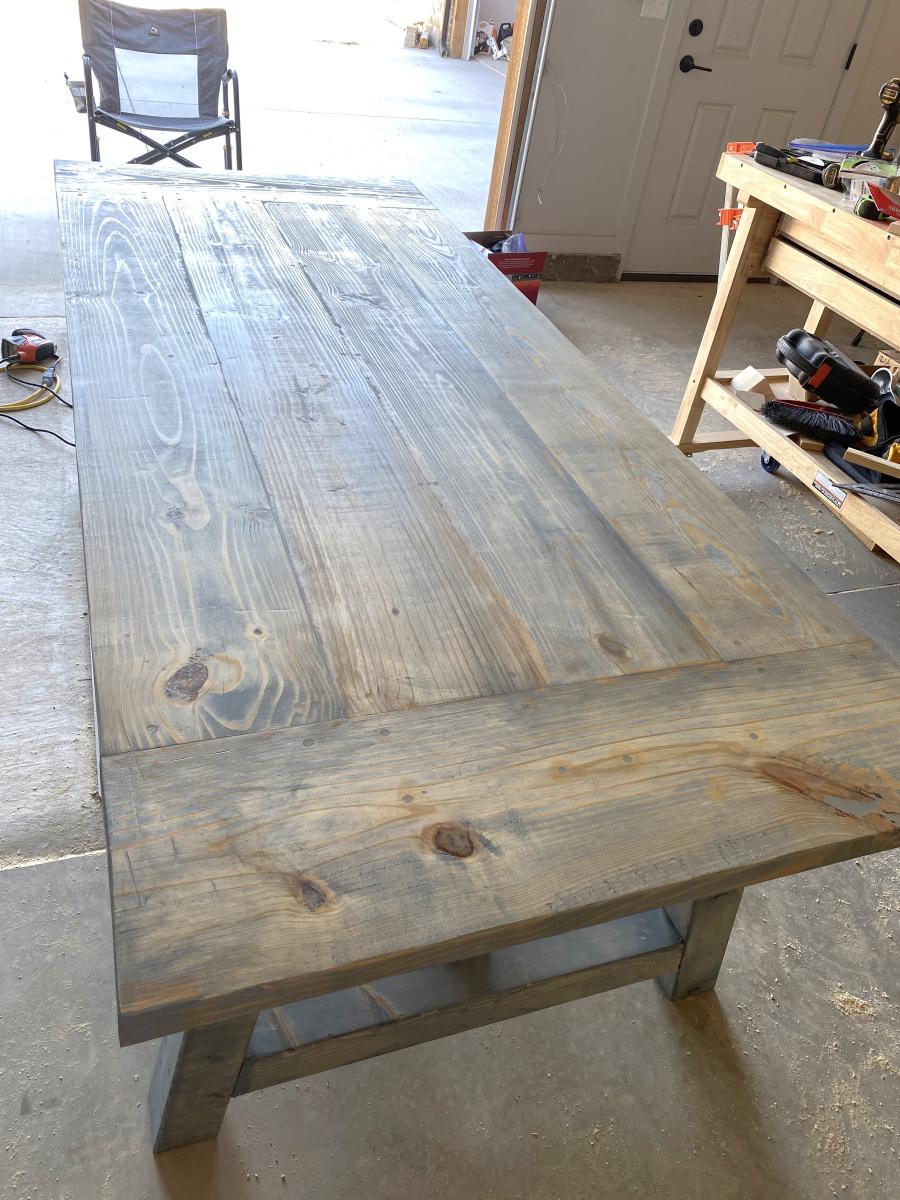
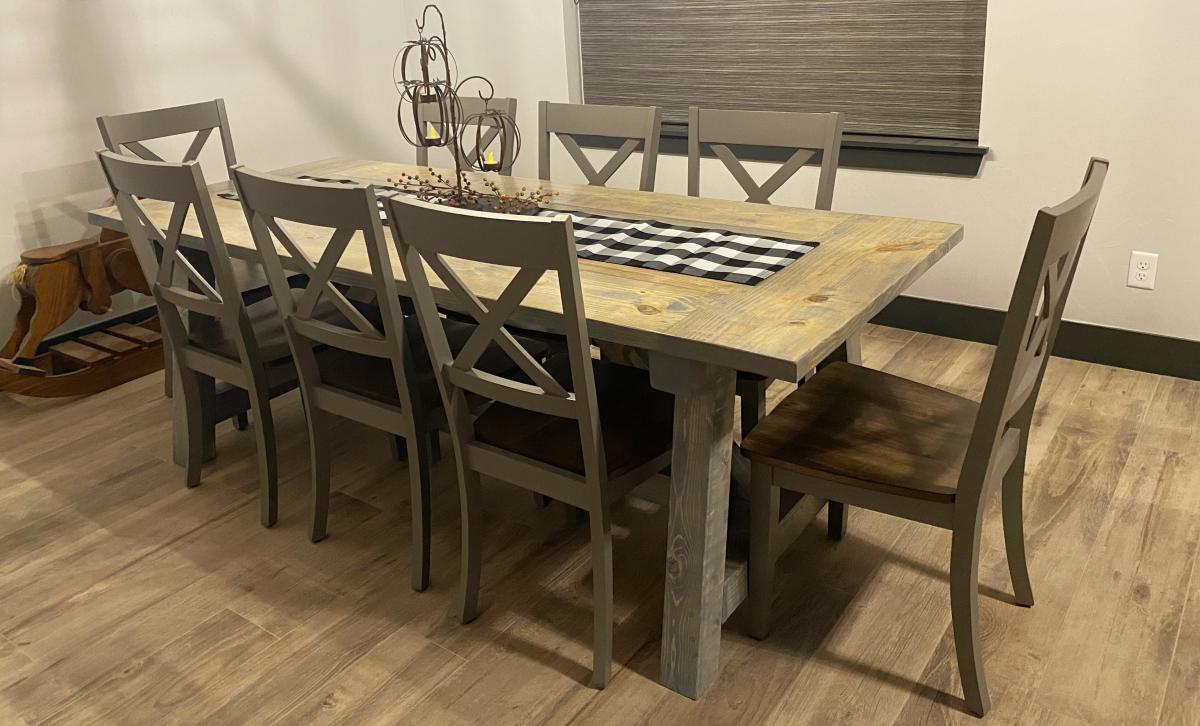
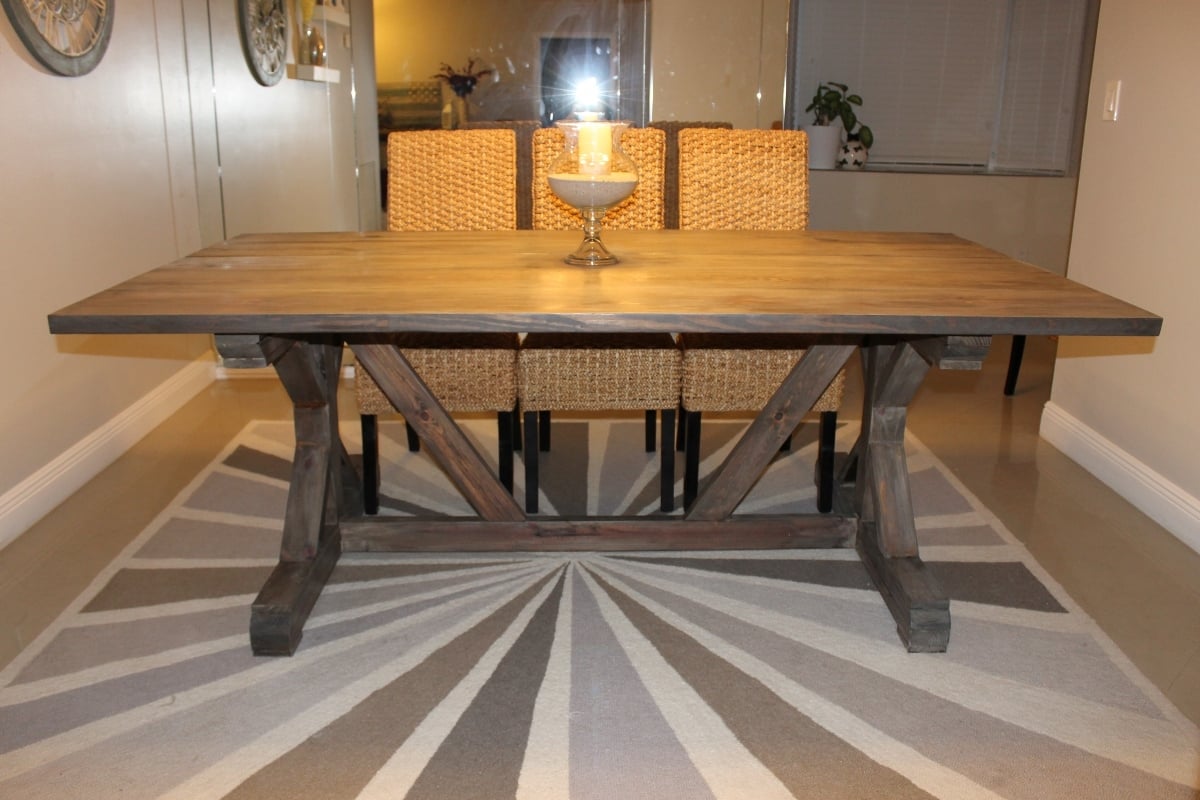
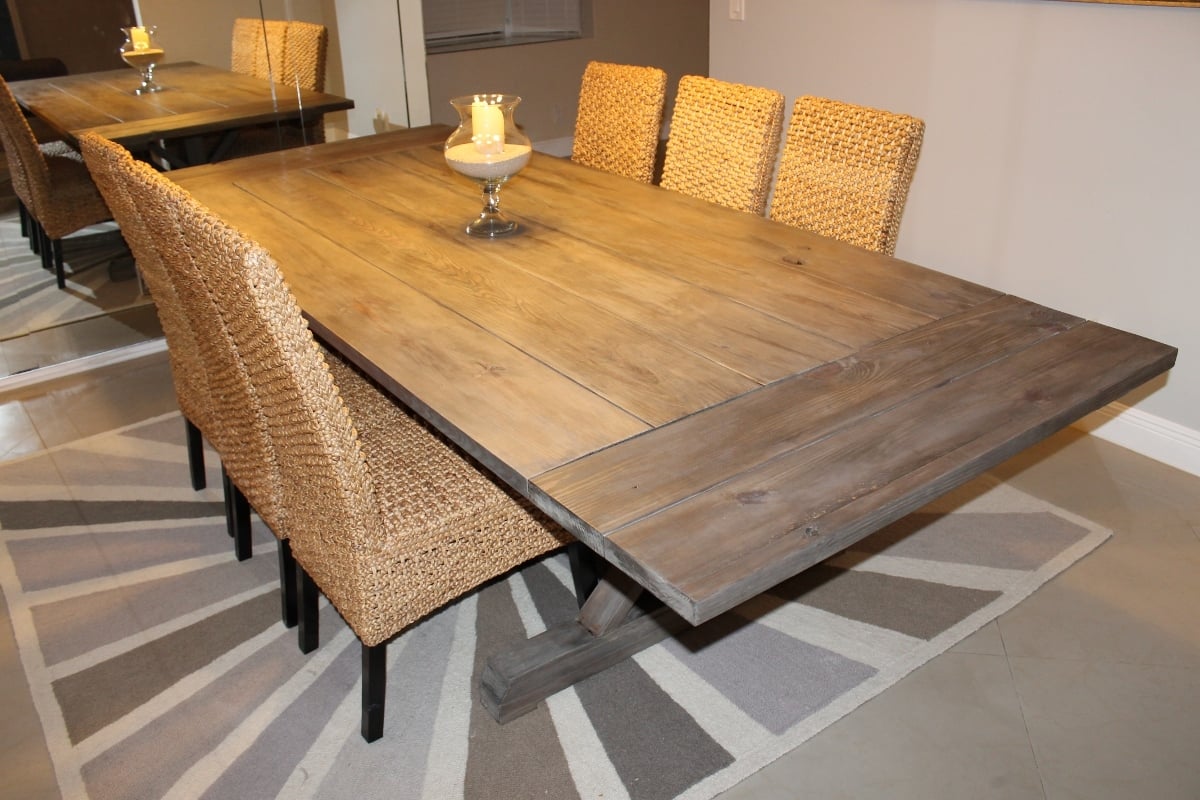
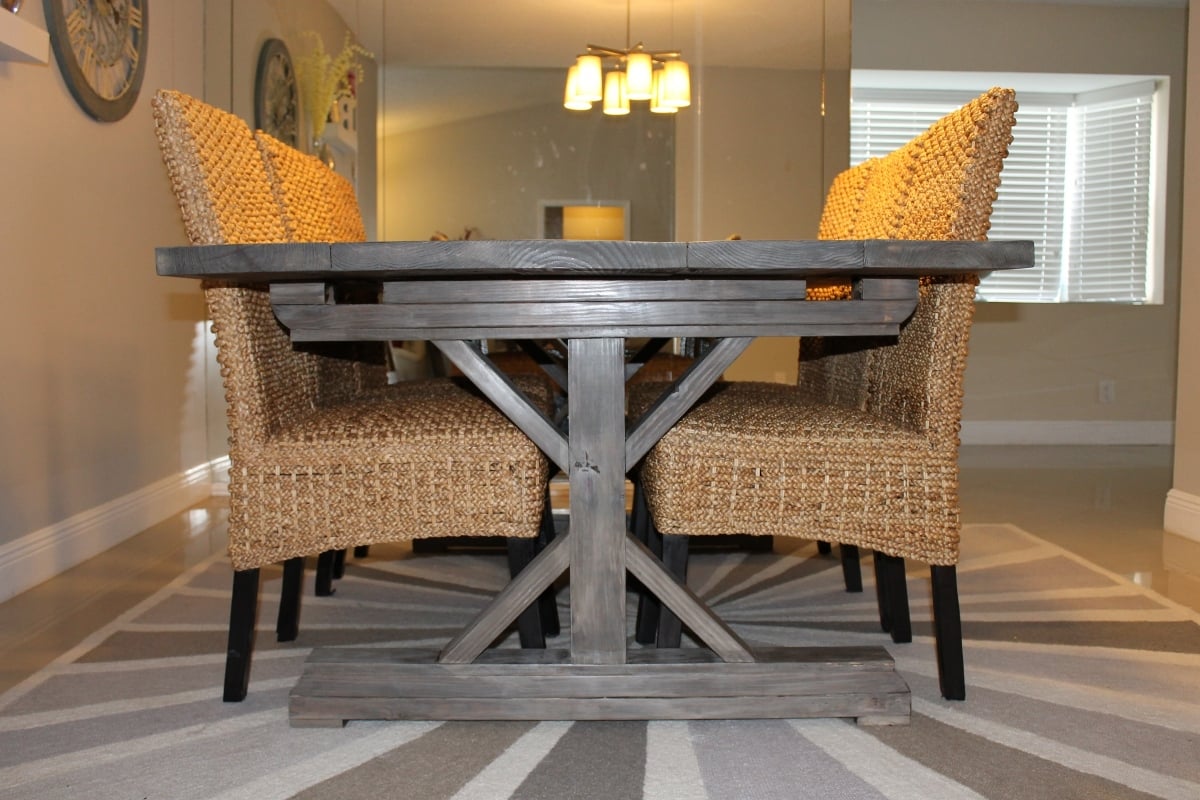
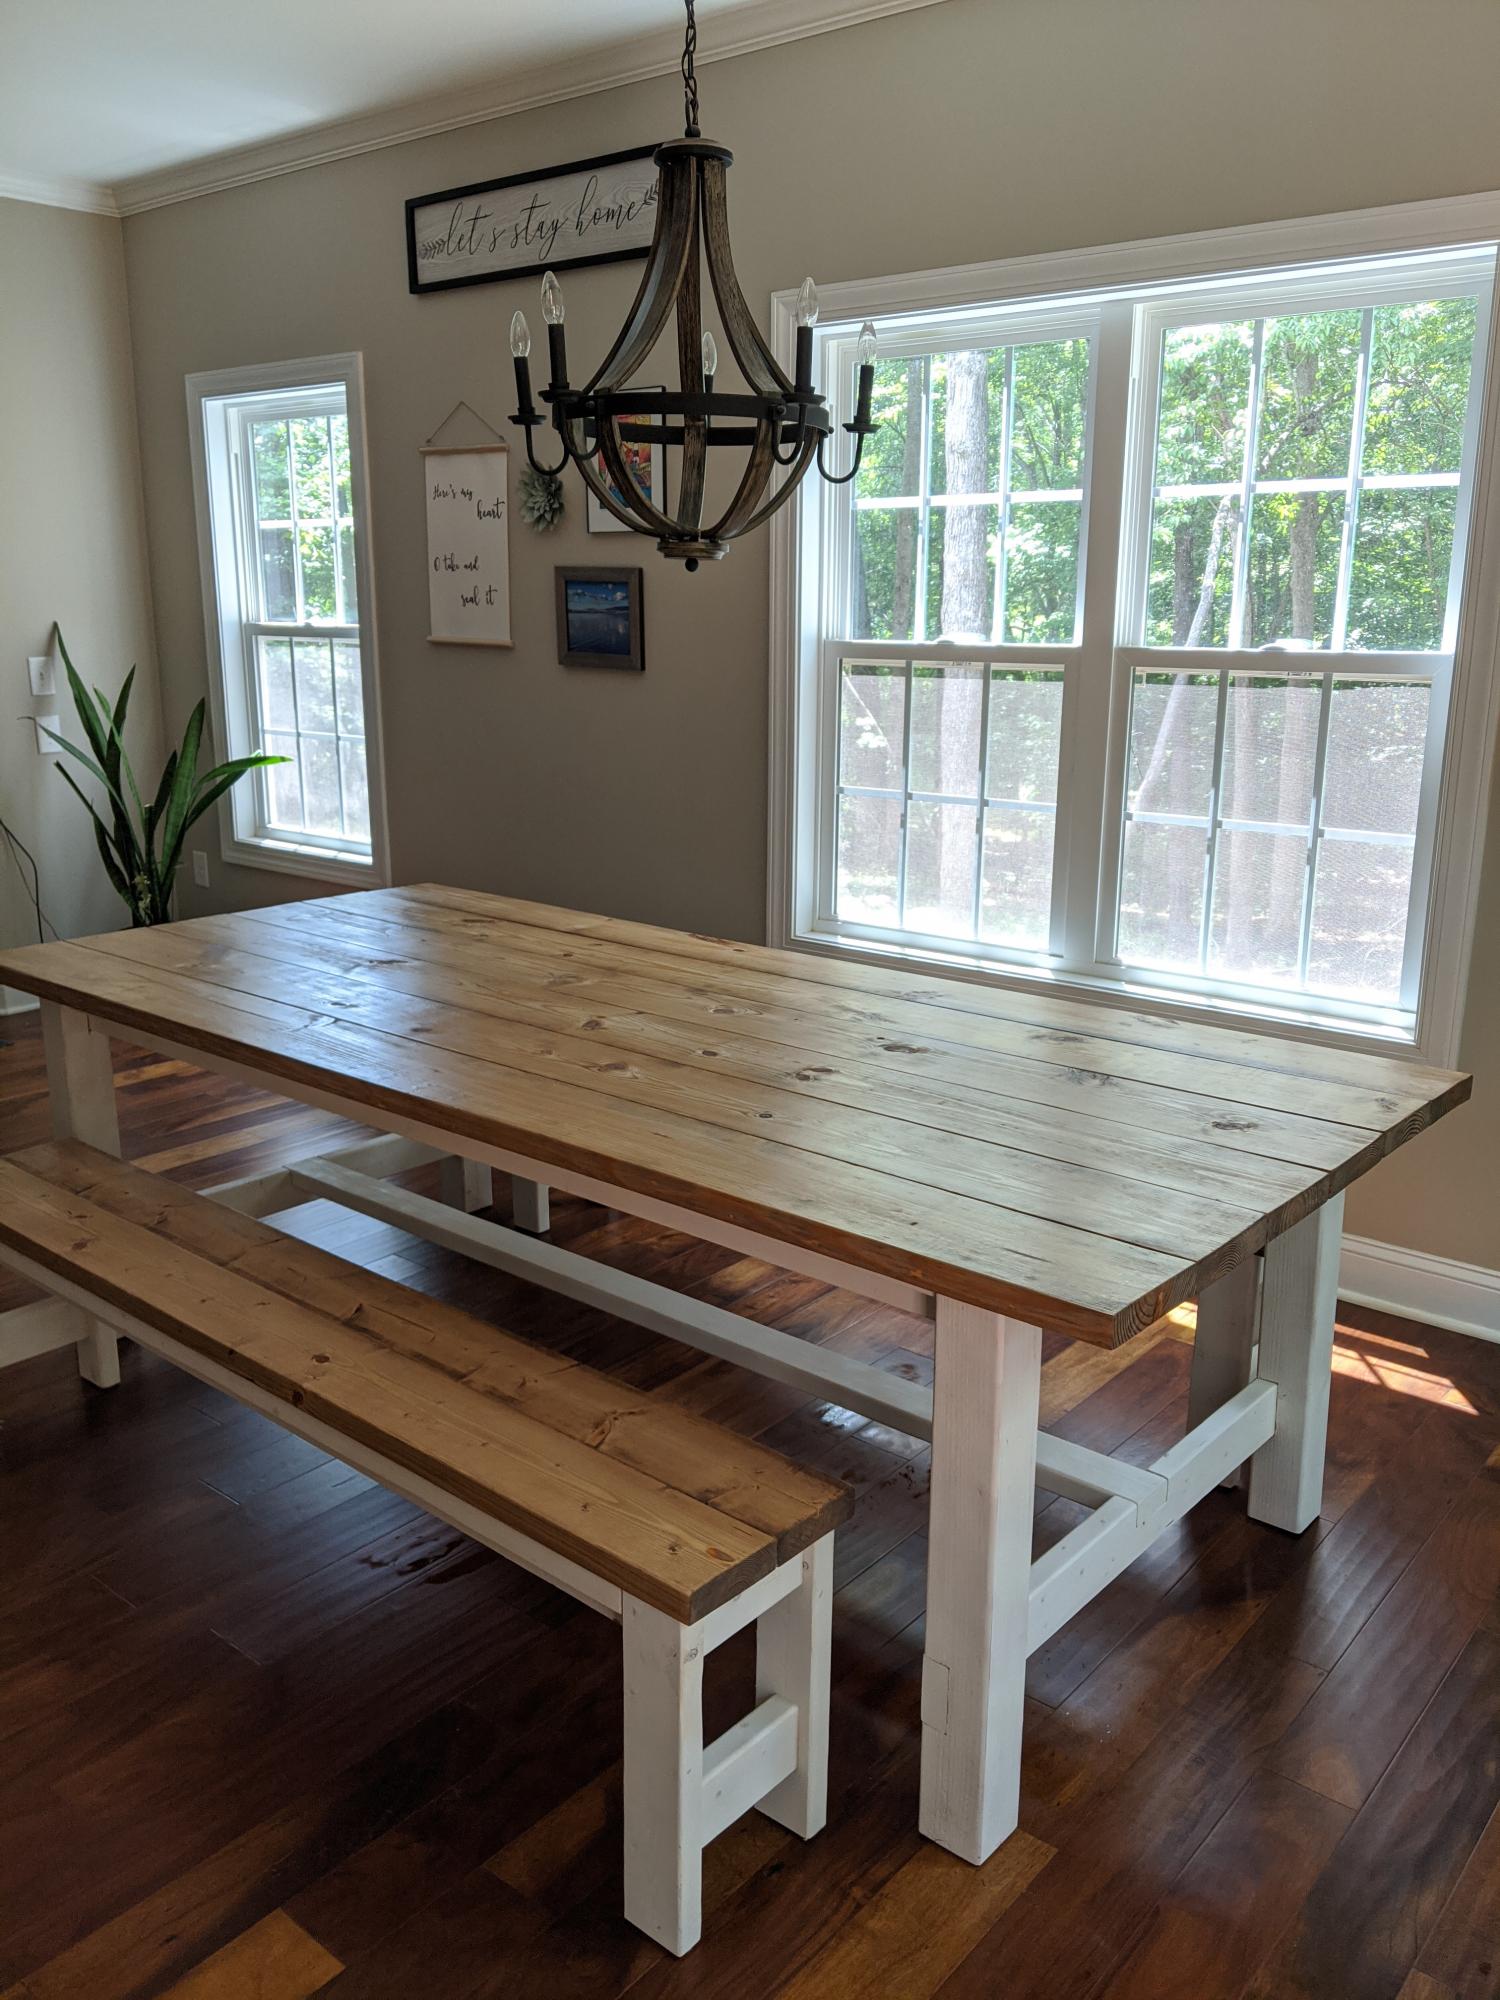
This is our attempt at the Fancy X Farmhouse Table. My husband and I built this over a weekend. We modified our table from the plans, making ours shorter and wider. We also added extensions and changed out a few boards for a bit of a different look from the exact plan. We created a custom finish with a few cheap and easy steps to get the look we wanted. Our table is 84" long by 46" wide. The original plans for the table called for it to be 96" long by 37" wide. We added a fifth board to our table top, thus making our tabletop 9.25" wider (since a 2x10 is actually 9.25" wide.) To account for this, we simply increased the width of the base boards by 9.25". As for the length, since our table was 12" shorter than the plan, we decreased the length of the two support boards running between the bases by 12" to account for that. We had to adjust the length of our decorative pieces somewhat, because of the wider base and shorter length. It was bit of trial and error but we were happy with what came out of it. For the center base post, instead of using 2x4's we used one 4x4 which was clean, square, and straight. We were happy with how things turned out for the base. Perhaps our biggest alteration was the fact that we added extensions to each end. To do this, we cut out 3.5" slots in the top of the base so a 2x4 could slide in. We then took two 2x8's and used pocket holes to bring them nice and tight. With the extensions in place, our table is nearly 10 feet long! As for the finish, we wanted a weathered gray color and were able to come up with it through a three step process. Its really beautiful in person! Thanks again for the plan

Sun, 07/22/2012 - 15:26
Your new table is really very beautiful. The previous one was also very nice, great job!
Thu, 07/26/2012 - 06:37
Wow! Great addition of the extensions. I'm saving this for our build.
Tue, 08/07/2012 - 03:10
Could you possibly give me a detailed explanation of how you finished this table? I love, love, love the color and want to replicate it.
Thanks!
Darcy
Tue, 09/25/2012 - 09:06
Beautiful table, but I really want some information on the 3-step process you used to get the weathered gray look. Can you please provide that information? Thanks!
Tue, 10/23/2012 - 07:46
How did you create that Gray Weatered finish? Also what type of wood did you use?

Sun, 04/07/2013 - 20:40
Thank you for your interest in the finish....we used regular pine from Orange and Blue. We used a mixture of steel wool and vinegar in a glass jar, let it sit for a night or two, then brushed it on evenly over each board. We then let that sit for a night or two and then proceed to whitewash the entire table (two parts water one part paint.) After that, we took Dark Walnut Stain and wiped it over each board, then quickly wiped/scrubbed it off after just a minute or two. That's how we did it!
Id suggest practicing first with some scrap , esp. with the steel wool mixture so you can see how the wood changes. :)
Fri, 09/23/2016 - 15:24
Hi Emily!
I love your table. We are about to make one and love your stain. Would you be so kind to give me details of what you used to achieve the look? I read the above post, but could you give me brands and colors? I don't understand what is steel wash- is that the color?
Thank you so much!
FLKS
Mon, 09/09/2013 - 11:40
but when we brushed on the steel wool/vinegar mixture, the holes on the table top and base that we had filled in with putty didn't really stain...did you run across the problem? I don't see any areas on the top of your table where you can tell where the holes were??
Wed, 04/09/2014 - 09:05
I'm curious if you made the extensions permanent or if they can be removed and added as you need? I love this table!
Thanks,
Wed, 08/13/2014 - 11:50
I am not understanding how you made the extensions from your description and then looking at the end pictures... Would you please explain this a little further and how they are stored and placed for use and how this works? Thank you!

Tue, 10/07/2014 - 17:39
LOVE the finished product! I aim to get the hubby to make this one at some point! But for now, we have just a bench in our kitchen that he made and I'd like to apply the same finish you did. I've looked at a bunch of different tutorials but I like yours the best. Here's the question...how long after I apply the paint/water mixture to I apply the walnut stain? Do I apply the water/paint and wipe off right away? A few seconds later? A minute later? Do I allow the applied/wiped water/paint mixture to dry completely before adding the stain or do I want to apply the stain before it's throughly dry so that it mixes a bit for a softer look? Thanks so much!
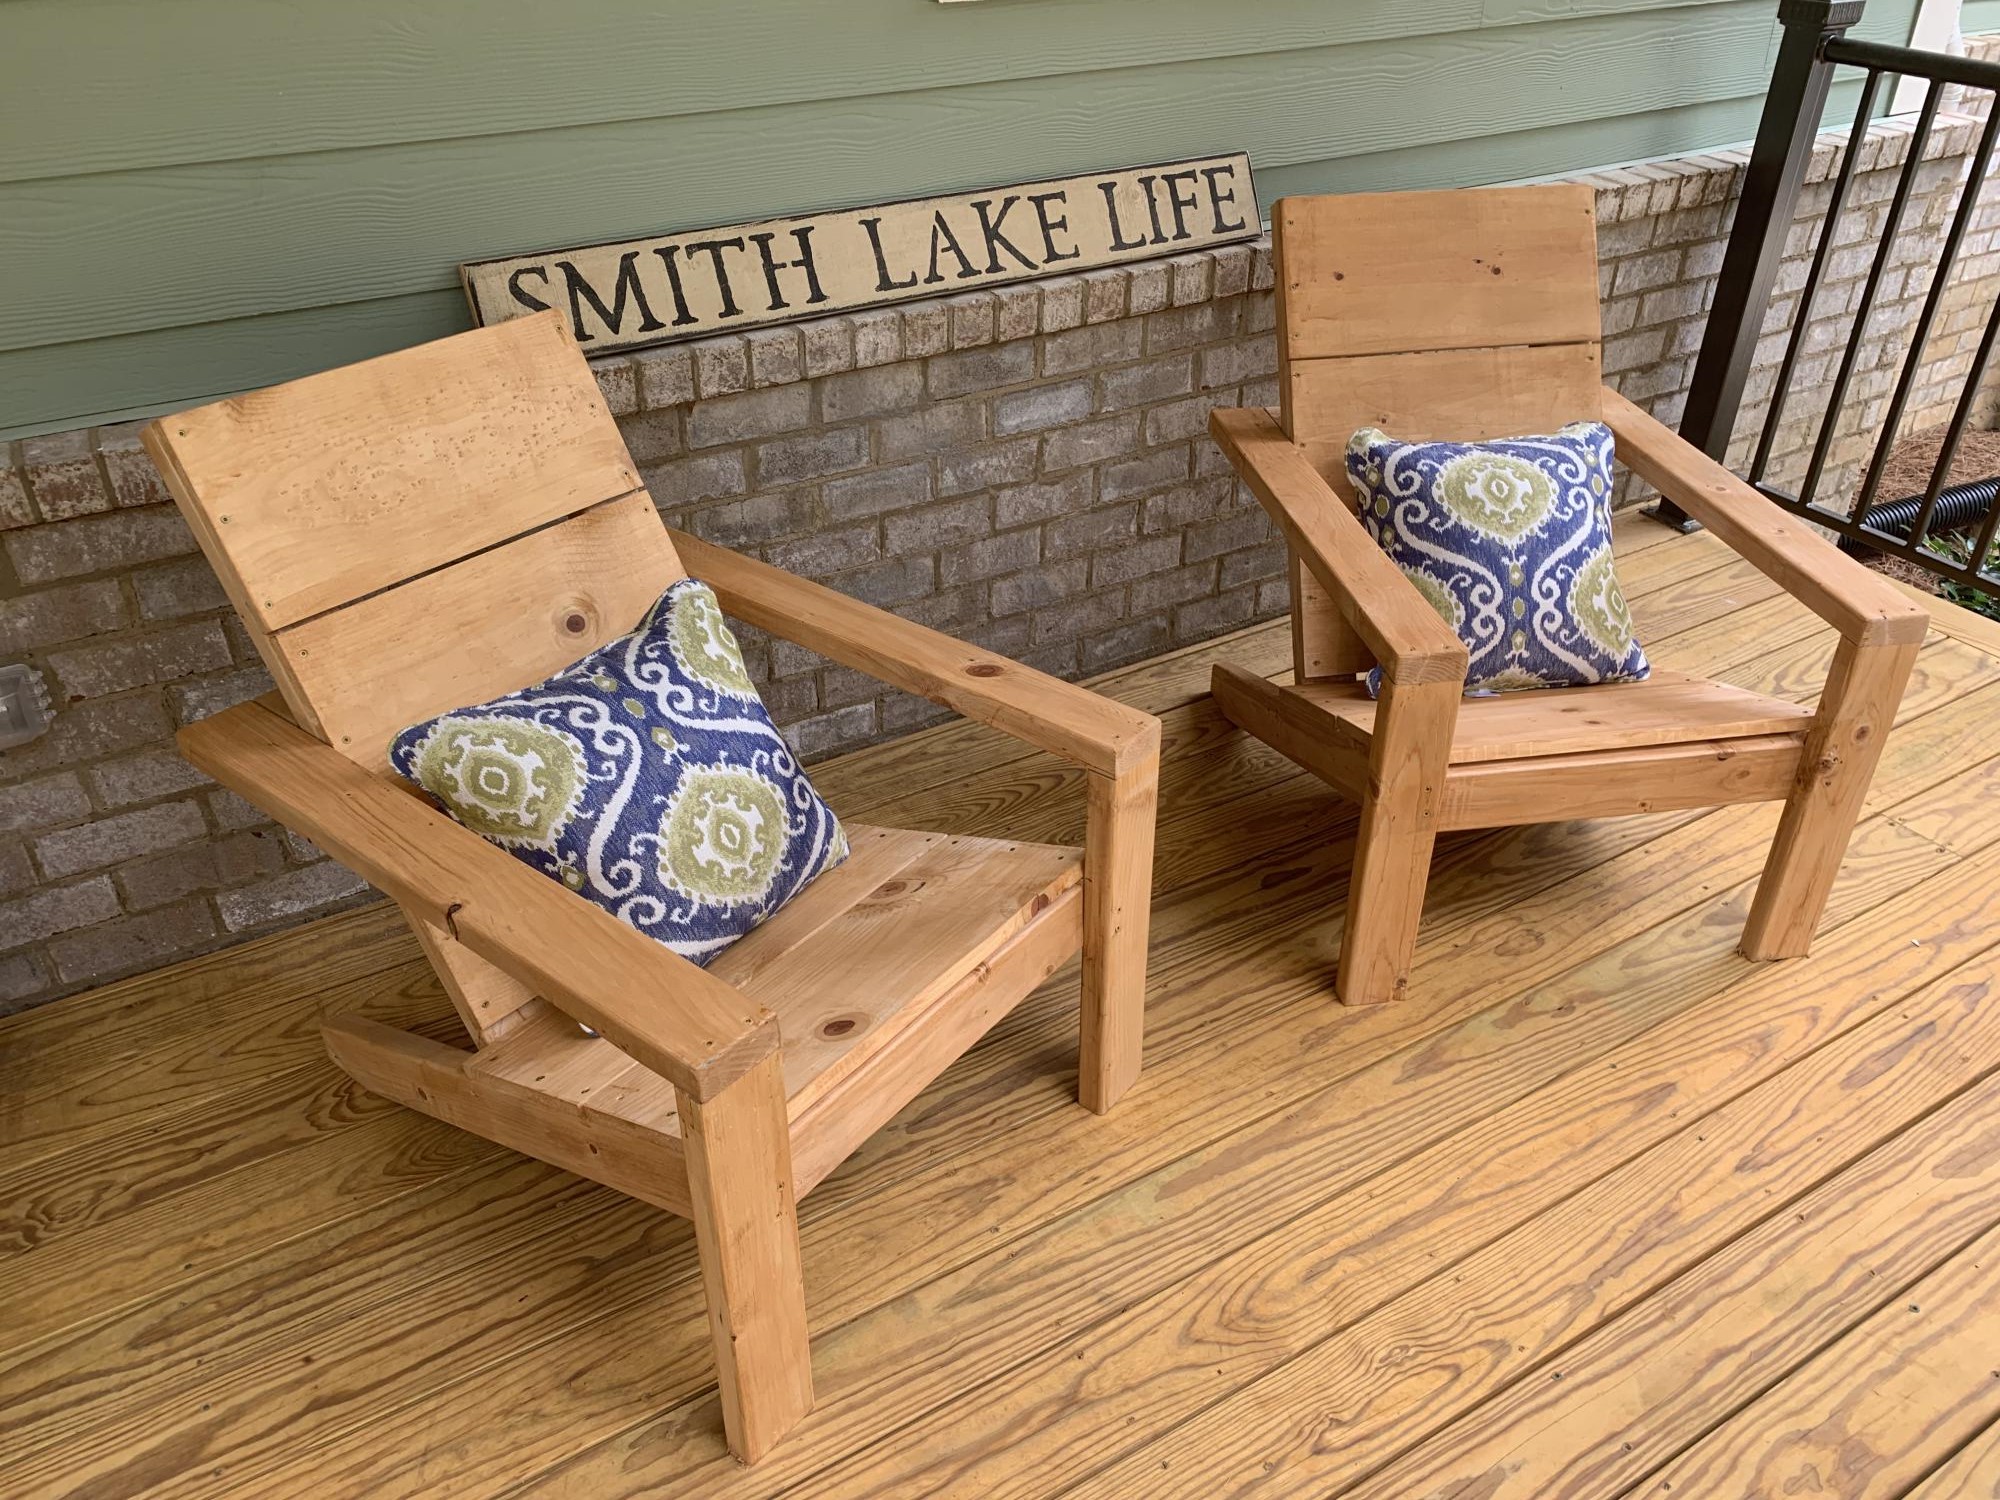
Modern Adirondack Chairs on our front porch lakeside!
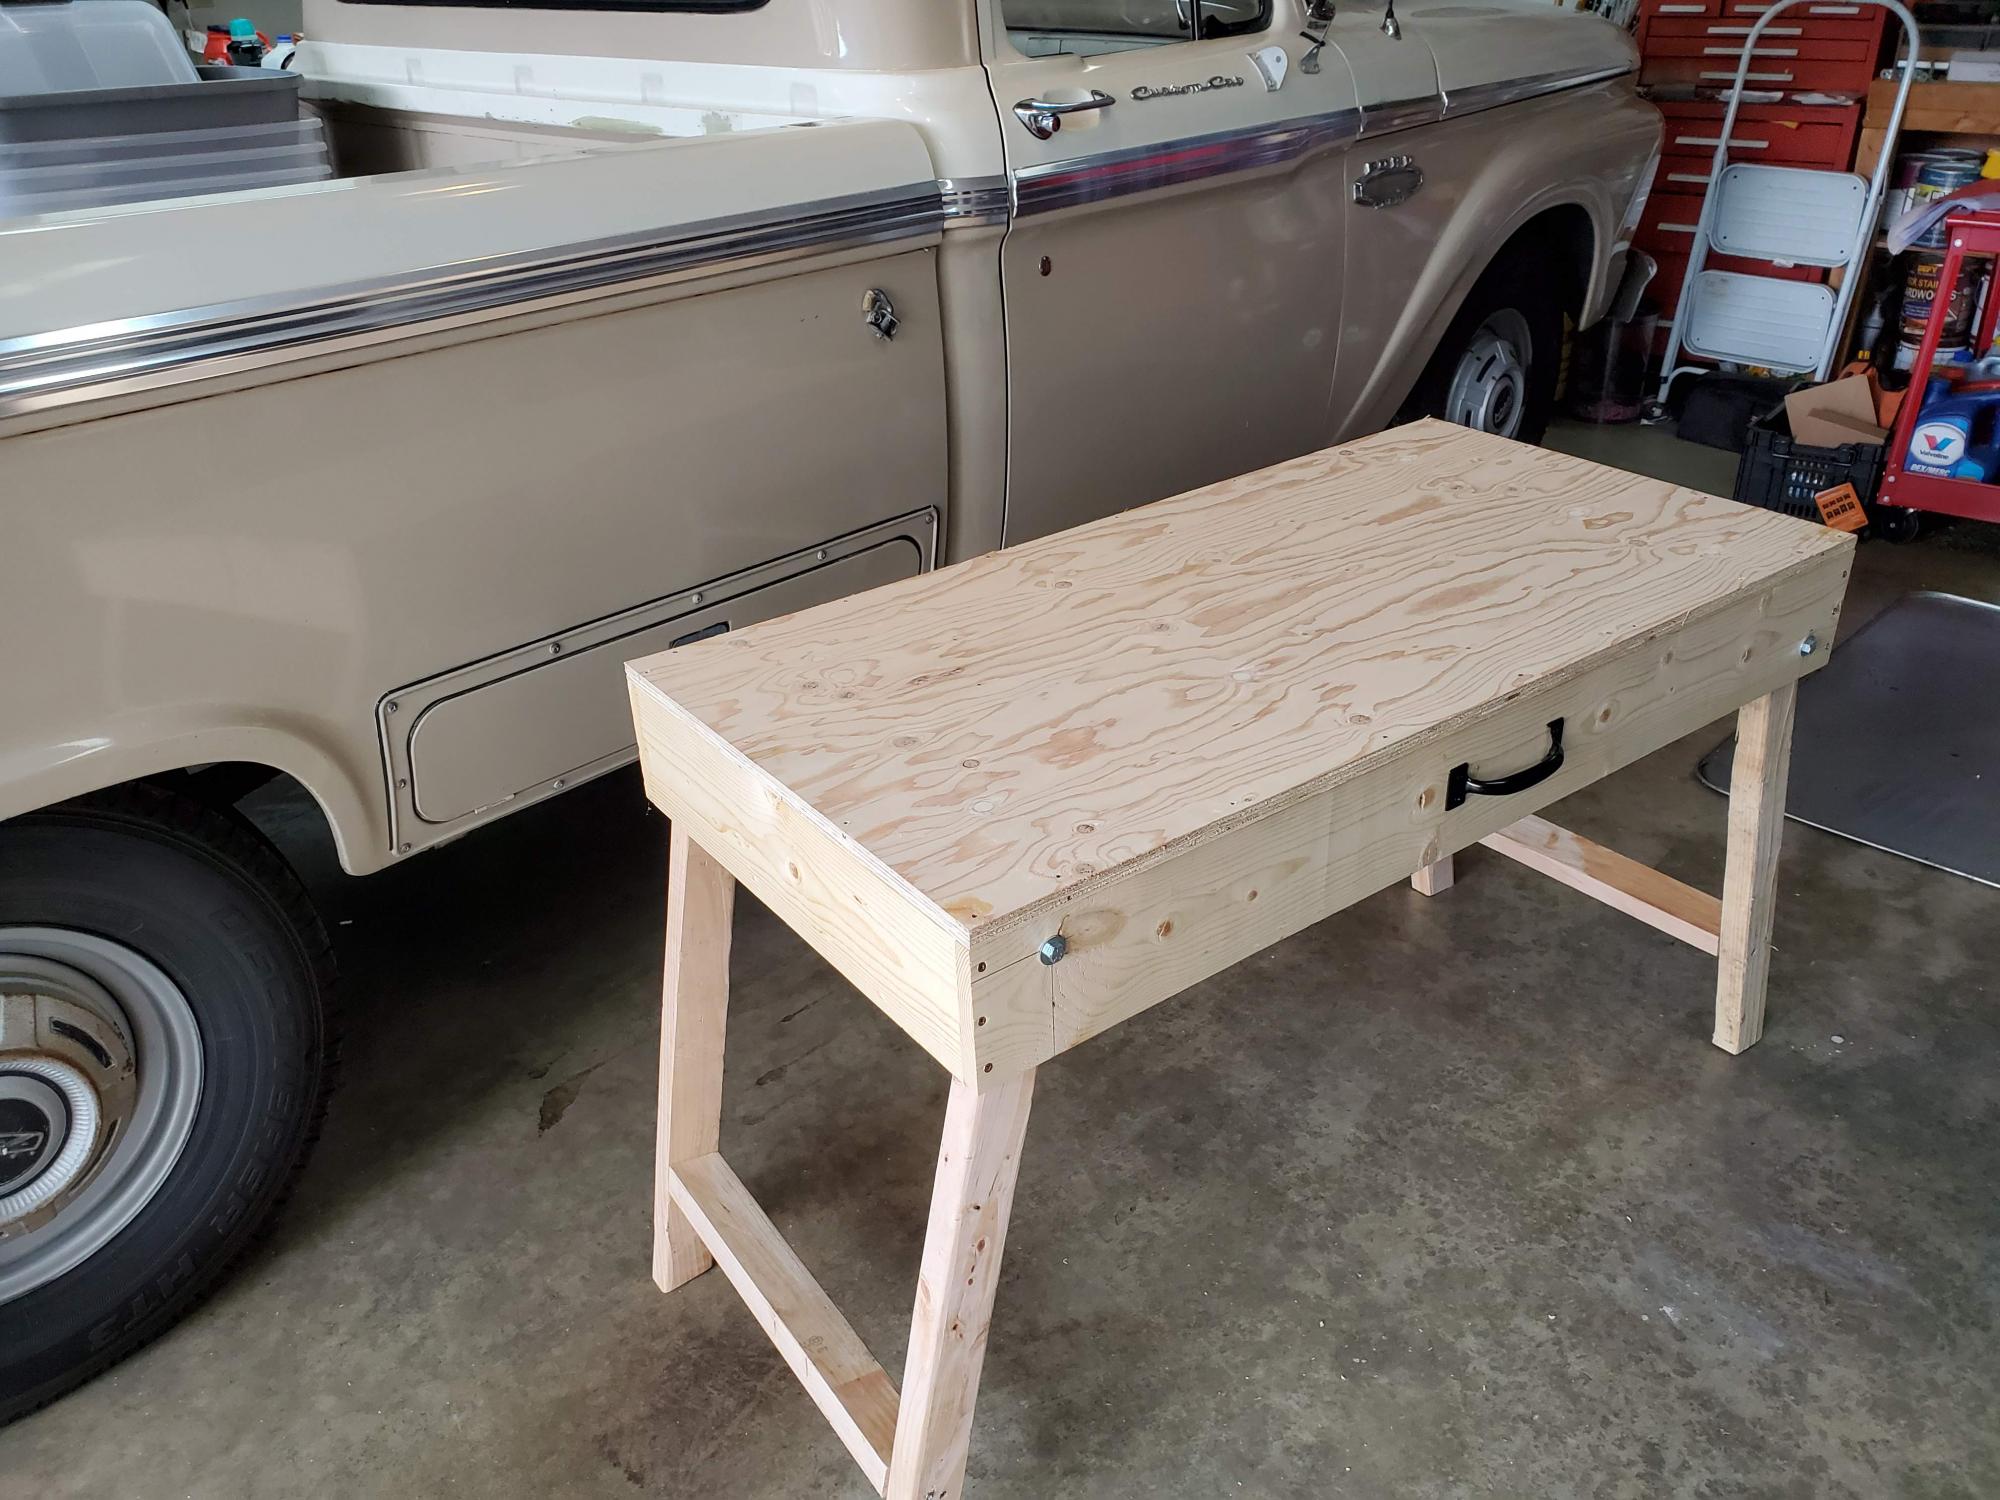
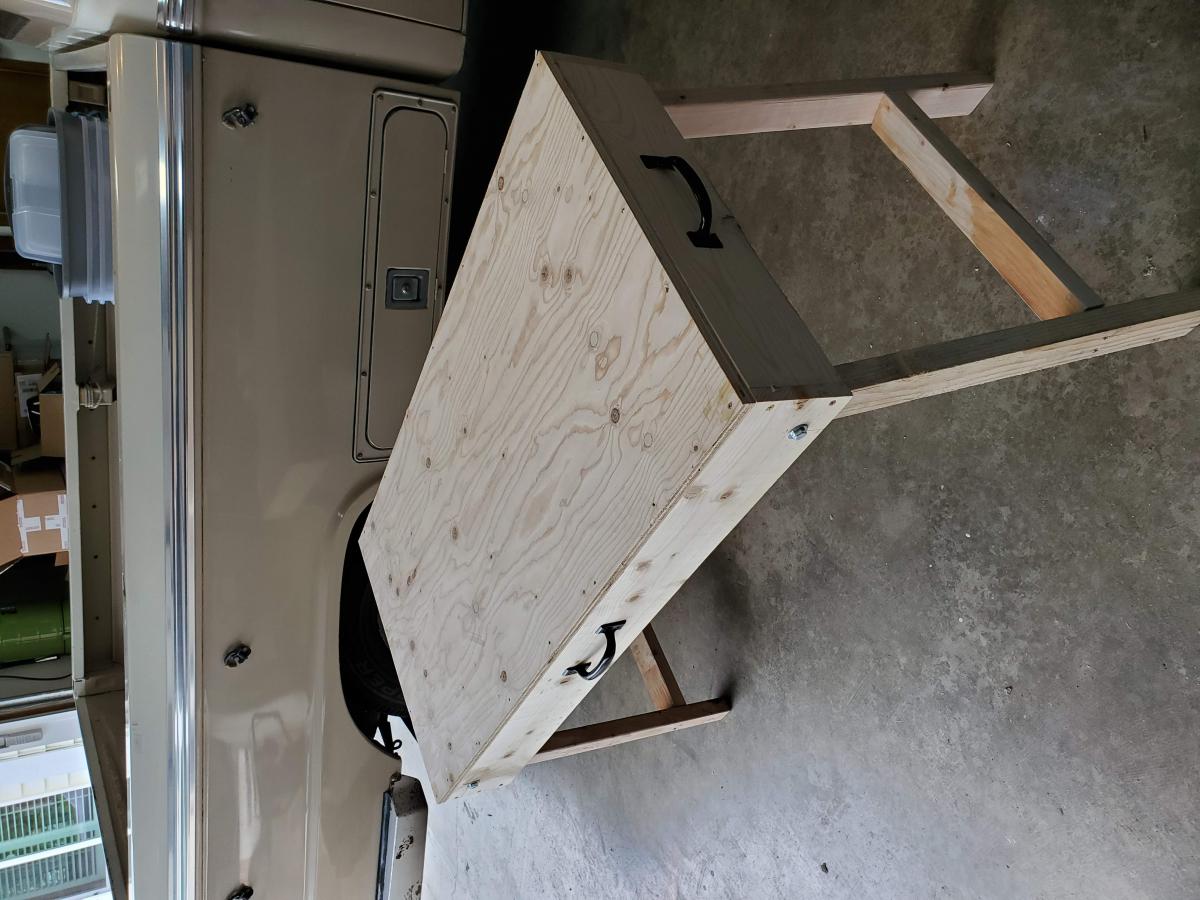
This is my first build. I thought making a work table would be the ideal first project. I'm very happy I came across Ana's Youtube channel and website. I made some rookie mistakes with the cut list. I t was my fault but a good learning experience. In the past I have dreaded any kind of woodworking project. I became very frustrated using the garage floor or some makeshift work table. This sores nicely in the garage and is very functional. I did add a handle on the side of the work table to carry it to the work site. I'm looking forward to many new projects.
First table build! We modified the plans with no breadboard ends since we live with lots of humidity and wanted to allow the wood movement. We also used 4x4s for the legs. White chalk spray paint legs and custom mix of special walnut and weathered oak stains. We LOVE it!!
Built for my daughter!
Carol Hebert