Community Brag Posts

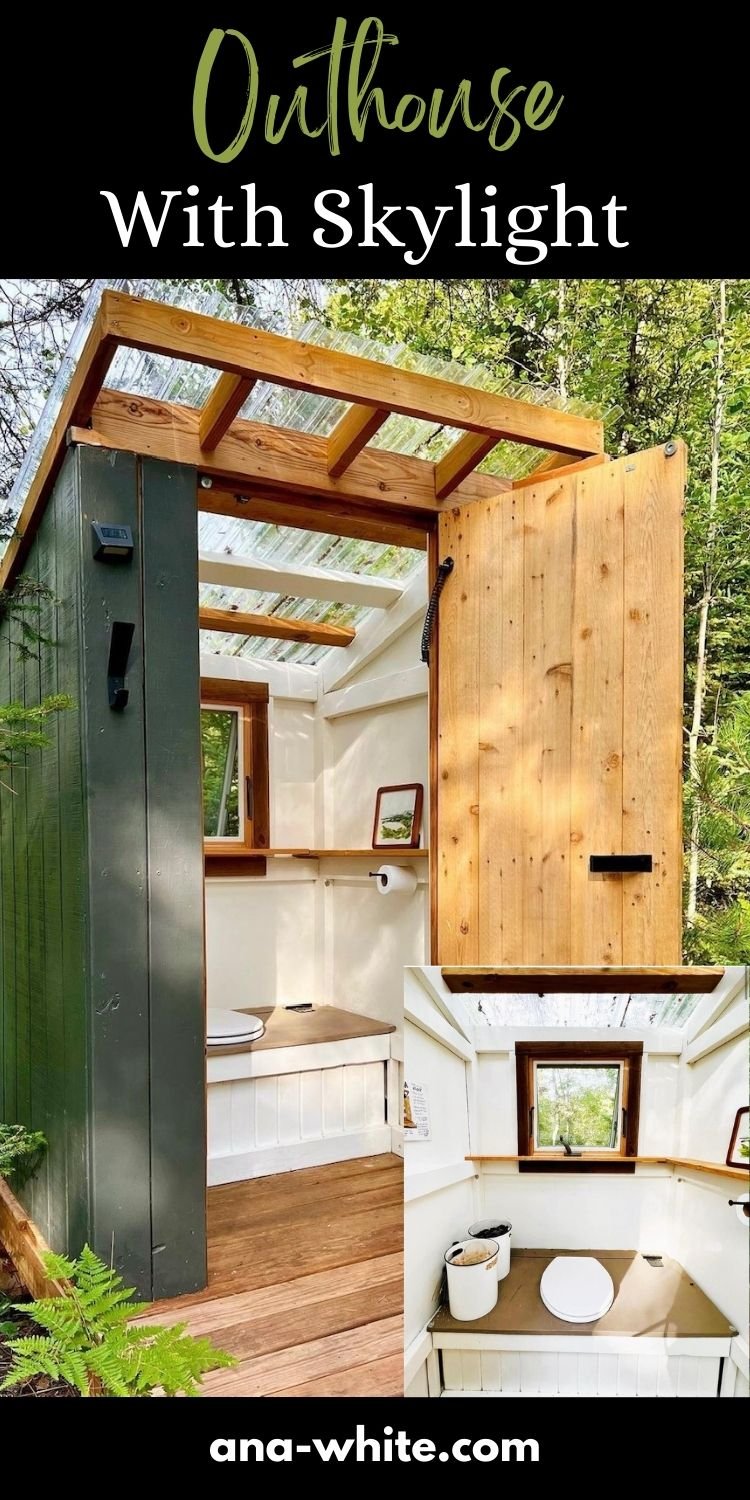
Outhouse with Skylight

Submitted by Anonymous (not verified) on Fri, 08/04/2023 - 11:03

Our favorite throne in town.

My daughter and I built the outhouse in the snow a few years ago. Once the TwoGa was named after the Stuga, the outhouse quickly became “The PooGa” (aka “The Ash-Hole “🤣). We use ash in the winter and sawdust in the summer, to keep away the stink, which works like a charm.

This is an adaptation to an Ana White outhouse design.


Pin For Later!

Outhouse with Skylight

Built from Plan(s)

Comments

Rustic Queen Sized Wall Bed

Submitted by ldo2626 on Wed, 06/25/2014 - 09:09

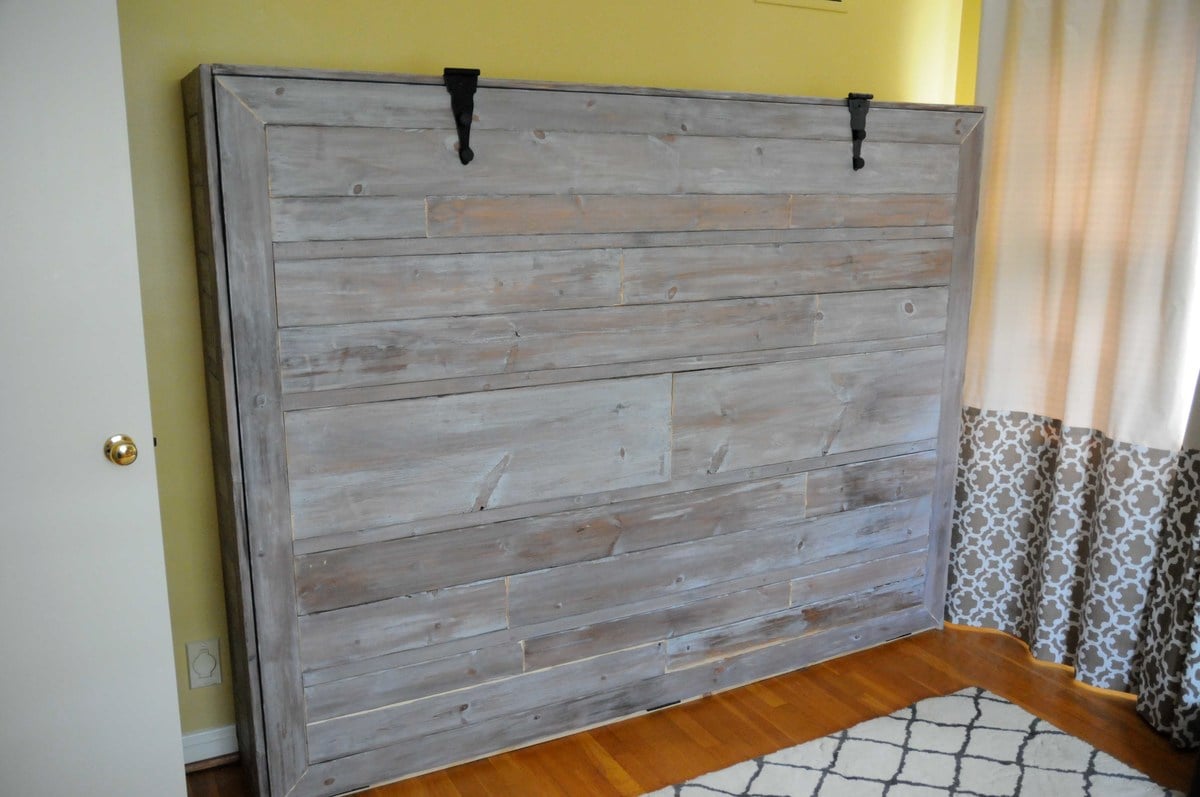
Expecting our second child, my wife and I decided to do away with our guest bedroom and combine it with our office. The only problem was our queen bed took up way too much space and it didn't get enough use to justify the sacrifice. We looked at the wall bed options available for purchase and decided they were way too blah and very expensive. I then found the "A MURPHY BED YOU CAN BUILD, AND AFFORD TO BUILD" post on Ana's website (thanks for the inspiration)! 

 Using cheap pine boards, plywood, door hinges, vinyl upholstery and stain I constructed the wall bed you see here. It really wasn't that difficult but facing it took the most time. To give the boards a more rustic look I used a utility knife to shave off the edges/corners and stained them with the Minwax American Walnut water based stain and the Minwax White Wash Pickling. When this started we thought we were going to have to settle for something unattractive and less than desirable. Seeing it in our office now, we love our new bed and actually think it makes the room look much better!  I didn't keep track of costs, but it couldn't have been more than $150.


Estimated Cost
I didn't keep track of costs, but it couldn't have been more than $150.
Estimated Time Investment
Weekend Project (10-20 Hours)
Finish Used
Minwax American Walnut water based stain and Minwax White Wash Pickling
Recommended Skill Level
Beginner

Comments

jwm816

Tue, 07/08/2014 - 08:08

Looks great! May I ask what the final outside dimensions were? Curious to see if this would work for me.

Thanks!

ldo2626

Wed, 08/06/2014 - 09:23

I would have to measure it when I get home... at work currently. Looking back, I think the best approach is to take the measurements from the plan, find the difference between standard mattress and queen mattress dimensions (check wikipedia for standard sizes), then add that difference back to the plan. I cut it real close on mine and could use a little more space. It would be nice to make it a bit deeper and with some head room to store comforters and pillows.

lopixy

Sun, 11/30/2014 - 18:10

I love this!  Could you give more details about how you did the facing?  Are the pine boards just nailed onto the plywood? 

chefrgk

Sun, 12/28/2014 - 12:59

I am dying to get started on this wall bed project. I keep getting this message when trying to open the Plans.

The page you are looking for is temporarily unavailable.
Please try again later.
can someone help me find them.

chefrgk

Sun, 12/28/2014 - 12:59

I am dying to get started on this wall bed project. I keep getting this message when trying to open the Plans.

The page you are looking for is temporarily unavailable.
Please try again later.
can someone help me find them.

nicolanala

Tue, 08/09/2016 - 15:24

Hi. I would love to try this. Looking to build in the next month before parents in law come over. Is there any working links to the plans??

josheli

Thu, 01/25/2018 - 13:06

click on the bed picture above and it will take you to the plans


Garden Tool Shed (based on plans for Small Outdoor Shed)

Submitted by aceecee on Tue, 09/22/2020 - 14:07

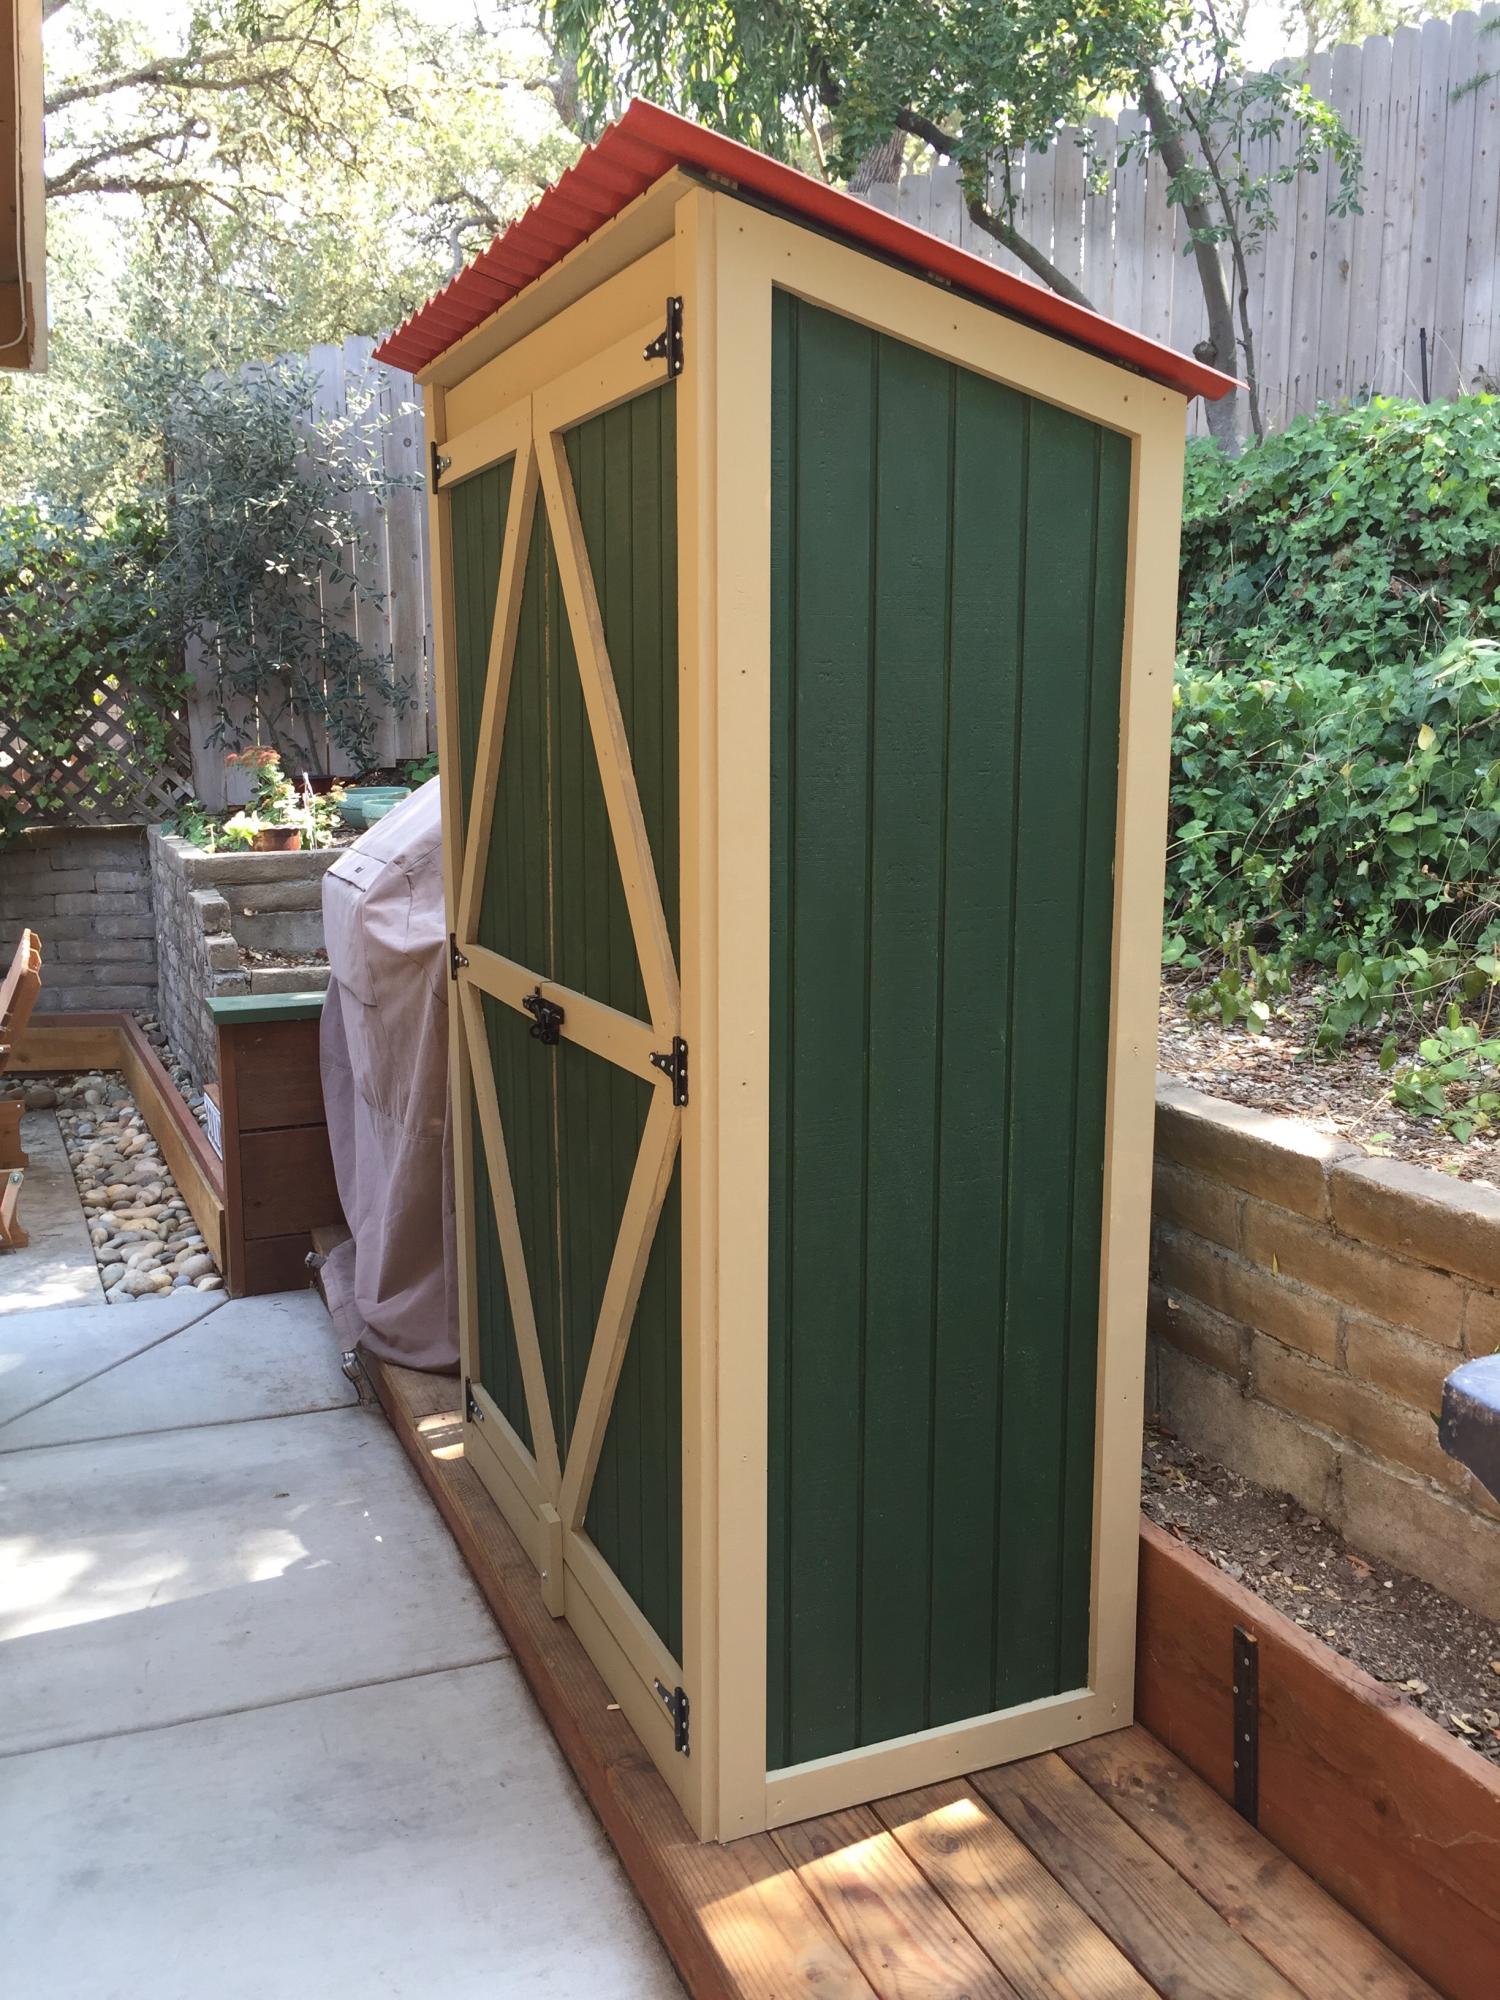
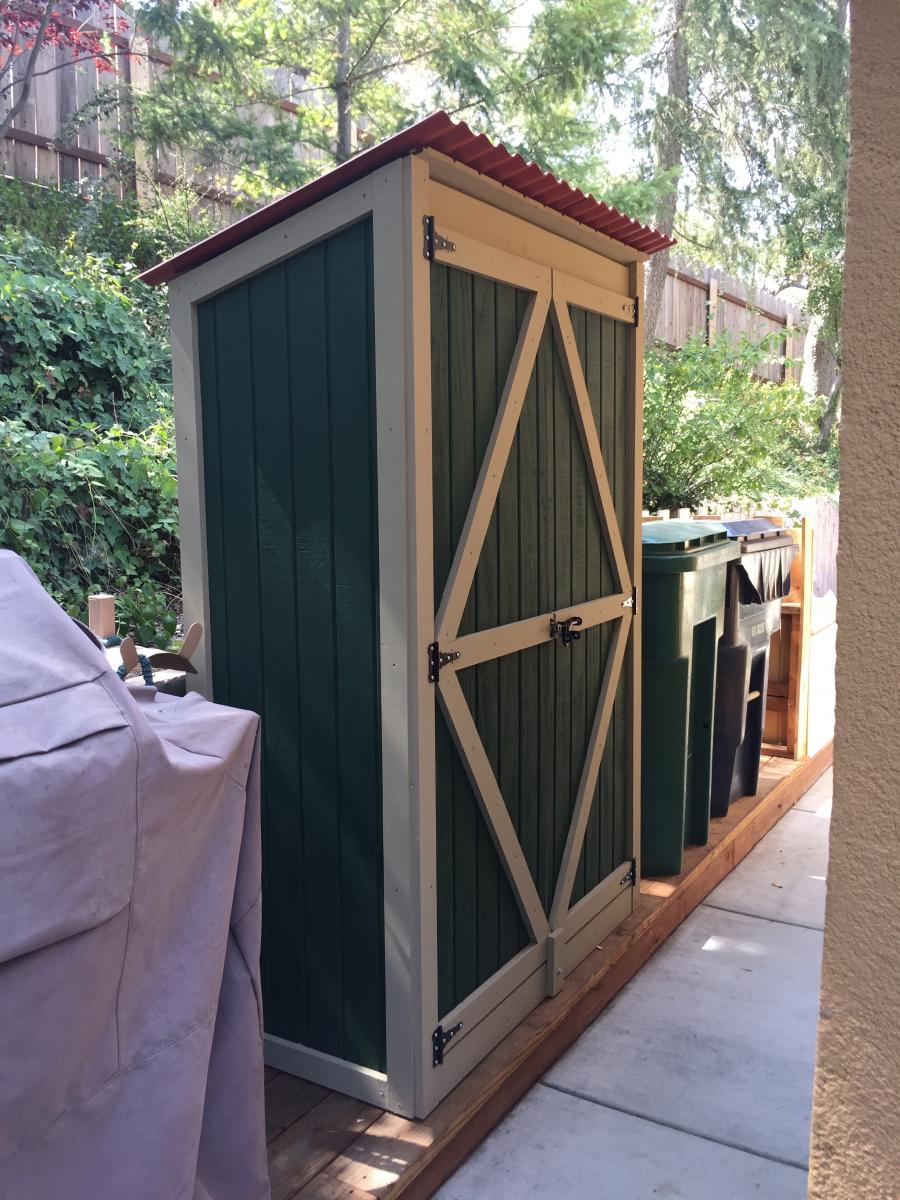
My husband and I built a garden tool shed using your plans for a "Small Outdoor Shed or Closet." We needed exactly this size for our available space. (THANK YOU! The video was really helpful and the plans were very detailed.) We are not handy at ALL, and are definitely beginners when it comes to woodworking. But, when the person who was supposed to build it for us was delayed, we thought we could try it, or at least START.

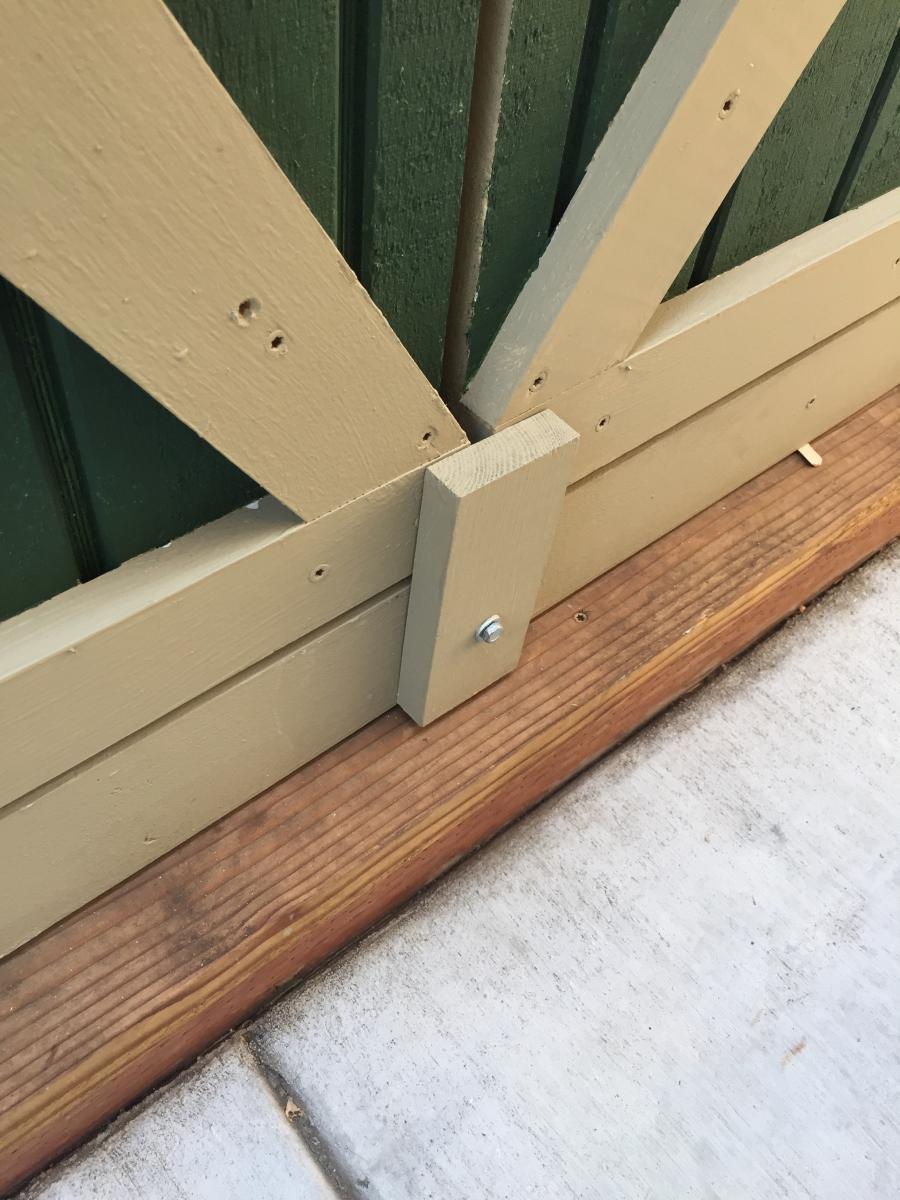
We bought a lower-end Kreg pocket jig and a secondhand mitre saw, and set to work, using T1-11 siding. We ended up building the entire shed ourselves, and were very surprised at the end result (and proud too!). The hardest part was building the doors, since we weren't really sure how to construct them to keep them from bowing. We ended up putting trim all around the edges of the T1-11 plywood doors, inside and out. (We were too far into building them when we realized we probably should have done it differently.) We also couldn't figure out how to get the double doors to stay tightly shut, but ended up using a rotating block (see picture) at the bottom and it works great, especially given that one of the doors had a slight bow at the bottom.

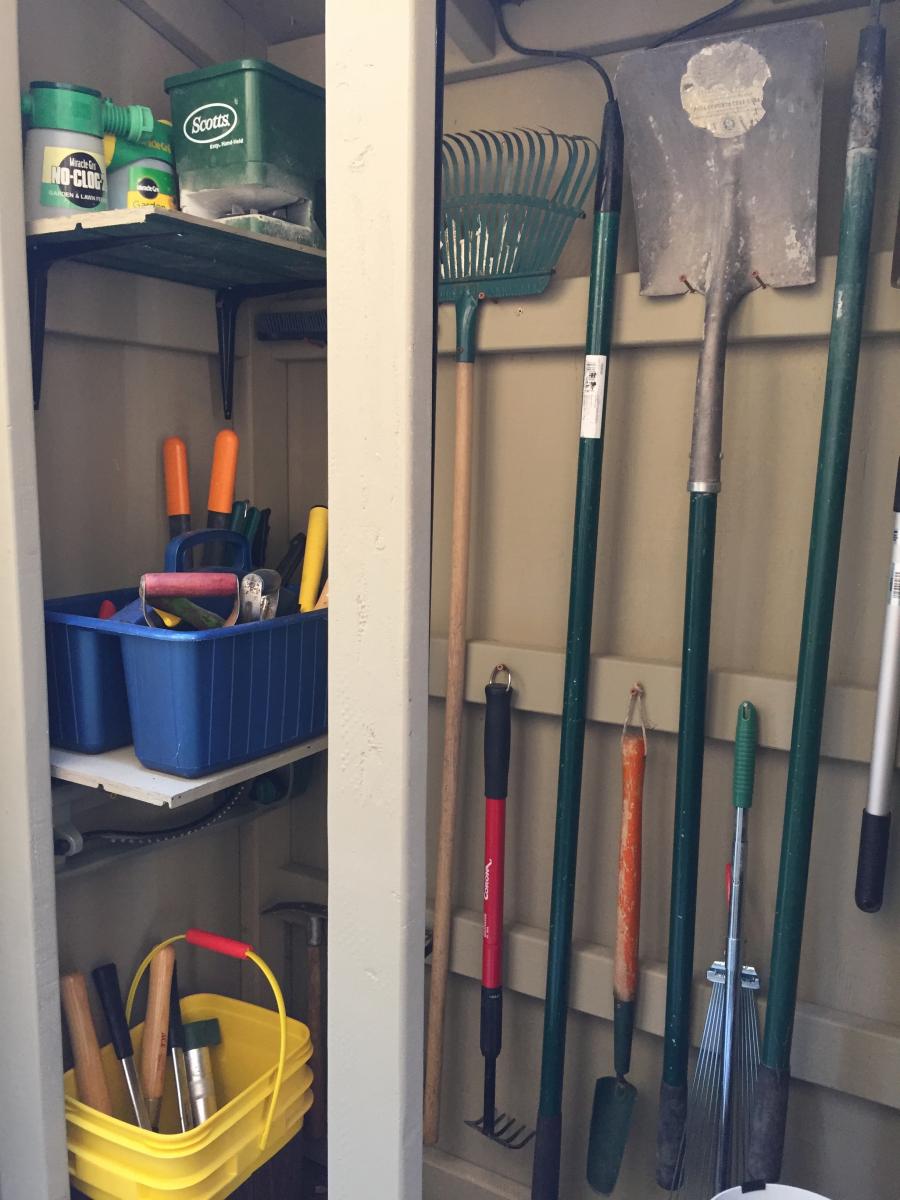
I think the only ways in which we deviated from the plan were that we added trim, an additional 2x4 up high across the back of the shed (for hanging long-handled tools), and two interior shelves on the left (from leftover siding). We used colored corrugated polycarbonate sheeting over the roof instead of asphalt shingles. (Unfortunately you have to use specific screws for the sheeting and one length was too short and the other too long and protrudes through the roofing slightly, into the interior. But we like the pop of color the sheeting adds, and REALLY didn't want to do shingles for such a small area, nor did we know how to do shingles.)

My final suggestions would be that a mitre saw and pocket jig are REALLY helpful and using star head screws is easier. I would also suggest that you paint everything (prime and color coat) before assembly and just touch up afterwards, especially if you use a lot of trim as we did. We primed and painted the siding but just primed the trim, and it was a real pain to put the color coat on all that 1x3 trim after construction.

This plan is listed as an "intermediate" project and I think that's probably a correct designation. As beginners, it just took BOTH of us to figure it all out (we work really well together) and to build it, and it took a much longer time than it would for someone with more experience.

Estimated Cost
I think we probably spent between $300 and $400 on lumber, hardware and paint, not counting buying the secondhand mitre saw and the Kreg jig.
Estimated Time Investment
Week Long Project (20 Hours or More)
Finish Used
Primed and painted, green and tan. (We bought the green and had the tan on hand.)
Recommended Skill Level
Intermediate

Comments

laurawelsh

Tue, 10/06/2020 - 15:56

Well done! I love this! Can I ask what dimension your garden tool shed is? And how did you decide on the new roof size/angle? I have a similar space and am contemplating something similar. Thanks!!

laurawelsh

Tue, 10/06/2020 - 15:56

Well done! I love this! Can I ask what dimension your garden tool shed is? And how did you decide on the new roof size/angle? I have a similar space and am contemplating something similar. Thanks!!

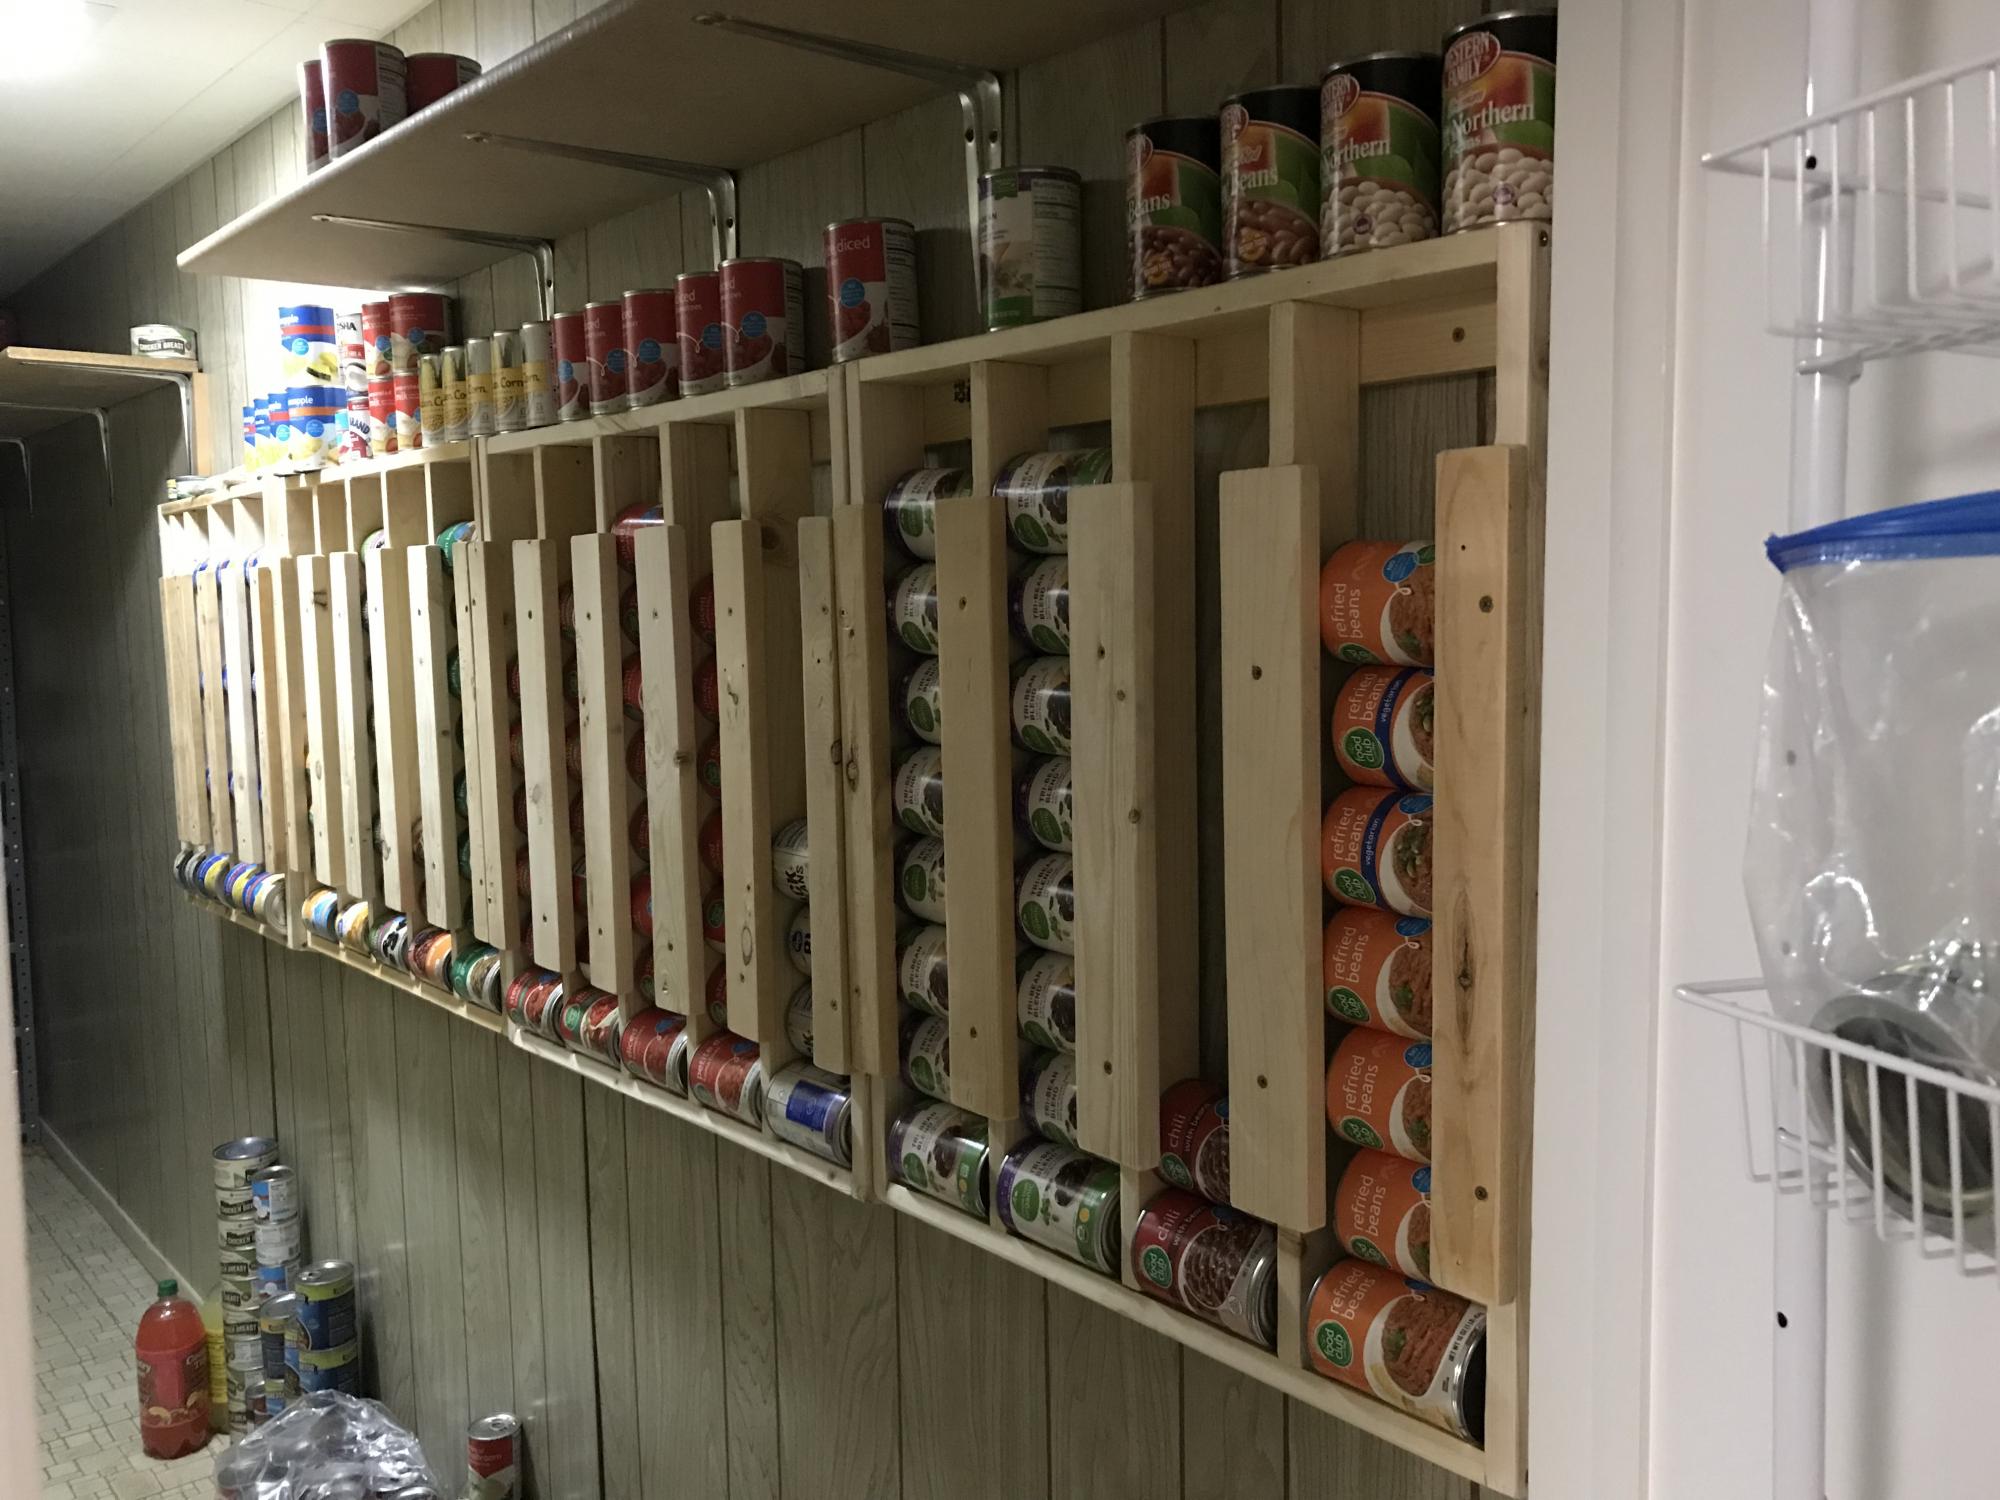
Walk mounted can organizer

Submitted by Anonymous (not verified) on Tue, 10/05/2021 - 20:13

Love this! My husband used this project to help boys learn to use power tools and work with wood. They made one and he did the others. THANK YOU!

Built from Plan(s)

Comments

Barbecue/BBQ Quick Built-in

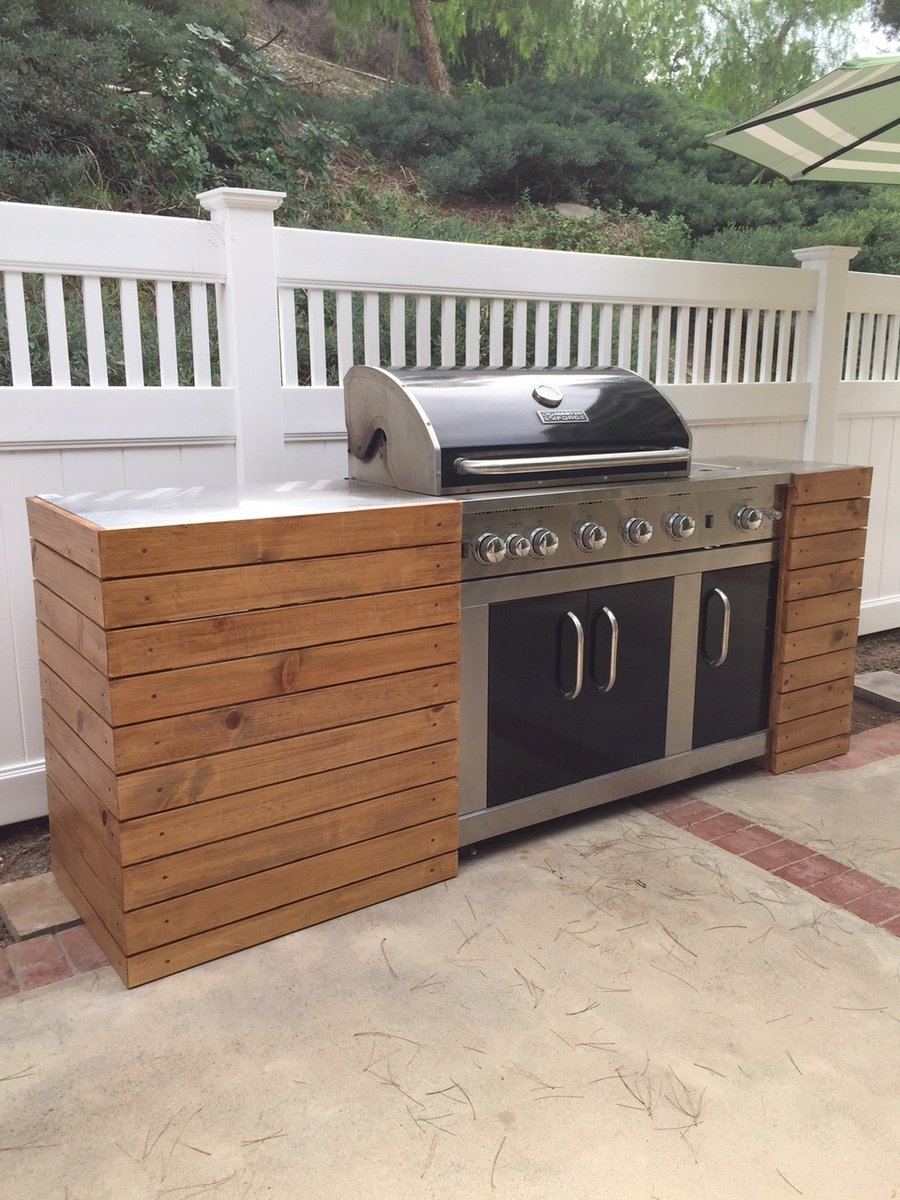
This was just a standard BBQ with an attached folding table. I used a combo of Ana's plans to add a little character and style to the BBQ and it made a huge difference in not only the BBQ, but also the backyard. 

Estimated Time Investment
Weekend Project (10-20 Hours)
Finish Used
Golden Oak
Recommended Skill Level
Beginner

Comments

mdwstgrl

Mon, 05/23/2016 - 12:29

Hello:  Very interested in which plans you used to build the BBQ Built In. Thank you.

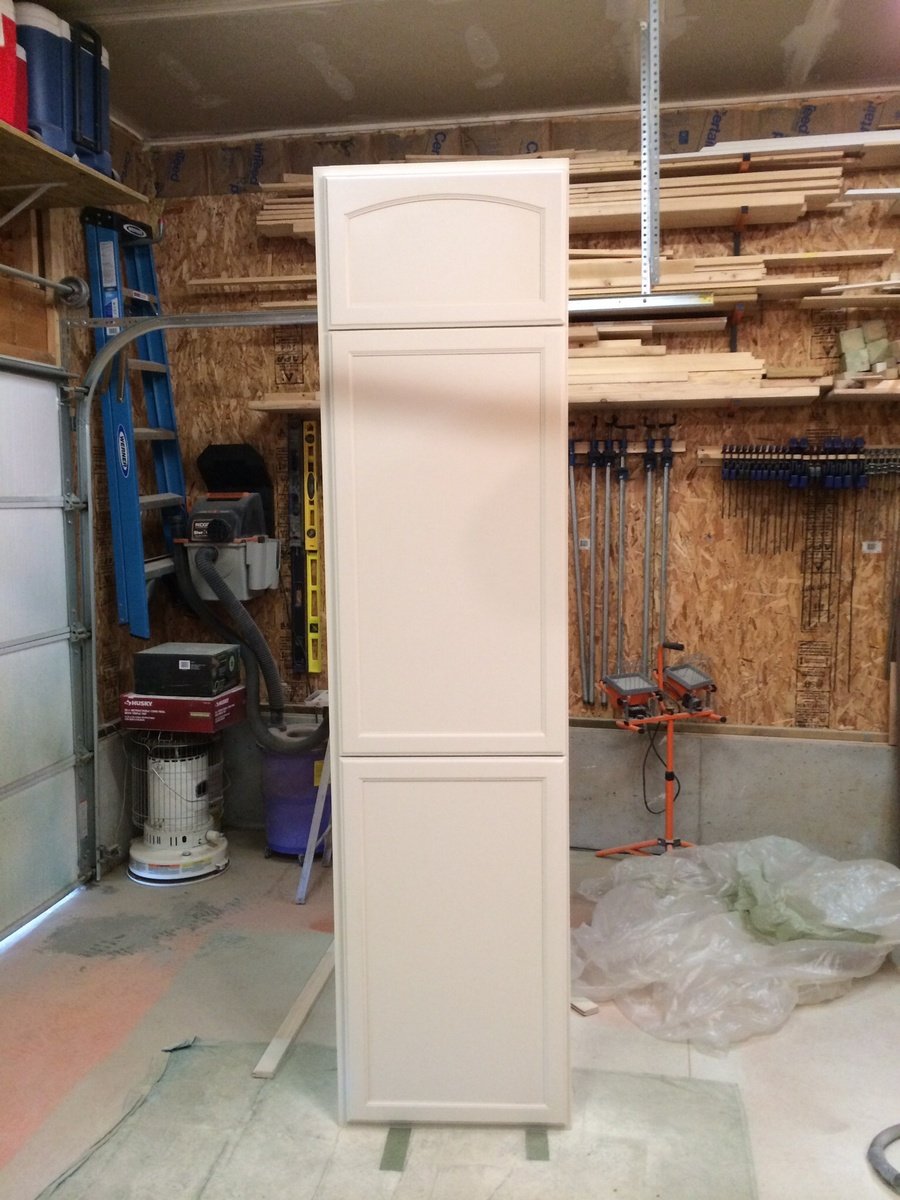
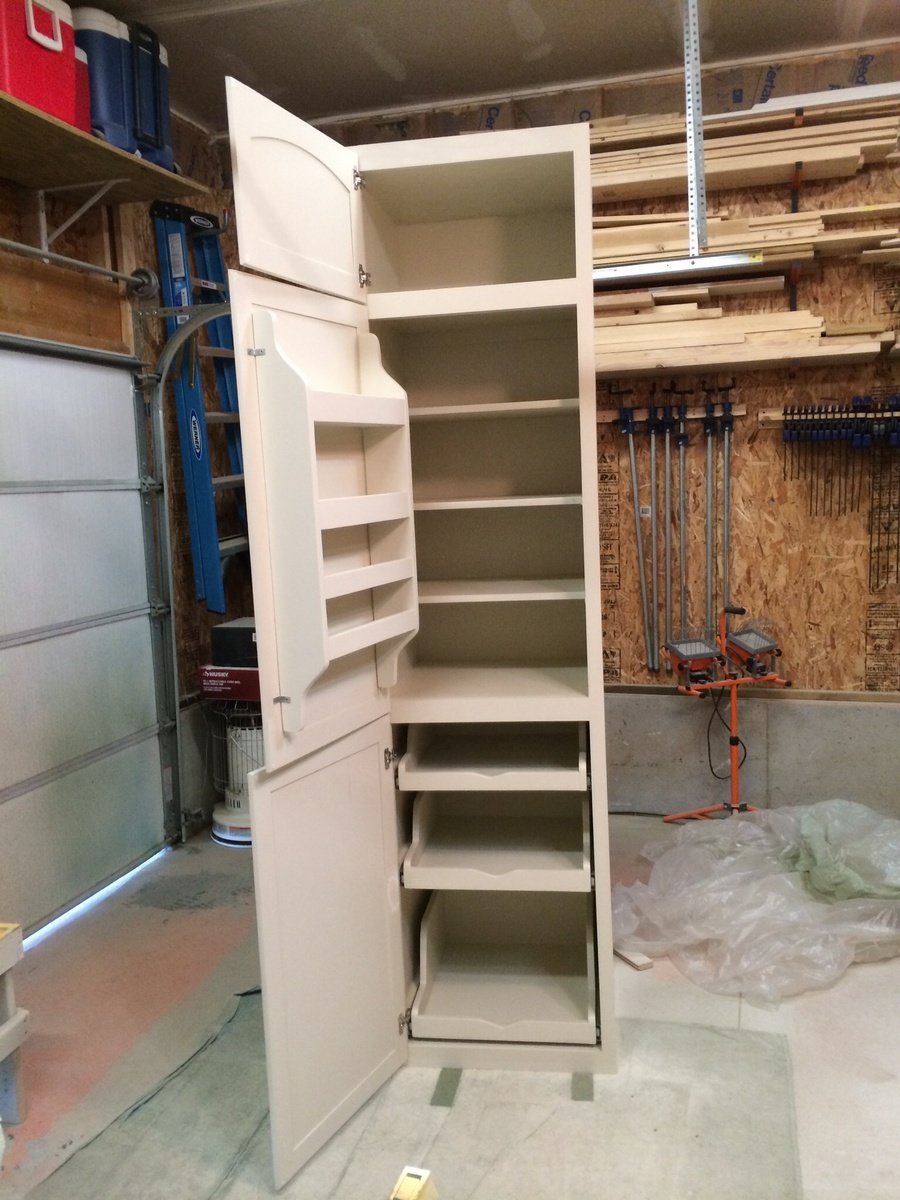
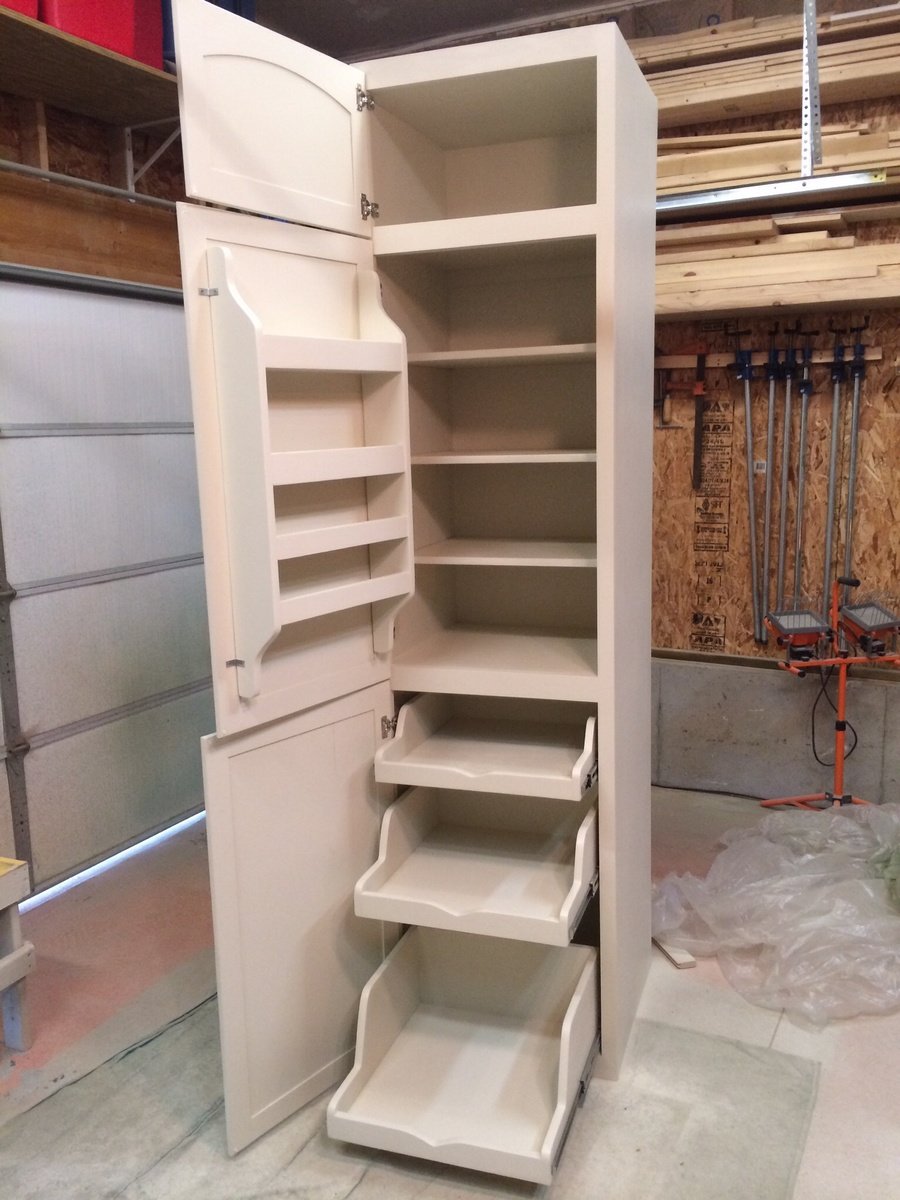
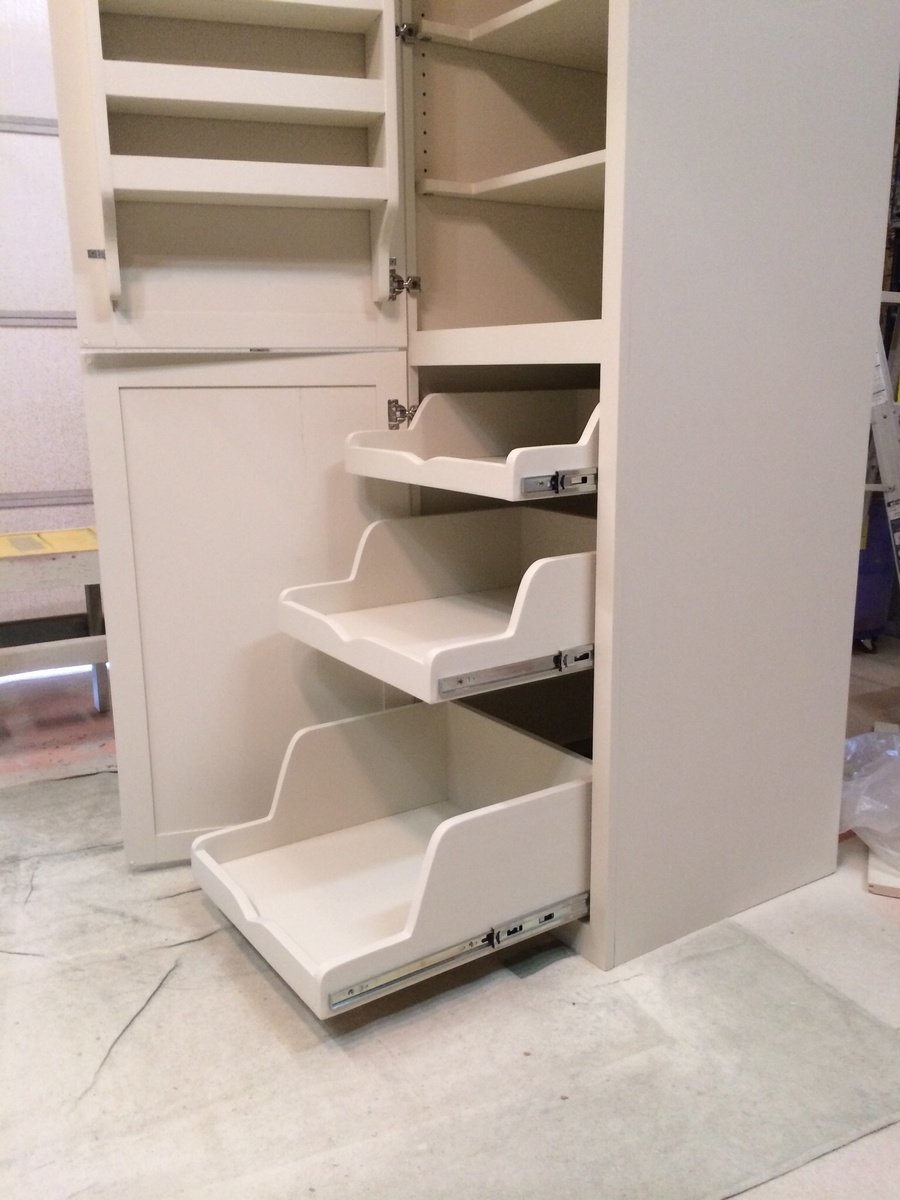
Kitchen Pantry

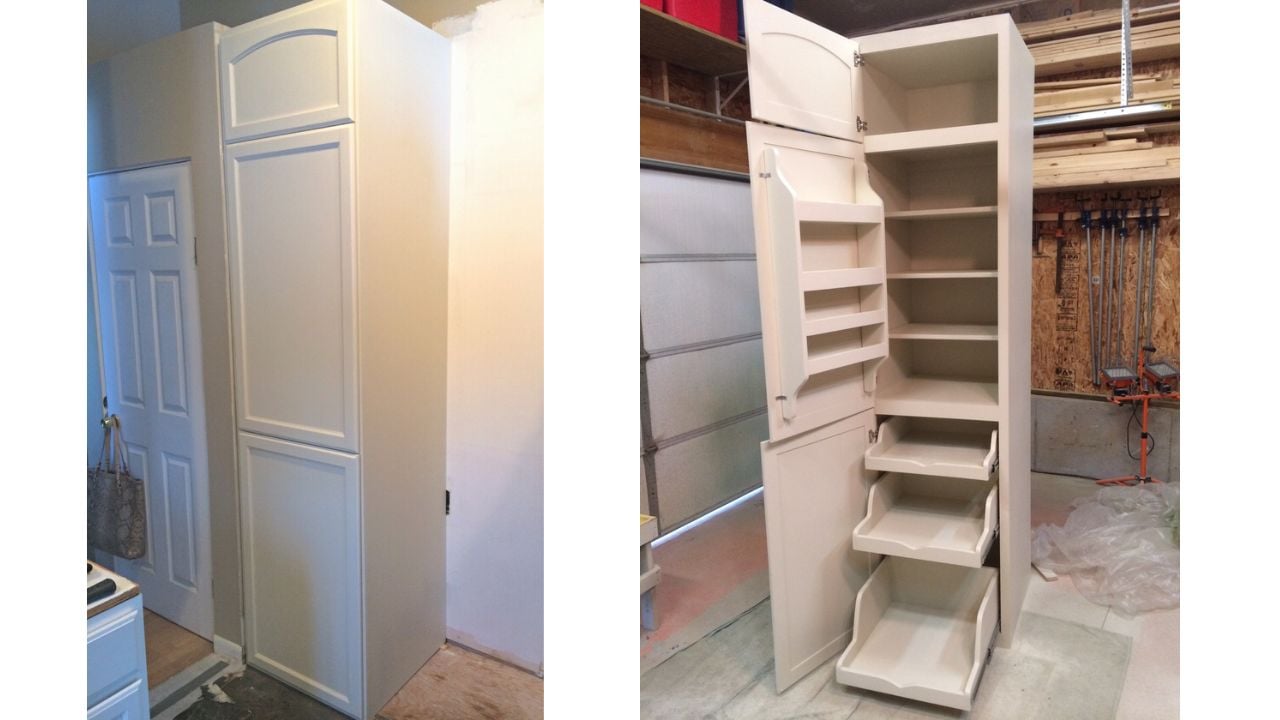
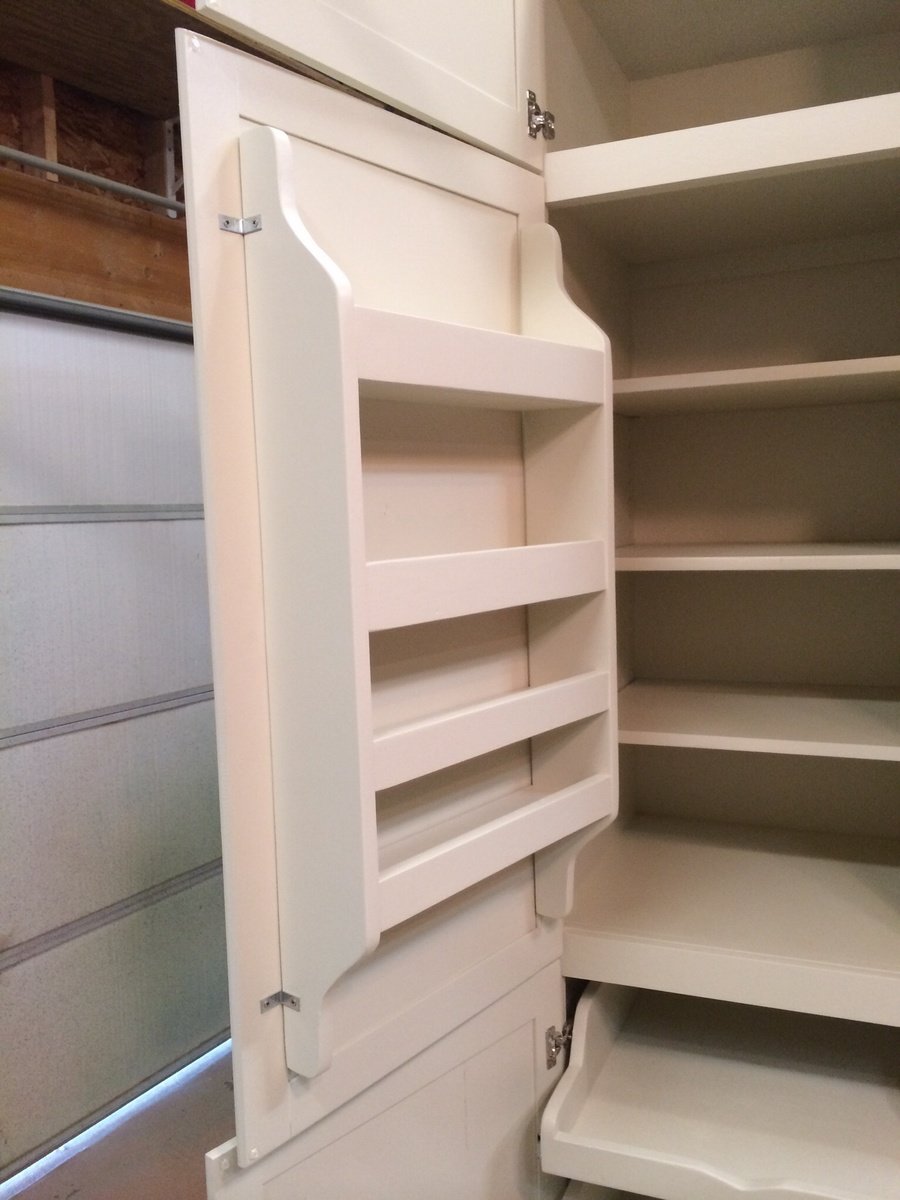
I made this pantry to match some new kitchen cabinets that my friend ordered from lowes. He wanted me to make all of his cabinets but unfortunately I didn't have enough time, it was kind of one of those things hey I'm redoing my kitchen can you make this. This was all built and designed from a picture his wife found on pinterest with just the measurements for the space it needed to fit in.

Estimated Cost
$400
Estimated Time Investment
Week Long Project (20 Hours or More)
Finish Used
Latex paint and polycrlic
Recommended Skill Level
Intermediate

Comments

alpinecwt

Tue, 02/11/2014 - 09:18

You should definitely get with Ana to make plans for this pantry!! Looks superb,job well done.

OurHome

Fri, 06/17/2016 - 18:39

HI - 

My husband and I have been trying to find a DIY Pantry for our kitchen. We've looked everywhere and finally came across this! We love it and would like to try and build it. Do you have the plans available to share? I look forward to hearing back from you.

suziewelker

Fri, 11/27/2020 - 21:33

I tried the link for crafted perfection in attempt to get the plans for this. It led me back to this website. Is there ANY chance of getting the plans for this pantry PLEASE?

watkinswd

Wed, 09/01/2021 - 13:59

Okay, Ana, where are the Plans? You're killing me with this teaser! I'm not smart enough make something this great without serious plans like you usually produce. Help this old guy, please.

farrellp

Thu, 08/11/2022 - 18:08

Hi Ana! Do you have plans? My daughter is moving and could always use more kitchen cabinets. She loves kitchen gadget everything!
Homemade Home Office with Peninsula Desk

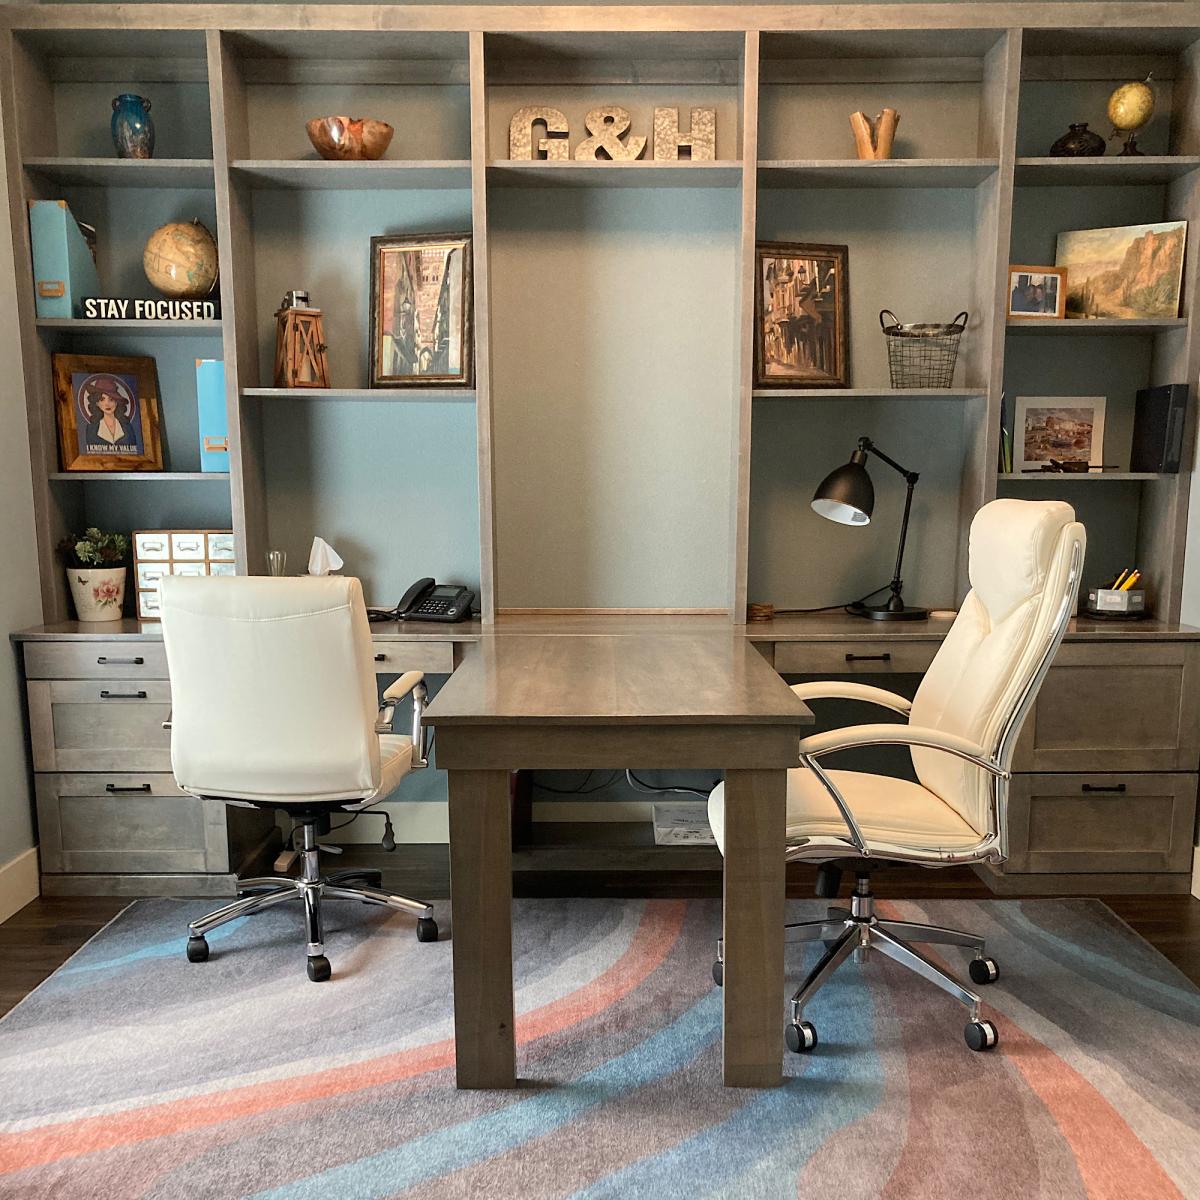
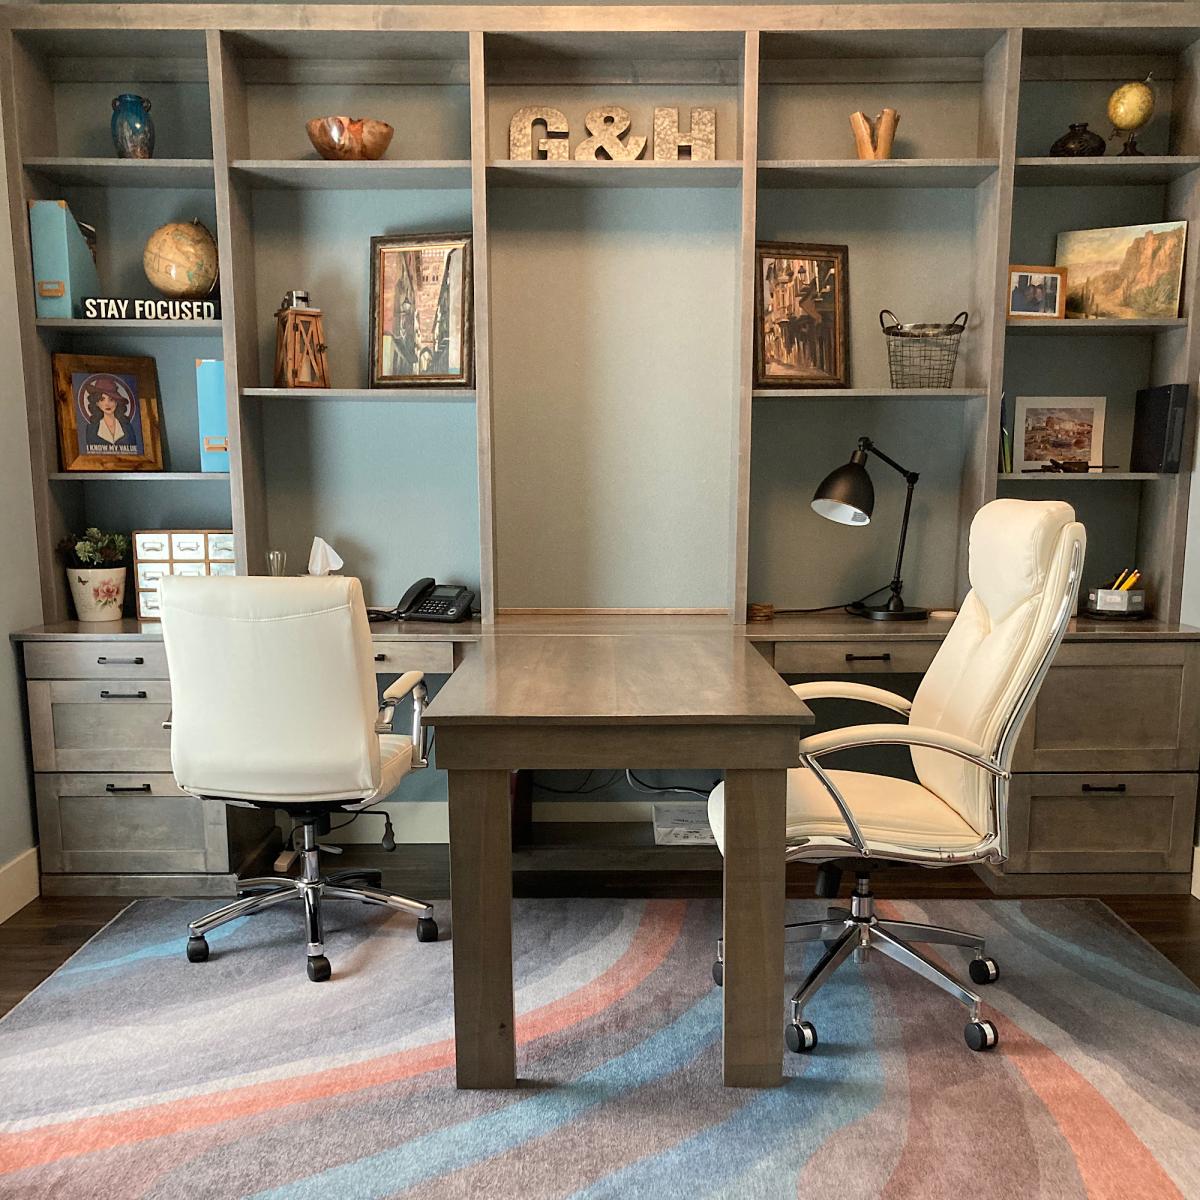
Thank you Ana for so many amazing plans and shelf help that helped me get this monster built! Now my husband has a nice office where he can work from home. I was so impressed with how easy it was to make the plans in shelf help and how quickly it all arrived. (I can’t link the drawer slide trick plans, but they were key and I based the middle table off of the foldable farmhouse idea)

Comments

My first project!

Submitted by J_Weeks13 on Sat, 03/07/2015 - 10:26

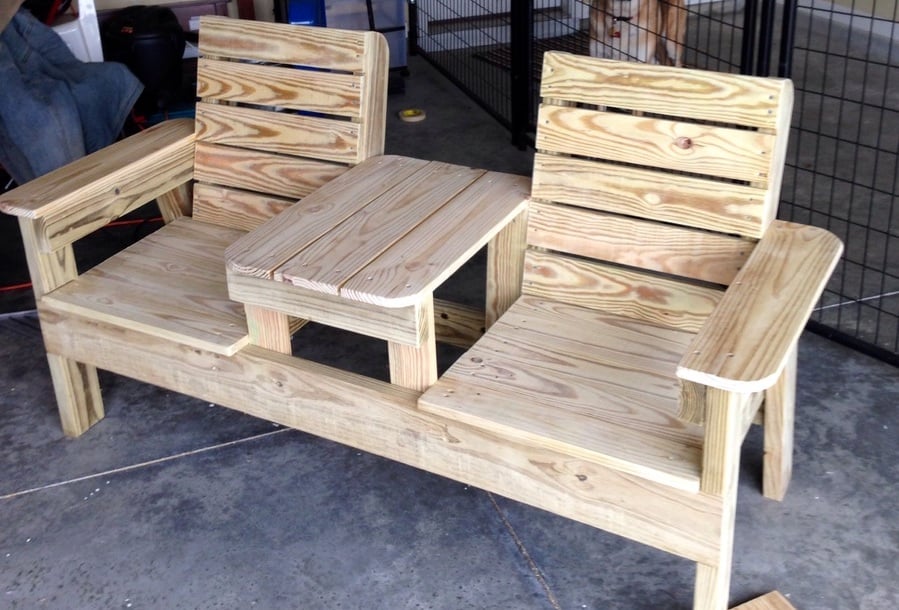
Thanks for the awesome, easy to follow plans!! All that's left to do is stain it and build another one- I'm going to have 2 on my back patio! A successful first project! Thanks!!

Estimated Cost
$130.00
Estimated Time Investment
Day Project (6-9 Hours)
Recommended Skill Level
Beginner

Comments

thecityalaskan

Sat, 03/07/2015 - 12:27

So awesome!!! Especially for your first project! Super inspiring for those of us who would like to attempt a project like this! Thank you for sharing!

My first build!

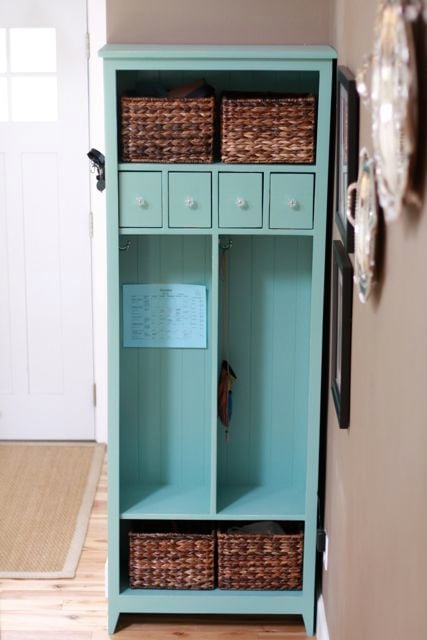
This locker cabinet was my first build and I learned a ton. For example:

1. Use the Kreg face clamps while drilling into the Kreg Jr.
2. Buy straight wood.
3. Buy wood that is not warped.
4. Do not try to buy wood with grouchy kids in tow.

Are you seeing a theme? Yep, your project will only be as square and perfect as the wood you buy.

I modified the locker plan to include apothecary-style drawers for our cell phones, sunglasses and chapstick. I also drilled through the back of one of the drawers to turn it into a charging station for our cell phones.

The locker has been super useful so far and is such a great way to keep my kids' backpacks and lunchboxes organized. The baskets are designated for my purse, stuff I need to return to stores, the dog's leashes, and library books. It's so nice to have all this stuff near the front door and never wonder where any of it is!

Estimated Cost
$100
Estimated Time Investment
Weekend Project (10-20 Hours)
Finish Used
Ralph Lauren "Aged Mint" in flat. Distressed and coated with Minwax Polycrylic in satin.
Recommended Skill Level
Beginner

Full length sliding mirror cabinet

Submitted by mltdblack on Tue, 10/16/2018 - 19:25

I built this for my daughter after building a ladder shelf for my kids bathroom. It took more time to install and adjust the drawer slides and paint the project.  

Estimated Cost
$65.00 - I used a slightly larger mirror.
Estimated Time Investment
Day Project (6-9 Hours)
Finish Used
Exterior - Valspar Black Flat Latex
Interior - Valspar Filtered Shade Flat Latex
Top Coat - Minwax Gloss Spray Polyurethane
Recommended Skill Level
Beginner

Comments

akagracegallag…

Sat, 09/07/2019 - 03:32

Hi mltdblack

Really nice finish on the cabinet.  

It looks like there’s molding on top of your mirror.  

Did you buy a mirror with a frame or buy molding and put it on over the mirror?  

What molding did you use an how did you secure it?  

What size mirror did you use?  Thanks

mltdblack

Fri, 01/07/2022 - 14:14

I am so sorry. This is the first I am seeing your question. The mirror came with a frame and I carefully nailed thru the frame to attach with my 18 gauge nailer. I bought the mirror at Lowe’s and I believe it was 15.5” x 50”. Also, I used full extension soft close drawer slides.

Playhouse Loft Bed with Storage Stairs

I changed this plan and made it into Full size. Feel free to contact me if you would like more information about how to do this too. 

Estimated Cost
$350
Estimated Time Investment
Week Long Project (20 Hours or More)
Recommended Skill Level
Beginner

Dartboard Cabinet

I had a big empty wall in my den/man cave, so I decided to build a dartboard cabinet instead of just hanging a dartboard on the wall. No plans for this, I just made it up as I went. Measured twice, sketched it out and cut as I went.

I use pine 1x4's for the frame and back. 1x3's for the accessory box, 1x2's for the door frame, and poplar strips for the doors and door braces. The darts are held by 6" long 2x2's with holes drilled.

Wood screws, finish nails, and small brads were used to hold everything together.

The chalkboards are simple MDF's cut and sprayed with chalkboard paint. Overlay hinges are used for the doors, and the dartbord is held on with screws from the back so it can be replaced when needed.

The Alabama A is hand-painted.

Estimated Time Investment
Day Project (6-9 Hours)
Finish Used
Minwax Classic Gray with light coats of spray glosscoat.
Recommended Skill Level
Beginner

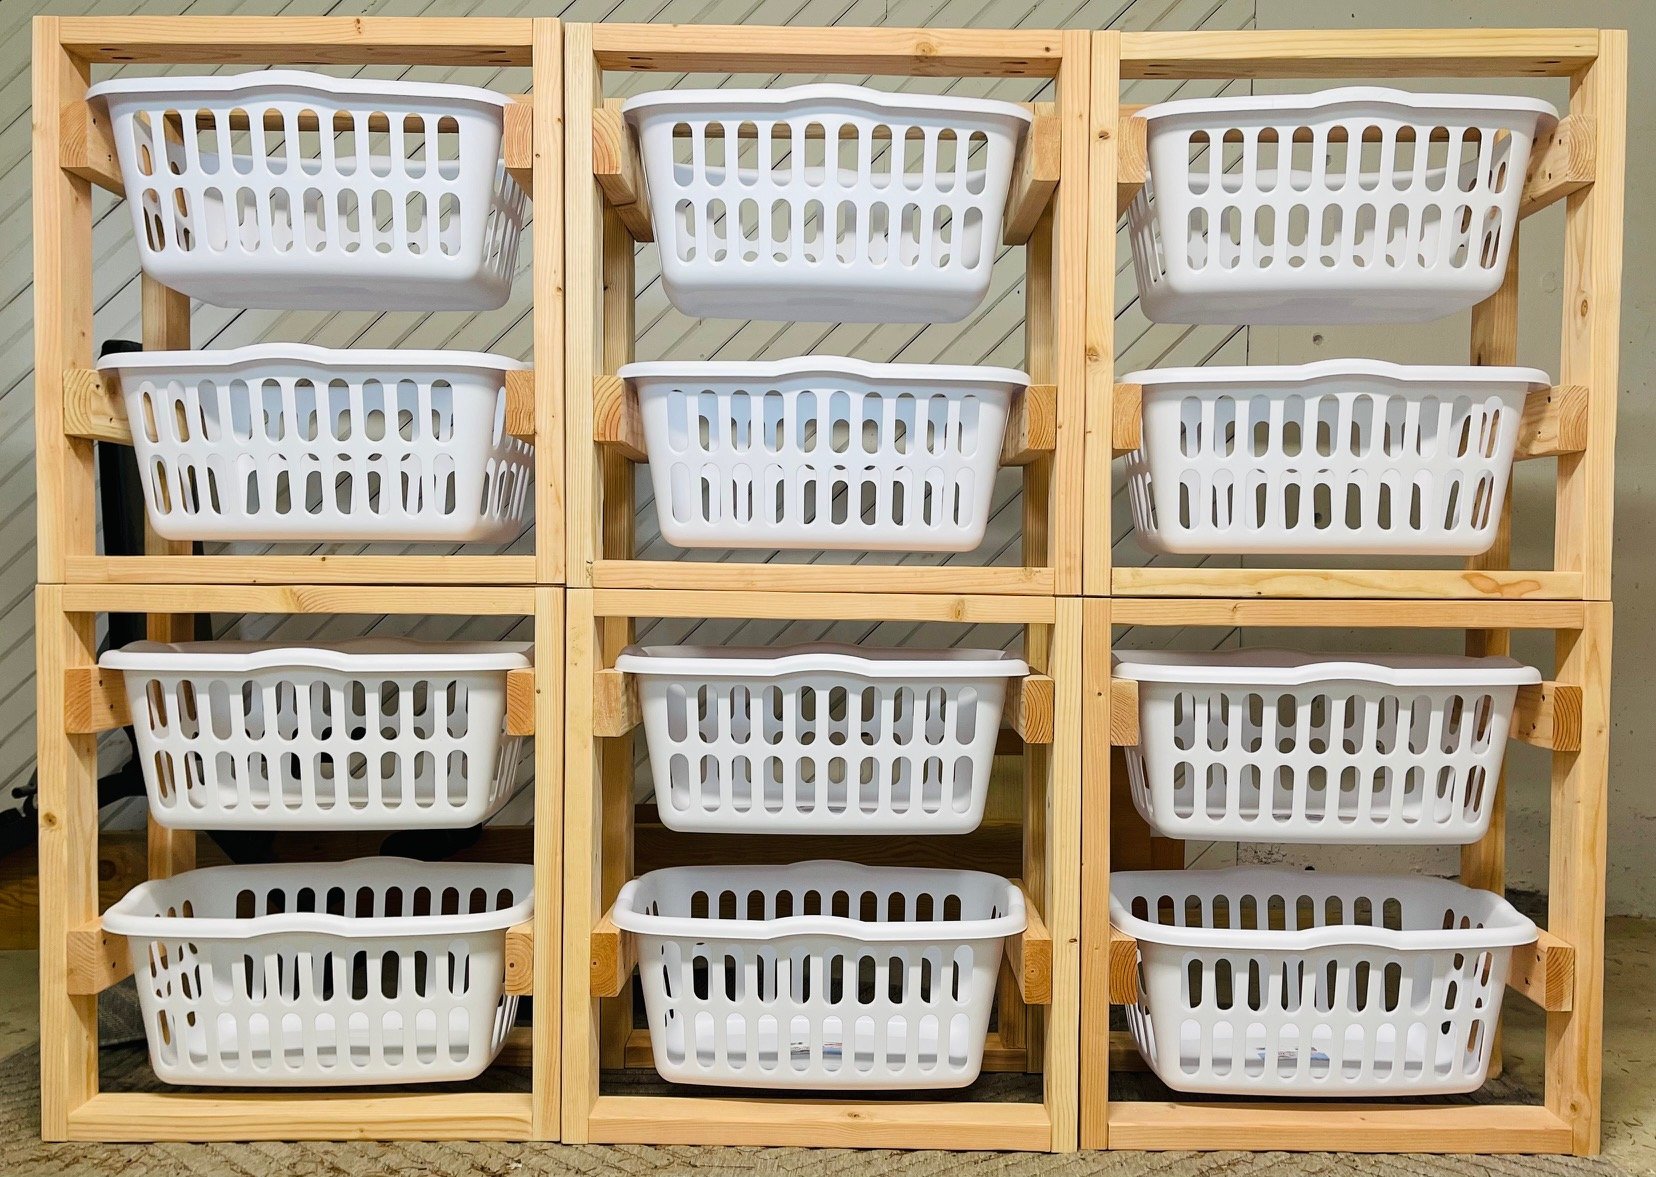
Laundry Basket Rack

This was a great last minute Christmas gift. Took me a little over two hours. Made completely out if pallet wood.

Comments

Chicken Coop with Run

Submitted by Jen Marzen on Fri, 06/17/2011 - 02:10

My husband and I live on a small hobby farm and are growing/raising a lot of our own food. We decided to venture into working with chickens. We wanted to start out small so we got 6 chickens and needed a home for them. We found a kids play house one day while shopping and got the idea of modifying it into a chicken coop with a run. We took off with this idea and with quite a bit of modification and some extra building materials we were able to raise it up in the air and attach a run so our chickens would have a nice home to protect them from preditors and the emements and not to mention one that looks good in our yard!

Built from Plan(s)
Estimated Time Investment
Weekend Project (10-20 Hours)
Finish Used
Cedar deck stain and white outdoor house paint
Recommended Skill Level
Beginner

Comments

Heather Dalton (not verified)

Tue, 02/21/2012 - 19:08

Are the plans available? I have Black Copper Marans and Lavender Ameraucanas and I really need to separate the LAs from the BCMs and this would be perfect!

madrona (not verified)

Tue, 02/28/2012 - 10:21

I'd also love the plans!
Great job - it's beautiful!

guest (not verified)

Tue, 02/28/2012 - 10:22

I'd also love the plans - thanks!

Eliza B (not verified)

Thu, 05/31/2012 - 10:02

Can you please post the plans you used? I have 4 week old chicks that need a coop. Thank you very much.

Jen Marzen

Sat, 06/02/2012 - 15:22

Sorry guys there are no plans for this coop. My husband and i just "winged it" and built it without any plans.

It is a play house that we found at Mills Fleet Farm and we modified it to make it a chicken coop. We put together the play house based on instructions from the box (with a few of our own modifications to make the window on the ground etc.) added some chicken wire to the doors and bay window, added some 4x4 "stilts" and a floor to get the house in the air, and constructed a frame around it with 2x4's and wire fencing to make the run

Sorry I dont have any plans to give you guys!

Seasonal And Holiday

Special Teacher Gifts

My son Jack, has Down syndrome. He's had the same preschool teacher for the last 3 years, and now it's time to move on to kindergarten. Not only does he have a dedicated teacher, but he has two paraprofessionals (teacher's aides) that take turns in helping him 1:1 all day long. I figured that it was time for all three of them to relax this summer. So, in appreciation, I made three of the adult sling chairs so they can enjoy their much deserved relaxation.

Estimated Cost
$25 - $30
Estimated Time Investment
Afternoon Project (3-6 Hours)
Finish Used
Since I used cedar, I didn't want to do anything to it except put a coat of Thompson's water sealer on it.
Recommended Skill Level
Beginner

Comments

mamma_joy

Tue, 06/21/2011 - 00:00

As an OT in the schools, I can understand your connection to the dedicated teacher and staff that work for your son. I'm sure that these gorgeous chairs will show your appreciation! What great choices in fabric, too!

marlaandwilliam

Wed, 06/22/2011 - 14:17

thanks!! i just love fabric! but mod-ish colors and designs really are so striking to me - LOVE it! :)

Sherry (not verified)

Fri, 09/23/2011 - 19:31

Would you mind sending the instructions for these chairs. I think this is something that I could do and would love to make a set for my husband for Christmas. We are all about homemade. That would be so great!

debandtom25

Wed, 09/28/2011 - 20:05

Hi Sherry. To find the page where I got the plans, just click on the words "Wood folding sling chair - adult" next to the bolded "From Plan" listed above. That will take you directly to Ana's plan.

Seasonal And Holiday

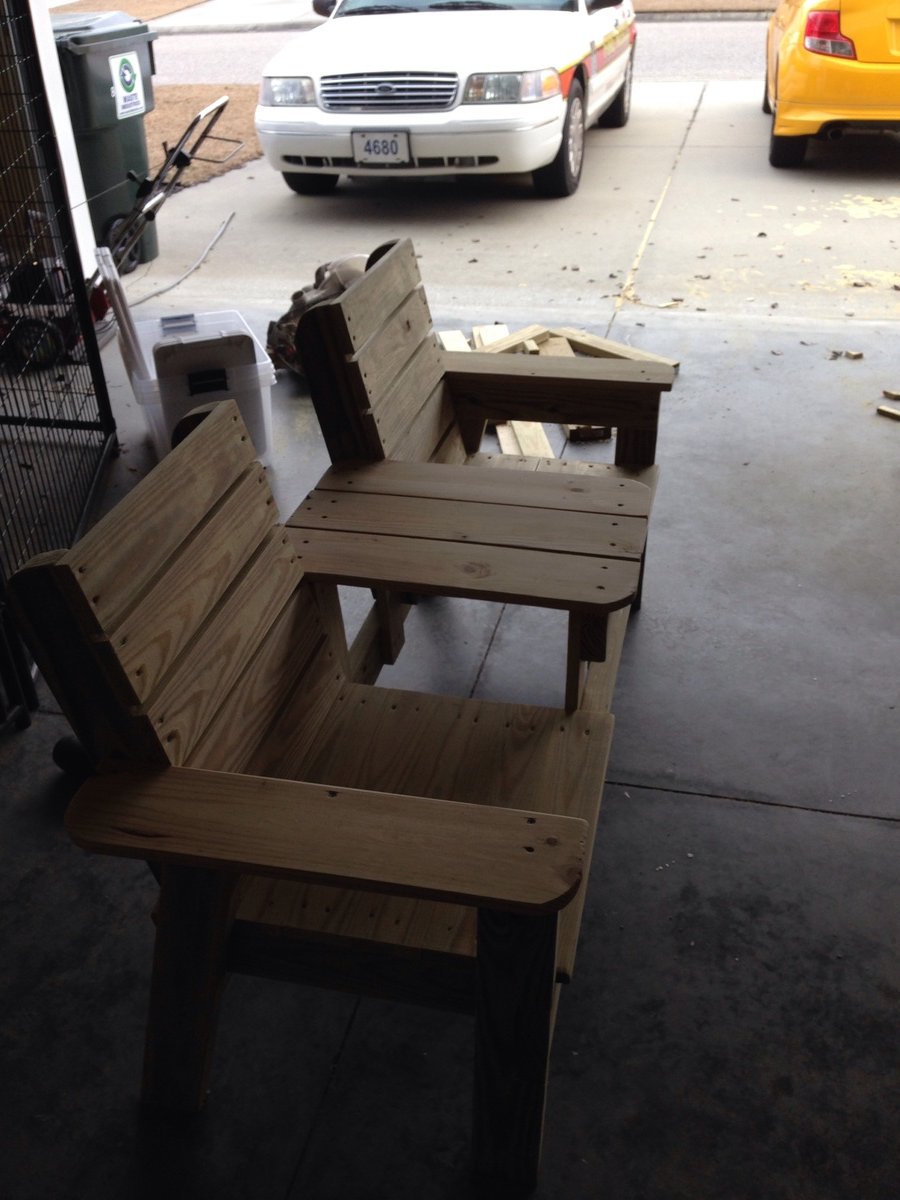
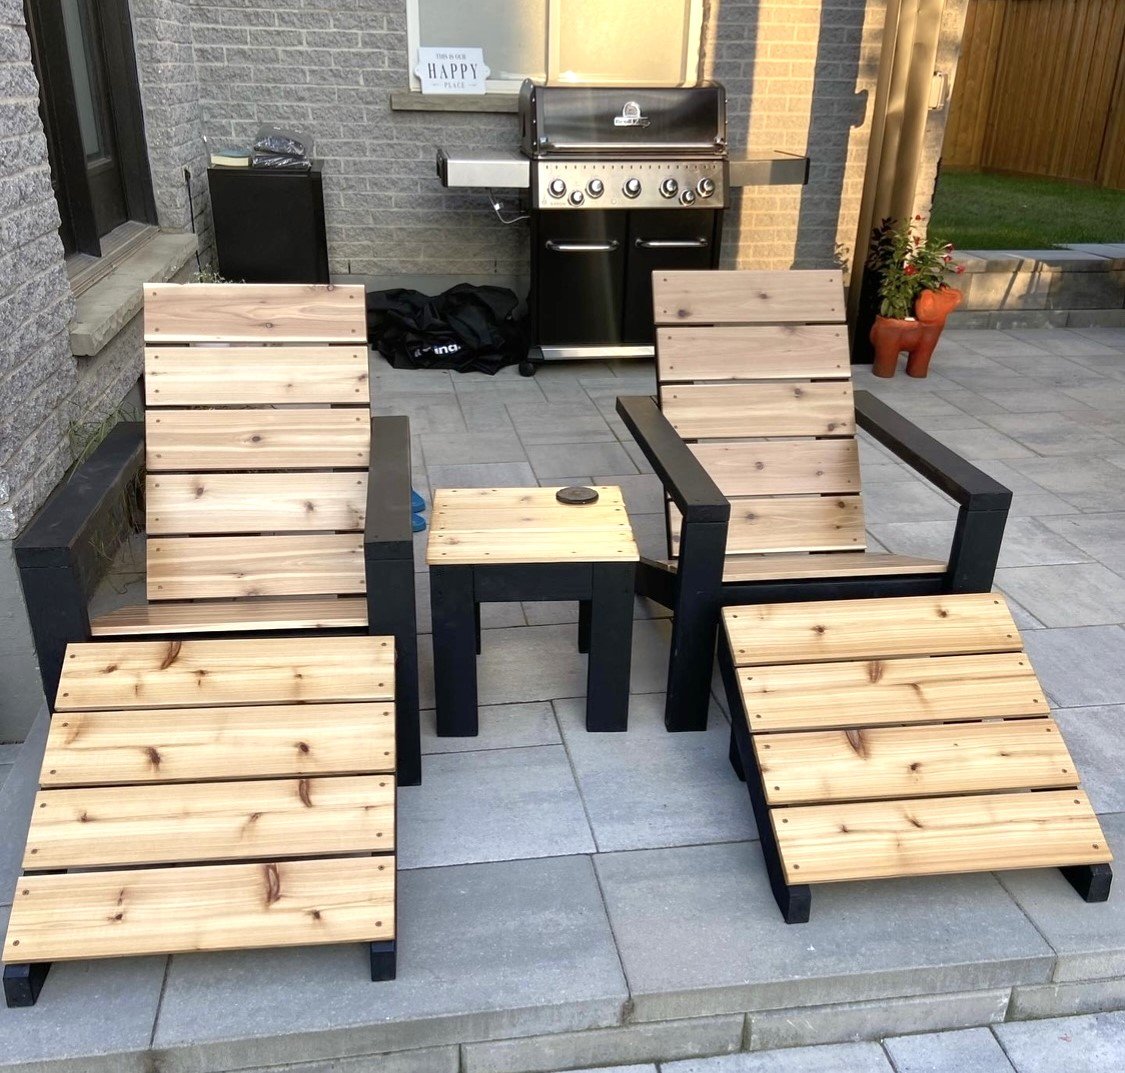
Adirondack Chairs with Foot Rest

Submitted by Anonymous (not verified) on Sun, 07/30/2023 - 14:45

Great set of outdoor chairs with foot rest!


RG Design & Build

Comments

Clubhouse based on Ana's Plan

Submitted by MattSl on Tue, 05/03/2011 - 09:18

I used Ana's plan as a base.

I changed it from 8x8 to 8x12, made the 4x4x8's to 4x4x10' for a higher main platform and swing platform, and added a 12' long monkey bar set to the other side. Also, an 8' climbing wall and a plank walkway to accompany the two slides.

For the clubhouse, I used Hardiplank 4x8 sheets for the siding and an EZ-Framer kit for the structure itself.

The slides I purchased from Lowes, monkey bars from Amazon, and the swing frame braces from Amazon as well. The swing kits I got from ebay.

Estimated Cost
1500
Estimated Time Investment
Week Long Project (20 Hours or More)
Recommended Skill Level
Intermediate
Seasonal And Holiday

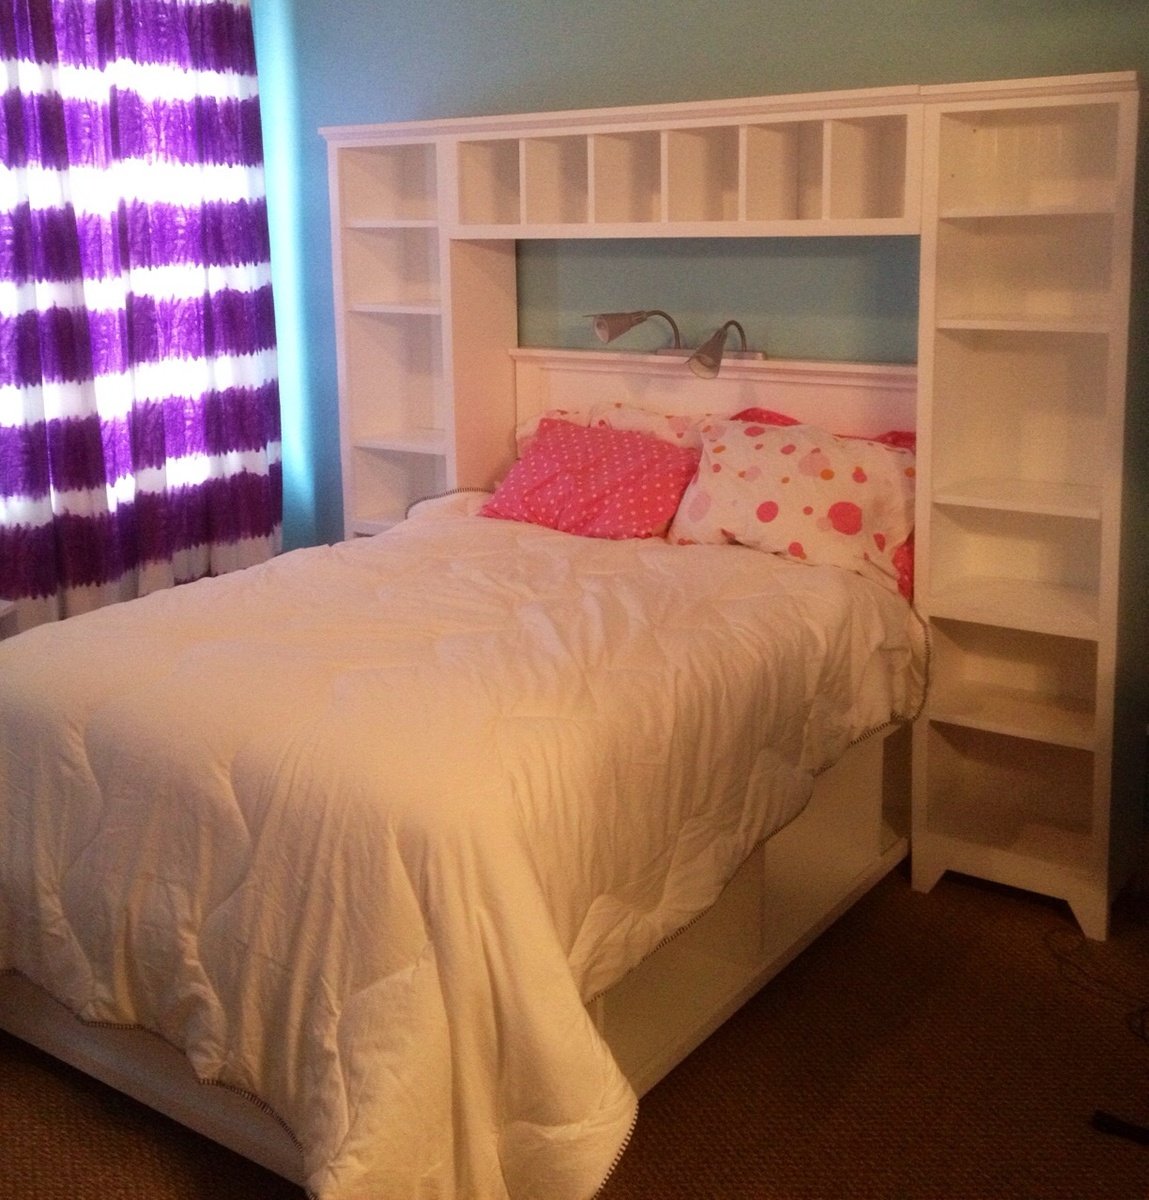
Complete Full Sized Hailey Bed and Storage System

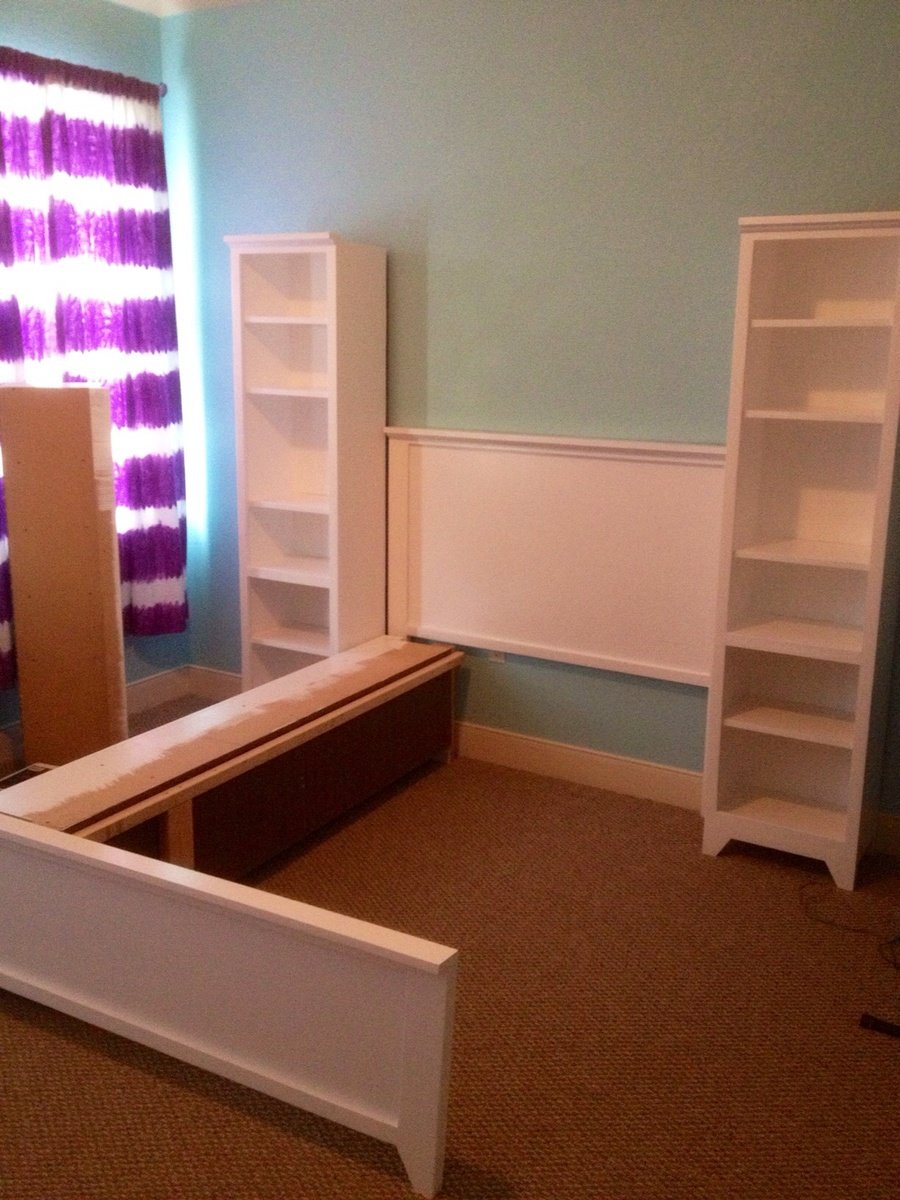
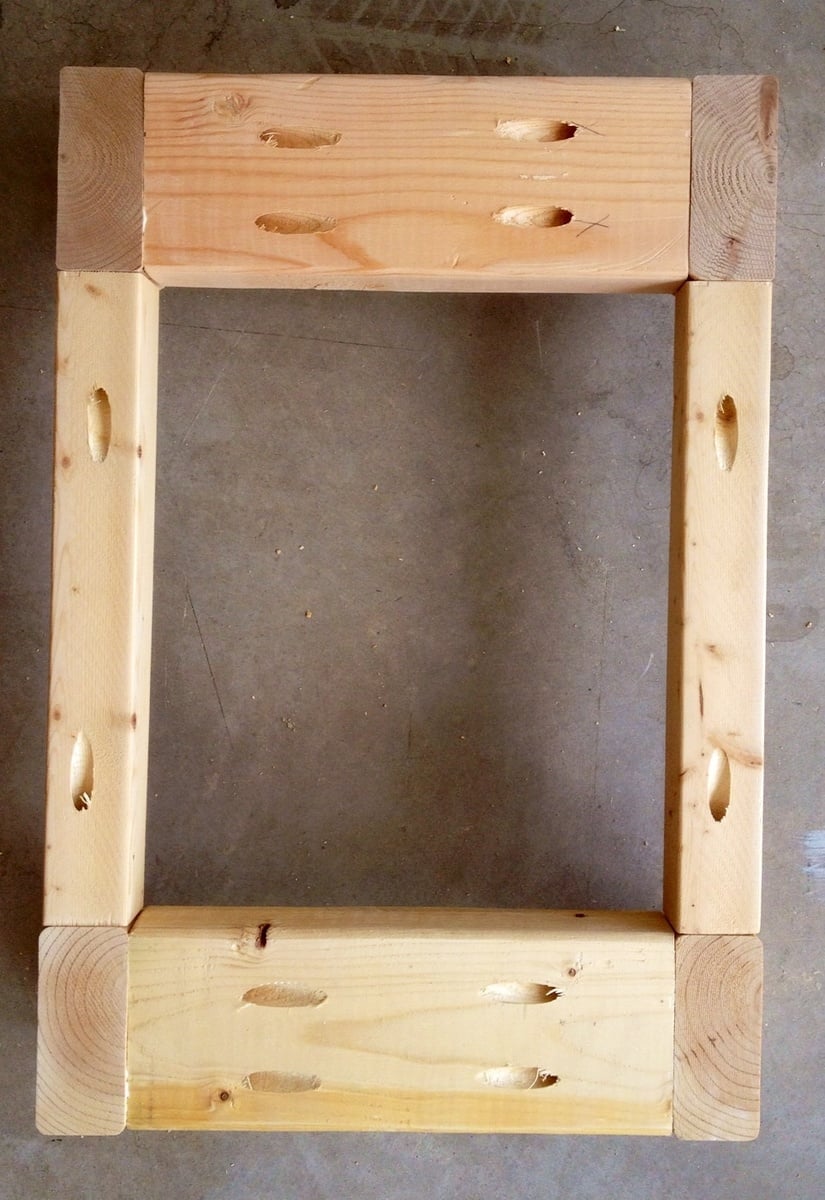
This project was our largest build to date, but the outcome was definitely worth the sweat! The build went relatively fast between my mom and I. I had a little problem assembling the tower bases, but we'll blame the 108 degree heat on my inability to figure out where to place my Kreg holes! I included a picture of how I did the tower base, in case anyone else runs into the same issue.

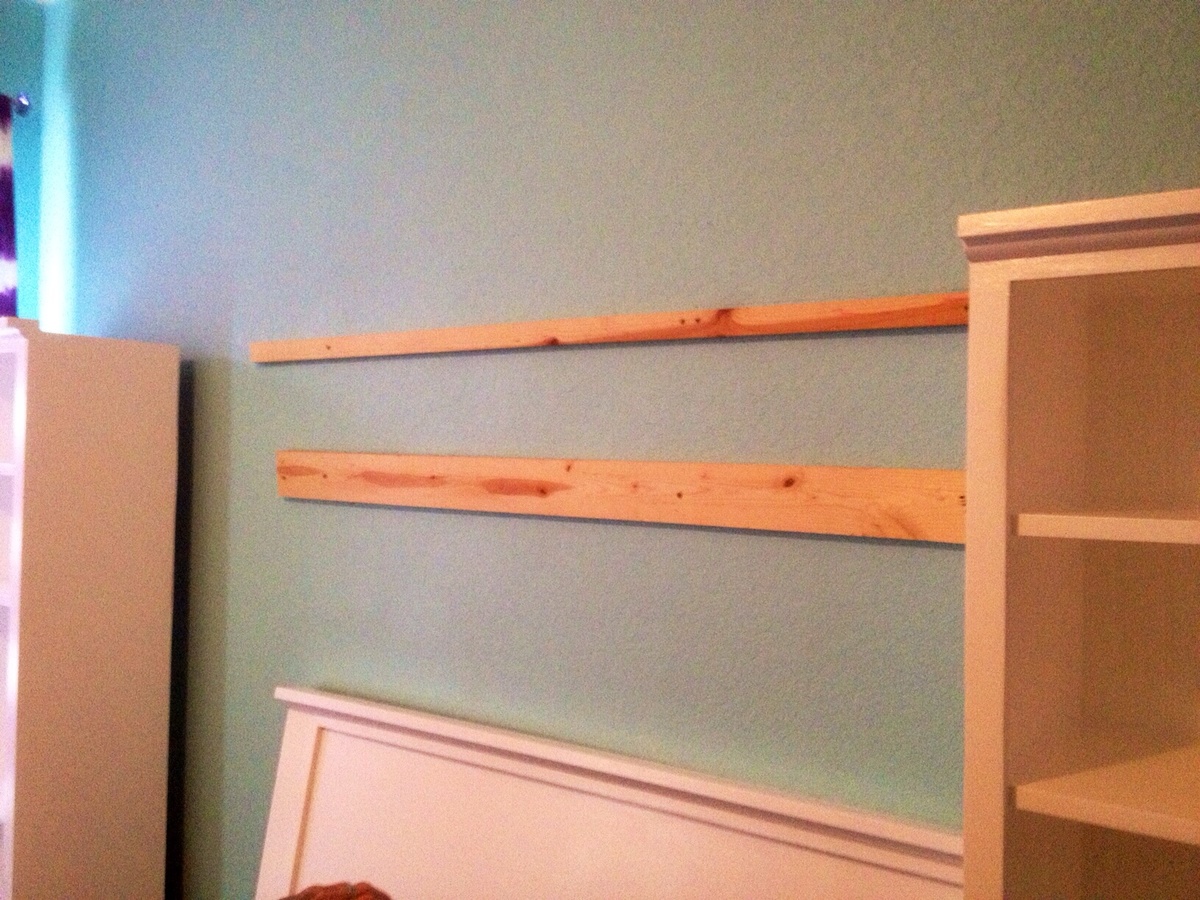
To accommodate for our base boards we added furring strips to the wall to bring all of the pieces flush. The hutch is secured into the studs with multiple L-brackets and so are the towers.

Finishing was very time consuming, but we'll worth the end result and look on my daughter's face! This system provides an incredible amount of storage. Thank you so much for the plans Ana!

Estimated Cost
$350
Estimated Time Investment
Week Long Project (20 Hours or More)
Finish Used
*All visible edges of the MDF were sealed with a mixture of white school glue & water, sanded and repeated until they were smooth.
*3 very light coats of Zinsser oil based primer with a foam roller, sanding between each coat
*2 coats of Behr Hi-Gloss lacquer in off the shelf white. Finishing was definitely the most time consuming part of the project.
Recommended Skill Level
Intermediate

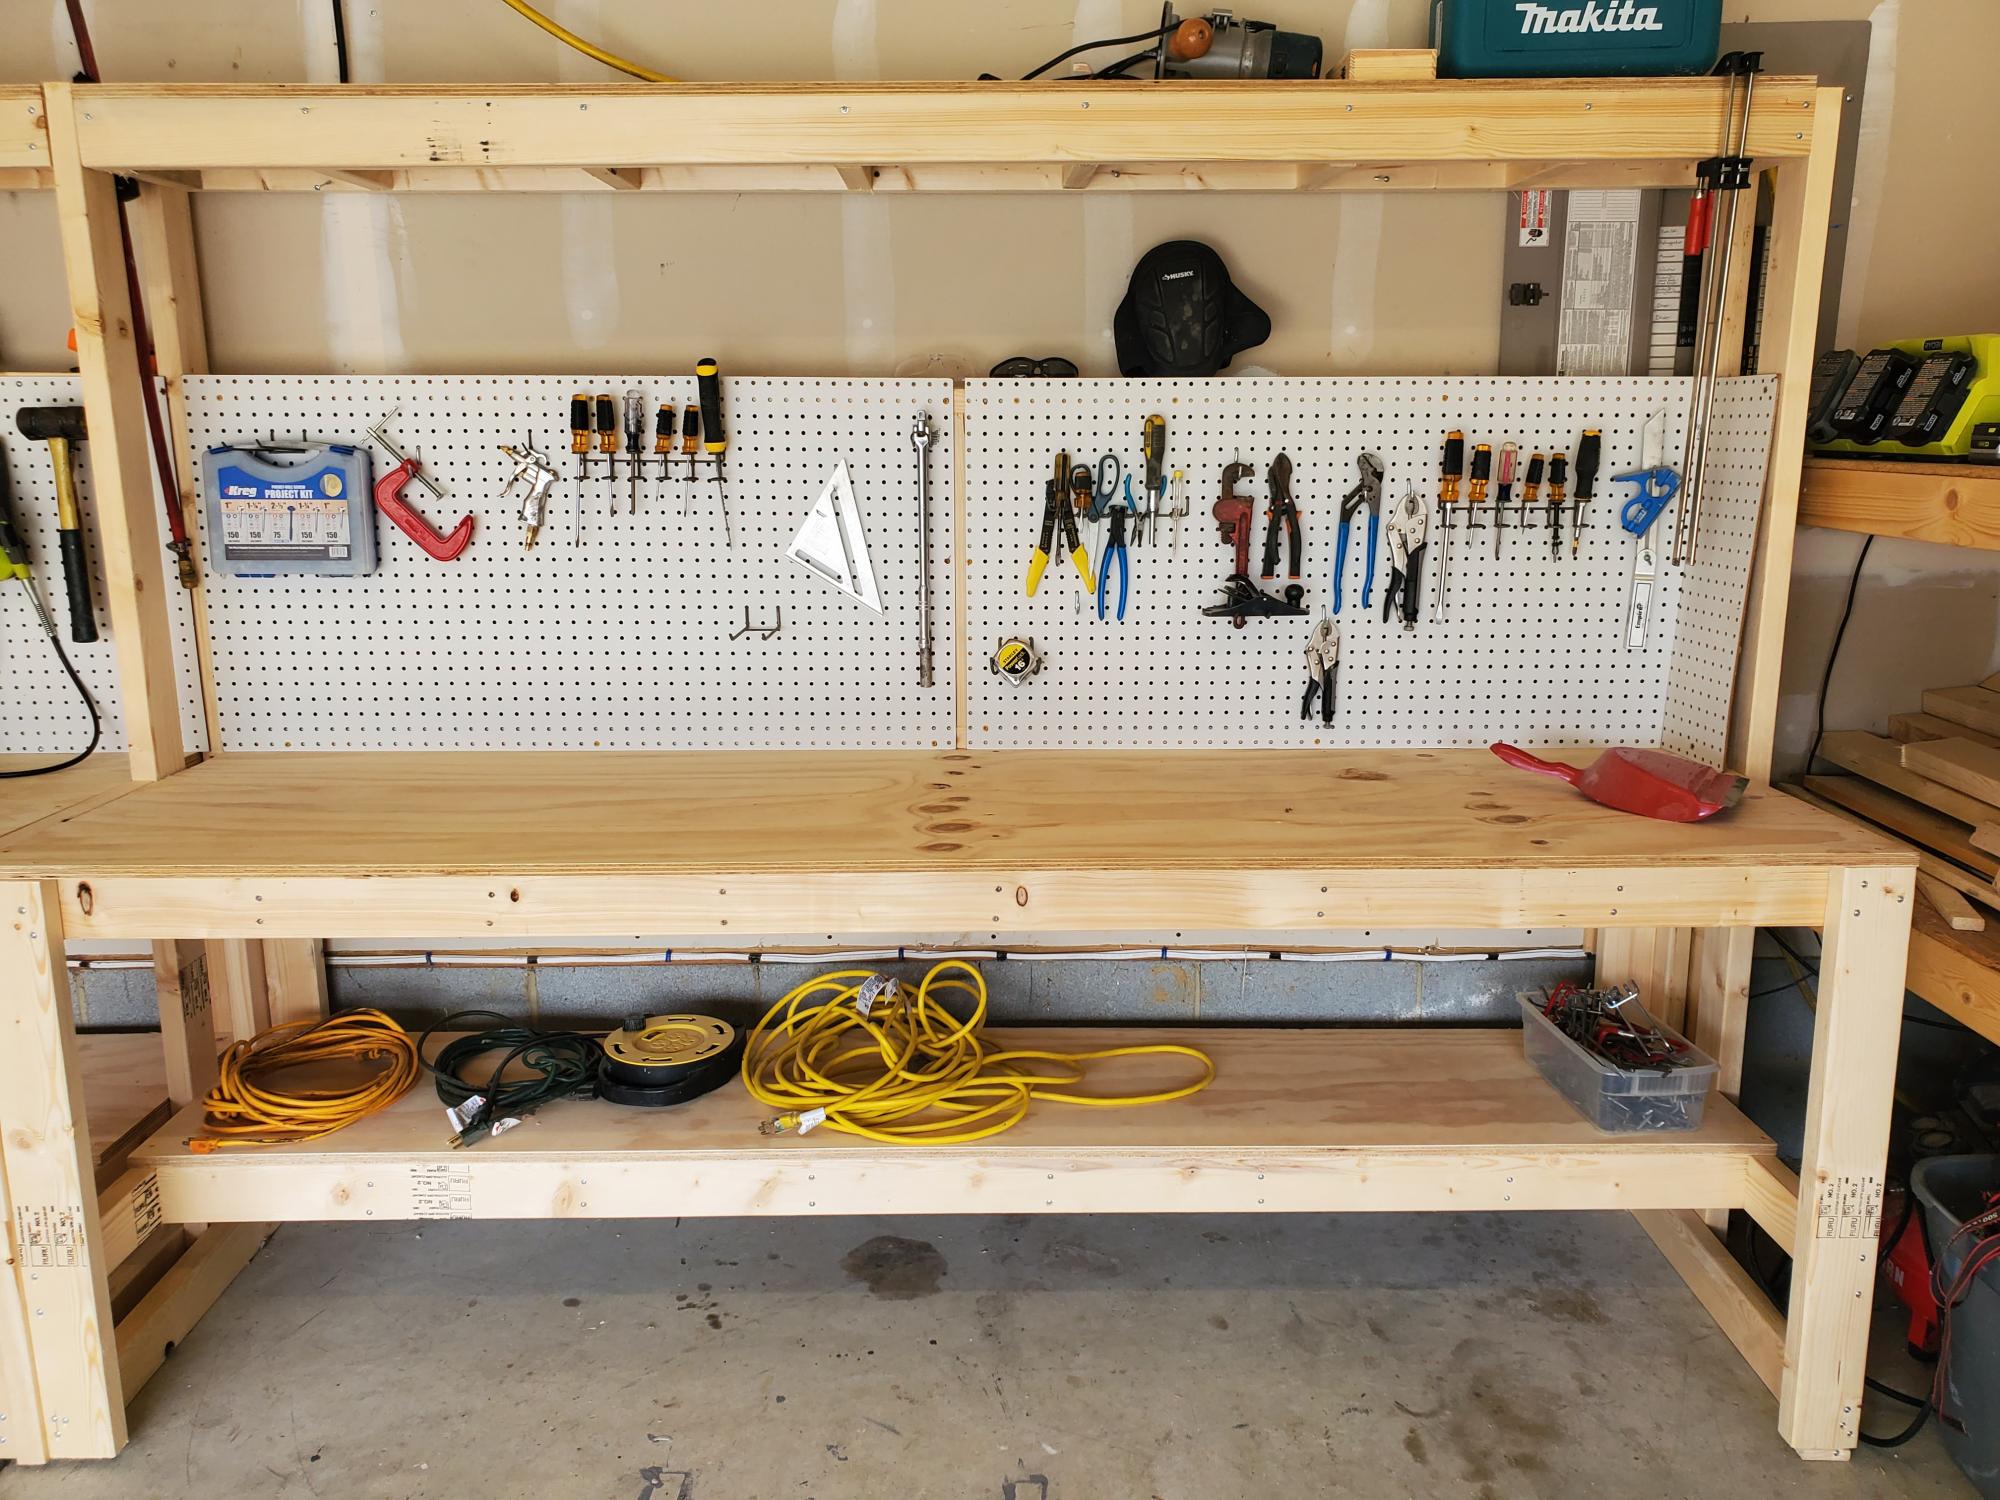
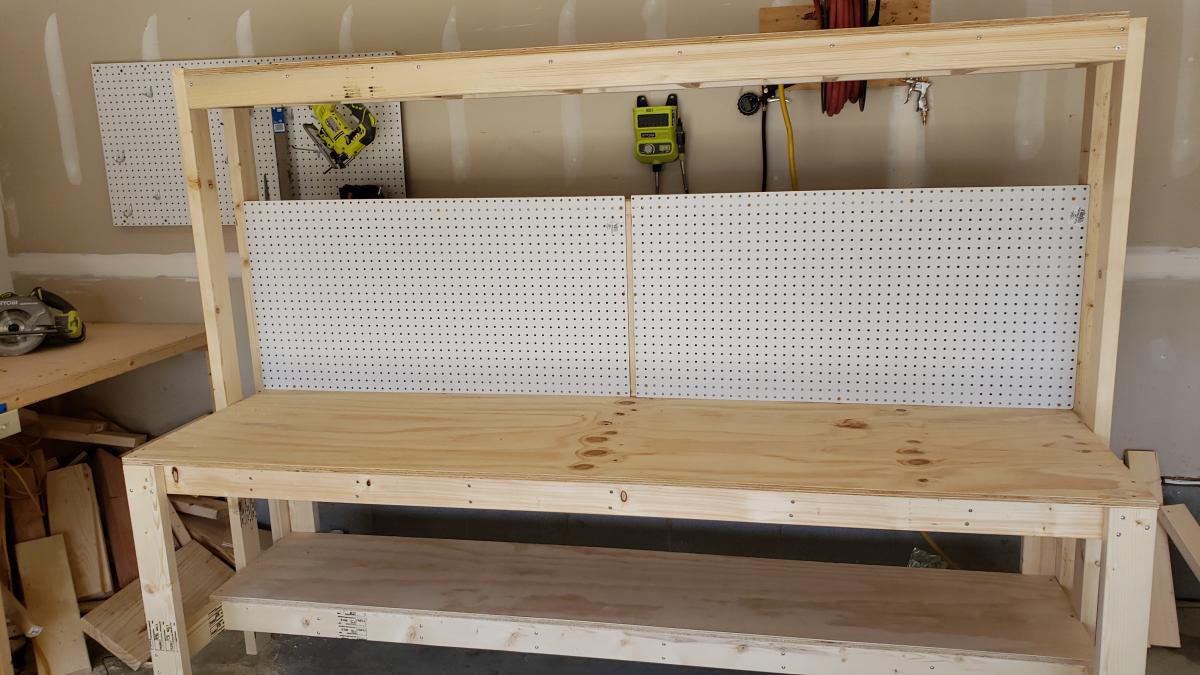
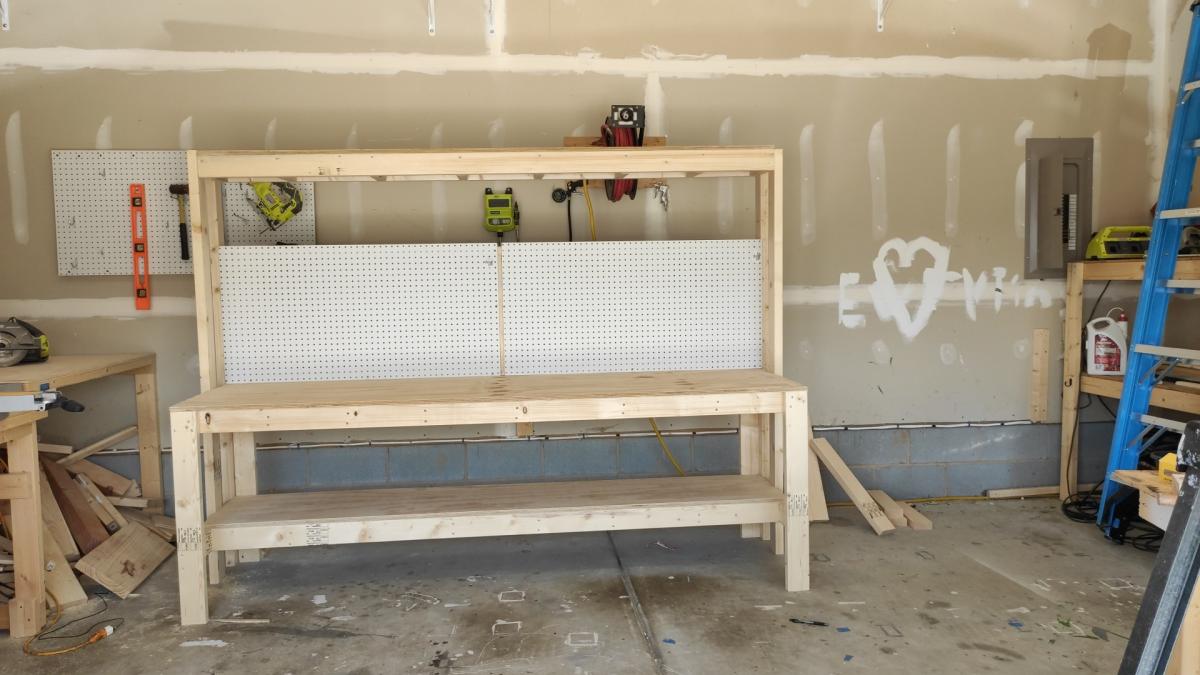
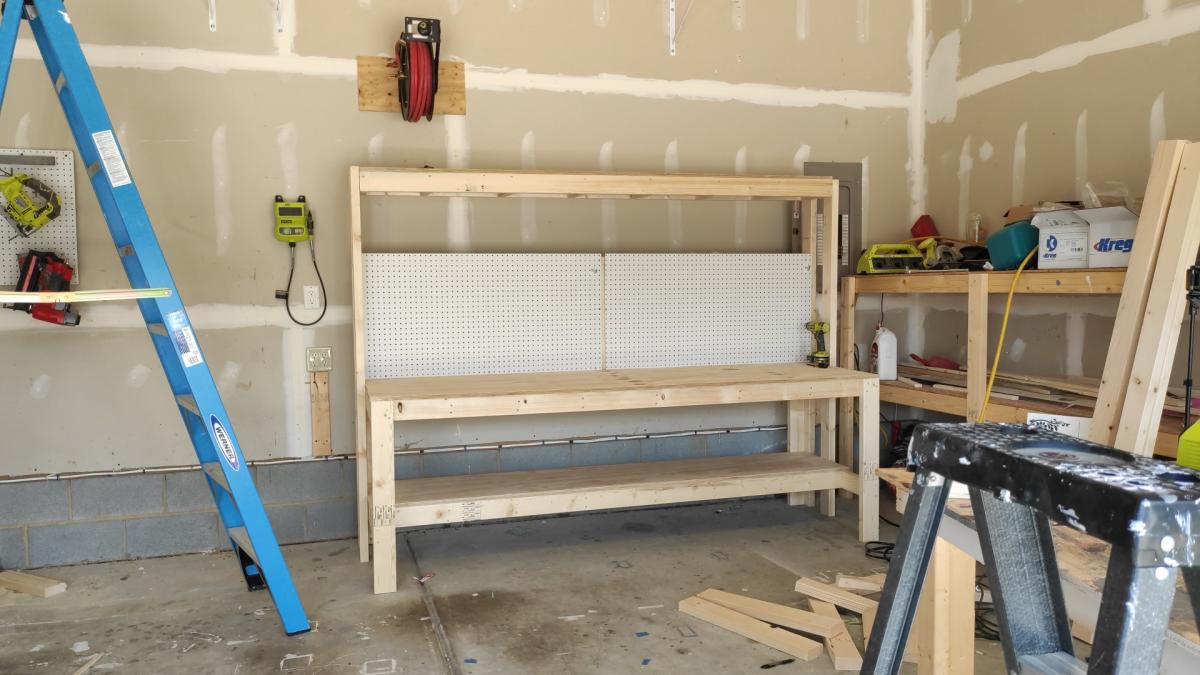
Workbench with pegboard

Submitted by bredbu on Wed, 07/01/2020 - 18:37

I made a workbench for my garage it was pretty easy. I also made an instructional youtube video if you want to learn how to make it. #diy #workbench #bench

Estimated Cost
125
Estimated Time Investment
Afternoon Project (3-6 Hours)
Finish Used
none
Recommended Skill Level
Beginner

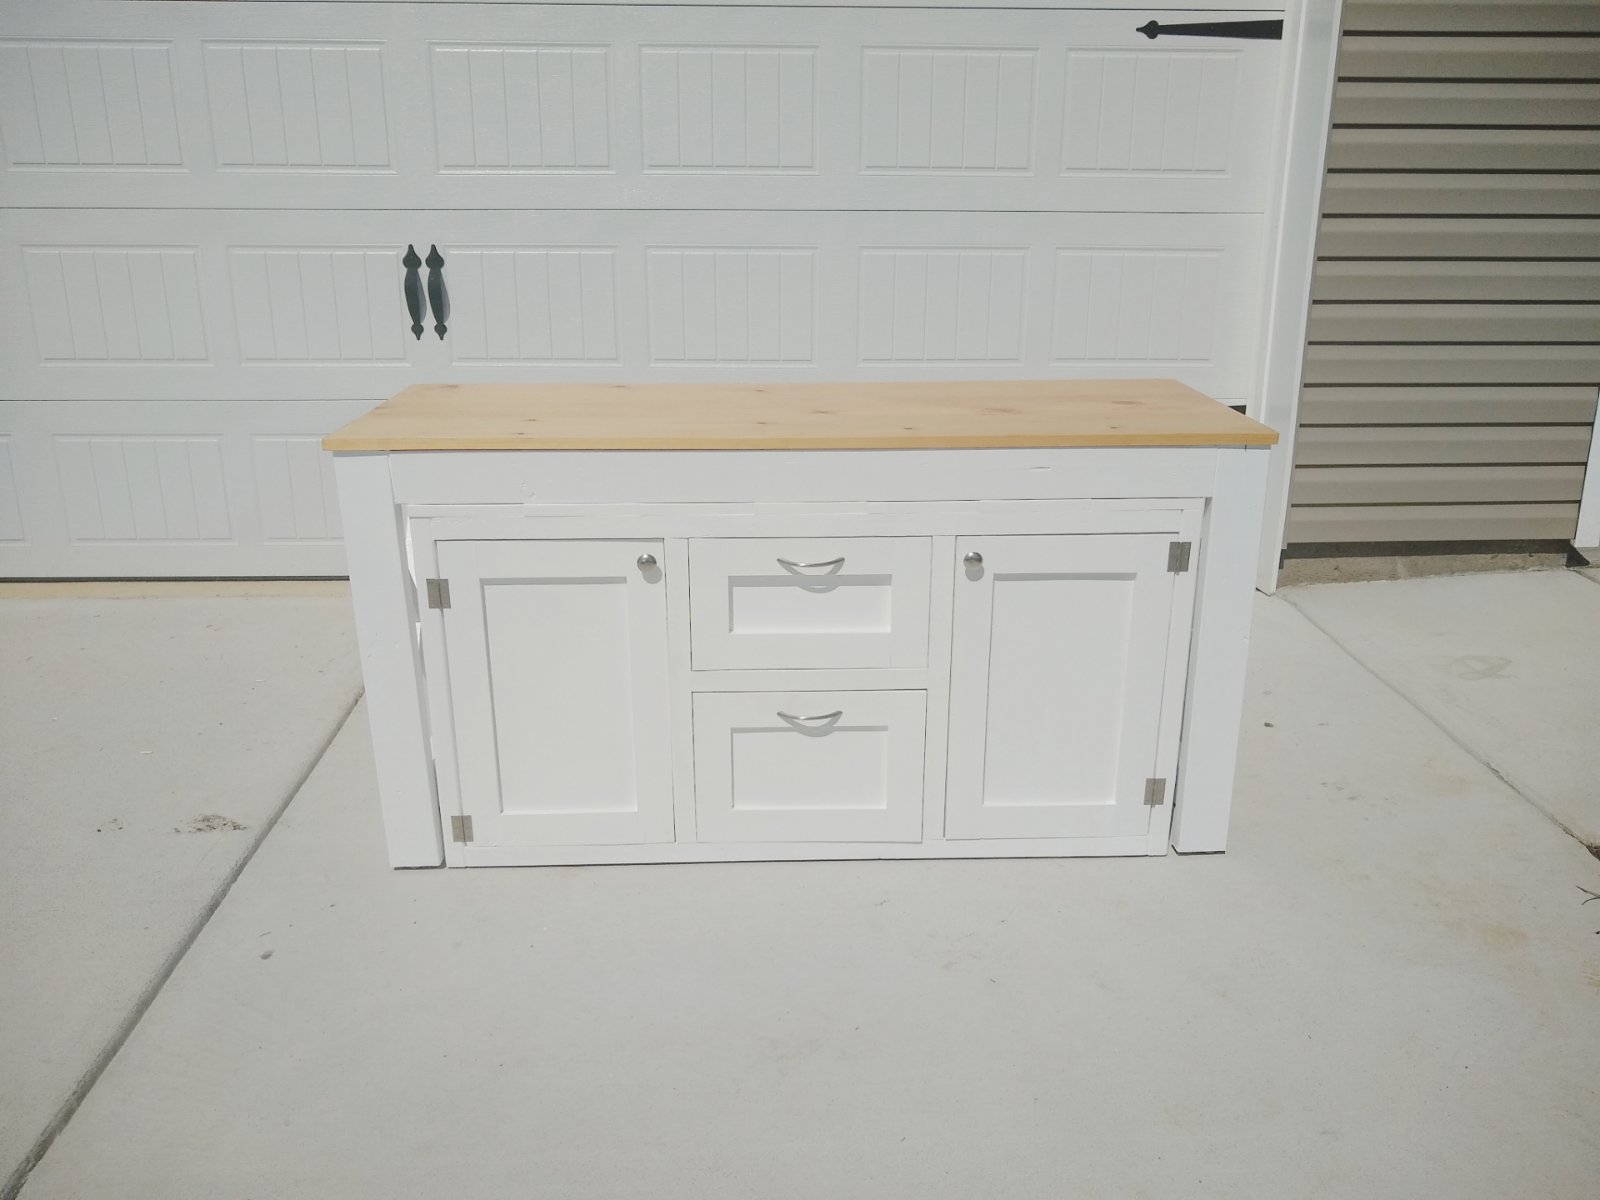
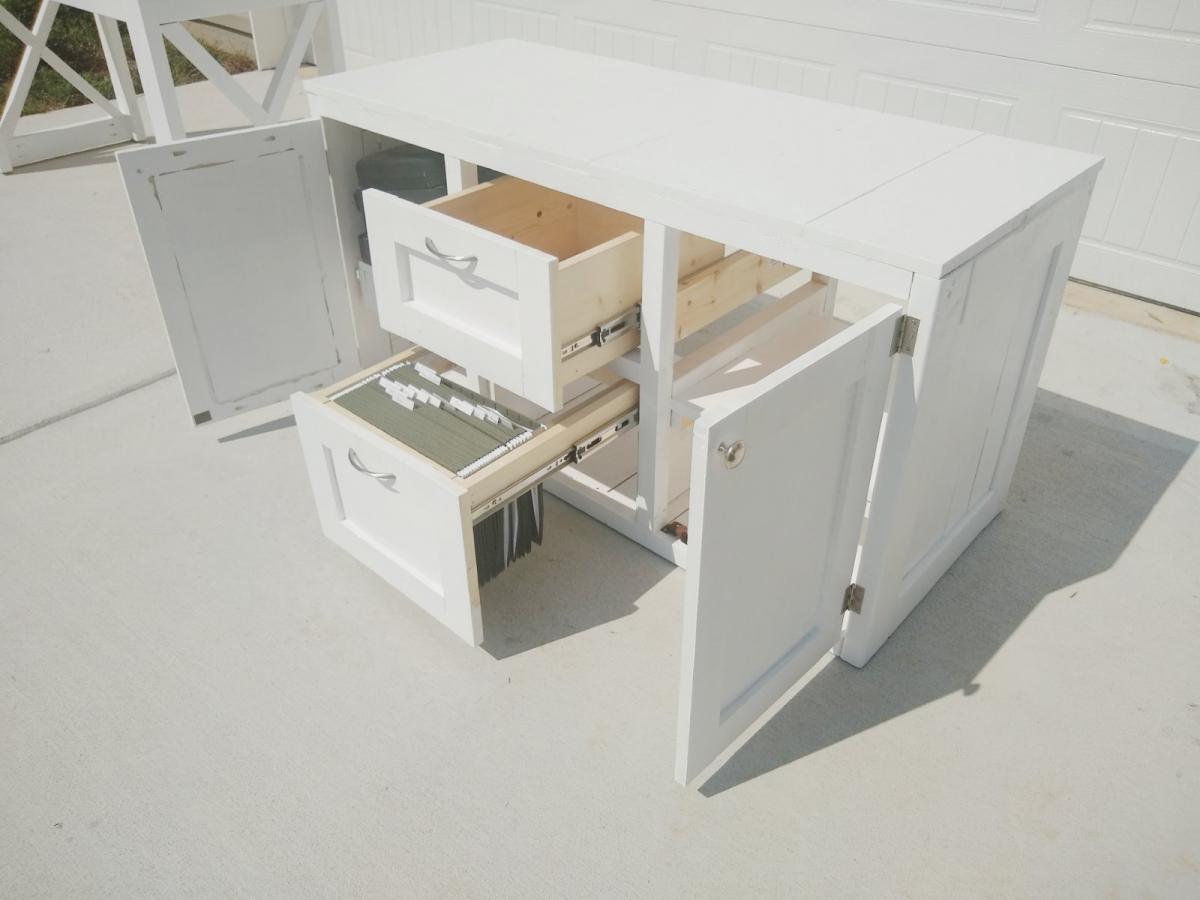
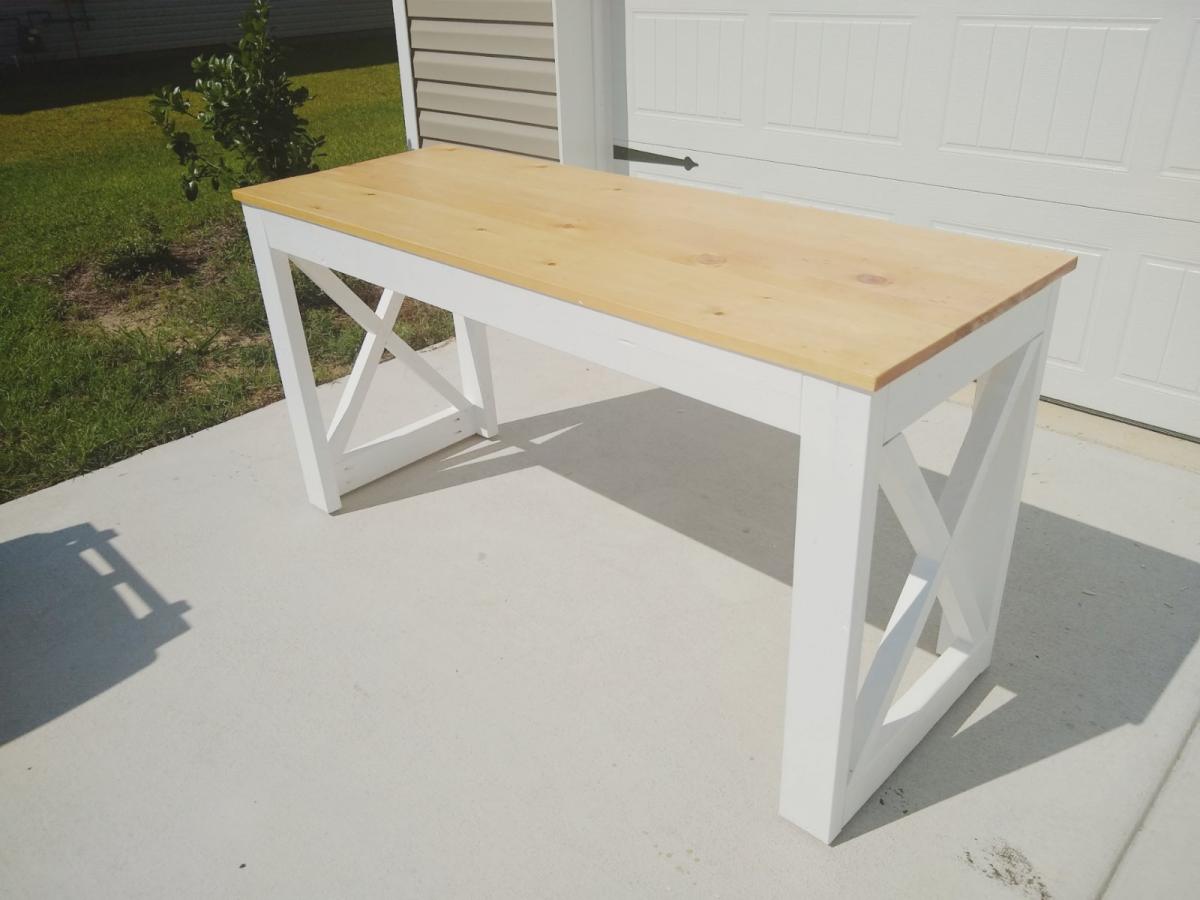
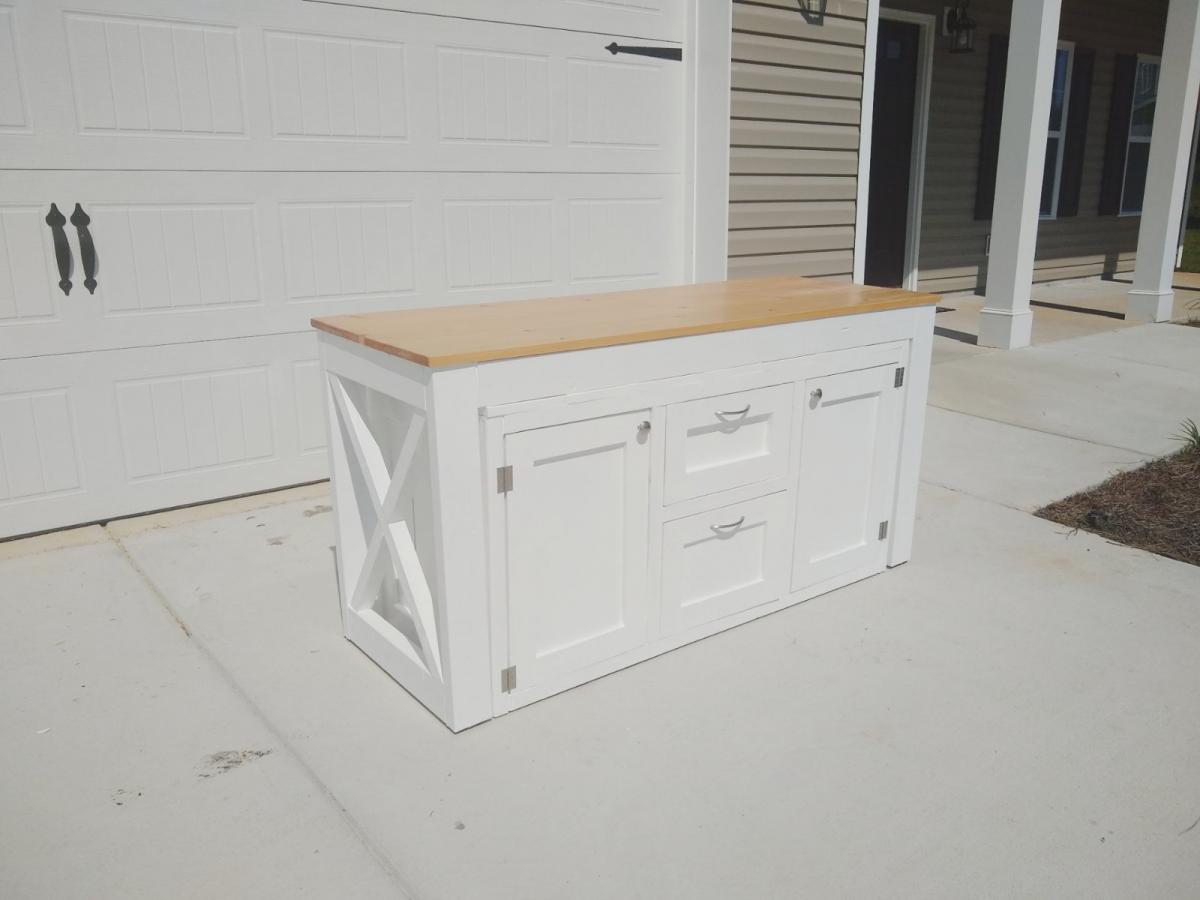
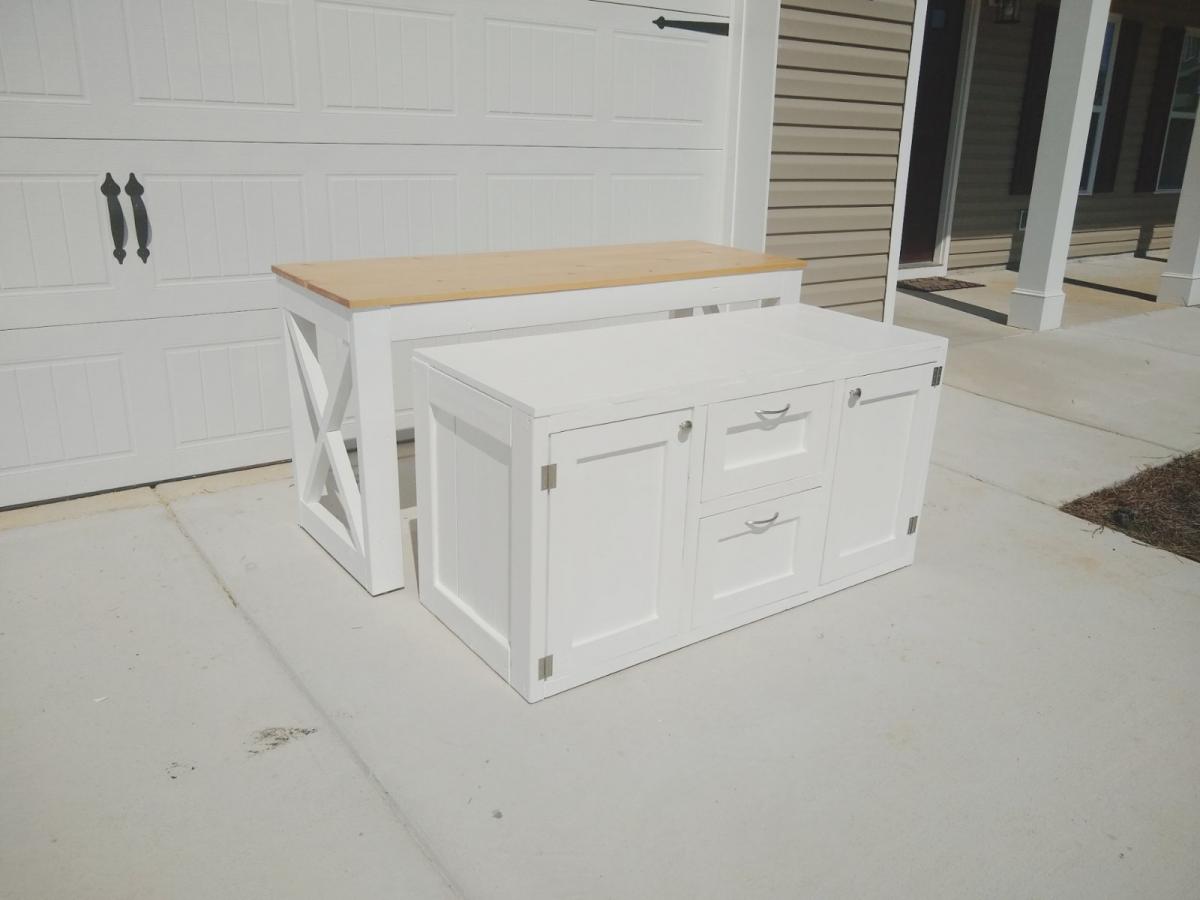
Nesting Office Station

Submitted by Sb1212 on Tue, 07/14/2020 - 18:38

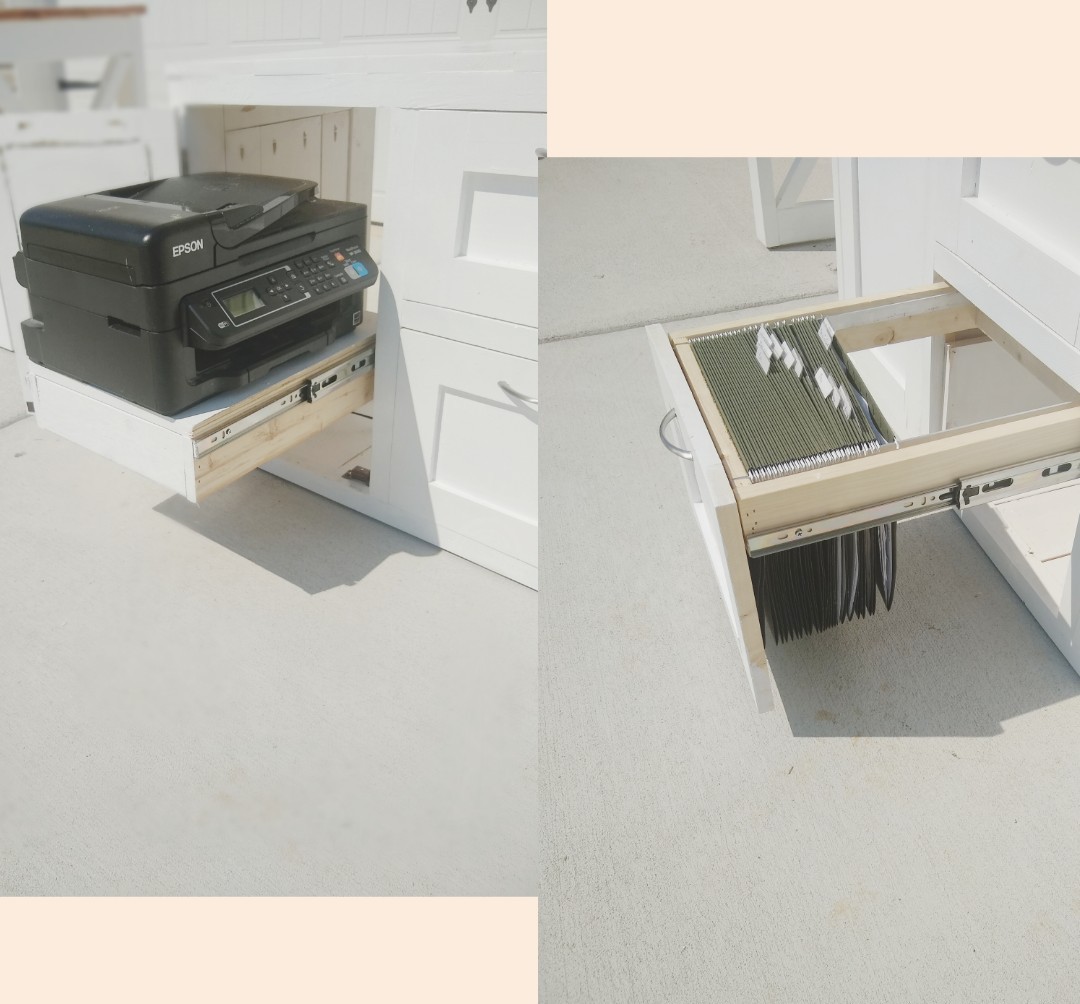
So loving this nesting office station❤️! We will have a sofa sleeper in the office as well. So we needed a desk that could be moved to the wall when the sofa sleeper is being used by guest. I saw a post from Ana for her Nesting Grill Station and I came up with the idea to make this nesting office station. The cabinet includes a file folder drawer (which is from Ana's mail boss plans), a regular drawer, cabinet doors with shelves. One of the shelves is a pull out shelf for the printer. I think it came together great! Design for nesting desk inspired by these plans: https://www.ana-white.com/woodworking-projects/nesting-grill-station https://www.ana-white.com/woodworking-projects/mail-boss

Estimated Time Investment
Weekend Project (10-20 Hours)
Finish Used
Minwax Golden Pecan
Valspar Signature Ultra White in satin
Recommended Skill Level
Intermediate

Comments

Sb1212

Sat, 10/03/2020 - 08:35

Hi, Thank you! Actually I didn't add wheels to the design since this will be in an office with thick carpeting. I added adjustable metal foot pads to the bottom of the desk.

Back