My first project!
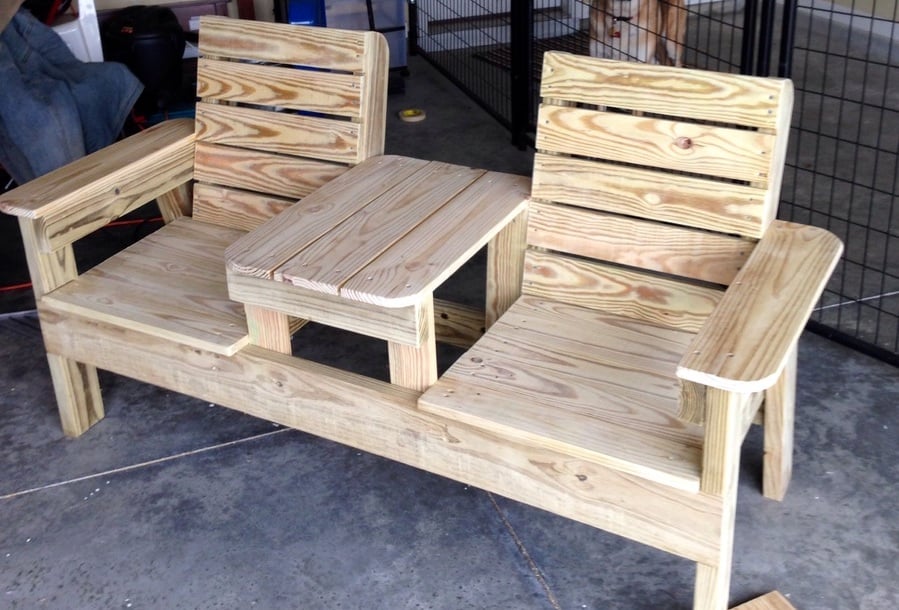
Thanks for the awesome, easy to follow plans!! All that's left to do is stain it and build another one- I'm going to have 2 on my back patio! A successful first project! Thanks!!
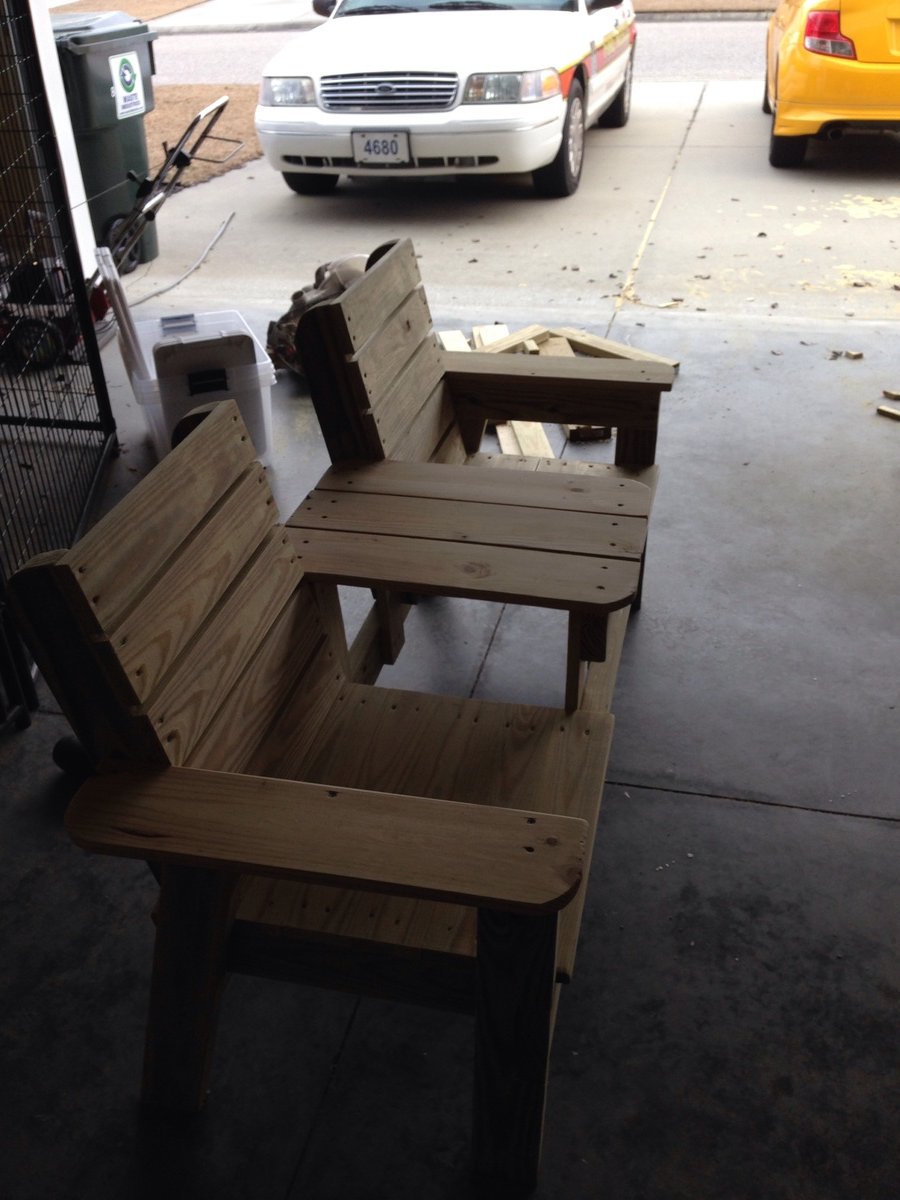

Thanks for the awesome, easy to follow plans!! All that's left to do is stain it and build another one- I'm going to have 2 on my back patio! A successful first project! Thanks!!

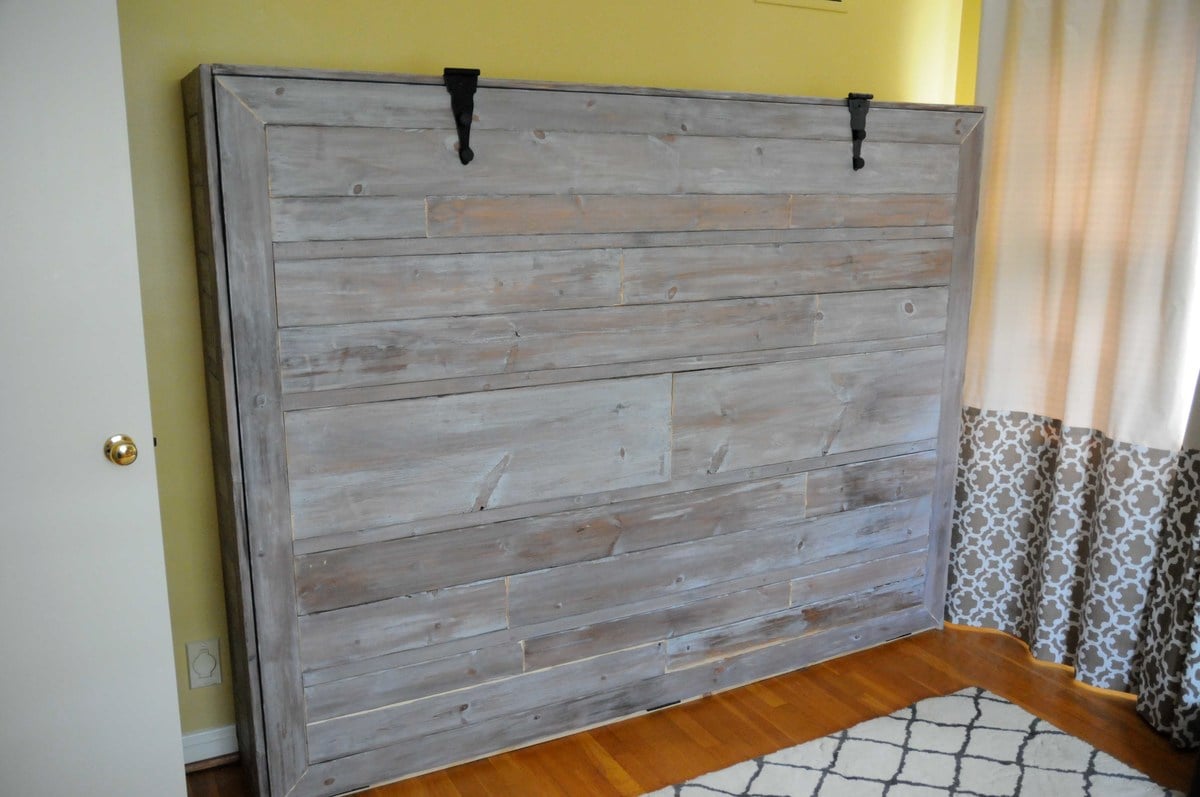
Expecting our second child, my wife and I decided to do away with our guest bedroom and combine it with our office. The only problem was our queen bed took up way too much space and it didn't get enough use to justify the sacrifice. We looked at the wall bed options available for purchase and decided they were way too blah and very expensive. I then found the "A MURPHY BED YOU CAN BUILD, AND AFFORD TO BUILD" post on Ana's website (thanks for the inspiration)!
Using cheap pine boards, plywood, door hinges, vinyl upholstery and stain I constructed the wall bed you see here. It really wasn't that difficult but facing it took the most time. To give the boards a more rustic look I used a utility knife to shave off the edges/corners and stained them with the Minwax American Walnut water based stain and the Minwax White Wash Pickling. When this started we thought we were going to have to settle for something unattractive and less than desirable. Seeing it in our office now, we love our new bed and actually think it makes the room look much better! I didn't keep track of costs, but it couldn't have been more than $150.


Tue, 07/08/2014 - 08:08
Looks great! May I ask what the final outside dimensions were? Curious to see if this would work for me.
Thanks!
Wed, 08/06/2014 - 09:23
I would have to measure it when I get home... at work currently. Looking back, I think the best approach is to take the measurements from the plan, find the difference between standard mattress and queen mattress dimensions (check wikipedia for standard sizes), then add that difference back to the plan. I cut it real close on mine and could use a little more space. It would be nice to make it a bit deeper and with some head room to store comforters and pillows.
Sat, 03/21/2015 - 08:32
To fasten the facing I used wood glue then a Ryobi 18ga nail gun. It's part of their 18v One+ line and works great!
Sun, 12/28/2014 - 12:59
I am dying to get started on this wall bed project. I keep getting this message when trying to open the Plans.
The page you are looking for is temporarily unavailable.
Please try again later.
can someone help me find them.
Sun, 12/28/2014 - 12:59
I am dying to get started on this wall bed project. I keep getting this message when trying to open the Plans.
The page you are looking for is temporarily unavailable.
Please try again later.
can someone help me find them.
Sat, 08/15/2015 - 12:05
did you ever find the plans?
I'm having thee same problems
Tue, 08/09/2016 - 15:24
Hi. I would love to try this. Looking to build in the next month before parents in law come over. Is there any working links to the plans??
Wed, 01/24/2018 - 21:42
WHERE CAN I FIND THE PLANS, MATERIALS LIST AND DIMENSIONS? THE ATTACHED LINK TO YOUR ARTICLE LEADS TO A TWIN SIZE BED. THANK YOU
Thu, 01/25/2018 - 06:30
is there a link to the plans? I can't find them and I really want to make this

Modified the plans of the outdoor sofa and sectional piece to create this set, then added cushions from IKEA.

Wed, 02/21/2024 - 10:27
I'm building the sectional this weekend, and saw your addition to the end piece and am going to steal your idea. Very nice.

I modified this plan so I could have 4 total work areas. Total Size: 48" x 96"

Tue, 09/08/2020 - 19:42
Is there anyway you can share these plans with me!? I drew out some plans for an identical table but I think my cuts may be off! It would be so helpful.
Fri, 11/06/2020 - 12:47
Is there a full update post with instructions for the table shown?
Tue, 12/20/2022 - 22:03
LOVE this! Just what I'm looking for! Can you tell me what you used for the top?
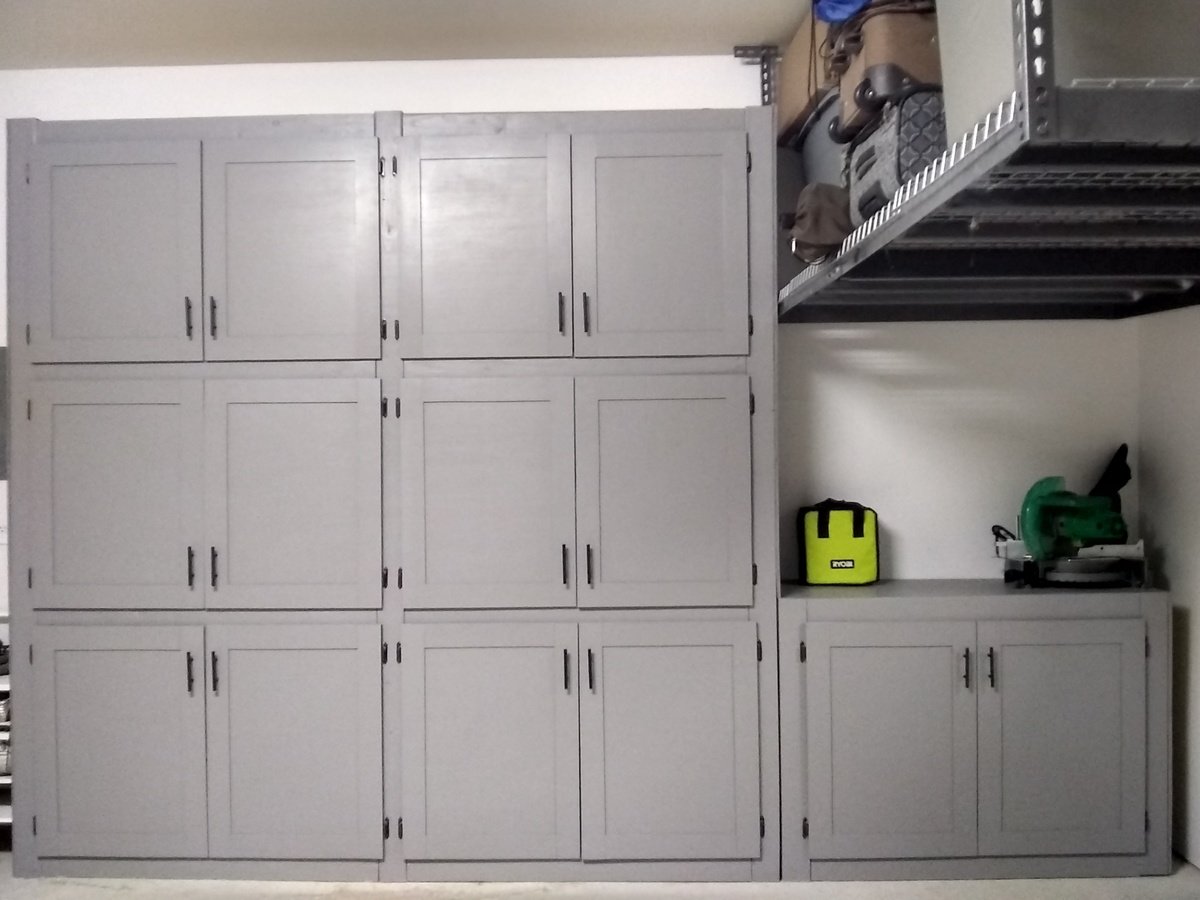
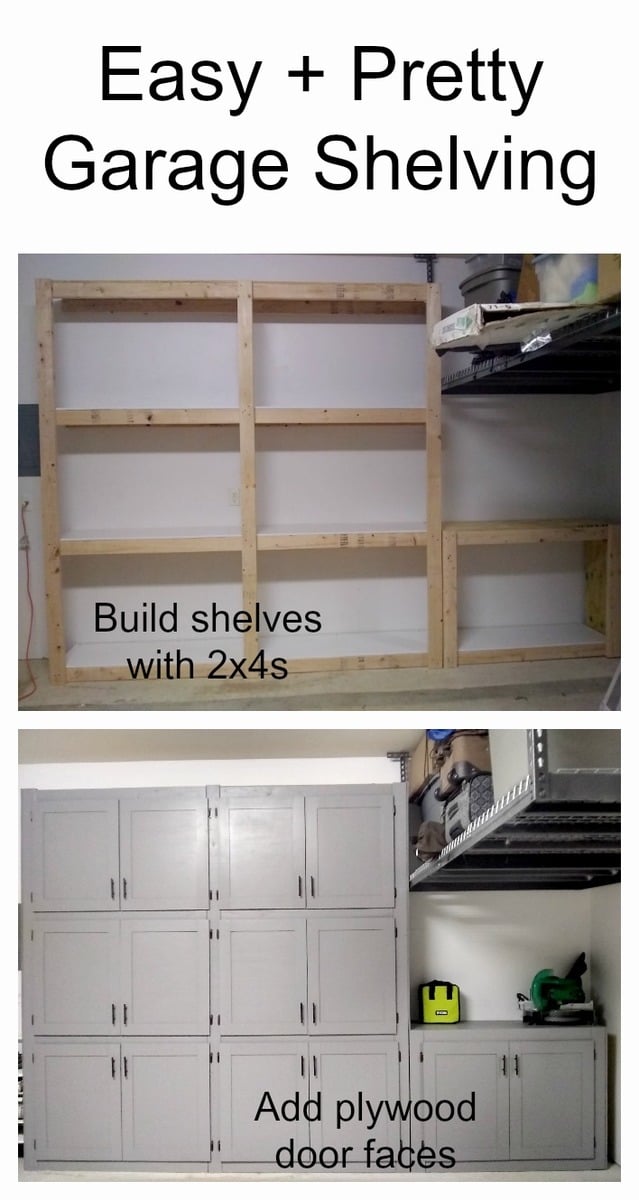
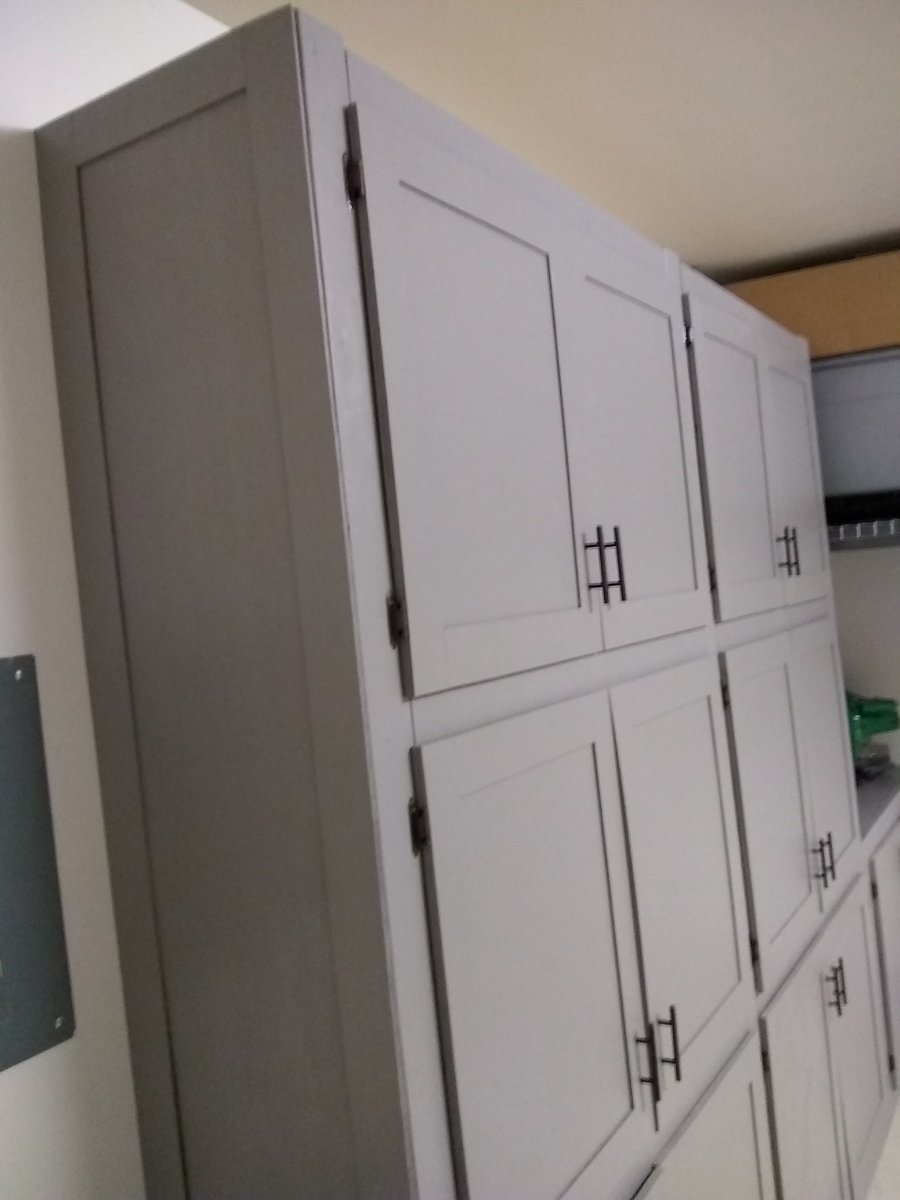
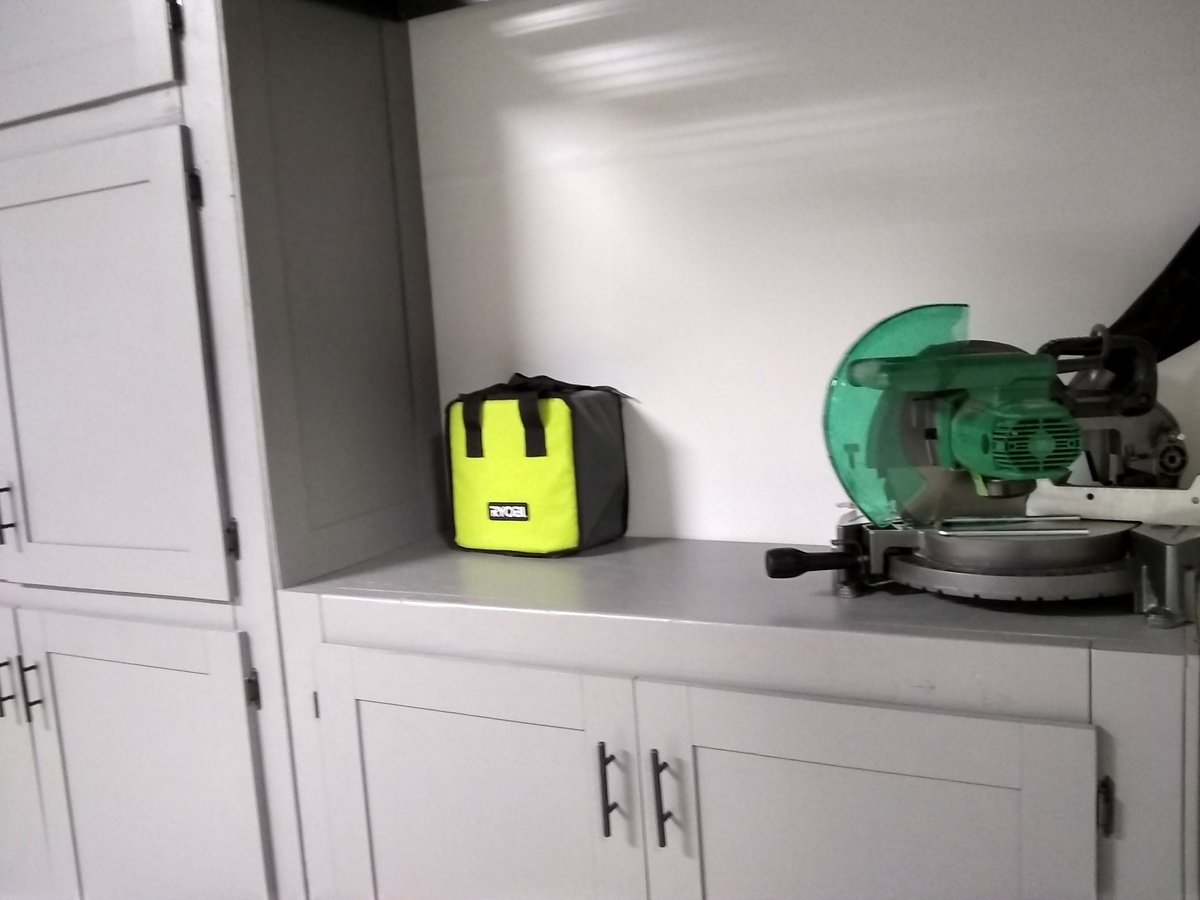
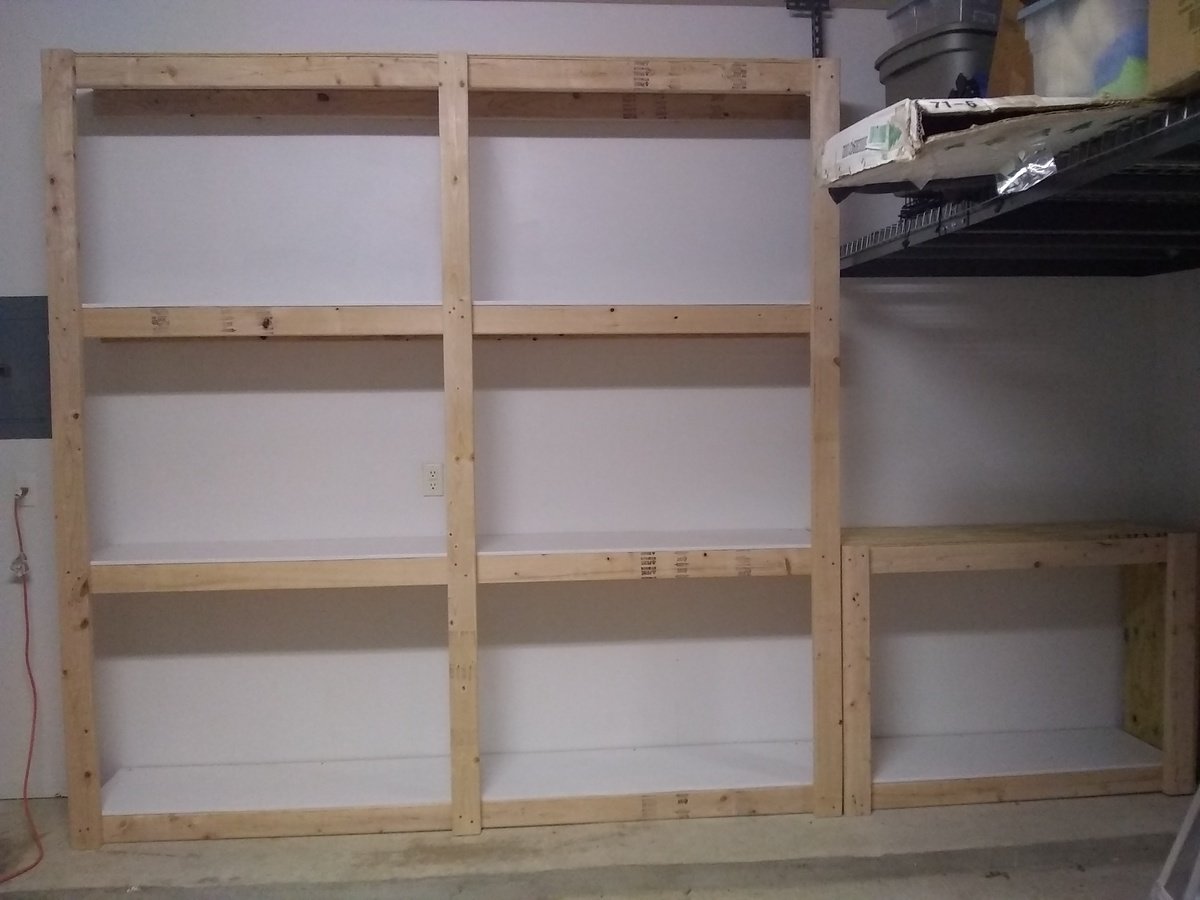
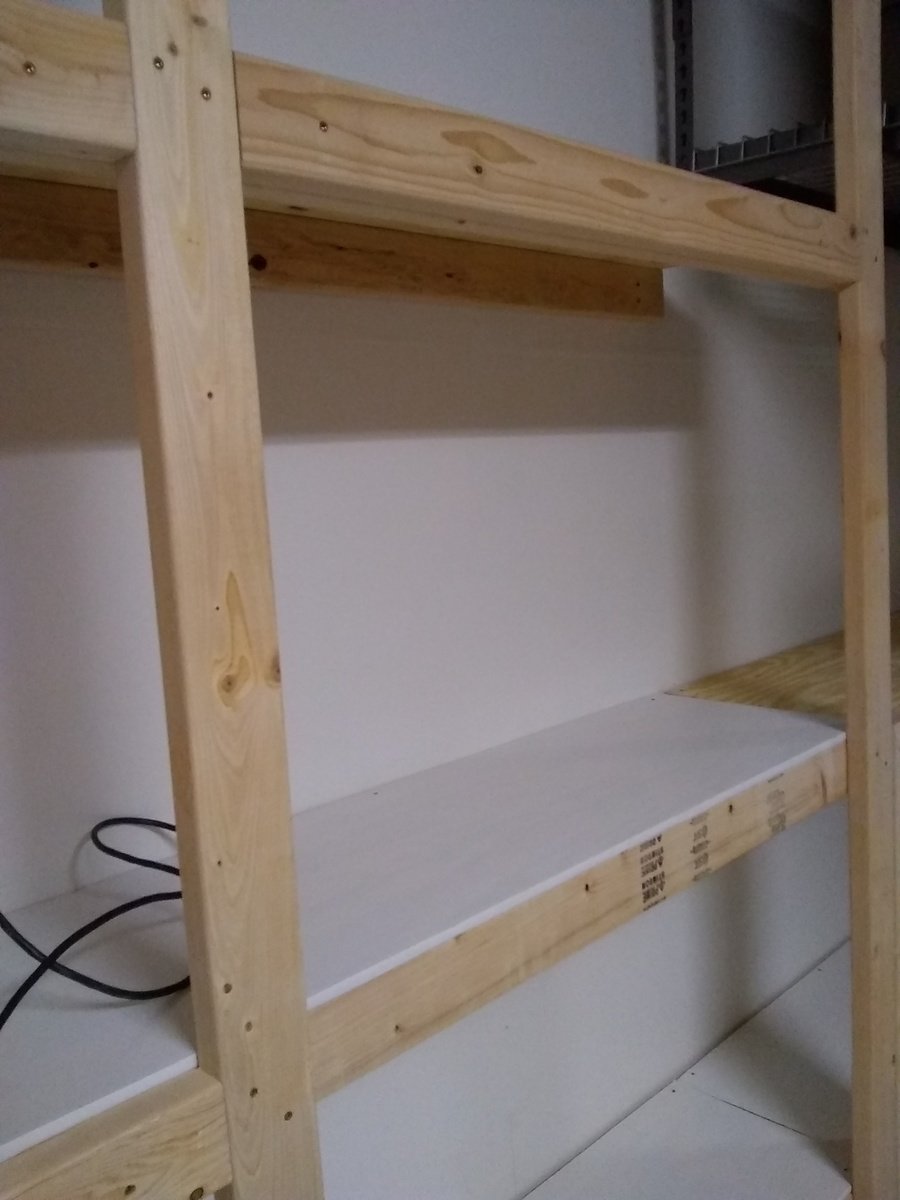
I have been wanting garage cabinets for a long time but couldn't afford them. When I saw these shelves I knew it would be easy to add side panels and create doors for the sections. The size is 8'x8' with the 4'x3' under the ceiling rack. I put a 2"x4" in the middle to divide each section, measured and cut doors from 5mm lauran plywood. I also cut the stiles and rails from the same material to give it interest but mainly to make it thicker to avoid warping as much as possible. I added 2"x4" to create a facing for the doors to rest on. Also used overlay hinges to simplify the hanging as much as possible. I was able to follow the design plan and the only thing I did was add a shelf at the bottom. The cleats were definitely not necessary, it's very sturdy.
Making the doors
The first thing is to learn how to measure for cabinet doors. There are plenty of sites and YouTube videos showing how to correctly measure. If you are doing the same type of doors like I have, with no middle divider, then be sure to pay attention how to correctly measure for those instead of a single door.
The easiest way to make the doors will be getting 1/2 in sanded plywood and use a table saw to cut each door to size. Skip the shaker style trim and put the hardware on and be done. Make sure the hinges will be able to hold the weight of the door.
Unfortunately, I didn't have a table saw but I did have a router and a jig saw, and found a great video on YouTube on how to use a router to cut straight edges without a table saw. I measured out one door and used that outline to cut two identical doors. It turned out that each section was slightly a different width so I had to do two at a time. However, if you have a circular saw you can rig it to make a table saw and make a guide to rip the doors. It all depends on what tools you have available to you.
I have a compact plunge saw and was able to cut the 3 inch strips for the shaker style with it. Honestly, that was the most tedious part and most time consuming by far. That also had to do with the fact that because the plywood is only 5mm thick I cut strips for both the front and the back to make it over 1/2 inch thick to help minimize warping and give the hinges something to grab.
I used the miter saw to cut the stiles and rails to size and a 23 gauge nailer with 1/2 nails and glue to get them on the door. I glued and nailed the front and the back of each side at the same time because the nails are a bit longer than two pieces of plywood. I then turned it over and nailed the other side. The great thing about using a 23 gauge is that I didn't have to fill any holes because they are so small you can hardly see them at all.
The last thing is to use your sander to ensure all of the pieces are even. I used a 60 grit and then followed it with a 220 where needed.
If you want to avoid cutting the strips but still want to have the shaker style, Home Depot sells 1/4 thick Polystyrene flat moulding that will add vertially no weight to the door but the cost can easily add up if you have a lot of doors.
Lastly, if you are wondering why I got such thin plywood that ended up creating more work. The reason is because I wanted to save money on hardware and I didn't trust the inexpensive hinges I got off eBay would hold a heavy door for many years.
Wed, 06/19/2019 - 13:20
What kind of paint did you use? Looks really nice, the whole thing!
Thu, 07/18/2019 - 10:28
This is amazing! Thank you for sharing so much detail on your project too.
Wed, 06/10/2020 - 13:14
Can we get detailed plan of how you made this from the start to end like a material list and cut list.

I love how this bed frame turned out! Everywhere that has stain is cedar and the rest is all scrap spruce. Thanks for another great plan Ana!

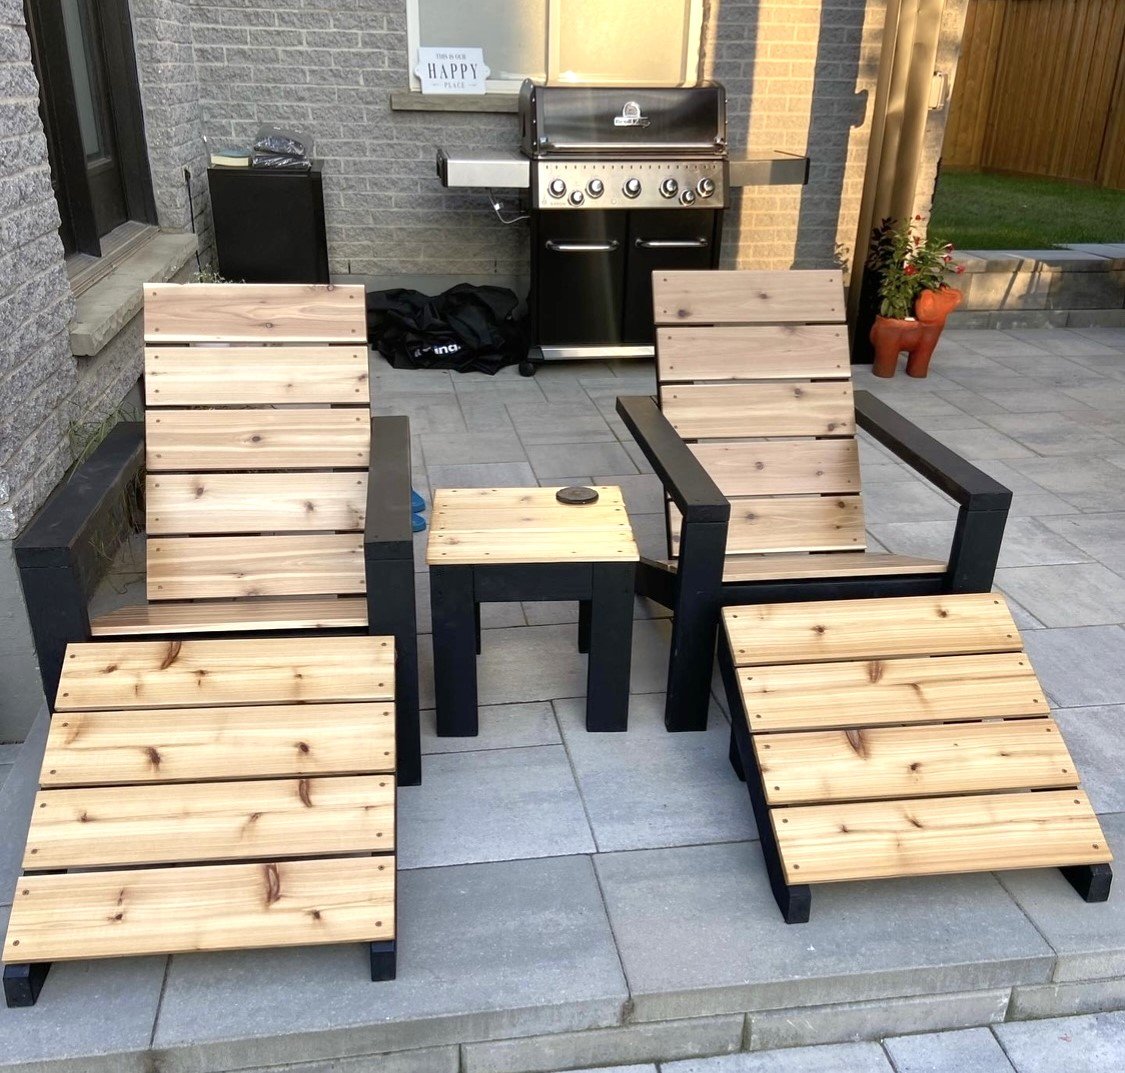
Great set of outdoor chairs with foot rest!
RG Design & Build

We needed a way to get all of the lawn & garden stuff out of our garage and organized. I found Ana's plans for the Small Cedar Shed & adjusted them to fit our space. We used 2x4s as our studs & added front walls on the sides. Our shed measures 9.5'x30". We had a concrete slab poured for our foundation. We are experienced DIYer's but had never taken on a project of this scale from scratch. This project was much easier than I was anticipating, and we were able to complete it in one weekend! Similar shed kits were way more expensive and not the size that we were looking for. Thank you so much for the inspiration!

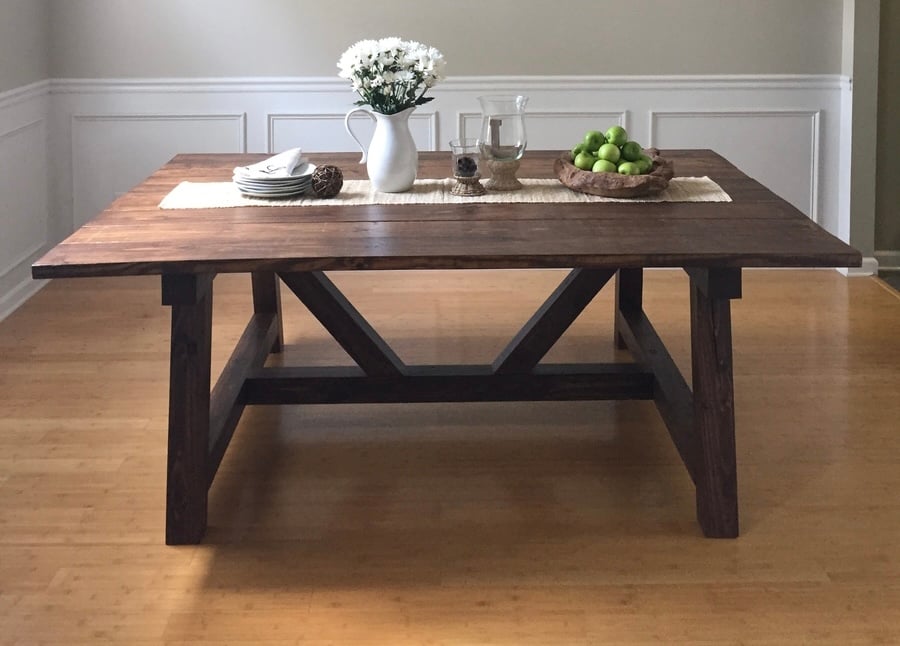
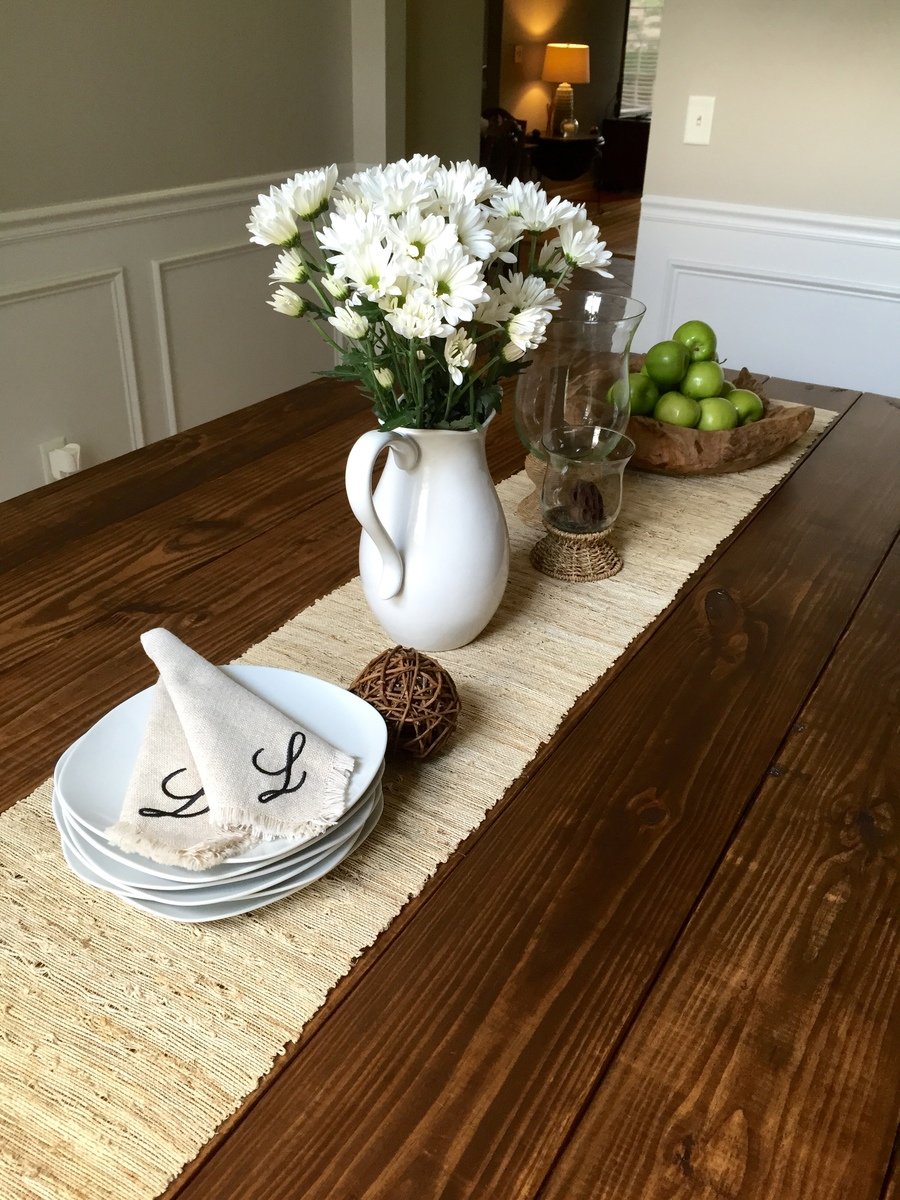
My husband and I moved in to our new house last fall and we needed a dining table that would seat at least 8. We picked this plan from Ana's site because I love the look of the 4x4 beams. I used Adobe Illustrator and my math skills to modify the size and scale to fit our dining room with exact spacing all the way around. We had difficulty finding untreated 4x4 beams but were able to special order some for a reasonable price from a local lumber company. It is more expensive than combing 2x4s but I did not like the pieced together look of the 2x4s. We stained with Rustoleum Dark Walnut and Matte Poly just like the blog post from Ana's site. We also used the Kreg Jig HD which is SO AWESOME! We love the table. Now we just need to decide: chairs vs. benches. I hate to block the beautiful truss design of the base. Its so gorgeous!

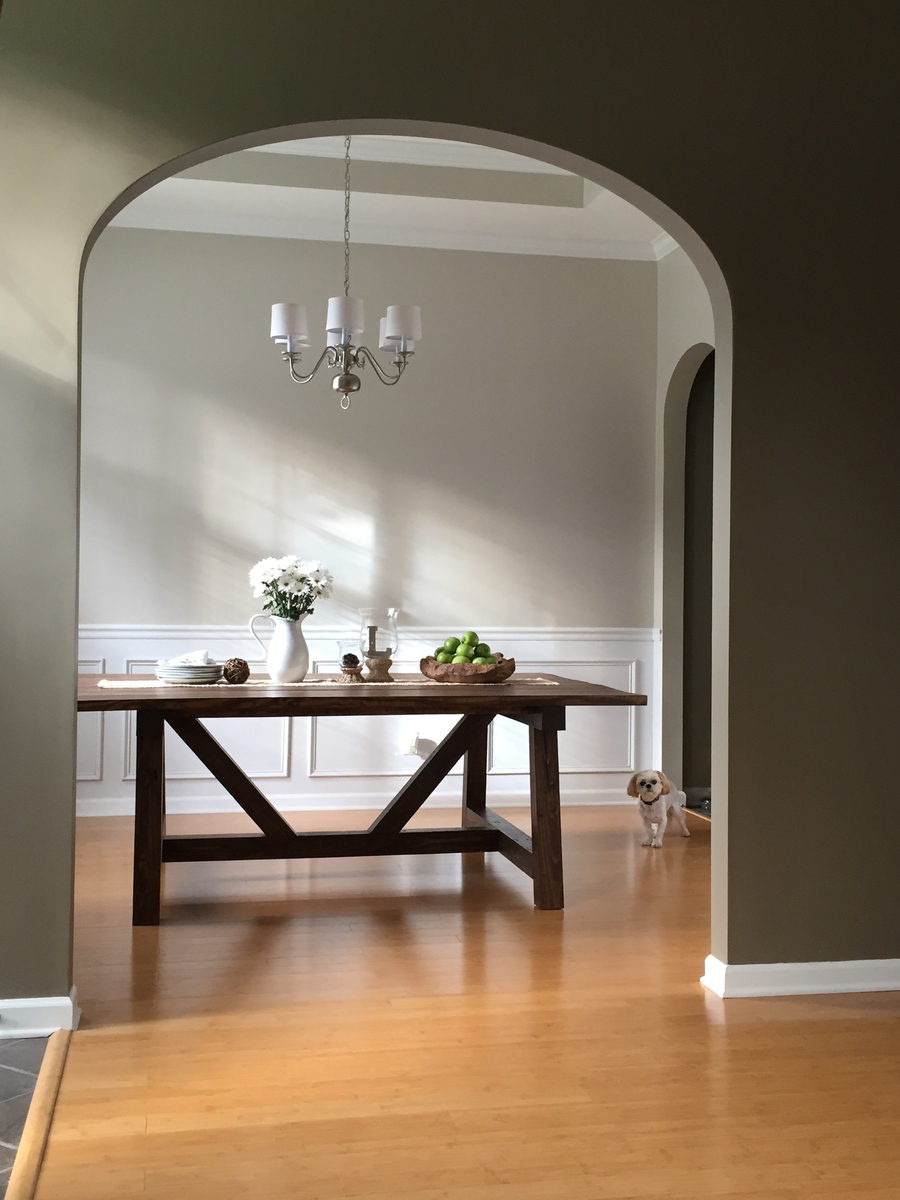
Mon, 08/31/2015 - 14:18
I love this table. The finish came out great by the looks. My wife and I are moving into a house soon and I think this is going to be the design for our table as well.
Mon, 09/07/2015 - 06:21
What a beautiful table! Is this table square? We are also looking to build a table to sit 8 and love the look of yours. Could you share your cut list or dimensions?
Mon, 08/29/2016 - 06:08
Thank you for all the kind comments! I did not know that I had gotten any and had not checked back over the past year. The jump drive with my dimensions on it got damaged last year shortly after the build and I lost all of my home decor files including the AI with my cut list and dimensions. I know it had been a while since several of your comments but I will see if my husband can help me measure the table and figure out what the dimensions are and post them on here for you. Happy Woodworking!
Tue, 11/15/2016 - 18:01
This table really looks great! I'm about to start making one and would love to know the dimensions you used. I also noticed that you didnt use the bread boards on either end. How many people does this table fit?
Thanks!
Mon, 02/27/2017 - 08:51
No, we did not use bread boards. It seats 8 with plenty of room.
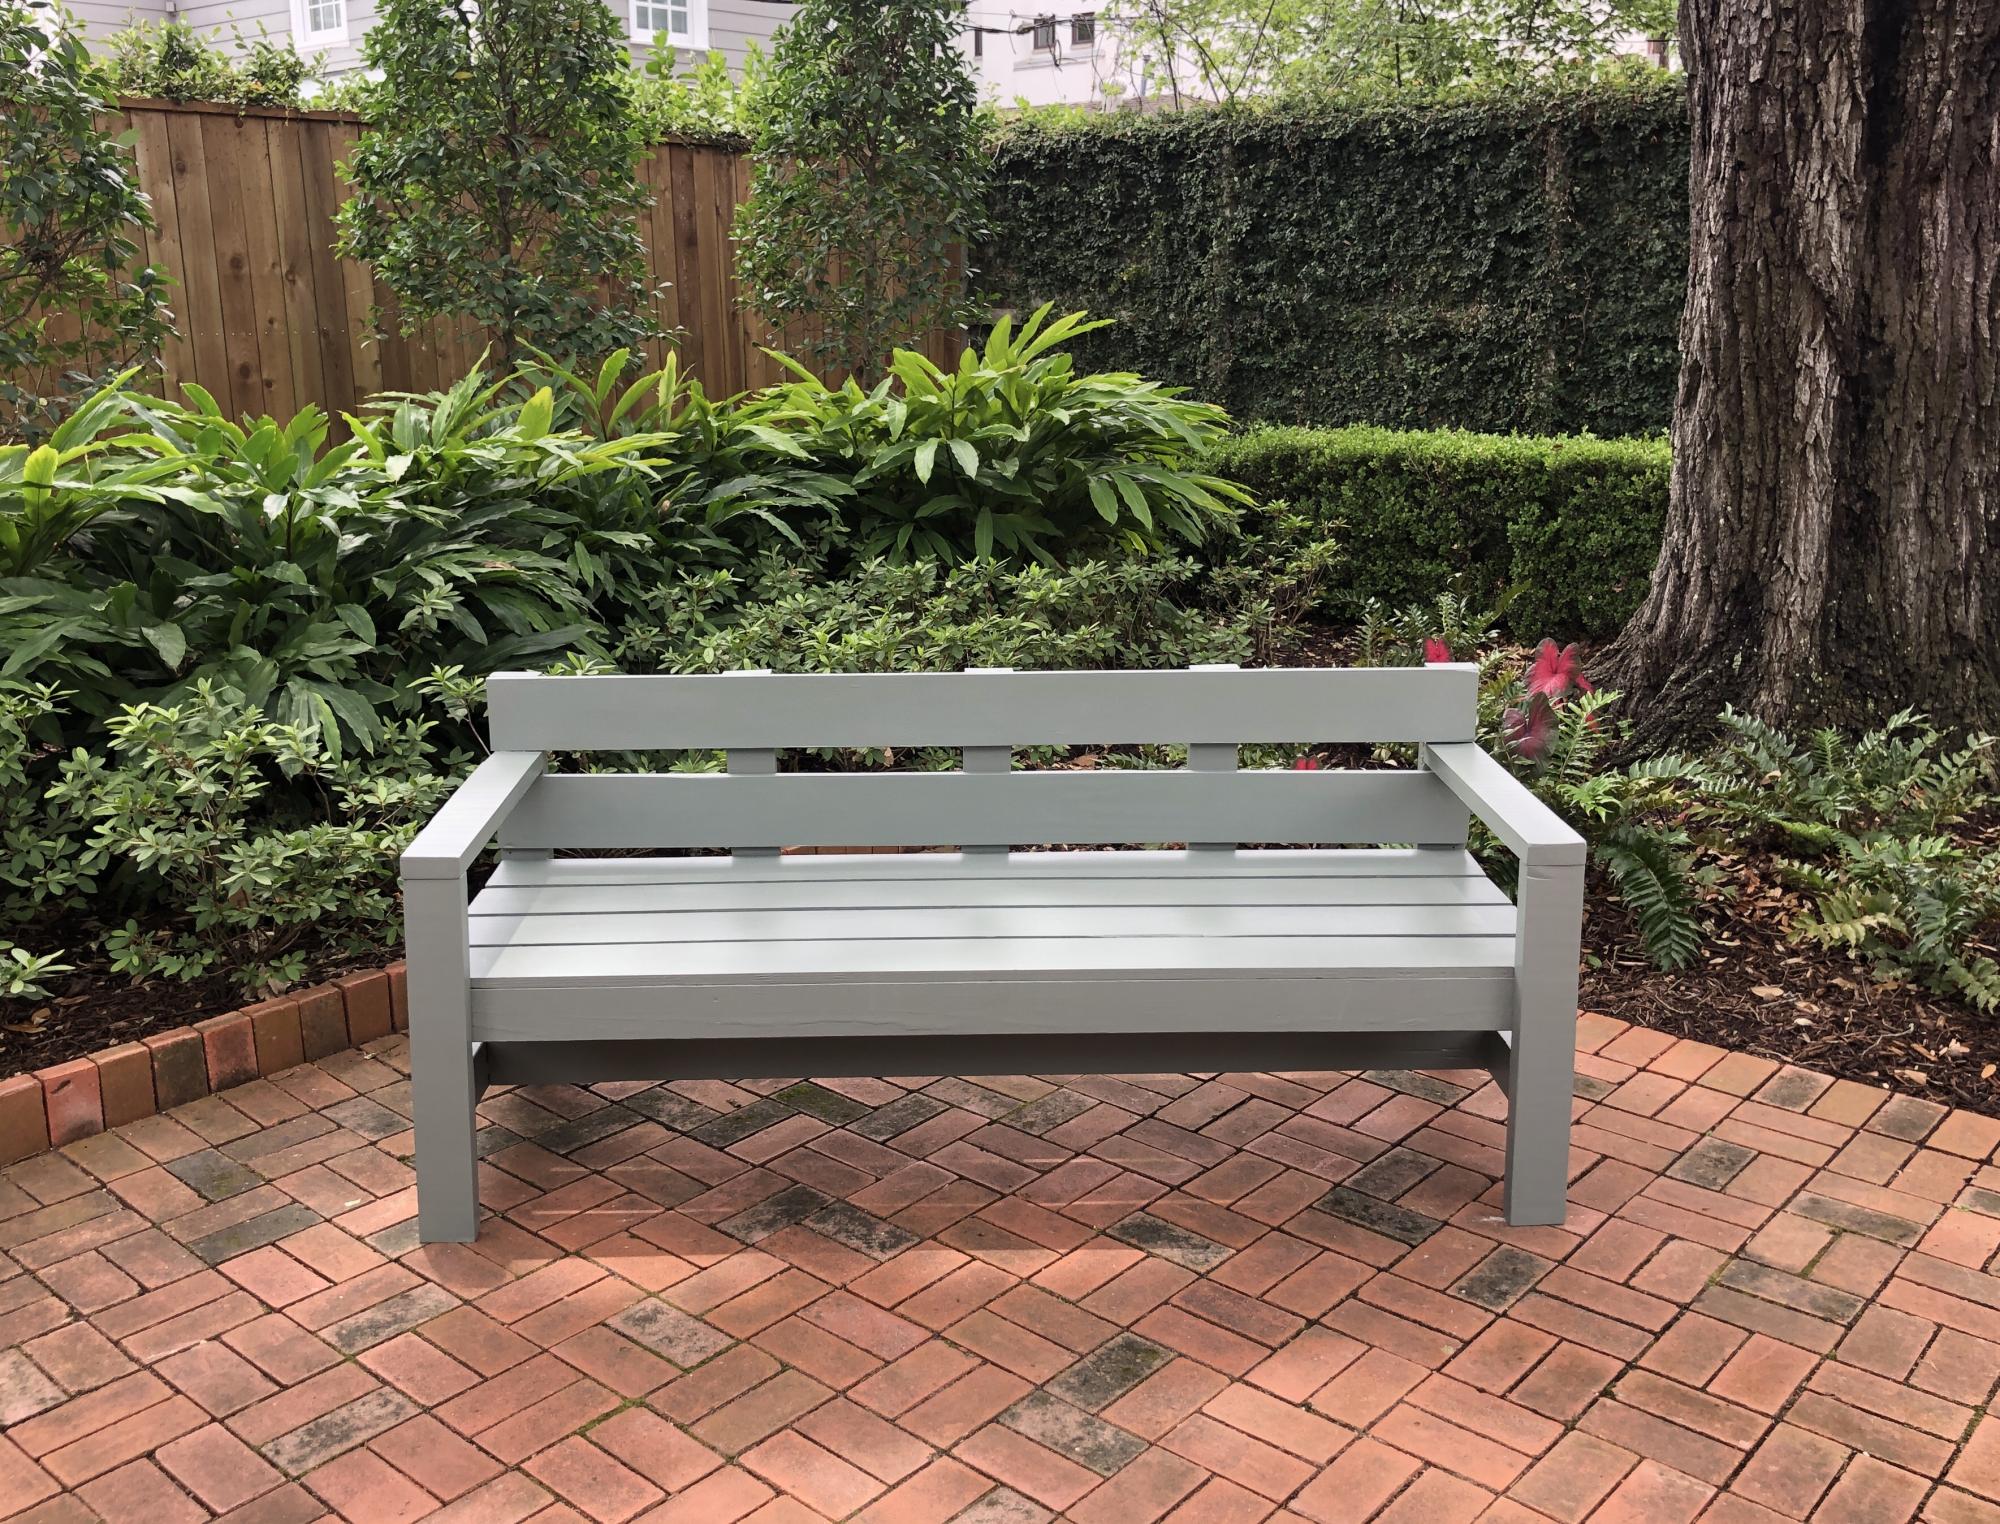
This was one of my first projects. I just used a circular saw but a mitre saw would be better. I’ll look for one soon. It was rewarding, fun and we love how it looks on our back patio.

So I've always wanted to build a Murphy bed. And by always I mean since I first came across plans here that made it look so simple. It ended up taking me a while to do because my job has me working 6 days a week so I was only able to work on it for short chunks of time.
I ended up utilizing a few different plans and mashed them together to build a full size murphy bed. The shelves are the support legs when the bed is down. The "hinge" mechanism are heavy duty 360 degree seat swivels.
All-in-all it turned out WAY better than I expected with only some minor issues throughout the construction process.
Next up is a twin xl Murphy bed with a murphy desk attachment that will serve as a craft table when up.


Fabulous home gym by Nailgun Nelly!
*Incorporated and modified the grand waterfall console plan

This project was made from reclaimed wood from my office where they had built a temporary safety railing out of 2x4s and 2x6s. I added a compartment for storage. The top is stained in a classic grey. I painted the body in black followed by white. I then sanded the body to allow the black to bleed through for a distressed look.


Our old screen door wasn't cutting it anymore, so I built a new one, and to kill two birds with one stone, I included a built-in dog door. Now I just need to find the motivation to close off the old dog door.
I have the plans to build this screen door with a built-in dog door posted via the blog link below for anyone interested.

Well, I started with one chair and finished with a full set. Not bad for a first timer. Definitely room to improve. Little tip if you're going to make this amazing set... raise the backs as they are too low with thicker cushions. I built a casing to go on top after the fact. Pretty happy with how it all turned out. Thanks Ana for the plans... now onto the next project!


Fri, 04/28/2023 - 08:41
Very nice workmanship. I'm curious as to how comfortable they are with the straight 90* backs? Let me know please at [email protected]. Again nice workmanship.
Fri, 04/28/2023 - 08:41
Very nice workmanship. I'm curious as to how comfortable they are with the straight 90* backs? Let me know please at [email protected]. Again nice workmanship.
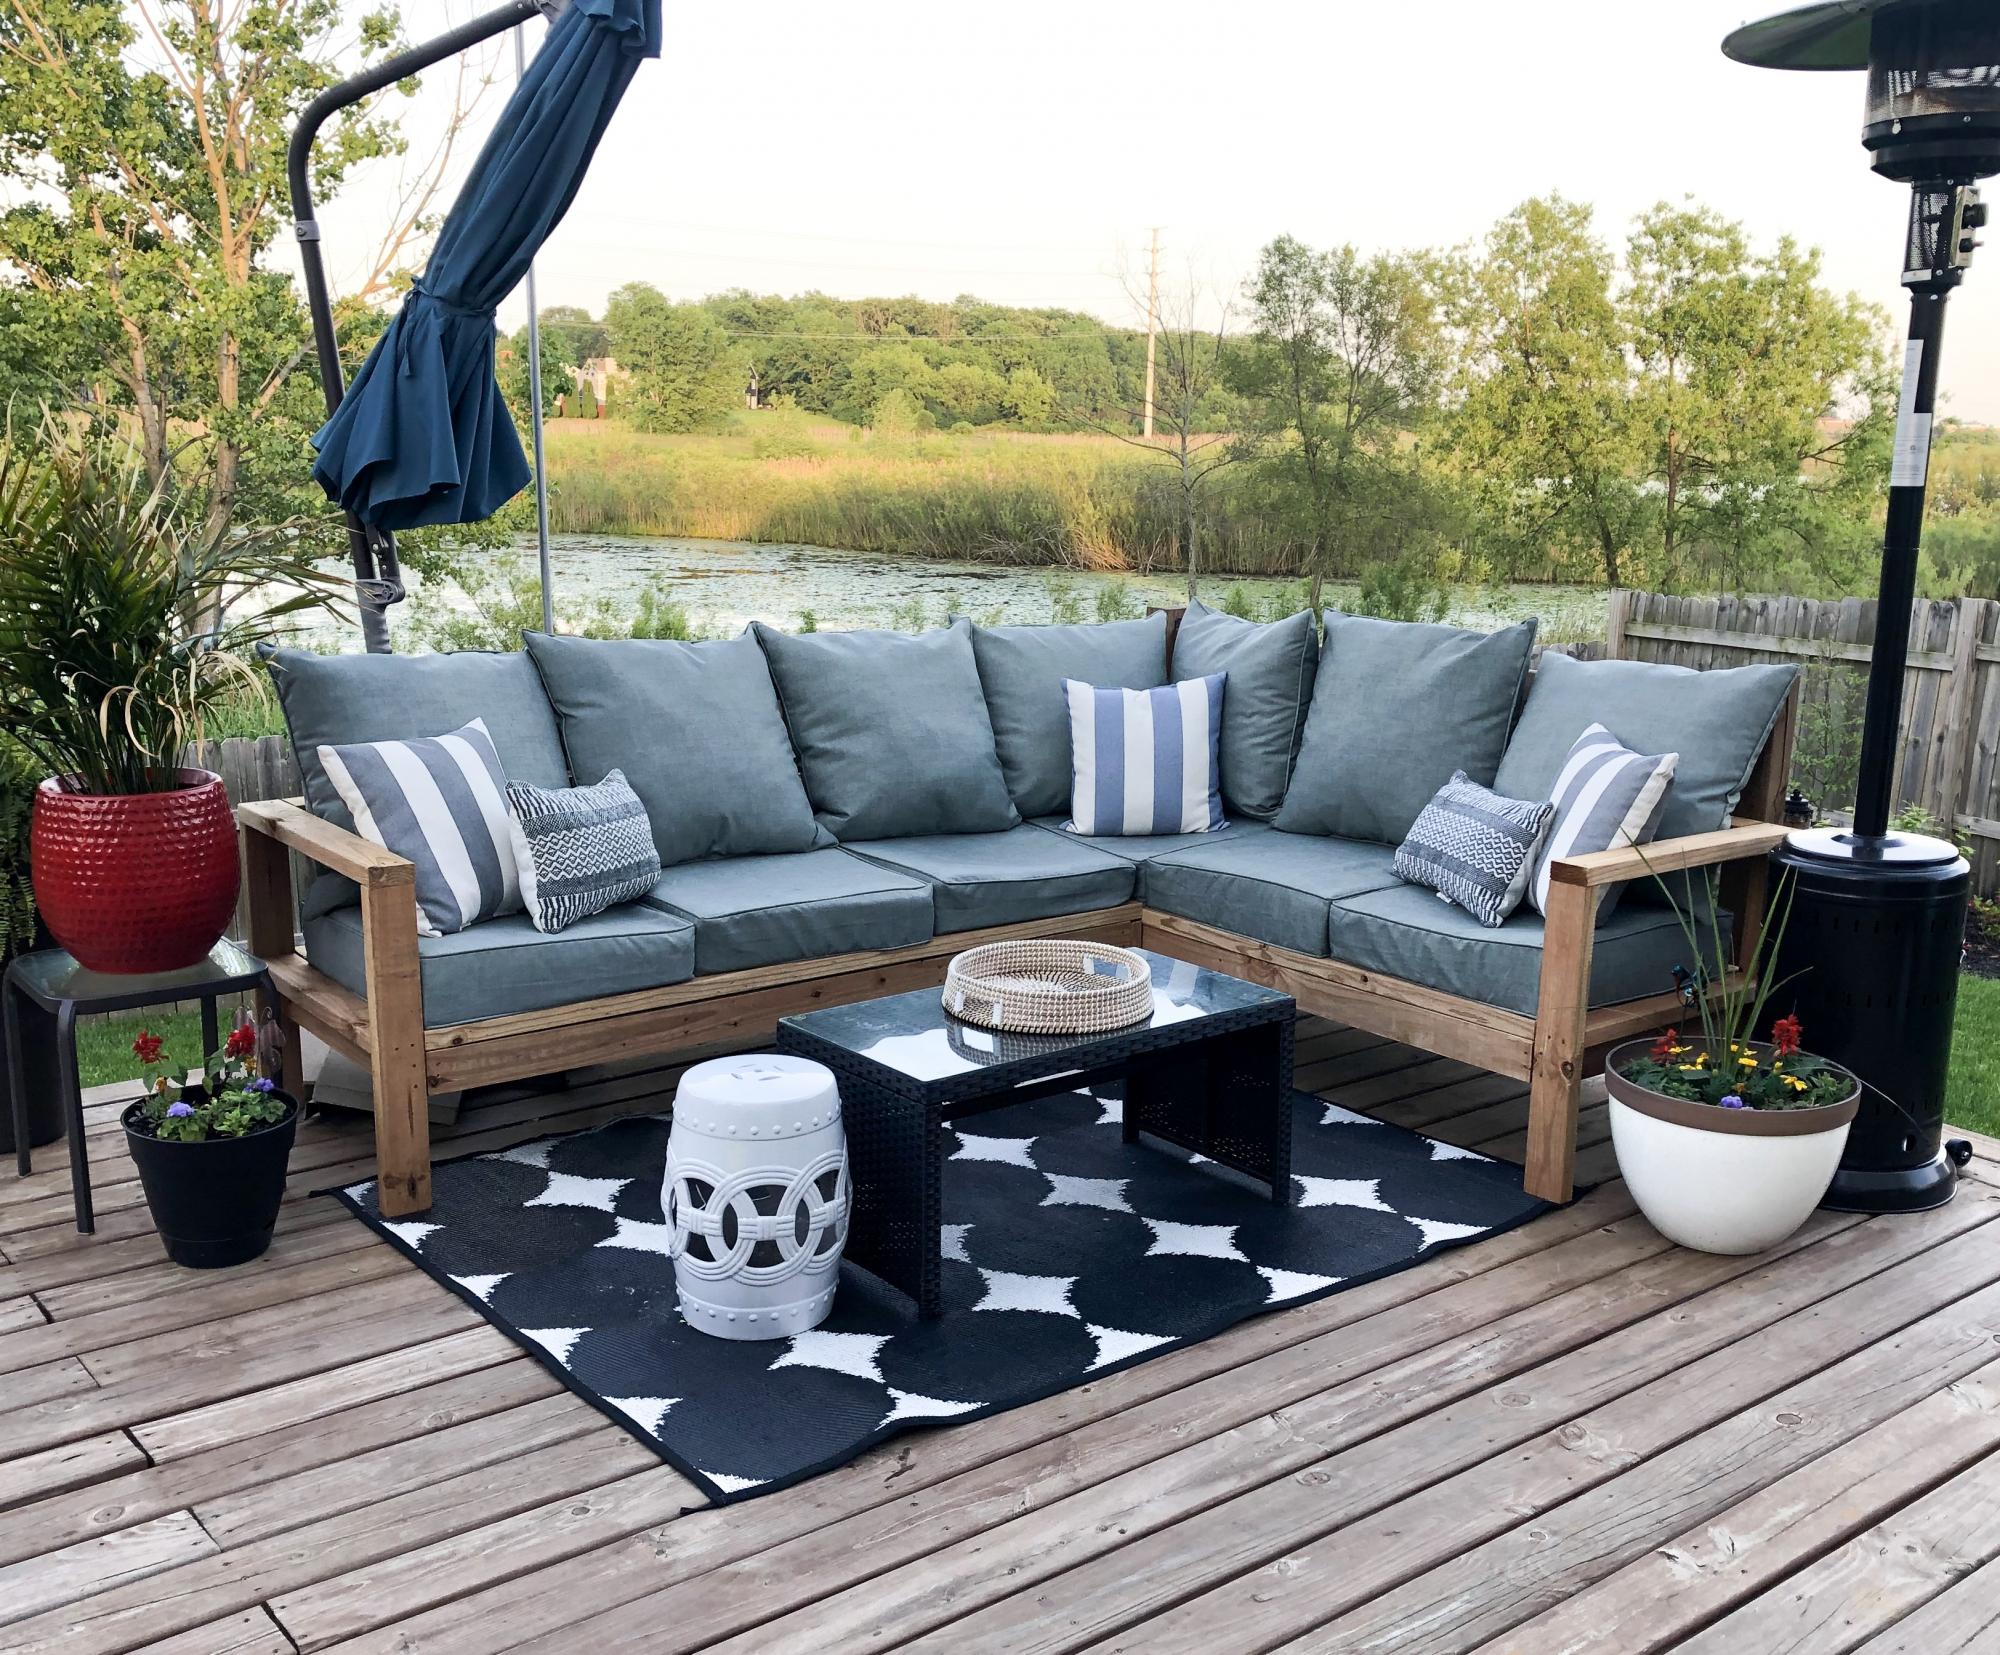
We built Ana’s outdoor sectional in a few hours and it’s made a huge impact on our deck! It saved us so much money but looks like a high end piece! Thank you for the simple and structured plans!
Fri, 06/07/2019 - 10:53
This is gorgeous! You really have an eye for putting different colors, textures and patterns together! Thank you so much for sharing a brag post.
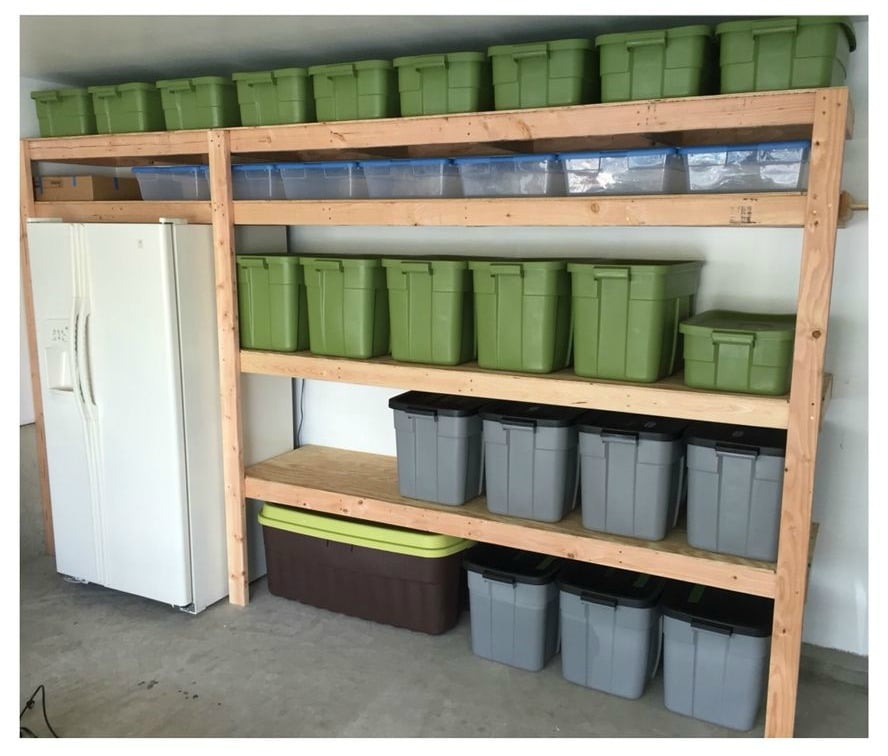
Easy to build, easy to customize, perfect for totes


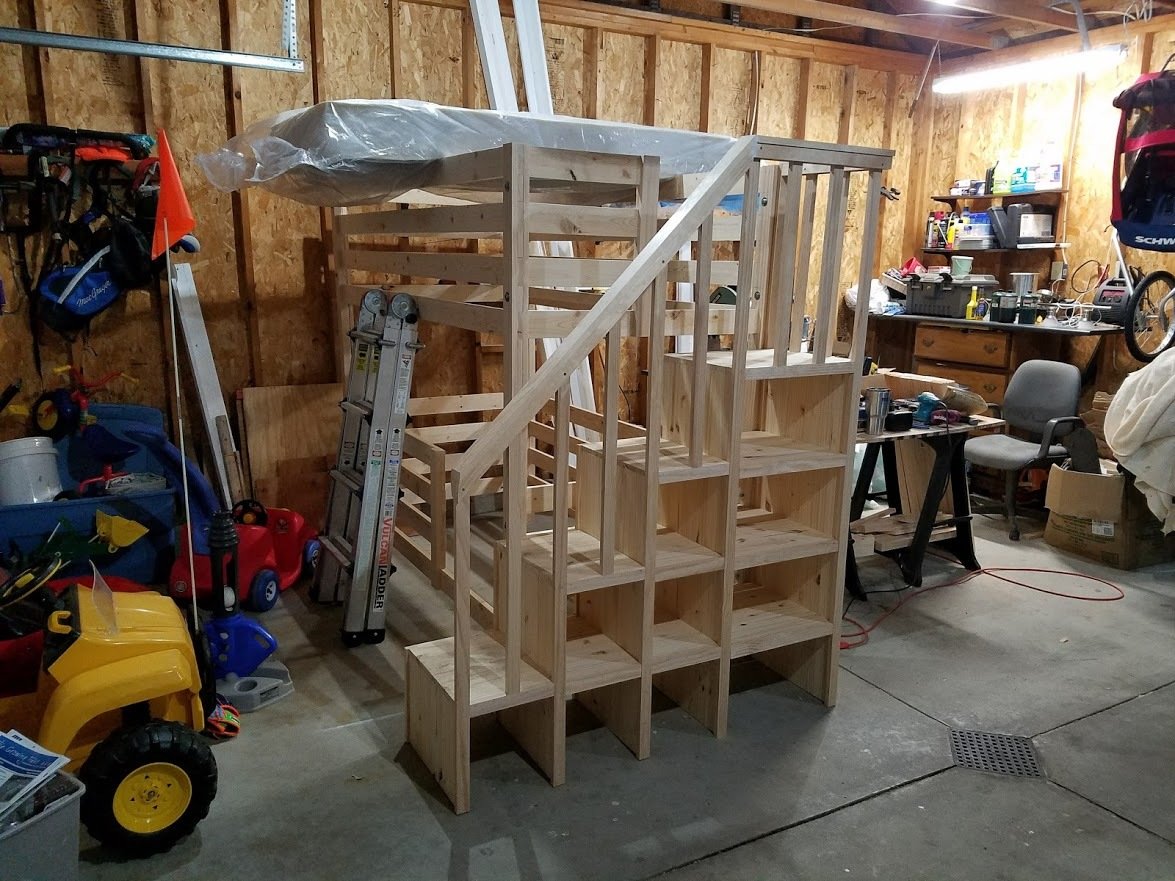
I modified the plans for the Classic Bunk beds by making them 74" tall instead of 63" and added a fourth slat all the way around to add more protection from potential falls. I created one opening in the front for my youngest to get into the bottom bunk, and built slats about 2/3's across the front to act as a gaurd rail. I created another opening on the side for my oldest to get into the top bunk with stairs instead of ladders to again prevent falls. I had to modify the Sweet Pea stairs to accomodate for the extra height in the bunk beds, simplified the railings, and I created each cubby to be big enough to use cloth storage totes that were 11x11x11. Sanded the whole bed and stairs so the corners and edges were all rounded and smooth, and put two coats of white Deck and Porch paint to stand up to the the boys running up and down. I used brackets to secure the stairs to the bed, and sixteen 3" bolts to bind the bed together. Precut and drilled 17 slats for each bed seperated them 2" apart. Spent a few hours every night during the week measuring, cutting, glueing, drilling and assembling the bed and stairs. Spent an entire weekend sanding and painting. Very happy with the way these beds turned out. Overall cost of the project including the paint was around $400.




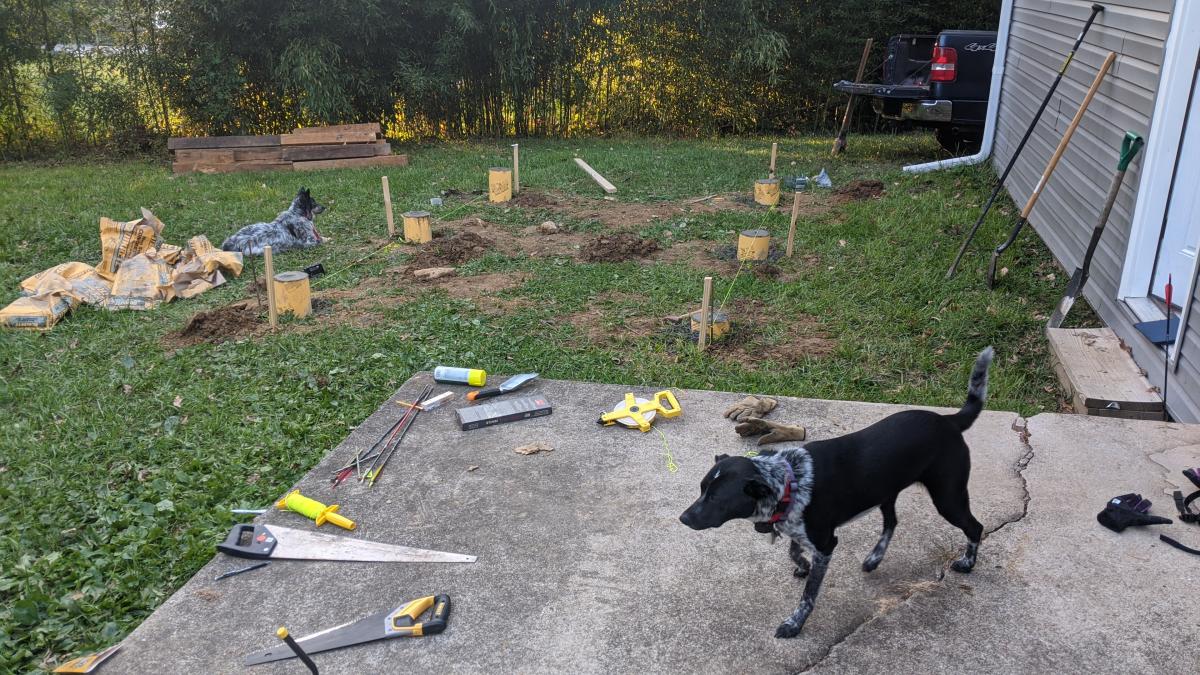
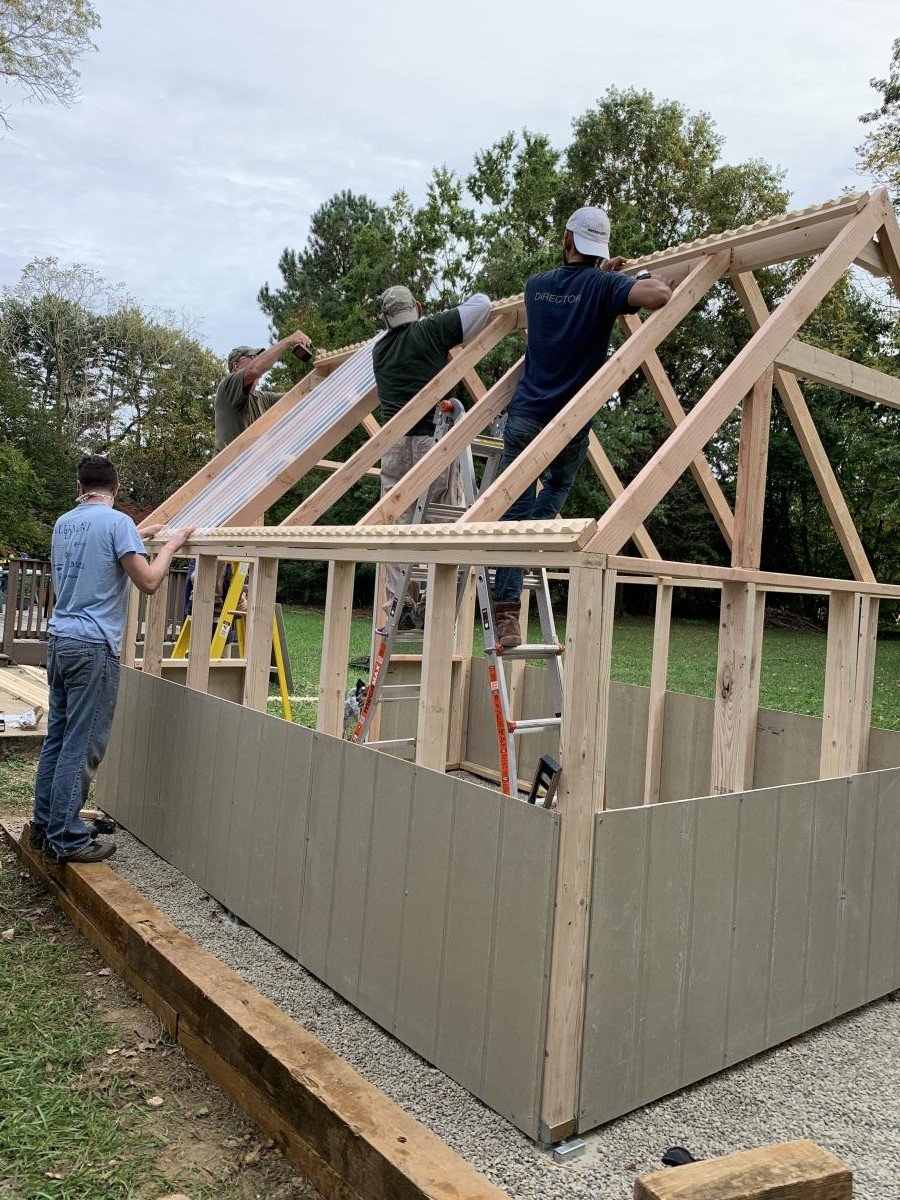
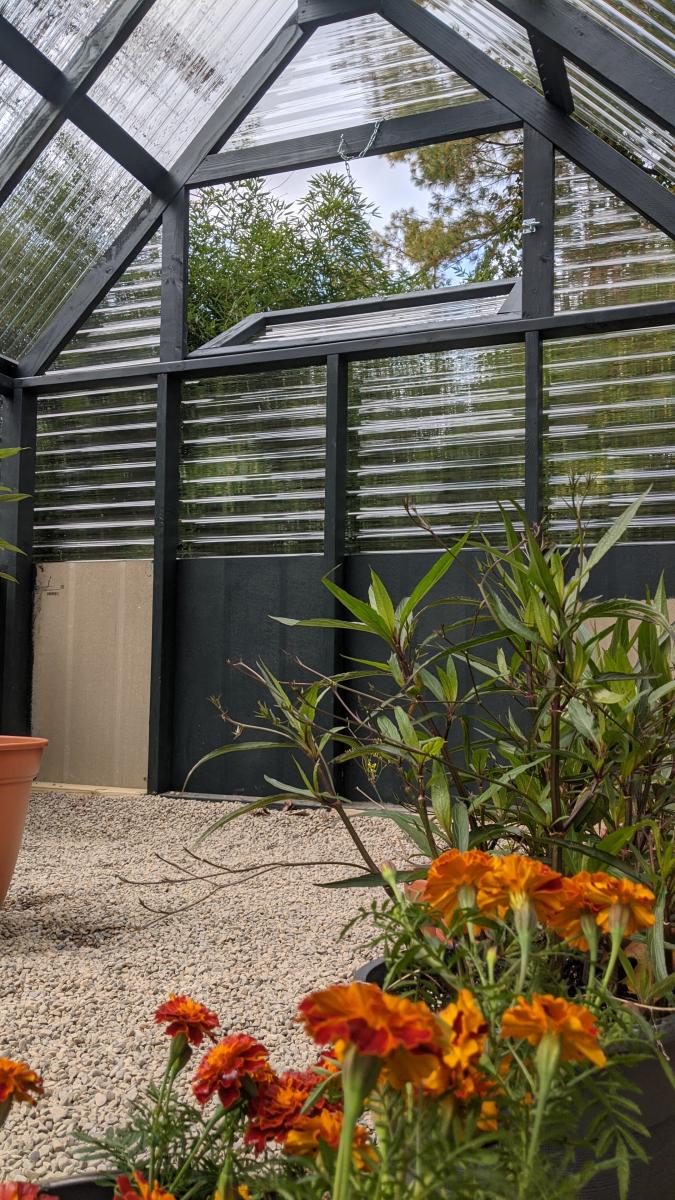
With the help of friends and family, we managed to build this greenhouse rather easily. We had to start with the foundation since the spot we chose was not an even grade. We did this by filling sono tubes with cement and leveling each off so the greenhouse would have a solid place to sit. We then built out a frame around the outside of the cement tubes with some reclaimed 6x6's. After that, we filled the space with 5 tons of river rock and then got to work! After the foundation was ready putting the rest of the house together was a piece of cake. The frame was so easy to put together. We had a few minor kinks to work out here and there, I won't say this house came out 100% perfectly, BUT I am so happy with the end results. We chose to paint it a deep green color as a final touch. So far we just moved a few potted plants from our deck to the greenhouse for the winter. It has been working very well to keep the plants cozy during the colder days we've had. Eventually, I plan to build a potting station, shelving, and most likely a garden bed for winter harvests.


Mon, 11/09/2020 - 09:52
The foundation looks great the greenhouse looks amazing! I'm sure fun was had building it too:) Thanks for sharing.

Great for a small flock of 5 or less.


They were simple to make and the plan was easy to follow. The only modification I made was adding the 1x3 topper in place of the longer legs sticking out of the top.

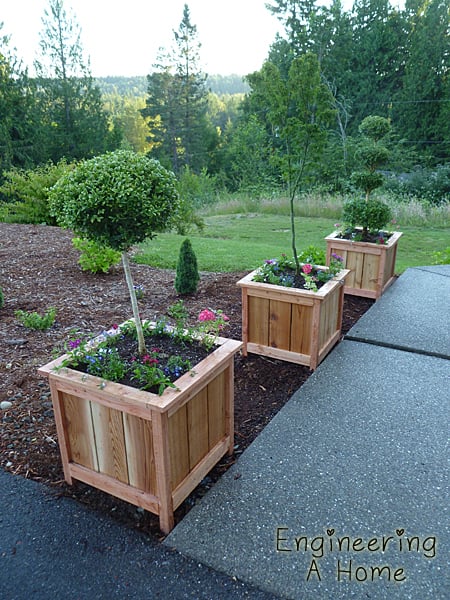

Fri, 07/19/2013 - 06:36
Adding these to my to-do list for spring (yes, I plan ahead). I'm thinking of elevating and elongating them to fit around a bay window.
Comments
thecityalaskan
Sat, 03/07/2015 - 12:27
Awesome job!
So awesome!!! Especially for your first project! Super inspiring for those of us who would like to attempt a project like this! Thank you for sharing!
DaDeDeuce
Mon, 07/20/2020 - 07:15
Niiice...I'm thinking about…
Niiice...I'm thinking about this for my next project. Great work.