Barbecue/BBQ Quick Built-in

This was just a standard BBQ with an attached folding table. I used a combo of Ana's plans to add a little character and style to the BBQ and it made a huge difference in not only the BBQ, but also the backyard.
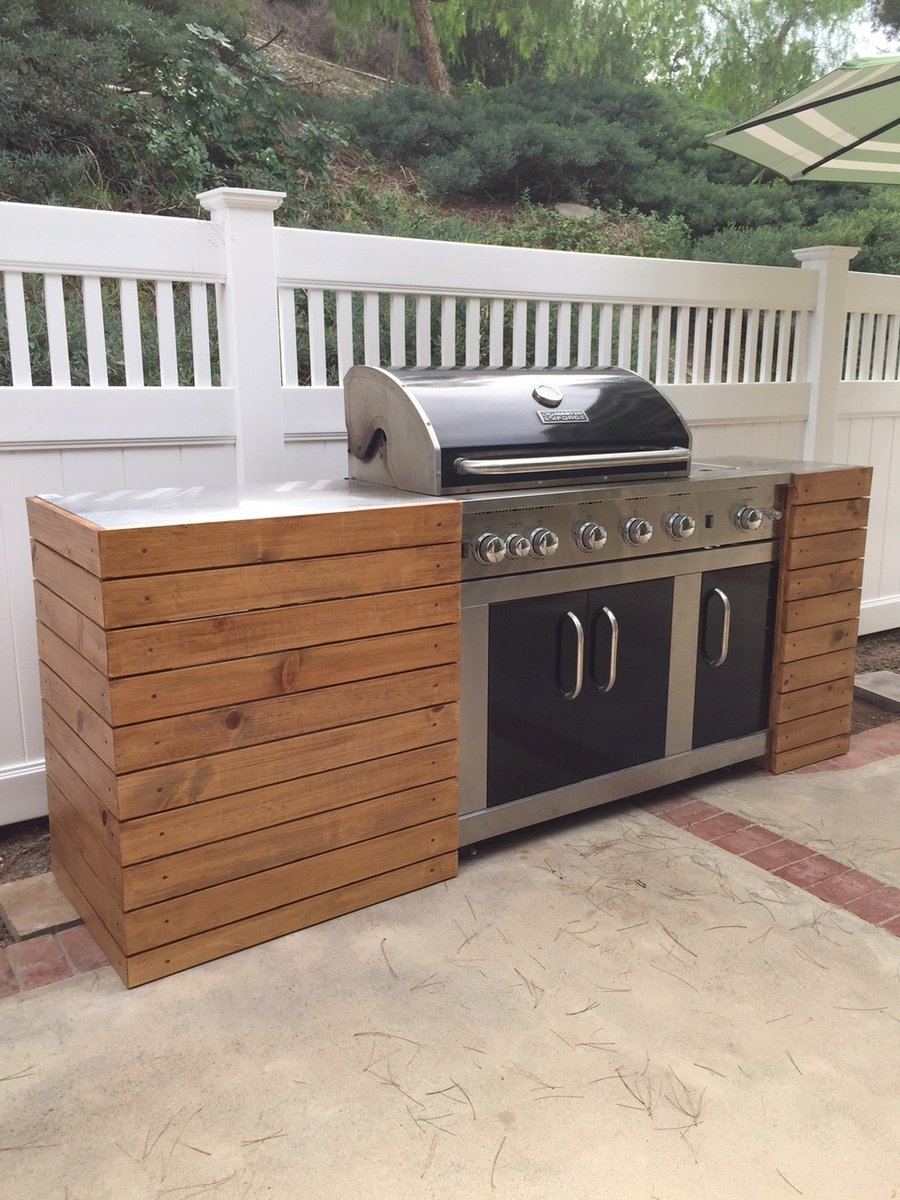

This was just a standard BBQ with an attached folding table. I used a combo of Ana's plans to add a little character and style to the BBQ and it made a huge difference in not only the BBQ, but also the backyard.


Needed a shed to store bikes and mowers, etc, so I'd have more room in the woodshop : ) I made a lot of modifications to the plan to fit my space and make it much larger. The completed size is 7 foot tall at the peak, 6 feet deep and 5.5 feet wide. I made it as a 3 sided shed, using the wall as the 4th to save on cost, increase air flow, and make the exterior house wall accessible. I also made an egress in the back of the shed in order to get behind the shed if needed.
Instead of roofing shingles, I opted for ribbed metal sheets and one clear sheet in the middle to make a skylight, so there would be light in the shed. This is my favorite part of the project. It was a huge pain to attach the roofing from a ladder with very limited access, but it looks great and I love the light coming in. We have very little rain in CA, so I'll have to wait until winter/rainy season in order to test out its waterproofing.
Since the shed sits between the house and the neighbors block wall fence, and I wanted to use as much of the space as I could, I decided to design the shed to have the side wall against the house rather than the back wall, as shown in the plan. This took a large amount of modifications, but with careful planning and measuring, it can be done. This also meant blocking off access to behind the shed, so I cut an egress in the back wall and added hinges so you can lift the back cut out panel, and rest it on a stop block attached to the fence behind it in order to have access. That's what woodworking is about- problem solving. Love it.
As you can see by the full shed picture, it fits a large amount of stuff- 2 adult bikes, mower, edger, trimmer, chainsaw, hedge trimmer, garden tools, shovels, etc, with plenty of room for more. I now have a free corner in my garage that I've already filled with a DIY rolling workbench and more pegboard space for tool hanging. Woodshop increased space= happy Brittany.
I should also mention that building the frame and adding the pickets was quite a quick and easy job. The hardest and most time consuming part was the roof (I didn't have metal cutting tools), rolling each very heavy wall to the site (I was alone) and the previous 2 weeks in which I built the paver patio the shed sits on. Hard work, but worth it. I love it!


Thu, 08/20/2015 - 05:56
And for under $300! Nice touch with the skylight also. Two thumbs up.
In reply to This is awesome! by Cross35
Thu, 08/20/2015 - 09:42
Thank you! I'm very pleased with how it turned out!
Mon, 04/27/2020 - 10:28
SWEET!!! What a great use of space! That skylight was a brilliant idea. No lights needed to see what you need to get at in there. Well done!
In reply to SWEET!!! What a great use… by carewarner
Mon, 01/25/2021 - 13:15
It has been incredibly useful for storing! One thing about the skylight- Over time the sun has warped it and there is now a hole and crack there. So I wouldn't plan on the clear roofing being a long term solution- I will be replacing it with either thicker clear roofing or 2 layers.
Wed, 05/06/2020 - 13:15
Love the design and space saver idea, brilliant! How can I get the dimensions? Tks
In reply to Love the design and space… by shed man
Mon, 01/25/2021 - 13:25
I just went out and measured- 6' wide and deep, 7' tall at its tallest point, tapering down to about 5' tall. Hope this helps!
In reply to Love this! by V2theicki
Mon, 01/25/2021 - 13:14
I based it off of this plan, but heavily modded it to fit our space. https://www.ana-white.com/woodworking-projects/small-cedar-shed
Hope that helps!
Tue, 06/23/2020 - 20:26
This is exactly what I want to do for the side of my home , I also would love to get the plans for this .
In reply to This is exactly what I want… by ajg1972
Mon, 01/25/2021 - 13:16
I used Ana's plans here, but heavily modded it to fit my space: https://www.ana-white.com/woodworking-projects/small-cedar-shed
Sun, 02/21/2021 - 09:39
Did you use cedar pickets?
And what did you use for the roofing material?
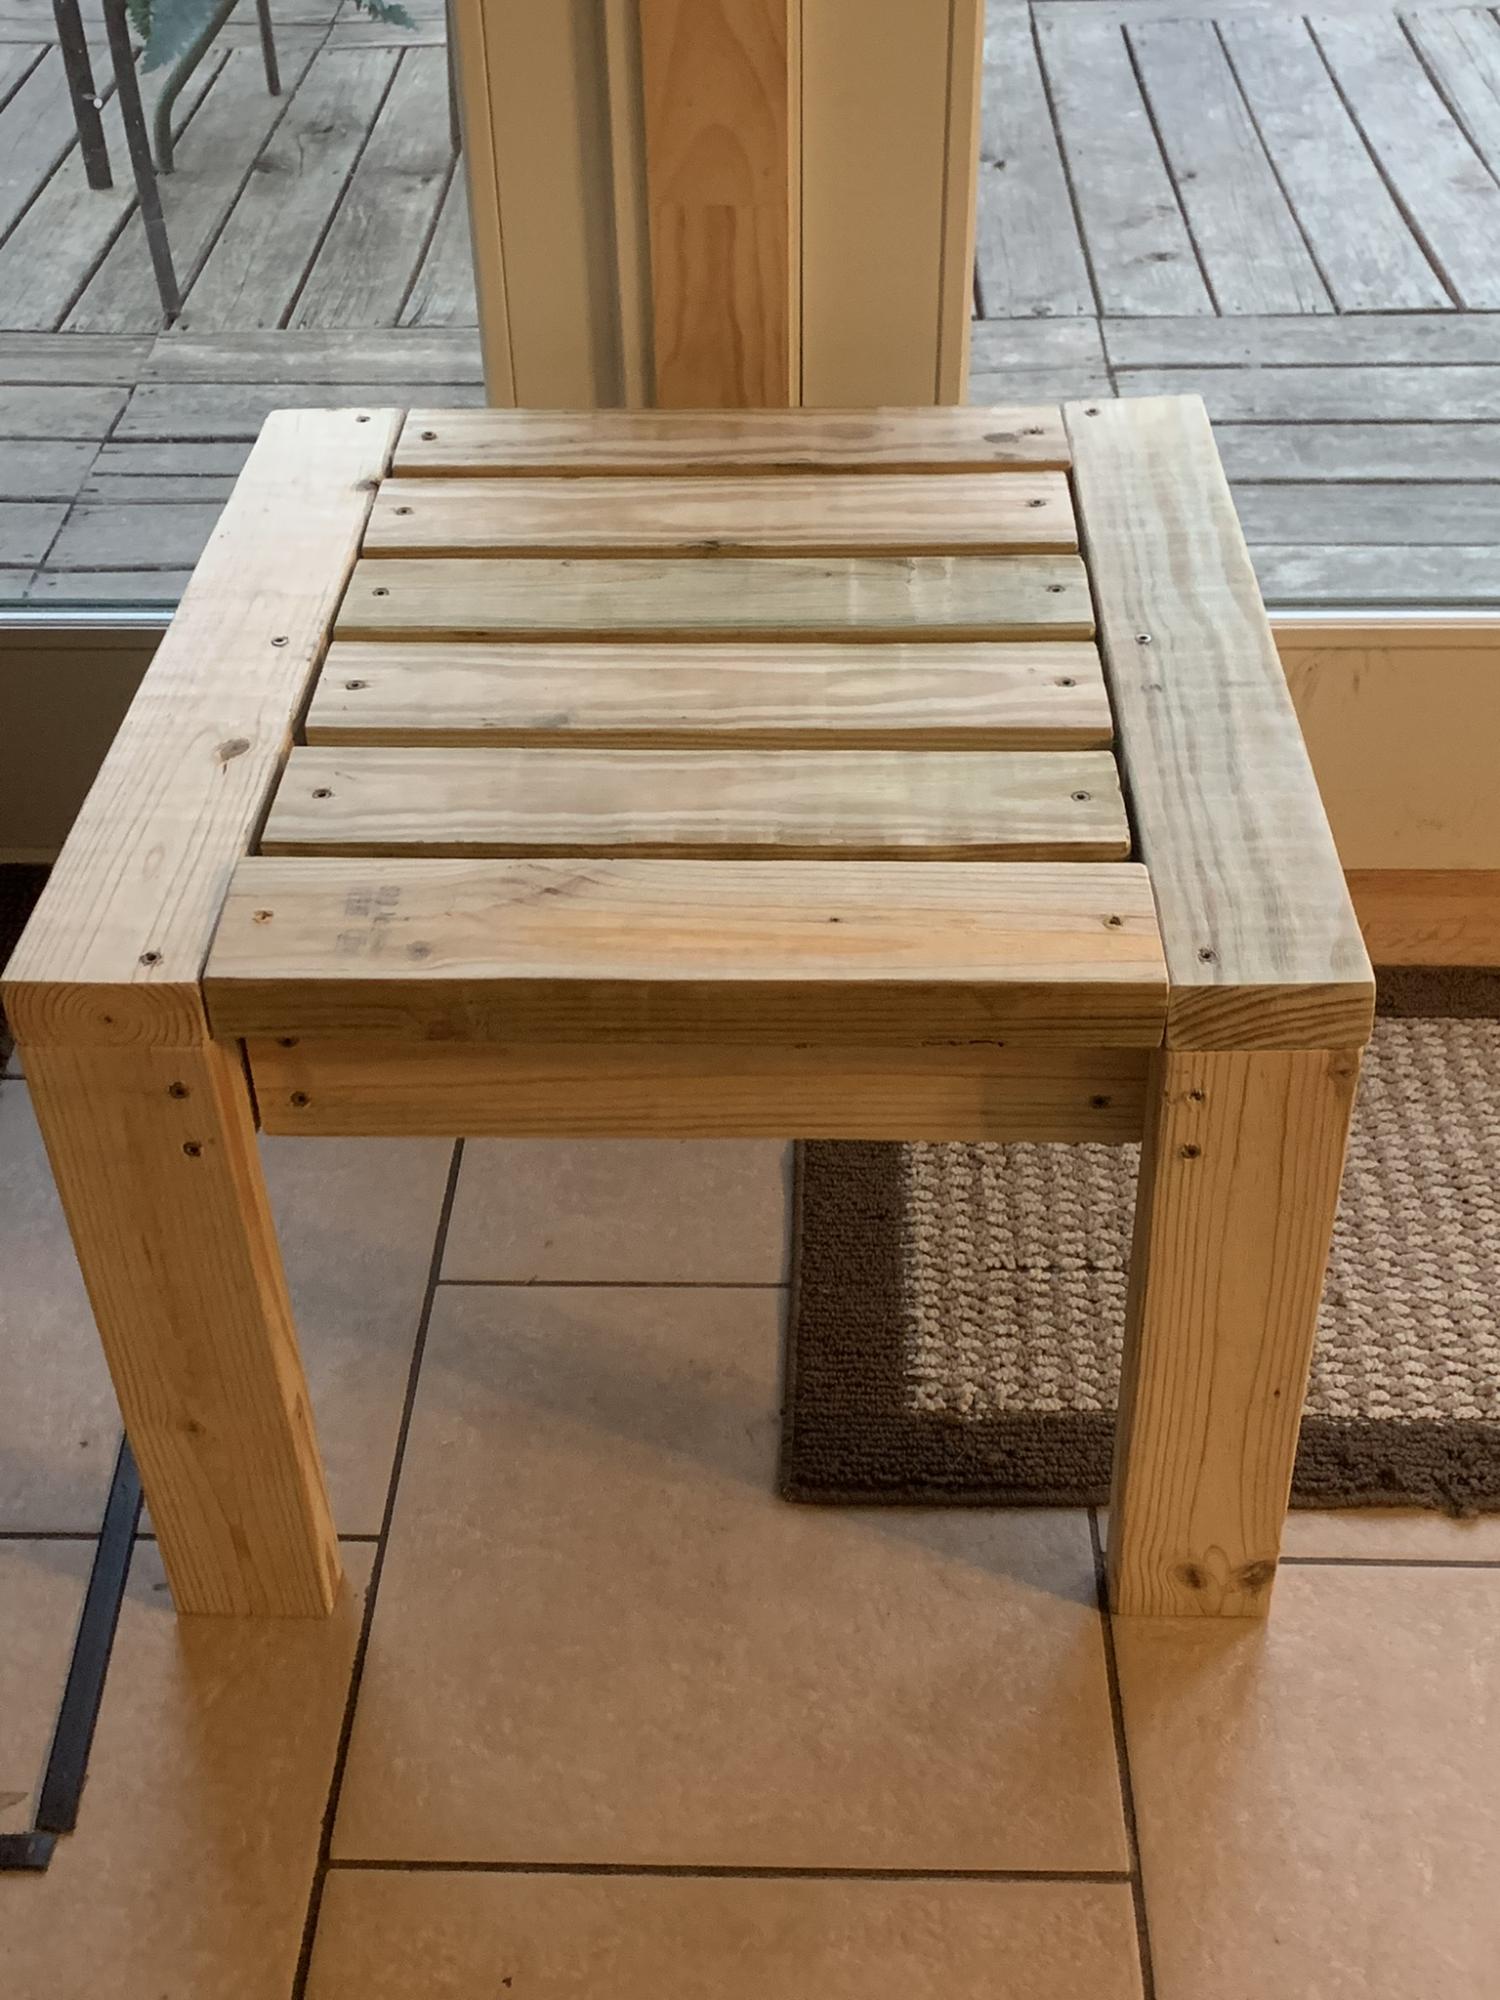
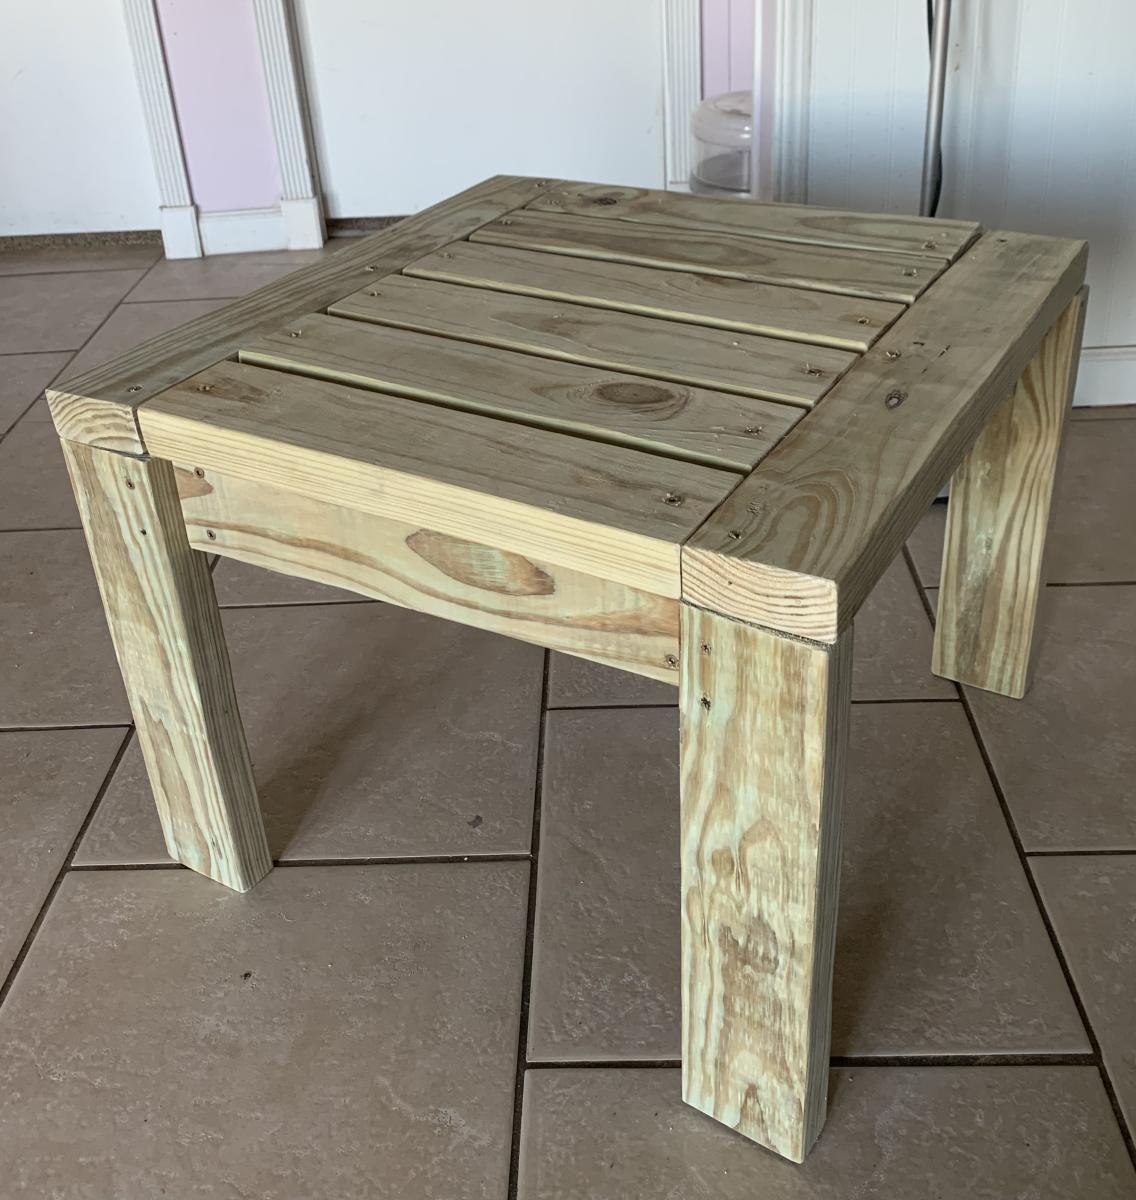
I made these two Ana White outdoor end tables for my patio. Next up will be the matching coffee table
Sun, 01/29/2023 - 16:04
Thanks for sharing, they will be a nice outdoor additon!

I'm happy to share with everyone my IKEA hack 6" tray cabinet.
I found a 24" cabinet box in IKEA's As-Is section and took it home for half price ($23)! I would have preferred plywood, but my table saw is a little small and cutting large sheets of plywood is a little scary. When I deconstructed the cabinet, it sustained some damage (as its particleboard), so if you try this at home, be careful! I ended up changing the depth to 22" in order to cut off the damaged piece, but that shouldnt be noticeable with average trays and cutting boards.
I used Ana's 6" tray cabinet plan and modified the dimensions a little for my planned space. It still needs the back, face frame and door (which will be a replacement drawer front from the cabinet manufacturer). I plan on building the face frame at the time the cabinets are installed, since this will go in between the 36" corner easy-reach and the 36" sink base. Once its done, I'll post updated pics!

Loved these easy to follow plans and love our outdoor living room!

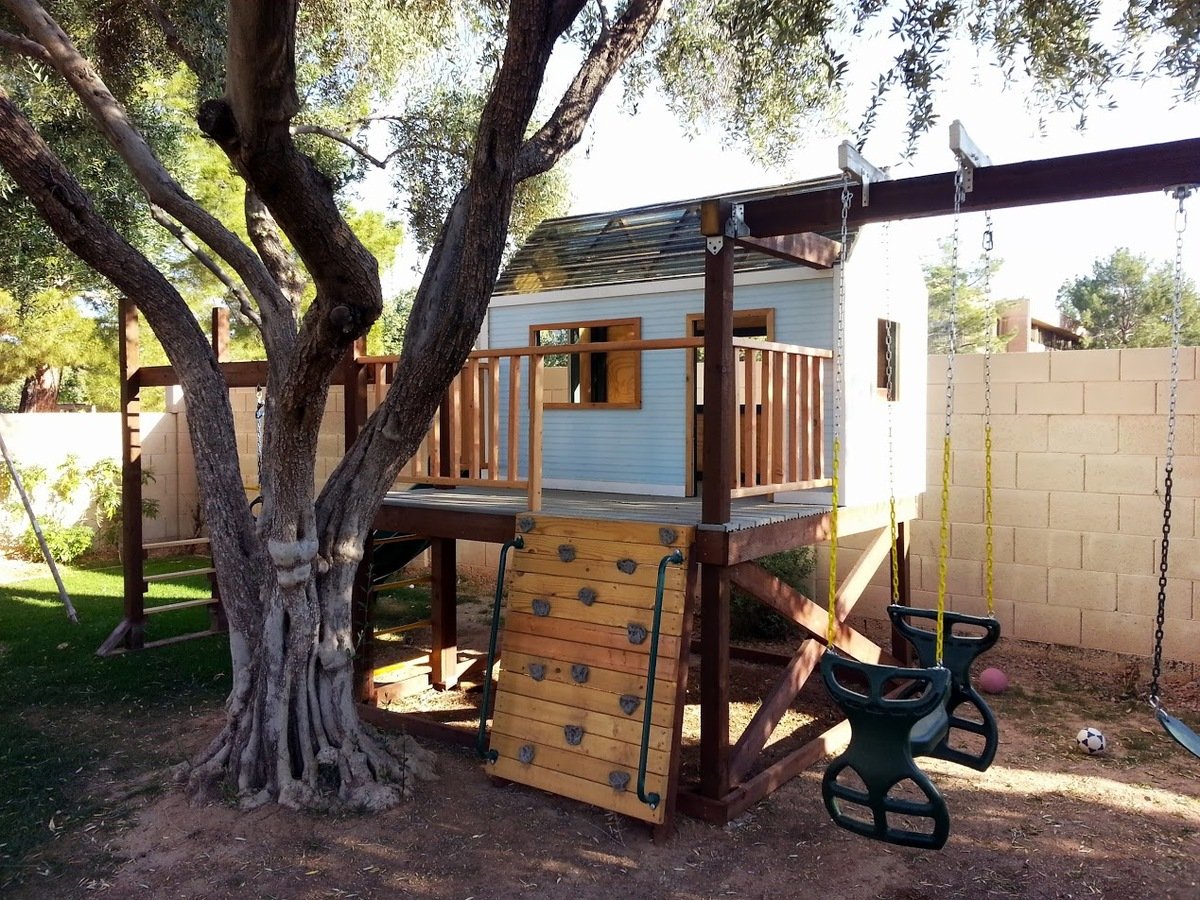
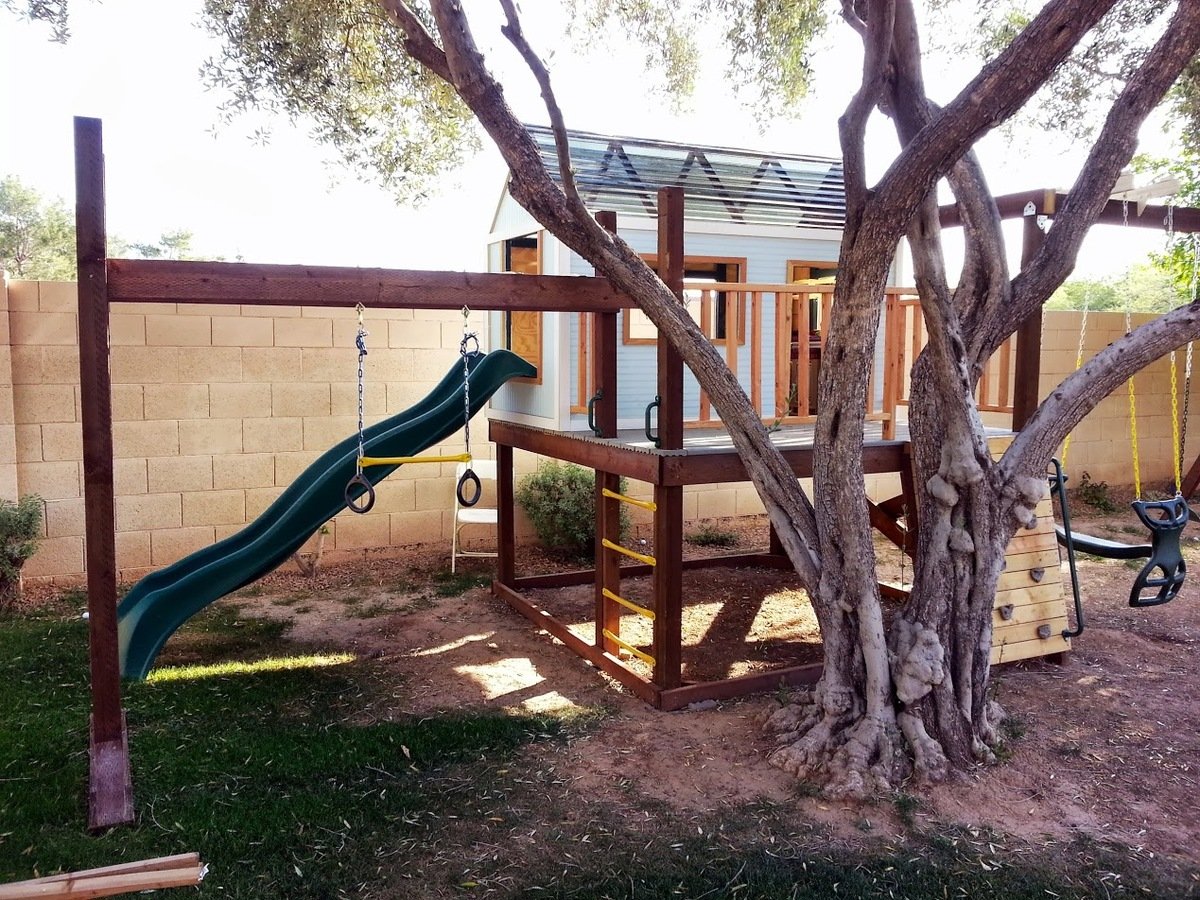
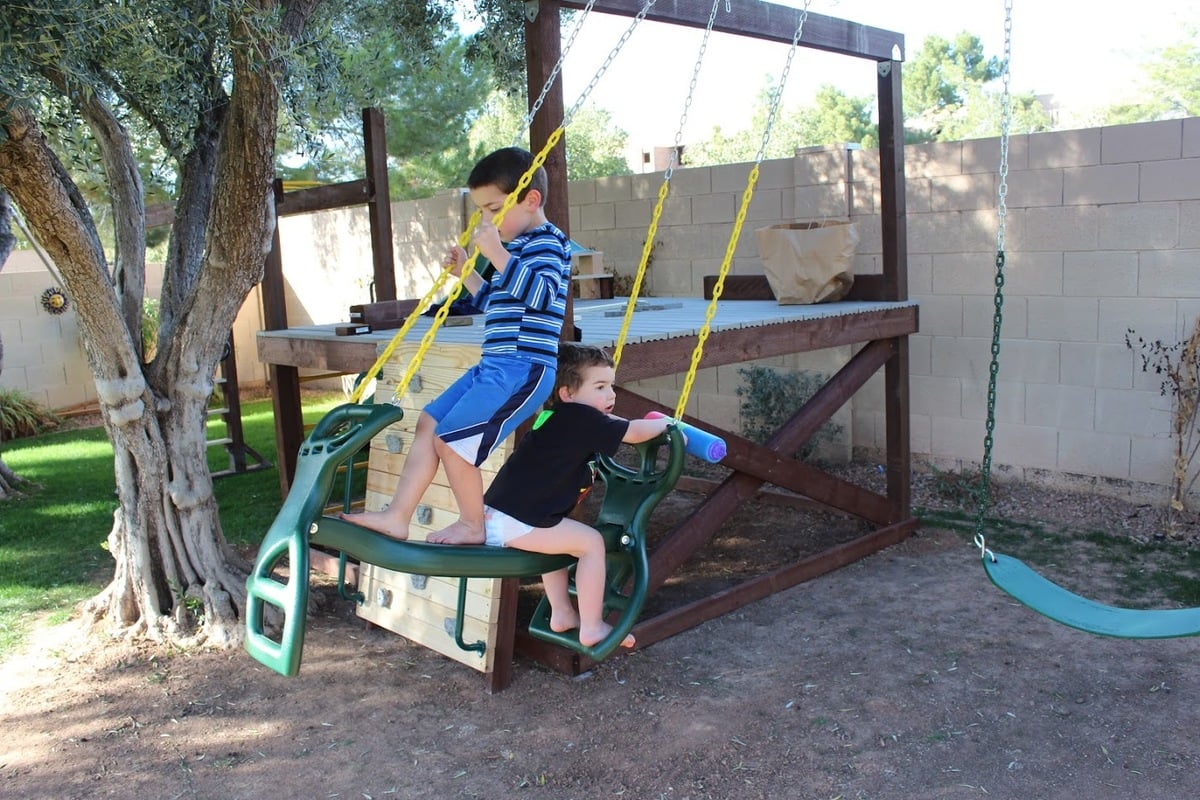
My second building project... this one took quite a while, building in the evenings after the kids went to bed.
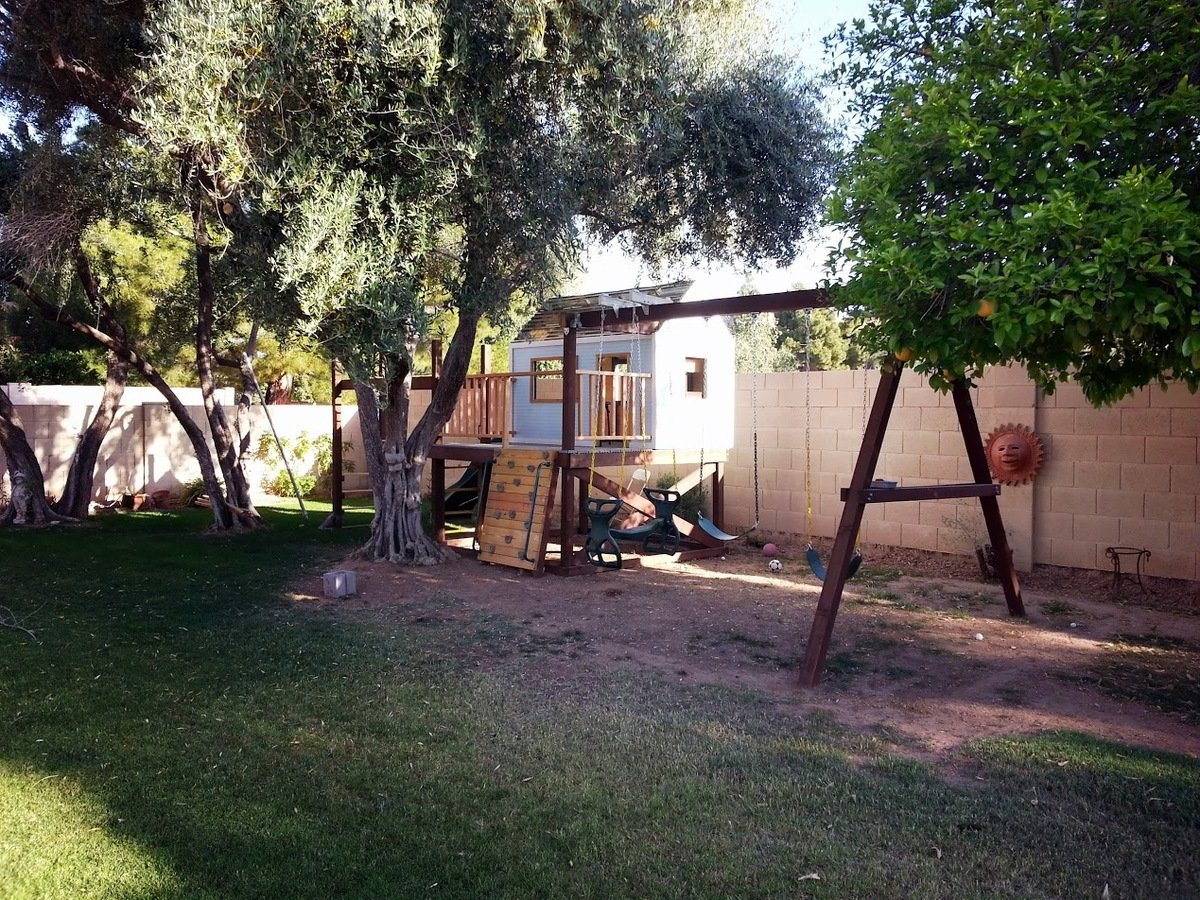
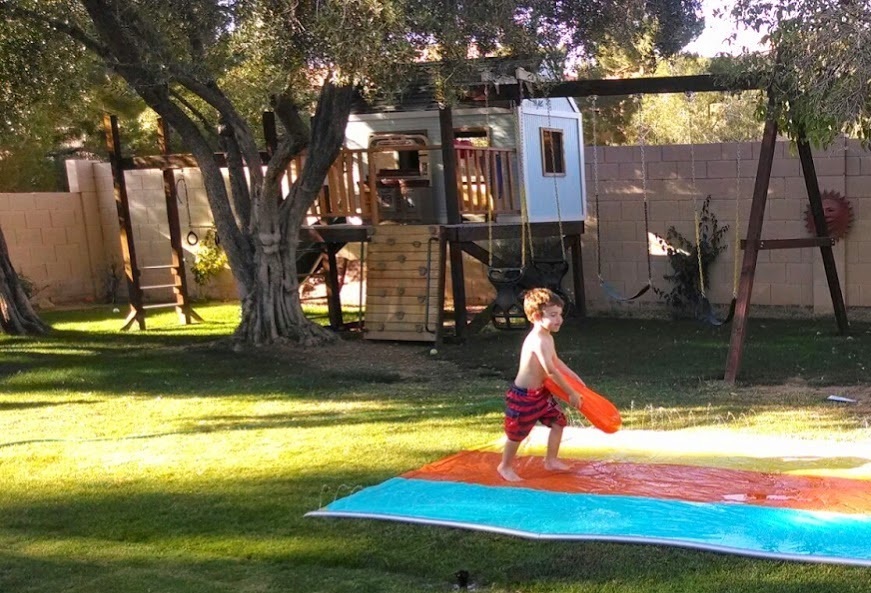
The playhouse is based off of Ana's Playhouse Building series, with some modifications to fit the space in my backyard and accommodate climbing wall, monkey bars, and slide.
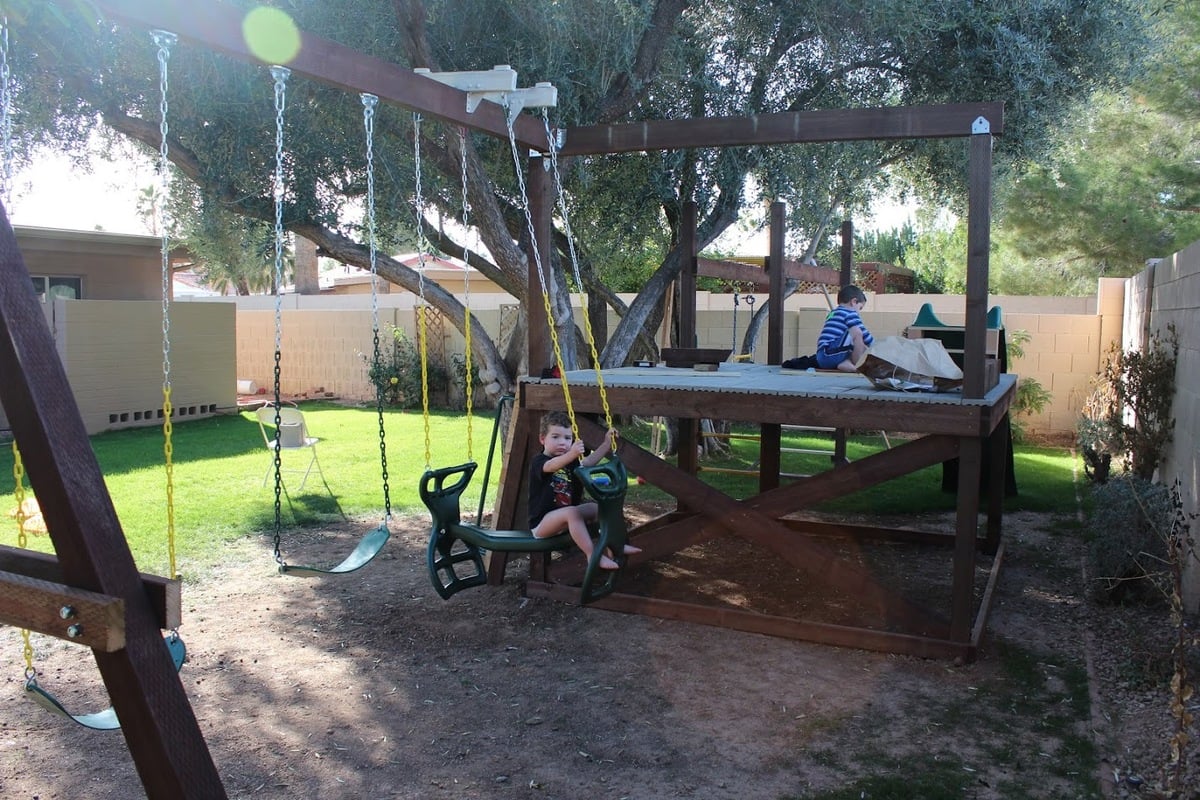
To put the main deck structure into the ground for sturdiness while protecting from moisture, I dug out 5 holes to fit single hole cinder blocks (4 corners plus an extra 4x4 for the monkey bars; you can see an leftover block on the ground in one of the pictures). I placed some brick in the holes, then the cinder blocks on top. I then partially filled the cinder blocks with sand, put the pre-built deck in the cinder block holes (with help - it's heavy!), and then filled the rest of the cinder block holes with sand. It's worked remarkably well - the deck has been up for about a year now. I also sprayed some clear waterproof sealant on the bottom part of each beam near the ground for extra protection (deck, monkey bars, climbing walls, and swingset A-frame). This has allowed me to still run sprinklers near/around the playset and even grow grass underneath the swings!
Materials used:
* Playhouse: pine, plywood, Suntuf solar grey polycarbonate corrugated roofing panels (I live in Arizona, so little rain to worry about but lots of heat - the sheeting lets light in but blocks most of the UV rays, corrugated shape also provides venting at top when placed sideways)
* Deck/Swingset/Monkey bars: treated lumber, composite decking, pine for railings, monkey bars purchased from Amazon
* Climbing wall: pine, treated lumber, handholds/railing bought off ebay/Amazon
* Swings/slide/bongos/wheel, telescope: purchased from Amazon
Modifications:
* Turned playhouse 90 degrees to be in back of the deck, with swingset coming off the side. This meant the support beam for the swingset had to pass through the playhouse - modified the frame for that wall slightly and created a notch for the beam to pass through.
* Slide comes out one end of playhouse - made the "window" on that end larger than the plans called for in order to give room for the slide.
* Monkey bars come off one side of the deck - used extra 4x4 here to create support for the bars, and used extra bars to make a ladder on this side
* Climbing wall instead of ladder for main entrance
* Put large window in back wall of the playhouse
* Added cross bracing to side of decking on swingset end to make it more solid/cut down on sway when swinging
Tue, 04/29/2014 - 20:41
This is phenomenal - just the plan & design we've been looking for. Can you upload a few more pictures? Any sketches you can provide? Shopping list? Really great job - I hope your kids love it. It looks awesome.
Wed, 09/10/2014 - 14:03
Thanks! It's certainly nestled in right behind that tree - I originally was going to place it in between that tree and another one but then decided to just place it behind them in order to take better advantage of shade (critical in AZ) and fit in everything I wanted to put on it (monkey bars, swings, slide, climbing wall)
Mon, 07/08/2019 - 00:48
We've been looking at these type of players for our son, and good grief! Prices are astronomical for playsets that are NOTHING like this. This absolutely an amazing place for those boys to make memories. You're amazing! Do you mind if I ask what it cost once it was finished? I never imagined that it would cause a tic in my eye to look at the kids from Lowe's or anywhere else for that matter.
Tue, 08/20/2019 - 10:14
I don't remember how much it cost in the end... but probably around $900? That may include getting some tools that I needed but didn't have at the time. The slide was the most expensive single piece I bought - I think I got it from Amazon.
When it was all done, I remember thinking that what I got for my money was *way* beyond what I would have gotten by purchasing a kit or a pre-built play structure. Plus, by going my own way, I was able to build it to fit my space and the needs/abilities of my kids.
While the whole thing is big and looks like an intimidating build, it really isn't bad - the platform is a fairly blank base to design everything else off of, and is incredibly sturdy. Everything else is a discrete part that branches off of the platform and can be planned out as you need. Adding the monkey bars required putting in a 5th upright (the first 4 are the corners), but that was an easy modification since I knew I wanted it before building the platform. The playhouse just sat on top of the platform (screwed down, of course).
Sat, 08/01/2020 - 20:40
Hello. This is pretty cool, probably the best modification that I am looking for from Ana's default plans. Could you please add some more detail on the right side wall, and how you incorporated the support beam through the playhouse? (with maybe a picture from inside of that wall). And secondly, if you can add the dimensions for the monkey bar setup on the left side of the deck? Thanks, much appreciated
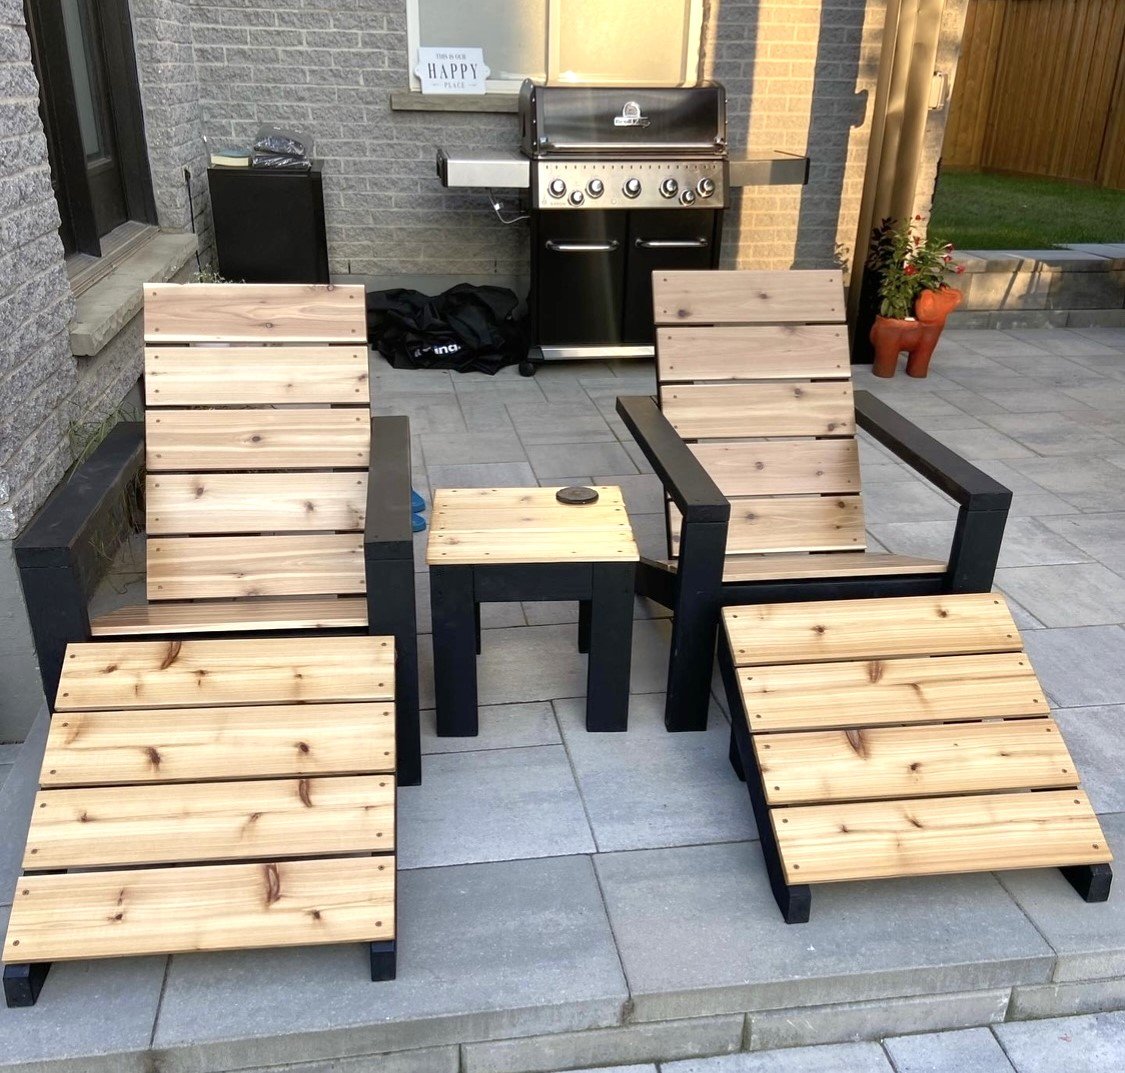
Great set of outdoor chairs with foot rest!
RG Design & Build

Built a full size loft bed for my kids but wanted something safer than having them climb up and down a ladder so used the Camp Loft Bed plans to add the platform and stairs. It is much easier for the kids. Going to finish by covering the platform and stairs with carpet.


Wed, 10/02/2019 - 09:51
I really like how the platform is only half way so the stairs are inset, this is very smart and good use of space.

Modifications to the simple outdoor table plan thanks to Finn’s dad.


This build was also a lot of fun! I made an extra brace to hold the wait of two sitting on the bench. Thanks again Ana for your plans!
David Marks
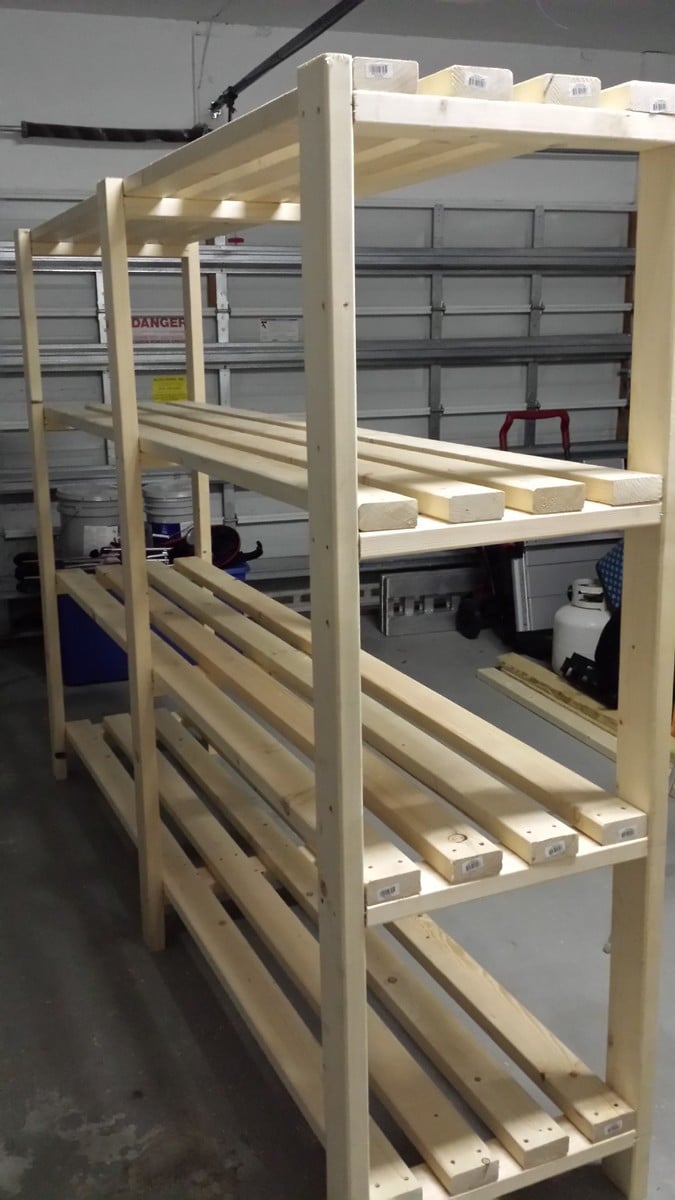
This was an easy project to complete in an afternoon that does not require any advance woodworking skills

Wed, 11/26/2014 - 12:19
This project looks even better than mine! I love look with paint! Well done!
Wed, 12/10/2014 - 09:41
This is my second completed project with plans and ideas from your website. Thanks for your good work!

A frame chicken coop with a few modifications- metal roof, insulation and slightly larger second floor.
By Chrystal
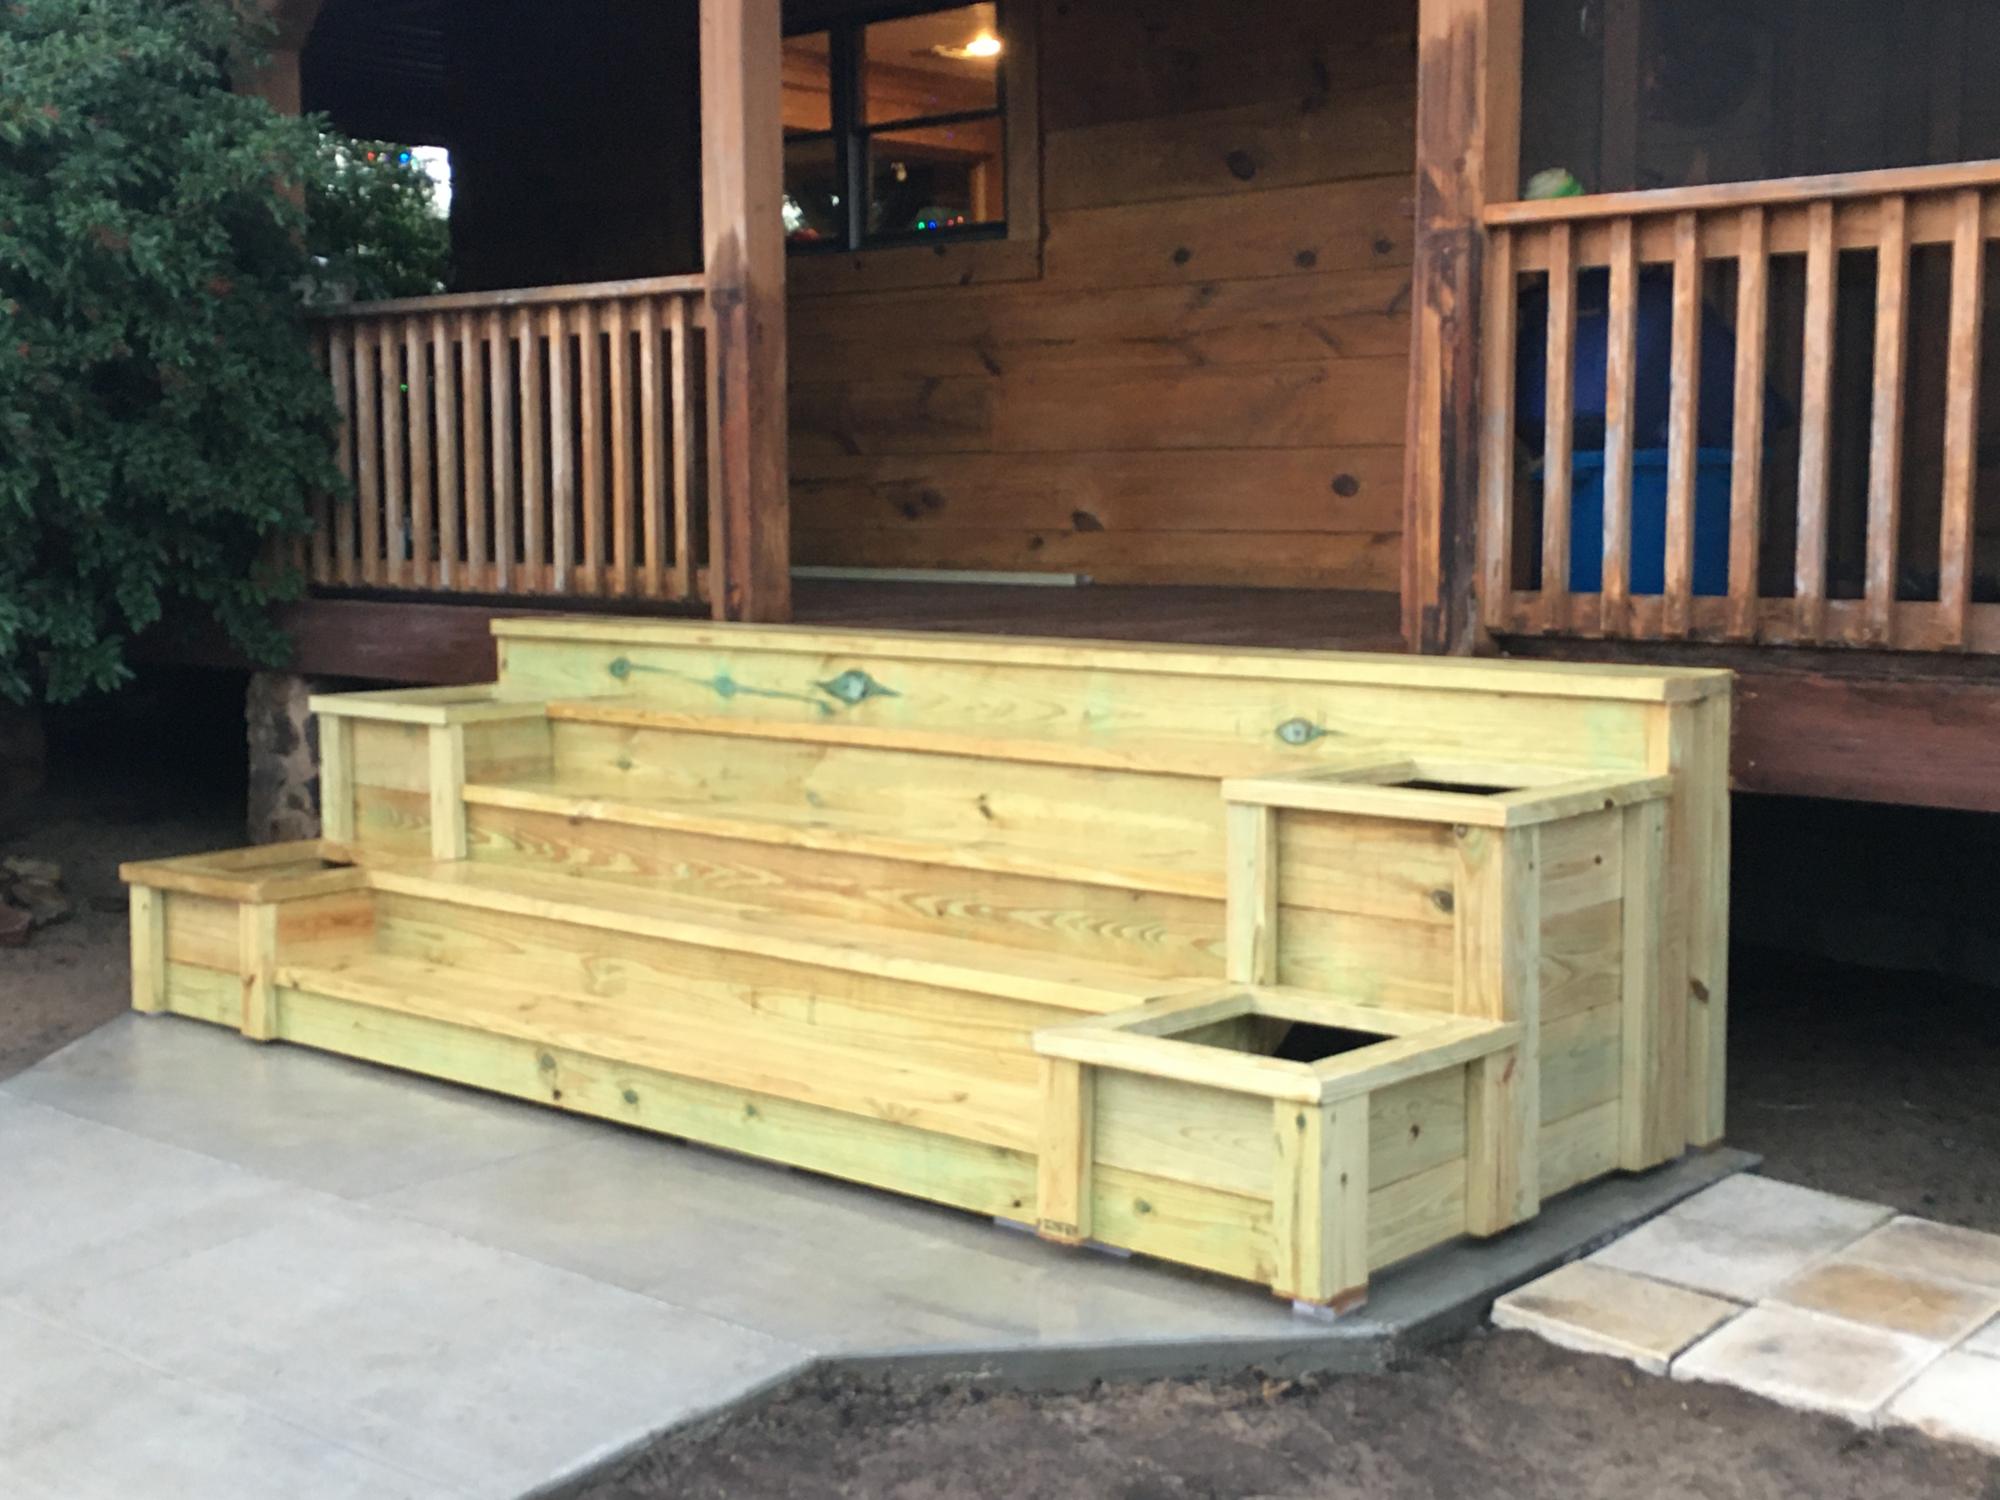
Plan modified to be built on stringers due to hight.
Fri, 07/07/2023 - 15:22
Do you have an illustration or instructions on the exact modifications you used for this project?
This is a mashup of several plans, combined into one big, bad ass, office desk. I've had a little experience years ago in high school woodworking classes, but haven't really built much since. This reminded me how much I enjoy working with wood. So rewarding to be typing this message at my new office desk!
Wed, 08/19/2020 - 06:25
This is amazing! So amazing could I ask you to share with me what prices from the collection of plans you used and how? I’m looking at your pic trying to figure out how to incorporate the plans you used. I want to build one for myself lol fantastic job!!!!
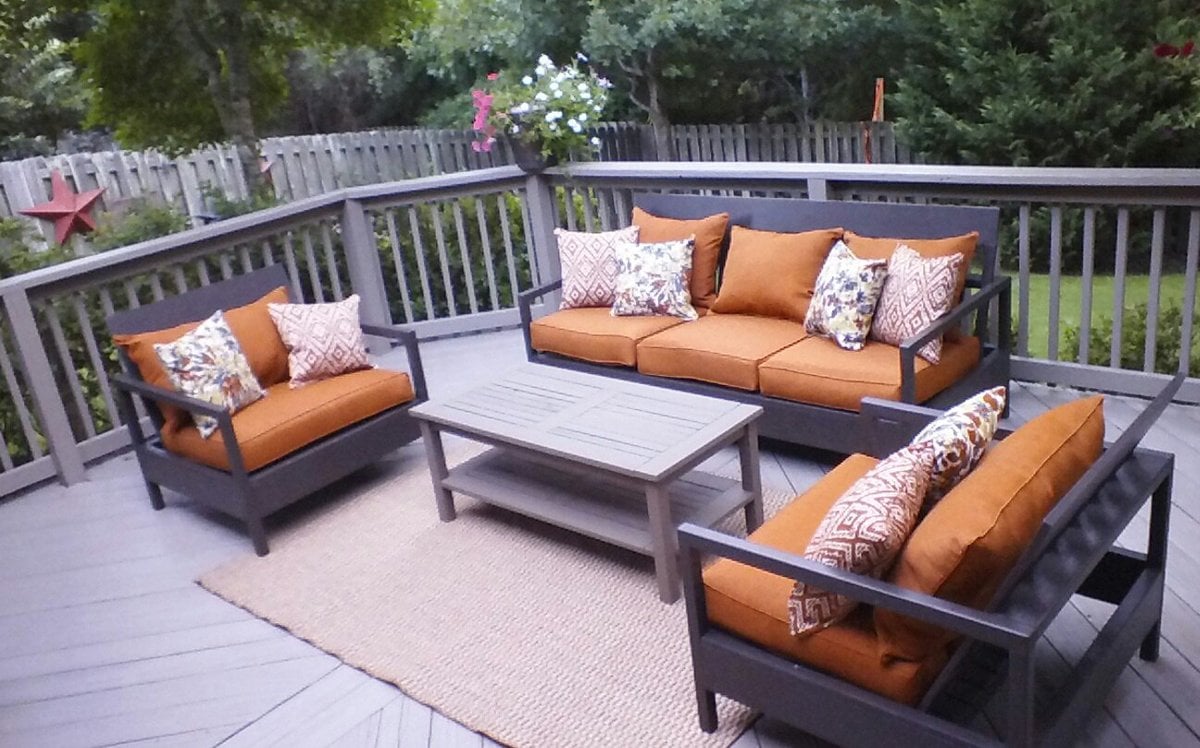
Well this was first project my hubby and I tackled together. He actually let me use the power tools. The plans were great! Loved having a shopping list! I made the cushion s myself. I have to say, I wish I had made the couch and chairs the size of cushions available at Lowes . AFt e r you buy foam batting fabric and chording I found set at lowes for a lot less but I am so happy how it all turned out . Thks for providing plNz!
I've thought for a while about building a bed for our dogs, but wasn't sure where to start. We had an extra crib mattress so I set out to find a toddler bed that would work. I decided the Lydia Toddler Bed plan would work best. It doesn't look anything like it, but it was a great starting point.
First, I got rid of the canopy and the decorative side pannels. I also raised the bed 12 inches. (The hope is to add a rug on the floor underneath as sort of a "bottom bunk") The lumber store didn't have 2x2s so I used 2x3s for the legs. I also only used two 1x6s at the head and foot of the bed. They are seperated by 1" because when I got home, I realized they were actually 1x5 (RUDE).
All in all, it turned out exactly as I had hoped and the dogs love it! GOODBYE stinky dogbeds!
**Photo 1: Just finished building--the slats weren't screwed down yet.
**Photo 2: Deacon is testing out his new digs! See the stinky dogbed underneath?YUK!
**Photo 3: Dog Bed Completed! Mac & Deacon love it!


Thu, 10/16/2014 - 18:49
Thanks for sharing the great plans. We built this end in a few hours and she loves it!
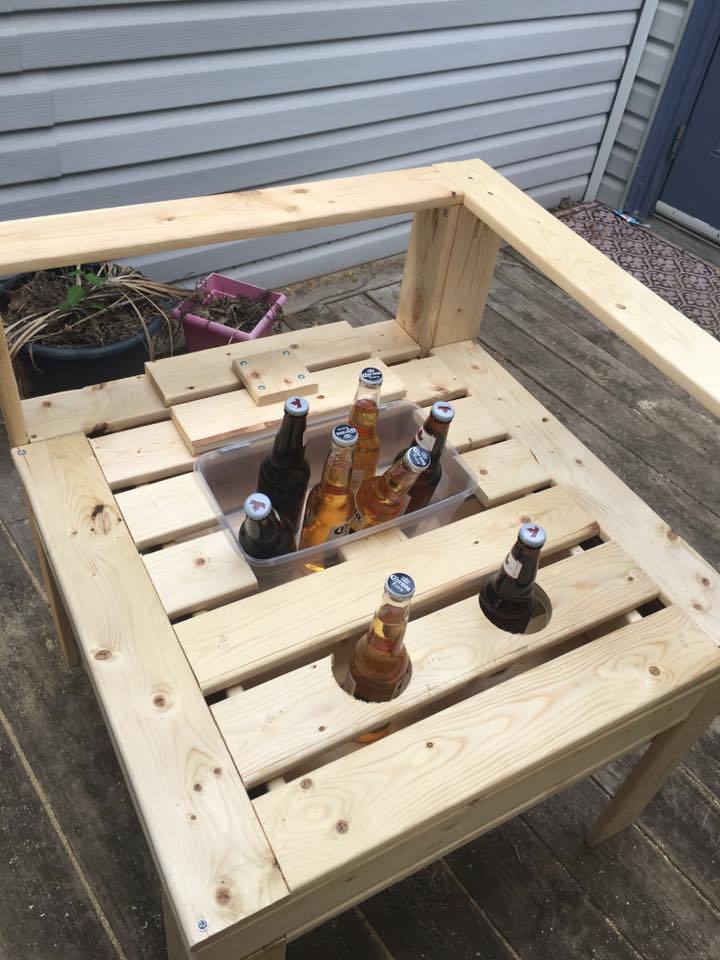
I had so much fun building this! I got a little creative with the corner section and decided to make it a table. I built a small hatch so that I could put in a container for ice and cold beer. When the hatch is not in use, the container can be removed and the hatch can be closed to provide more table space. I also added drink holders!


I live in a smaller rental with limited garage space, so I needed a place for my kids bikes. This is what I came up with. It required minimal screw holes in the treated fence posts and I attached a rail system(rubbermaid fasttrak) for the bikes to hang from. I used Ana's easy shelves plan for the upright supports and then just added some corrugated roofing and cedar fence pickets (which I had on hand) to finish off the top.
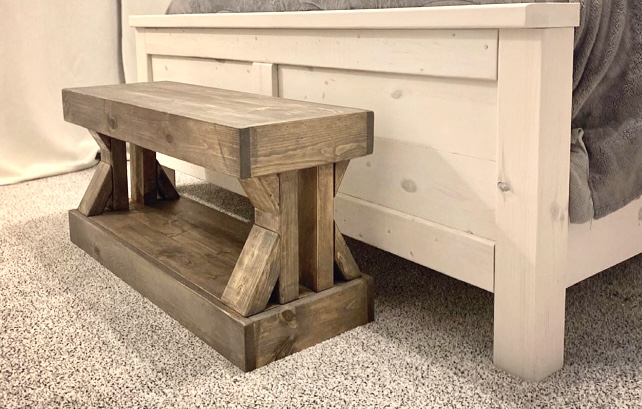
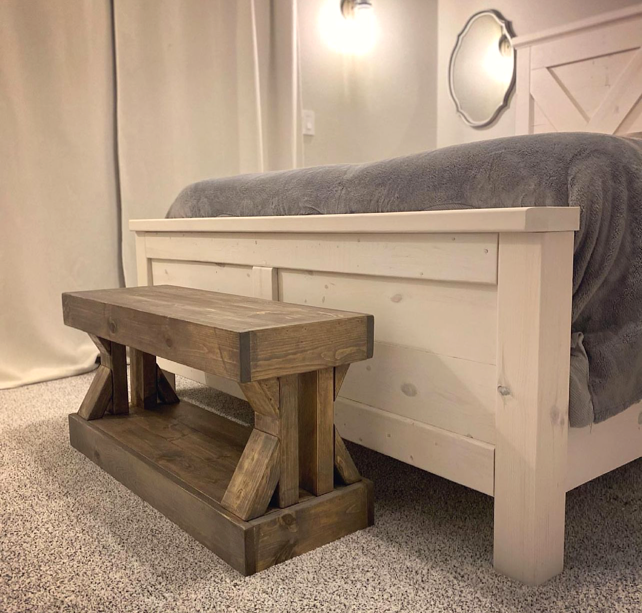
With all my bed frame scraps, I was able to build a small bench for resting and so the hubs doesn’t bump into the old ottoman when walking around the bed. by Mmade
I found these plans online and was just waiting for the kids' grandpa to come out and build it. Could be built in one afternoon (depending on how many trips to your local Home Depot, and availability of the correct tools)
Modifications from original plan:
6x6 instead of 4x4
Brackets to hold patio umbrella for shade
Added seat gussets for additional support
Added "wooden flange" around bottom of box to run lawnmower on
One additional center back support on each bench
One centered handle (instead of a handle on each end)
Stapled landscape weed barrier fabric onto the bottom
Sanded all exposed edges
Materials:
4@2x10x8'
12@1x6x6'
2@2x6x12'
8 hinges
2 handles
3 1/2" decking screws (for attaching 2"x boards)
1 5/8" decking screws (for attaching 1"x boards)
2+ 1 1/4" 2-hole straps for metal conduit (for attaching patio umbrella*)
*Our patio umbrella pole was 1 1/2" diameter, but 1 1/2" straps had too much play, so we used 1 1/4" straps and misc flat washers to adjust the snugness to the pole
Cut lengths:
2@2x10 cut to 72" (long sides of the box)
2@2x10 cut to 69" (short sides of the box)
Cut one each of the following out of a 12 footer:
2@2x6 cut to 75" (long side "flange")
2@2x6 cut to 64" (short side "flange")
No cuts were made to the 12 1x6's
Used one leftover 2' from the 2x8x10's ripped in half cut to 11.5" for arm rests
Used two leftover 2' sections from the 2x8x10's ripped in half cut to 21" for back supports
Used the last 2' cutoff to make two seat gussets (cut about 9 1/2" off and then ripped it at 45 degrees)
Used the remaining piece (ripped in half length-ways) to attach to the center of the backrest for additional support and as the attachment point for our handles
We decided to do one handle in the center of the backrest so one reasonably strong adult could open the lid
The bottom "flange" was assembled with the box upside down. Basically a 2x6 screwed to the bottom edge of the box allowing 1 1/2" overhang all the way around
After making cuts, but before assembly, we recommend using a quarter-sheet pad sander (or similar) with 60 grit paper to break all of the edges and round over any ends or corners that will be in contact with sandbox users
Followed other general assembly instructions

We used the shoe dresser instructions with some modifications to make it longer
Comments
mdwstgrl
Mon, 05/23/2016 - 12:29
BBQ Built In
Hello: Very interested in which plans you used to build the BBQ Built In. Thank you.
[email protected]
Wed, 06/08/2016 - 09:22
BARBECUE/BBQ QUICK BUILT-IN
Hello dbryant1977, please share the plans. Also, what's brand/model of BBQ? Very nice.
cmsorensen604
Sun, 05/05/2019 - 07:33
bbq surround
How do I get the plans for this
kobej9
Thu, 04/09/2020 - 18:27
This is my guess on the…
This is my guess on the plans used! https://www.ana-white.com/woodworking-projects/diy-grill-island-featuri…
TruTalesFeats
Mon, 06/03/2019 - 06:45
Barbecue/BBQ Quick Built-in
Please, which plans did you use for this?
bprice89
Fri, 08/30/2019 - 09:50
Are there plans for this…
Are there plans for this project or at least some pictures from while you were building it?
joany515
Mon, 03/16/2020 - 14:55
Built in BBQ
Would definitely like plans for this :)
kobej9
Thu, 04/09/2020 - 18:27
This is my guess on the…
This is my guess on the plans used! https://www.ana-white.com/woodworking-projects/diy-grill-island-featuri…
dchil23
Wed, 04/22/2020 - 15:52
Can you provide us with the…
Can you provide us with the plans for this? I would love to build one.
Angie Jester
Mon, 03/04/2024 - 14:49
Can you provide us with the plans for this?
Hello: Very interested in which plans you used to build the BBQ Built In. Thank you.