Community Brag Posts

Workbench

Submitted by jaimej on Sun, 04/28/2013 - 18:38

This is our 2nd project - we liked building the bookshelf so much, we decided we're gonna keep going and need a good workbench. Got these plans from the Family Handyman Website (http://www.familyhandyman.com/DIY-Projects/Woodworking/Workbenches/how-…). They claim the cost to be $50, but it was closer to $80 for us - still a GREAT project and easy to put together with the nail gun.

Built from Plan(s)
Estimated Time Investment
Afternoon Project (3-6 Hours)
Finish Used
none
Recommended Skill Level
Beginner

Comments

Pallirondack Laundry Basket Dresser

I showed my wife the Laundry Dresser featured on Ana White's website and she asked if I could make one for her, but not quite so tall. I also turned the orientation to fit our laundry room space. I used primarily oak from recycled pallets to build the Laundry Basket Dresser. She wanted a work space on top, so folded laundry, empty baskets, etc. all have a temporary resting place depending on the day. From start to finish, it took me about 6 hours. She plans to stain the piece at some point, but its already in use, so I'm not 100% sure that will ever happen until we move or something. ;-) Great idea and laundry room organization!

Estimated Cost
Half a box of screws
Estimated Time Investment
Afternoon Project (3-6 Hours)
Recommended Skill Level
Intermediate

Comments

Kathy in Pittsburgh (not verified)

Mon, 09/10/2012 - 10:22

I love the open sides, plus it makes it much more feasible to build with scraps repurposed wood, which I love. Thanks for the inspriation

payne.kj

Mon, 04/08/2013 - 08:48

Hi, do you have any kind of plans for how you did this or atleast dimensions? I think this one fits more of what my wife needs, but I'm pretty new to making anything.

nicholas_ftm

Sun, 06/14/2015 - 20:16

Soooo I made this according to the measurements and no laundry basket I find fit. Kind of dissapointed in the fact that this cool thing I just built doesn't have any baskets that will fit it. Any advice on finding a basket that fits?

jkread

Fri, 07/10/2015 - 20:56

I think the idea is to build it to fit the baskets you have or buy some and build around them.

6'x6' Box

Submitted by Anonymous (not verified) on Wed, 04/20/2016 - 19:22

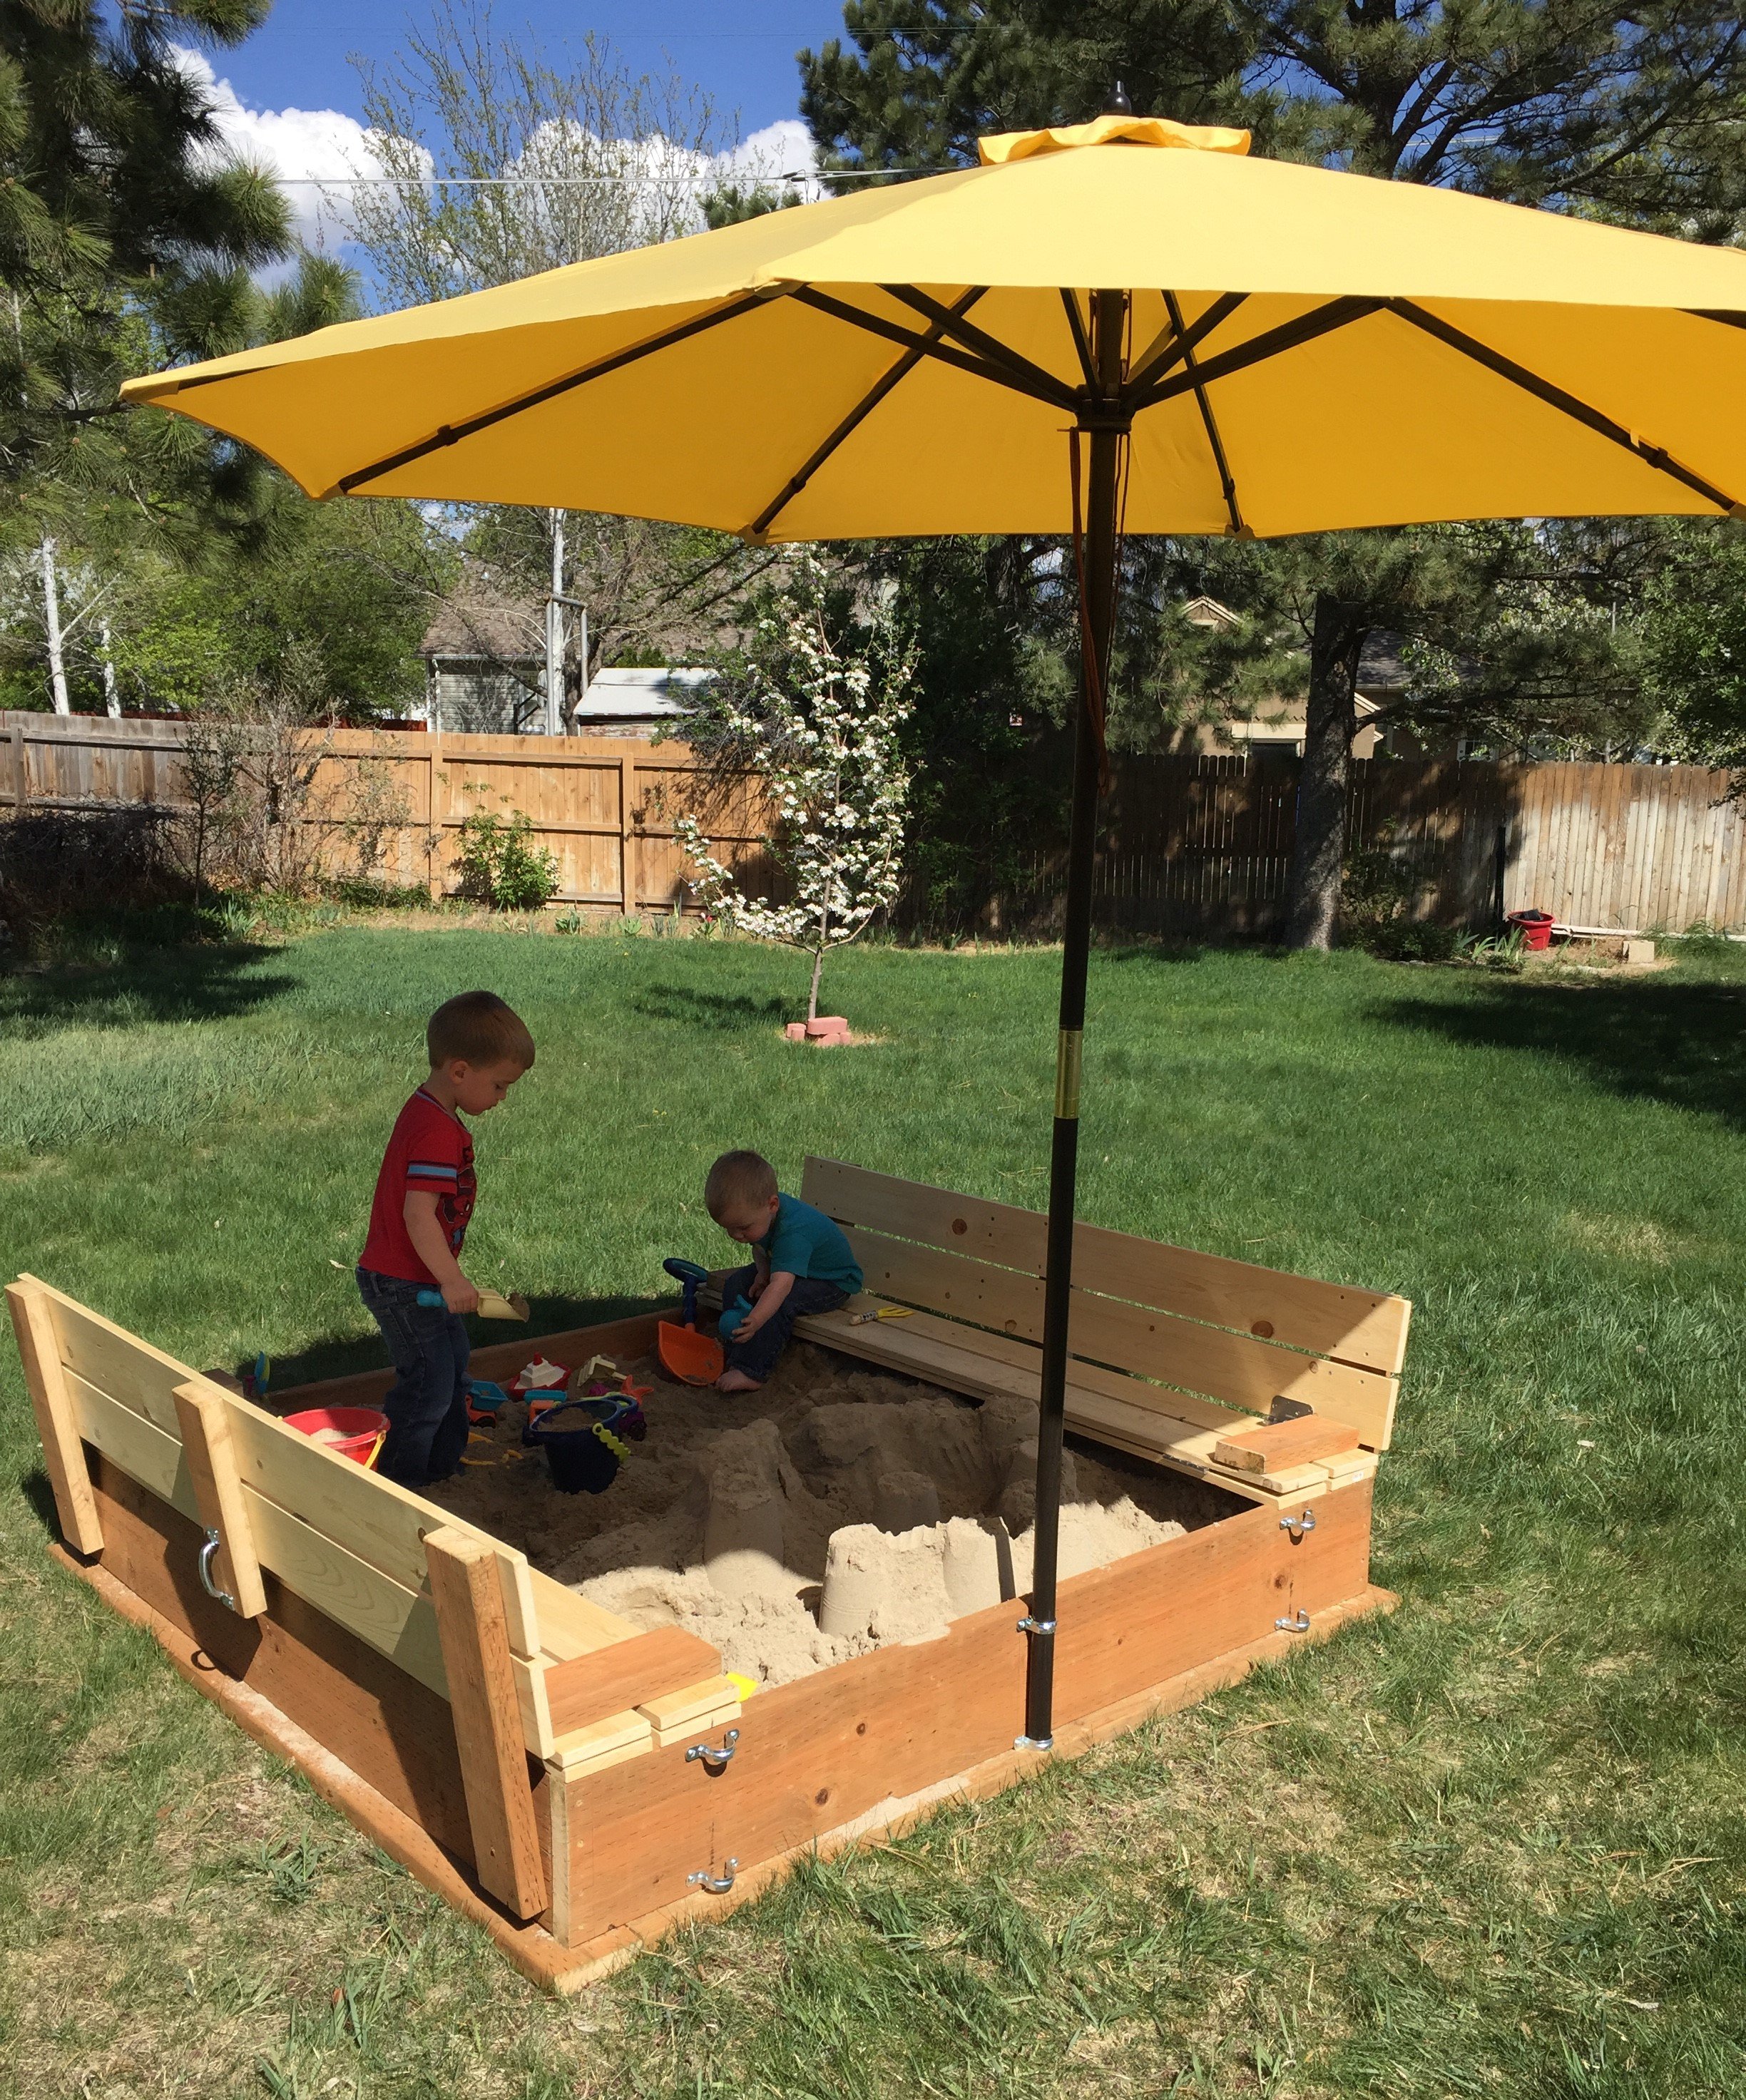
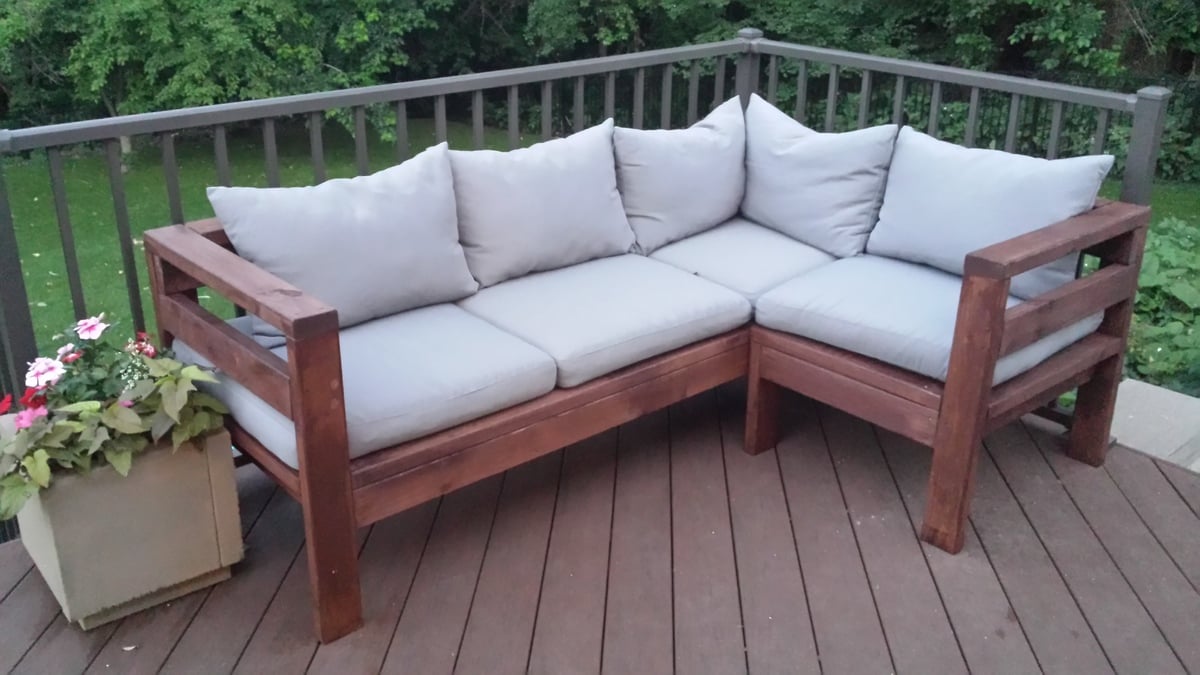
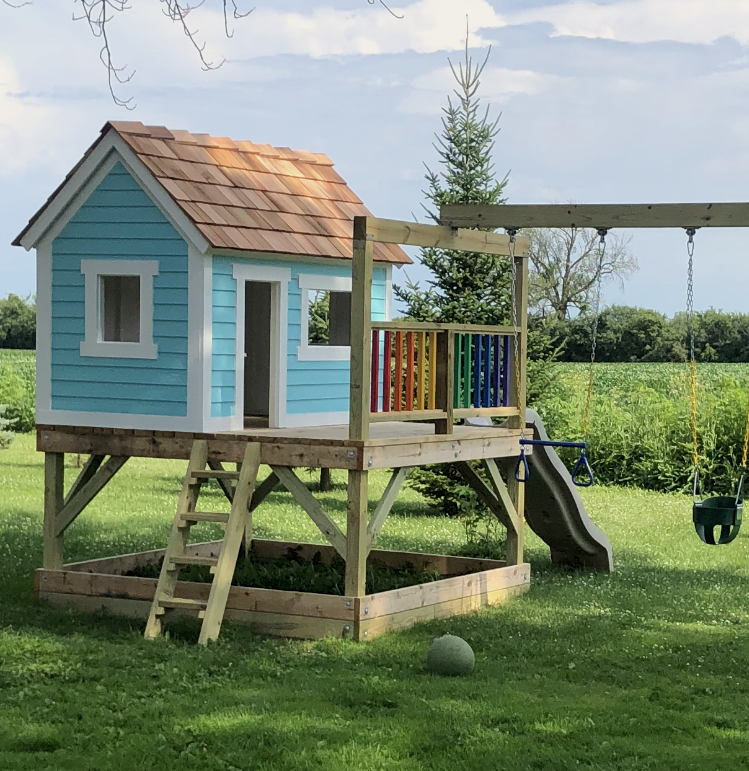
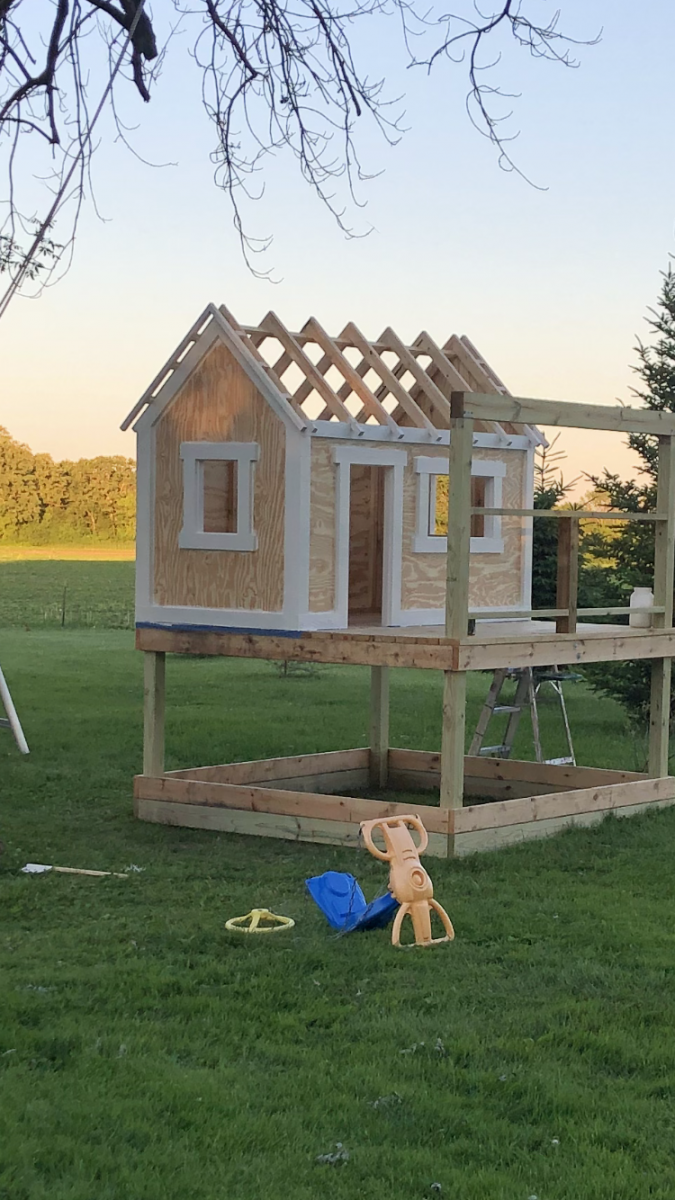
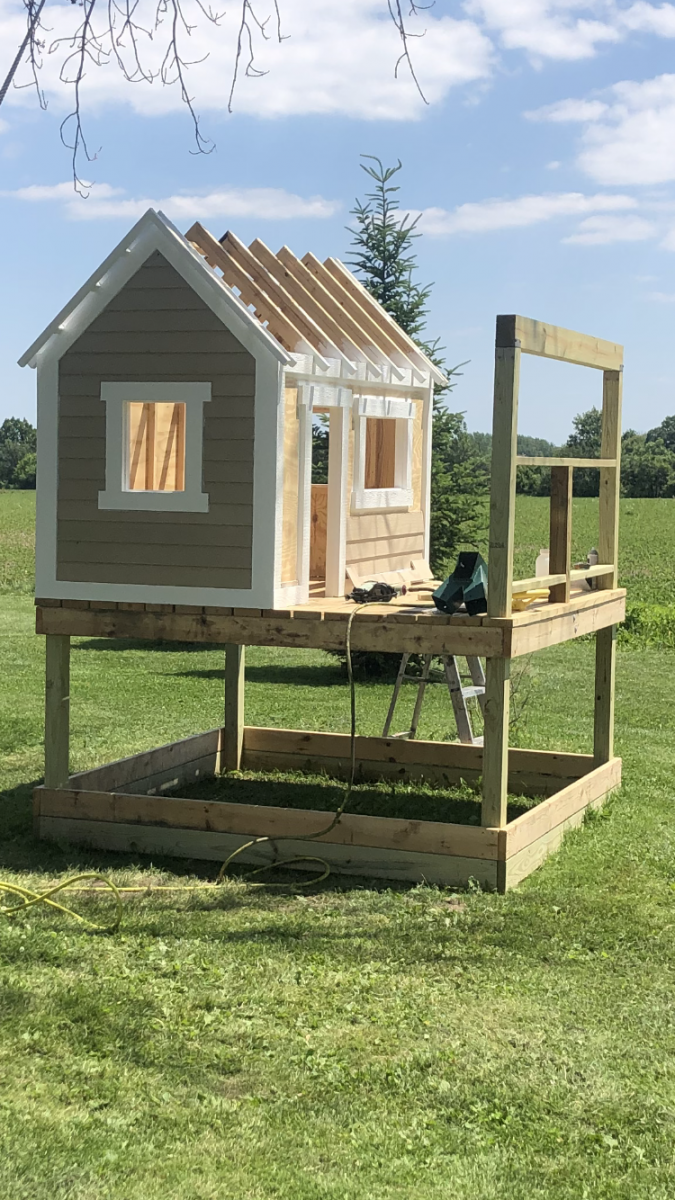
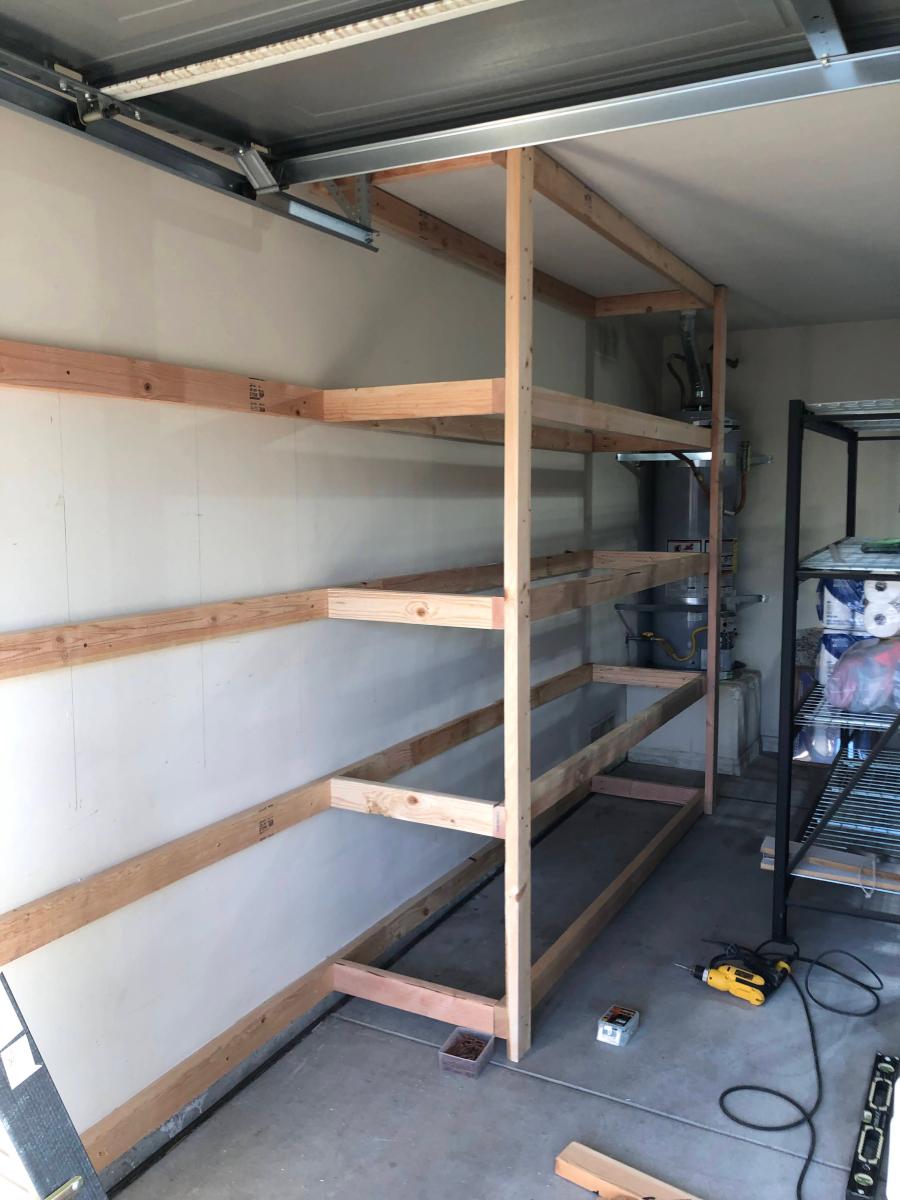
I found these plans online and was just waiting for the kids' grandpa to come out and build it. Could be built in one afternoon (depending on how many trips to your local Home Depot, and availability of the correct tools)
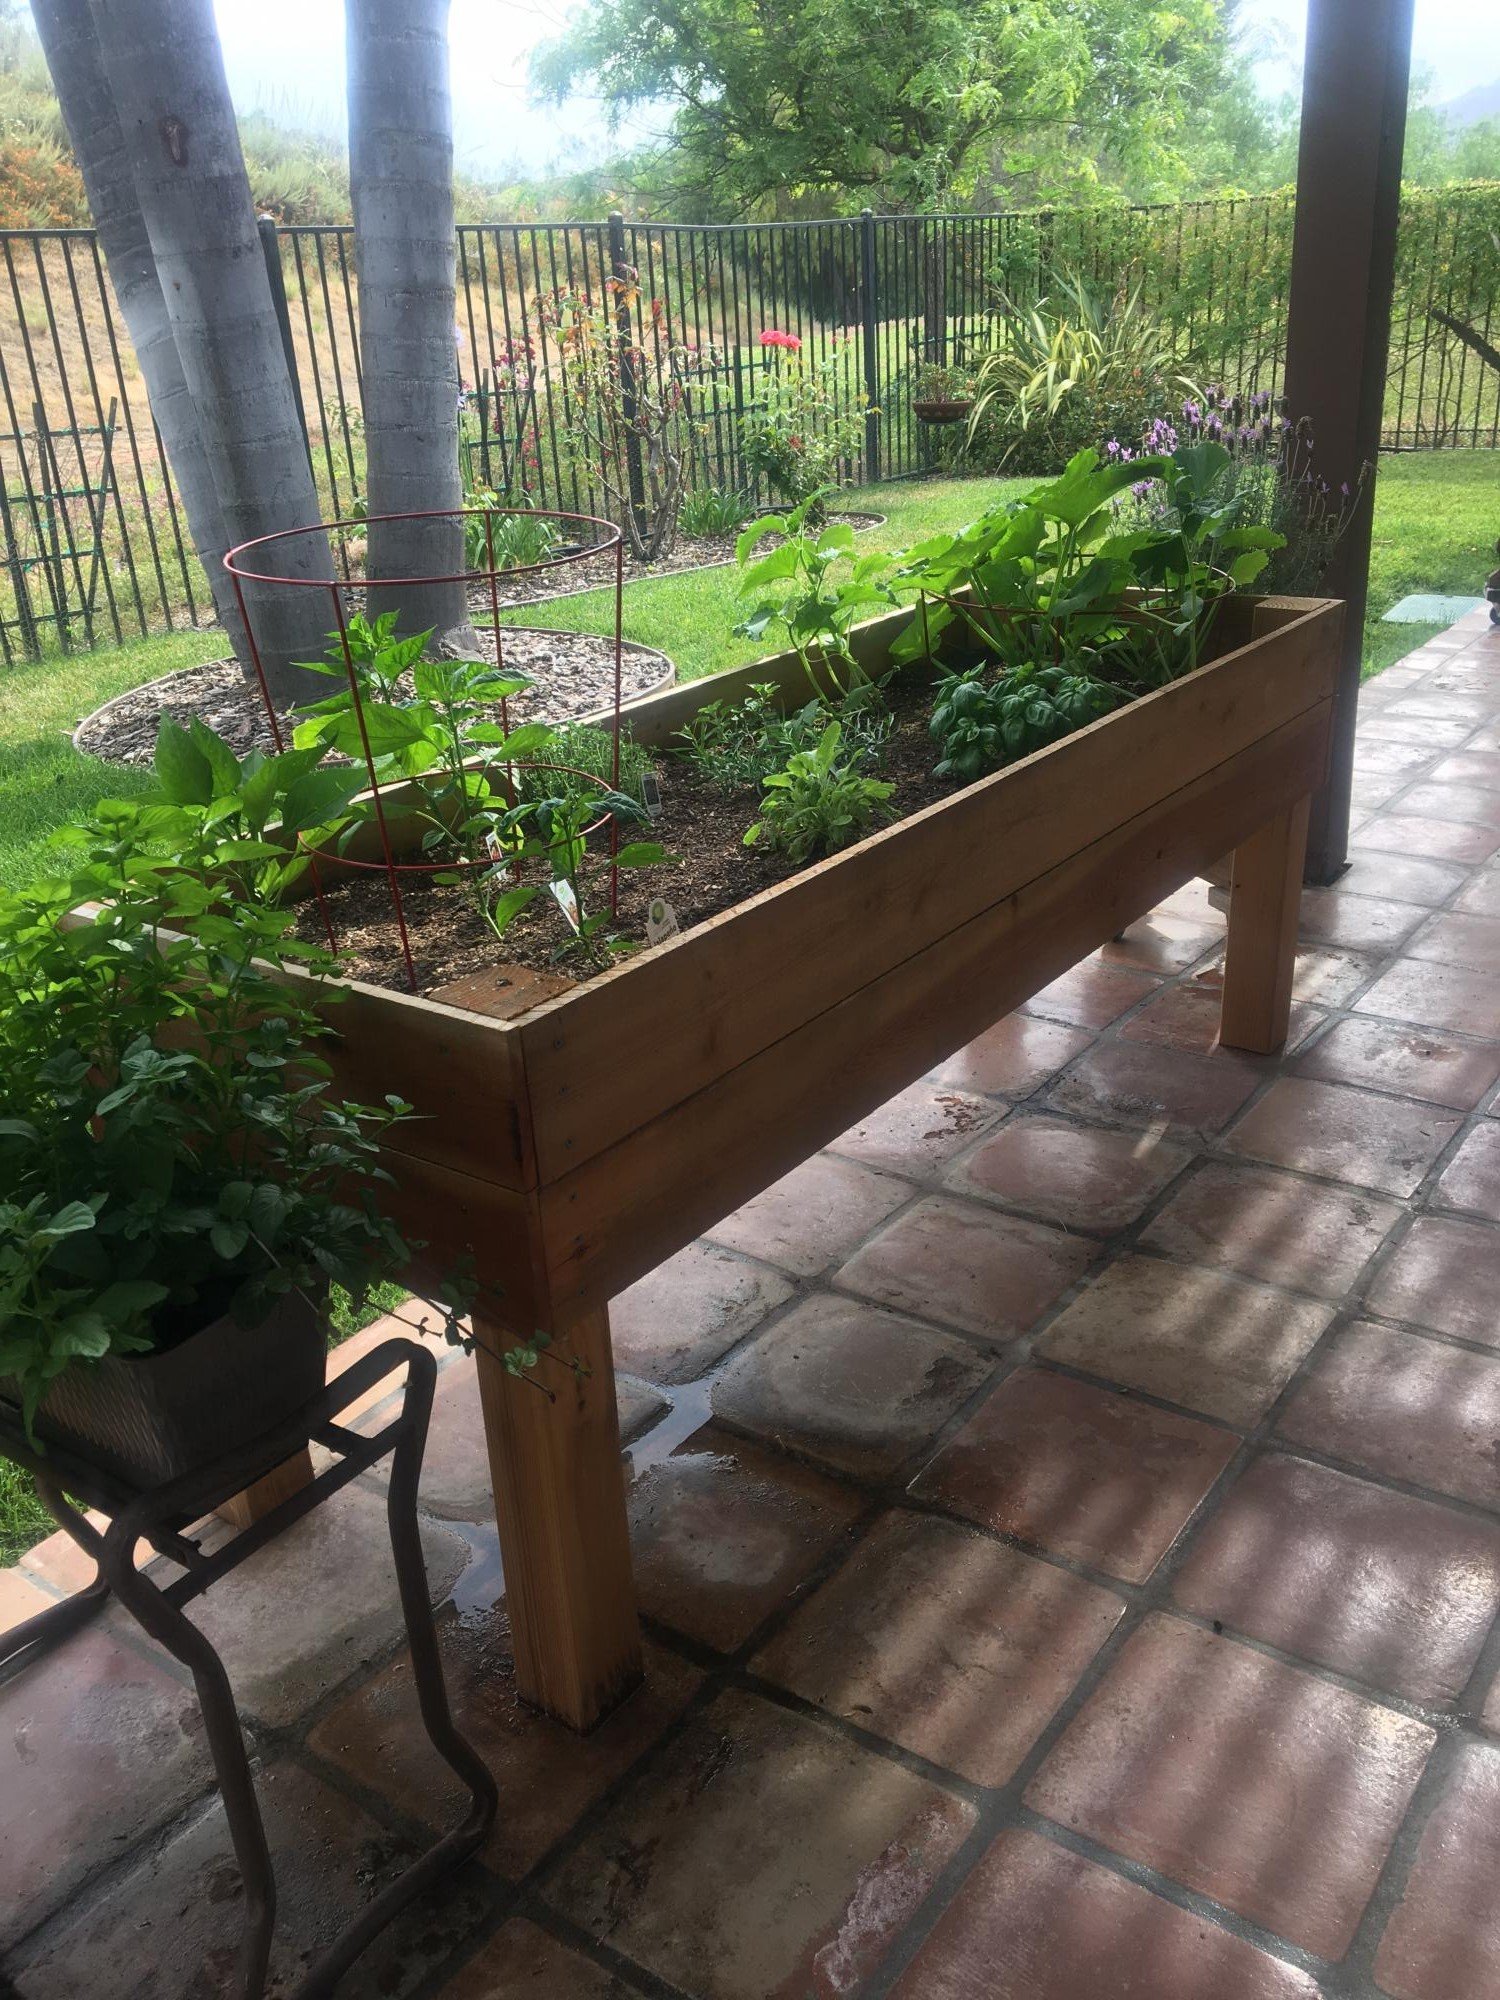
Modifications from original plan:
6x6 instead of 4x4
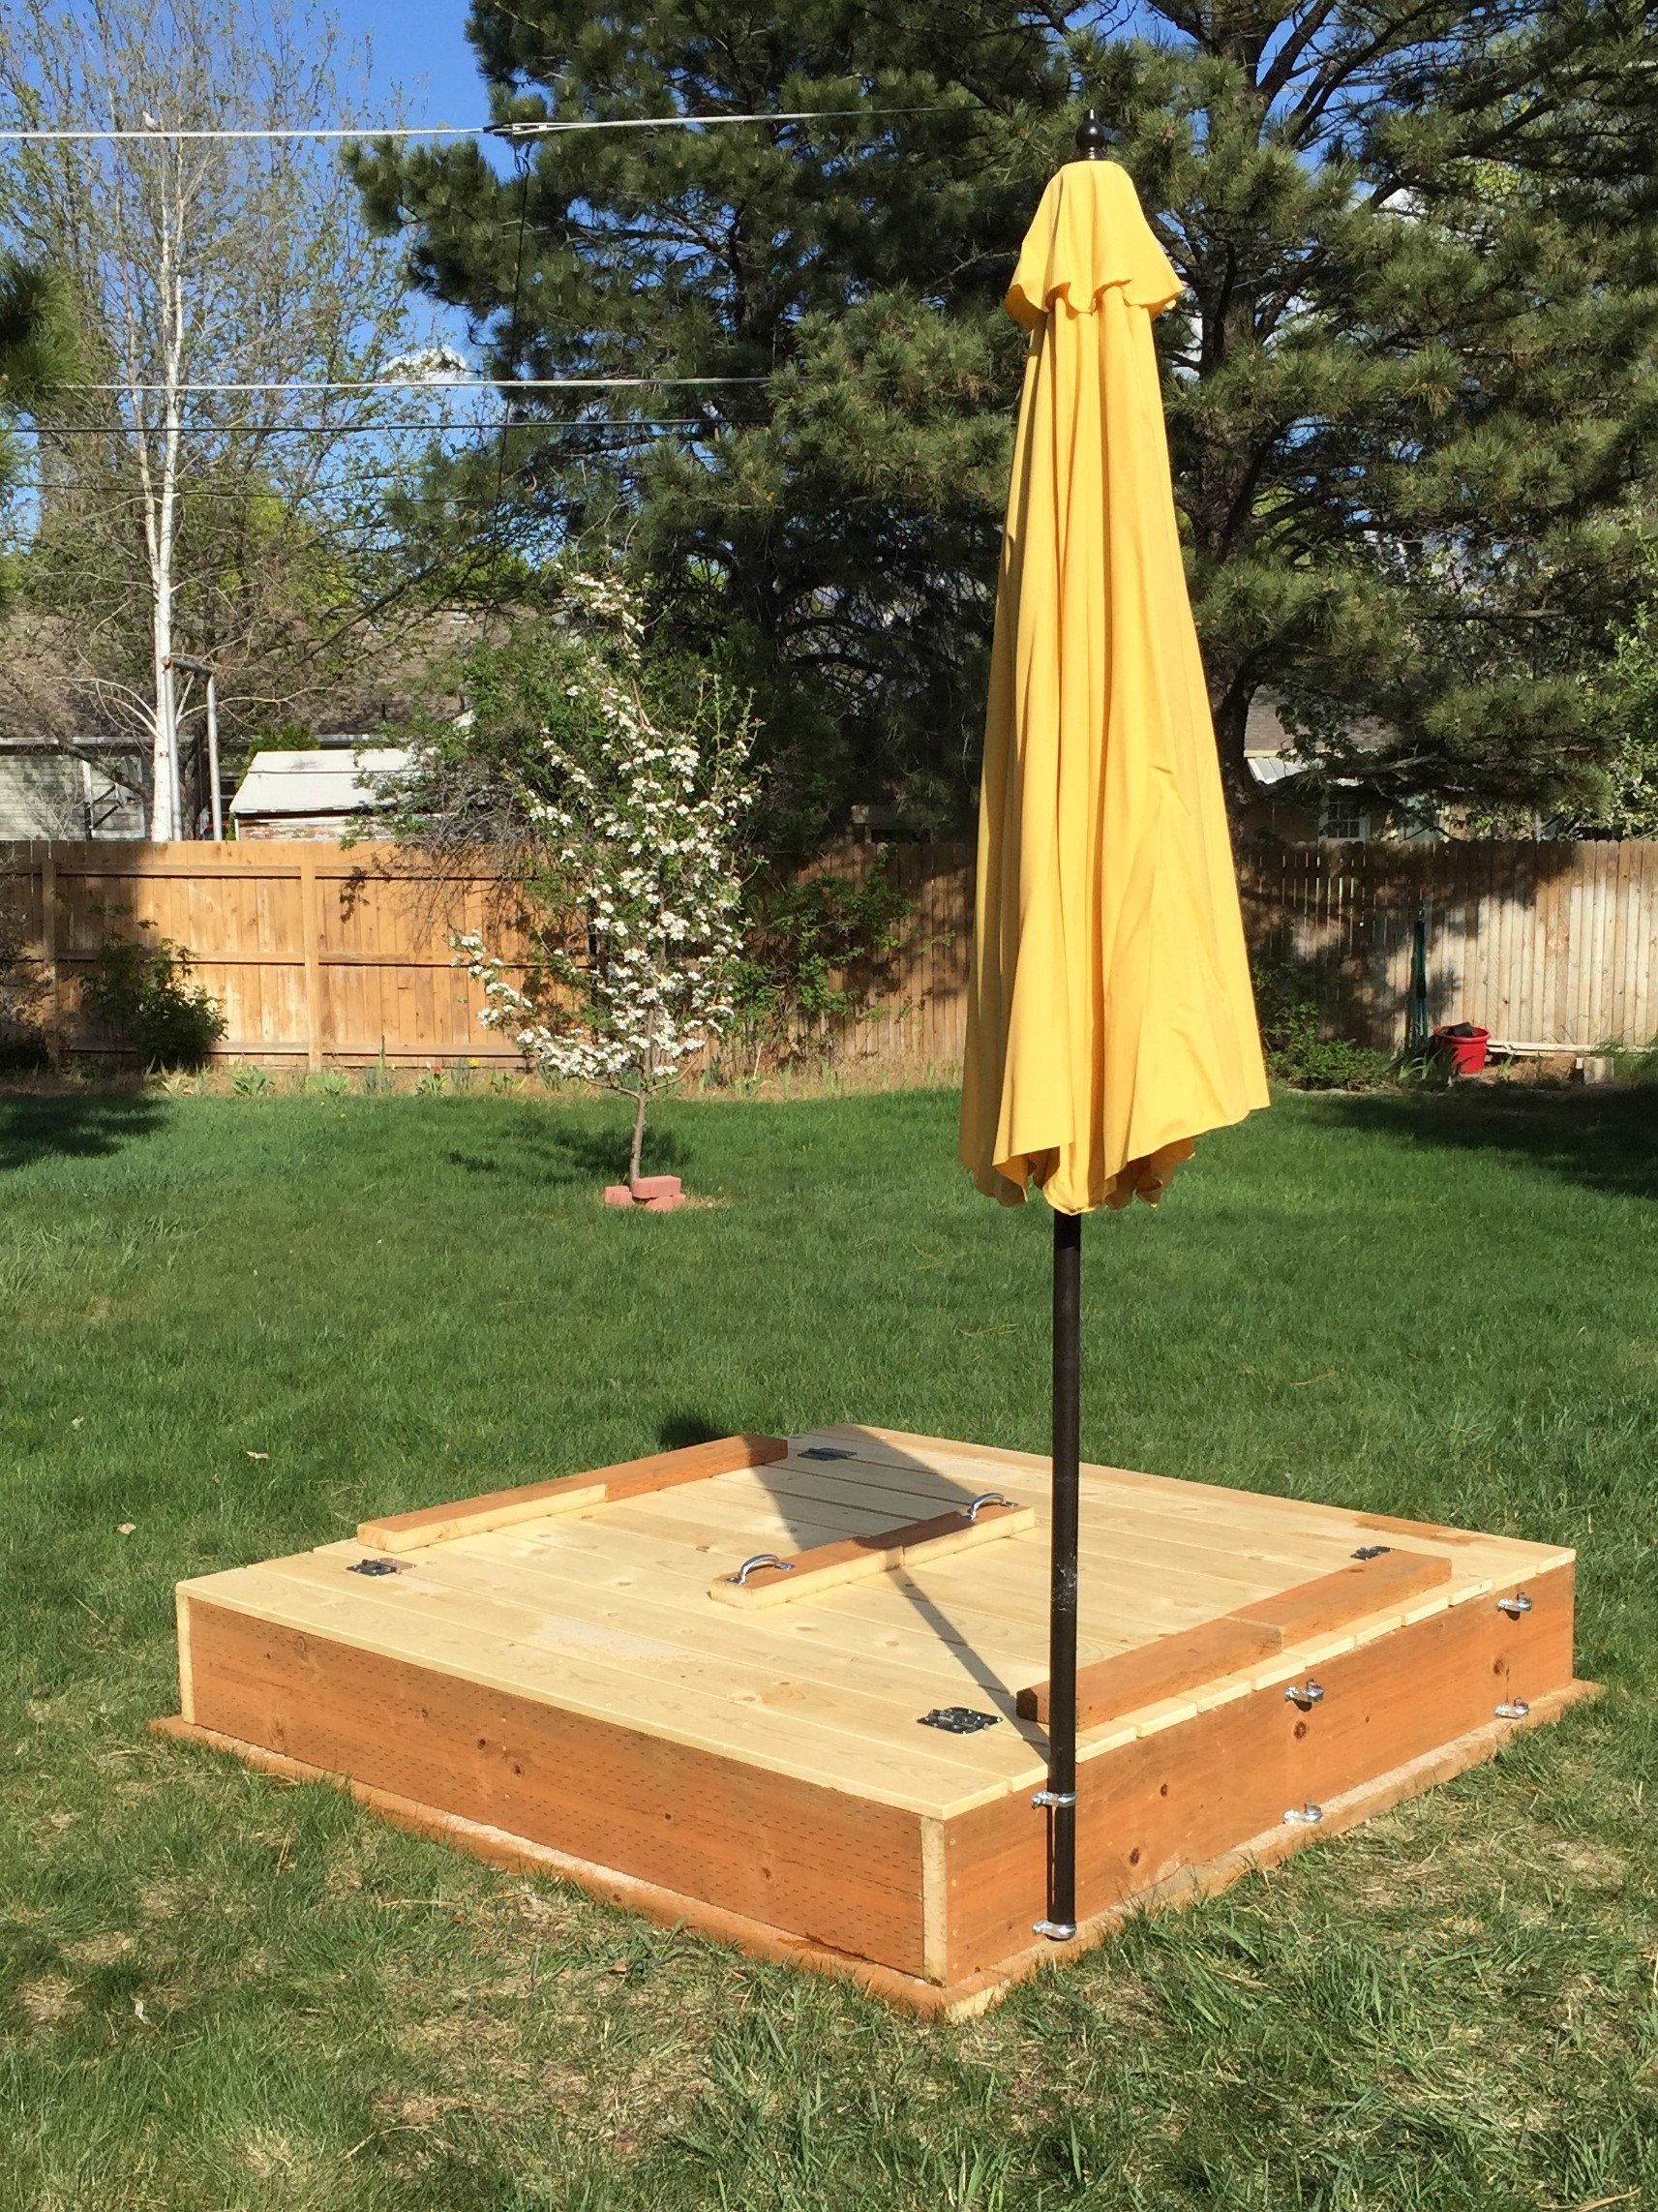
Brackets to hold patio umbrella for shade
Added seat gussets for additional support
Added "wooden flange" around bottom of box to run lawnmower on
One additional center back support on each bench
One centered handle (instead of a handle on each end)
Stapled landscape weed barrier fabric onto the bottom
Sanded all exposed edges

Materials:
4@2x10x8'
12@1x6x6'
2@2x6x12'
8 hinges
2 handles
3 1/2" decking screws (for attaching 2"x boards)
1 5/8" decking screws (for attaching 1"x boards)
2+ 1 1/4" 2-hole straps for metal conduit (for attaching patio umbrella*)
*Our patio umbrella pole was 1 1/2" diameter, but 1 1/2" straps had too much play, so we used 1 1/4" straps and misc flat washers to adjust the snugness to the pole
Cut lengths:
2@2x10 cut to 72" (long sides of the box)
2@2x10 cut to 69" (short sides of the box)
Cut one each of the following out of a 12 footer:
2@2x6 cut to 75" (long side "flange")
2@2x6 cut to 64" (short side "flange")
No cuts were made to the 12 1x6's
Used one leftover 2' from the 2x8x10's ripped in half cut to 11.5" for arm rests
Used two leftover 2' sections from the 2x8x10's ripped in half cut to 21" for back supports
Used the last 2' cutoff to make two seat gussets (cut about 9 1/2" off and then ripped it at 45 degrees)
Used the remaining piece (ripped in half length-ways) to attach to the center of the backrest for additional support and as the attachment point for our handles
We decided to do one handle in the center of the backrest so one reasonably strong adult could open the lid
The bottom "flange" was assembled with the box upside down. Basically a 2x6 screwed to the bottom edge of the box allowing 1 1/2" overhang all the way around
After making cuts, but before assembly, we recommend using a quarter-sheet pad sander (or similar) with 60 grit paper to break all of the edges and round over any ends or corners that will be in contact with sandbox users
Followed other general assembly instructions

Built from Plan(s)
Estimated Cost
$300 with umbrella and sand
Estimated Time Investment
Day Project (6-9 Hours)
Finish Used
We live in a very arid climate (Utah) so we chose not to varnish or paint this project
Recommended Skill Level
Beginner

Essential Adirondack chair

Submitted by str1523 on Mon, 05/25/2020 - 10:23

Like this chair! Changed the 3 1x10's on the back to 4 1x8's ripped down to 6 ¹⁵/¹⁶

Estimated Cost
40
Estimated Time Investment
An Hour or Two (0-2 Hours)

Comments

Outdoor Sectional

I scaled back the length of the sofa by a few inches and I made the sectional only one seat to fit my space on the deck. This was my first woodworking project that I did by myself. I got the cushions for more than 1/2 off at Ikea so the whole project cost about $150 ($80 for the cushions). It took me about a week to complete but the total time was less than 10 hours to build and stain. I'm pretty happy with how it turned out.

Estimated Cost
$150
Estimated Time Investment
Weekend Project (10-20 Hours)
Finish Used
Pittsburgh Paints Stain & Sealant in One for Decks, Fences, & Siding in Walnut. I brushed on the exterior stain just like a paint. I did the top part of the sofa first, then flipped it over and stained the bottom. Read instructions on the label.
Recommended Skill Level
Beginner

Comments

Makings of an Herb Garden

I followed Ana's Raised Planter Box plan exactly. We did purchase a Kreg Jig Jr. recently, which came in handy on this project for sure. It is a very sturdy piece and it only took a couple of hours to assemble.

Estimated Cost
$120
Estimated Time Investment
Afternoon Project (3-6 Hours)
Finish Used
Sherwin Williams Deckscapes in Flagstone with Minwax Whitewash pickling over the stain. Poly over the whitewash
Recommended Skill Level
Beginner

Comments

Pergola Swing

Submitted by grarob1956 on Thu, 04/23/2020 - 17:59

I saw this project on YouTube under Arbor Pergola Swing. It did not mention any specific detailed plans or cut list but it was enough to get me started. I began with (2) 10' 6" x 6" post. buried each 24" and cemented. I cut the post tops at 83" from ground line. The rafter consist of (2) 10' 2"x 6". I used the leftovers of the 6" x 6" post tops in the middle of my rafters to hang the swing from with 1/2 " eye bolt. Then I used (9) 2" x 2 " x 8' and cut each at 36" to finish off the top and (2) 2x6x8 for the 4 rafter supports. I drew out the designs of the rafters and top ends free hand and at made a template for the cuts with s jigsaw.

The entire cost including hardware minus the swing was $170. My wife had purchased the swing last Fall at a clearance for $40 brand new.

Built from Plan(s)
Estimated Cost
$170.00
Estimated Time Investment
Weekend Project (10-20 Hours)
Finish Used
Valspar Duramax Special Walnut
Recommended Skill Level
Intermediate

Queen Farmhouse Guest Bed

Submitted by Anonymous (not verified) on Wed, 05/08/2024 - 09:33

Ana - built this Queen Farmhouse Bed from your plans and videos. Really a warm, guest room that I built inspired from your work and detailed plans — thanks again!

Chris K

Built from Plan(s)

Cedar Planter Boxes

Submitted by KaityJene on Wed, 07/17/2013 - 19:59

They were simple to make and the plan was easy to follow. The only modification I made was adding the 1x3 topper in place of the longer legs sticking out of the top.

Built from Plan(s)
Estimated Cost
$23
Estimated Time Investment
Day Project (6-9 Hours)
Finish Used
Thompson's Water Seal which I just brushed on using a cheap paint brush.
Recommended Skill Level
Beginner

Comments

Debi G

Fri, 07/19/2013 - 06:36

Adding these to my to-do list for spring (yes, I plan ahead). I'm thinking of elevating and elongating them to fit around a bay window.

Tool Caddy

Submitted by docbromo on Thu, 01/20/2022 - 15:21

I repurpose furniture as a hobby and I got tired of having my tools hanging on a wall on the other side of the garage so I bult this rolling tool caddy. It is made out of 3/4" plywood, a couple of 2x4's and some heavy-duty casters. I built one about 3 years ago and realized that there were some things I wanted to do differently so I sold it and bult this one. My wife gave me a subscription to SketchUp and I had fun drawing it up and tweaking it. I left an over hang of 3" on both sides so I could store my clamps. I also attached an electrical cord reel on the right side and reversed the ends so the male end can plug into the wall and I can roll the unit across the room allowing me to be able to charge my batteries. The back side has a 44 drawer storage organizer and also a few shelves for additional tools like a router and a multi-tool. I'm not nearly the craftsman many of you are and I'm sure you could do a much better job. I didn't build it to look pretty but to be functional and it works for me.

Comments

Jayp413

Fri, 01/21/2022 - 09:16

I really like this idea. I have my tools hung up neat all around the garage, but I keep walking back and forth for tools and batteries. It would be great to roll this over to a project and have everything you need right there. Nice work. I will modify one for my needs.

BigMacQue

Fri, 01/21/2022 - 10:06

there are some very thoughtful features on this, notably the wings at the top and the bottom for clamps and extra tools and the different shelf heights. Well done! I'm going to build one just like it and a power strip for battery storage.

I used the corrugated polycarbonate to cover the greenhouse I made from a chalet style Sun Country Greenhouse Plans. Thanks for the idea.

Submitted by Anonymous (not verified) on Sat, 03/09/2019 - 06:34

I saw the barn shaped greenhouse plan but preferred a regular roof pitch. I did however incorporate the corrugated polycarbionate as a covering. I find it odd that you guys installed the polycarbonate horizonitally instead of vertically.

Anyway thanks for the info on polycarbonate.

Built from Plan(s)
Estimated Cost
Using cedar framing... 9 x 16' @ $3000 +/-
Estimated Time Investment
Week Long Project (20 Hours or More)
Finish Used
Behr
Recommended Skill Level
Intermediate

Comments

hauxy

Tue, 09/01/2020 - 17:47

Love this! I really prefer the roofline on your greenhouse. Did you modify Ana's design, or did you get plans from another site? Would love to replicate your design if possible-very elegant.

Seasonal And Holiday

Daughters blue Playhouse

Submitted by rysos81 on Thu, 07/23/2020 - 08:55

I used the basic framing plan for the project, but extended roof overhangs, added engineered siding / trim and cedar shake roofing. I put 2x4 bracing on for the platform.

Estimated Time Investment
Week Long Project (20 Hours or More)
Recommended Skill Level
Intermediate
Seasonal And Holiday

2x4 sectional outdoor sofa

Submitted by Anonymous (not verified) on Tue, 05/12/2020 - 08:10

My first Ana White project. My friend Shelley and I are RN's, and she got me hooked on woodworking. I started with cushions from Lowes ( in the sizes that you recommended)to see if I loved the sectional for a few years. I loved it so much I decided to have custom Sunbrella fabric ones made. Even though the custom ones were more expensive, it has been worth it. They go perfect with my California Mission style home. Now I want to add the armless one and make it a U-shape. I did add a piece at the bottom back of each sofa to hold the cushions in. The seat cushions would slide out the back when sitting on the sofa. I made the coffee table to match. Our family loves it!

Estimated Cost
building materials for sofa $250. Custom Sunbrella Fabric cushiosn $2000
Estimated Time Investment
Weekend Project (10-20 Hours)
Finish Used
Stained with Carrington Minwax and sealed with spray Shellac
Recommended Skill Level
Beginner

Comments

Raised bed planter

Submitted by Anonymous (not verified) on Tue, 06/02/2020 - 16:36

Hey Ana,

I saw your raised bed planter and decided to tackle it for ourselves. It measures 2'x8' and stands 28" to the bottom of the planter. I used redwood fencing for the sides and bottom at a cost of $1.79 each. I didn't use the wire mesh for the bottom but drilled 1/4" holes in the redwood fencing for drainage.

Thanks for the idea!!

Mike Howell

Estimated Cost
$45
Estimated Time Investment
Afternoon Project (3-6 Hours)
Finish Used
I left ours in it's natural state
Recommended Skill Level
Intermediate

XL Modern Craft Table

I modified this plan so I could have 4 total work areas. Total Size: 48" x 96"

Built from Plan(s)
Estimated Time Investment
Weekend Project (10-20 Hours)
Finish Used
White paint to match walls and trim (SW Alabaster)
Recommended Skill Level
Intermediate

Comments

briannamcelfresh

Tue, 09/08/2020 - 19:42

Is there anyway you can share these plans with me!? I drew out some plans for an identical table but I think my cuts may be off! It would be so helpful.

Outdoor sectional

Submitted by Anonymous (not verified) on Wed, 10/02/2019 - 04:17

Made the outdoor sectional. The coffee table was made out of left over pieces!

Estimated Cost
$260
Estimated Time Investment
Weekend Project (10-20 Hours)
Finish Used
We used a semi transparent stain applied with brush. We would recommend a hand sprayer instead.
Recommended Skill Level
Beginner

Comments

Farmhouse table

Submitted by Anonymous (not verified) on Thu, 06/18/2020 - 19:25

First table build! We modified the plans with no breadboard ends since we live with lots of humidity and wanted to allow the wood movement. We also used 4x4s for the legs. White chalk spray paint legs and custom mix of special walnut and weathered oak stains. We LOVE it!!

Estimated Cost
200
Estimated Time Investment
Weekend Project (10-20 Hours)
Back