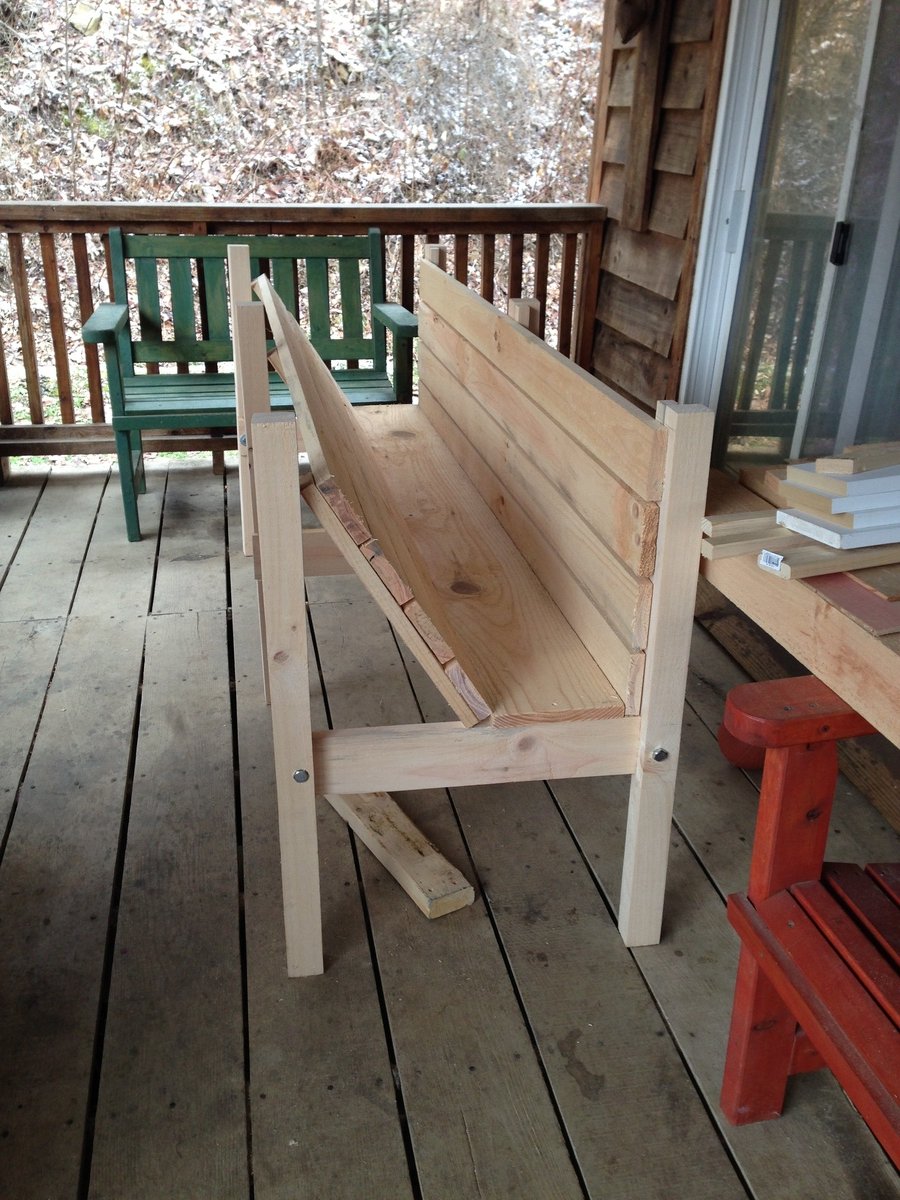
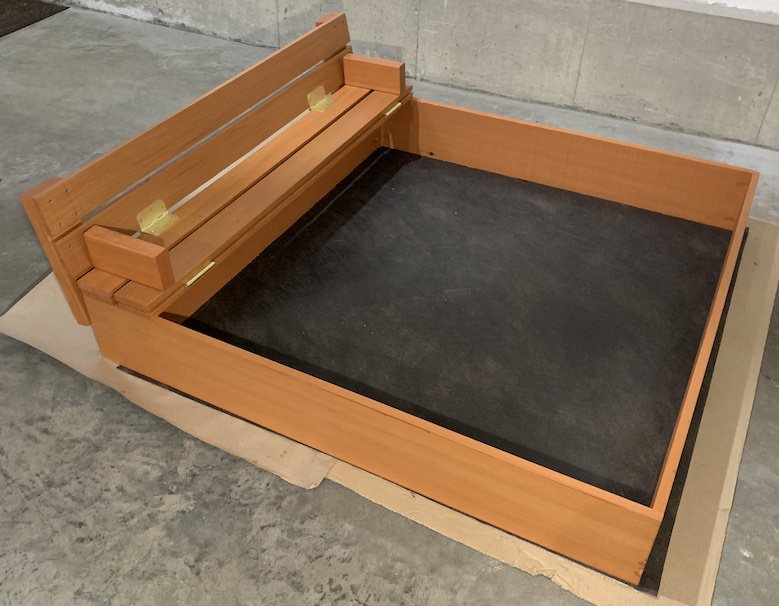
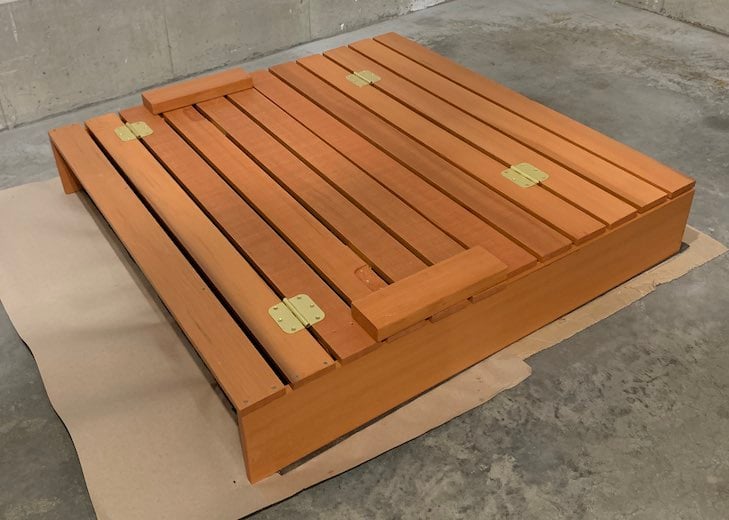
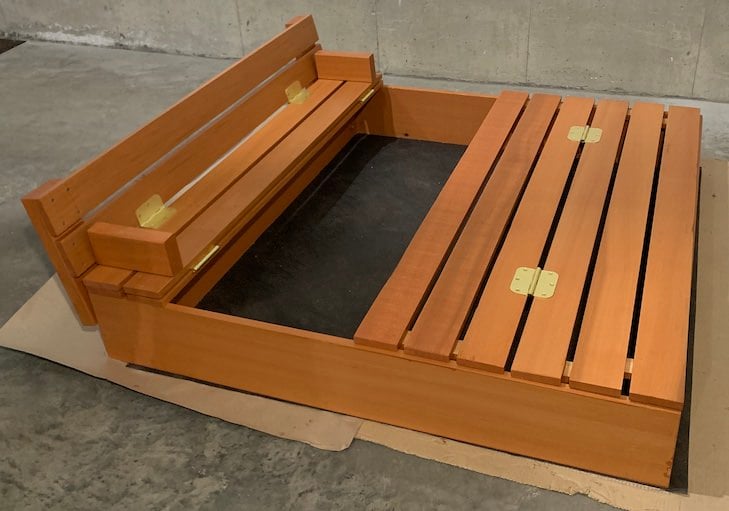
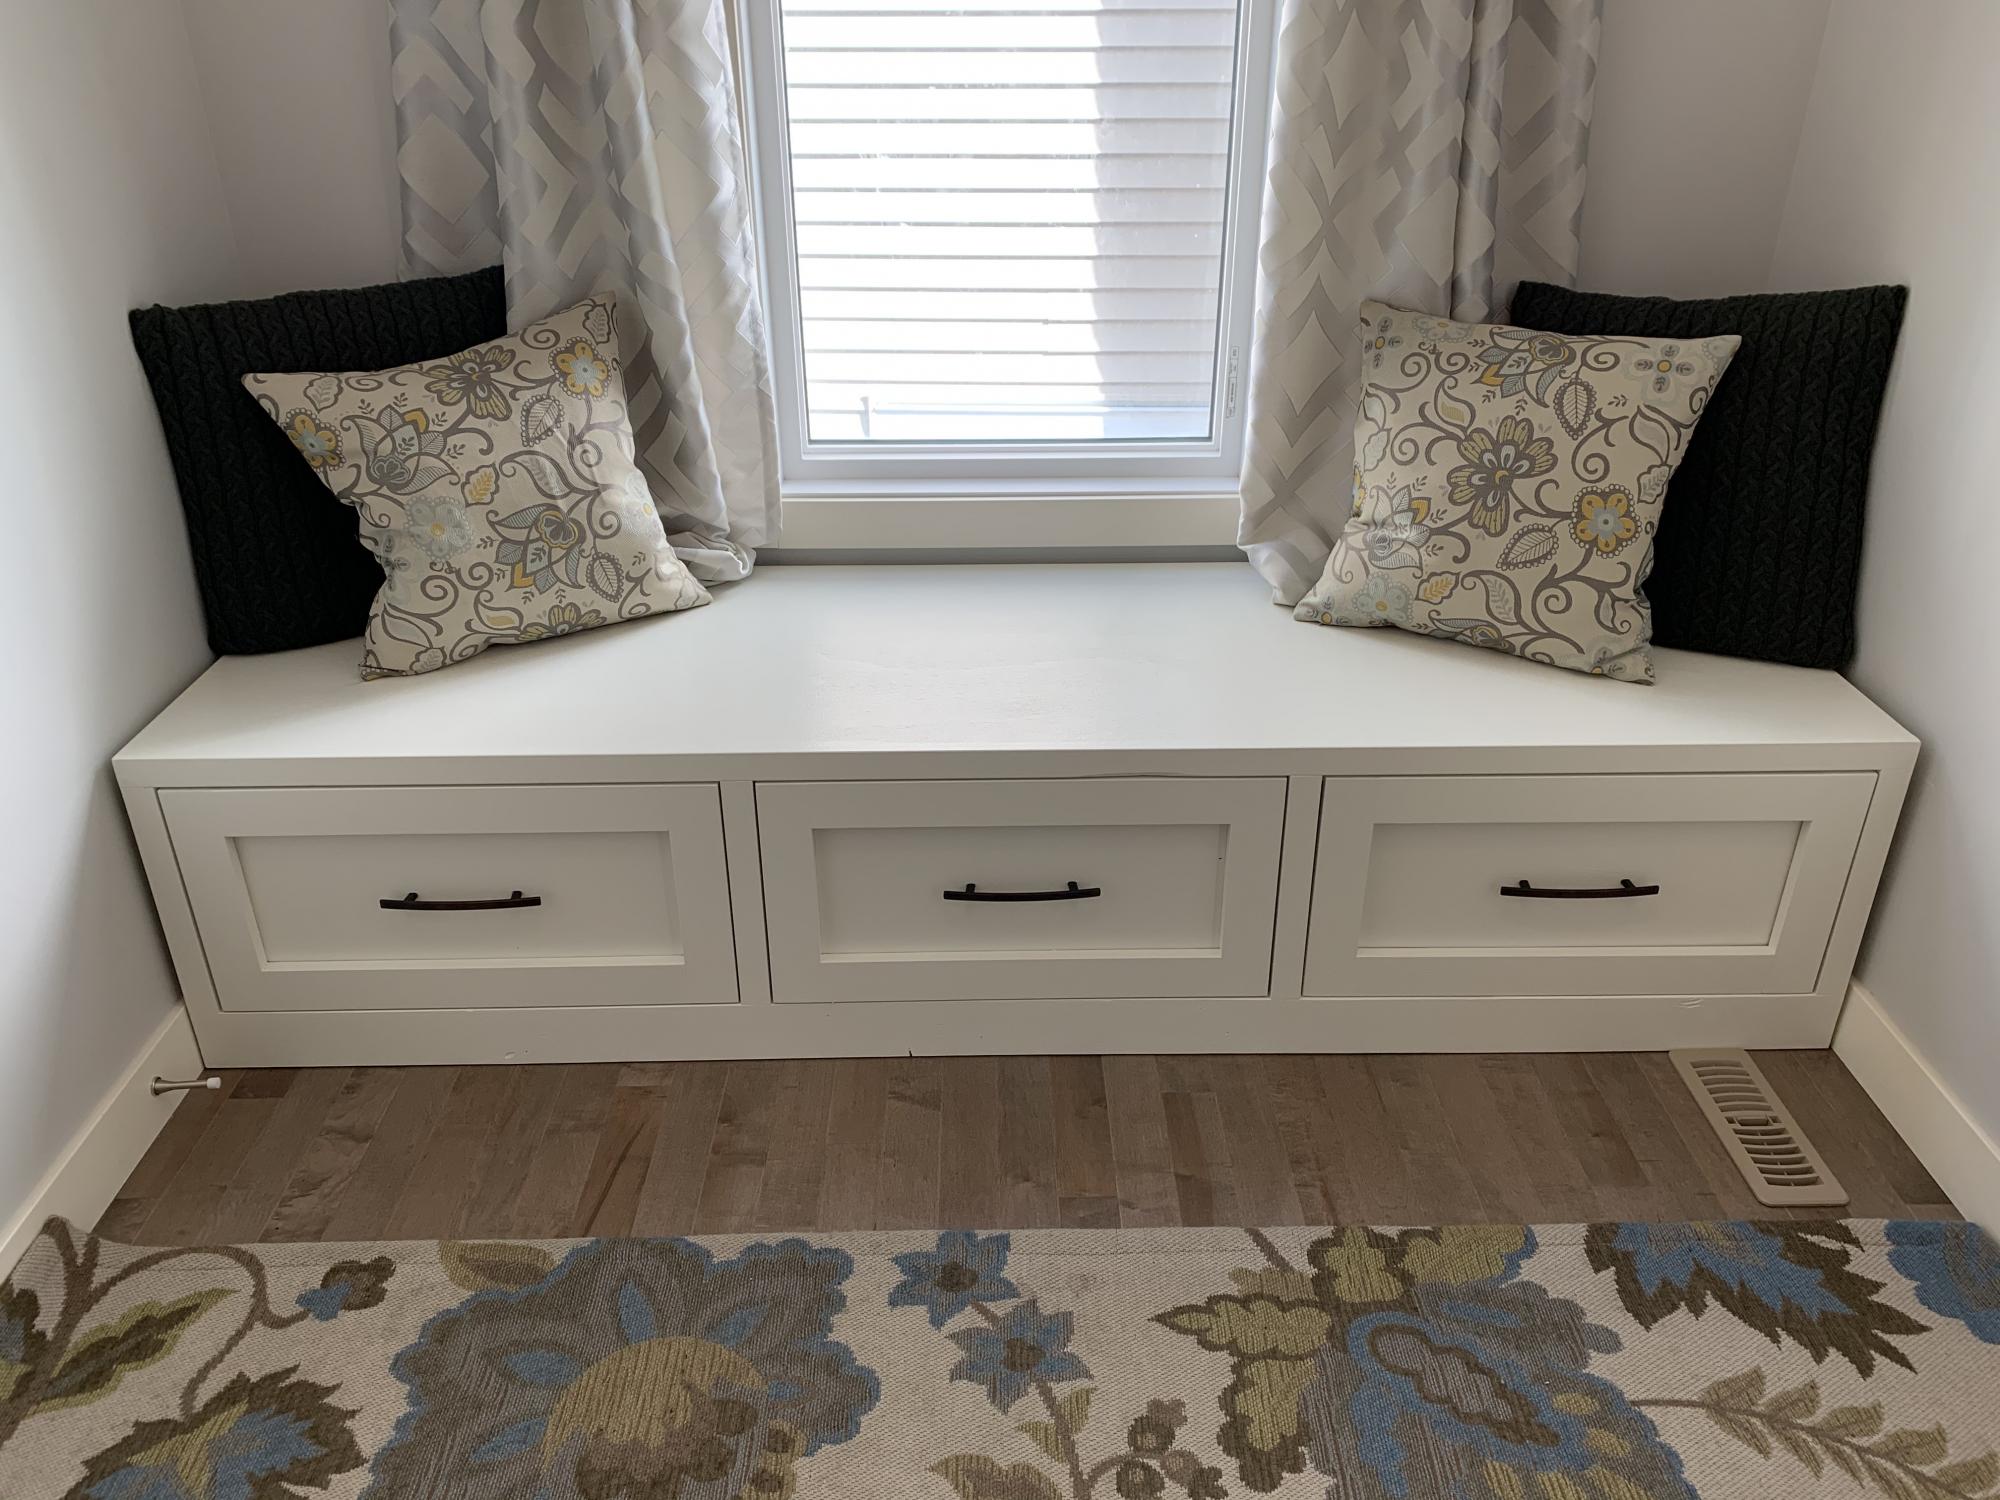
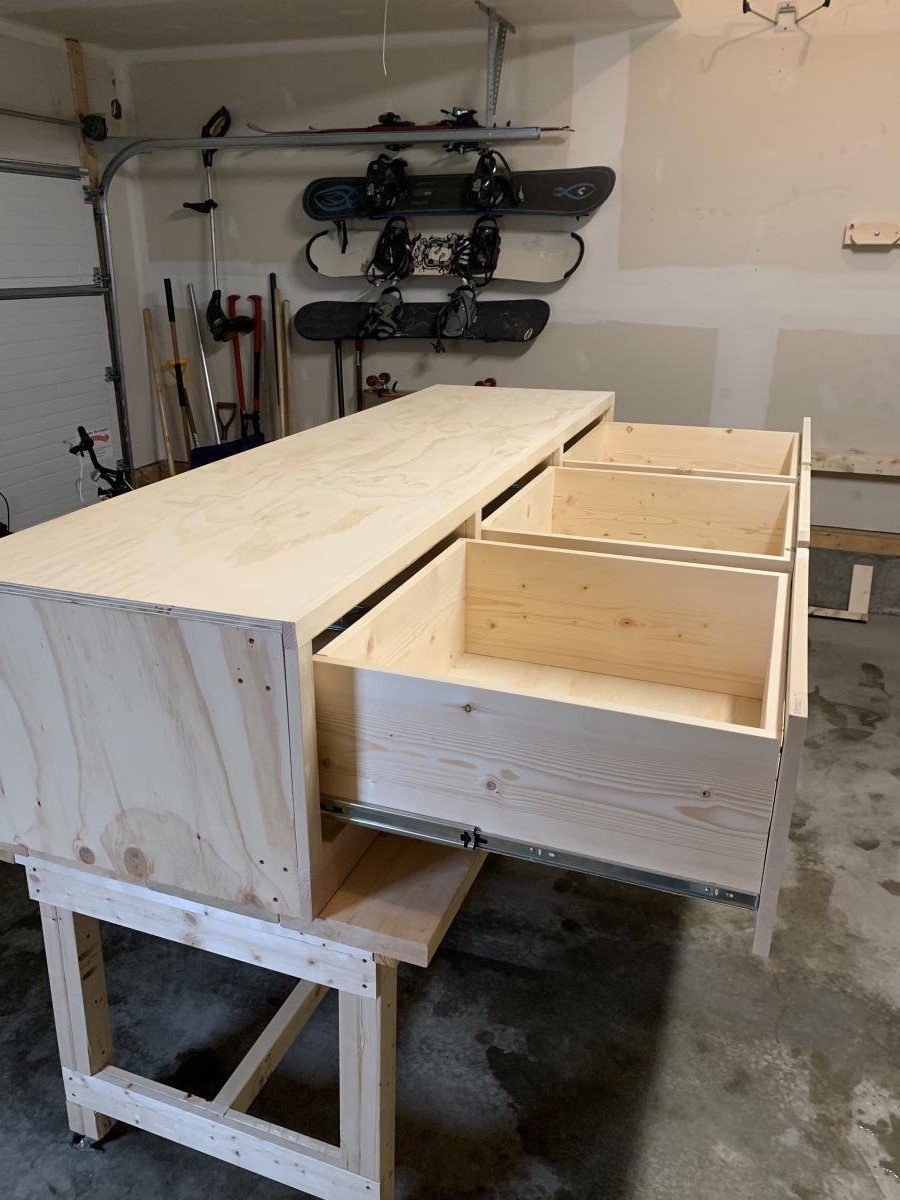
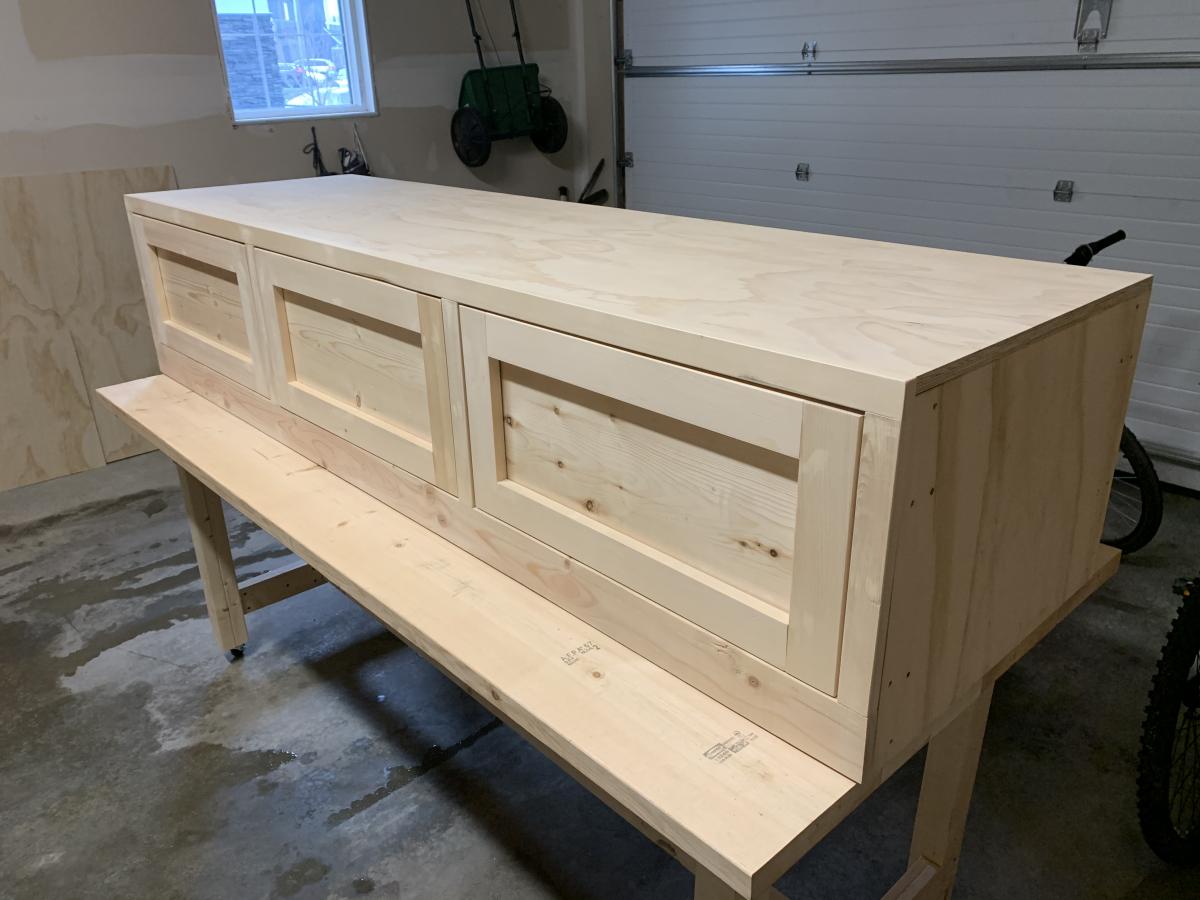
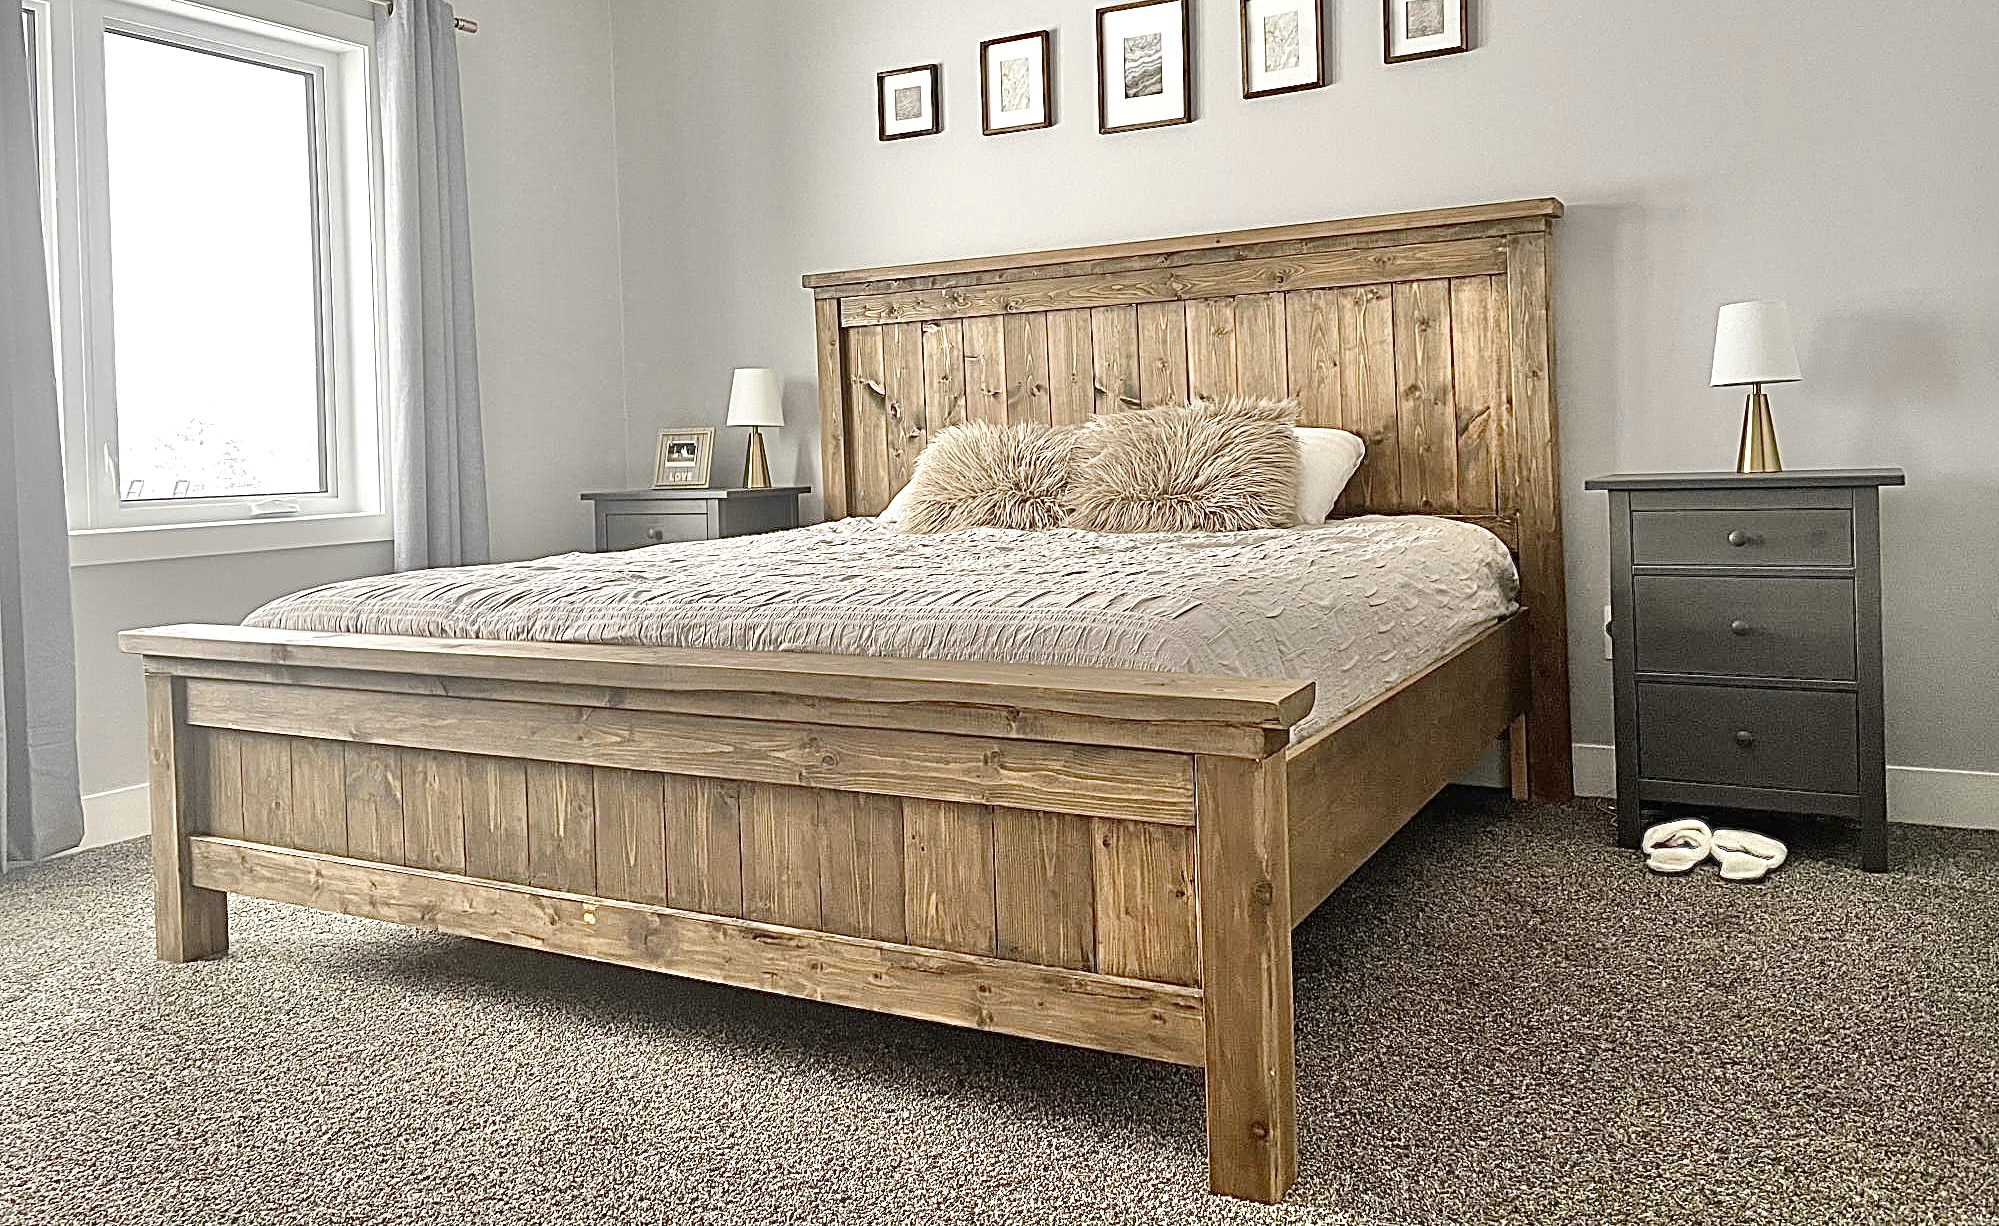
Community Brag Posts

Chunky leg bedframe

Submitted by Anonymous (not verified) on Tue, 02/12/2019 - 17:43

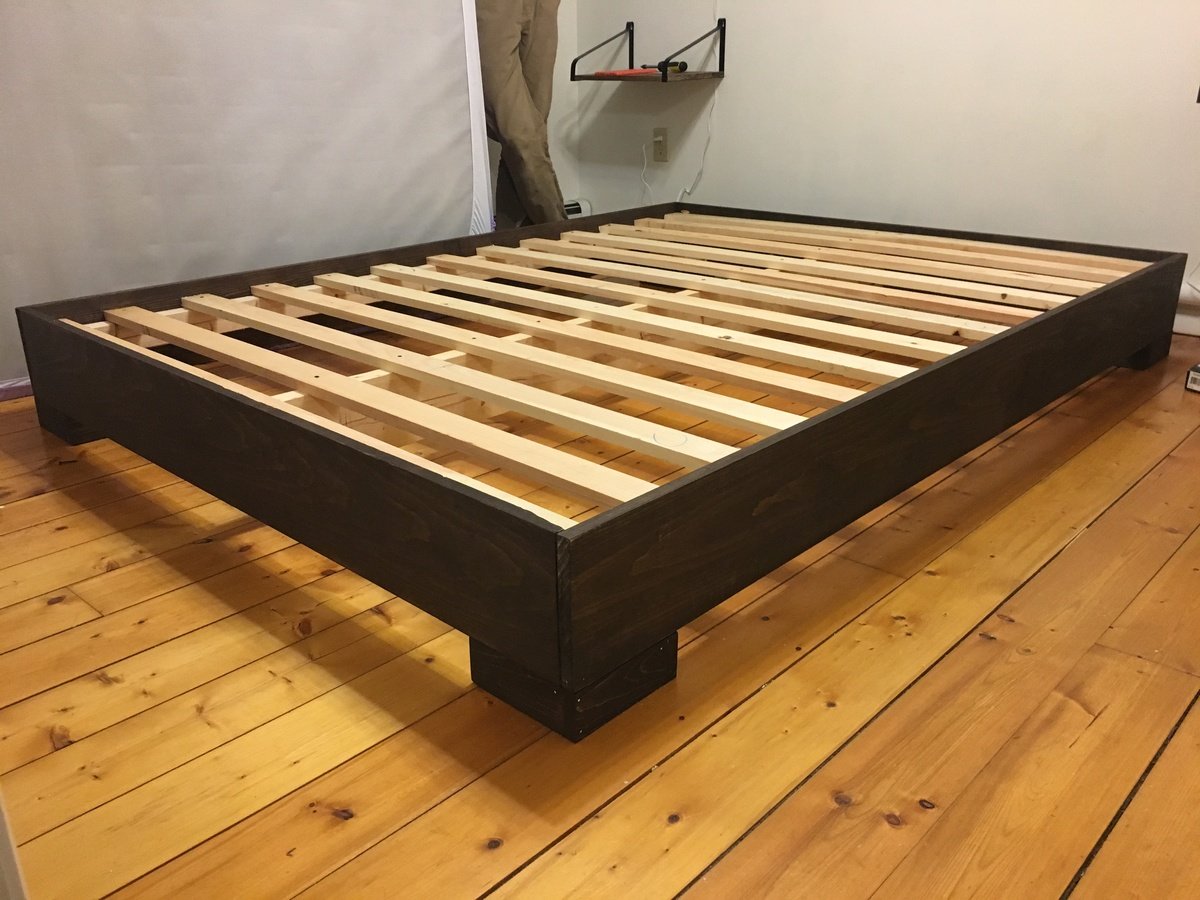
I got tired of sleeping on the floor like college kids, but I didn’t want to buy a junky particle board bedframe. My husband and I are novice woodworkers. Even still, we bought the lumber around noon and managed to finish the whole project in about 5-6 hours! We used a Kreg jig for the first time and it was pretty simple. I am really pleased with how this turned out, and I can’t wait to try more of Ana’s plans in the future.

Estimated Cost
$100 including the cost of pockethole screws and finishing nails.
Estimated Time Investment
Day Project (6-9 Hours)
Recommended Skill Level
Beginner

VegTrug

Submitted by carongirls on Sat, 02/22/2014 - 18:52

A friend needed a raised garden bed for her husband who is in a wheel chair. I searched and found the VegTrug's. It took a lot of trial and error. I based it off Williams Sonoma's pictures. I wouldn't of attempted this with out a plan if it weren't for Ana's website.

Recommended Skill Level
Intermediate

Comments

steve badham

Wed, 09/09/2015 - 02:56

We have just set up a "Men'sShed" in our little village here in the UK, and think that these would make a great first project for novice handymen. Are there any plans available to help us?

Steve

Trickman2

Wed, 05/18/2016 - 21:45

Not sure what the story is here,  Maybe she got in trouble for saying Vegtrug?  I would like plans for a DIY Raised planter bed like the above. 

Rocking Chair

Submitted by PPTG on Mon, 08/31/2020 - 12:11

Getting ready for retirement, so I thought I needed a rocking chair.
No plans, just built what looked and felt right.

Estimated Time Investment
Week Long Project (20 Hours or More)
Finish Used
Early American
Recommended Skill Level
Intermediate

Comments

David King

Thu, 03/18/2021 - 01:27

Lovely chair. Nice proportions. Would like to copy it. Have you got any plans, sketches, or dimensions to share?

jlxvnwk

Fri, 02/10/2023 - 13:10

Love this rocking chair! Do you have any dimensions or plans. I would live to take this project on. Thank you.

Outhouse

Submitted by Speedbump on Fri, 10/16/2020 - 21:04

I built this outhouse for beside our barn. My first large project and I’m really pleased with how it turned out!

Built from Plan(s)
Estimated Time Investment
Week Long Project (20 Hours or More)
Recommended Skill Level
Intermediate

Comments

Sand Box with Built-In Seats using Cedar Wood and 1 Seat

Followed the original plan except below changes:
- Only one seat to make it more spacious
- Made 2 groups of 3 planks each and connected both using hinges so it can cover the end without seat
- Stapled Hardware Cloth with landscape fabric

Cedar wood was the most expensive thing in this project, since I would want it to last long.

Built from Plan(s)
Estimated Cost
150
Estimated Time Investment
Weekend Project (10-20 Hours)
Finish Used
Thompson's WaterSeal Stain & Sealer
Recommended Skill Level
Starter Project

Three-Legged Stool

Submitted by Anonymous (not verified) on Mon, 05/09/2016 - 13:25

My 13-year-old daughter asked me about making a stool, with the main requirement being it had to have a round seat.  So I turned to this ana-white.com to see if I could find something that we could do and found the plans for the three-legged stool. The first one we made with the dimensions specified in the plans but she thought it was too short.  So we made another one with longer legs and a larger diameter seat.

Estimated Cost
$4. The lumber was scrap and the white paint was leftover. We only bought the blue paint.
Estimated Time Investment
Afternoon Project (3-6 Hours)
Finish Used
Rustoleum Painter's Touch
Recommended Skill Level
Beginner

Slat Bench

Cost: $45
Made this bench smaller than the plan so it measures 48" X 18". Using it in a spare bedroom so it will eventually get stained to match the wood furniture.

Estimated Cost
45
Estimated Time Investment
Afternoon Project (3-6 Hours)
Finish Used
Haven't stained the wood, can't decide on a color.
Recommended Skill Level
Starter Project

Comments

Rapturee

Mon, 12/04/2017 - 09:17

That was my idea as well, to shorten it. My wife just asked me if we could part with a few chairs on the back side of our dining room table and if i would make a bench or two across the back wall. Well "of course" i said hahah!!  Nice job on yours!!   :{)

Bench with soft-close drawers for Front Entry

Submitted by drickstan on Tue, 08/11/2020 - 10:43

We needed a bench to fill the space in our front entry and provide some storage for seasonal gear. We couldn't find anything to buy that would work for us, so when my wife found these plans, I had to try it! Couldn't be happier with the results. We widened the bench by a foot to 84" to fill the space. Basically, it just made each drawer 4" wider. Everything else was built to plan. The most expensive thing was the soft-close 24" drawer slides (~$100). As soon as you go above that 24" depth, they get pricier! It was also tricky to get the drawers to catch properly on the soft-close mechanisms, but I made sure to take the time to get it right before closing it all in. Now I just open and close the drawers for the pure satisfaction of it! I used premium pine plywood for the top and I find it still doesn't give that smooth finish I like, even after sanding. I think I'll create a new top out of joined knotty pine planks later and just attach it to the top.

Built from Plan(s)
Estimated Cost
$300 CAD
Estimated Time Investment
Week Long Project (20 Hours or More)
Finish Used
Primer and pearl finish paint.
Recommended Skill Level
Intermediate

Modern Farmhouse Bed

Submitted by Anonymous (not verified) on Sun, 01/15/2023 - 13:37

My husband and I had worked on this bed together, and we are so happy with it! We went with taller side tables that we purchased, and just stained the wood instead of painting it.

Comments

2x4 Sectional , table, and chairs

Submitted by Anonymous (not verified) on Fri, 04/14/2023 - 04:57

Your easy to follow 2x4 proje ts turned out amazing. My outdoor set is complete. The chairs, also, came from your plans. I built all of it by myself in one weekend. Thank you

Comments

Planter Porch Steps

Submitted by kstarbird on Thu, 12/26/2019 - 15:06

Plan modified to be built on stringers due to hight. 

Finish Used
Pending

Comments

Seasonal And Holiday

Queen Loft Bed

Submitted by christy on Tue, 05/22/2012 - 07:54

I made this bed for my 6 year old daughter. I loved Anna's Loft Bed plans, but she wanted a bigger play area underneath. So I modified the twin loft bed plans to fit a queen mattress. I also added extra supports for the mattress, and I used PureBond plywood on top of the supports for the mattress to sit on.
That's the Farmhouse Toddler Bed underneath. My younger daughter inherited her big sister's twin bed, so the toddler bed was put to use in the new "playhouse."

Estimated Time Investment
Week Long Project (20 Hours or More)
Finish Used
I sanded the wood and primed it. Then I sanded (lightly) again and painted it with Valspar latex enamel in Gloss Almond.
Recommended Skill Level
Intermediate

Comments

Neatha (not verified)

Mon, 08/20/2012 - 13:04

Do you have your modified plans still? I don't know where to begin with editing the originals. I am moving and we have limited space I need to place a desk under and queen sized bed but my ceilings are only 8ft.

Lindsay (not verified)

Sun, 09/02/2012 - 12:45

I think it's great that you modified it to a queen! I live a studio and NEED something like this. Could you share the modifications? It looks beautiful = )

christy

Sun, 09/02/2012 - 20:58

The changes I made were:
End planks cut to 63"
Top back guard and front and back rails cut to 87"
The top guard rails on ends cut to 66"
I measured for the mattress supports and the front guard rail after the rest was completed.
You should also measure for the bookcases after the rest is completed, but each of mine wound up being about 31" wide.

Everything else was pretty much the same.

Hope that helps.

dbai (not verified)

Thu, 11/01/2012 - 08:24

This is wonderful - I've been looking to make something like this for an urban efficiency (adult) apartment! Thanks so much for sharing your modifications!

gmur589

Mon, 07/29/2013 - 14:08

Will the height of the bed allow for adults to stand under it? If not what modifications should be made to make the height fit a standing adult? (the highest being 6'1" male) Thanks! =D

etb1999

Sun, 10/06/2013 - 08:23

Hello, about how much did it cost you to make this?
THANKS

NicoleLance0826

Fri, 09/19/2014 - 12:30

Hey Christy I was wondering if you could send the plans for upgrade to queen size. I cannot pull up the changes. Thank You. Im sure its not to many changes.

pretty-prima

Thu, 03/24/2016 - 16:52

Hello! I would like to build this queen sized bed, could you give me a cost estimate? I don't have any wooden planks sitting around so I would have to buy them all new.

Potting Table

Started with Ana's basic plan/dimensions. Changed the back legs to 1x6, added aa 2nd shelf and storage closet to hang hand tools/gloves.

Built from Plan(s)
Estimated Cost
$125
Estimated Time Investment
Day Project (6-9 Hours)
Finish Used
Minwax/Helmsman Semi-Gloss Spar Urethane
Recommended Skill Level
Beginner

Garden bed with folding screens

Submitted by Kate_14 on Wed, 05/27/2020 - 09:39

I added folding screens to my garden bed to prevent my dog to go in it. It can also discourage hares, cats and other animals. The folding screens make it easy to work in your garden.

Estimated Time Investment
Day Project (6-9 Hours)
Finish Used
None
Recommended Skill Level
Beginner

OutDoor dining table

My wife and I were looking for a larger table for our deck and after searching and seeing that everything out there was 300 dollars and up for something decent I decided I would try building something. This table was perfect for our needs and looked easy enough for me to put together. The most time consuming part was staining all of the boards as I went but it was totally worth it in the end. I also deviated from using screws and used my nail gun along with some glue to put the top frame together and the slats on but I did use some 2inch deckmate screws to attach the legs. One problem I did run into was I was about half a board short on the slats which wasn't a big deal just ripped one on the table saw, not sure if I miss measured or what but either way. We love our table and will entertain around it for years to come.

Built from Plan(s)
Estimated Cost
Around 80 Dollars
Estimated Time Investment
Day Project (6-9 Hours)
Finish Used
I used a Behr deck stain that was solid the color is called Russett and I did with a 3inch brush.
Recommended Skill Level
Beginner

Chicken Coop

Submitted by Elloh on Tue, 08/11/2020 - 11:05

This was my biggest build yet and these plans along with being able to see a few brag posts with modicifactions made this project less intimidating. I extended the coop in order to add a walk in door. The drop down doors on both sides will give plenty of access and help with cleaning. I've added door latches to all the doors since putting it in place. My dad provided the cedar so that greatly reduced my costs. This project took about six days to complete. The fun part was getting it out of my carport : ) This was built for my daughter's chickens and she is thrilled with it. So am I! Thanks for the plans Ana!

Estimated Cost
Hardware, screws, hardware cloth and plywood - around $150

Outdoor planter steps or benches

Submitted by Anonymous (not verified) on Tue, 09/15/2020 - 00:45

A very enjoyable project. I'm relatively new to diy woodworking projects but these plans make it so much easier.

Thanks.

Estimated Cost
$250
Estimated Time Investment
Weekend Project (10-20 Hours)
Recommended Skill Level
Intermediate

Comments

Rabbit Hutch for Indoor and Outdoor

Submitted by thediyplan on Fri, 03/26/2021 - 15:34

Looking for a cute, interactive pet to add to your home. What about bunnies? These creatures make great indoor pets. But before getting the rabbits, they will need a hutch to live in. To solve this problem, I’ve made detailed plans on how to build a DIY rabbit hutch that could be used indoor and outdoor.

The hutch has a litter pan under the floor that could be removed for cleaning. Since the hutch is only 3 feet wide, it could be easily moved around.

See my website for additional pictures and how I've built it, TheDIYPlan.com

Estimated Cost
$140
Estimated Time Investment
Day Project (6-9 Hours)
Recommended Skill Level
Intermediate