Community Brag Posts

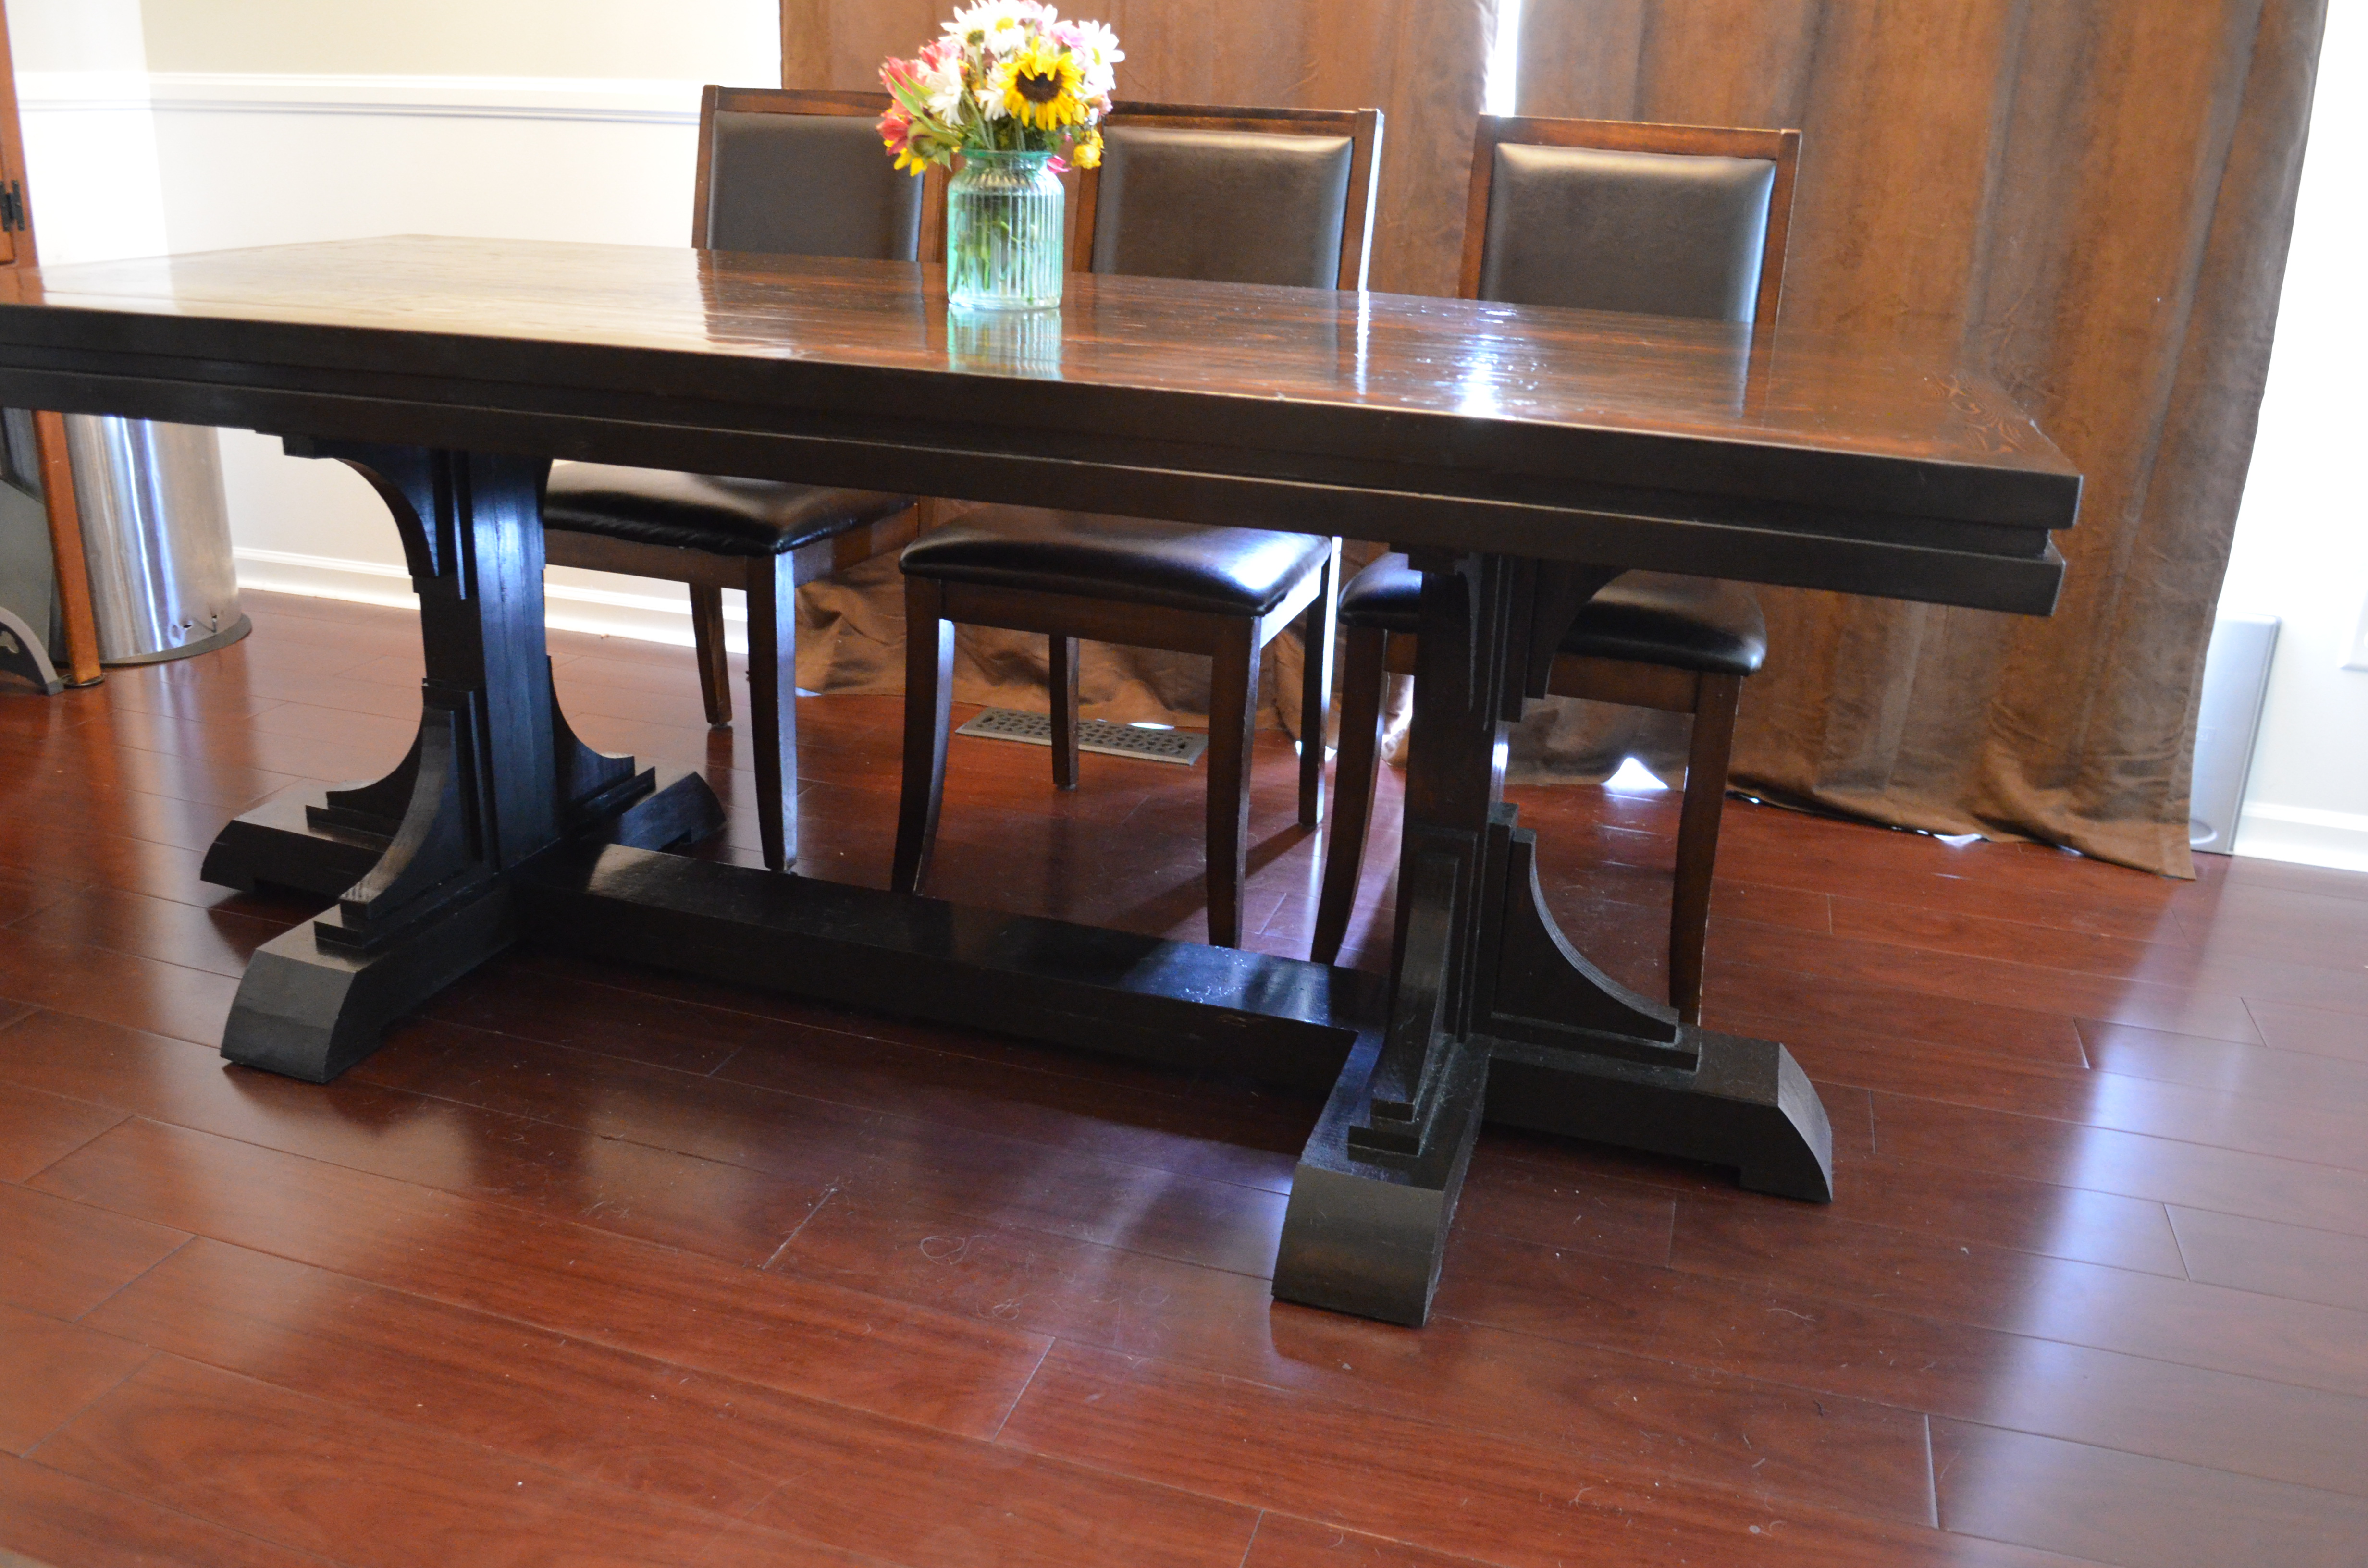
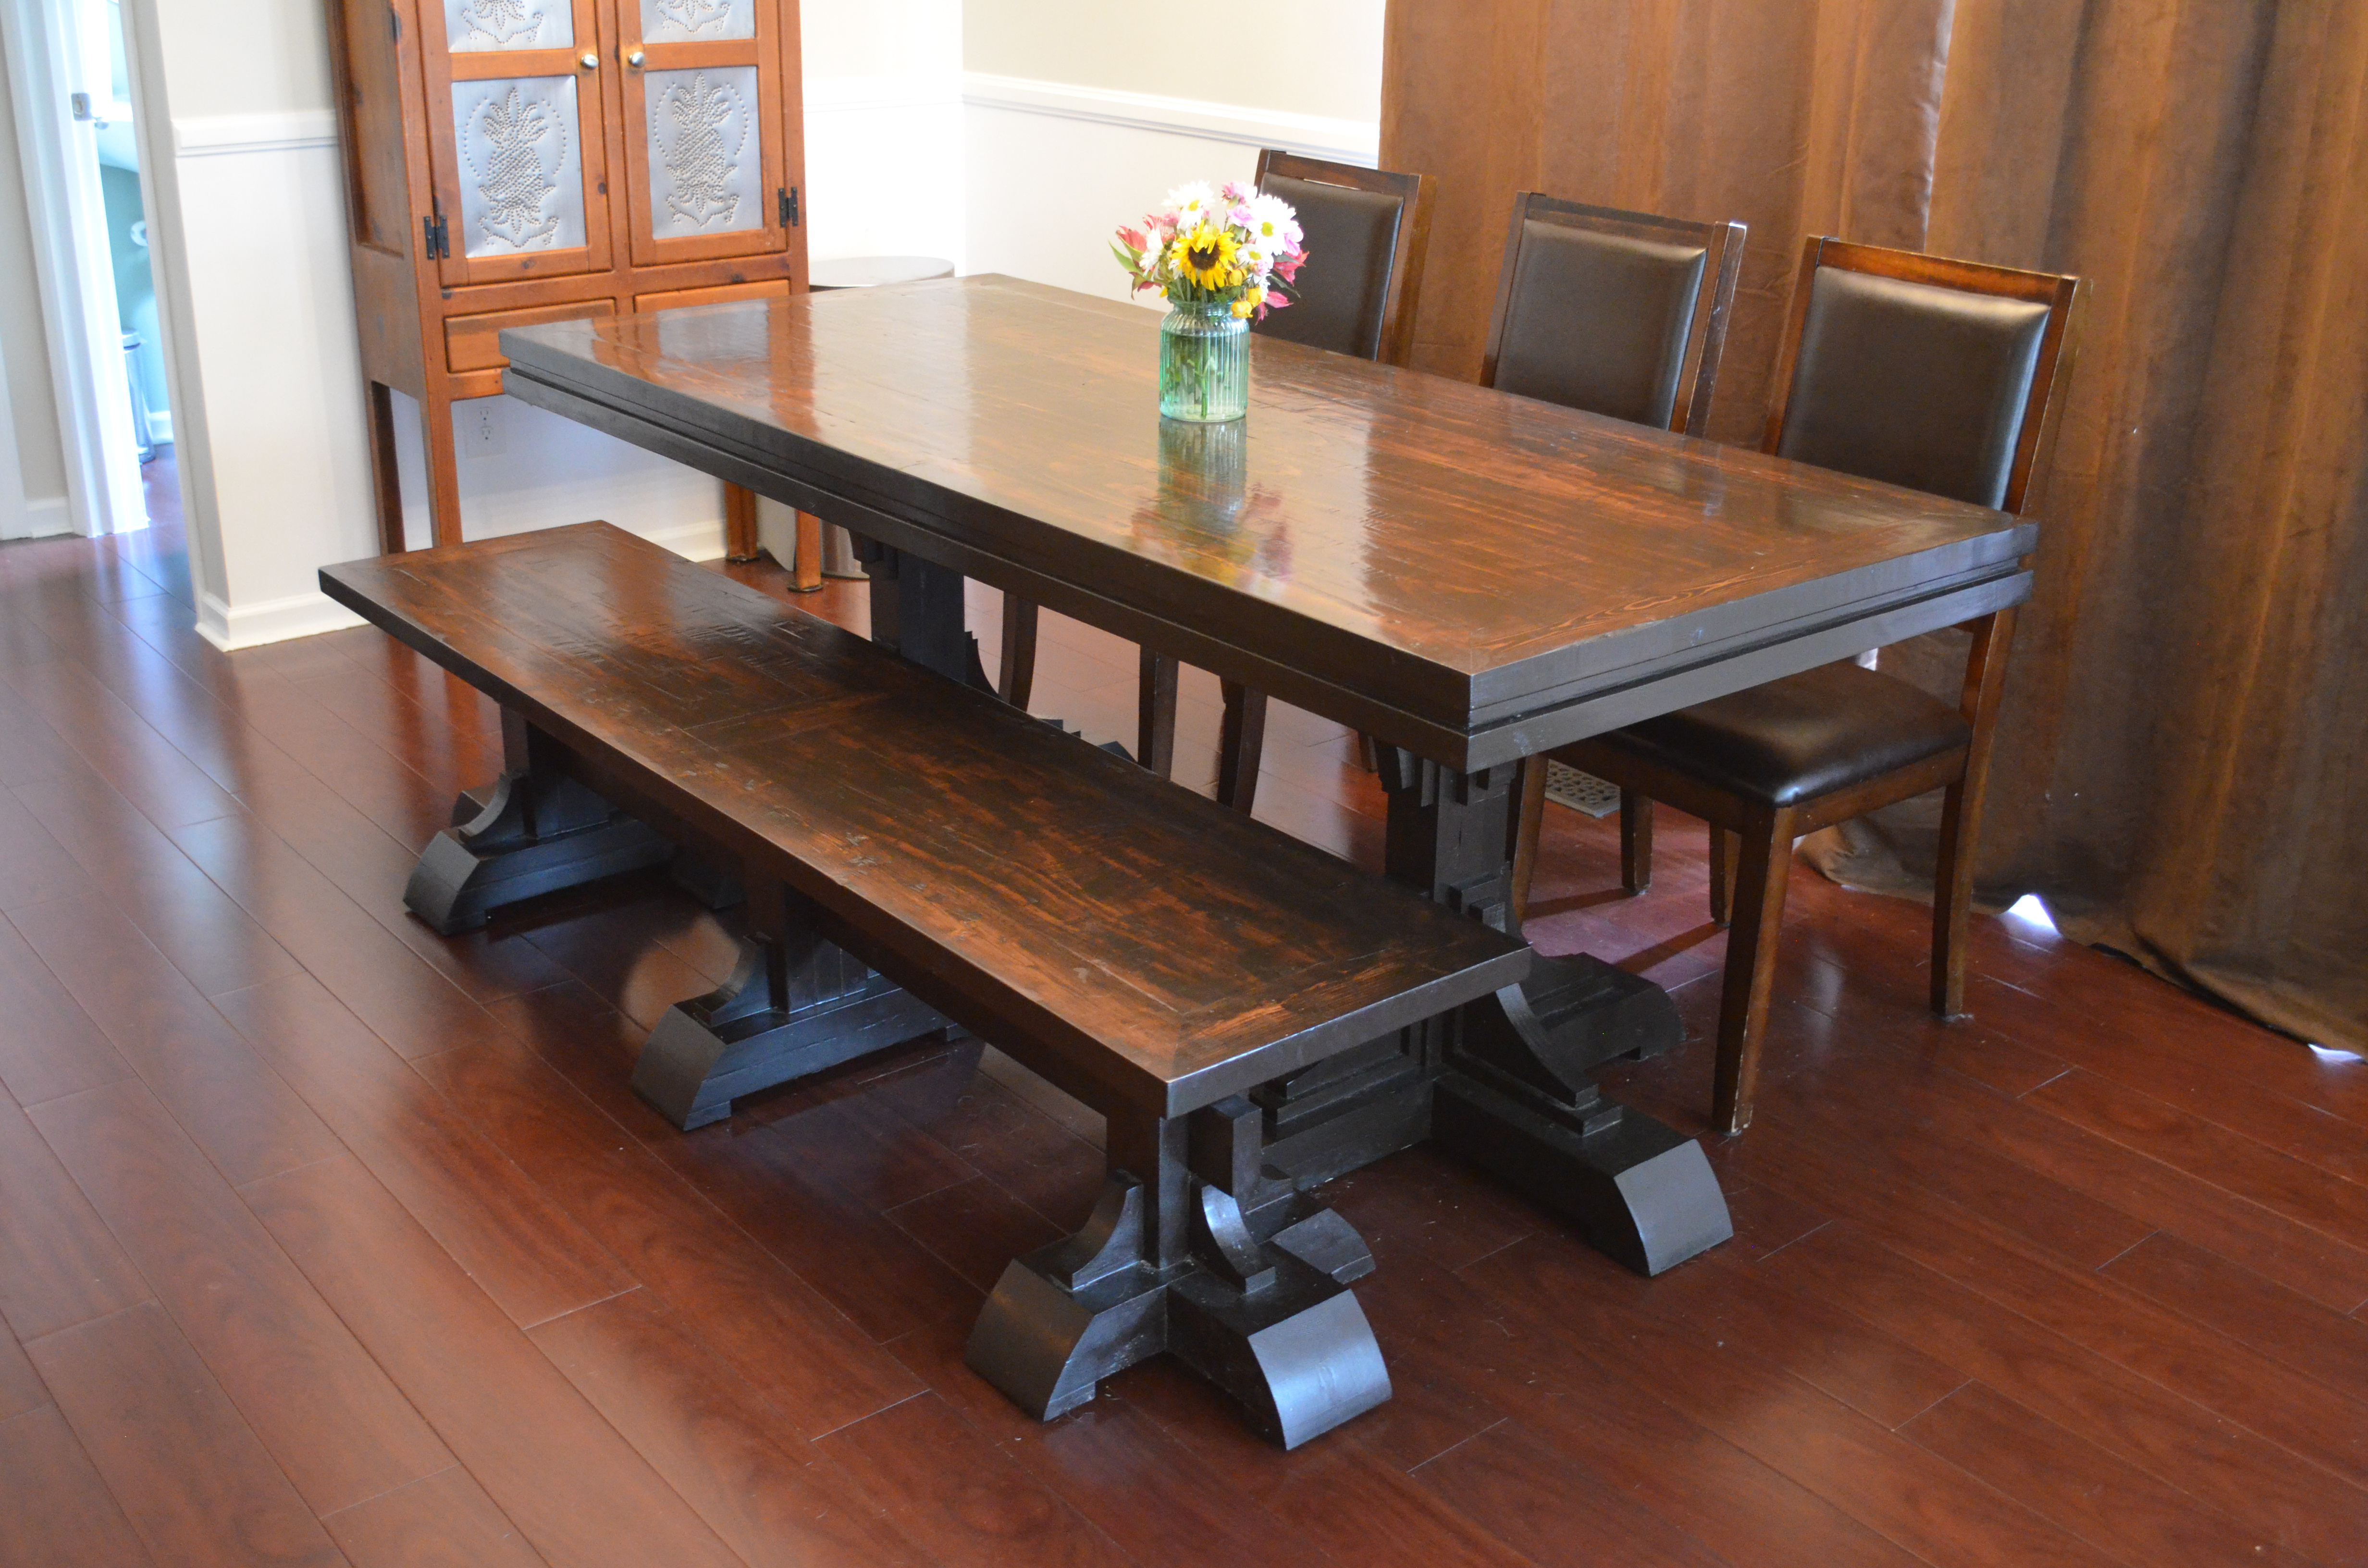
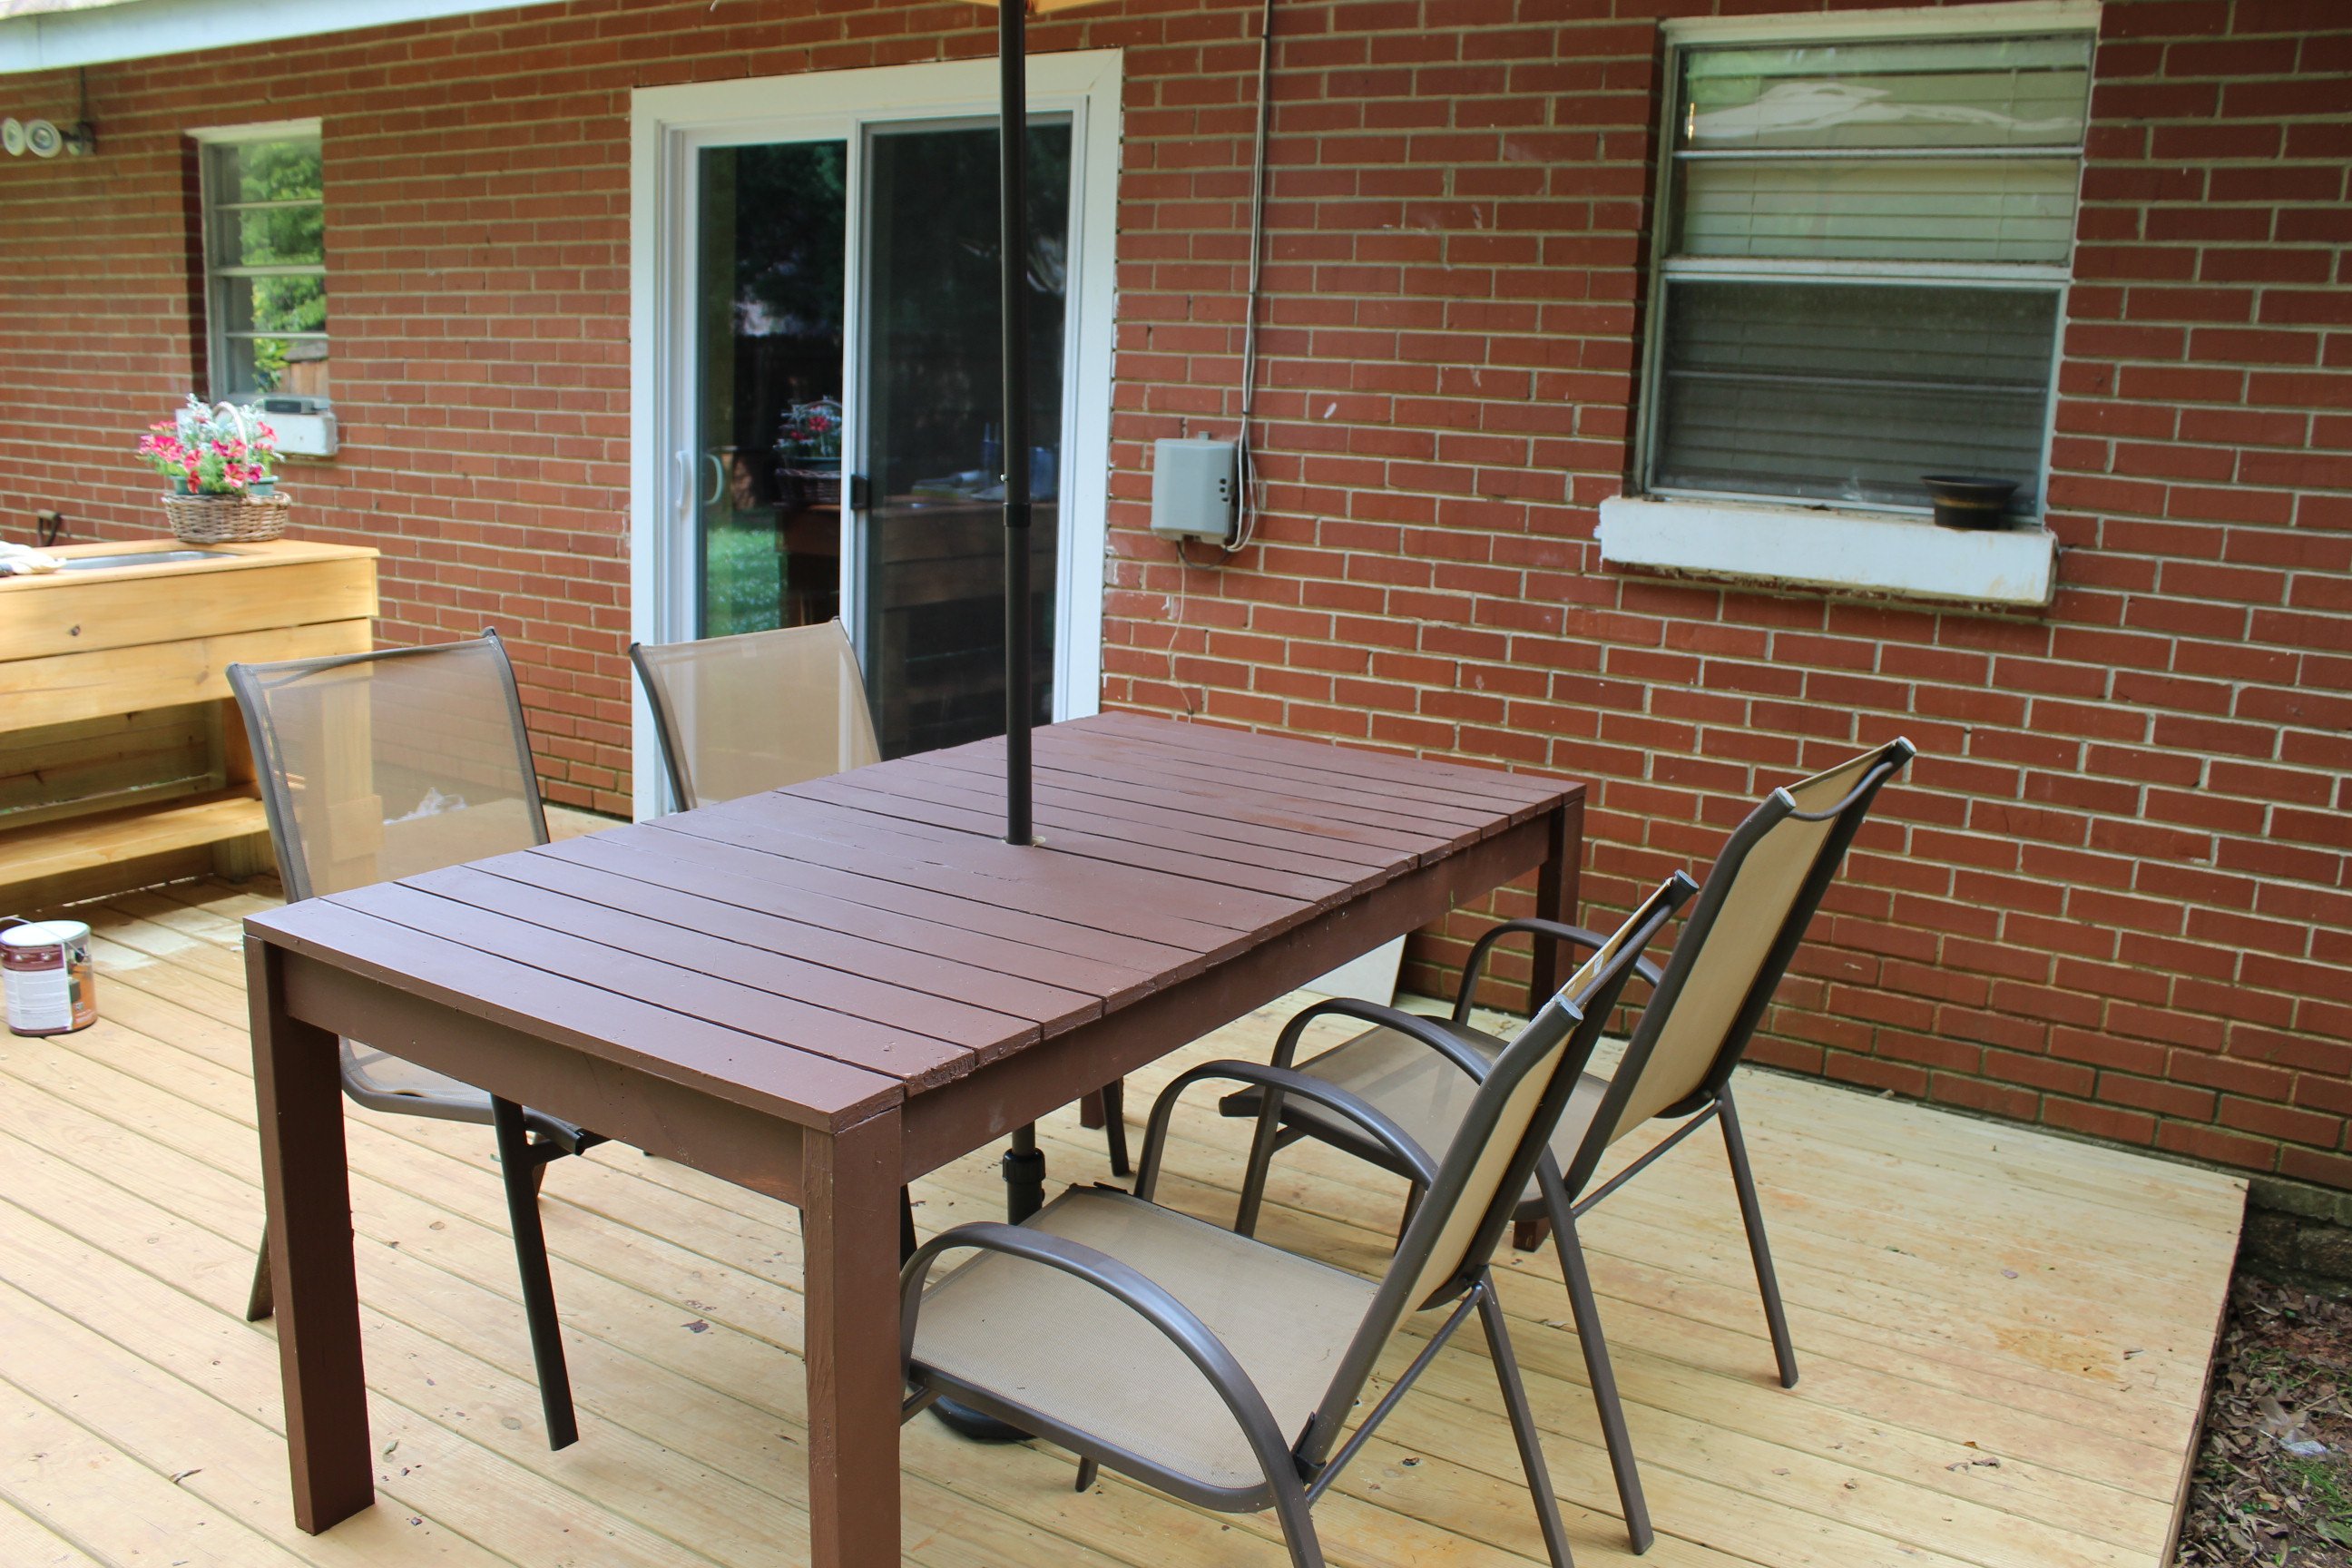
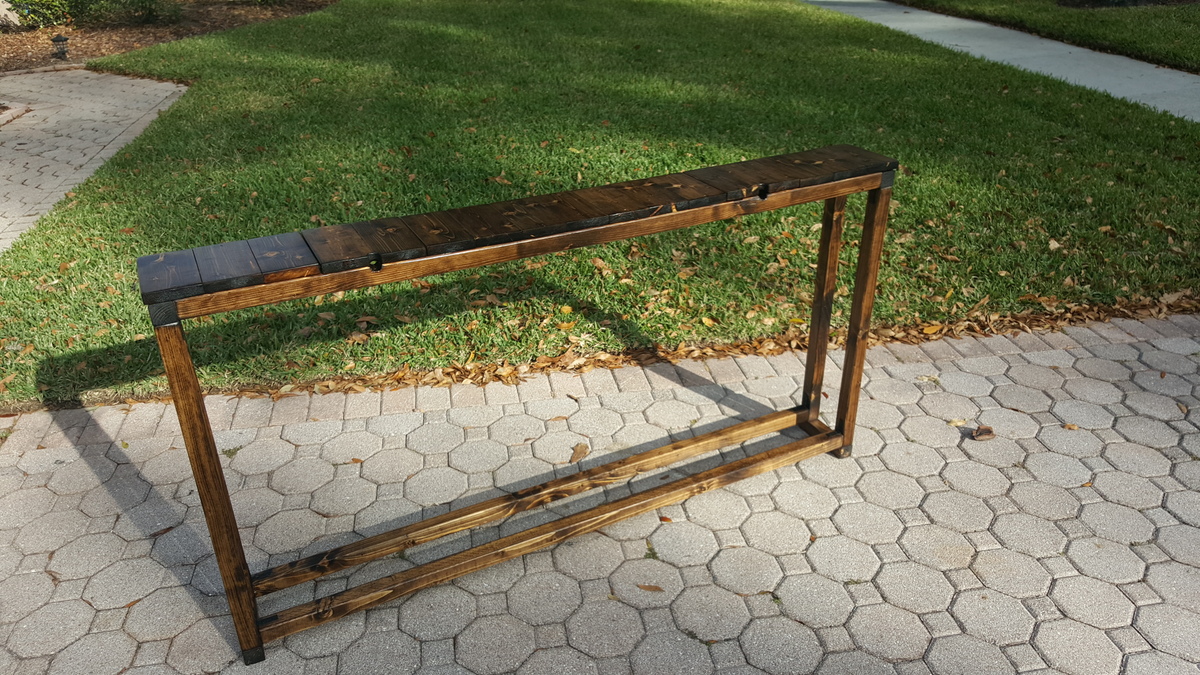
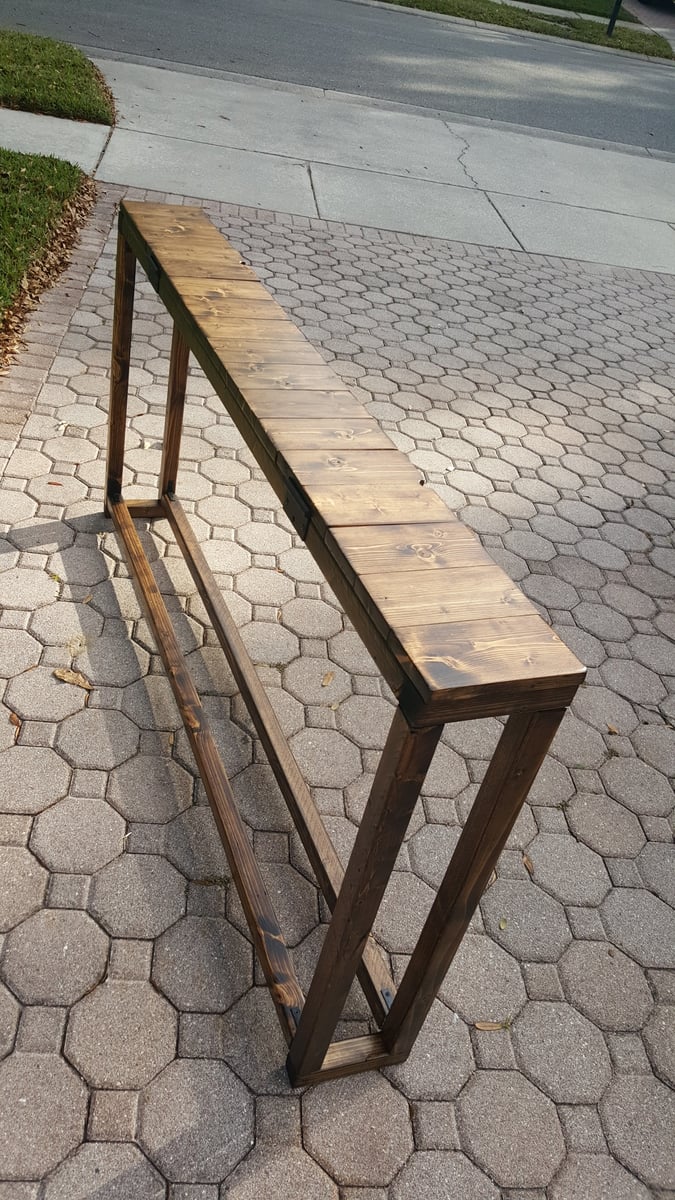
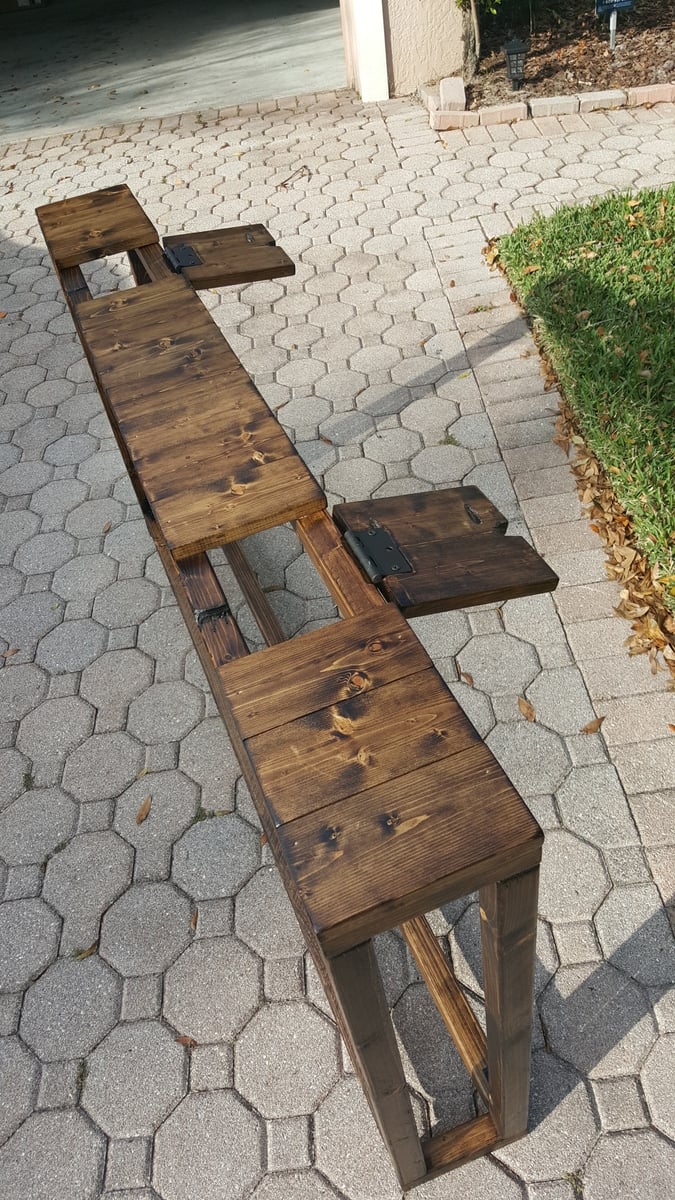
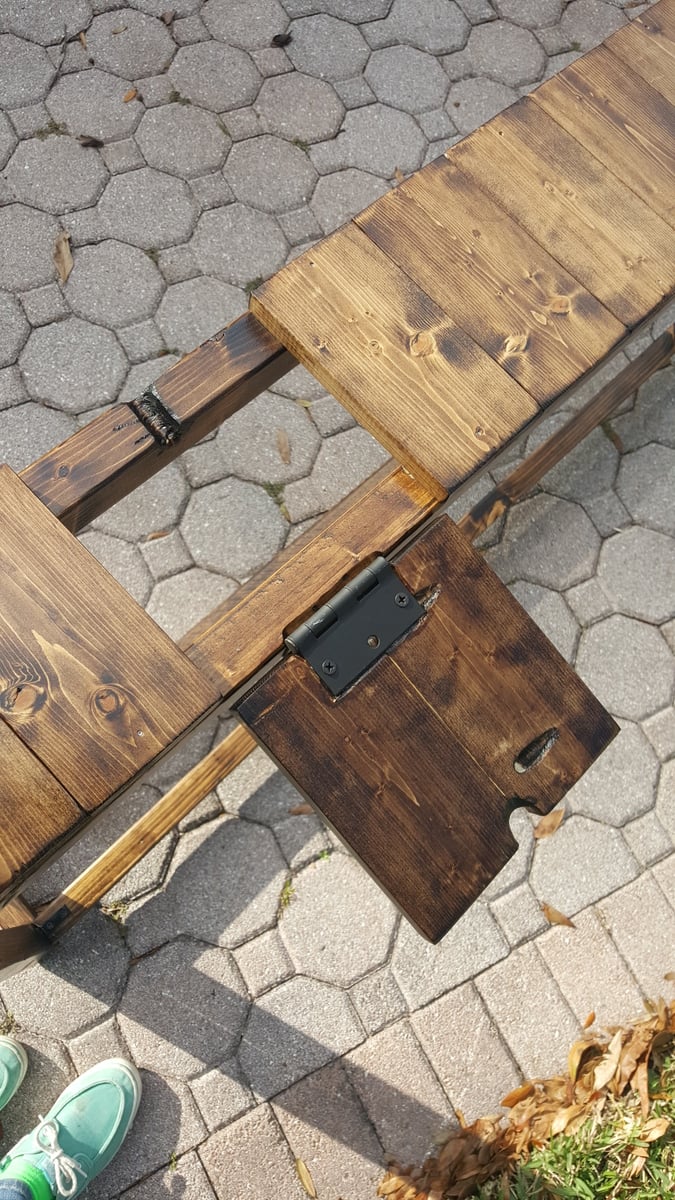
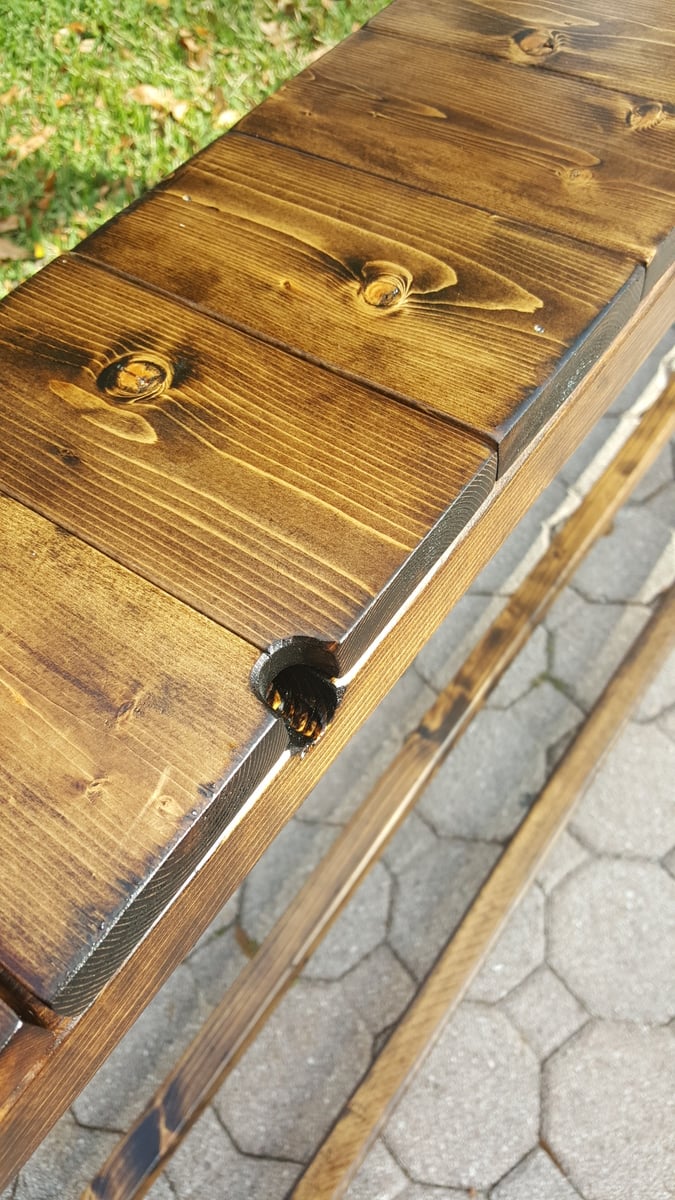
Triple foot farmhouse table with runner, triple pedestal bench

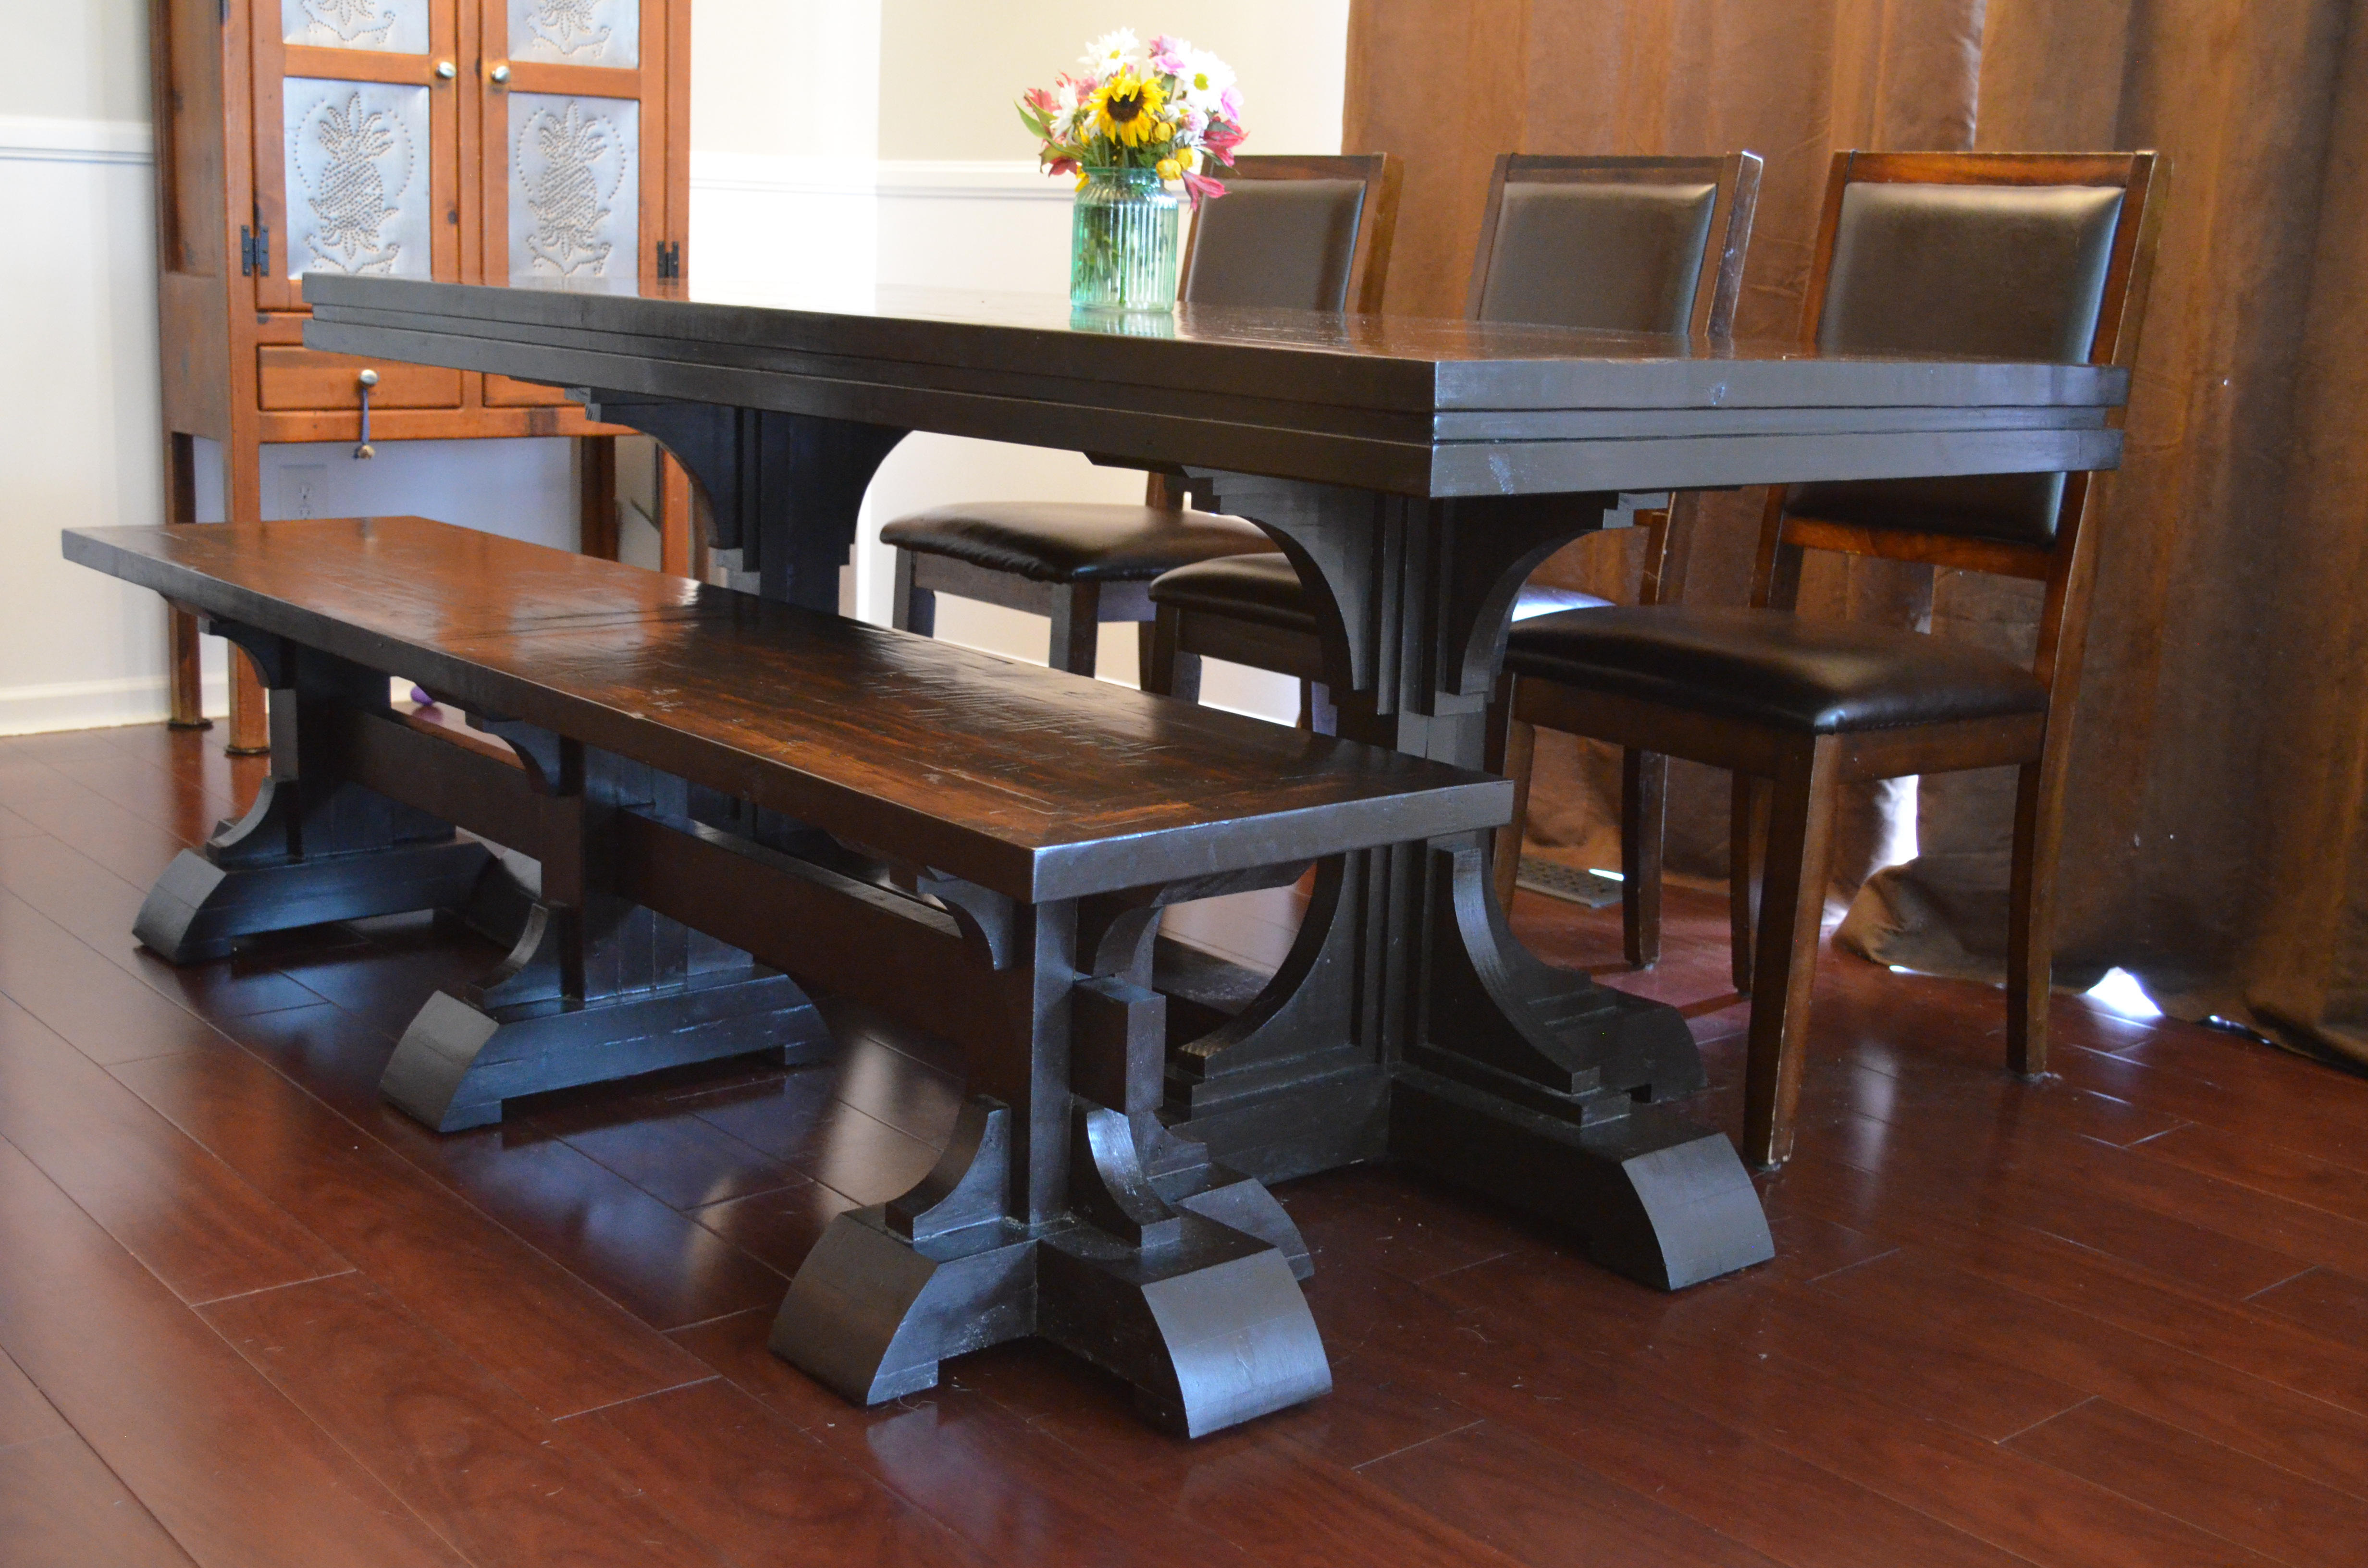
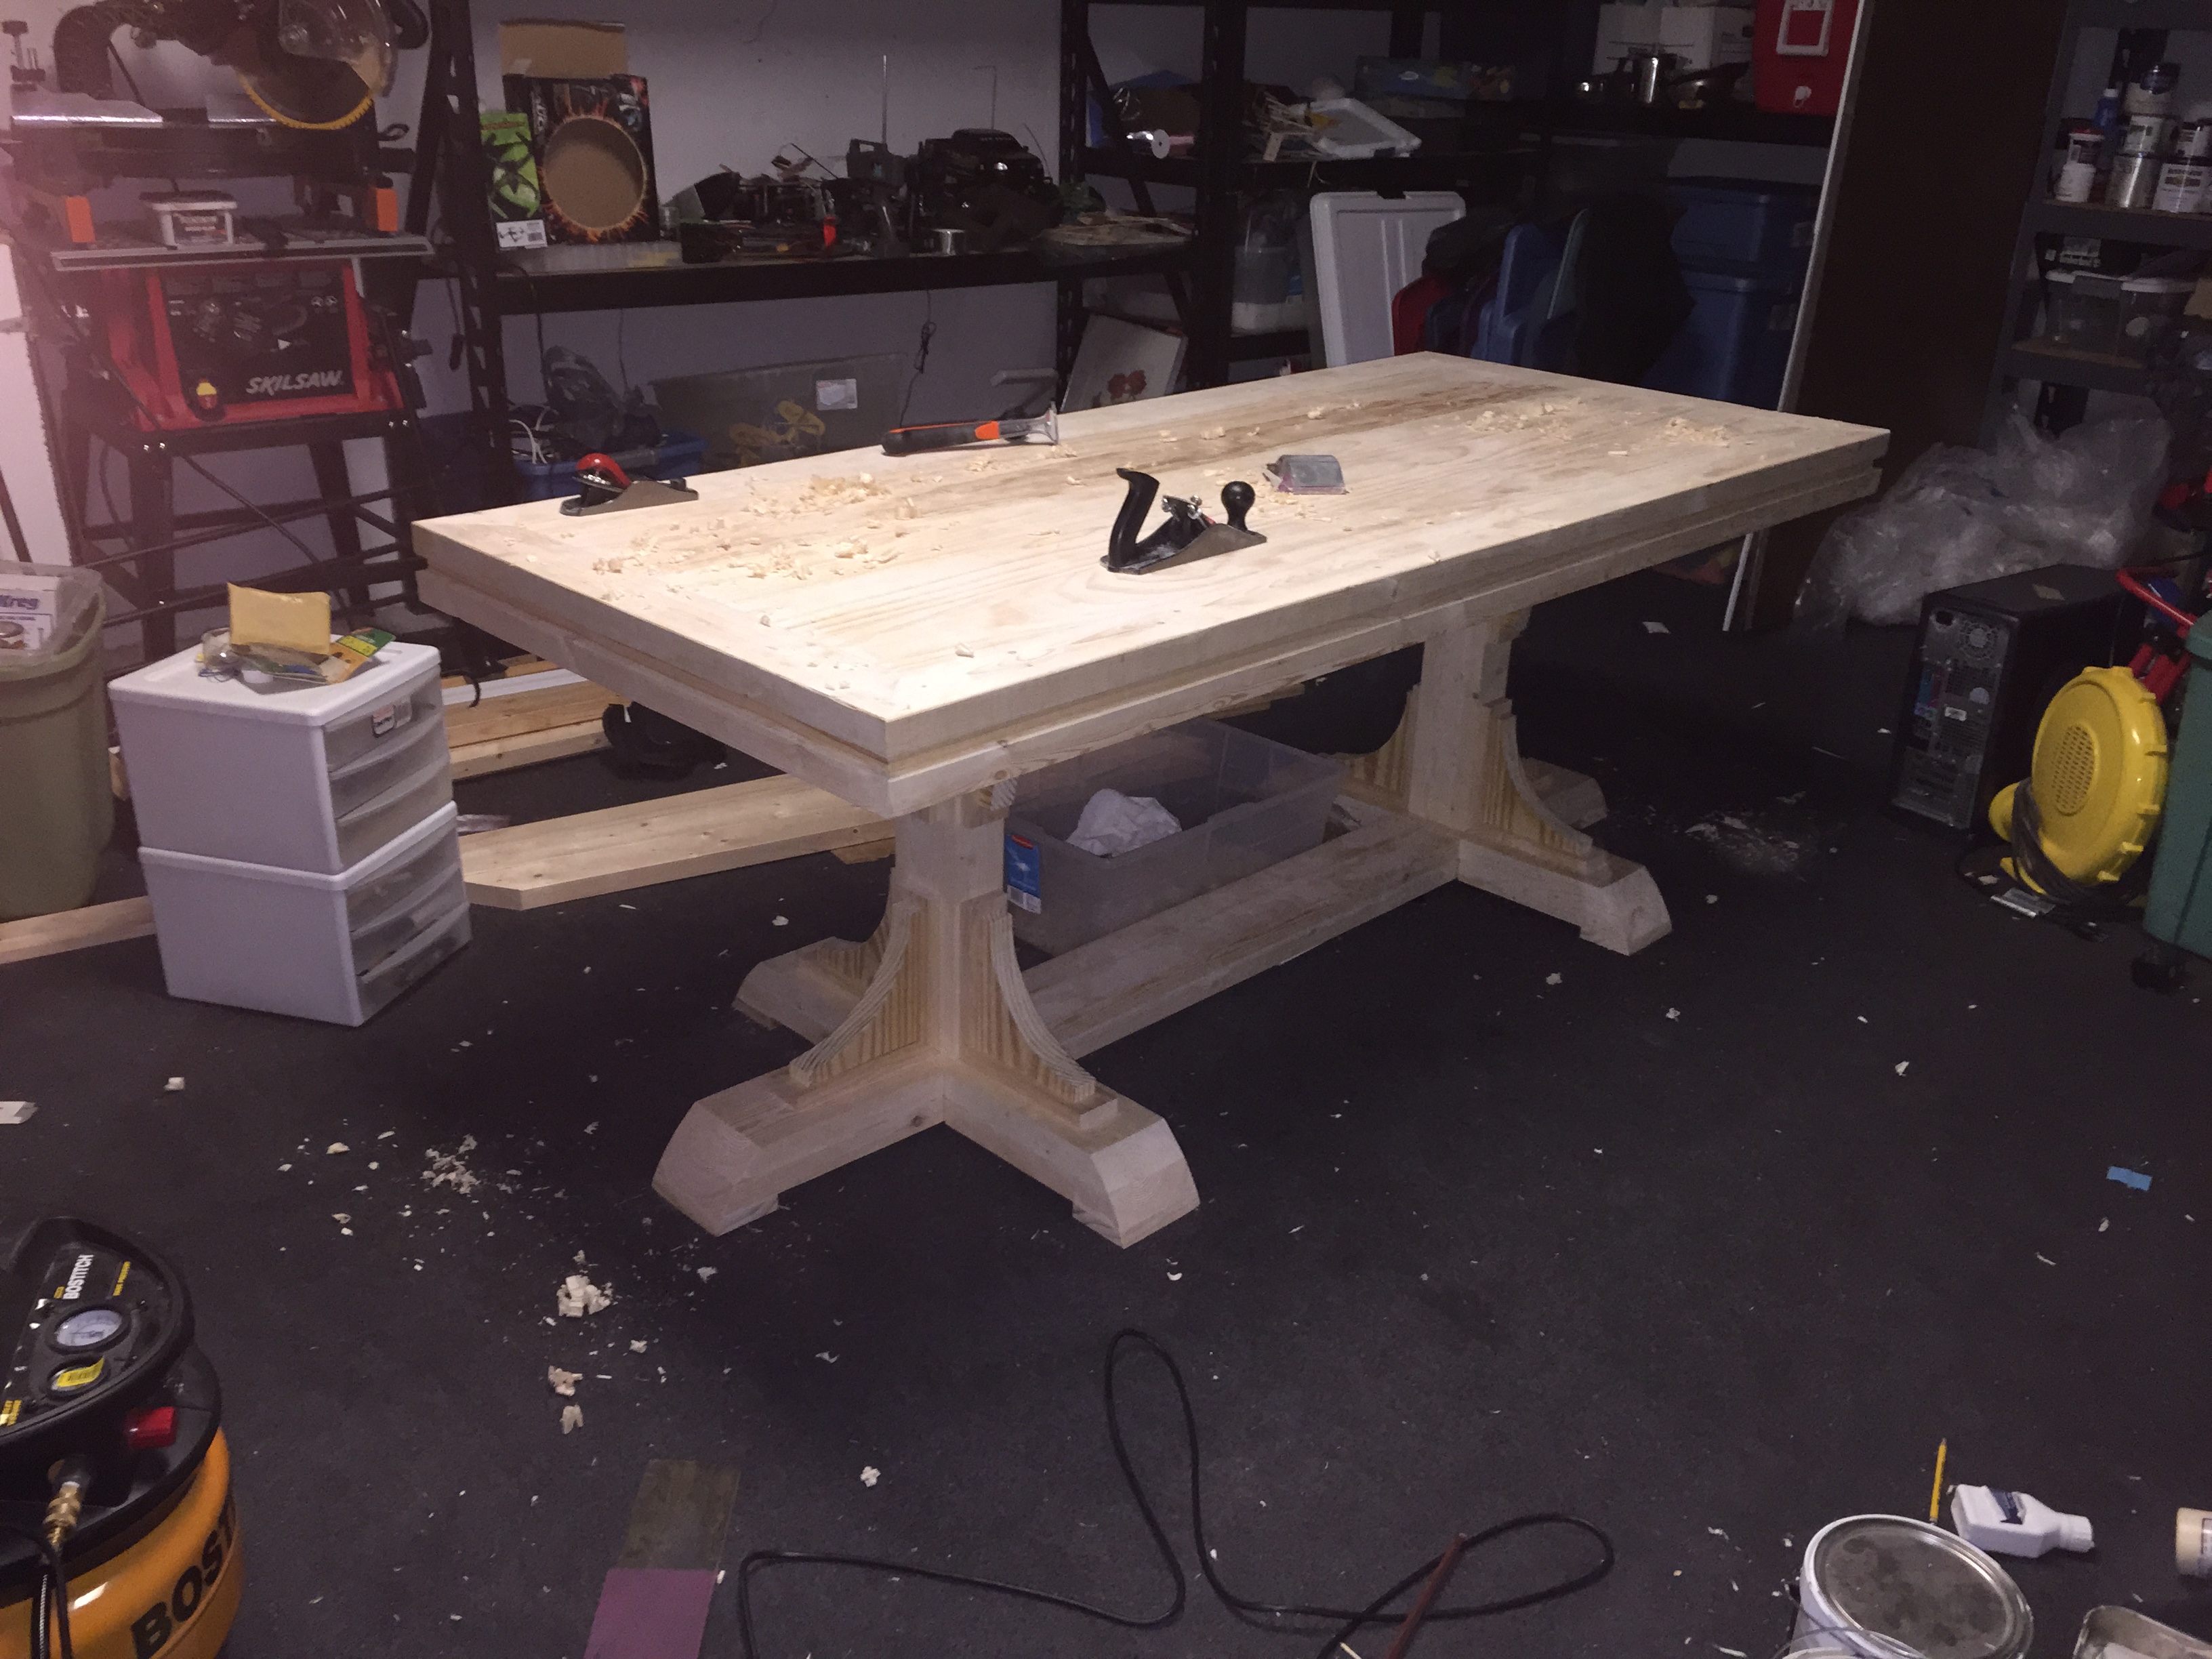
My first attempt at a real furniture project, I would have never tried this without all the plans and support here at Ana-White! These are 7' for the kitchen/breakfast area.  Since the table is only 7', it has 2 pedestals.  I modified these a bit from the triple pedestal farmhouse bench and table plans by using a runner along the floor instead of a stringer board on the table and adding triple feet on the outside pedestals.   I also added 1x3 trim under the arches to add some detail and hide the grooves between the three 2x4 leg supports.  The top has mitered 2x4s around the outside with 1x6s on the inside.  One issue I ran into was that the 2x4s shrank a lot as they dried, while the kiln-dried 1x6s did not.  To make an easier to clean surface I planed the top smooth, and then added minimal texture by hand scraping.  My plan is to build a big 12' version of this table for the dining room. 

Estimated Cost
Under $300 for both.
Estimated Time Investment
Week Long Project (20 Hours or More)
Finish Used
2 coats of kona stain, wiped more off the top than the legs. The top shows grain, the legs are almost solid brown. I used hand-rubbed satin poly. 3 coats on the bench turned out great. 6 coats on the table top turned out too shiny and easily scratches. I will refinish the table at some point, possibly with a softer finish.
Recommended Skill Level
Intermediate

Comments

Cute corner cabinet!

Submitted by rmurray87 on Sun, 06/02/2013 - 11:24

This project took me the majority of a three-day weekend to complete, but it was well worth it! I had the lumber store cut the beadboard panel for me so that it would fit in my car. This was also the first time I built something with doors on it, which was a bit of a learning curve, but came out alright in the end. I used pocket holes to build the face frame, and attached the shelves to the frame first before attaching them to the 1x8 back. I used 1 1/4" pocket hole screws and 2" wood screws. I left off the trim at the top and didn't bother to cut out the footer, but I think it still looks pretty cute.

Built from Plan(s)
Estimated Cost
$110
Estimated Time Investment
Weekend Project (10-20 Hours)
Finish Used
Accent color: Appletini from Valspar
Main color: Earthy Mushroom Taupe from Glidden

Everything was given a good sanding and a healthy dose of primer before painting.
Recommended Skill Level
Beginner

Comments

Small Cedar Woodshed

Spaced out the boards to allow airflow; did a sliding barn door and metal roof. Thanks for the plans!

Comments

Seasonal And Holiday

Charcuterie Board

Submitted by Anonymous (not verified) on Wed, 12/28/2022 - 15:27

Made a this for my step-daughter and her husband for Christmas. Love your projects, and am learning to do everything on my own which is so empowering thank you for sharing and encouraging all us girls we can do it!

Comments

Modern Craft Table *tweaked*

Completed Modern Craft Table! We tweaked the plans a bit because I was looking for a larger table top. The top now measures 48" x 76". We simply did this by adding an extra set of cubbies to the other side of the shelves. Absolutely LOVE how this turned out! All I need now is 4 counter height stools built and lots of shelves to complete my craft room! Will be sure to post those once they are completed!

Built from Plan(s)
Estimated Time Investment
Weekend Project (10-20 Hours)
Finish Used
Ultra White Latex Paint
Recommended Skill Level
Beginner

Comments

Ana White

Thu, 11/17/2011 - 01:10

Darn I was so excited to see you craft table! I apologize that your brag post did not show images. If you can send me images at knockoffwood(at)gmail.com I'd be happy to post. Thanks so much for submitting a brag post. Ana

Guest (not verified)

Sun, 03/04/2012 - 07:31

I LOVE LOVE LOVE your craft table. I want one! Looks like my husband wil have to get busy! Thanks for sharing!
Kristina
Houston, TX

Kimmy (not verified)

Tue, 03/20/2012 - 17:51

Is this the pic of the one you did ?? I am wanting a bigger table top too. I have waited years for just the right table and this is it.

Kimmy (not verified)

Tue, 03/20/2012 - 17:51

Is this the pic of the one you did ?? I am wanting a bigger table top too. I have waited years for just the right table and this is it.

Kimmy (not verified)

Tue, 03/20/2012 - 17:54

Is this the one you made ? I want a bigger table top as well. But I don't see the extra cubbies.

Kimmy (not verified)

Tue, 03/20/2012 - 17:54

Is this the one you made ? I want a bigger table top as well. But I don't see the extra cubbies.

naildoctors

Tue, 05/29/2012 - 00:05

This is great!! I am planning something similar, but what is your idea or the plan you used for the middle support to keep it from sagging over time? My idea is to run another cubby in the middle from side to side. What do you think?

Laura Mulholland (not verified)

Mon, 01/21/2013 - 09:54

I love the modern craft table, just what I have been looking for, do you share instructions, dimensions, etc.? thanks, Laura

HapETexanGal

Thu, 05/12/2016 - 15:14

I'm loving this and would love to have FIL build it for me but the plans look like its for the regular modern craft table but not the tweaked?  Also is there support for the middle?  Can you send me a link for the tweaked supply list please, can't seem to find it.  Love what you do!

Folding workbench

Submitted by mellyc_fl on Mon, 12/30/2019 - 17:42

We do not have a garage yet, so this size works great to push out of the way when not being used and pull out for a workbench and also to extend the table top for the saw.  The plans were easy to follow and easy to modify.  I added a base made of 2x4’s to make it sturdier since it will be moved across a deck vs a level floor.  I also added some boards behind the shelf to keep things from falling out the back and adjusted the height to match the table saw top.   Next up will be a router table stand to replace the camping footlocker. 

Built from Plan(s)
Estimated Cost
$100
Estimated Time Investment
Afternoon Project (3-6 Hours)
Recommended Skill Level
Starter Project

OutDoor dining table

My wife and I were looking for a larger table for our deck and after searching and seeing that everything out there was 300 dollars and up for something decent I decided I would try building something. This table was perfect for our needs and looked easy enough for me to put together. The most time consuming part was staining all of the boards as I went but it was totally worth it in the end. I also deviated from using screws and used my nail gun along with some glue to put the top frame together and the slats on but I did use some 2inch deckmate screws to attach the legs. One problem I did run into was I was about half a board short on the slats which wasn't a big deal just ripped one on the table saw, not sure if I miss measured or what but either way. We love our table and will entertain around it for years to come.

Built from Plan(s)
Estimated Cost
Around 80 Dollars
Estimated Time Investment
Day Project (6-9 Hours)
Finish Used
I used a Behr deck stain that was solid the color is called Russett and I did with a 3inch brush.
Recommended Skill Level
Beginner

Tall Loft Bed

Submitted by Anonymous (not verified) on Tue, 04/09/2024 - 07:27

My husband, Daughter and I built this loft bunkbed for our seven-year-old granddaughter‘s birthday. It turned out wonderful and she squealed when she saw it! Thanks so much for your online plans.

Jan Ott

Printer's Console or Sneaky Litterbox Cabinet? Cat Litter Box Cabinet

Submitted by Joni on Sun, 11/25/2012 - 08:12

I had been wanting to build something to hide the litterbox for a long time. When I saw the Printer's Console plan, I knew this was the perfect plan for a cat litter box furniture. I loved that Jen Woodhouse's version was completely modified to her bar plan, so I thought I could modify for my litterbox idea. I modified the plans on size, as I was trying to use a bunch of mis-matched plywood. I also modified it to include a cat door, a cat passageway on interior panel, a vent on the back behind one of the drawers, and the stone top. I built a frame on the back to house the backing as an inset piece, as I didn't want it to be seen at all. I learned a very important lesson during this build. Not all 1x3s are created equal. Once I got my doors assembled, they were too big for the opening. I couldn't shave off the tiny amount needed, and couldn't make anything work short of starting over with 1x4s, sawing off a small amount, and cutting down the # of "drawers" (and handles). I wanted the inside to be fully finished (because cat pee on raw wood would not be good!). I had to finish certain "planes" prior to putting the thing together. I used kitchen and bath paint on the inside floor and sides for easy cleanup. The stone was carryover from construction on our house 12 years ago. The handles were an amazing deal @ $1.81/each .


Built from Plan(s)
Estimated Time Investment
Week Long Project (20 Hours or More)
Finish Used
Minwax Wood Conditioner, followed by a mix of American Walnut & Onyx Minwax water-based Stain. 3 Coats of Old Village Gel Varnish. On inside, I used a kitchen/bath paint.
Recommended Skill Level
Intermediate

Comments

blueskiesinNM

Mon, 06/17/2013 - 12:23

Love your use of the buffet. Our family has discussed making a piece of furniture like this for our smaller dog. Nice to see someone has done it! Our big dog has scheduled feedings but our little dog would prefer to be a free feeder. Poor thing chokes down his food in our pantry listening to our big dog breathing under the door waiting for him to finish. When he is done we open the door and the Big, greedy dog bolts in looking for left overs. A family member has to wait patiently for the little dog to finish so he can escape the pantry. I really don't want a doggy door in my pretty swinging bi-fold doors to my pantry which is also access to our kitchen.That would be a pain to have to keep closed all day. But this buffet idea is super cute! Thanks for the inspiration.

wayneled

Fri, 01/09/2015 - 22:01

I know this is an old post, but I'll ask anyway

I love this piece and am in the planning stages for ours. Thank you for sharing!

I am Wondering how you went about the table top. Did you install a 3/4 ply on top but not flush, allowing room for mortar and tile? If so how much room did you allow for the tile/mortar? 1/2 inch? How did you keep the surface of the tile level and uniform? Lastly, did you seal the tile with anything when you finished?

Aesthetically, the tile top really sets this piece off and I really want to make my own.

Thanks

Seasonal And Holiday

Front porch planters

Submitted by Anonymous (not verified) on Thu, 01/07/2021 - 20:21

Followed your plan but added extra 1 x 2 trim to the sides, feet made from 1 × 3 and 1x 3 trim around the top

Built from Plan(s)
Estimated Cost
$35 per planter
Estimated Time Investment
Afternoon Project (3-6 Hours)
Finish Used
Cedar Naturaltone Behr Waterproofing Wood Finish
Recommended Skill Level
Intermediate

Comments

Seasonal And Holiday

Modern Toy Box

Submitted by Anonymous (not verified) on Sun, 03/19/2017 - 14:32

I had a wonderful time making this toy box and learning new techniques. Having access to a table saw really made this project turn out awesome. I was able to get 1/4" shims made that allowed for easy, precise offsets. The family just loved it!

Built from Plan(s)
Estimated Cost
$100
Estimated Time Investment
Weekend Project (10-20 Hours)
Finish Used
ProClassic white paint
Recommended Skill Level
Intermediate

Mega work bench with miter station

Submitted by Anonymous (not verified) on Mon, 10/04/2021 - 16:51

When I was 8 months pregnant and going through my “nesting phase” I knew I needed to get my garage organized. Prior to building this, my tools were all over the place. To try to get it done before the baby came, I called my dad to help me out, and we built it together in just a couple days. It was a weekend I will never forget and I smile every time I walk into my shop knowing we did it together.

Comments

Master Walk In Closet with Bookshelf Door

Submitted by valpal5 on Thu, 04/16/2015 - 20:26

We used an unfinished attic space above our garage that was connected to our bedroom to make a walk-in closet with great shelving.  This project took a lot of time but we are so happy with the results!  There is a side for my husband and a side for me.  Although it is hard to see we also incorporated a small door/bookshelf into the room to allow us access to attic storage space.

closet shelving
 

Estimated Cost
$500
Estimated Time Investment
Week Long Project (20 Hours or More)
Finish Used
White painted finish.
Recommended Skill Level
Intermediate

Comments

Raised Garden Beds

Submitted by kari on Sat, 03/12/2011 - 09:54

I made these last summer for my sister. And she didn't even use them yet! Very easy to make. She did want them taller, so that is the only modifacation I made. We're hoping the bunnies won't notice all the yummy veggies up this high :) I know, probably wishful thinking. Makes a great kid corral too.

Estimated Cost
it's been a while
Estimated Time Investment
An Hour or Two (0-2 Hours)
Finish Used
none
Recommended Skill Level
Starter Project
Seasonal And Holiday

www.ana-white.com/Hutch

Submitted by svtigrz on Sun, 10/28/2018 - 04:39

My wife wanted a hutch to store her canner and supplies in. We searched online for hutches and Hoosier cabinets and they were anywhere from $1200-$2000!!. That's when I said "I can build that". I sat down and custom designed on CAD and started my build. I was able to find the butcher block top at Lowes for $50!!.  It took me about 3 weeks to build it in my spare time. I had to special order some of the hardware because I could not find what I wanted locally. I had a lot of fun building it. On to my next project!!

Estimated Cost
$400
Estimated Time Investment
Week Long Project (20 Hours or More)
Finish Used
stain and poly
Recommended Skill Level
Advanced

Comments

Slatted Sofa Table

Submitted by raybwright on Sat, 02/13/2016 - 09:36

I based this design of the simple Sofa Table by Jenna Sue. Instead of a 2x8 across the top, I opted to use 1x4s side by side. This slatted look matched some of the other items in the house and to allowed me to create two hinged sections. These sections allow for easy access to wall plugs and include small notch for the cables to come through.

Estimated Cost
$35
Estimated Time Investment
Weekend Project (10-20 Hours)
Finish Used
Minwax Wodd Finish Dark Walnut Stain with Minwax Clear Satin Polyeurethane
Recommended Skill Level
Beginner

Outdoor Sofa

Submitted by stell on Wed, 01/22/2014 - 19:23

Was my first project from Ana White's designs. I enjoyed making it, and plan on following up with the outdoor loveseat this spring.

Estimated Cost
Wood & hardware $80, the finish $16. The cushions were $126
Estimated Time Investment
Weekend Project (10-20 Hours)
Finish Used
Olympic Solid Exterior Stain in Antique Silver.
Recommended Skill Level
Beginner

Simple Composting Toilet Outhouse

Submitted by Emillie on Thu, 06/18/2020 - 13:36

We built this composting toilet as one of the first things we did on our piece of vacant land. (How can you build anything else without somewhere to go when nature calls?)

An eco-friendly design was important to us, so we used cedar fencing instead of plywood. Otherwise, we followed Ana White's simple outhouse plans. It came out perfectly! It even has a rain barrel for hand washing.

Estimated Cost
800
Estimated Time Investment
Weekend Project (10-20 Hours)
Finish Used
We stained the outside with a semi-transparent stain and varnished the inside with an outdoor varnish.
Recommended Skill Level
Beginner
Back