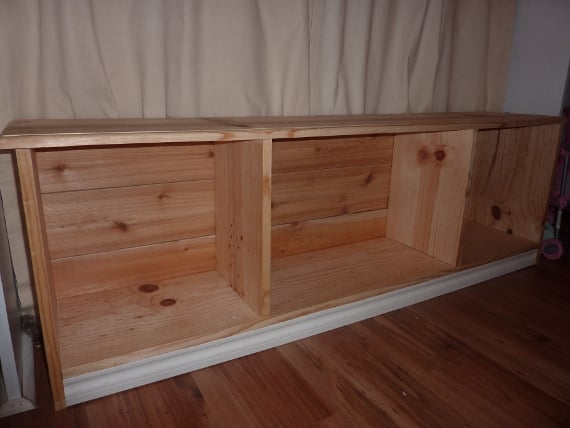
Coat closet
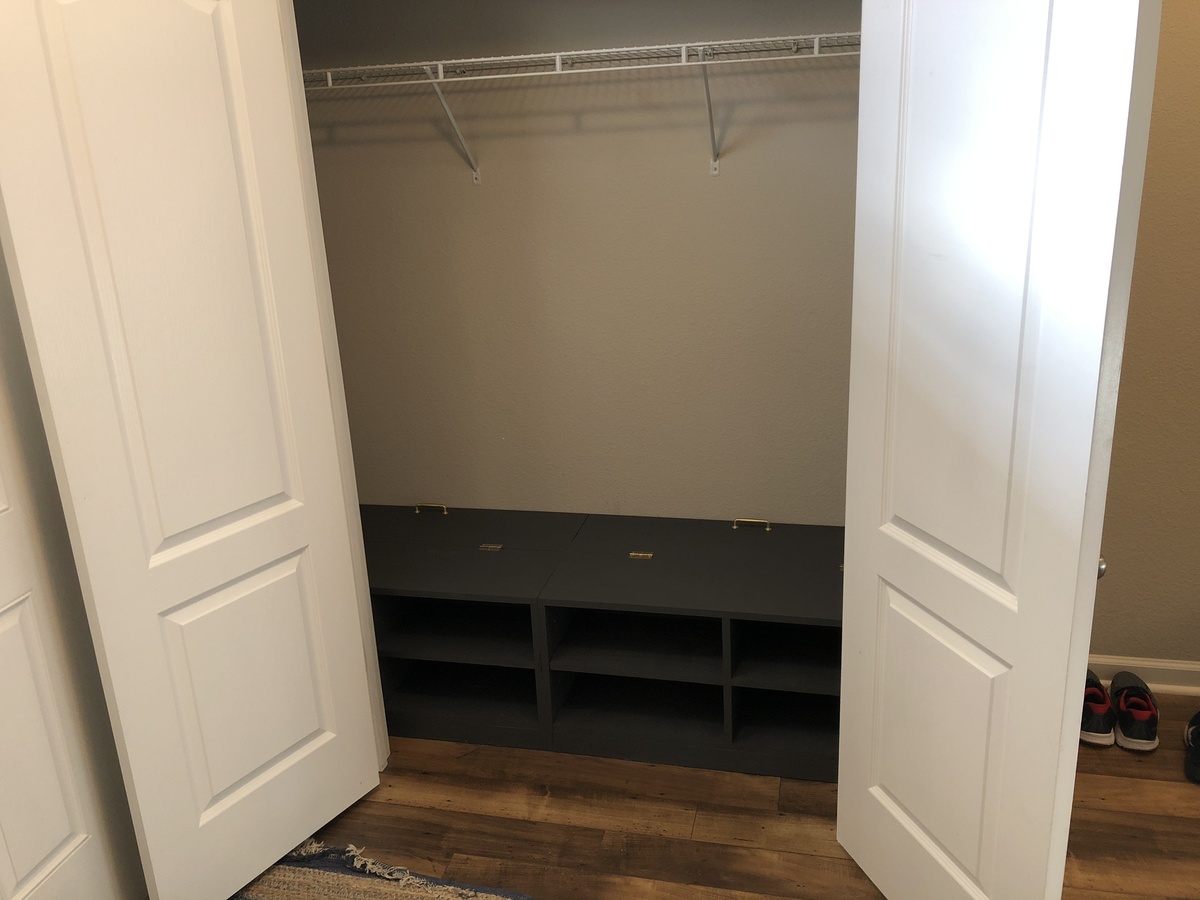
I just wanted better organization and shoe racks up close to the front of the closet instead of in the back but I also didn’t want them too deep. These plans fixed that.
I had very little clearance on the long side of the shed, so I opted to put the door on the short side. Thanks for the plan, it was a great starting point for my project.
Tue, 09/10/2013 - 10:15
Thanks for posting! I plan to make this shed. Yours turned out beautiful!
Ana's plans are so easy to work with. This greenhouse was build with all recycled materials from our home build, except for the corrugated plastic (total cost approx. CAN $1,000). I did have to make it a little bit smaller as the area that was leveled was a bit smaller than planned. I'm planning to add raised beds inside, add a solar panel so that I can have light in the evening and a fan during the day. I'm planning to attach some gutters and a rain barrel.
This is my second project, based on Ana's plans (first one: https://www.ana-white.com/community-projects/indoor-firwood-console). Next, I'm planning to make the fancy X farmhouse table and bench with storage. Stay tuned.
Reader submitted photo
My husband and I worked together to build this spice rack with the plan from ana-white.com. The instructions were very clear and easy to follow.
As you can see from the photo, we haven't hung it on the wall just yet. We have a narrow galley kitchen in an apartment, and I won't be able to get a good photo of it once it's hung.
Thank you, Ana, for inspiring us! We have picked out several more plans to build.
Sarah Hughes
Simple benches that convert to picnic tables
Used your original plans for these. I'm very pleased with the result. Carpentry is not really my thing, but I'm inspired to do more now.
Sat, 02/25/2023 - 11:59
These look fabulous, thank you for sharing! Can't wait to see your next project.
"Here's a pic of the planter I made! I modified it to fit a 36" planter. I LOVE it. Thanks!!"
My husband and boys made a beautiful enclosed raised bed using your plans. It was modified to include exterior raised beds for flowers.
I had to modify the plans a little to make the steps 9ft long. I also used 2x6 on the bottom step, so the rise was the same.
We paired this bed frame with Nathan James upholstered headboard to replicate our favorite Airbnb we stayed at in Telluride. That bed was a $1300 from West Elm. Minus the tools, this bed came in around $500 for everything (including bedding).
Wood: Douglas Fir
Stain: American Walnut
This was my first project using my circular saw and Kreg jig, so I wanted to try something that was not too difficult. It probably took me longer than most as I had to read all the directions on my saw and Kreg jig. Both are super fun to use. Ana’s plans made it super easy! After assembly, I decided to paint it as it needed to be weather/waterproof. I used Behr waterproofing stain &sealer in slate. Love how it turned out! Thanks for the easy to follow plans.
I took the pony wall idea and went with it.
Mazda Mitch
Great plans, Ana! I swapped out the wood for PVC trim, and used stainless steel screws to hopefully make this thing weatherproof.
Our daughter's room has built-ins on either side of the window. I always wanted a window seat to sandwich in between, but couldn't find one with the right dimensions.....THANK YOU ANA WHITE! I used her Entryway Bench plan and just changed the length and depth to fit the window. I didn't add the side and back supports on top, but I bullnosed all the edges to make it look more finished.
I built this in one afternoon and even used cedar fence planks (left over from my husband's fence project) for the backing....love the extra charm of those planks!
We also had some molding left over, so I worked that in to the bottom for a little extra detail.
Haven't painted it yet....just enjoying it's usability until I decide on a color. It's super durable. My three year old sits on it (to read), stands on it (to spy on the neighbor's cats) and tosses those baskets in and out all day long.
I combined the play sink and play stove into a one-piece kitchen by having them share a side. I found a bathroom faucet at my local Habitat ReStore for $15 (and that included a sink I didn't even need!). Time investment does not include painting. Here's my cost breakdown. Lumber: $25 (I used some scraps.) Faucet: $15 Dog bowl: $7 Hardware: $13 Primer and paint: $19 Screws: $4 Sandpaper: $5 Plexiglass: $3 Prepping dinner while my toddler works in his play kitchen beside me: Priceless.
I was planning to make a train table trundle for my son's bed, but once I saw this plan everything changed. I'm so SO happy with it. Modifications: 1) We took off the bottom shelf because hubby likes to stretch his long legs out underneath. 2) We used laminated pine project panels for the top, they cost more, but they were already the correct size, and the finished look of the top would be nicer. We altered the design to make the panels go lengthwise. So far so good, neither have bowed whatsoever. 3) we used inset handles from Lee Valley with an antiqued finish. I had yet to lacquer this when I took the photo because we couldn't wait to get the trains in there! I have since done 3 coats of minwax Poly to protect it from little hands, crayons, etc.... We're hoping this table will graduate cars, then to legos, and then....who knows!? Thanks to Ana and all the contributors here.
Made the planters to hold flowers for a small garden wedding. Used 3-1/2" wide fence boards as my HD was out of standard 5-1/2" boards. Used 11 boards for finished height of 38" top was 18" wide, bottom 12-1/2" using a 4° angle. Ripped fence boards to size to use in place of 1x2/1x3 boards. Added center trim as on another brag post, as well as, framed the top to finish off the planter.
My daughter and I used these easy plans to build these two shelving units for the garage. We altered the plan slightly.The sizes that I used were determined by the lumber I had available as we used rescued lumber for this project. The height on each is 5' (tallest 2x4's we had) and the length is 64". All I had for 2x4's were 48" pieces so we used some other rescued lumber for the shelves. We used whatever we had. So they are made from misc lumber. The 2x material made for the strongest shelves. Depth is 17" as in original plans.
We added additional brackets for support under a couple of the shelves. We also attached to the wall to avoid tipping. I absolutely love these. So useful. No more unstacking each tote to find out what's in the bottom one. I LOVE IT! Thanks for the plans.
We completed these in one afternoon.
Modified the design to allow me to roll lawnmower directly in the end. Fun project.
Comments
Ana White
Wed, 01/02/2019 - 12:14
This is awesome!!!! I'm so
This is awesome!!!! I'm so excited to see the closet built and to read that it is working well for you! Share some more pics sometime!