Community Brag Posts

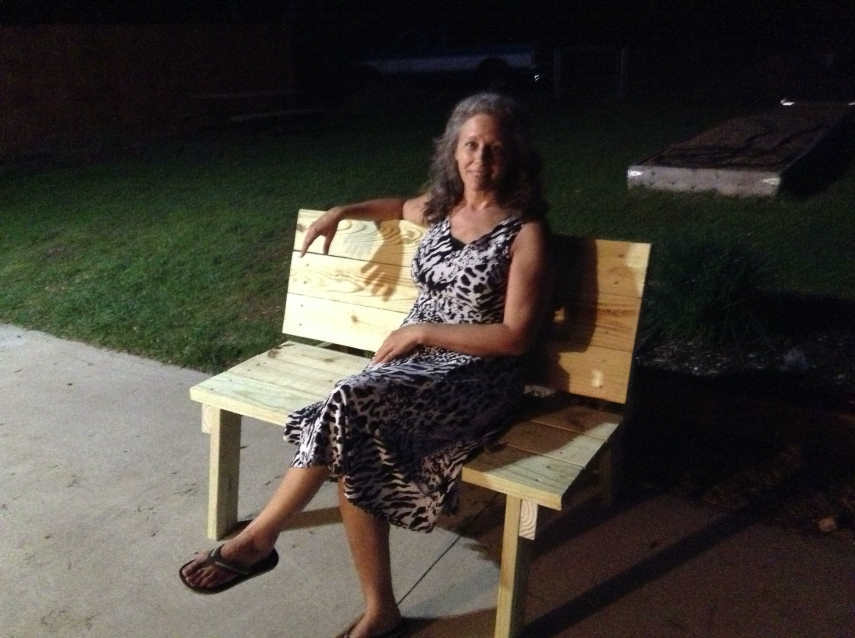
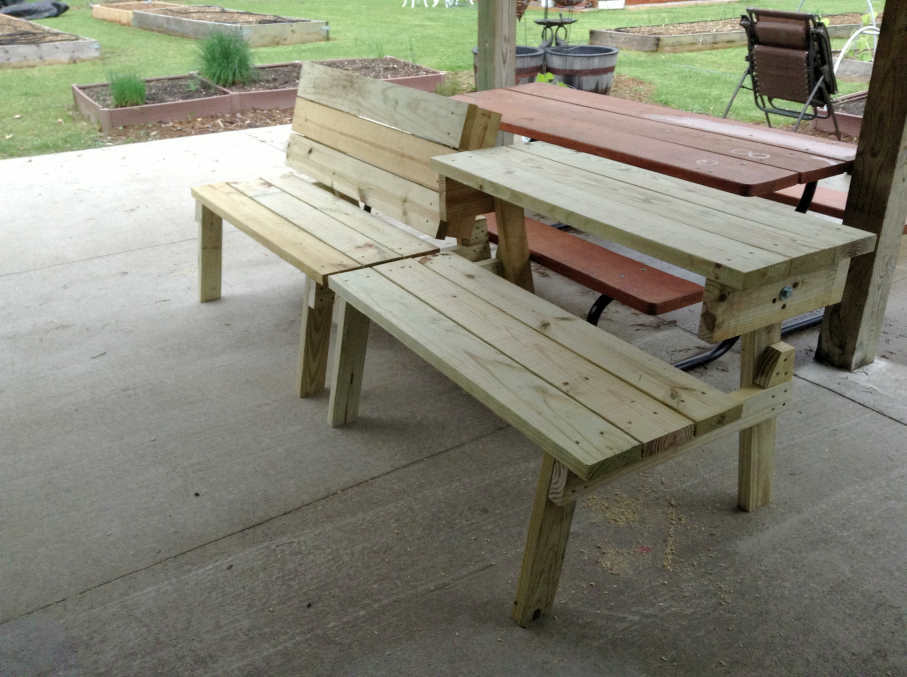
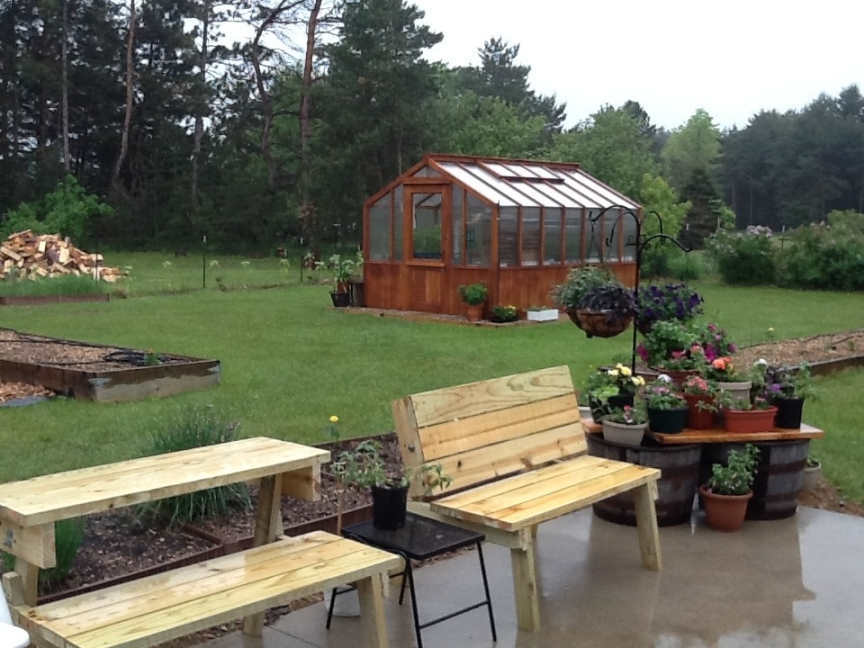
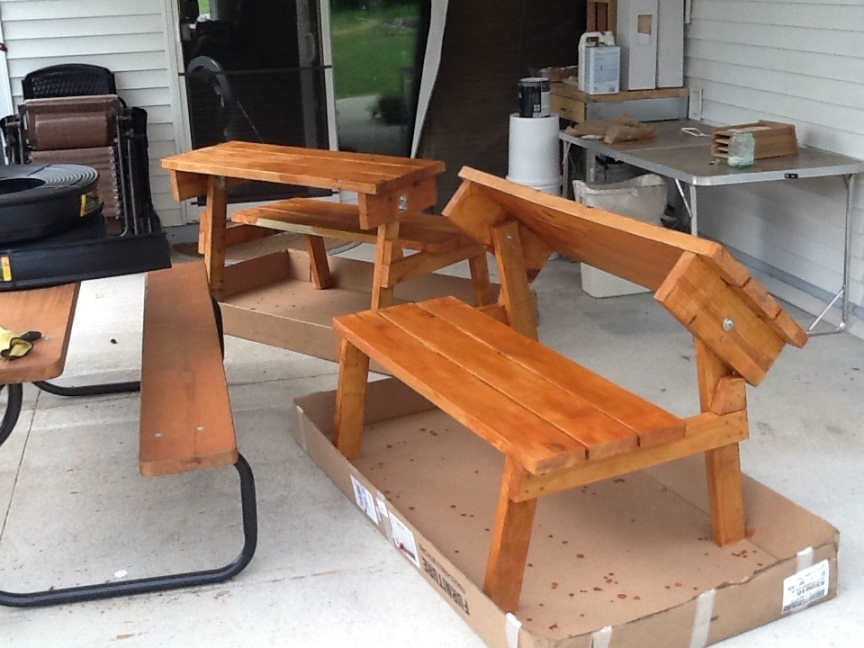
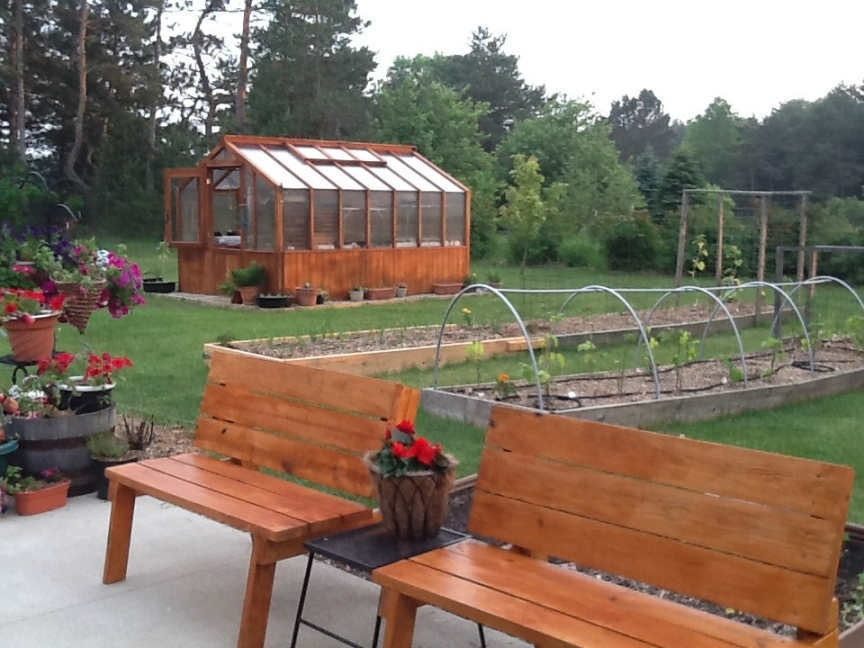
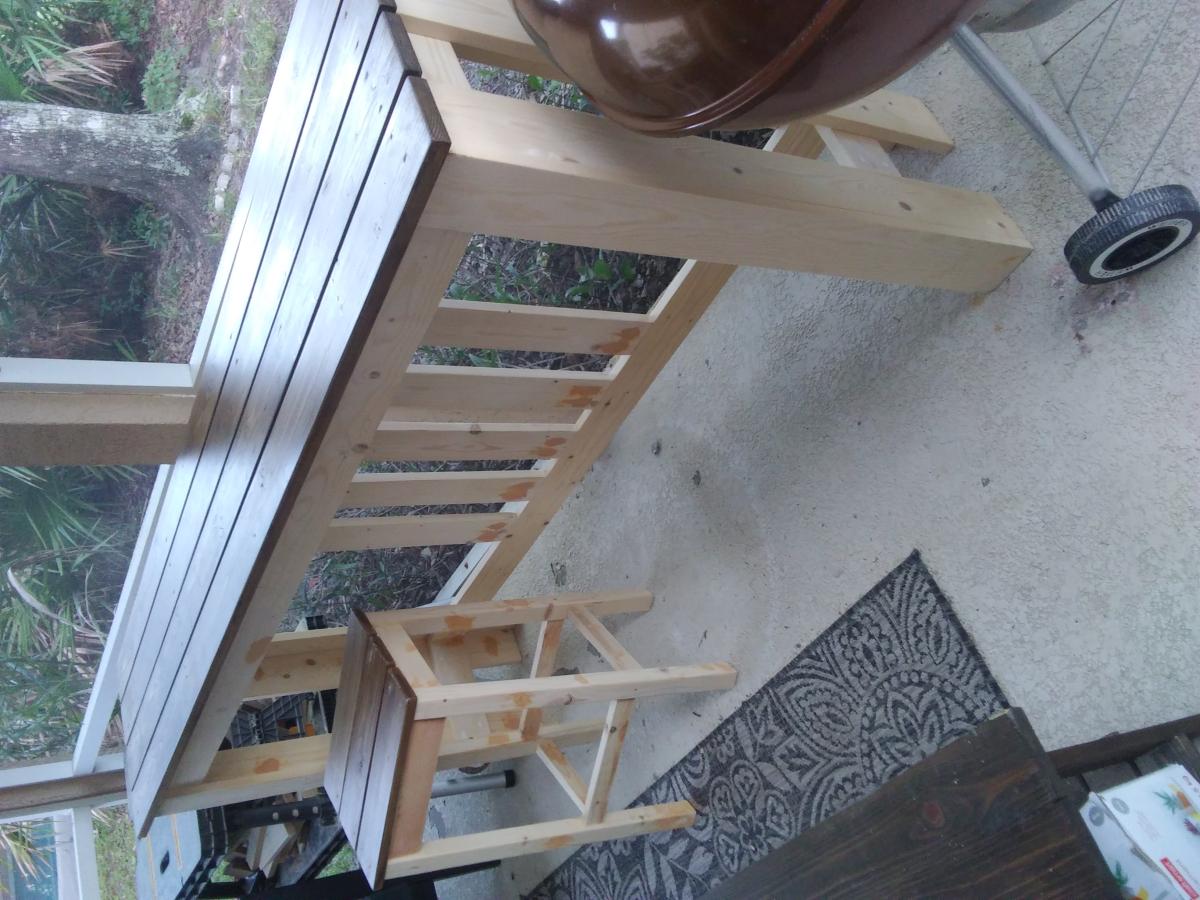
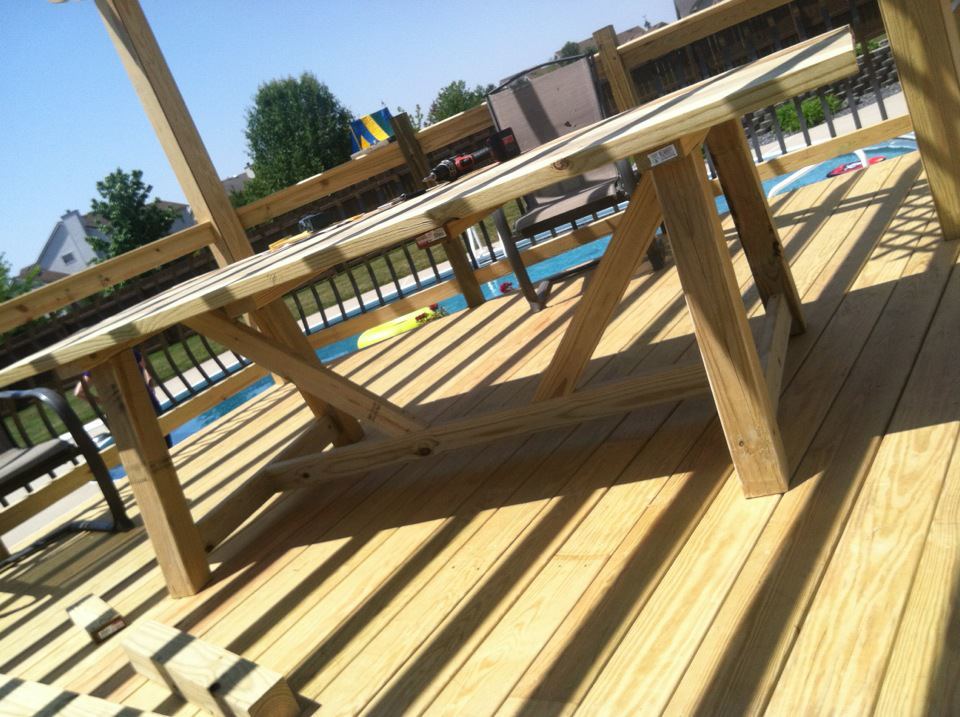
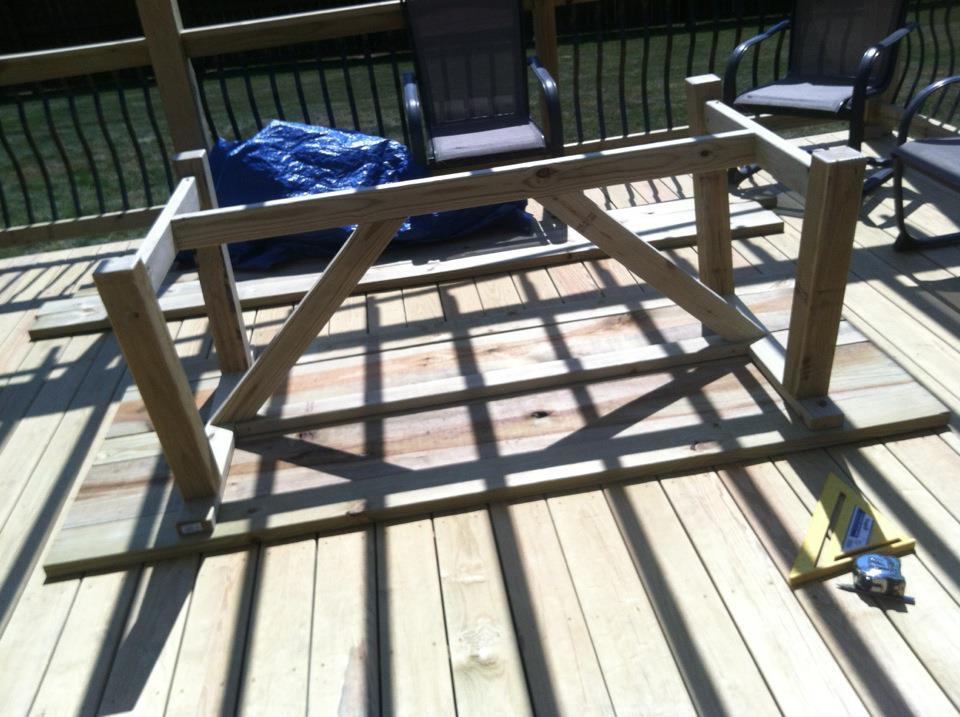
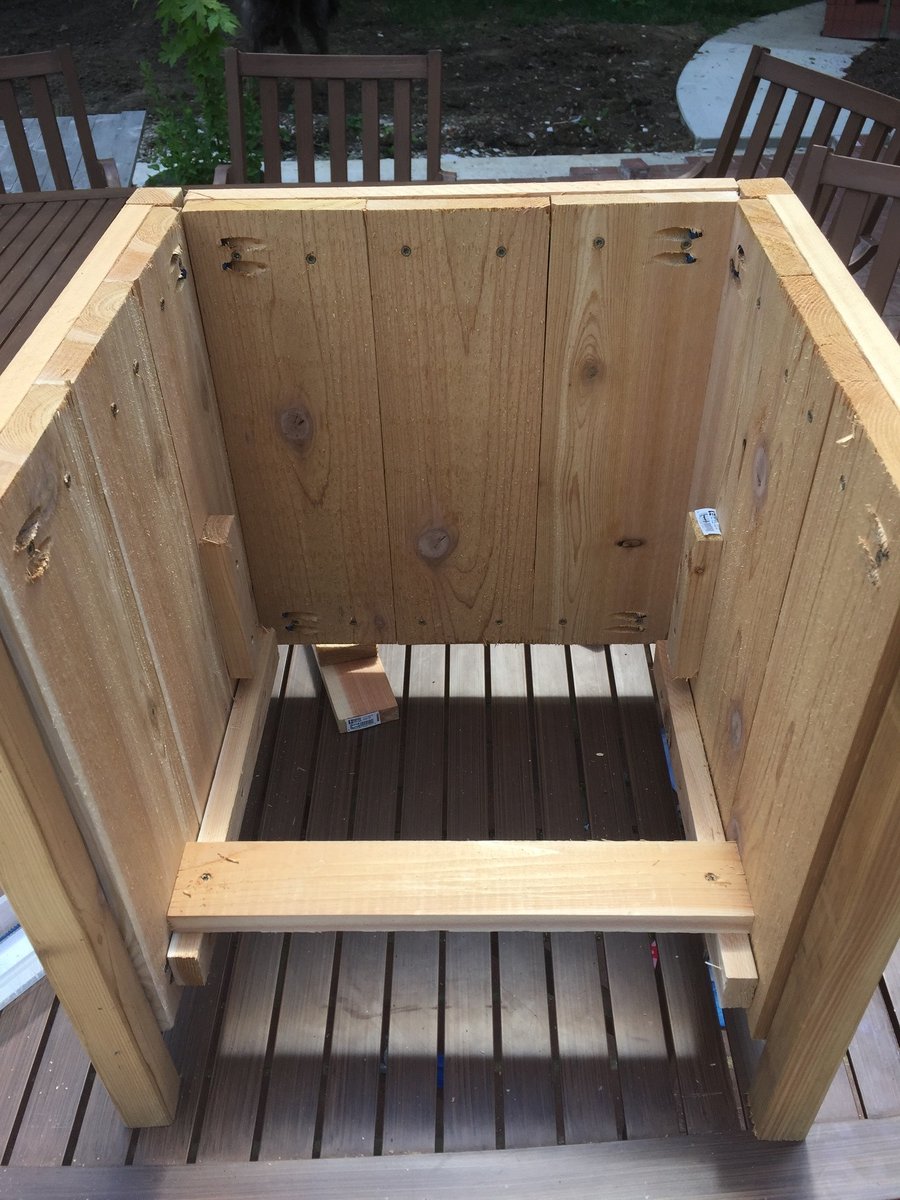
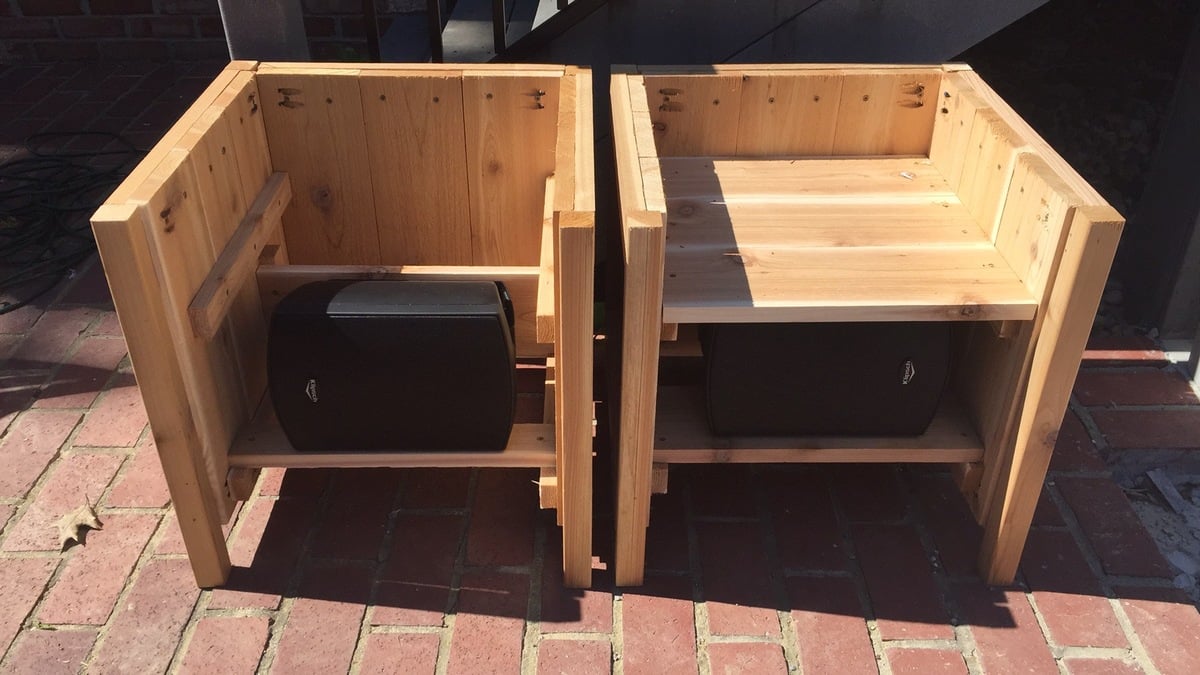
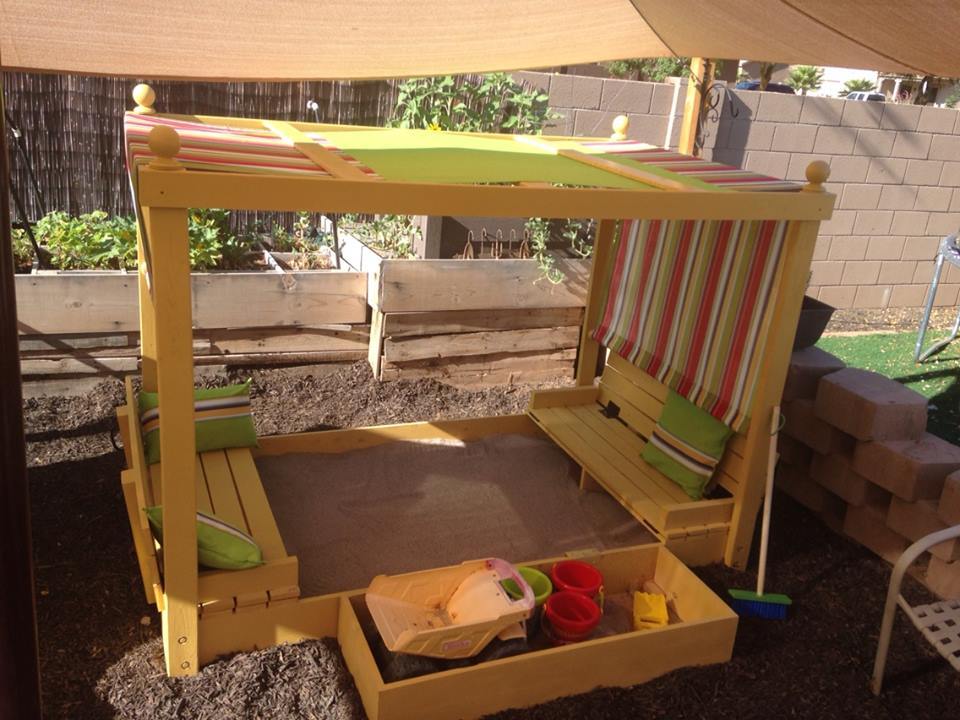
PICNIC TABLE THAT CONVERTS TO BENCHES ~ Cedar Finish

Submitted by Tonya P on Mon, 06/10/2013 - 19:50

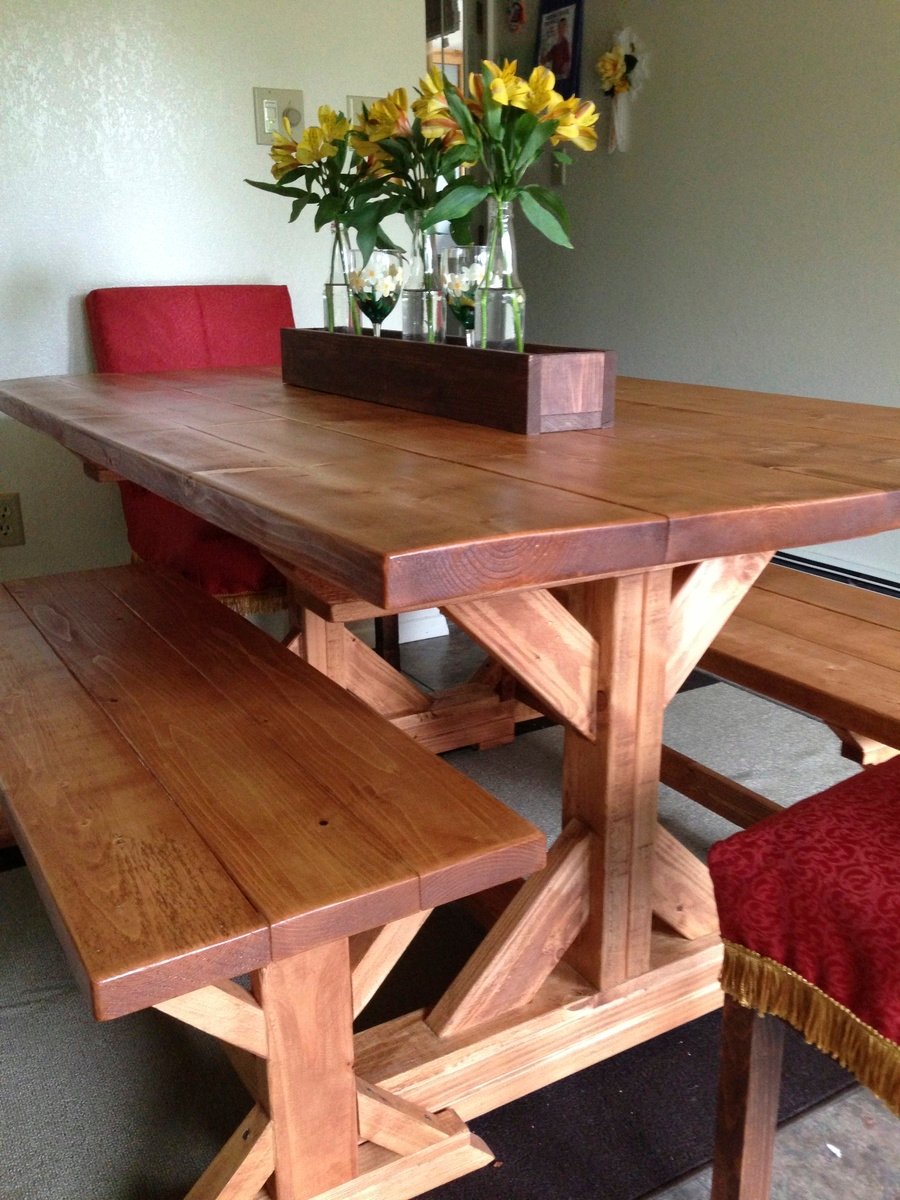
I saw a type of this for sale at Costco for $109 (for just ONE bench, not a pair). It' looked nice, and I almost bought it, but it had metal legs and trim and I wanted more of a natural look to go with my Cedar theme that I have going in my back yard garden/patio/greenhouse area. After seeing it in the store, I did an online search to see if I could find something a little more organic in nature... imagine my surprise when Ana's version of the bench/table came up! I looked over the plans and thought... well, I made the modified Farmhouse Table via her excellent instructions, I can surely do this! I did make a small change, I cut small pieces of wood to use as stops for the backs of the benches, instead of using holes and bolts to hold the backs at an angle that is comfortable. You can see this in the pictures, they are just beyond the back of the seat boards, on the leg supports. Thank you Ana! It was easy, quick, and they look SO good on my patio. I will be making more, maybe even selling a few because so many have asked me if I might :) I figure the cost was about $65 for both benches. A great deal and a fun project! Patrick really has to refrain himself from wanting to "help" me, but I am determined to do it myself... and low and behold! With Ana's generous free plans and inspiration, no problem!

Estimated Cost
$65 for the two
Estimated Time Investment
Day Project (6-9 Hours)
Finish Used
Cedar Stain. The project was not stained until the benches dried out for several days. They were built using green treated lumber, so they needed to dry out well before staining.
Recommended Skill Level
Beginner

Comments

Kabarie

Wed, 07/17/2013 - 13:11

Oh, great job!! I love it. The back stops for the bench is a great idea because those bolts are expensive! I'm going to do the same. Thank you for the idea!

Seasonal And Holiday

Fancy X Farmhouse Table and Benches

Submitted by LeaG on Mon, 07/08/2013 - 17:38

I was inspired to build this table after taking Ana's Adirondack Chair Class at Home Depot. Living in Fairbanks, AK means that the pickings are slim and pricy for quality furniture.

I shortened the table length to 5' to fit my space and made the benches 4' long and lined the legs up so they would fit comfortably under the table. I also made the chairs based on Ana's Parsons chair pattern.

Estimated Cost
About $250-300 Total
Estimated Time Investment
Week Long Project (20 Hours or More)
Recommended Skill Level
Beginner

Comments

Weatherly Sectional (L-shaped)

Submitted by OUKerri on Fri, 08/07/2015 - 21:50

When I first saw the outdoor sectional plans from Ana I had to build this! The sectionals at potterybarn cost at least $1500 and that is without the cushions. I chose cedar for the lumber because I wanted a high end stained wood look that would stand up to the pacific northwest weather. I purchased most of the lumber from Orange and some of the smaller boards from a local lumber yard. Every board was cut first then sanded and stained before assembly. This made it look a lot more professional and no drips! There are just too many tight areas to do this after it is assembled. I made 2 Weatherly outdoor sofas and used the plans from the Weatherly loveseat to leave the end off of one of the sofas to make an L-shaped sectional. This fit perfectly for my narrow deck which is the beauty of DIY and Ana's easy to modify plans. I  followed the suggestion of another brag post to attach the 2 sofas together with carriage bolts and nuts. It is important to be very accurate with all of the cuts because they have to fit together perfectly for the final product to look straight and measure correctly. Because there a about a million repetitive cuts in these plans I took the idea of another brag post and youtube and created a stop out of leftover lumber which really helped me keep my cuts accurate and saved me a lot of time. I really enjoyed using my new Kreg K5 pocket hole jig on this project which saved me time and my new Ryobi brad nailer that I convinced my husband I needed. I plan on using it on several projects which "require" a brad nailer! I bought six 25" cushions in turquoise from Pier 1 in mid-July which were on major sale and several pillows to match the color. I am somewhat of a beginner so I didn't adjust te plans to fit six 25" cushions so I had to have one cut down to 22" by a local upholstery shop (I could have purchased a 22" cushion but of course they were all sold out). I suggest at least a 3-4" depth cushion that is fairly firm, which Pier 1 cushion were.

I love the outdoor coffee table with built in beer cooler idea that another brag post had suggested.It uses a planter box as the cooler.  I used the same stain which worked well and adequately waterproofed the table. It also has a cover for the cooler when it is not in use. I thought it was a nice addition.


I loved this project and how it turned out! Thanks for the plans and inspiration!!!


Estimated Cost
$300 for the lumber, sand paper, screws and stain. $300 for 6 cushions and pillows from Pier 1.
Estimated Time Investment
Week Long Project (20 Hours or More)
Finish Used
Behr Transparent Weatherproof Wood Finish in Cedar Naturaltone
Recommended Skill Level
Intermediate

Outdoor Bar Table and Stool

Submitted by Titus2000 on Thu, 06/09/2022 - 14:38

I love this bar table! I needed something long and narrow for our small patio - just deep enough to fit a plate and a drink, or a laptop, and long enough to fit three stools, so I modified Ana's dimensions. Also, living in Florida, we occasionally need to bring our furniture inside for hurricanes, so I made it a lighter by using 1x3s and 1x4s instead of 2x or 4x4s. I still need to paint the bottoms a cream color and build two more stools, but I already use it a lot. Thanks Ana! (The photo was upright on my computer, but I didn't see how to rotate it once it was uploaded)

Comments

Northern Wisconsin White Pine Bed and Dresser

In need of outfitting the spare bedroom for overnight guests I came upon this site and found the storage bed plan we liked.  After building the bed of course a dresser was in order.  My sawyer has some northern white pine that came from the Wisconsin Northern State Fair grounds in Chippewa Falls.  Having never worked with white pine before I found it rewarng and was happy with the finished product.  Hope our guest enjoy it as much I had building it

Estimated Time Investment
Week Long Project (20 Hours or More)
Finish Used
A self leveling poly finish by General Finish.
Recommended Skill Level
Intermediate

California King Modified

Submitted by Anonymous (not verified) on Fri, 02/08/2019 - 10:48

This was my first furniture build.  Wanted something a little more detailed, so did solid panels, and inset molding into the panels for depth.  I also wanted a taller footboard, so the panel is 18" high instead of the 15" that the plan showed.  Ended up adding some crown molding as well, but mostly to cover up my mistakes.  Also dressed up the side rails by covering them in a matching molding as well.  Didn't want to use box springs, so moved the slats up to the top of the rail, and spaced them with 2" gaps between slats to give maximum support to the mattress.  Since we have a small dog that I tend to trip over in the dark, I ran a 24' rope light along the interior side panels and footboard, and plugged into a wireless switch that I mounted to side of headboard, which I can turn on and off from bed.  Stained it with General Finishes Mahogany Brown and then two coats of poly.  Really happy with the way this turned out!  Can't wait to do some more building, thanks to Ana! :-)

Estimated Time Investment
Week Long Project (20 Hours or More)
Finish Used
General Finishes Brown Mahogany stain and two coats of poly in a glossy finish.
Recommended Skill Level
Beginner

Modern Craft Table *tweaked*

Completed Modern Craft Table! We tweaked the plans a bit because I was looking for a larger table top. The top now measures 48" x 76". We simply did this by adding an extra set of cubbies to the other side of the shelves. Absolutely LOVE how this turned out! All I need now is 4 counter height stools built and lots of shelves to complete my craft room! Will be sure to post those once they are completed!

Built from Plan(s)
Estimated Time Investment
Weekend Project (10-20 Hours)
Finish Used
Ultra White Latex Paint
Recommended Skill Level
Beginner

Comments

Ana White

Thu, 11/17/2011 - 01:10

Darn I was so excited to see you craft table! I apologize that your brag post did not show images. If you can send me images at knockoffwood(at)gmail.com I'd be happy to post. Thanks so much for submitting a brag post. Ana

Guest (not verified)

Sun, 03/04/2012 - 07:31

I LOVE LOVE LOVE your craft table. I want one! Looks like my husband wil have to get busy! Thanks for sharing!
Kristina
Houston, TX

Kimmy (not verified)

Tue, 03/20/2012 - 17:51

Is this the pic of the one you did ?? I am wanting a bigger table top too. I have waited years for just the right table and this is it.

Kimmy (not verified)

Tue, 03/20/2012 - 17:51

Is this the pic of the one you did ?? I am wanting a bigger table top too. I have waited years for just the right table and this is it.

Kimmy (not verified)

Tue, 03/20/2012 - 17:54

Is this the one you made ? I want a bigger table top as well. But I don't see the extra cubbies.

Kimmy (not verified)

Tue, 03/20/2012 - 17:54

Is this the one you made ? I want a bigger table top as well. But I don't see the extra cubbies.

naildoctors

Tue, 05/29/2012 - 00:05

This is great!! I am planning something similar, but what is your idea or the plan you used for the middle support to keep it from sagging over time? My idea is to run another cubby in the middle from side to side. What do you think?

Laura Mulholland (not verified)

Mon, 01/21/2013 - 09:54

I love the modern craft table, just what I have been looking for, do you share instructions, dimensions, etc.? thanks, Laura

HapETexanGal

Thu, 05/12/2016 - 15:14

I'm loving this and would love to have FIL build it for me but the plans look like its for the regular modern craft table but not the tweaked?  Also is there support for the middle?  Can you send me a link for the tweaked supply list please, can't seem to find it.  Love what you do!

King Size Farmhouse Bed

Submitted by Anonymous (not verified) on Thu, 10/03/2019 - 13:02

This farmhouse bed is a combination of Ana White's Farmhouse Bed/Modern Farmhouse Bed plans as well as some slight modifications. I modified the bed using materials already on hand and leftover from past jobs. The 4x4 posts are 2 - 2×4s glued and filled together. The headboard was made using 2x2's and tongue and groove boards. The side rails, foot board and matress supports are 2x10's since this was old material from a job site my husband was on. I opted for no footboard to make the bed feel less bulky. The finish was done using chalk paint in a light gray, giving it a more modern look.

Estimated Cost
$200
Estimated Time Investment
Day Project (6-9 Hours)
Finish Used
The bed is a painted finish using Rust-Oleum Chalked in Aged Grey. The paint dries quickly allowing for two coats to be applied on the same day. Between coats, I lightly sanded the paint to remove any roughness. I find chalk paint to be durable and easy to apply. I opted not to apply a clear coat as our bed doesn't see a lot of wear and tear.
Recommended Skill Level
Beginner

Comments

Modern Park Bench

Submitted by TaylorMade on Tue, 03/08/2016 - 18:42

HI Ana! Just wanted to tell you thank you for sharing all your knowledge. I really got inspired reading your book and looking through your website. I was quite intimidated but I finally completed my first build. It feels amazing and I am so grateful for your help! XO Sarah Taylor

Built from Plan(s)
Recommended Skill Level
Intermediate

Comments

West Elm Bed Knockoff

Submitted by Anonymous (not verified) on Fri, 07/14/2023 - 13:00

We paired this bed frame with Nathan James upholstered headboard to replicate our favorite Airbnb we stayed at in Telluride. That bed was a $1300 from West Elm. Minus the tools, this bed came in around $500 for everything (including bedding).
Wood: Douglas Fir
Stain: American Walnut

Built from Plan(s)

Purple chicken ark w/ retractable wheels

Submitted by Anonymous (not verified) on Sat, 05/07/2016 - 16:59

We worked on this project on and off for a couple weeks.  60 degree angles were the hardest part.  Decided against adding upper coop floor to minimize cleaning.  Coop will only be used seasonally.  End coop is very heavy, so wheels were a must.  Scoured internet and found simple retractable lever design with bolts to adjust wheel height.  Very happy with project, thank you Ana!

Estimated Time Investment
Weekend Project (10-20 Hours)
Recommended Skill Level
Intermediate

Farmhouse Writing Desk

Submitted by Anonymous (not verified) on Fri, 10/06/2023 - 08:58

Brookstone desk with a white oak top and drawer that I built for my 8- yr old son. It is a very fun build.

Jerry from NC

Built from Plan(s)

Comments

mistycoruscate

Fri, 05/17/2024 - 02:11

Having a comfortable desk is very important to me. A comfortable desk helps me focus and increases my productivity. Plus, the best book review writing service gives me easy access to professional help to polish my resume and make it stand out. So if you're serious about landing that dream job, investing in a good desk and using Skillroads' services is a winning combination!

LuckyGirl

Fri, 05/17/2024 - 10:45

As a student, having a comfortable workspace is crucial for productivity. A farmhouse writing desk not only adds charm to my room but also provides a functional space for studying and writing. Plus, with the help of reliable essay writing services like the one recommended on https://www.clevescene.com/sponsored/the-best-essay-writing-service-202… I can focus more on my studies without worrying about looming deadlines. It's all about creating a conducive environment for academic success.

Providence Table

Here is my Providence Table made from scrap wood we had left from building our deck. I am not thrilled that it is made out of pressure treated wood but it is what it is. I used 2x6 mixed in with 2x10's for the top, 4x4's for the legs and used a 1/4 router bit for all the edges.

Built from Plan(s)
Estimated Cost
free from scrap
Estimated Time Investment
Afternoon Project (3-6 Hours)
Finish Used
It is still drying out but the plan is to paint the legs white and the top a stain color.
Recommended Skill Level
Intermediate

Comments

Cedar Planter Outdoor Speakers

Submitted by Hoosierdoc on Fri, 06/10/2016 - 10:53

We just put in a pool and I needed something to hide a pair of outdoor speakers. I used Klipsh AW-525 speakers.

Basically I raised the bottom of the planter enough to fit the speaker under and had to add a few framing pieces to secure the speaker mount to. The mount attaches to a vertical board and the weight rests on a horizontal board. The wiring comes up from below.

The front panel uses vinyl mesh from Sailrite.com to hide the speaker but allow sound out. Imm planning to hang it with magnets if it doesn't distort sound too much.

Built from Plan(s)
Estimated Time Investment
Afternoon Project (3-6 Hours)
Recommended Skill Level
Beginner

Comments

OutDoor dining table

My wife and I were looking for a larger table for our deck and after searching and seeing that everything out there was 300 dollars and up for something decent I decided I would try building something. This table was perfect for our needs and looked easy enough for me to put together. The most time consuming part was staining all of the boards as I went but it was totally worth it in the end. I also deviated from using screws and used my nail gun along with some glue to put the top frame together and the slats on but I did use some 2inch deckmate screws to attach the legs. One problem I did run into was I was about half a board short on the slats which wasn't a big deal just ripped one on the table saw, not sure if I miss measured or what but either way. We love our table and will entertain around it for years to come.

Built from Plan(s)
Estimated Cost
Around 80 Dollars
Estimated Time Investment
Day Project (6-9 Hours)
Finish Used
I used a Behr deck stain that was solid the color is called Russett and I did with a 3inch brush.
Recommended Skill Level
Beginner

4x4 Truss Beam Table

Submitted by Anonymous (not verified) on Mon, 06/22/2020 - 14:44

I followed this plan to create our new dining table and bench. I went with a distressed chalk paint for the base, and the top is made from 100 year old douglas fir barn rafters. They look great with our blue/white cafe chairs. Thanks for the great plan!

Estimated Cost
$400 (mostly from purchasing the reclaimed rafters)
Estimated Time Investment
Week Long Project (20 Hours or More)
Finish Used
Behr Chalk Paint and Dark Wax on Base, combination of Special Walnut and Oaked Grey stain on Top, matte poly
Recommended Skill Level
Intermediate

Sand Box

We adjusted the plan and created a 4x7 sand box with toy box and canopy. We are in love with the way this has turned out!

Estimated Cost
300
Estimated Time Investment
Weekend Project (10-20 Hours)
Recommended Skill Level
Intermediate

Comments

Floor to Ceiling Canned Food Storage

Submitted by Anonymous (not verified) on Fri, 04/19/2024 - 13:56

Loved these plans. Top unit was built exactly to specs. Bottom unit was built to accommodate one column of cans. I have also built one for my sis-in-law and will be building one more for this pantry. Love this project!

Leah

Built from Plan(s)
Back