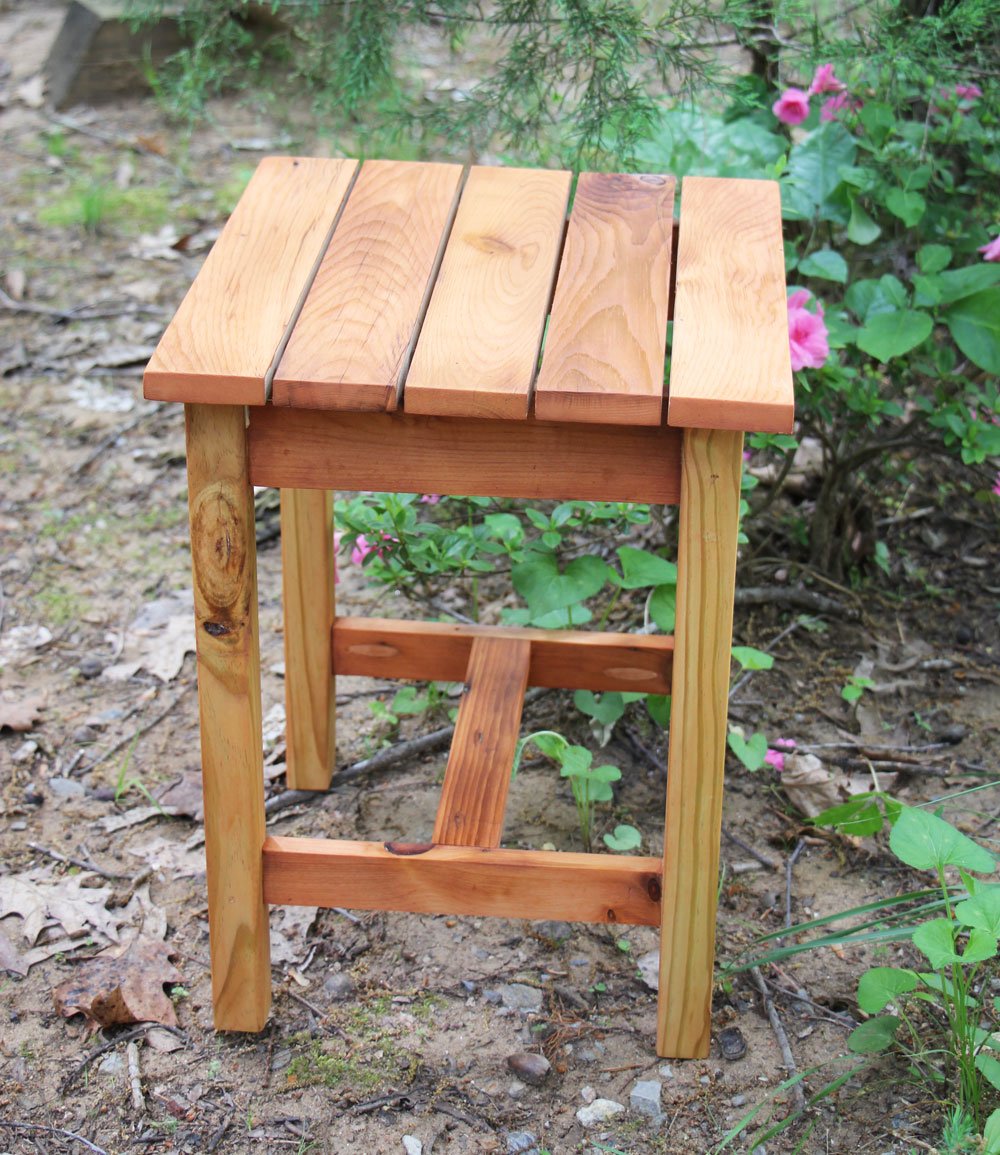
Bench Planter

This build was also a lot of fun! I made an extra brace to hold the wait of two sitting on the bench. Thanks again Ana for your plans!
David Marks
Built from Plan(s)
This build was also a lot of fun! I made an extra brace to hold the wait of two sitting on the bench. Thanks again Ana for your plans!
David Marks
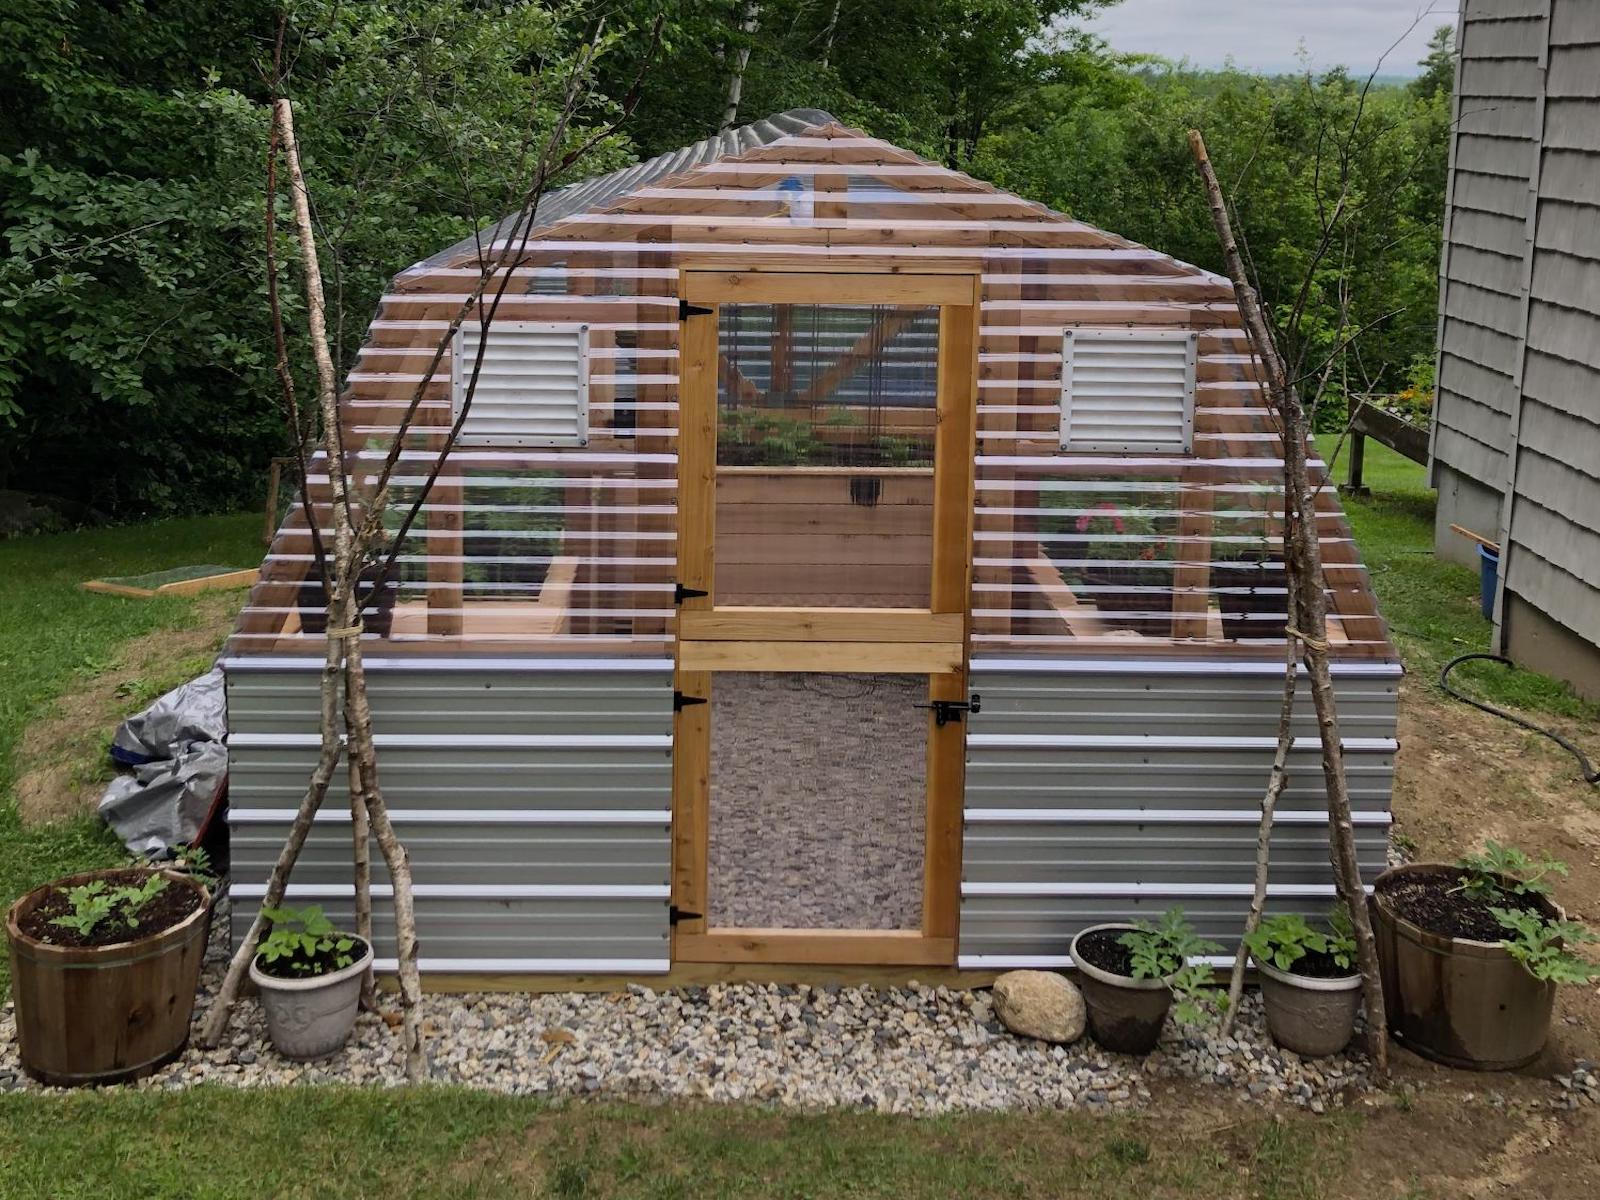
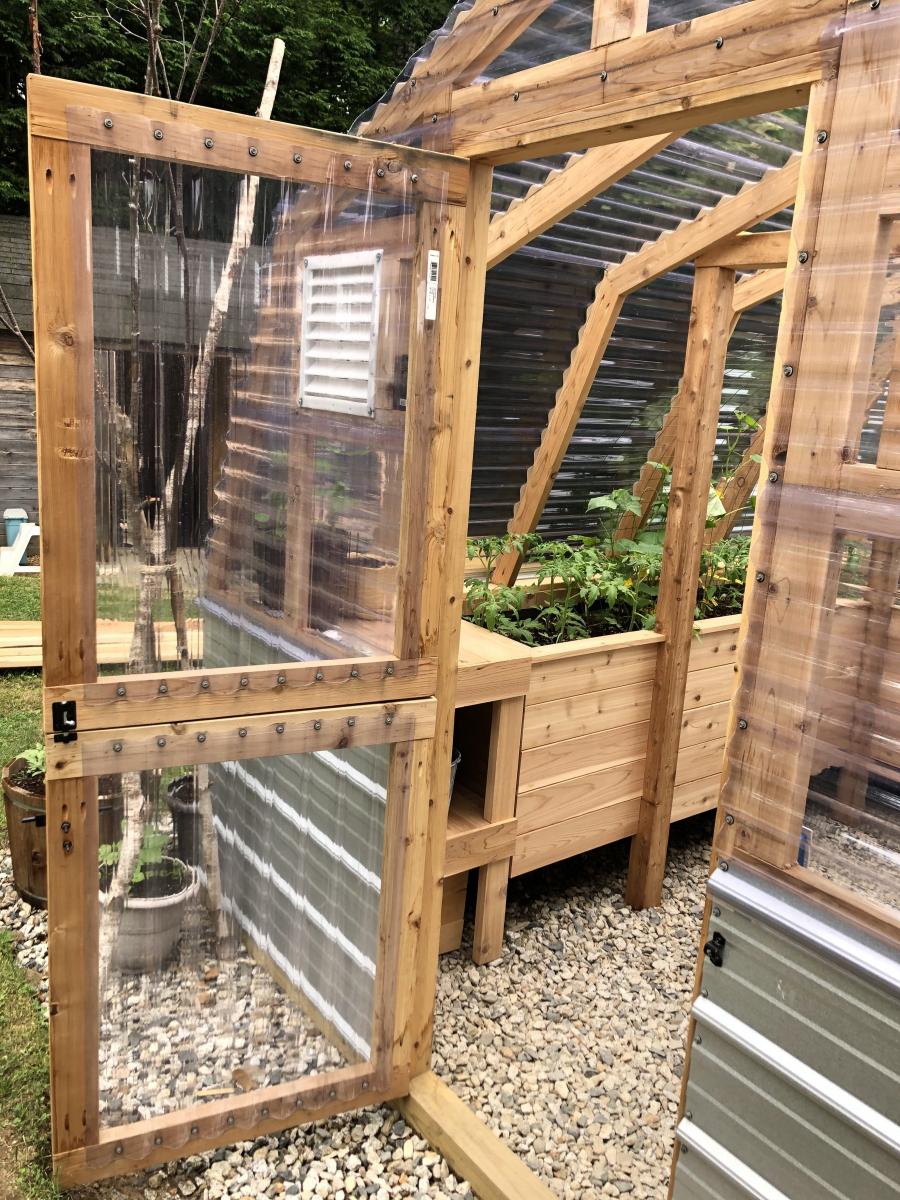
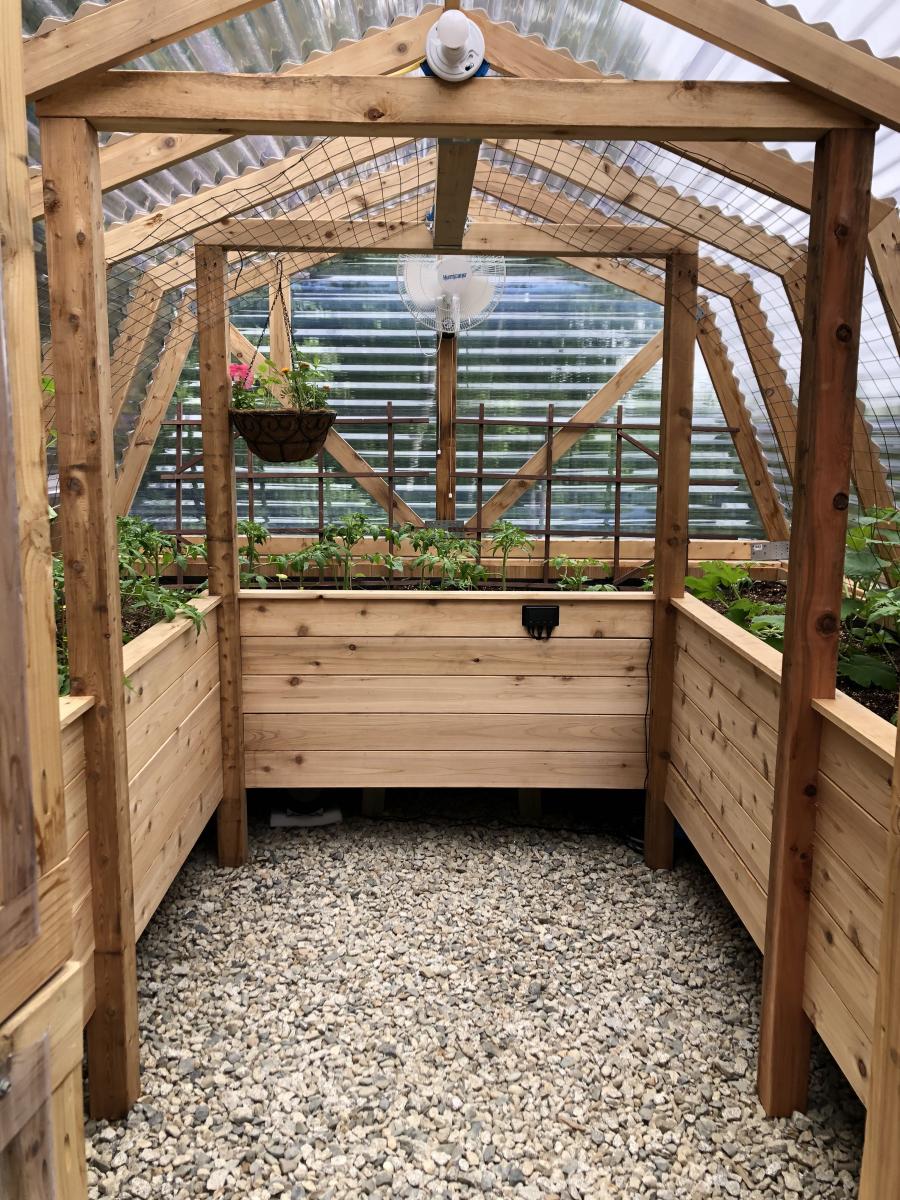
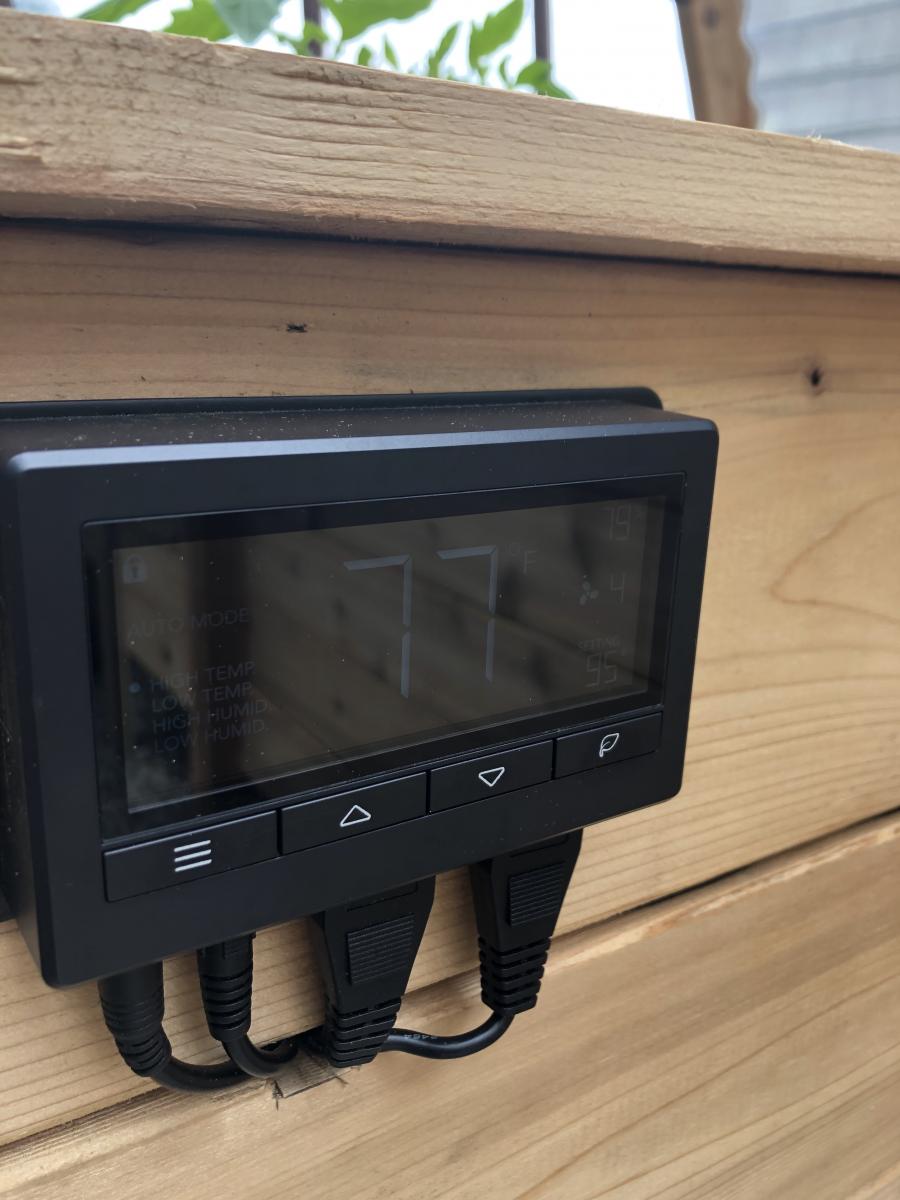
We loved this greenhouse plan from AnaWhite and wanted to be able to grow in 3 seasons so we modified the design to include humidity & temperature control & 18" deep elevated cedar beds inside with 4x4 posts for support and trellis option. We added electricity in order to have a lighted workspace and the ability to put in a circulating fan to control mold and fungus. We added 2 work tables (2x2') on the inside of the door left and right side door in order to do seed trays & store supplies. This was a wonderful project for my husband and my plants inside are doing incredibly well compared to my outside garden beds here in zone 5. Products used:
Foundation
We had a landscape company come and scape/dig a platform and then fill/compact with crushed rock
My husband then used rebar driven into a 4x4 frame in order to secure the frame to the ground and create a base upon which to build the greenhouse
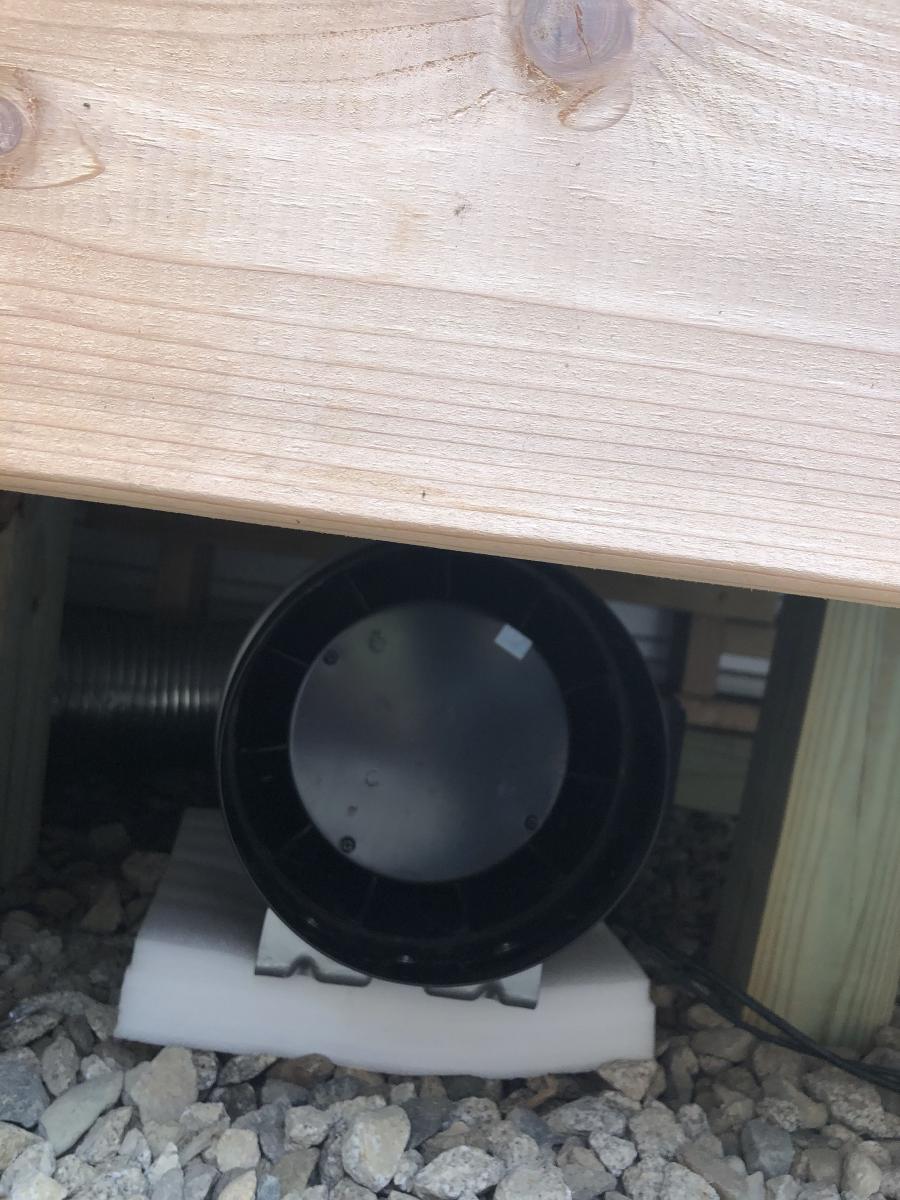
Active ventilation
AC Infinity Cloudline T8 Inline duct fan
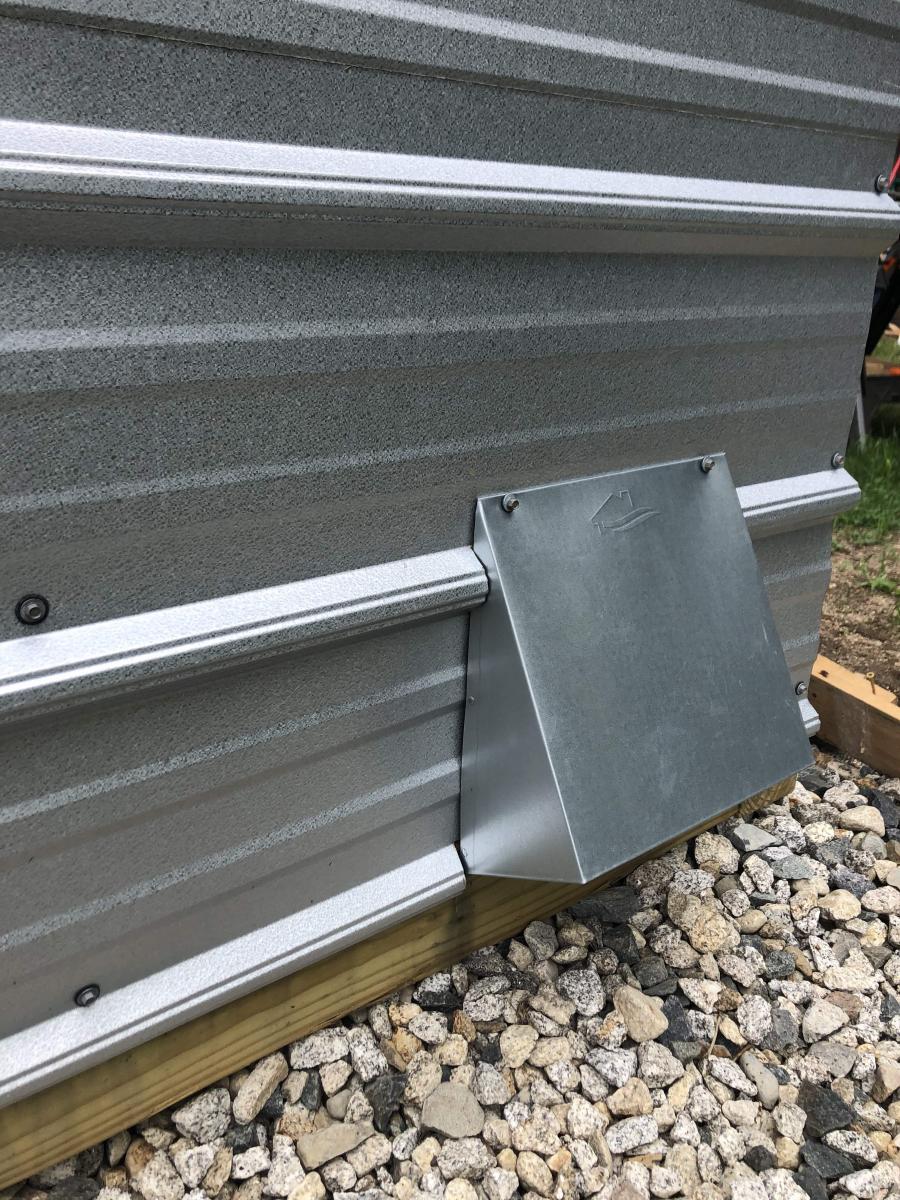
Air king range hood wall cap 8" on the bottom outside of the greenhouse wall for air intake + flex 8" duct to the fan itself
Shelter logic autovent automatic shelter vent kits (1 on each side of the front wall) in order to allow air intake from the bottom back of the greenhouse under the elevated beds to flow to the front of the greenhouse and out
Circulating fan- Hurricane wall mount fan 16" - this fan has 3 speeds with tilt function and small mounting bracket
Soil - sourced 3 yards of 50/50 loam/compost from local landscaping supply
60% loam
30% organic compost
10% organic topsoil + perlite
Soil beds
-cedar frame 2 feet wide along sides, 3 feet wide on the back wall
-galvanized metal roofing with holes drilled into it for drainage
-landscape cloth lined
Wed, 09/09/2020 - 13:09
Thanks for that update! I was wondering how to vent this project, as Green houses need the ventilation. Good to know dollar amount also. Great photos.
Wed, 09/09/2020 - 13:09
Thanks for that update! I was wondering how to vent this project, as Green houses need the ventilation. Good to know dollar amount also. Great photos.
Wed, 09/09/2020 - 13:09
Thanks for that update! I was wondering how to vent this project, as Green houses need the ventilation. Good to know dollar amount also. Great photos.

I made these modern Adirondack chairs for our business in Anchorage. GREAT and easy to build design by Ana - we upgraded the arms to tapered 2x6 and they're awesome!


This was an easy project to complete in an afternoon that does not require any advance woodworking skills


Wed, 11/26/2014 - 12:19
This project looks even better than mine! I love look with paint! Well done!
Wed, 12/10/2014 - 09:41
This is my second completed project with plans and ideas from your website. Thanks for your good work!

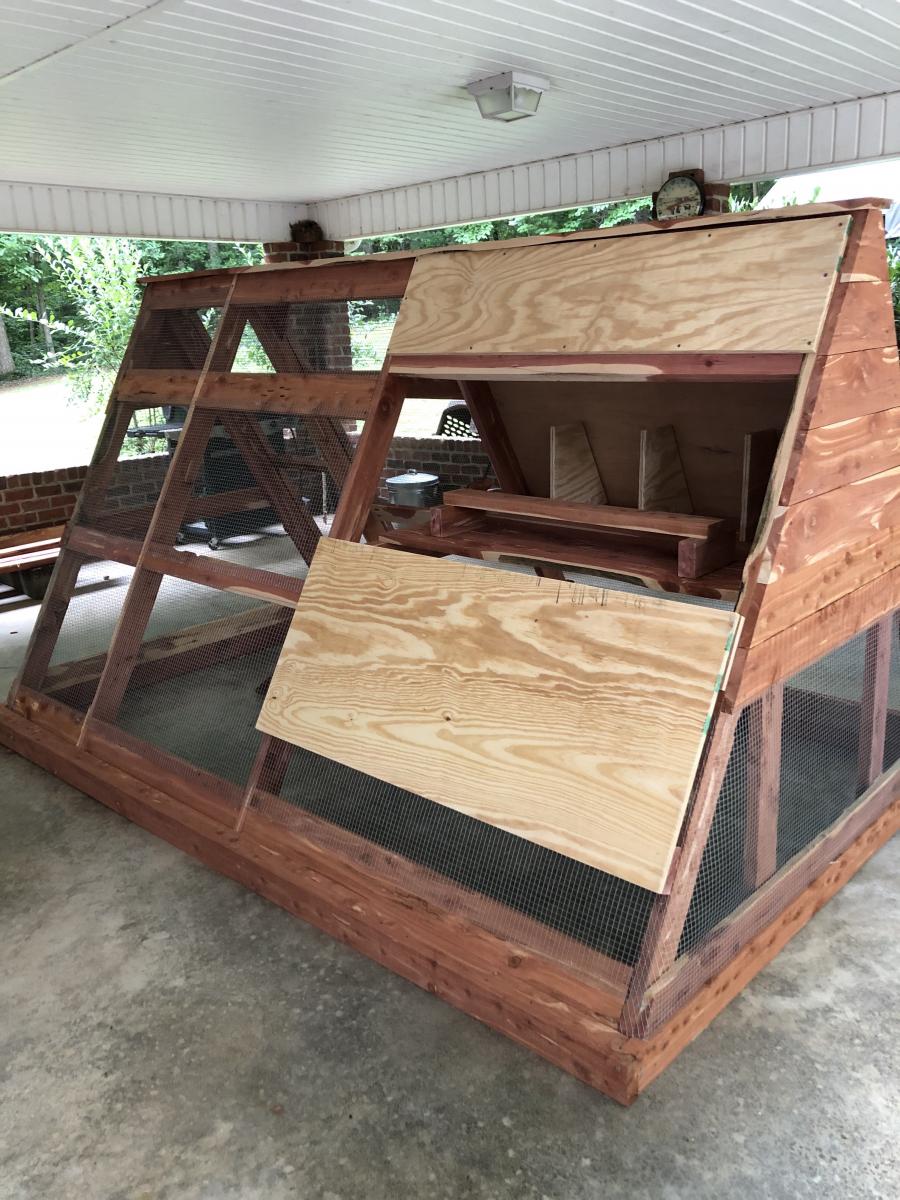
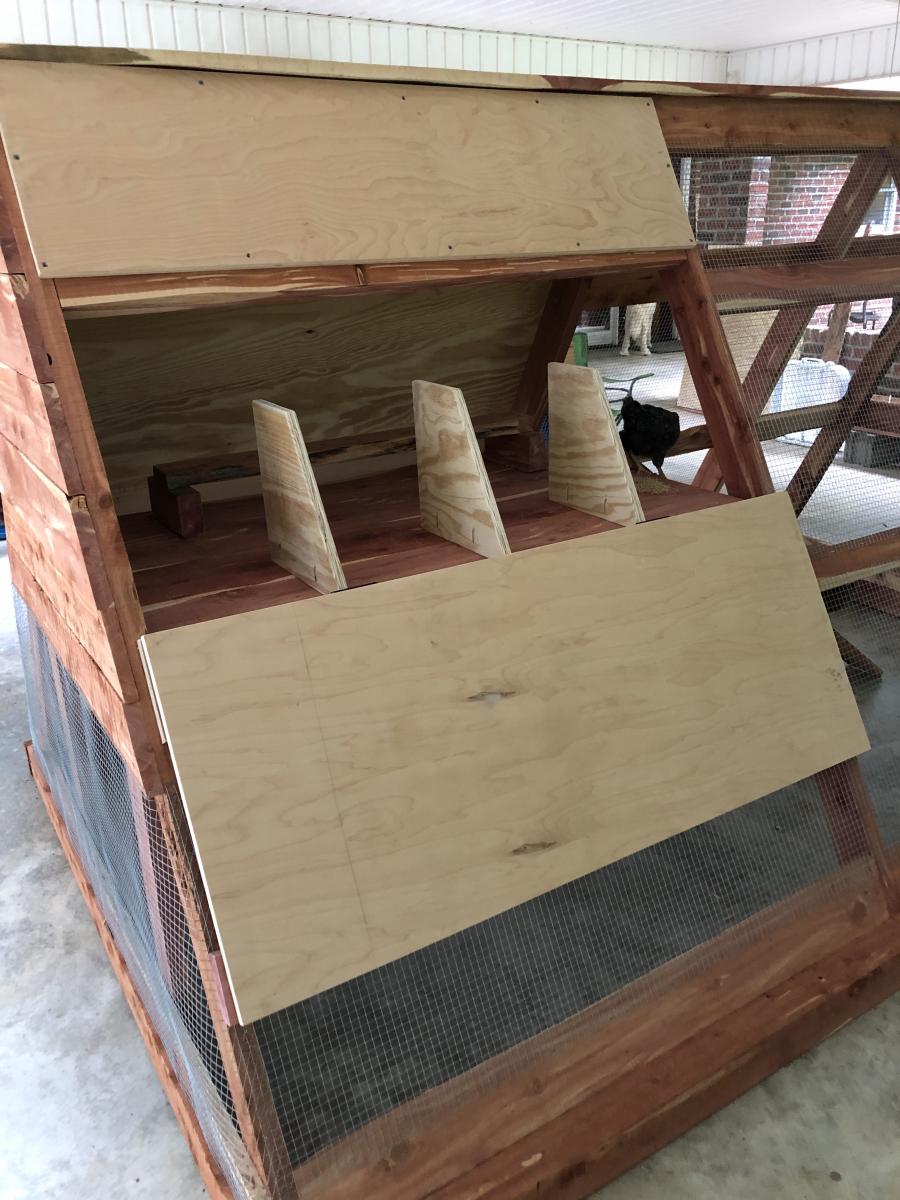
A frame chicken coop with a few modifications- metal roof, insulation and slightly larger second floor.
By Chrystal
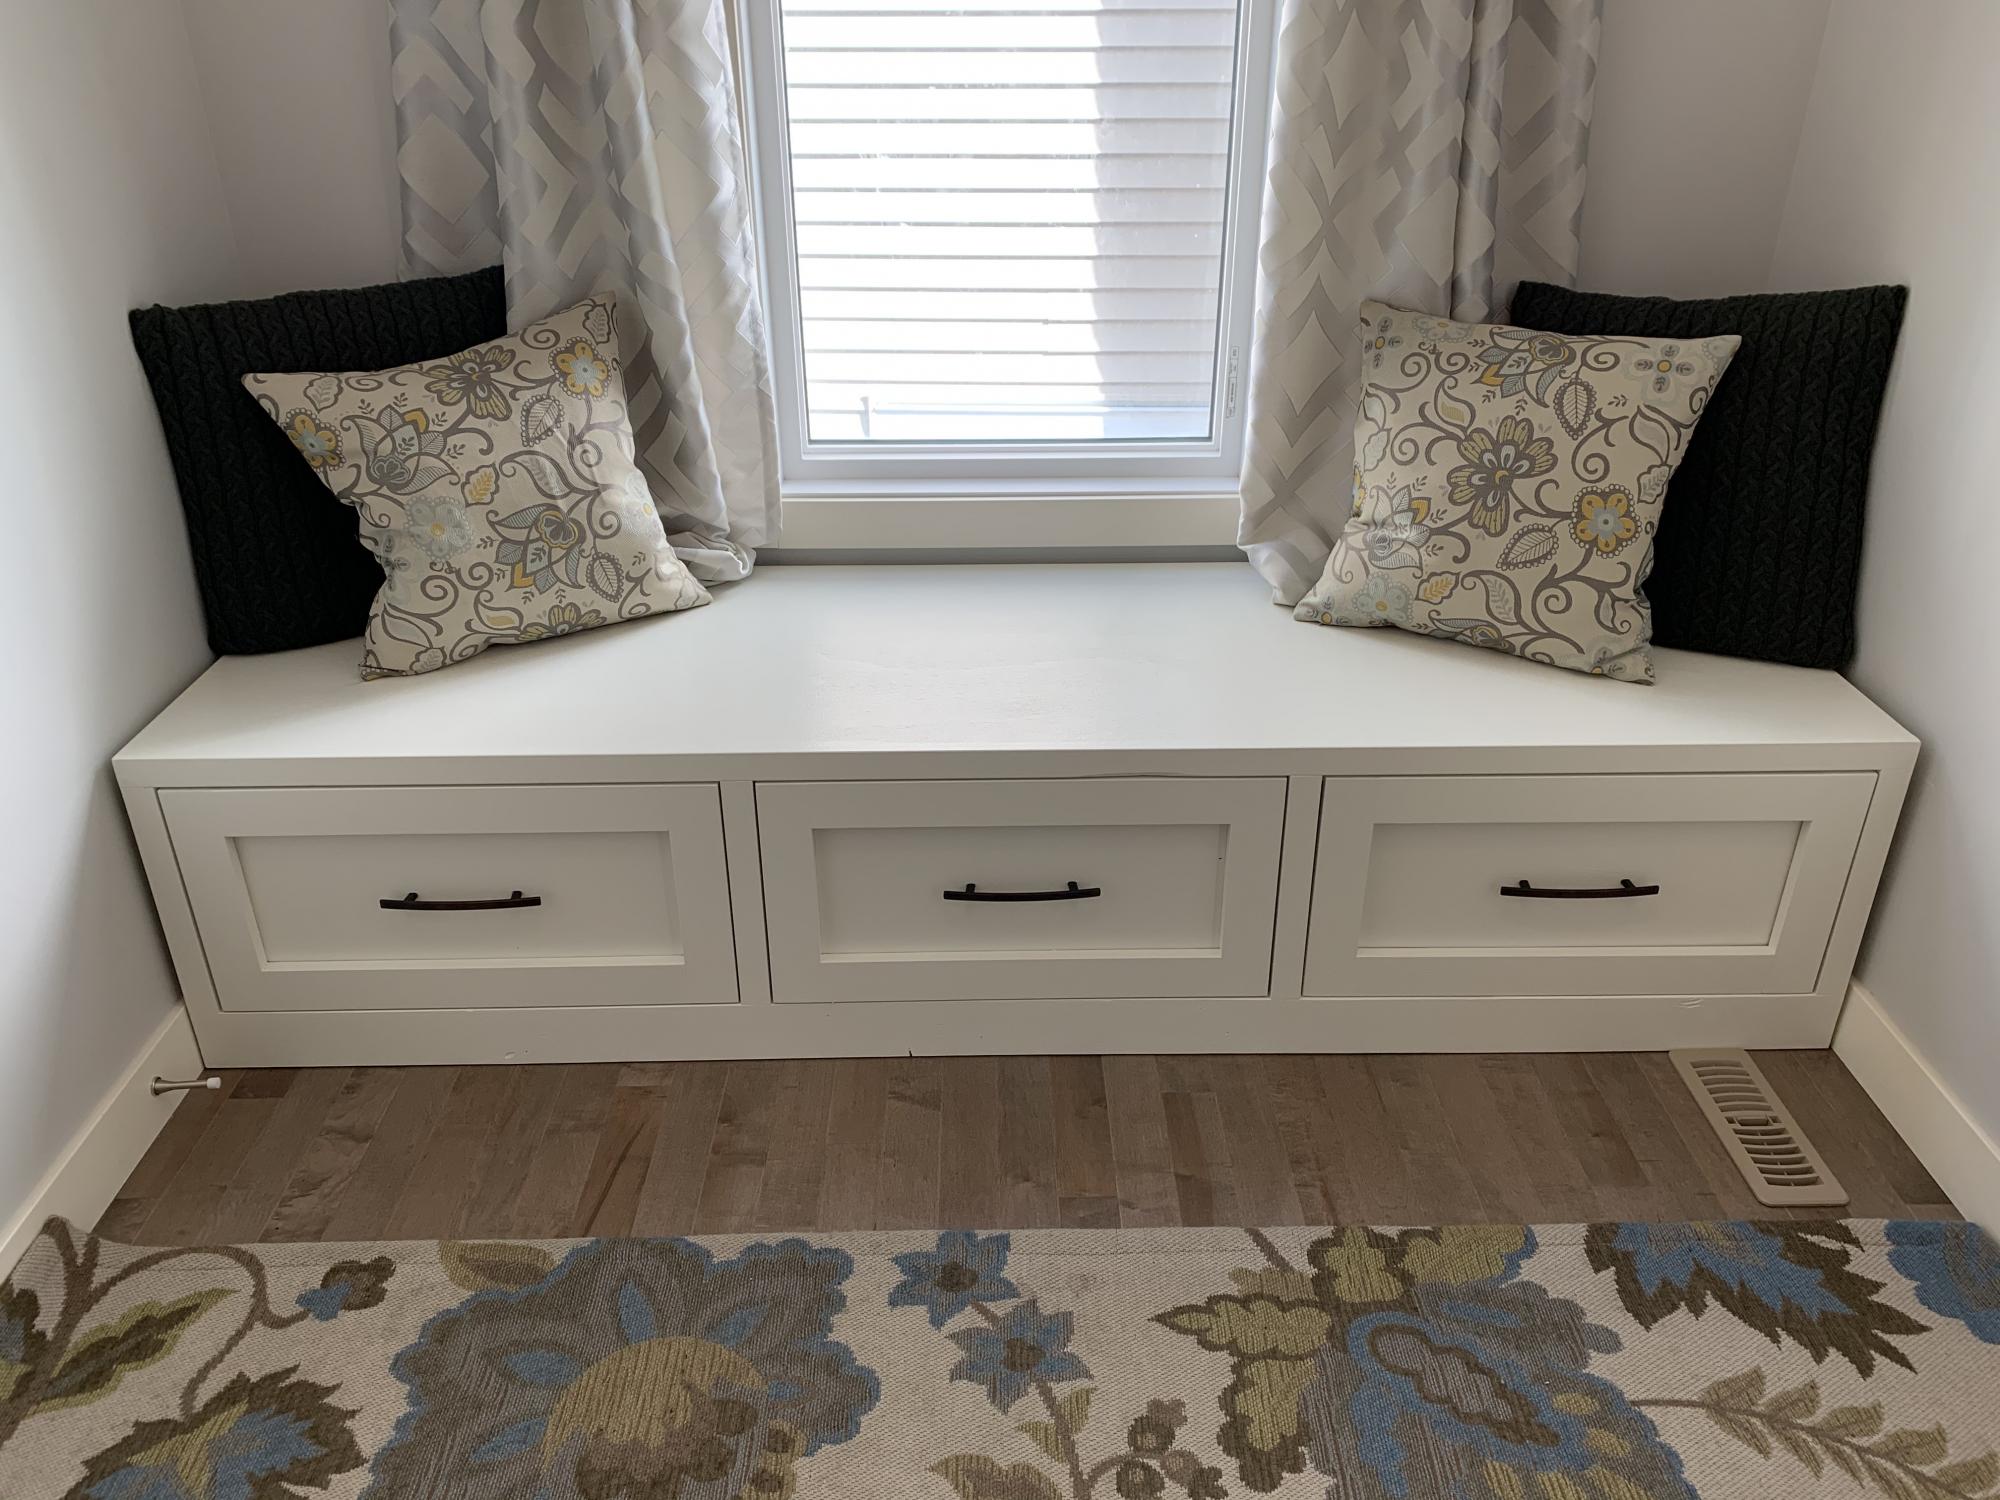
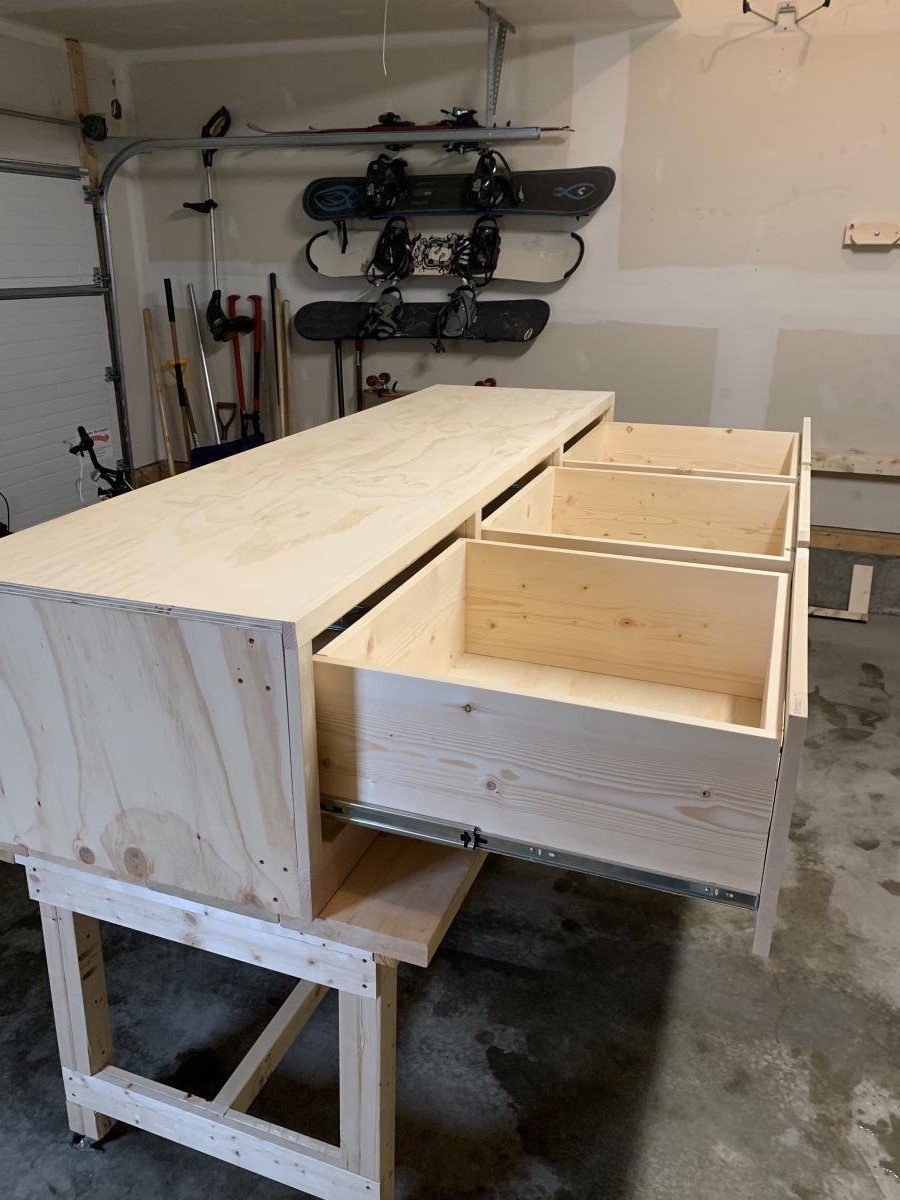
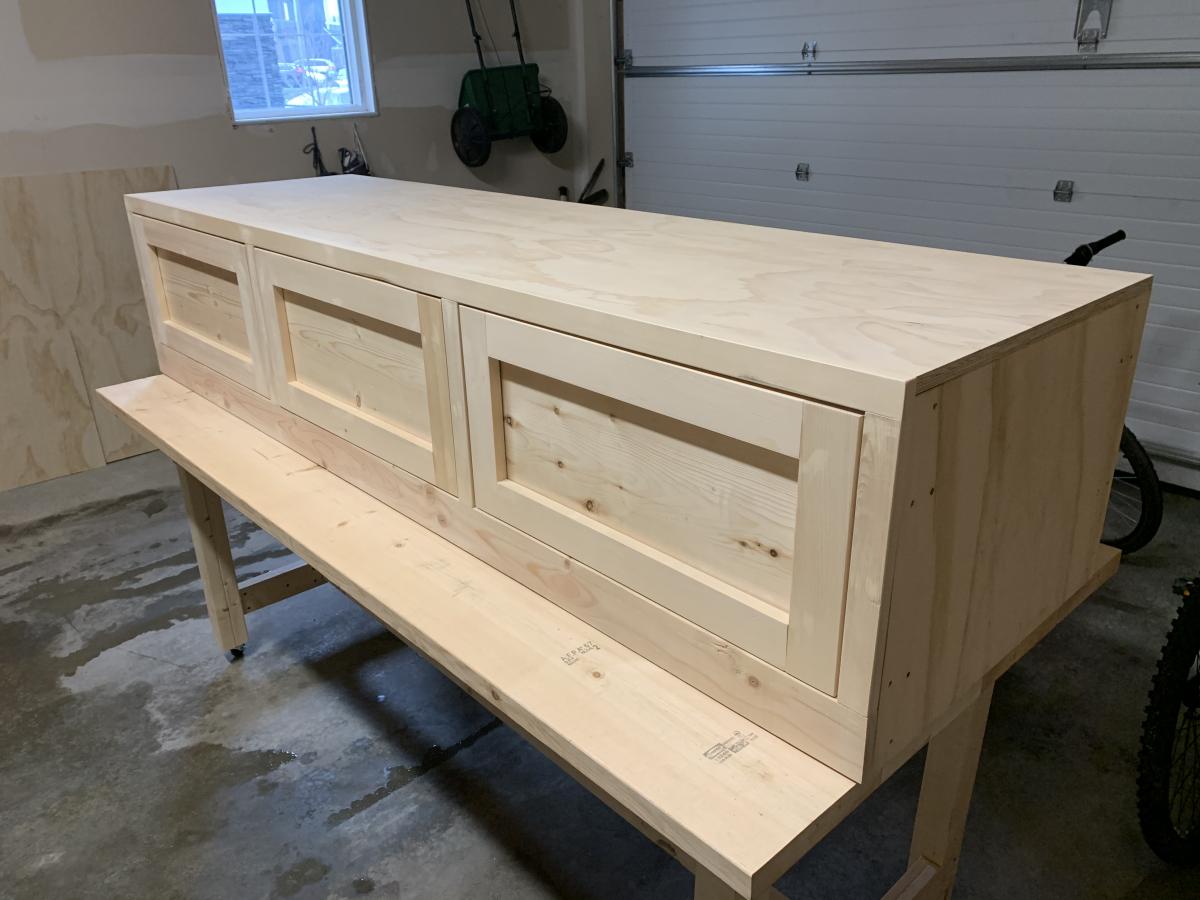
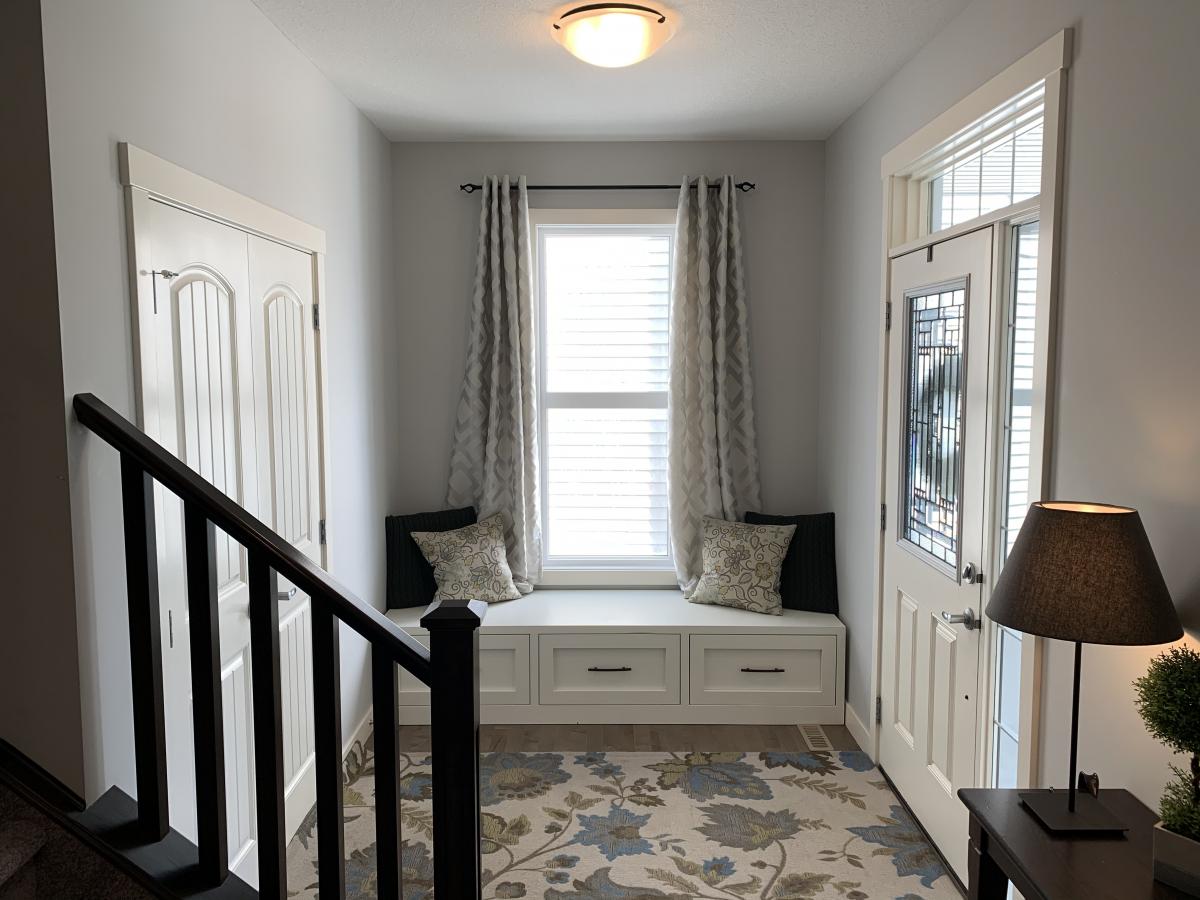
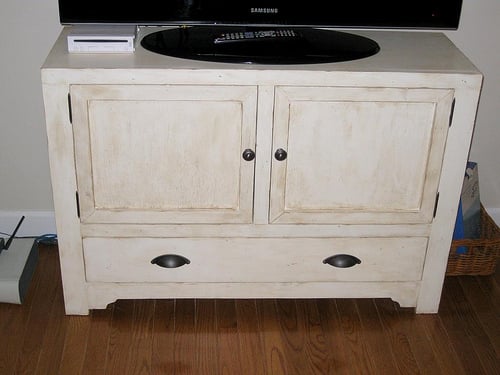
We needed a bench to fill the space in our front entry and provide some storage for seasonal gear. We couldn't find anything to buy that would work for us, so when my wife found these plans, I had to try it! Couldn't be happier with the results. We widened the bench by a foot to 84" to fill the space. Basically, it just made each drawer 4" wider. Everything else was built to plan. The most expensive thing was the soft-close 24" drawer slides (~$100). As soon as you go above that 24" depth, they get pricier! It was also tricky to get the drawers to catch properly on the soft-close mechanisms, but I made sure to take the time to get it right before closing it all in. Now I just open and close the drawers for the pure satisfaction of it! I used premium pine plywood for the top and I find it still doesn't give that smooth finish I like, even after sanding. I think I'll create a new top out of joined knotty pine planks later and just attach it to the top.

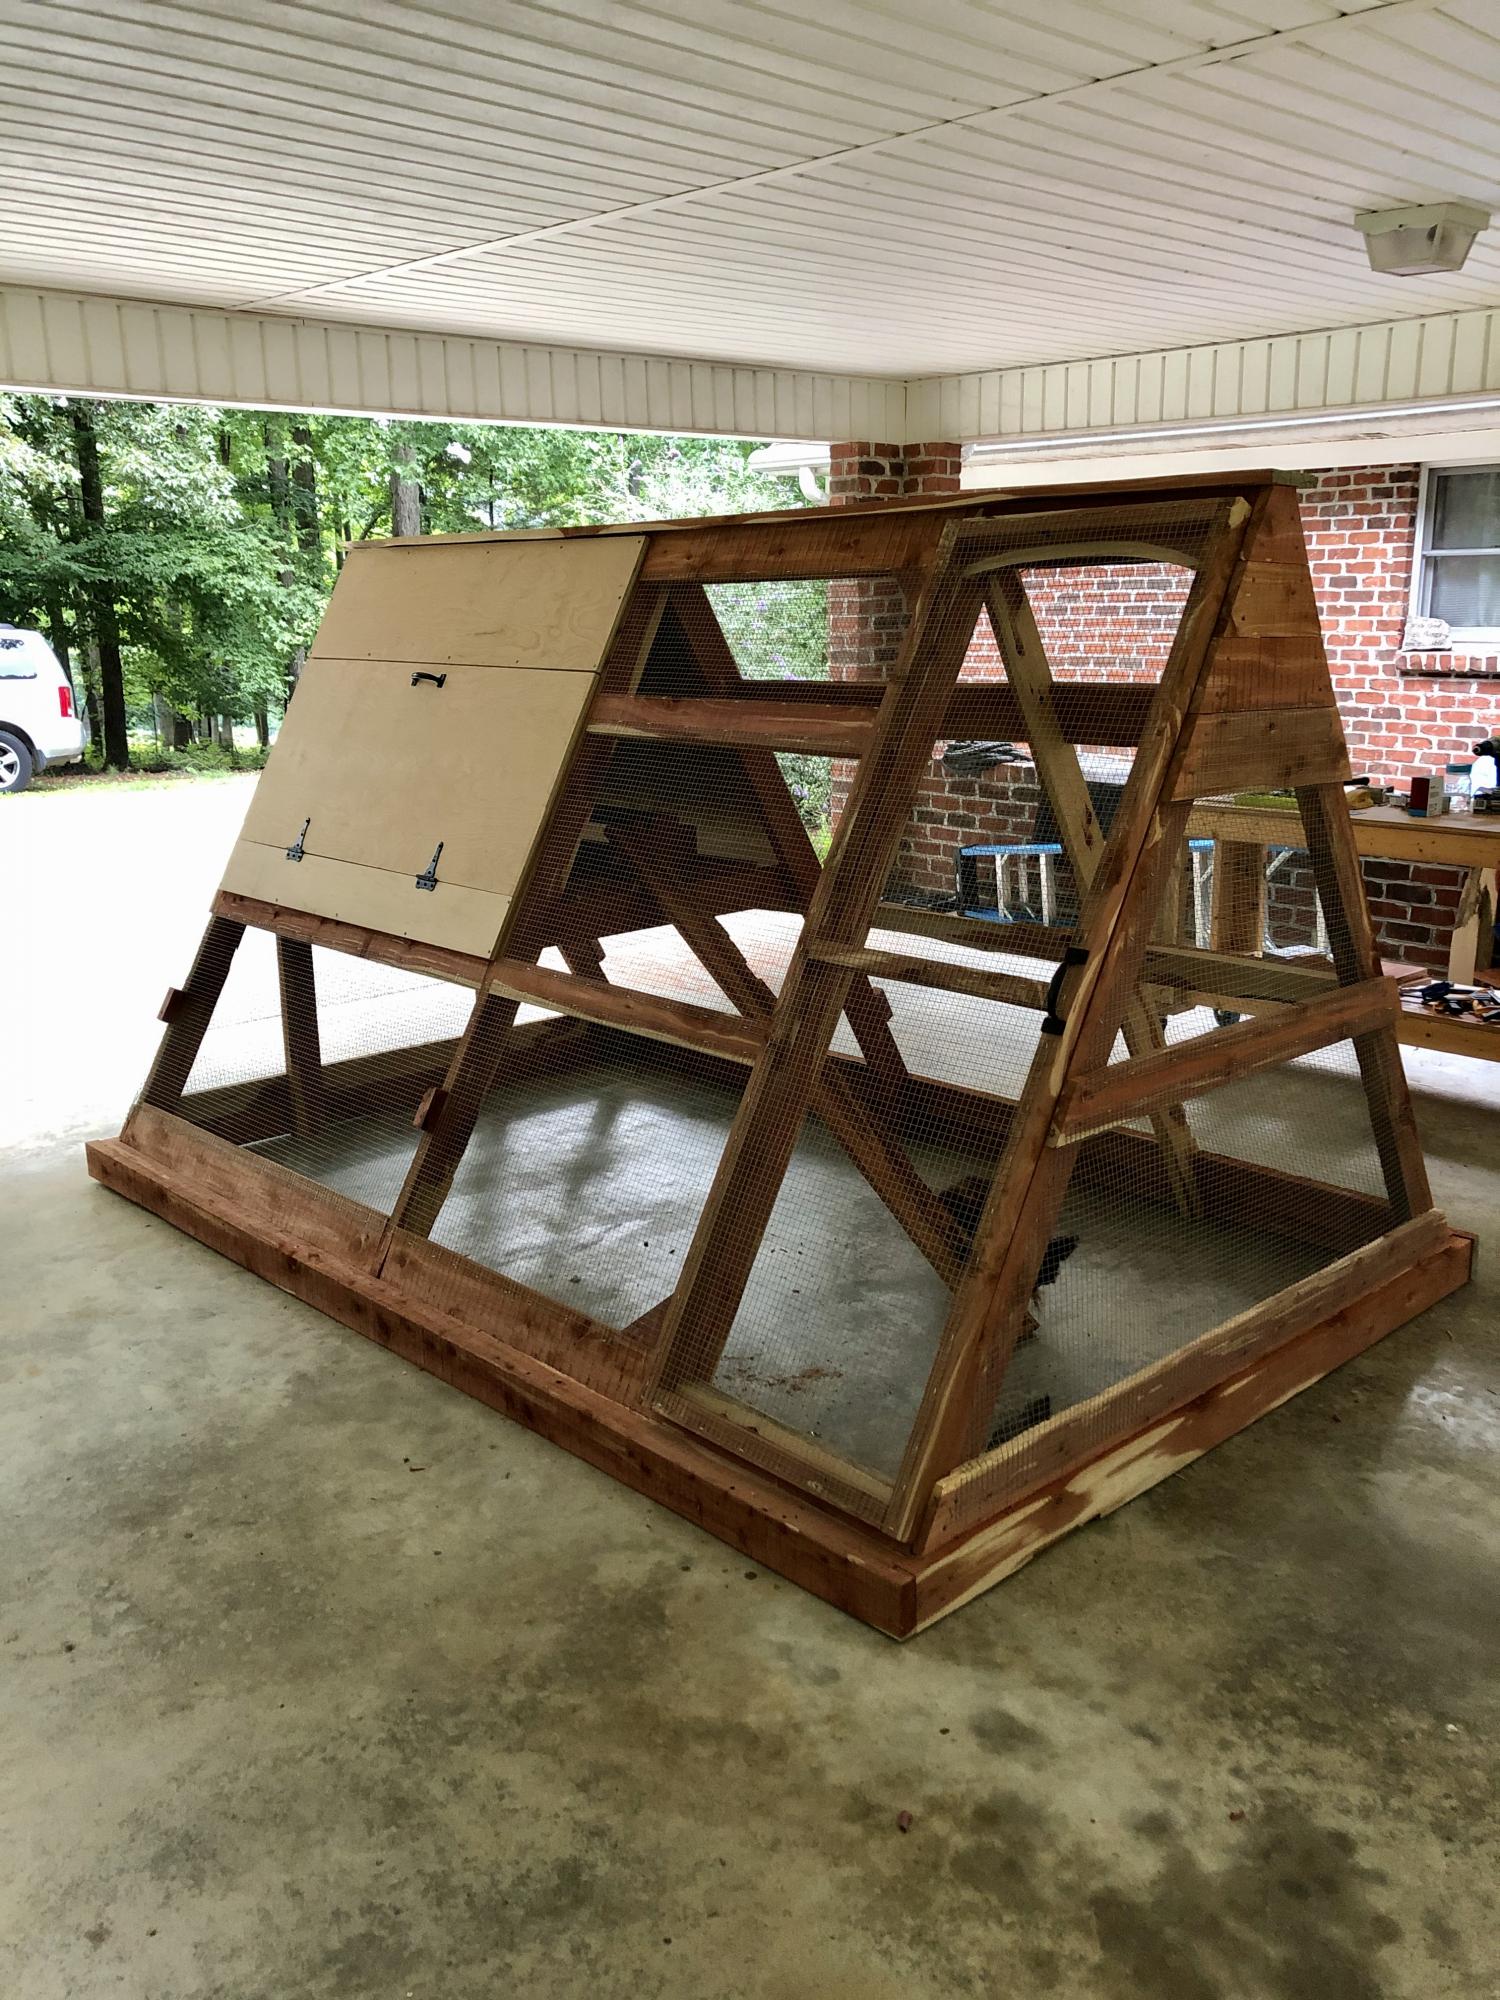
This was my biggest build yet and these plans along with being able to see a few brag posts with modicifactions made this project less intimidating. I extended the coop in order to add a walk in door. The drop down doors on both sides will give plenty of access and help with cleaning. I've added door latches to all the doors since putting it in place. My dad provided the cedar so that greatly reduced my costs. This project took about six days to complete. The fun part was getting it out of my carport : ) This was built for my daughter's chickens and she is thrilled with it. So am I! Thanks for the plans Ana!
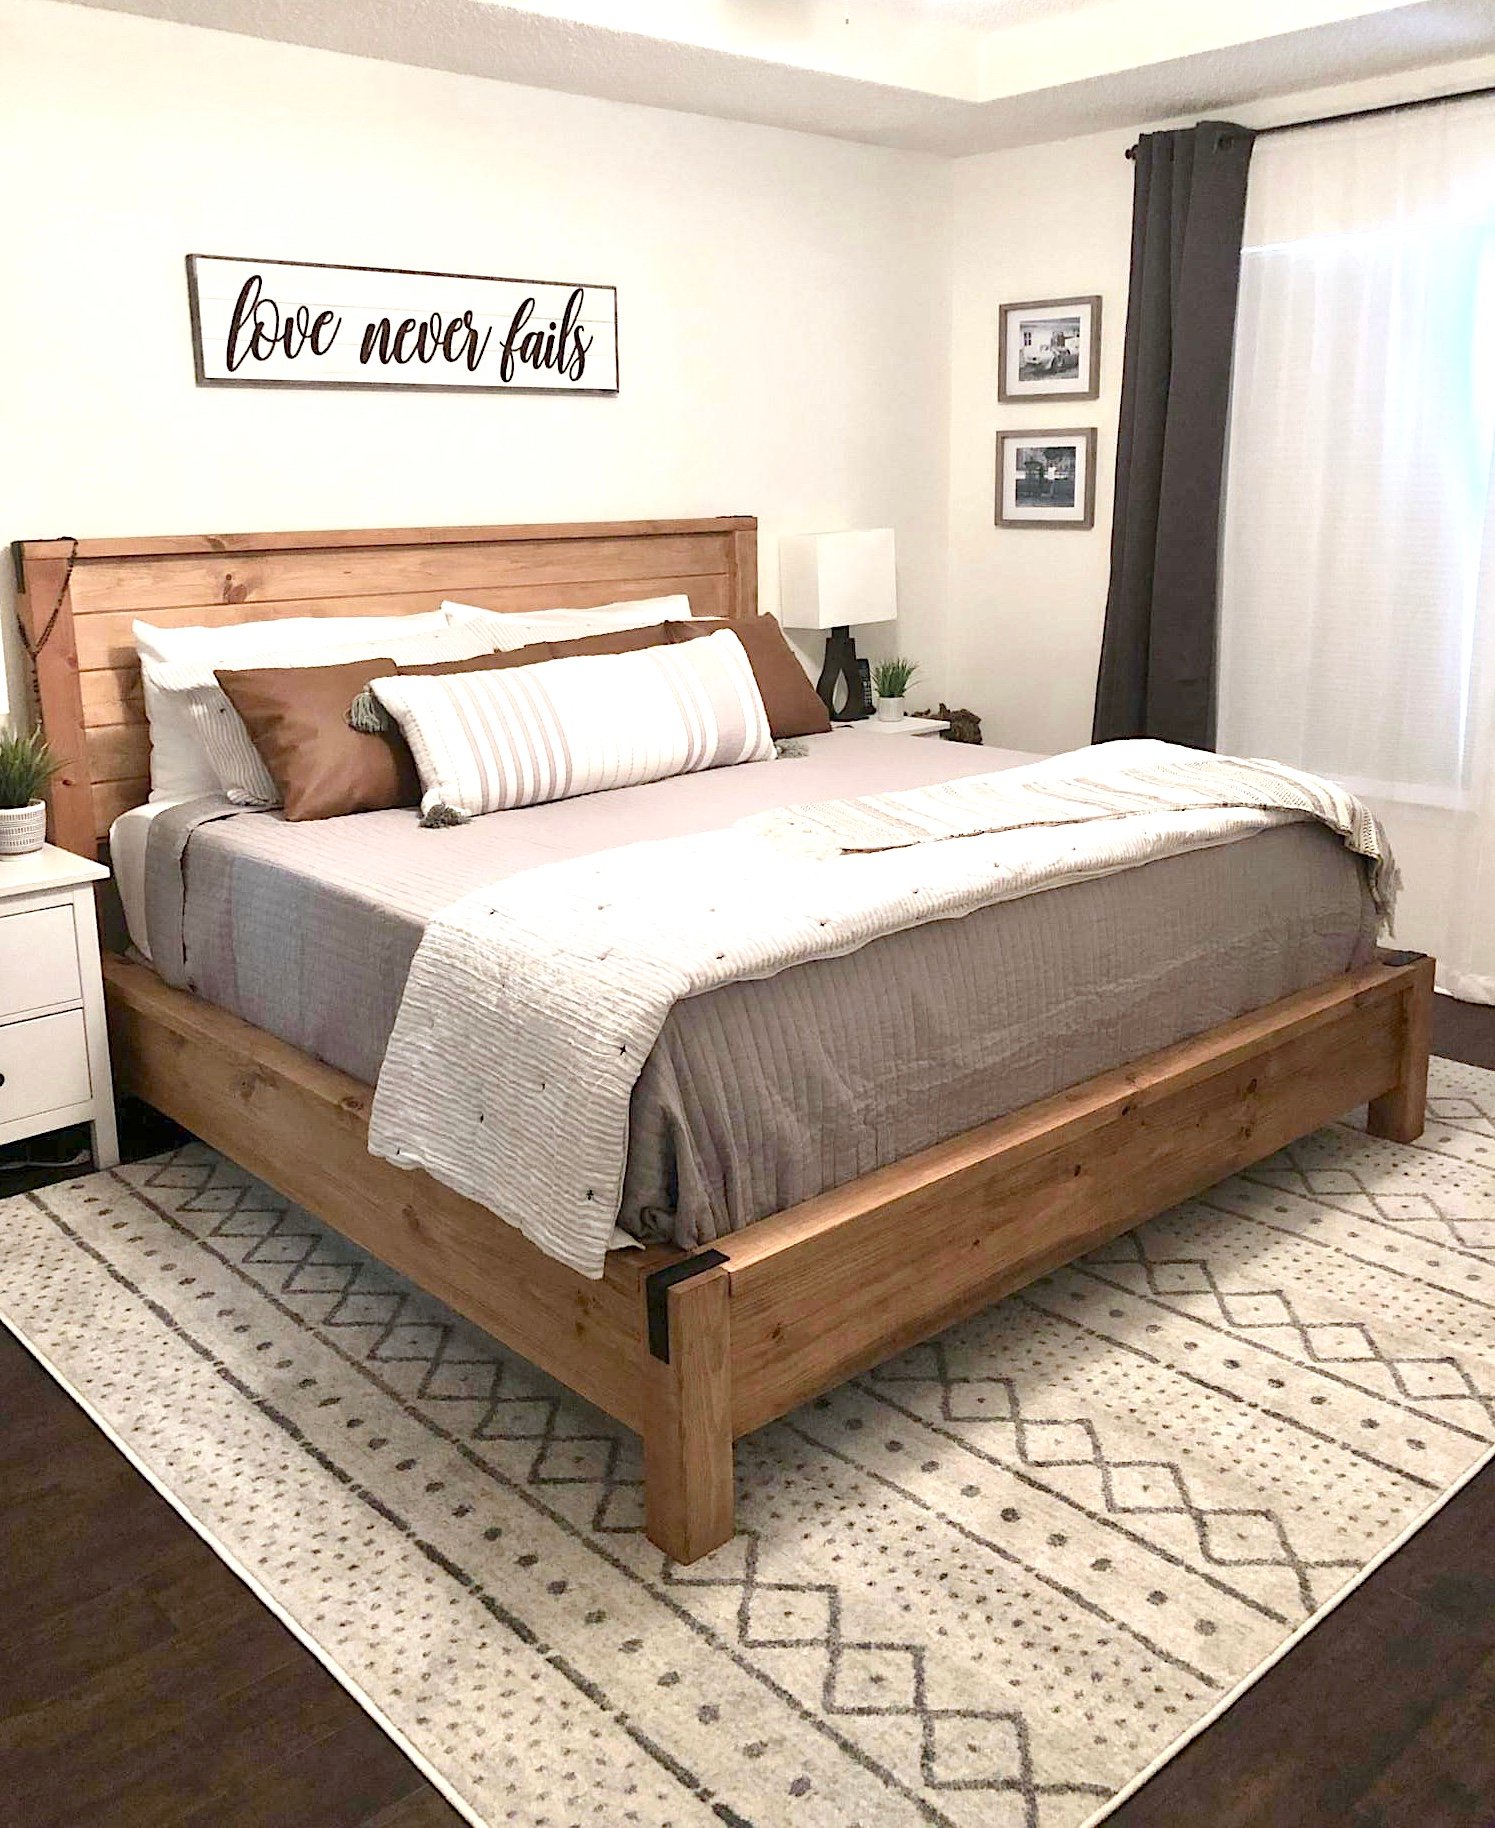
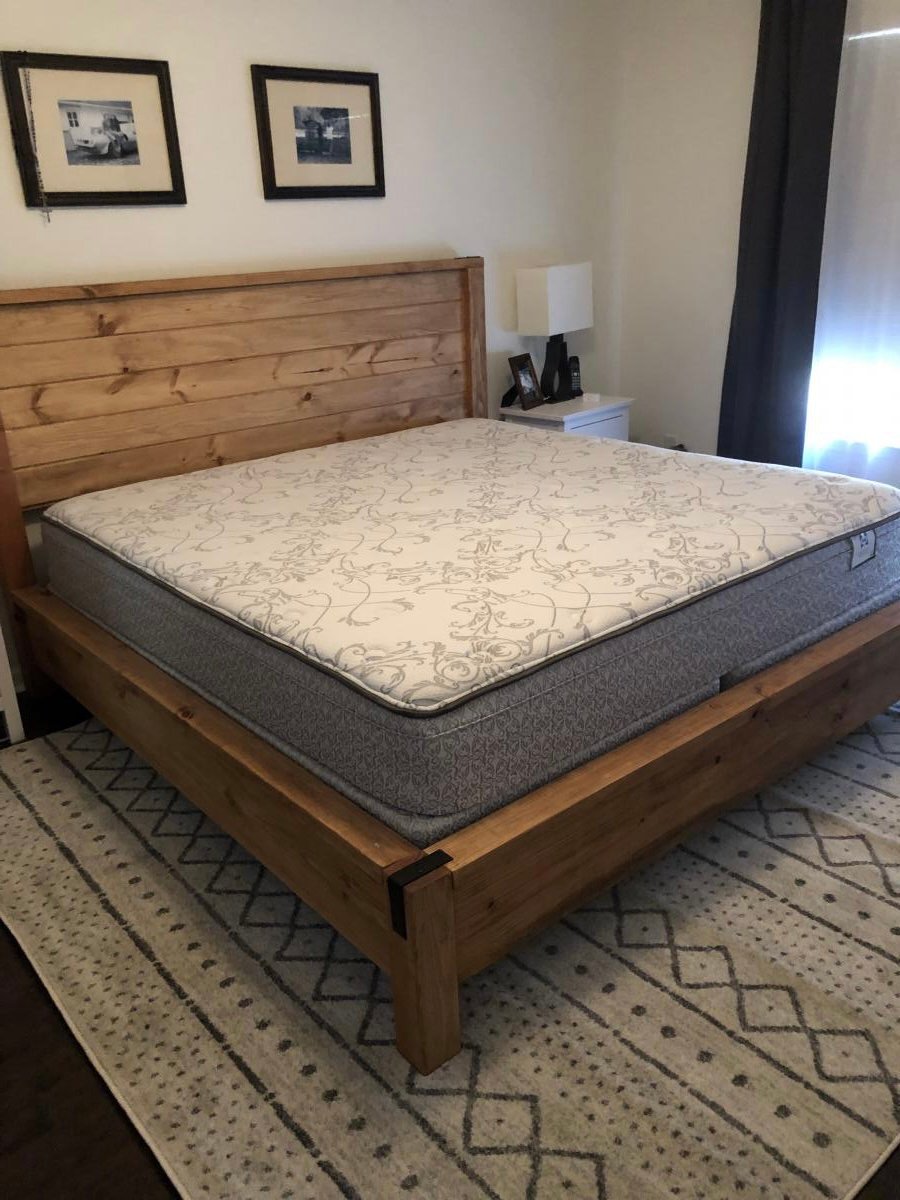
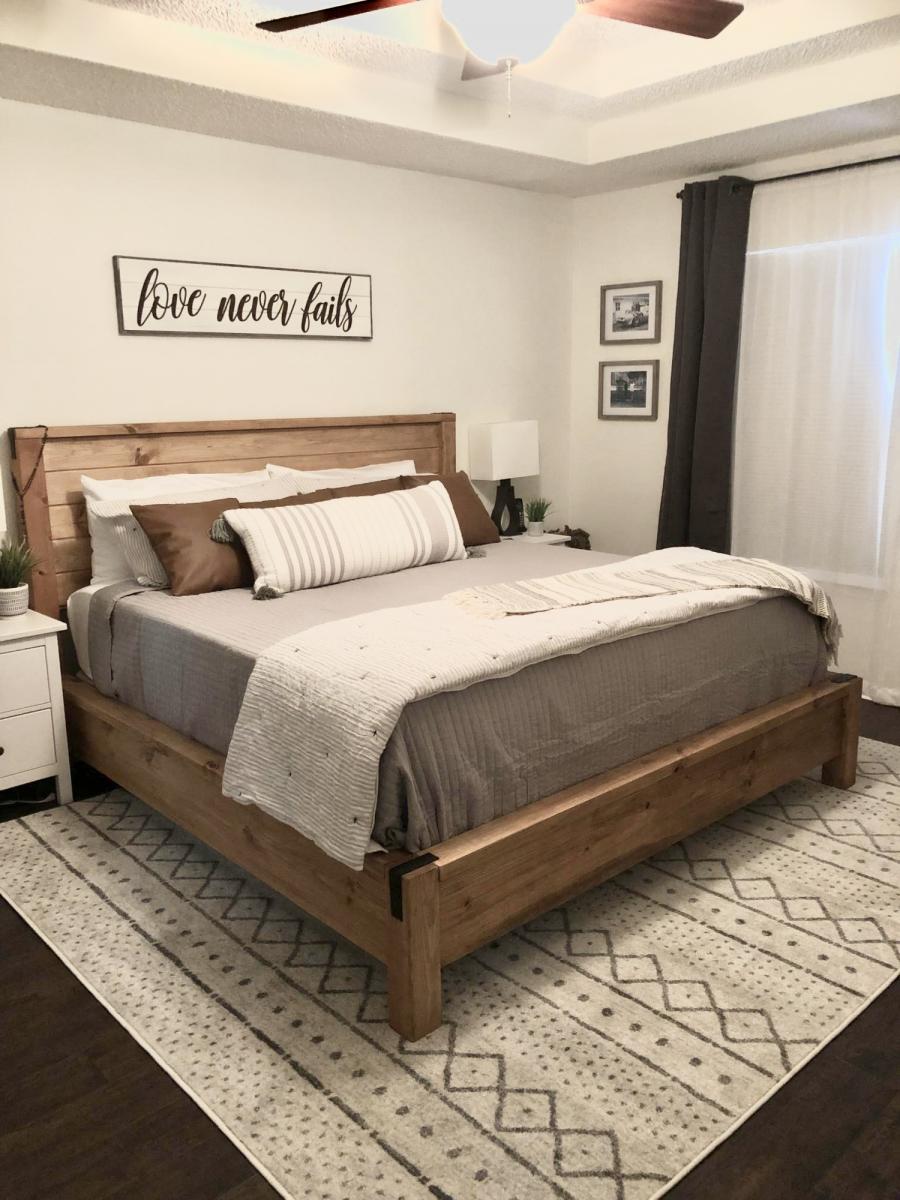
Made this bed from Ana's plans. Modified it with rail so I can add my box spring. Cost was approximately $160 for lumber, screws and stain. Absolutely loved the plans and easy to follow or modify if needed.
Tue, 02/23/2021 - 20:12
This is gorgeous! Is there anyway you could post your modifications? Very nice work!!!

Modified the design to allow me to roll lawnmower directly in the end. Fun project.
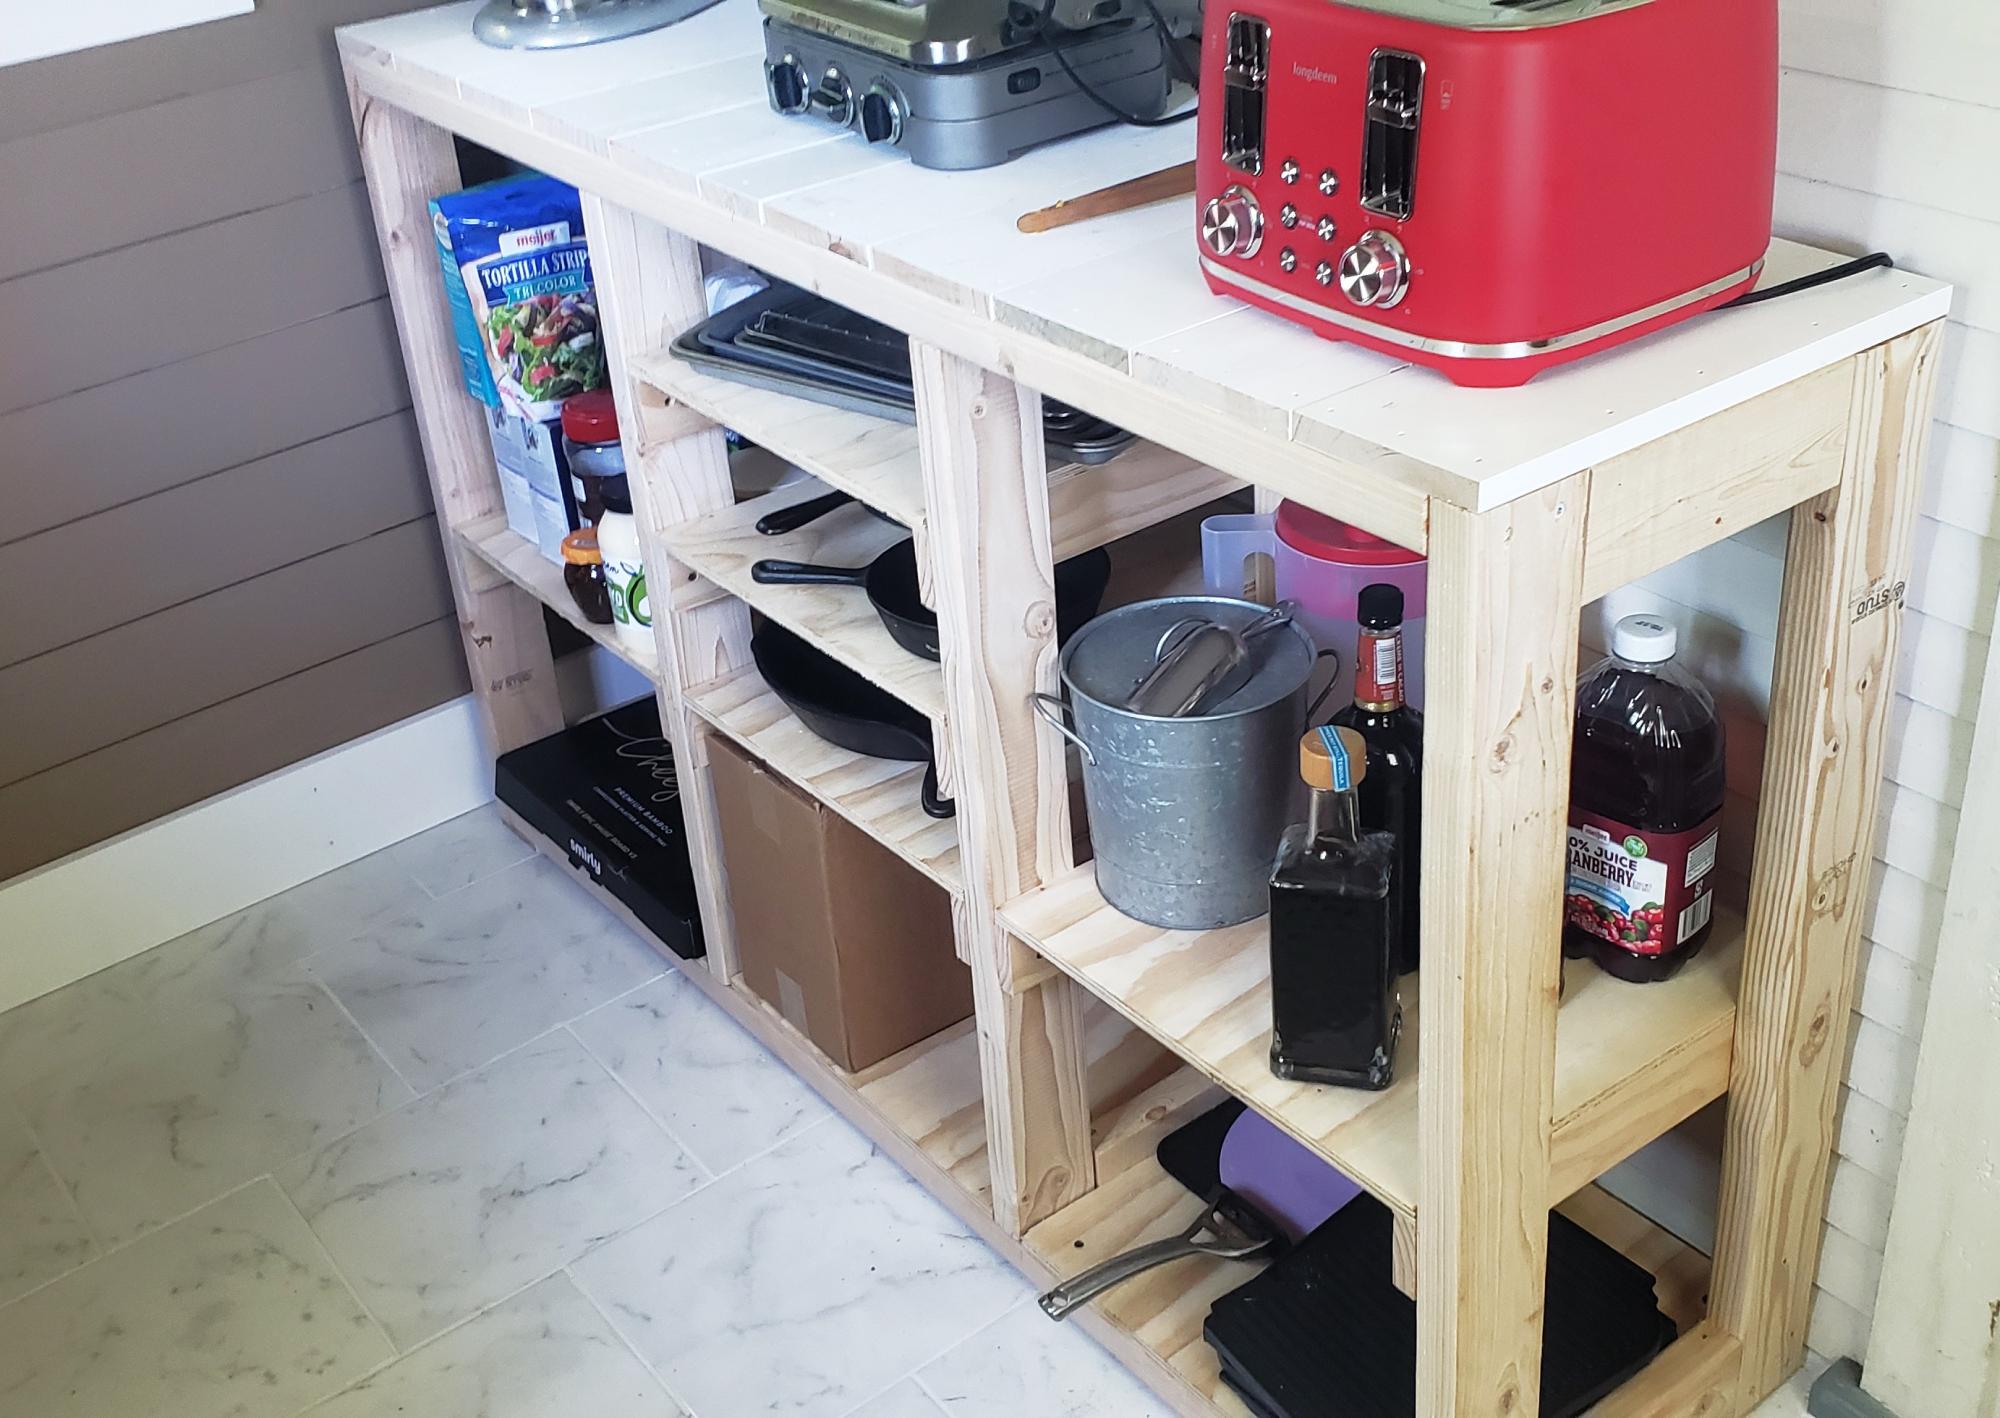
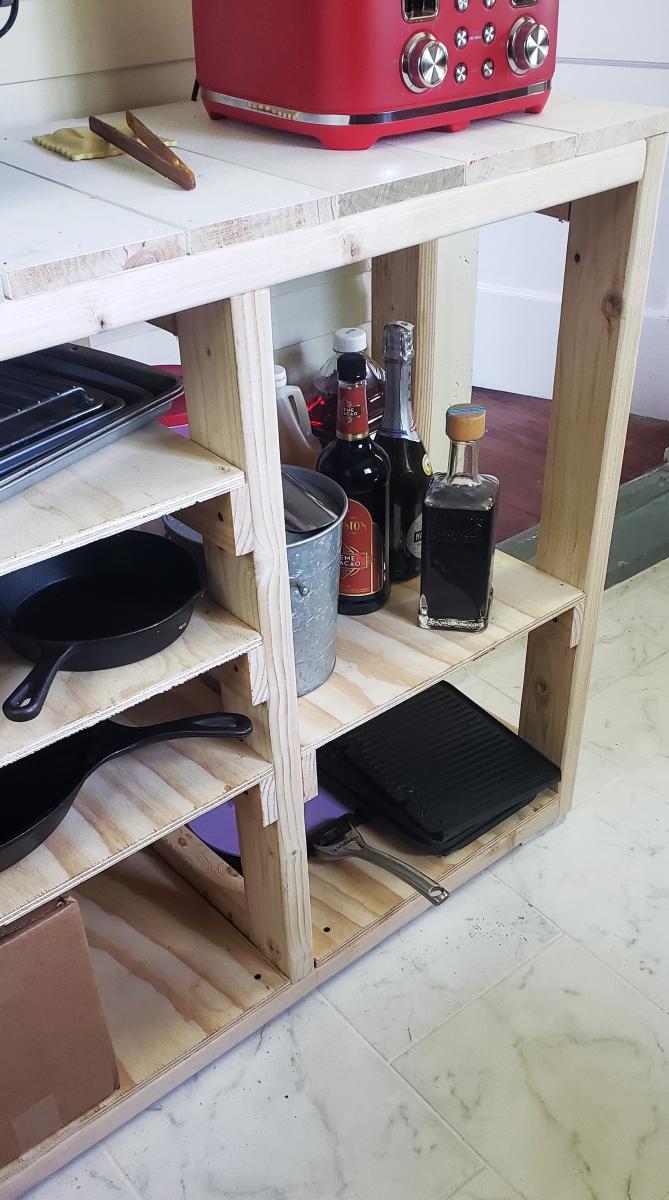
I made this pantry workstation by modifying the six laundry basket plans. Added 2x4 stretchers between the front and back frames, top and bottom. Made cleats from 1x3 for a less bulky look. And added 1/2 inch AC plywood shelves. Sand and stain later.
gypsy


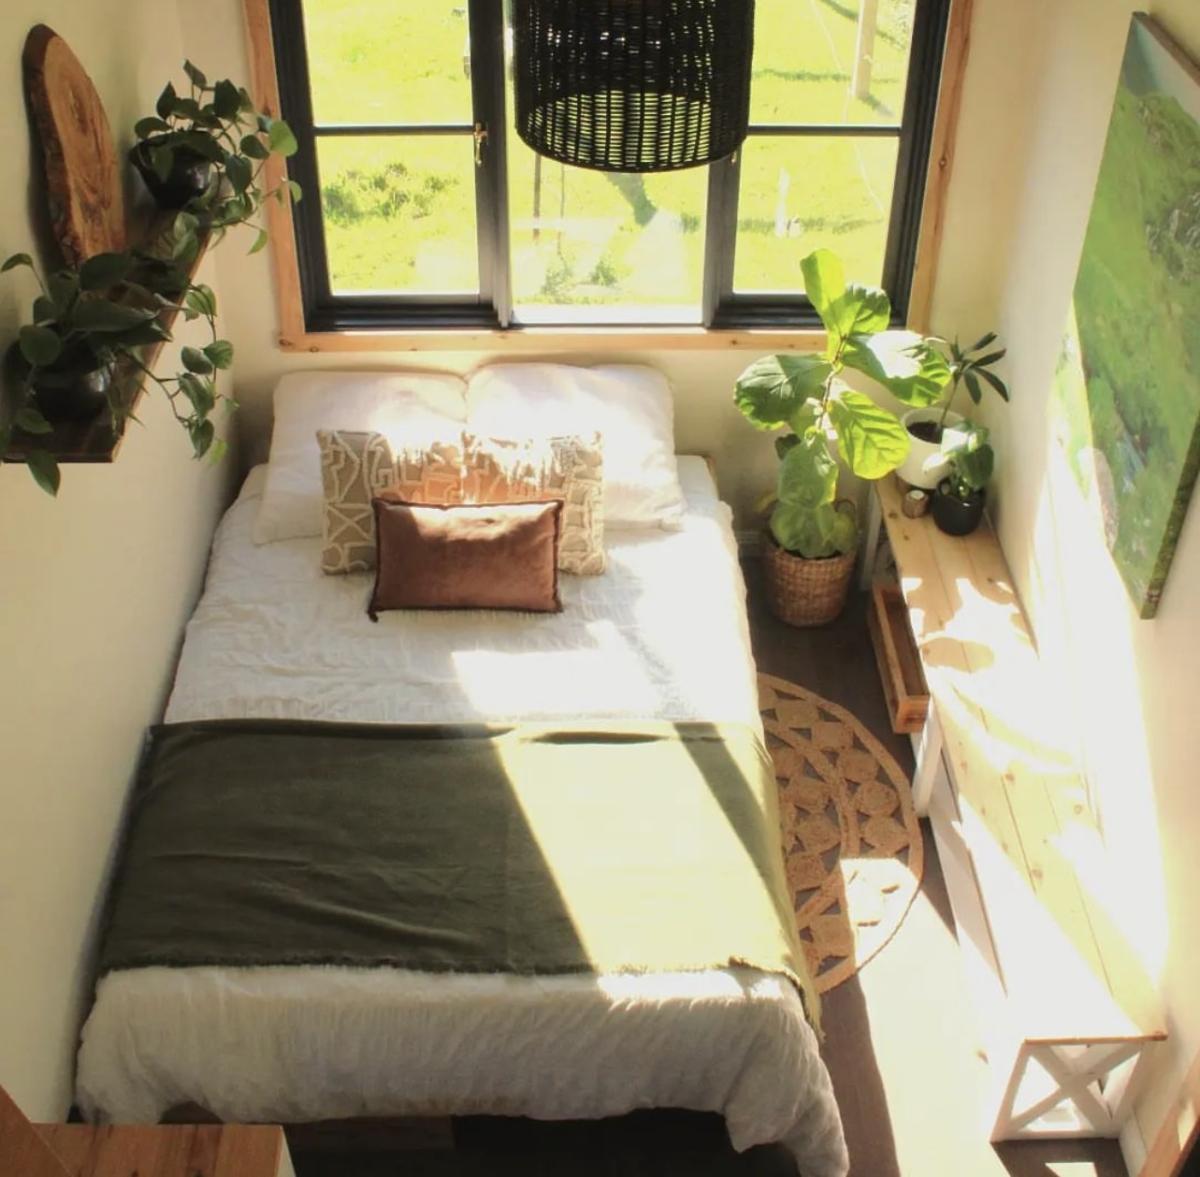
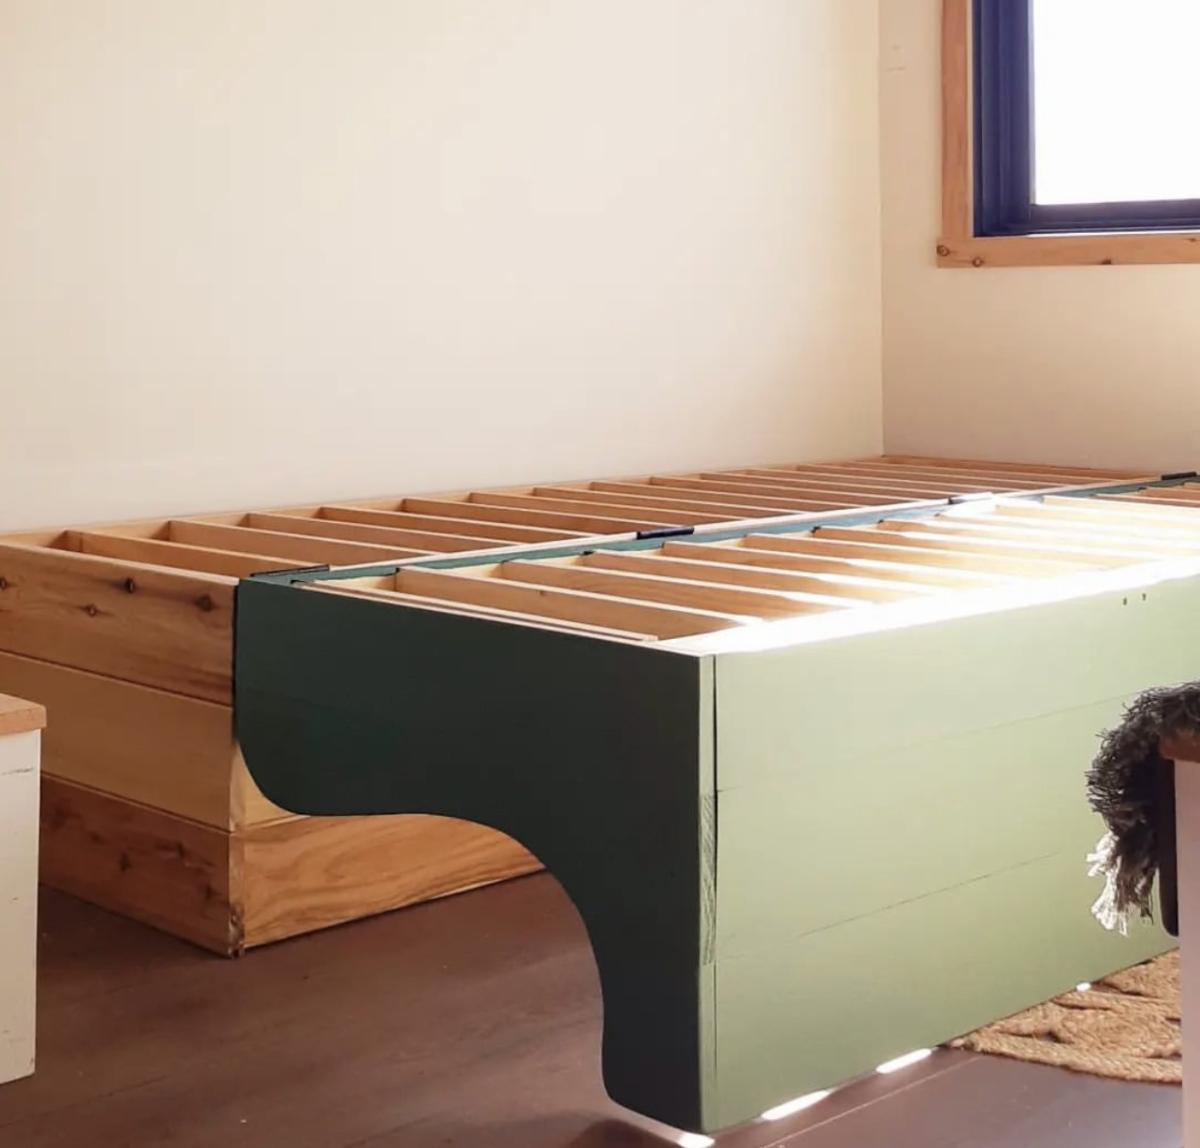
Modified from our twin sleeper chair plan, this amazing hinged sofa bed was built and shared by #tinybuilderau
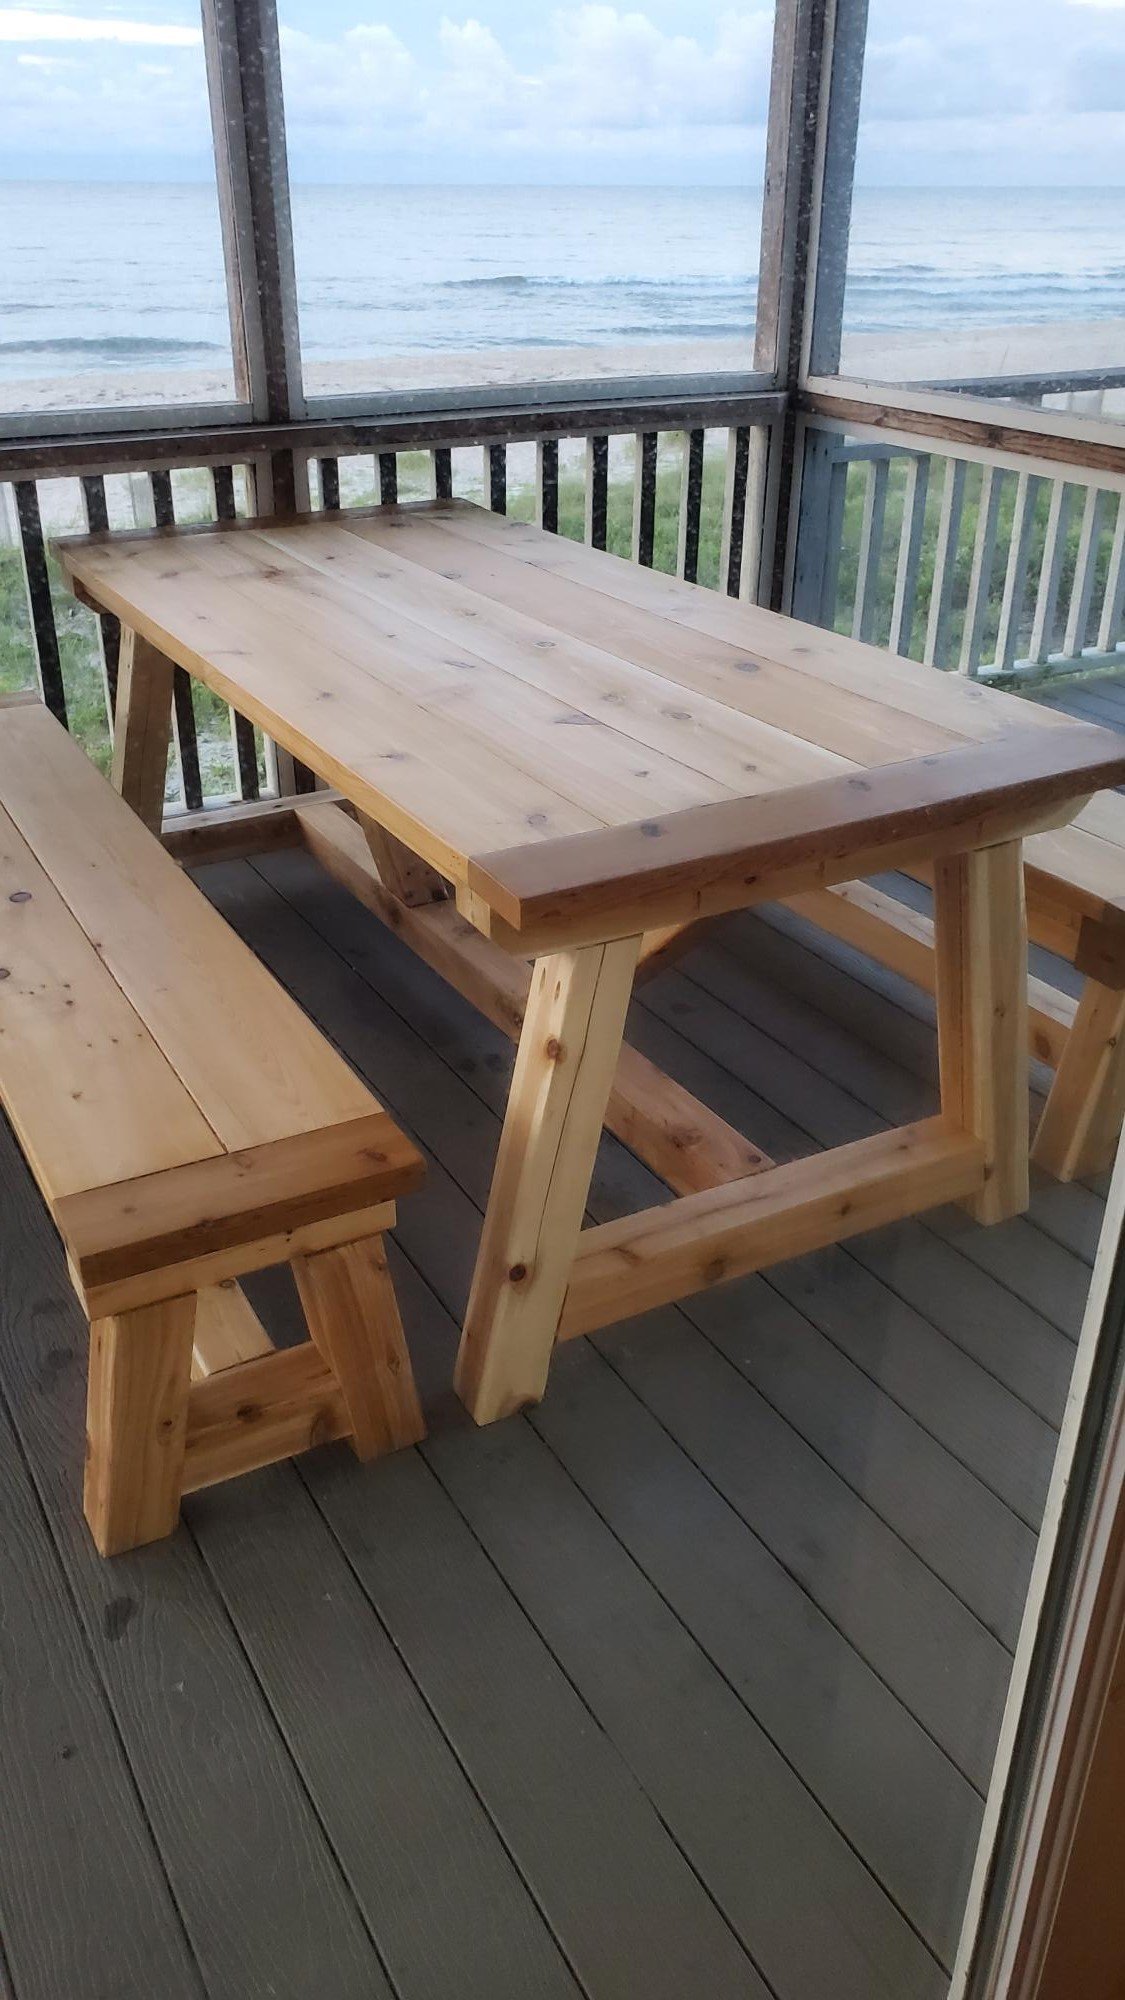
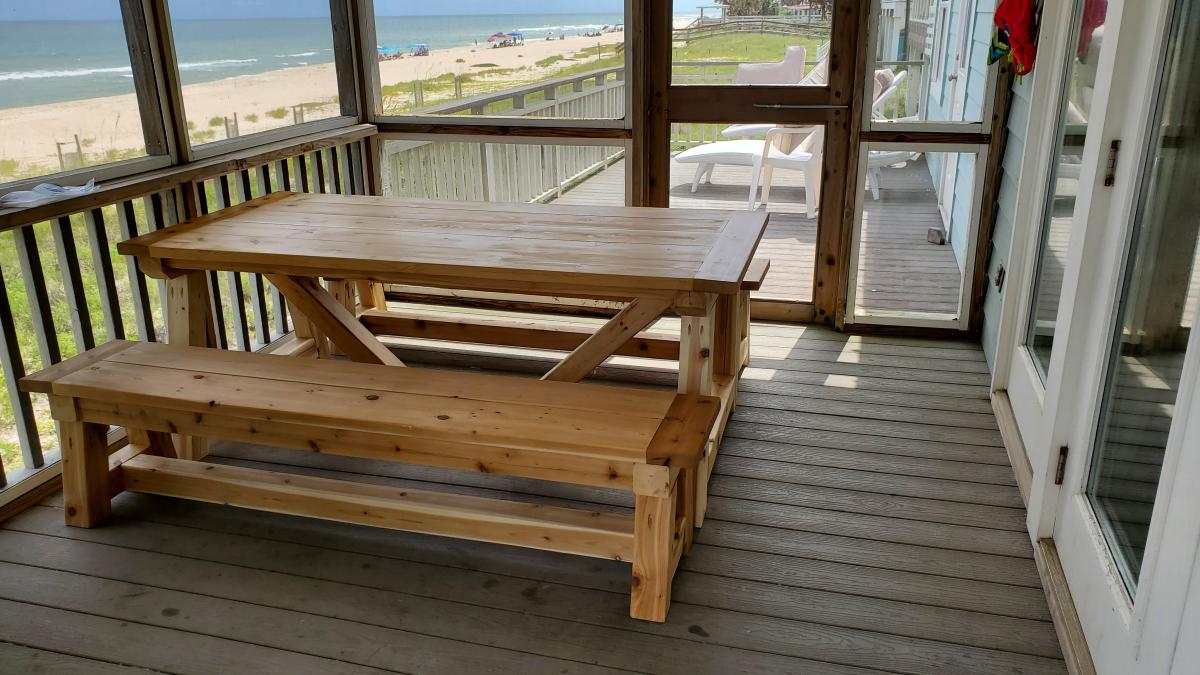
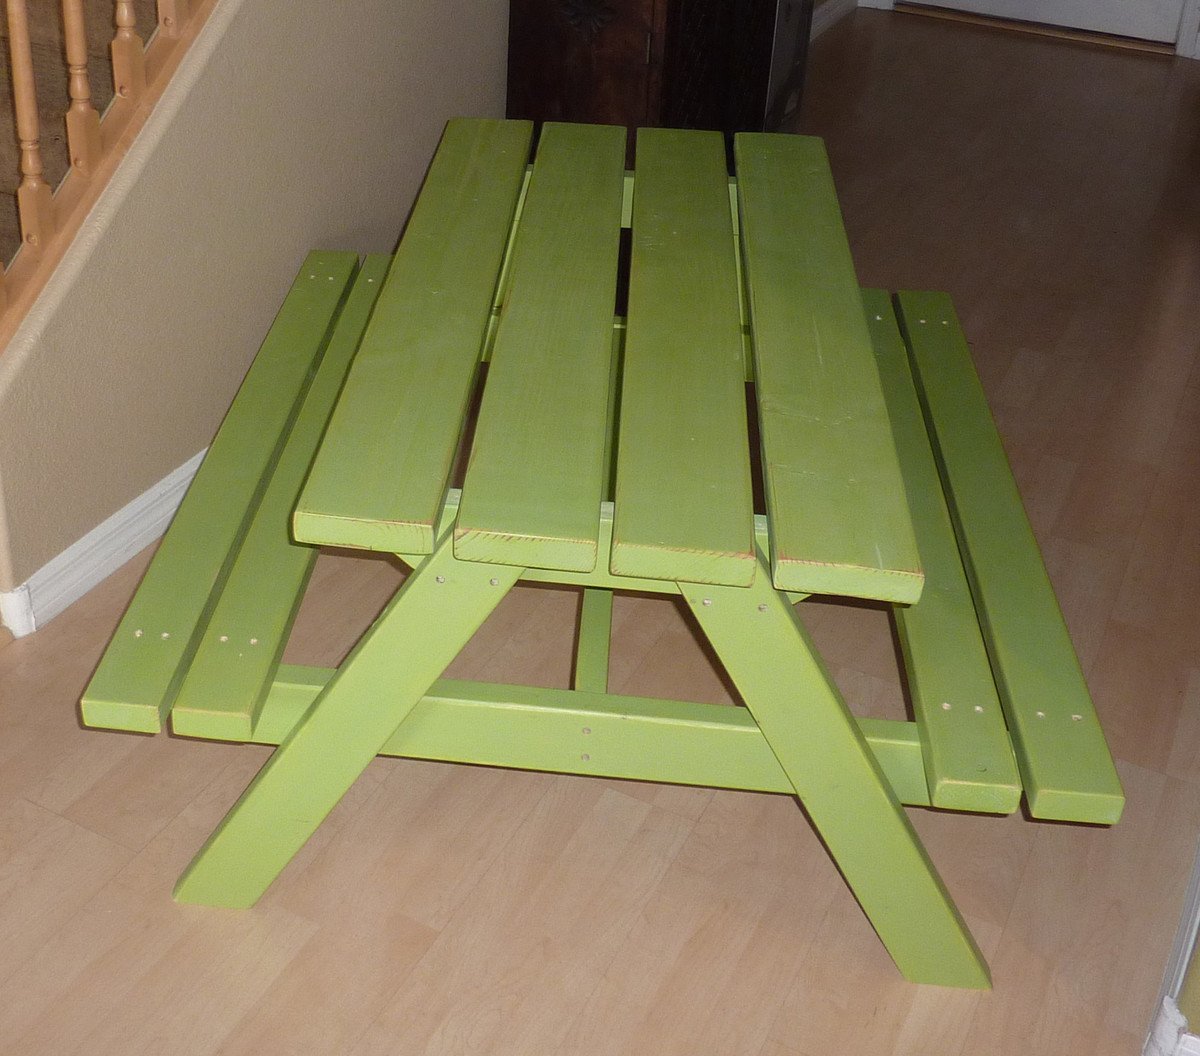
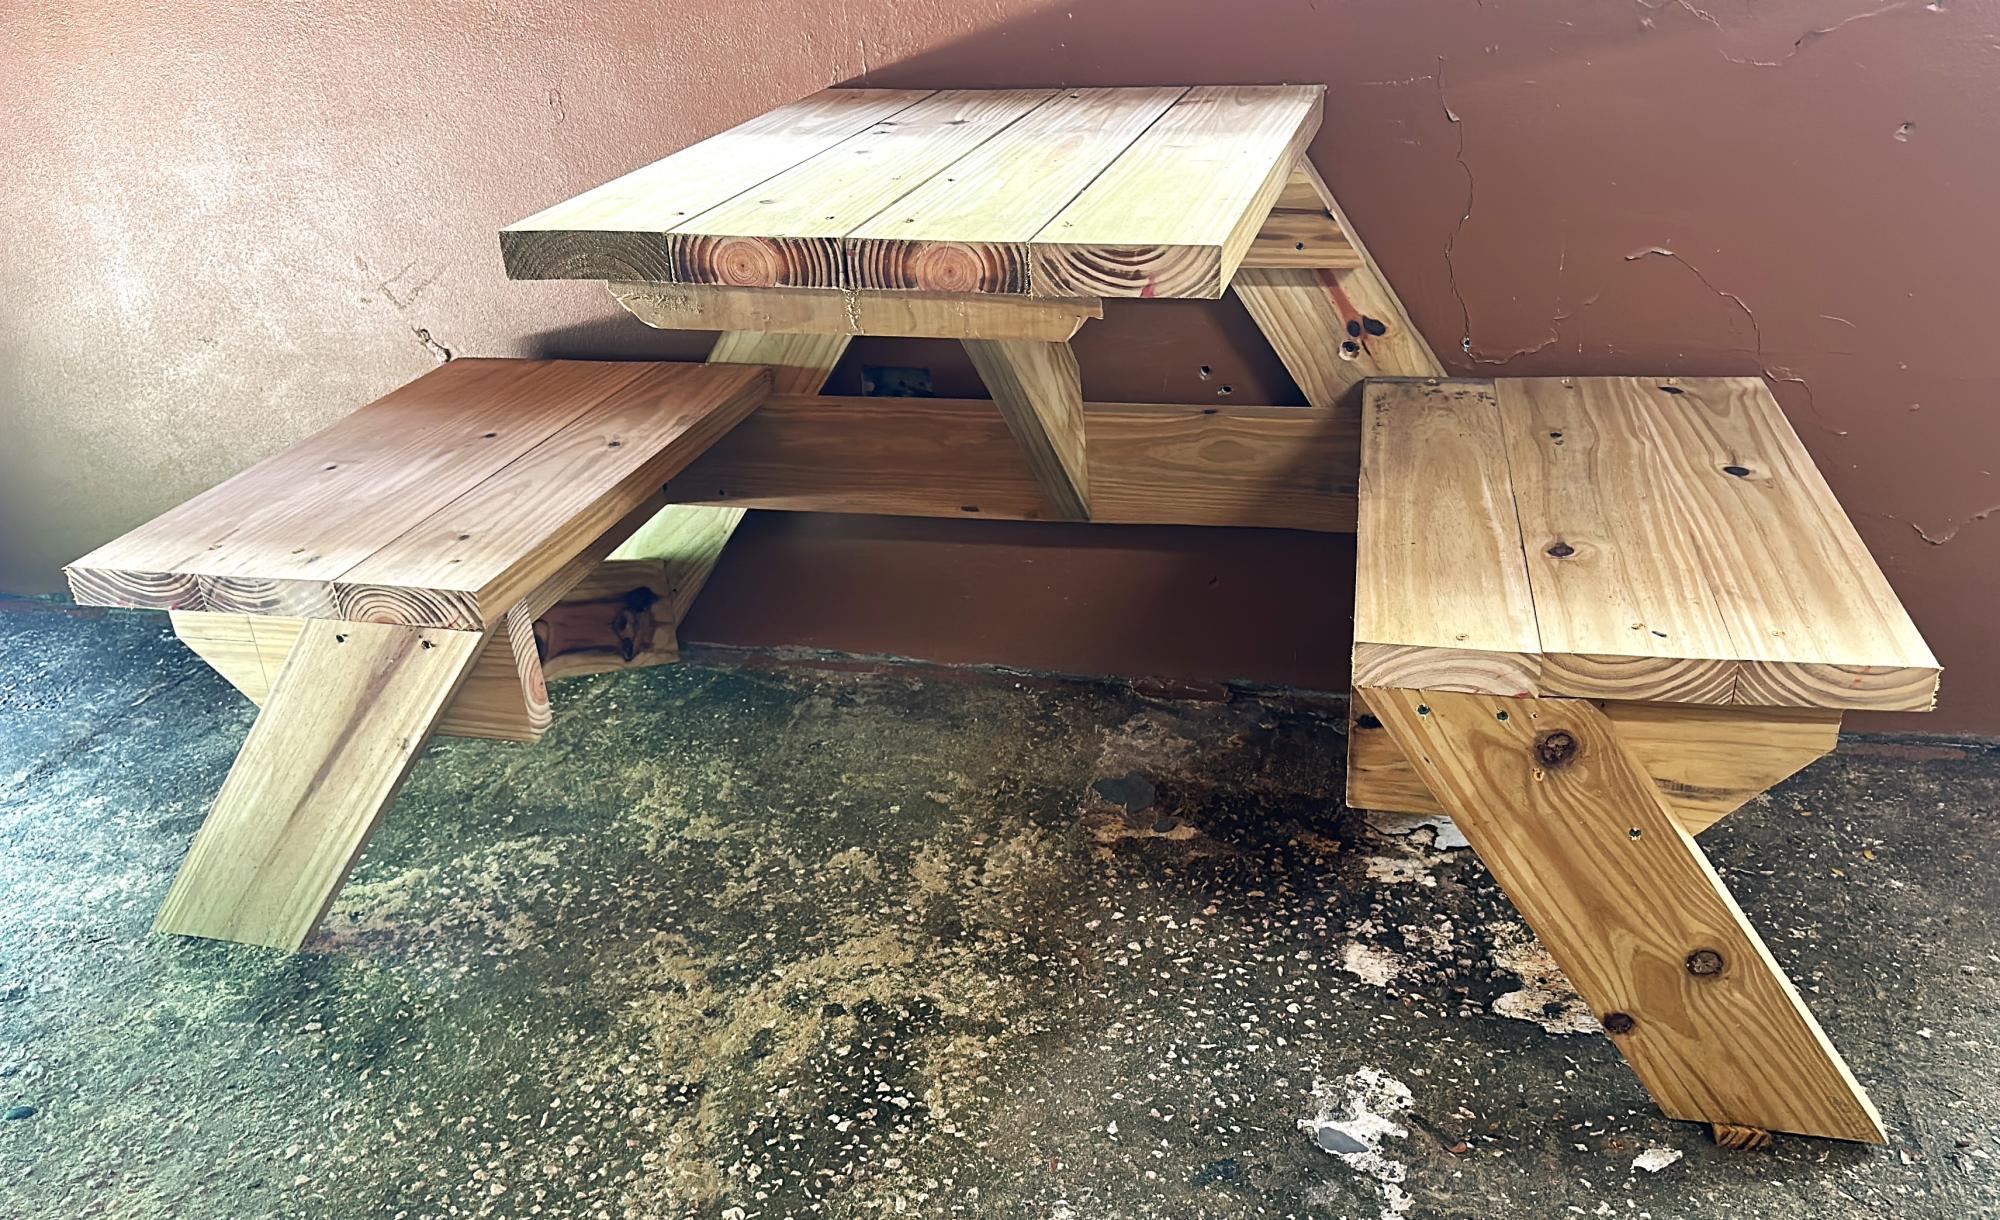
I used the trestle table and benches plans to make a cedar picnic table...
by Joe
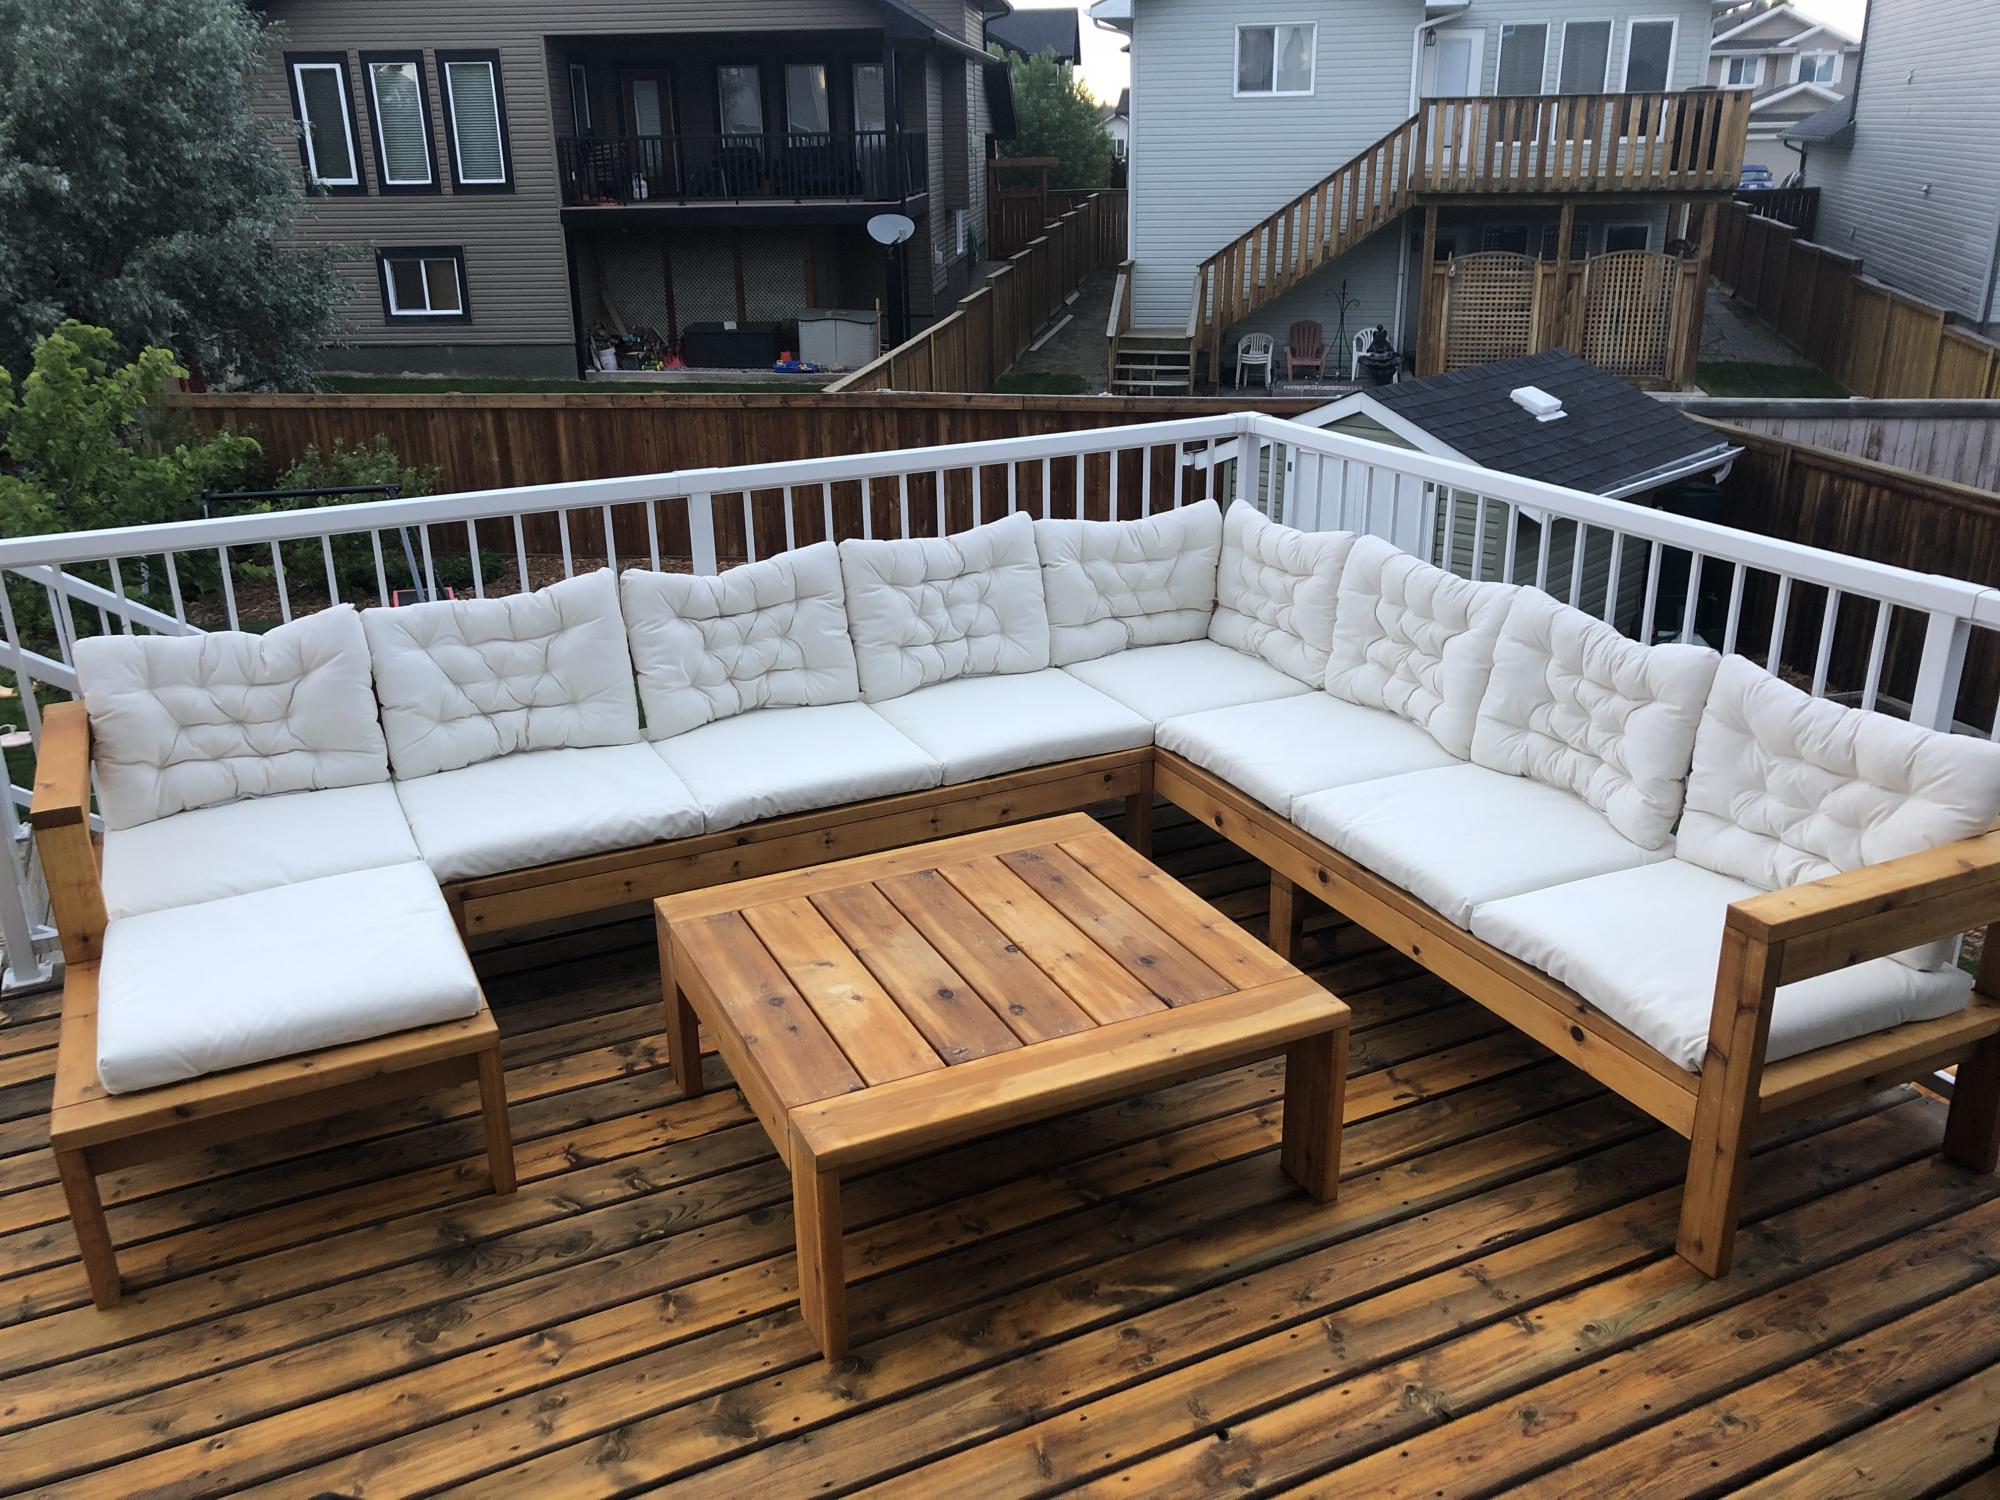
Modified the plans of the outdoor sofa and sectional piece to create this set, then added cushions from IKEA.
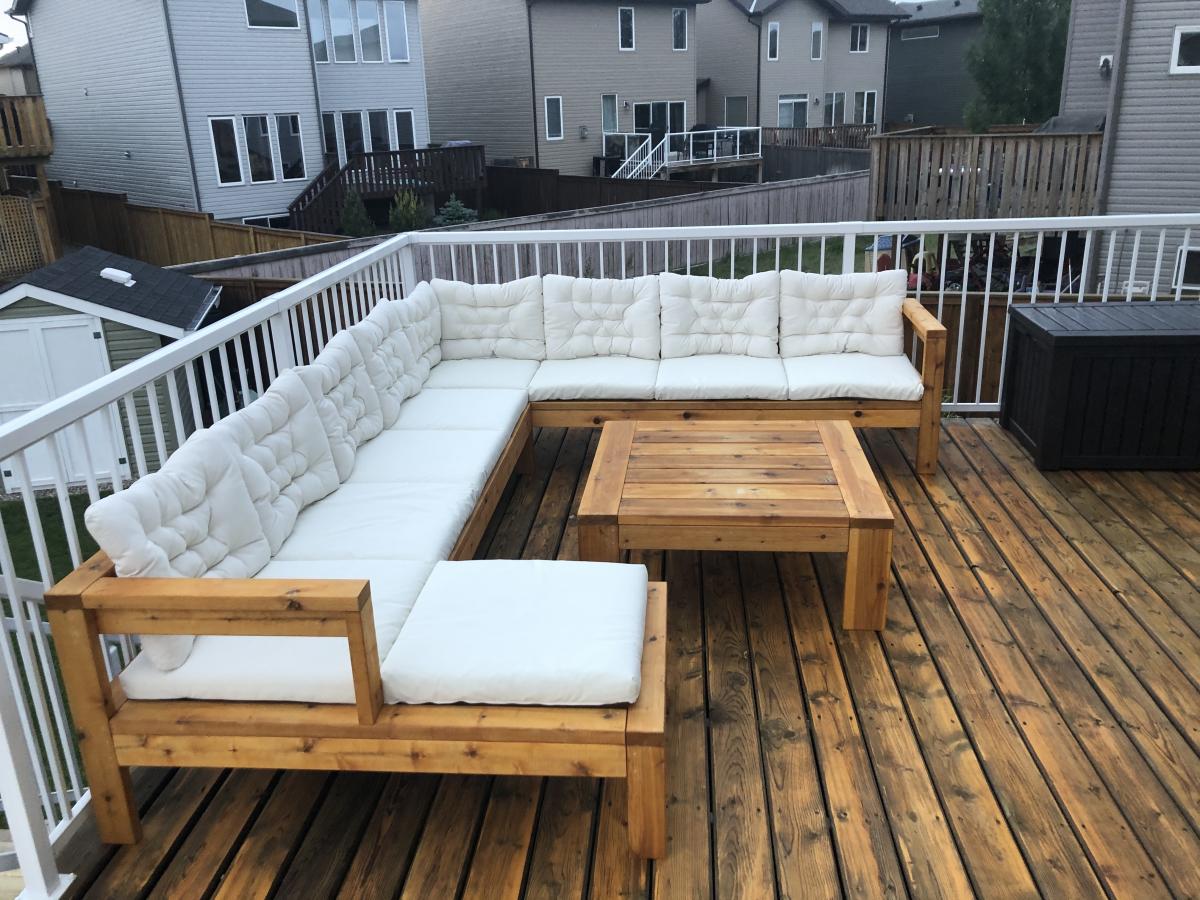
Wed, 02/21/2024 - 10:27
I'm building the sectional this weekend, and saw your addition to the end piece and am going to steal your idea. Very nice.
Such a great, simple project! Thanks for the plans Ana! I'm doing my best to send people your way via my blog, iliketomakestuff.com

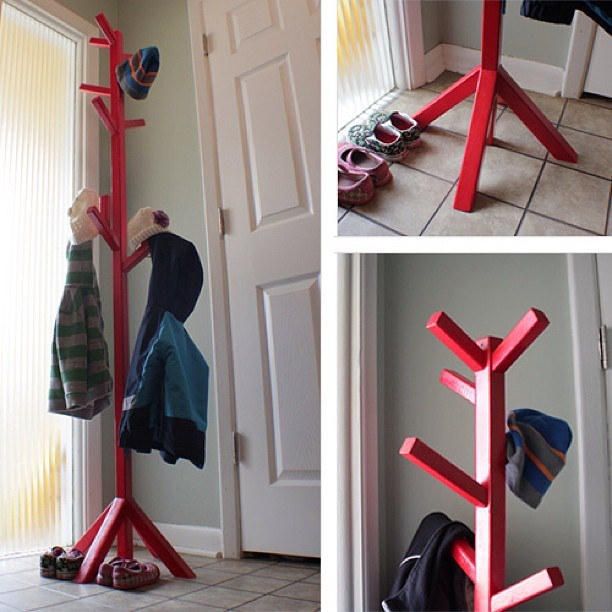
Tue, 03/12/2013 - 22:56
I made Ana's coat tree recently as well, but I painted mine white. I love that high gloss red that you used! It turns your coat tree into an accent piece. :)

Thank you! You've helped me look like a true carpenter who knows what he's doing! My whole family is impressed with my woodwork lately, and now I'm addicted. I've done your seesaw, bar table and stools plus the treehouse in 2 weeks. Thank you for sharing your plans!


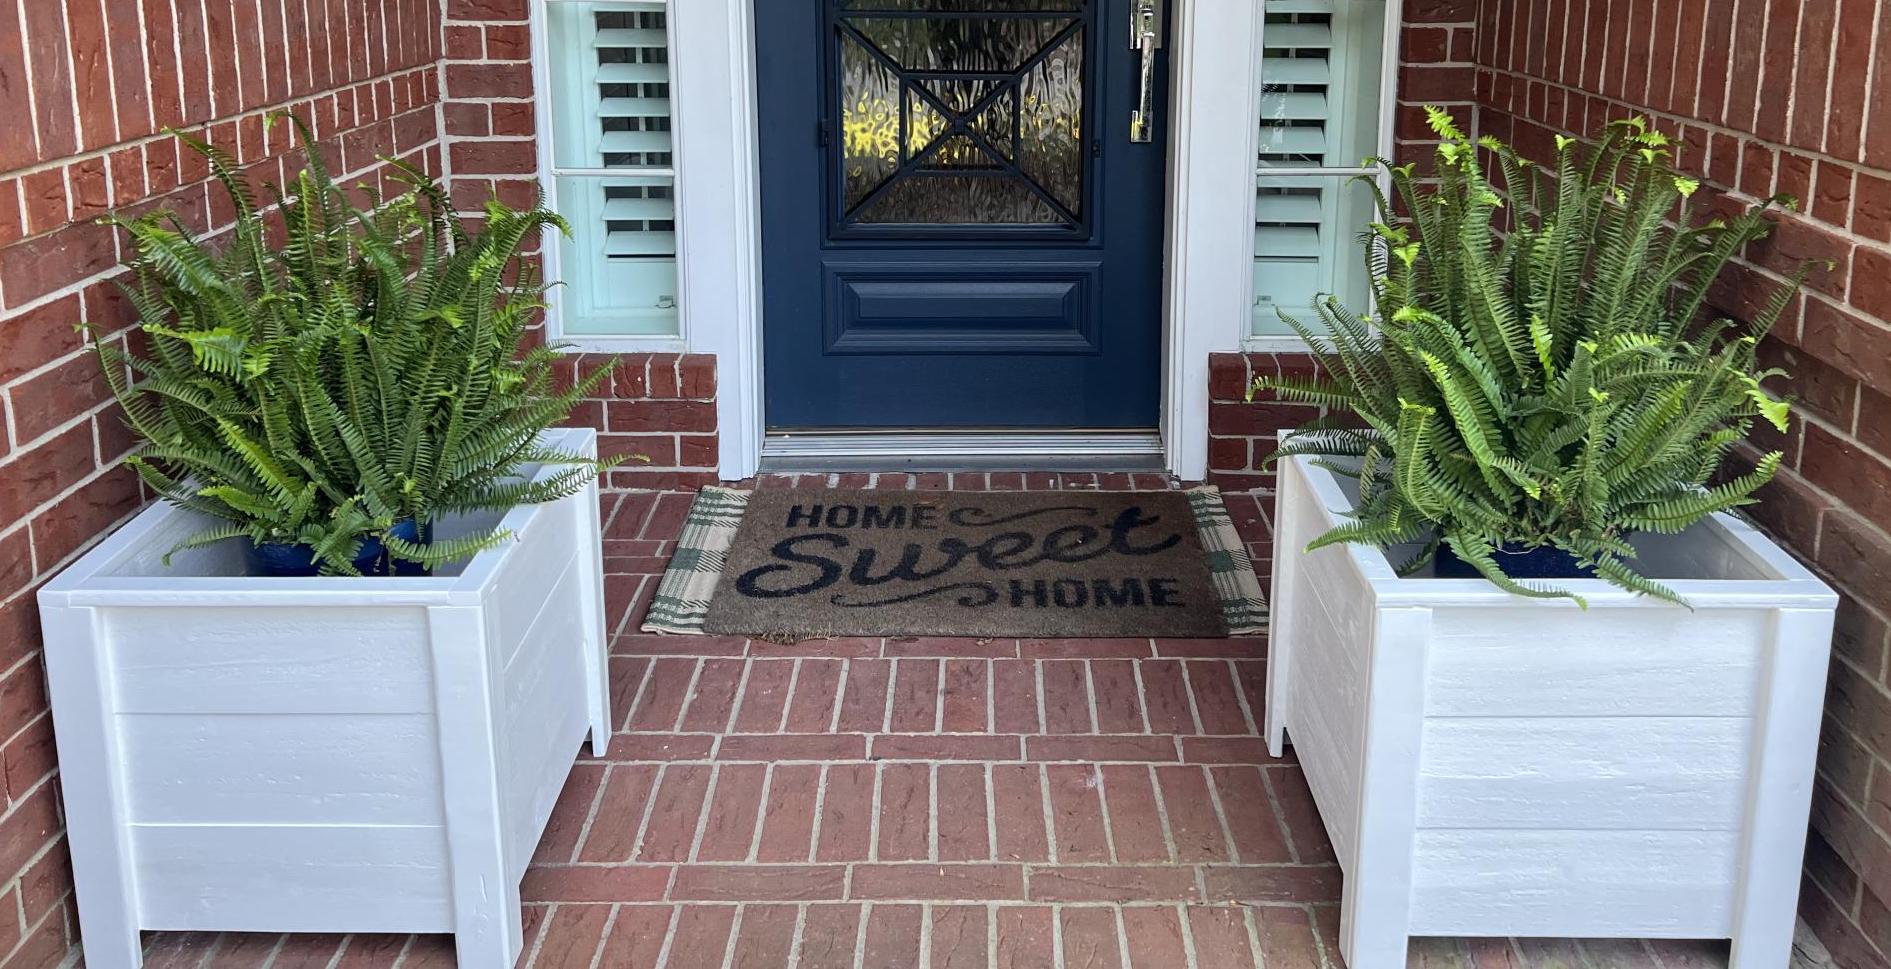
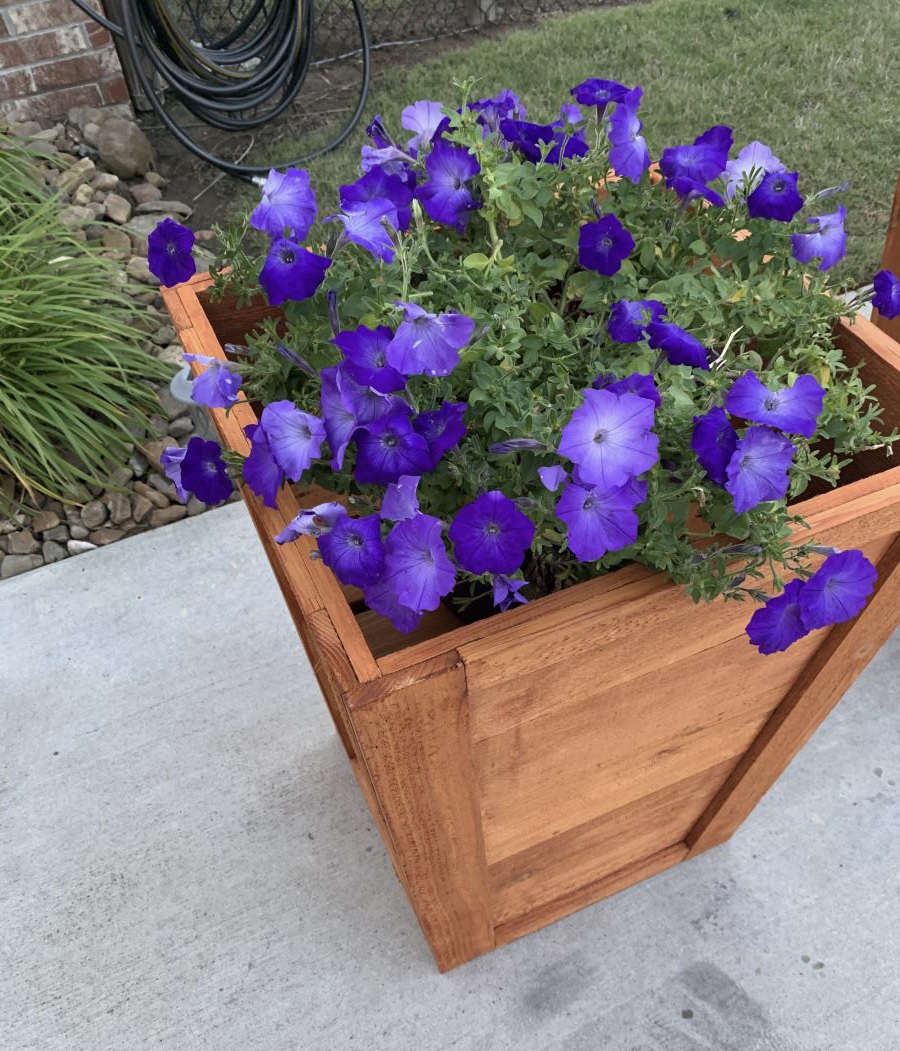
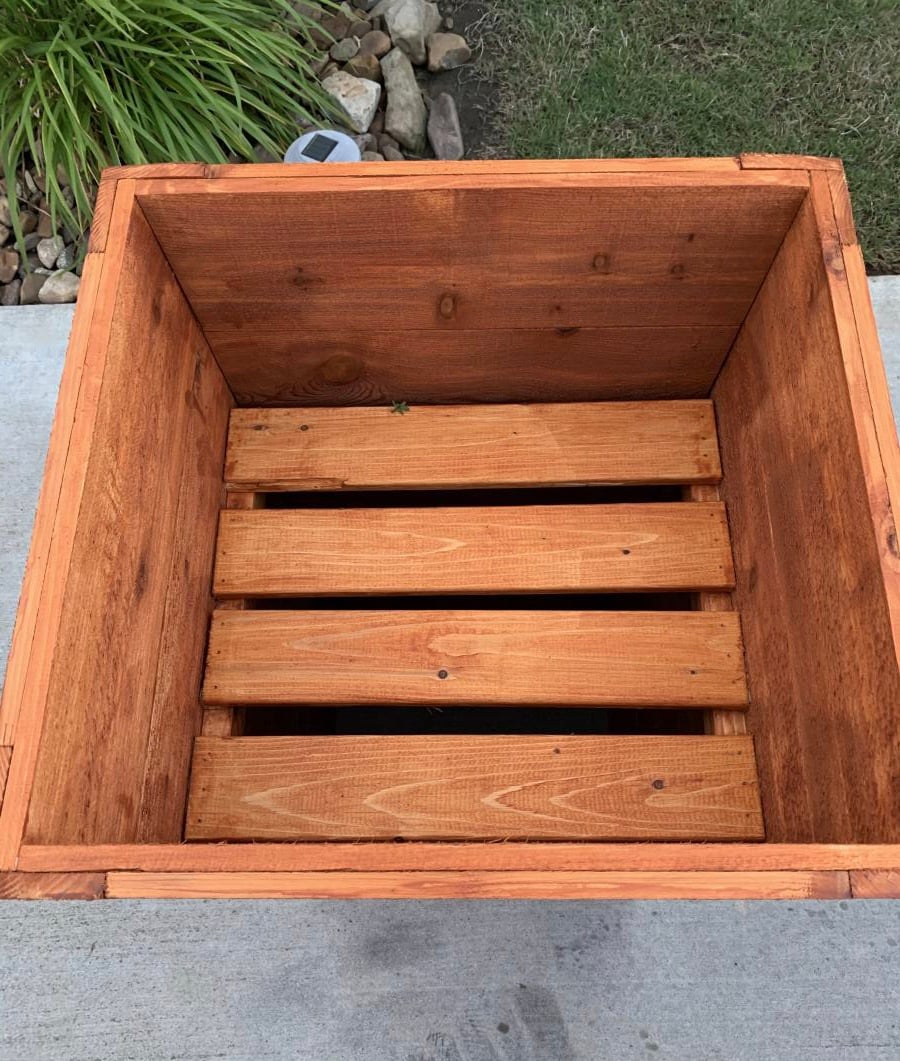
I was looking for planter boxes for my front door and these were easy and super sturdy. I absolutely love them and how they enhanced this area! Thank you Ana for this simple yet impactful plan!
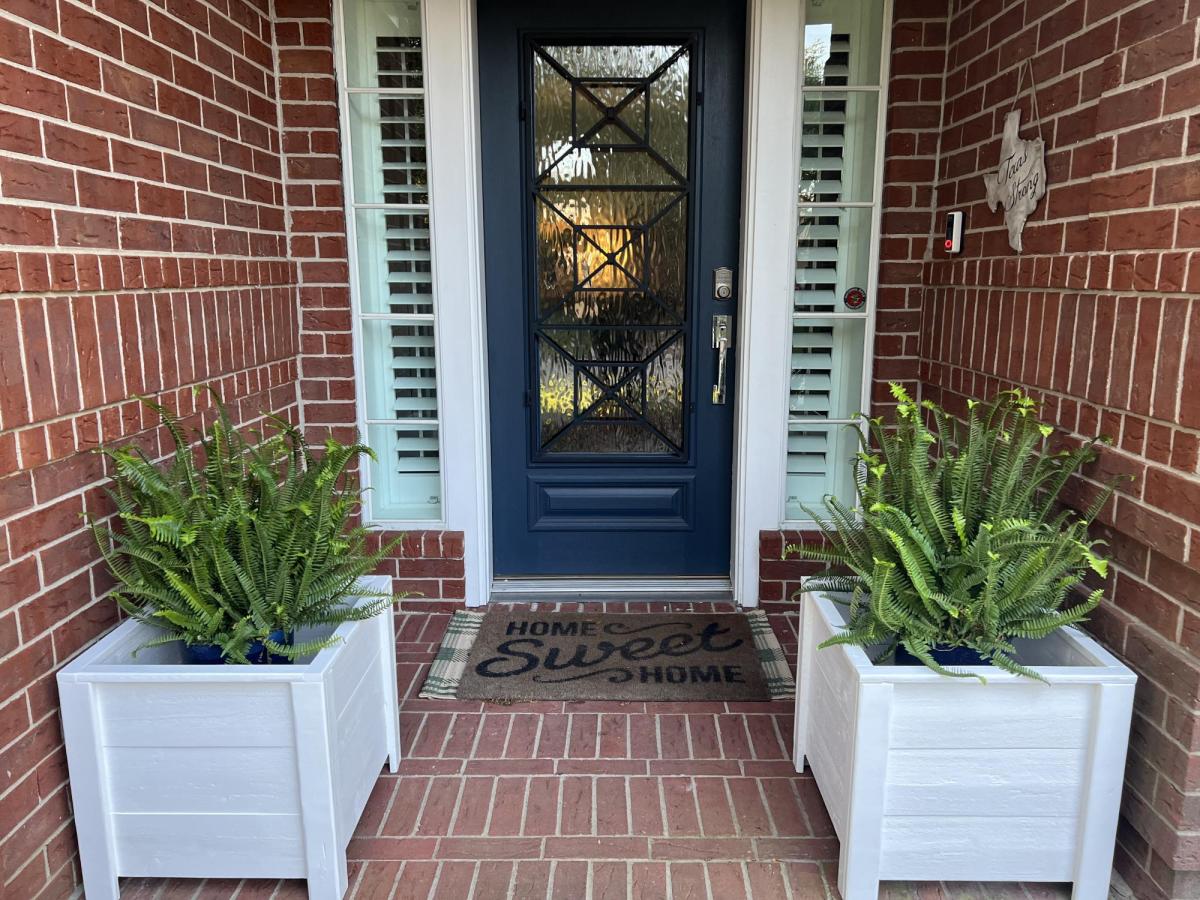
Tue, 04/18/2023 - 15:32
The finish choice is beautiful and it looks amazing by your front door! Thanks for sharing.
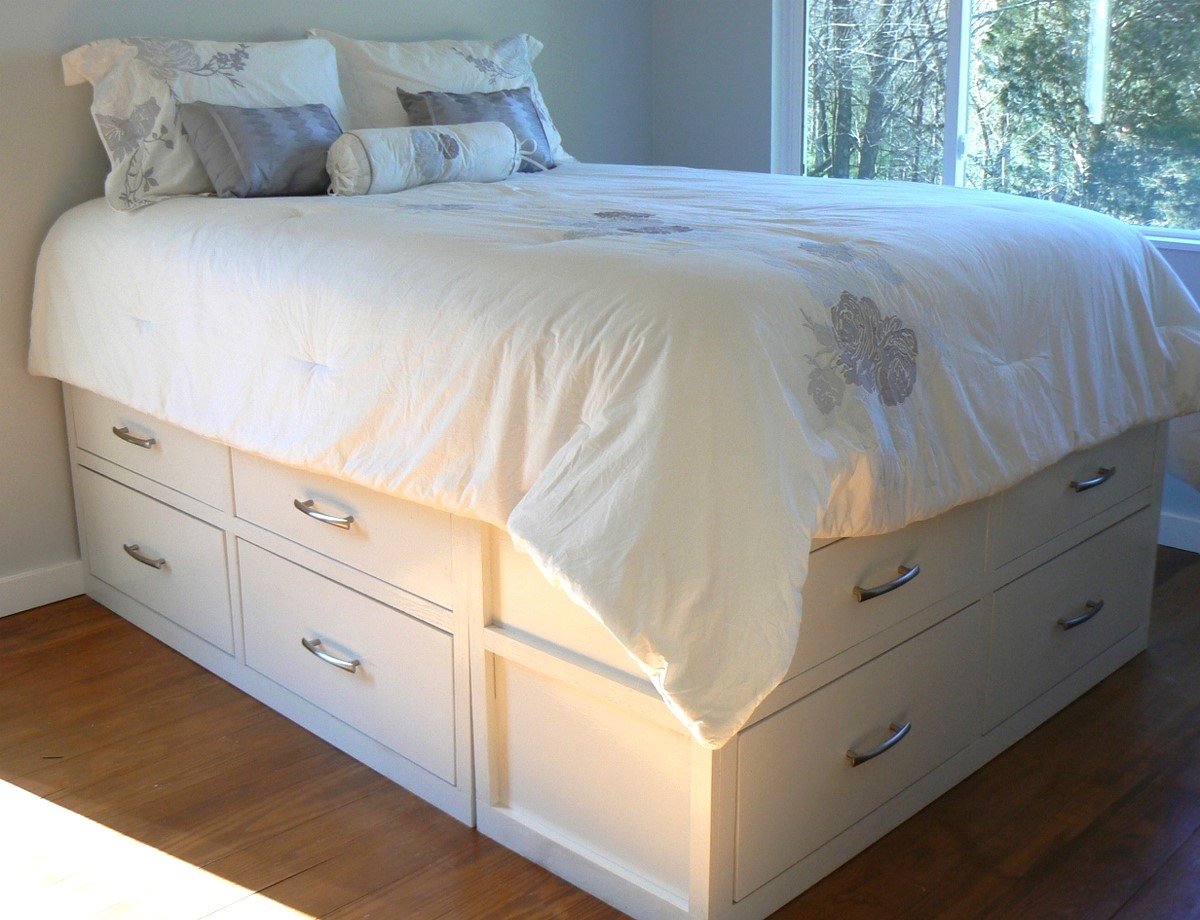
After we built the first level, we decided we didn't like how low to the ground the mattress was going to be, so we made another level. Our master bedroom is very small so this gives us plenty of storage space! The floor throughout the house is wavy, so theboxes do not meet perfectly ( you can see a slight gap at the bottom) which drives me crazy, but I will have to live with it for now. We kept the drawer face simple (less work, and we like the clean lines). Our mattress is quite thick, so I see myself building a step stool in my near future! This was our first project and very easy to follow. Already working on my next project. I am addicted! Thanks for the great site, Ana!
Wed, 02/22/2012 - 13:05
Total height is 25 inches. I love how tall it is, because the dogs cannot jump on the bed! I wish we would have thought about the double drawer height before we started as it would have brought the cost and time down significantly. We live and we learn. Enjoy your new bed!
Tue, 07/31/2012 - 19:48
Just wondering how you attached the double drawer layers together... Love the look of it...
Mon, 06/10/2013 - 17:41
Sorry for the delay in response. I haven't been on the site in awhile and I could not figure out my password! We used the Kreg Jig to attach the top level to the bottom. Looking back on it, we should have just built the walls as one piece, but since the top drawers were an addition, after the fact, we just had to deal. The 1x2 trim piece gave it a finished and less pieced together look. It has been so long since we built this, the details are fading!
Sat, 08/06/2016 - 20:37
I'm new to furniture making and was wondering if you had plans for your work since I like the height, queen and twin size? Also, I was wondering if any drawers are for storage purposes, as I would like them to be?
Mon, 10/08/2012 - 08:00
Hi this is exactly what I need to do!
we just bought a new bed and I new I'd be making this not thinking I decided not to buy the box spring, now I realize my bed will be on the floor...
I would love it if you could share everything you learned in making it double decker! please
thanks
Natasha
Mon, 06/10/2013 - 17:48
Better late than never, I hope...
First thing we learned, the bed is a little too high, so we should have made slightly smaller drawers. Still happy our dogs can't get up there, but I have to actually hop up on the bed every night, and still have yet to get around to making my step stool.
Second, cut the side pieces for the height needed for two drawers, then you have a cleaner look with no middle trim piece. I don't mind it, but I would like it more without, I think.
That is really all I would change. The plans were easy to follow and made it easy to alter for our needs.
Tue, 05/07/2013 - 23:52
I am flabbergasted by this AMAZING bed you MADE over the WEEKEND! This is simply unbelievable! I absolutely could never do something like this. Are you willing to make a King size one exactly like this and sell it to me??
Oh please?!
Renee
Mon, 06/10/2013 - 17:53
Thank you for those kind words! I was a little nervous about taking on such a big project, but we had a fun time building it { I can't say the same for sanding and painting :-) } and are very happy with the space it freed up in our very small bedroom! Just take your time, invest in a Kreg Jig, and you can do it too!
Made 2 of these for my coffee shop in Puerto Rico. Easy instructions. Thank you!
Javiel Cardona
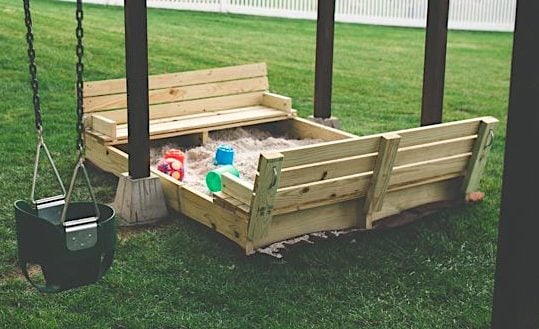
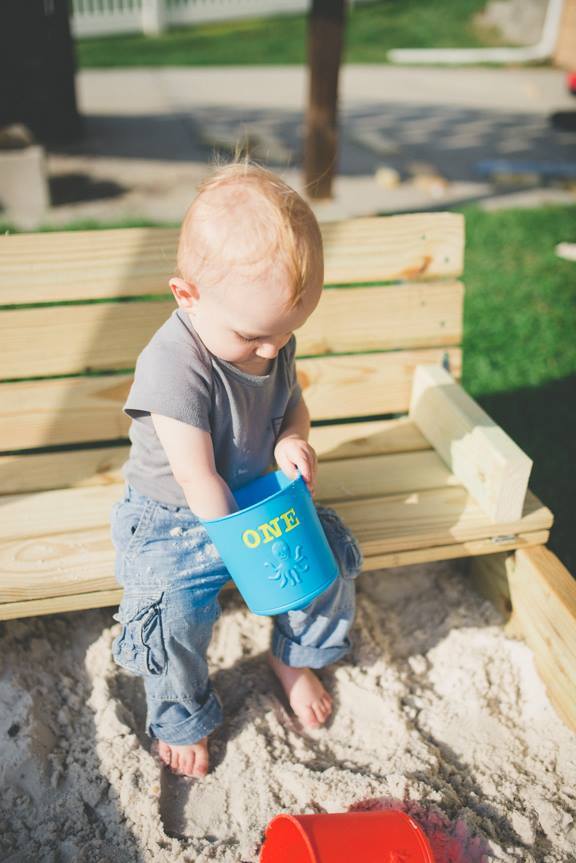
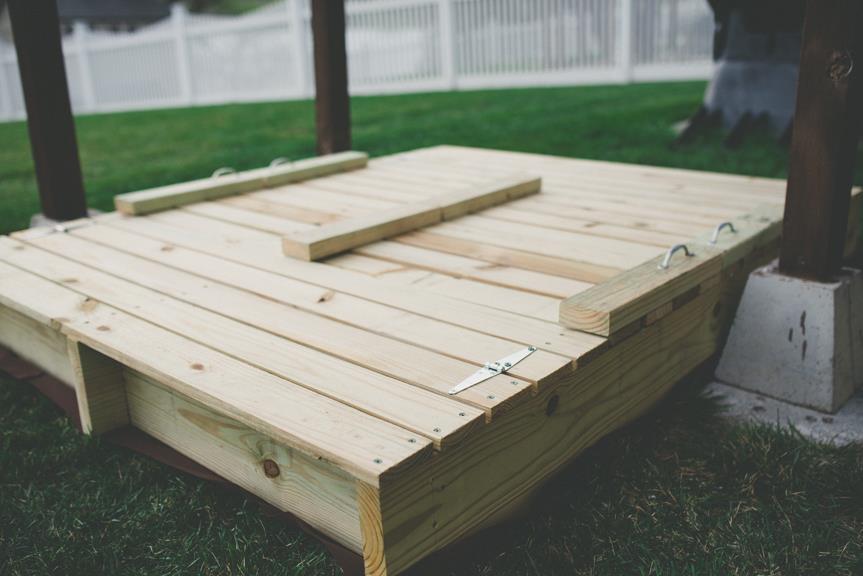
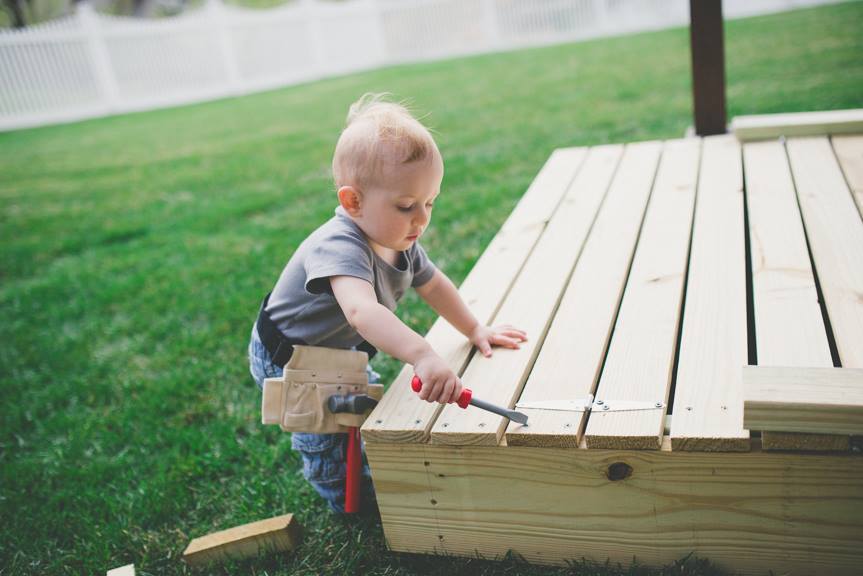
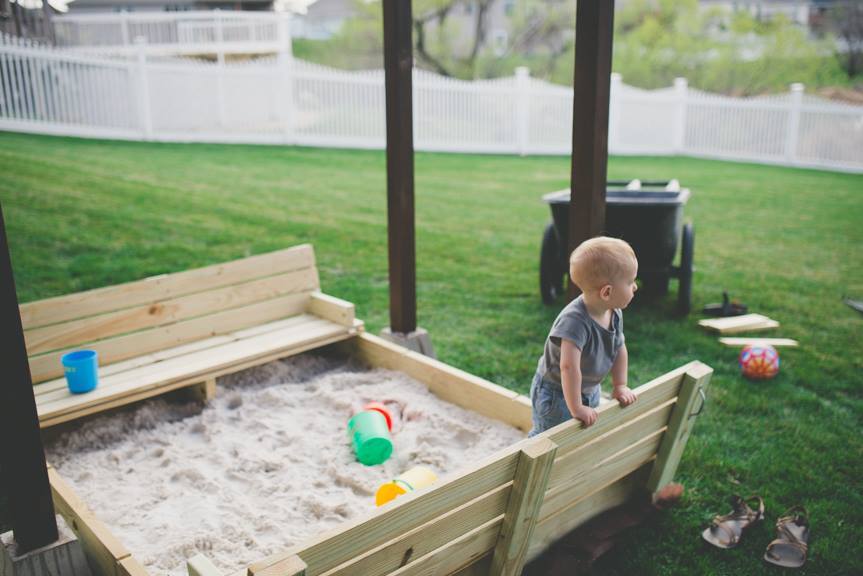
We altered the original plan by enlarging the sandbox (approx 5' x 6') which made for wider benches that can comfortably seat an adult. The benches and back rests are three boards deep instead of two. We added 2x12 supports under the benches for additional support, as well as another 2x4 support in the middle of the backrest.


Tue, 04/14/2015 - 20:00
I just love seeing pictures of these built! Makes my heart swell :-)
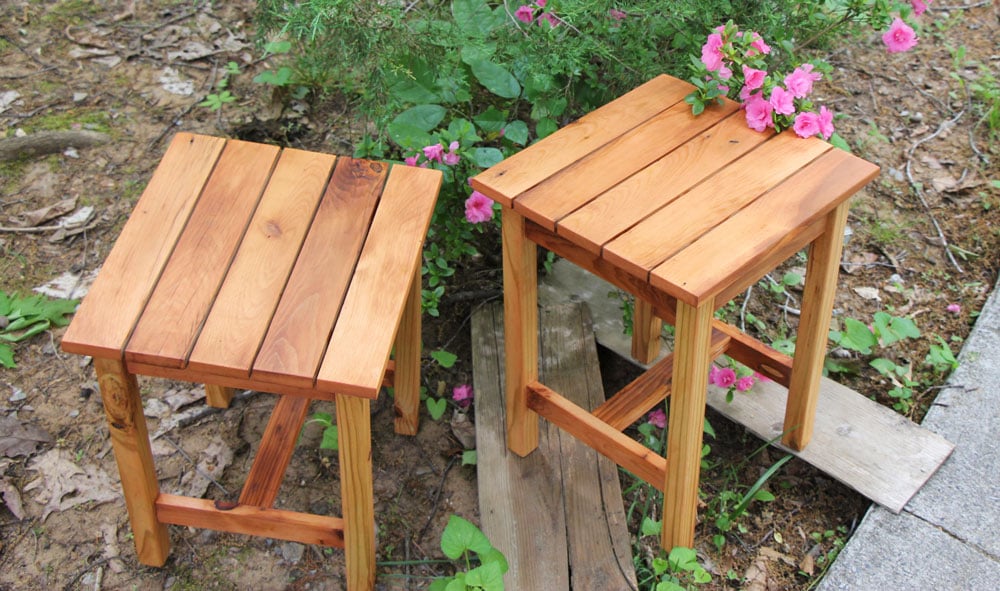
This was my first attempt at making anything out of wood. I was thankful for guidance from my husband but I did it myself!!!
Sat, 05/04/2019 - 13:30
Great job! These little side tables are perfect! LOVE!
Thank you so much for sharing a brag post!

Added some extra trim pieces to finish it out. turned out really nice!!
Mon, 05/18/2020 - 17:25
These look great! Did you use the cedar tone water proofing?