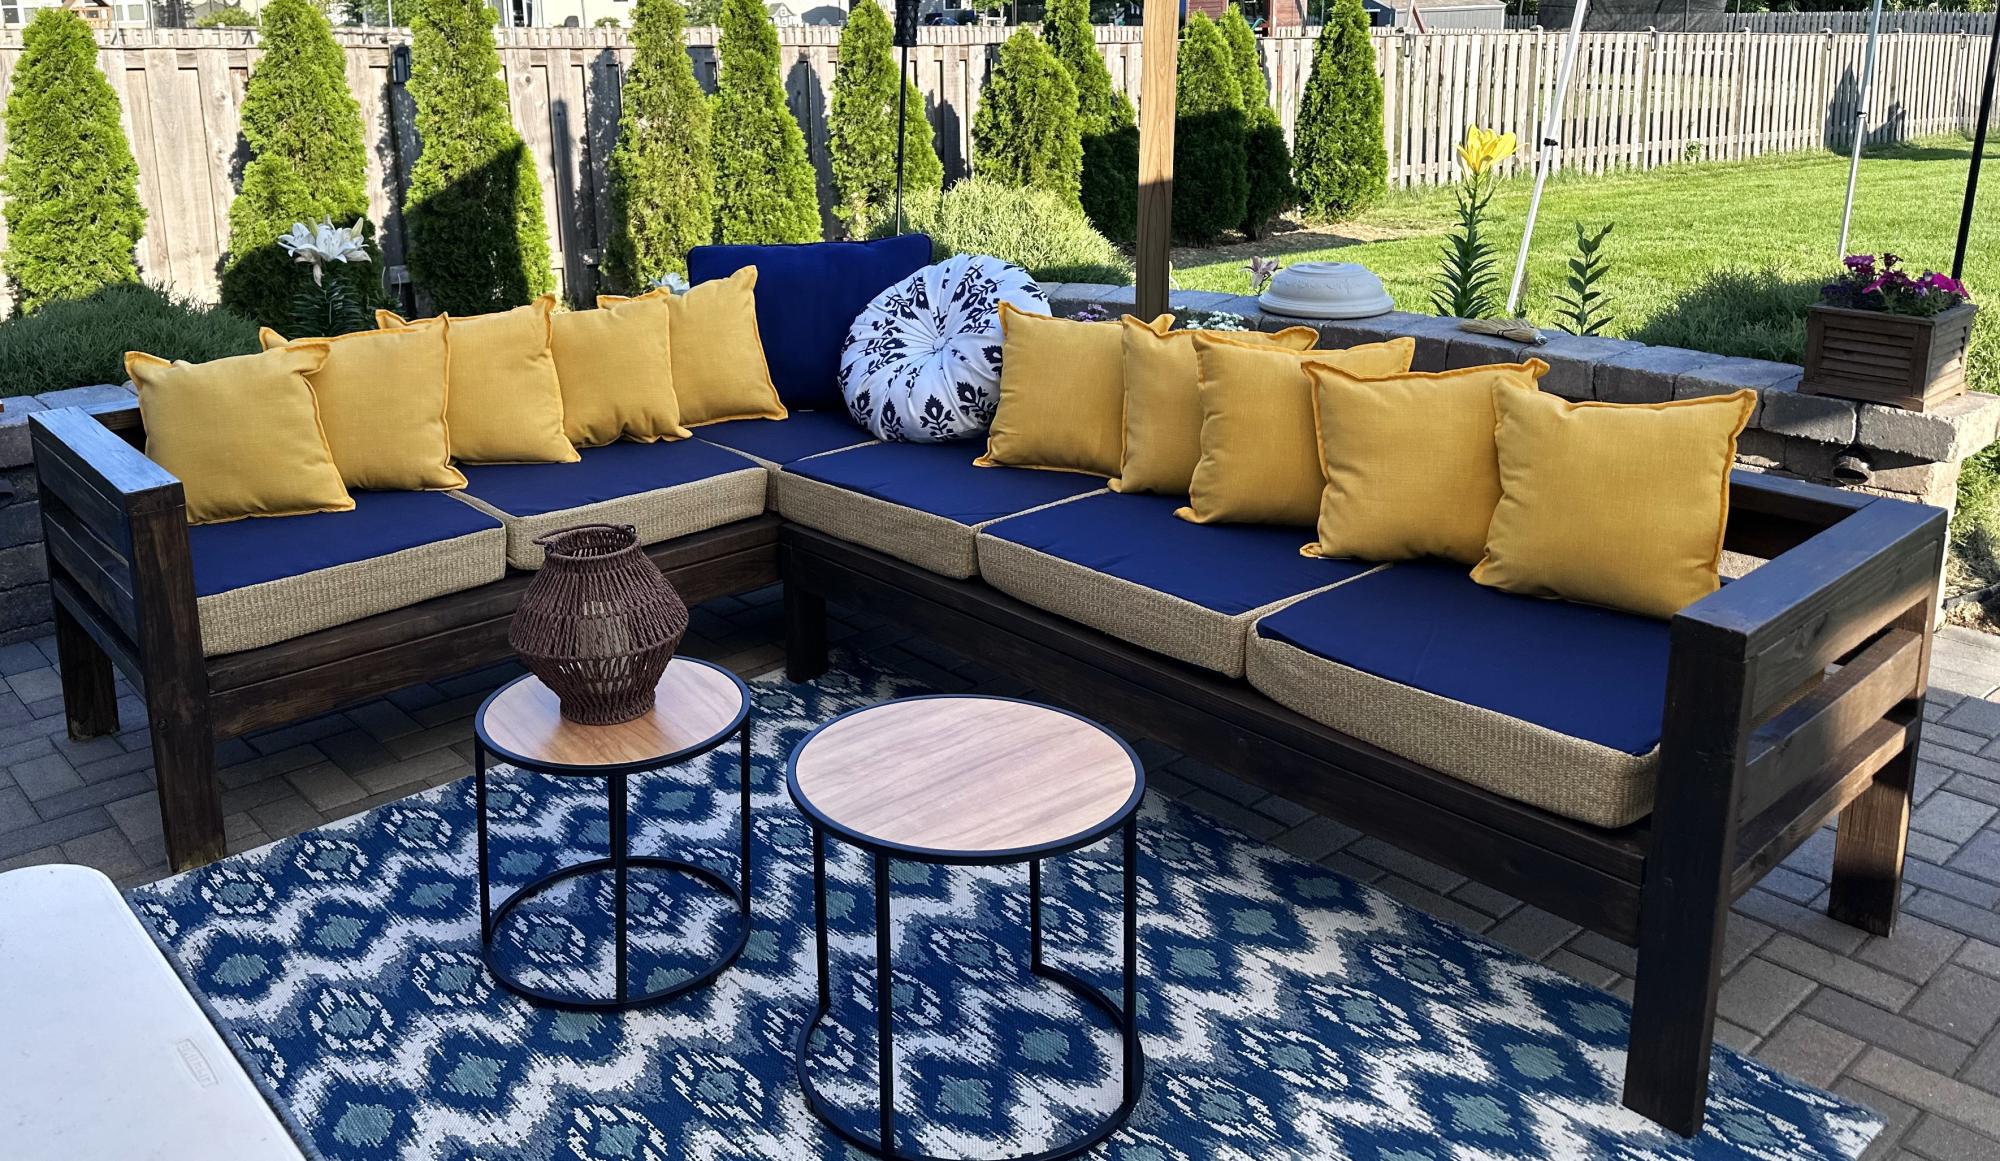
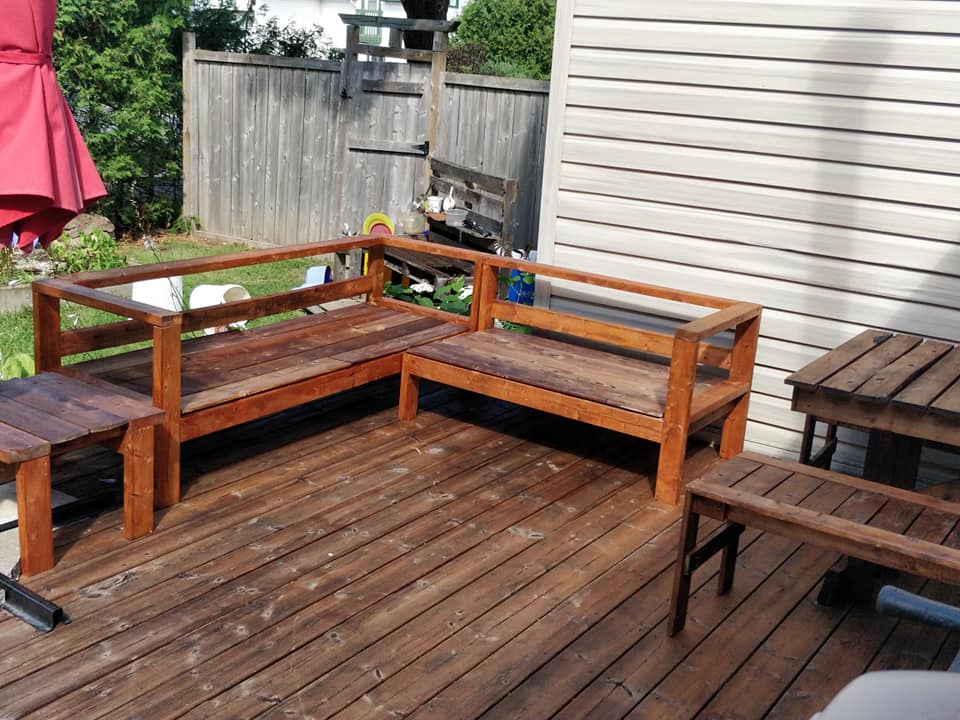
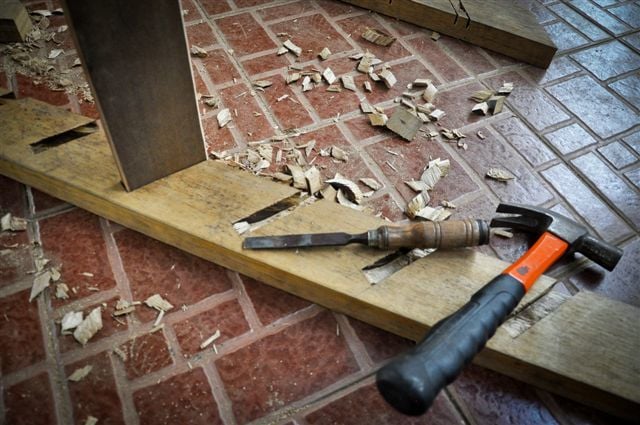
Outdoor Wood Sectional
Super fun project!!
Built from Plan(s)
Super fun project!!
This is the second project I attempted and it was a huge undertaking for me, but it was fun and went well! I had planned to sew a cushion for it, but by the time I completed the project, I was DONE! So I bought some for now.
The only modifications I made were larger arm rests so I could put cup holders in them. The cup holders I made out of PVC 3" Male end and a 3" drain, which I glued together. I then scuffed the entire thing and painted them with acrylic paint (trying to get them to match the blue and green in the cushions) before spraying them with gloss sealant.
My family LOVES the new "swing bed". It weighs ALOT so I had to make sure to get proper hanging gear. It's obviously not hung yet when I took the pics tho.
Thank you for another beautiful project!


Well, I started with one chair and finished with a full set. Not bad for a first timer. Definitely room to improve. Little tip if you're going to make this amazing set... raise the backs as they are too low with thicker cushions. I built a casing to go on top after the fact. Pretty happy with how it all turned out. Thanks Ana for the plans... now onto the next project!


Fri, 04/28/2023 - 08:41
Very nice workmanship. I'm curious as to how comfortable they are with the straight 90* backs? Let me know please at [email protected]. Again nice workmanship.
Fri, 04/28/2023 - 08:41
Very nice workmanship. I'm curious as to how comfortable they are with the straight 90* backs? Let me know please at [email protected]. Again nice workmanship.
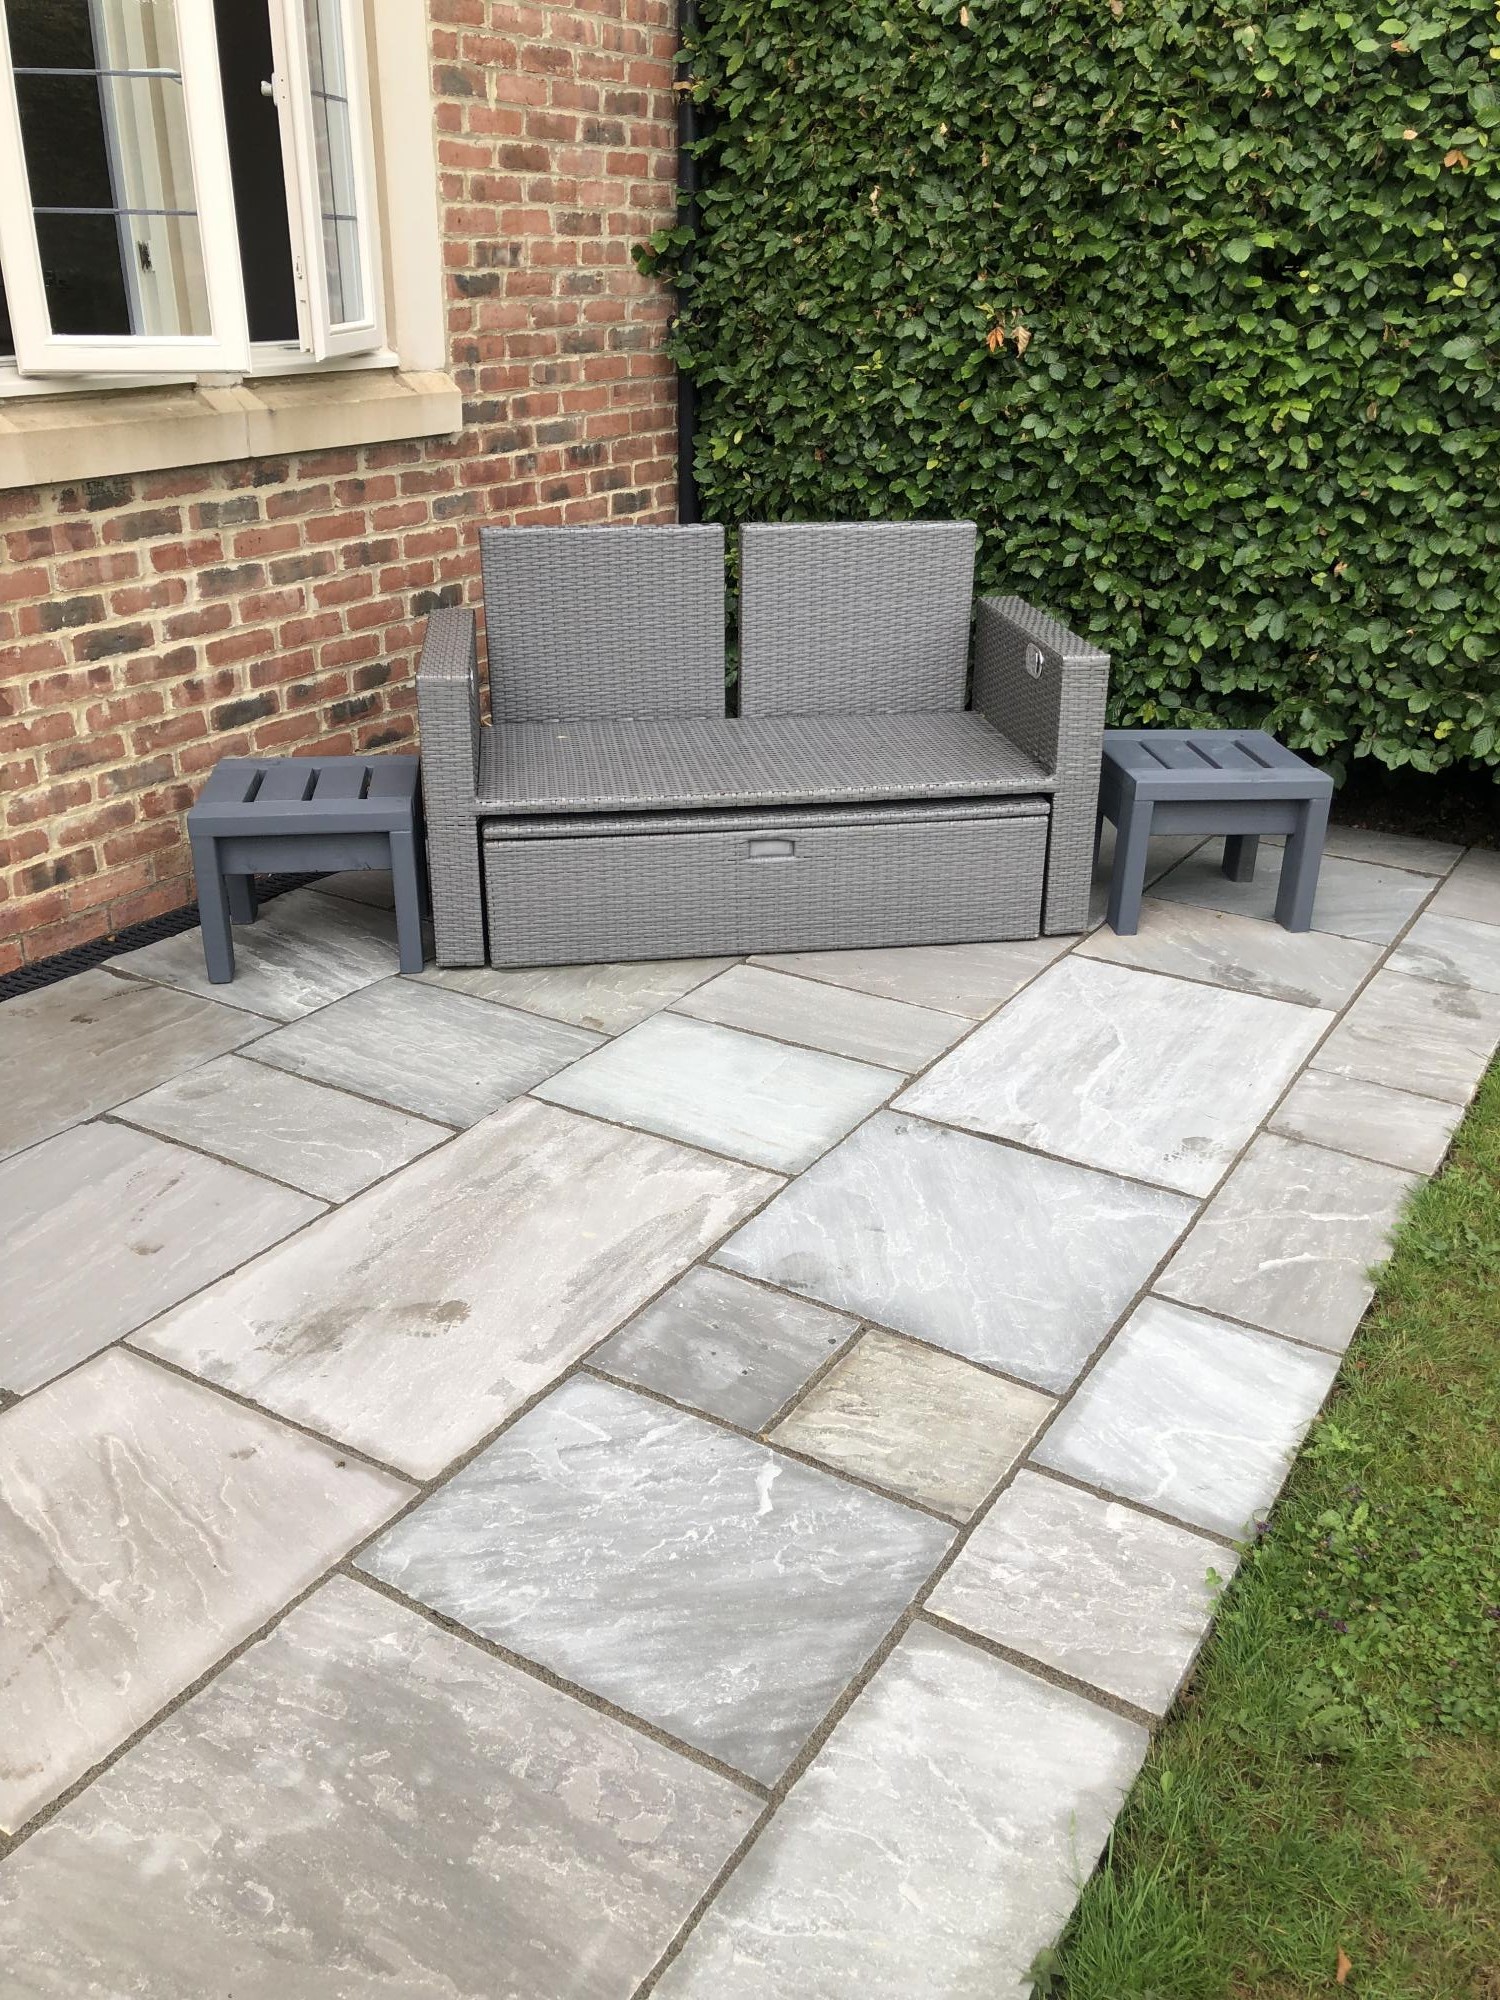
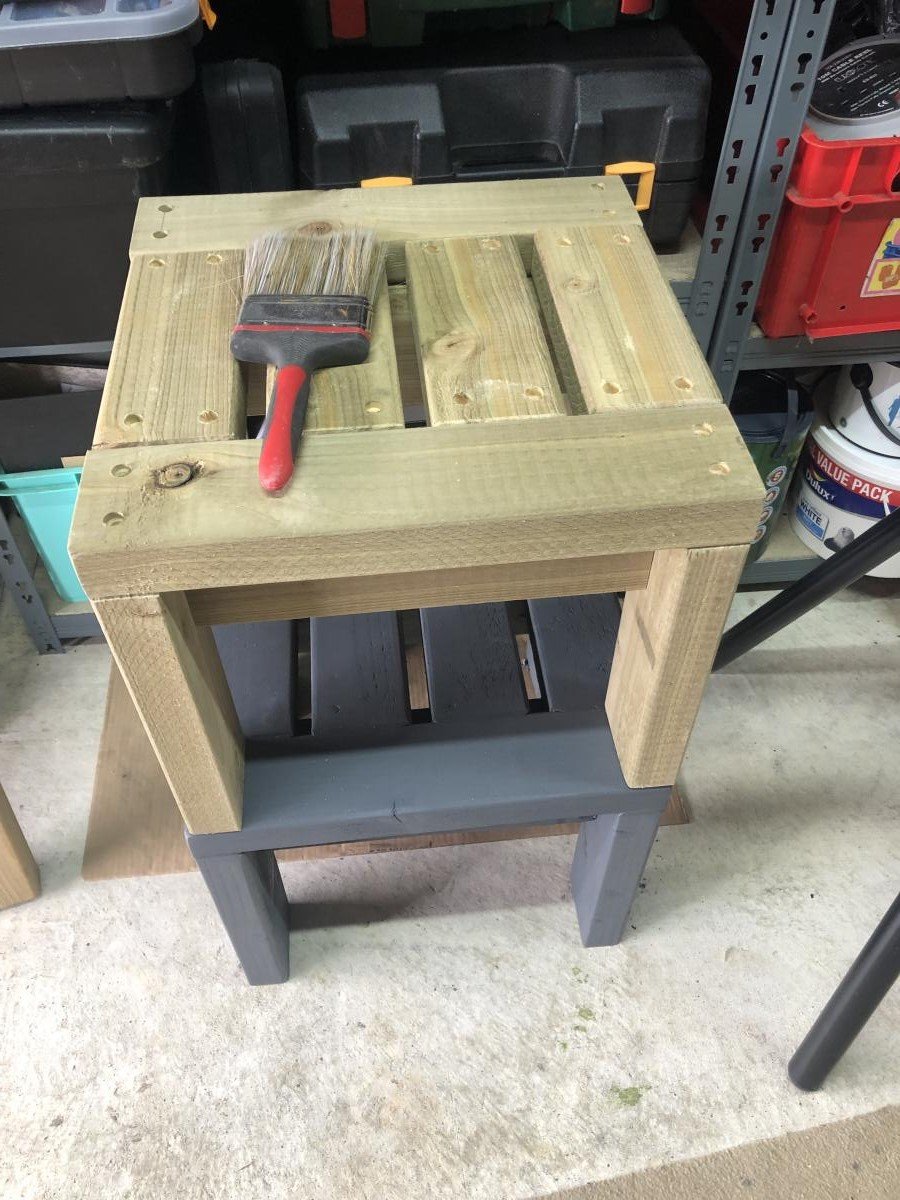
Well my wife bought 2 x 17” square seat cushions the problem was we didn’t have any stools to put them on so decided to enhance our front seating patio area with 2 solid 2x4 side tables that would double up as stools.
I based the design on Ana’s table design but decided to counter sink all the screws & cut plugs to suit so no screw heads could be seen, they turned out perfect & very robust, perfect for the U.K. weather, my wife finished them in grey outdoor paint to match the furniture, all in all they took only around 6hrs to make & paint.
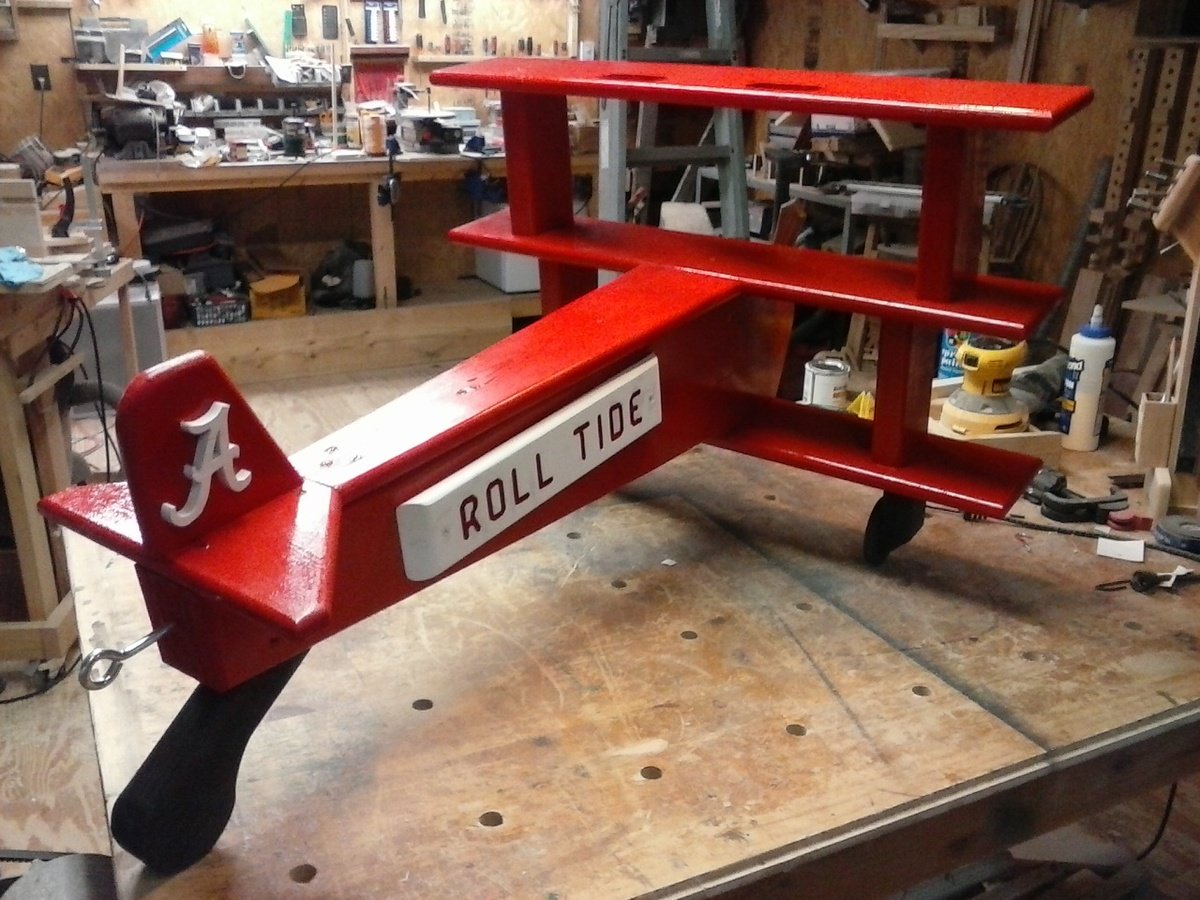
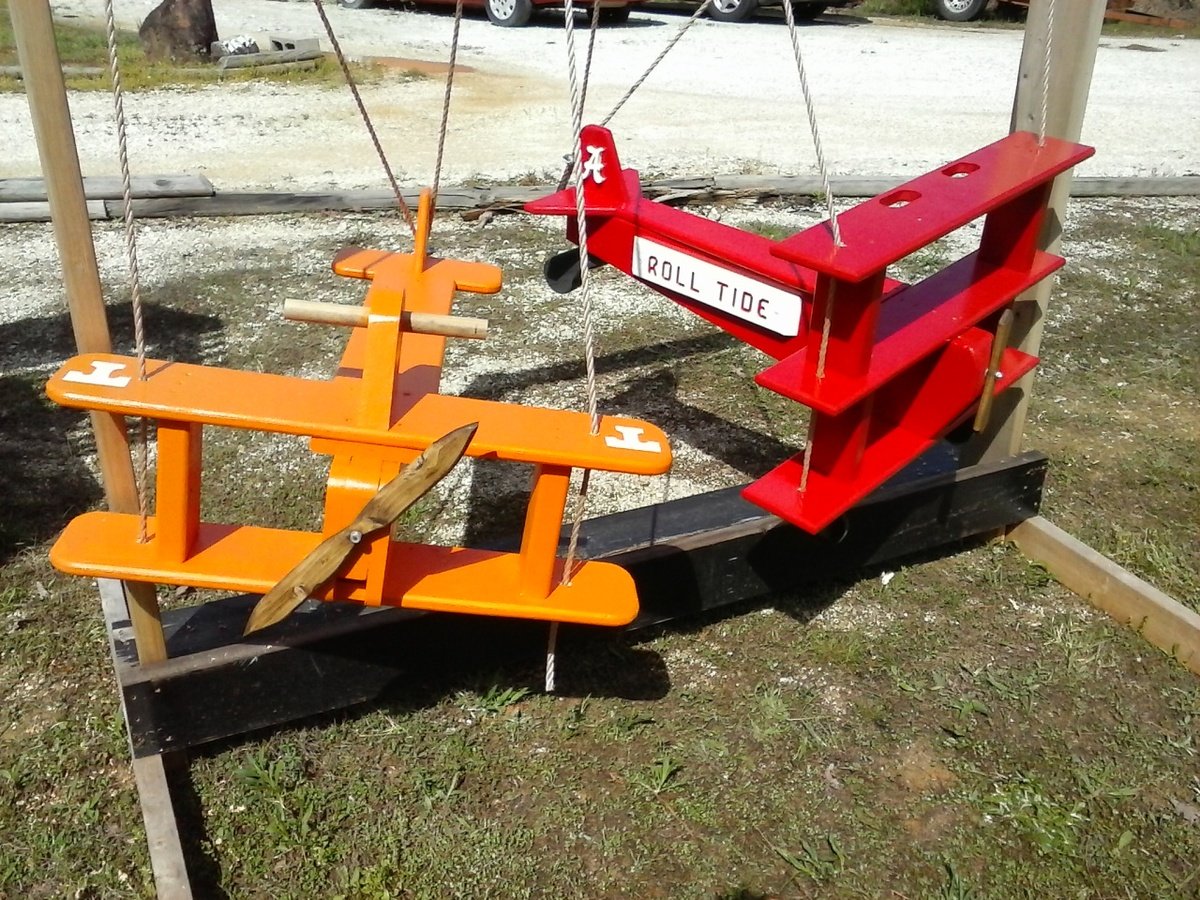
Built in an afternoon. I built them from a picture on Ana White website and modified a bit with both planes. Roll Tide was routed into a piece of wood and glued to the sides of the plane. The "A" was cut out on the band saw and finished on the scroll saw. The "T" on the orange plane was painted on The tri plane is the favorite. Roll Tide !

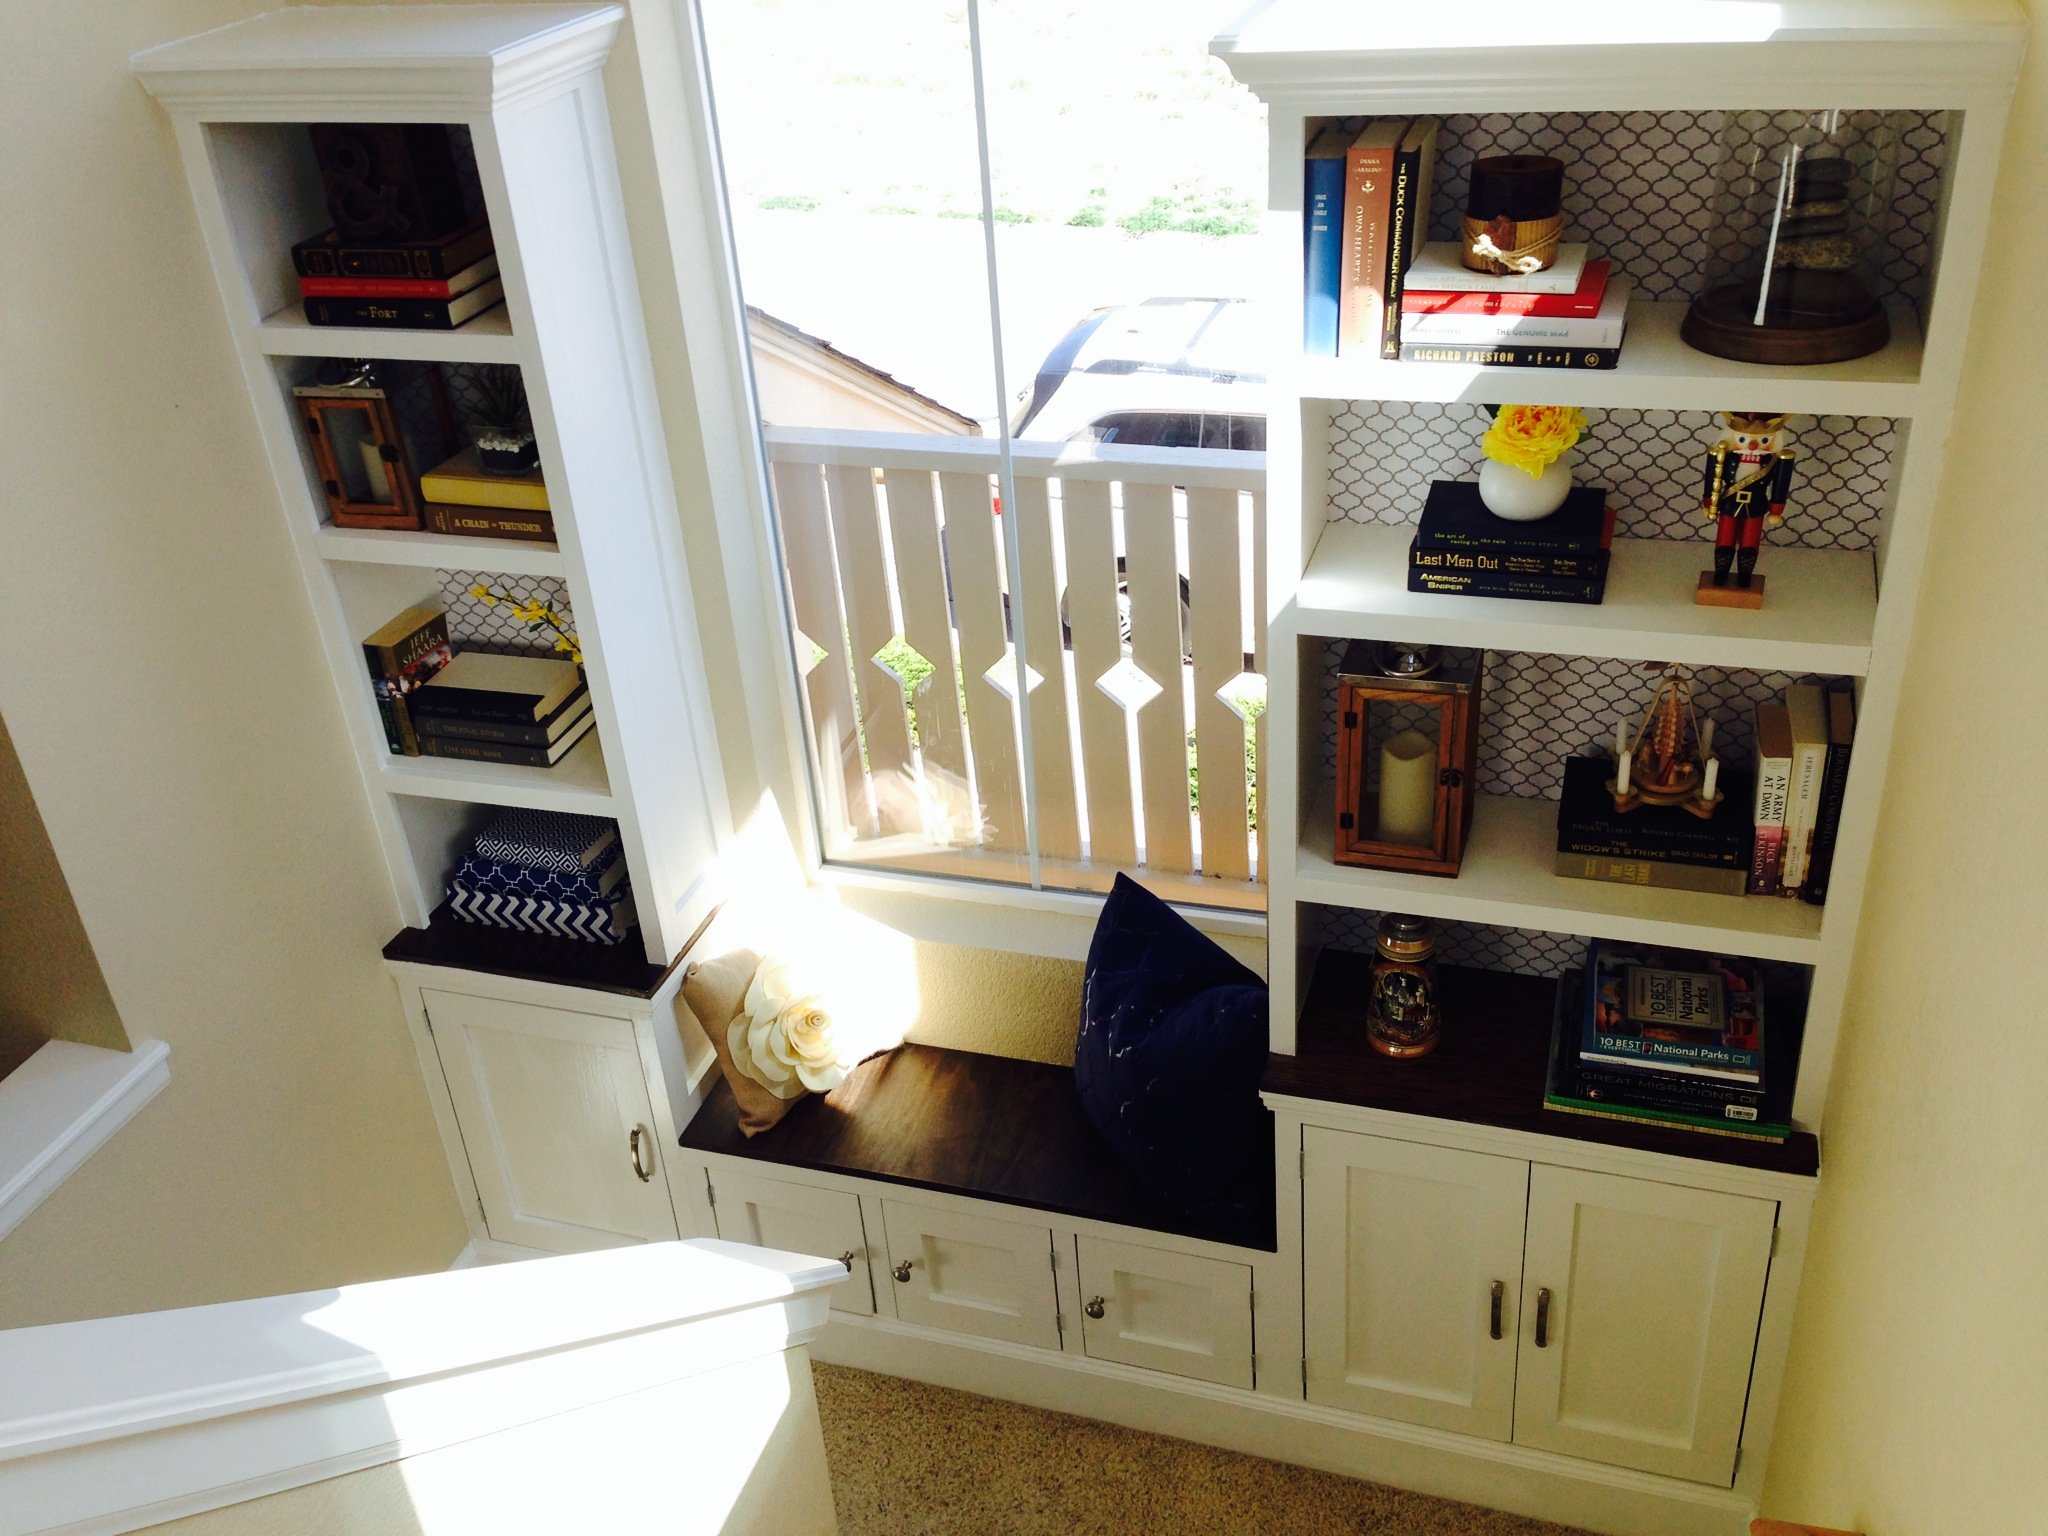
Built in bookcase with lighting and power outlets in cupboards for audio and DVD equipment to feed to the wall mounted tv (to the left).
The photo with the lights is when it was unfinished and I also decided that I didn't like the inset doors and so made new overlay ones. Now I have four doors I need to use on another project...


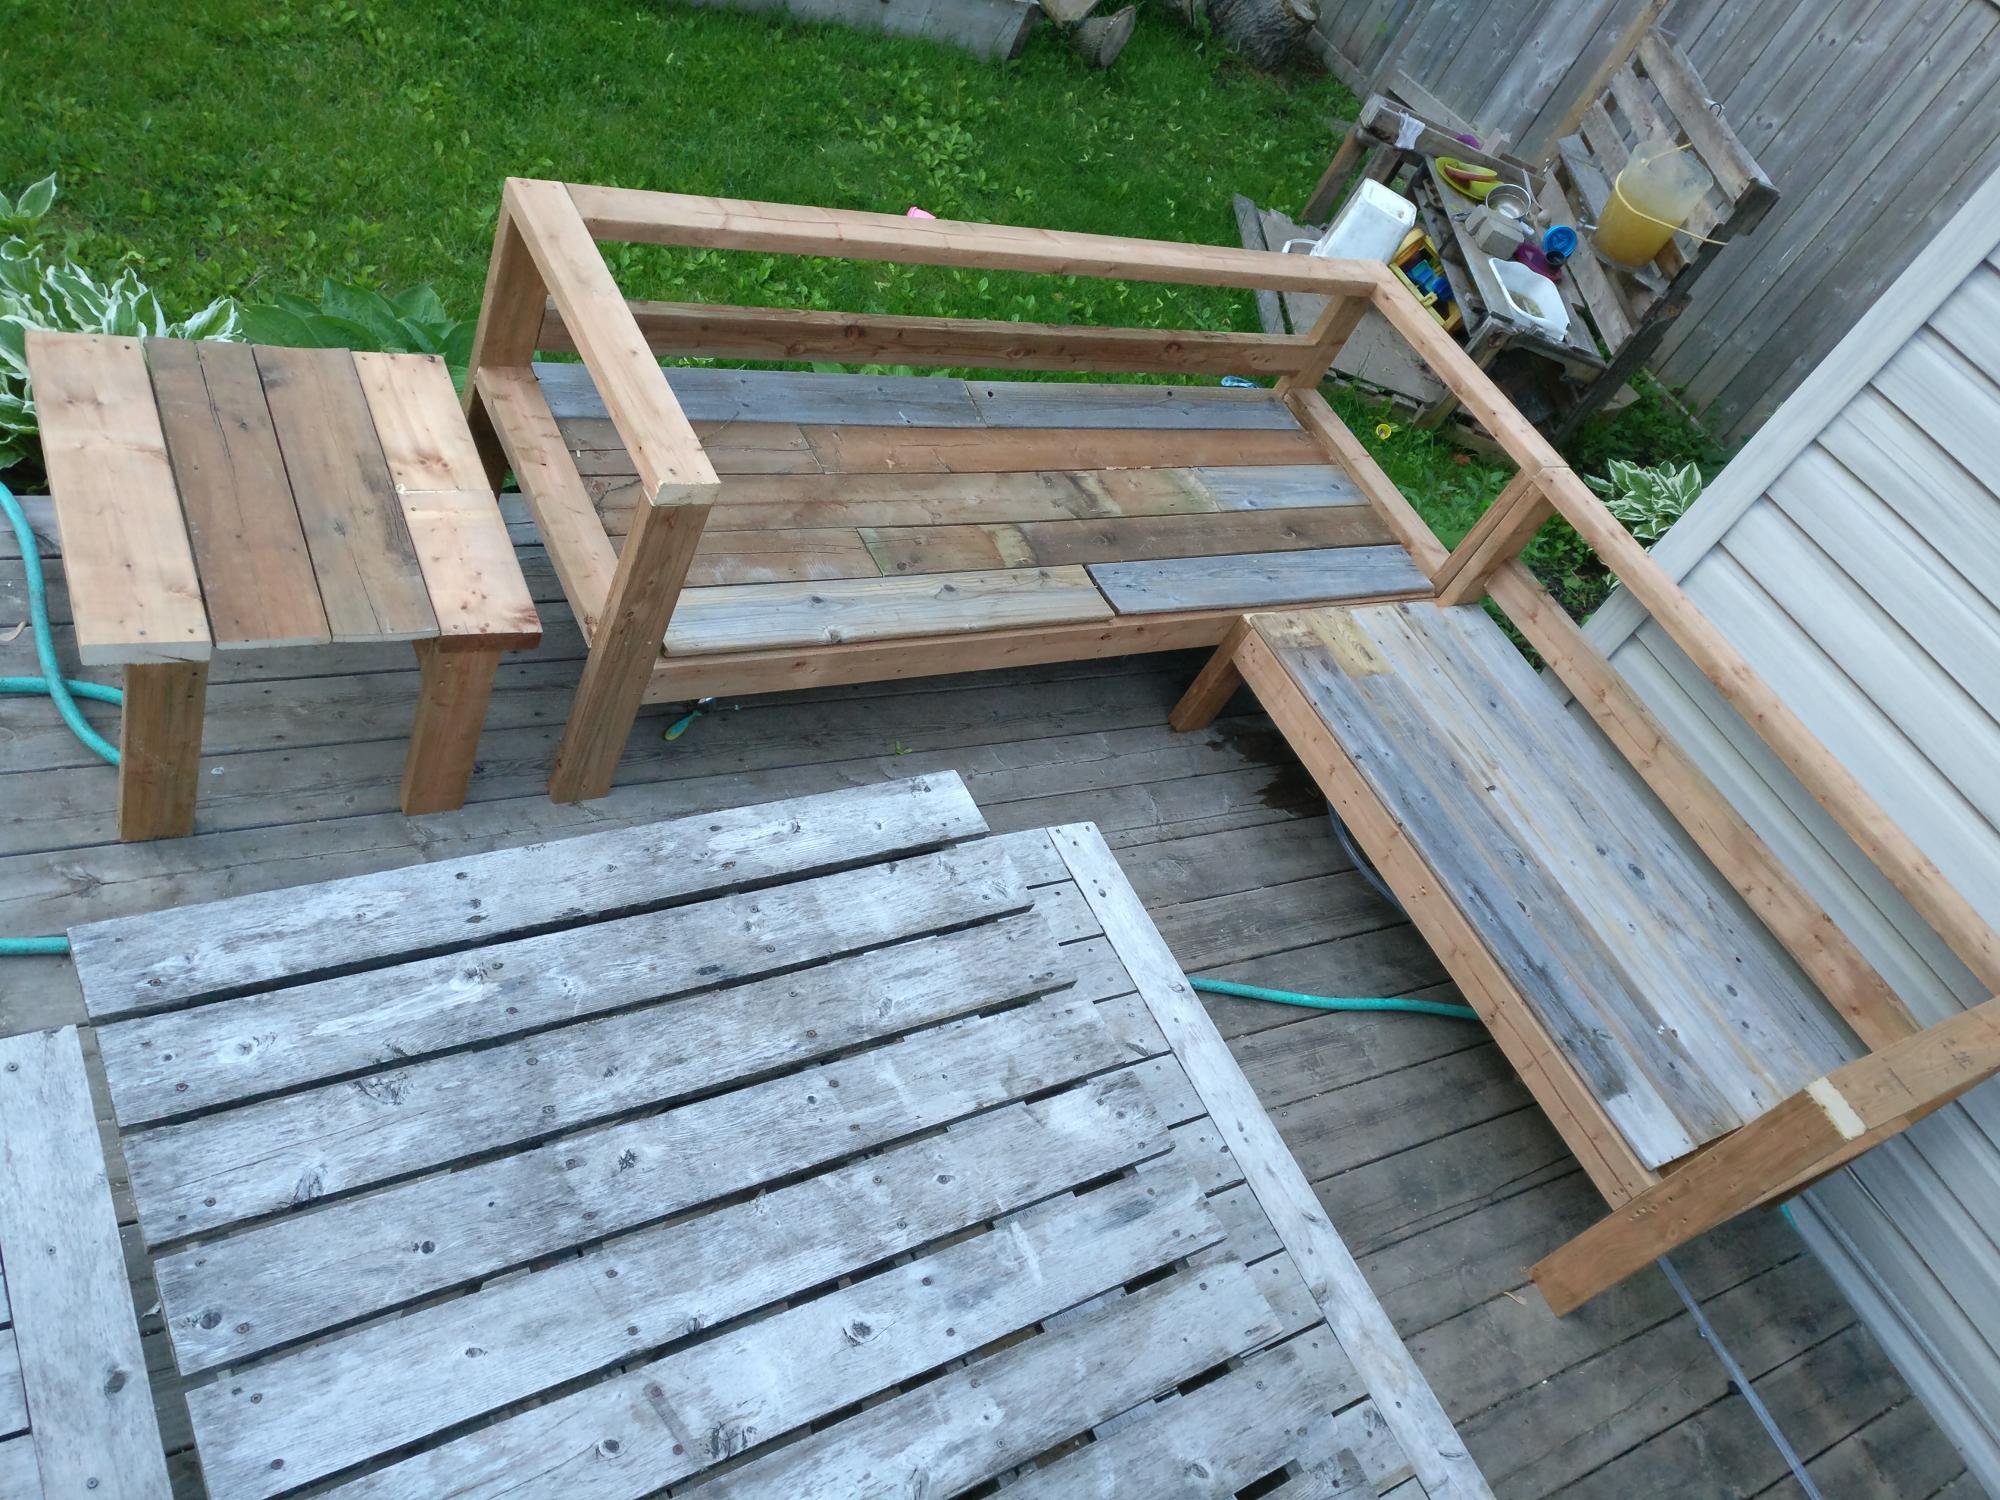
Bought enough lumber for one sofa but ended up using old fence boards for the decking so had enough lumber to make the sectional and a shortened coffee table.
Great way to save some cash even if u have to buy the fence posts.
Added a reinforcing piece to the one armed sofa between the legs using a kreg jig to stabilize the legs a bit more.
Waiting on my foam from Amazon to finish off this project!
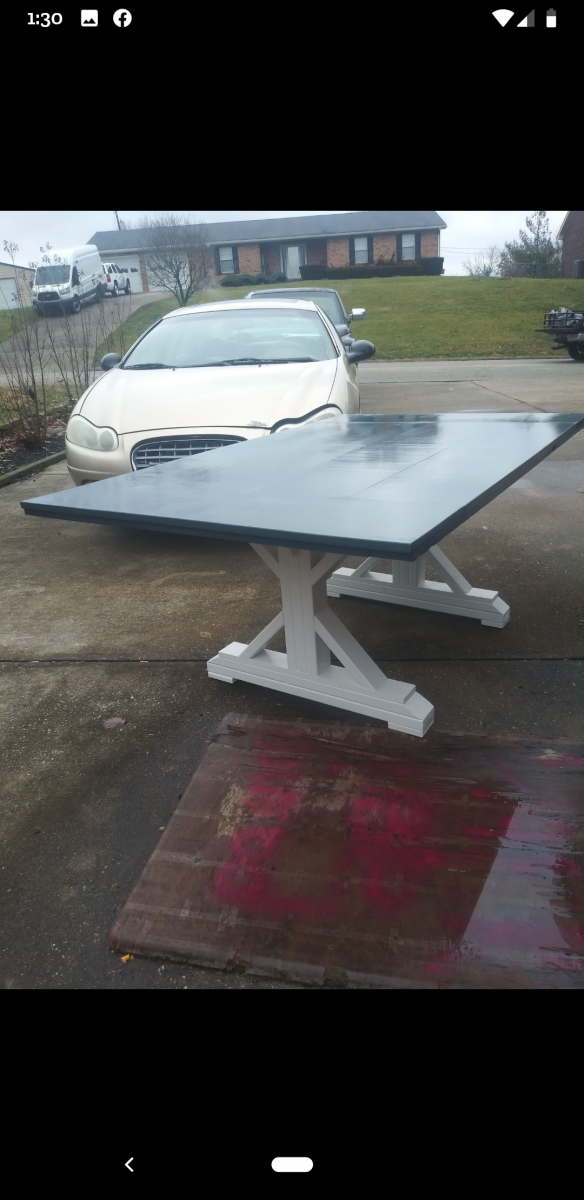
Used inspiration from the beer/wine cooler patio table and made the middle of the table removable to add a buck underneath later.
Note the 5 year old patio set, also an ana white project from back in the day!
Super quick build!
I did find that the measurements for customizing it for your cushion size seemed about 1.5 inches too big for all the depth pieces so I sized down but I haven't received my foam yet so maybe I'm wrong but Smth to think about. I didn't want my cushions to slide around so I took that into consideration when building.
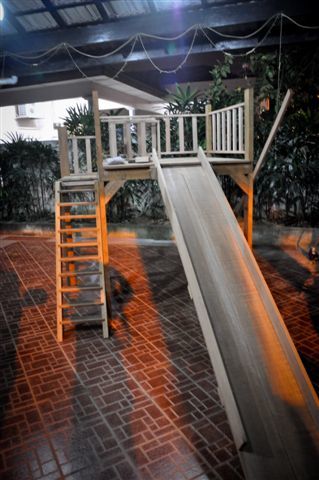
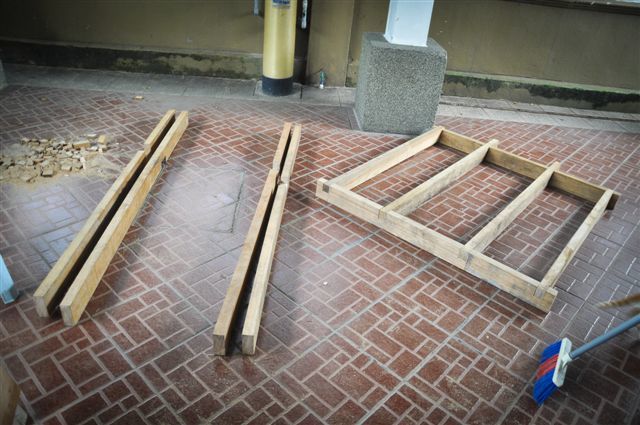
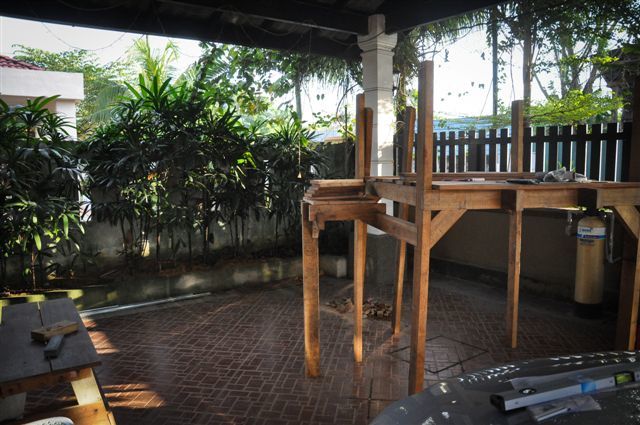
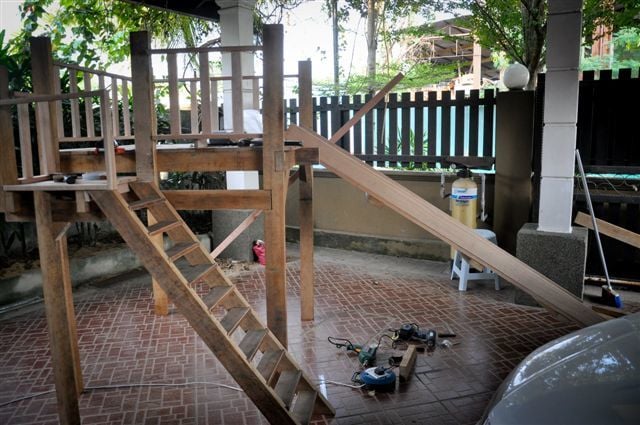
It's my first woodwork project and I went ahead on building a slide with a playhouse underneath. Took some of the ideas from Ana's playhouse deck plan. It took me awhile to figure out how to build the slides and steps though. The project is intended to cater for my 1 year old daughter. As you can see, the playhouse is not "there" yet as there's no wall surrounding the structure beneath the slides (there will be some soon enough). As this playhouse will someday be put under direct sunlight and heavy rain, choice of wood takes into account the tropical weather that we have here in Malaysia (I might have to put some heavy coating on that Meranti though).
Dimension wise it's a 4'X4'X4' structure with 1.5' steps attached at the side. The railing are about 1.5' high.
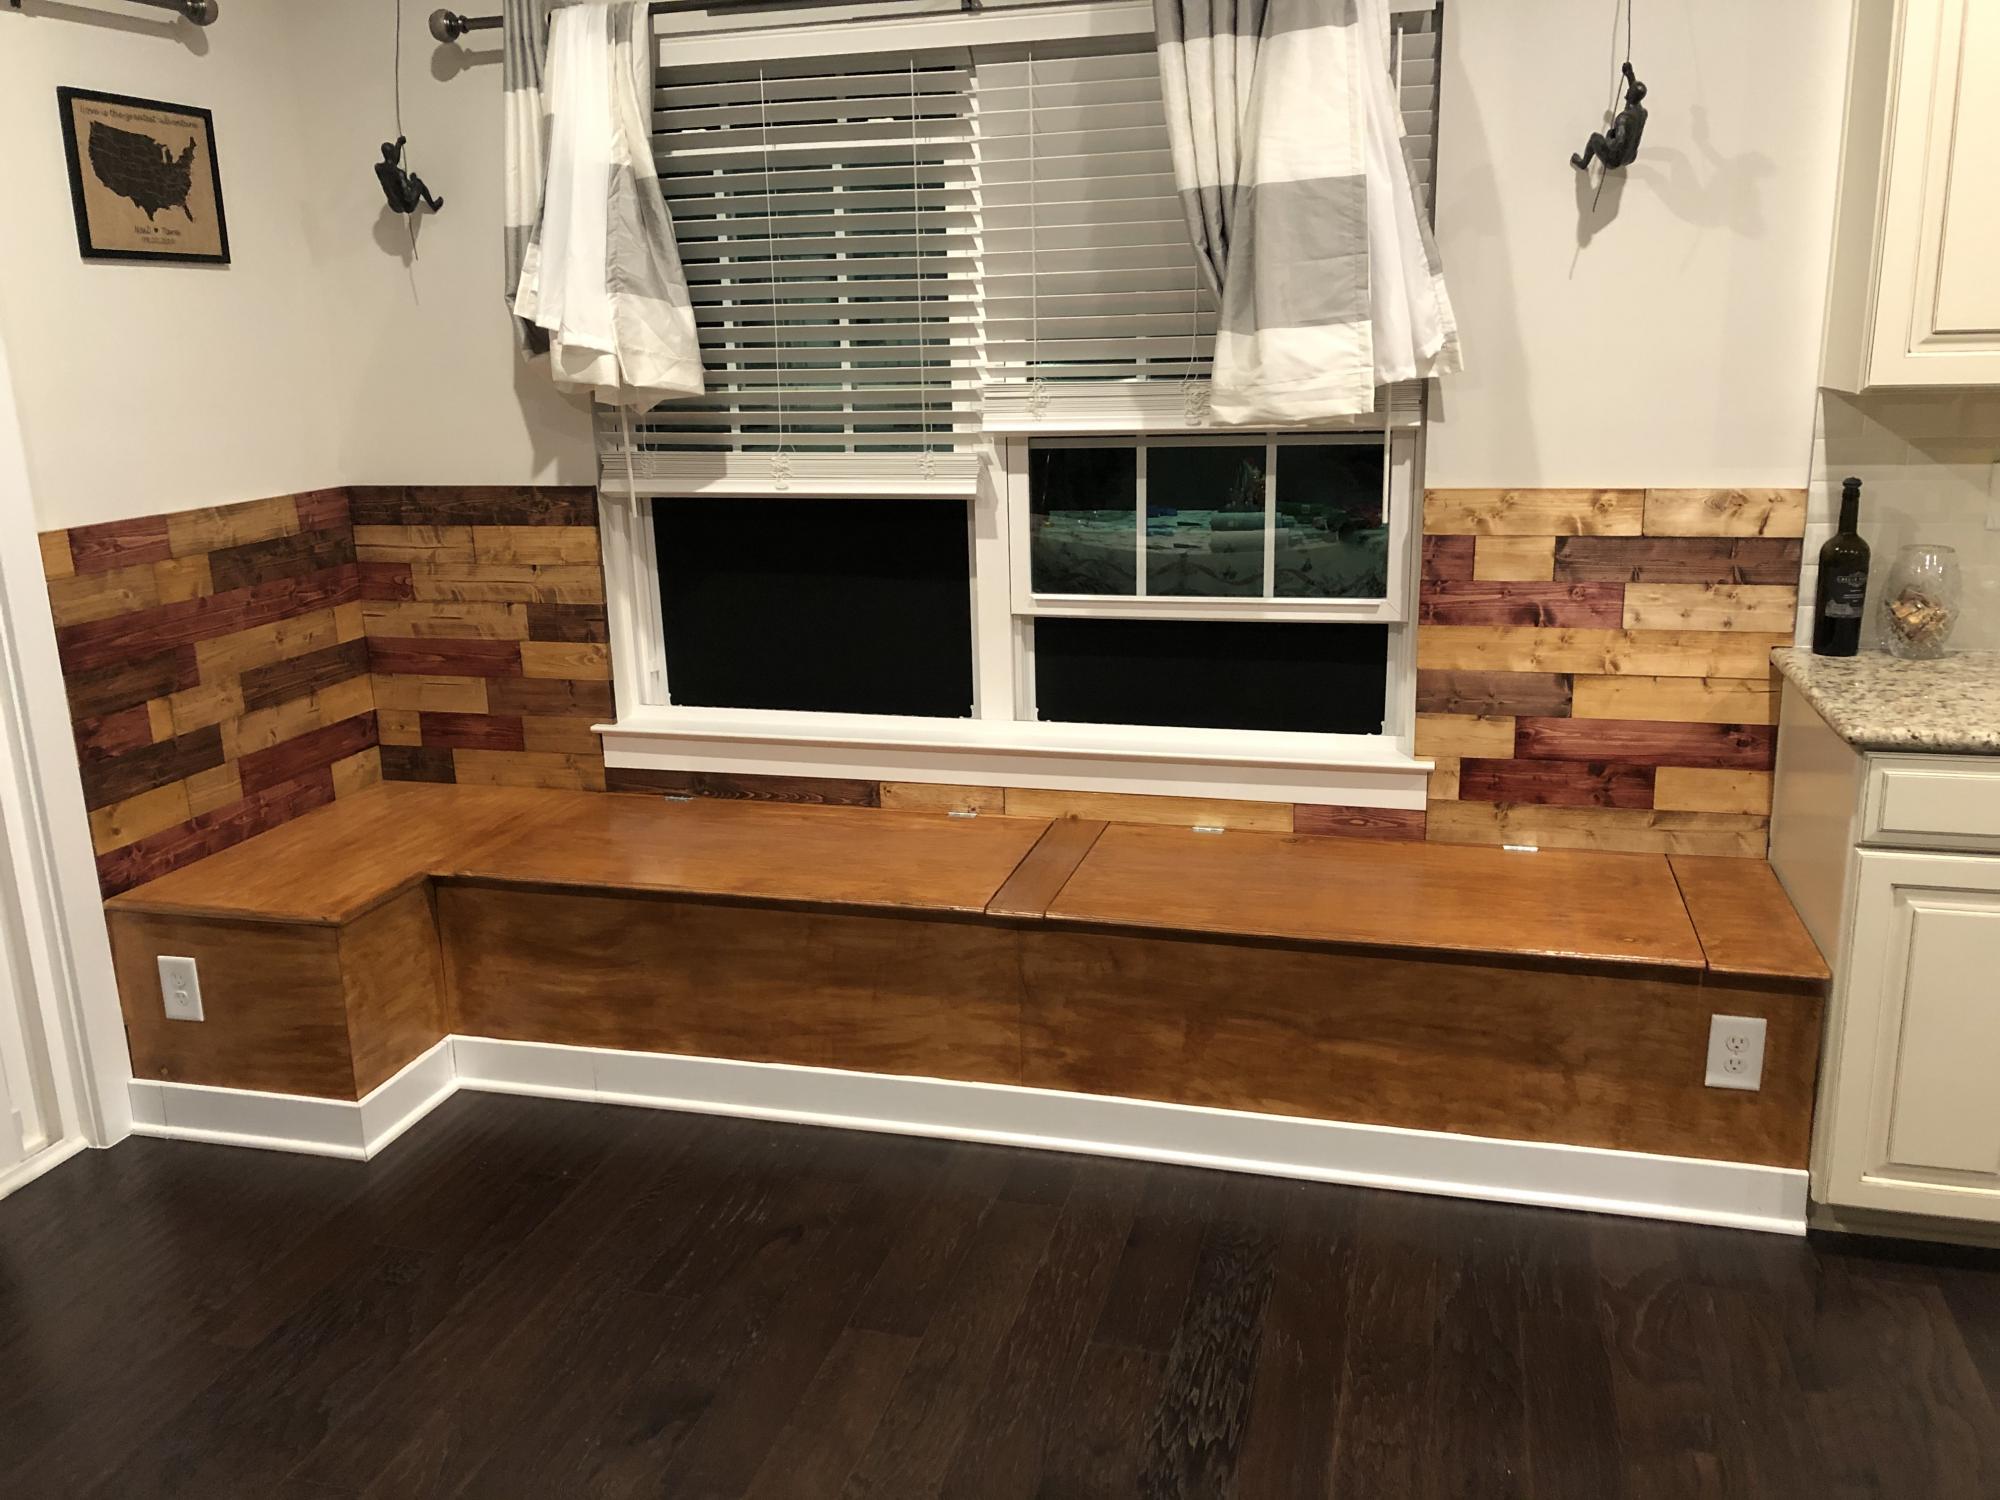
Modified the benches a little to be opened without removing a cushion. Cushions to come. We made our own paneling for the back and reused the original trim. Table to come.
Idea and plans from another brag Breakfast nook.

This was my first project. It was relatively easy but I did make some mistakes that are now design features


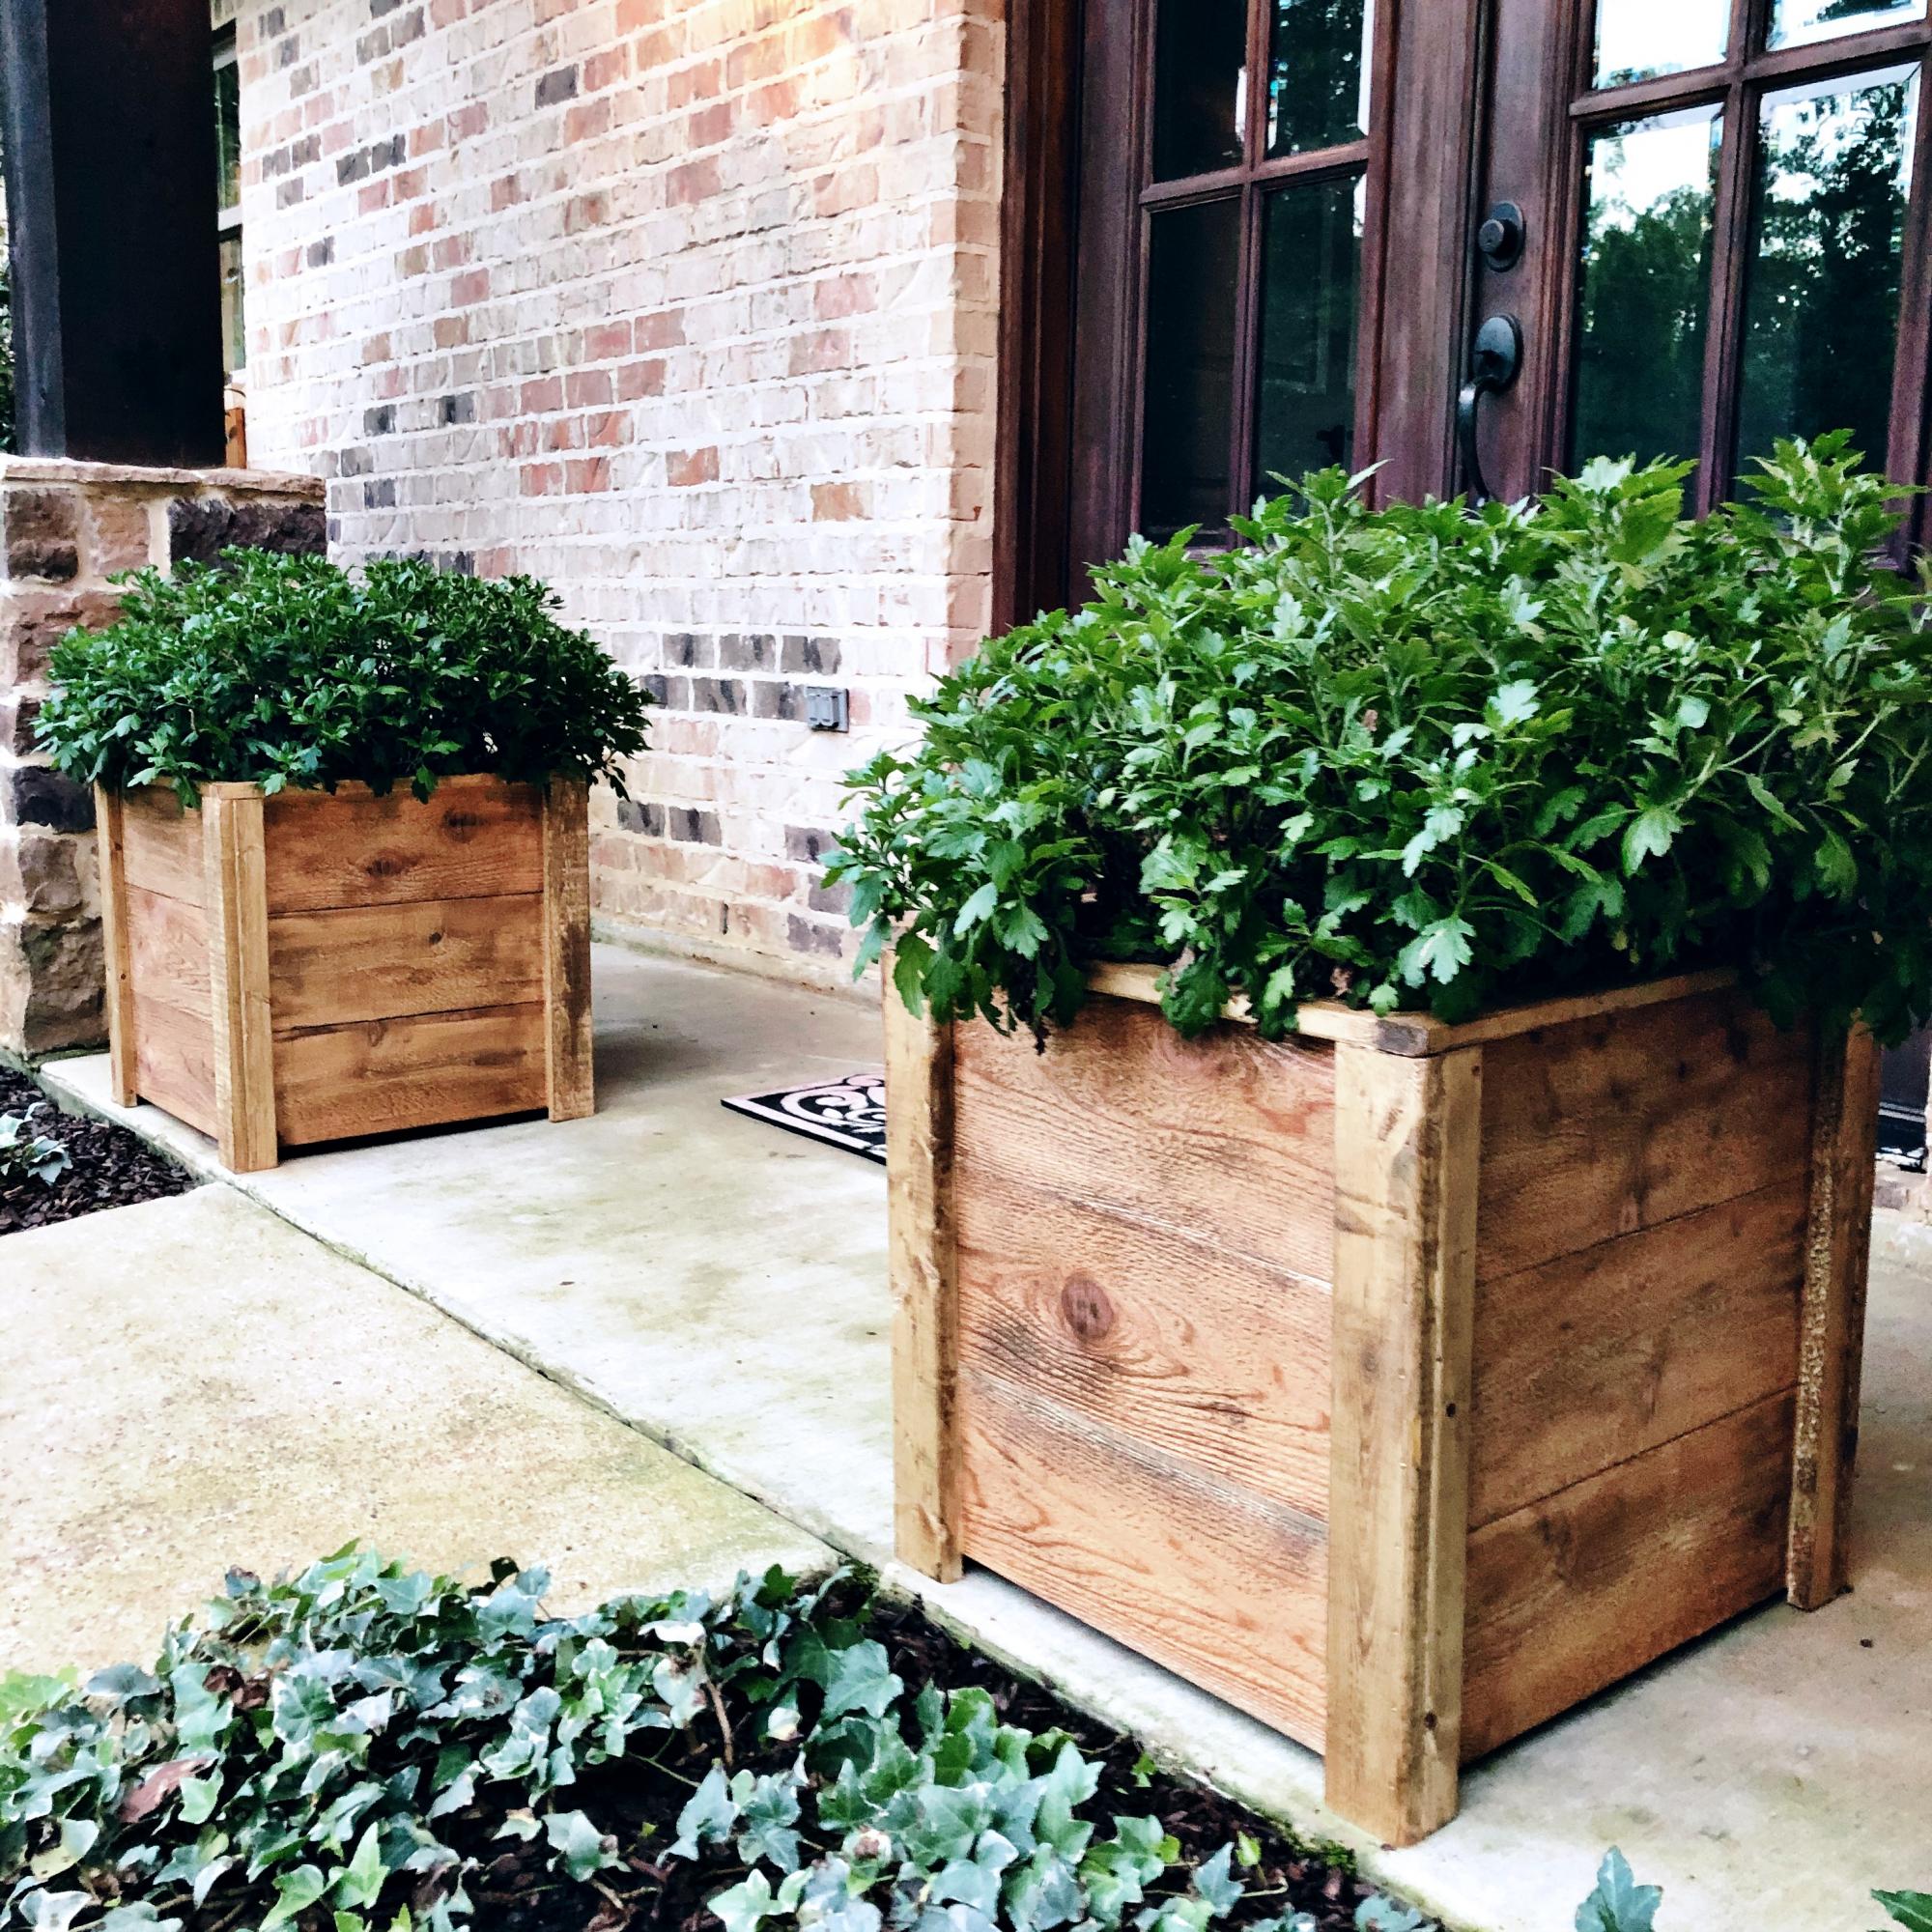
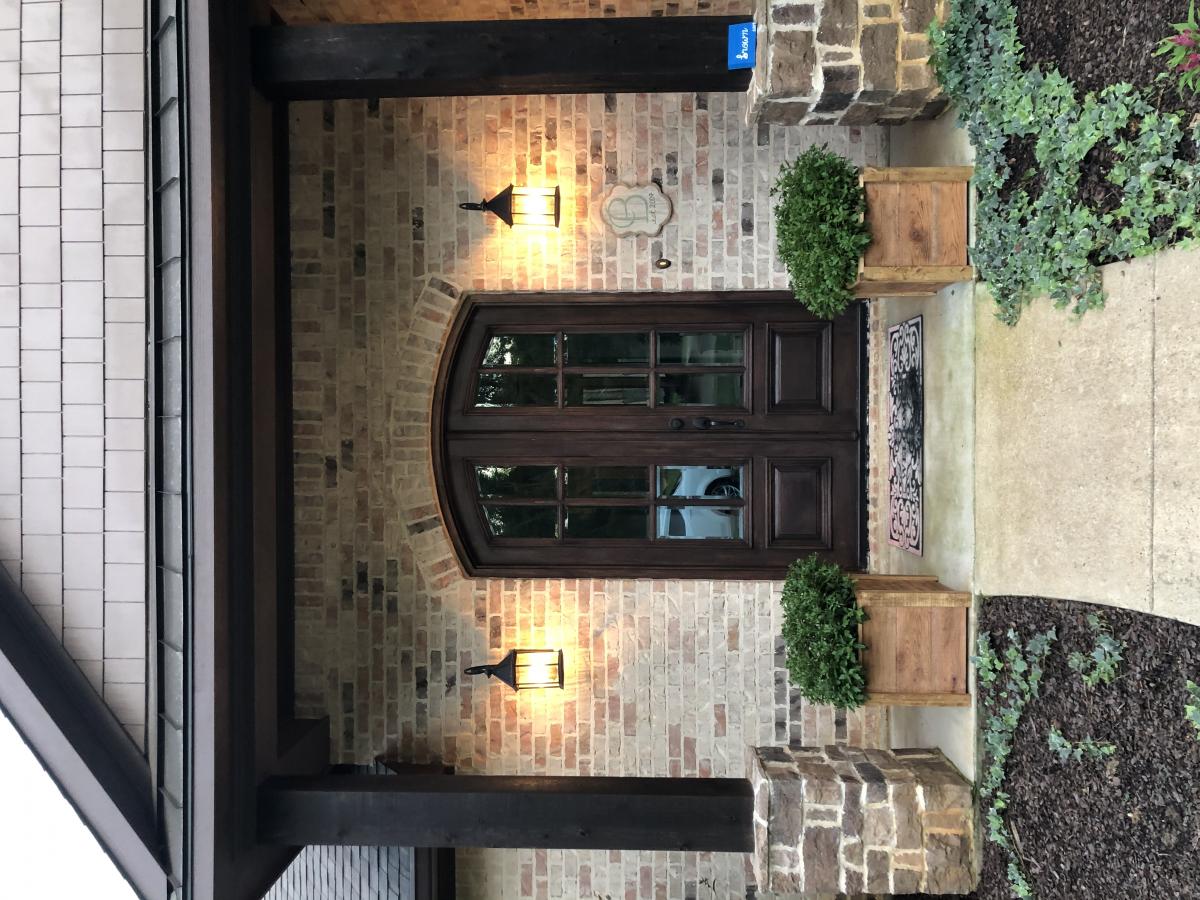
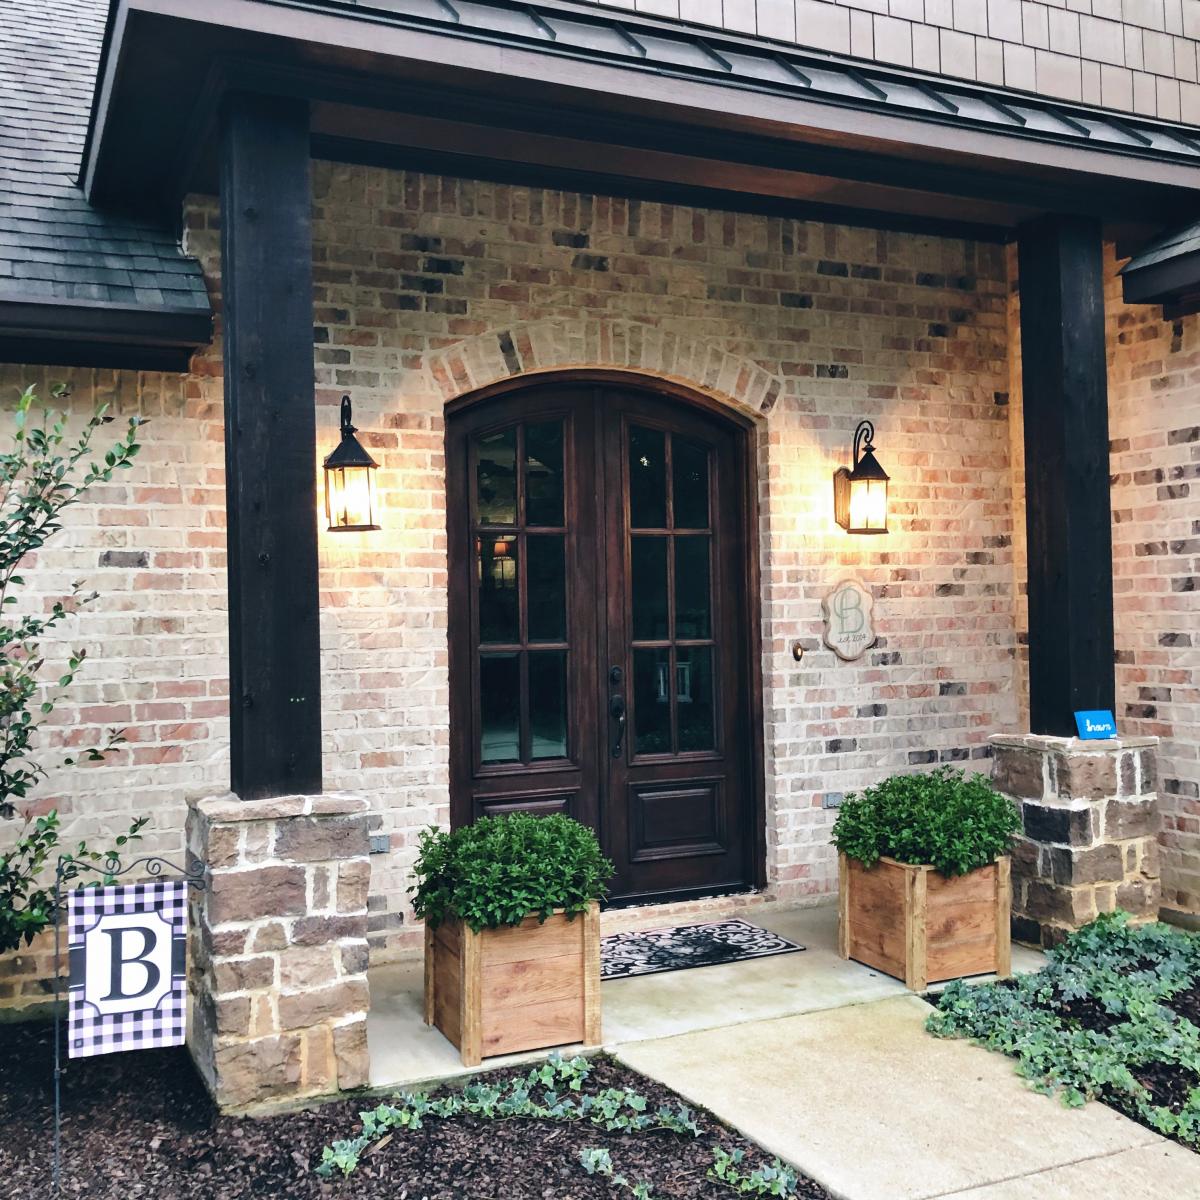
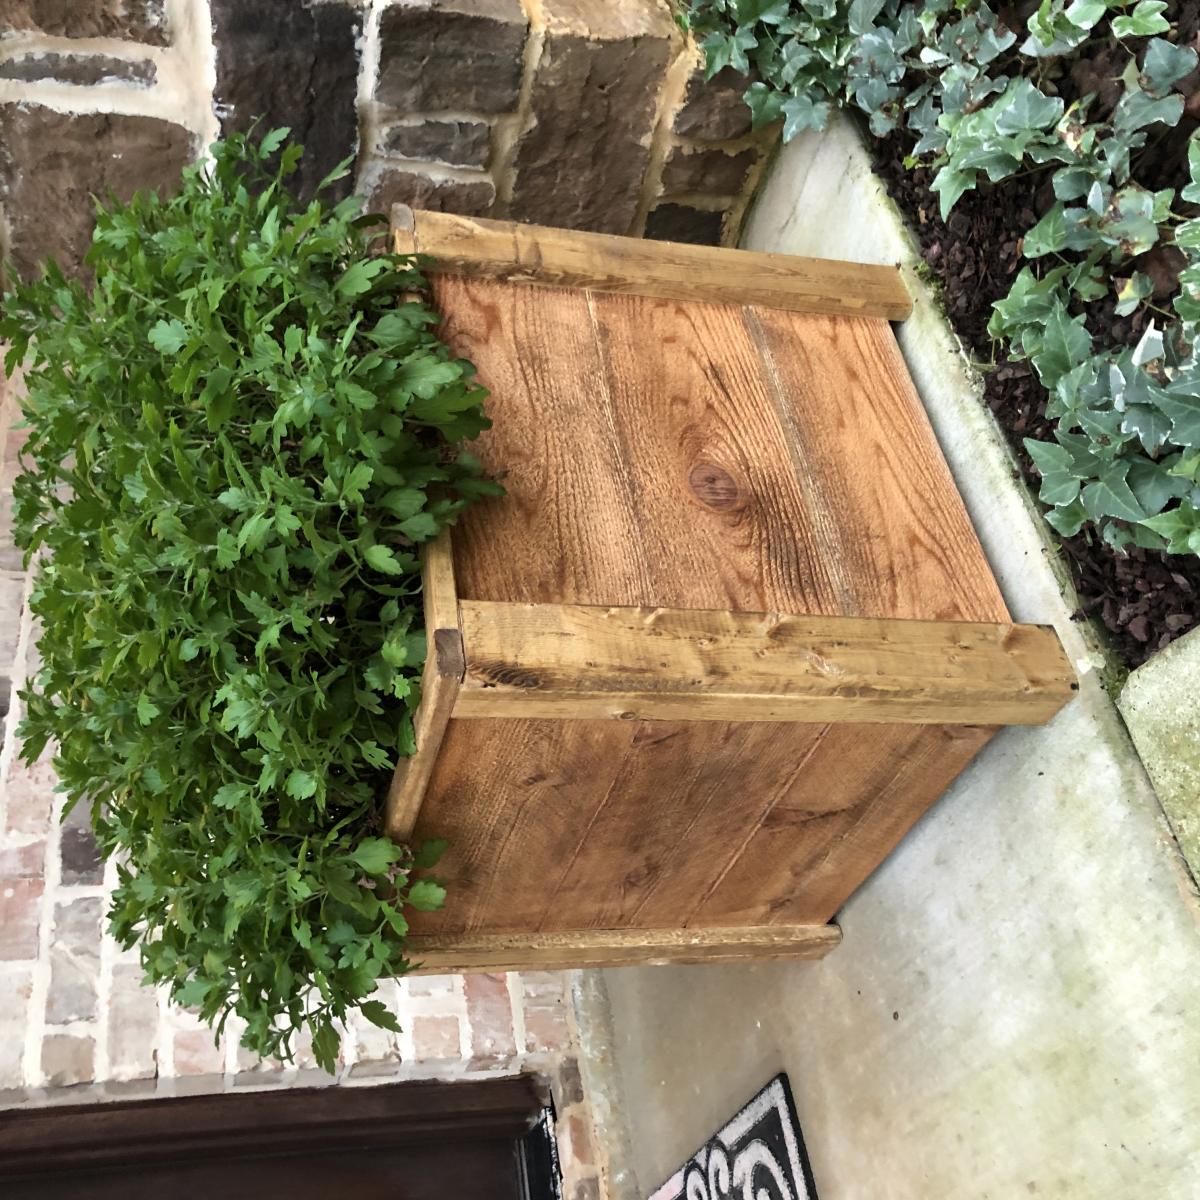
These were a quick weeknight build! And.... My very first “all by myself” build! I’m really proud of how they turned out and love how much style they add to my front porch!

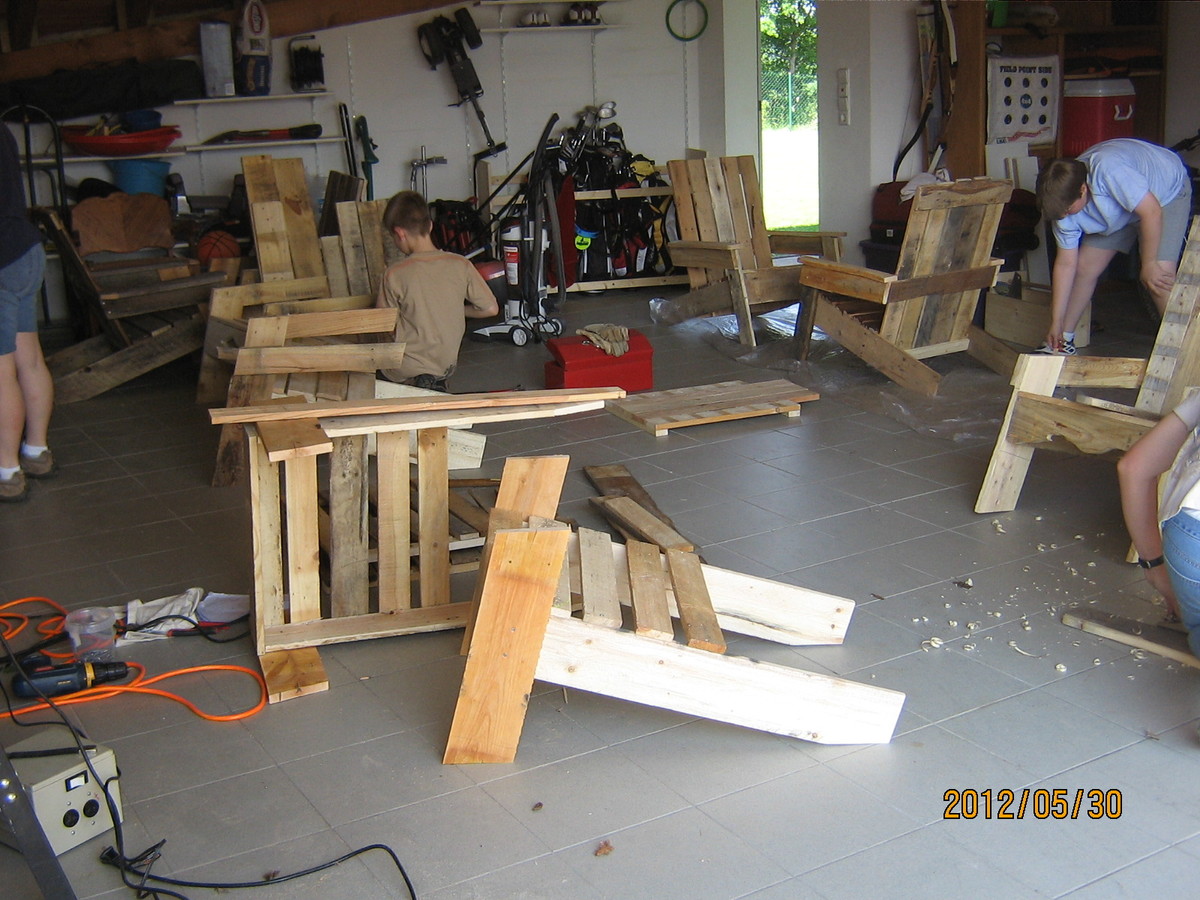
We were able to pick up pallets for free. There were 6 boys aged 10-13 years old. They each took apart 5 pallets. Their pallets with time and patience became two adirondack chairs each. We love the chairs and the boys learned quite a bit. The challenge was that the pallet peices differed in thickness and widths so the boys had to really focus on each piece and the overall look. They look fantastic. The finishes were all different. We are so thankful that Ana has put together such a wonderful website.
Thank you Ana! These boys learned that if they need something, they can make it themselves! They also learned that trash can be a treasure.
Thank you,
Amy
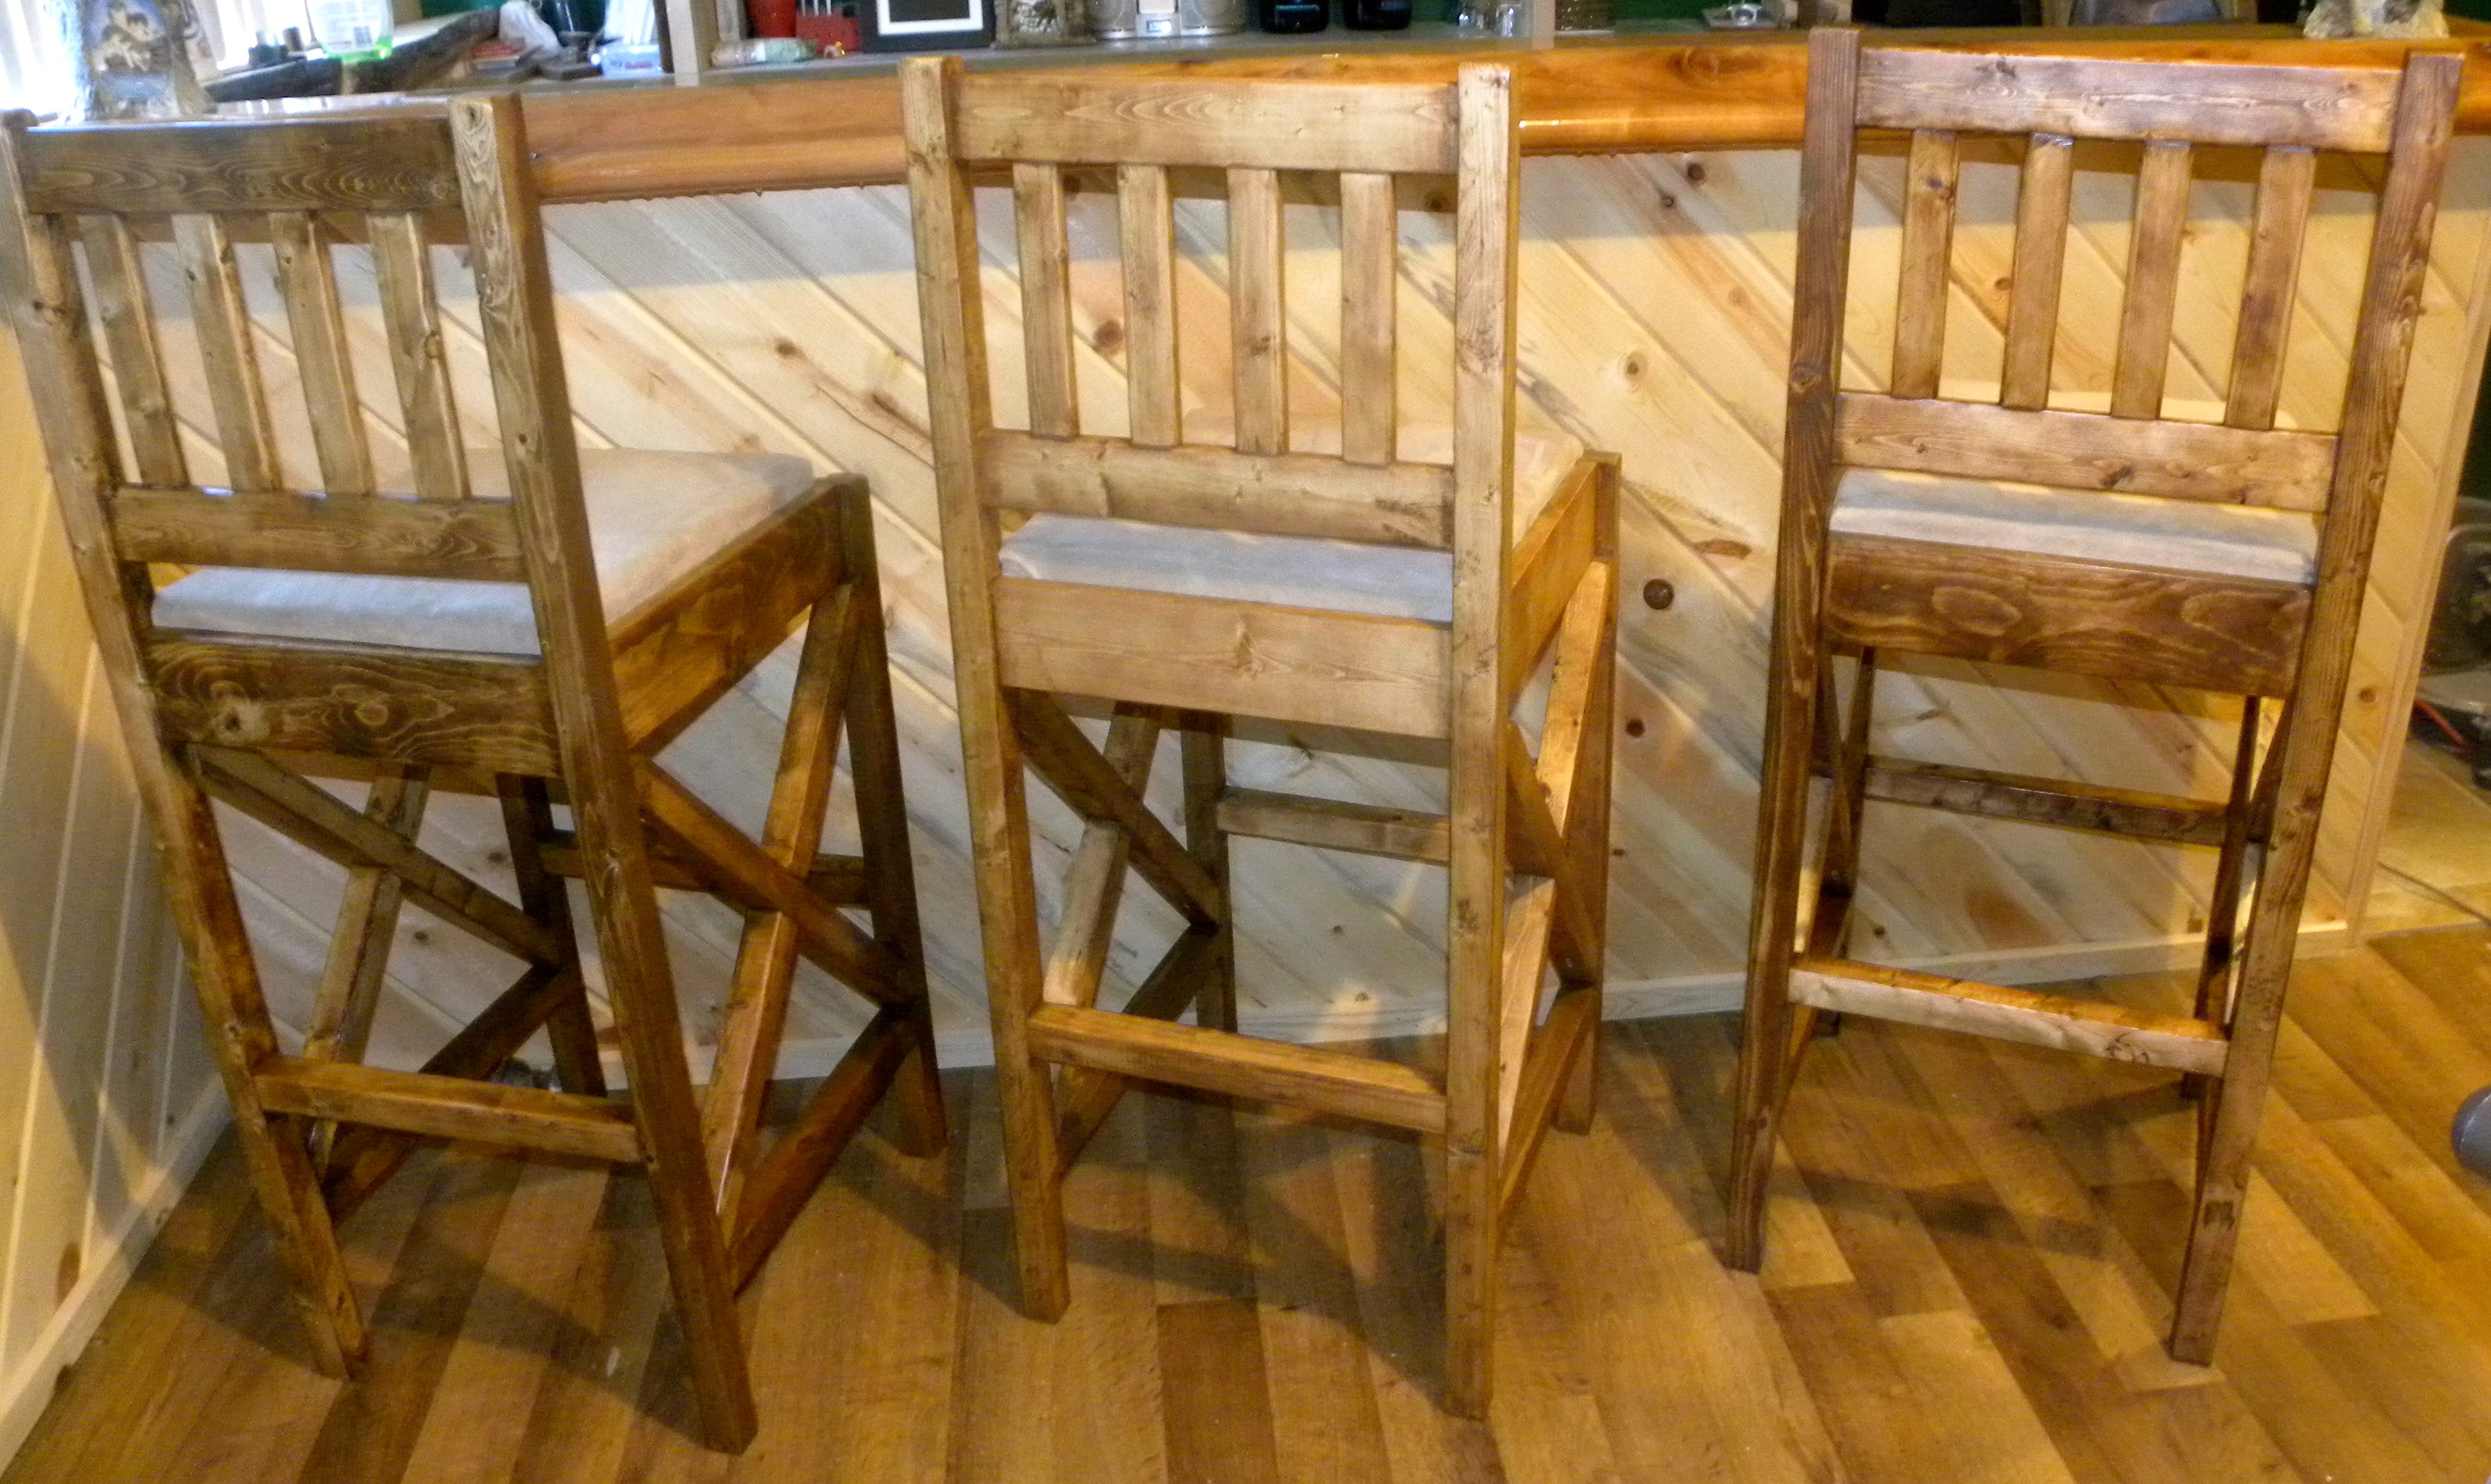
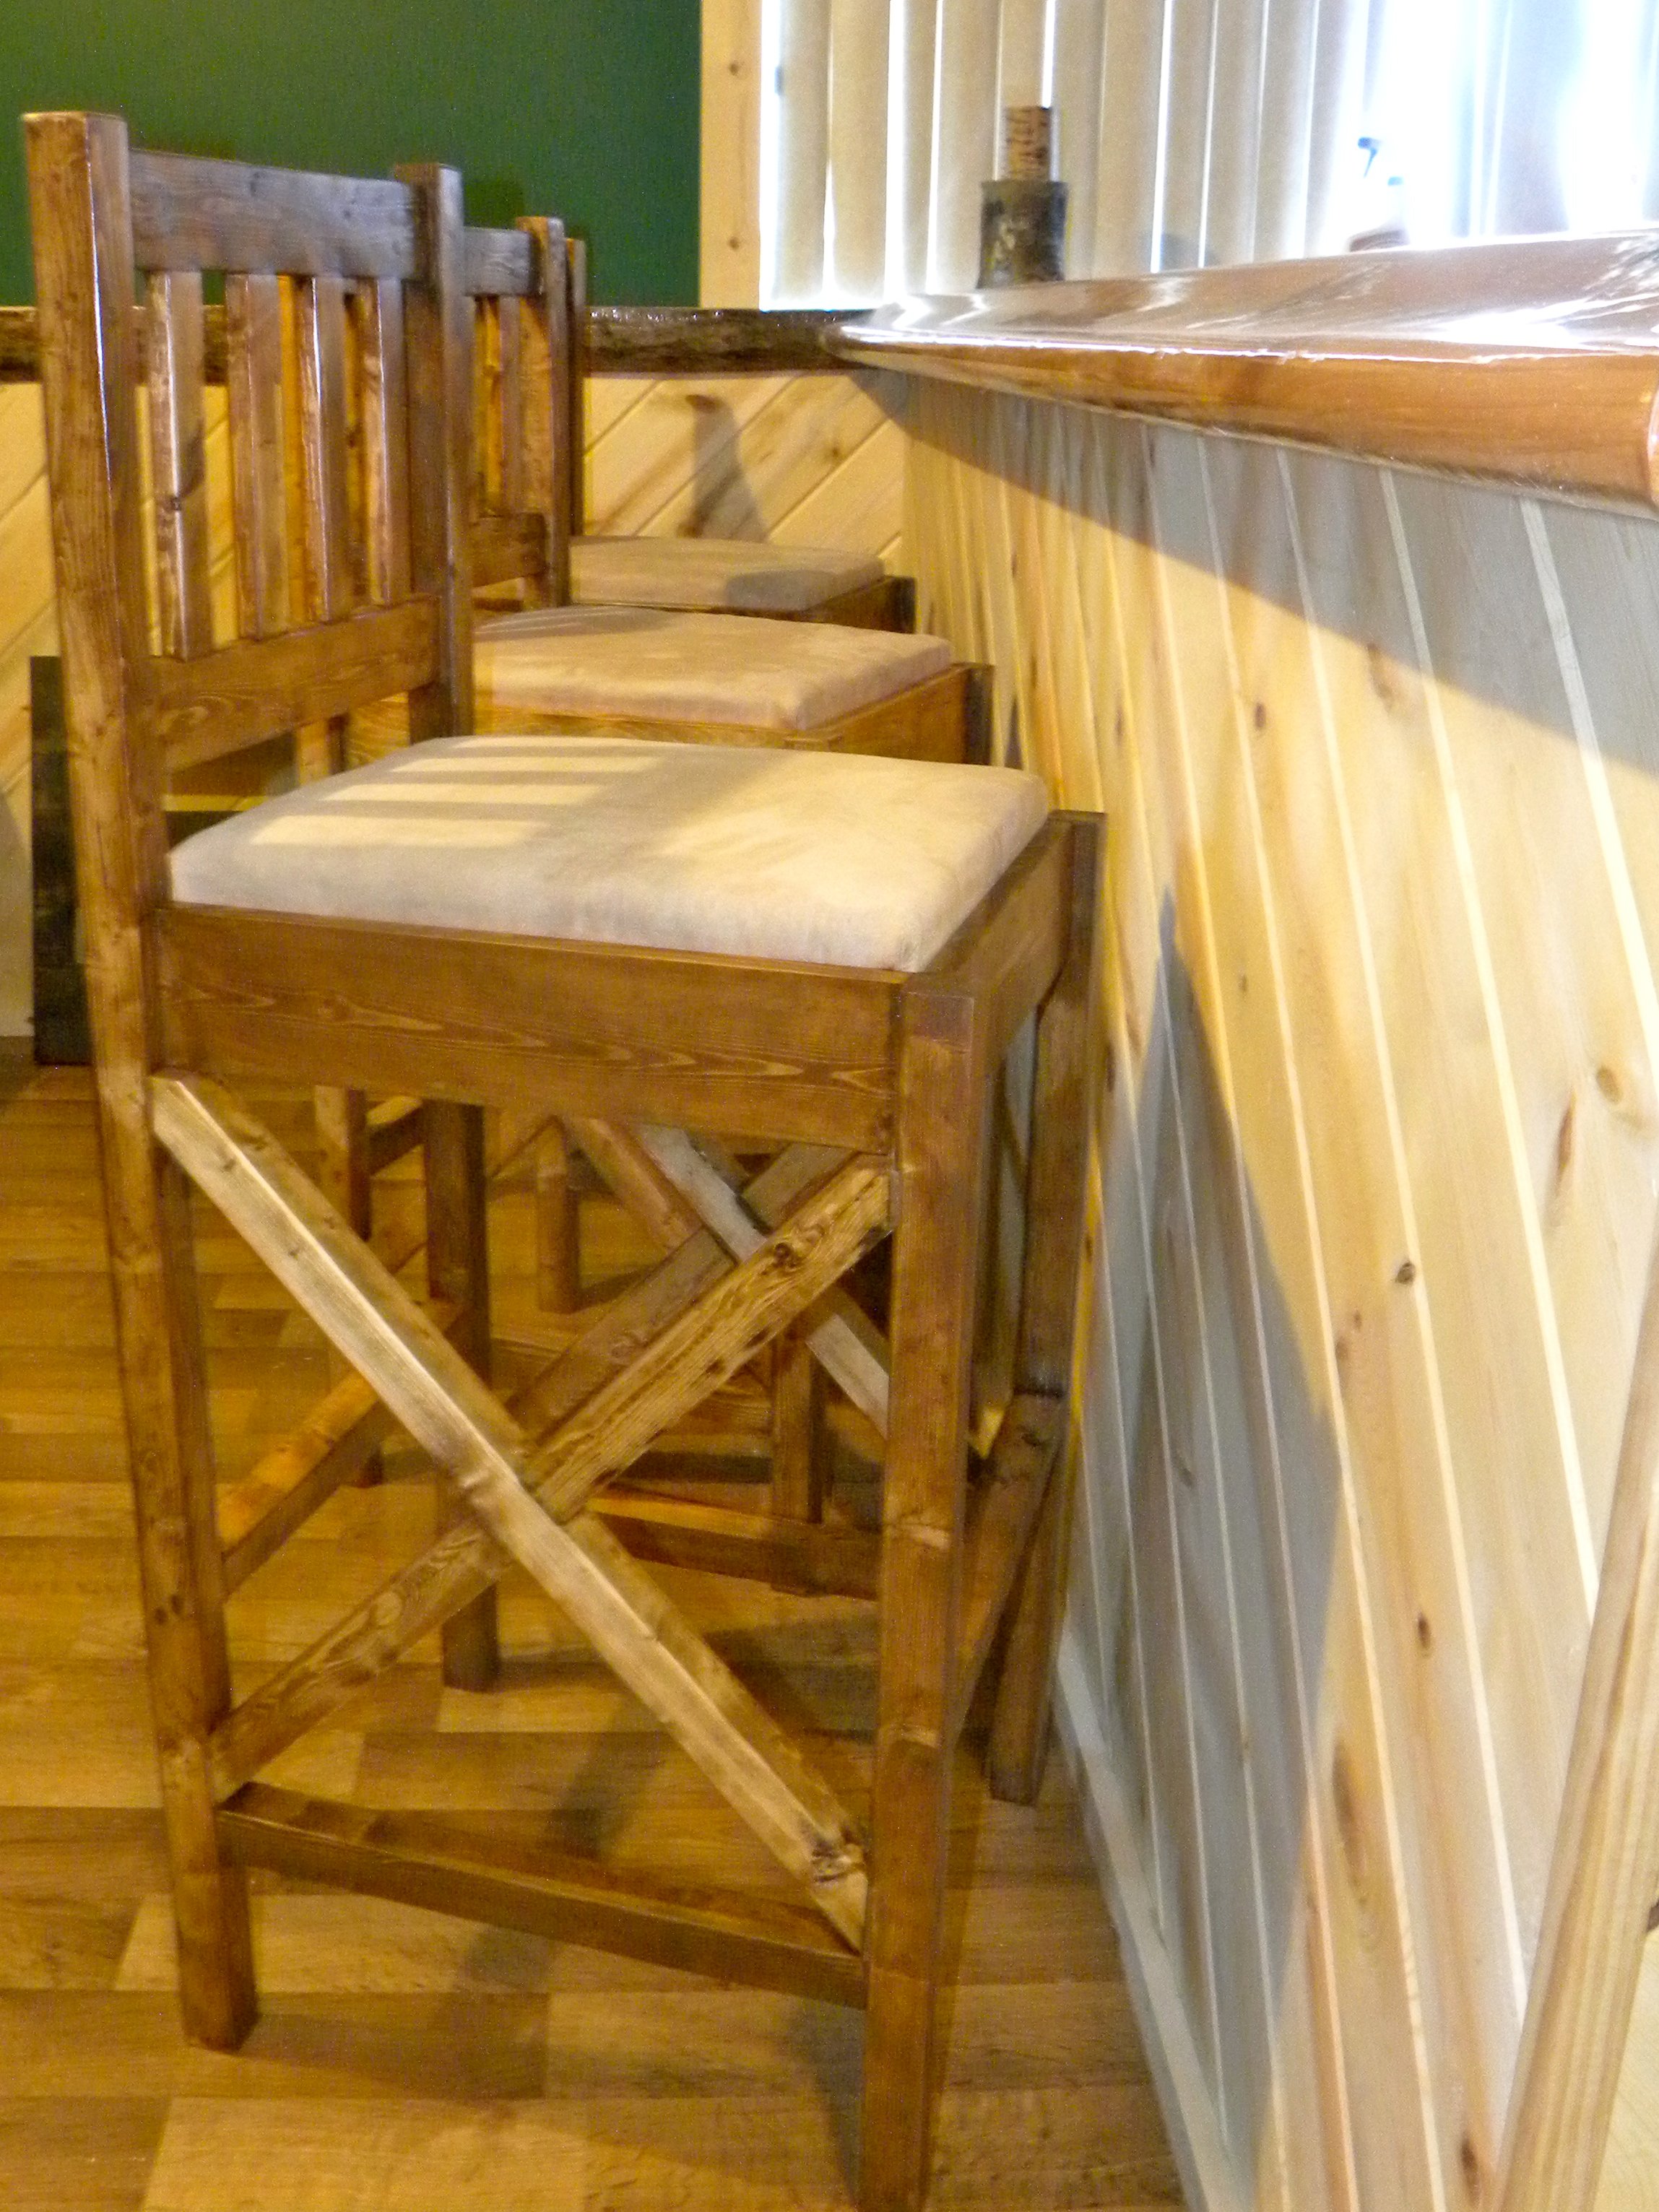
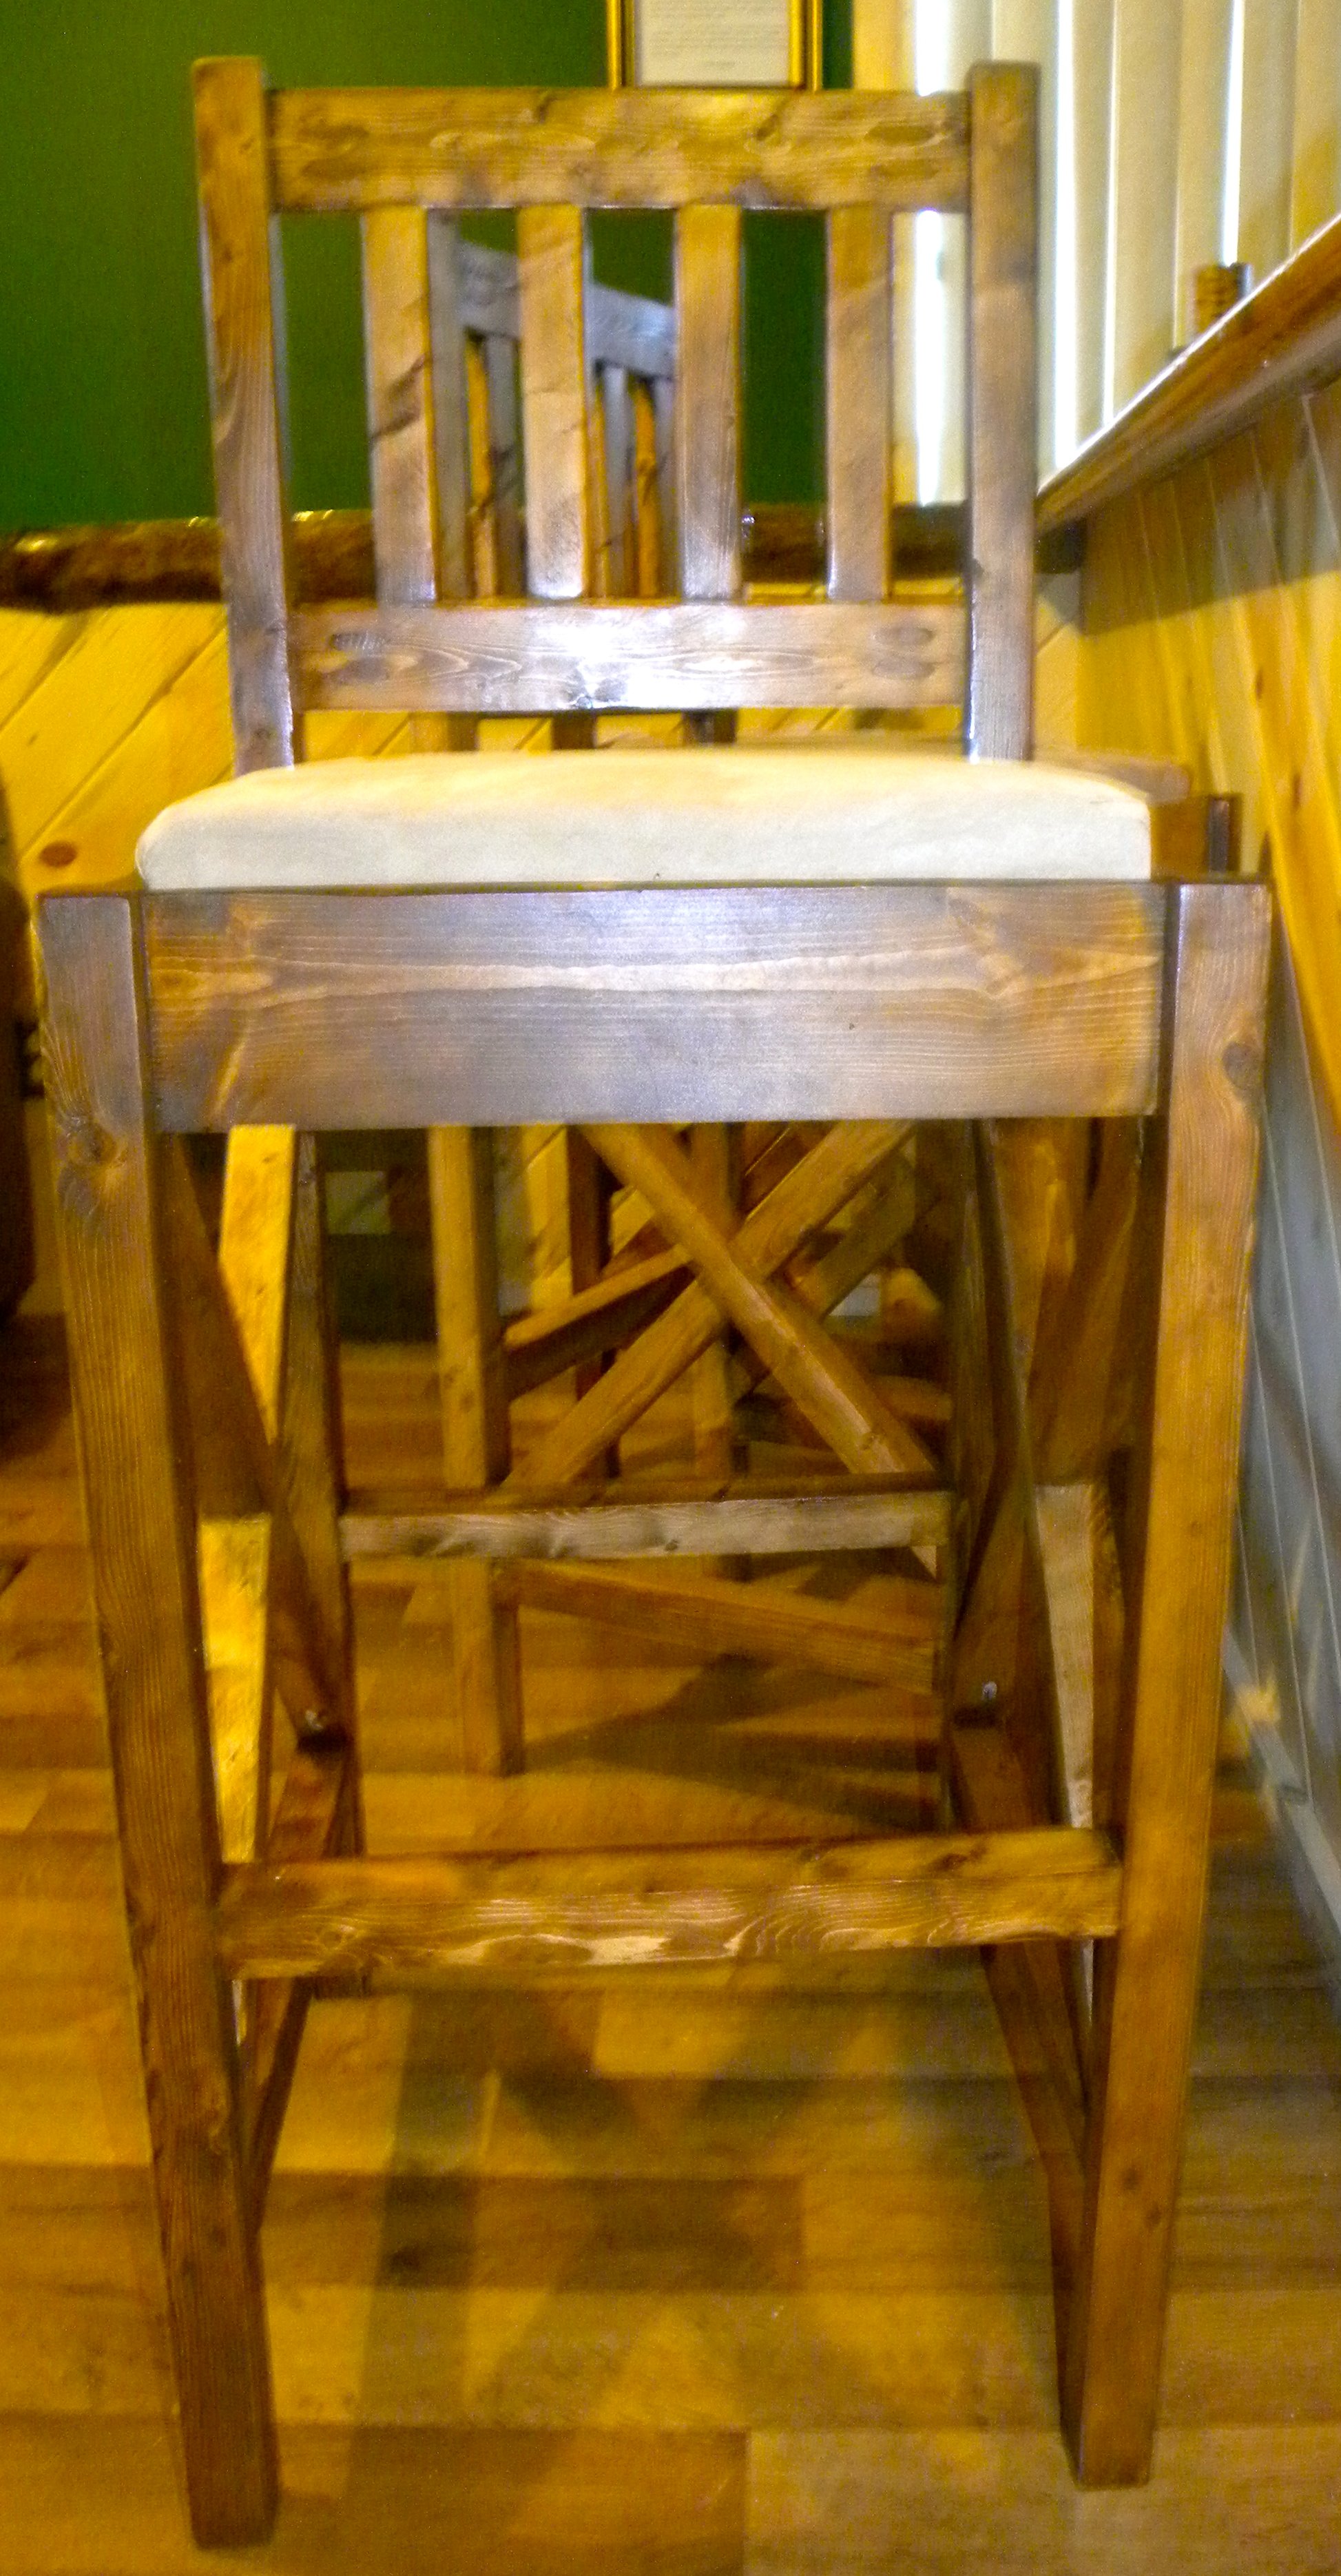
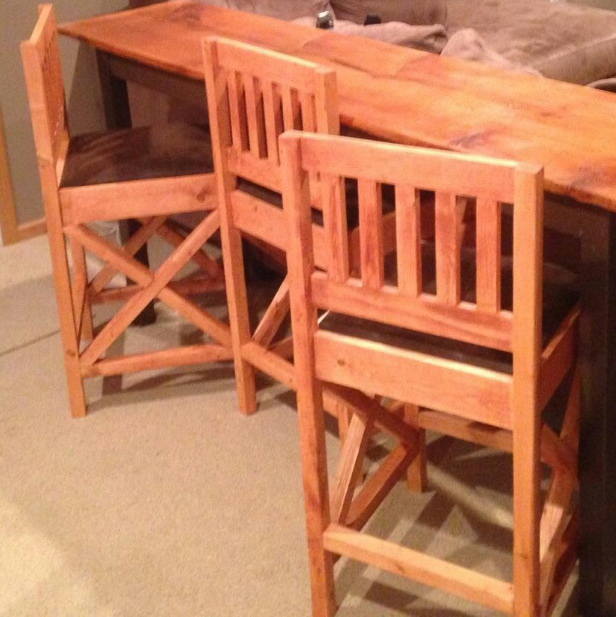
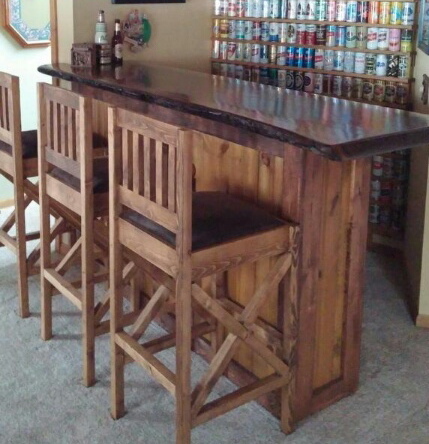
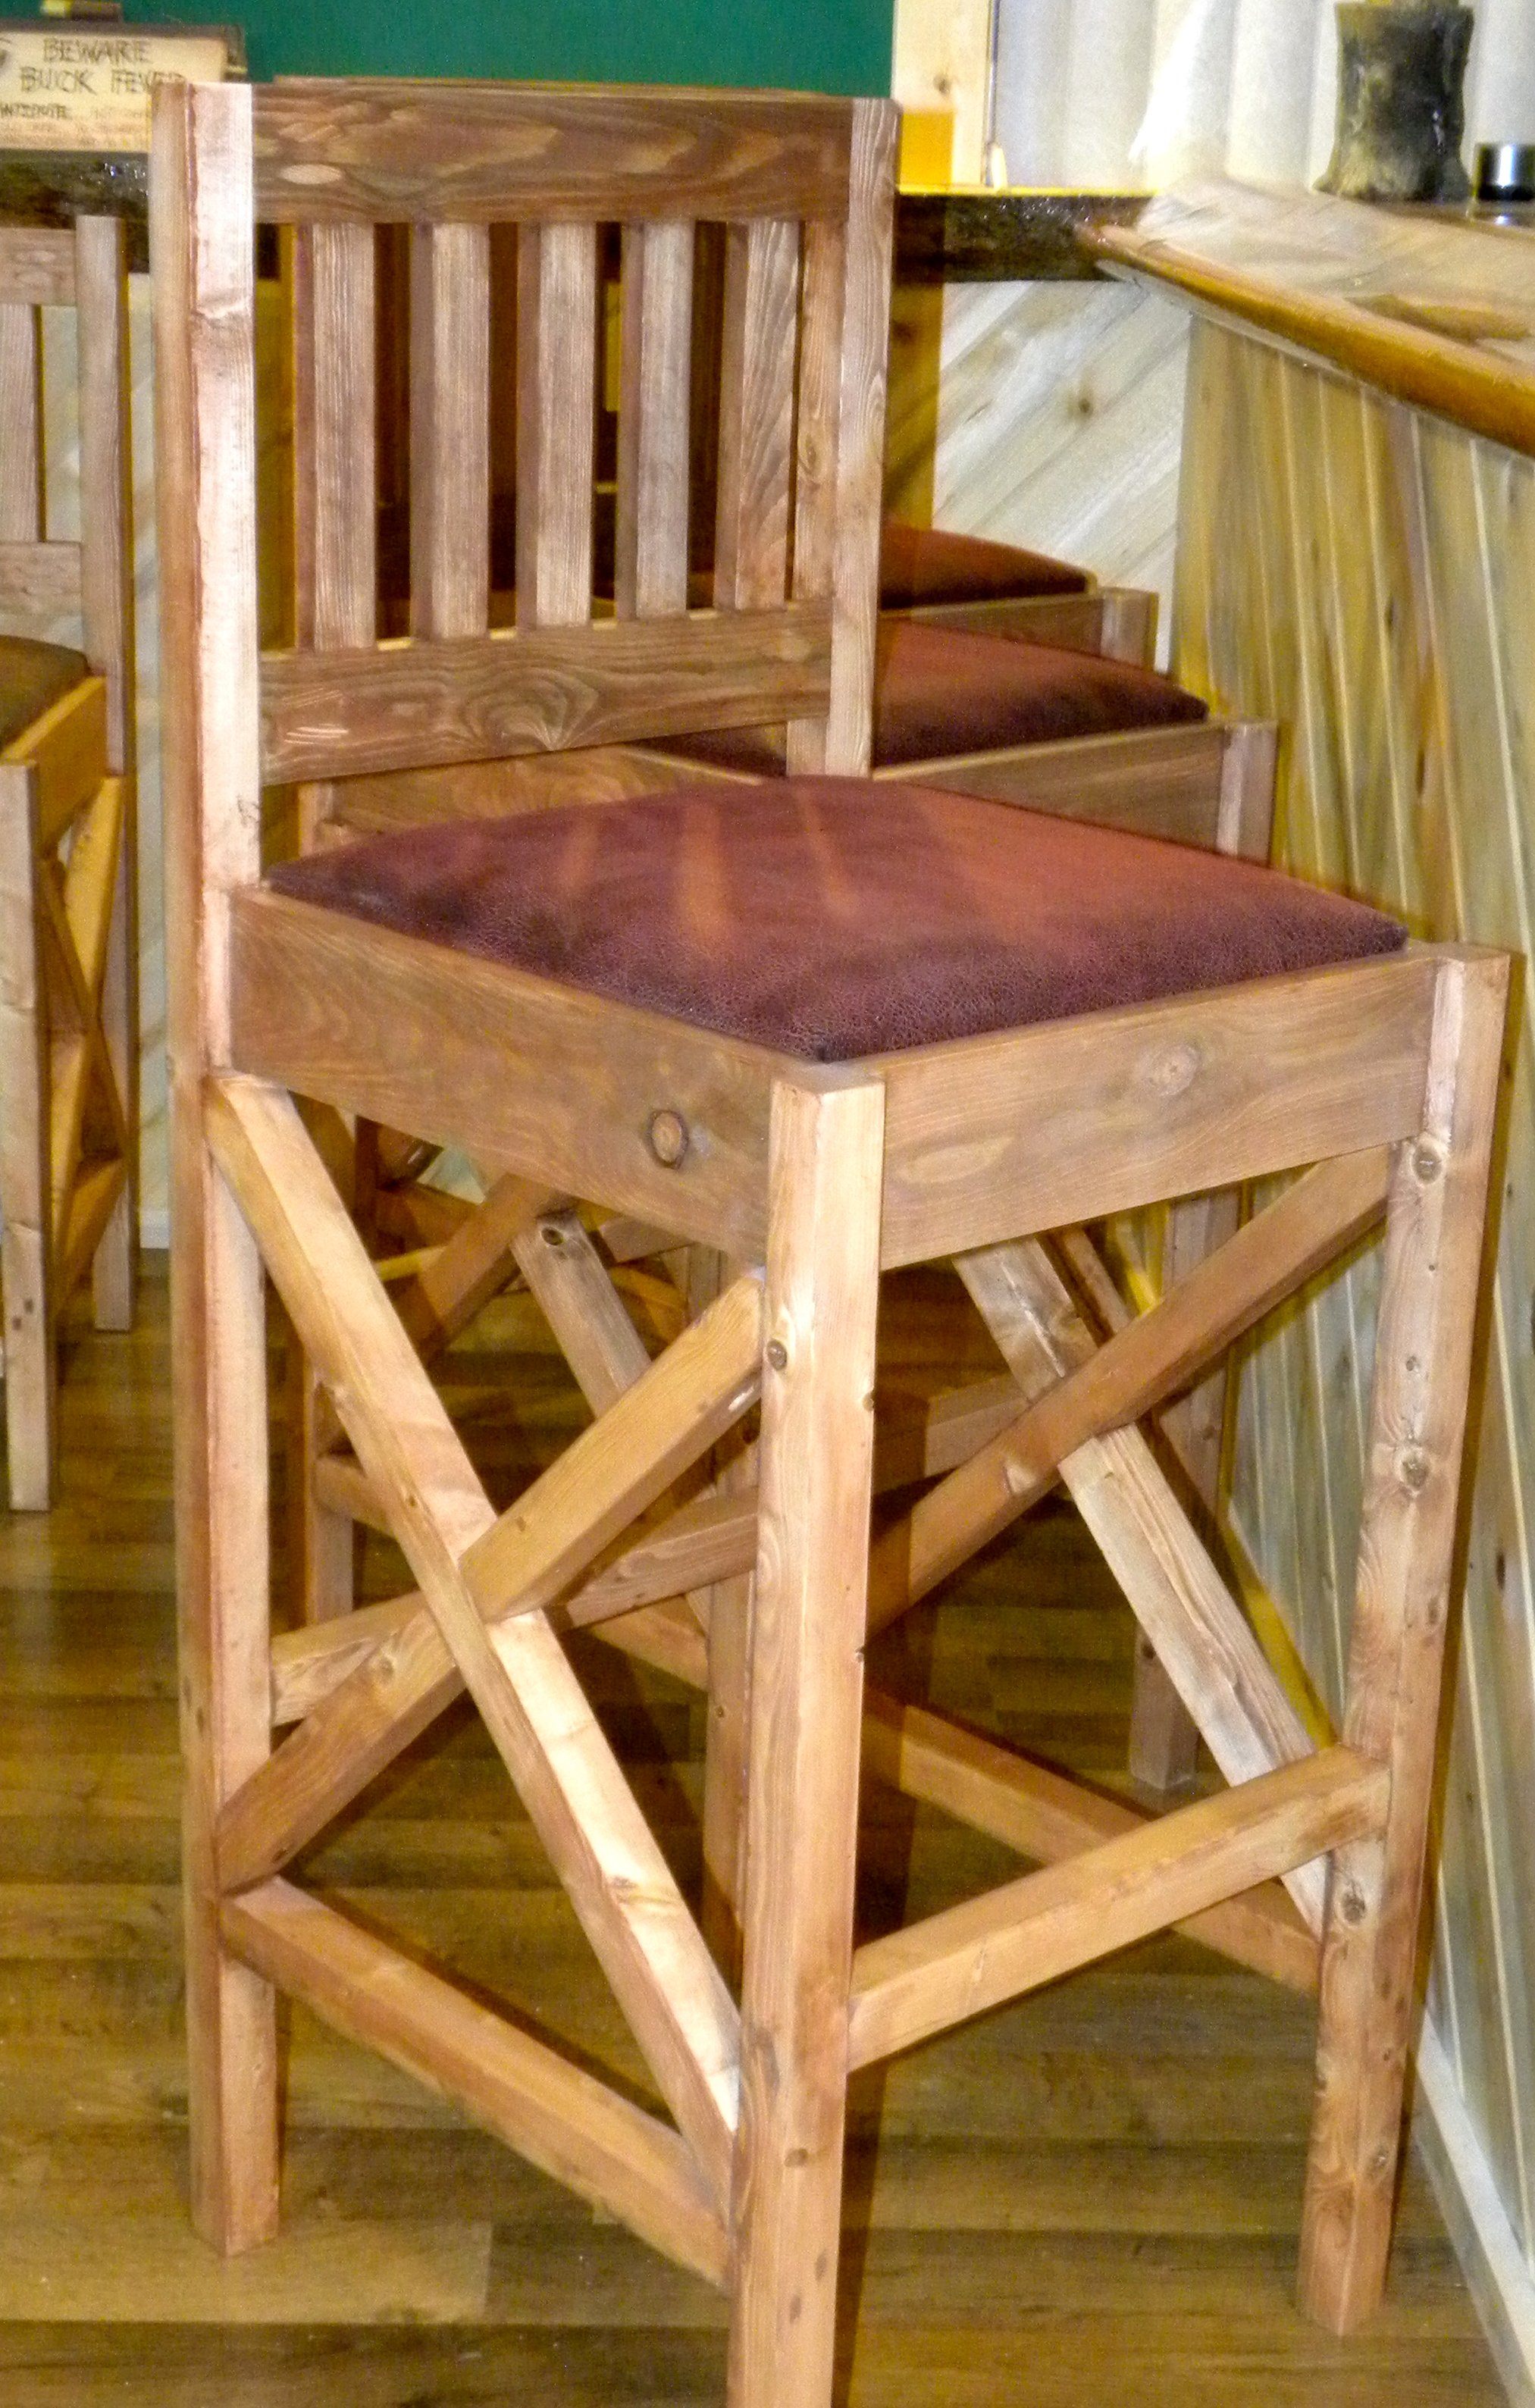
I needed new bar stools for our new bar that we designed and built in our basement family/entertaining room. Regardless of where I was looking, these things are silly expensive. I also wanted a little more of a country/rustic look that would suit my husband and my likes. I used the Vintage Bar Stool plans but my husband isn't a small guy and we have friends that aren't classified under the small frame category either, I needed more structure. After thinking about it for a few days, I liked the rustic X look and used that from so many plans. I also am all about comfort and the padded upholstered seats was a must. Can't wait for my next project. BTW. The cabinets behind the bar also came from here I simply modified for what we needed. We get compliments on it all of the time. Love this website, thank you so much for making simple to read instructions for things I actually want to do.
Mon, 06/26/2017 - 05:44
I need to build 24" bar stools with the rustic x look on the side. Do s anyone have plans to make them?

In reply to Rustix x bar stools by Daisypage
Sun, 07/01/2018 - 13:51
I am sorry. I just saw this. Honestly I don't make any plans, I kind of fly by the seat of my pants. The X's are measured out at the end.
Thu, 12/26/2019 - 03:49
These look great. I think that I'll add them to my build list that my wife seems to keep growing for me. How did you attach the back pieces? In the original design it showed pocket holes, but I don't see any on your work. Thanks for the help.
Tim

Sat, 06/06/2020 - 09:58
Could you please settle a discussion between myself and my husband? Are the legs notched out for the 1x4's to sink in , or are they just attached with pocket holes

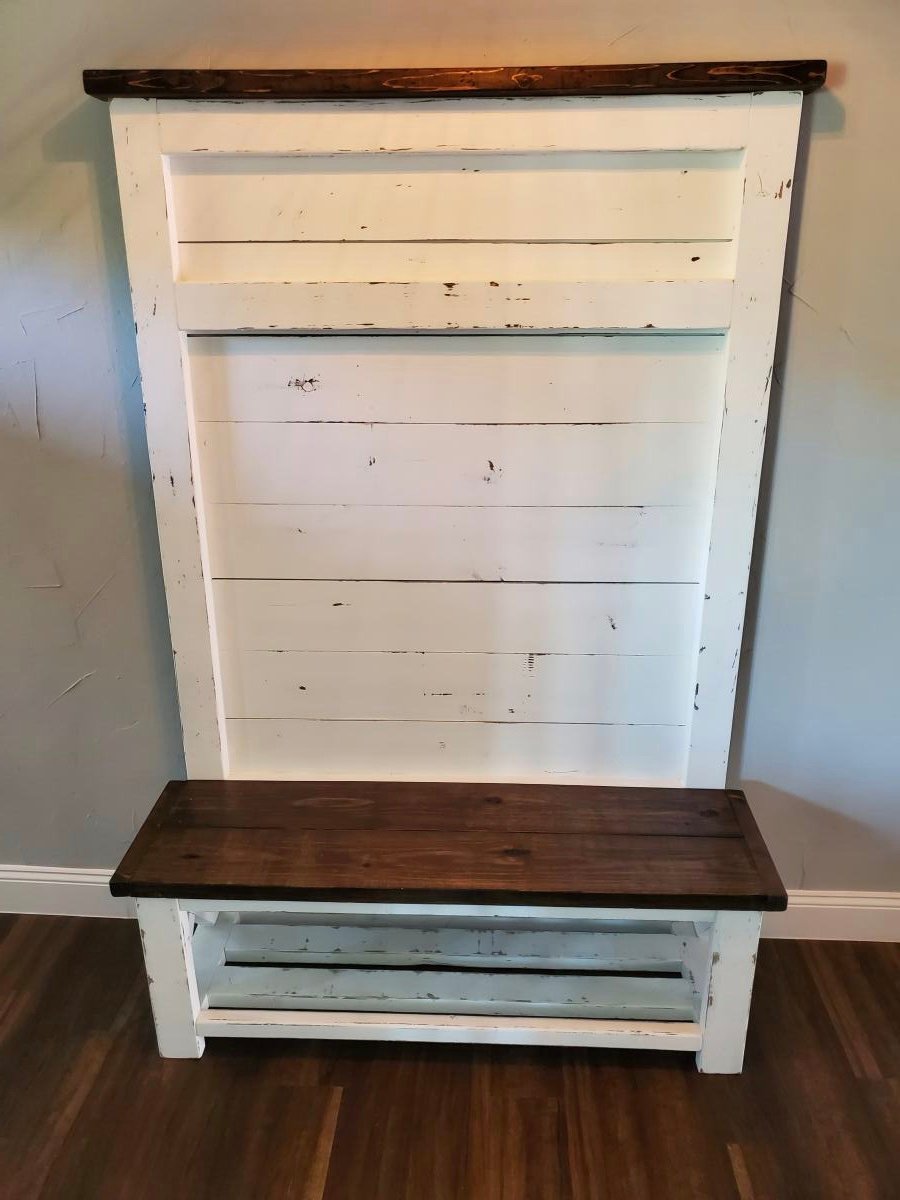
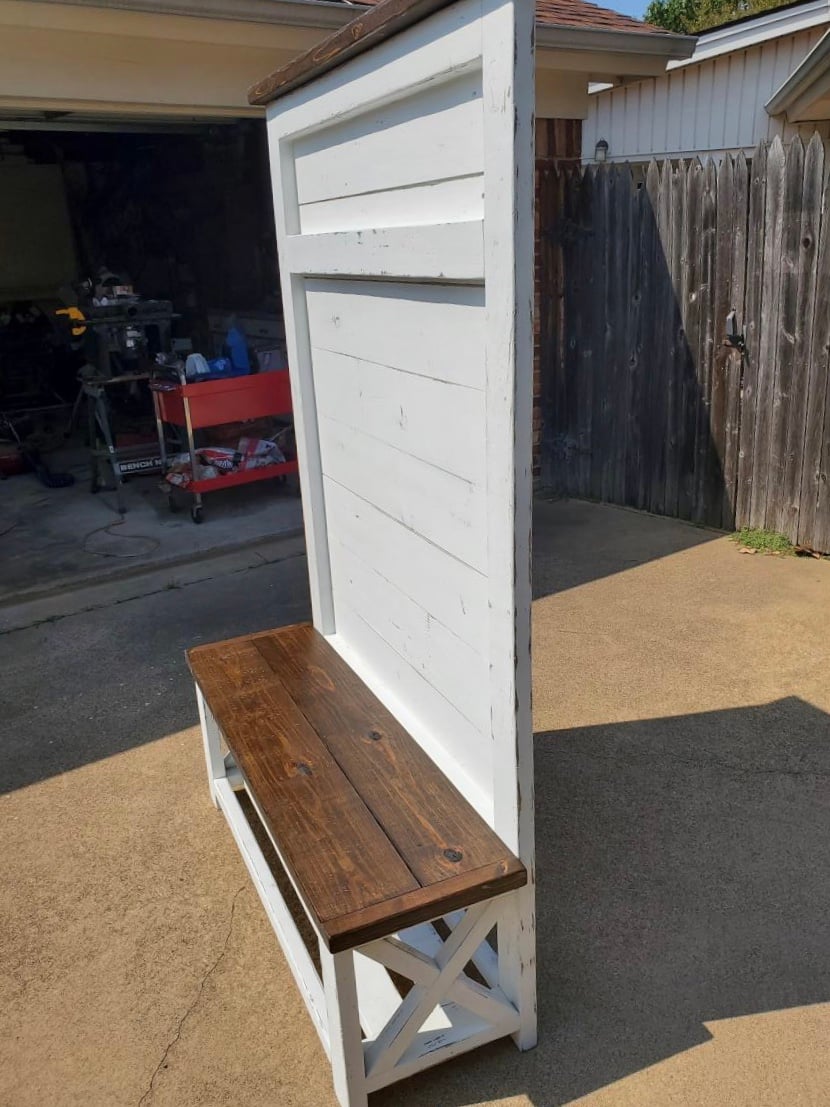
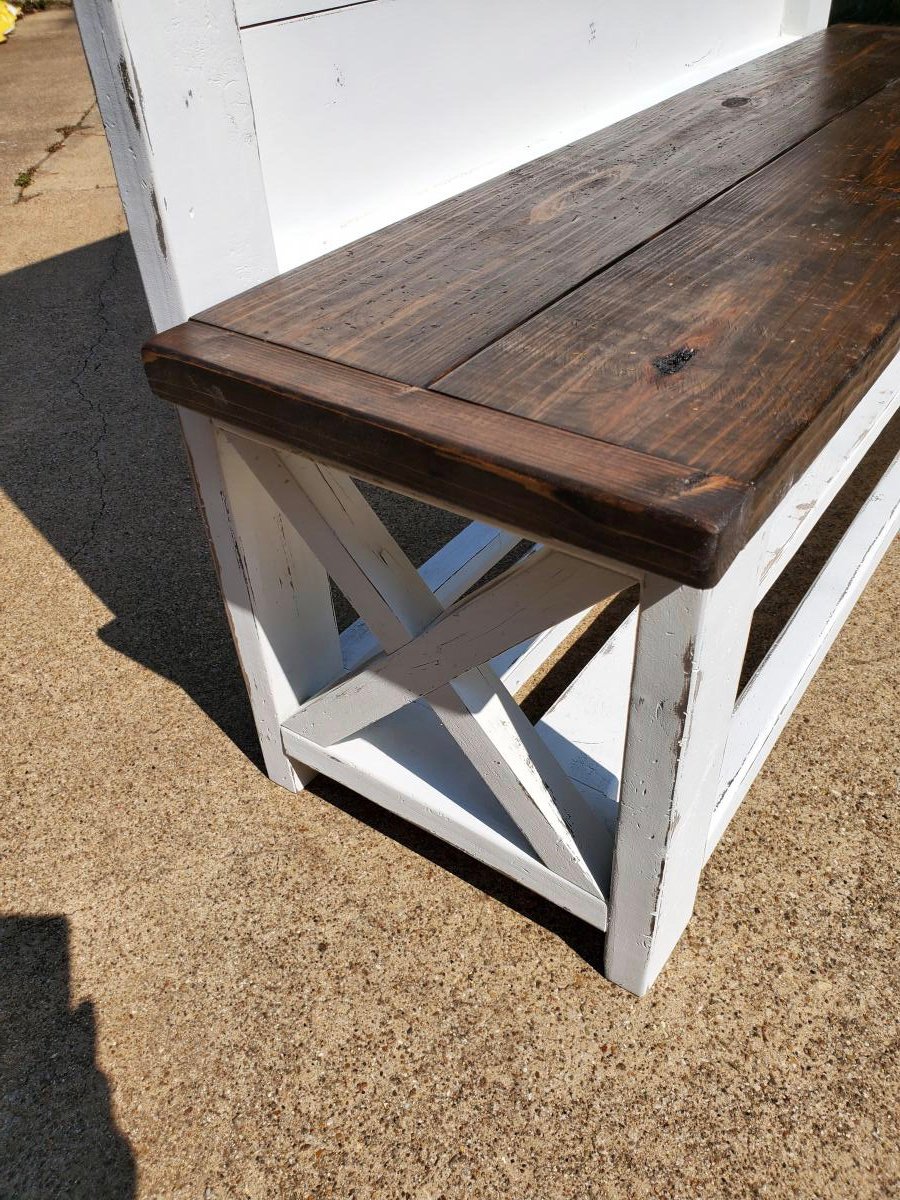
first furniture build from scratch. A few minor differences. I decided to distress by staining entire piece with minwax espresso stain, then painting over with white chalk paint and sanding through. Decided to leave bench and to molding stained for effect. Love the piece and so does my wife.
Just a few of our Fancy X farmhouse tables. Along the way, we where able to put our own spin on the original plans by Ana White.
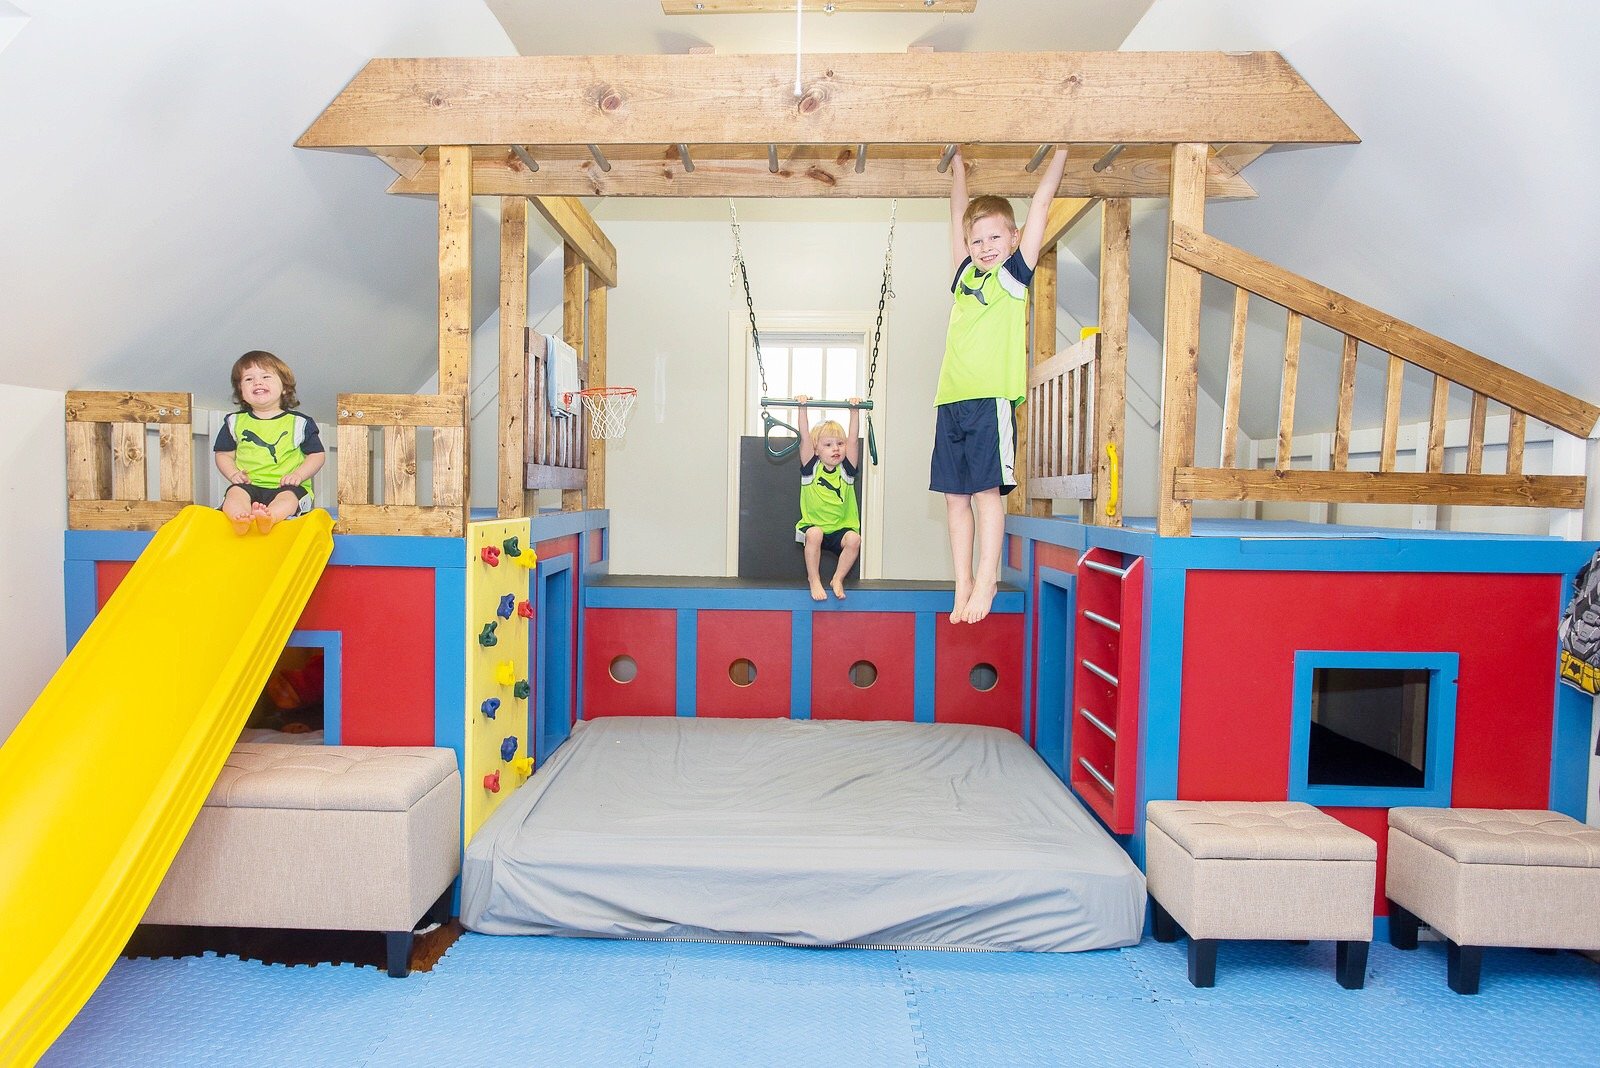
This playroom set was inspired by the plans you posted. I was forced to make some significant modifications due to the fact that our bonus/playroom has angled ceilings. We have a rock climbing wall, ladder, crawl tunnel with windows, trapeze bar, monkey bars, miniature baskeball goal and a slide. My boys are 6, 3 and 19 months and they love it! Thanks for the inspiration.
Jim and Caroline Sparrow
Sun, 01/05/2020 - 10:03
Hi -
Would you be able to share your modified plans with me , please ?
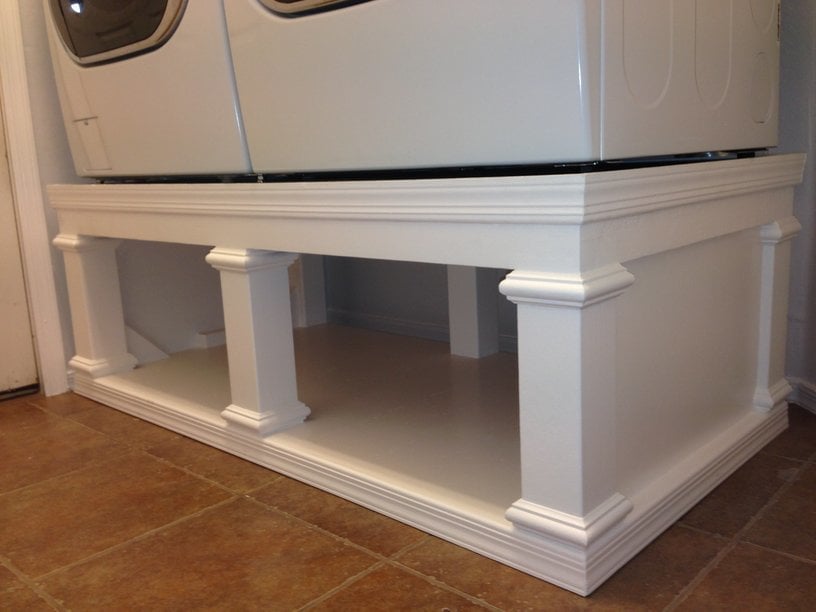
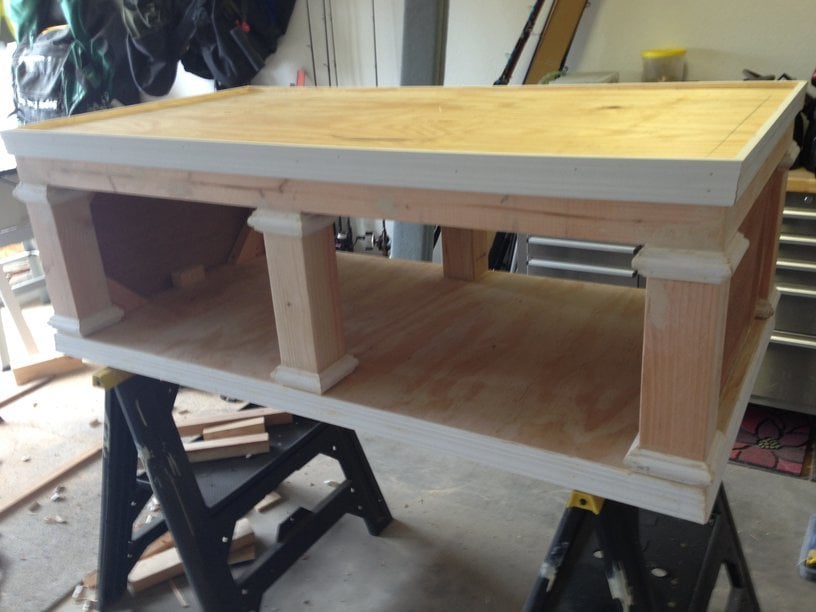
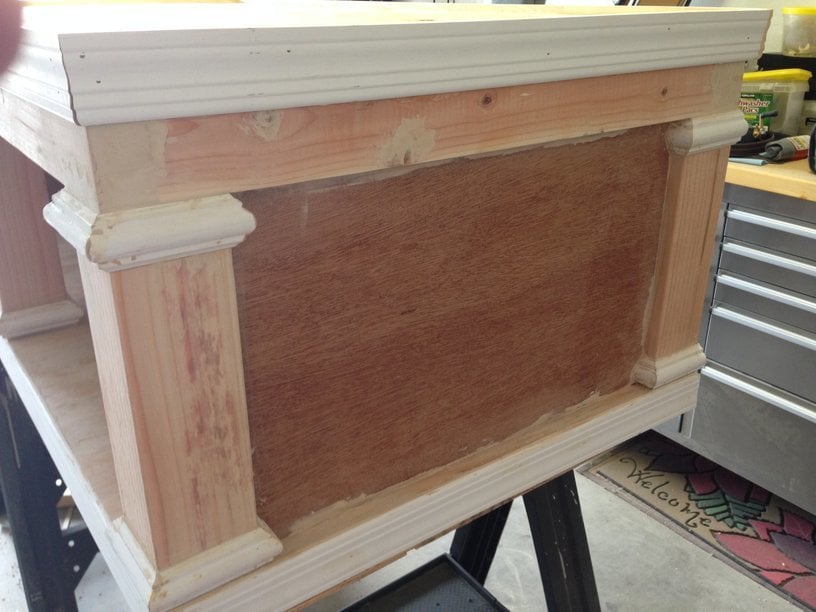
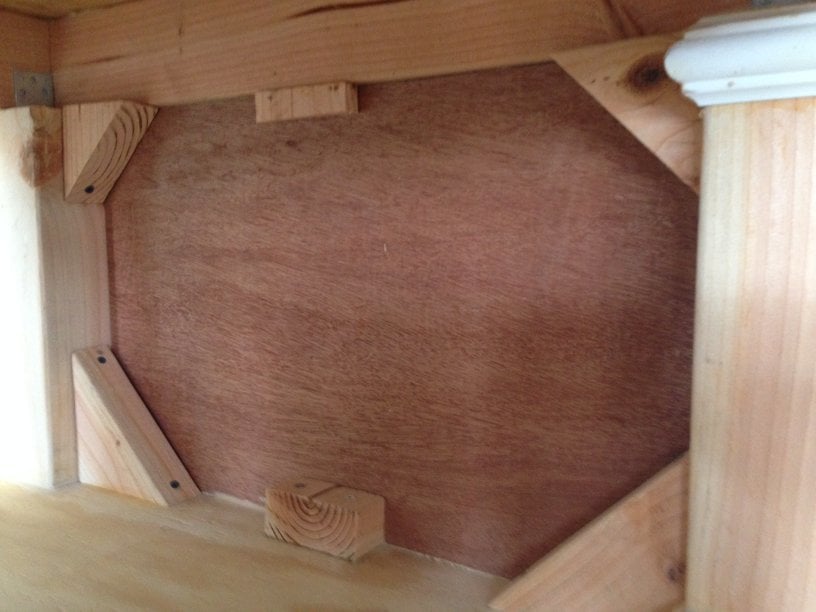
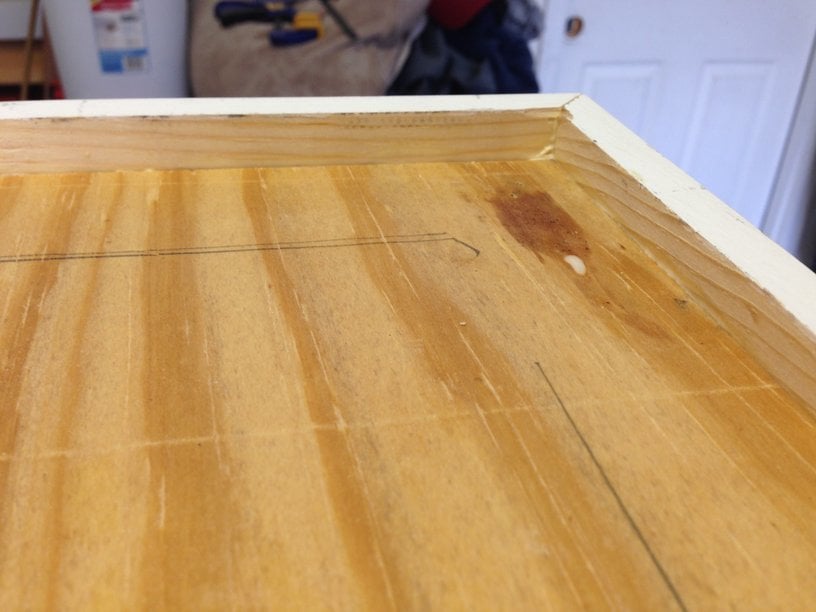
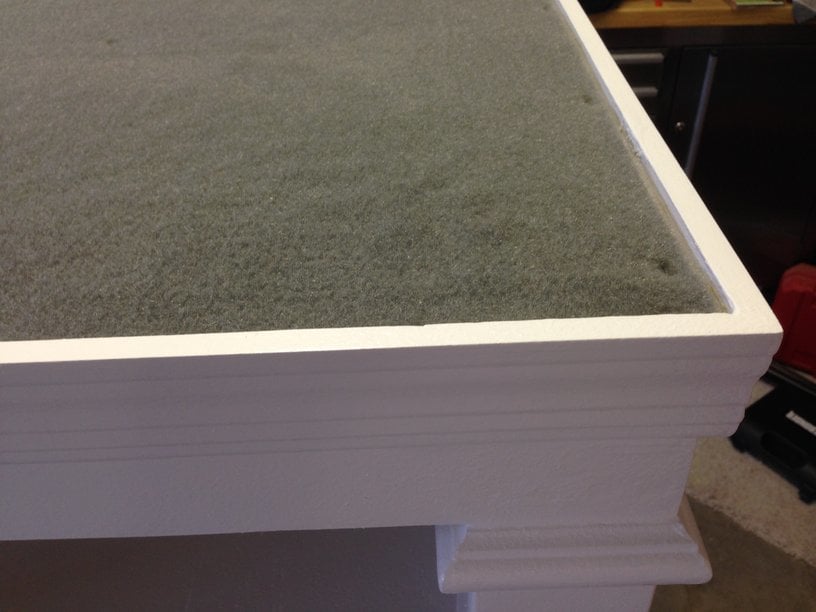
I loved this design. I couldn't believe that they wanted to charge me almost $600 for the pedestals for the washer/dryer set that I bought on black friday, so I decided to give this project a go. I basically used the same construction plans from Sausha's project, but I dressed mine up a bit. First, I chose a bit larger trim for the tops and bottoms of the posts. Then, I bought some 2" baseboards and did the top and bottom with baseboards. On the bottom, I had to use my tablesaw to trim off about 1/2" because I used 1x1" boards on the bottom so that I could have more space for baskets. Then, on the top, I inverted the baseboard and allowed it to overlap a bit so that if it were to vibrate, the washer/dryer could not fall off the edge. I also added some fabric on the top (stuff that I use to cover the bunk boards on my boat trailer...kind of like a very thick and durable felt material) to cut down on vibration and also keep the units in place. Finally, I added sides by using wedge trusses on the inside of my side posts and then I put a 1/8" piece of plywood over top and nailed/glued it to the trusses.
It turned out great. Thanks for the plans Sausha!

In reply to Nice Detail by earthbybike
Mon, 12/08/2014 - 11:42
Thanks. Yeah, I thought that it did really dress things up. I really like the way it turned out.
Mon, 12/21/2015 - 17:38
Did you use sanded plywood? Did you use any veneers for the exposed 2x4's to get a smooth finish or did you paint right on it?
lastly, what is the name of the trim you put on the 4x4s? I've hard a hard time finding it. Thank you!
Mon, 12/21/2015 - 17:44
Did you plane the 2x4s? Because they look really straight.
In reply to Question... by Zlk200
Wed, 06/29/2016 - 13:59
Sorry for the super delayed response. I didn't realize this question was here. I did not plane anything. I did sand the surfaces a bit, but I didn't get too crazy. I put 3 thick coats of paint on it which made it pretty smooth. If you look very closely in person, you can still see a bit of wood grain, but it is only noticable if you really get down and look. I did use a lot of wood putty to fill all of the gaps and crevaces and then I sanded those parts pretty well.
With regard to the trim, the top literally just standard baseboard material turned upside down, and then the little trim on the tops and bottoms of the 4x4s is just another standard strip of moulding that I got from Lowes. I think they call it "Chair Rail" moulding. Its the stuff that you put down if you are doing some sort of paint separation or wainscoting.
http://www.lowes.com/pd/1-625-in-x-12-ft-Mdf-Chair-Rail/3403018
I used woodglue on all of the moulding and tacked it on with a nail gun. Then I filled all of the nail holes with wood putty and also use the putty to fill gaps where the corners came together to make that look smooth.
I hope that helps...you are probably already done with your project by now, but I figured that I would answer anyway. :)
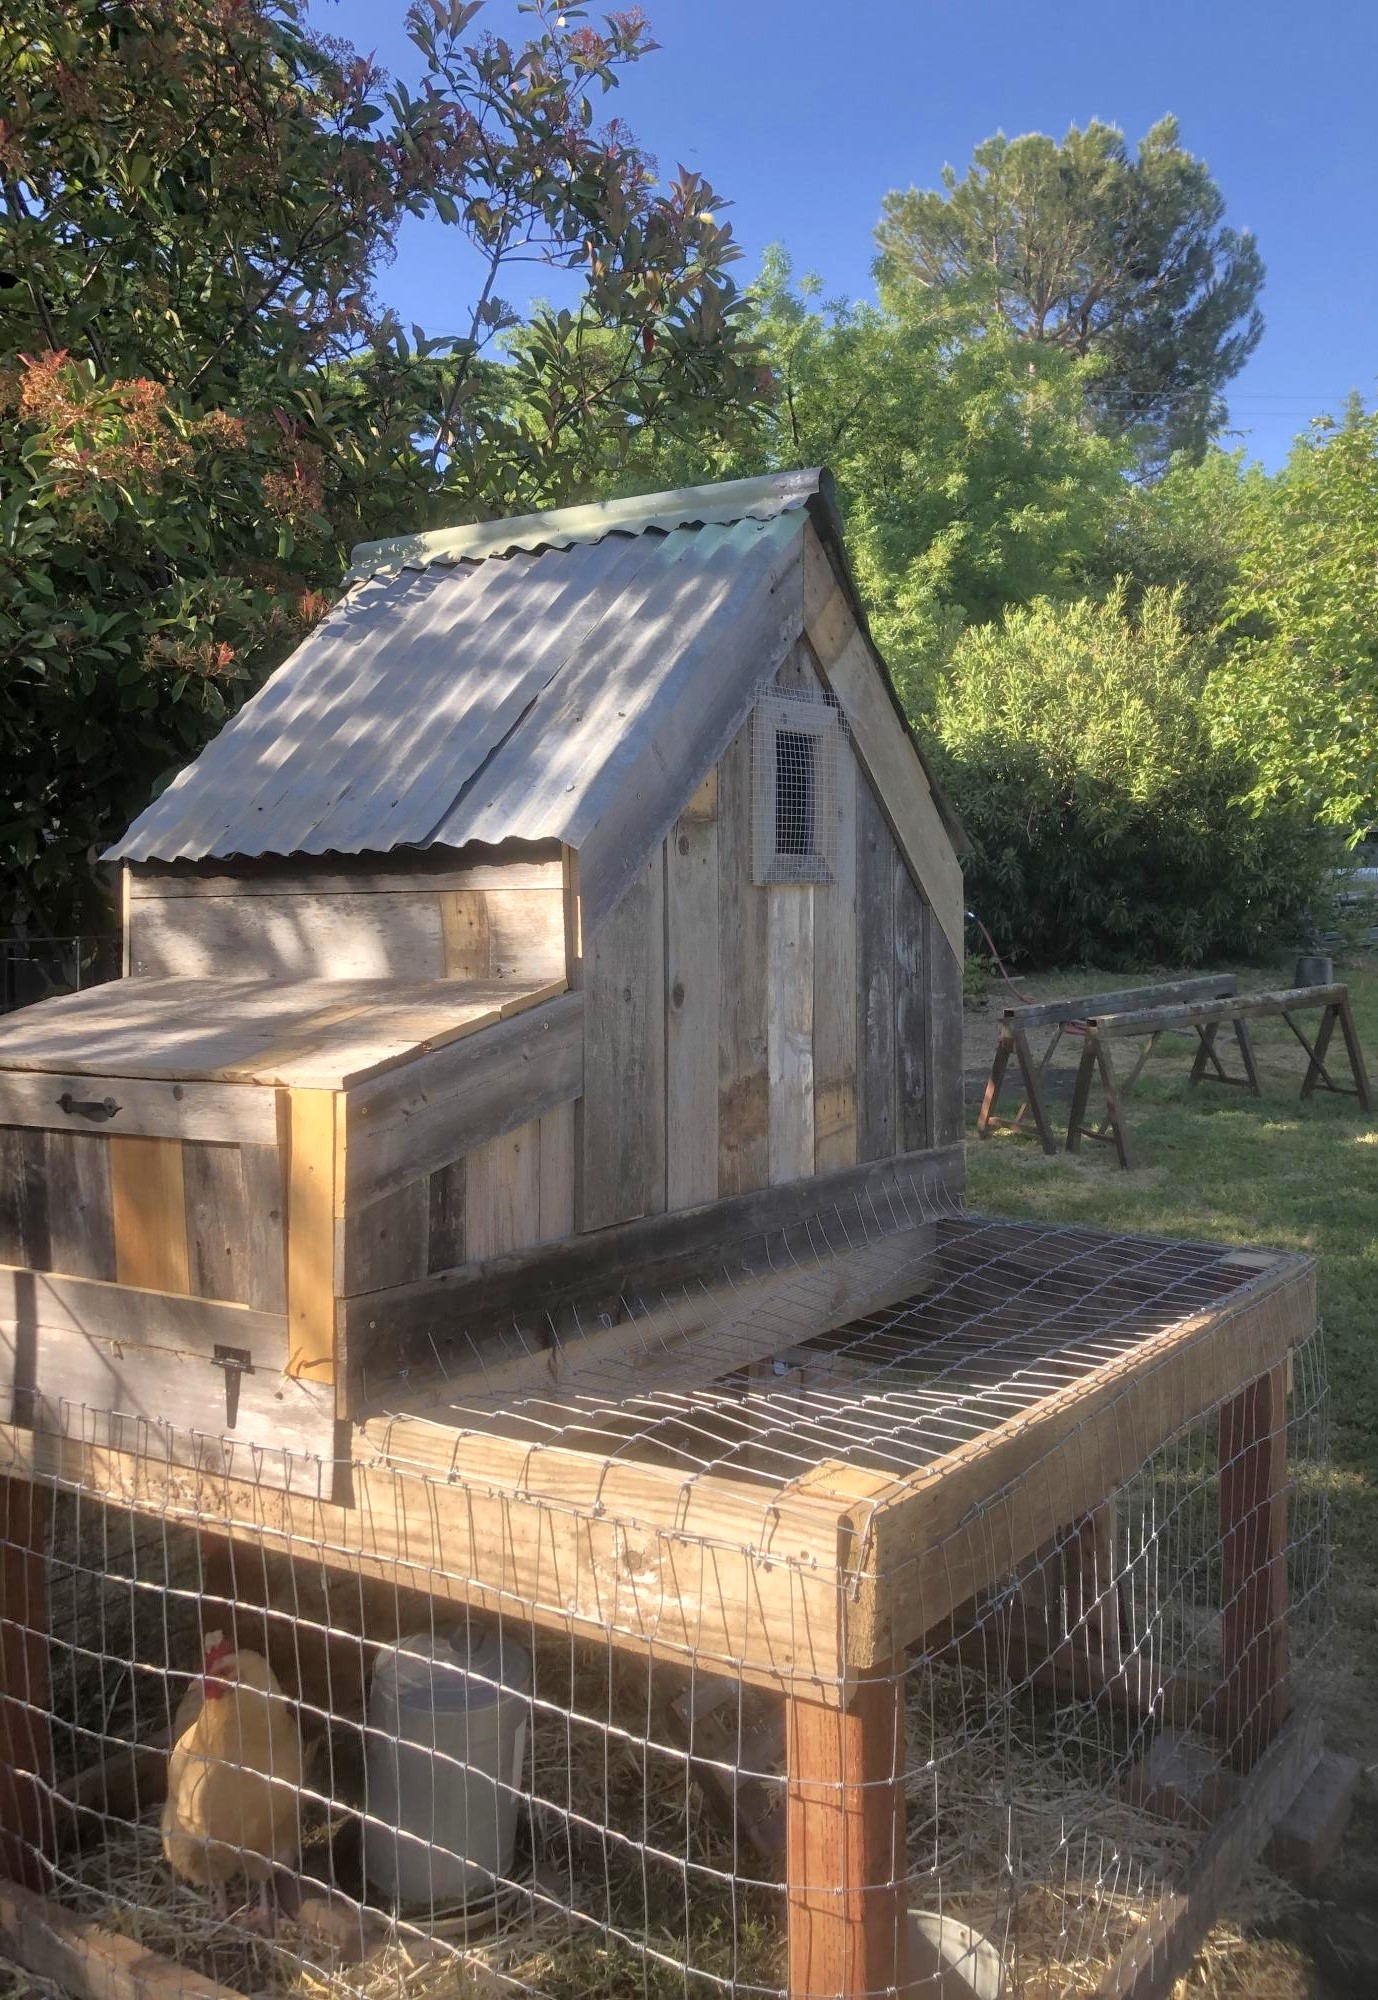
This is a coop I built from plans on the site. I modified by covering the ply with old cedar boards and used tin for a more rustic look. I opted not to add the planter just covered it with wire.
Love your plans! So easy to follow!
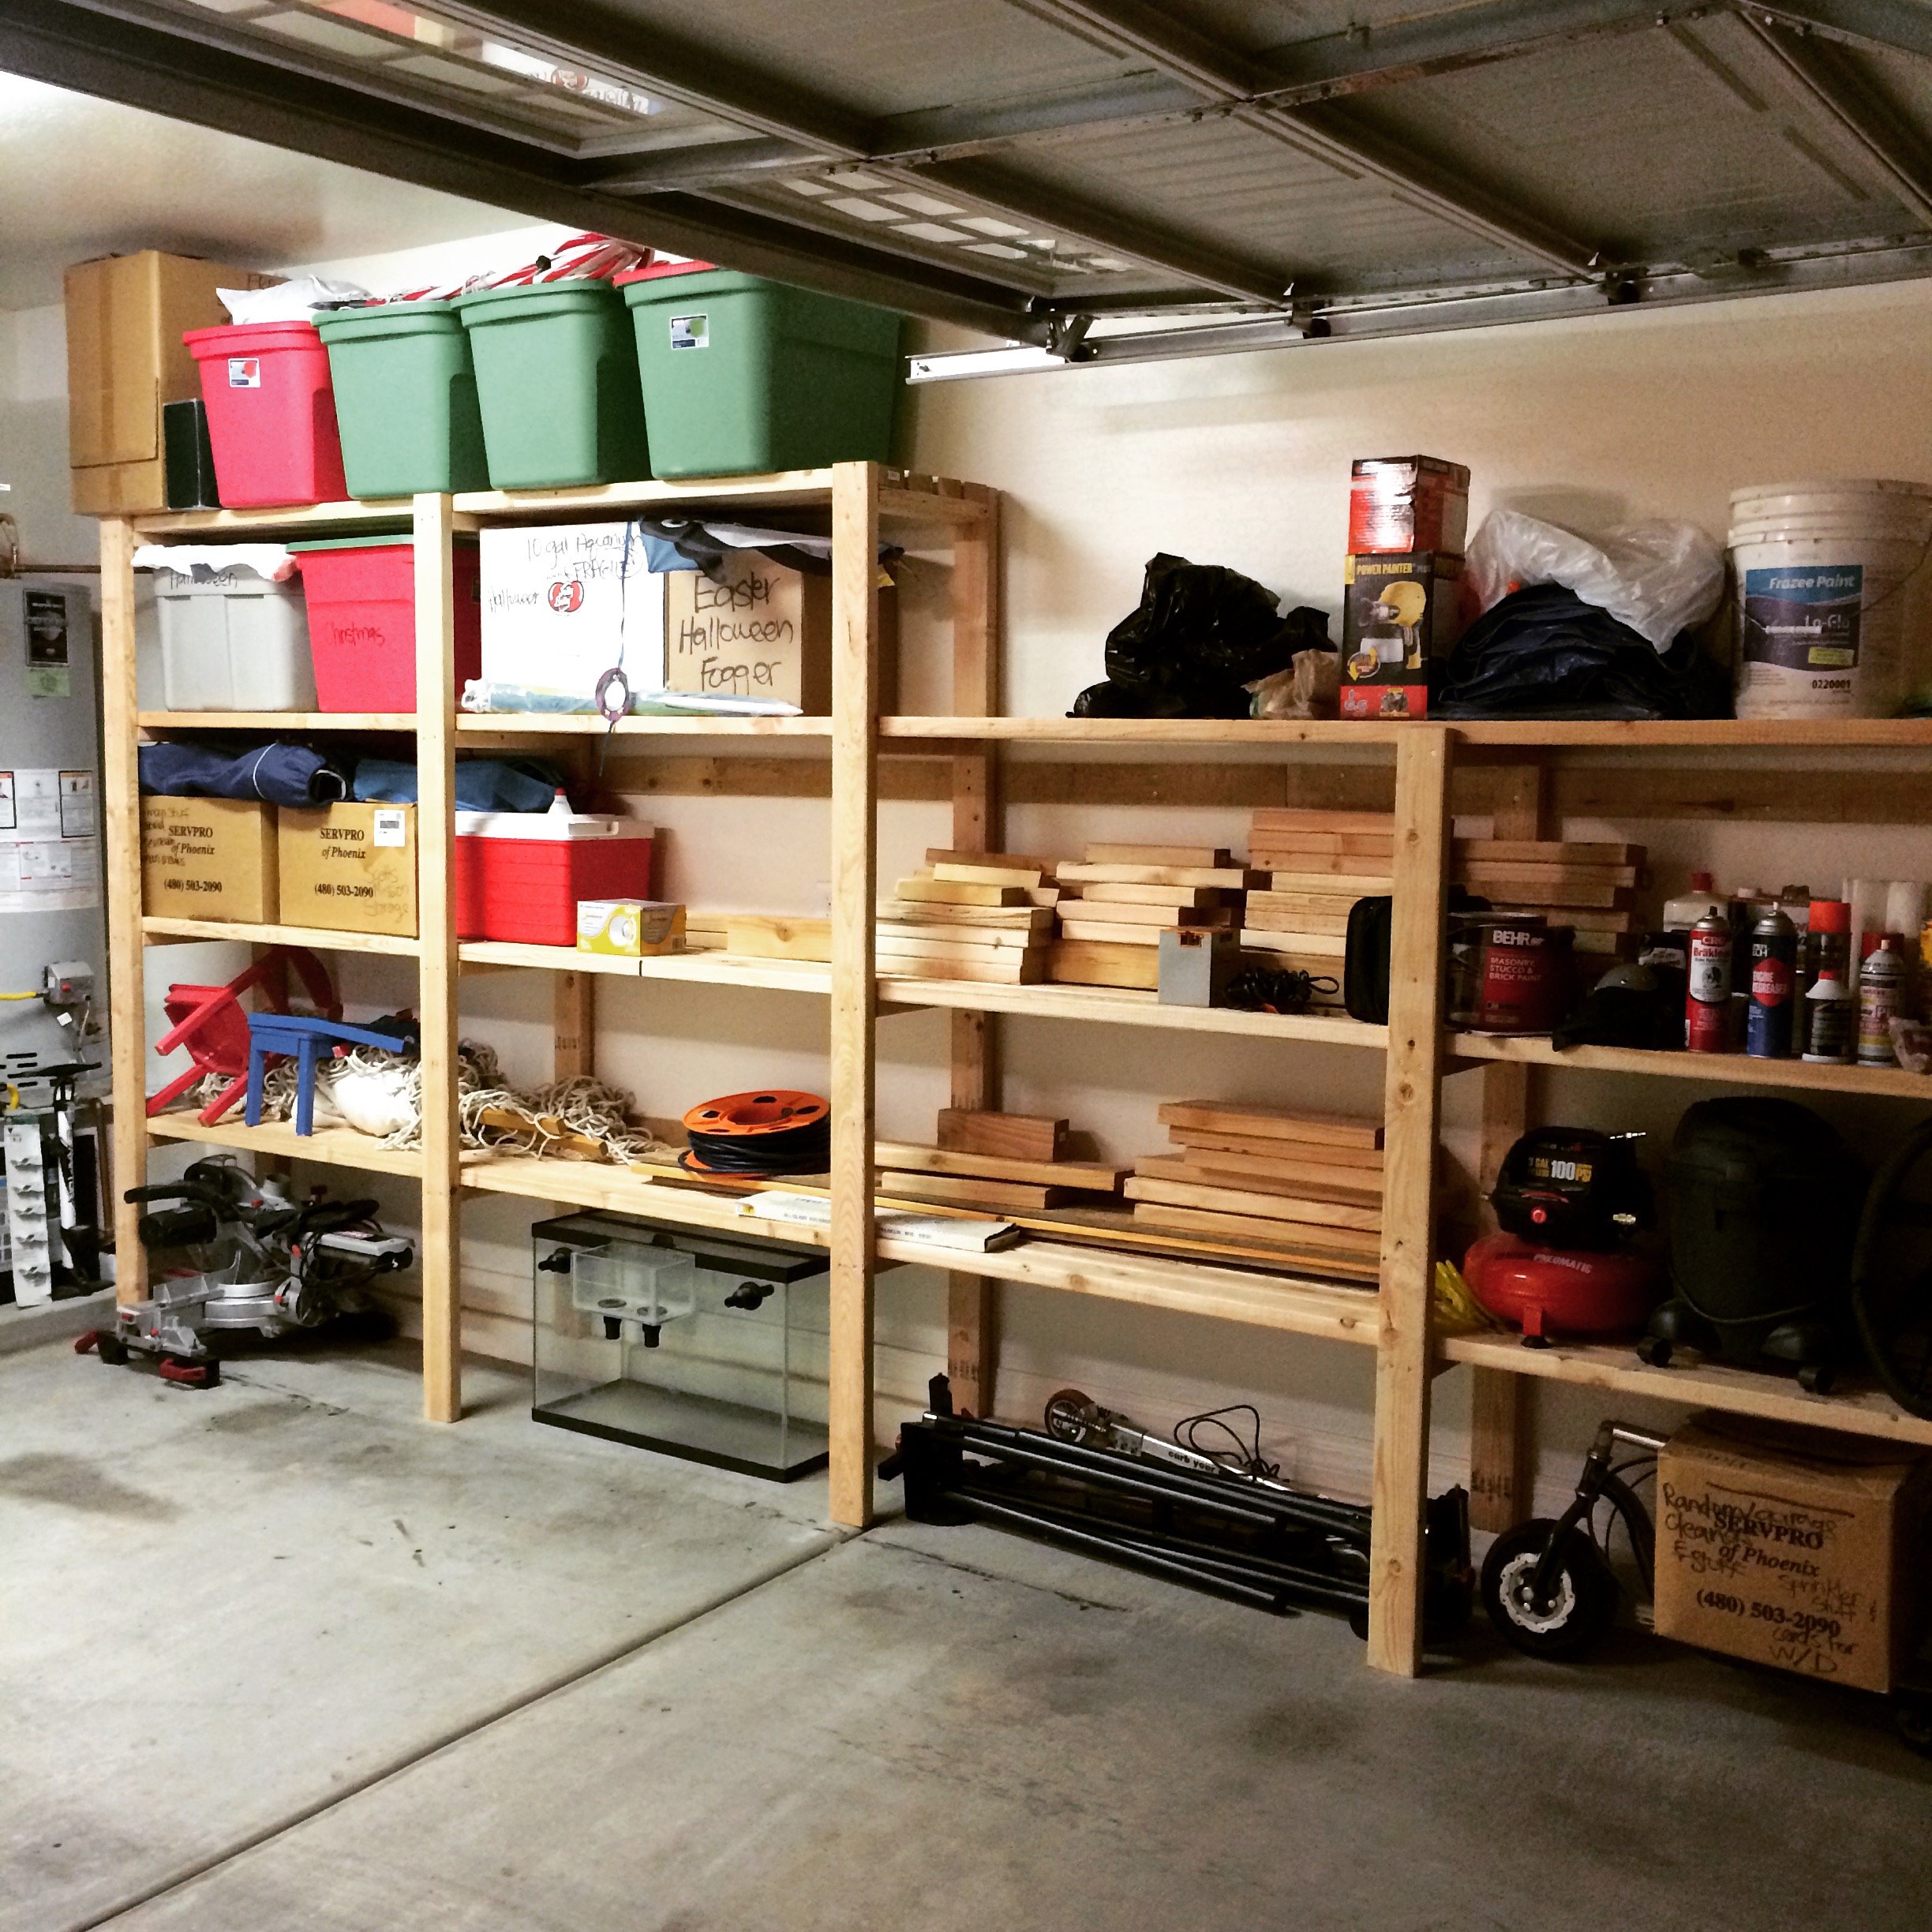
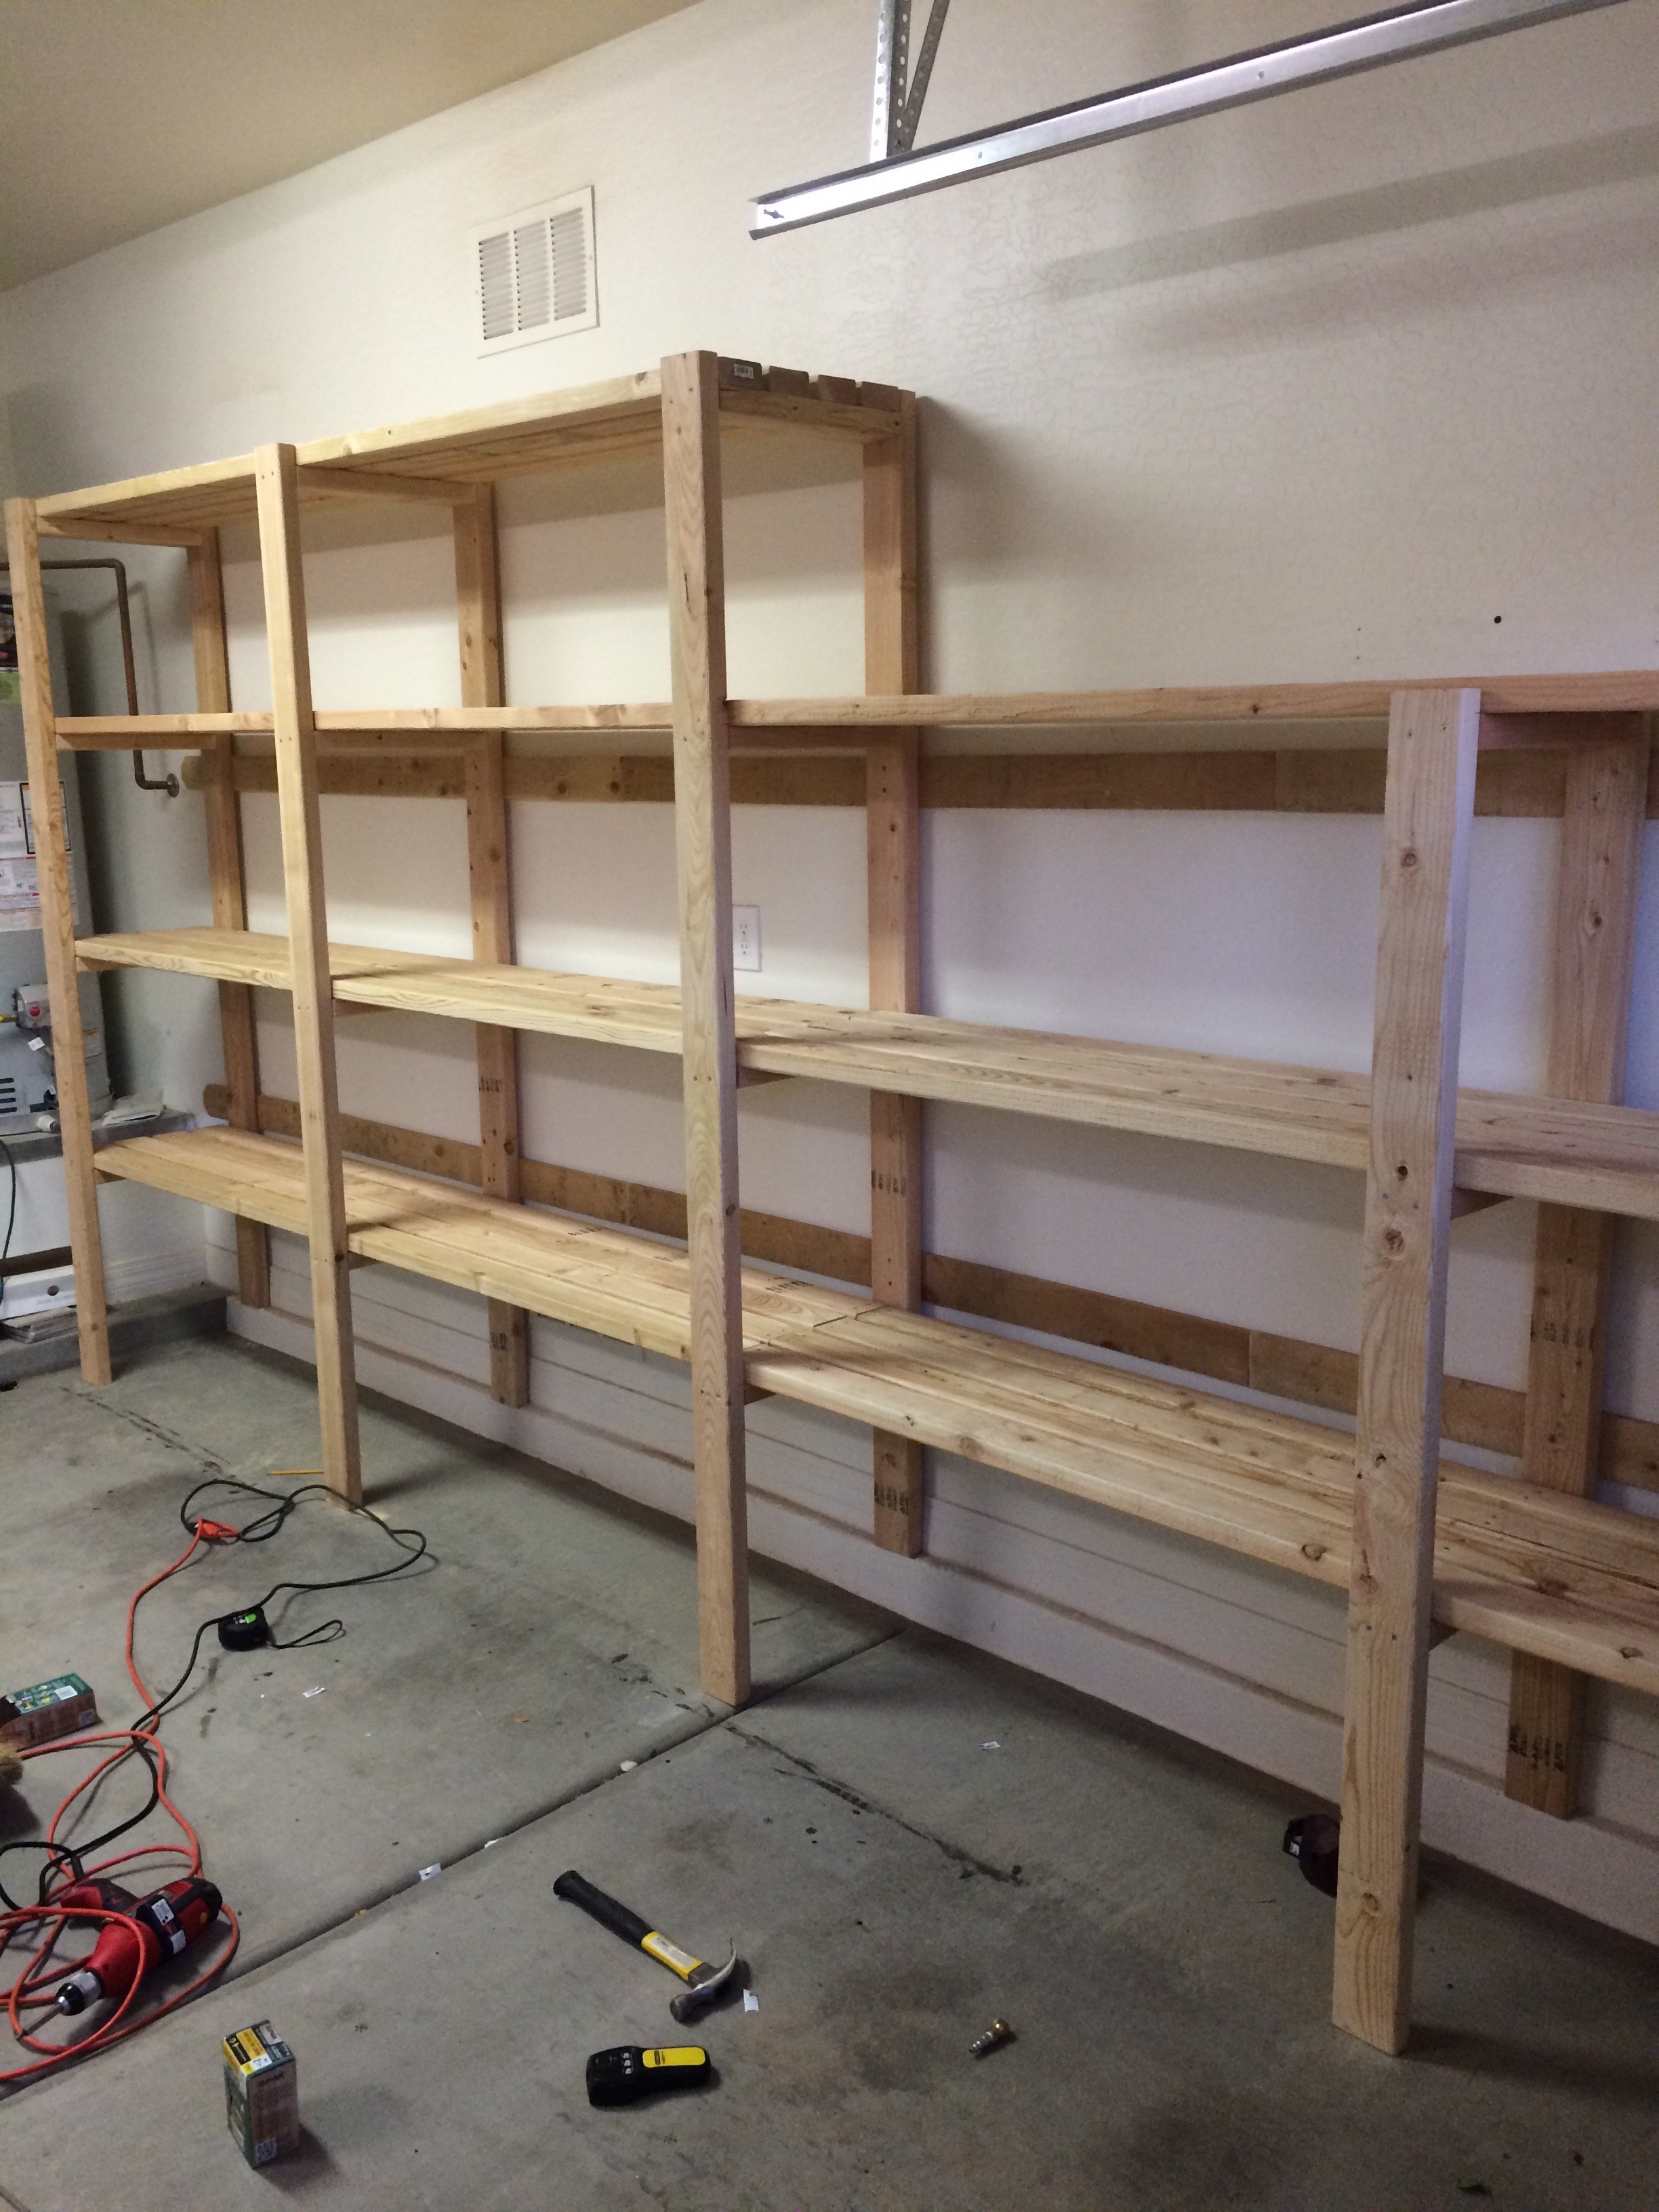
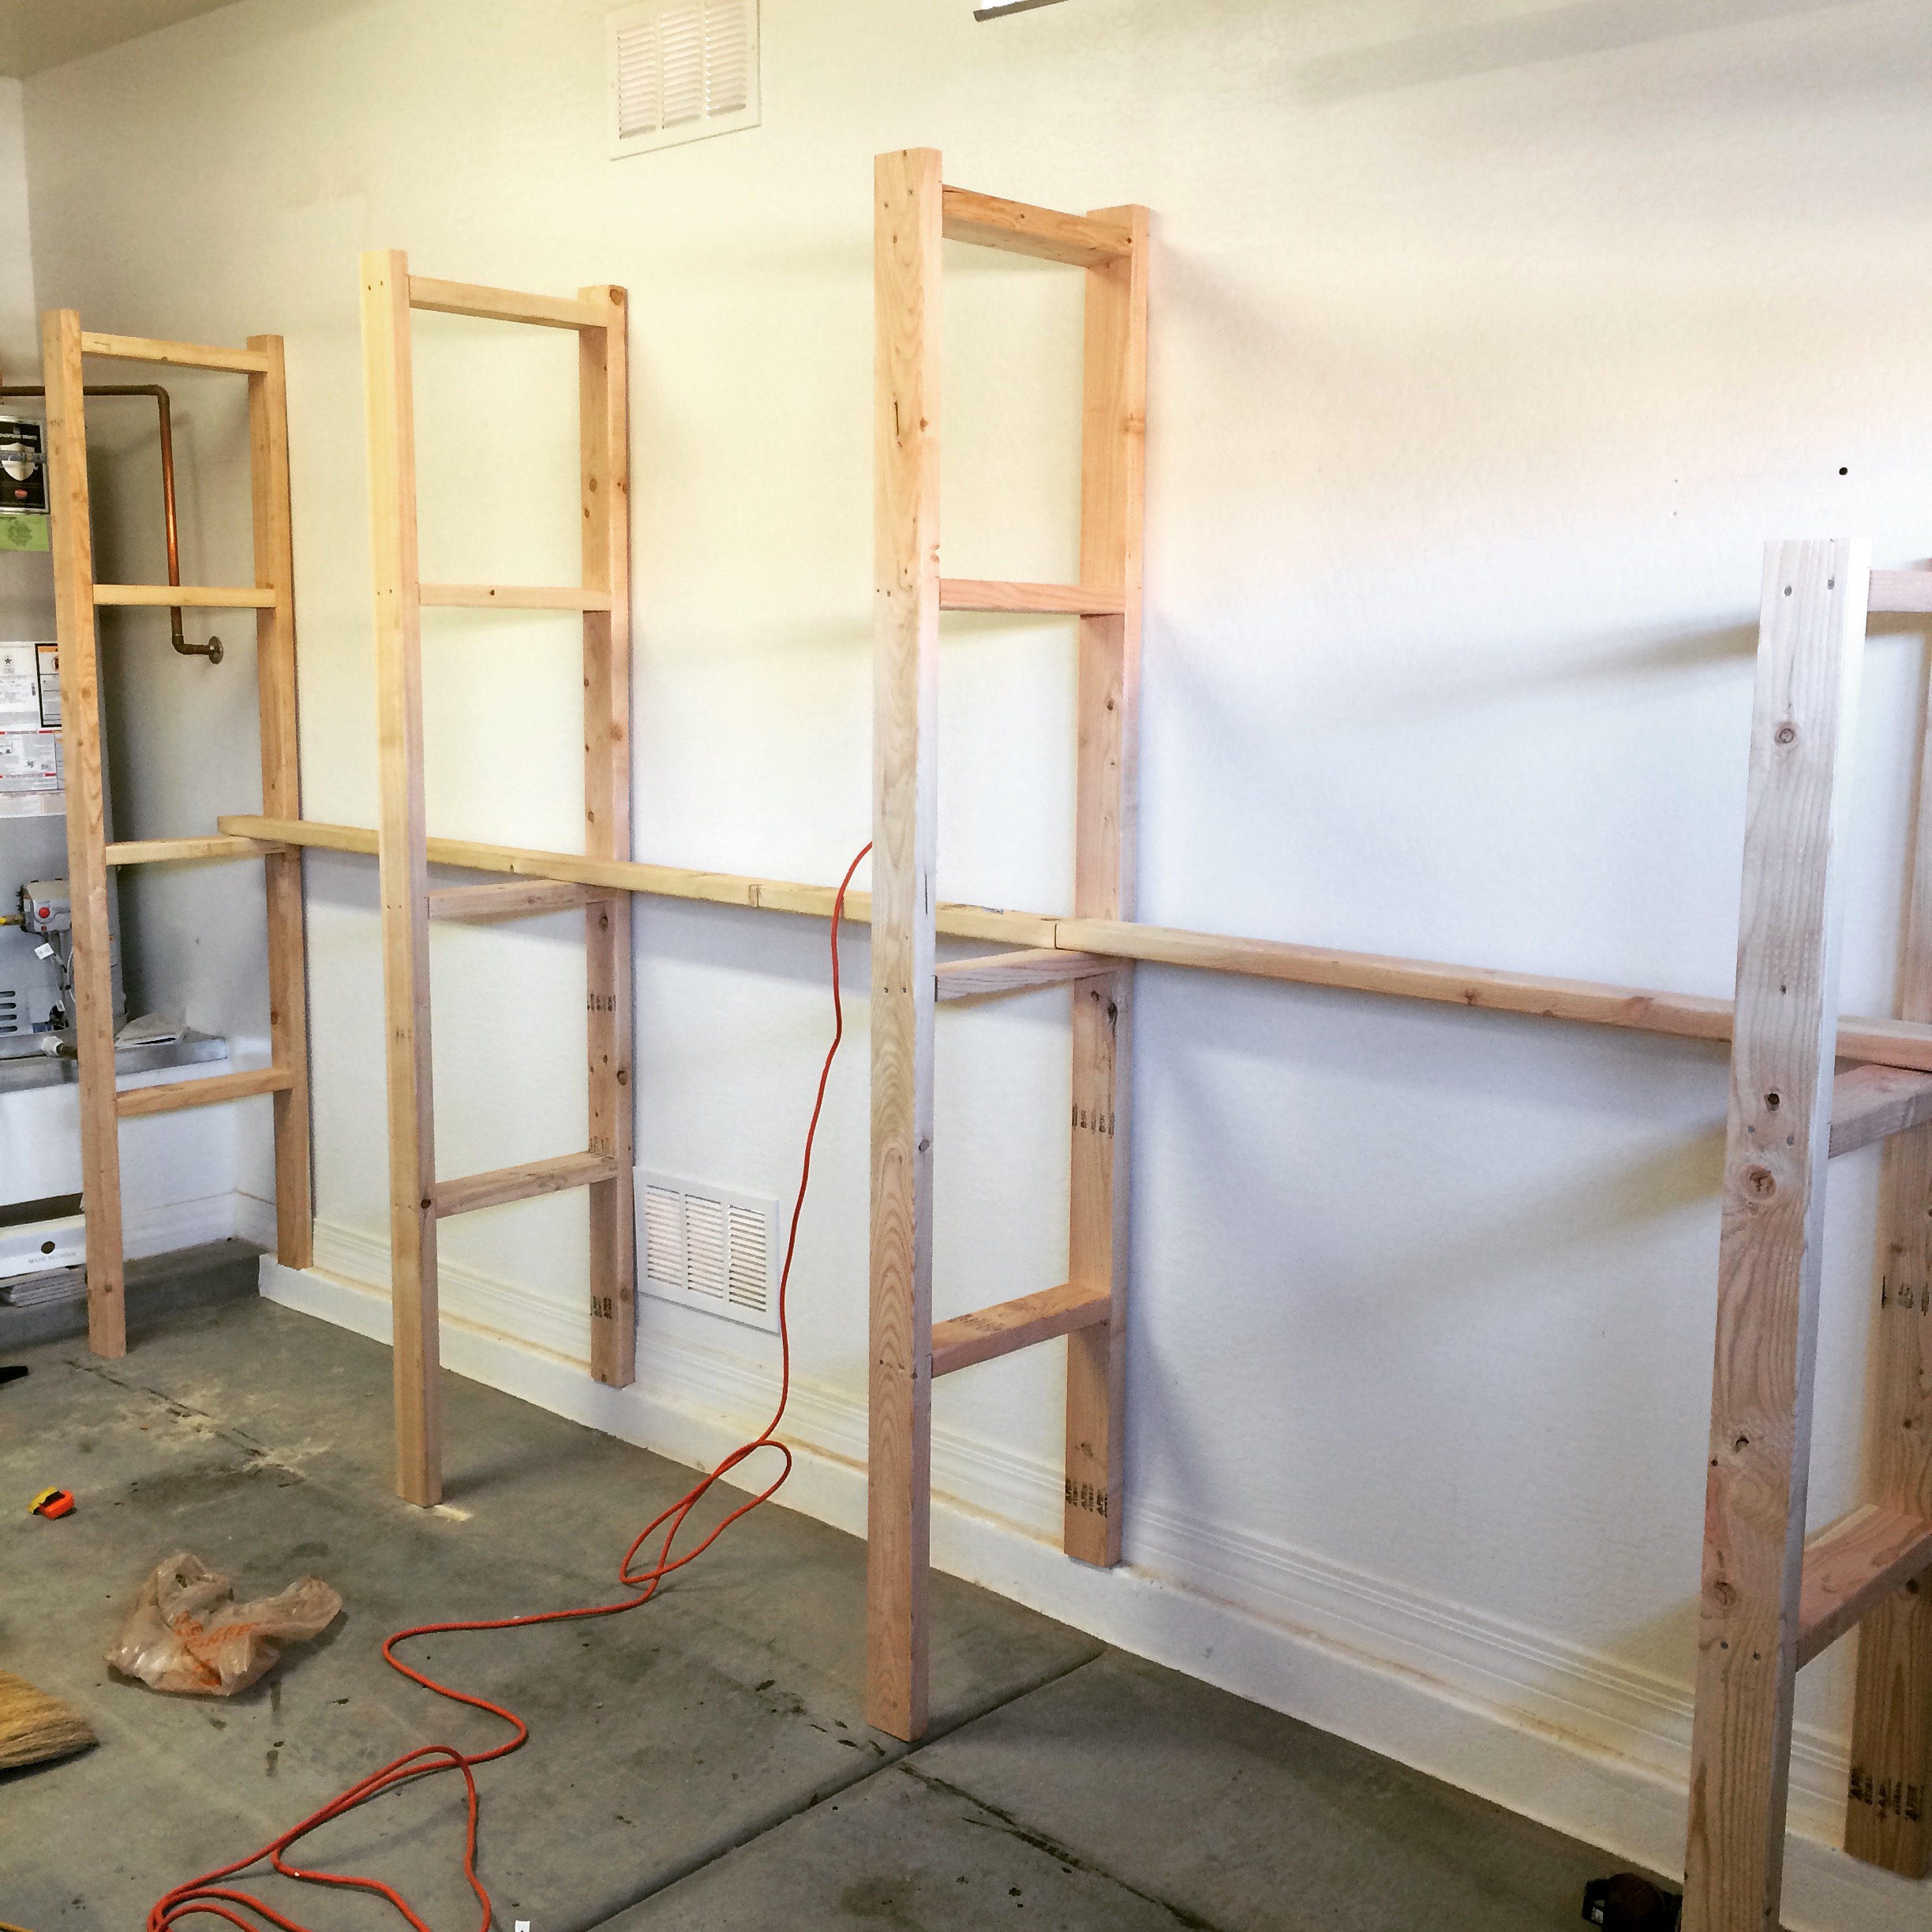
I changed the plans a little bit to add on the extra shelf on top as well as making the shelves an inch narrower than the plans. The project was actually pretty easy and really only took me about a days worth of work.