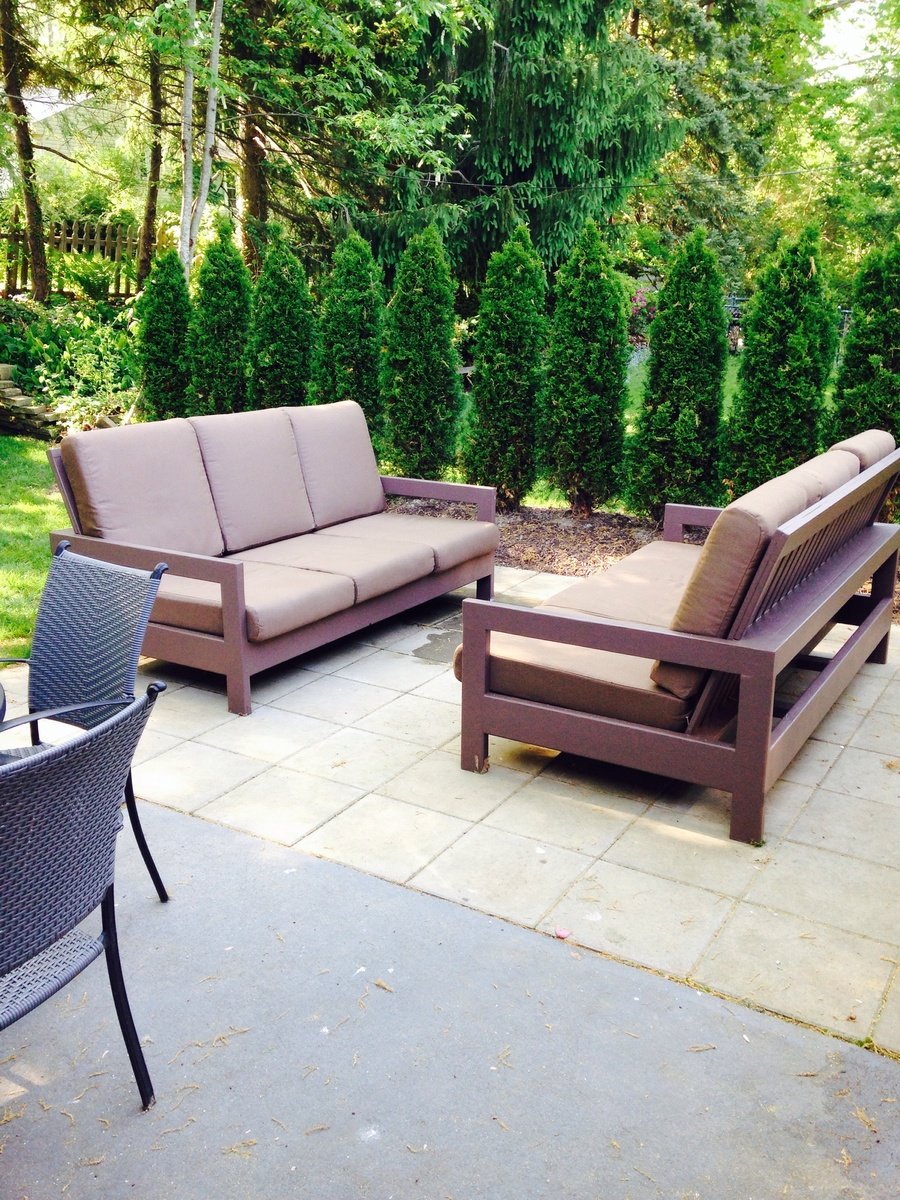
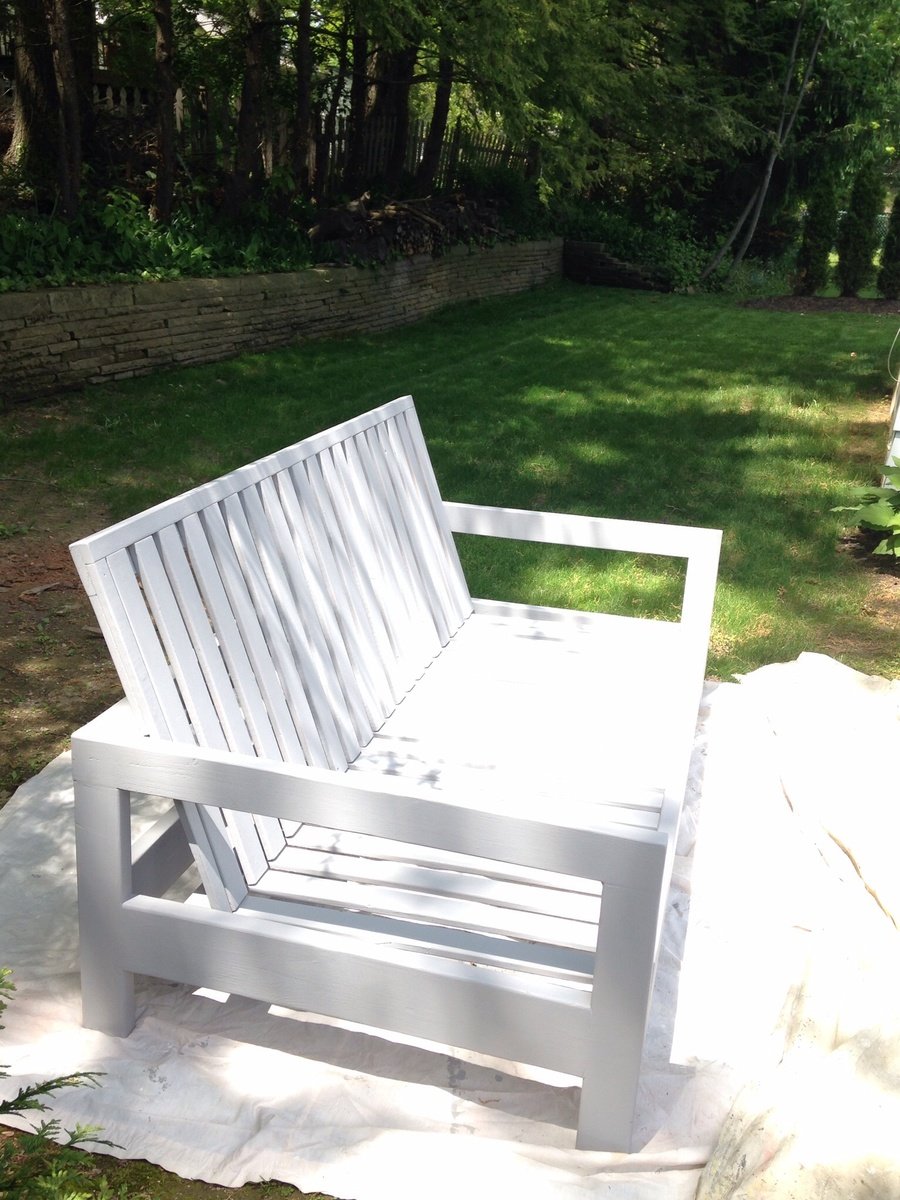
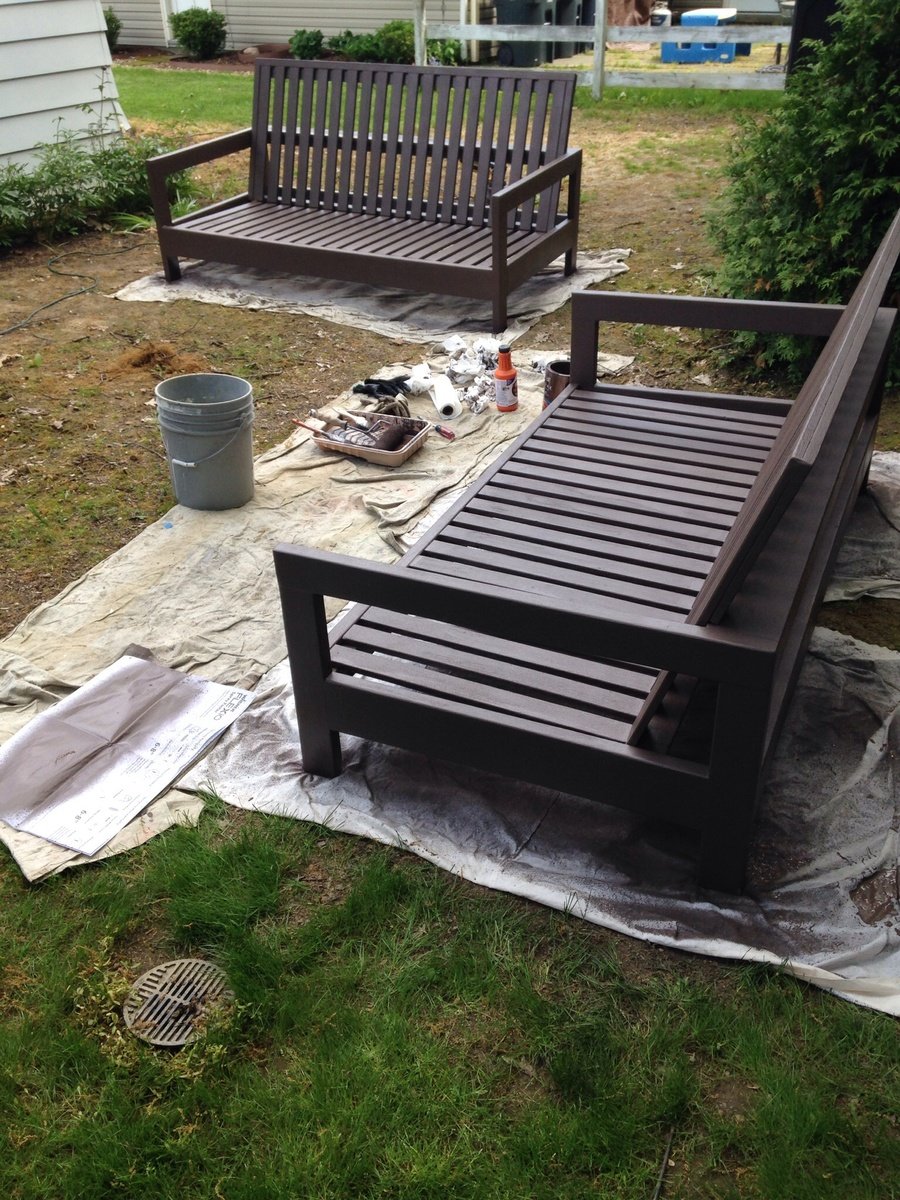
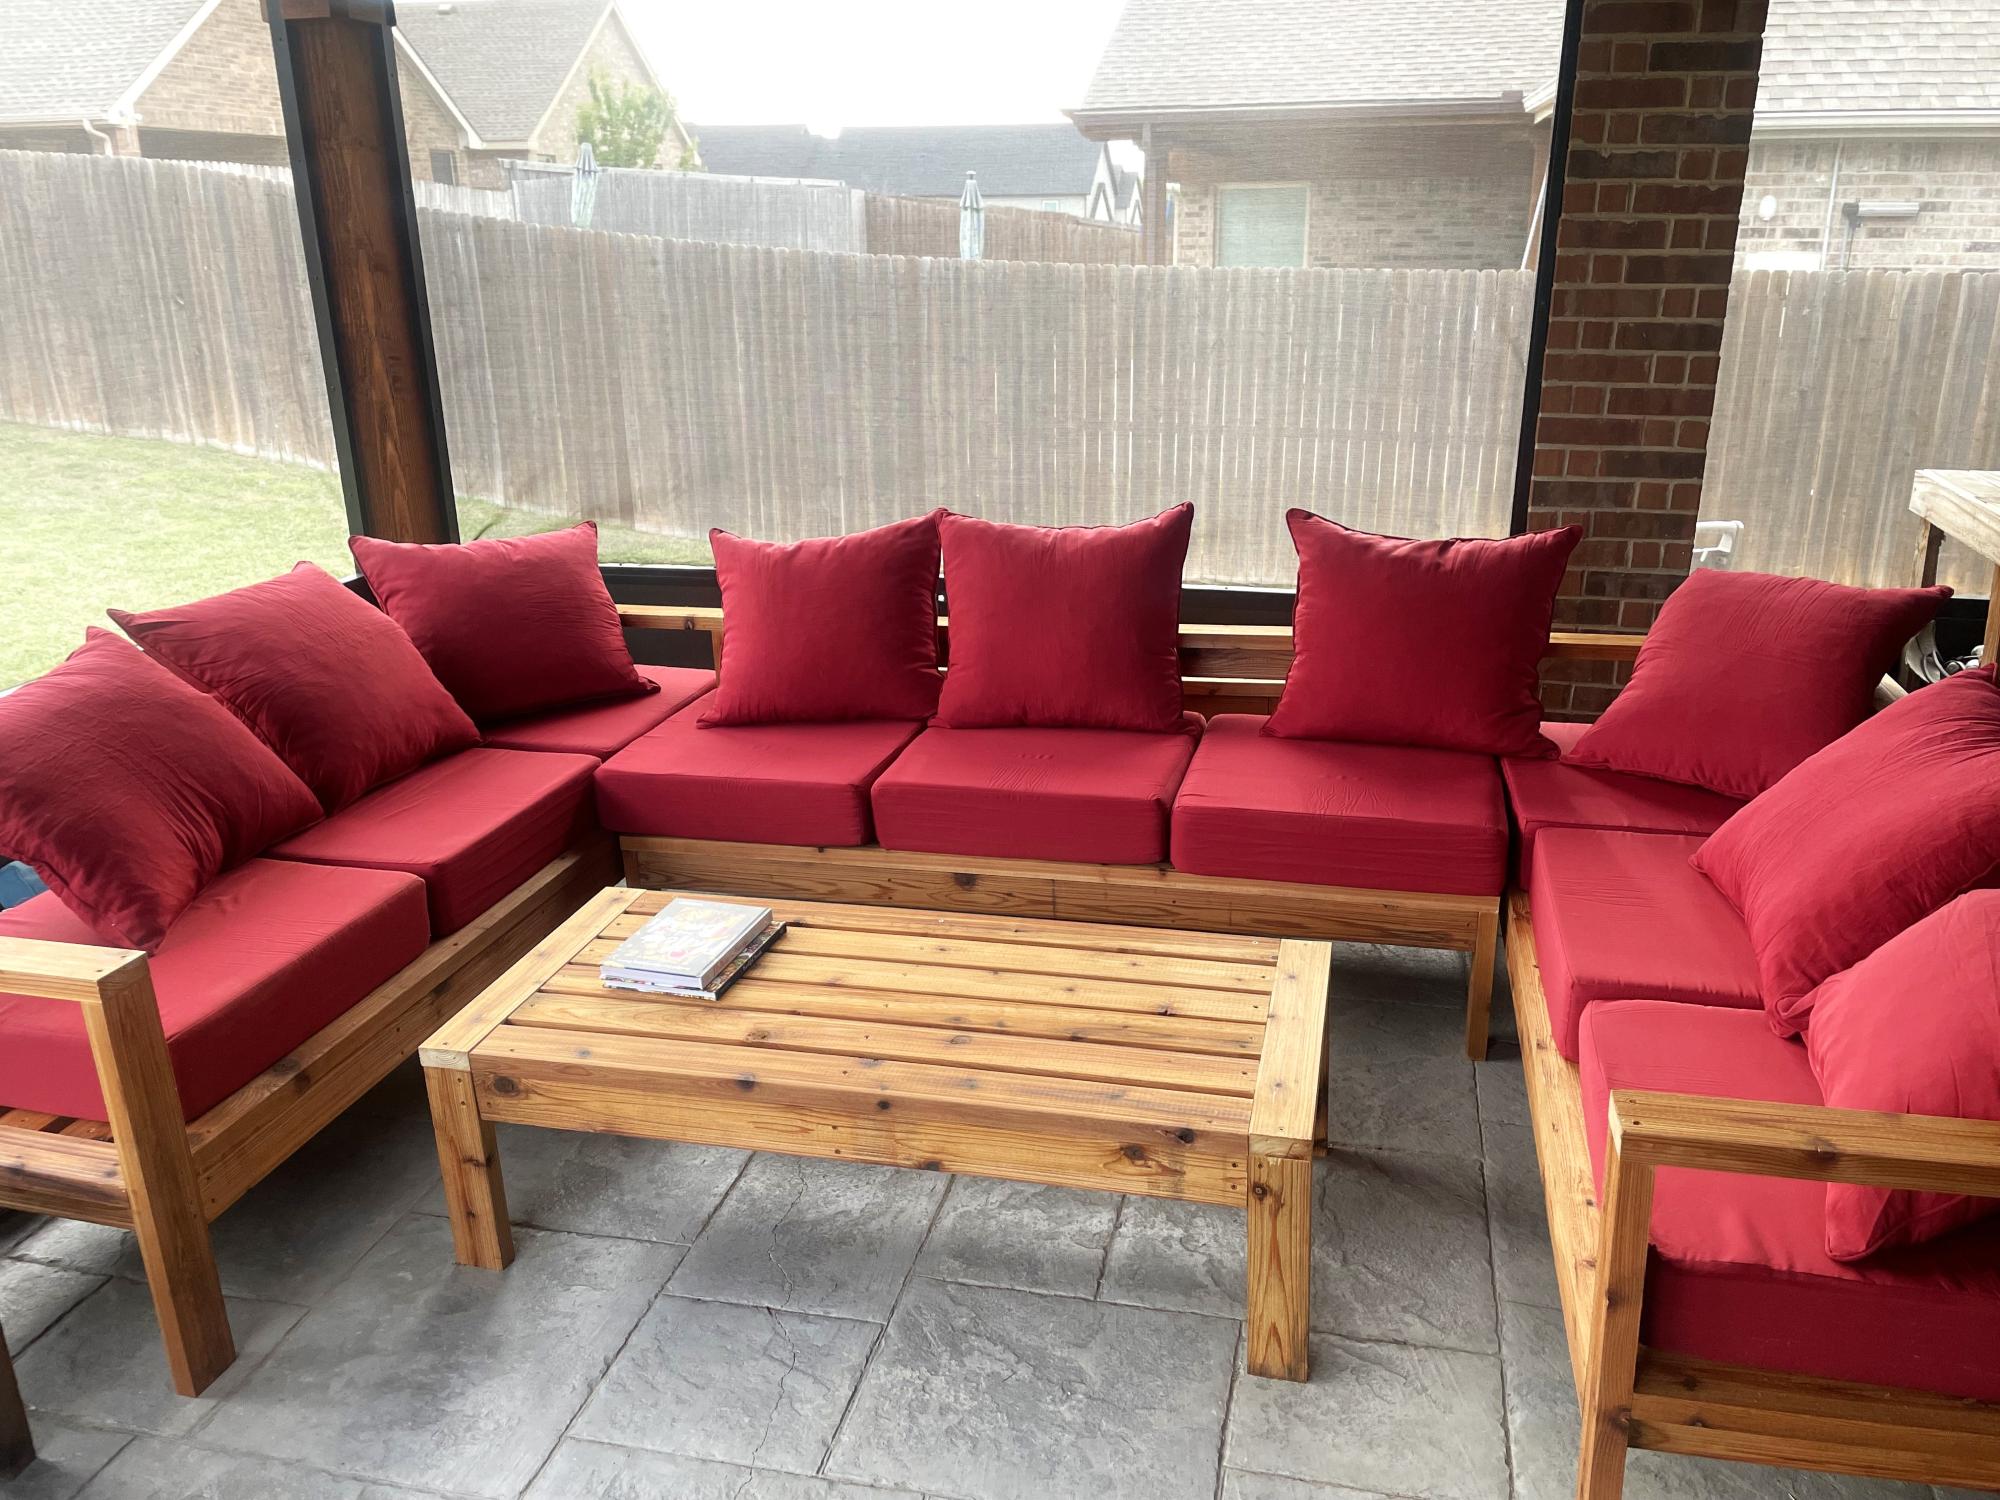
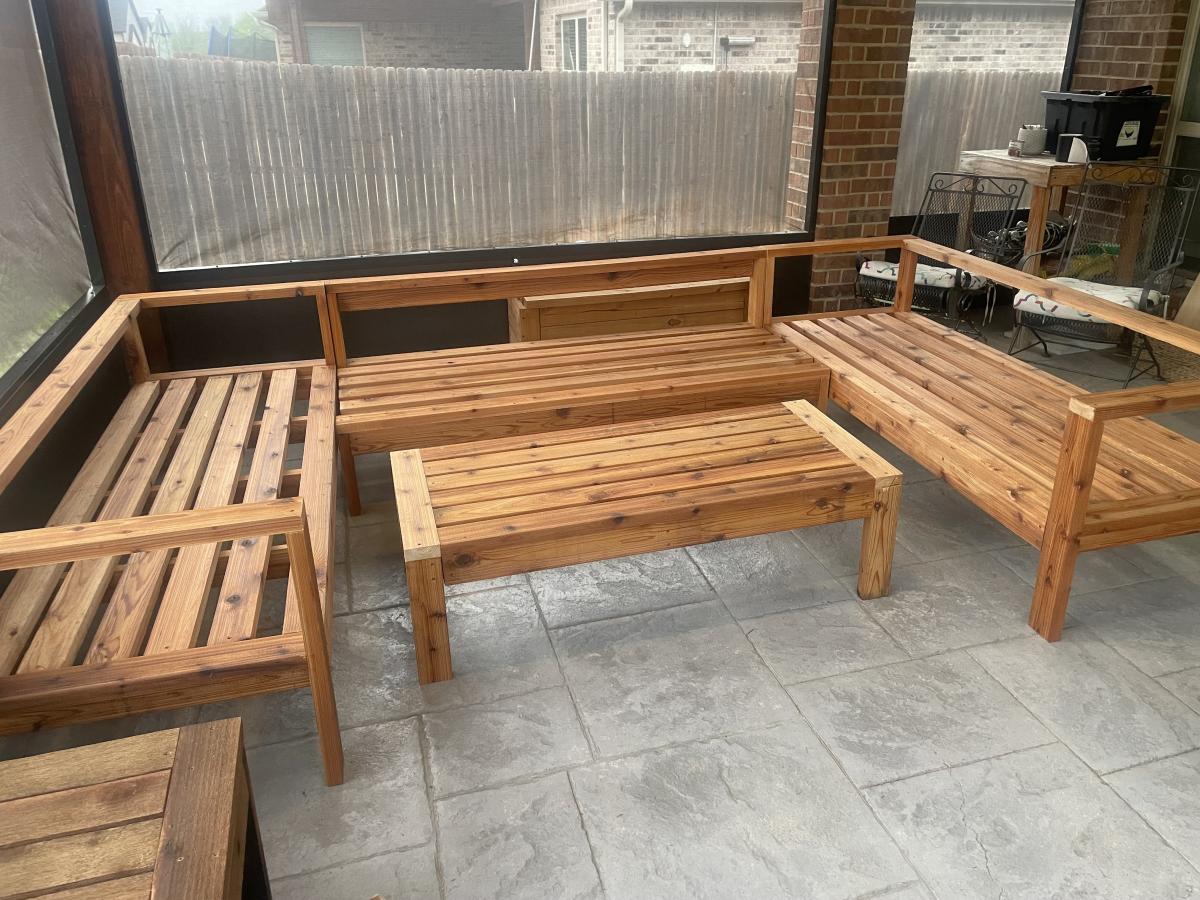
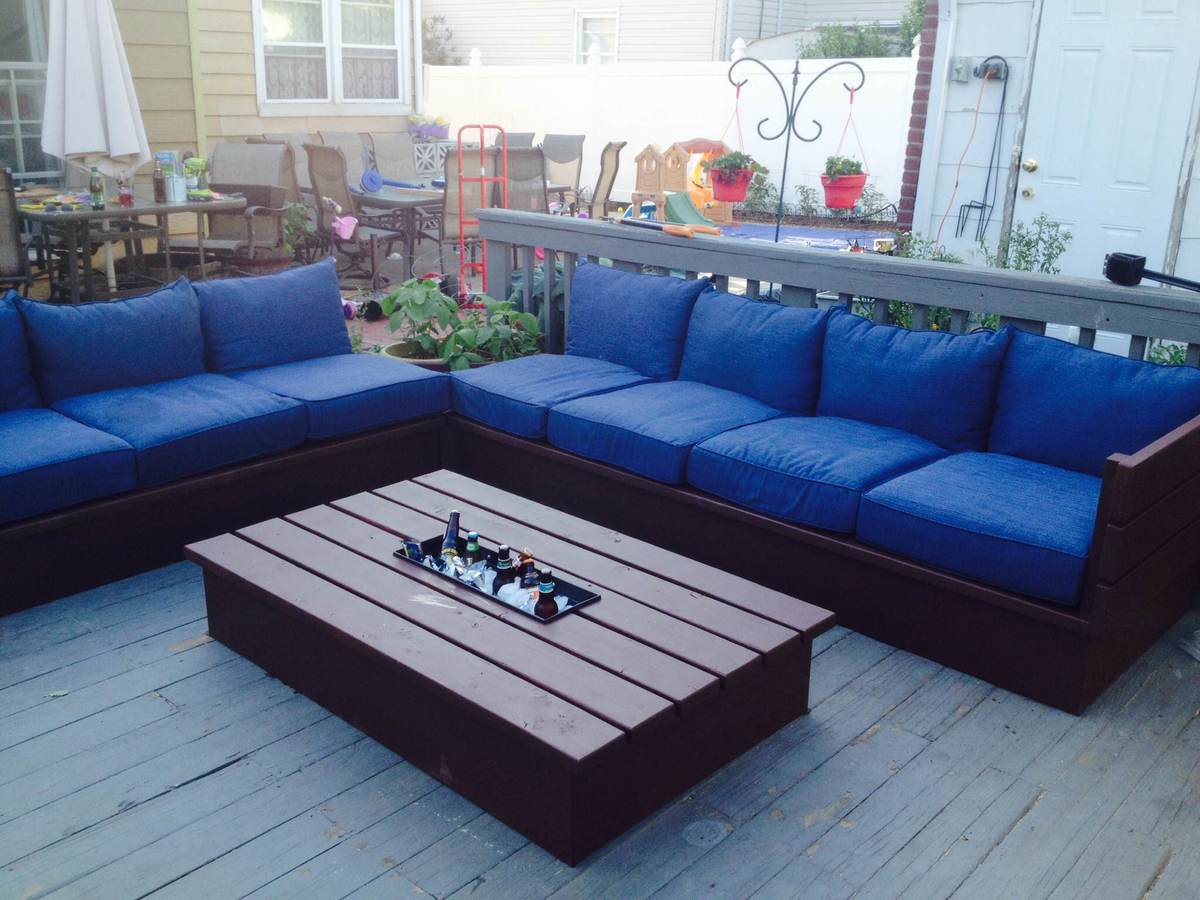
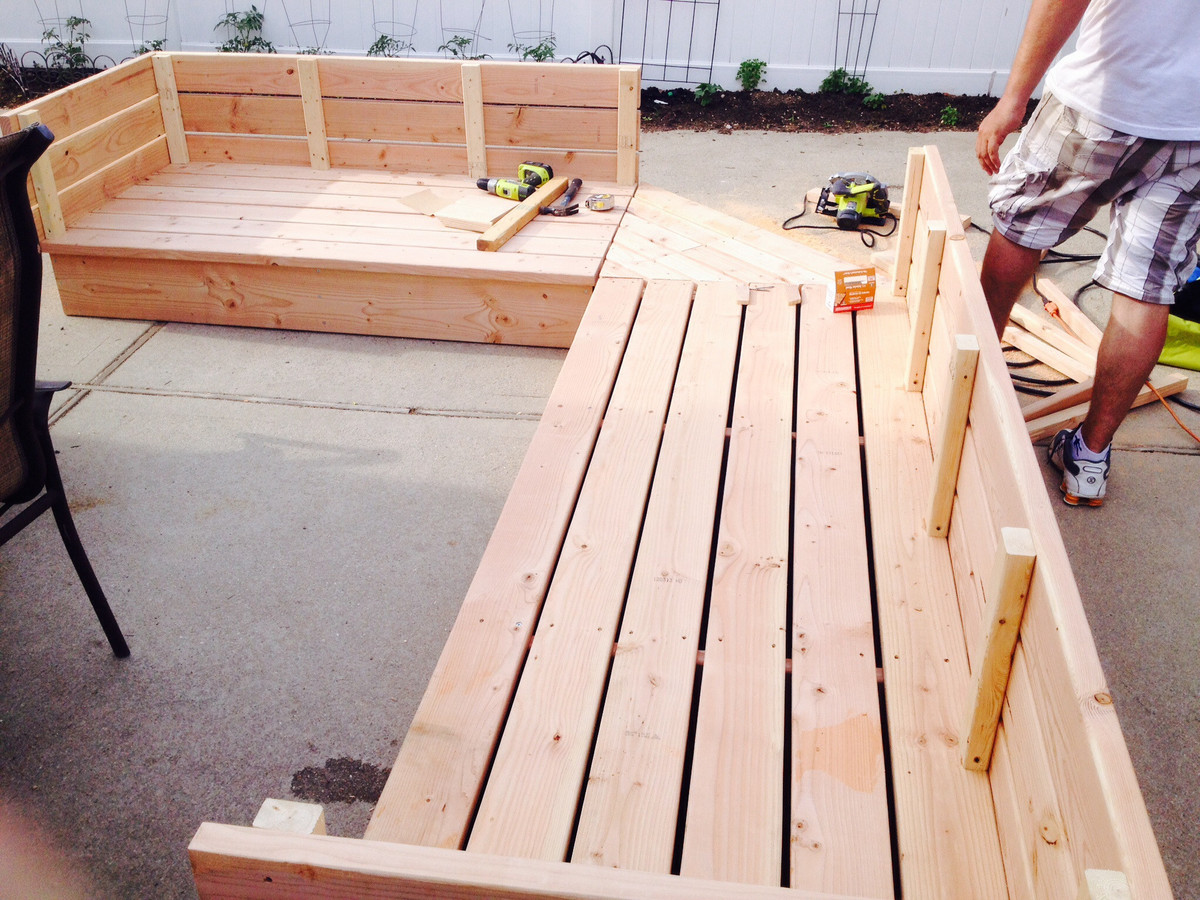
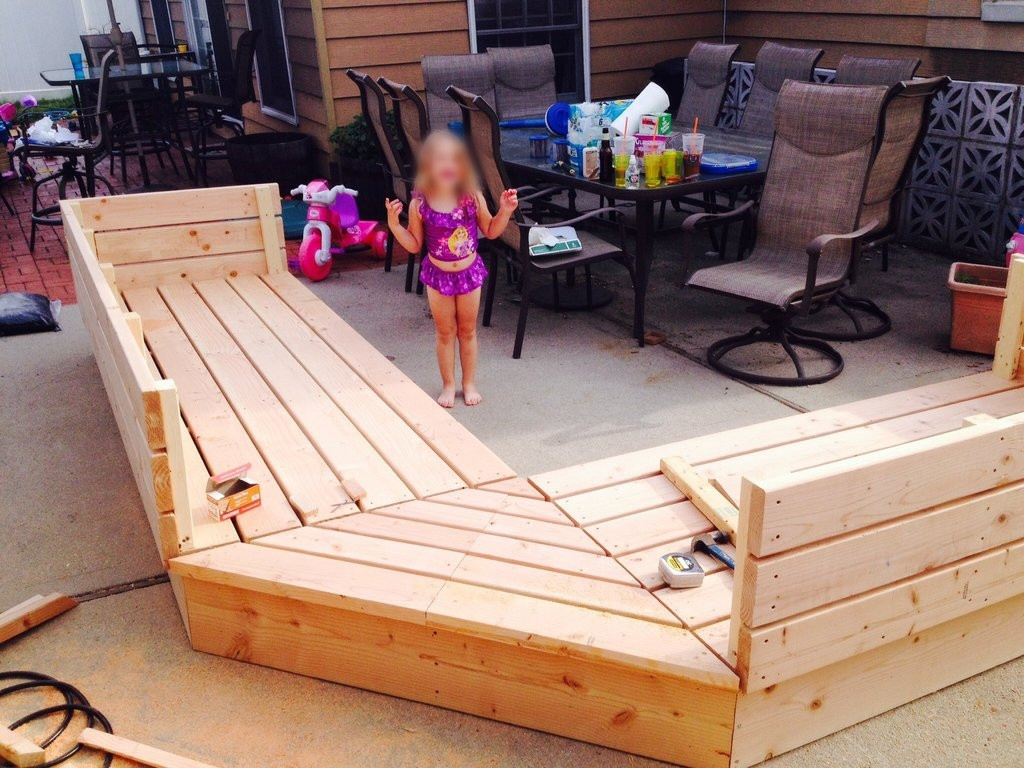
Community Brag Posts

Outdoor Sectional

Submitted by flarbort on Wed, 10/30/2019 - 06:36

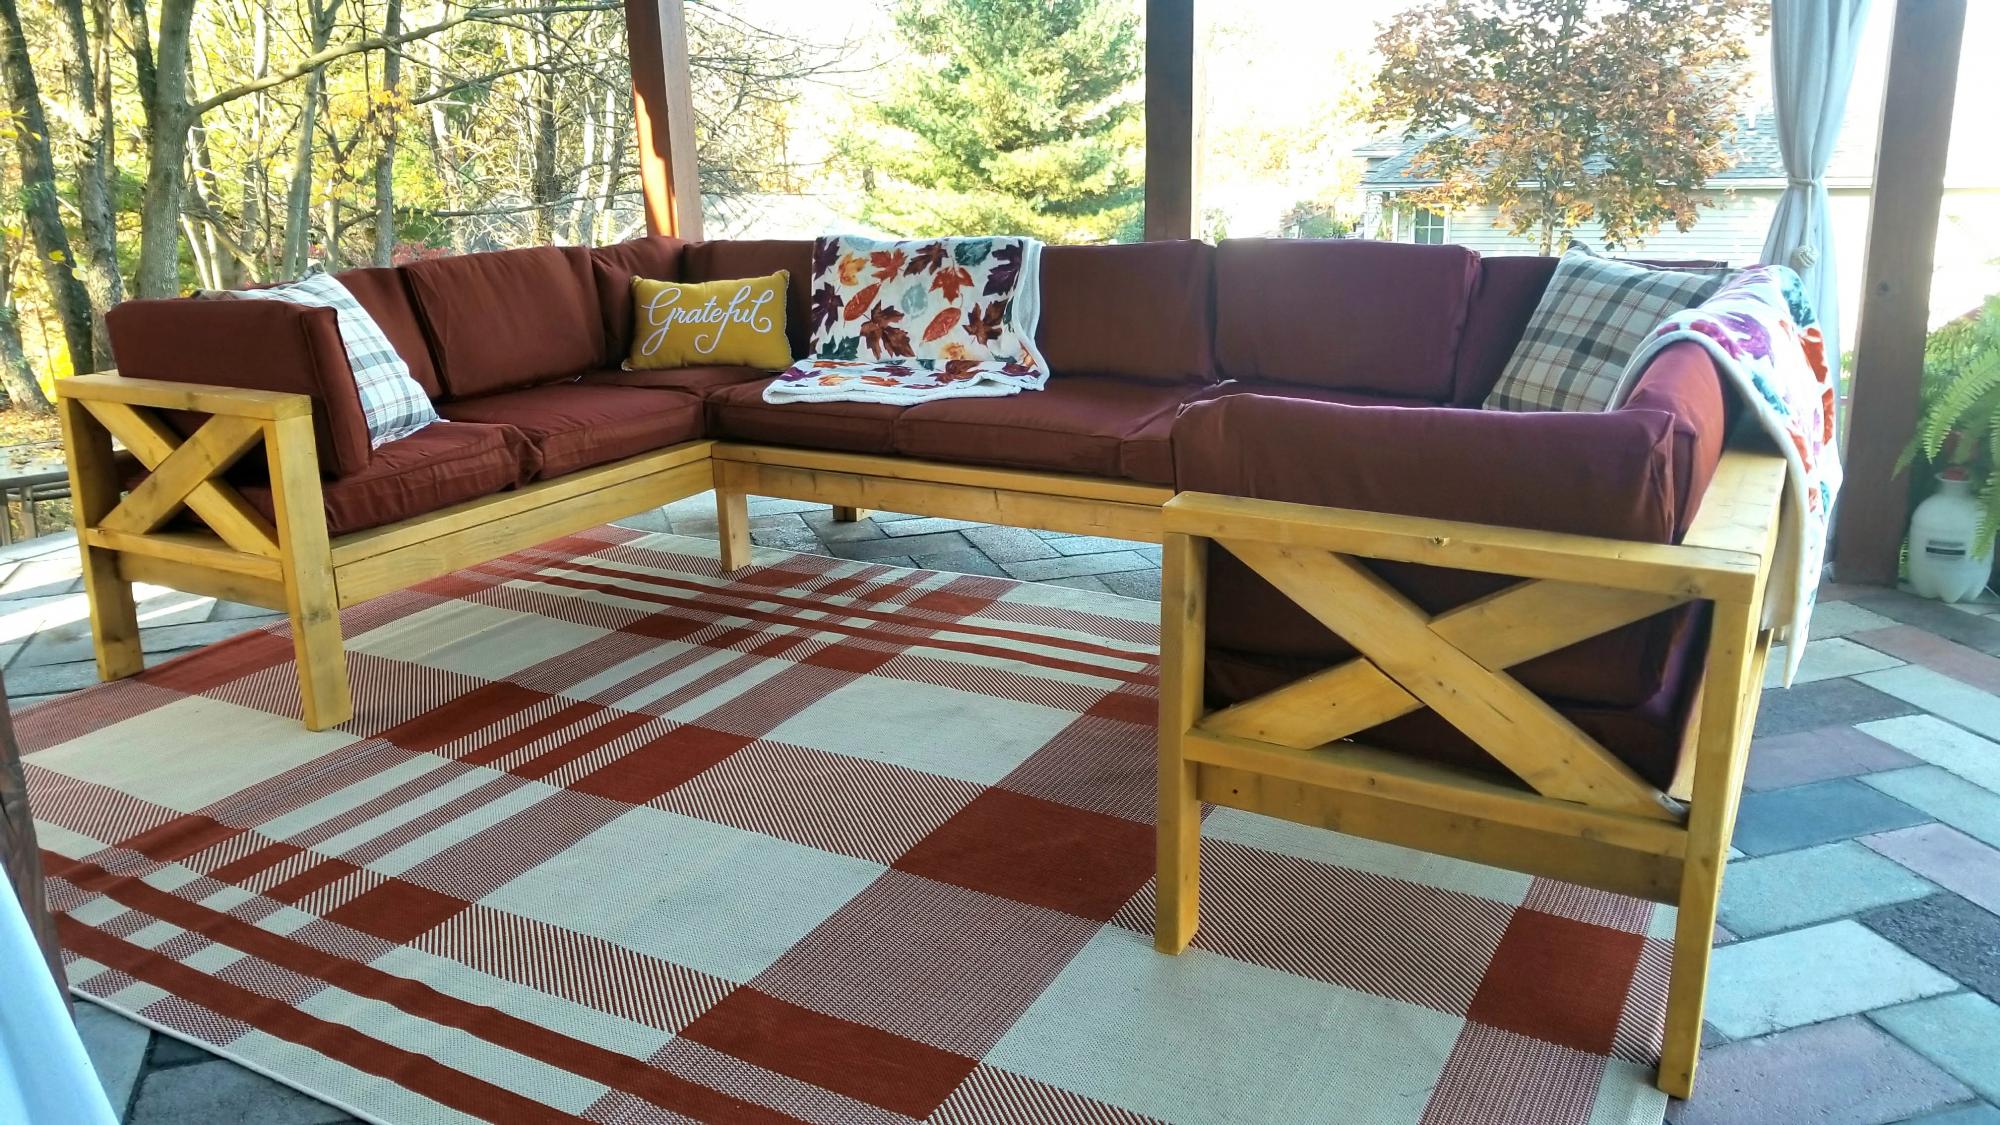
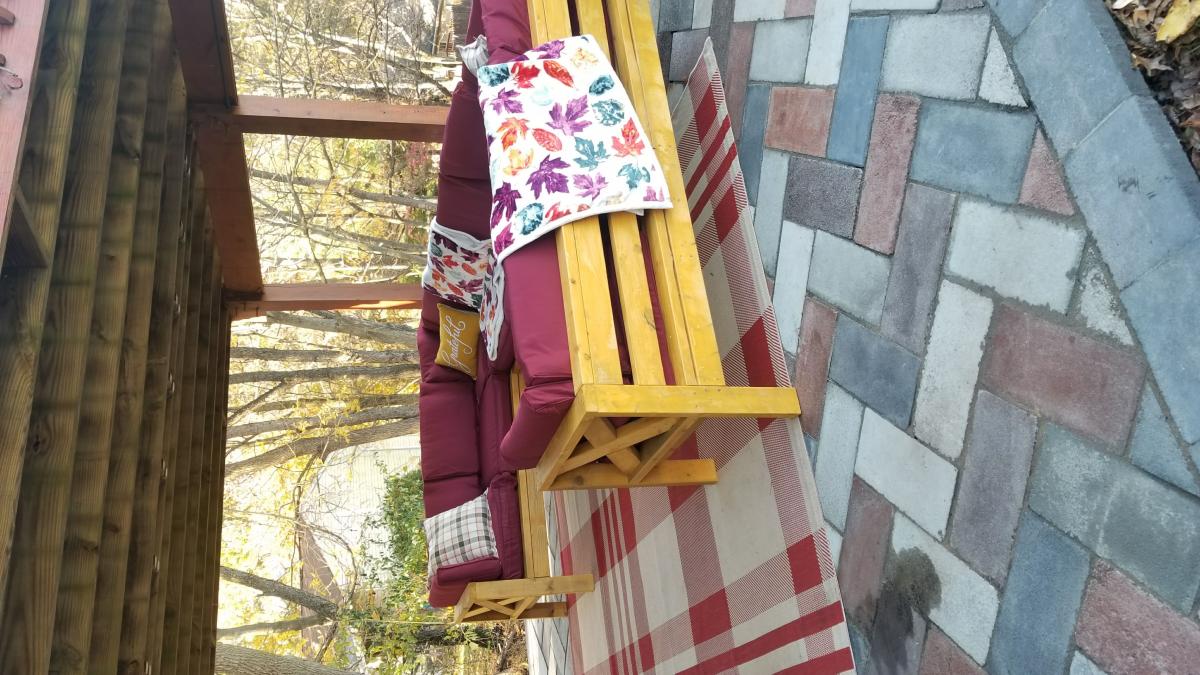
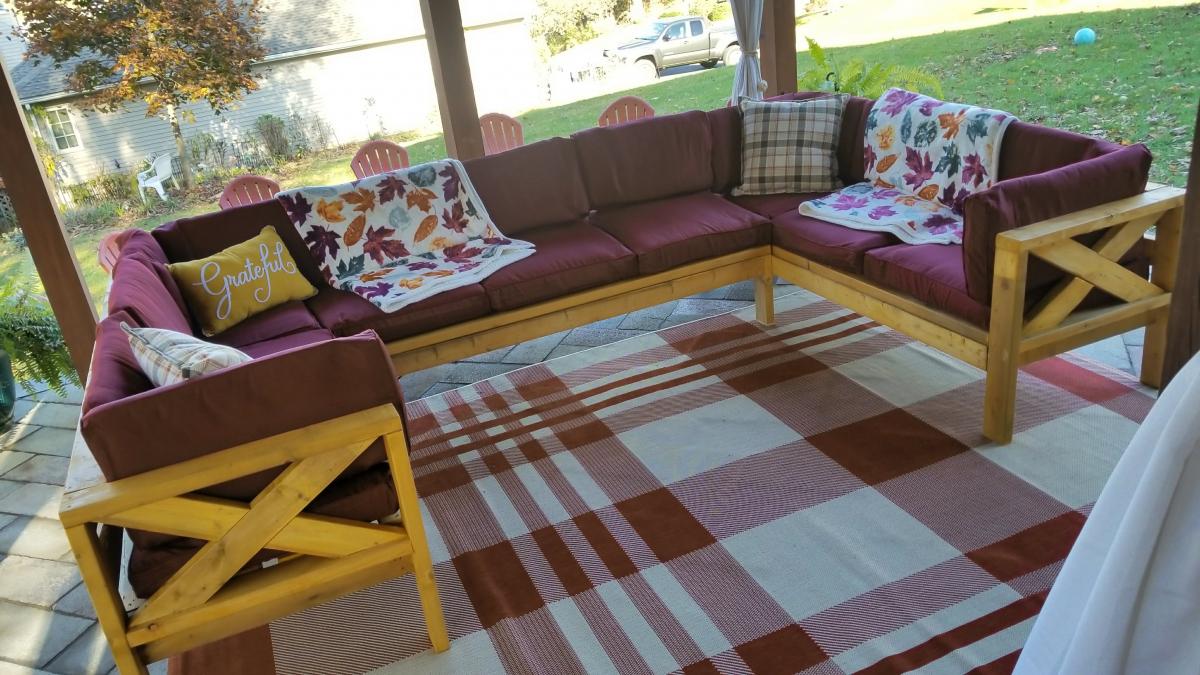
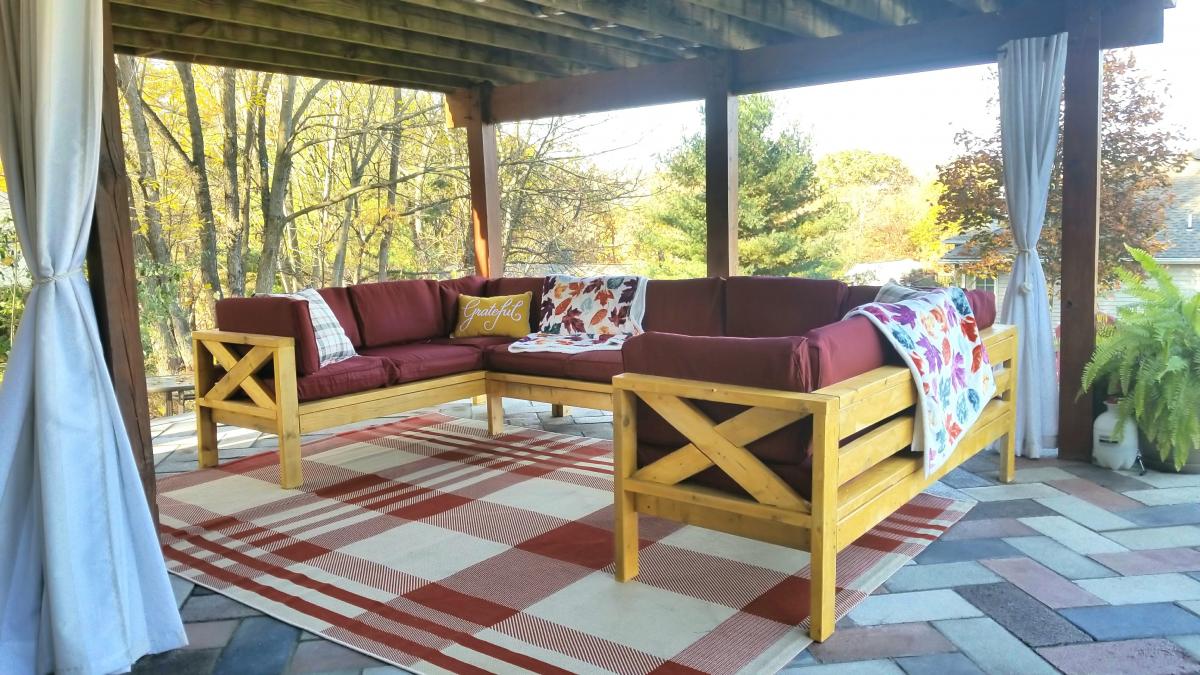
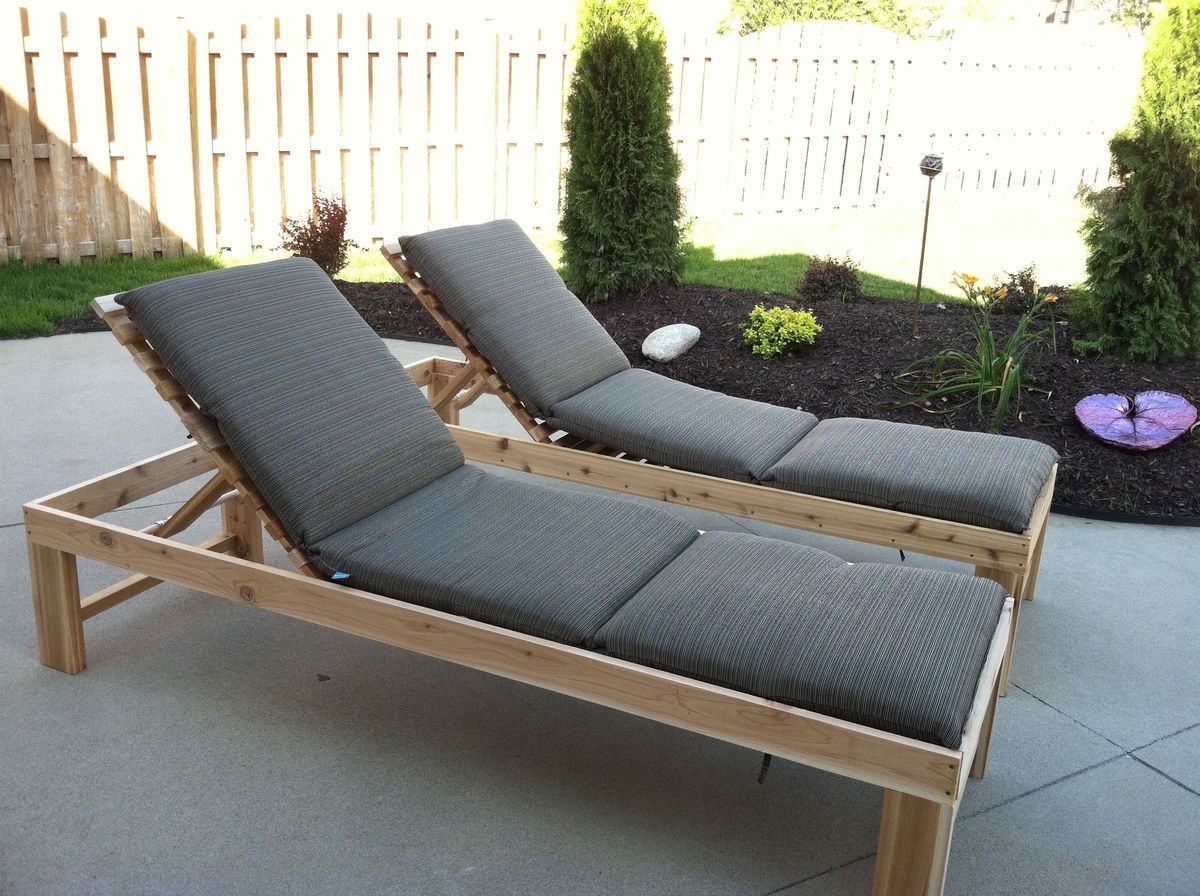
Just put the final stain on the outdoor sectional and I'm so psyched at how great it came out. Believe it or not, this is a very beginner piece (just 2x4s, NO pocket hole screws, all straight cuts- x ends optional) and anyone can do it with a circular saw, some clamps, a sander and an impact drill. Just takes some planning ahead of time. I bought the 2x4 wood and the cushions off Facebook Marketplace to save money so the total cost of this whole sectional was only $140 (wood, cushions, stain, screws). If you price similar new wood sectionals (U shaped, 9 seats) they're well over $1500+. Now, my sectional isn't as perfect as a brand new sectional but I do feel way cooler for saving a ton of money and doing it myself. In all it only took 4 days, working no more than 2.5 hours per day from start to finish to build this and stain it. It's made up of three pieces and I finished one piece a day and stained on the last day. You can make it while your toddler naps;-P Or if you had no other distractions you could bang it out in one long day. As for any of Ana's outdoor sectional plans the biggest expense is going to be the cushions. The cheapest new ones I could find were $40 a set (a 25" seat and a back cushion). That would have made this at least $400 in cushions ALONE! So what I did instead and I recommend this for anyone trying to save cost on this project is that I got a whole bunch of cheap and random cushions off Craigslist and Facebook Marketplace and then I bought cushion covers off Amazon. https://amzn.to/2BRBeeZ I cut some of the cushions to fit the covers and added stuffing to others.

Estimated Cost
$140
Estimated Time Investment
Day Project (6-9 Hours)
Finish Used
Golden Honey
Recommended Skill Level
Beginner
Seasonal And Holiday

Live Edge Custom Built Entryway Bench

Submitted by Anonymous (not verified) on Fri, 08/25/2023 - 11:01

Entryway Bench. I customized the plan with a maple live edge top and a fourth bay that had to be modified to extend the right side of bench down to lower level floor. Worked out perfectly! I am a total amateur woodworker but impressed with how easy it was and how professional it looks.

web: floatingislandsstudio.com

Built from Plan(s)

Rustic X Hall Tree

Submitted by Anonymous (not verified) on Mon, 01/27/2020 - 14:22

I built this scaled down version of Ana's Hall Tree to fit into a 3 foot wide space in my daughter's living room.

Built from Plan(s)
Estimated Cost
$55
Estimated Time Investment
Afternoon Project (3-6 Hours)
Finish Used
Whitewash
Recommended Skill Level
Starter Project

Sausha’s Washer/Dryer Pedestals

Submitted by TLinskey on Mon, 02/10/2014 - 06:24

After reviewing the comments I was a bit hesitant to start this project but then I realized I will build then make my own opinion. I am very happy I did because these pedestals are sooo wonderful and beautiful. This project must be built with extreme detail and everything must be square, etc to avoid any vibrations and complications. I did include extra center supports and thought of it like building a house frame.

Estimated Cost
80
Estimated Time Investment
Week Long Project (20 Hours or More)
Finish Used
Satin White Dove Ben Moore, PolyAcrylic
Recommended Skill Level
Intermediate

Comments

bclute

Mon, 02/10/2014 - 11:38

Looks solid! Did you follow the plans? We have a samsung front load washer / dryer as well. It's not the same as yours, but we have a hard time keeping it from moving around. We have tried making it as level as possible but still have a problem. Did you find by putting it on a pedestel that you had any issues? I was thinking maybe if I did build a pedestel, I could drill or recess holes on the platform for the feet to go in to prevent it from shifting around. Let me know your thoughts, thanks.

TLinskey

Thu, 02/13/2014 - 10:50

Thank you for your comment! I will send you a follow up note with my comments this evening. Thank you and have a great day! Happy Building.

TLinskey

Sat, 02/15/2014 - 12:33

Hello - Yes we did follow Ana's plan with some minor modifications. My suggestion would be to knotch it like a corner deck post so the 4x4's can go through the platform. If you don't understand I will happy to forward you a drawing. Just let me know. Thank you! Good luck!

DIY Shed

Submitted by Anonymous (not verified) on Mon, 11/06/2023 - 11:07

8’ by 12’ shed with extra 15” of height. Thanks for the plans!

Built from Plan(s)

Kitchen Island

We had an area in our kitchen where the washer and dryer use to be, and we wanted to build a cabinet that would fit in that spot. We took these plans and adjusted the sizes to fit the space we needed. We made the depth deeper and we cut off one of the side drawers and doors. We found a pre-made 1 1/2 inch butcher block counter top at a local wood supply warehouse that fit our needs perfectly. The countertop was about a quarter of the price of the whole cabinet, but it was worth it. In the drawers we used wrapping paper that we found at Cost Plus which fits us to a "T". We painted it with General Finish Milk Paint in Bayberry Green and used a clear coat with a satin finish. My biggest advice to someone making this cabinet is to take your time and make sure everything is square.

Built from Plan(s)
Estimated Cost
$600
Estimated Time Investment
Week Long Project (20 Hours or More)
Finish Used
General Finish Milk Paint Bayberry Green, Satin Clear Coat
Recommended Skill Level
Intermediate

Comments

vabvive

Mon, 07/02/2012 - 10:10

You've done a beautiful job! What did you find was key to getting everything square?

This is lovely & has inspired me to make my own. I need a piece for my master bedroom that I can use as a TV stand and also to conceal my laundry baskets. Originally I'd planned on adapting a sideboard and using a tip-out door like Ana's trash bin for the laundry -- but this piece is so beautiful I may just ensure that my laundry basket will fit inside and build as-is so that I can easily have the option to use it differently if I want to.

Schweizerfamily

Wed, 07/04/2012 - 06:59

Thank you so much. We purchased a couple of Clamp it Assemby Sqares from rockler.com. These helped a lot for getting everything square. We also took our time and did not rush.

Dustin (not verified)

Wed, 07/11/2012 - 19:42

Love your modified sideboard! The color is gorgeous and the butcher block is a great addition!

I was wondering what kind of hinges you used. I looked for flush mount hinges at Lowes today and they are not going to work. I want it to look like yours where you can barely see the hinge.

Do you remember the name of it? Where you got it? Pic? Any help would be appreciated!!

Dustin Roberts
[email protected]

Schweizerfamily

Wed, 07/11/2012 - 20:15

Thank you very much. We had a really hard time finding hinges also. We tried Home Depot and Lowes and came up empty. We finally went on to Hillary Louise's blog and follow the links to the website where she bought her hinges. http://www.cabinetparts.com

Here are the links that she posted.

http://www.cabinetparts.com/p/amerock-traditional-cabinet-hinges-AMCM31…

http://www.cabinetparts.com/p/amerock-traditional-cabinet-hinges-AMCM31…

We just bought ours in a different color.

Becka (not verified)

Sat, 09/08/2012 - 13:14

My husband & I are looking to build our own too but the dimensions of the original plan would make it too big for our dining area. Yours would be a perfect size though - would you mind posting the size adjustment for yours? Or could you email it to me? I would be forever grateful :)

Love the color you painted it too....very nice choice!

Becka Krikorian (not verified)

Sat, 09/08/2012 - 13:18

My husband & I are looking to build our own too but the dimensions of the original plan would make it too big for our dining area. Yours would be a perfect size though - would you mind posting the size adjustment for yours? Or could you email it to me? I would be forever grateful :)

Love the color you painted it too....very nice choice!

rhettar

Sat, 01/19/2013 - 11:37

This is exactly the size down I had in mind and was wondering how it would look with one door off by itself, it looks great! I even thought about incorporating one door to actually be a tilt or pull out for trash. You guys did a wonderful job and it looks like it was built in where you ended up putting it in your kitchen... Are you going to do a little something now to match on the other side of the stove?

Schweizerfamily

Fri, 01/25/2013 - 09:12

Thats a great idea. We were thinking one our next projects would be a mix between this and Ana's recycling center with the tilt out for dog food.

chicken coop

Submitted by namaste7 on Mon, 05/11/2020 - 22:10

Modified to make the coop bigger and the planter smaller. Added 1" foam insulation on the inside and changed the design to use the "deep litter" method. This means the coop bottom goes all the way to the bottom of the support beam rather than using a removable tray. Added a steel roof with a ridge vent at the top. The chicken run under the coop is lined with buried hardware cloth so no animals can dig under the coop. All hinges are mortised and doors flush mounted. The coop is wired for power for a heat lamp. The planter is lined with a metal tray. The coop can be separated into two pieces so you can move it or rotate the top 180 deg if needed (so you can get to the eggs from the left or right side). Great plans, thanks Ana!

Estimated Time Investment
Week Long Project (20 Hours or More)
Finish Used
cedar deck stain. Olympic. brand
Recommended Skill Level
Advanced

Comments

Seasonal And Holiday

I did it!

Thank you for all the wonderful plans!

i used the modified plan of the tilt out waste bin that Shanty2chic put out as a three bin laundry sorter.   It turned out great!  

It is finished with chalk paint, lightly distressed. 

Estimated Cost
$40 or so
Estimated Time Investment
Weekend Project (10-20 Hours)
Finish Used
Rustoleum's Chalk paint in old gray. Lightly distressed with the ryobi corner cat.
Recommended Skill Level
Beginner

Comments

Outdoor patio couches

Submitted by Chrisann on Tue, 05/27/2014 - 11:06

Love this design! We had to adjust the plans to fit a different cushion from Restoration Hardware. The couches turned out great and we had a party the day after the paint dried! Thx Ana-white!

Estimated Cost
Material $200, cushions $700
Estimated Time Investment
Week Long Project (20 Hours or More)
Finish Used
Valspar outdoor paint "frontier road"
Recommended Skill Level
Intermediate

$55 Fancy X Desk

This was probably my favorite build yet! Love how it turned out

Built from Plan(s)
Estimated Cost
$80
Estimated Time Investment
Day Project (6-9 Hours)
Finish Used
Minwax walnut polyshades
Recommended Skill Level
Intermediate

Water table for 1 year old

Submitted by Anonymous (not verified) on Fri, 09/02/2016 - 15:42

Shortened the legs to 17" and used 1x2s on the shelf because that's what we had on hand. Sealed with Thompson's aerosol clear waterseal. 

Built from Plan(s)
Estimated Cost
$38
Estimated Time Investment
Afternoon Project (3-6 Hours)
Finish Used
Thompson aerosol clear waterseal
Recommended Skill Level
Beginner

Pallet style outdoor platform sectional (variation) with patio table

Submitted by SeanyMc on Tue, 06/17/2014 - 13:44

Saw the Outdoor sectional on your website and I just had to build it! Made some variations to the original plans, one being making it higher off the ground and the other was a necessity because Home Depot didn't have the right size wood and I wasn't about to go running around from store to store, so I used scraps to make a corner piece that fits perfectly. The most timely aspect was the sanding and removing all the rough edges. Also used Bondo to fill in all the holes that were on the outside to give it an all around smooth finish. The end result is just about the same though and the family and friends are in love with it! Thank you so much for the plans! Really could not even come close to justifying what it would cost to buy a sectional like this. Cushions were a huge concern and rightfully so. After building, I started searching and was mostly getting prices in the plus $800 range. It was breaking my heart knowing I was going to have to pay more than double what the entire sectional cost me. In the end though, was able to land some 25 x 25 x 6 cushions at Lowes for 50% off ($50 a piece).

Estimated Cost
$750 ($300 Wood & supplies. $40 paint. $400 for 50% off cushions)
Estimated Time Investment
Weekend Project (10-20 Hours)
Finish Used
Behr Premium Dark Walnut Paint, All in One.
Recommended Skill Level
Beginner

Comments

drhj84

Mon, 10/06/2014 - 08:18

I was wondering if you could tell us the model of your cushions.  I builth this over the weekend, but I ma having a tough time picking cushions.  thanks


HANLOP01

Mon, 03/16/2015 - 09:06

I love this modification. Did you use 2x8s or 2x10s for your base? It looks like you angles the back. How did you go about doing that? Thank you for posting this?! Great work!

longshot

Mon, 06/29/2015 - 18:00

nice build, when you get some time can you put up your modifications please:) would love to build this! Love the colours you used and how it looks!Me too..you cook like me, i make it my style...thats how i do my salsa ..my way i like it...

longshot

Mon, 06/29/2015 - 18:00

nice build, when you get some time can you put up your modifications please:) would love to build this! Love the colours you used and how it looks!Me too..you cook like me, i make it my style...thats how i do my salsa ..my way i like it...

tsmith@vanausd…

Wed, 07/22/2020 - 11:37

This looks great. This is exactly what I want to make. How is the height of the sectional? That's my only concern. Is there anything you would change if you were to do it all over again?

Seasonal And Holiday

Organizer

Submitted by Taa-daa on Thu, 09/29/2016 - 21:41

It's a little twist on Ana's Coat organizer. Turned out really useful and did not cost me anything since I ussed scrap wood. I wish I would build have built one for coats as well.

Estimated Cost
0
Estimated Time Investment
An Hour or Two (0-2 Hours)
Finish Used
Walnut stain plus clear coat
Recommended Skill Level
Beginner

Screen door with built in dog door

Our old screen door wasn't cutting it anymore, so I built a new one, and to kill two birds with one stone, I included a built-in dog door. Now I just need to find the motivation to close off the old dog door.

I have the plans to build this screen door with a built-in dog door posted via the blog link below for anyone interested.

Estimated Cost
80
Estimated Time Investment
Afternoon Project (3-6 Hours)
Finish Used
white exterior paint
Recommended Skill Level
Intermediate

Pony Wall Workbench

I picked up wood working as an indoor hobby during the Coronavirus and working from home. I was doing everything on the floor in my garage until I saw these plans for the Pony Wall Workbench. I'm 6'4 so having a bench to work at is such a savor for my back. I didn't have as much room, so I just used the 8 foot section and dropped the miter saw into the middle, two drawers on either side. I'm a big golf fan as well, so I spiced it up with some old golf balls I had laying around for drawer knobs!

I really appreciate this site and all the plans. I'm looking forward to many new builds, not on the ground haha!

Built from Plan(s)
Estimated Cost
$150-$200
Estimated Time Investment
Day Project (6-9 Hours)
Recommended Skill Level
Intermediate

Pottery Barn inspired griffin console table

I took the end table submitted and modified it for a console table from the same collection with a piece of reclaimed wood as the table top.  Please visit www.ourhomemadefamily.com for details on how I made it.

Built from Plan(s)
Estimated Cost
$20-50
Estimated Time Investment
Afternoon Project (3-6 Hours)
Finish Used
Rustoleum hammered finish, Polyurtrane matte finish
Recommended Skill Level
Beginner

Comments

Poolside Towel Cabinet from Benchmark Cabinet Plan

Submitted by Anonymous (not verified) on Thu, 03/23/2017 - 11:21

My father and I made this awesome poolside towel cabinet using the Benchmark Cabinet plans. A super easy 1 day build and it looks amazing on the patio. Bring on the pool weather! 

Estimated Cost
$60
Estimated Time Investment
Day Project (6-9 Hours)
Finish Used
Chalk paint/Poly topcoat
Recommended Skill Level
Beginner
Back