Community Brag Posts

Tilt Out Wooden Trash Bin

Submitted by paigers01 on Mon, 01/09/2017 - 11:27

Tilt Out Wooden Trash Bin

After 7 years of our trash can sitting out in the open, my wife decided we needed to do something about it. I saw the plans for this tilt out wooden trash bin, and slightly modified it using tongue and groove for the face panel.


Estimated Cost
$50-$75
Estimated Time Investment
Afternoon Project (3-6 Hours)
Finish Used
Minwax English Chestnut
Recommended Skill Level
Beginner

My first plan-free project...

Submitted by Joni on Mon, 12/31/2012 - 10:11

This was my first project without a set of plans, and all I had was a pitiful hand-drawn diagram and a lot of good ideas from prior Ana-White projects/plans (Google sketchup seems beyond my intellectual capacity!). I started with a spare piece of cherry that I wanted to use somewhere, so it became the basis for the top of this office shelf unit. I had to go with the dimensions of the cherry, so everything was built around that.

I used maple plywood for the base and sides of the cabinet, and pine furring strips for the frame/edging. Then, once I had the entire unit put together, I decided that I would like to stain just the frame. I had to take the whole project apart (all 51 pieces), stain the frame/edges, varnish the interior portions of the maple, and re-assemble without ruining the finish.

I try to never use glue because it's the one action that can't be reversed. I made a critical error on this (in a rush) when I installed the lower shelf in the wrong place and glued in a panel that hid all the screws. I thought the thing was totally ruined. My husband suggested adding a 2nd divider and calling it a "design feature". It saved the whole project.

Once re-assembled, I didn't want my Kreg holes to show, and I haven't had much luck with the Kreg plugs. So, I added a mitered frame around the insides and stained it cherry to match the edges.

Minwax didn't have a water-based cherry that I liked, so I mixed my own out of various water-based stains. That process took over a week to get just the right tone. This was the first time I've used Minwax Polycrylic, and I will be using this product forever...it is fantastic.

Estimated Cost
60
Estimated Time Investment
Week Long Project (20 Hours or More)
Finish Used
Minwax Pre-stain conditioner, Cherry water based stain (made from 6 parts Antique Walnut, 2 parts Cinnamon Toast and 1/2 part Colonial Pine), followed by 4-5 coats Minwax polycrylic
Recommended Skill Level
Beginner

Comments

Cyndi2015

Sat, 03/21/2015 - 17:03

Wow! This is an amazing piece and I would love to build this. Could you give me more detail on how you assembled it???

Pergola (attached directly to the house)

Submitted by dwm22 on Thu, 05/23/2013 - 17:34

Instead of building a free-standing, 4-poster Pergola, I attached one side directly to the house. There are various Pergola design types and shapes. Simply Google for "pergola" images and decide which design you like best, or combine design ideas together (as I did).

Couple things to consider:
A: Is your Pergola more for decorative purposes or actual shade?
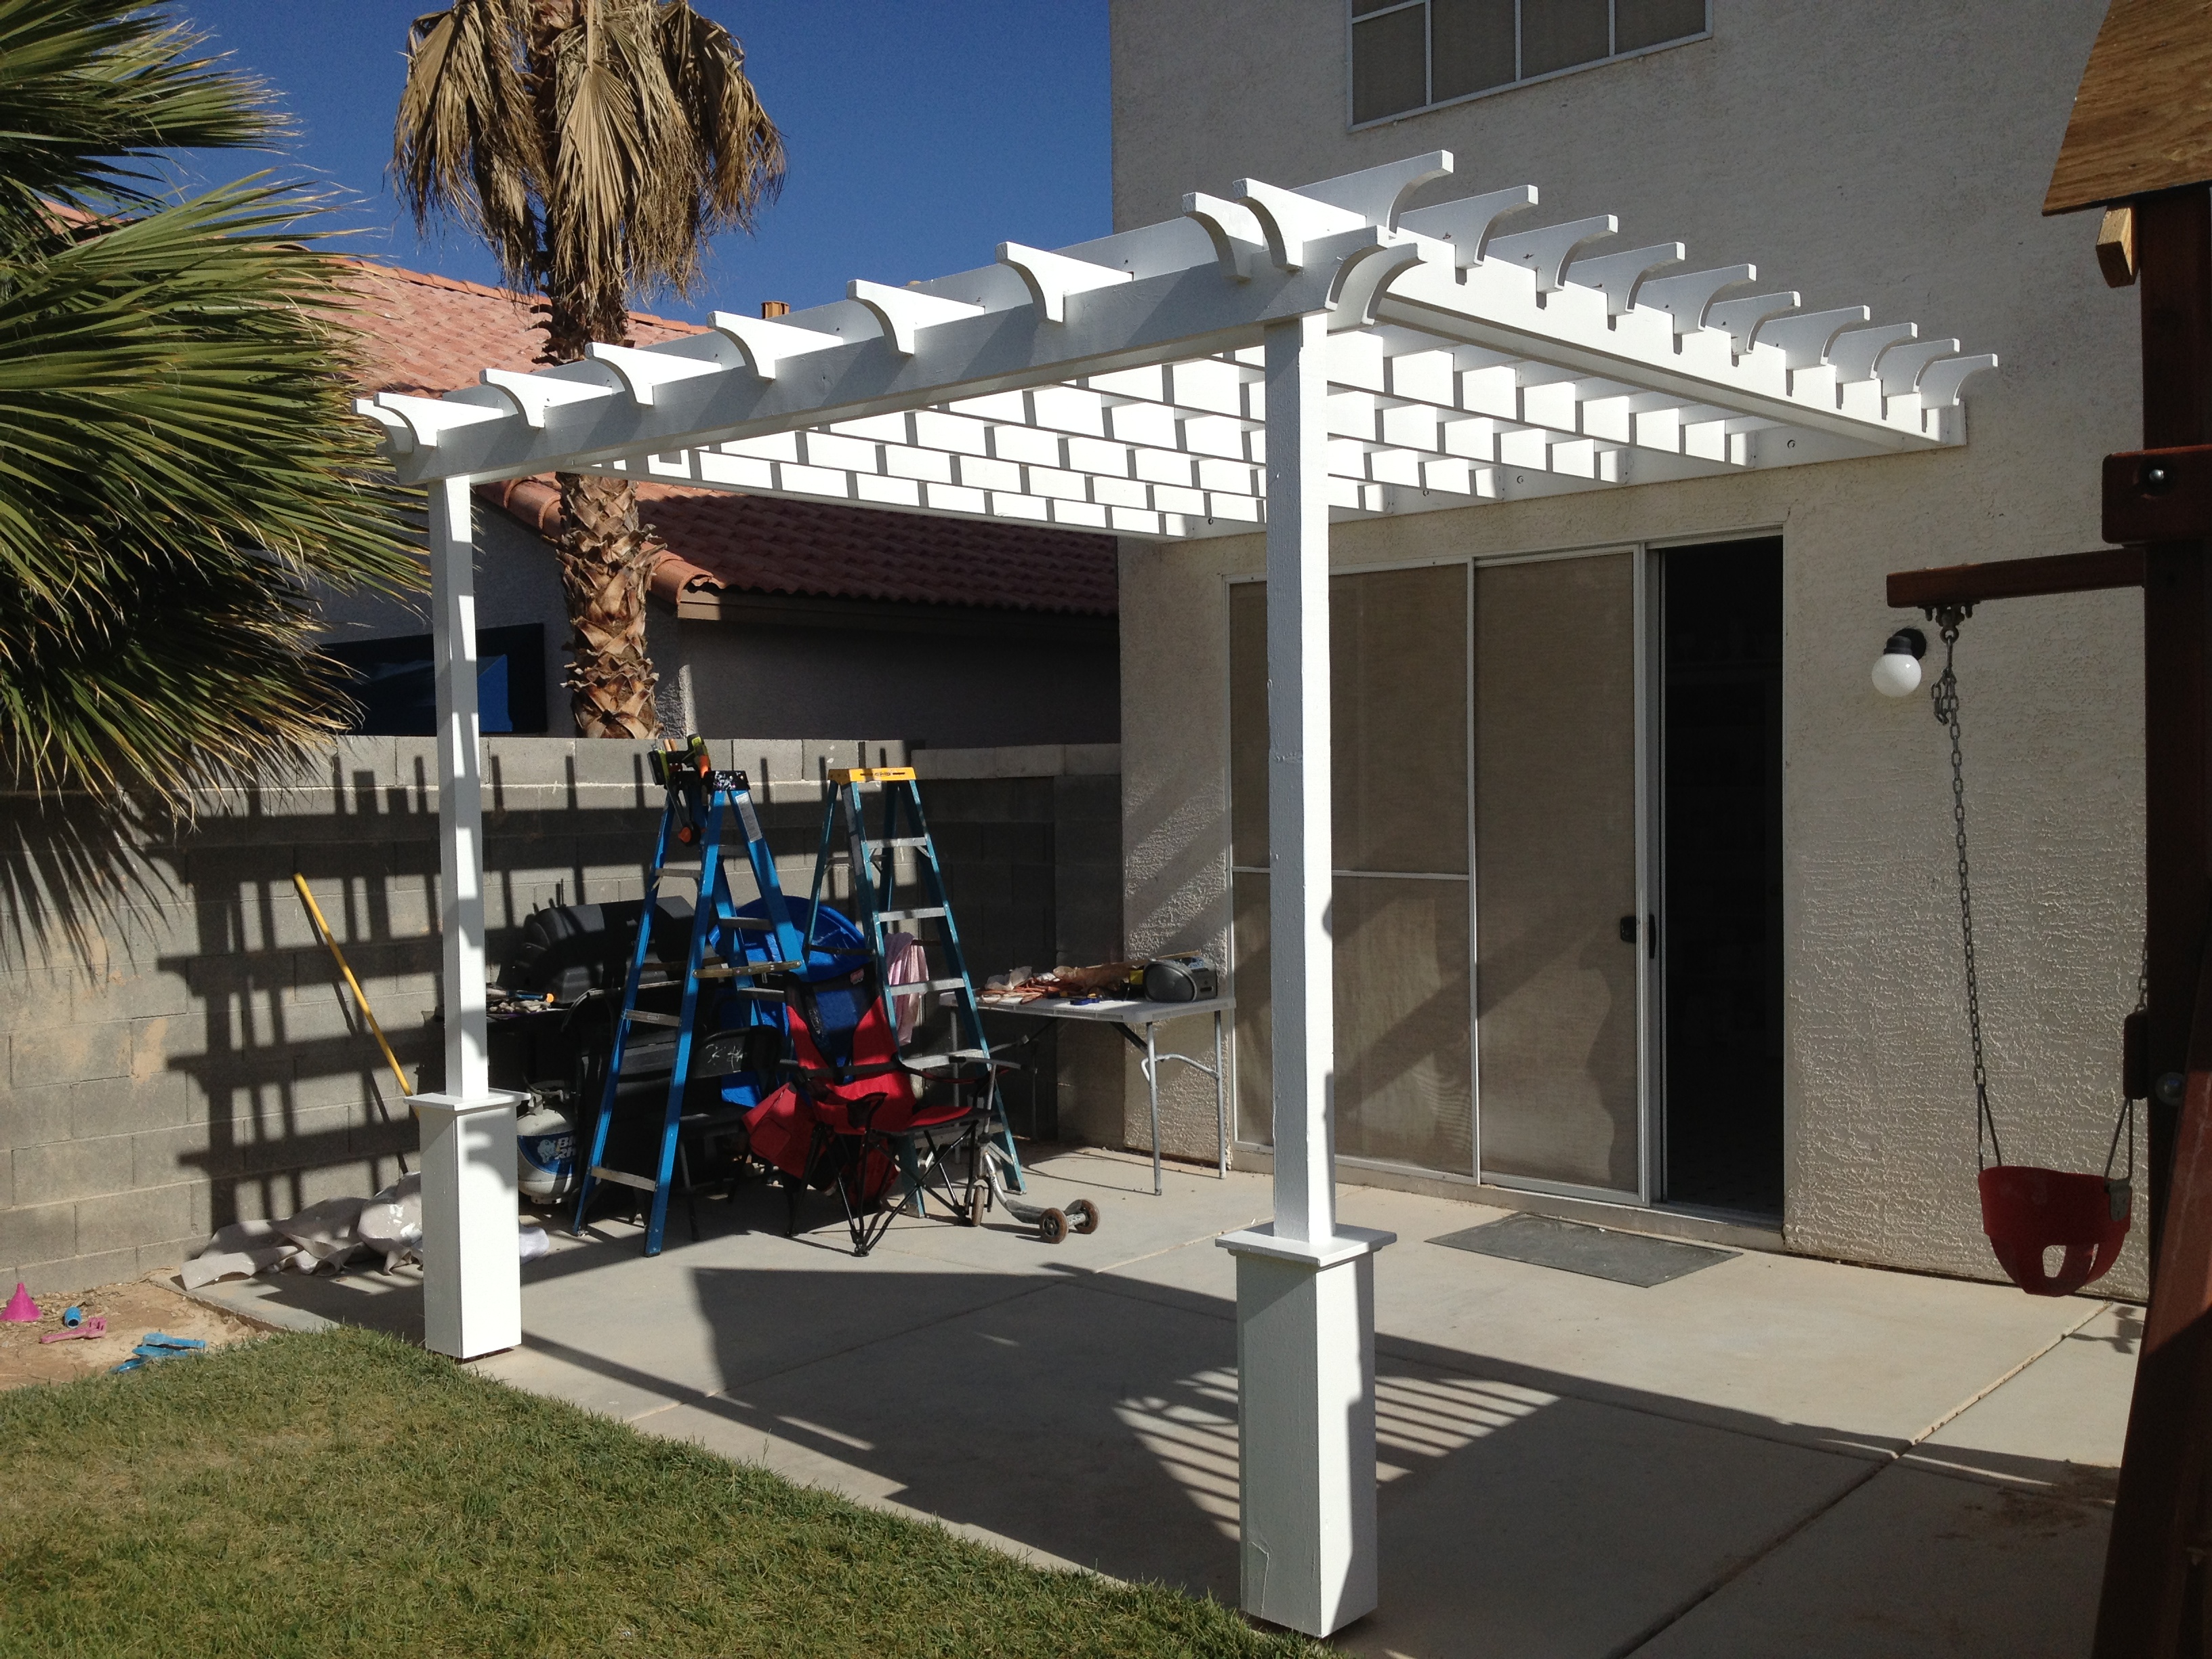
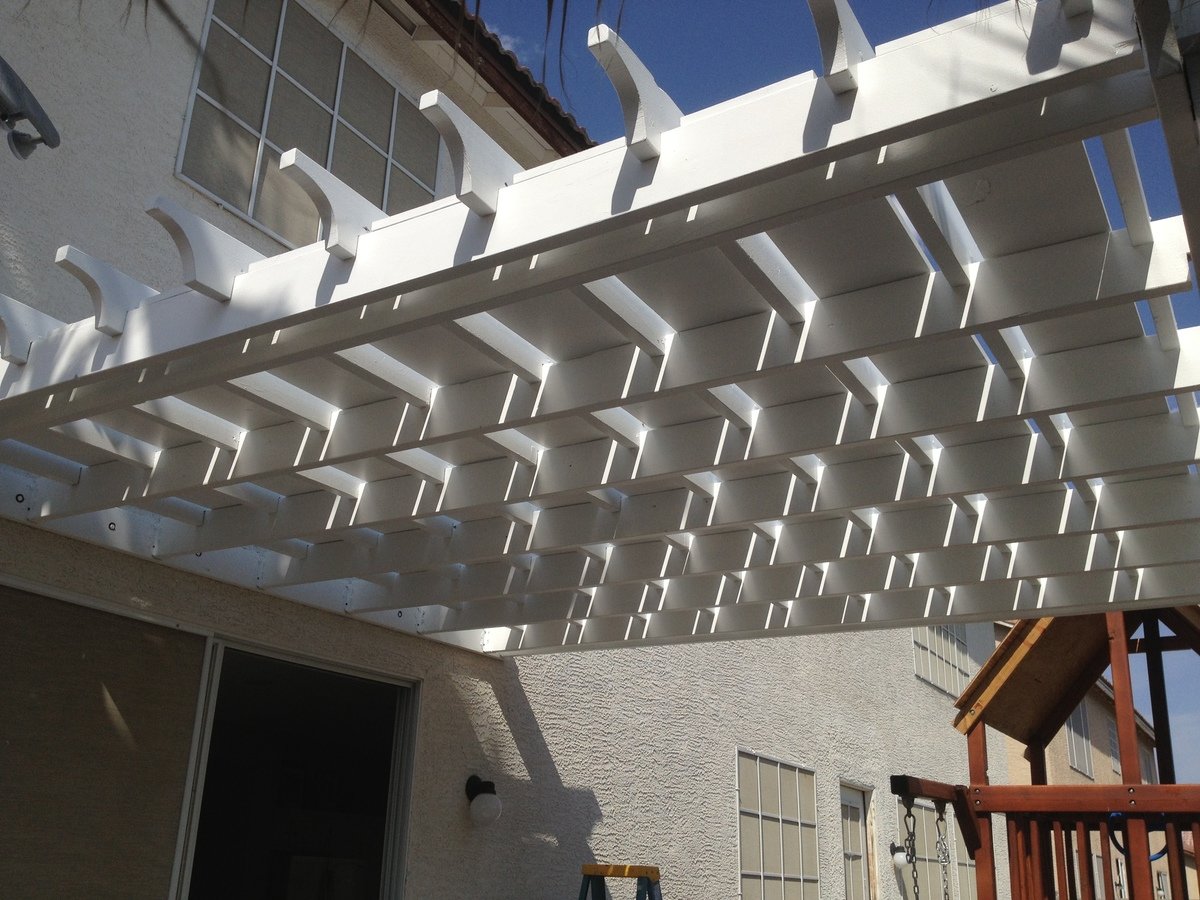
My design was more for actual shade (but with a decorative design), which is why I added the 1in x 12in x 12ft Pine boards between the cross beams at the very end (last picture). If your design is more for decorative purposes, you can space out your support beams and cross beams wider (using less wood and money).

You can also choose to use 2x4s as your support beams with 2x2 cross beams on top (essentially furring strips) either close together or spaced farther apart. This would also reduce the overall cost of your Pergola and make it much lighter as well. I chose to use all 2x6s for both support beams and cross beams.

B: What path does the sun follow across the sky over your Pergola?
If the sun passes directly over your Pergola and you want a lot of shade, you'll obviously need to consider this in your design (i.e., more cross beams that are close together).

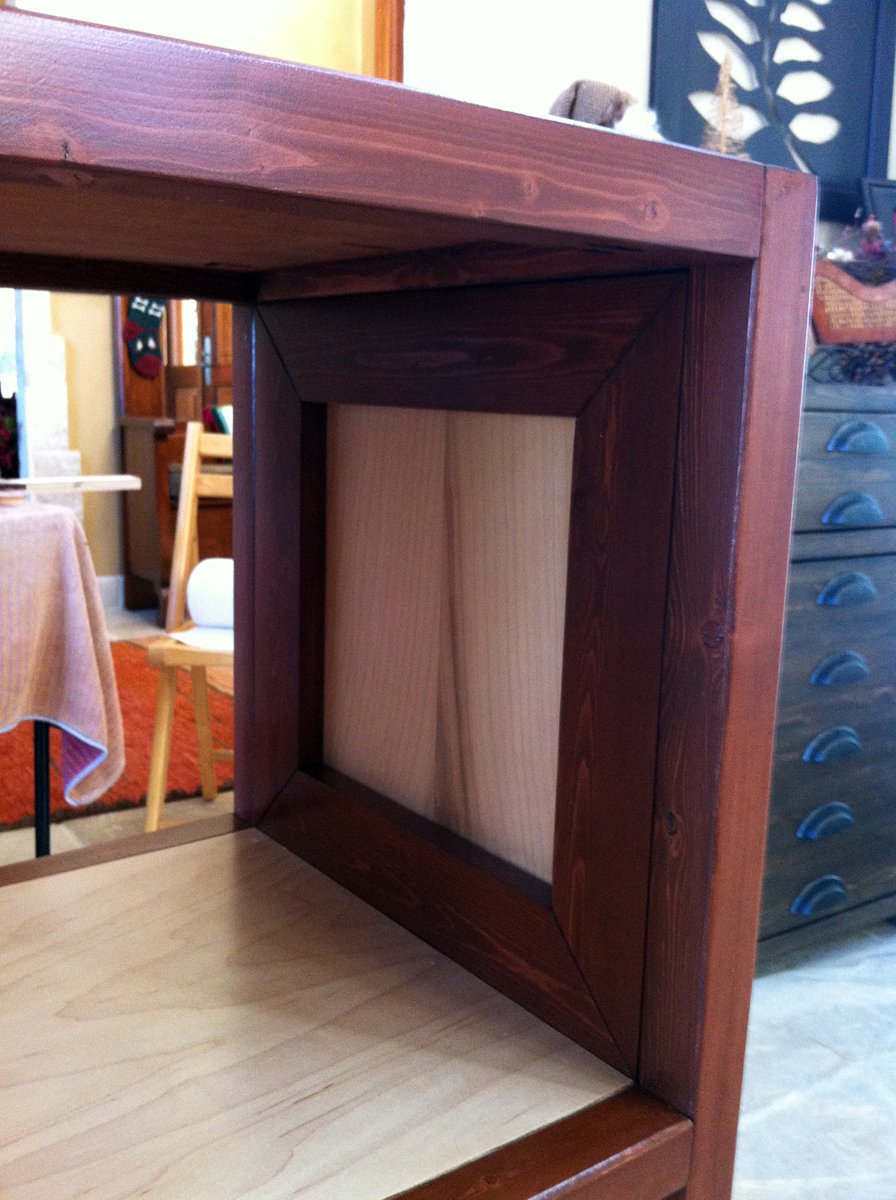
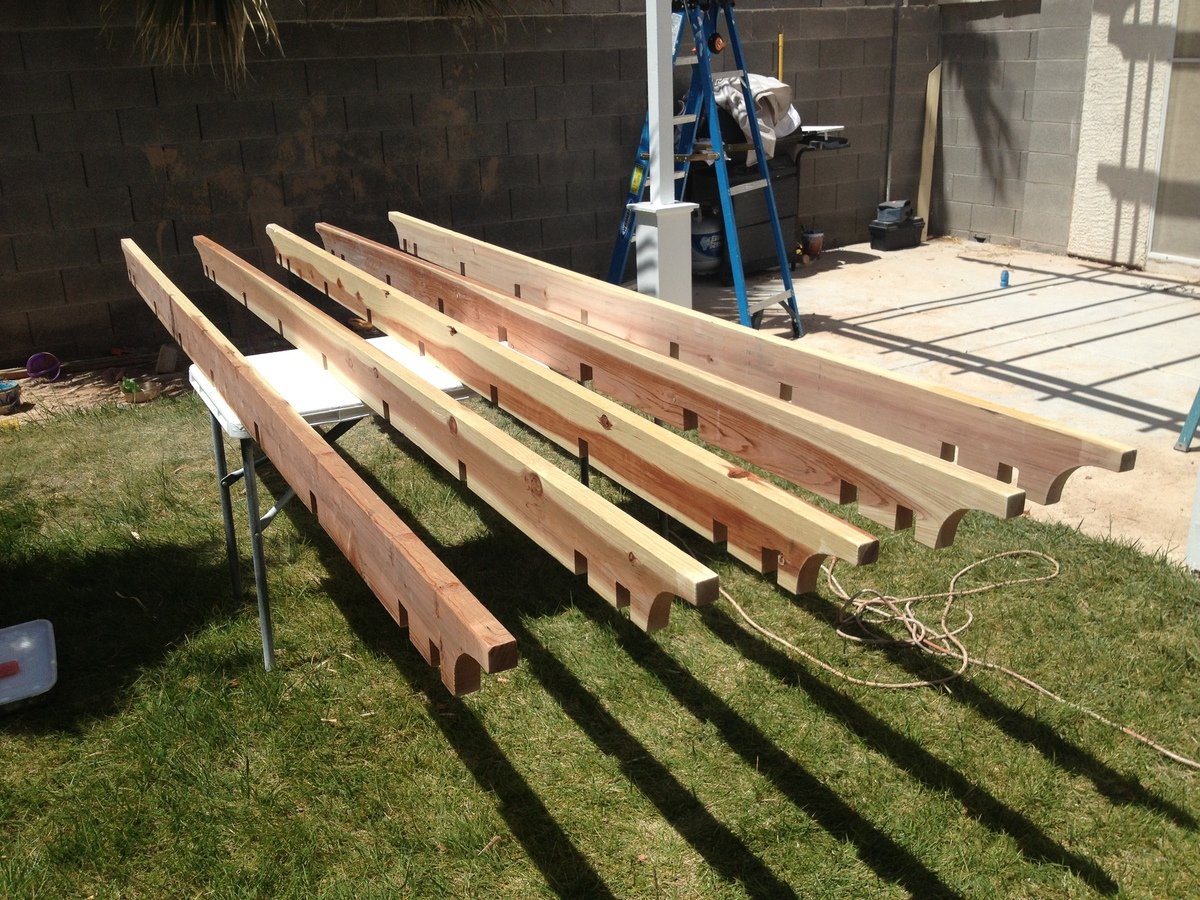
C: Do you want your support beams and cross beams to inter-lock (by cutting square notches and assembling them like linking logs), or simply stacked on top of each other? (Again, Googling for Pergola images will help you see the differences in designs.)

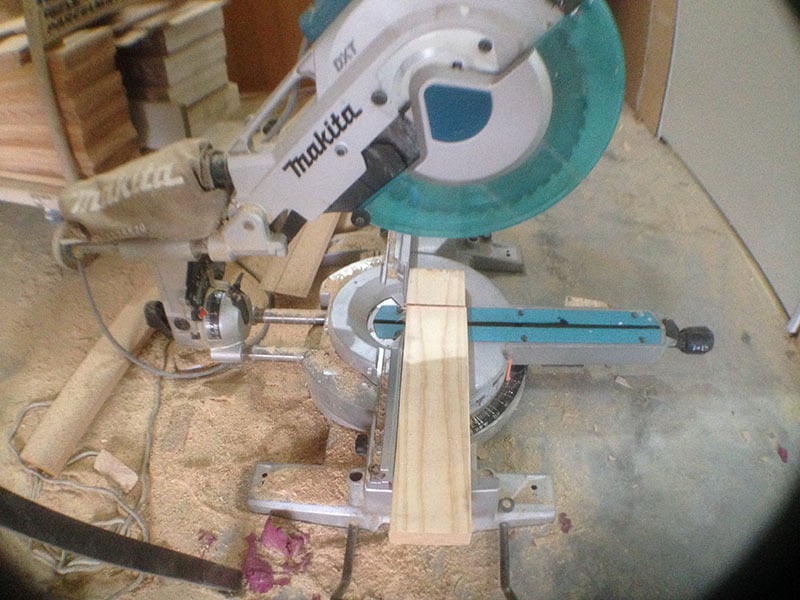
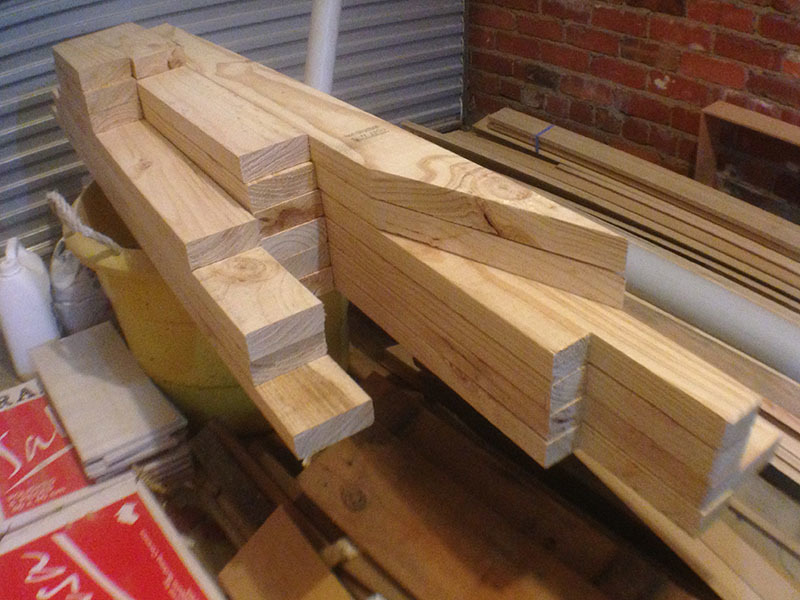
I chose to interlock all of my beams by cutting notches and fitting them together. Obviously more time consuming to measure each notch, cut, and chisel them but the stability of inter-locking beams should hold up a little better in the strong winds of Las Vegas.

HOW TO (abbreviated)

Overall Pergola Dimensions: 10ft Height, 12x12ft

Tip: Paint or stain all your wood prior to assembly. Much easier. You can always touch-up scuffs and scrapes after it's built.

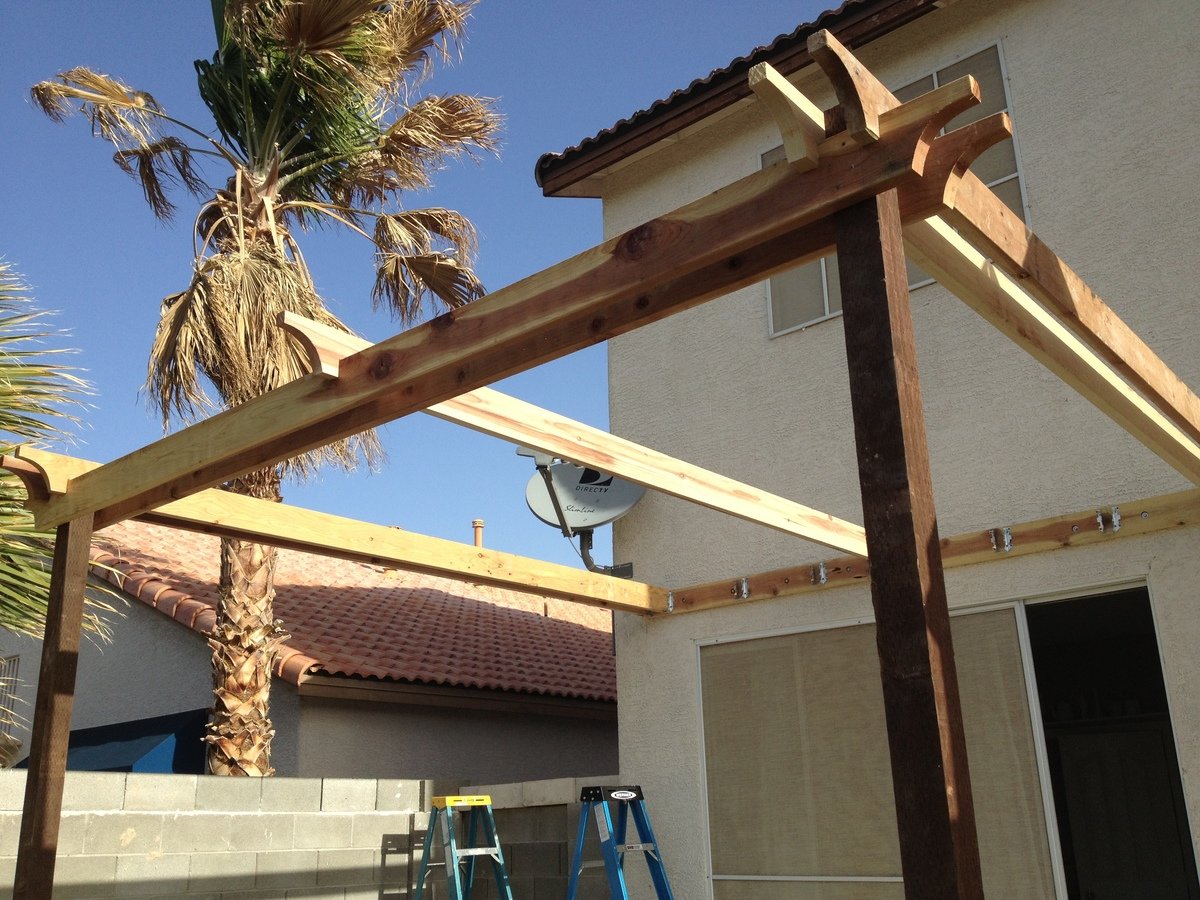
1. 2x6x12 installed directly onto the house (thru the stucco into the studs) using 3/8in. x 5in. lag screws. (Tip: Seal the top edge of the 2x6x12 that's against the stucco so water doesn't run behind it and down into the lag screw holes.)
2. Install the 2x6 Double Shear Hangers (as many as you need for your design)
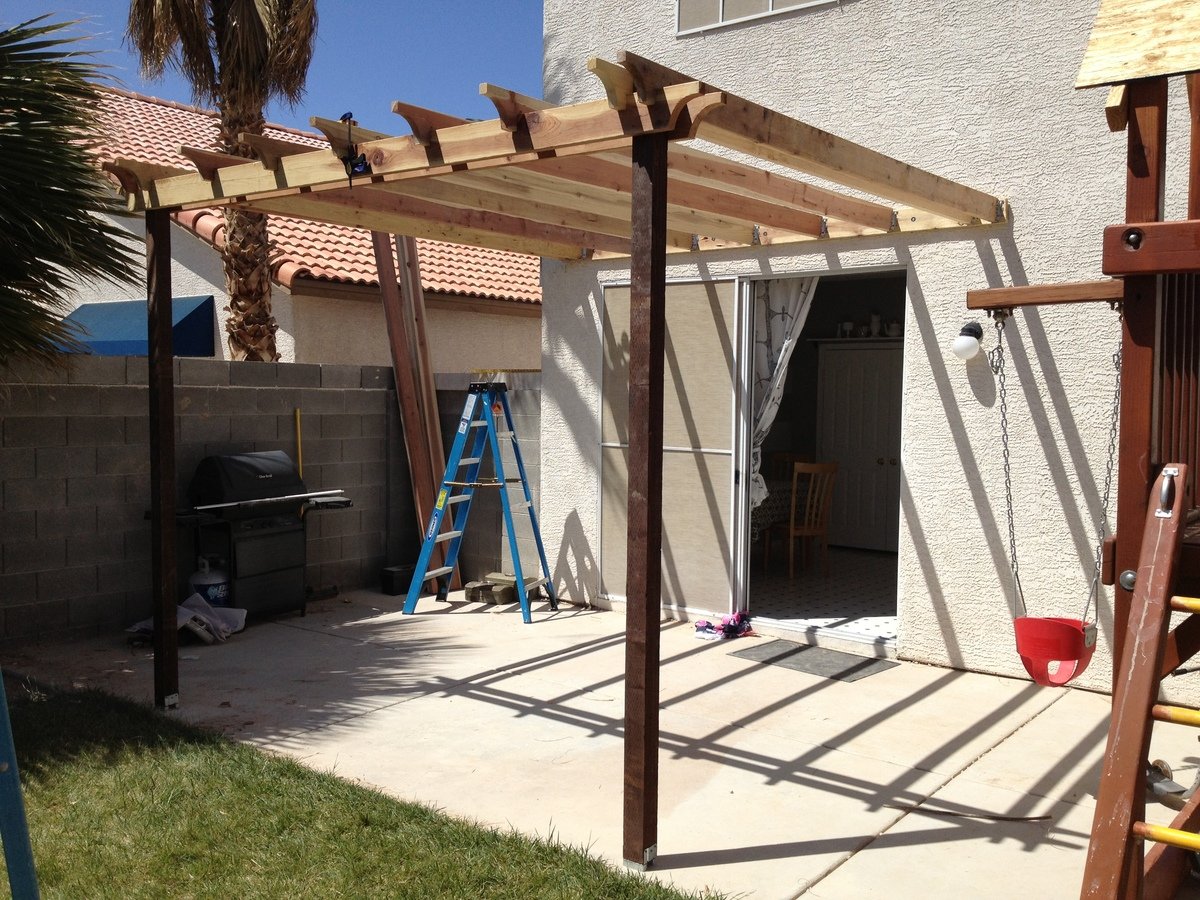
3. 4x4 post anchors secured directly into the cement patio using Tapcon 3/16 in. x 2-3/4 in.cement anchor screws.
4. 4x4x10ft posts screwed on top of the anchors. Ensure level on all sides (use a partner to help hold the posts).
5. Attach the front and side 2x6 beams to the 2 posts (again, use a partner to help hold posts while you're up on the ladder screwing your beams to the posts)
6. Attach the remaining 2x6 support beams.
7. Attach the 2x6 cross beams on top (whether you inter-lock them by cutting notches or simply resting them on top, be sure to toe-nail screw them in with 2in exterior screws).
8. Lay 1x12x12ft pine boards on top in between the cross beams and secure with 2in exterior wood screws.
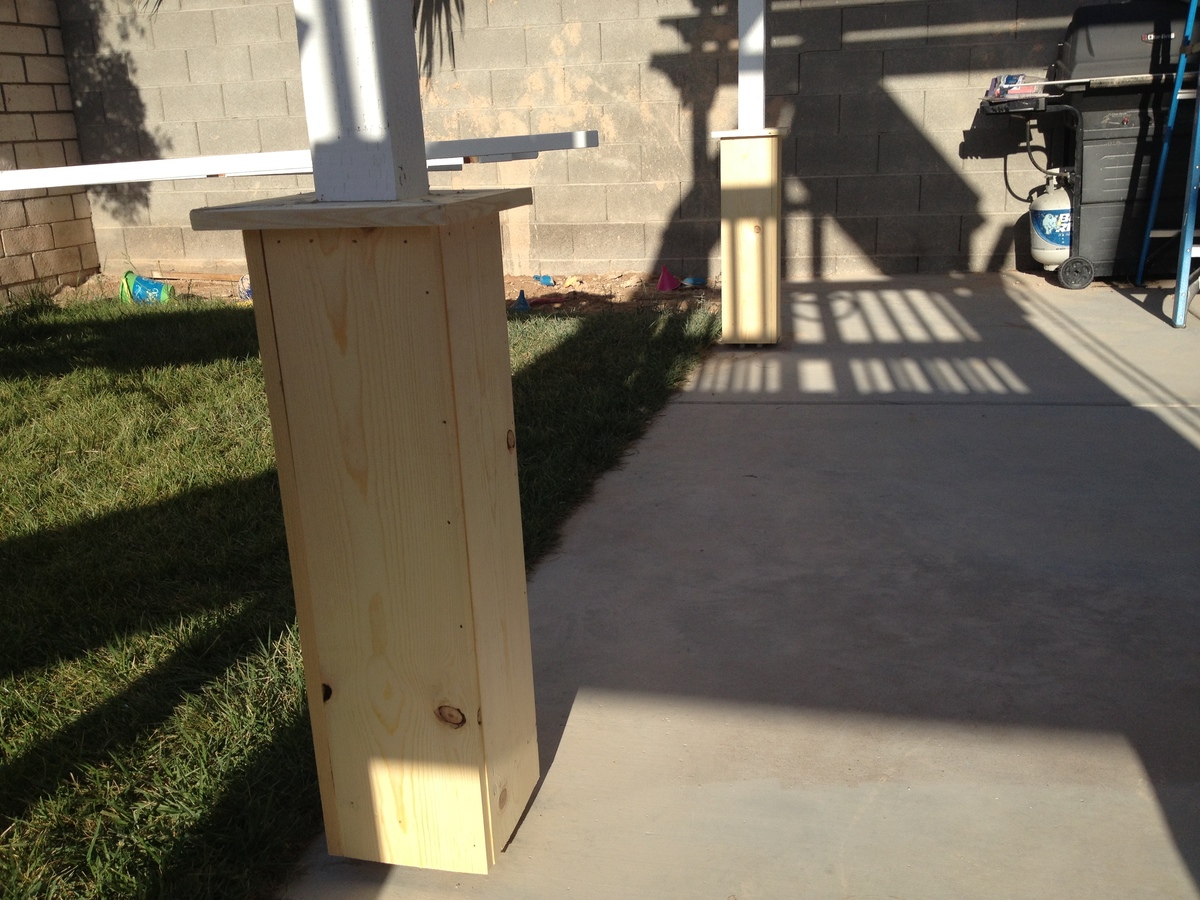
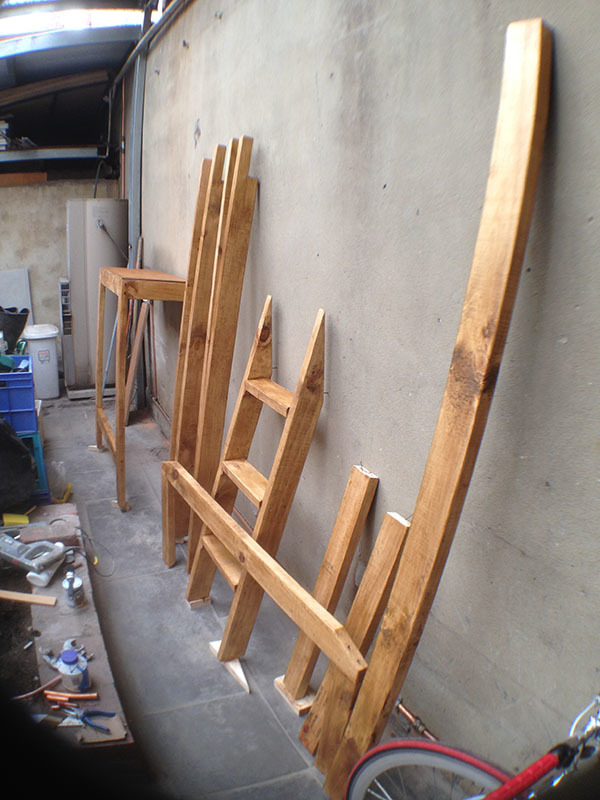
9. Construct the post bases ("sleeves" or "leggings") which greatly adds to the look, as outlined in the "Weatherly Pergola" plans.
10. Touch-up paint / stain any areas you need.

Built from Plan(s)
Estimated Cost
800
Estimated Time Investment
Week Long Project (20 Hours or More)
Finish Used
BEHR Premium Plus Ultra - Ultra Pure White Satin Acrylic Exterior Paint (2 coats applied with roller)
Recommended Skill Level
Intermediate

Comments

bullitt453

Tue, 05/28/2013 - 07:29

Great work and very detailed post. I plan to build something similar for my parents once they are done with their renovation.

Drop-Down Door Hutch Desk

Submitted by danicarby on Thu, 05/14/2015 - 13:47

I designed this desk from another desk I built. With this one, I wanted the overall foot-print smaller but still something that was able to organize all our office stuff and be able to close everything to keep it clutter-free. We have a small apartment, and although this desk is about the size of an up-right piano, it works perfectly into our living space!

I made it out of raw hardwood (Ash) and because I knew just the wood alone would make this desk heavy/bulky to move I made the top hutch removable. It's held in place by wood pegs (dominos). All the shelves are adjustable and the drawers are full-extension (something I've never had - wahoo)! The drop-down door is help up by 2 pull-out boards on each side (my first desk had chains). I spend a lot of money on this desk because I knew it was a chance in a lifetime to make and wanted it to be perfect and something that would last generations.

I built the main carcass off of plans/measurements I designed, but then all the insides, drawers, shelves, doors, etc where made as I built (because just a millimeter difference in building changes everything)!

If you want more pictures/descriptions of the building process I wrote about it in a 4-part series on my blog.

Estimated Cost
$1,000 for all wood & supplies
Estimated Time Investment
Week Long Project (20 Hours or More)
Finish Used
To achieve the ash gray color I used "General Finishes" brand water-based stains (equal mixtures of Walnut, Antique Oak & Whitewash) with 1/2 ratio of Pre-Stain Conditioner (bought from Woodcraft). I did 2-3 coats stain, lightly sanded and sprayed 2 coats of Ceramithane clearcoat using HVLP sprayer (sanding with 550 grit paper in between).
Recommended Skill Level
Intermediate

Comments

Ice cream cart

Submitted by Markb25 on Mon, 11/22/2021 - 23:52

A friend wanted a tatty old chest freezer turning into a traditional looking ice cream cart for her business. The freezer itself was way to heavy and not really fit for purpose but, after a week of tinkering about with a couple of design changes here and there to accommodate the weight, I don't think I've done too bad a job.

The internal frame is Nordic fir, half lapped at the joints and secured in place with 38mm oak dowels, the cladding is 6mm birch ply finished with paint from the French chic Al fresco range, the writing proved a little challenging on the the eyes and my hands aren't as steady as they used to be but she's happy.

Comments

Freestanding Closet

Submitted by vendo on Fri, 04/08/2022 - 16:44

My daughter's room didn't have a closet, so I built one. This only took a couple of hours to build. I found the bins on Amazon and built to fit. It's 60" wide 18" D and 75" tall. I love this plan, it's super easy to modify the size and configuration!

Built from Plan(s)

Petite Planters for the Potager

Submitted by JoA on Mon, 08/19/2013 - 06:23

After building a large planter from Ana's plans and my salvaged fence wood I thought 2 smaller planters for the entrance to our kitchen garden would be nice. The complete instructions are on my blog, Let's Face the Music. Jo

Built from Plan(s)
Estimated Cost
$12 each
Estimated Time Investment
Day Project (6-9 Hours)
Finish Used
Benjamin Moore Exterior Semi-gloss in Bunker Hill Green over exterior primer.
Recommended Skill Level
Beginner
Seasonal And Holiday

Full Size Storage Bed

My daughter wanted her room redone for her tenth birthday. We decided to go big with Ana's storage bed plans. I had so much fun building this and really learned a lot. It took me three months to find enough spare time to finish it, but it was worth the wait.

Estimated Cost
$200+
Estimated Time Investment
Week Long Project (20 Hours or More)
Finish Used
Dutch Boy Refresh paint in Mocha White over no VOC primer. I rolled it on with a smooth roller.
Recommended Skill Level
Beginner

Comments

Misty Tillema

Mon, 11/07/2011 - 19:24

You did a really great job building the storage bed. I am in the process of building this same bed for my teenage son, only I'm not building the towers. Finding enough time to actually get a project finished is nearly impossible when you only have a few hours here and there! Your daughter will love all the extra storage space as she gets older.

Corn Hole Boards

Submitted by Anonymous (not verified) on Sun, 05/28/2023 - 10:53

The Ana White corn hole board plans were straightforward and easy to understand. Building was a breeze. Our boards turned out great!

Comments

Super Easy DIY Upholstered X Bench

Submitted by Anonymous (not verified) on Thu, 03/10/2016 - 16:36

I've wanted a nail head upholstered ottoman for forever. I came across this tutorial & Roque Engineers tutorial and combined them Super super easy guys! We made ours at 6' in length x 12" in width ( our room is SUPER small ) Check out our blog for more details.

Built from Plan(s)
Estimated Cost
45.00
Estimated Time Investment
Afternoon Project (3-6 Hours)
Recommended Skill Level
Starter Project

Vintage Butcher Block Vanity

Submitted by Anonymous (not verified) on Fri, 07/21/2023 - 10:40

Use the general idea of the kitchen island plans. I had an old butcher block work table top from June 1952. I wanted to cut it down and make a bathroom vanity. We used cedar legs for the posts and shelves.

Kristi


Built from Plan(s)

Converted A ashley twin size bed into Twin size Crib

Submitted by Mamabear2 on Thu, 01/23/2014 - 09:53

I purchased a twin girls captins bed for my daughter to grow into but she wasn't quite big enough for it yet so I had my husband convert it into a twin size crib!!!! Im in love with how it turned out. My husband Free hand a crown on a sheet of ply wood and cut it out. I used quilt batting and covered it with pink material and did the tips of crown in purple.

Estimated Cost
80.00
Estimated Time Investment
Day Project (6-9 Hours)
Recommended Skill Level
Starter Project

Full Size Loft

So I had an IKEA DELSEV single bed frame which i bought off someone who didn't need it anymore. Great sturdy bed for $25, but I wanted more space in my rental room, so I decided to go loft given the generous ceiling height. I did some research for ideas to convert my current bed, and found the perfect one at your site! I made modifications to your plans so that I would be able to walk underneath without having to slouch, and adjusted some measurements to integrate the IKEA bed frame. The project only cost me $38 worth of timber, screws were pinched (with permission!) from my landlord's stash, and this was the result after 3 days of cutting, sanding, partial assembly, staining and varnishing, and final assembly! The small tin of stain and varnish was originally for a wooden rack project for my vintage bicycle, and i managed to cover both rack and bed frame with the entire tin, down to the very last drop!

Estimated Cost
$38
Estimated Time Investment
Week Long Project (20 Hours or More)
Finish Used
British Paints Stain and Varnish, Maple Satin
Recommended Skill Level
Intermediate

Outdoor Play Kitchen

Submitted by Anonymous (not verified) on Mon, 04/15/2024 - 10:05

I built this using Ana's plans for her outdoor play kitchen. I live in North Carolina and took it to my grandchildren in Ohio. They love it! I used an inexpensive beverage dispenser installed into a trashcan and connected a small aquarium pump to recirculate the water from the sink to the water tank. I'm super pleased with how it turned out!

Nancye Butterworth

Built from Plan(s)

Paulieboxer

Ana, First time I have every attempted any kind of woodwork/building furniture other than building Ikea stuff. The plans were very easy to follow and now I want a chop saw for xmas. I roped my daughter in to help me and we completed the project in 2 days. Husband was totally blow away by our achievement. I love it and feel accomplished. Away to work on the table and further benches/seating over the next few weeks. Pauline

Estimated Cost
£200
Estimated Time Investment
Day Project (6-9 Hours)
Recommended Skill Level
Beginner

Modern adirondak chair

Submitted by Jodynana on Wed, 07/22/2020 - 21:30

My latest project during Covid! Making my yard a little cozier.

Comments

Modern Park Bench

This is my third build and it took about 1/2 a day and cost $50 for lumber and $15 for hardware (decking screws). I previously built Ana's Farmhouse Table and doll farmhouse bed and cupcake stand. 

I used the small kreg jig for part of the underseat frame, but it is not necssary. I wasn't using kreg screws so I found it easier to just attach through the end of the 2x4s. I recommend checking for squareness often for this project, especially as the arms and stretcher are attached.

Estimated Cost
$65 plus finishing paint
Estimated Time Investment
Afternoon Project (3-6 Hours)
Finish Used
Acrylic exterior primer and Ben Moore latex semi gloss in Spanish Red
Recommended Skill Level
Beginner

Country Desk

I wanted a good solid desk for my office and I thought these plans were perfect. The wood, screws, paint, and stain all cost less than $30. Instead of using 2x4's for the top I used a solid piece of aspen. I then stained the top and painted the bottom white.

Built from Plan(s)
Estimated Cost
$30
Estimated Time Investment
Weekend Project (10-20 Hours)
Recommended Skill Level
Beginner

Comments

Back