Fancy Farmhouse King Bed
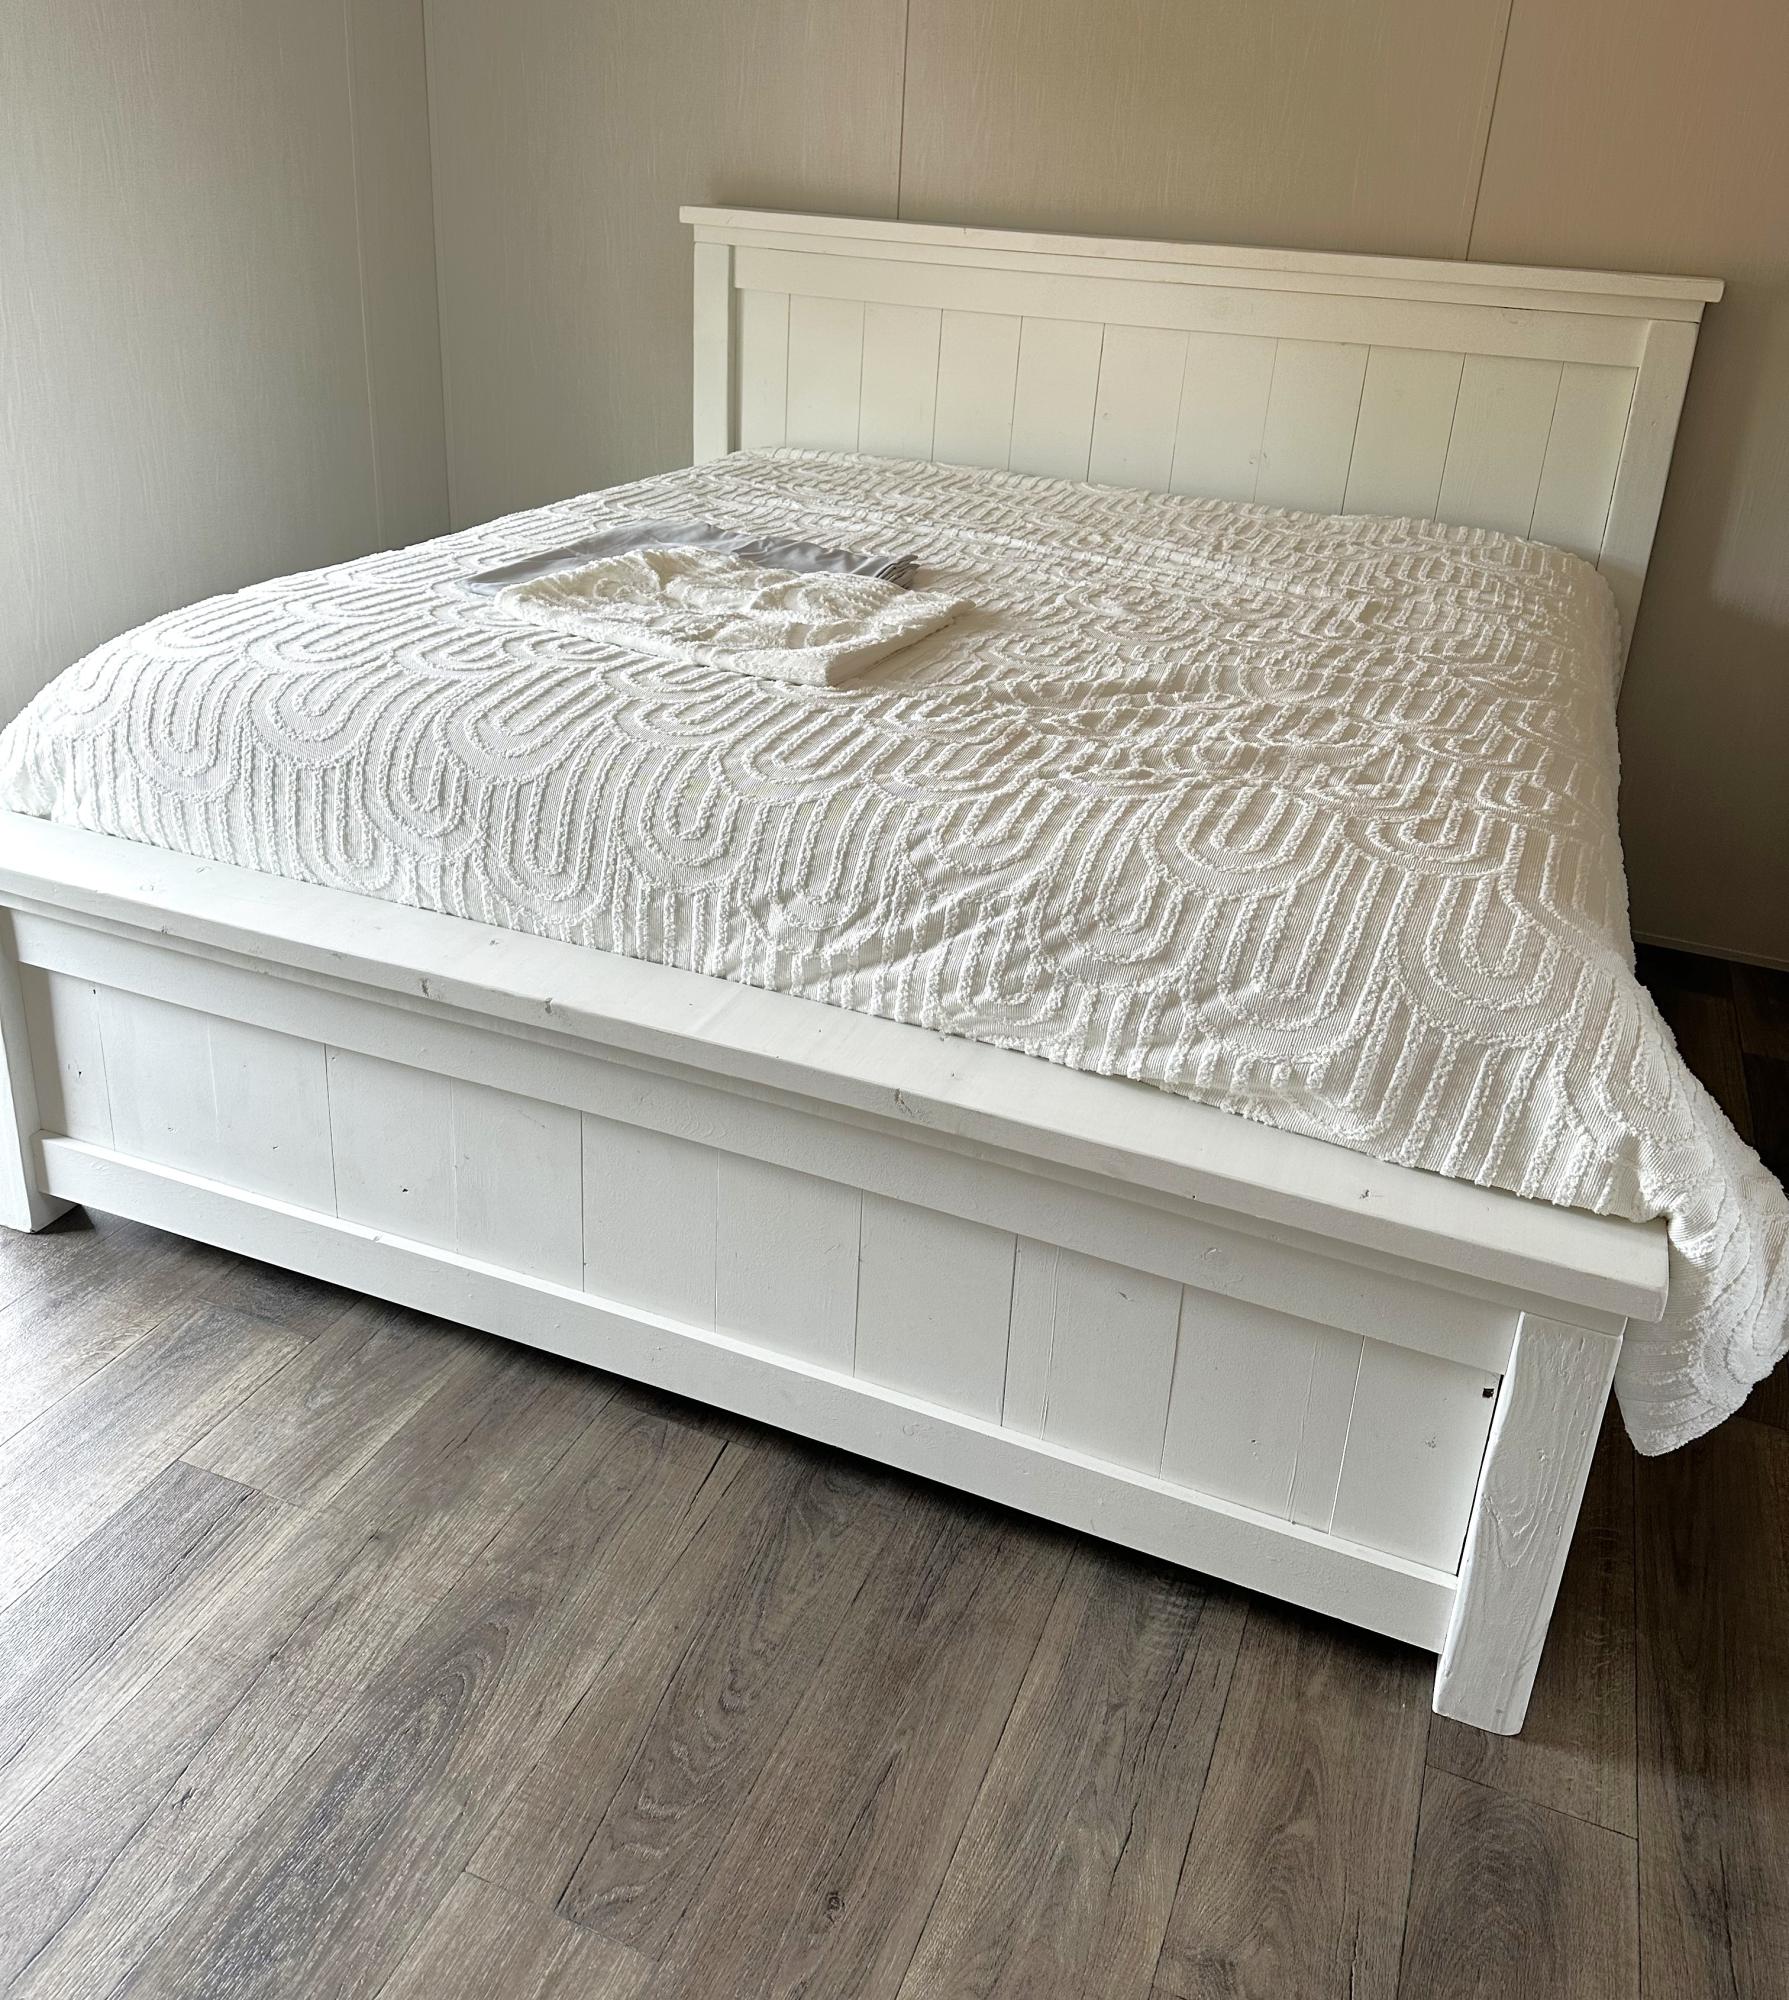
Fancy Farmhouse King Bed
Heather Kay
Built from Plan(s)
Fancy Farmhouse King Bed
Heather Kay
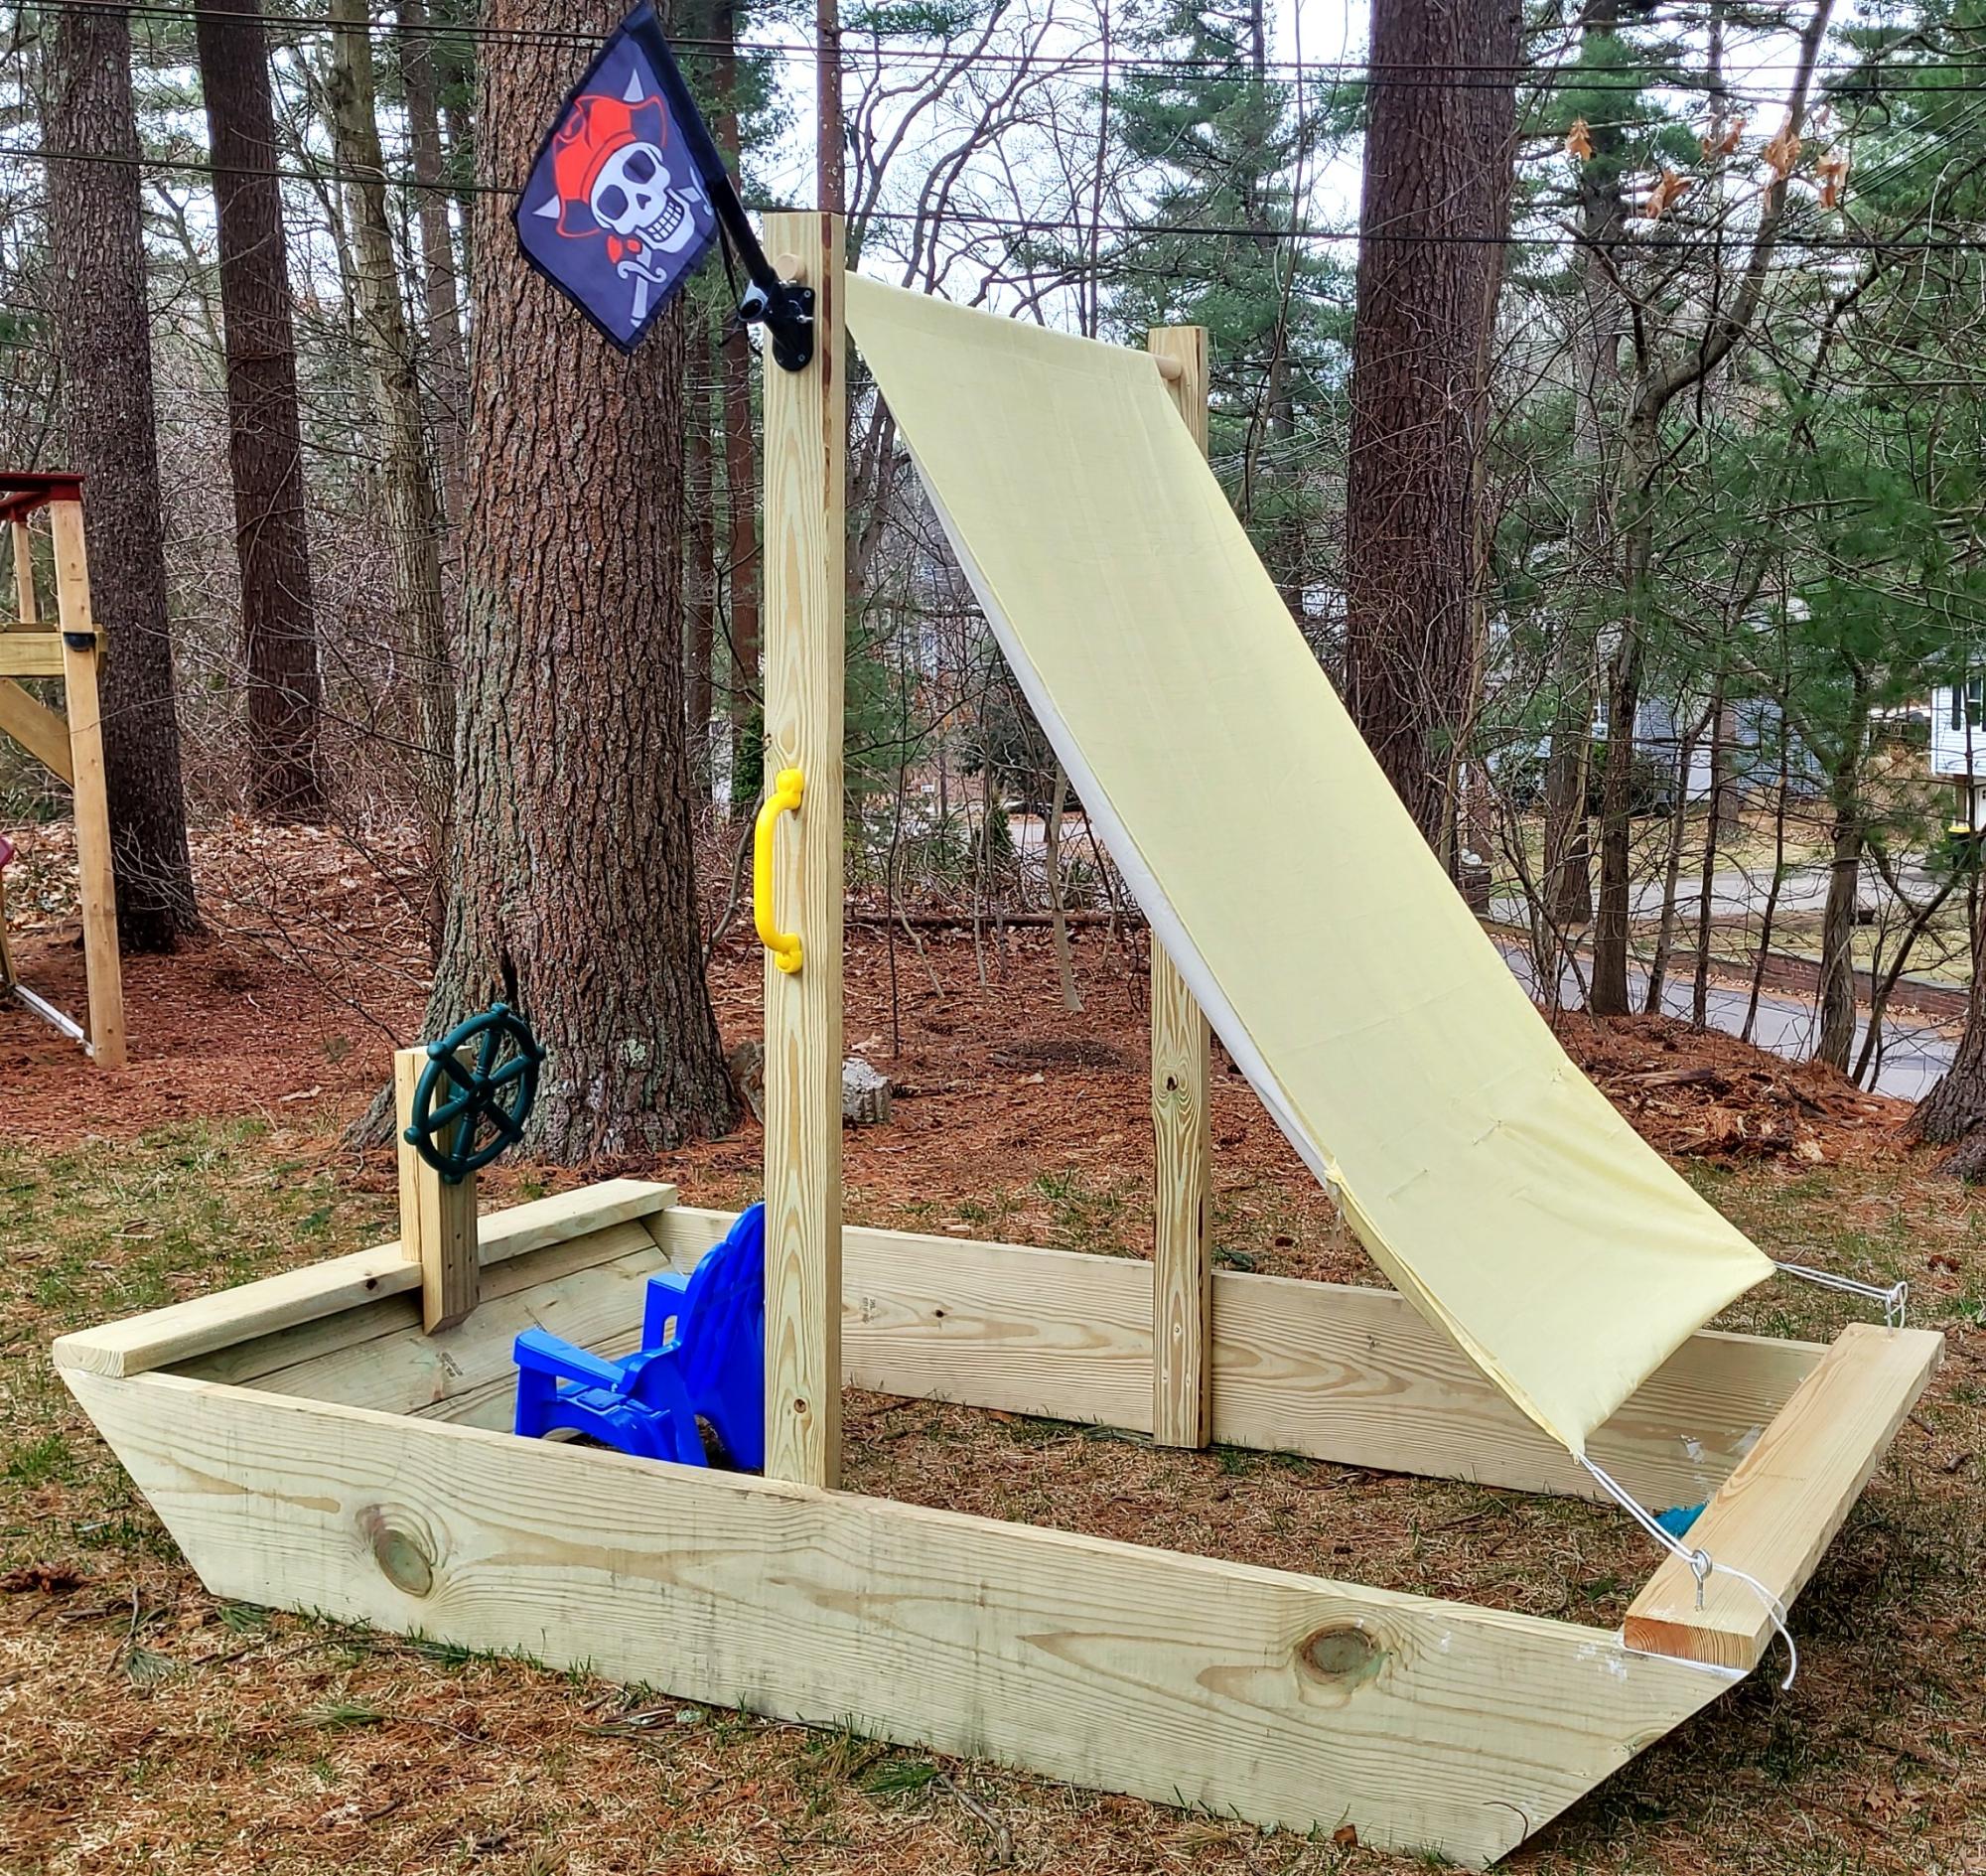
Turned the sandbox into a pirate ship. The kids love it!
Lea B.

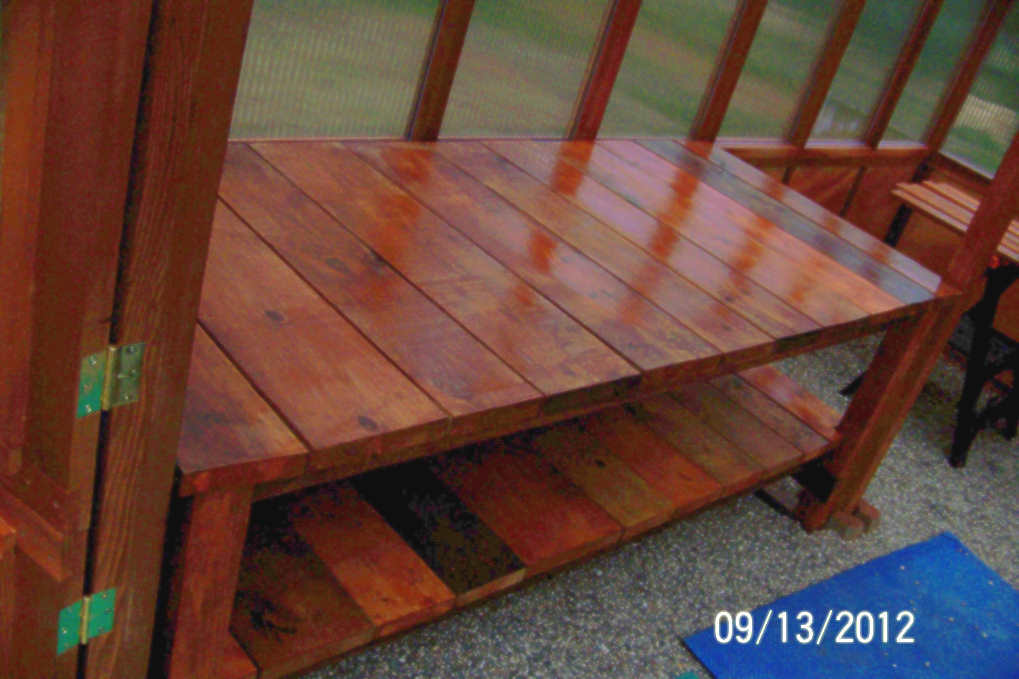
I've been searching for a deck set and I didn't want to spend a lot of money. I altered the plan to include a table instead of another seat (I used a piece of square patio glass from my old patio set). I made this sectional in an afternoon using green-treated lumber and cushion sets from Walmart.
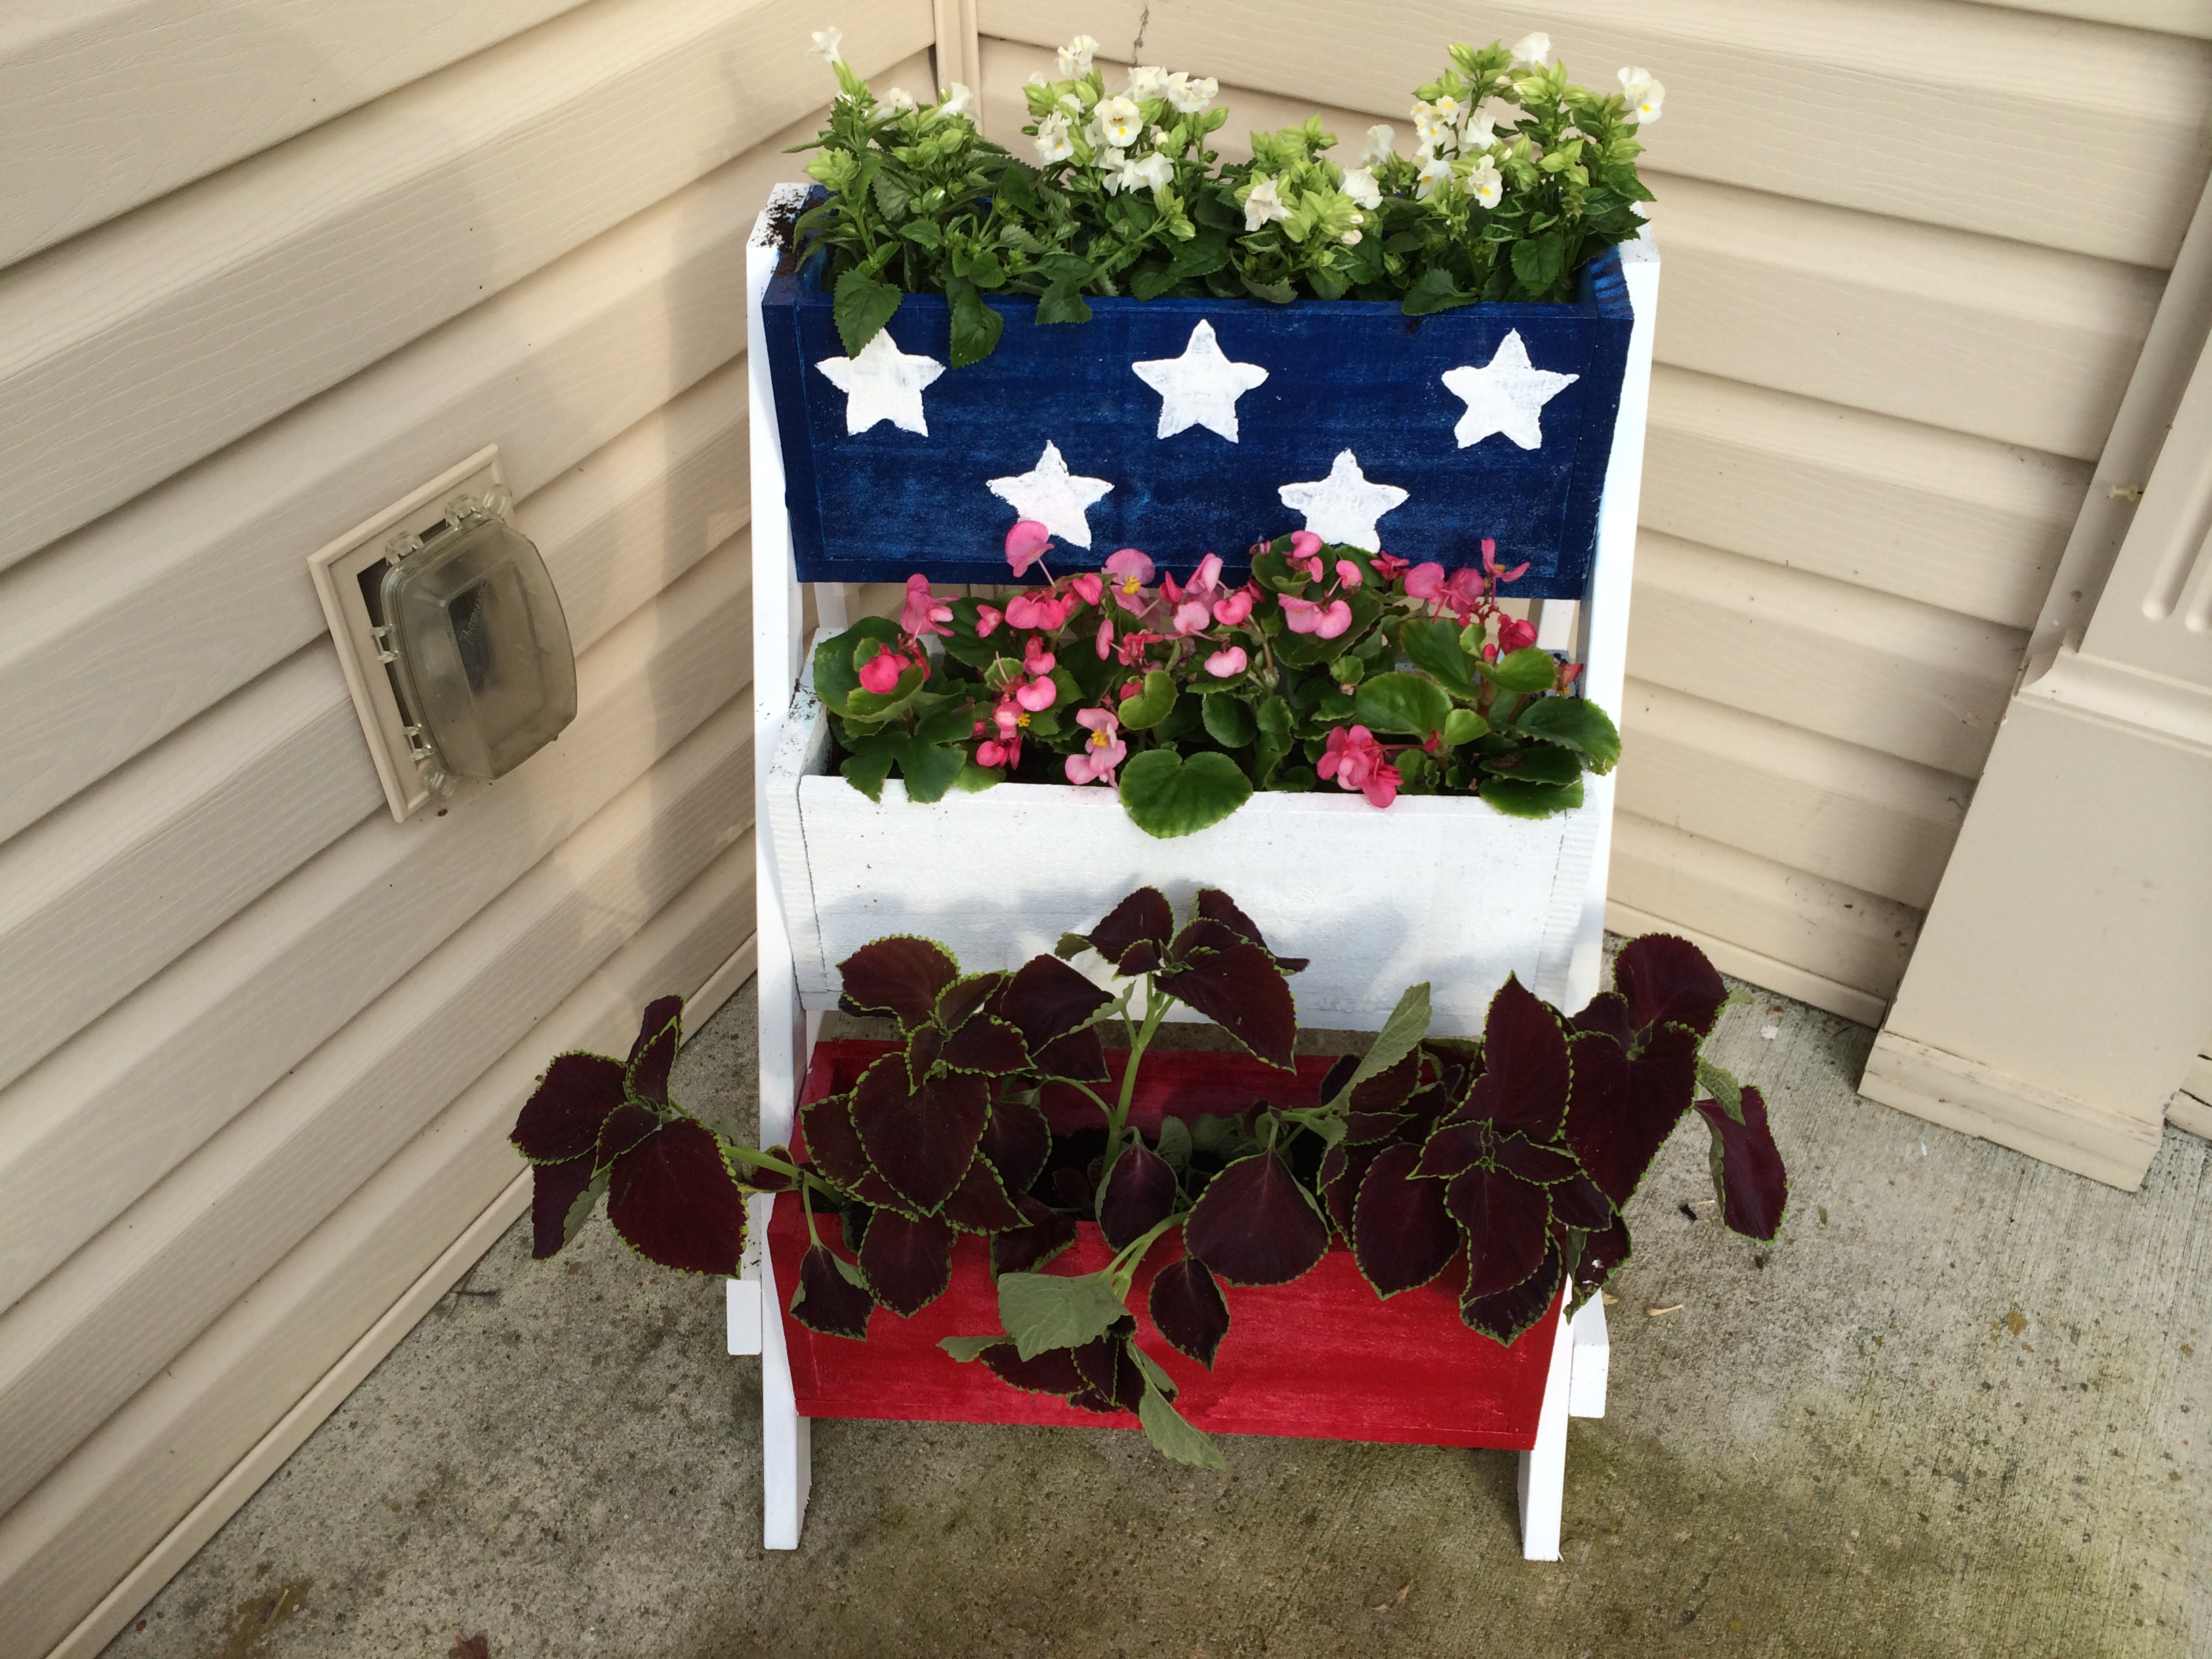
I made this using the $10 Cedar Tiered Flower Planter plans. Painted Red White and Blue with stars.
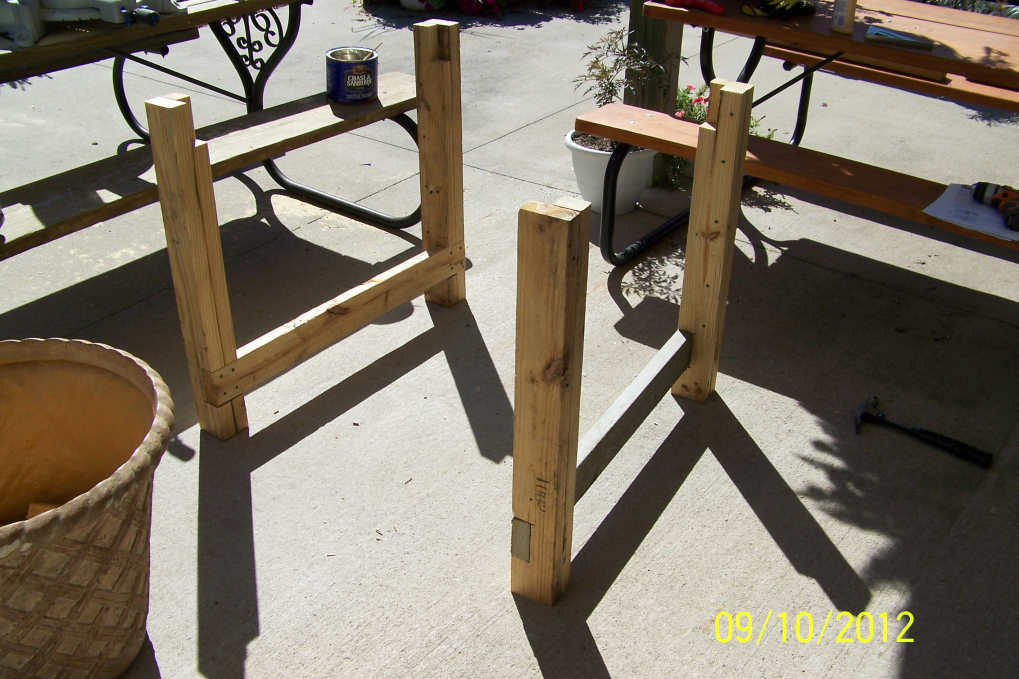
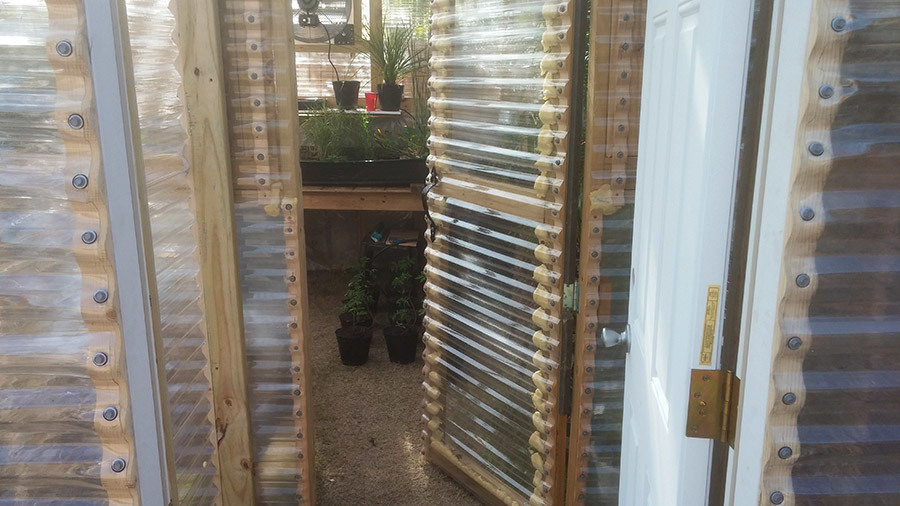
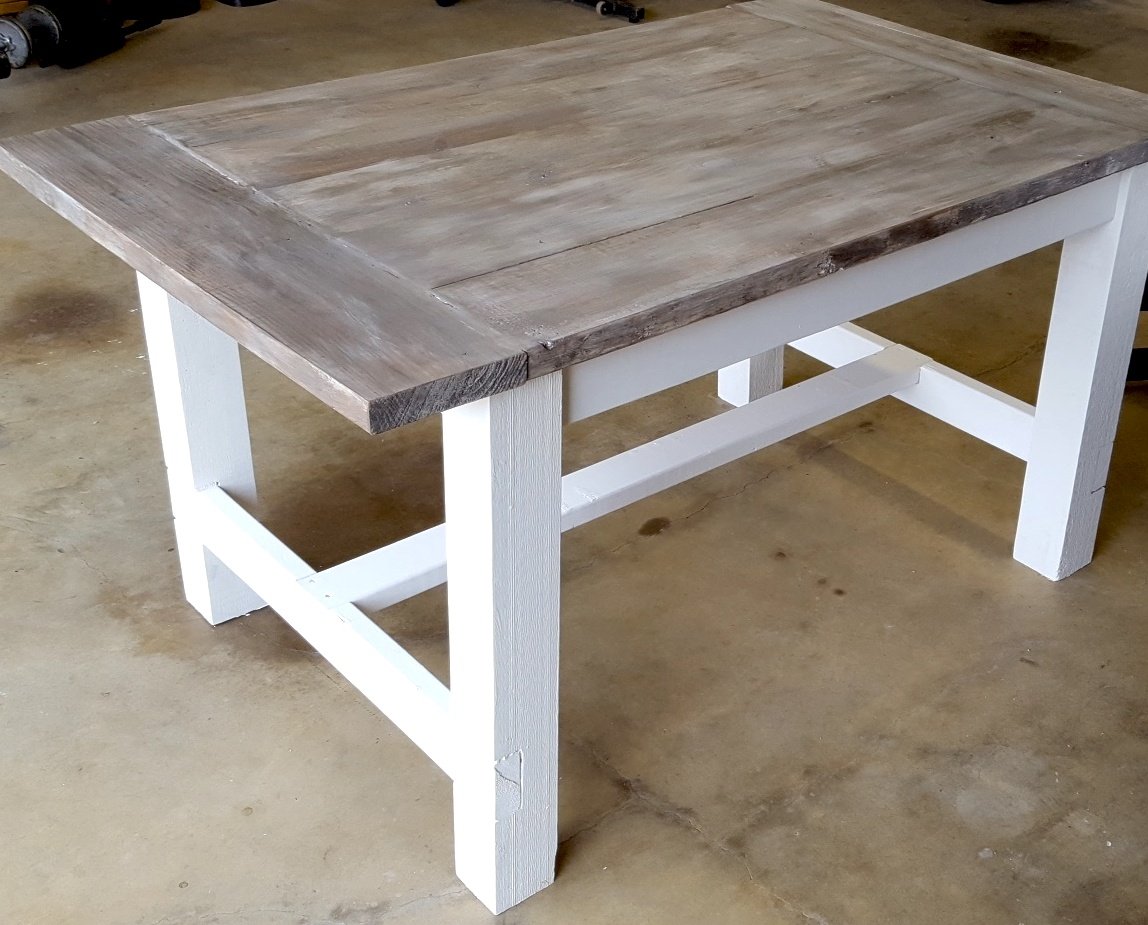
Before my new greenhouse was even delivered and built, I was searching for ideas on potting / greenhouse benches. The company wanted nearly as much $$ for the benches as they did for the greenhouse. By accident I came upon Ana's site. I saw the Farmhouse Table plans, then I saw Handy Andy's modification of the plan, and I was inspired to build them myself!
I found a big pallet of 2x pieces of wood at Menards for $25. They usually set out a pallet of odds and ends that are of "like" items. These were about 3.5' long pcs of 2x10's and 2x8's and such (I have enough of these to do the other benches I want to build... and then some!). I also used some 2x4's that came off a really nice sturdy pallet that we picked up for free, and the rest were just boards we had around the shed.
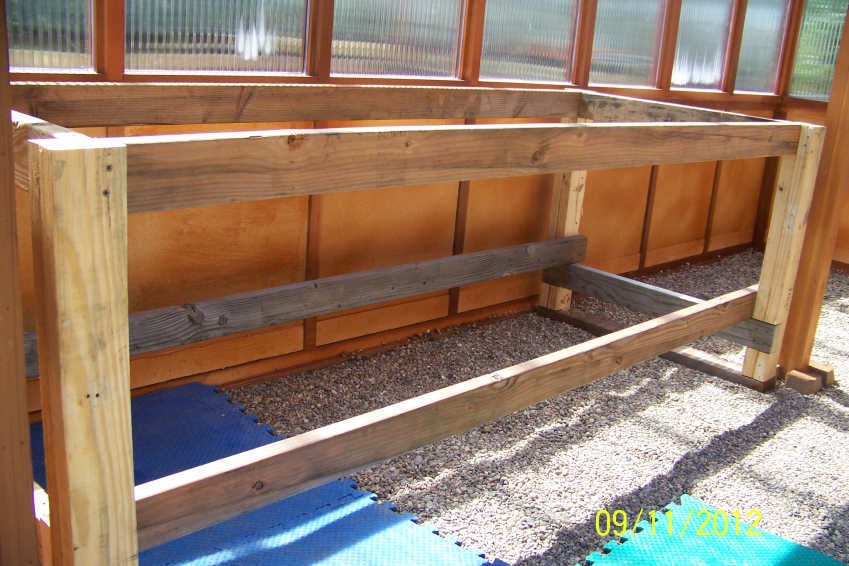
Hubby was willing to help me with this project, but I wanted to do it myself. He did help with the heavy lifting, and I do appreciate that :) Once I had the frame built, we had to move it into place in the greenhouse otherwise we would not have been able to get it in there. And now that it's complete... it's HEFTY!!! And believe me, it's not going to shift about! lol I also put 2x4's across the bottom of the legs so that it wouldn't sink down into the pea stone floor.
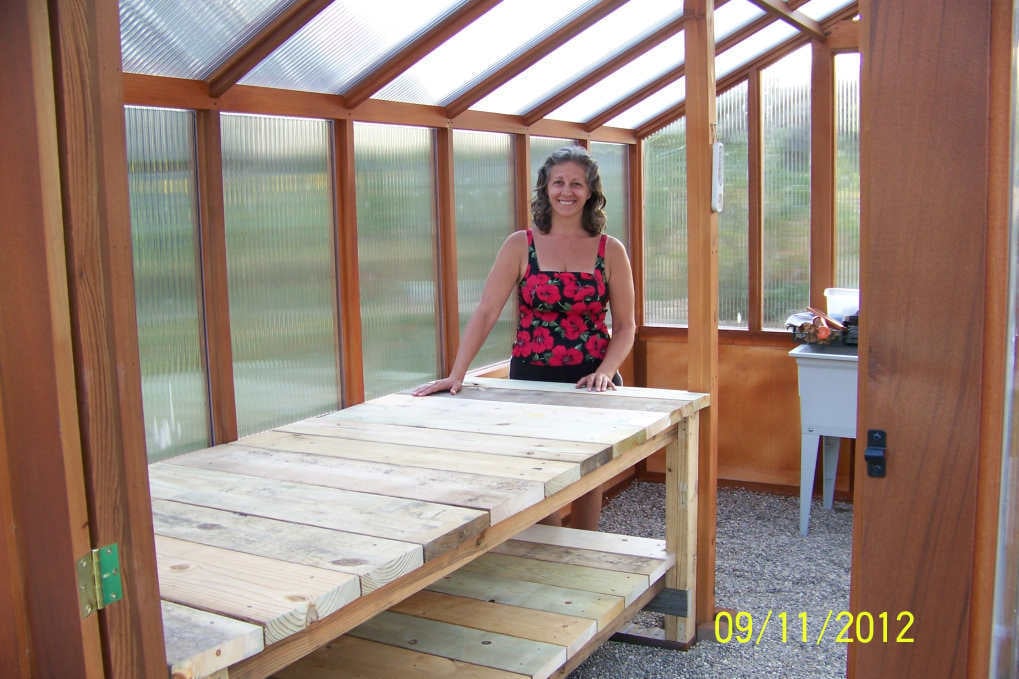
The benches basic construction is the Farmhouse Table, but I added a bottom shelf, a little like Handy Andy's. I must say, because this was not a fine piece of furniture, I was not as intimidated or nervous. It was great for my first ever big project :) It took me some time to complete it, over the course of 2 days, but then I also have to cook and clean and work and garden and a hundred other things in a day :) So, I was in no hurry, but it was a very fun project and I'm SO glad I took it on.
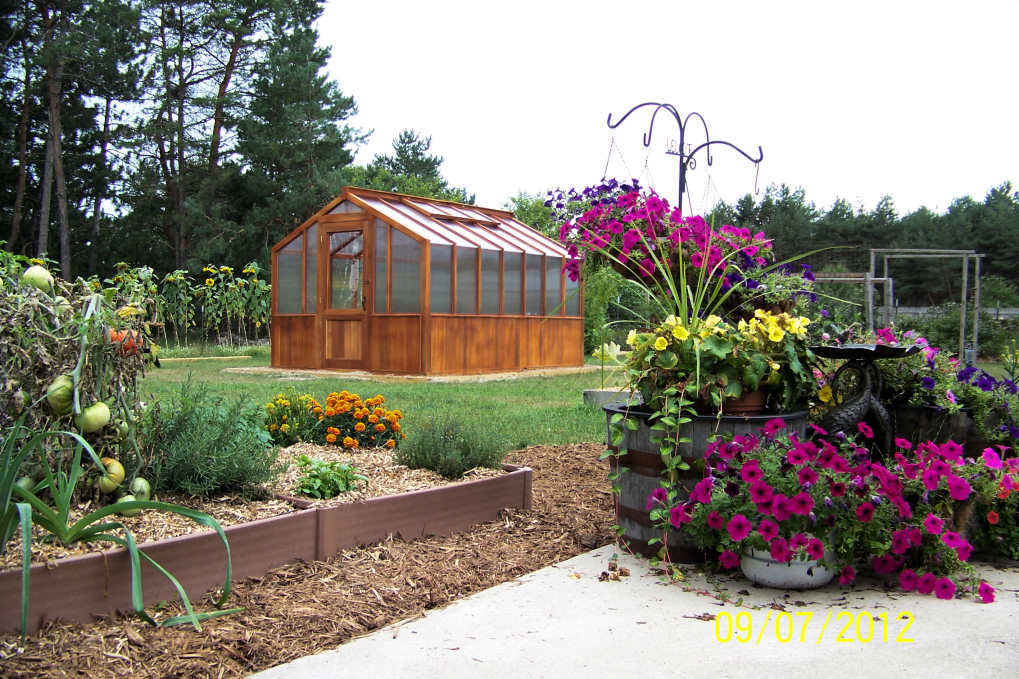
I will be building more of these benches to fill up my beautiful new 10x14 Cedar Built Greenhouse.
Thank you Ana, and Handy Andy!!! I couldn't have done it without your examples!
~ Tonya

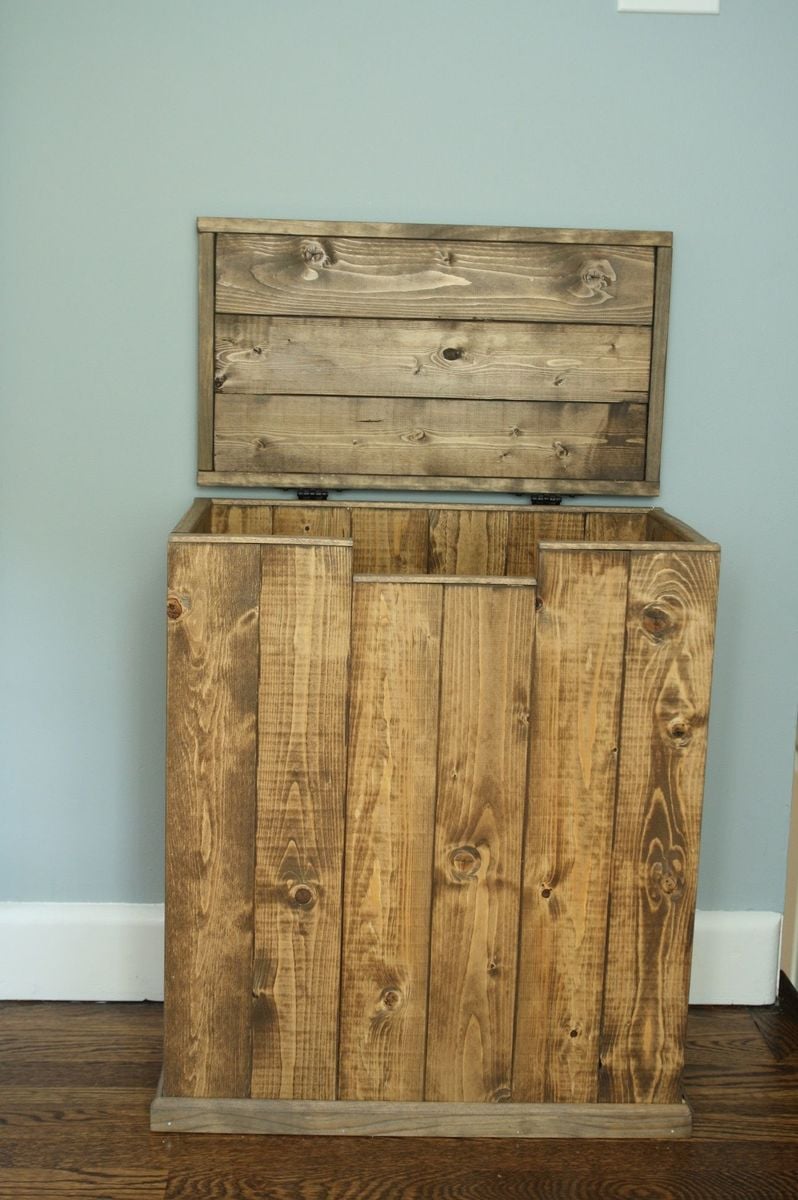
My family is expanding, which means more laundry! (I am 39 weeks pregnant now) So I decided to build a big enough hamper for us (two adults, one toddler who constantly dirties his clothes). For finish, I tried to mix two stains "weathered oak" and "dark walnut" and I think it came out really nice! I must admit I love my new hamper!

Tue, 07/16/2013 - 12:54
I would love to replicate!! It is beautiful :)
Wed, 04/01/2015 - 05:00
I liked this design of hamper you made. After looking at your photo and doing some figuring I started working on my own yesterday. So far I like it, although I think mine maybe taller. Again I really like your idea here.
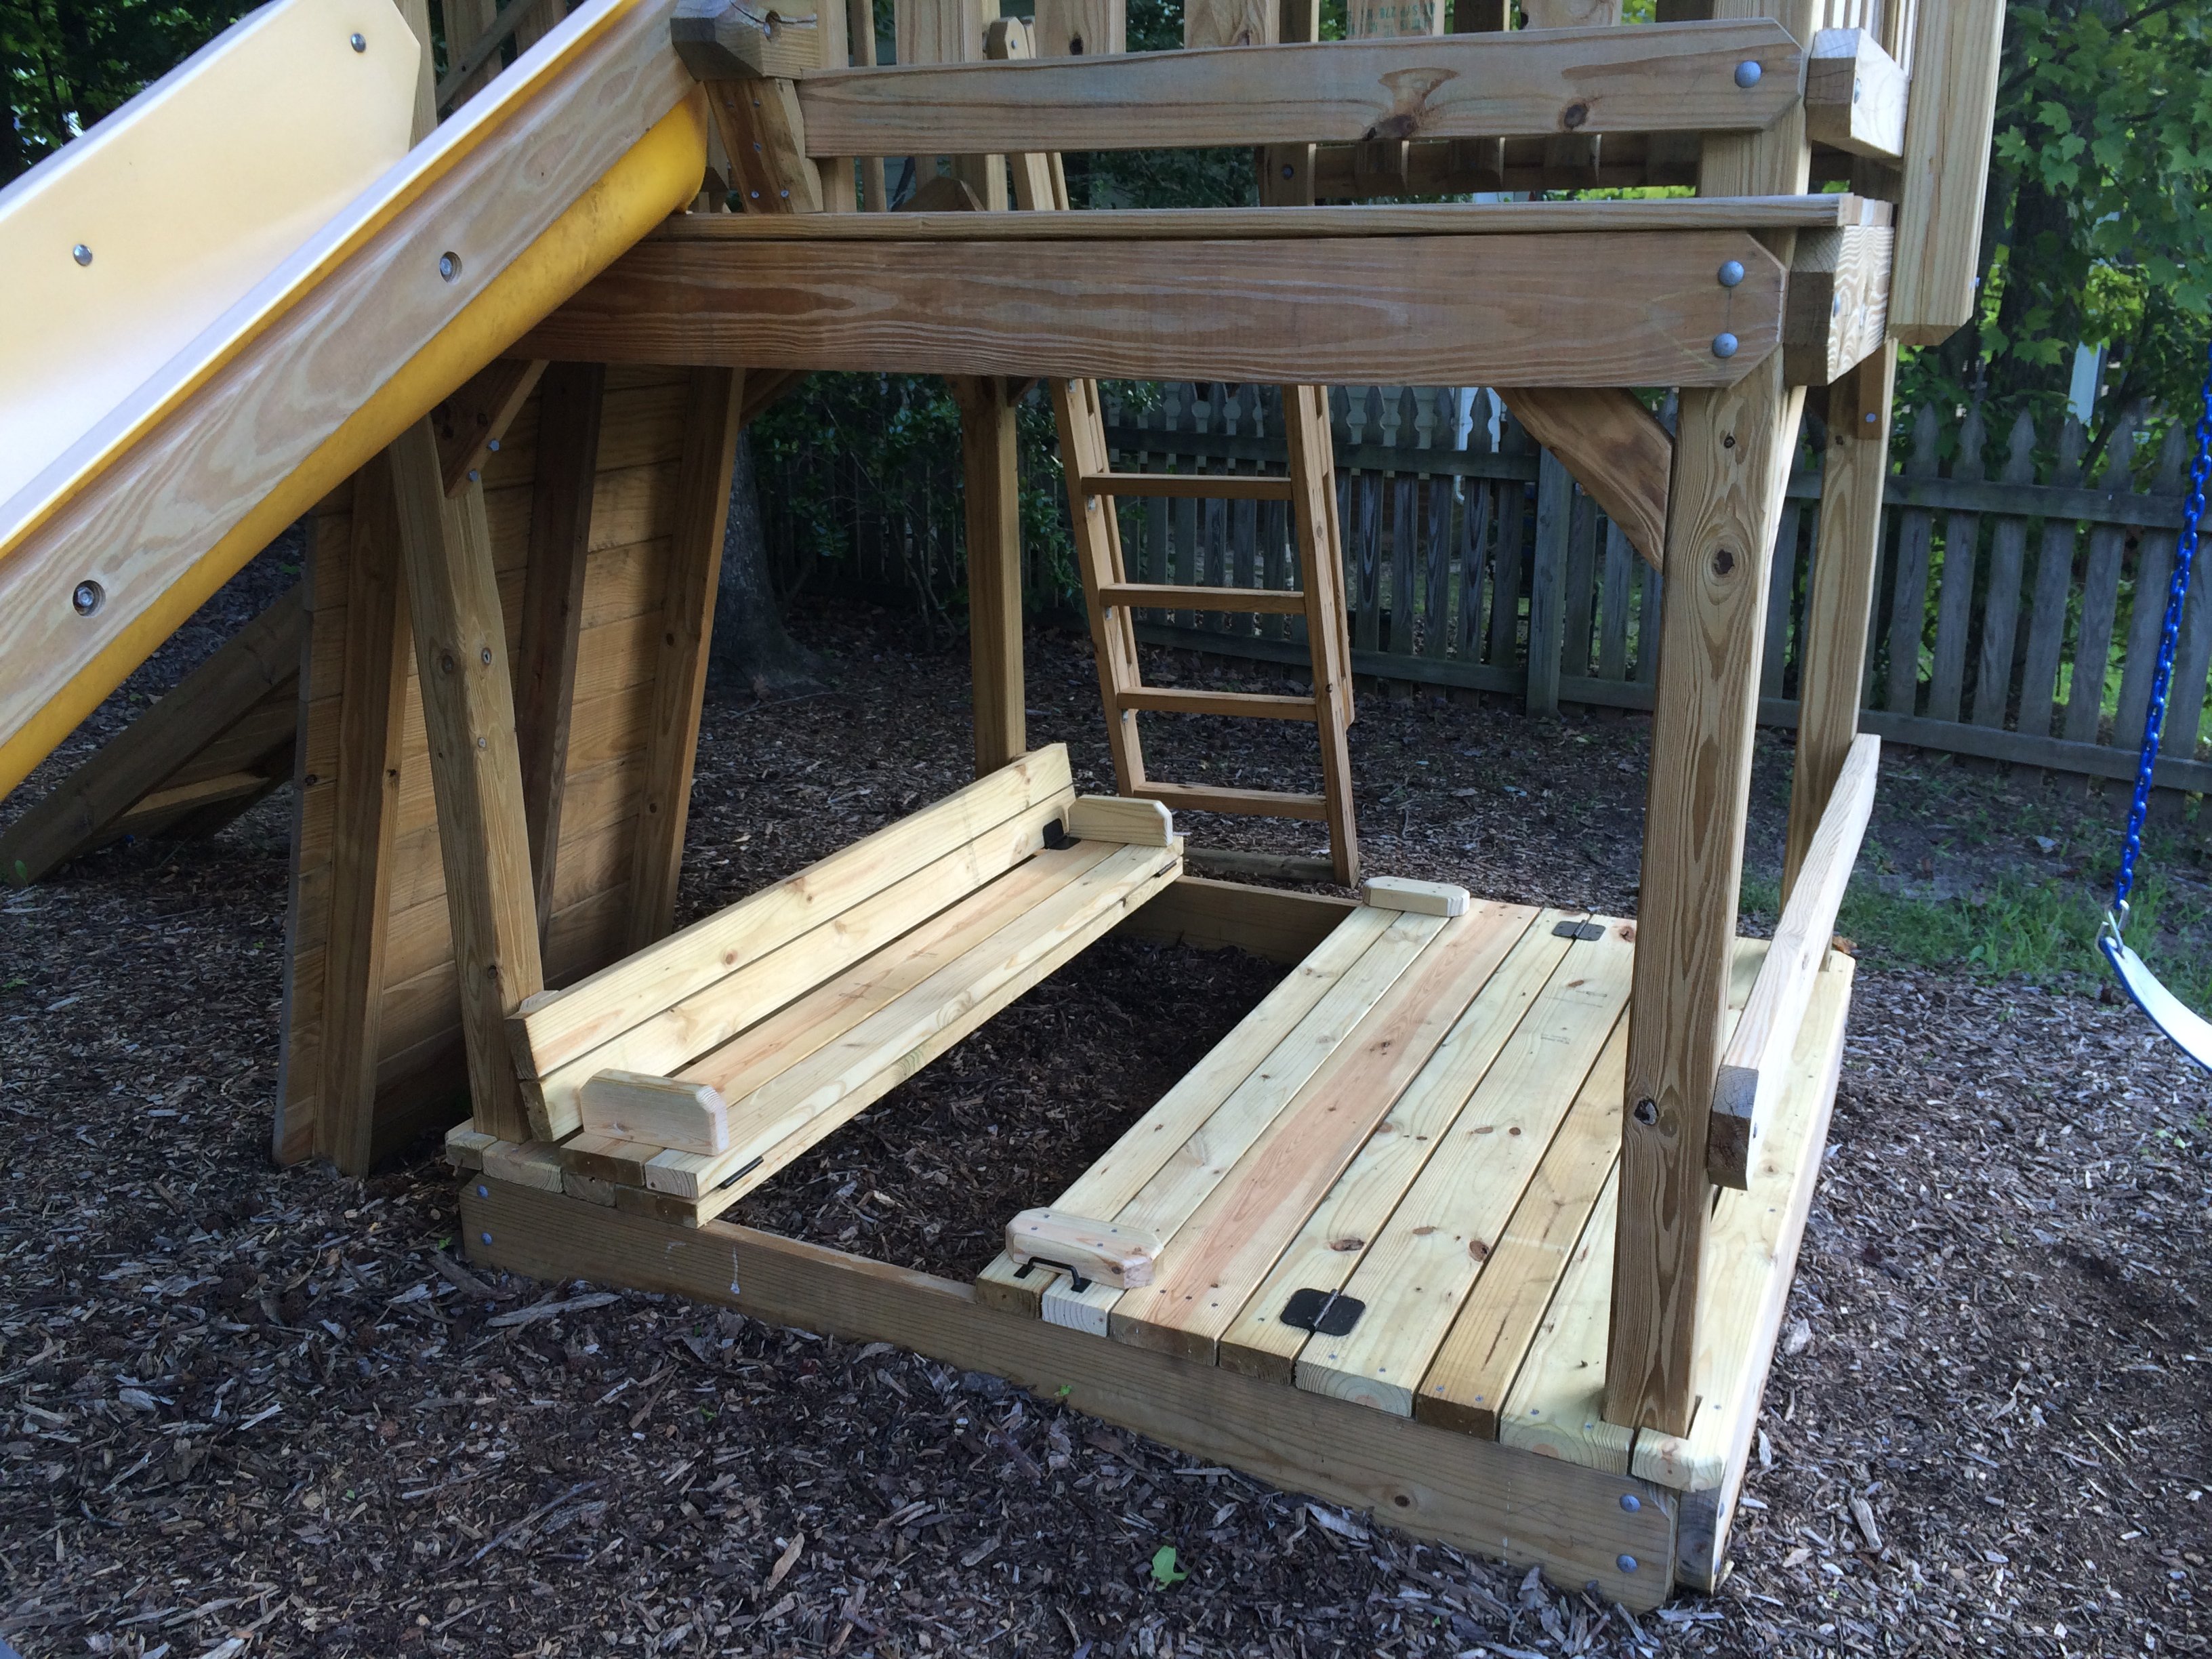
Thanks to inspiration from Ana's post on the Sand Box with Built-in seats, I've retrofit our Jungle Fort (http://www.detailedplay.com/Jungle-Fort-Swingset.htm) with the sandbox cover/bench system. I've upgraded the lumber dimensions to 2x4s and 2x6 to accommodate the increased 67.5" span.
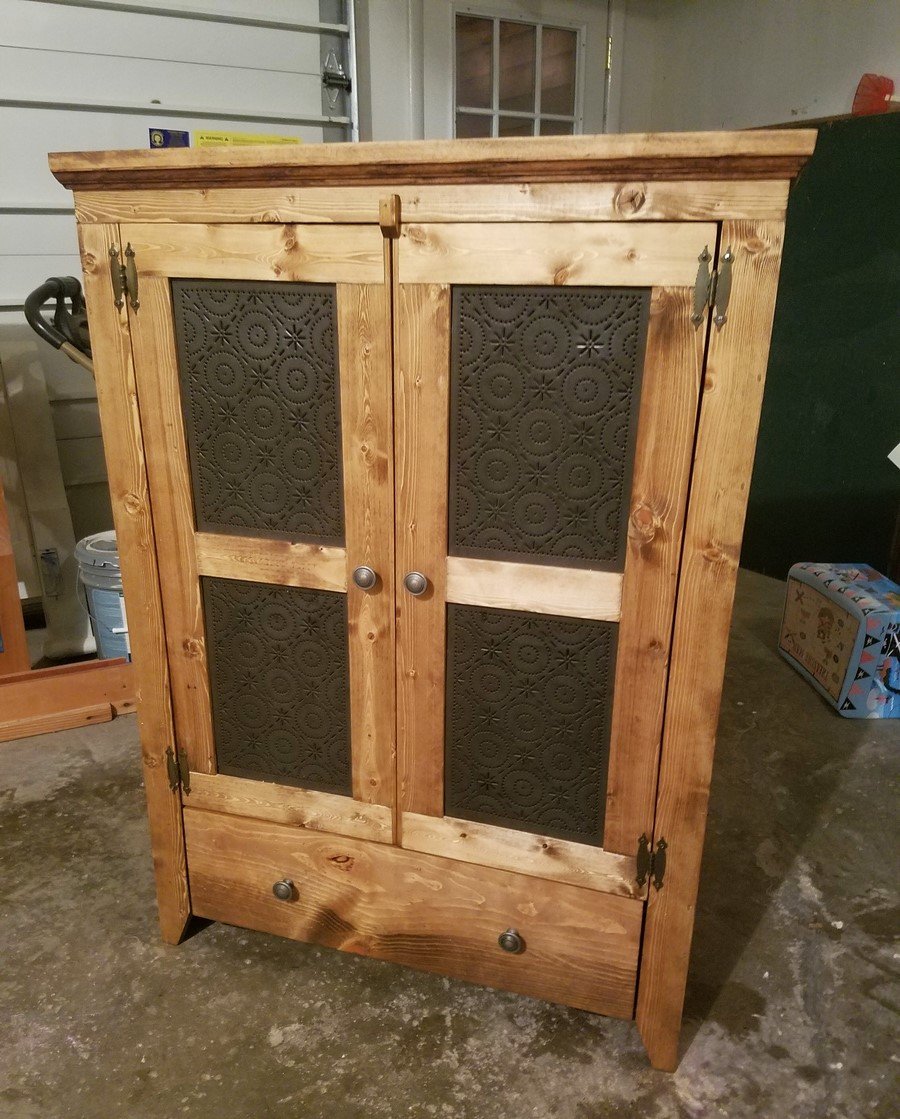
This project was built for my mother as christmas gift. Very easy to do, I based it off of Patrick's jelly cupboard plans and ana whites pie Chest idea. I modified mine to allow for a drawer/door at the bottom.
http://www.ana-white.com/2015/10/DIY_furniture/pie-safe
http://www.ana-white.com/2011/12/plans/patrick039s-jelly-cupbard
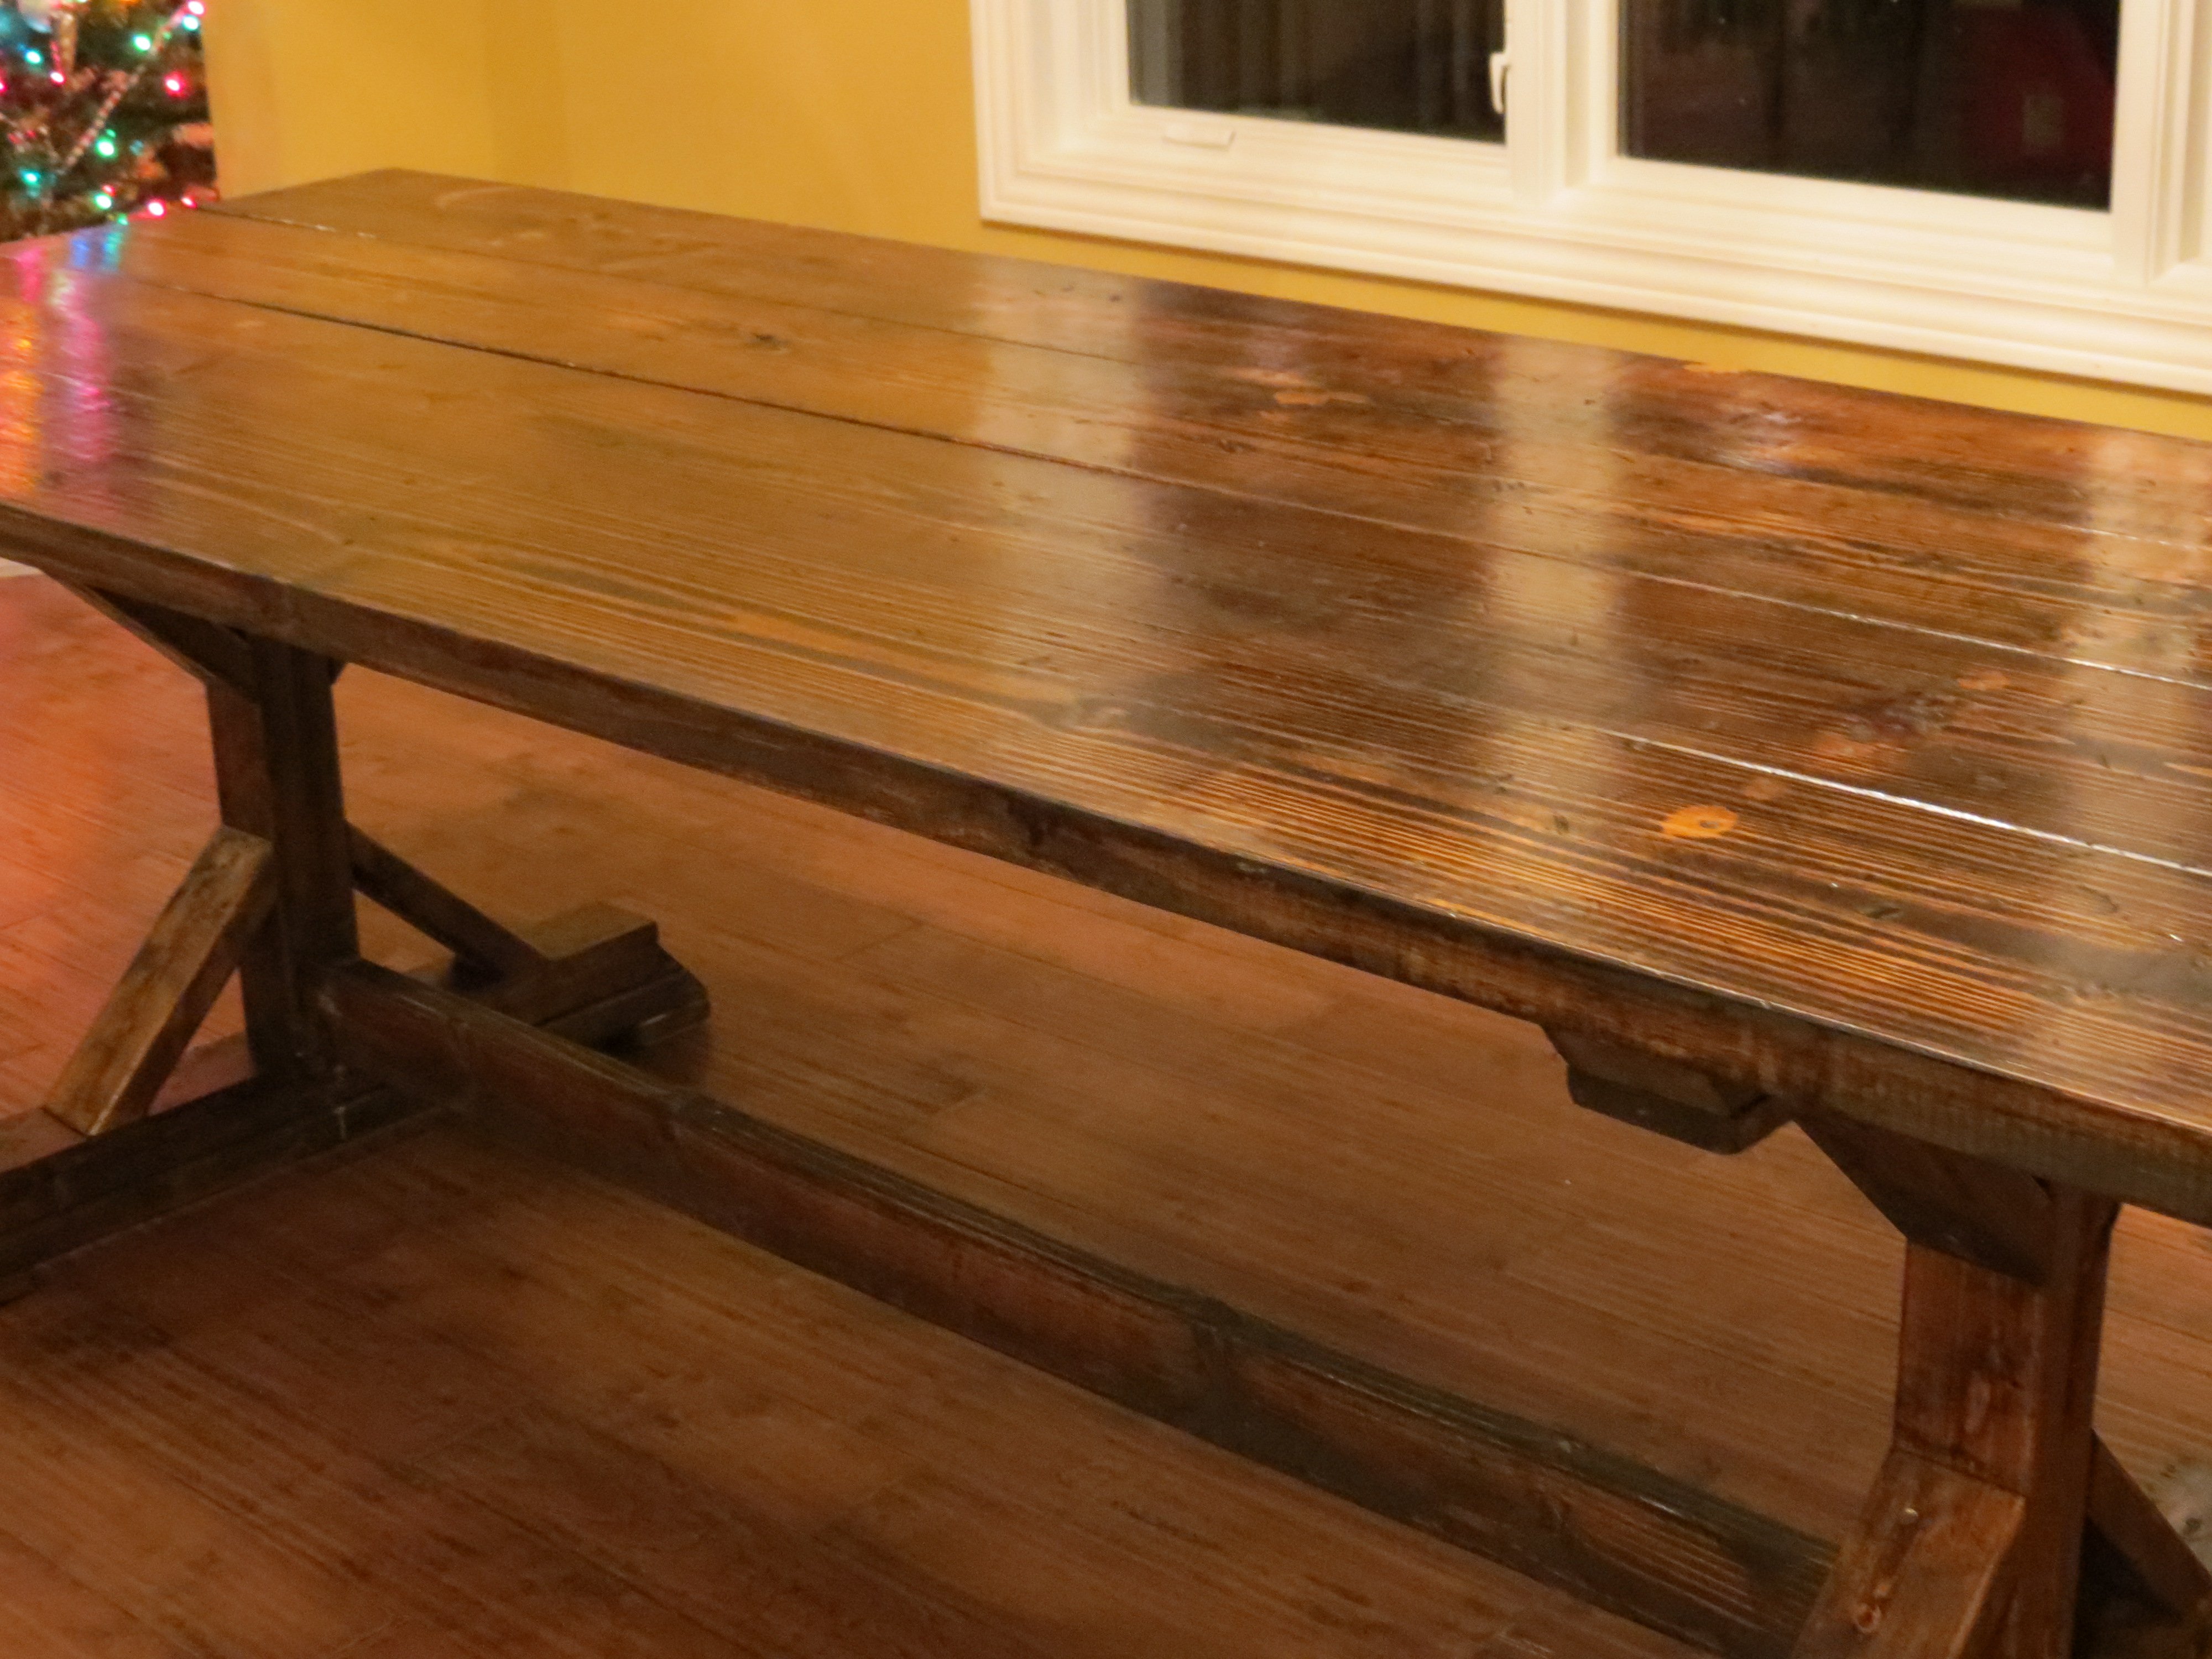
We built this table over one weekend and did the finish work another weekend. We are in the middle of building our home so the table project took a back seat for awhile but we are happy with the result in the end! Could be done all in one weekend without an issue.
You can read about it and see lot's more photos here:
http://letsjustbuildahouse.blogspot.com/2012/12/diy-rustic-farmhouse-ta…
and I'm sure I will be posting more photos with hopefully a bench soon too on:
http://letsjustbuildahouse.blogspot.com/
thanks for the plans can't wait to see what I can talk my husband into next from Ana's site!
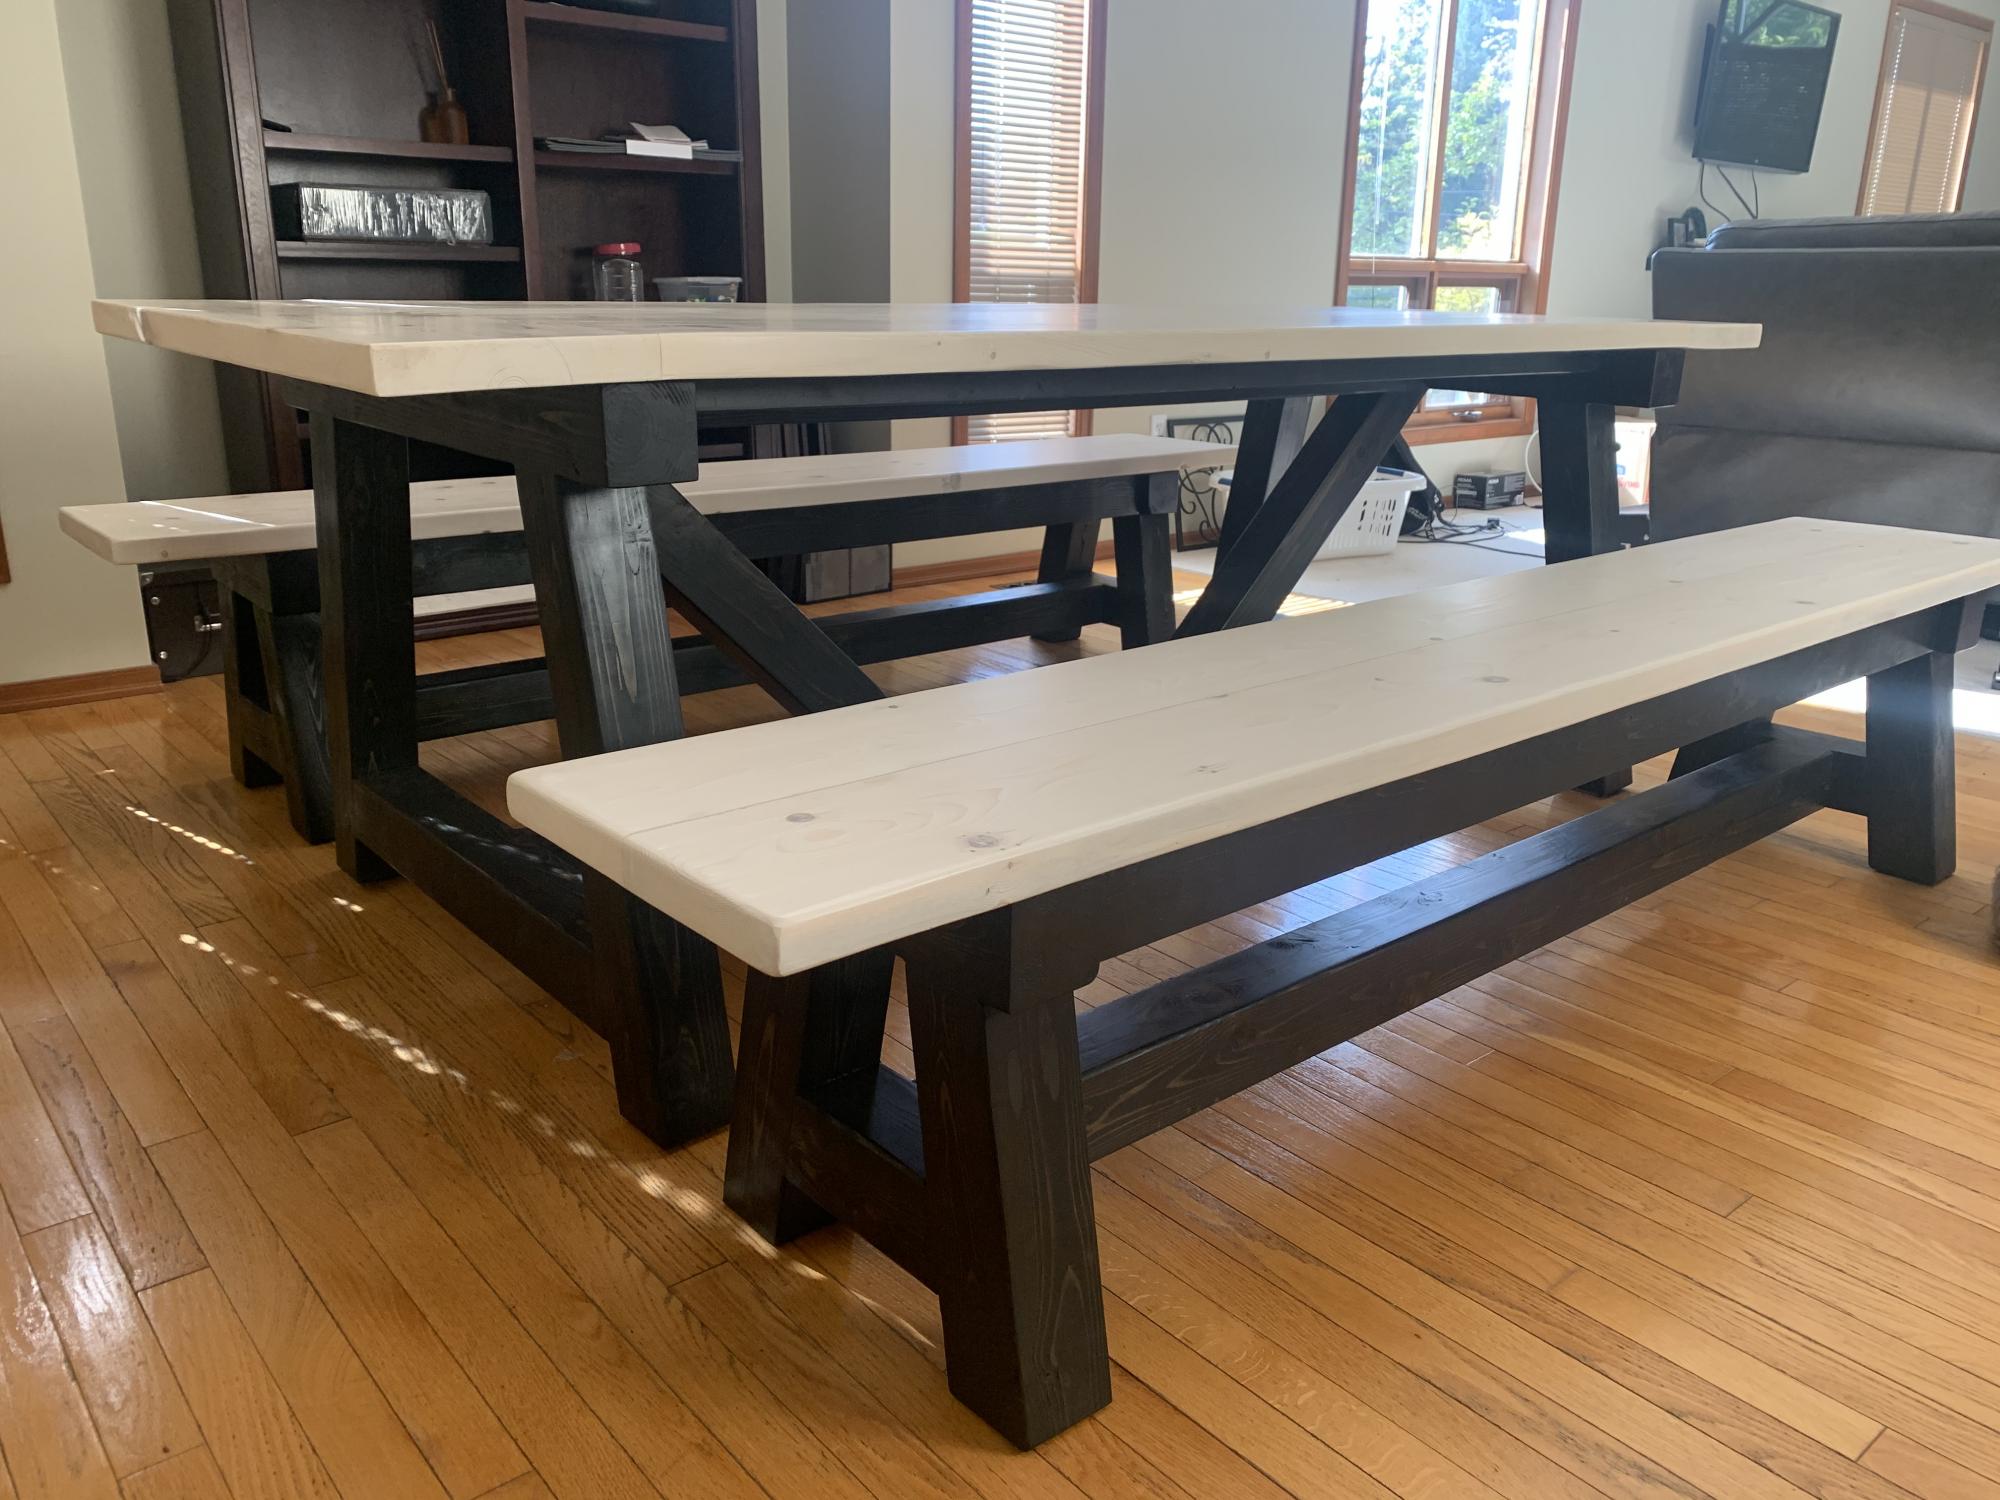
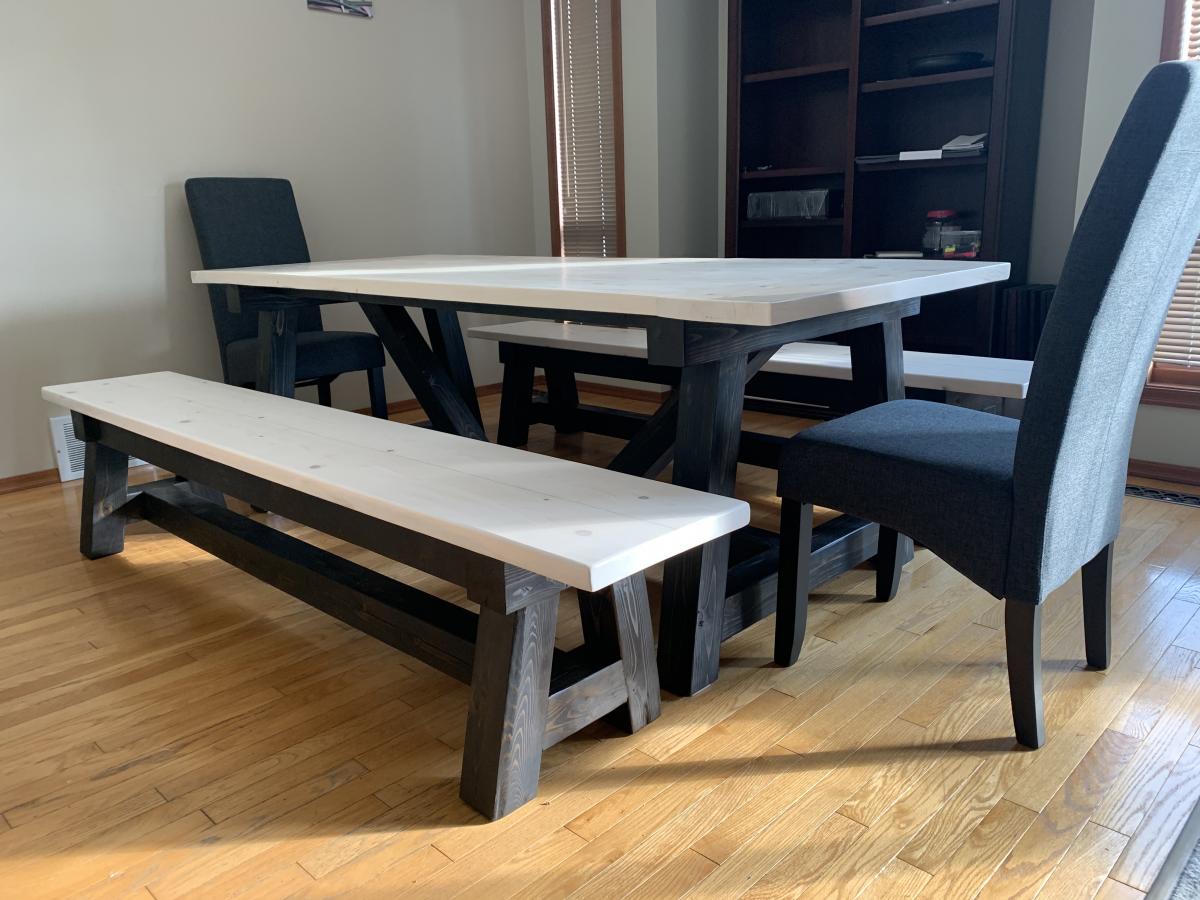
My first furniture project. Made the 4x4 Truss table and matching benches. I used cedar for the 4x4’s as they are the only kind of untreated 4x4’s available here other than knotty pine for $9 a foot. The rest is spruce as that’s what most dimensional lumber here is. The only changes I made were to the pocket holes. I didn’t feel 2 on 1 side would be a tight enough joint so for the table I put them where the plans called for them and then 2 more on the opposite side. I filled in the visible pocket holes with 1/2 dowels and sawed them off flush
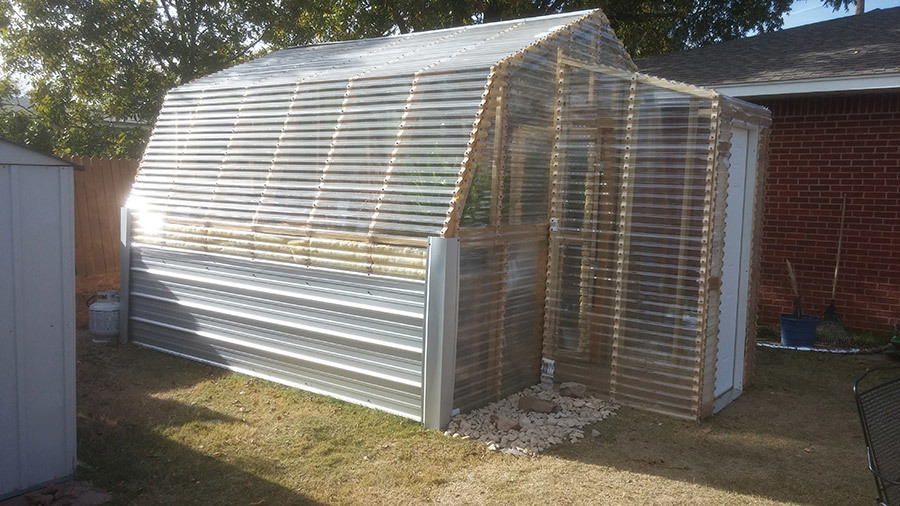
This was built mainly as a place to bring our pond plants in for the winter. After looking at various kits we decided this was the best option for us and much cheaper.
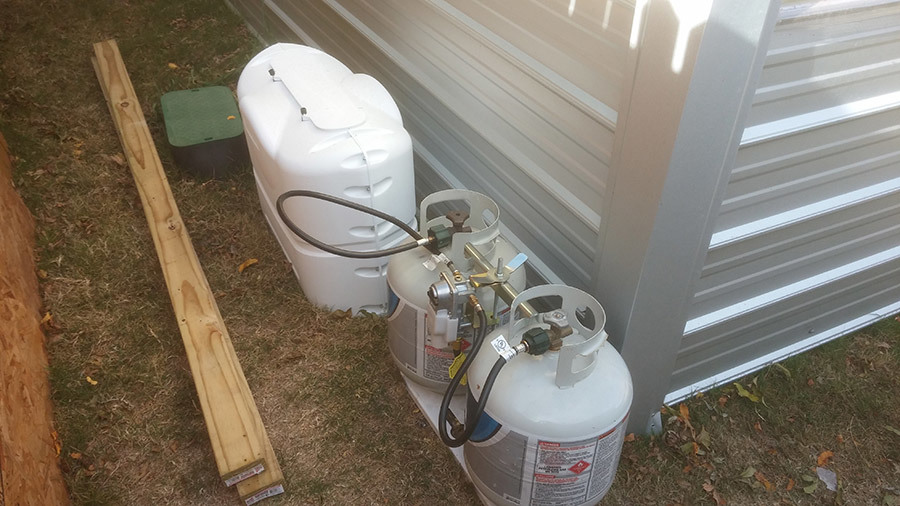
The size was increased to 12 X 12 and the walls/ceiling were increased another 15" in height over the original plans. An entryway was added to block the cold wind as our original barnstyle door wasn't tight enough and ended up being too drafty. Also added an RV type autoswitching propane system and blue flame heater for backup. For the winter months we insulated the lower portion of the interior walls with spun fiberglass and 6 mil film stapled over it.
This is a very utilitarian version that serves our needs well. Great original plans and easy to build.
Tue, 11/11/2014 - 14:34
We didn't change the angle from the plans. 22 degrees I believe was the cut.

Tue, 11/11/2014 - 16:04
Wow, this looks awesome! I love the arctic entryway (thats what we call them up here in Alaska) and all the mods! Thanks so much for sharing!
So easy to make!
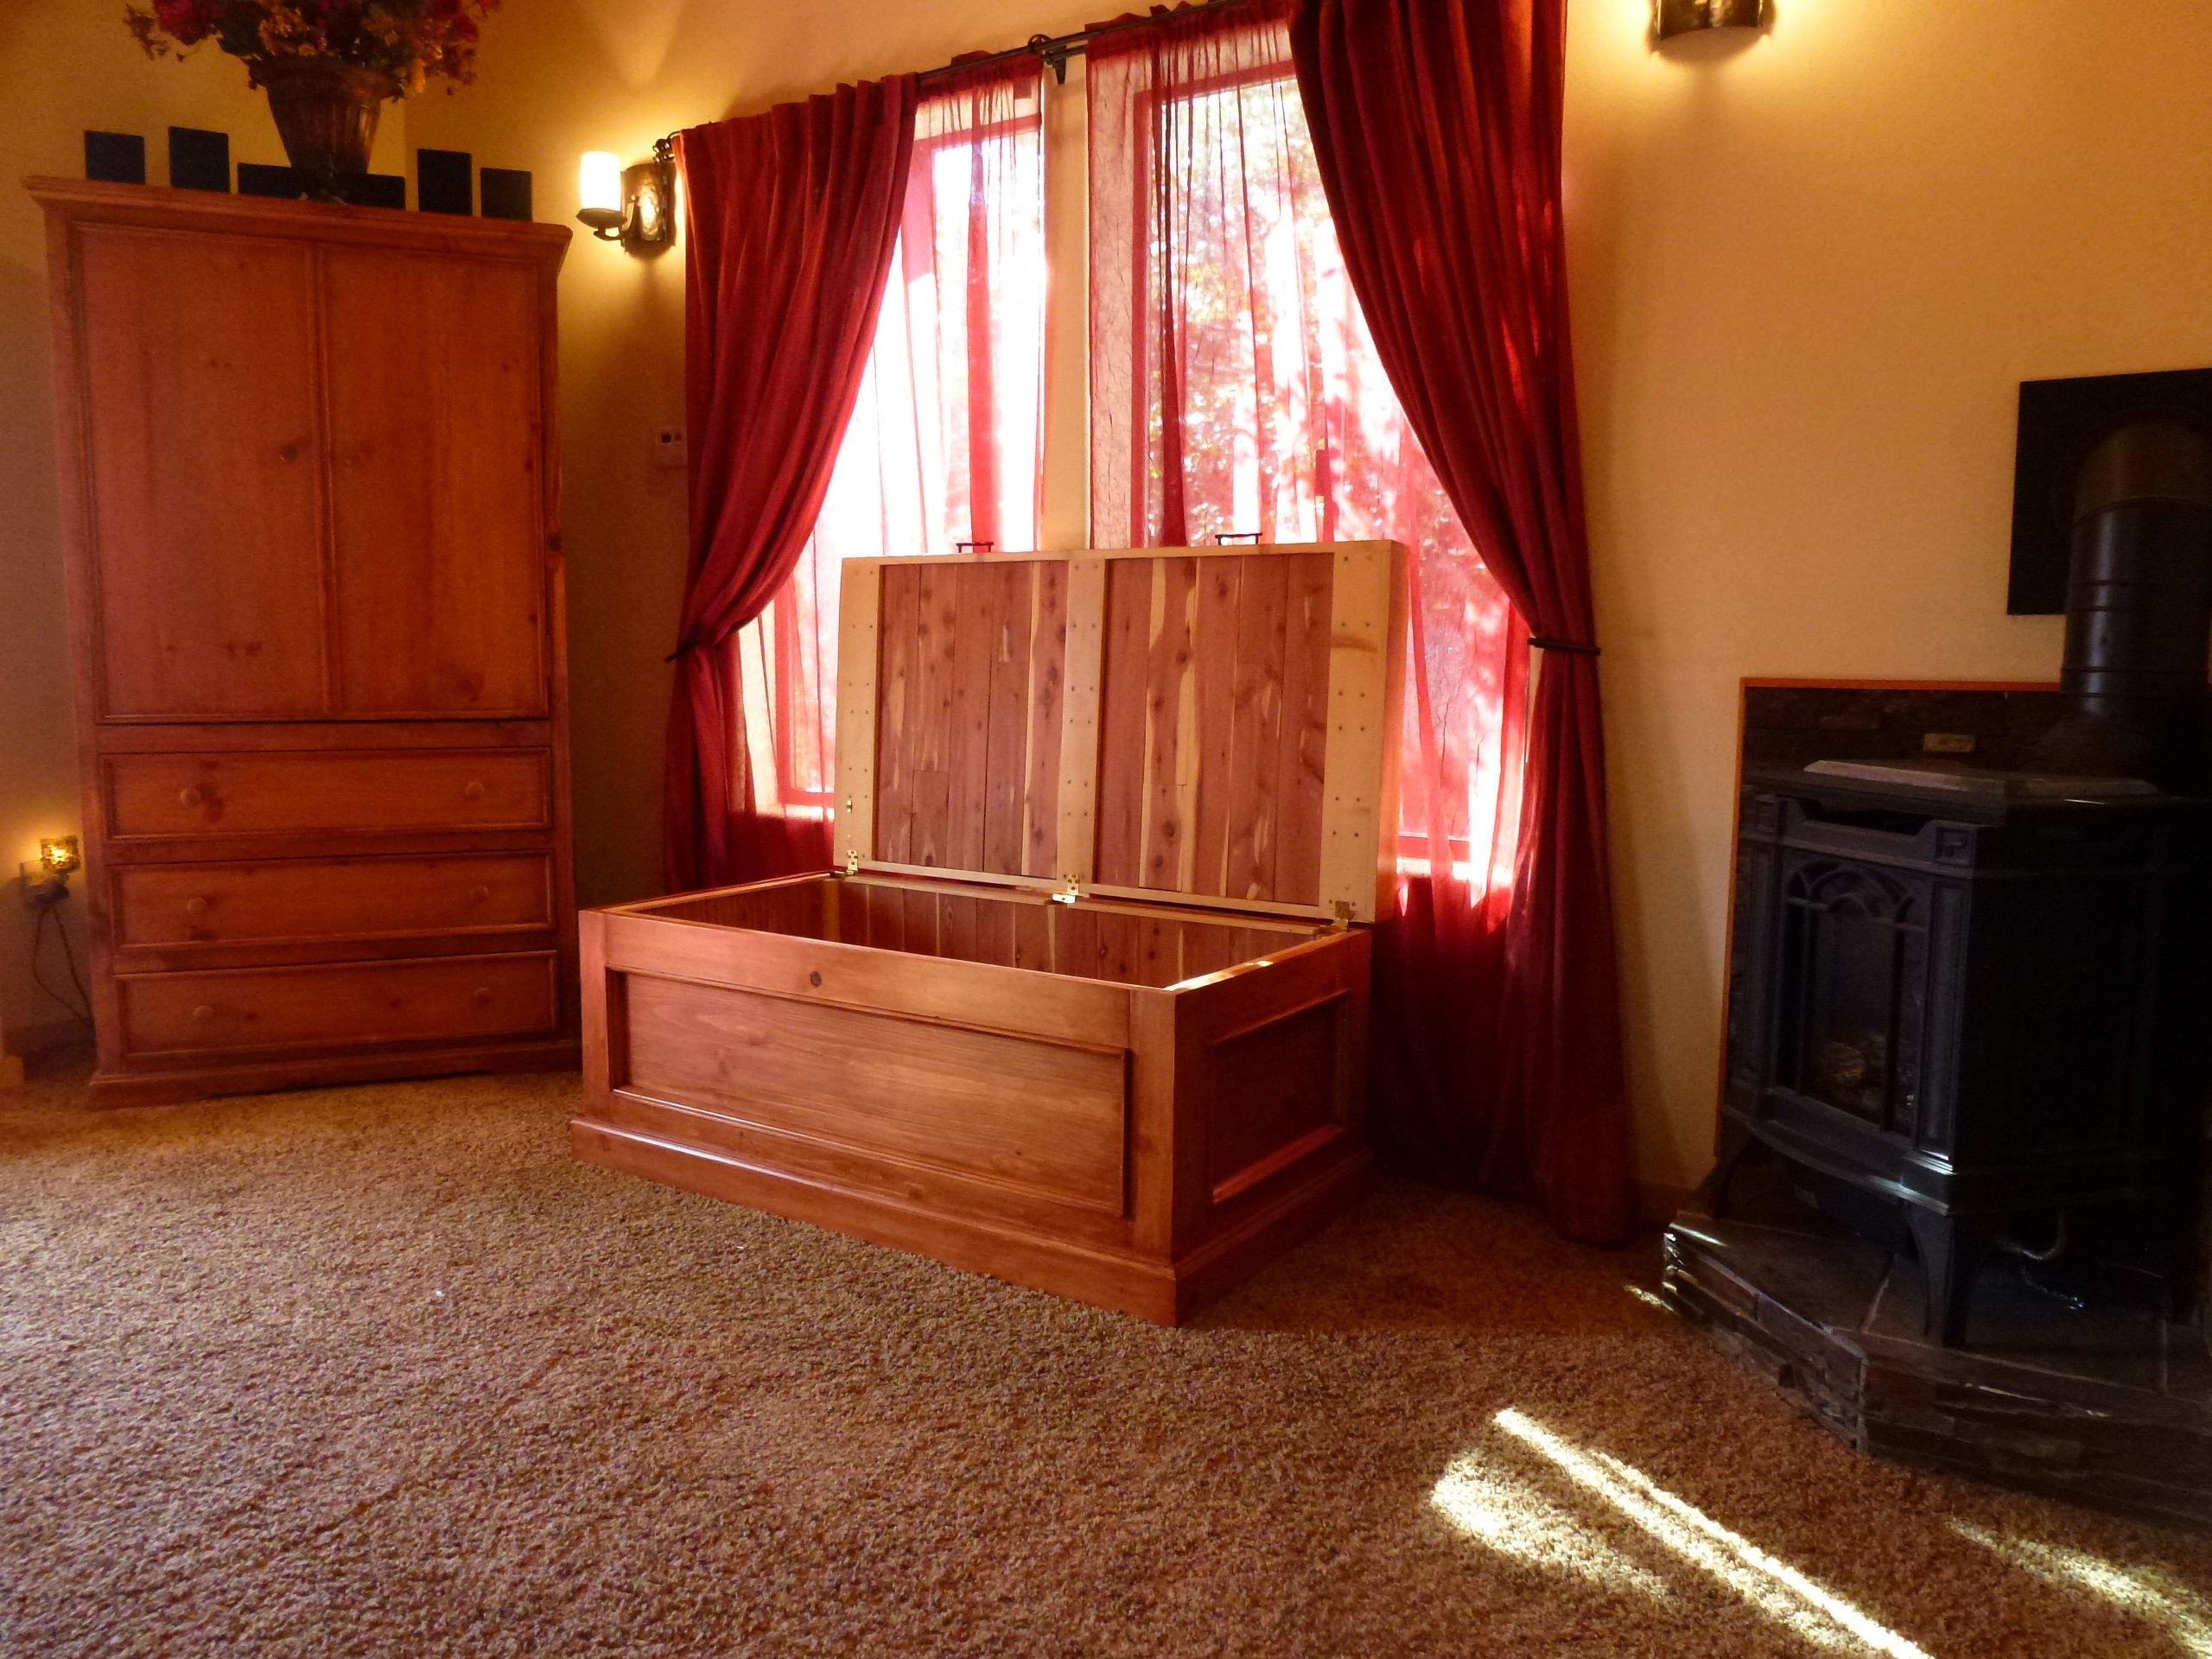
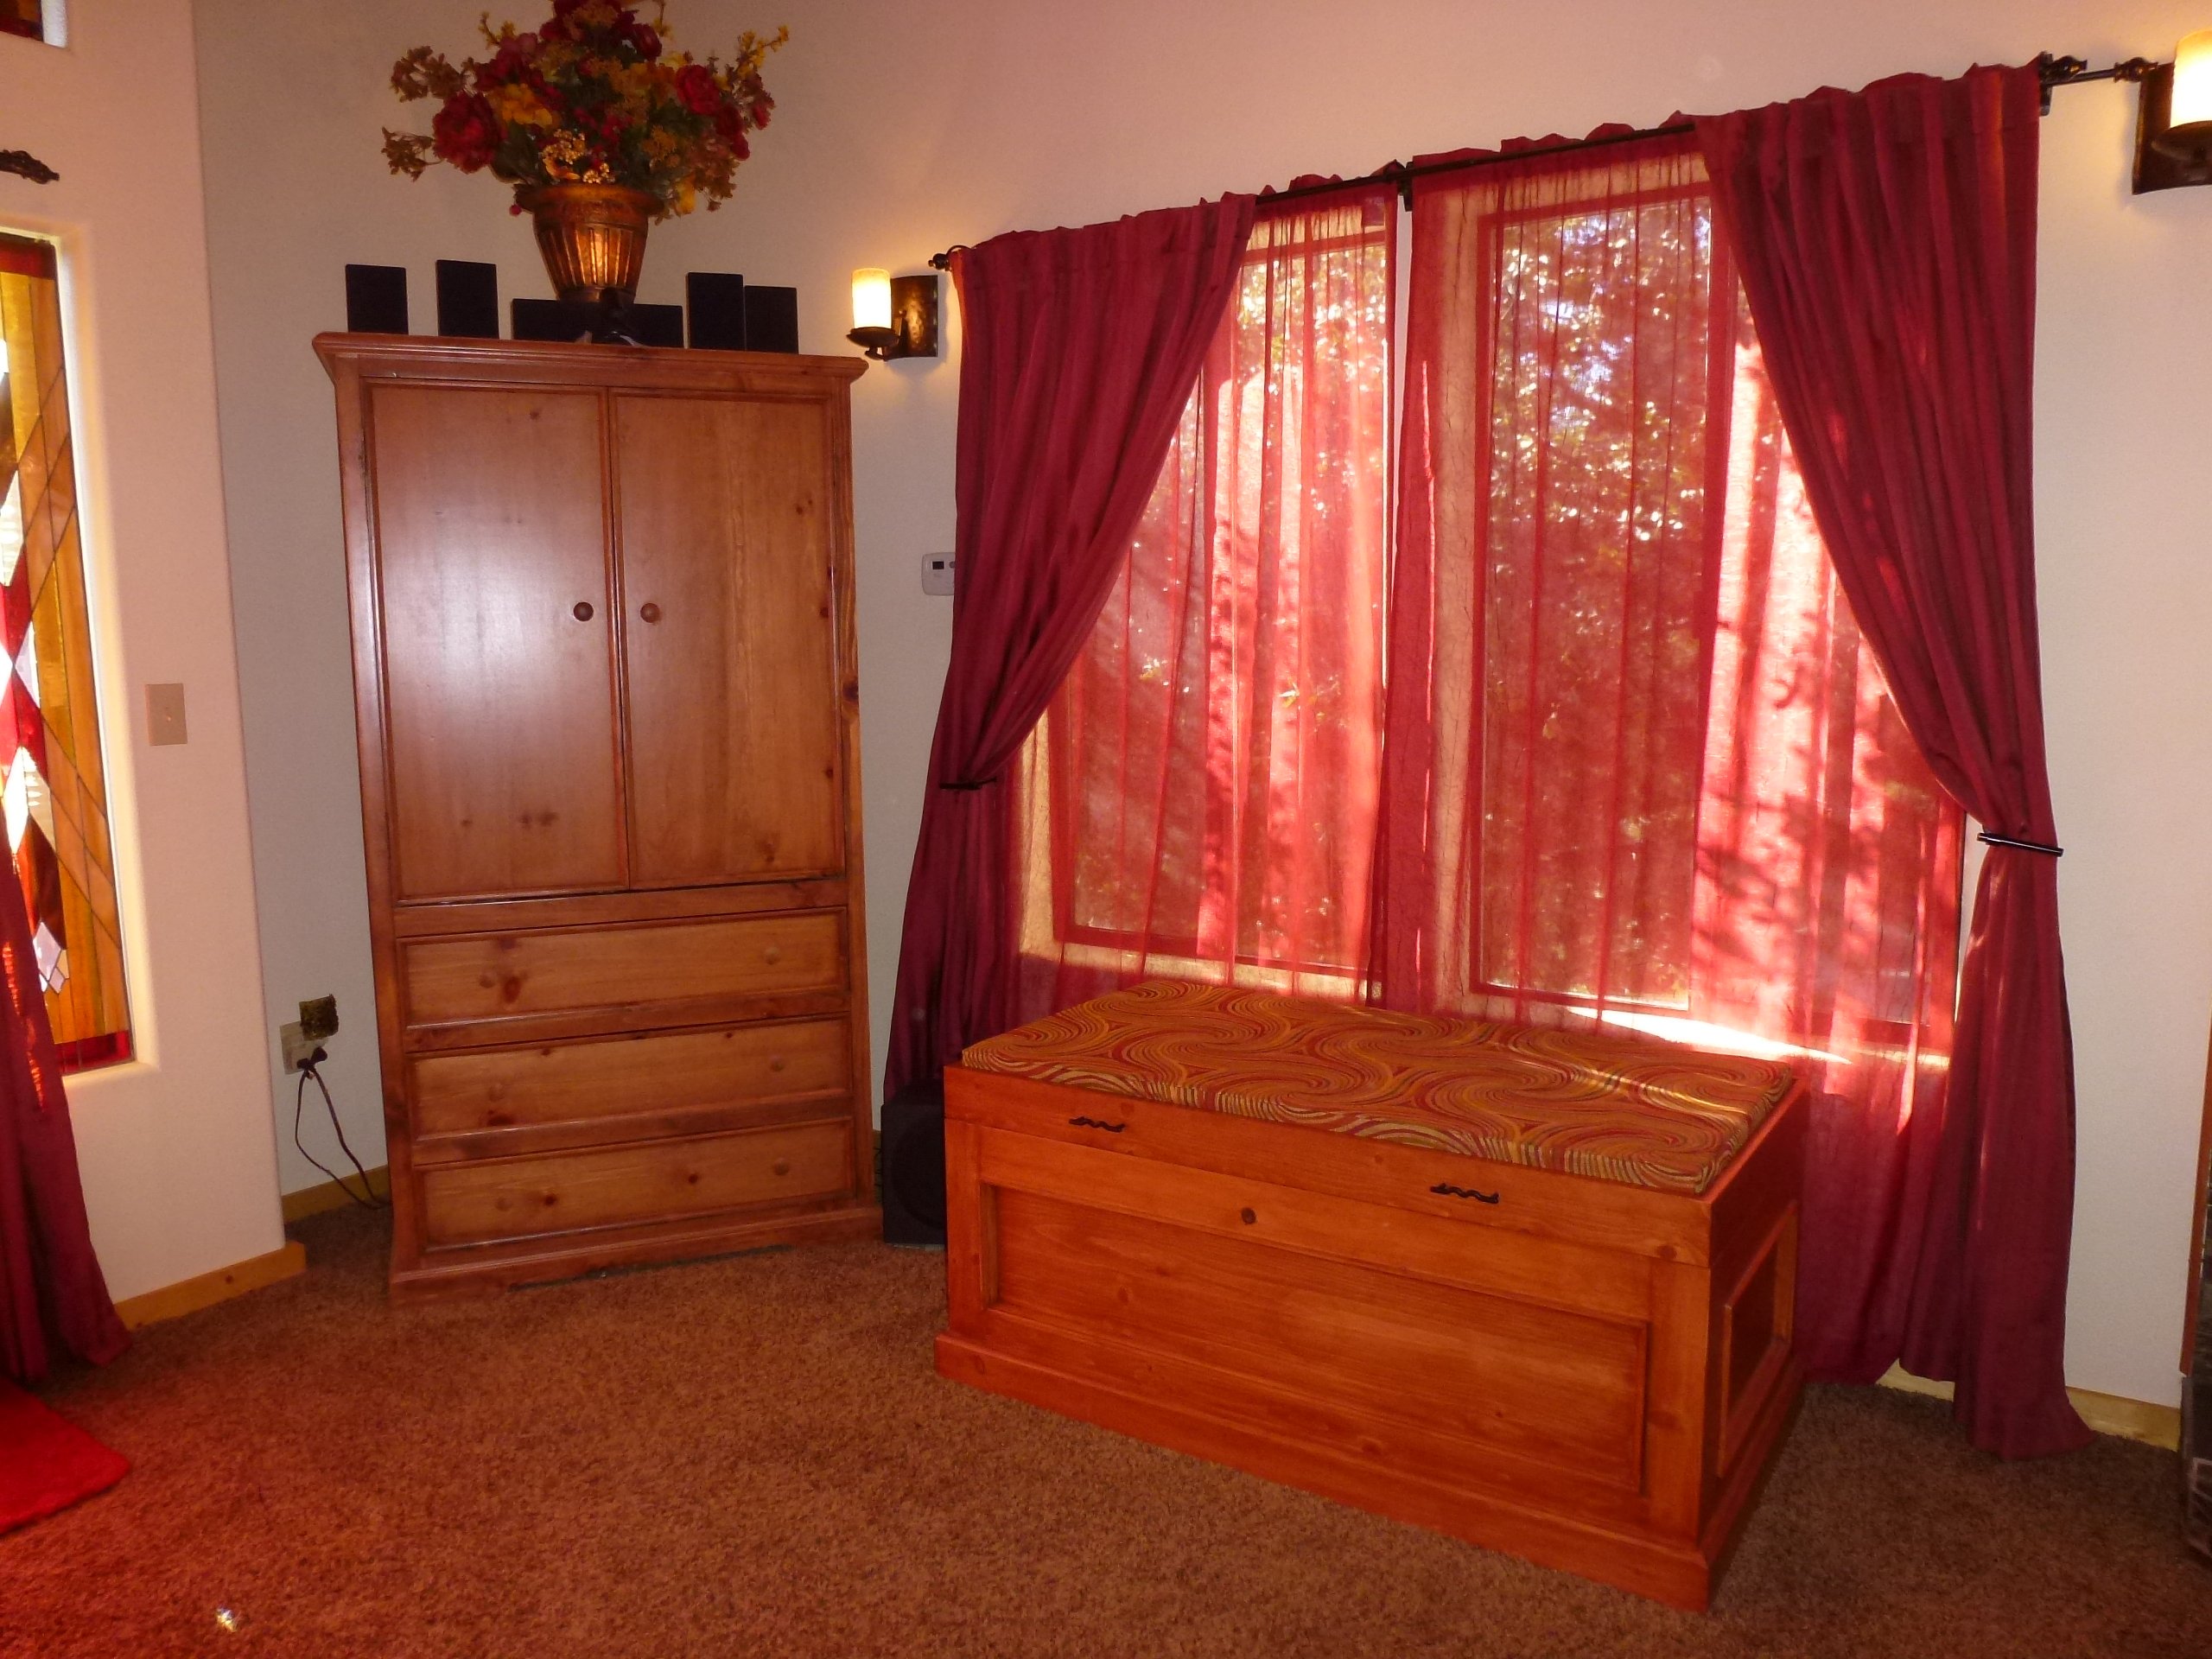
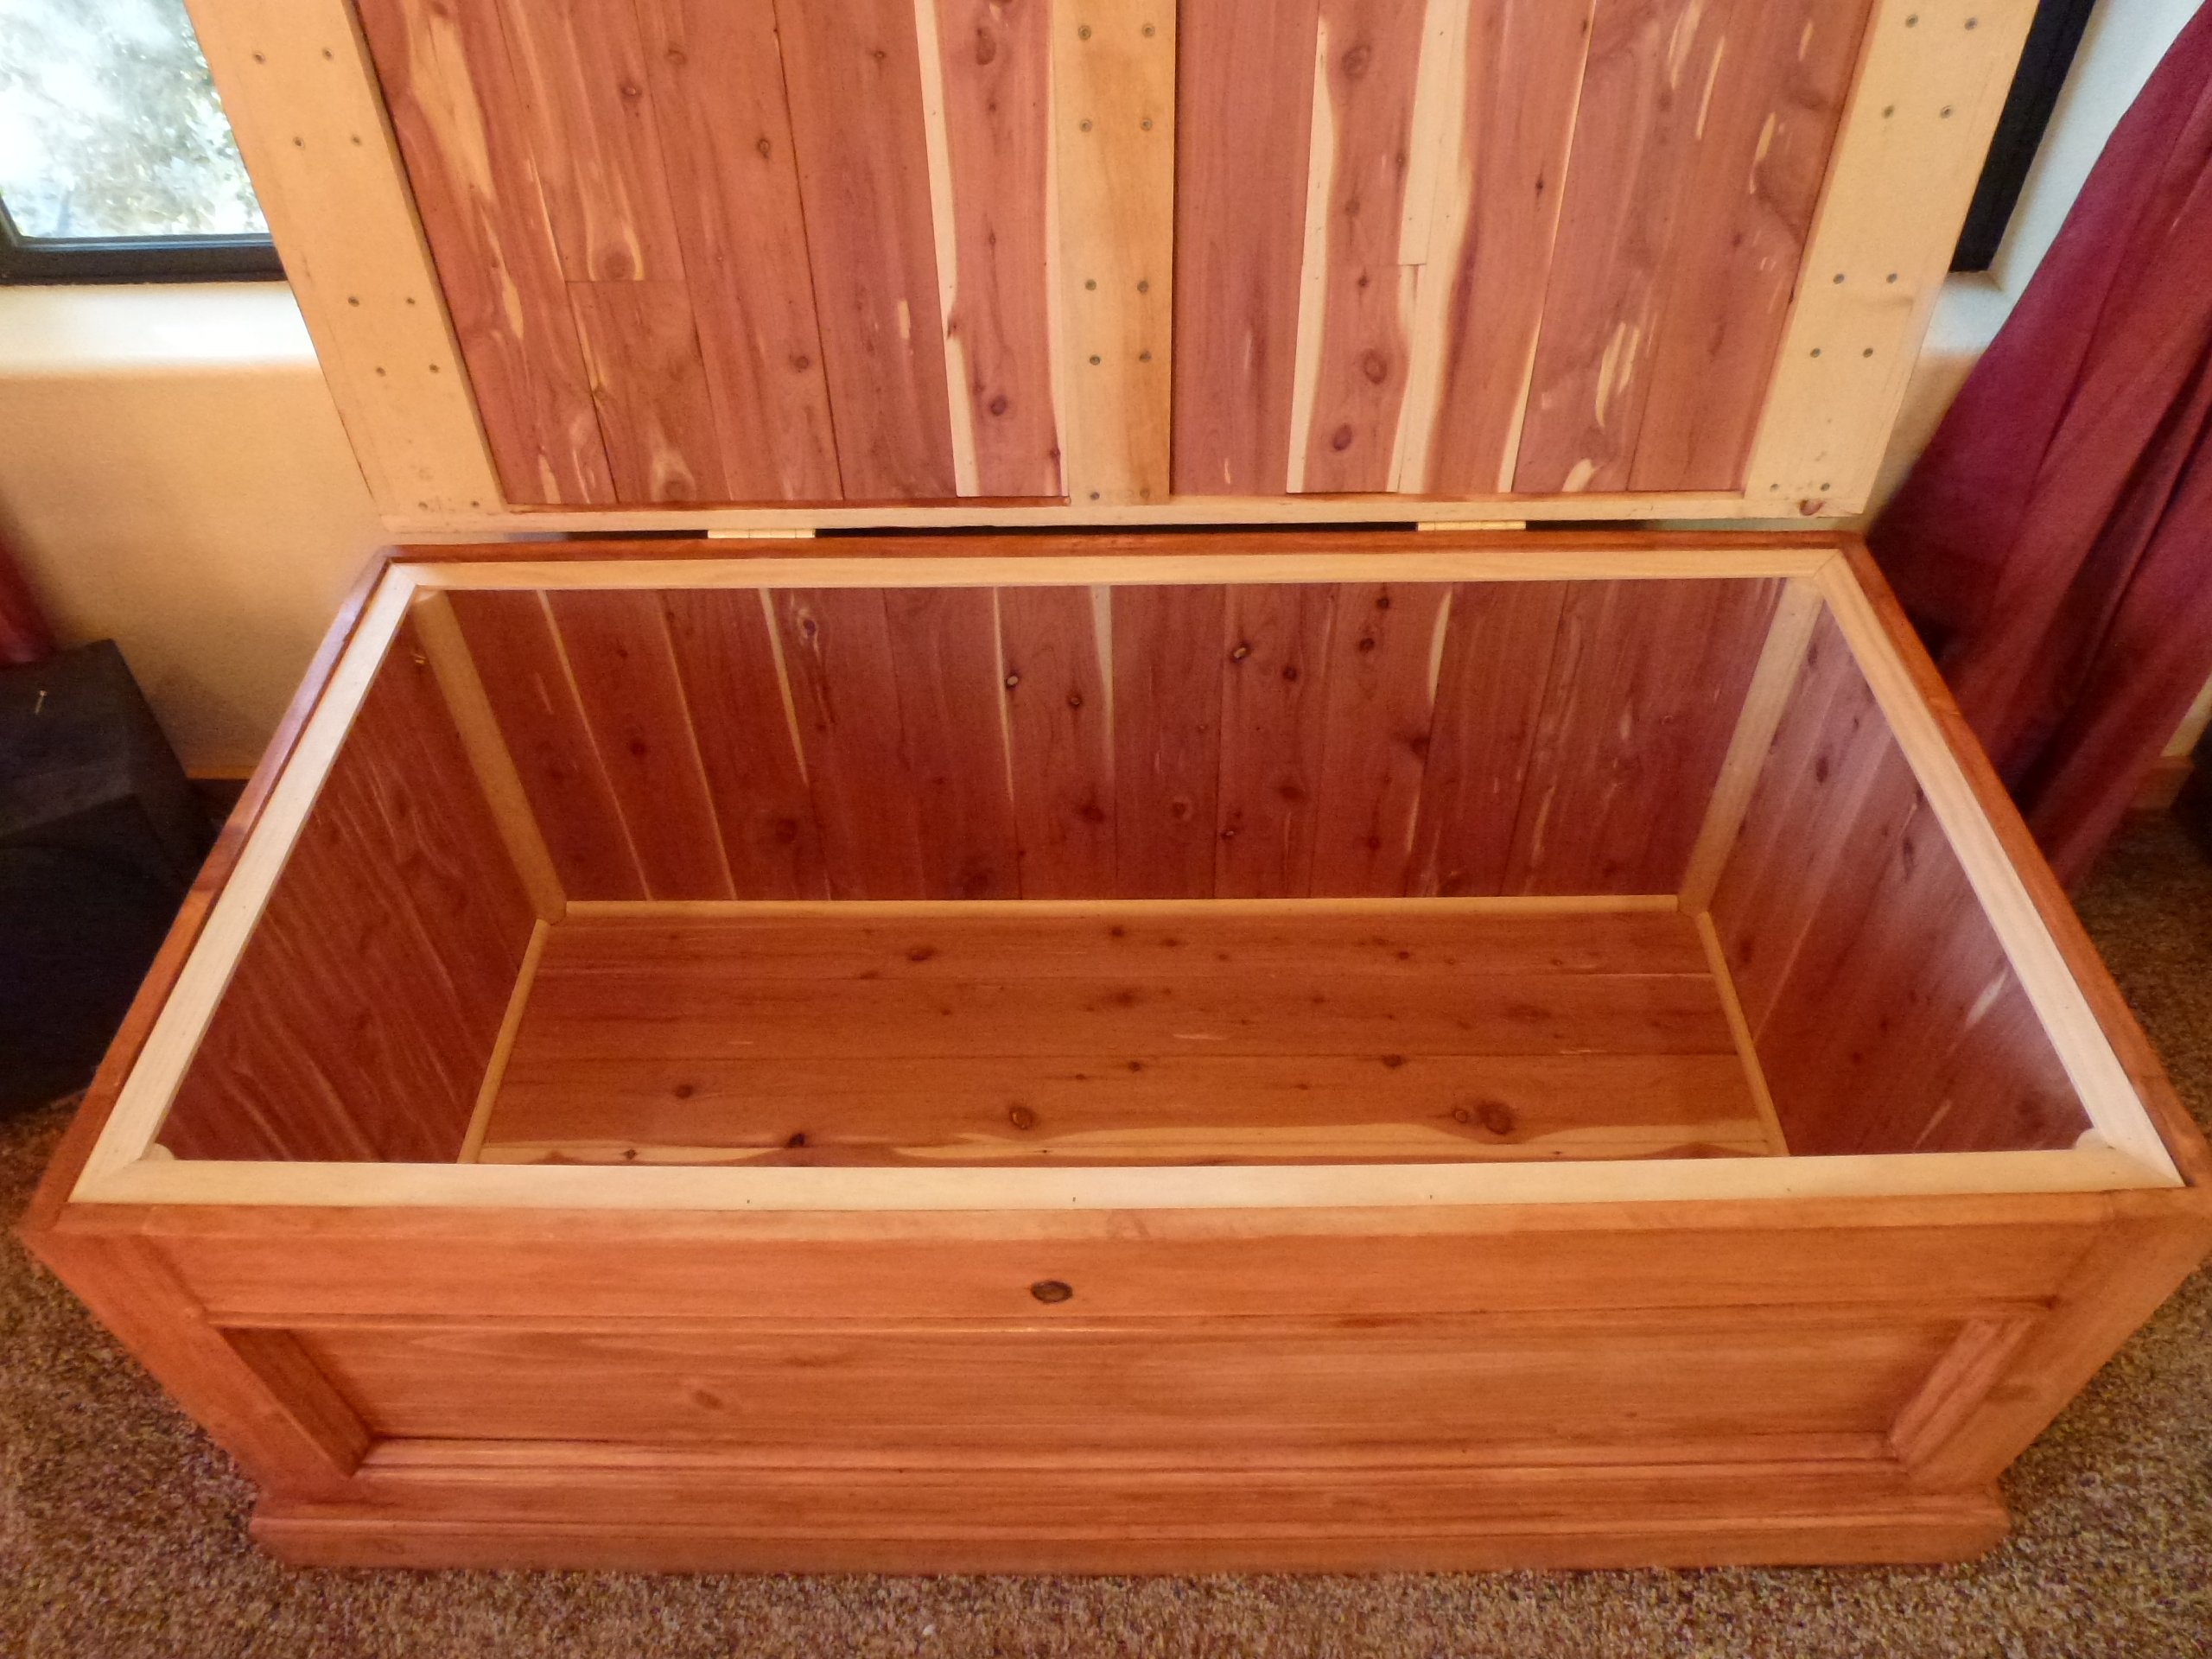
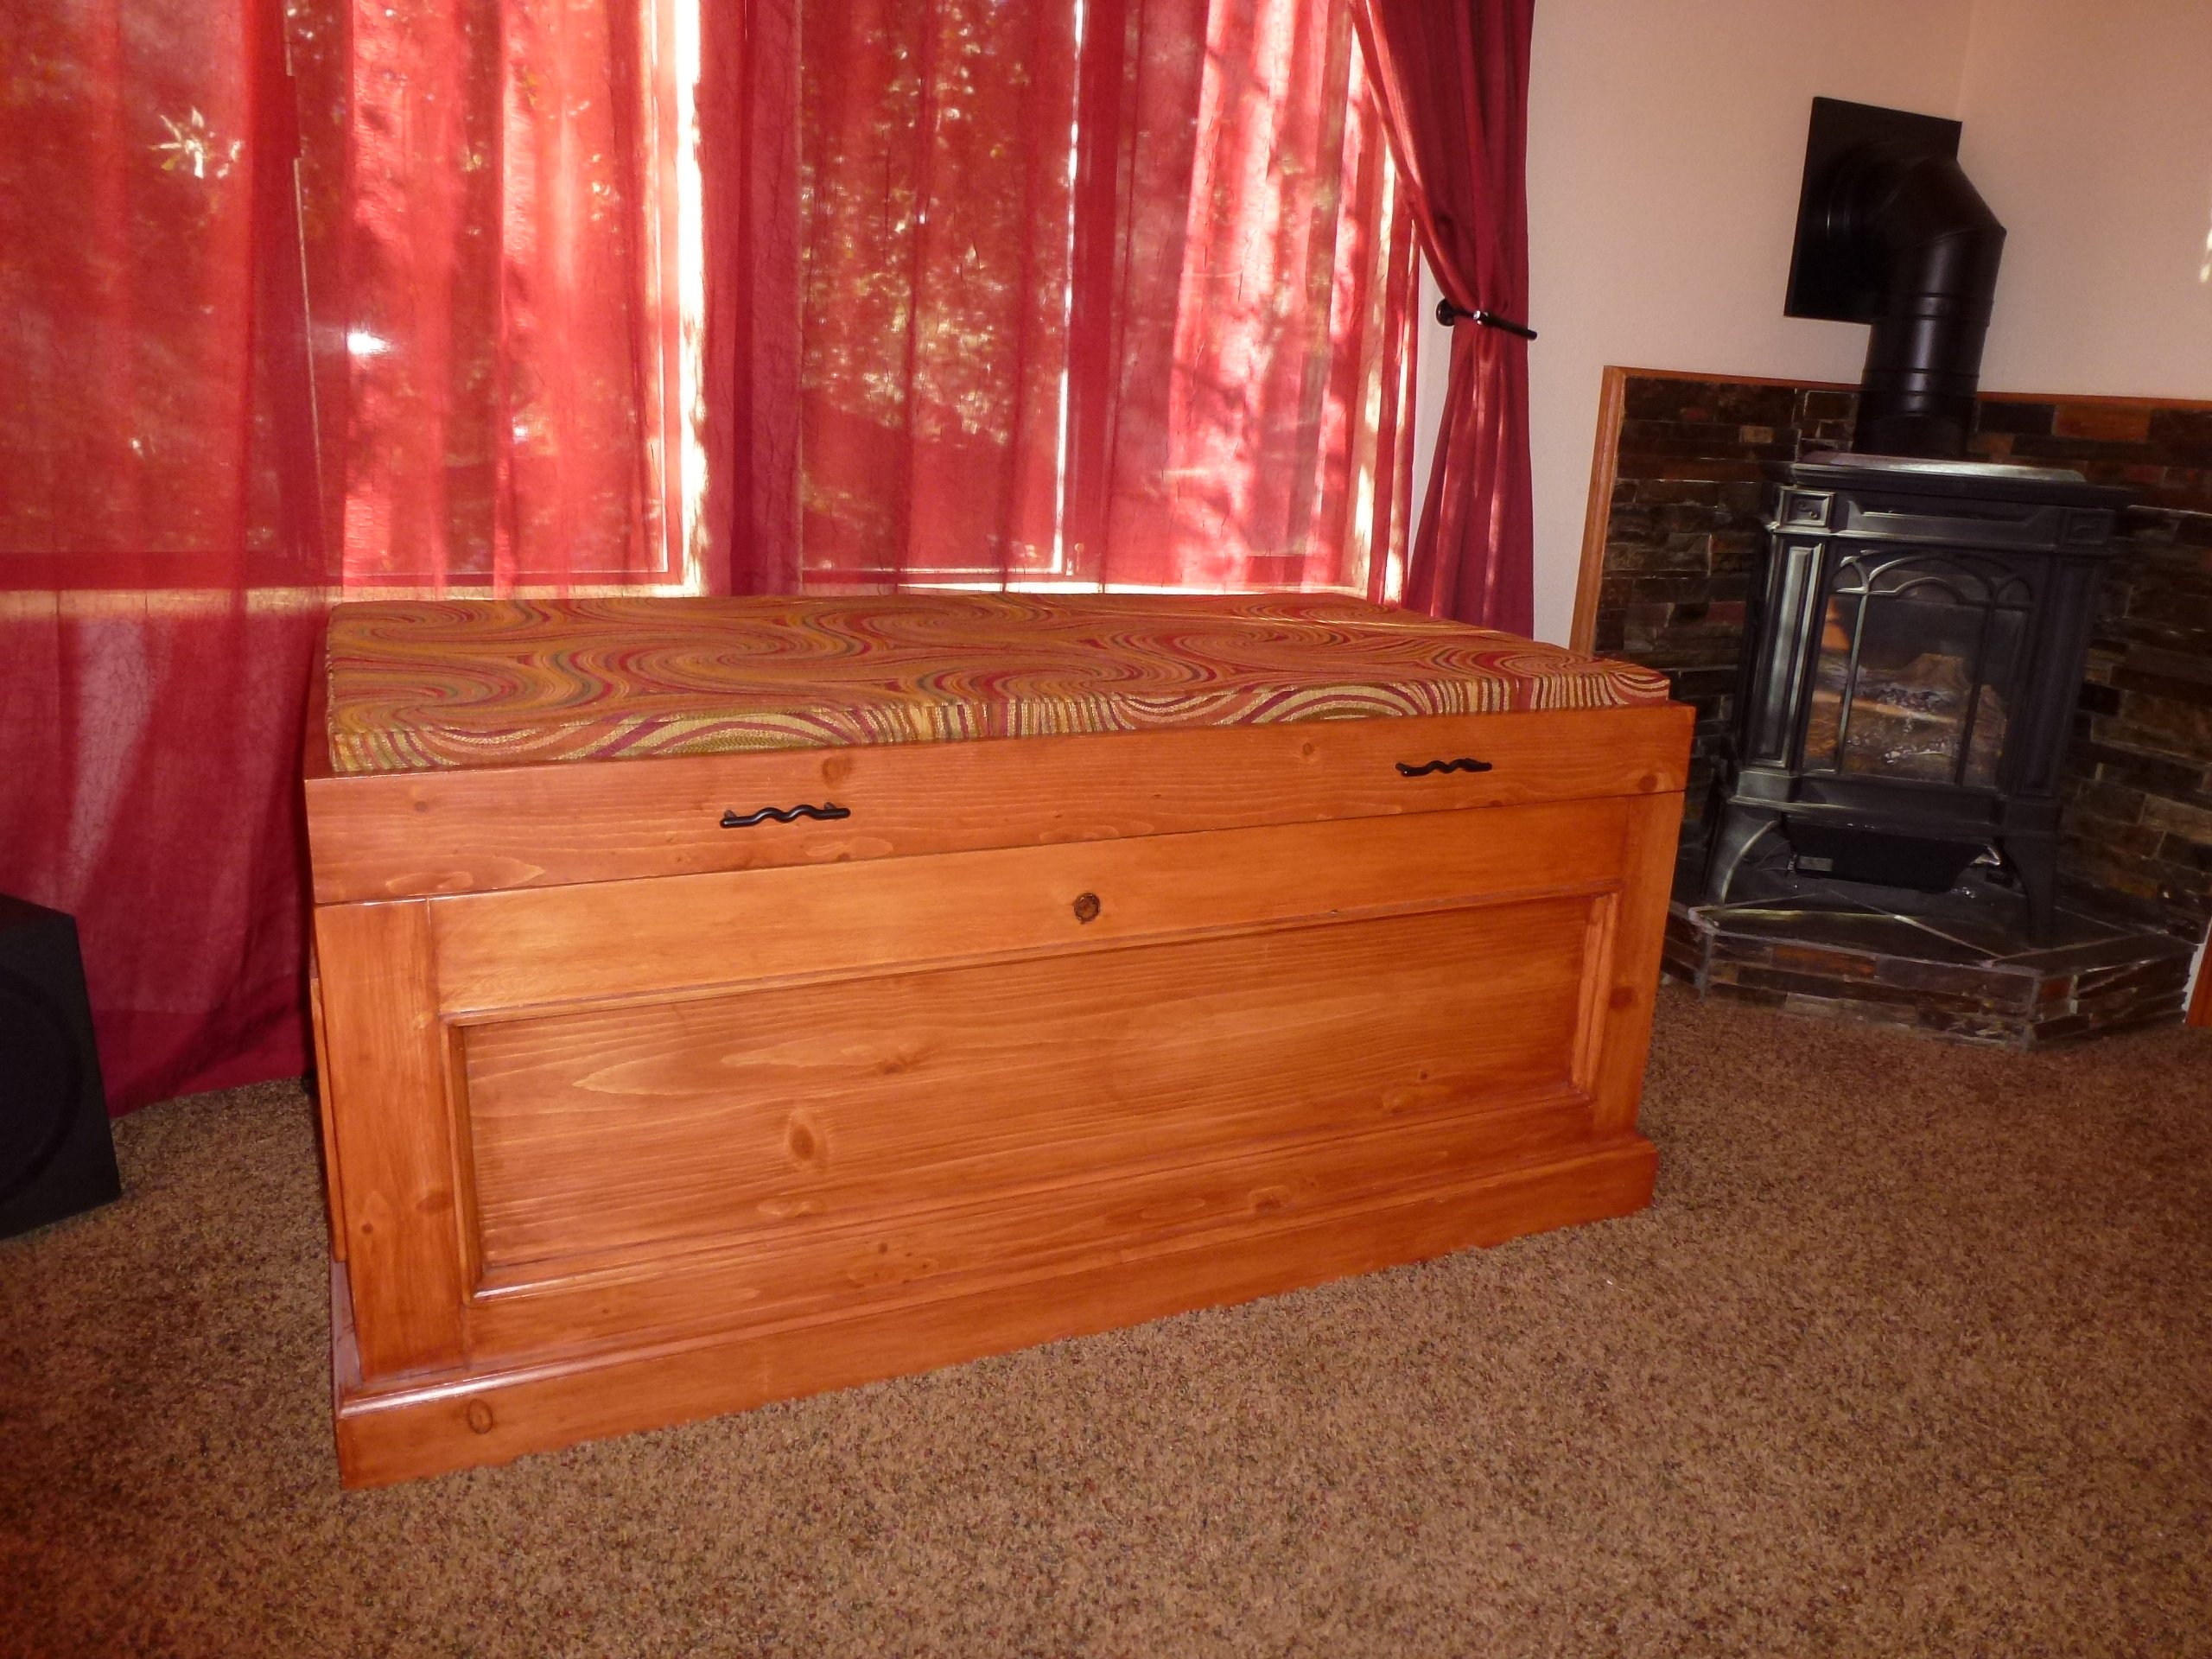
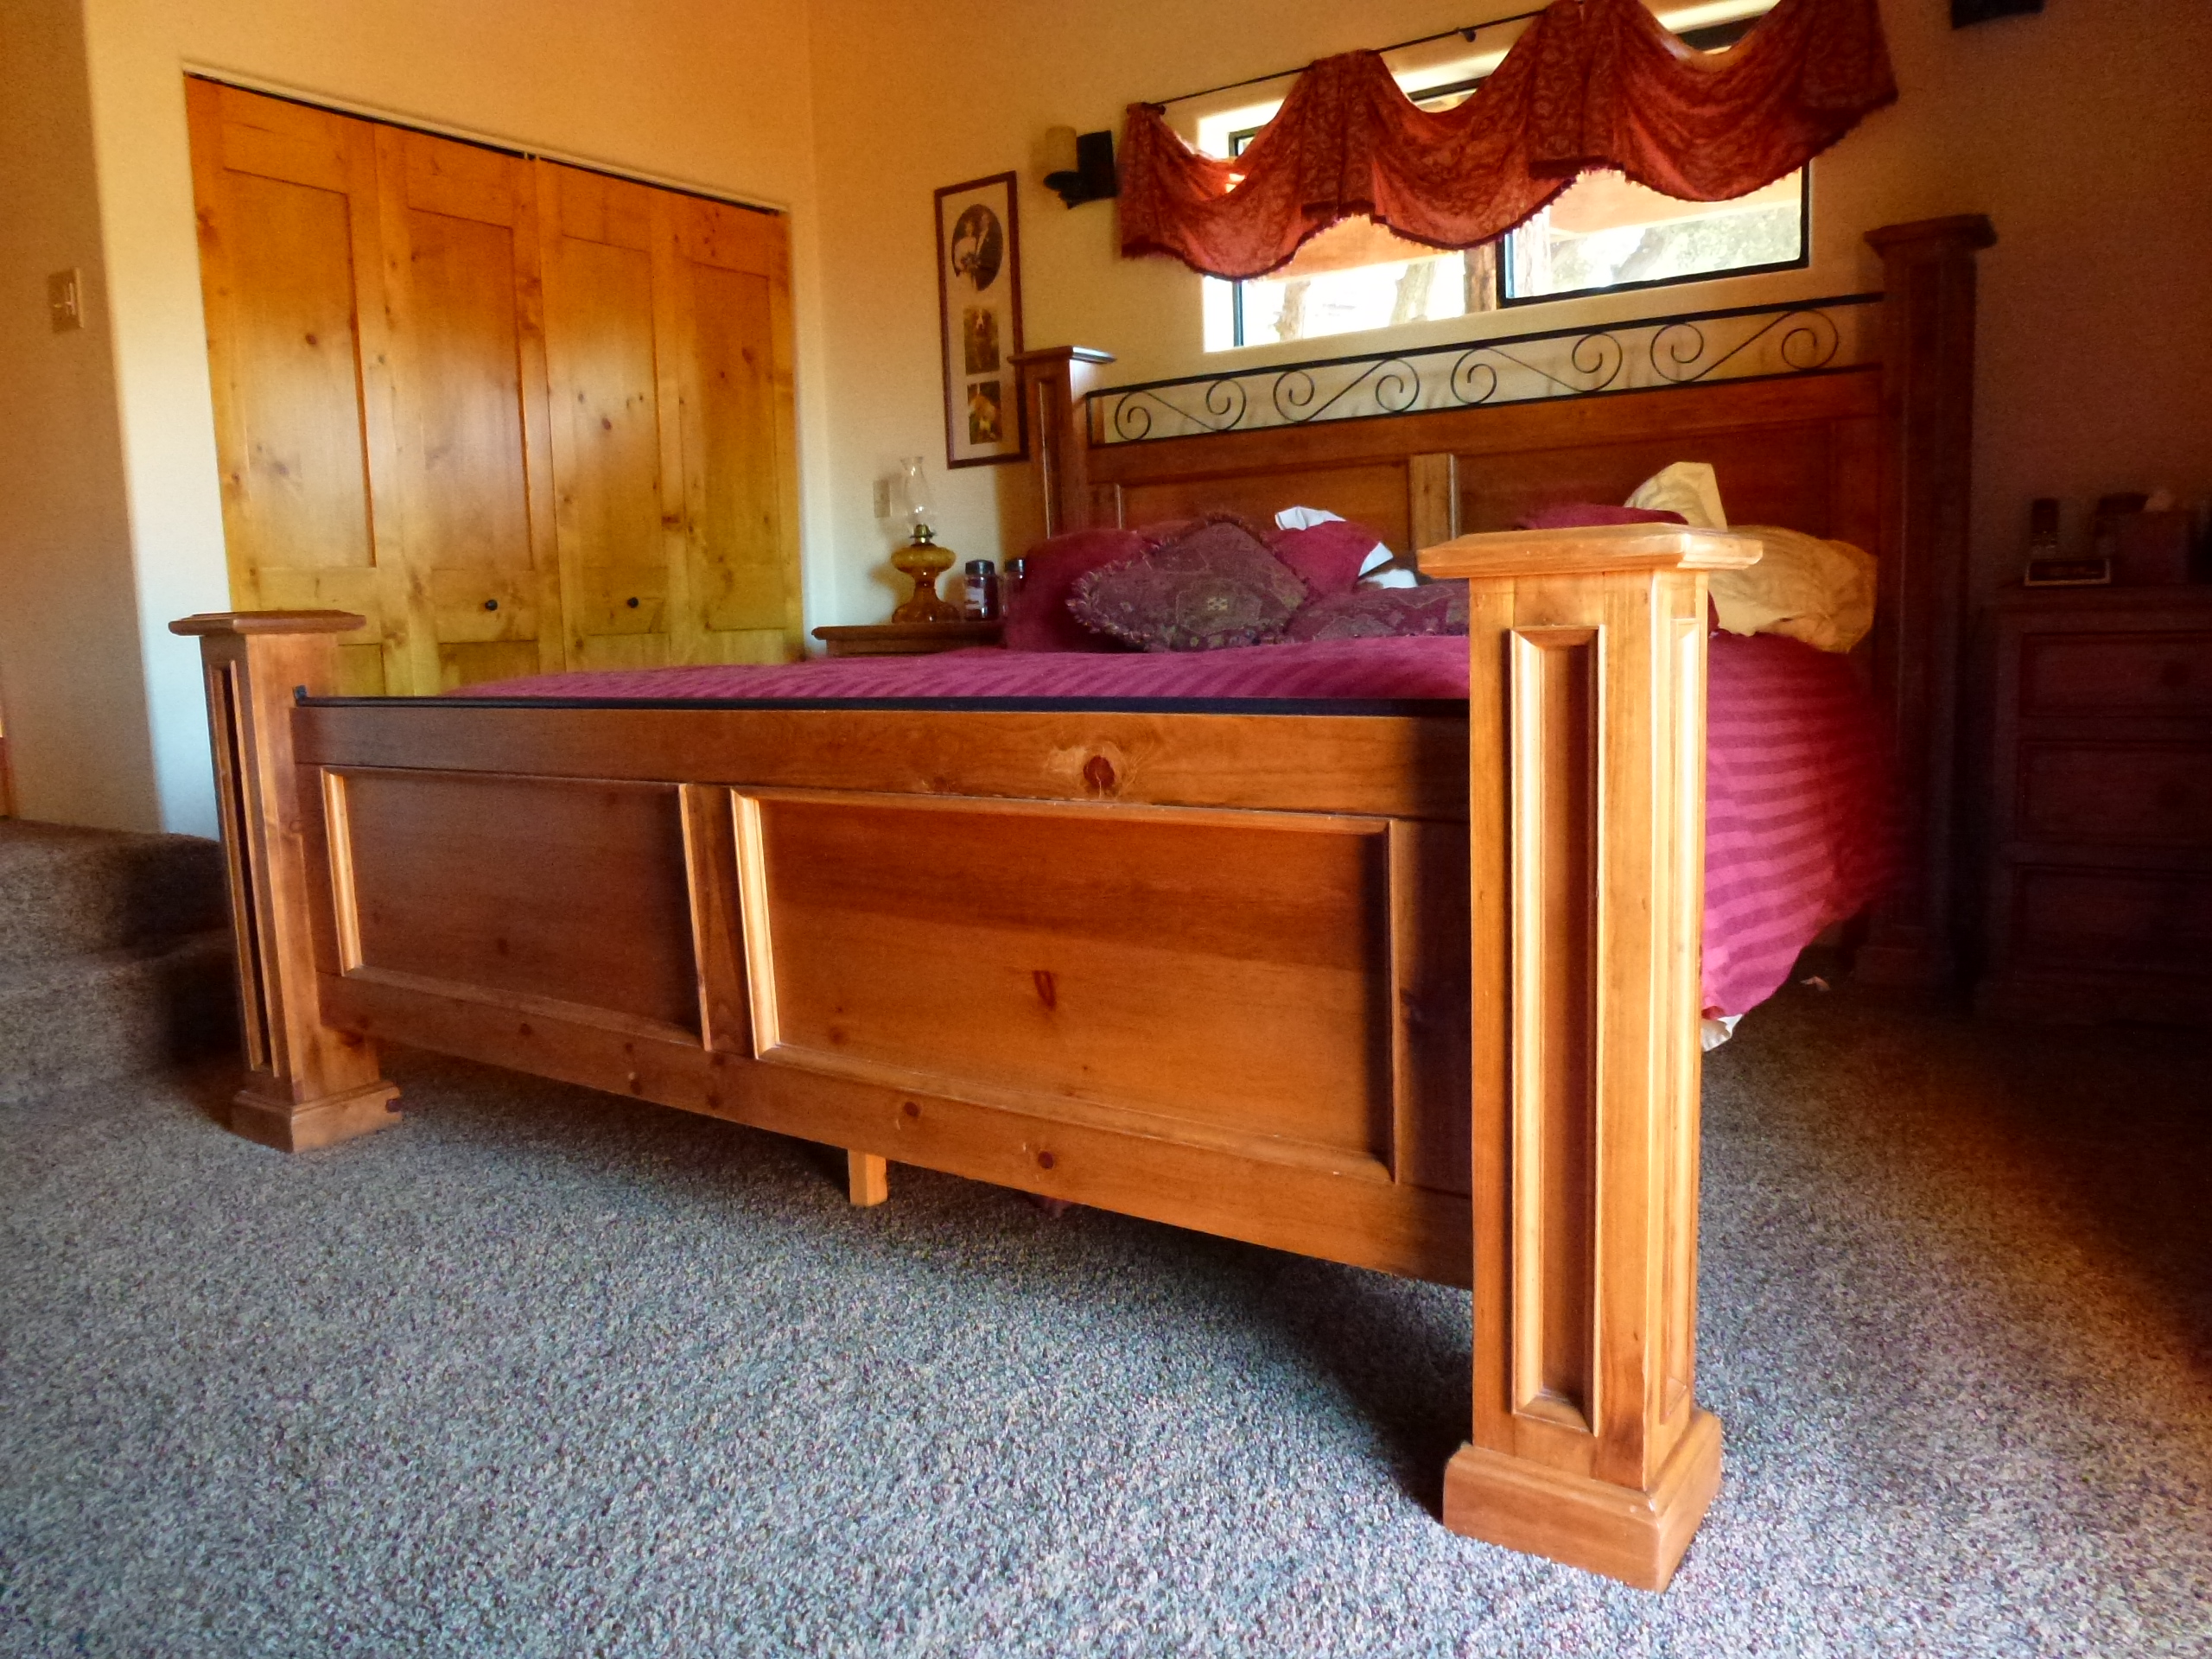
We have considered buying a cedar-lined chest to store blankets, towels, etc. for many years. However, we couldn’t find one that came close to matching the Knotty Pine bedroom set that we had in our master suite.
Hence, our design criteria was quite simple; match the bedroom set and have a chest sturdy enough to support our Beagles as they peer at the squirrels outside the window.
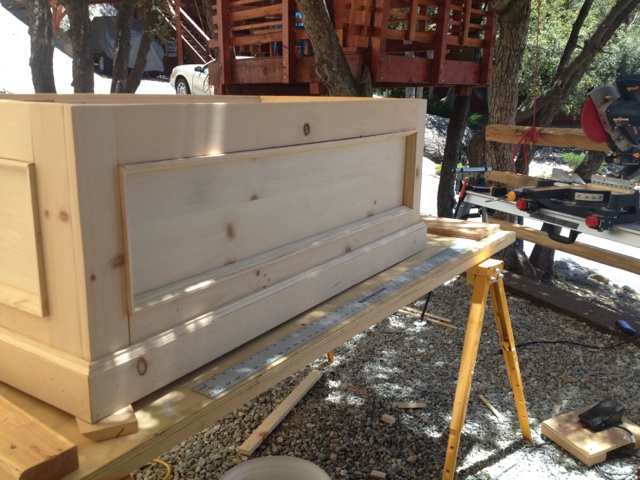
We used plans / ideas from several different chest designs which were readily available on the internet. Most of those plans were using hard woods such as oak. Those plans called for a hard wood framing with ¼” oak plywood for the panels. Since we needed to use Knotty Pine to match the bedroom set, we used 1” Knotty Pine for framing and Knotty Pine ¾ ply w/ Kreg Screws and copious glue to strengthen the construct. We finished it off with locally available 3/8” cedar T.G. planks. It is very heavy and very strong! This project was done entirely w/ Kreg Screws and no router rabbeting for the panels.
We learned the following while doing this project:
· When using soft woods, always put the power sander on the wood before you start the sander. Otherwise, you can get scratching / sander burns that don’t present themselves until staining begins.
· While very strong, ¾” plywood is very heavy!
· When using plywood, it is recommended that you stain both the visible and non-visible sides of each piece where glue is not to be applied. Otherwise the chance for delaminating increases dramatically.
60 hours work and $350 to build.
Mon, 12/15/2014 - 12:40
Beautiful chest. I better get busy and make one.

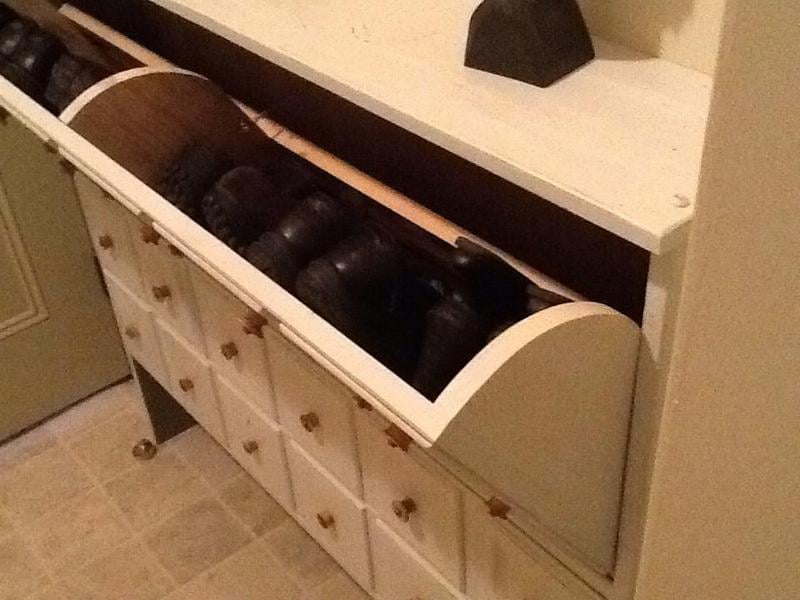
Absolutely love my new shoe cabinet! Saw the original plan on Pinterest in distressed black. Downloaded and asked hubby if he would build this for me and he did! I finished it with Colonial White oil base paint and distressed it with sand paper, hammer, steel wool and paint spatters.
One of the coolest features .... the knobs which are wooden thread spools cut in half.
The cabinet holds 11 pair of shoes and 3 pair of short boots.
Sun, 02/24/2013 - 18:01
This looks amazing! Love the style! Great work. :)
Julie
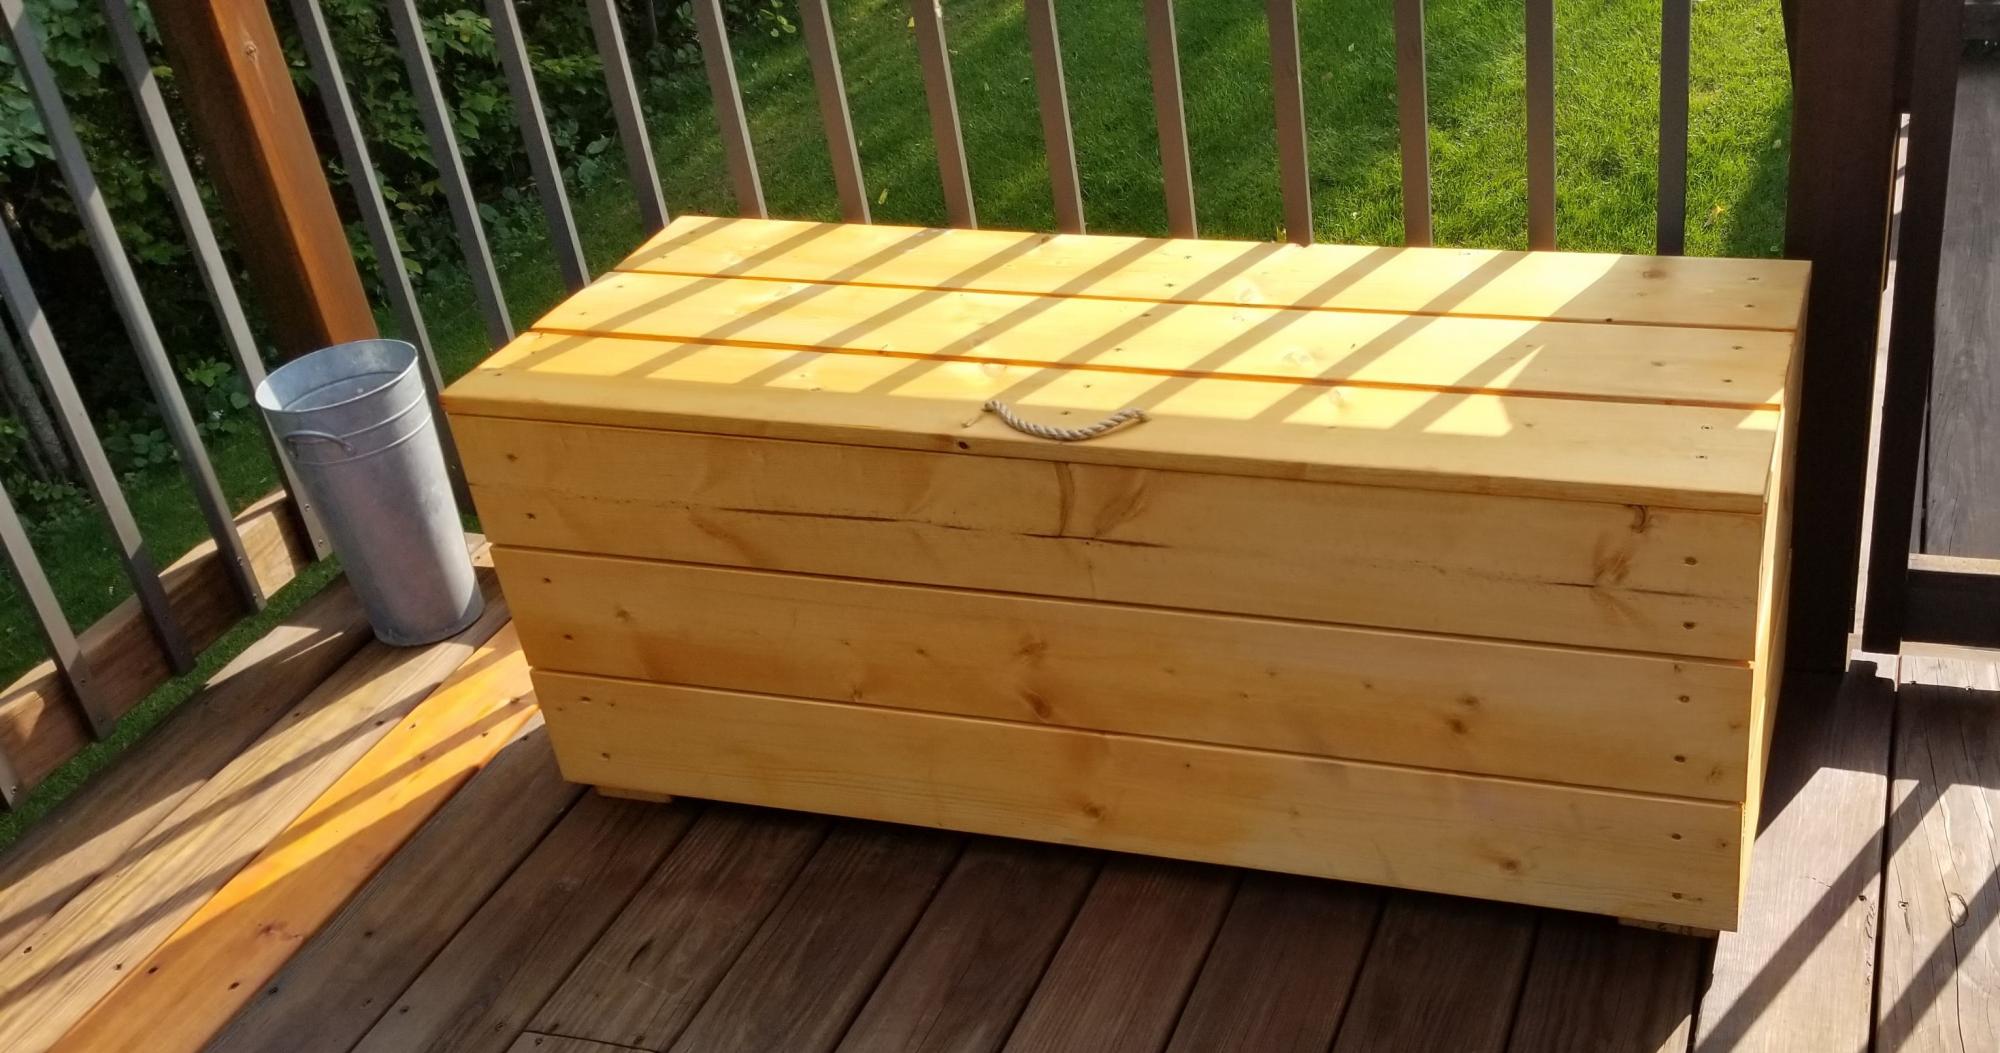
I love this dual outdoor seating plus toy storage bench. I lengthened the plans so I needed to add some additional support for the lid. I also decided to go with a rope pull which is easier for the kiddos to utilize.
Mon, 02/22/2021 - 13:08
You've been busy, love the functionality of all of your projects! Thank you for sharing:)
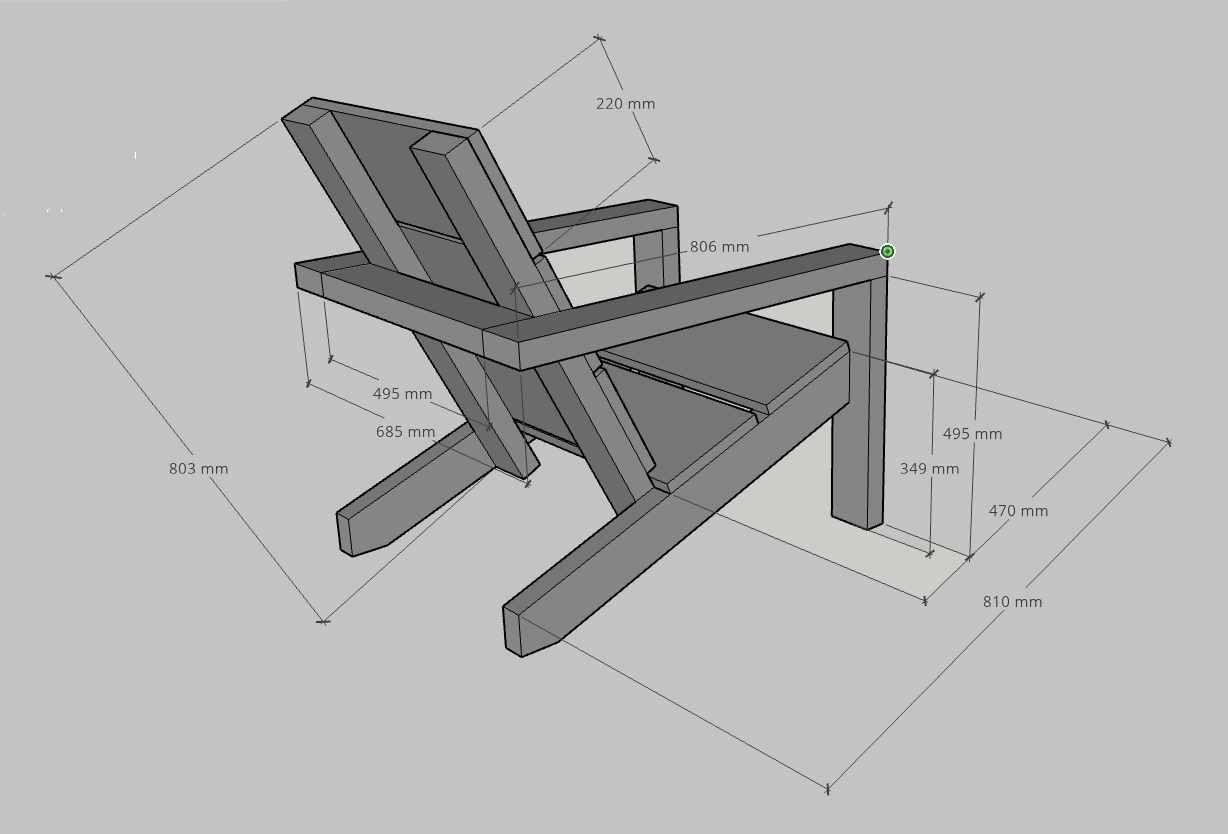
Unfortunately I didn't have the chance yet to build these amazing chairs, but in preparation I figured out what the measurements would be in mm's so I thought maybe other people would like to use it as well :-)
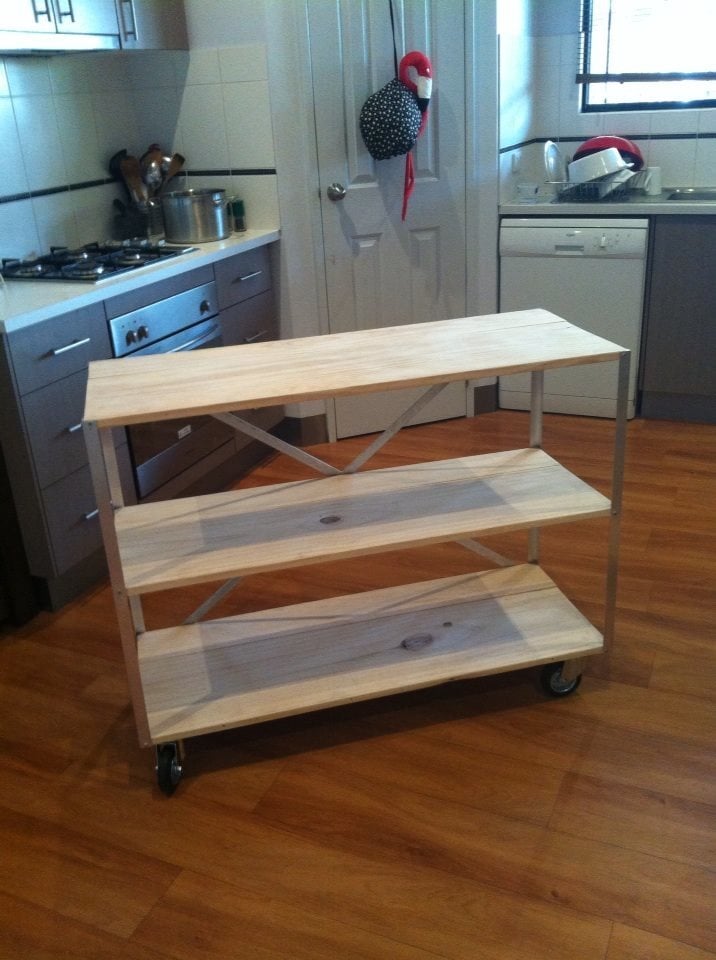
We went off the Farmhouse table and bench design but had to customize the length of the table and bench so that it fit in our kitchen space. The table was our first ever project and we made a few mistakes but learned from them and built the bench and are hoping to move up to the Farmhouse bed and then the fullstorage bed.

So a few notes... We added a base of 2x4 pressure treated wood footing around the entirety of the greenhouse which should help keep it from rotting? Blocks are an alternative here. Our lumber store didn't carry the right size of tin sheets so we added a 2x10 at the bottom which seems to work and still look okay. We picked up a 30" metal screen door there which should assist in keeping out the critters and allows us to lock out our small kiddos who might wreck the plants :) This is a great plan!!! Thank you so much! Oh - materials ran about $700 including screen door? We went through about 4 1-pound boxes of sheet metal screws and at least a large box of 3" screws?? and 2 small boxes 1.25"?? If you cut you pieces right you may end up with an extra 8' clear sheet of corrugated plastic? We spent about 20 hours building just the greenhouse but we had hauled a lot of stuff to the site by hand... We are new to carpentry and pulled this off so anyone can do this!! Dremel tool works for cutting plastic, but not as good as the tin!! Good luck and cheers!


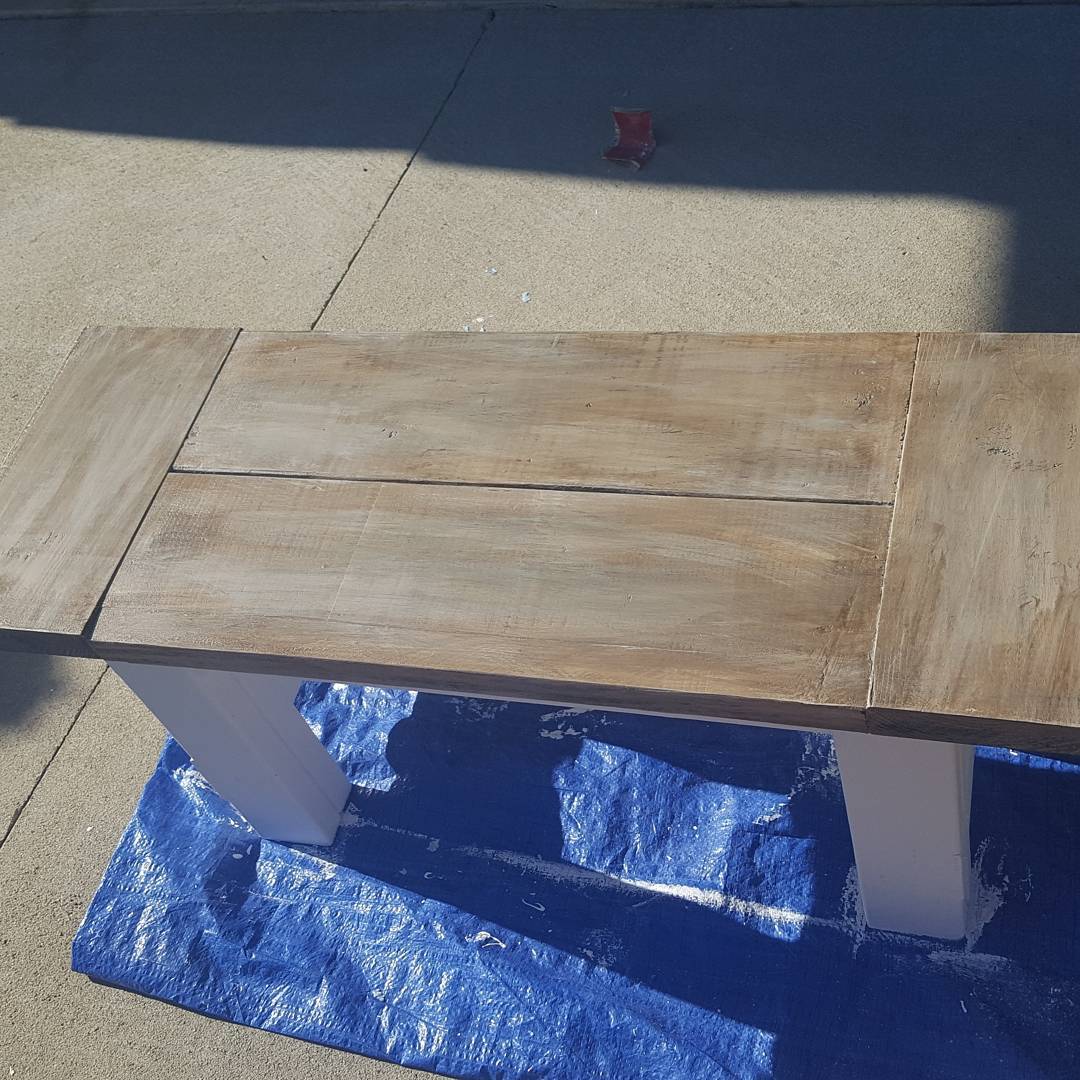
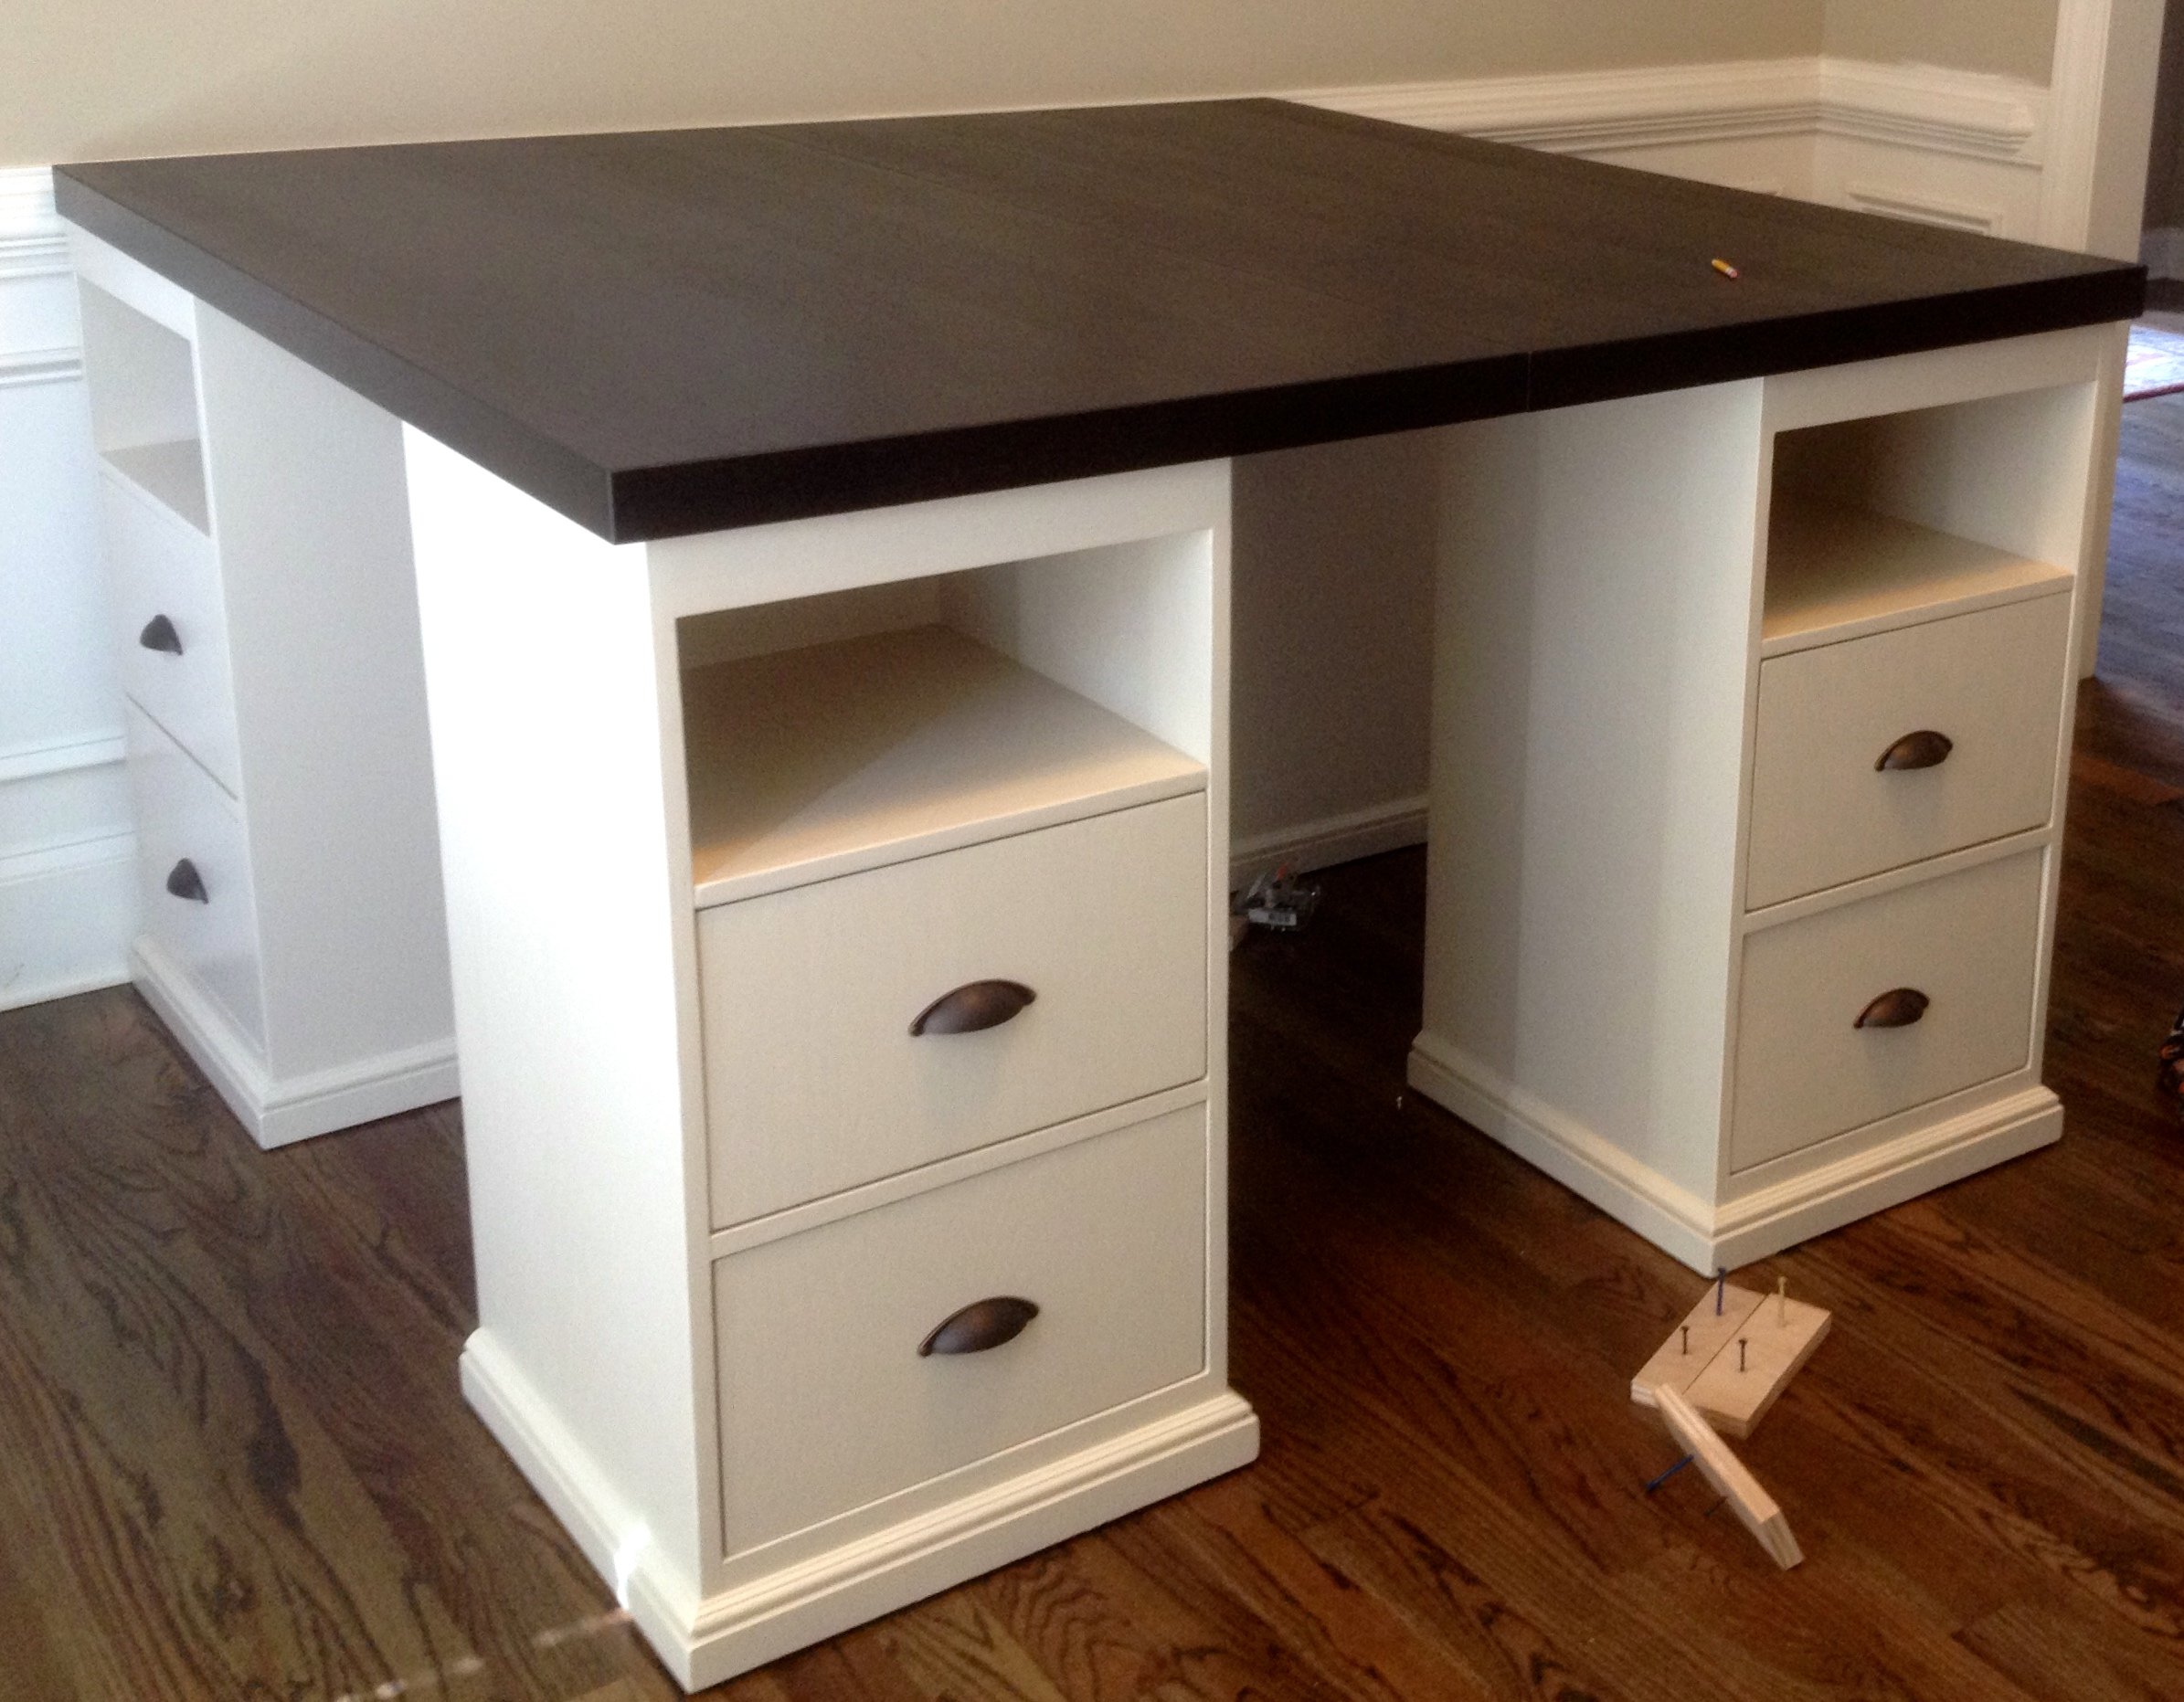
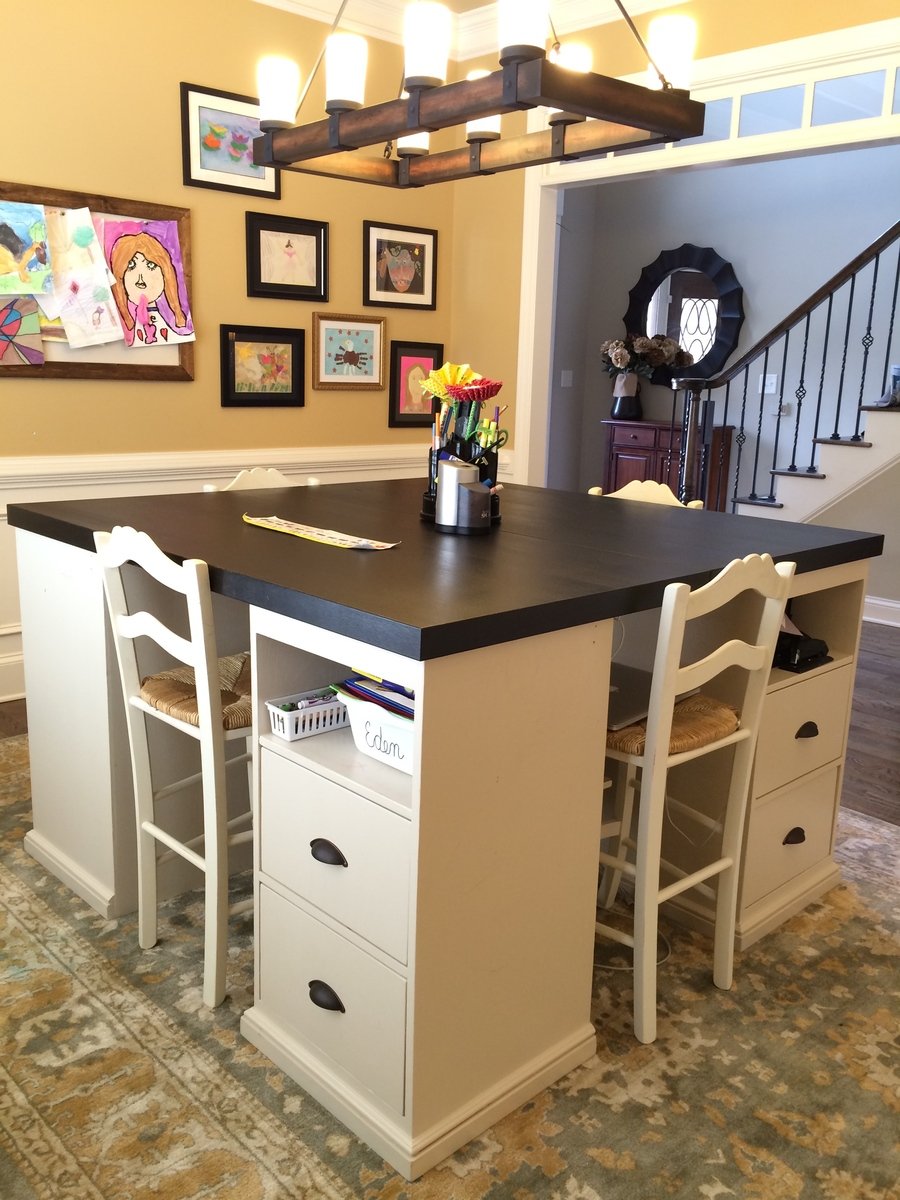
I really liked the PB mega desk, but I didn't want to spend $1600 on it. After seeing someone's post here (a couple years ago...) asking for plans on that desk, I decided to do it myself. I took these two plans and made 4 base units. They are 18" square at the top and 34" tall. I used 2 IKEA table tops connected underneath for the top, to make a total height of 36" - counter stool height. I constructed them a little differently than the plans, but no matter how you make them, the idea is the same. The plan is to take them apart and make 2 desks once everyone is too old and cool to do homework/artwork together.

Mon, 03/16/2015 - 20:39
this is really awesome! What a cool work area :)

Sun, 08/02/2015 - 11:39
Where did you get the chairs to complete your project? And how much were they?
Sat, 08/15/2015 - 04:33
Just seeing your comment...sorry for the delay! I got the stools and the light fixture at a Ballard Backroom (outlet) store near me. 3 of the stools ended up being about $40 each with the sale they had at the time, and the 4th was $60? - bought at a later time than the first 3.
Sun, 08/30/2015 - 13:54
Could we get more detail on how this was built? The base units, for instance.
Thanks!
Wed, 11/04/2015 - 07:40
How did you connect the table tops from the bottom so that the tables were secure together? I'm curious what's the best way to do this. Since two of the four seats will be where the seam is, I want to make sure I secure it properly so it's not wobbly. Thanks so much.
Sat, 01/09/2016 - 05:06
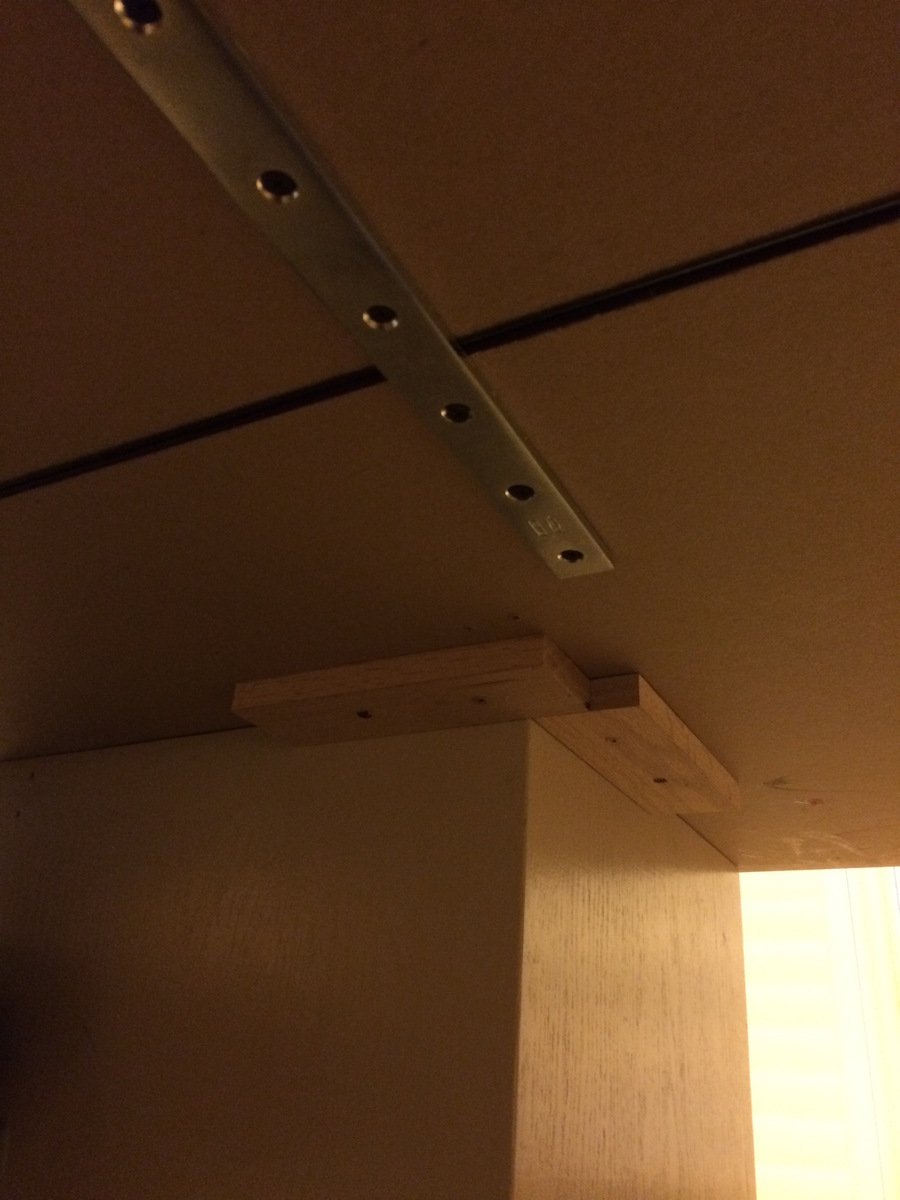
I'm just seeing these latest comments for the first time, so you may have long finished this project already! The tops were surprisingly sturdy but I did reinforce them. I placed the tops on the floor upside down and screwed some metal brackets (about 12" long each) across the joint in four places. I just screwed them in through holes already in the brackets. This wasn't the most stable because those tops are particle board and don't hold screws very well... But since it was already pretty sturdy, I figured it would do. It has been fine, even with standing on the top (kids who get up there and me hanging the light fixture above).
Once the tops were joined, I placed the bases so there was about a 1" overhang on the top. To hold the top in place, I used small pieces of wood screwed to the underside of the top at the inside corner to act as a placement stop. The top is pretty big and heavy even though they are IKEA tops, so they don't have a tendency to move or slide at all anyway. I'm going to try to figure out how to post another picture of the braces and corner stops...we'll see if I can do it! Let me know if you have any more questions...again, sorry I didn't see this in a more timely manner!
Sat, 01/02/2016 - 05:55
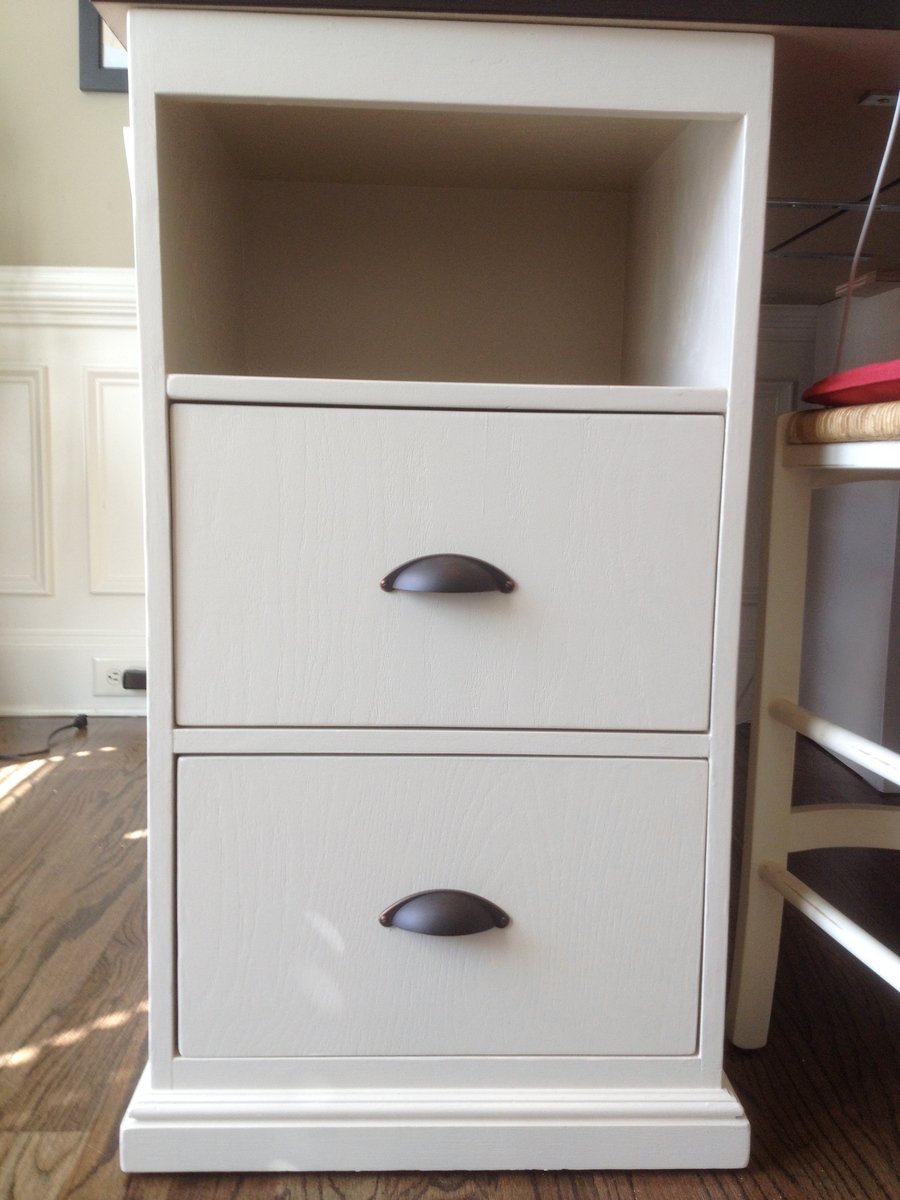
Is the photo above the Pottery Barn version or your product result? I'm trying to figure out the dimensions for the drawer and shelf configurations. Thanks! BTW, I'm totally addicted to your style and personality...my husband loves the productivity inspiration I've received. :-)
Sat, 01/09/2016 - 10:17
Hi!
I'm glad you like the desk! The one in the picture is the one I built, not the pottery barn one! My dimensions were a good bit different than the PB desk - square bases instead of rectangular and counter stool height instead of desk/table height. So, I have no idea if I have my plans for this anymore, so I went and measured it again for you!
So each base is 18" x 18" square and 34" high so that with the 2" top the total height is 36".
Each base was made of oak plywood that made with 3 sides, a top and a bottom. All edges were rabbit joints (3/8" deep in thickness of boards and probably 3/8" wide - not 100% on width of rabbits). It's kind of a pain to do rabbit joints if you don't have a dado blade for your table saw, so you could use pocket hole screws instead. I glued and nailed these joints with a finish nailer, I believe.
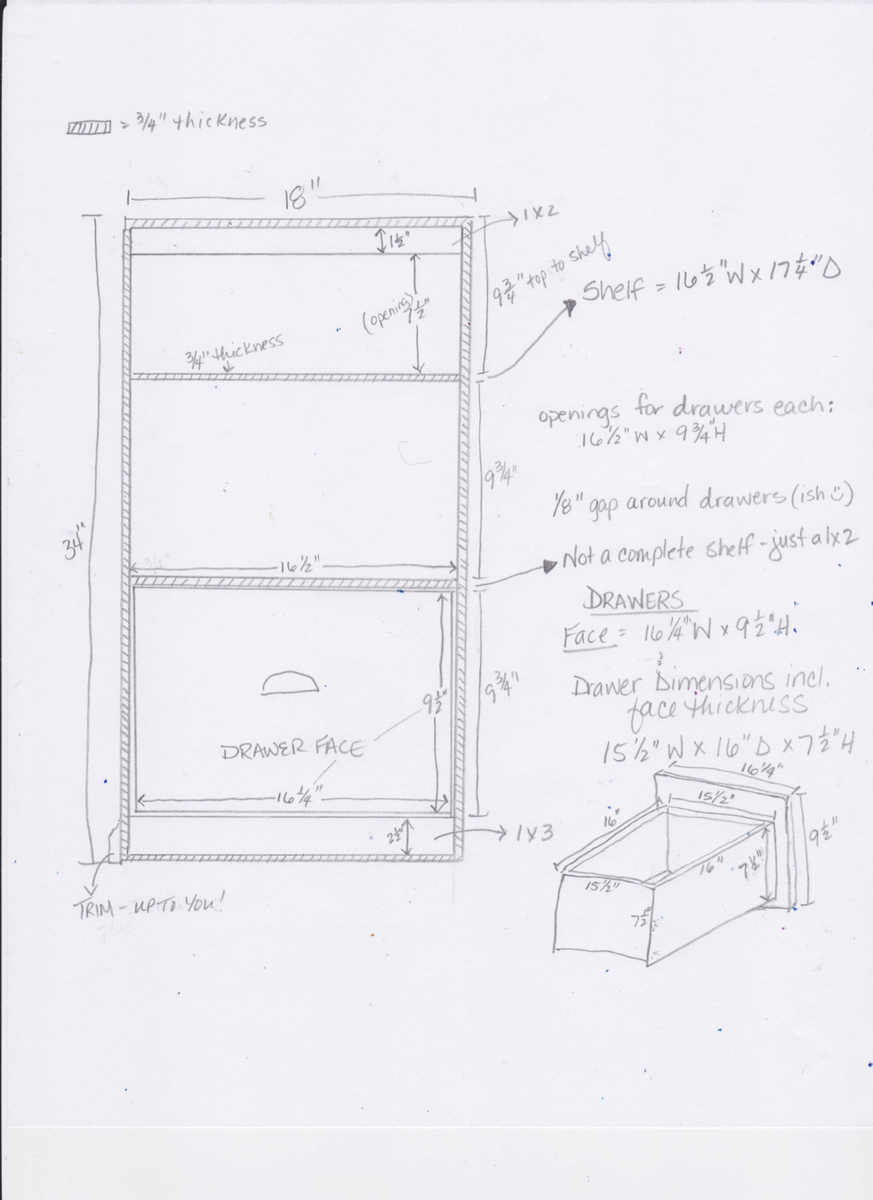
I figured a diagram with measurements would be easier than trying to write descriptions...so I'm adding another pic with the dimensions outlined. Drawing is NOT to scale, so sorry about that! I really need to learn to use SketchUp. Let me know if you have any questions!
Sat, 01/09/2016 - 07:57
Hi!
I'm glad you like the desk! The one in the picture is the one I built, not the pottery barn one! My dimensions were a good bit different than the PB desk - square bases instead of rectangular and counter stool height instead of desk/table height. So, I have no idea if I have my plans for this anymore, so I went and measured it again for you!
So each base is 18" x 18" square and 34" high so that with the 2" top the total height is 36".
Each base was made of oak plywood that made with 3 sides, a top and a bottom. All edges were rabbit joints (3/8" deep in thickness of boards and probably 3/8" wide - not 100% on width of rabbits). It's kind of a pain to do rabbit joints if you don't have a dado blade for your table saw, so you could use pocket hole screws instead. I glued and nailed these joints with a finish nailer, I believe.
I figured a diagram with measurements would be easier than trying to write descriptions...so I'm adding another pic with the dimensions outlined. Drawing is NOT to scale, so sorry about that! I really need to learn to use SketchUp. Let me know if you have any questions!
Wed, 06/22/2016 - 15:26
Can you buy the bases from ikea? or did you build them from scratch?
Thu, 07/28/2016 - 14:13
No you can't buy them from Ikea. I bought the table tops from Ikea, but I built the bases. The dimensions for the bases are in one of the additional pictures with the post if you want to see them!
Mon, 10/10/2016 - 07:41
What are the total dimensions of the table top? Thinking of building something like this, but want to make sure it will fit in my space.
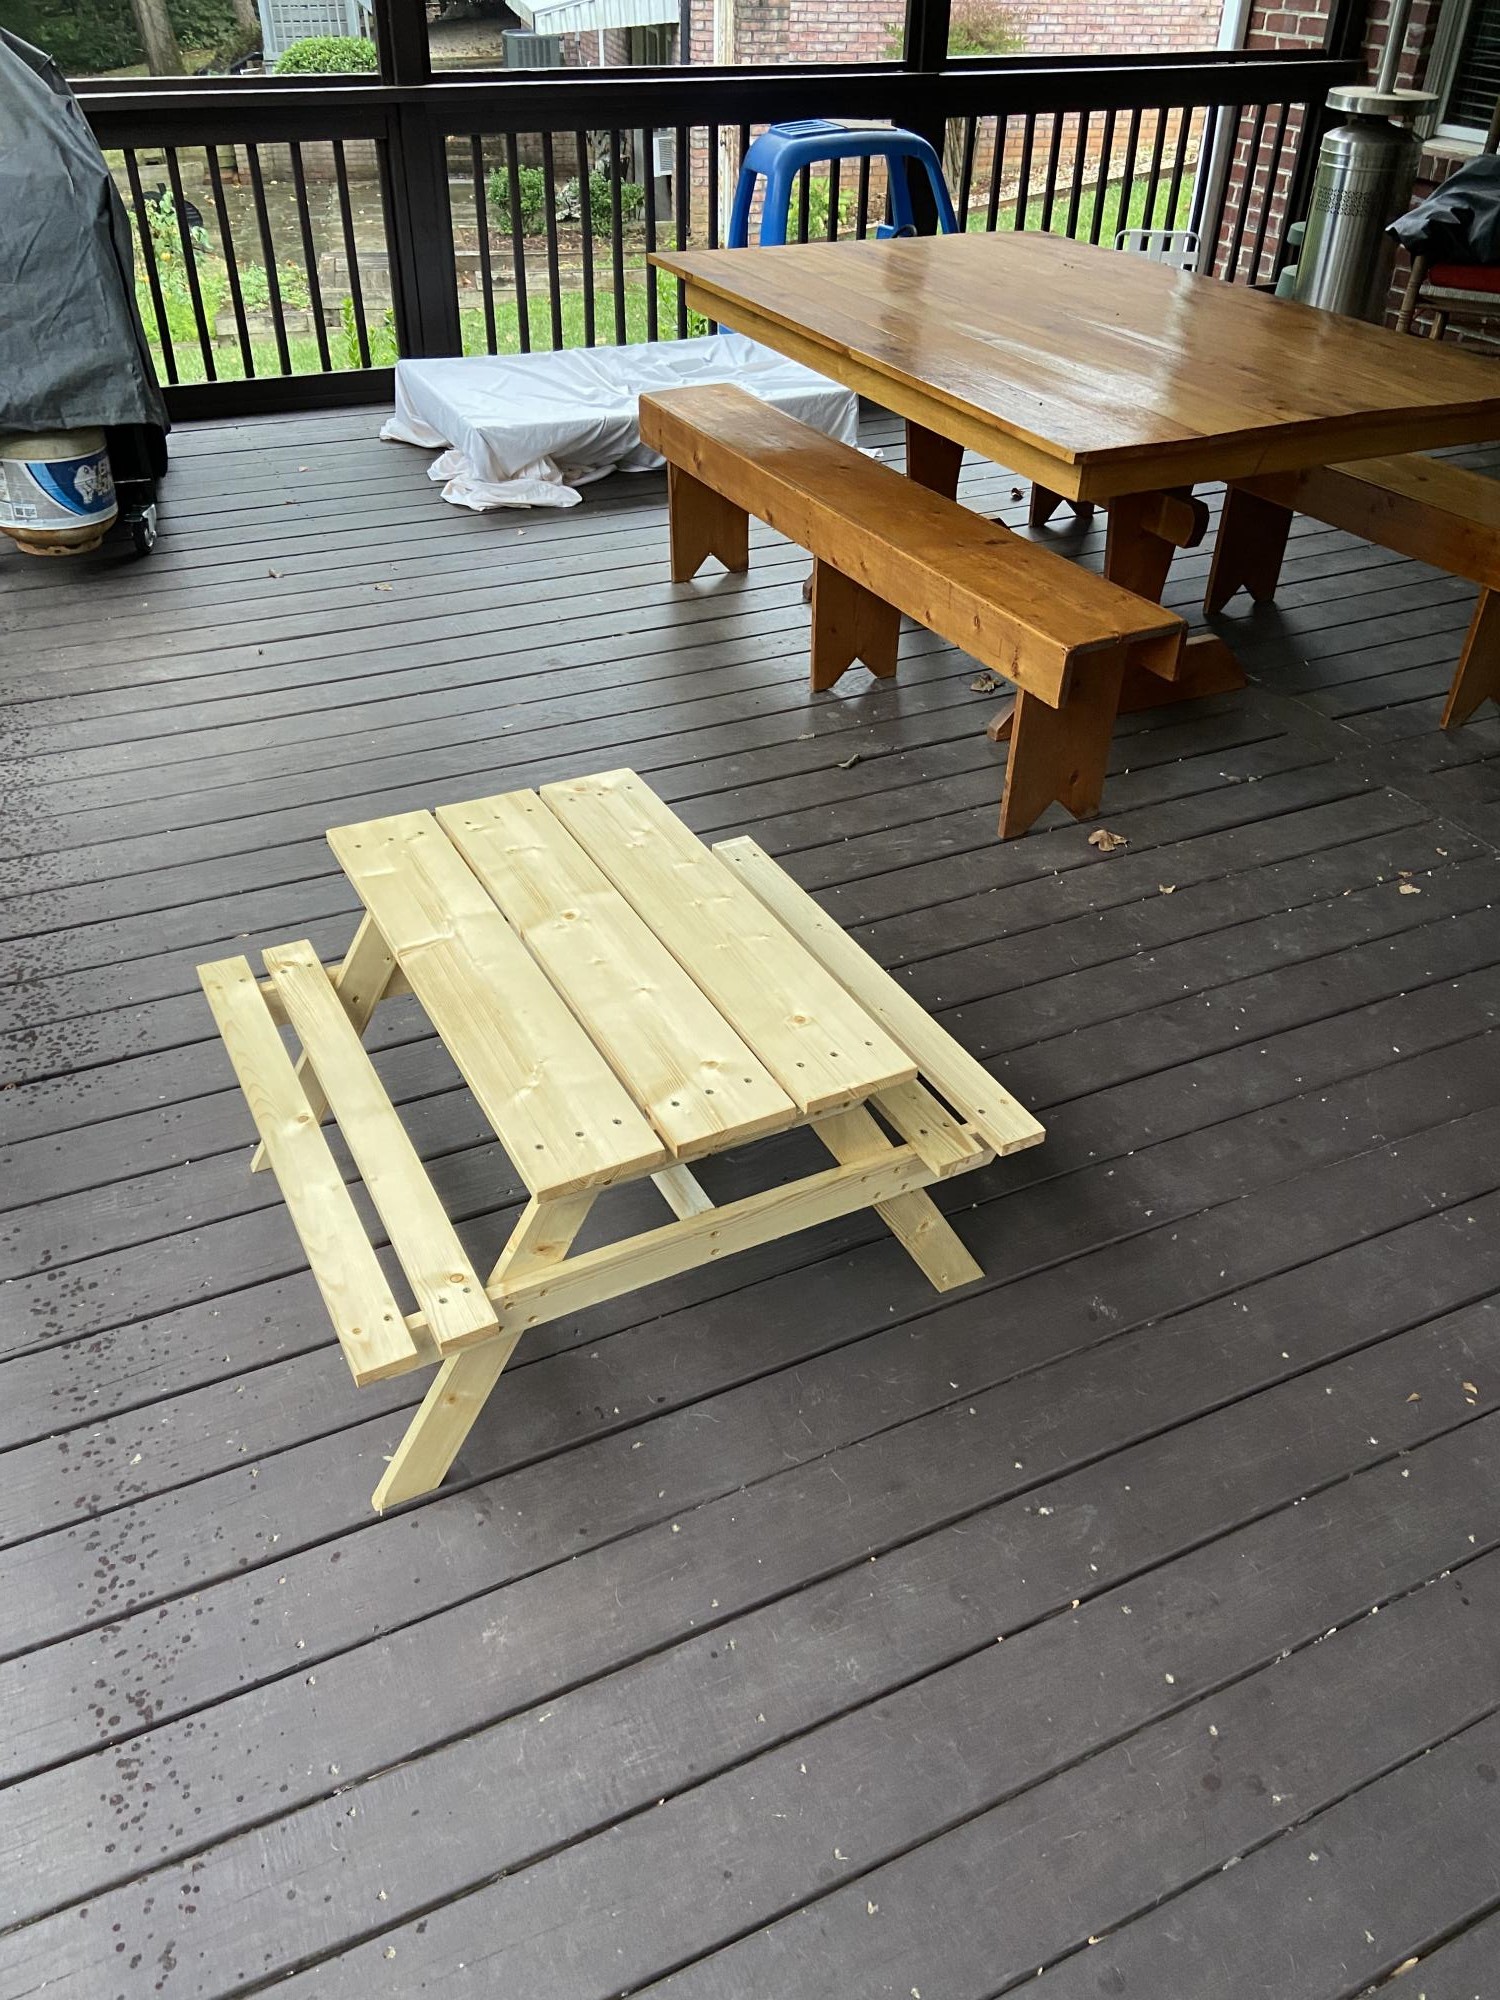
Our grandsons live 10 hours away. I always try to make something for them when they visit. When we saw them a few weeks ago they needed a table their size!
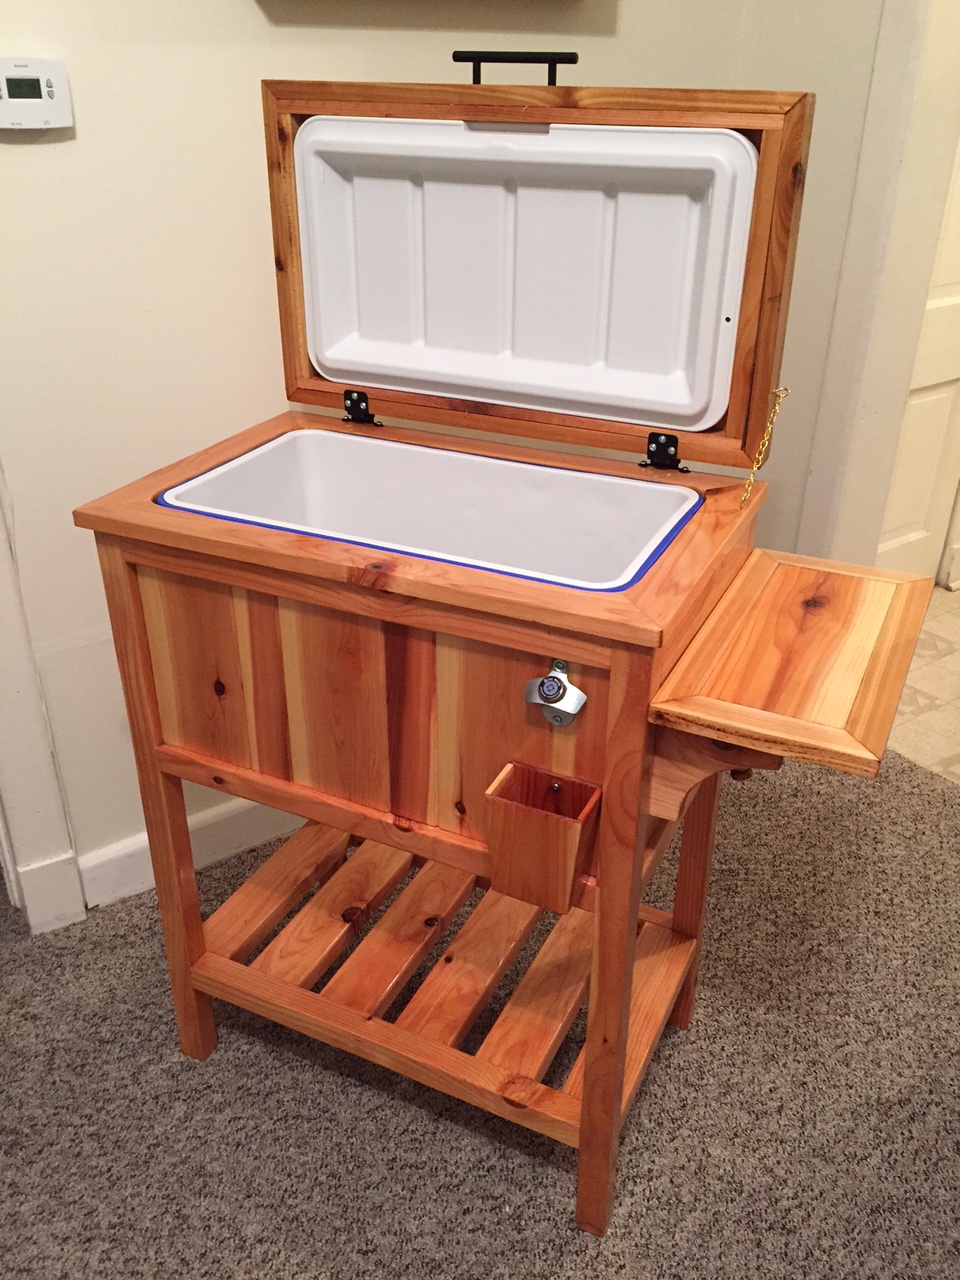
This is the cooler stand presented by Jenny from Birdsandsaoap. Very easy to build and always ends up with someone asking to buy it or have you make them one.
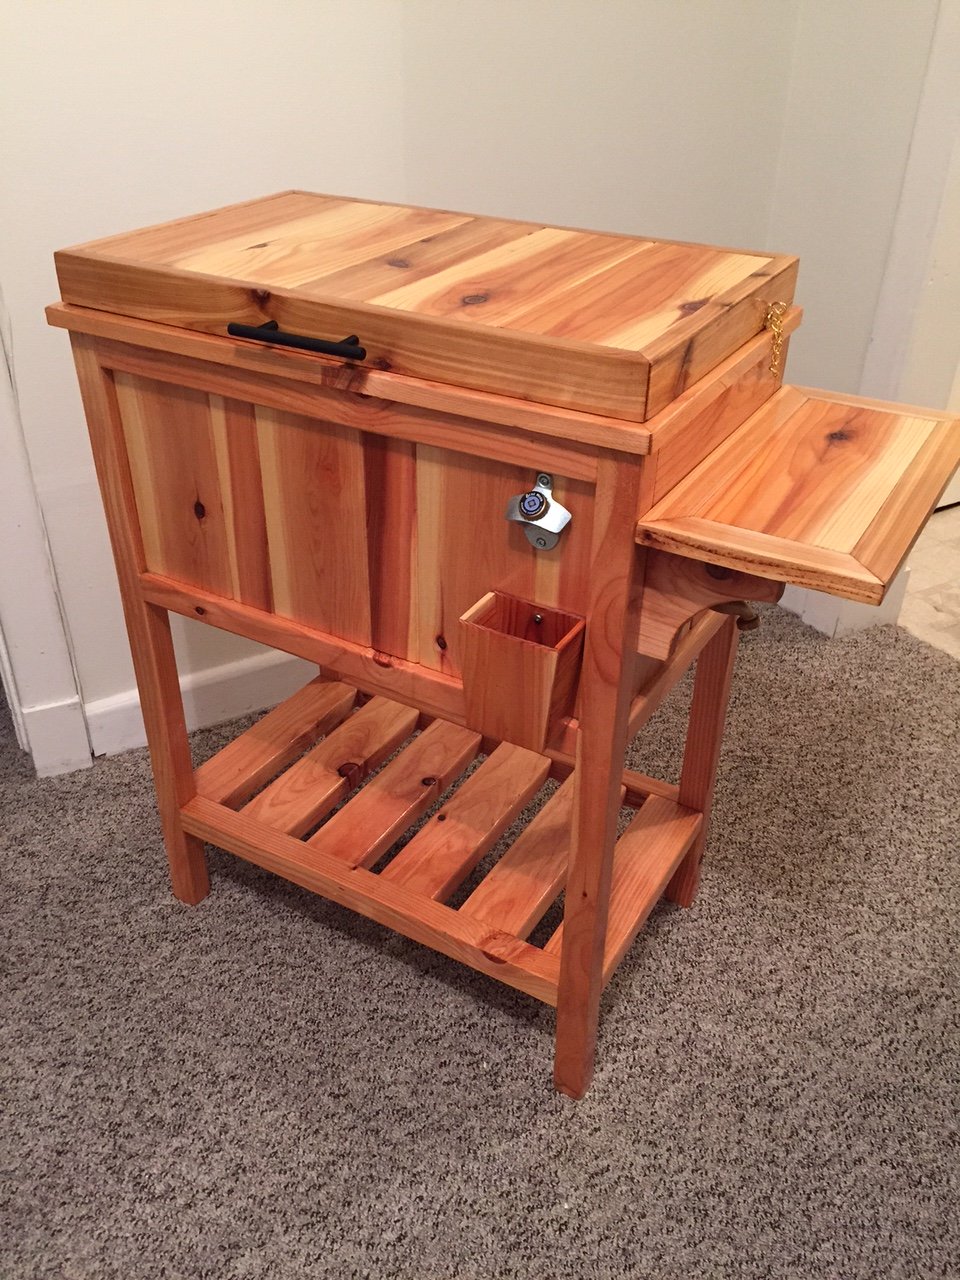
Wed, 06/10/2015 - 11:34
The plans for this can be found at the following web adress: http://ana-white.com/2013/06/plans/wood-cooler-birds-and-soap
Hope this helps
Wed, 09/21/2016 - 08:07
New to this site. How do I get the plans for the Wooden Cooler Stand?
Thank you!


