Community Brag Posts

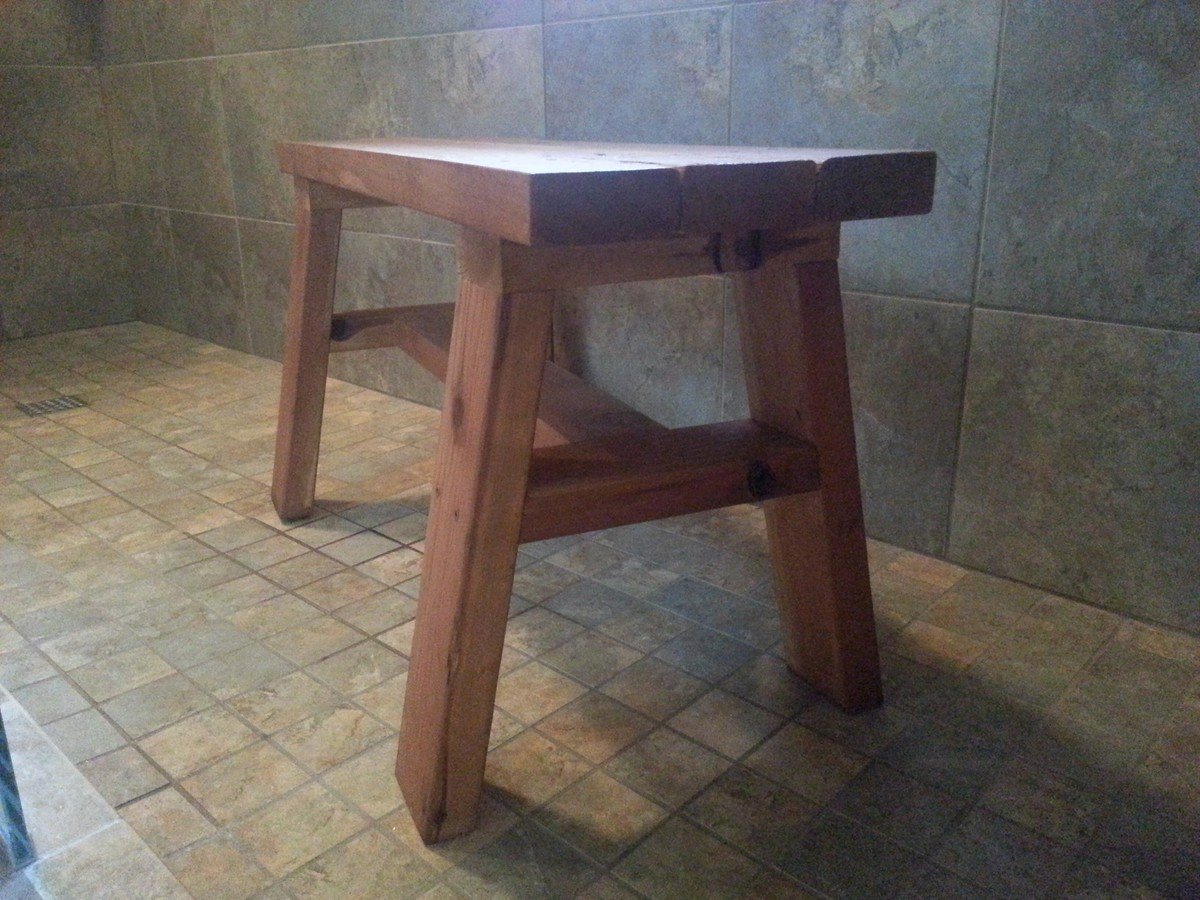
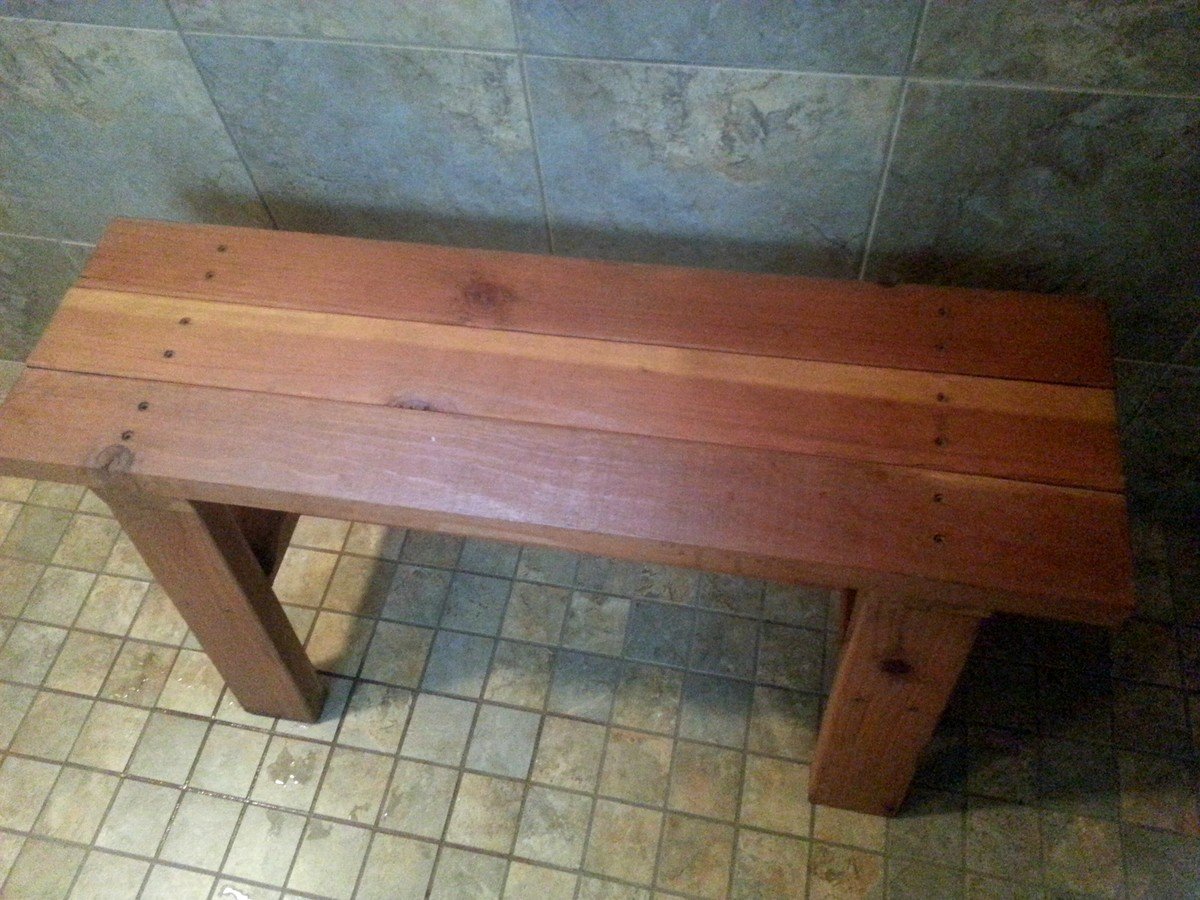
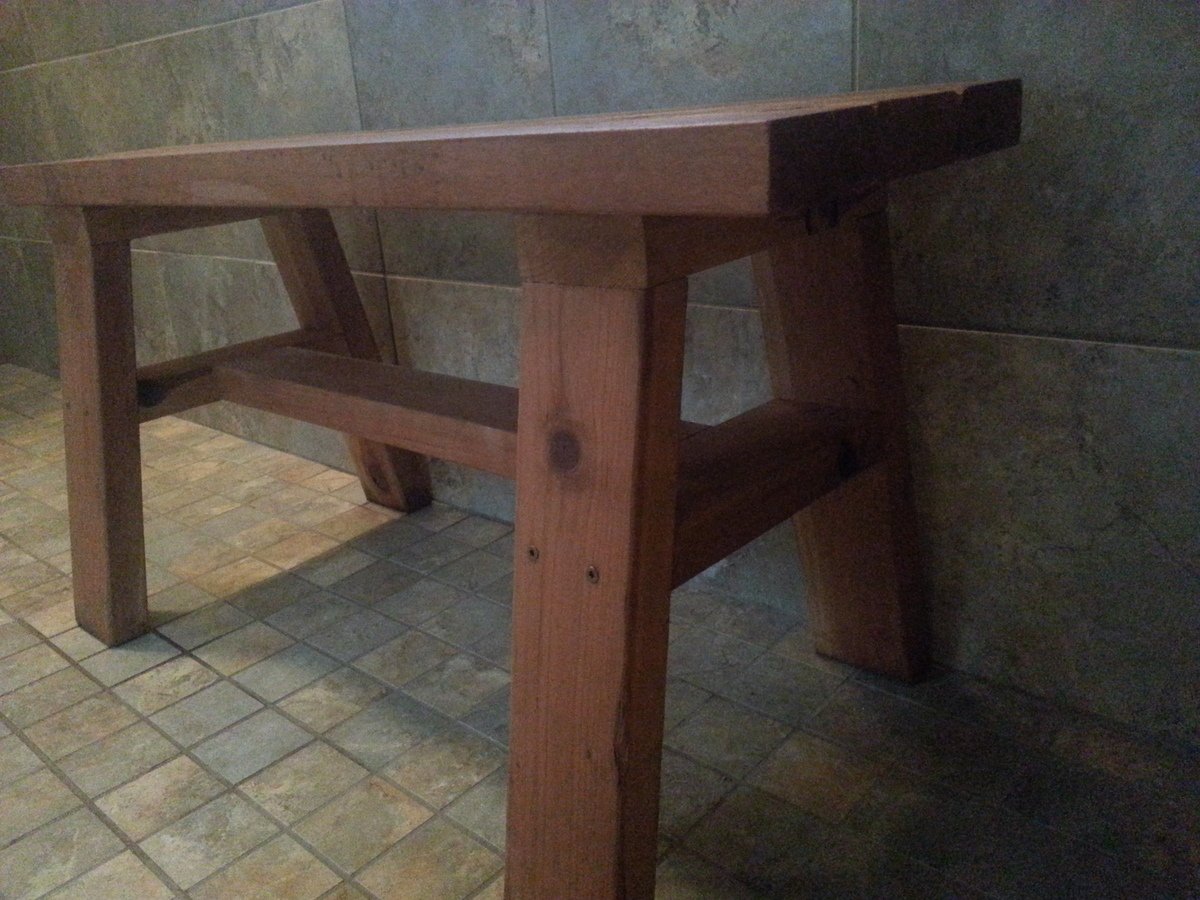
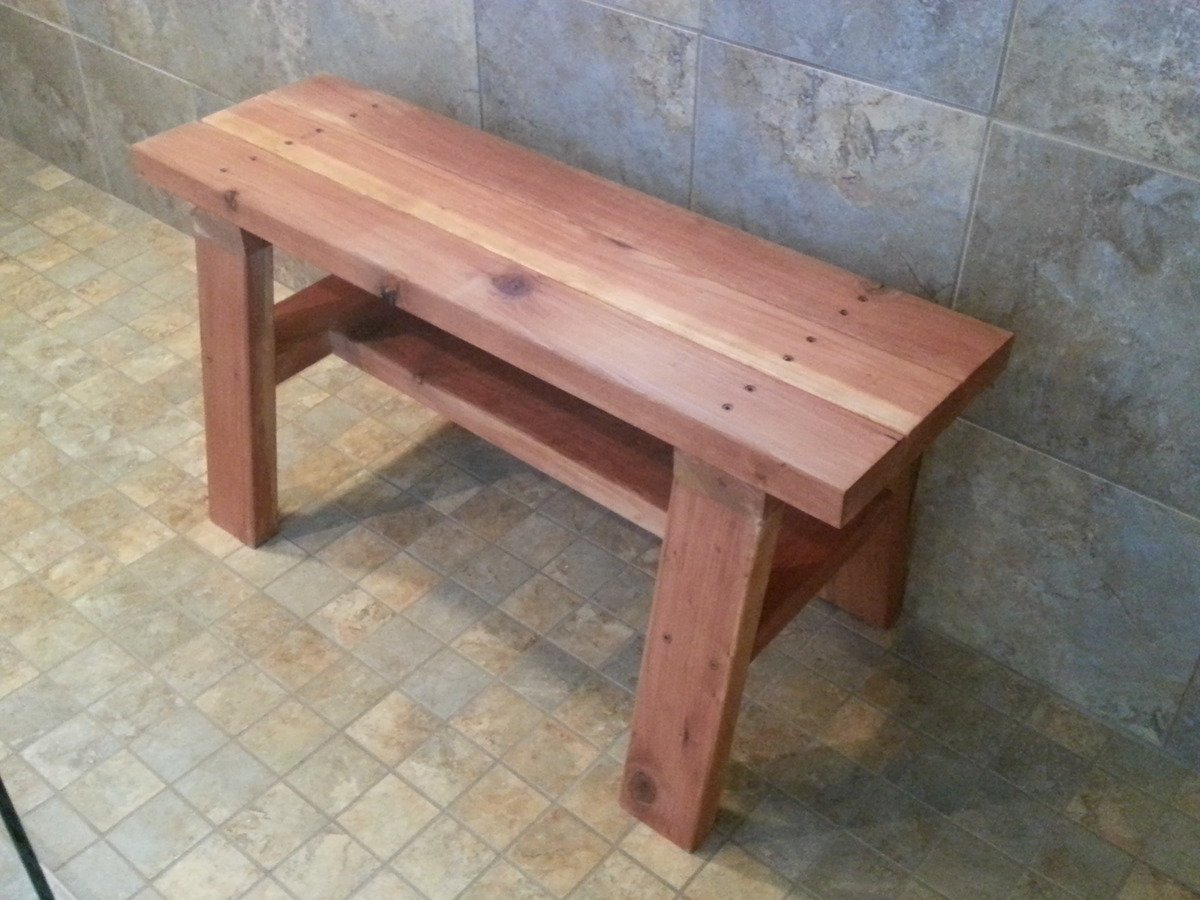
Redwood Shower Bench

Submitted by lwarteman on Sun, 10/20/2013 - 08:33

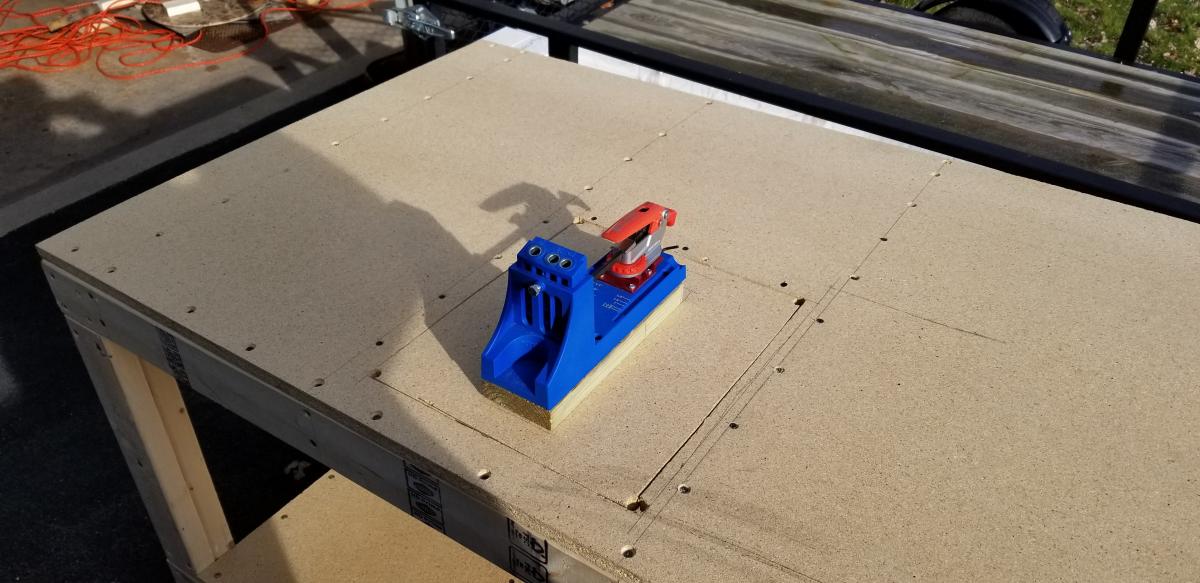
I wanted to build a small shower bench. I used the Providence Bench Plans and just made it a bit smaller with a few adjustments. This bench is 35" long and 18" tall. I did not use the cross supports on the bottom because it was so short. Also, you will see that I turned the bottom stretcher and side supports flat/horizontal. I put the screws for the seat boards through the top down just because this was the easiest way for me to do it. The plans did not show in detail how to attach the seat boards from the underside. It just said "finally, the seat boards." I guess they probably used a pocket jig. I bought a pocket jig and used it in the couple of places, but this was my first time using it. I used brown, coated decking screws in the places I did not use the pocket screws. This was my first attempt at building anything and my first time to use a pocket jig. I used a natural wood stain and Behr Weather-Proofing since it will be in a wet area.

Built from Plan(s)
Estimated Cost
$20
Estimated Time Investment
An Hour or Two (0-2 Hours)
Finish Used
Behr All-in-One Stain and Weatherproofing in Cedar Naturaltone (No. 5533). Because this is going to be in a wet area, I put 2 coats on and let each one dry 12-24 hours in between and before getting wet.
Recommended Skill Level
Beginner

Overhead Garage Storage

This project was born out of desperation for some way to organize our garage. It is not difficult to build, and it went pretty quickly with two of us. It probably didn't take more than four hours tops for each section. I've seen the prices for garage storage components and some of them are staggering! We have removed a tall chrome shelf, and moved a ton of stuff onto these shelves, creating a hundred square feet of floor space! And for only $25! Come on over and check it out on my blog! Val

Estimated Cost
$25 per 8 foot section
Estimated Time Investment
Afternoon Project (3-6 Hours)
Finish Used
Whatever white paint we had left over from various projects.
Recommended Skill Level
Beginner

Comments

Full Size Storage Bed

My daughter wanted her room redone for her tenth birthday. We decided to go big with Ana's storage bed plans. I had so much fun building this and really learned a lot. It took me three months to find enough spare time to finish it, but it was worth the wait.

Estimated Cost
$200+
Estimated Time Investment
Week Long Project (20 Hours or More)
Finish Used
Dutch Boy Refresh paint in Mocha White over no VOC primer. I rolled it on with a smooth roller.
Recommended Skill Level
Beginner

Comments

Misty Tillema

Mon, 11/07/2011 - 19:24

You did a really great job building the storage bed. I am in the process of building this same bed for my teenage son, only I'm not building the towers. Finding enough time to actually get a project finished is nearly impossible when you only have a few hours here and there! Your daughter will love all the extra storage space as she gets older.

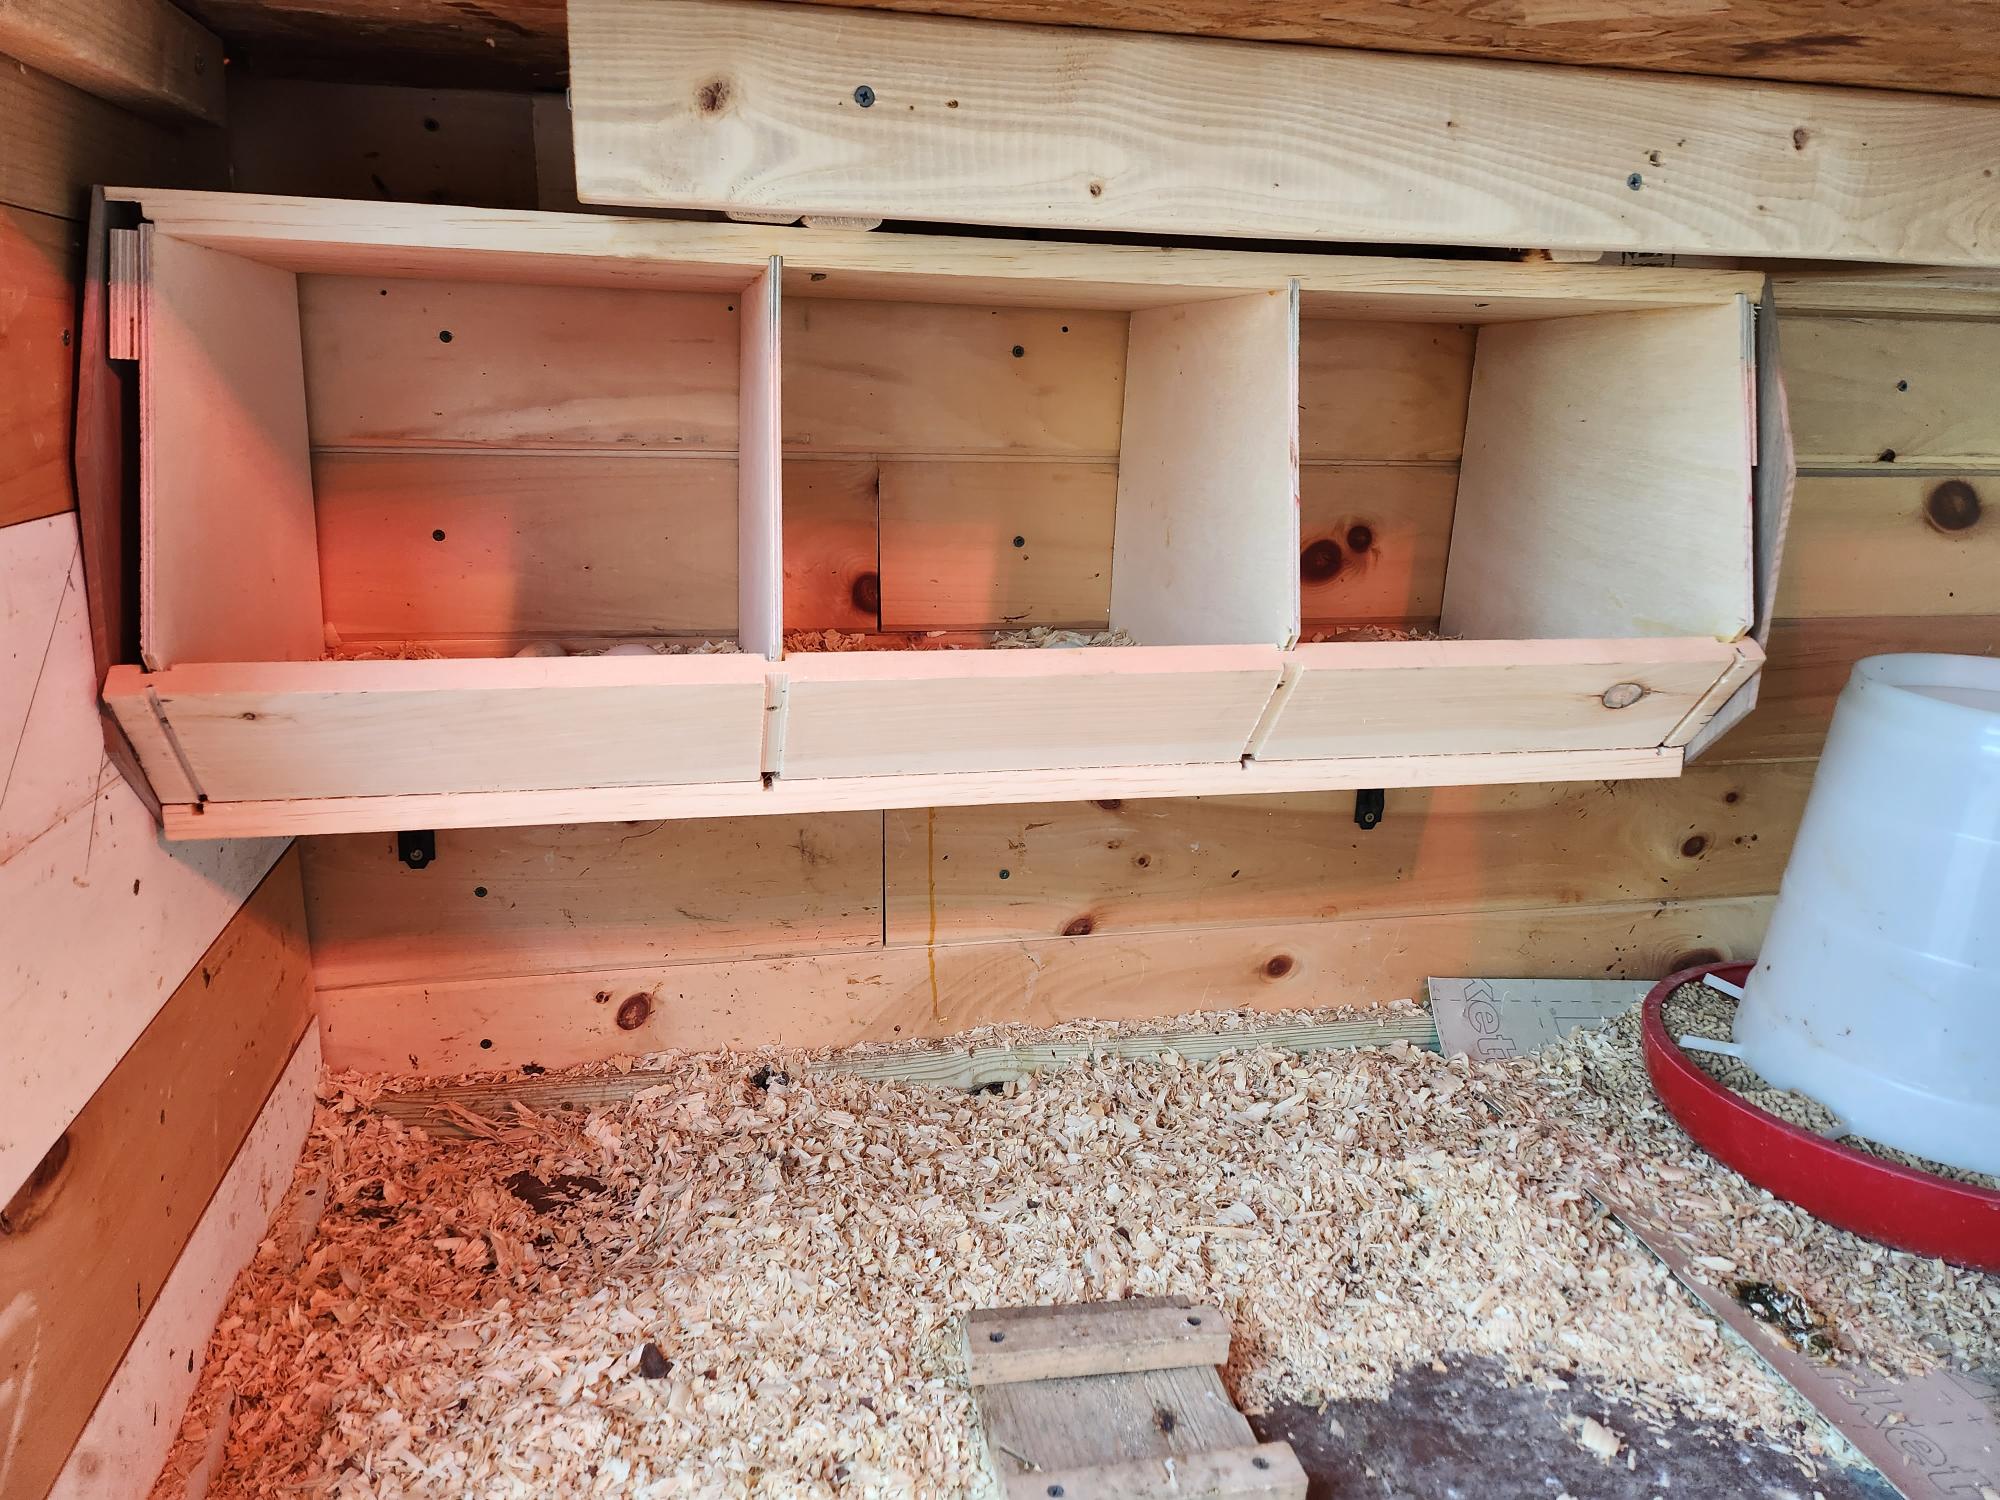
chicken boxes that work!

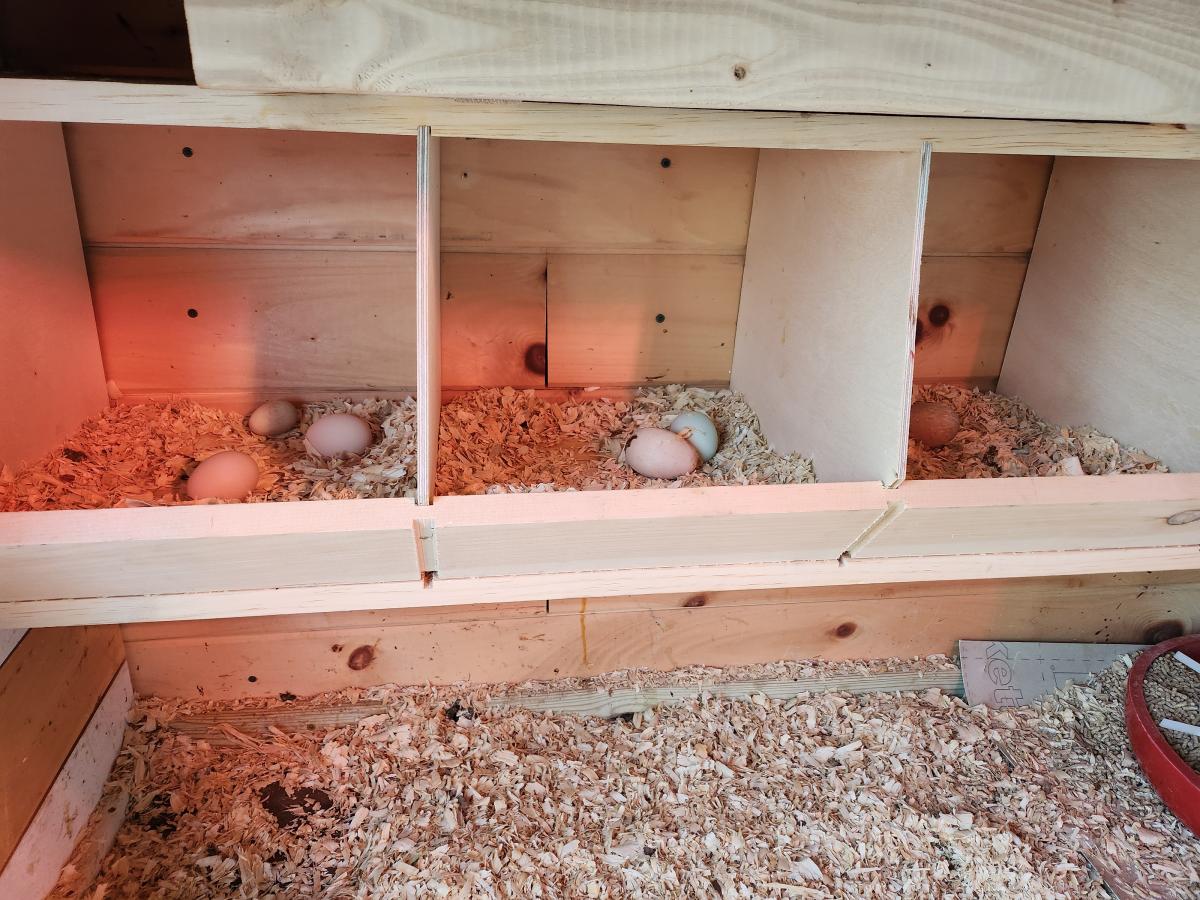
I have tried all sorts of nest boxes. No one ever used them. I decided to make the one from Anna White's site. I used joinery to attach the various pieces. The best thing of all: I find girls sitting in the boxes and take eggs from them. It really is awesome. I got a photo with real eggs and you can also see the wooden eggs to entice them to try it out. Thank you so much! I will build another one for the other side of the the wall.

Built from Plan(s)

Comments

Tilt out wood trash can cabinet

Submitted by Bombadil on Sat, 03/31/2012 - 08:18

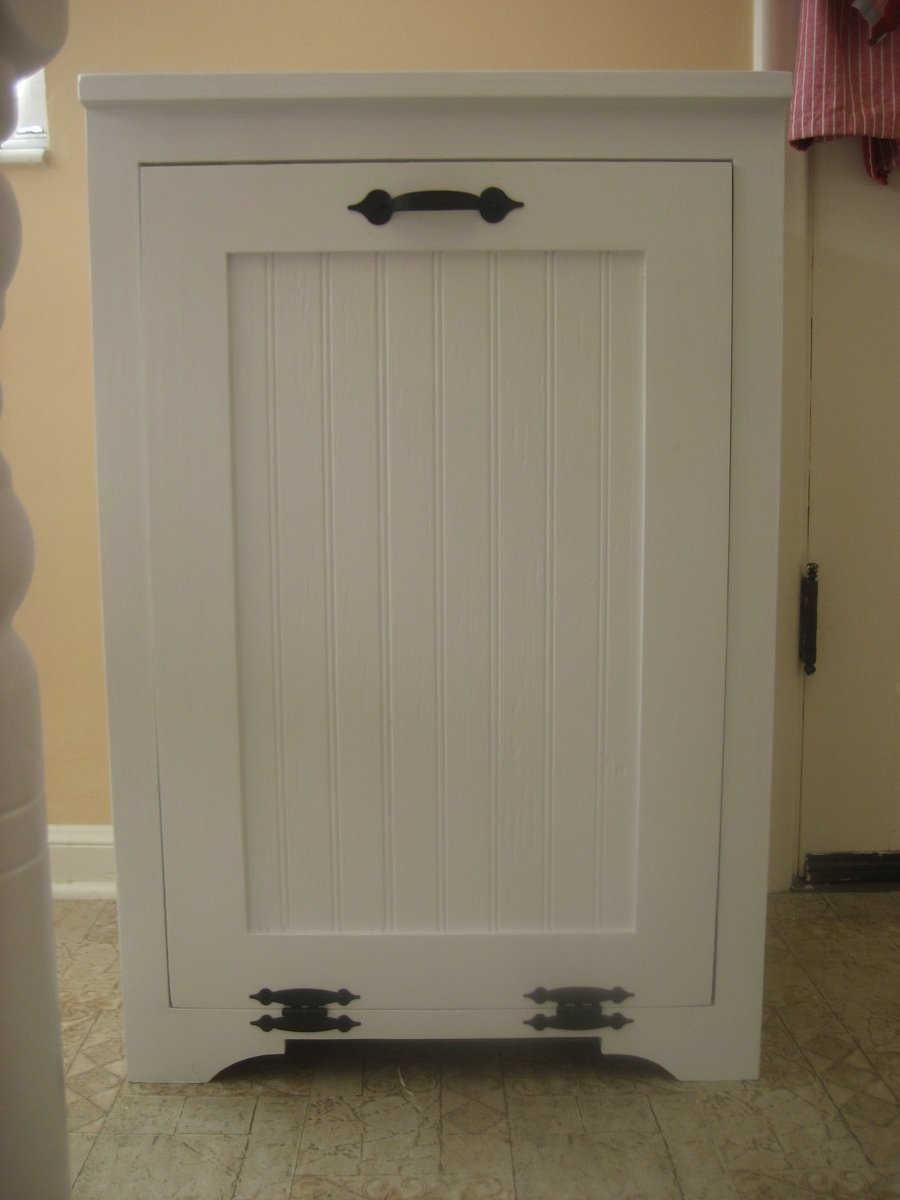
My family has been needing something like this for a while to keep our toddler out of the trash. Now I can tell people I built it myself. This is my first Ana White project and first time using pocket holes and I have to say I am very happy with how it turned out.

Estimated Cost
$50 - $75
Estimated Time Investment
Weekend Project (10-20 Hours)
Finish Used
I just used the basic white paint that we already had on hand.
Recommended Skill Level
Beginner

Comments

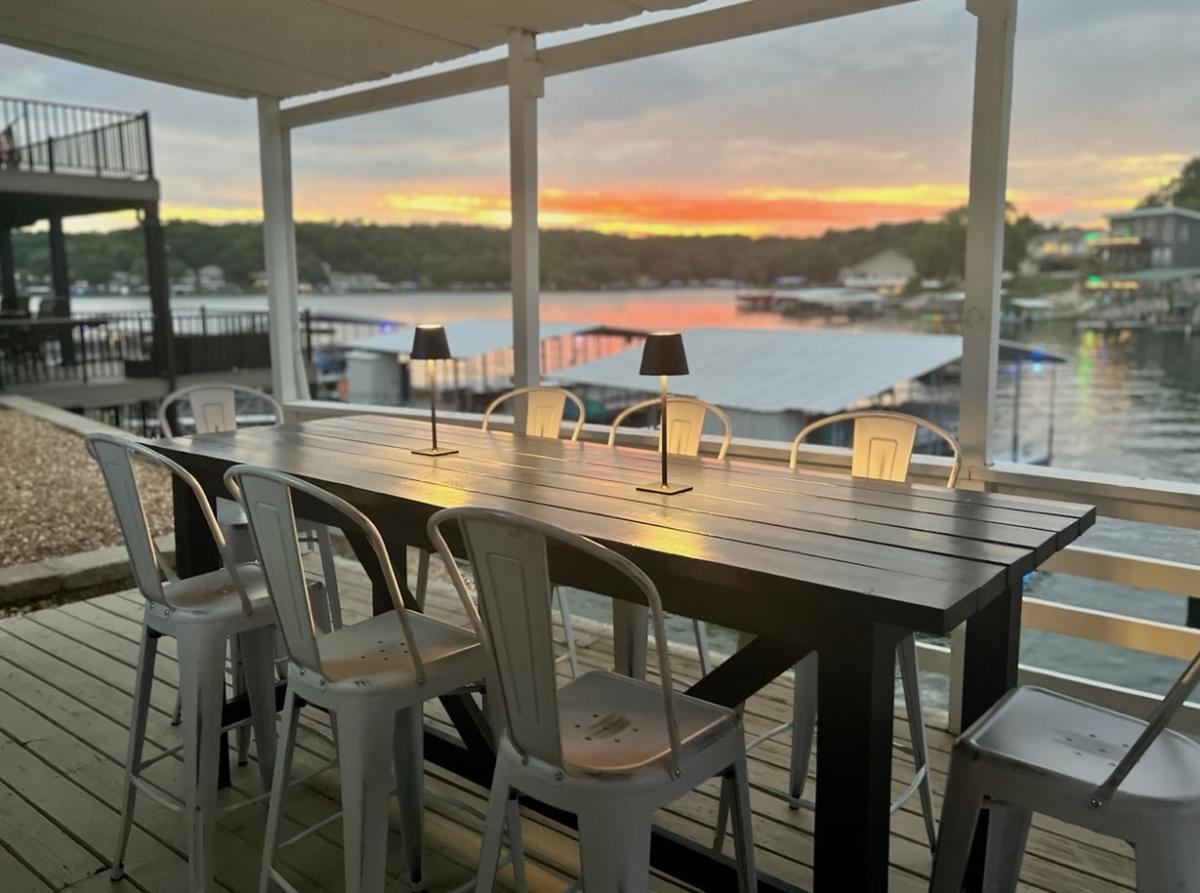
Bar Height Outdoor Table

Submitted by Anonymous (not verified) on Sun, 08/27/2023 - 12:42

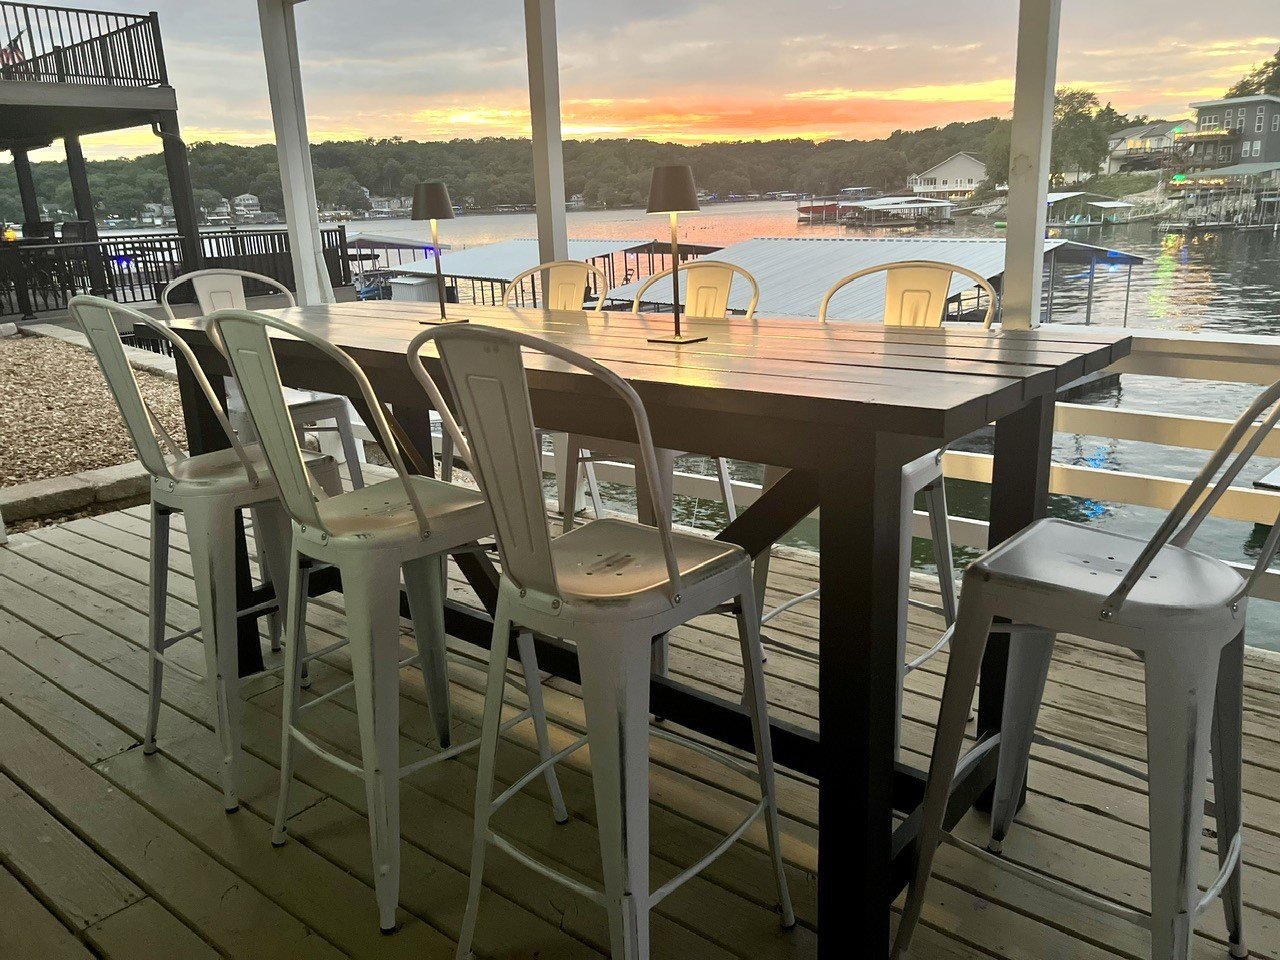
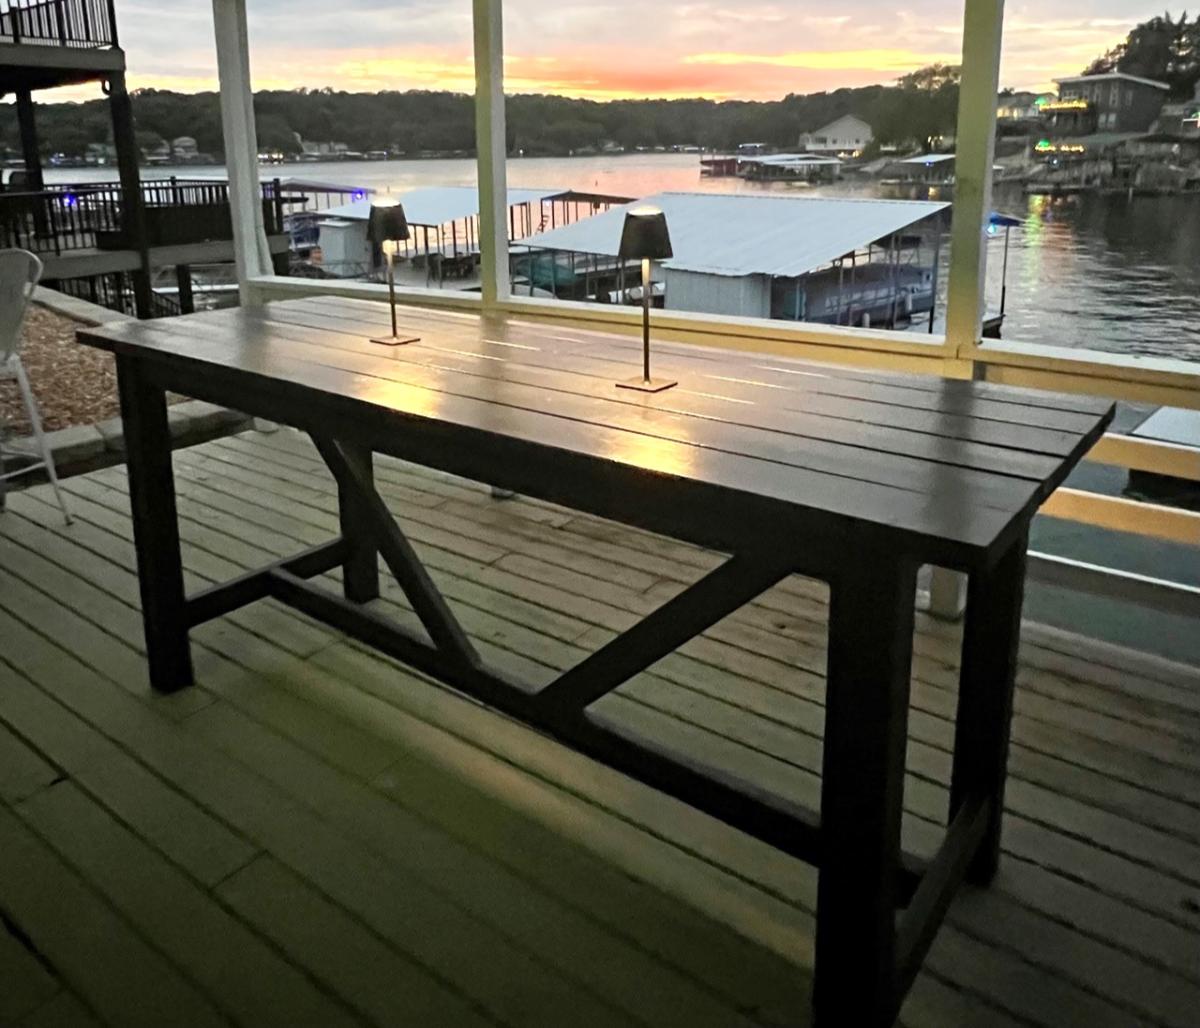
We had this unused lower deck and this bar height table was the perfect addition. We have place now to hang when too hot or it’s raining. My husband and I built it in one weekend and your plans where great.

Julie Moran

Built from Plan(s)

Comments

Seasonal And Holiday

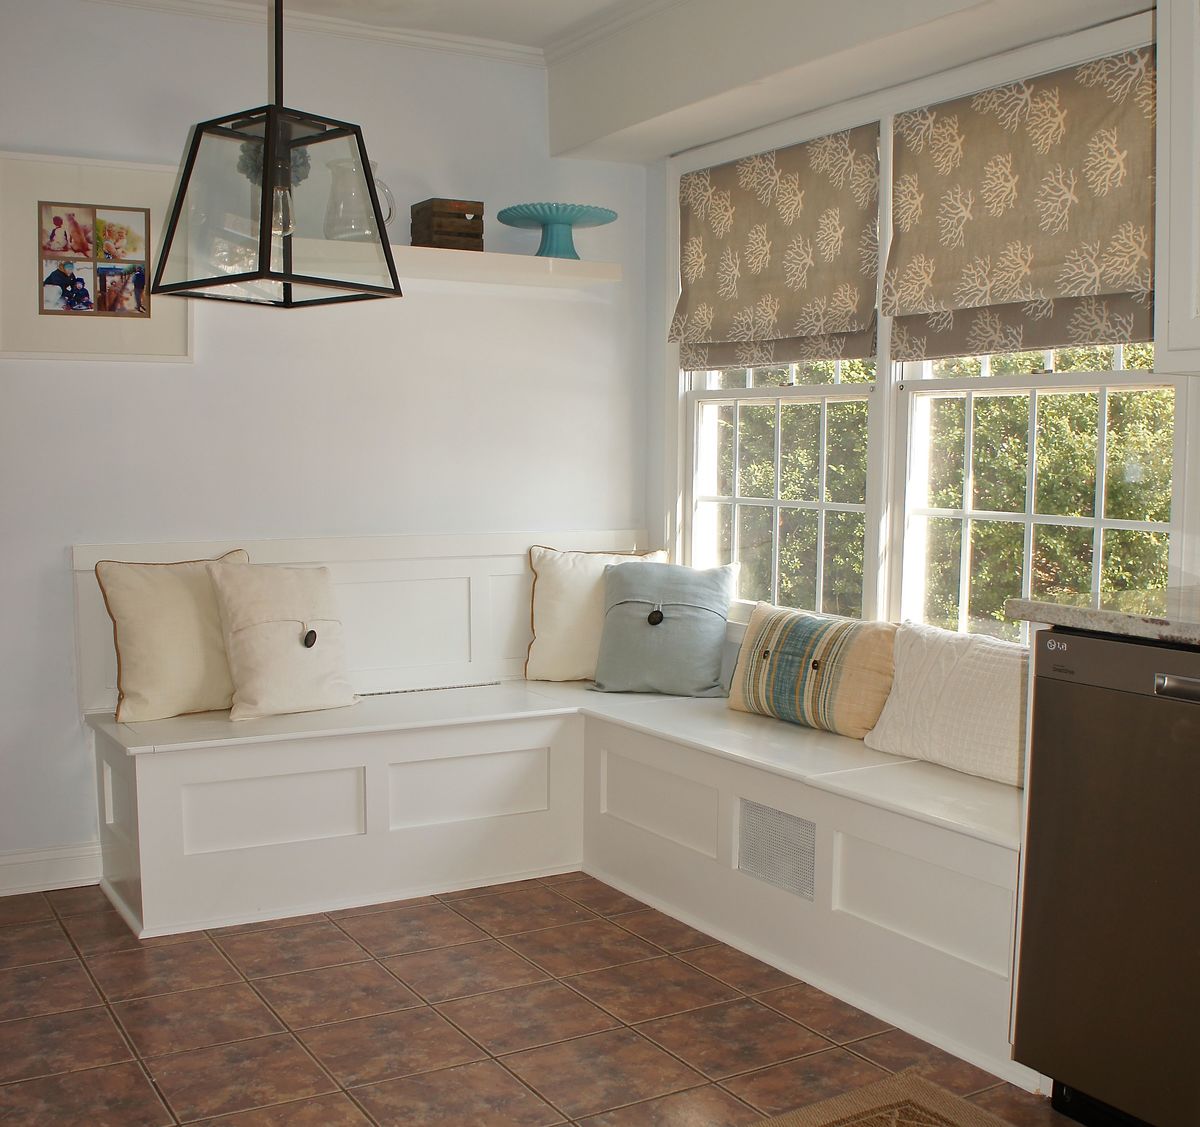
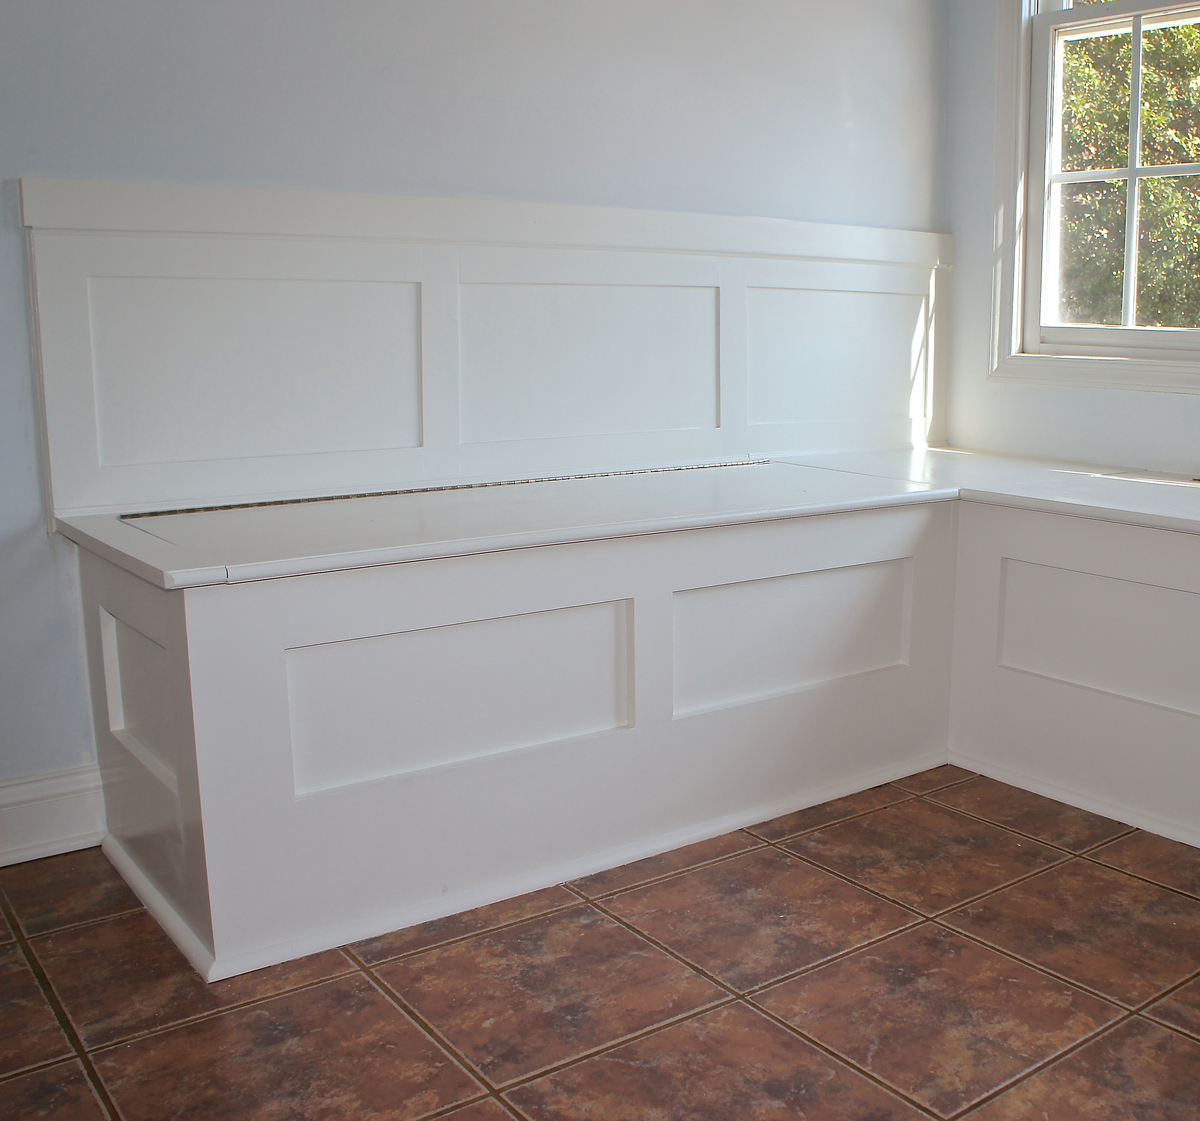
Built In Storage Bench

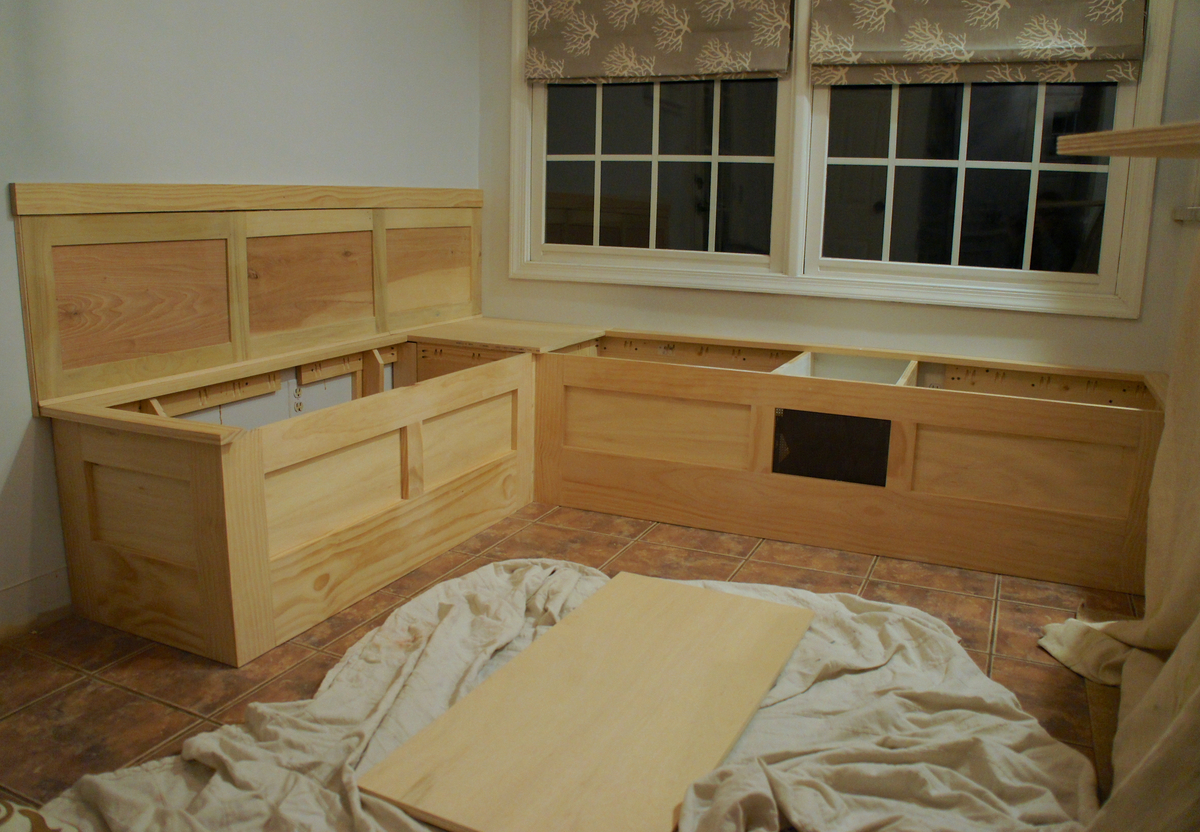
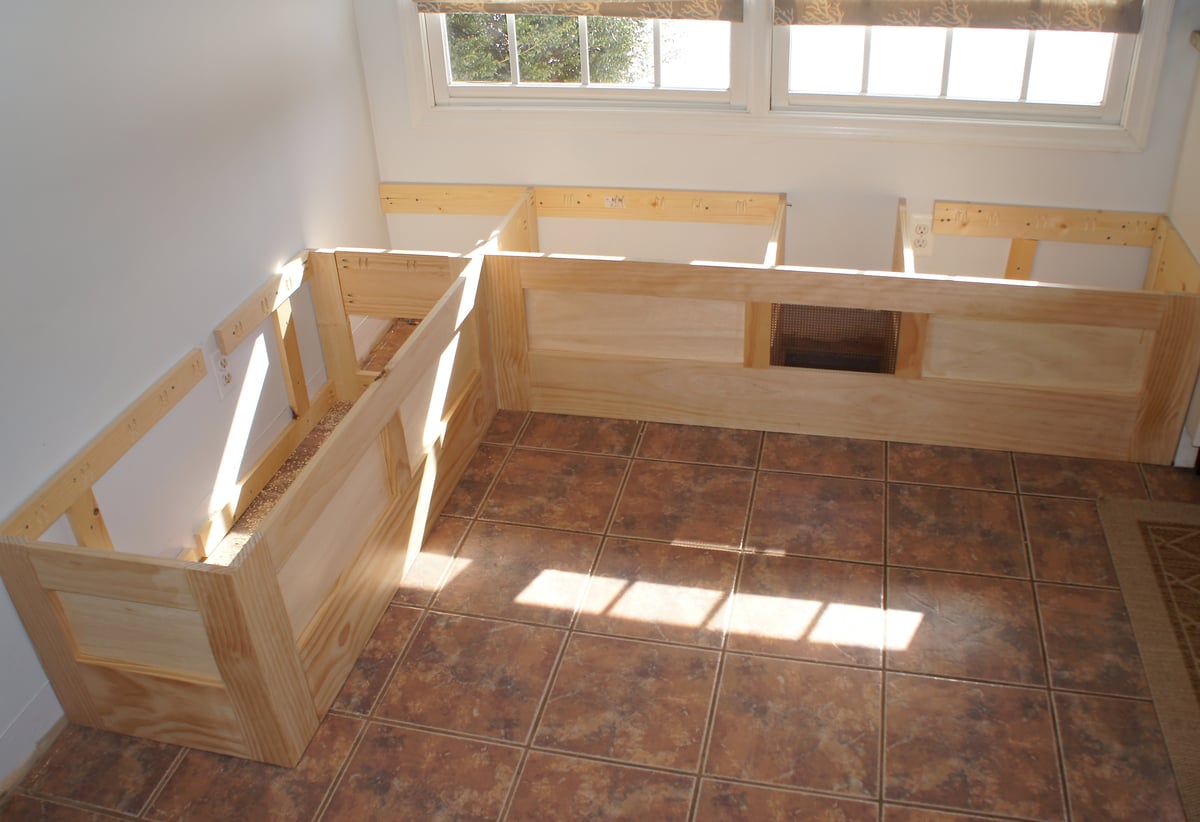
I wanted to make a built in storage bench for the breakfast nook in our eat-in kitchen, but wasn't entirely sure how to go about the process. After seeing Ana's "Mimi's Storage Bench" I thought the plan could be modified to fit our space, so I convinced my husband to give it a shot. We've done a fair amount of carpentry in our house, but this is the first piece of furniture that we have ever built. Thanks to Ana's plans and our new Kreg jig, it turned out better than I ever imagined. We absolutely love the new bench, where my toddler spends every morning eating his breakfast while staring out the window and giggling at the squirrels in our backyard.

Estimated Cost
$300
Estimated Time Investment
Weekend Project (10-20 Hours)
Finish Used
Benjamin Moore's Satin Aura paint in White Dove
Recommended Skill Level
Intermediate

Comments

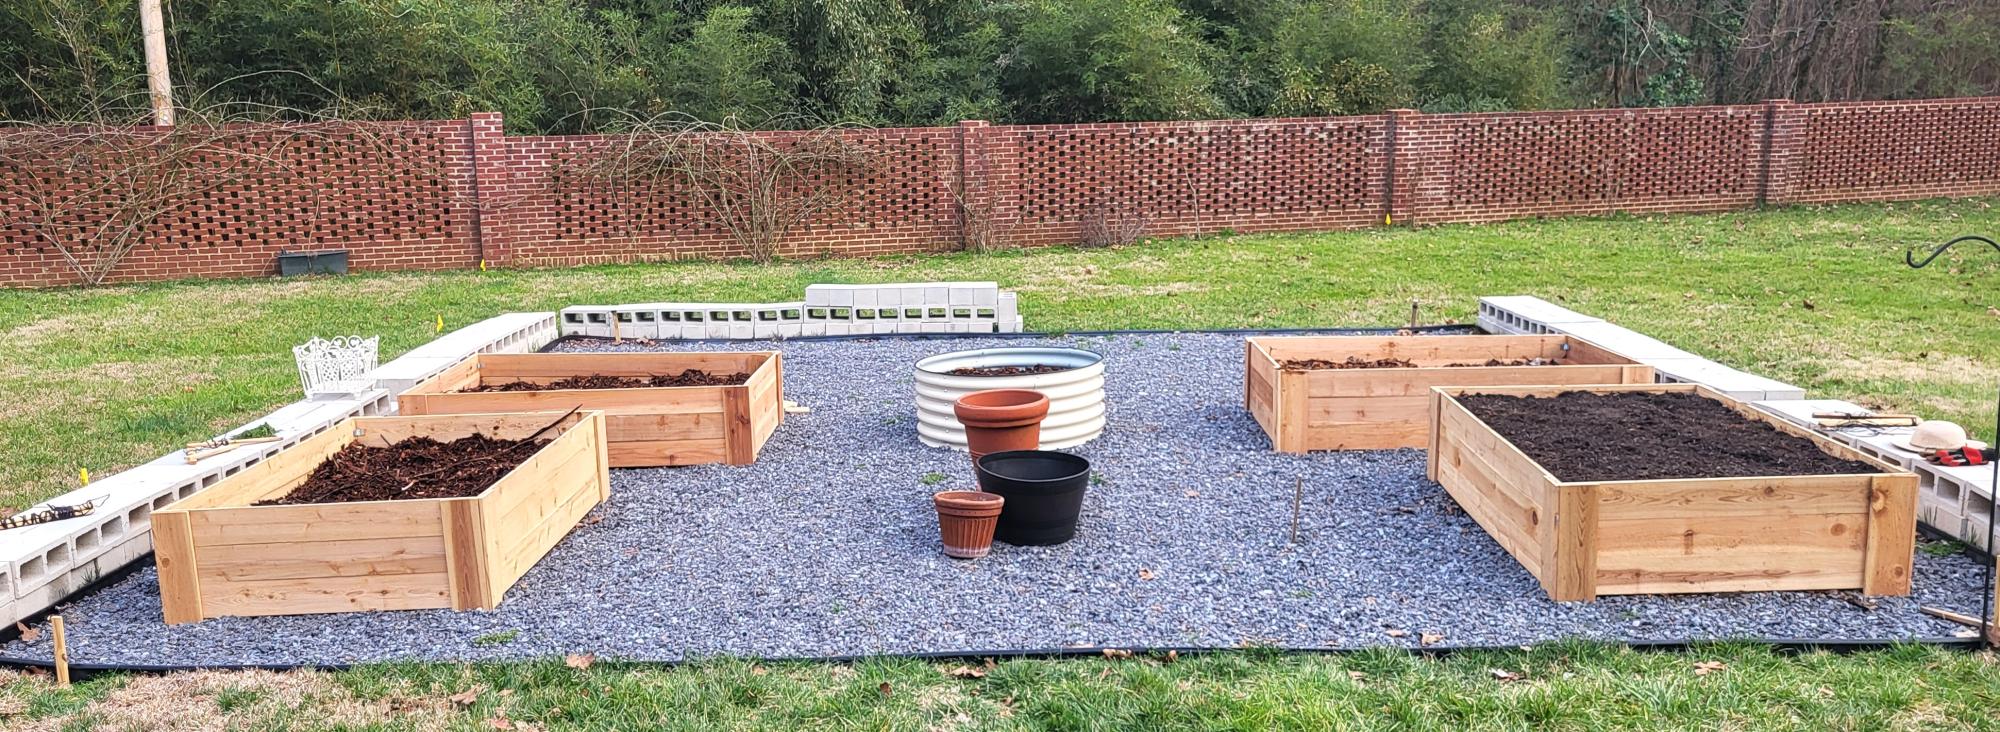
Raised Bed Garden Enclosure

Submitted by Anonymous (not verified) on Tue, 06/21/2016 - 08:07

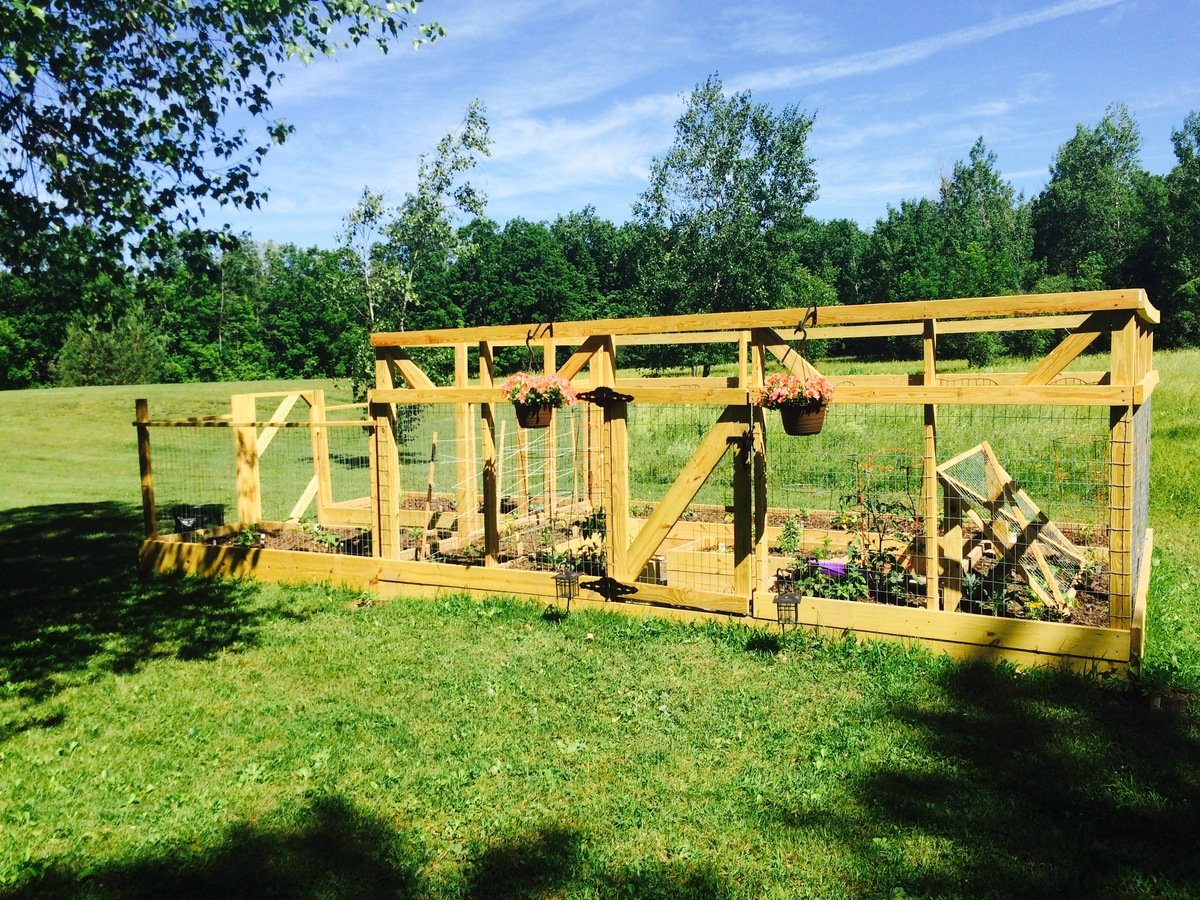
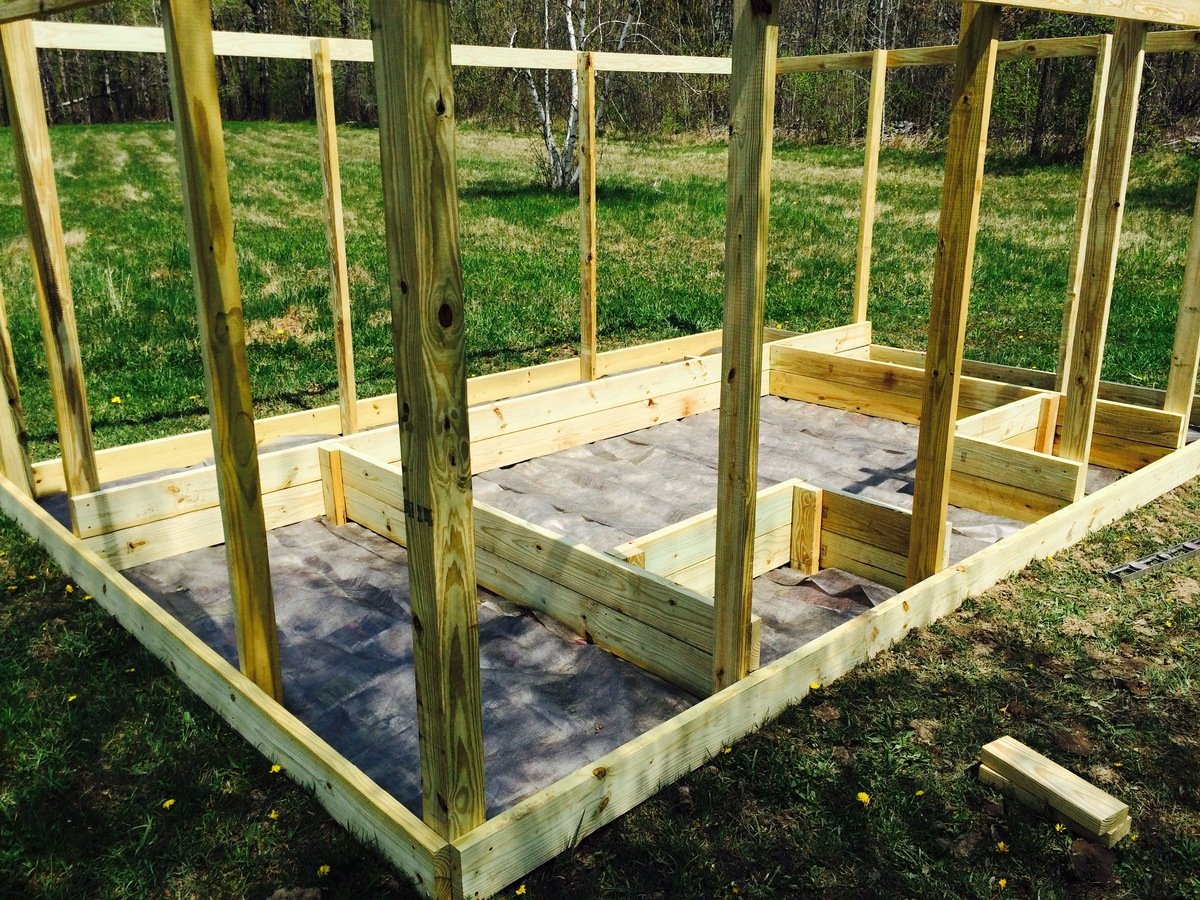
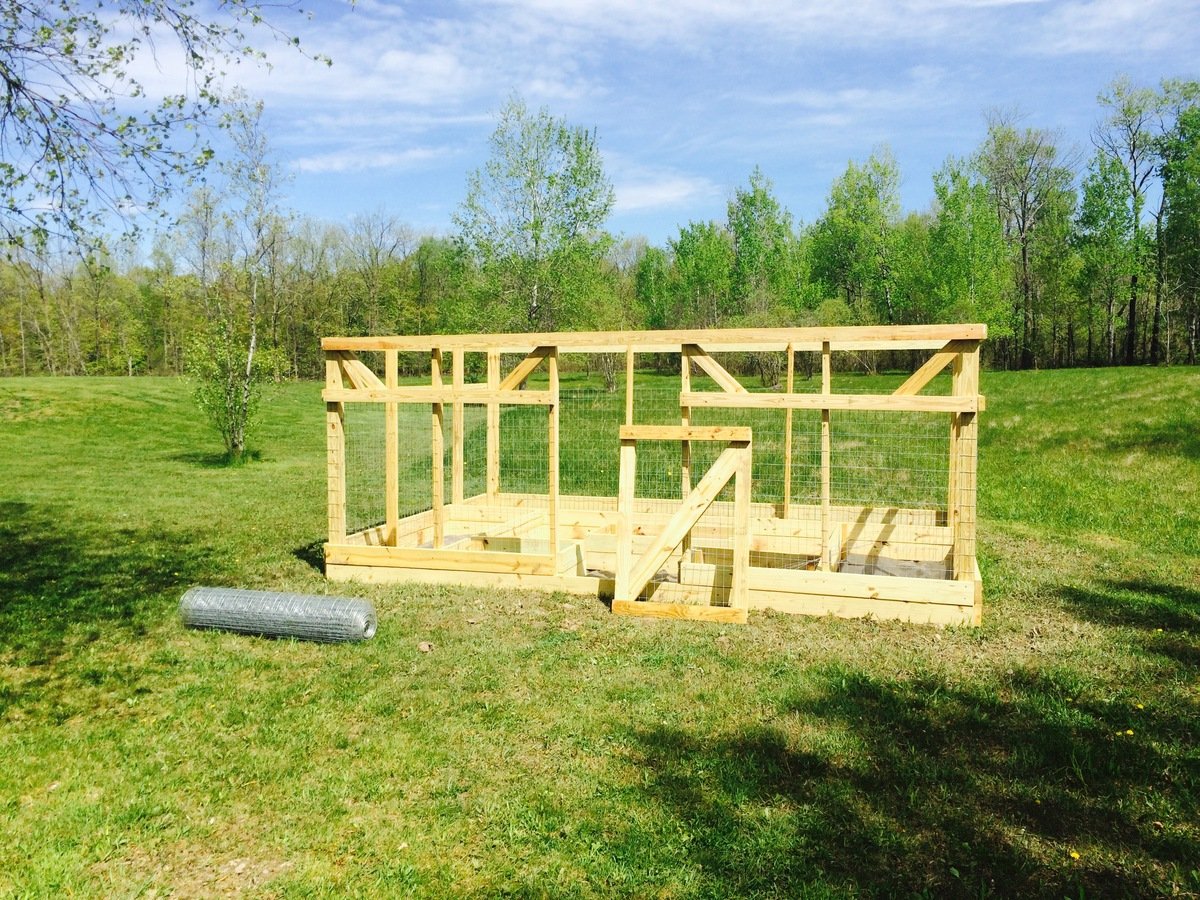
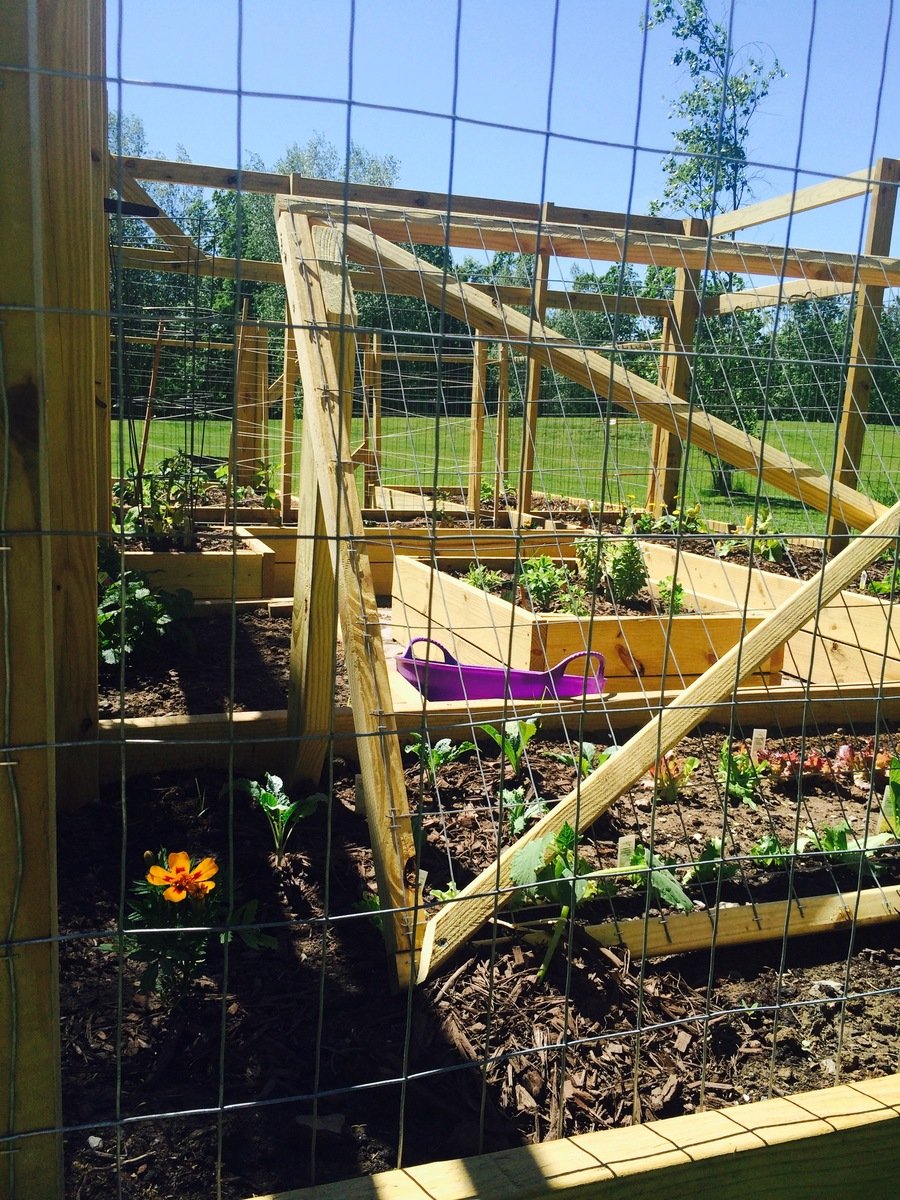
With lots of deer, rabbits, coyotes, and the occasional bear, garden enclosures are a must in our area (although I am not sure they will really help if a bear decides they're interested in our food). As our old garden enclosure was falling down due to the high winds and a quite a few winters in upstate New York, my mom found a horseshoe shaped garden with rasied beds that she loved. So, after searching around for a good plan, I found Ana White's collaboration with Home Depot for this enclosure.

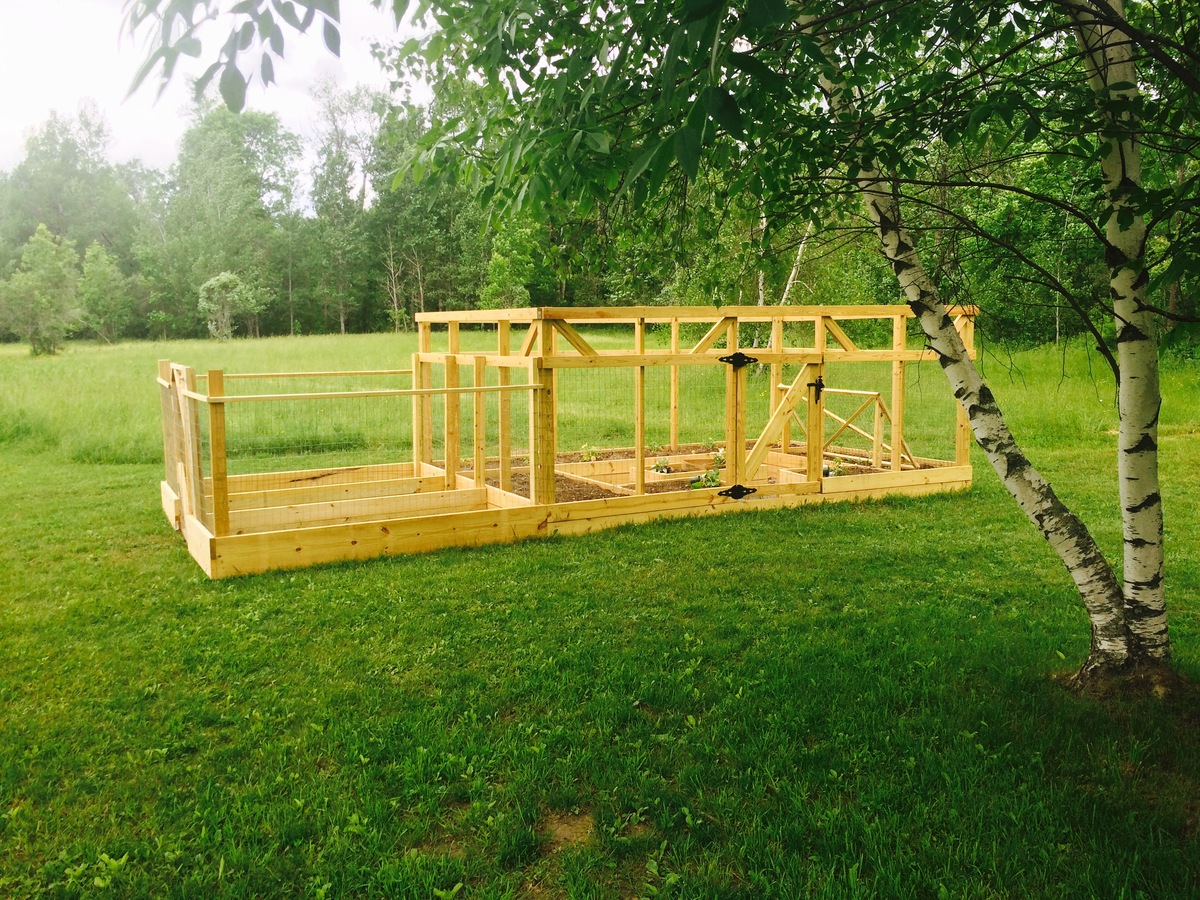
While the original plan was far too small for our needs, I was able to expand the length of the enclosure creating enough room to add two small beds on either side of the door and a center bed, which is perfect for herbs. The build was not difficult as I was able to do most of it by myself (with the exception of contructing the frame and attaching the door) and I am sure this would go much quicker with an extra set of hands. As I did not have a large chunk of time to devote to this project, it did take me quite some time stretched over a few weeks. Nonetheless, I am very happy with how it turned out.

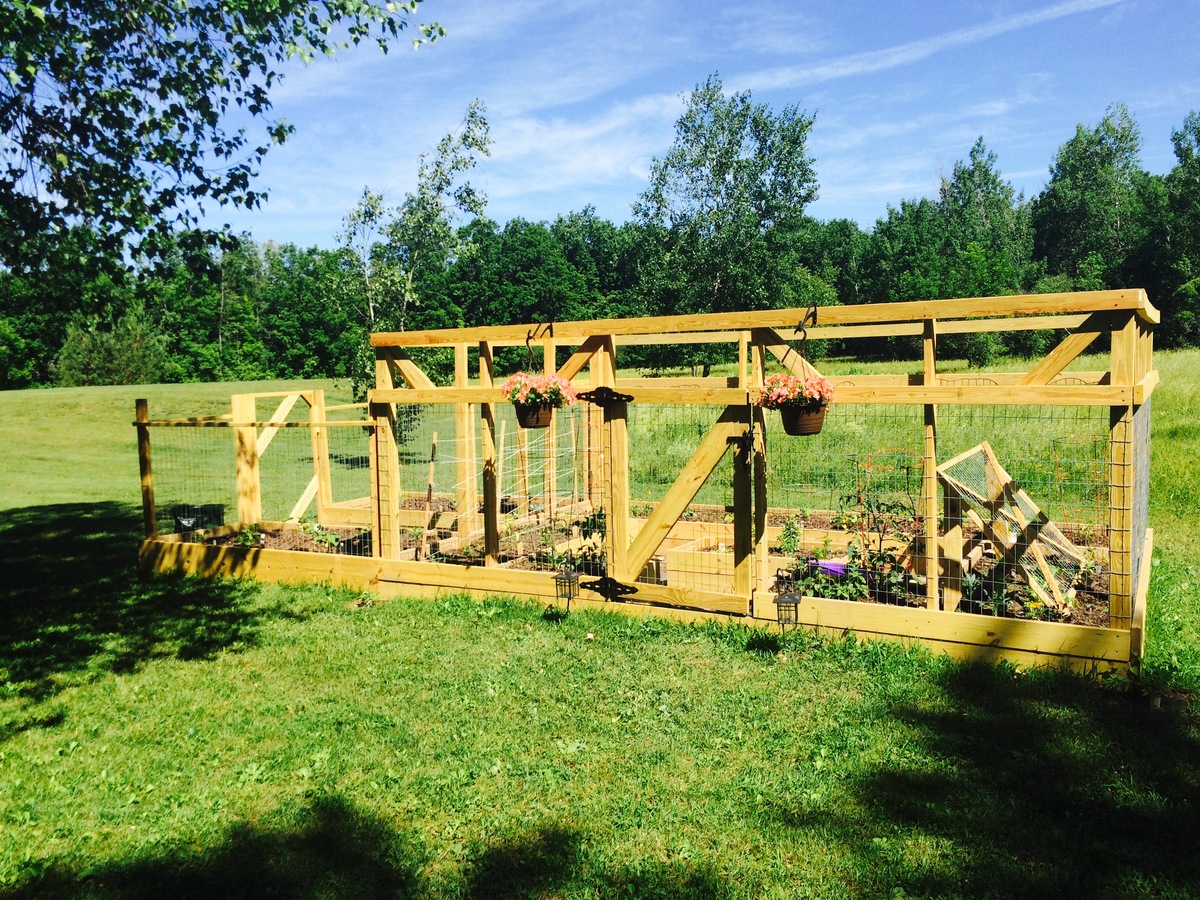
After construction, my family got a little garden happy and decided we wanted to plant even more vegetables than we had originally planned. So, we created a much simpler but nonetheless less pest-proof enclosure for two more beds to the left of our original project (shown in the photos).

Although this was an expensive project (exact price is unkown), it is quite sturdy and we expect it to last a long time and provide lots of vegetables. We added some hanging baskets for decoration and decided next year we will add some morning glories around the outside corners for some extra shade during the afternoons. Some minor alterations also included a latch that allows us to open and close the door from both sides, we actually picked up a gate latch kit for this part of the project, and using welded wire fencing instead of chicken wire. While the welded wire added to the cost, it will hold up better to the wind and snow and is still protective enough to keep out our main predators.

Thanks so much for the plans Ana! In the begining, our neighbors joked we were building a guest house :). I have included some photos from throughout the build as well.
Built from Plan(s)
Estimated Cost
~$500?, we had to make some adjustments in size and swap out some materials due to the high winds we get, so this could probably be done for cheaper. The cost is also a guess as I am not completely sure what the total came to after many trips to the store. Nonetheless, our garden is twice the size of the enclosure kits Home Depot and other stores sell for what I predict to be more than twice the cost.
Estimated Time Investment
Week Long Project (20 Hours or More)
Finish Used
Unfinished
Recommended Skill Level
Beginner

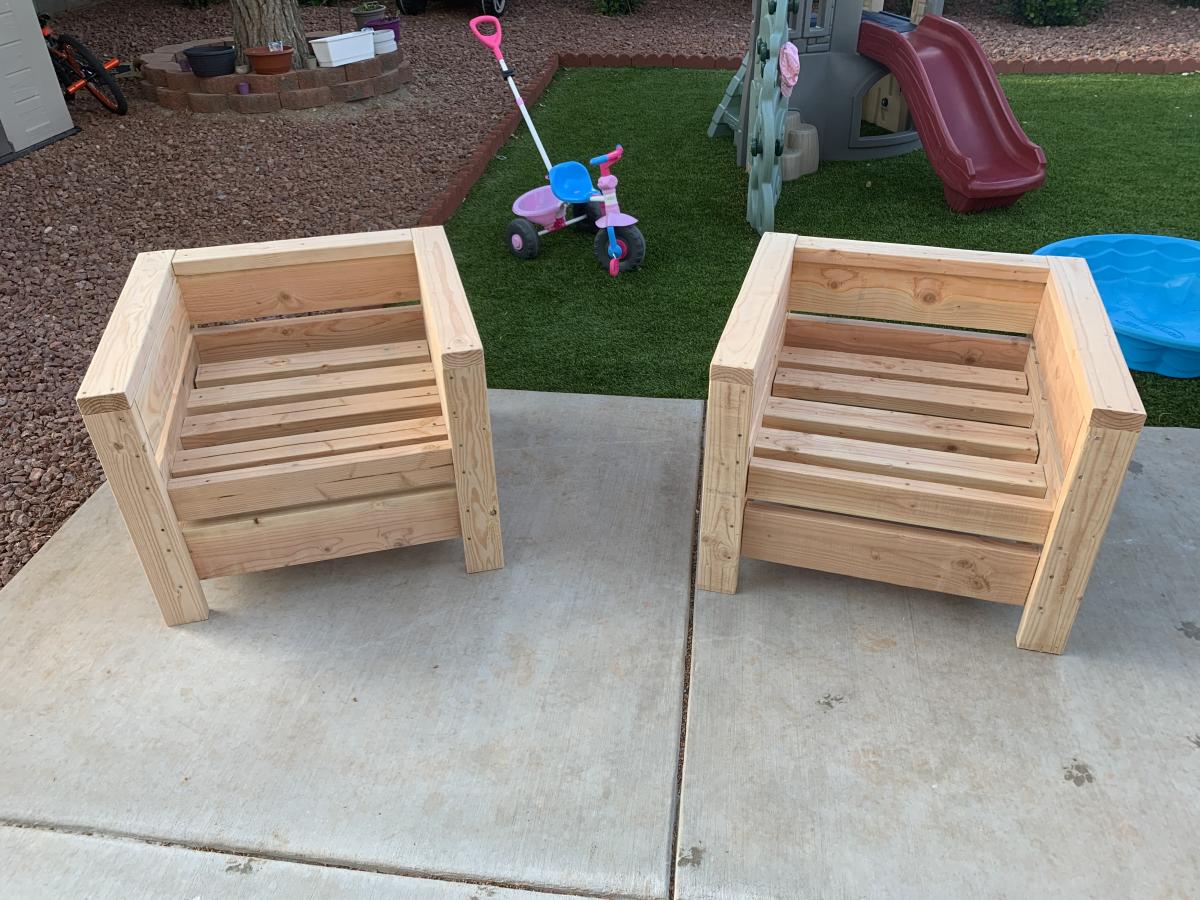
2x4 and 2x6 Chairs and Couch

Submitted by clintusaf on Mon, 05/11/2020 - 16:43

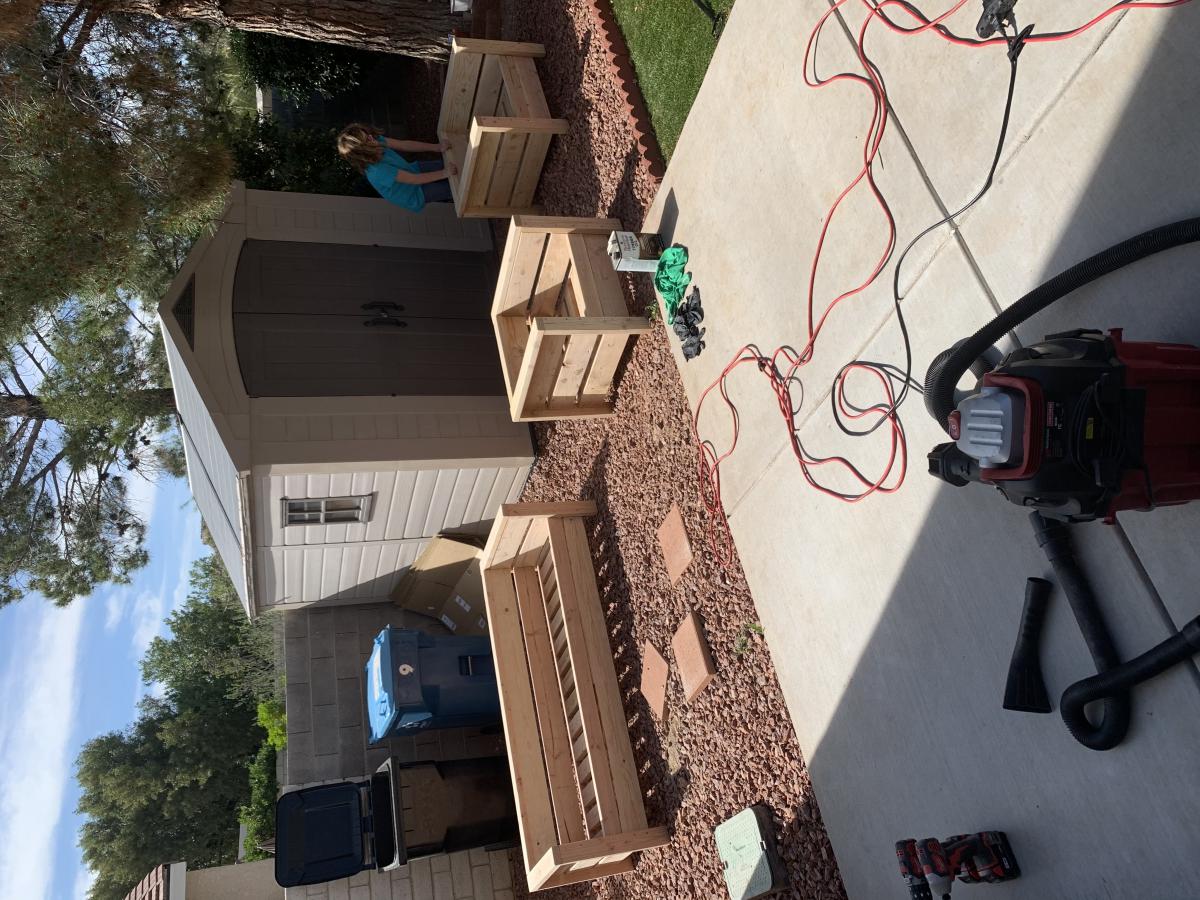
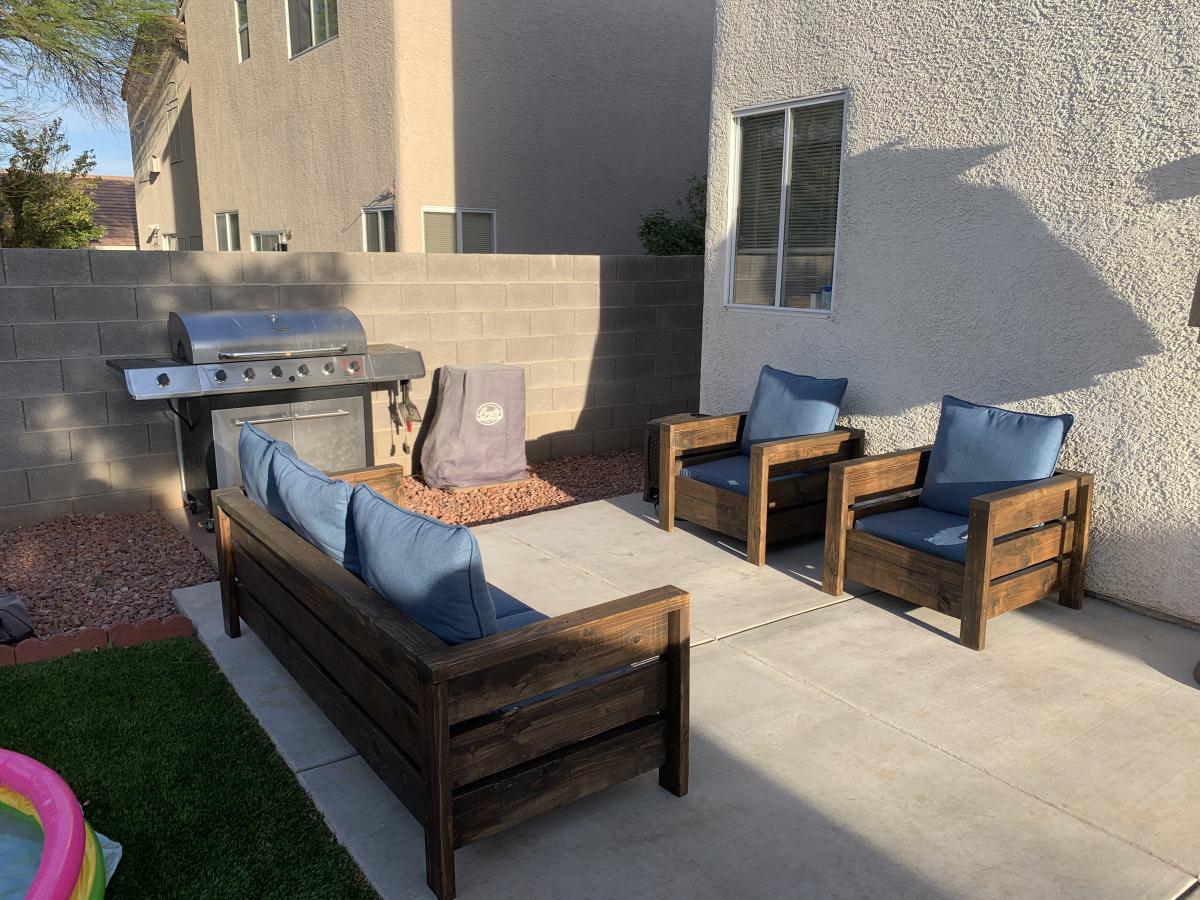
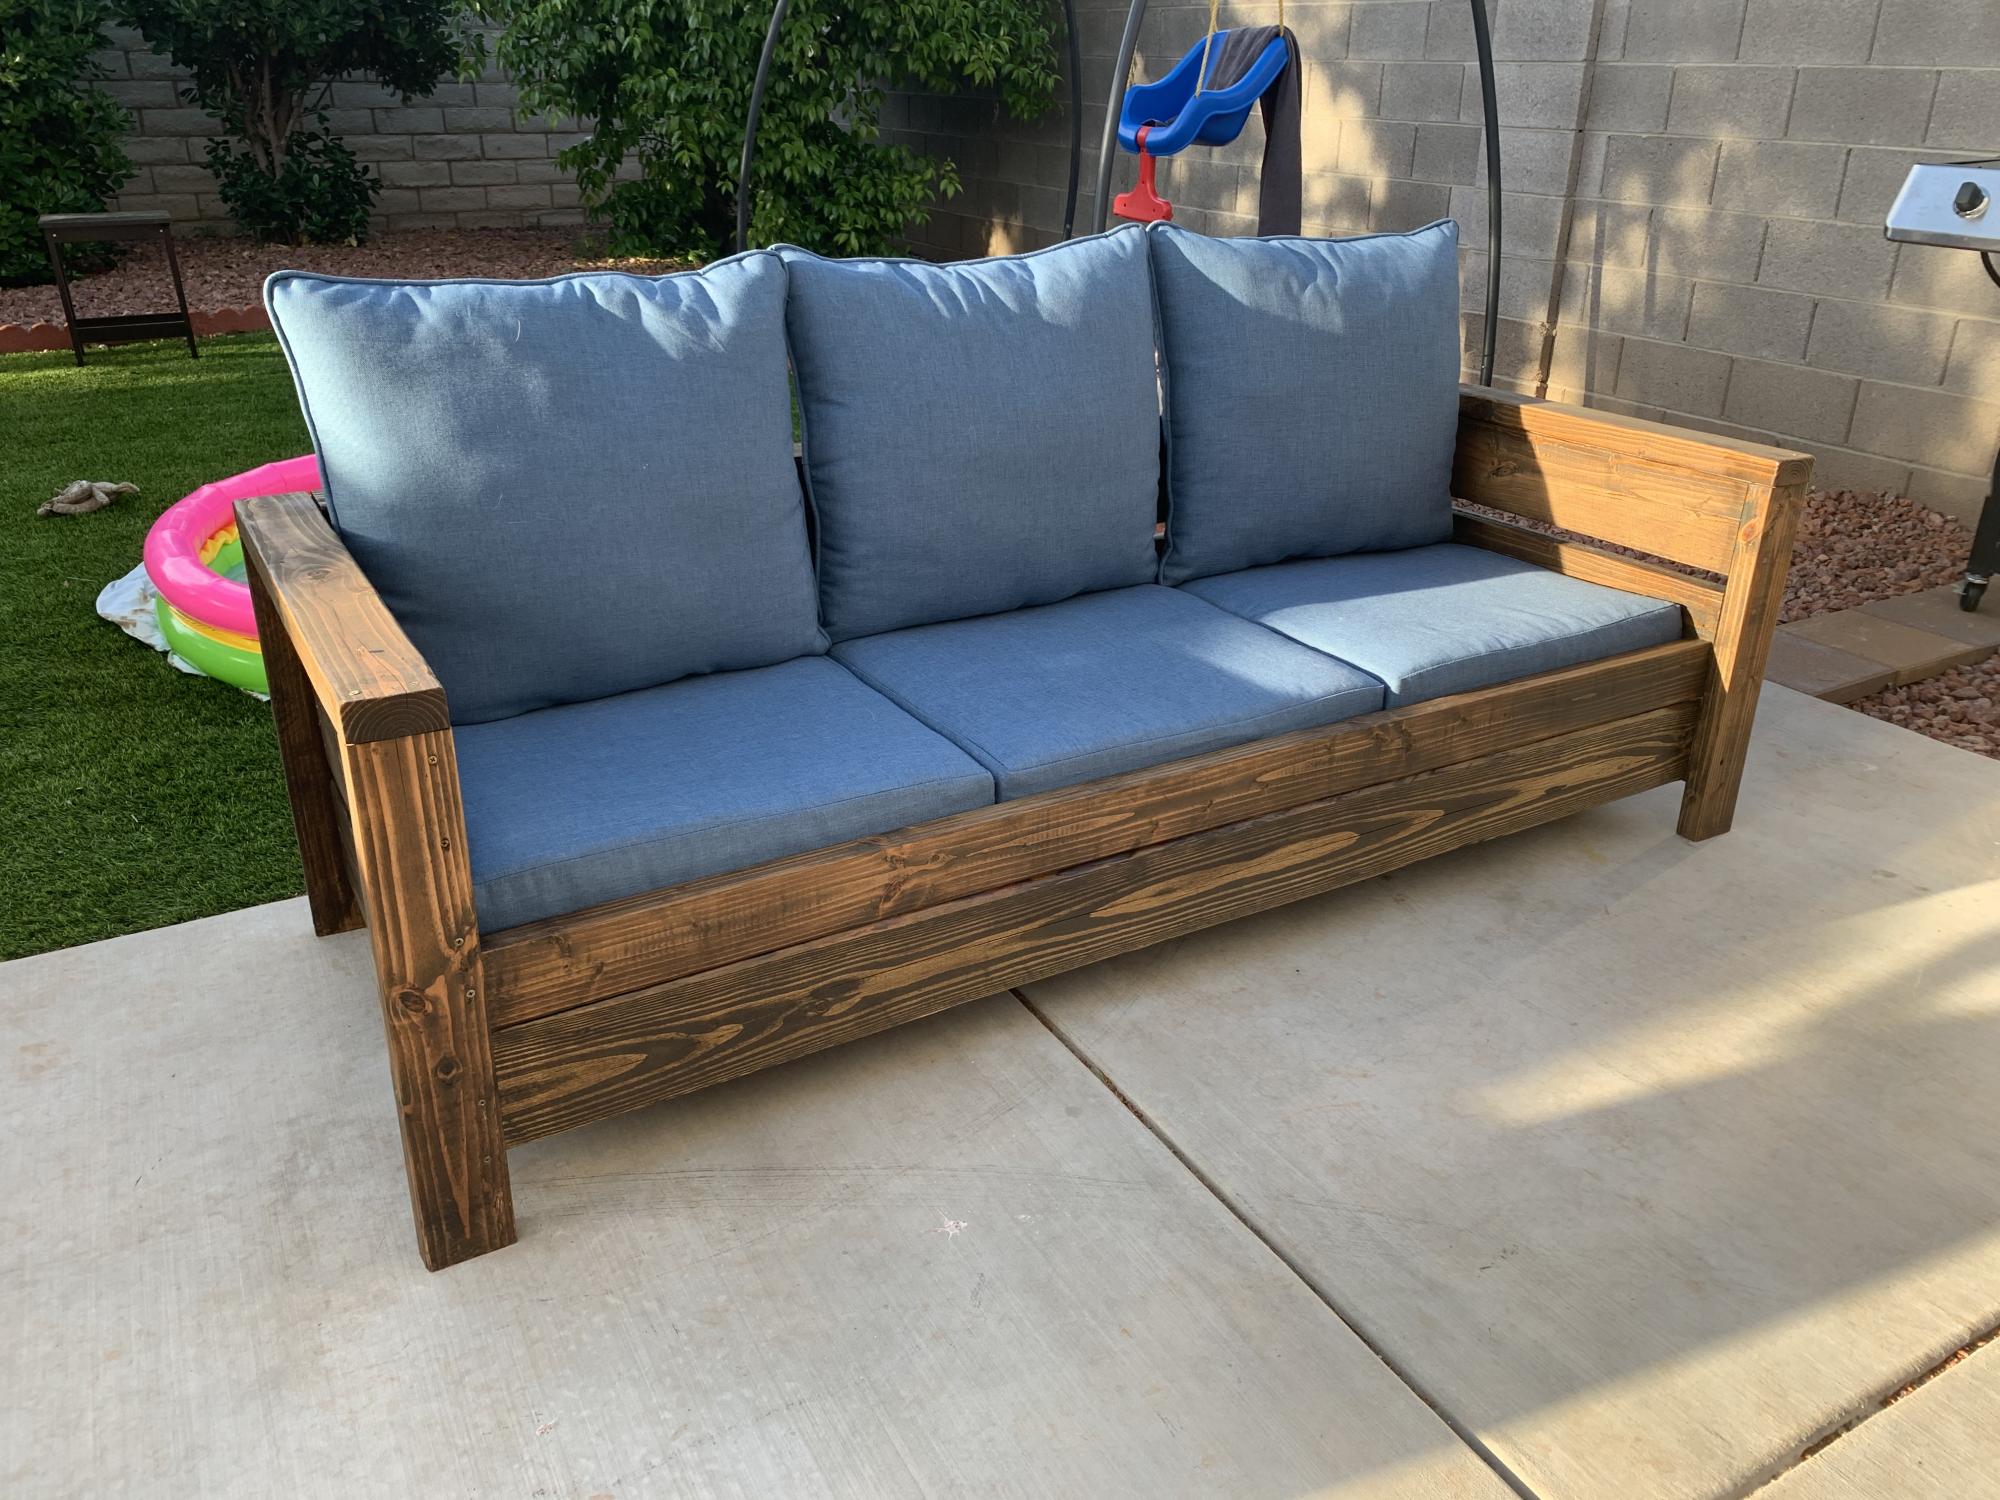
I used the Modern Outdoor Chair from 2x4s and 2x6s plans and slightly modified then to make a 3 seater couch. My cushions(most expensive part) were 24 in x 24 in and purchased from Lowes for $40 per seat. The couch is 79 inches in total length. I also dropped the seat down to the lower level to allow more room for my cushion backs to sit further down into the seat.

Estimated Cost
$400
Estimated Time Investment
Weekend Project (10-20 Hours)
Finish Used
Thompsons Waterseal Teak Oil Walnut Semi-Transparent
Recommended Skill Level
Beginner

Modern Adirondack Chair Set

Submitted by Anonymous (not verified) on Wed, 06/10/2020 - 17:25

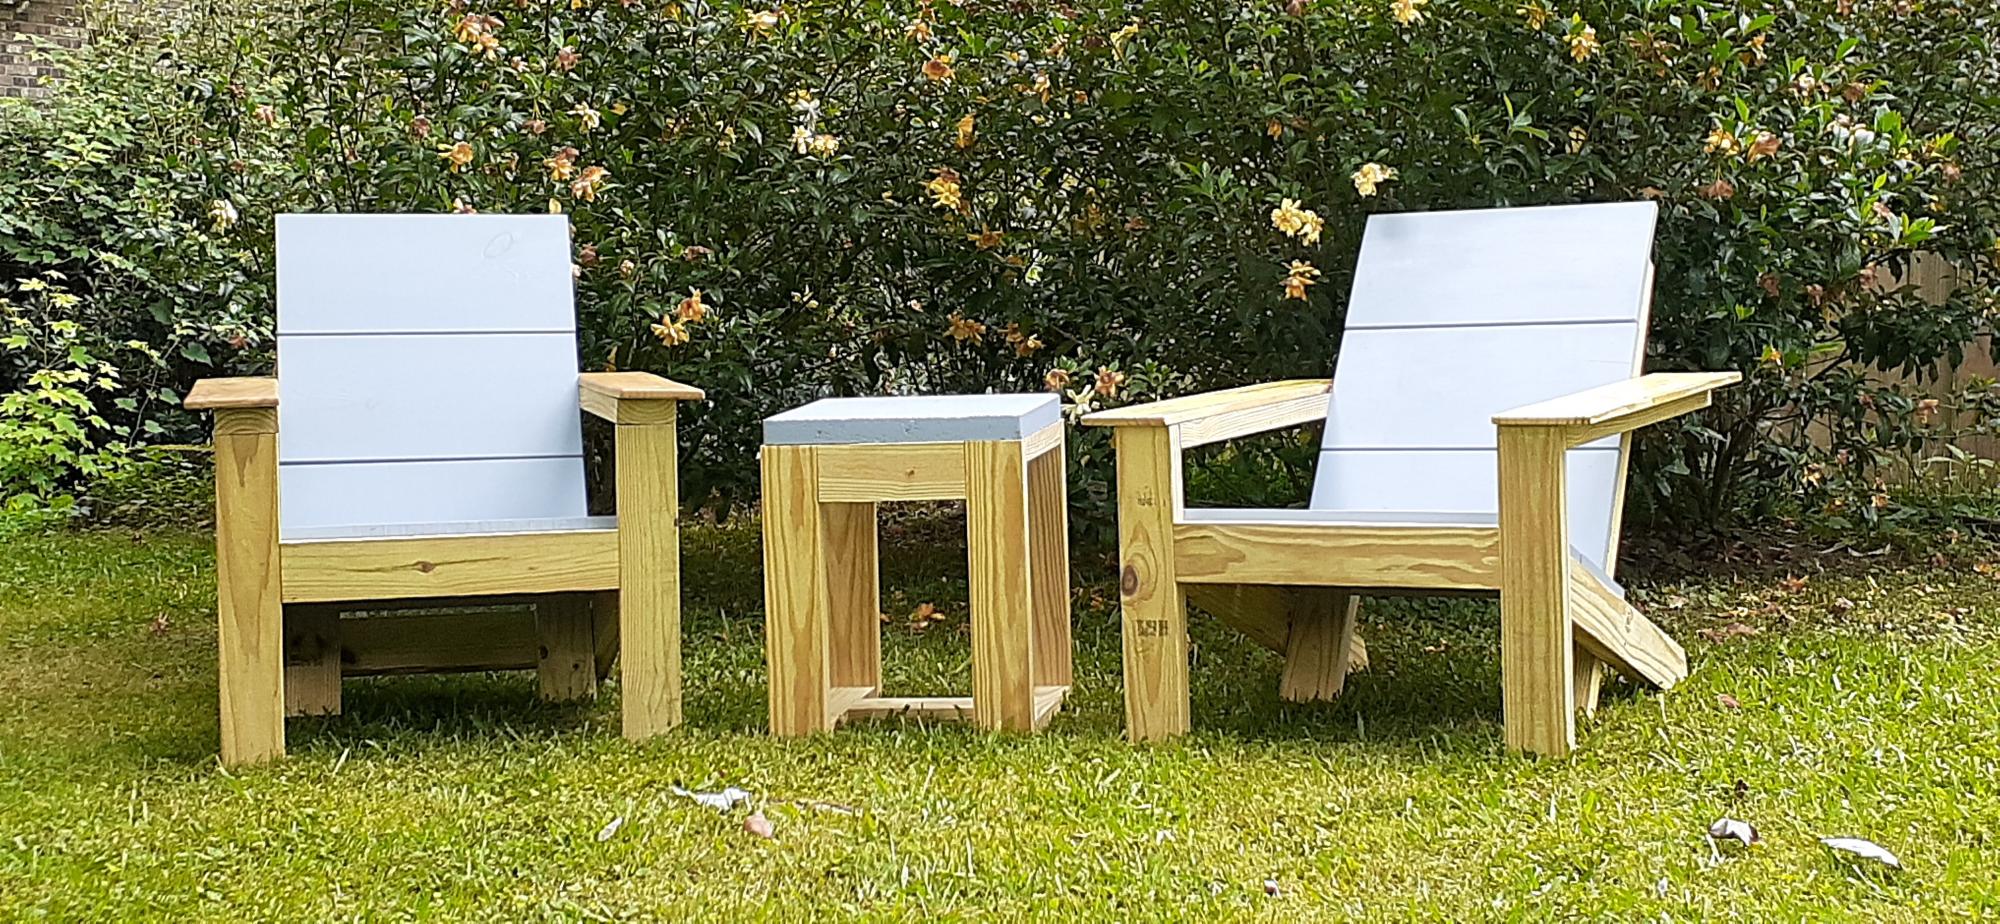
I used 5 5/8 fence pickets I had in the scrap box to give the chairs a wider arm rest. I wanted something wide enough to safely hold a paper plate and drinks.
I planned them, routered the edges and put a coat of oil based polyurethane on them.
The table is just something I put together and the top is a 1.5 inch thick 16x16 concrete paver.
If you like the wide arms, use wood glue and clamps, not nails or screws. Saves you from having to fill them and it looks better too.
Enjoy
And thank you Anna for a great build!

Built from Plan(s)
Estimated Cost
$60
Estimated Time Investment
Day Project (6-9 Hours)
Finish Used
Exterior paint and oil based polyurethane
Recommended Skill Level
Intermediate
Seasonal And Holiday

Pallirondack Laundry Basket Dresser

I showed my wife the Laundry Dresser featured on Ana White's website and she asked if I could make one for her, but not quite so tall. I also turned the orientation to fit our laundry room space. I used primarily oak from recycled pallets to build the Laundry Basket Dresser. She wanted a work space on top, so folded laundry, empty baskets, etc. all have a temporary resting place depending on the day. From start to finish, it took me about 6 hours. She plans to stain the piece at some point, but its already in use, so I'm not 100% sure that will ever happen until we move or something. ;-) Great idea and laundry room organization!

Estimated Cost
Half a box of screws
Estimated Time Investment
Afternoon Project (3-6 Hours)
Recommended Skill Level
Intermediate

Comments

Kathy in Pittsburgh (not verified)

Mon, 09/10/2012 - 10:22

I love the open sides, plus it makes it much more feasible to build with scraps repurposed wood, which I love. Thanks for the inspriation

payne.kj

Mon, 04/08/2013 - 08:48

Hi, do you have any kind of plans for how you did this or atleast dimensions? I think this one fits more of what my wife needs, but I'm pretty new to making anything.

nicholas_ftm

Sun, 06/14/2015 - 20:16

Soooo I made this according to the measurements and no laundry basket I find fit. Kind of dissapointed in the fact that this cool thing I just built doesn't have any baskets that will fit it. Any advice on finding a basket that fits?

jkread

Fri, 07/10/2015 - 20:56

I think the idea is to build it to fit the baskets you have or buy some and build around them.

Toddler Farmhouse Bed

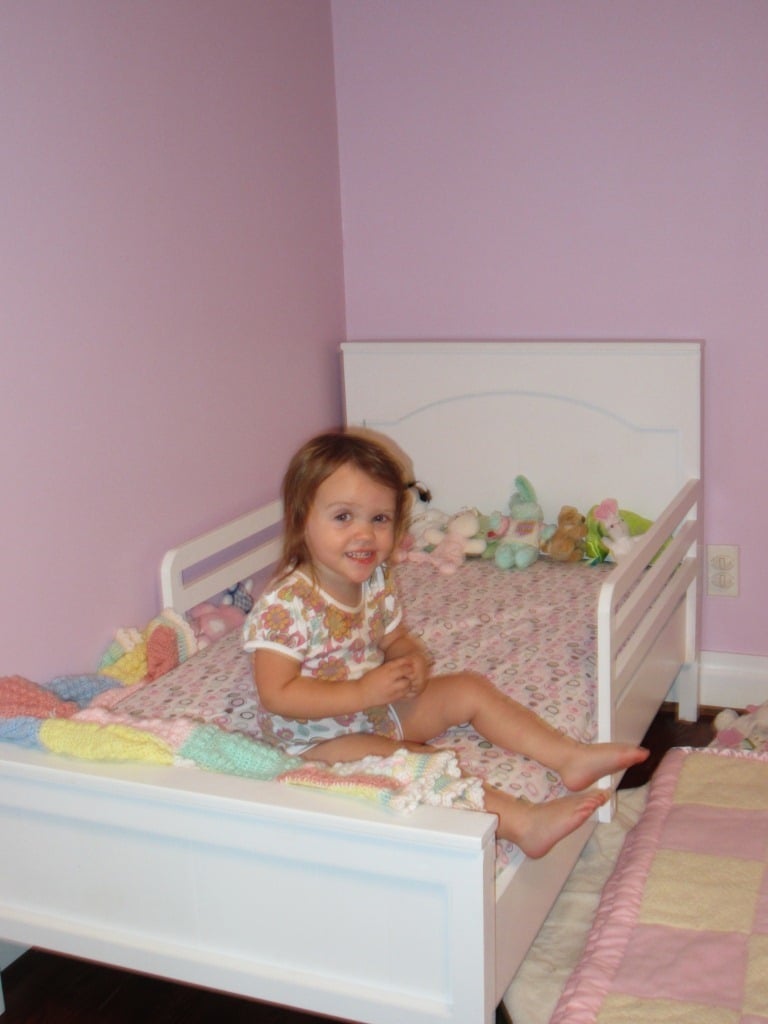
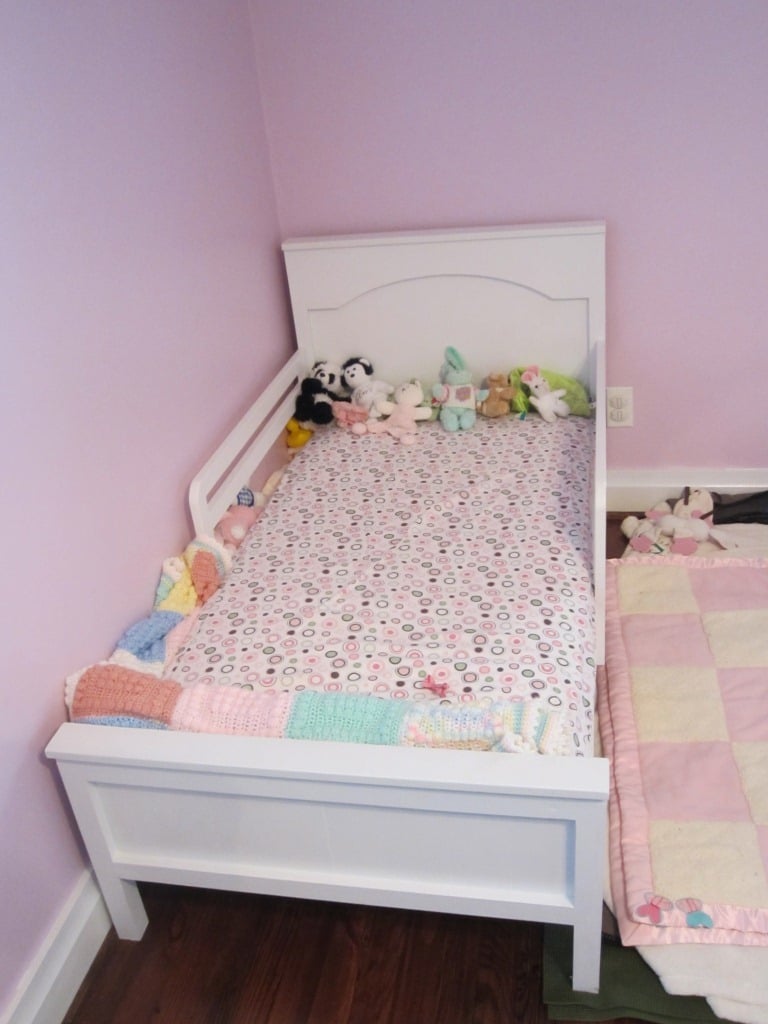
I can't believe I built this bed! It's the project I'm most proud of so far and my daughter loves "my big girl bed!" I recently got a jigsaw and tried it out making the arch. It didn't turn out perfect but I'm probably the only one who notices it. I built the rails using 1x2's from the "Traditional Wood Toddler Bed" plans on this site and altered them to fit this design. I added a third rail to it because there was too much space between the mattress and rail when my daughter lies on the bed.

I found a bunch of free wood on Freecycle from someone local so I didn't have to spend a ton of money on this.

Thanks for the plans, Ana!!!

Built from Plan(s)
Estimated Cost
$30
Estimated Time Investment
Afternoon Project (3-6 Hours)
Finish Used
White paint.
Recommended Skill Level
Beginner

Comments

Big Sandbox with Lid

Submitted by flinchball on Mon, 09/21/2020 - 13:18

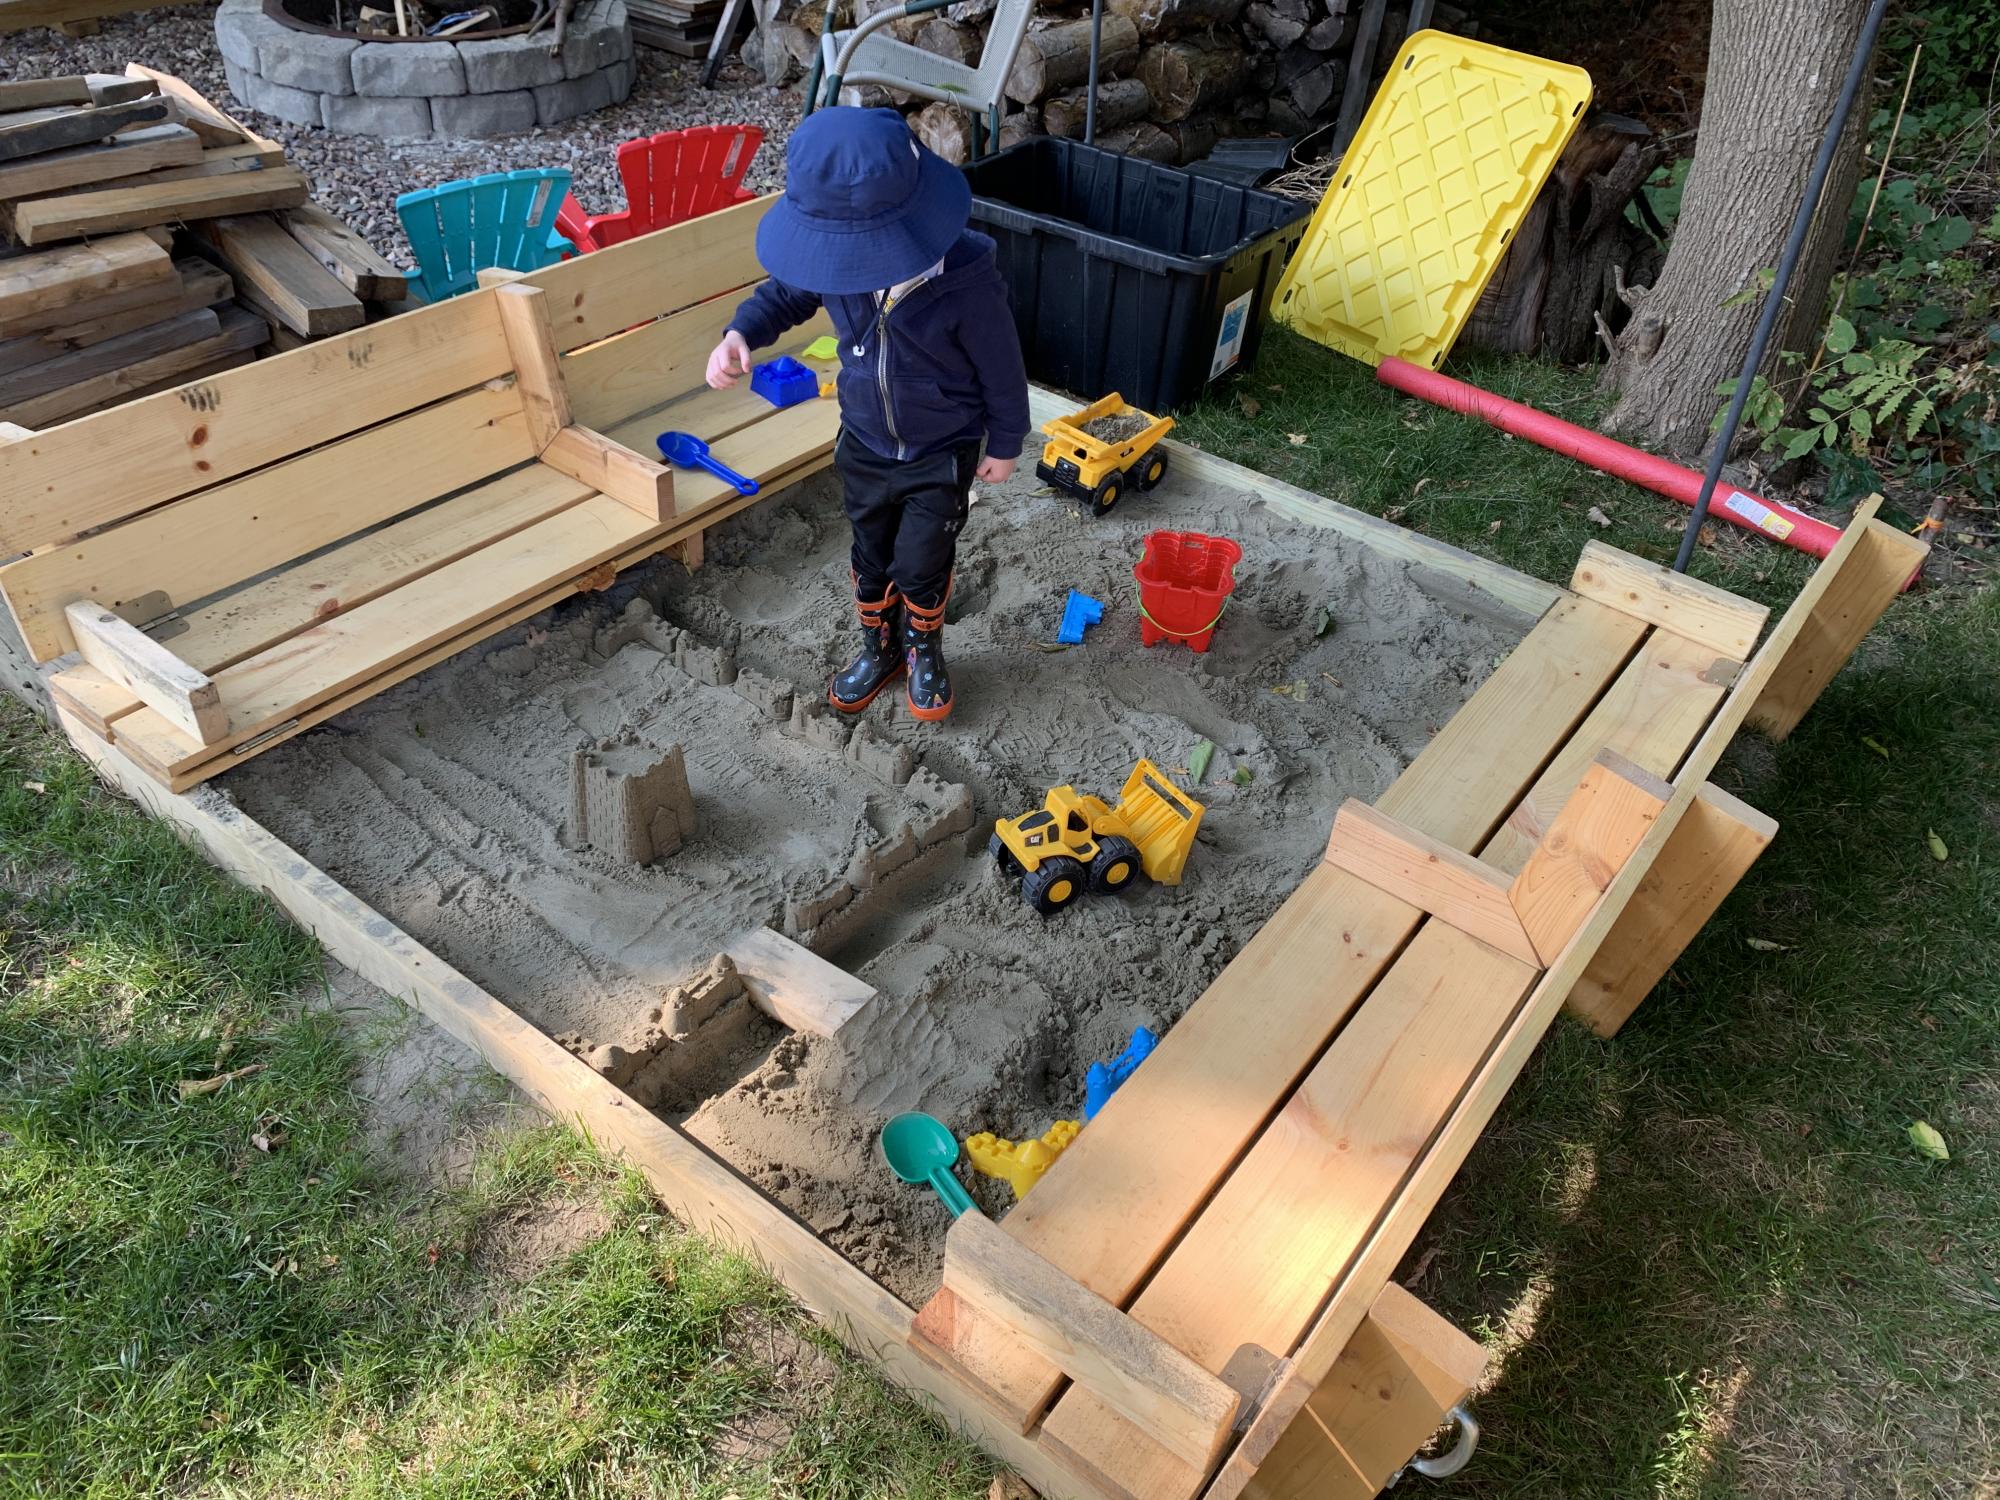
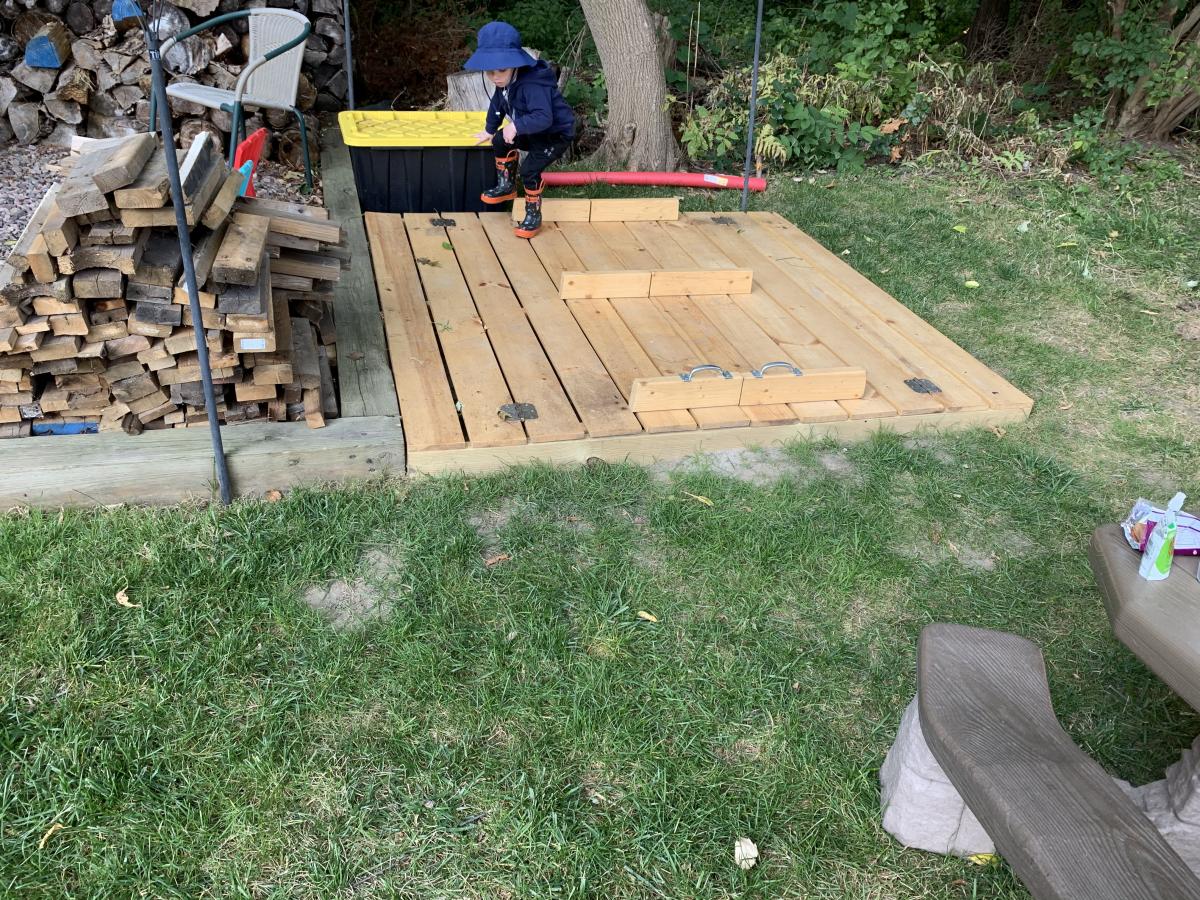
Made the sandbox 6x6. Recessed it so it sits flush with the timber’s around our fire pit area. I added extra armrests in the middle that double as supports when the lid is closed in case anyone wants to walk on it. Filled the sandbox full enough that the armrests sit on the sand when closed. It’s very sturdy now for walking on and the kids have tons of room to play. Thanks for a great plan to work from.

Built from Plan(s)
Estimated Cost
$100
Estimated Time Investment
Day Project (6-9 Hours)
Finish Used
Boiled linseed oil.
Recommended Skill Level
Beginner

Comments

Greenhouse

Submitted by Anonymous (not verified) on Tue, 01/05/2021 - 08:08

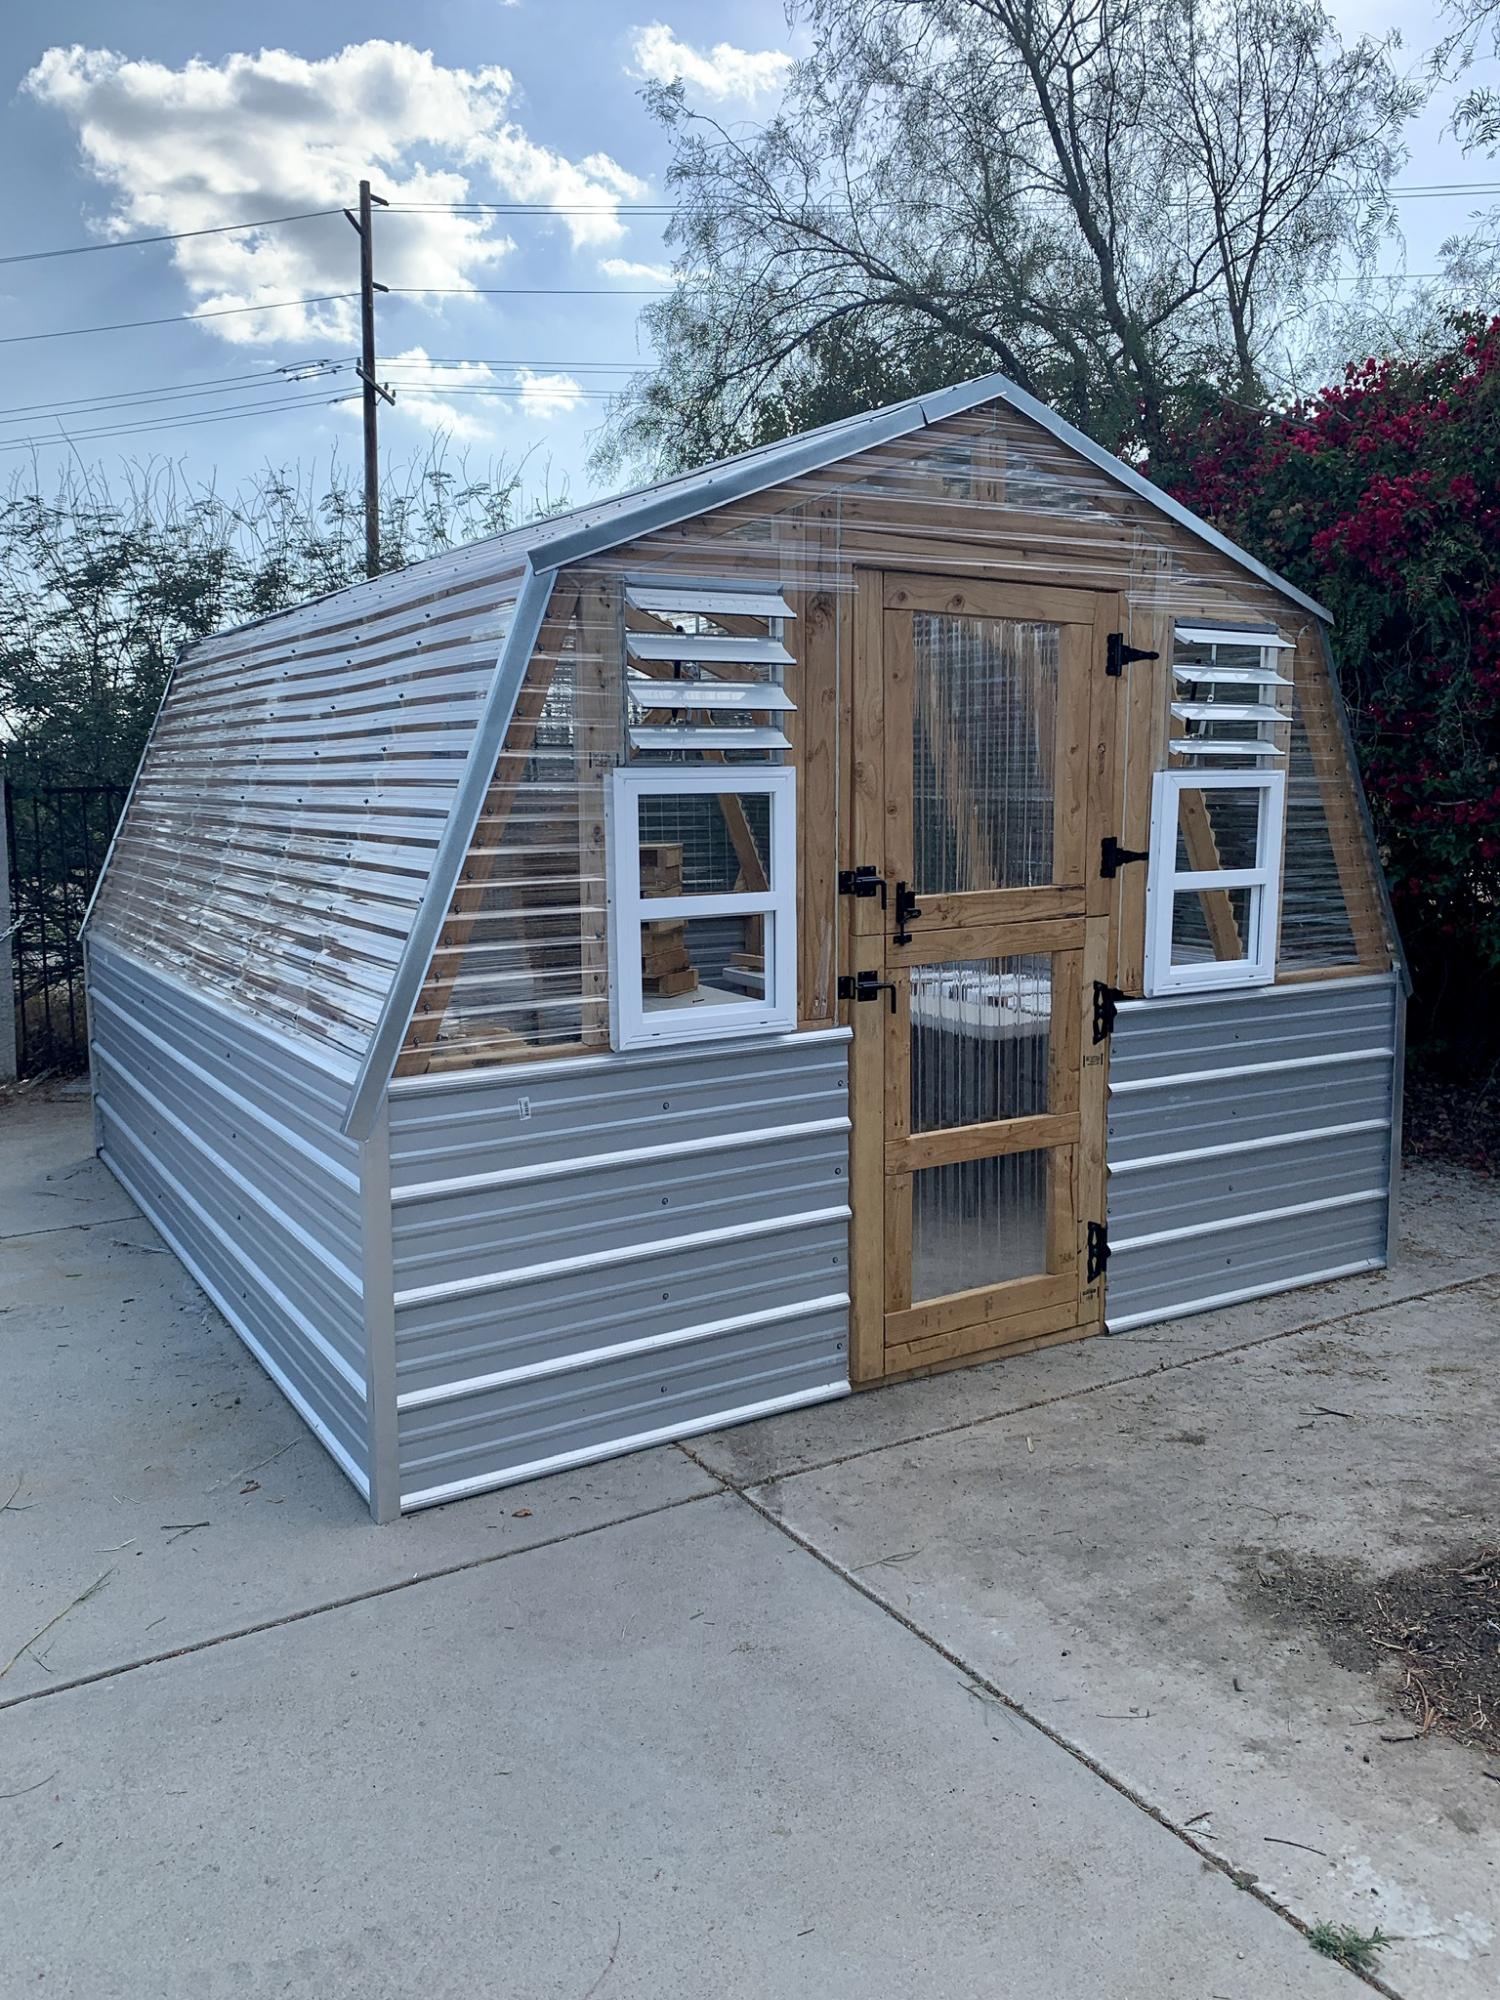
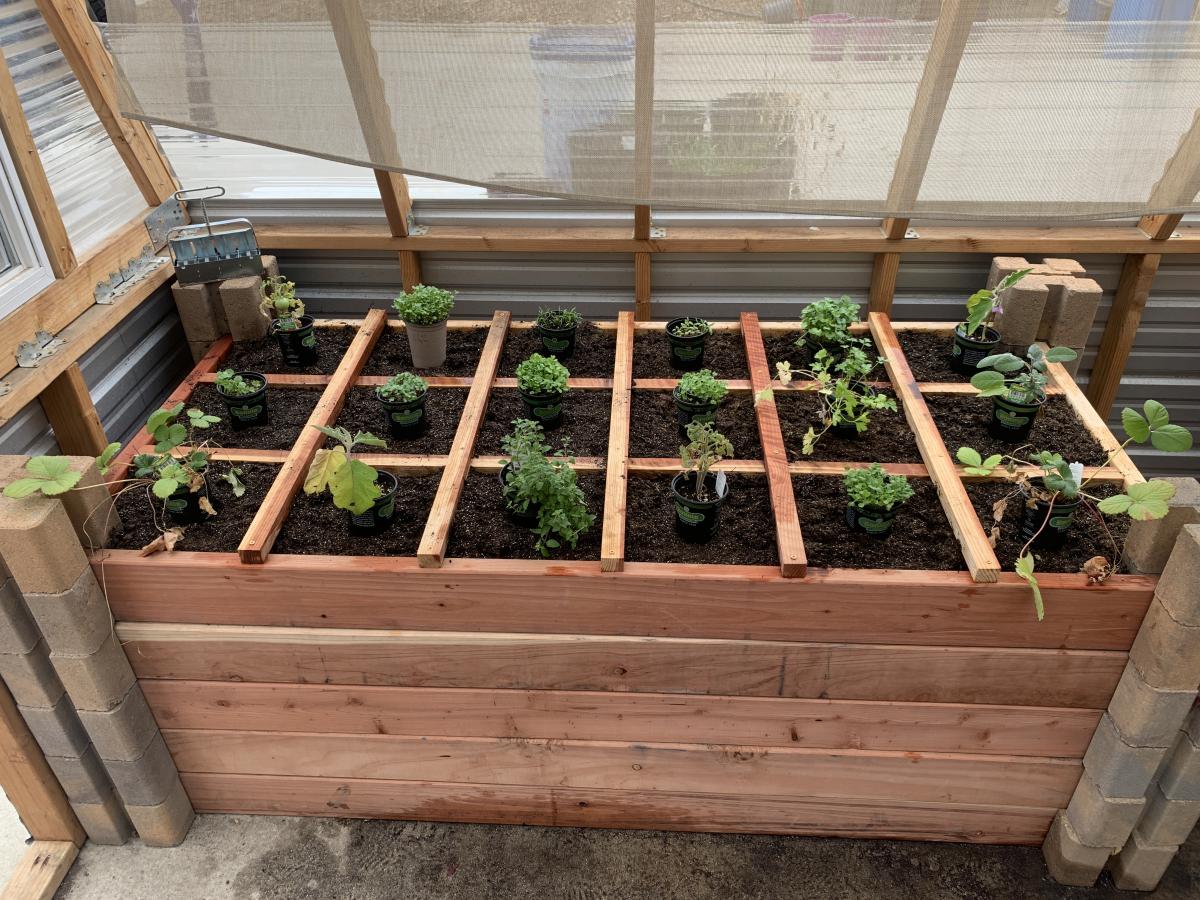
We made some modifications to the greenhouse to include a bench with three levels, a working bench and a square foot garden. We also put it on concrete to keep all the weeds out from the bottom as well.
Built from Plan(s)
Estimated Cost
2500.00
Finish Used
We start our own seeds and plan to grow 15 different varieties of vegetables inside this greenhouse all year long.
Recommended Skill Level
Intermediate

Comments

Kitchen Spa Bench

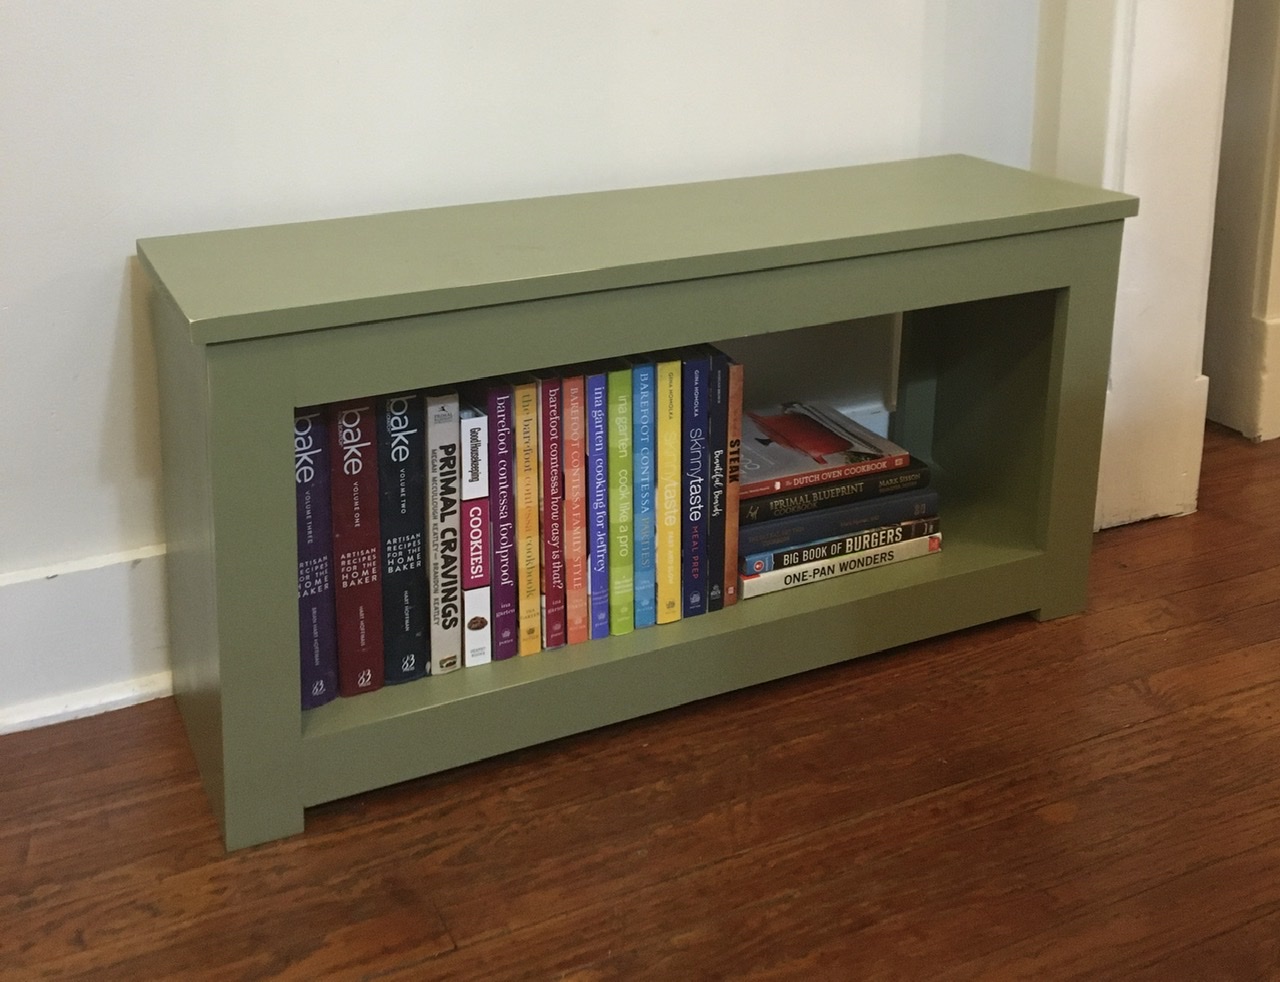
There is no seating in our small kitchen and this spa bench was the perfect solution. Adds just the right amount of space for someone to keep a chef company while cooking or baking.

Estimated Time Investment
Afternoon Project (3-6 Hours)
Finish Used
I used Sherwin Williams’ “Sheraton Sage” in a semi-gloss. Also sanded the edges a bit to create a distressed look.
Recommended Skill Level
Beginner

Comments

Planter Box on Wheels

Submitted by thediyplan on Fri, 03/12/2021 - 09:55

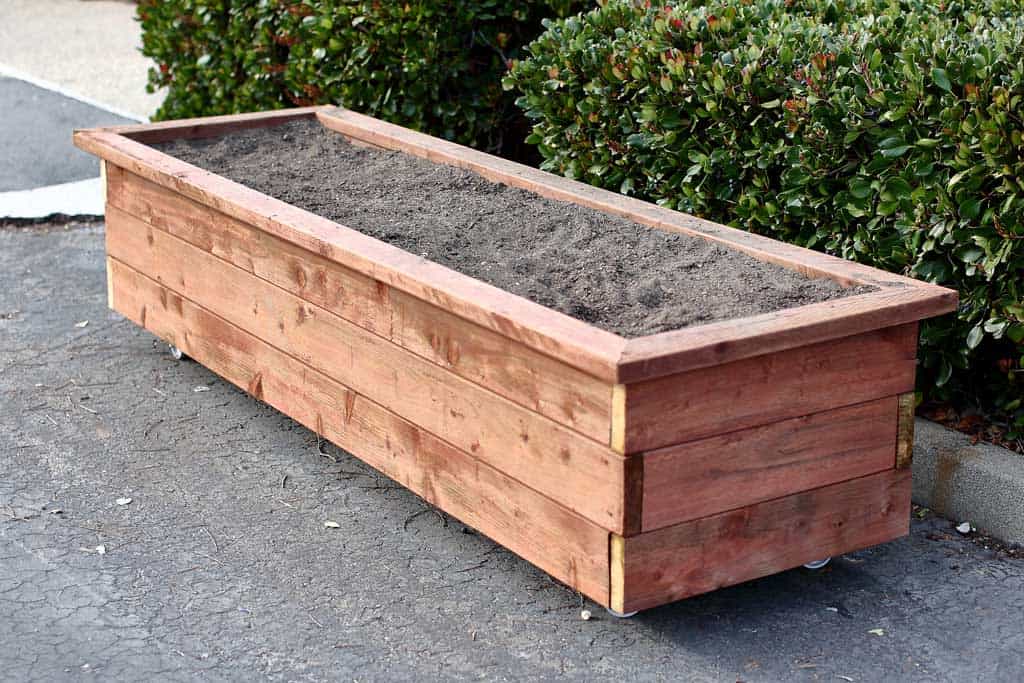
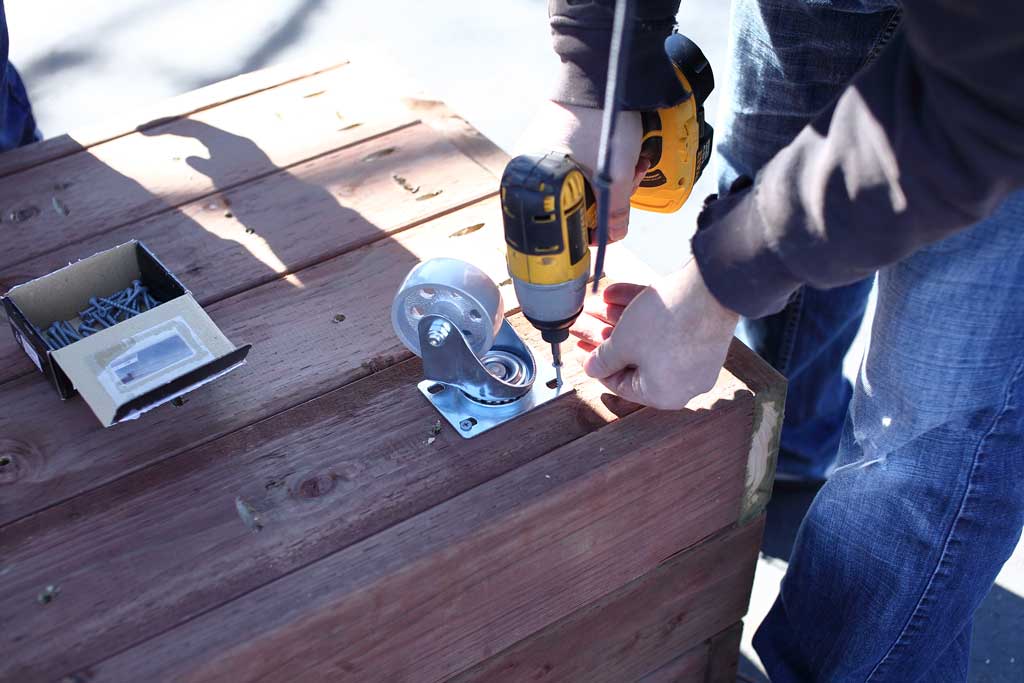
Have you ever wondered how to get your kids to eat more vegetables? If you get them involved in growing their own plants, they tend to take a much bigger interest in eating their leafy greens. But before planting, you need to get a planter and fill it with dirt. To save money, why not build your own DIY Planter Box on wheels? You could even have kids help you, just like we did with a school that our kids go to. Follow this simple plan that I’ve made with step-by-step instructions on how to build it.

We were asked to build a project for two classes, so we decided to build a couple of planters that will allow them to grow their own vegetables. I pre-cut the boards and drilled the pocket holes at home. Then as a class, we assembled the planters together and filled them with dirt. It was a fun project to build as a class and to see kids get hands-on experience, building something out of wood.

See my website for additional pictures and how I've built it, TheDIYPlan.com

Estimated Cost
$250
Estimated Time Investment
Afternoon Project (3-6 Hours)
Recommended Skill Level
Beginner

Comments

Back