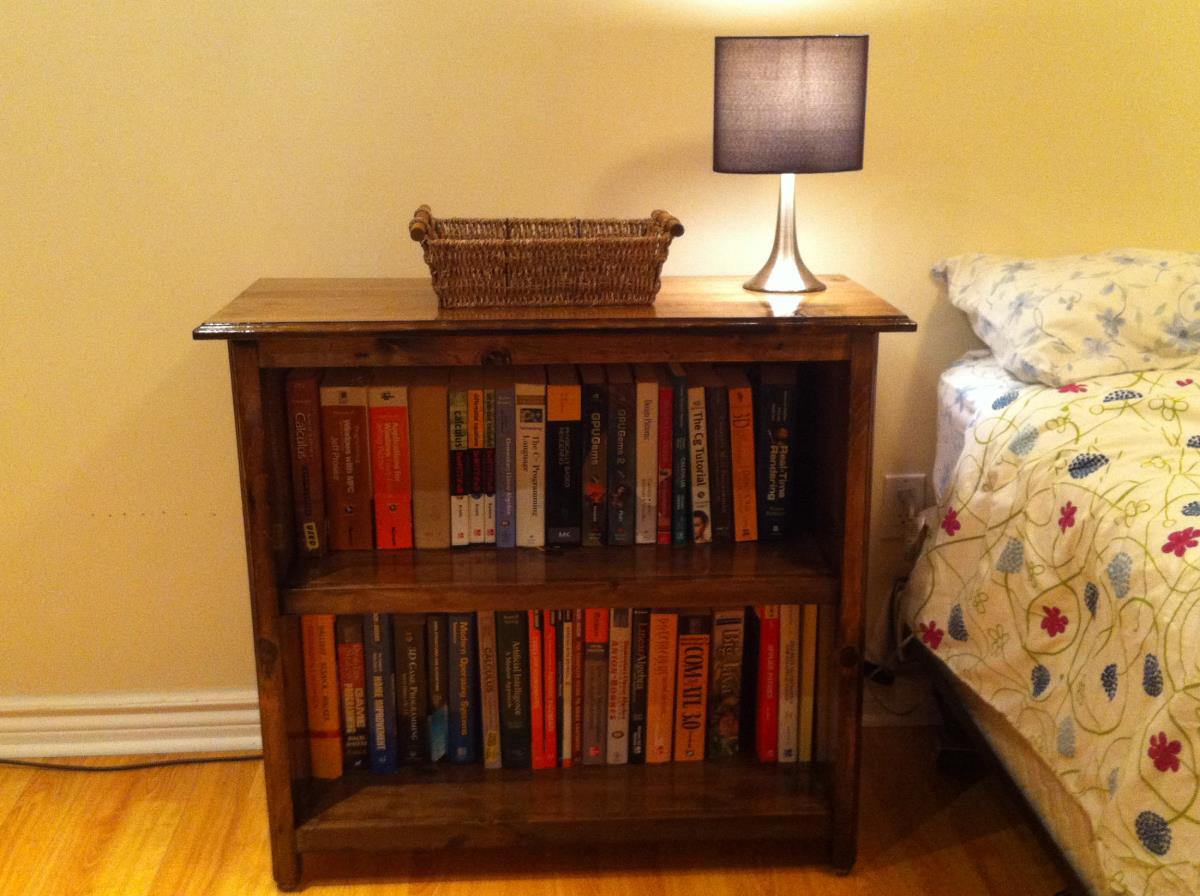
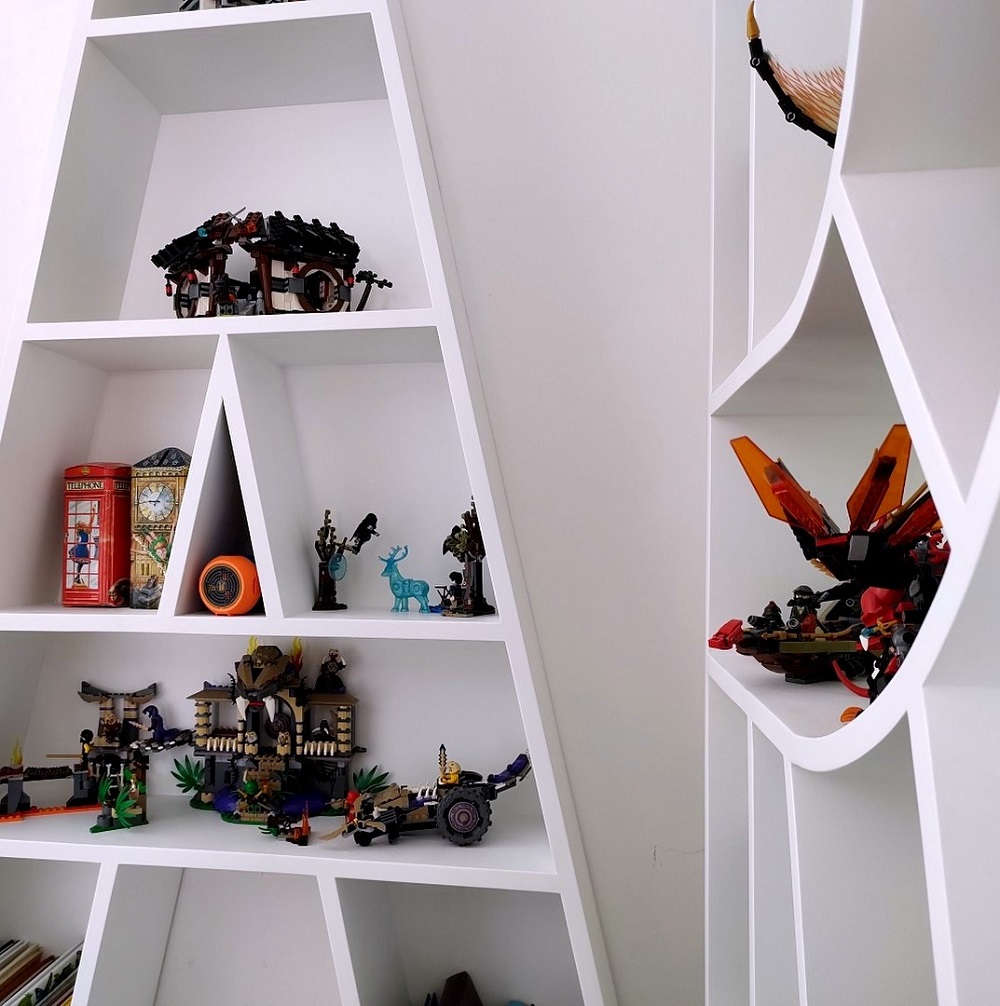
Essential End Tables
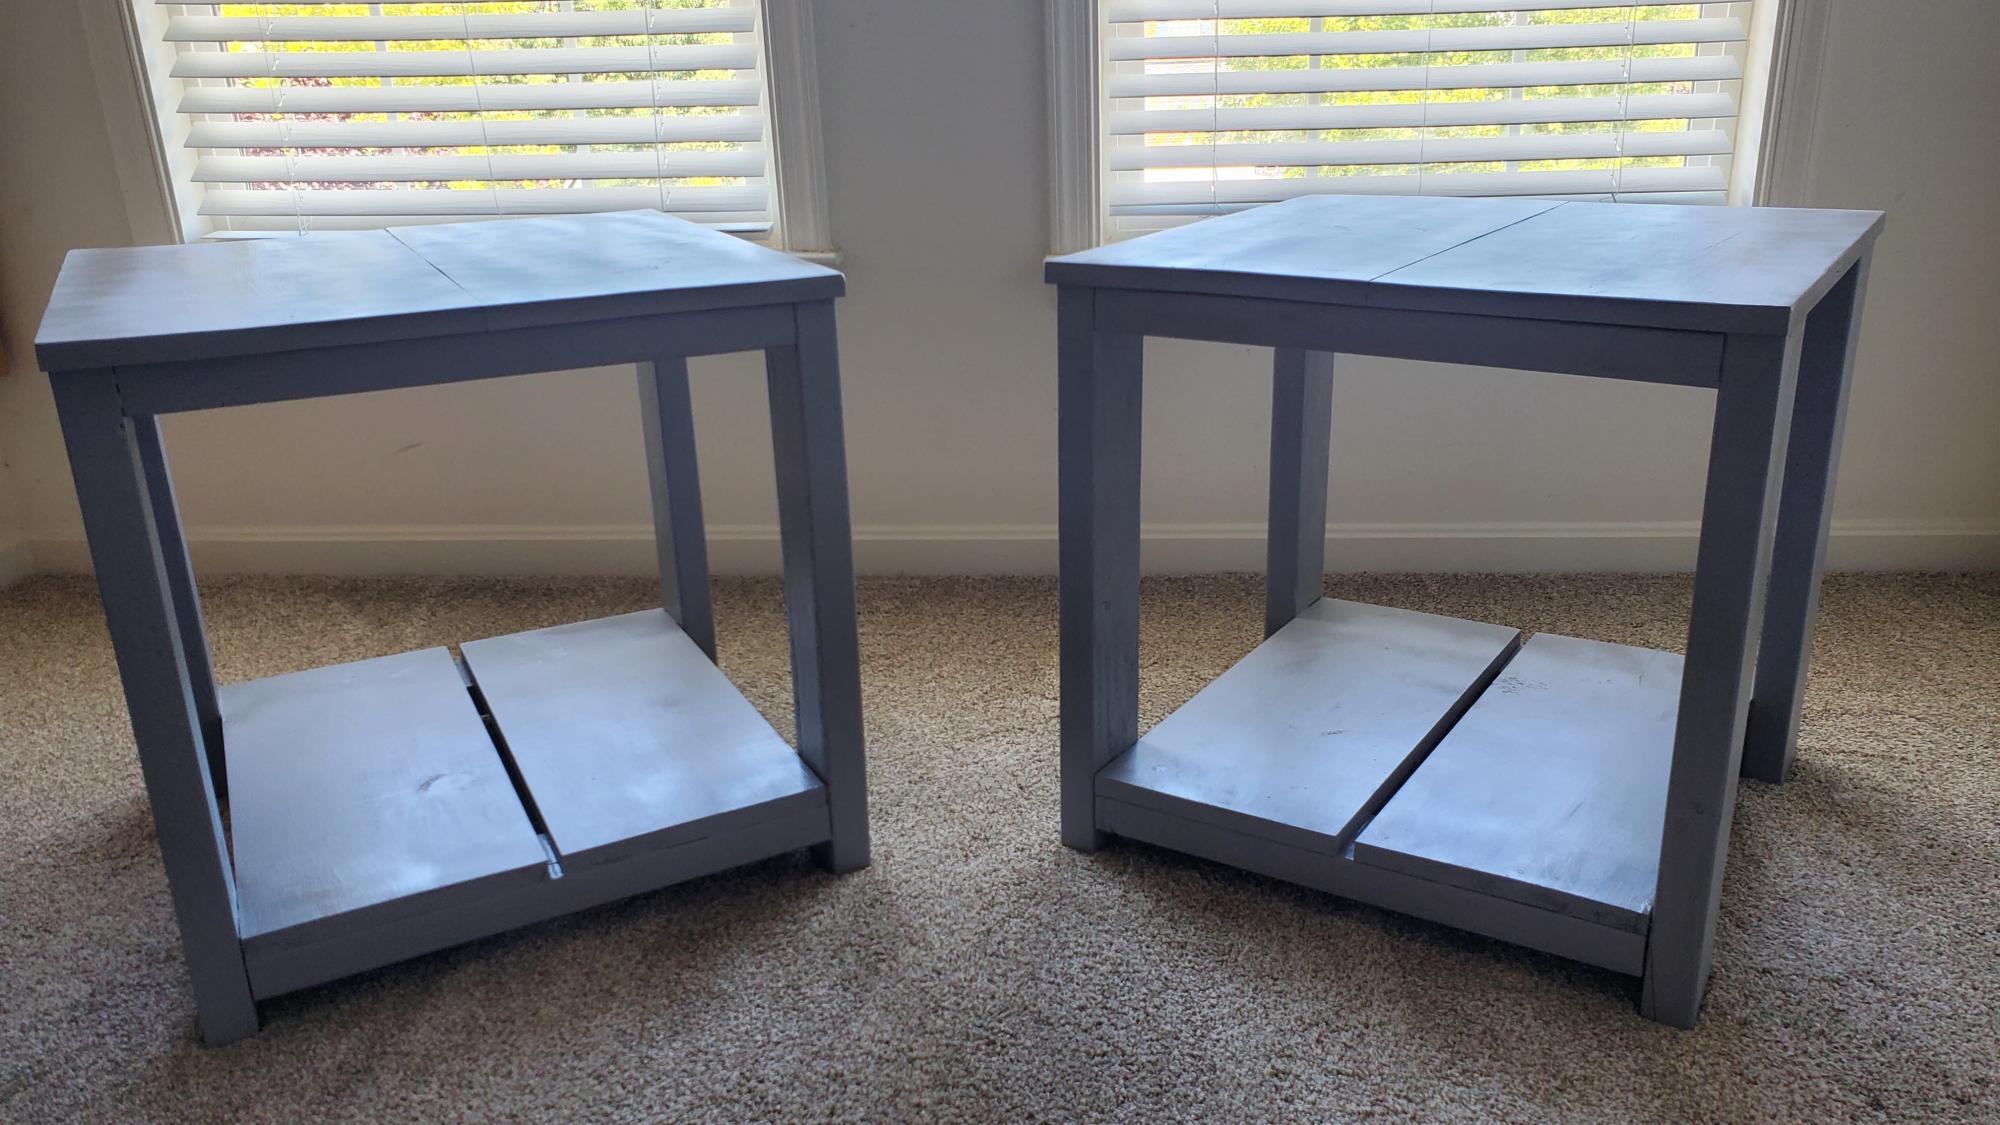
Plans are 2x4 Nightstand https://youtu.be/gLYuisY7i-M and color is from DIY Nightstand https://youtu.be/FR8x_PFPGXM
I loved the simplicity and my wife loved the color.
Thank you
Built from Plan(s)
Plans are 2x4 Nightstand https://youtu.be/gLYuisY7i-M and color is from DIY Nightstand https://youtu.be/FR8x_PFPGXM
I loved the simplicity and my wife loved the color.
Thank you
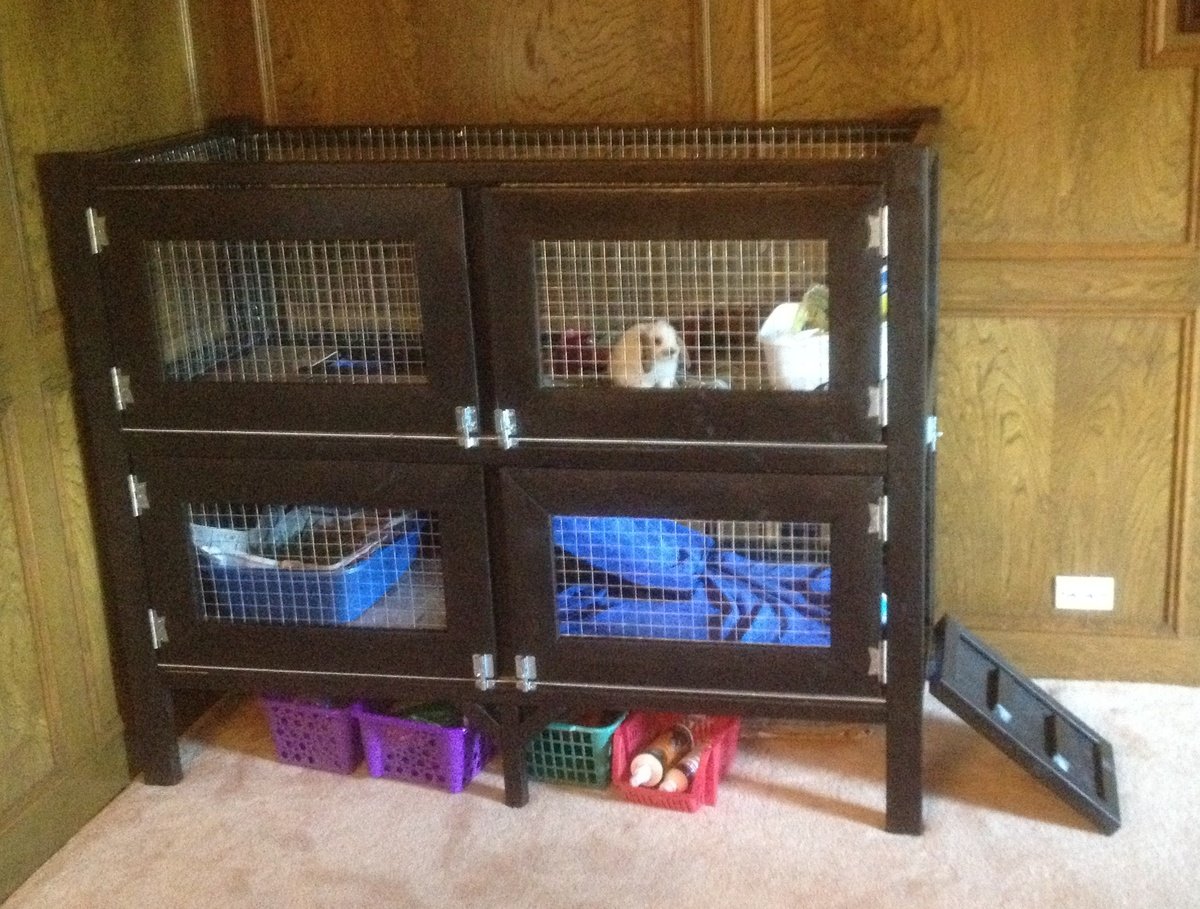
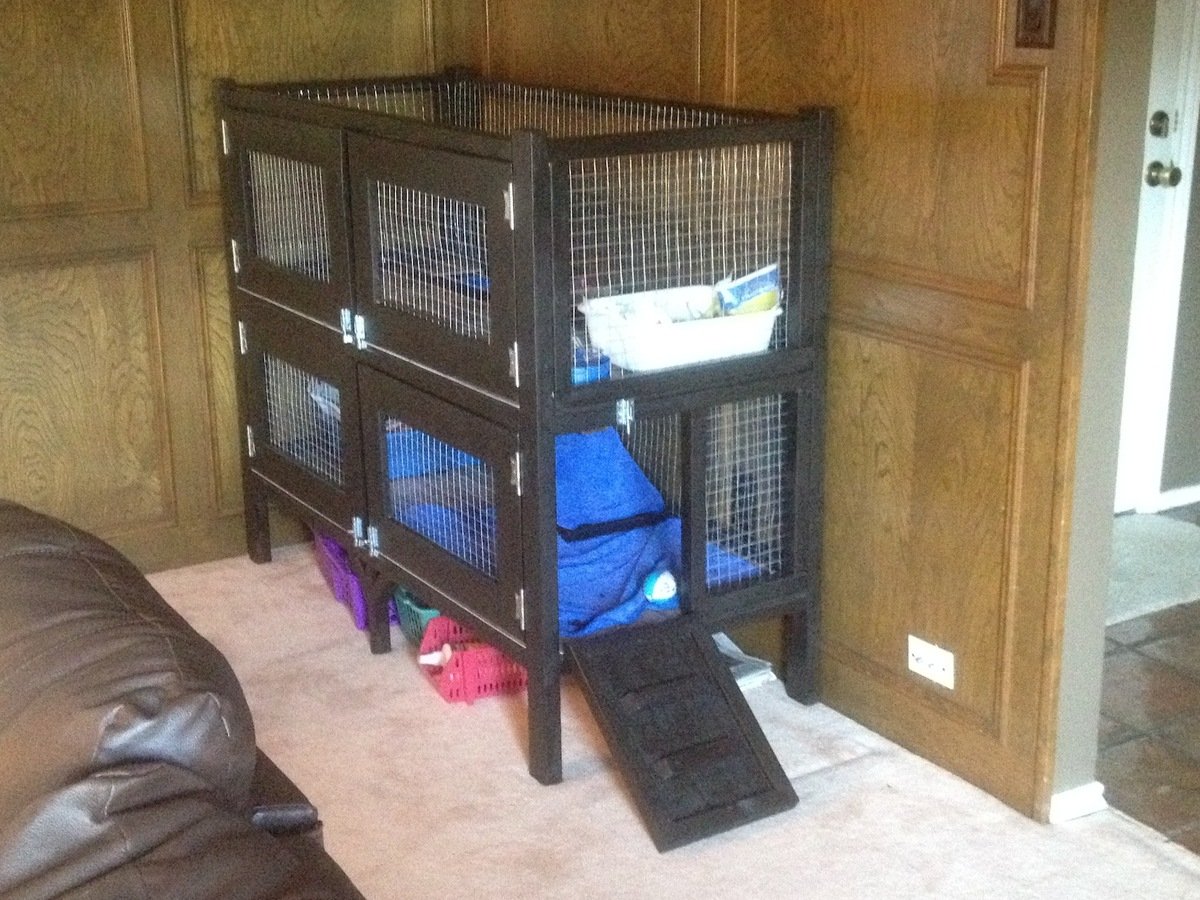
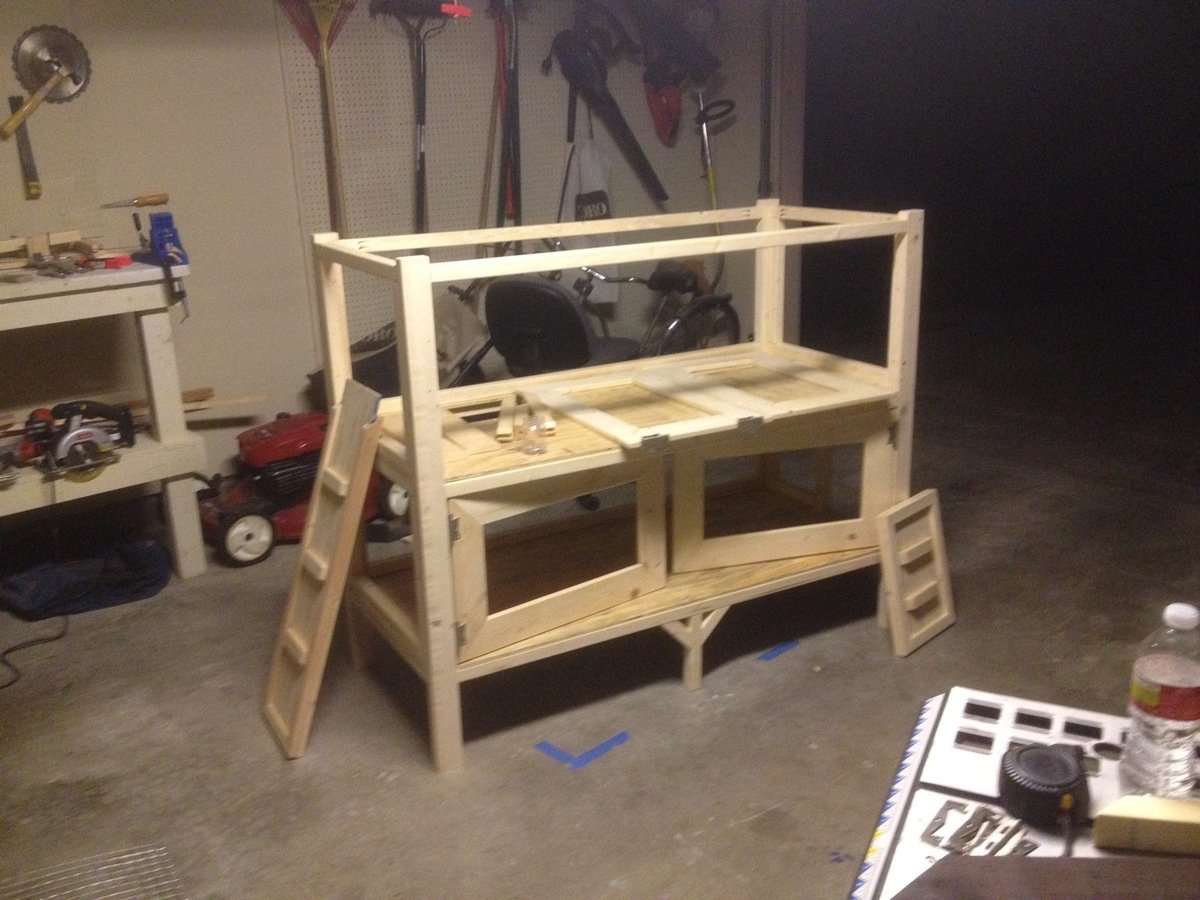
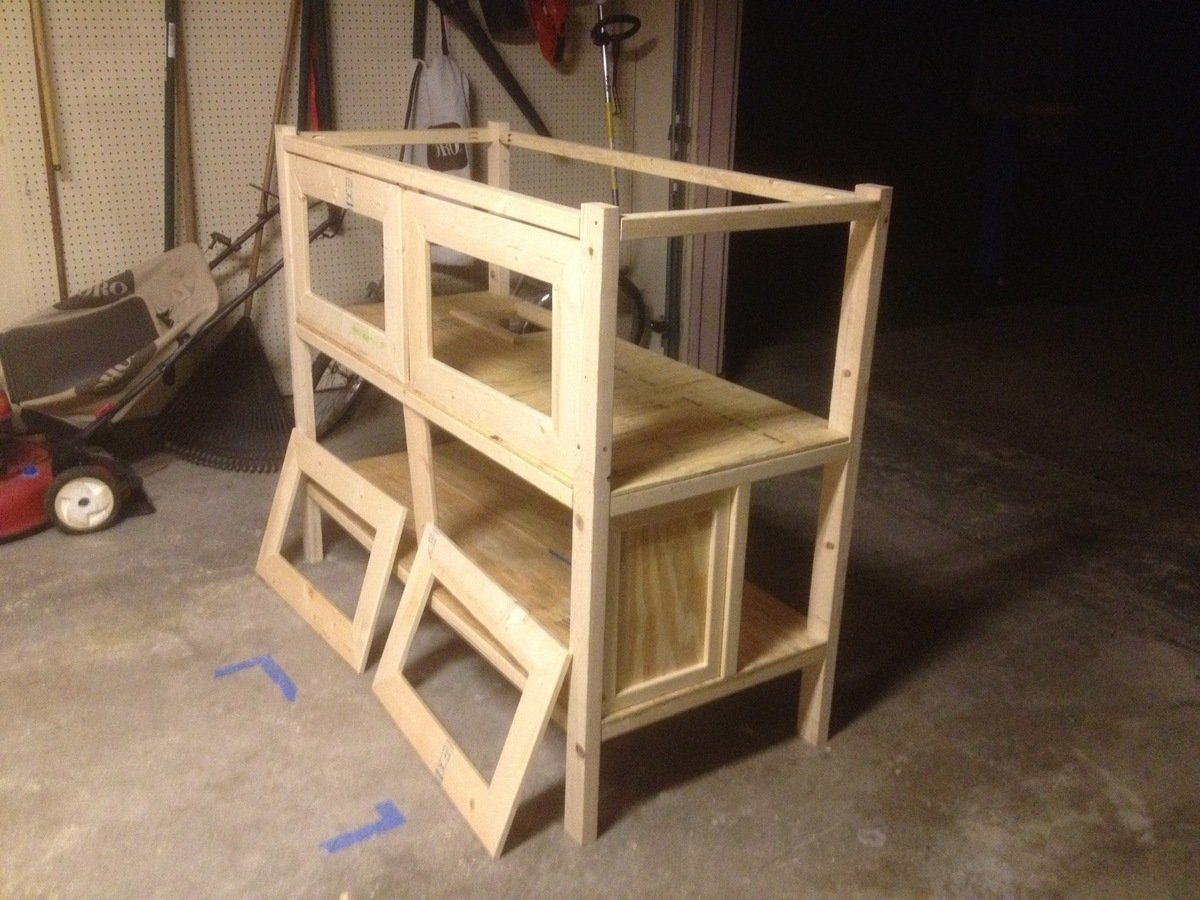
For my first woodworking project, I foolishly decided to build a rabbit hutch without plans for my daughters new Easter Bunny. So I literally scratched some ideas on my wood working bench and started going to work. I did some construction over a decade ago, but never attempted to build any furniture before, so I'm pretty happy with how this came out.
I spent a few days researching various rabbit cages and for our place we needed something that was ascetically pleasing and functional as it was going in our living room. I got some ideas from the web and decided the best thing for us would be to have an entry ramp, 2 sets of barn doors for each level (for easy cleaning) and an open roof. We went with linoleum floors since she's already litter trained. The floors could easily be modified to add 1/2" wire mesh if we decide to change things down the line. Also, we chose an espresso finish with silver hardware to accent the wire mesh
I pretty much crashed and burned on the staining as I've never done that before, but it ended up looking ok after all. I did a light sanding, but will probably invest in a planer and jointer to get my wood in better shape before assembling in the future. Also, I'll probably lightly dab some stain on ends of wood before final assembly as it made it difficulty trying to hide the white pine with the dark stain.
Other cages I saw ran around $200-$350.00 so i don't feel so bad about the cost. It's really the time that it took learning and making mistakes. I'm sure if I had plans I could of cut my time in 1/2.
Total Cost came out to around $150.00 but probably would of been cheaper if I had some plans to go by. I probably wasted a few 2x2s and accidentally mis-cut a scrap piece of 1/4"plywood which added another $16.00 to the bottom line.
Here's a breakdown of my total cost.
Hardware - $30.00
Includes 5 latches, 4 sets of hinges (8 total) and a 3' piano hinge
Stain - $8.00
Linoleum Tile @ ¢.69 sq ft - $16
Brushes, Stain Rags - $5.00
Screws - $6.00
Wire Mesh Roll $30.00
Needed 2 rolls at $15.00 each. I used 1" Wire Mesh measuring 2'x15'
Total Wood $50.00-$60
I used 2x3's for the legs - 2 @ 8' - $2.00 each ($4.00)
probably 15-20 2x2's - $1.52 each - can't remember how many I used to be honest ($30.00)
and a few 1x6's for the Doors - $2.00 each ($6.00)
Sheet of 1/4 plywood - $12.00

Thu, 05/03/2012 - 06:24
I bet your rabbit is pumped! What a nice house. Good Job.

In reply to I bet your rabbit is pumped! by Aargh (not verified)
Thu, 05/03/2012 - 06:57
Thanks! The rabbit definitely seems happy.
Thu, 05/03/2012 - 08:09
I also have been thinking with the idea of building a two story hutch for our rabbit. I love your ideas so now i have a new project to work on. Thanks for sharing!
Mon, 10/08/2012 - 12:46
I LOVE your cage! We have 2 rabbits and 2 Guinea pigs which means we have 2 ugly cages in our living room. We are planning something similar, but a bit bigger (but lower if that makes sense). And we'll put a 3rd story on for our Guinea pigs. So we have everyone on the same patch of real estate so to speak. I was going to do 3 solid walls with wire "windows" too keep all the hay, poops and such contained. I am also going to put lockable wheels underneath, so I can move it to my office if I ever need to (parties and renovations).
Is there anything that you can now think of that you would like to change on yours? R my research purposes.. :) It looks awesome, I'm just picking your brain for "hindsight" tips.
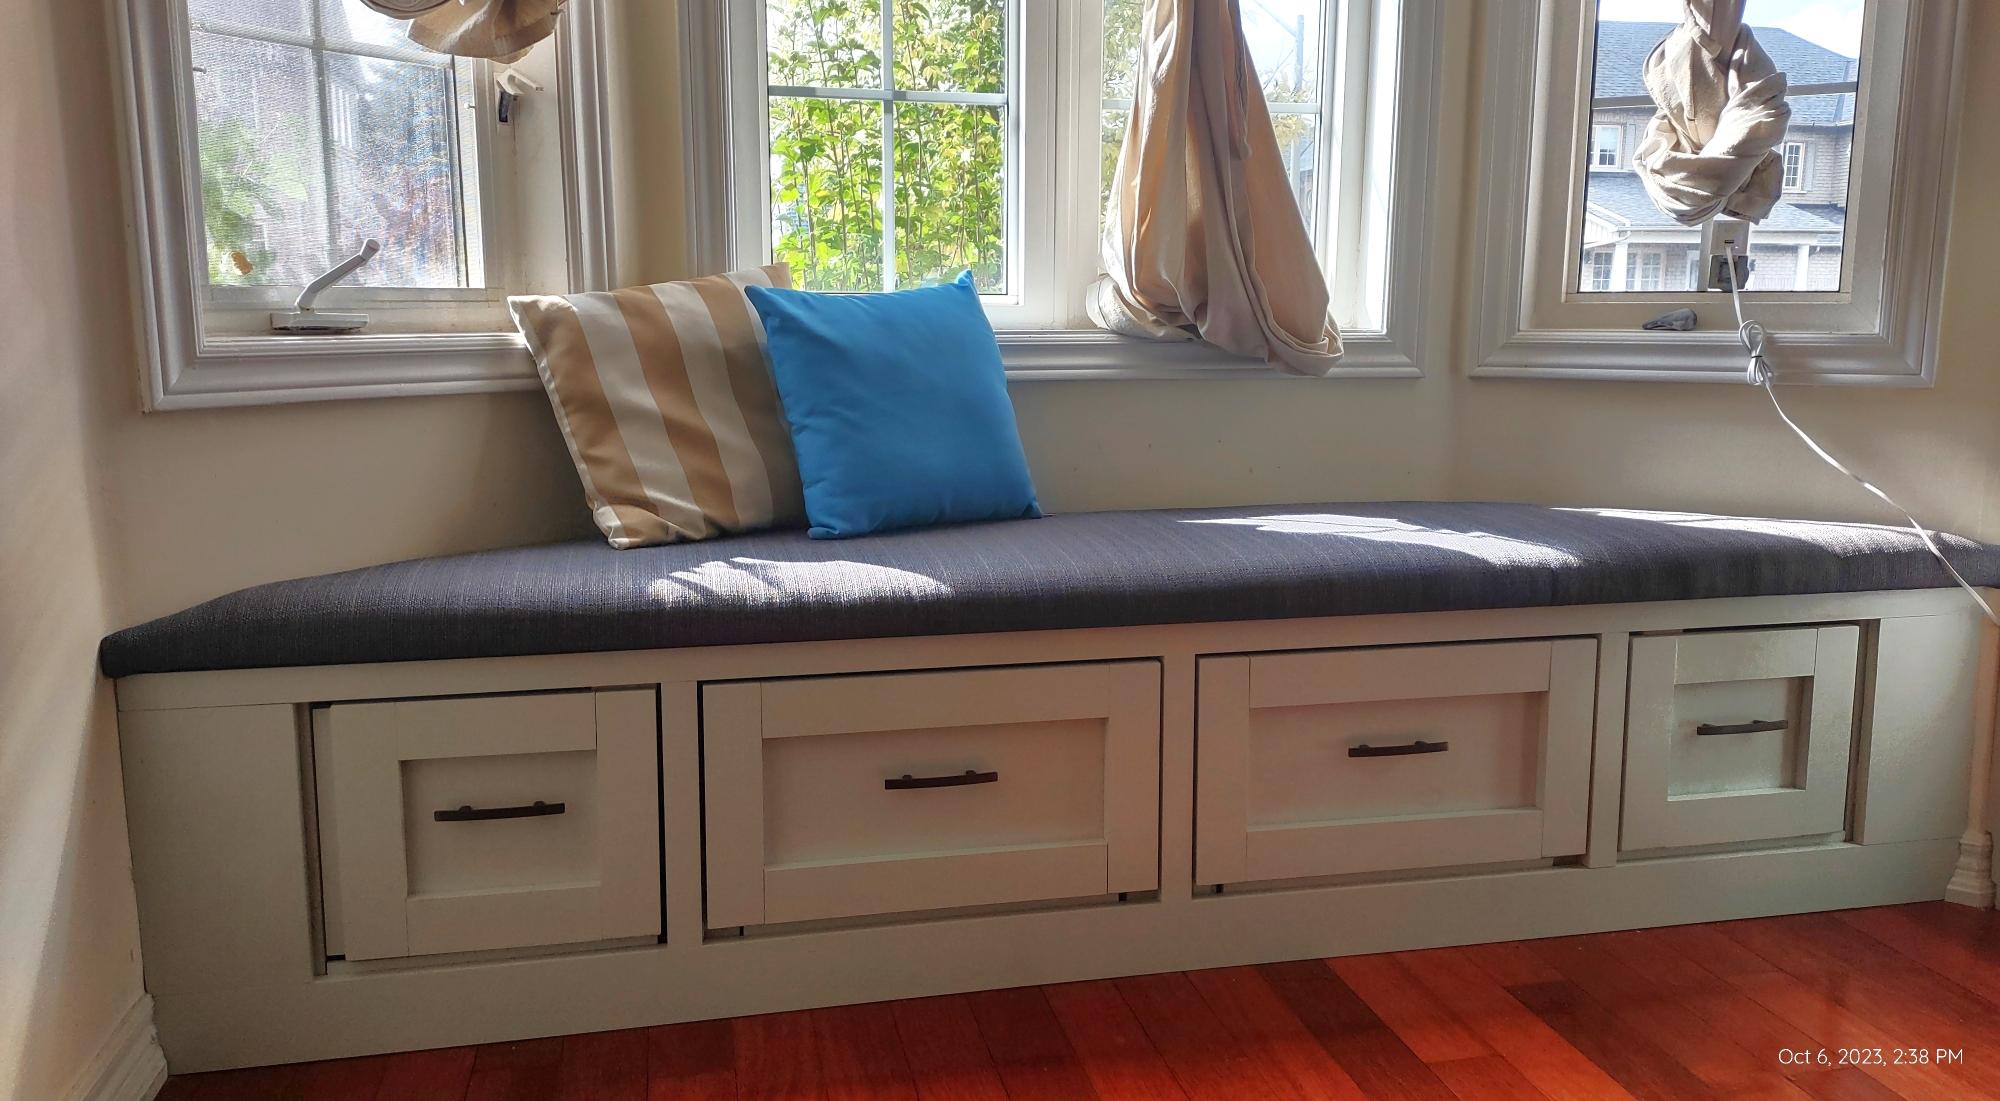
This is inspired by mud room bench with drawer. Apparently I had to make quite some modifications as this is for a bay window bench with trapezoid shape instead of a rectangular. In the middle are 2 drawers, at both ends are corner cabinets. Ana's design worked beautifully as the foundation of my project.
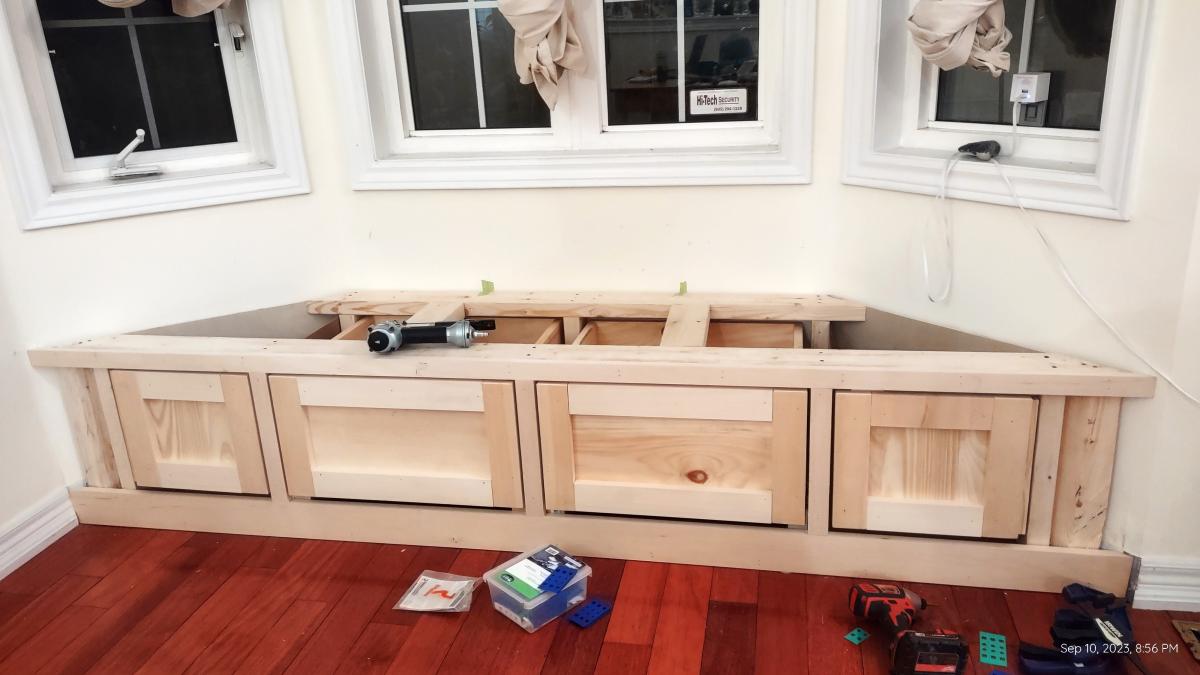
While I found the plans a little difficult to follow as there were steps left out, missing measurements, and misinformation, it was an easy project and I'm so glad I made it. Even at 21 weeks pregnant it was totally doable alone. The only thing I needed my husband for was to hold the side rails at the correct height.

Hello everyone,
I collected unwanted wood and I put them in a good use. Transform them into planters . Many people throw excellent wood . Either, they aren’t aware or they purchased new furniture.
Thank you Mrs. Anna . She has inspired me with her excellent ideas. God bless you
Jean Abinajem

This was my first project. It was relatively easy but I did make some mistakes that are now design features


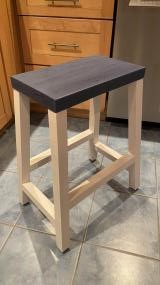
I started learning woodworking several weeks ago and came across your video and plans for the Farmhouse Counter Stool. It was easy to follow, and I love how it turned out! I made one first as a test, and I think I'll make three more. Thanks Ana!
Fri, 09/25/2020 - 14:57
Welcome to the woodworking community, it looks fantastic! Thank you for sharing:)
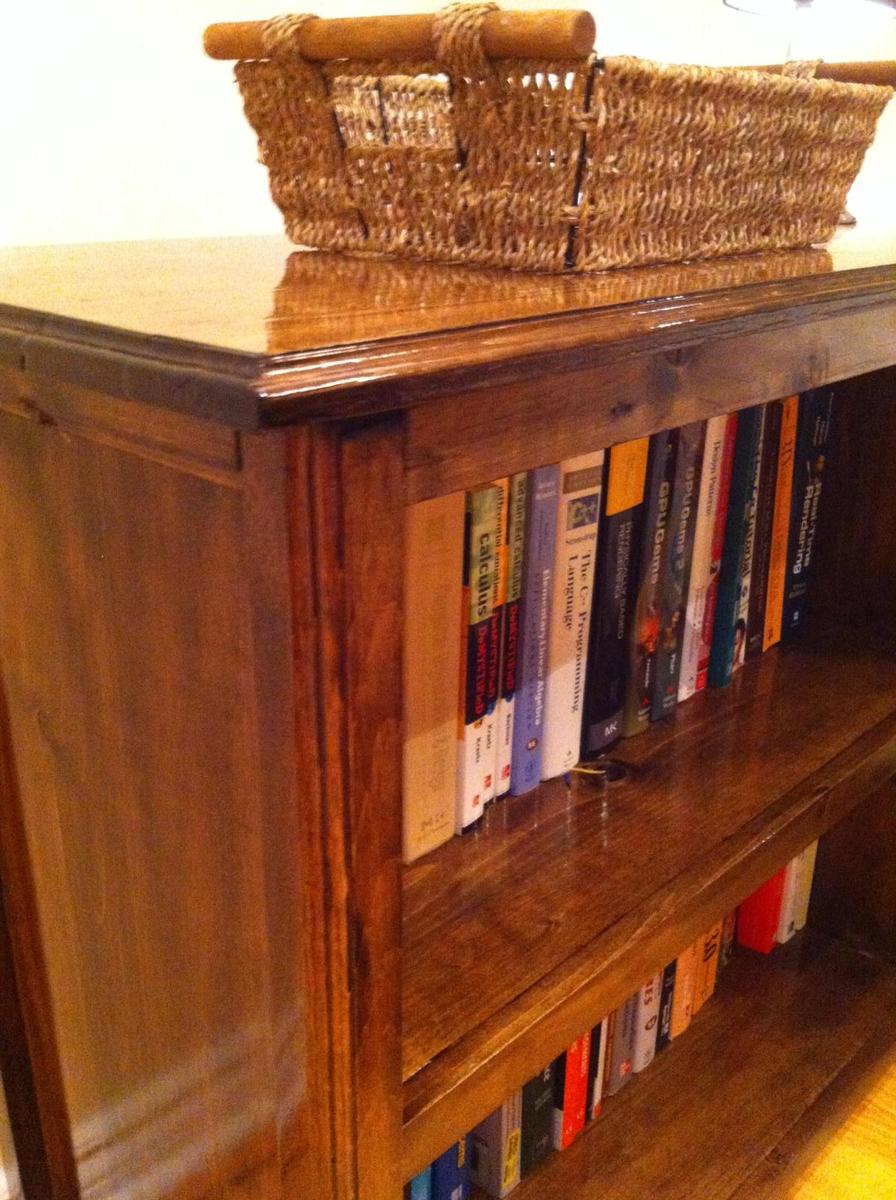
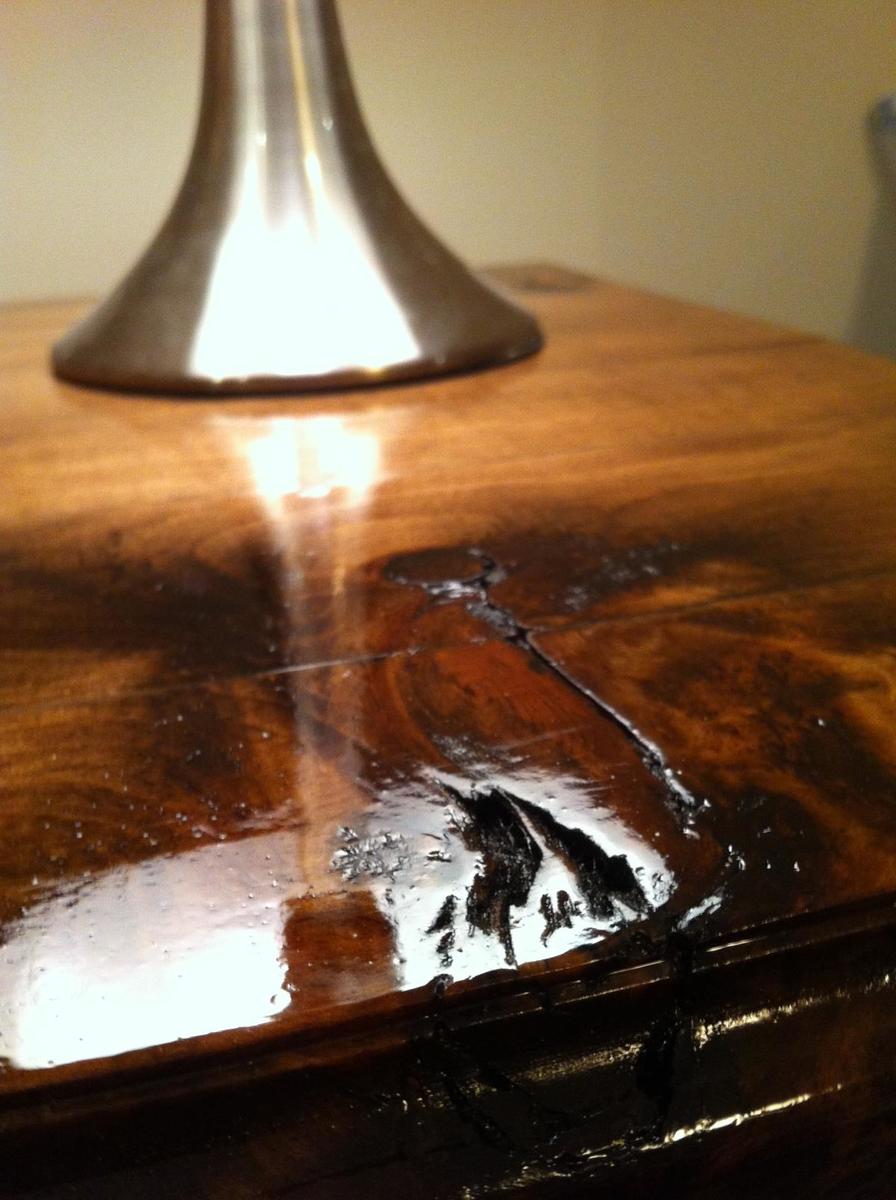
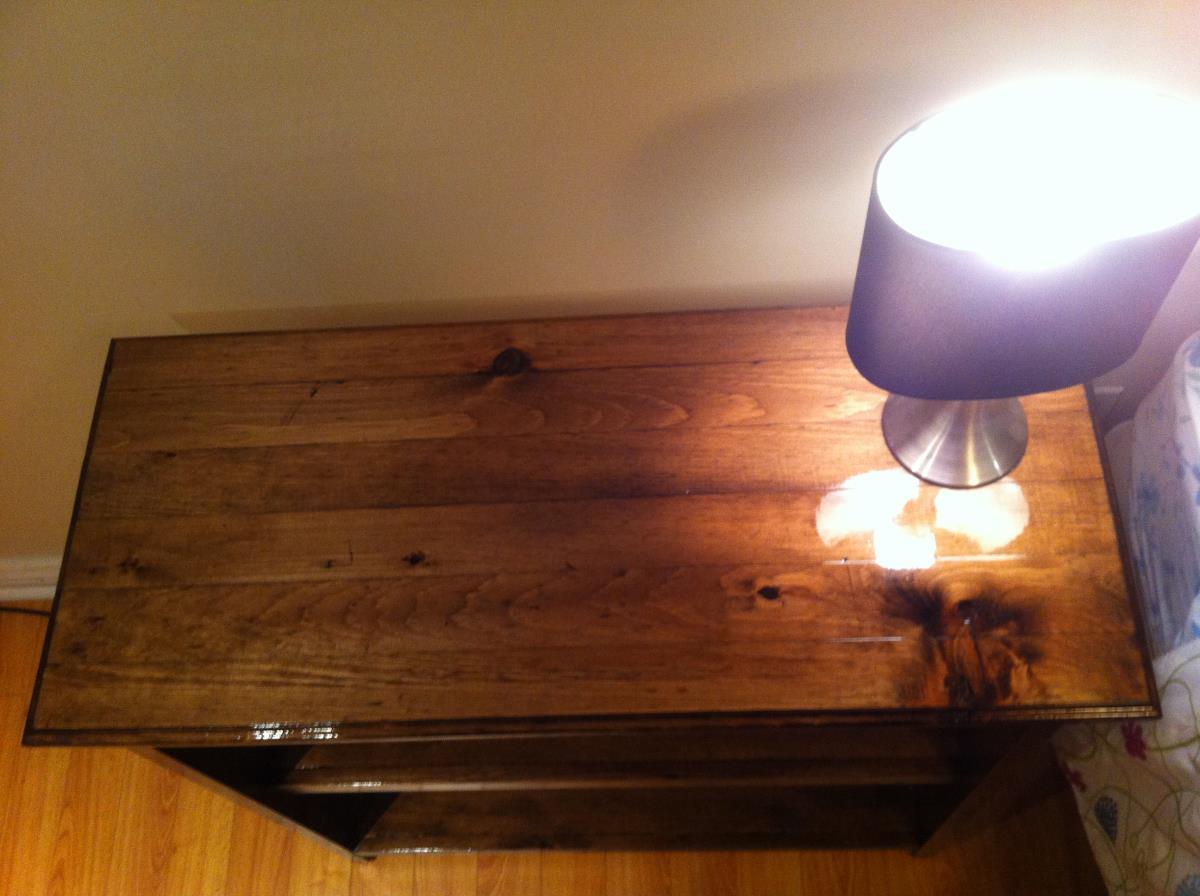
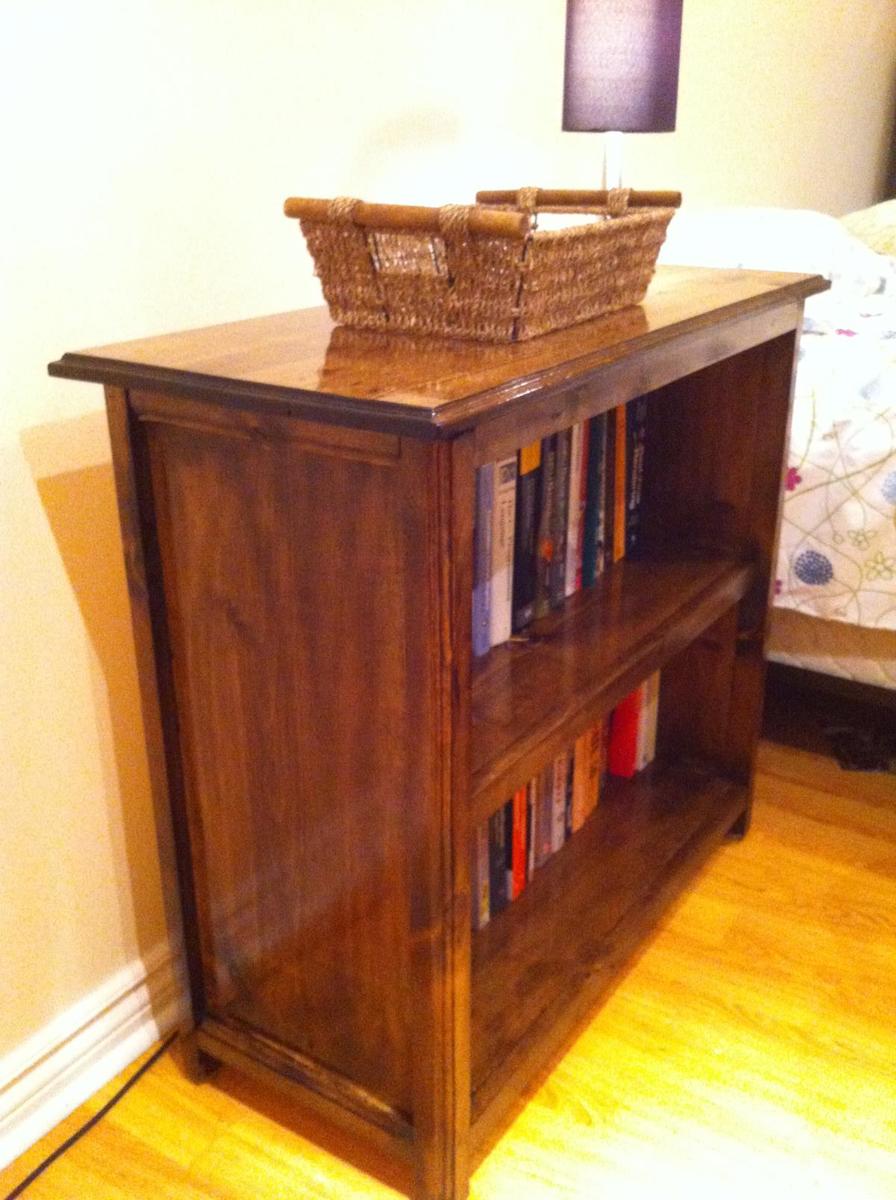
This is a modified version of the Kentwood Bookcase to be shorter and wider to fit my space. I used my router for the first time on this project giving the legs and top a little bit of flair. I also wanted it super glossy, so I applied three coats of Minwax high gloss polyurethane.
One lesson I learned for my next project is that "stainable" wood filler isn't actually stainable. I'm quite disappointed with how visible my Kreg pocket holes are on the front - I'll be sure to make sure they're all hidden next time.
Mon, 10/13/2014 - 13:32
This is beautiful! You did a good job, and I love the finish. I can't see the pocket holes in your finished pictures even after you pointed it out.
I used wood filler that was tinted the same color as the stain last time, and it was great.
Mon, 03/30/2015 - 20:23
Wow!!! This is so beautiful, and the stain job on pine...just wow!! You did such a great job with the router and I can't even find the kreg jig holes even though you said it. The plugs made for those work out perfectly though and are pretty cheap for a huge bag to have around.
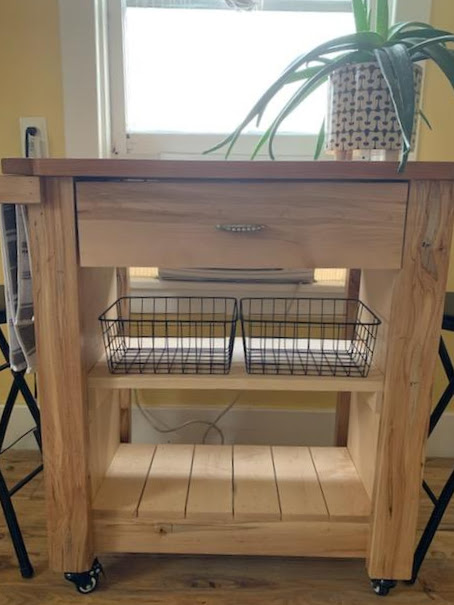
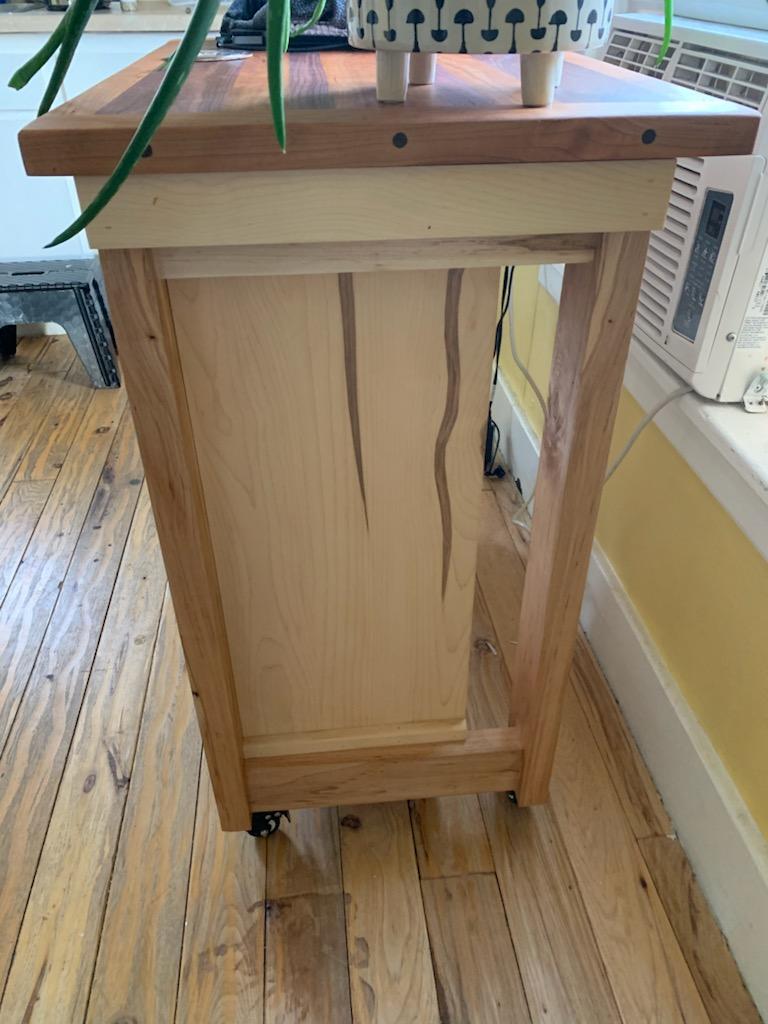
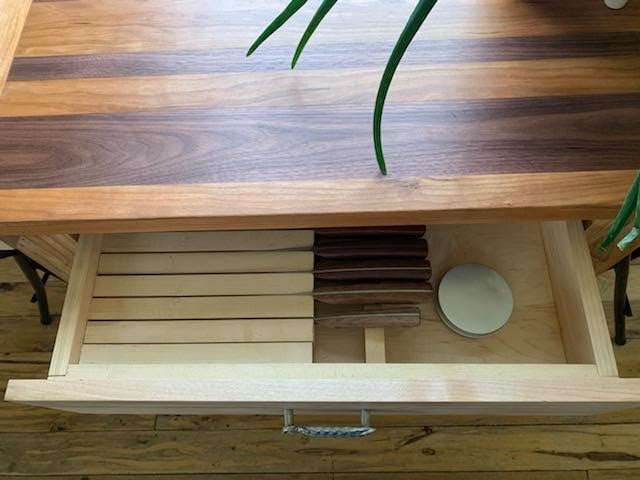
Used your plan as a base to make this kitchen island for my daughter. It is made from ambrosia maple and soft maple, has an integrated knife block in the drawer (also from one of your plans), and has a cutting board top made out of cherry and black walnut.

Wed, 01/27/2021 - 12:12
This is beautiful, love the cutting board top and knife block!
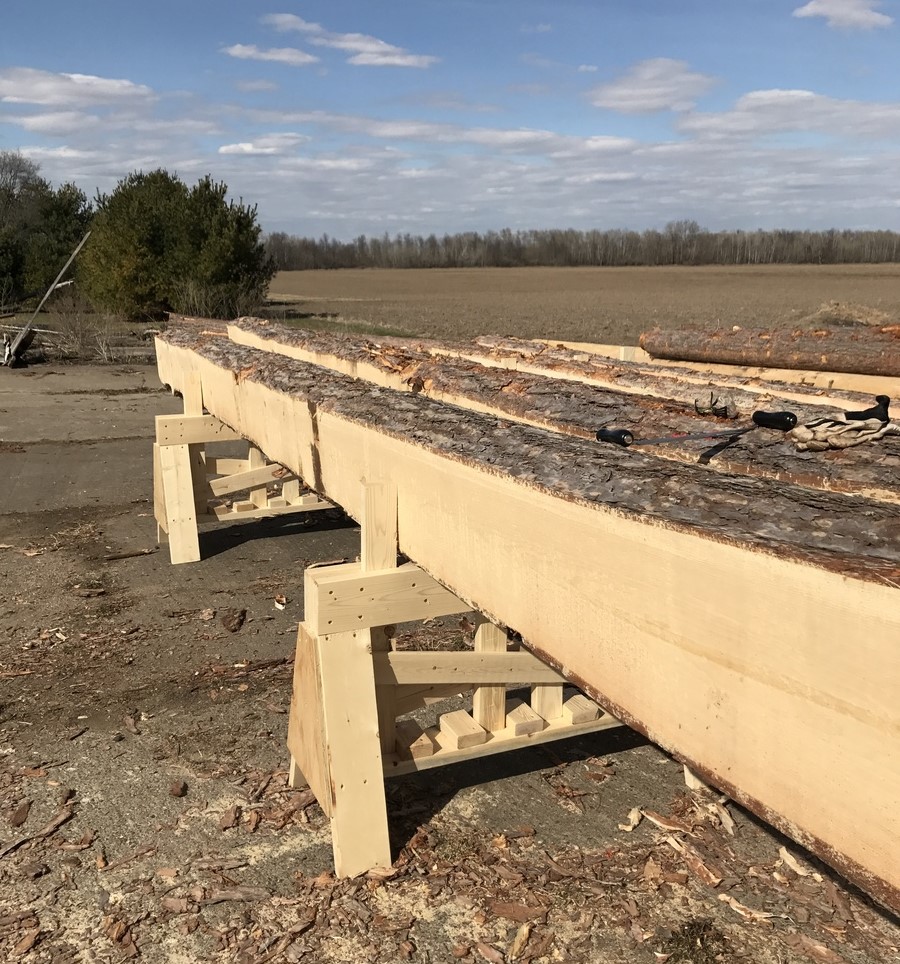
I modified Anna's plans to make these heavy duty saw horses.
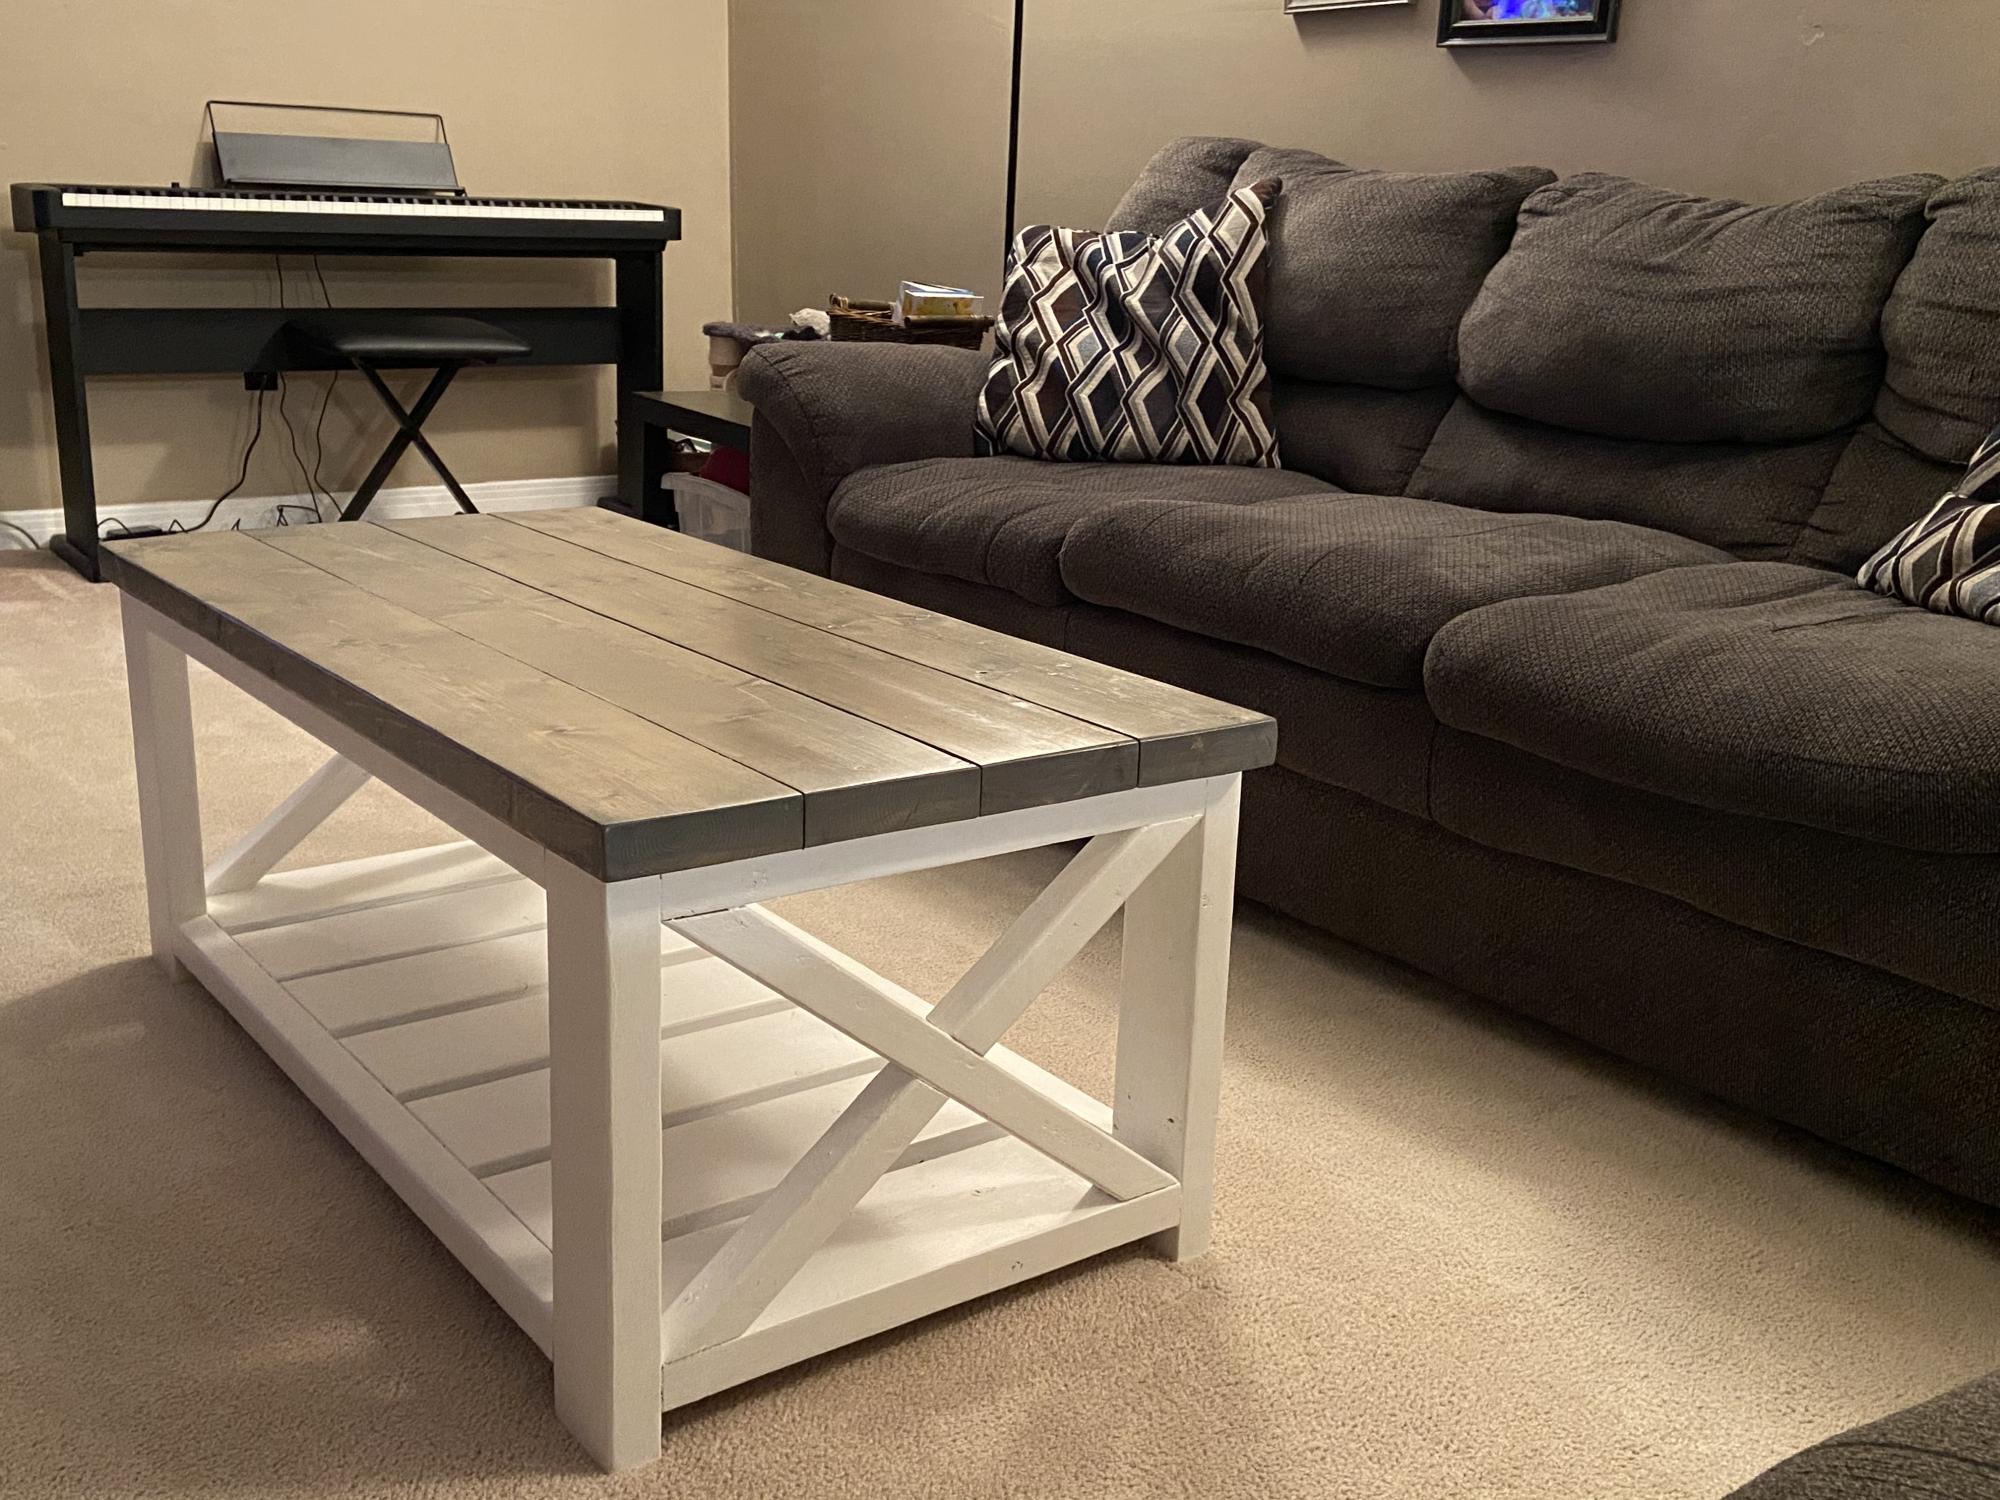
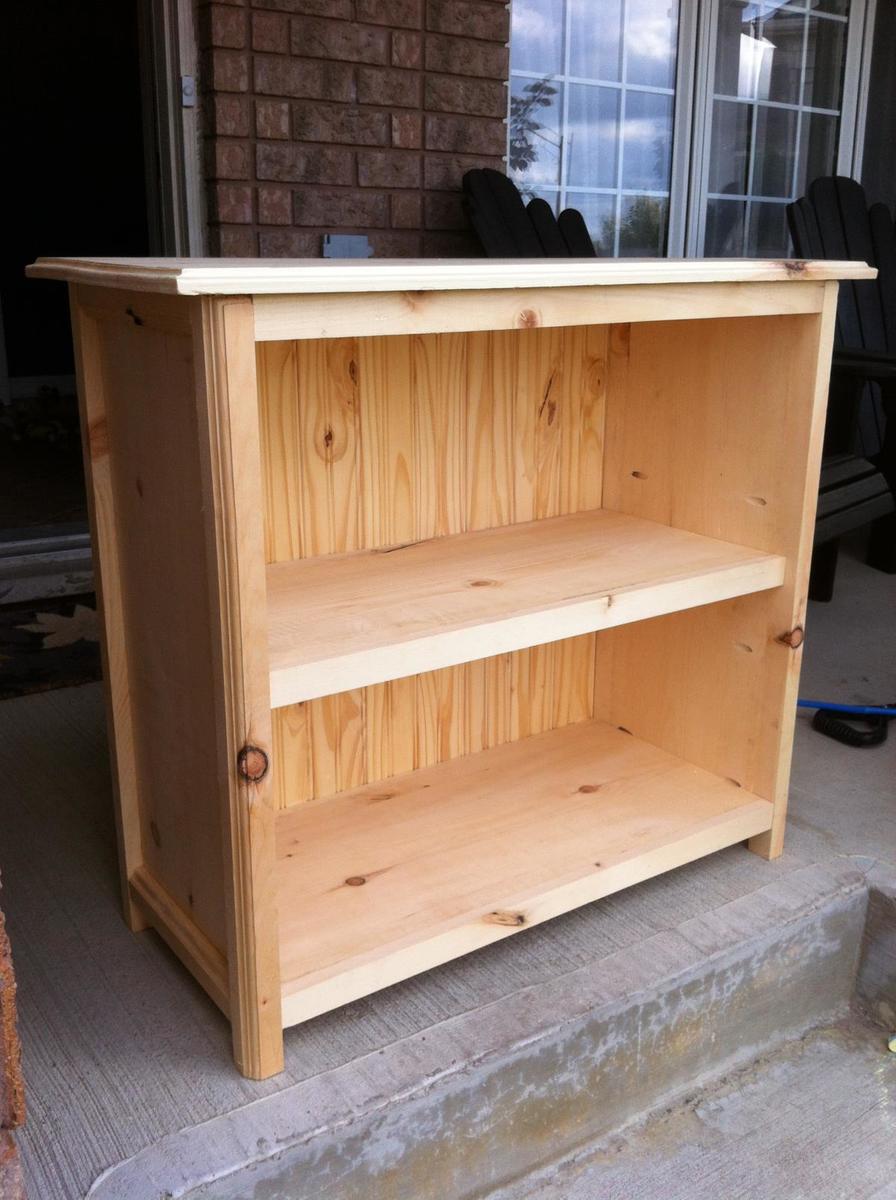
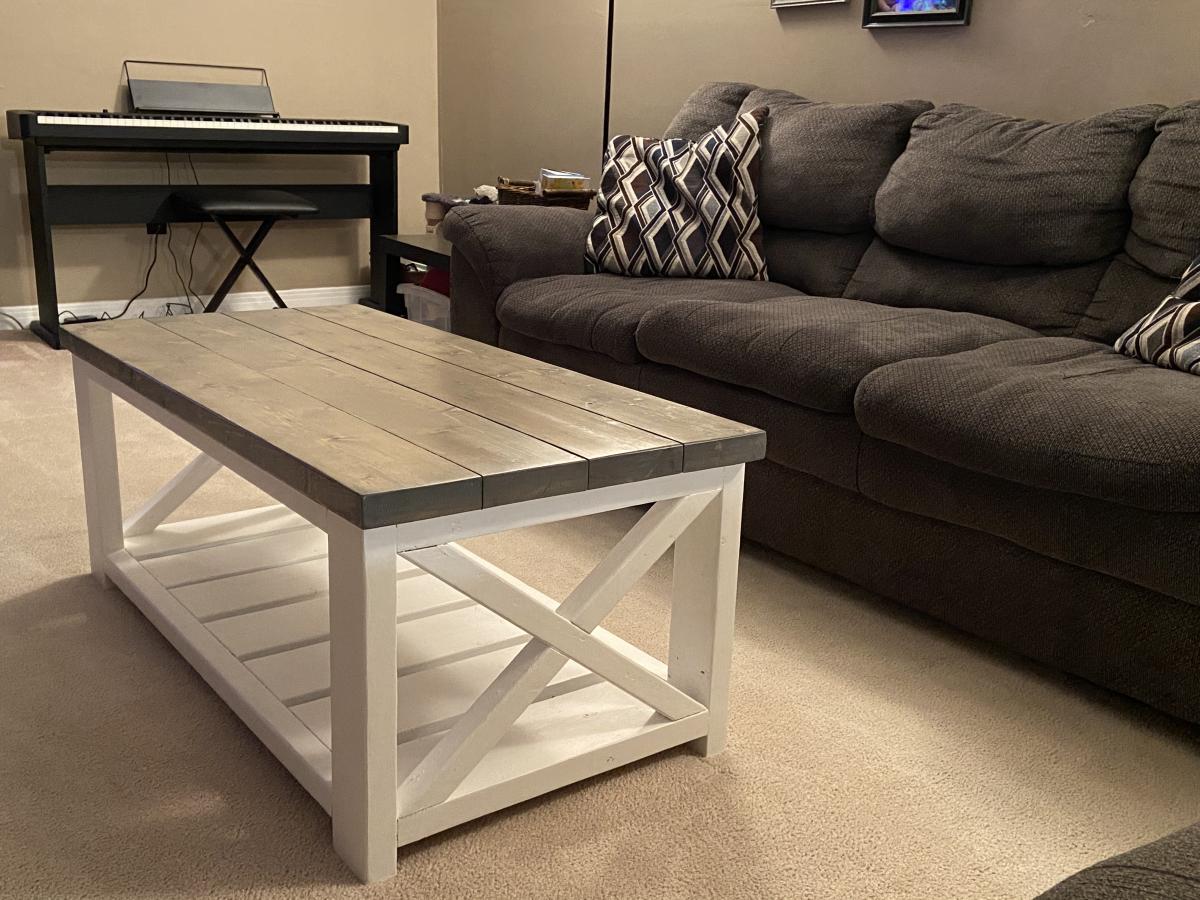
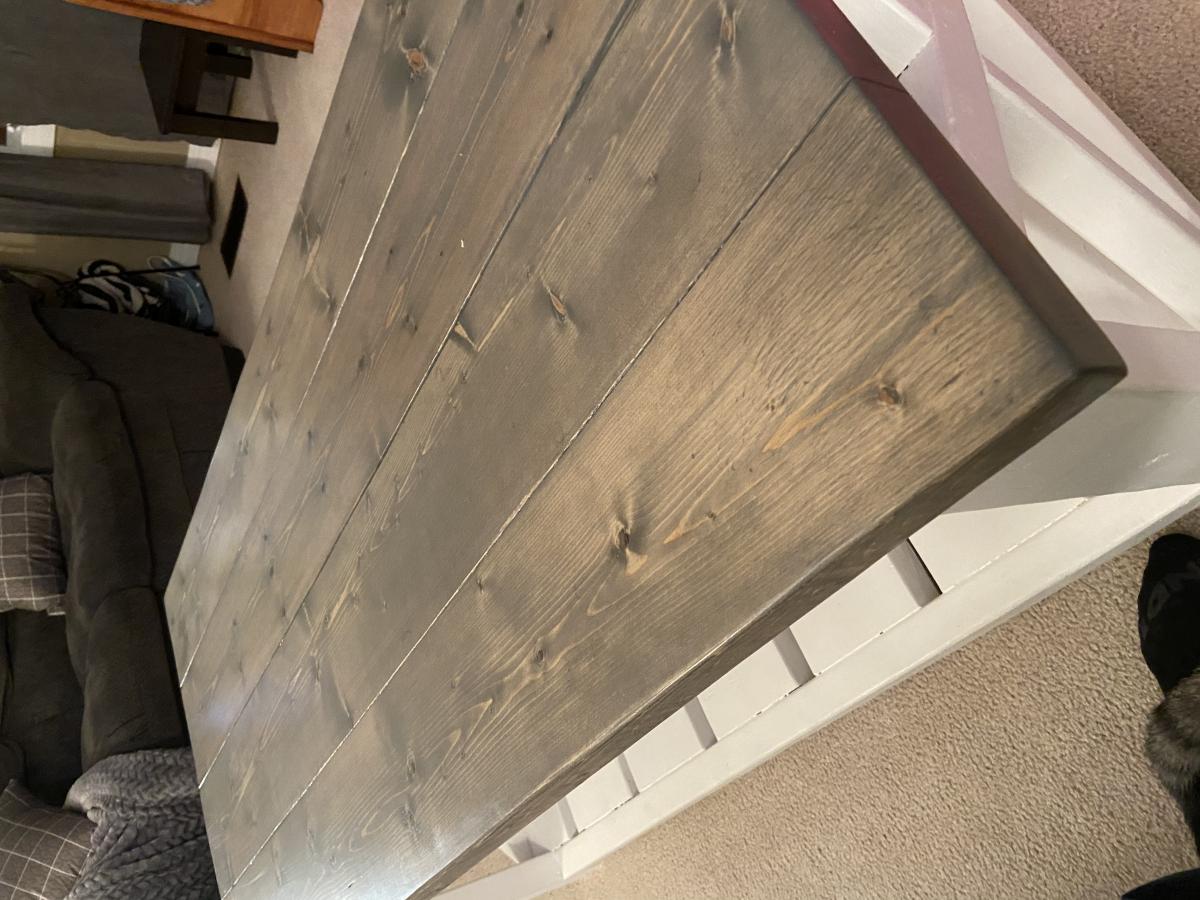
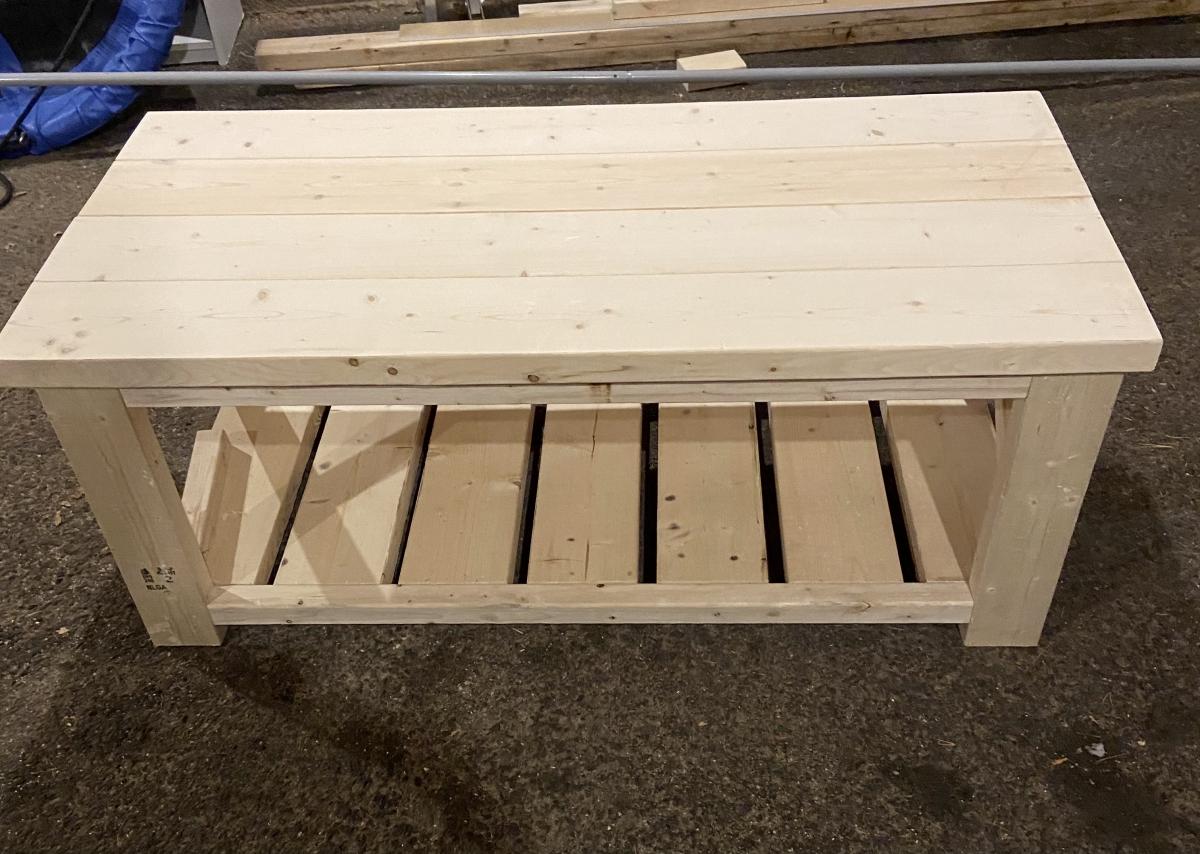
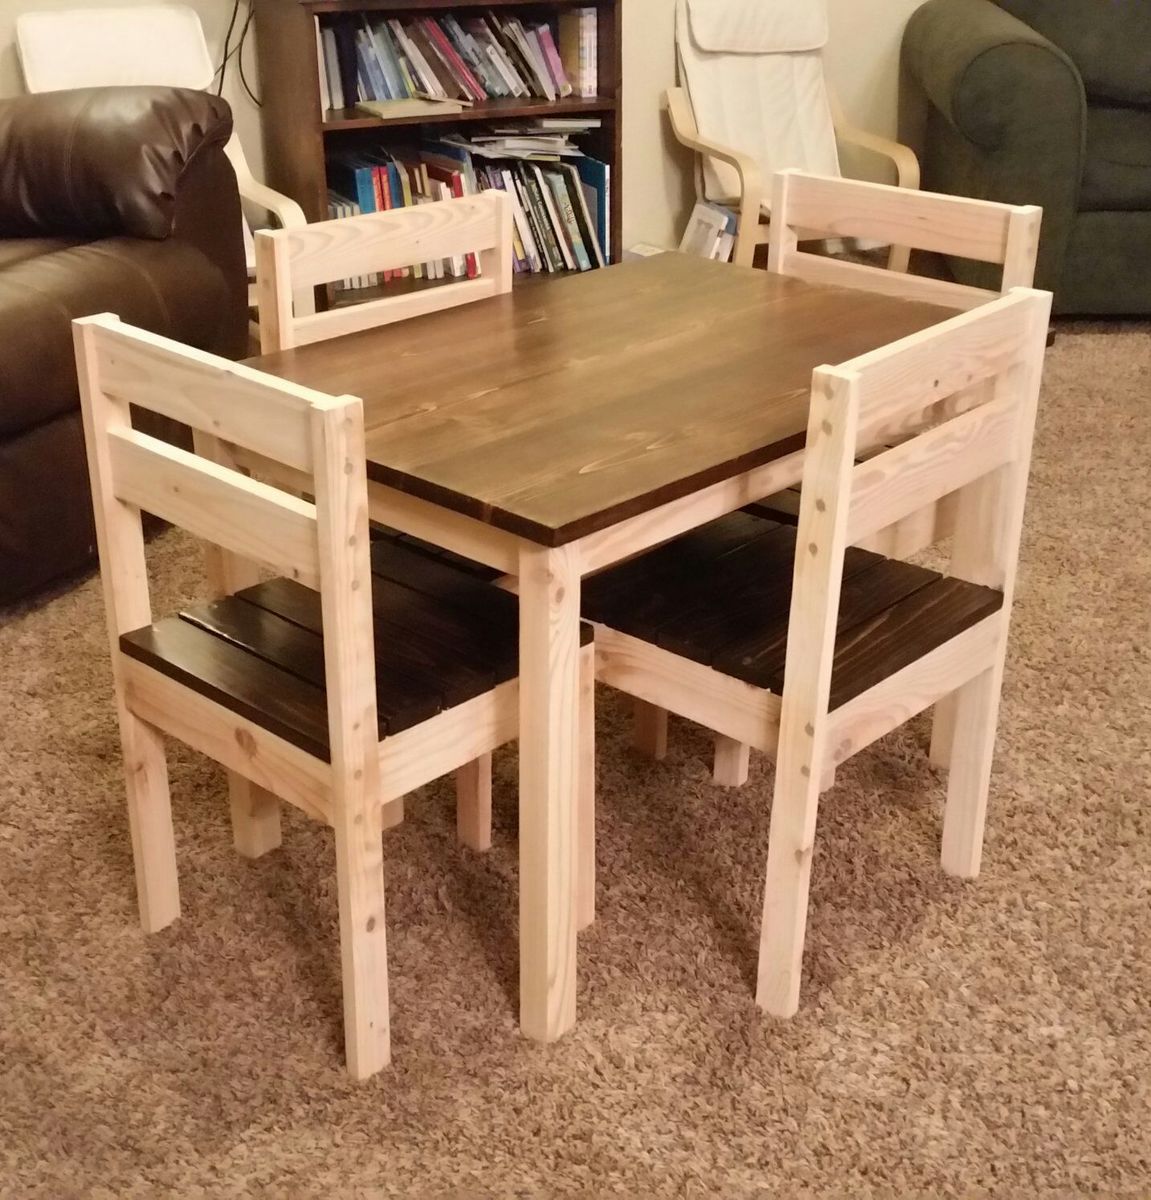
This was my first project and had tons of fun building it. Can’t wait to build to end tables to match.
The plans are so easy to understand. The only change I made was instead of exposed screws I used the pocket hole method


Fri, 01/12/2024 - 08:33
This is beautiful and just the look I'm going for with the color scheme. I am wondering if it would be easier to paint the wood before constructing it? Also, what is the pocket hole technique? I think I would like the screws hidden too.
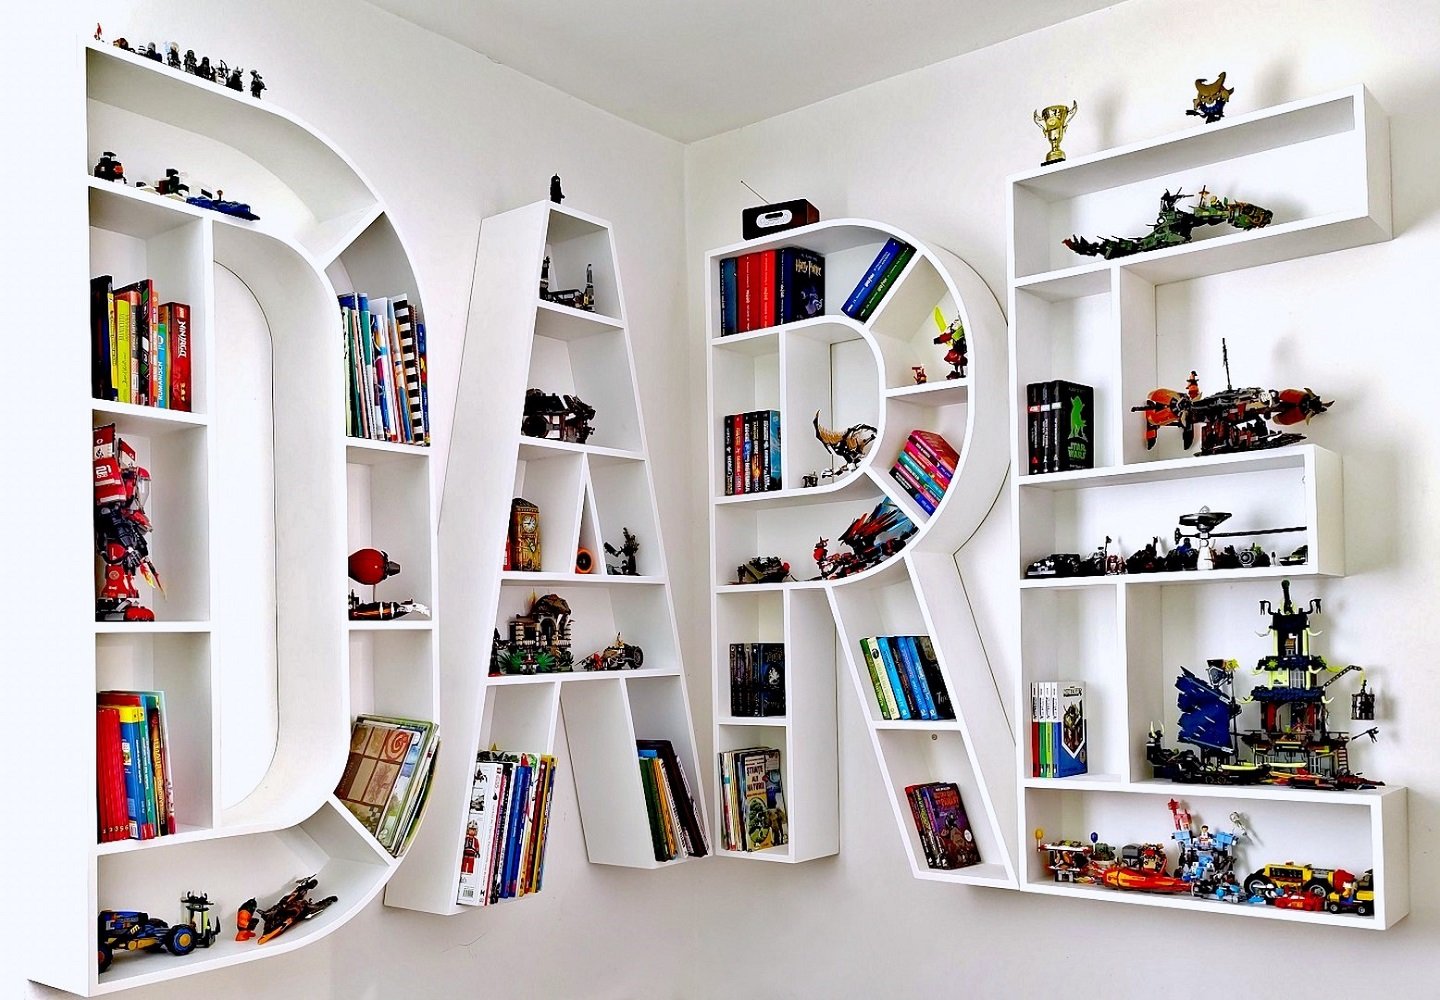
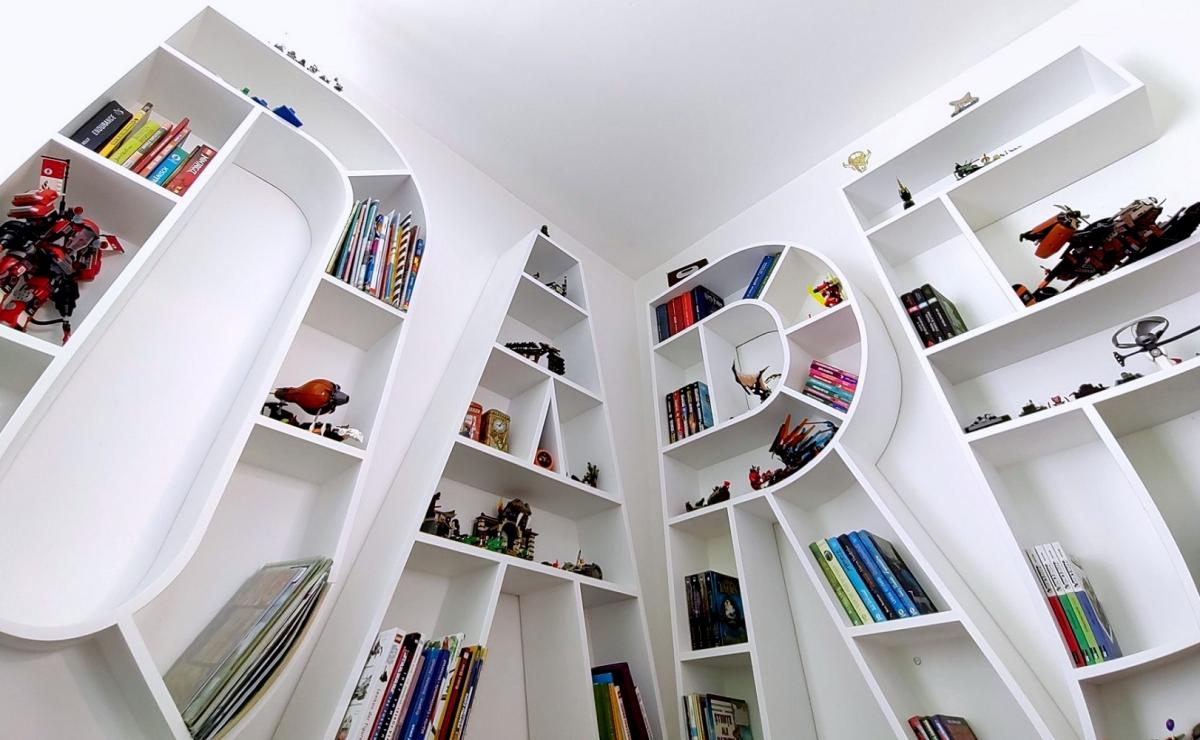
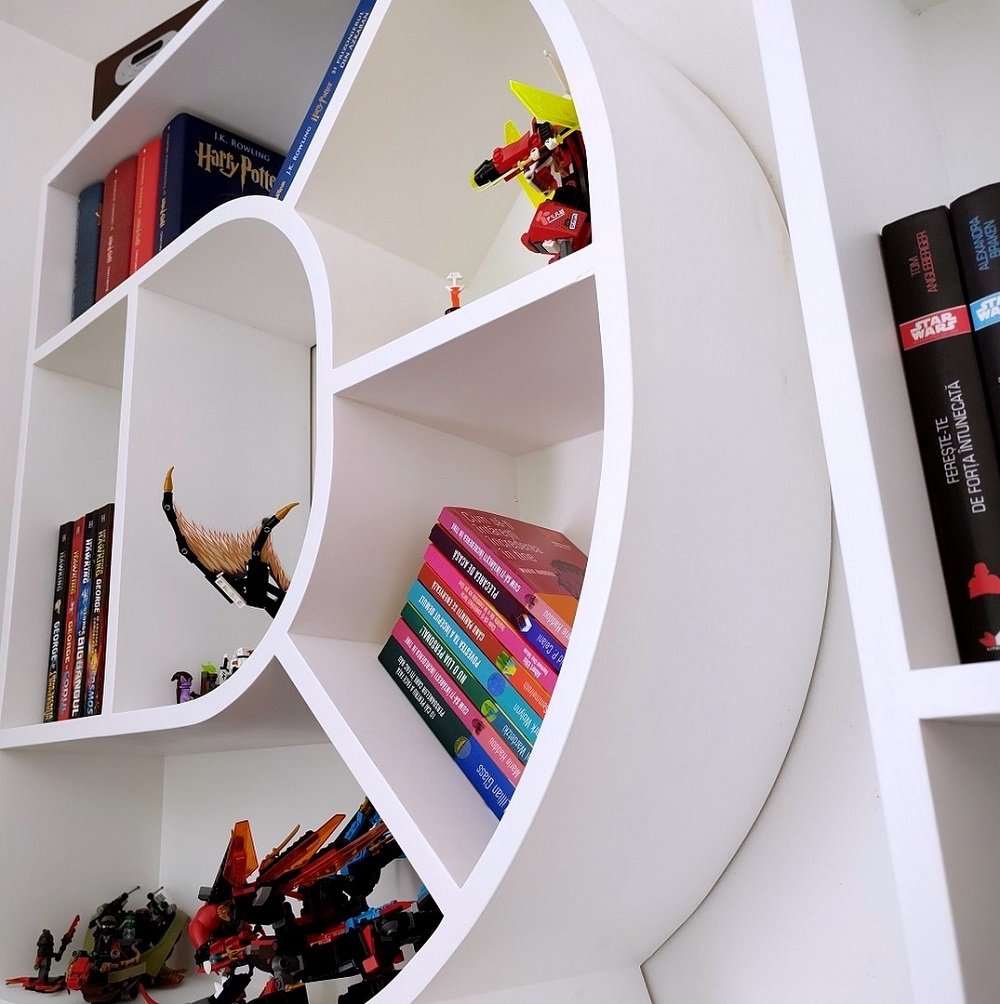
We built the letters bookshelves for our kids' room. First, we wanted to write READ on the wall, but in the end, we arranged them as DARE. We hope it will be a motivational message for our kids to have the courage to make the impossible possible.
The letters are built entirely out of MDF. The hardest thing was to make the curved walls. We cut a lot of curved MDF strips and glued them together to get the rounded shapes.
We described better the process on our blog!
Hope you like them as much as we do!
Sat, 04/23/2022 - 09:59
Congrats! I am so proud of them. I wish I also could write good essays, but it is very difficult for me to express myself and organize my thoughts and ideas. This is why it takes me a lot of time to write a good essay. So, sometimes I pay for paper writing because I like it when everything is done at the highest level. However, I really hope that these essays will help me to achieve my goals especially since I feel very motivated right now. Wish me good luck!
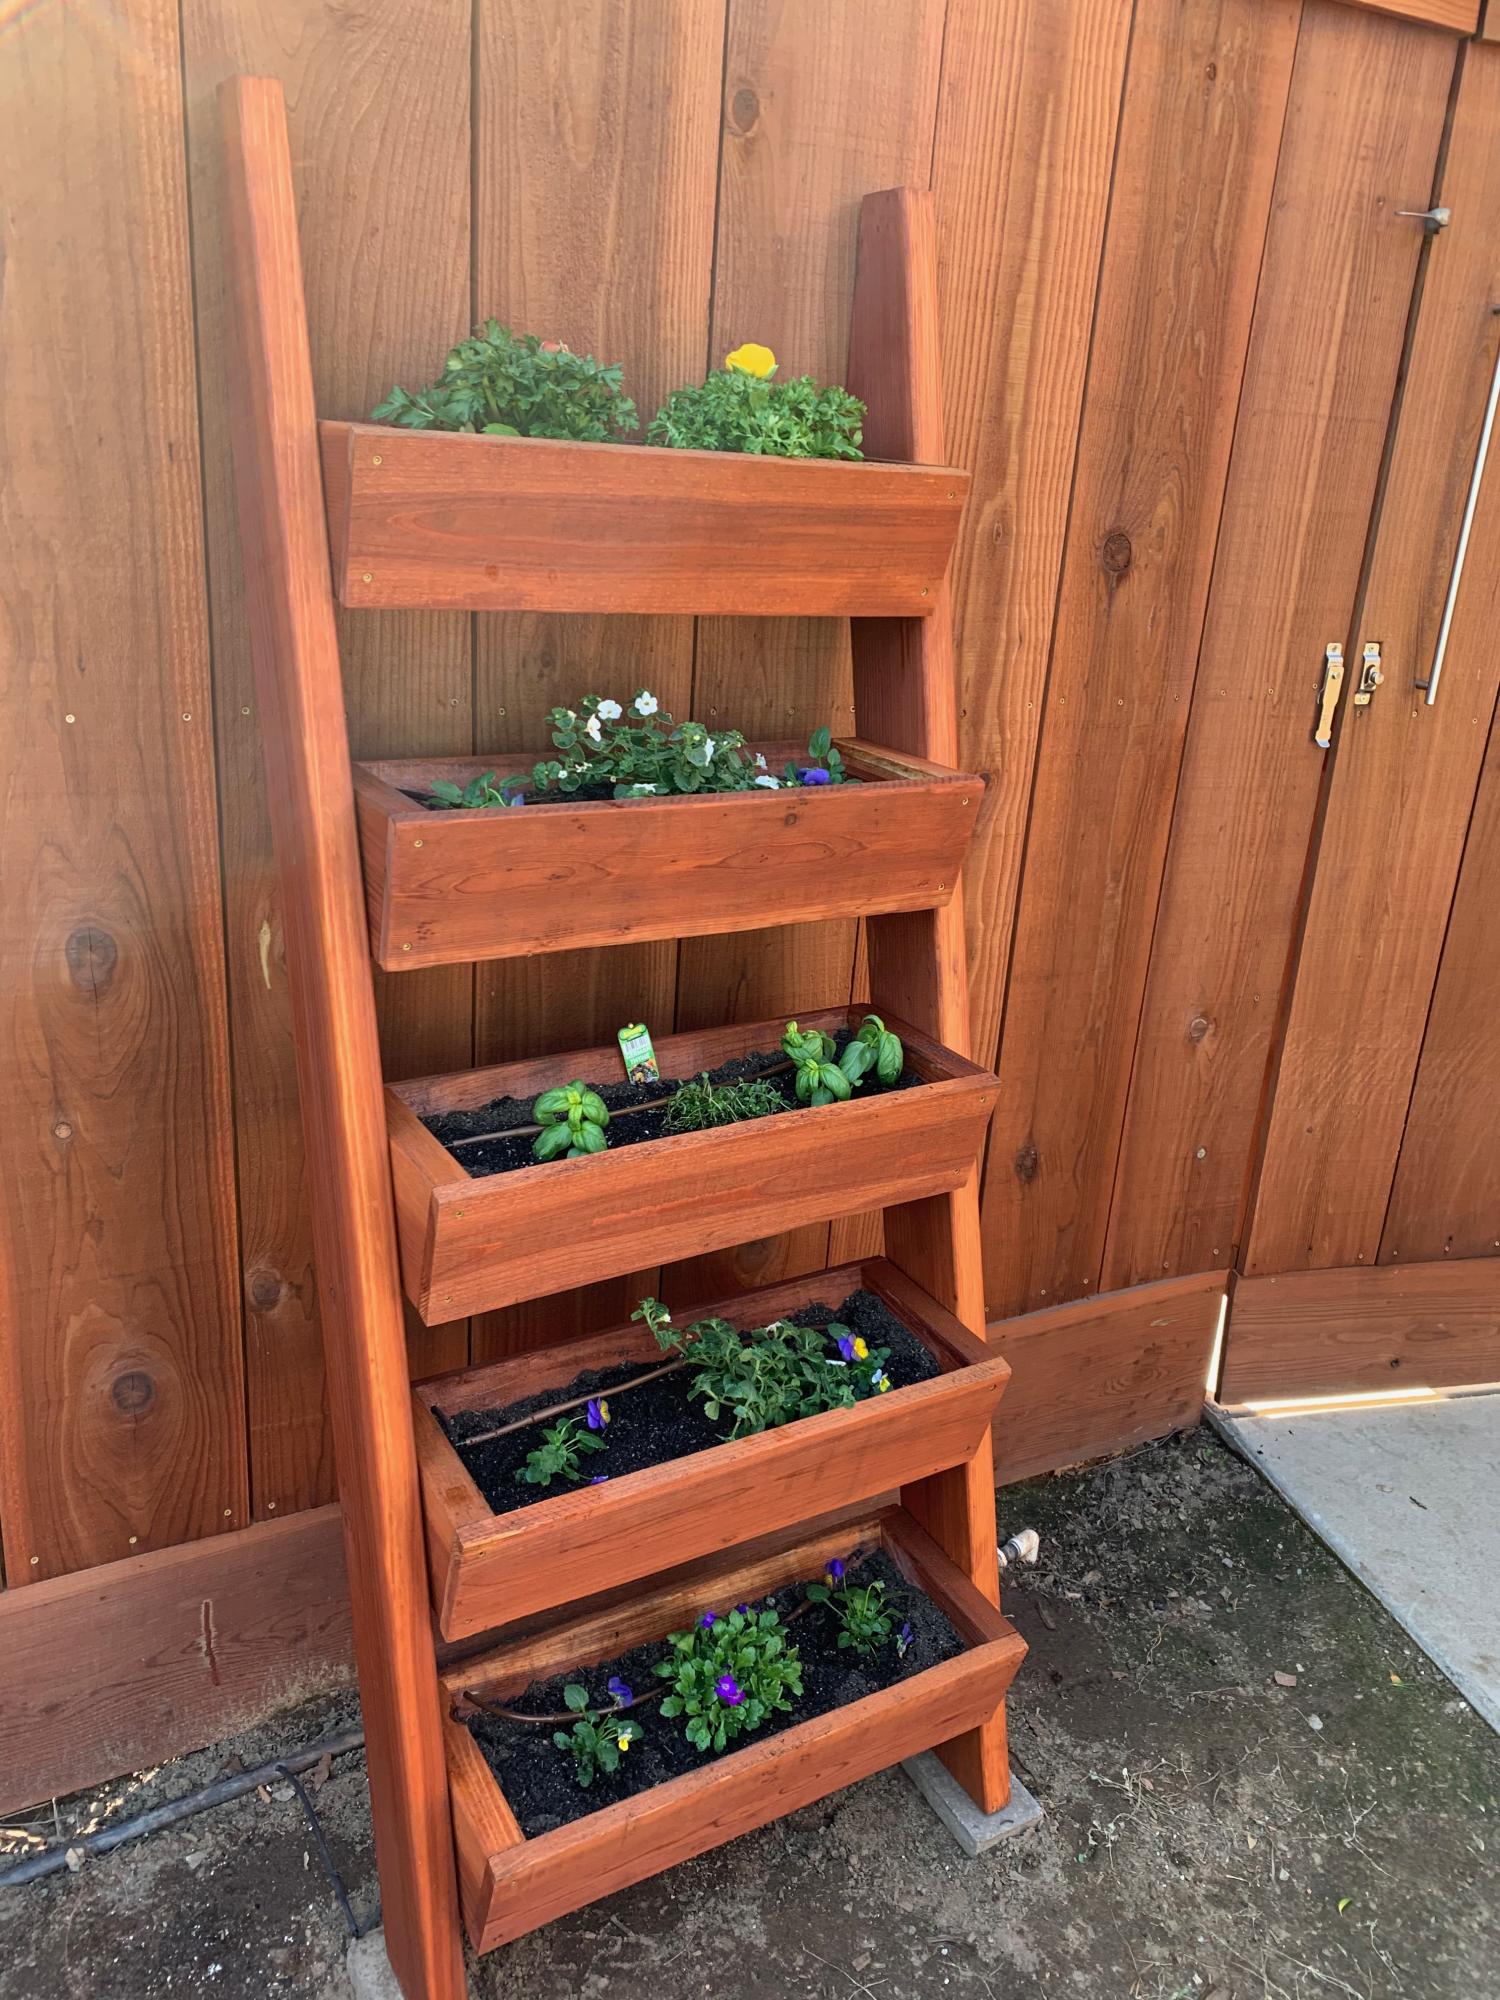
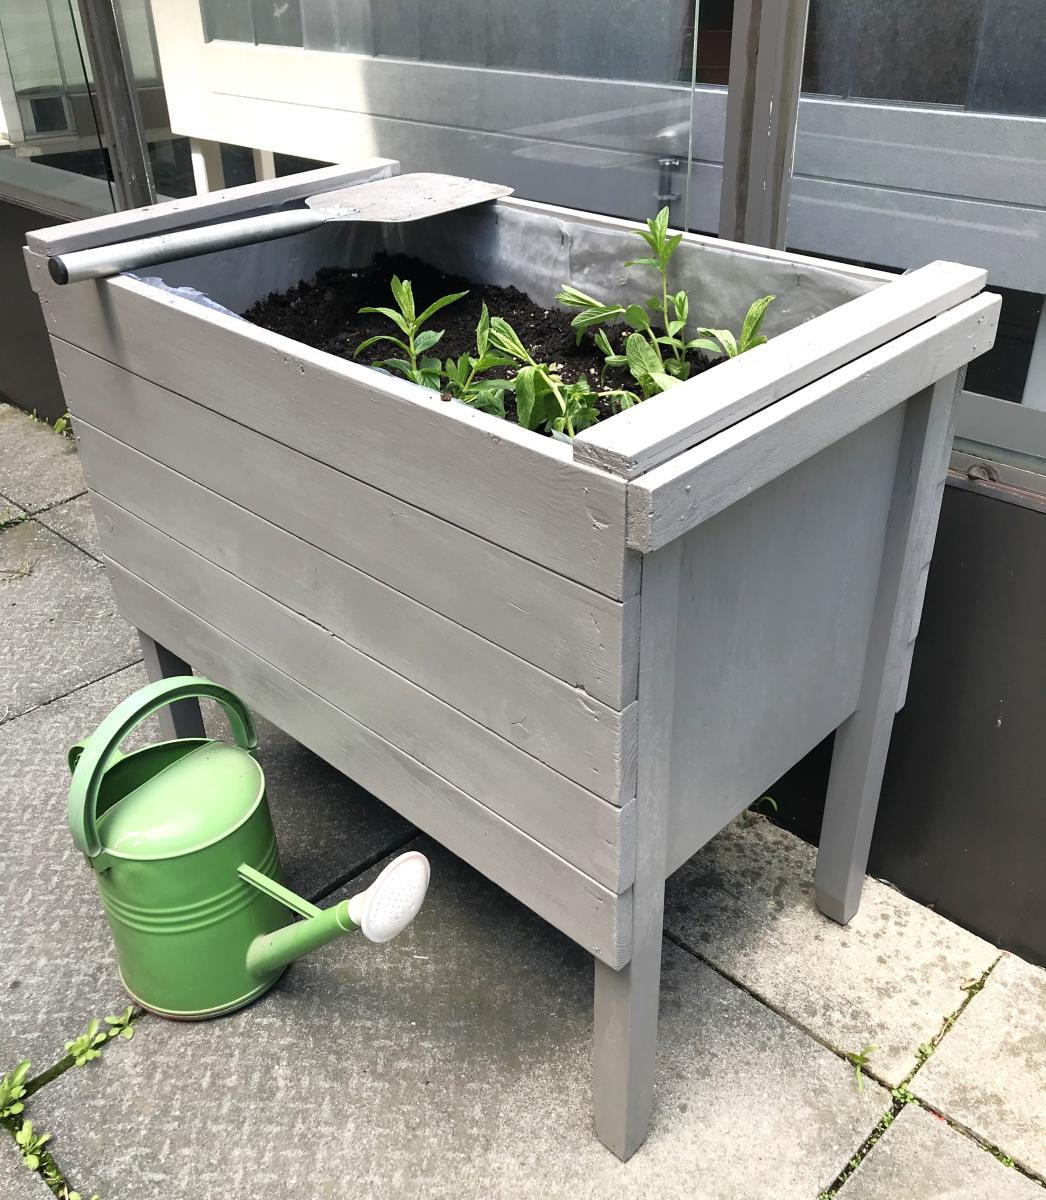
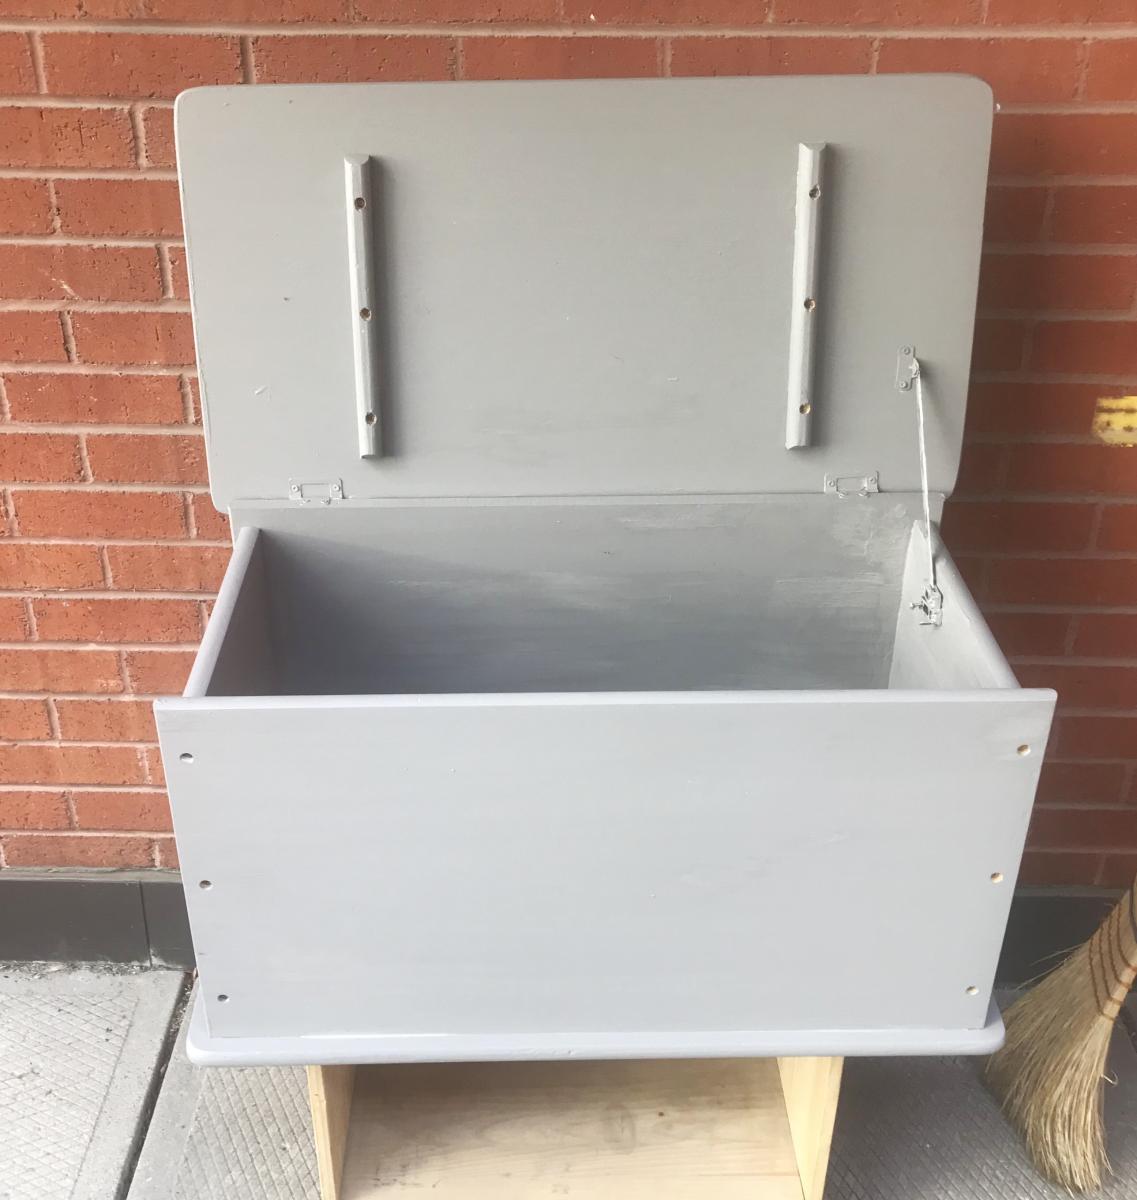
I learned so much for this first project. I used redwood instead of cedar and finished it to match our fence. I coated the inside with flex seal. Next time, I'll drill drain holes nearer to the front edge of each box so they drain into the box below a bit better. I angled the bottoms of each box with a band saw on a 15 degree tilted platform. They fit like a glove! Thanks for a great plan.
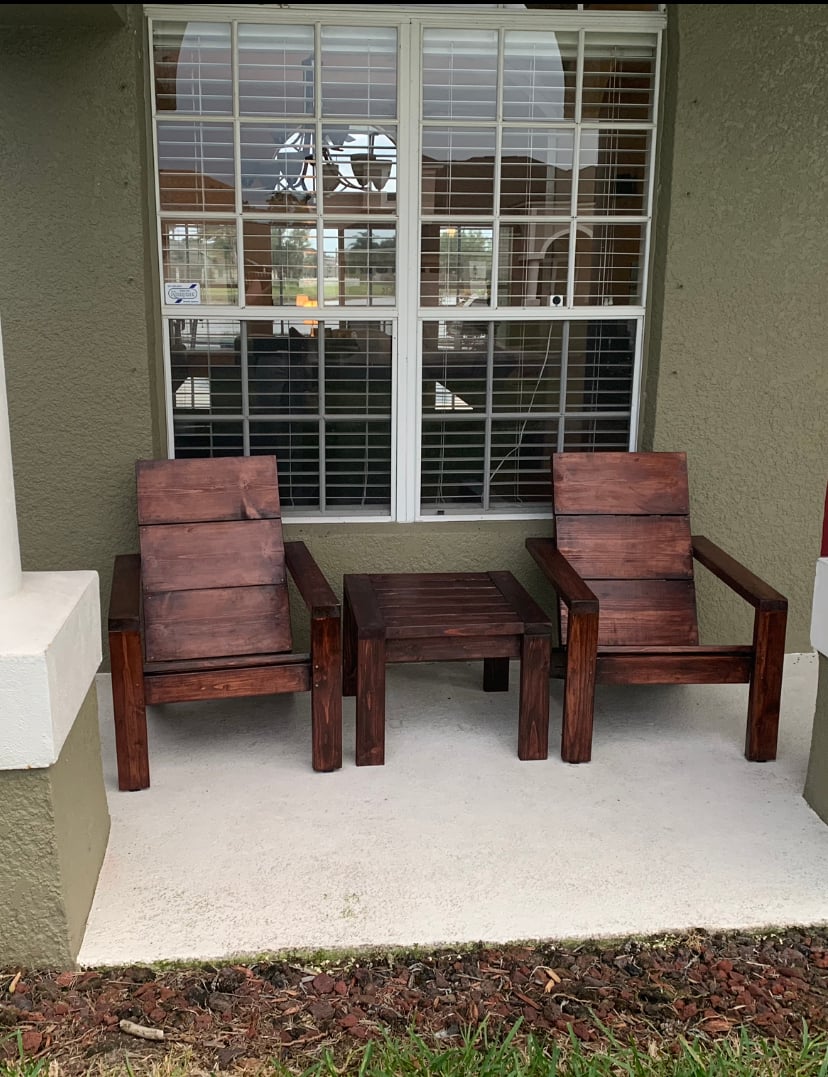
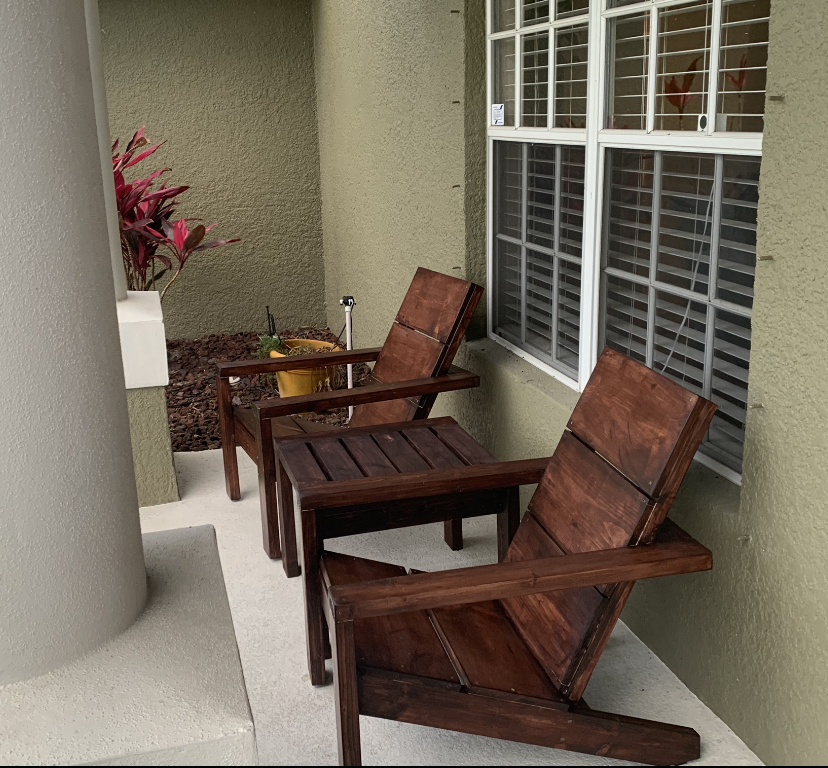
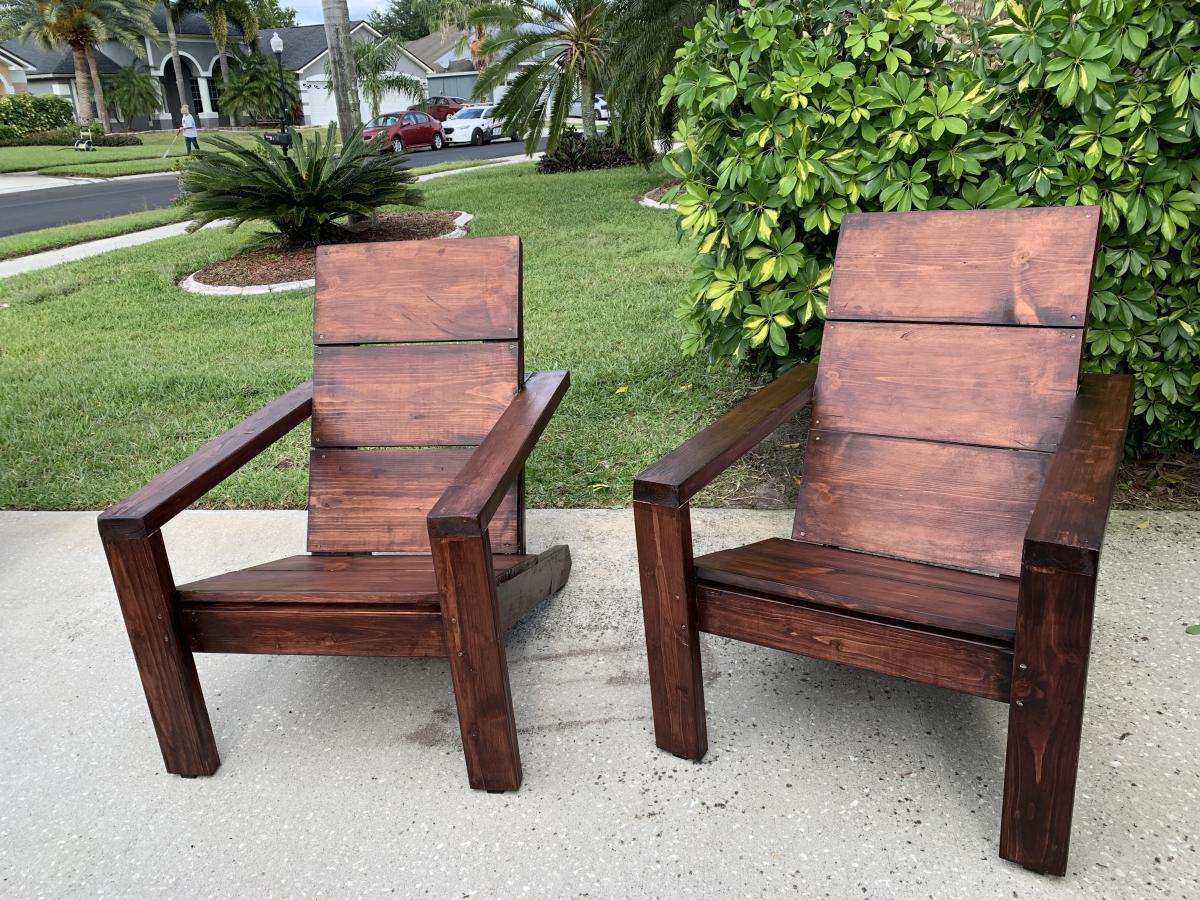
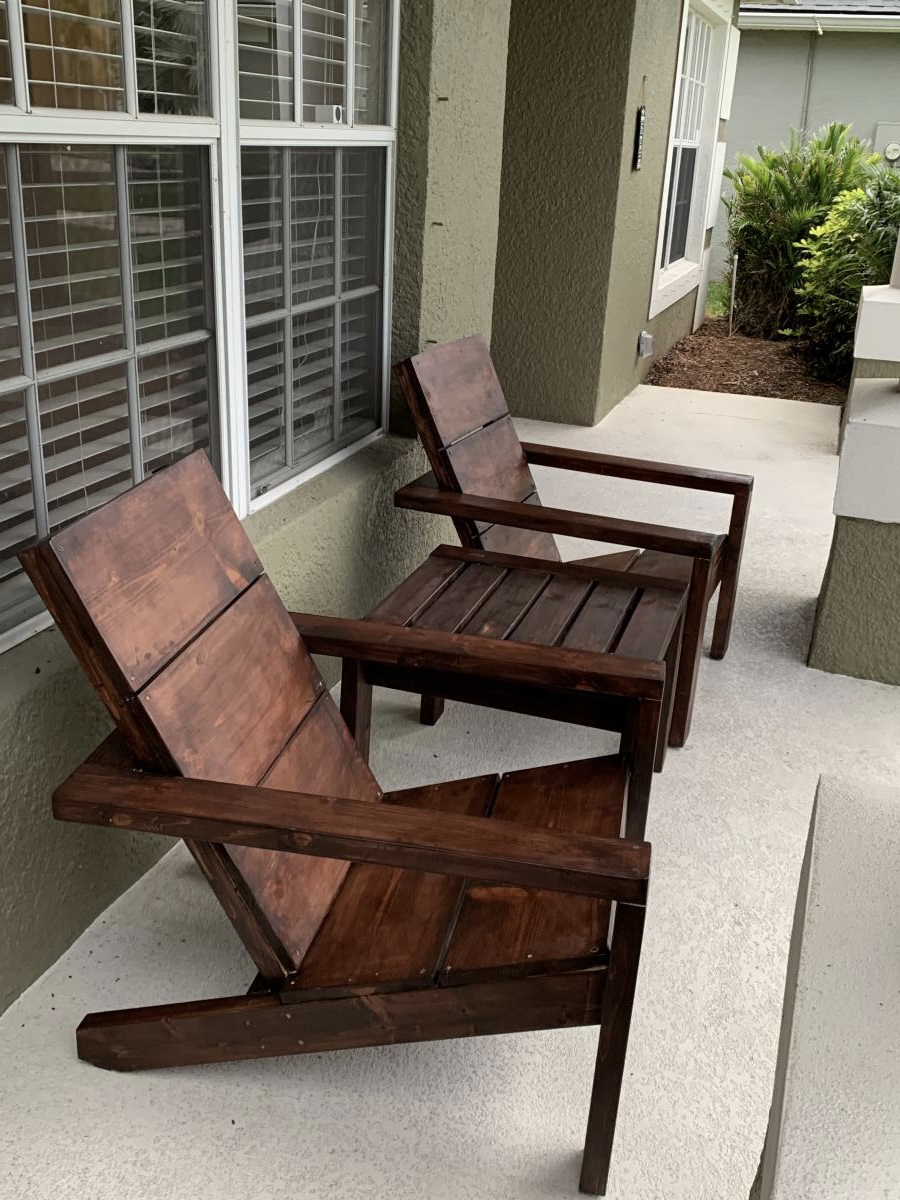
These modern Adirondack chairs were my first wood working project ever and they turned out awesome! I wanted to build a small table to complete the set and Ana’s new side table plans were exactly what I was looking for. I am truly amazed at how easy these projects were to make and how great they look on our front patio. Ana’s step-by-step plans make it so simple. My wife and I can’t wait to build some more of these projects for our backyard lanai and pool area.


Mon, 04/12/2021 - 10:21
Amazing job on your first build, I see more handmade pieces in your future!
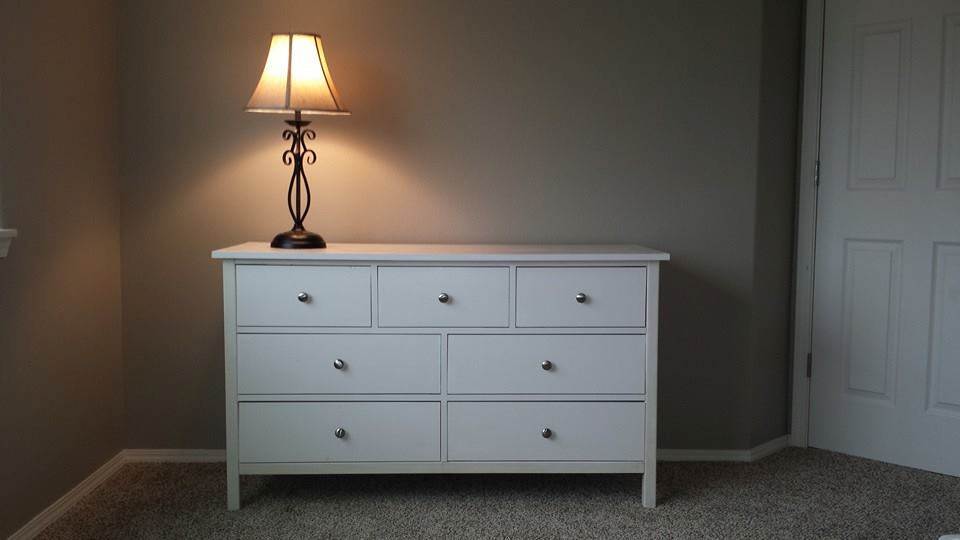
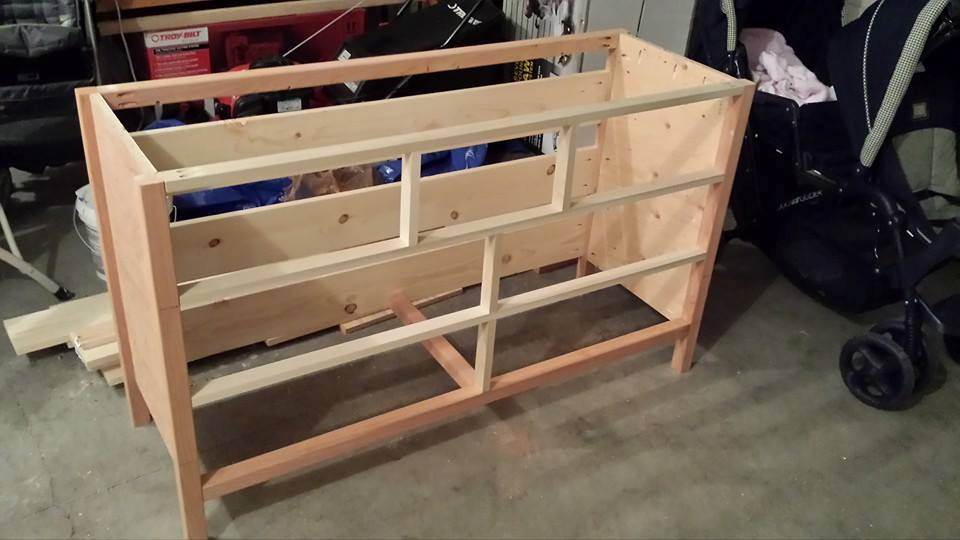
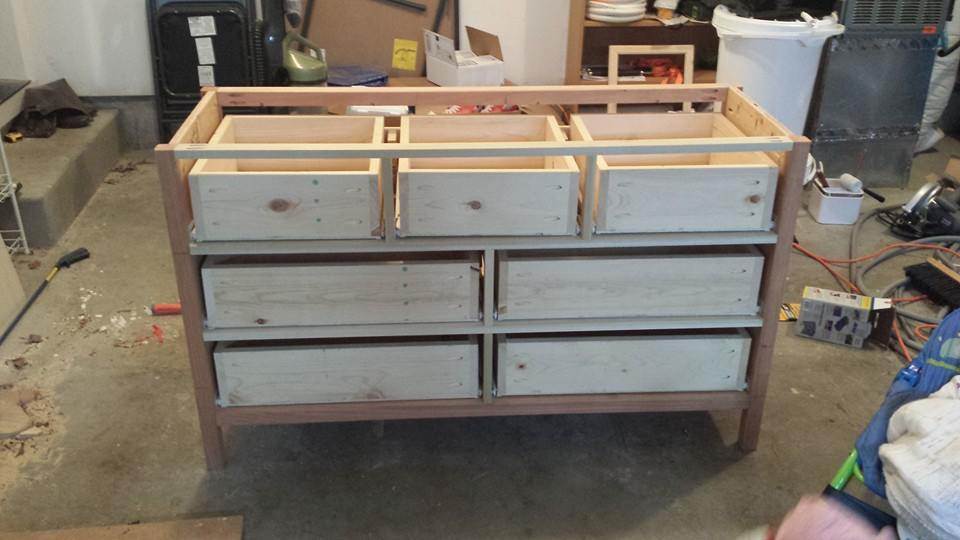
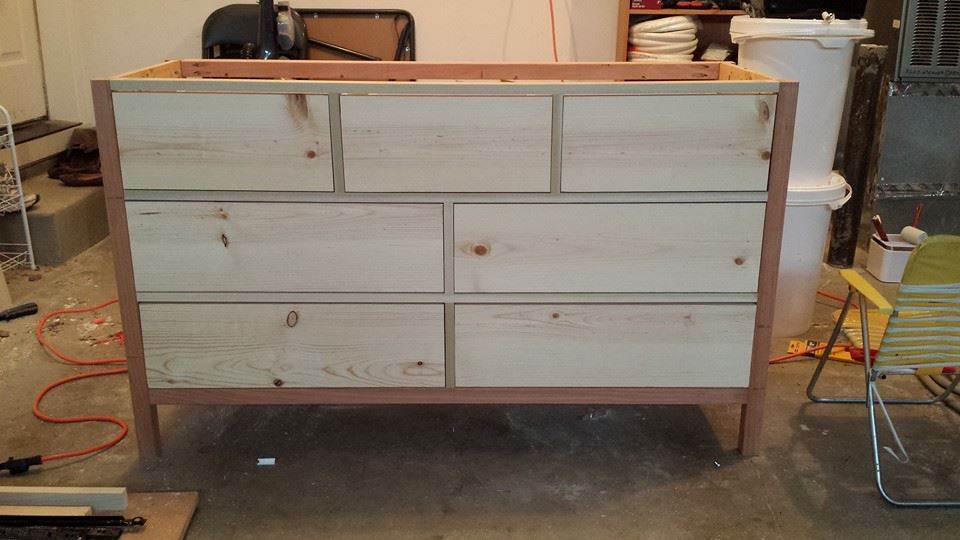
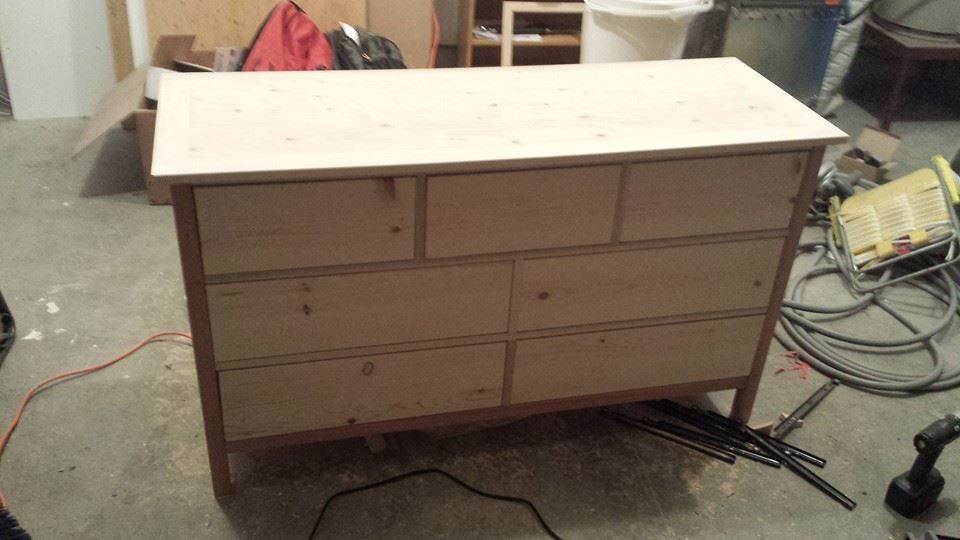
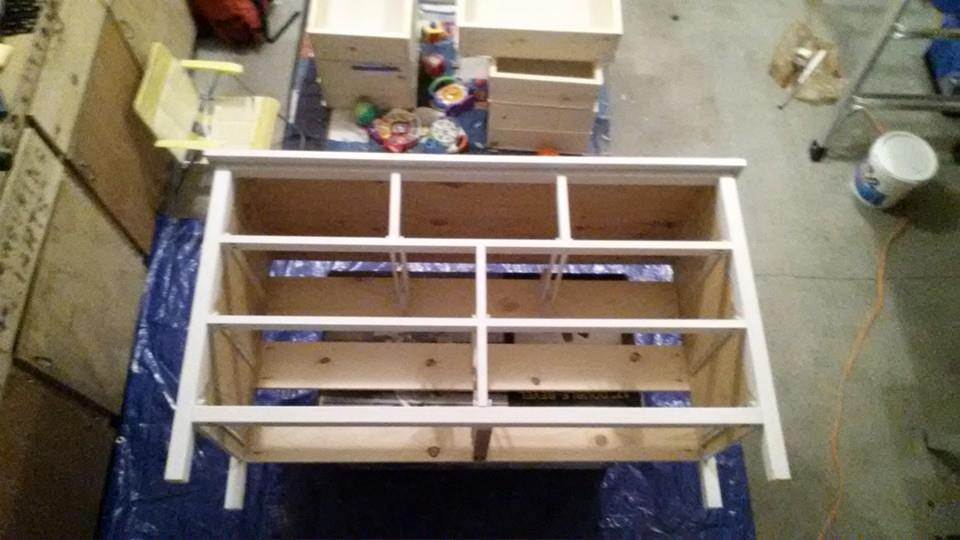
This is the first dresser that I have ever made. There was a learning curve, but not much. It was a lot of fun and I hope you enjoy it!
Tue, 02/16/2016 - 10:40
what kind of wood did you use to build the drawers? i have used 1X6 and 1X8 as per the plan and the drawers dont fit in the frame. sliding doesnt work properly. plewase let me know, thnks
This was the perfect post-retirement project for me. It was a lot of work, but very rewarding.
I documented most of it on my blog.
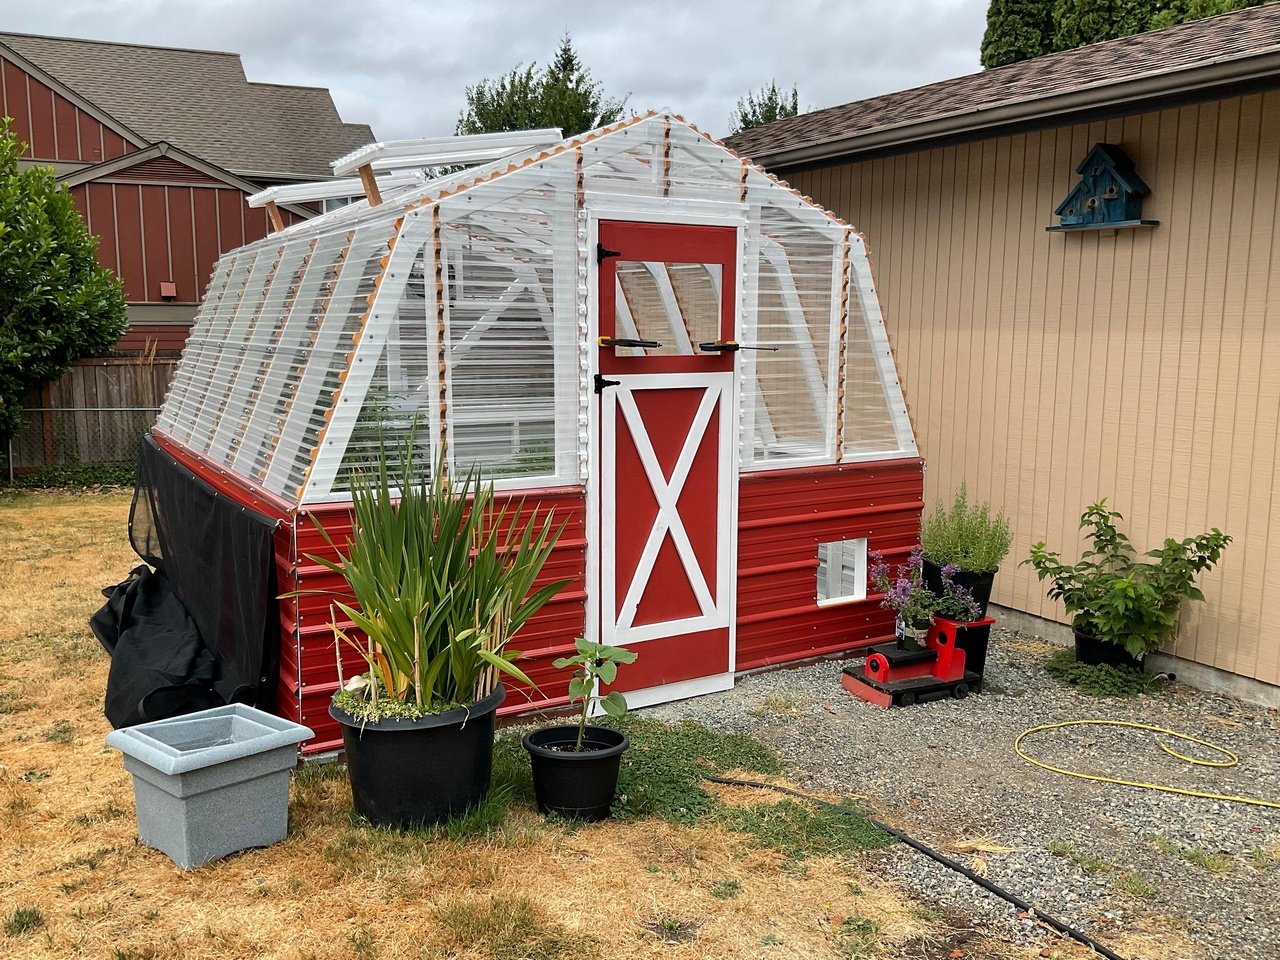
We sure love this greenhouse!
Tue, 08/31/2021 - 12:23
Gorgeous, those skylights are the ticket! Thank you for sharing!
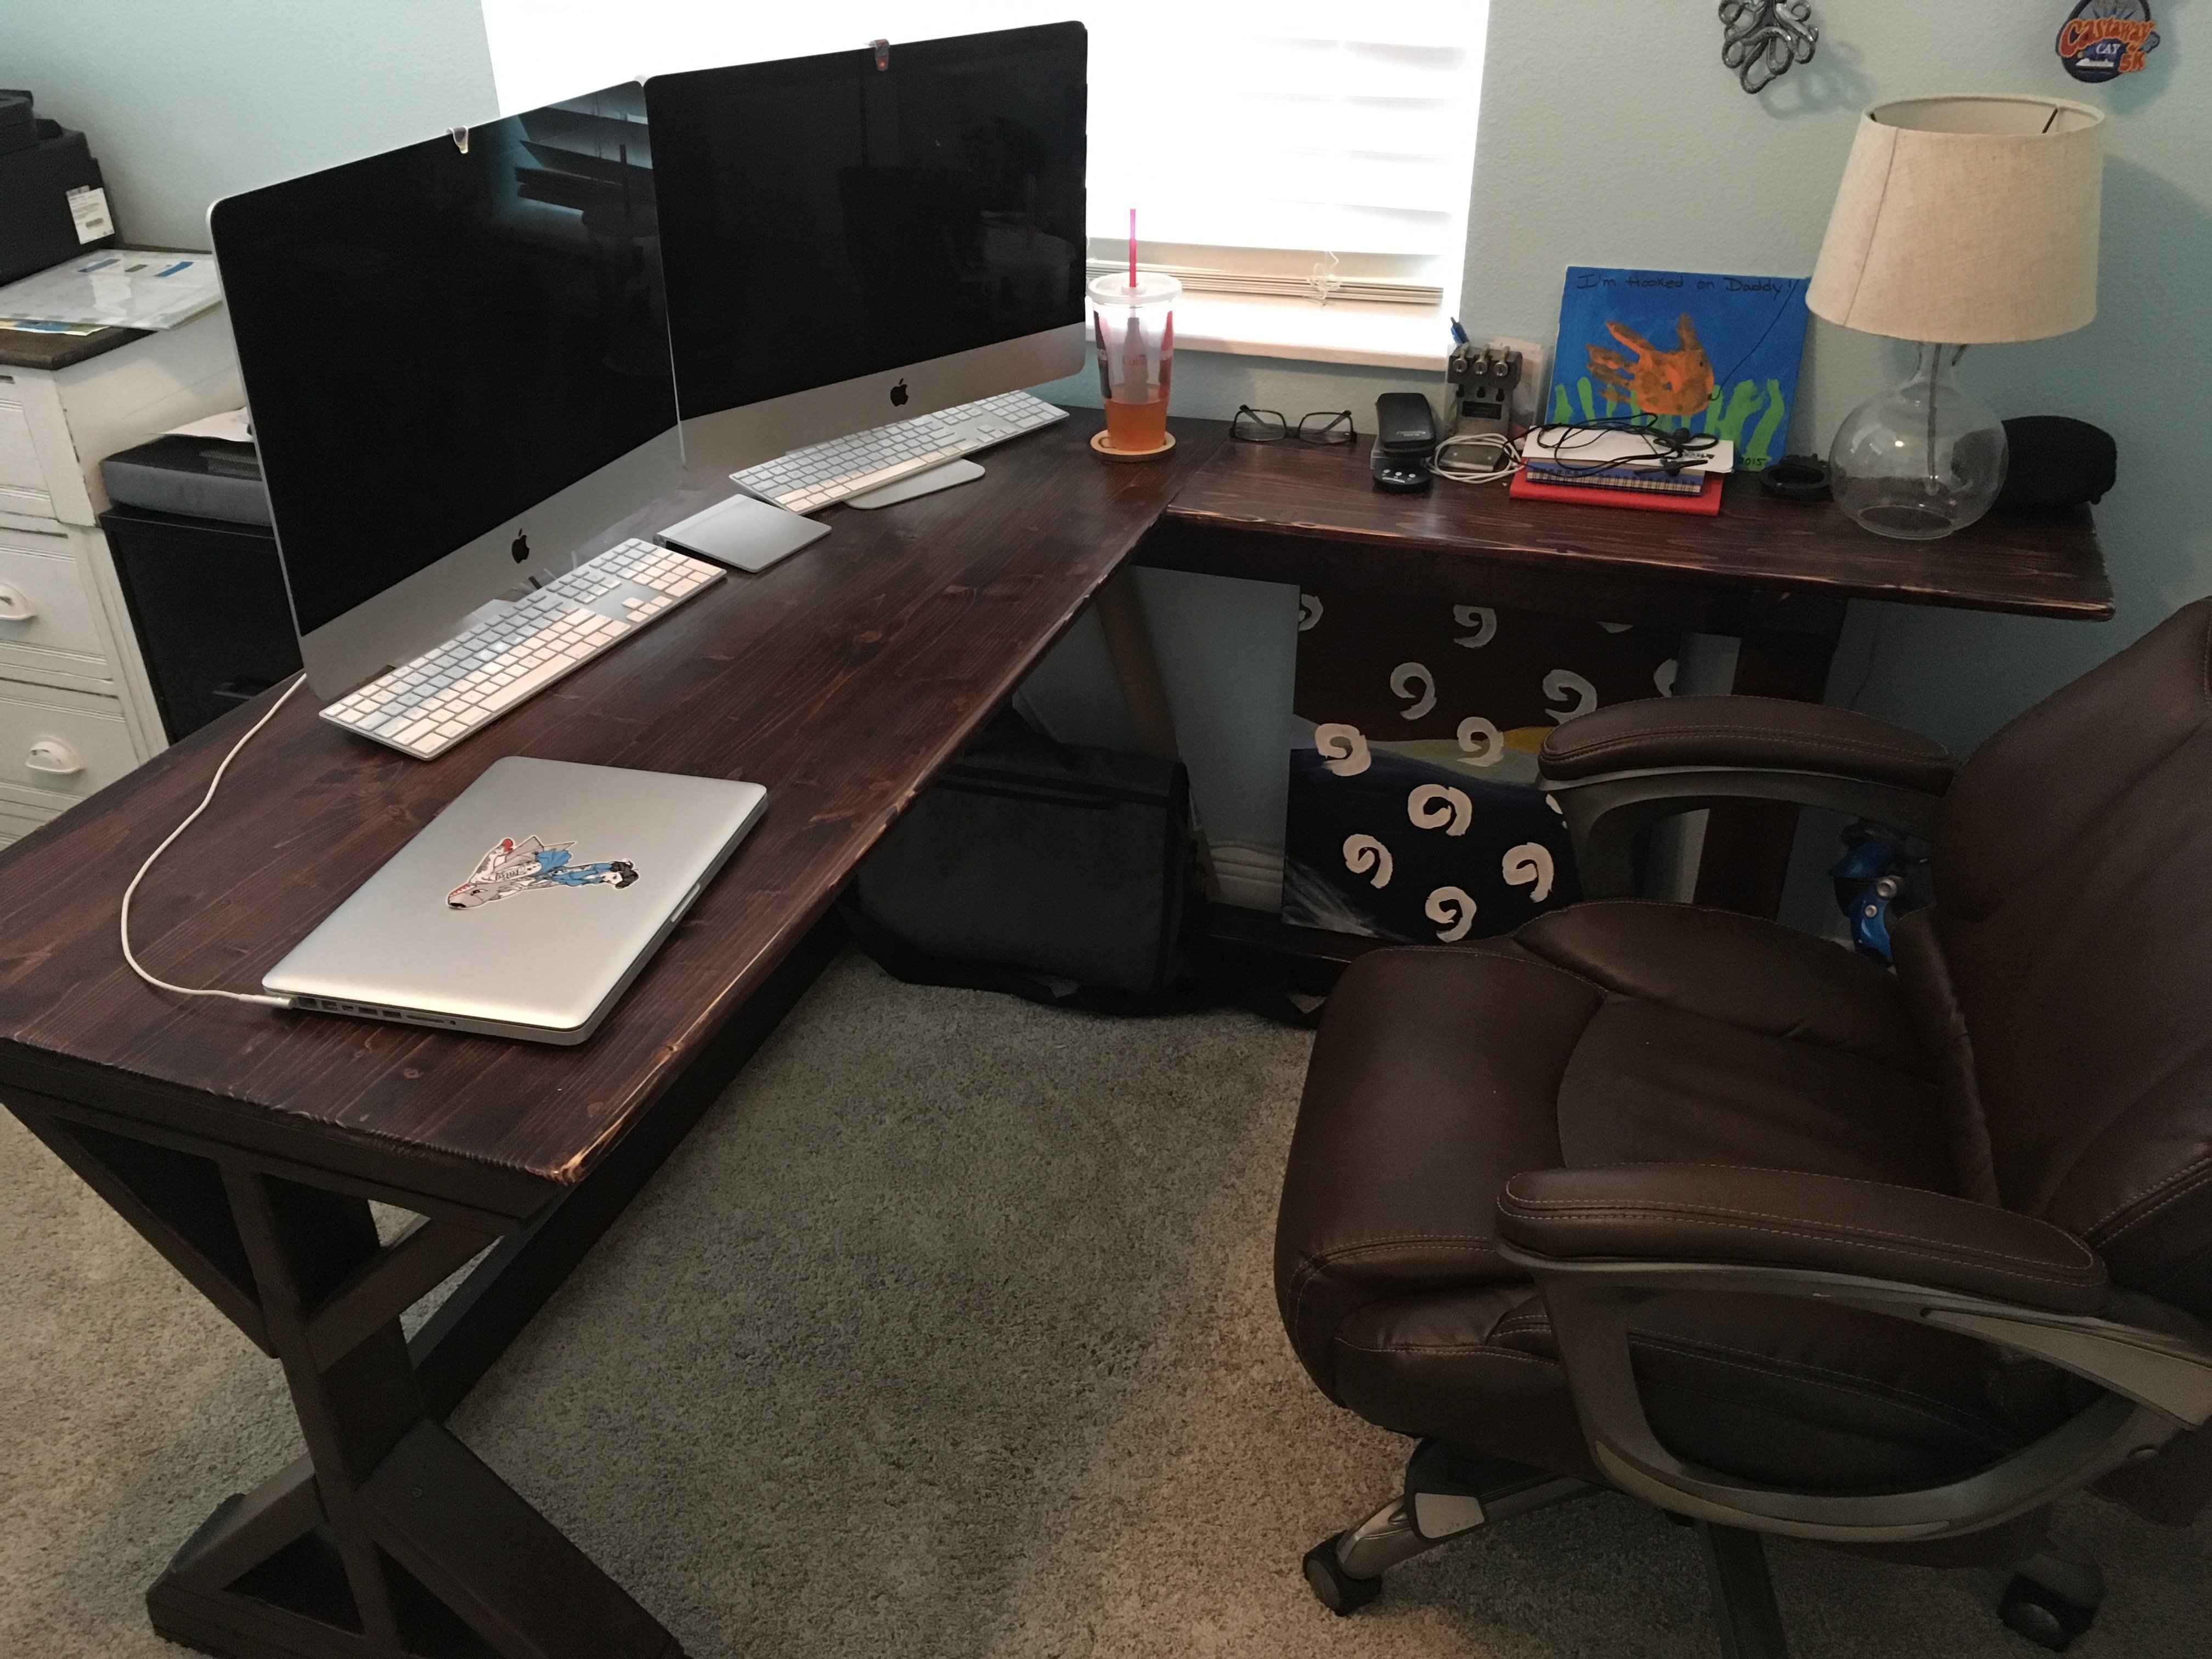
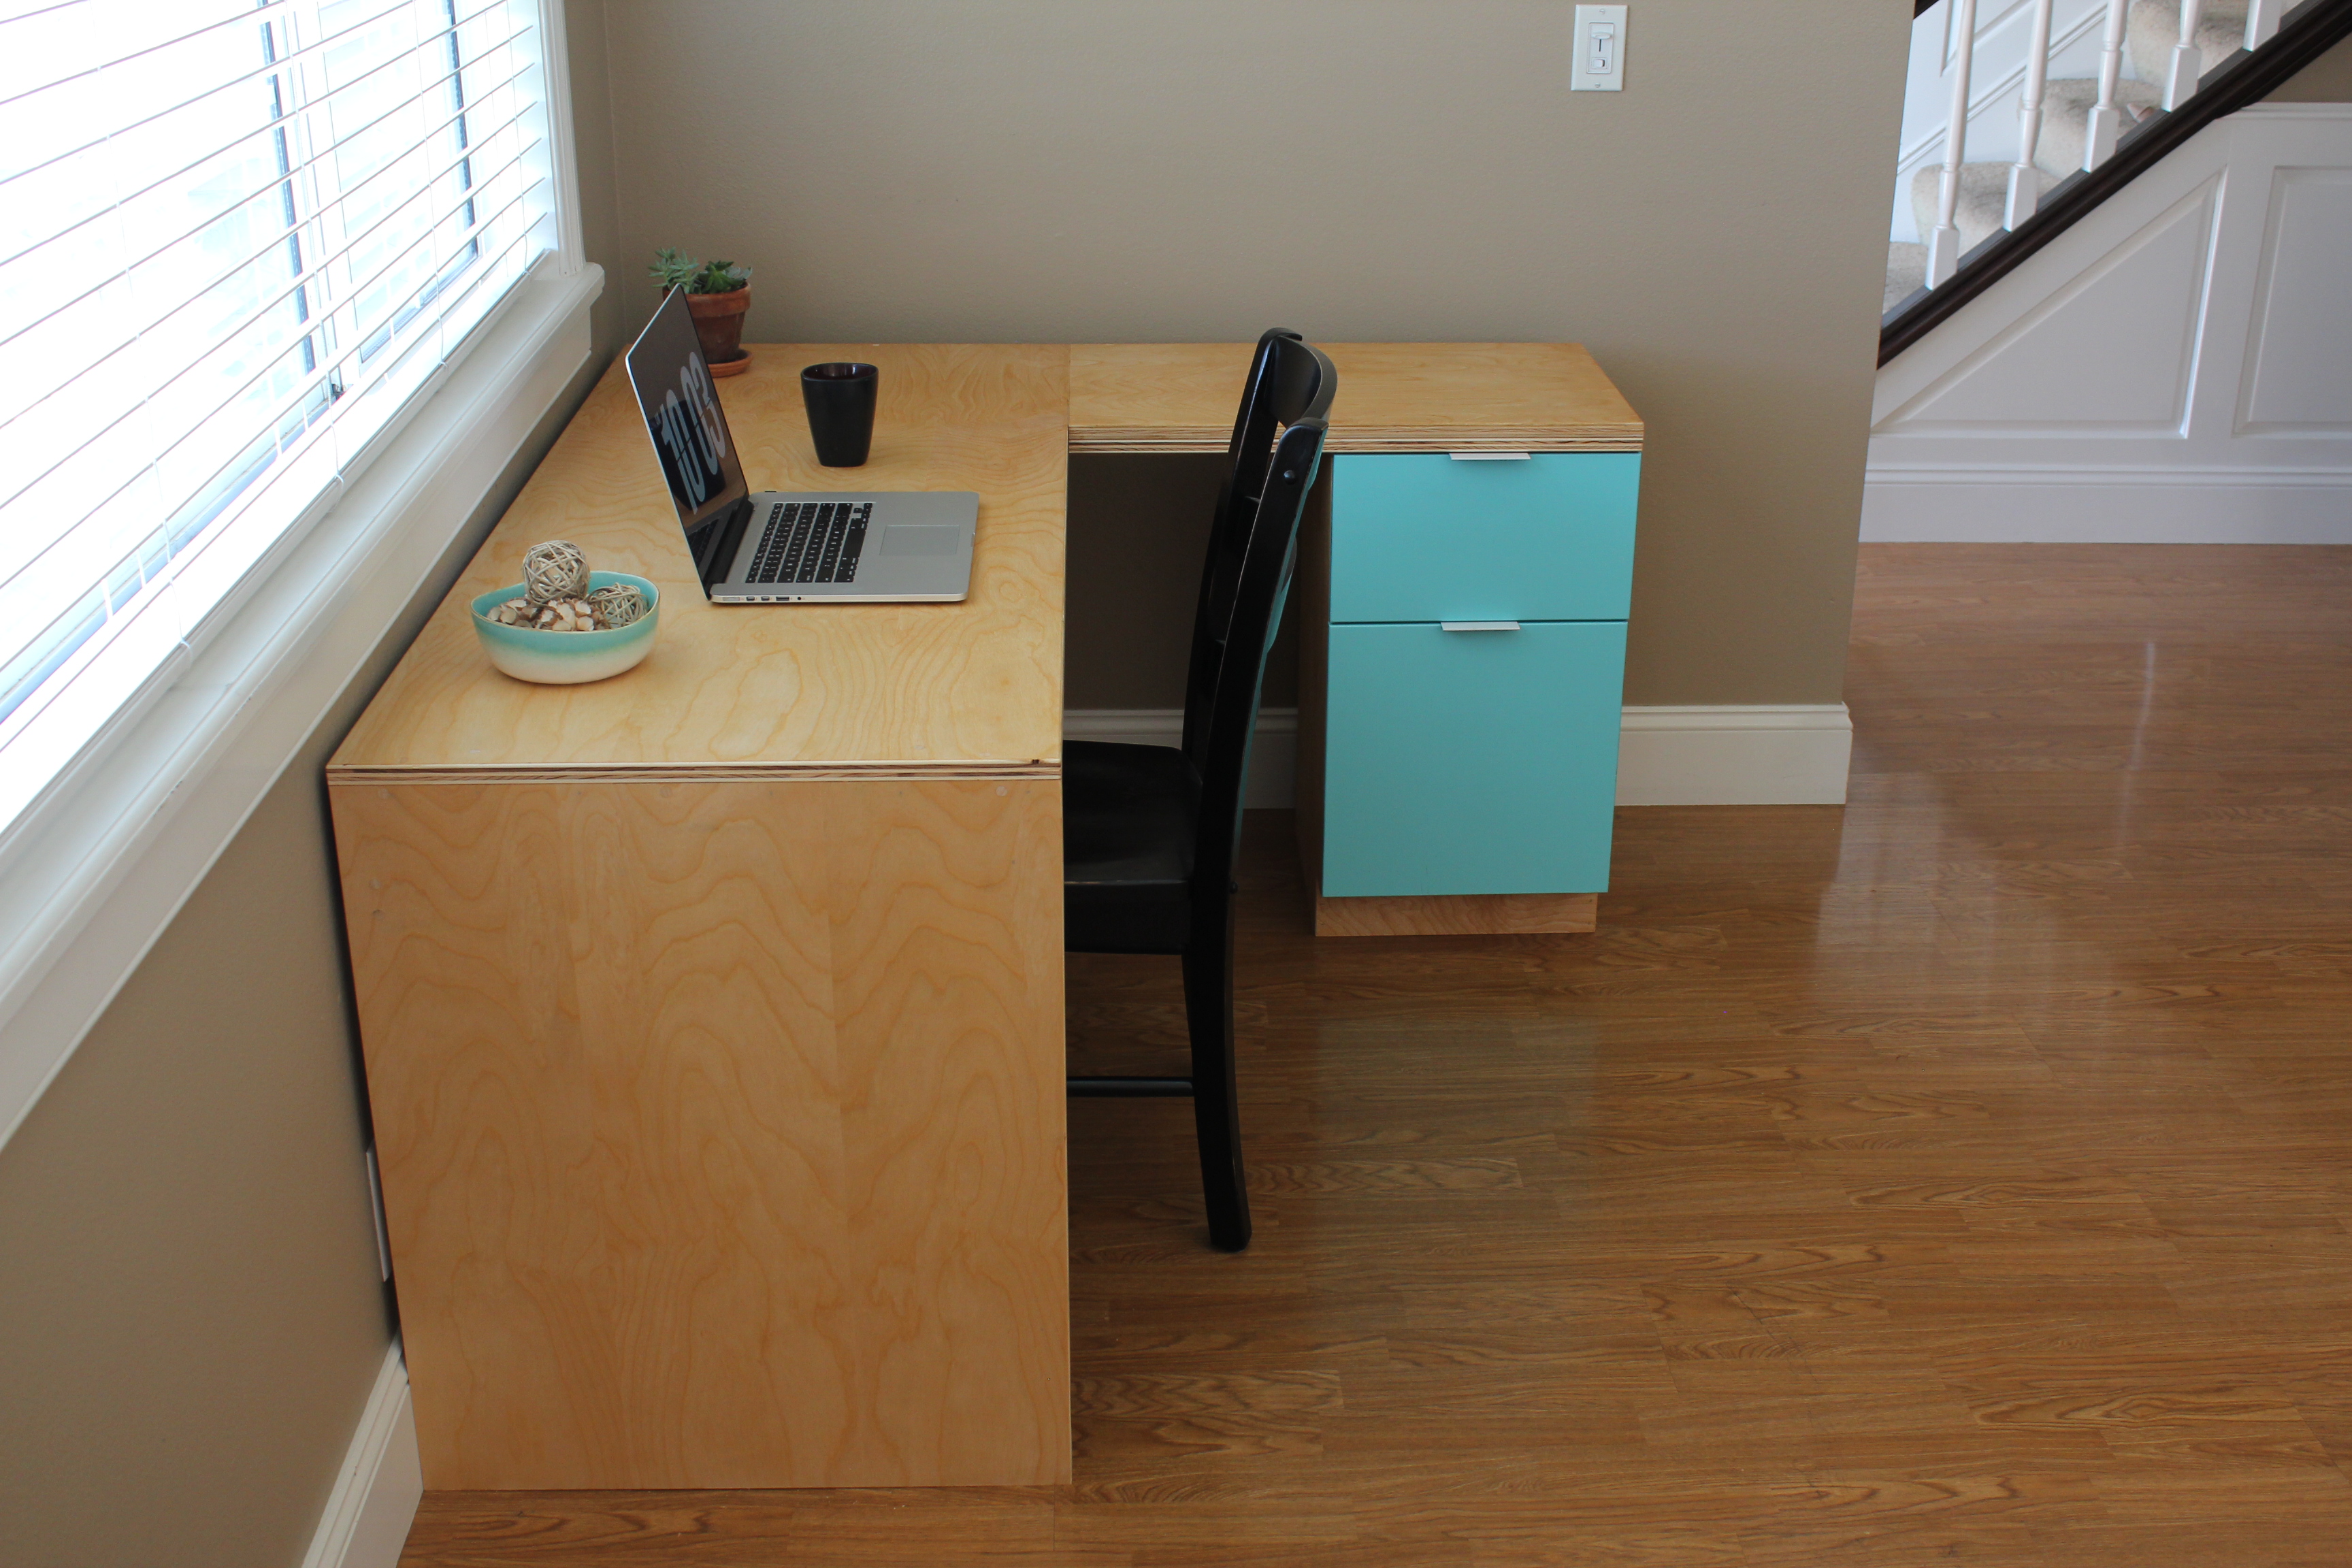
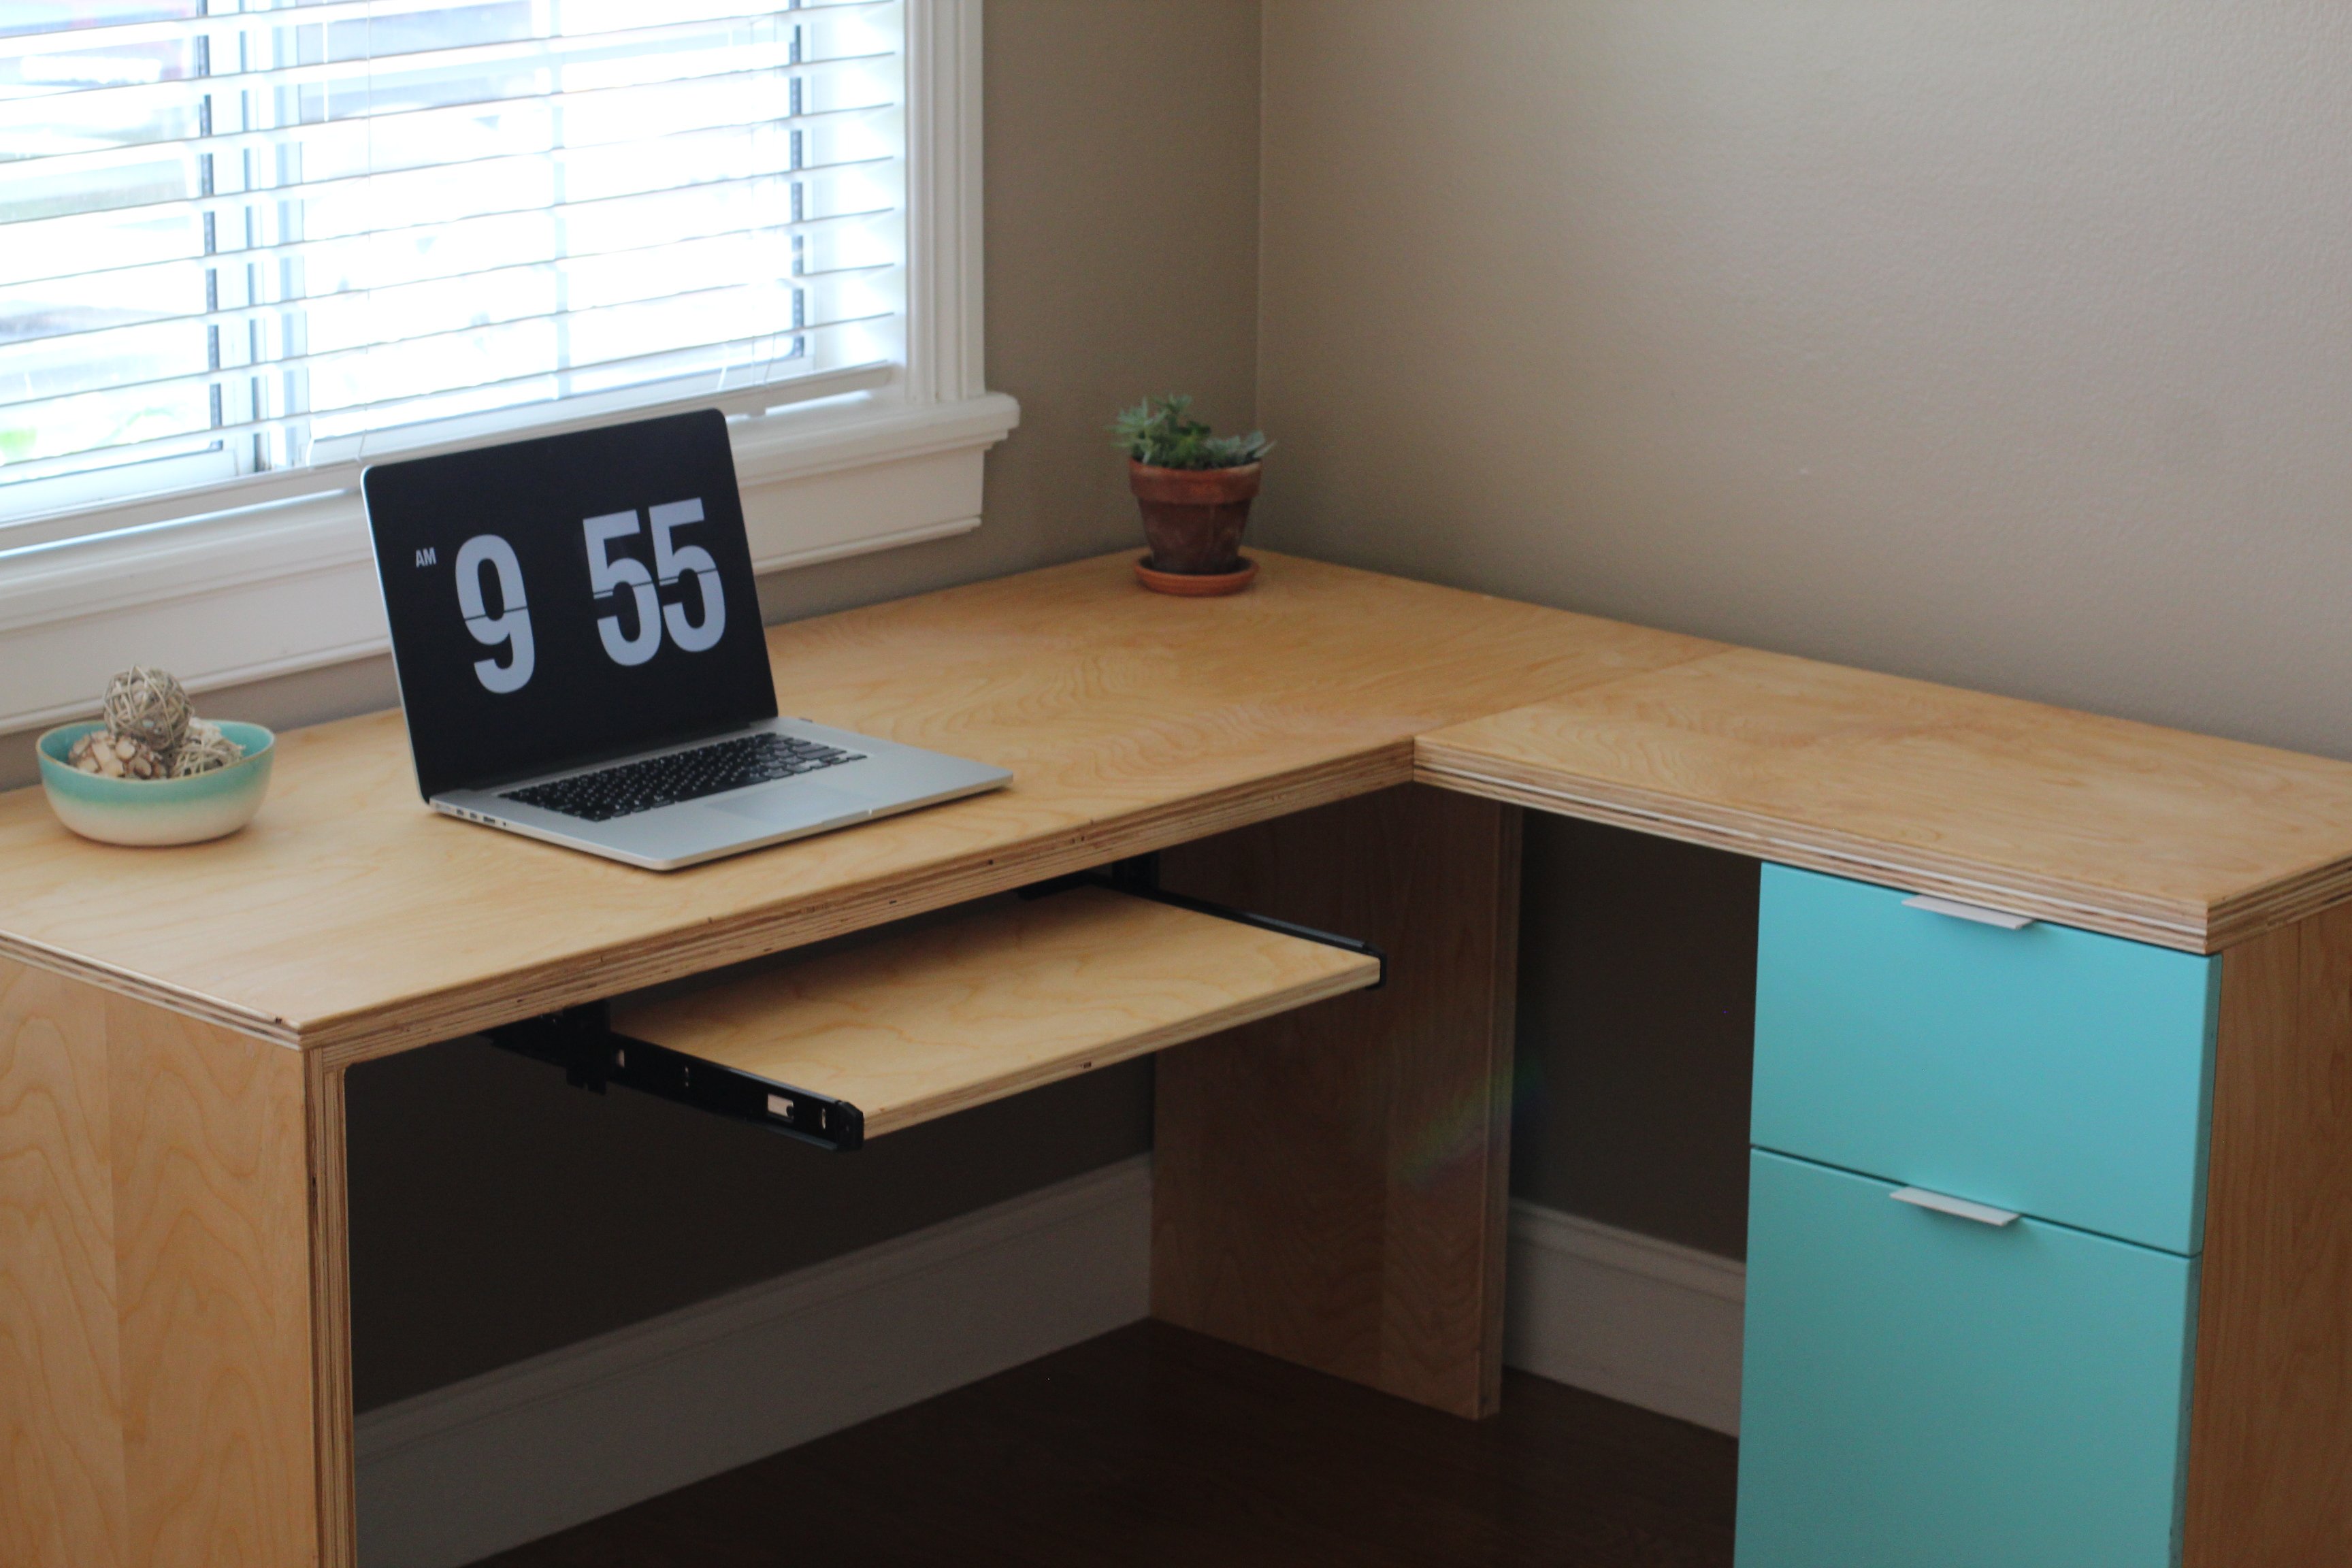
Added an L section to the Fancy Desk to increase usable space So far it still stands strong for me. Thanks Ana
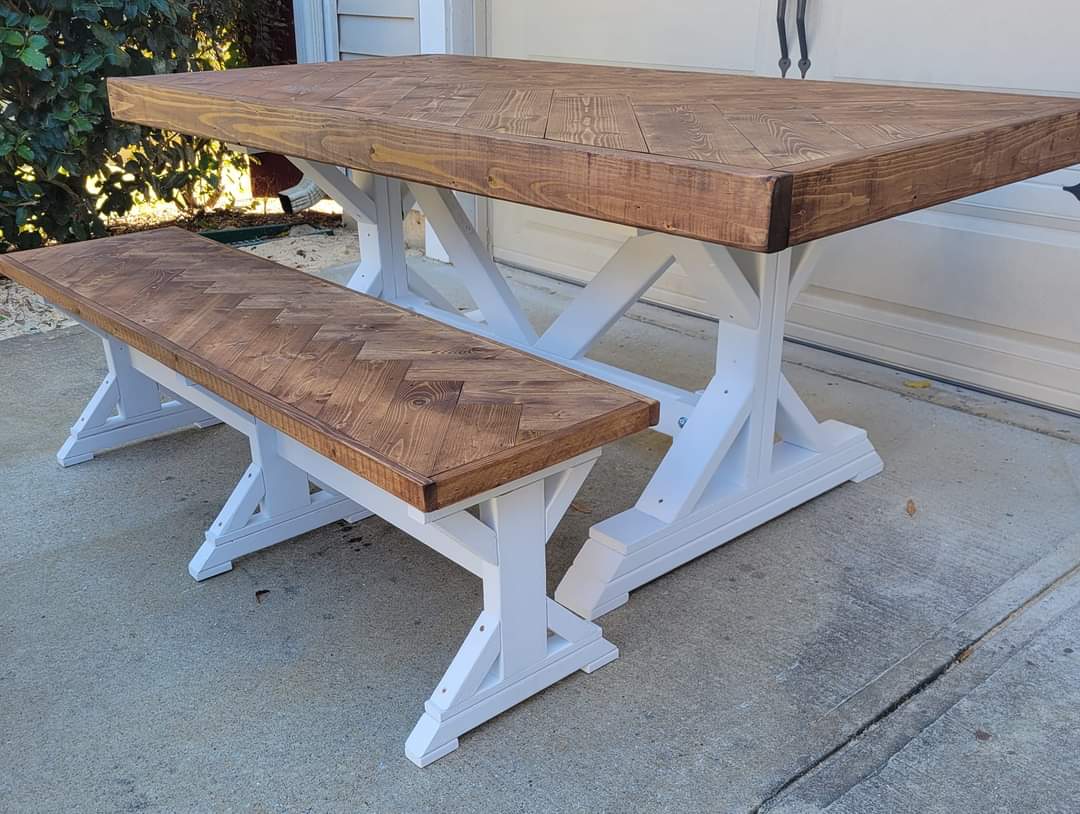
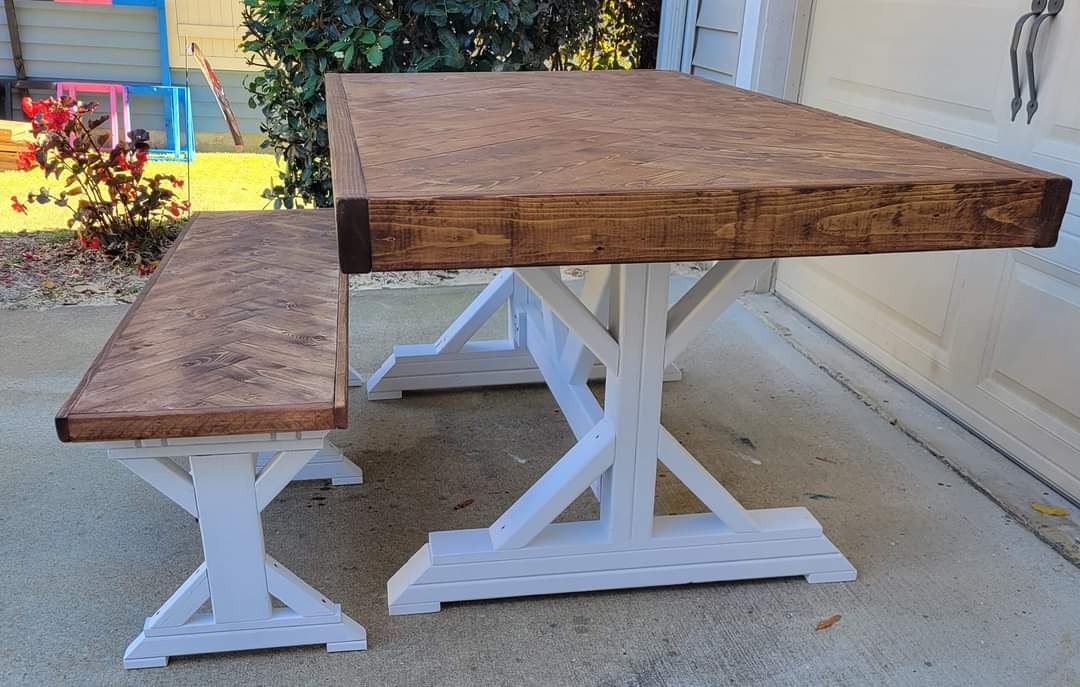
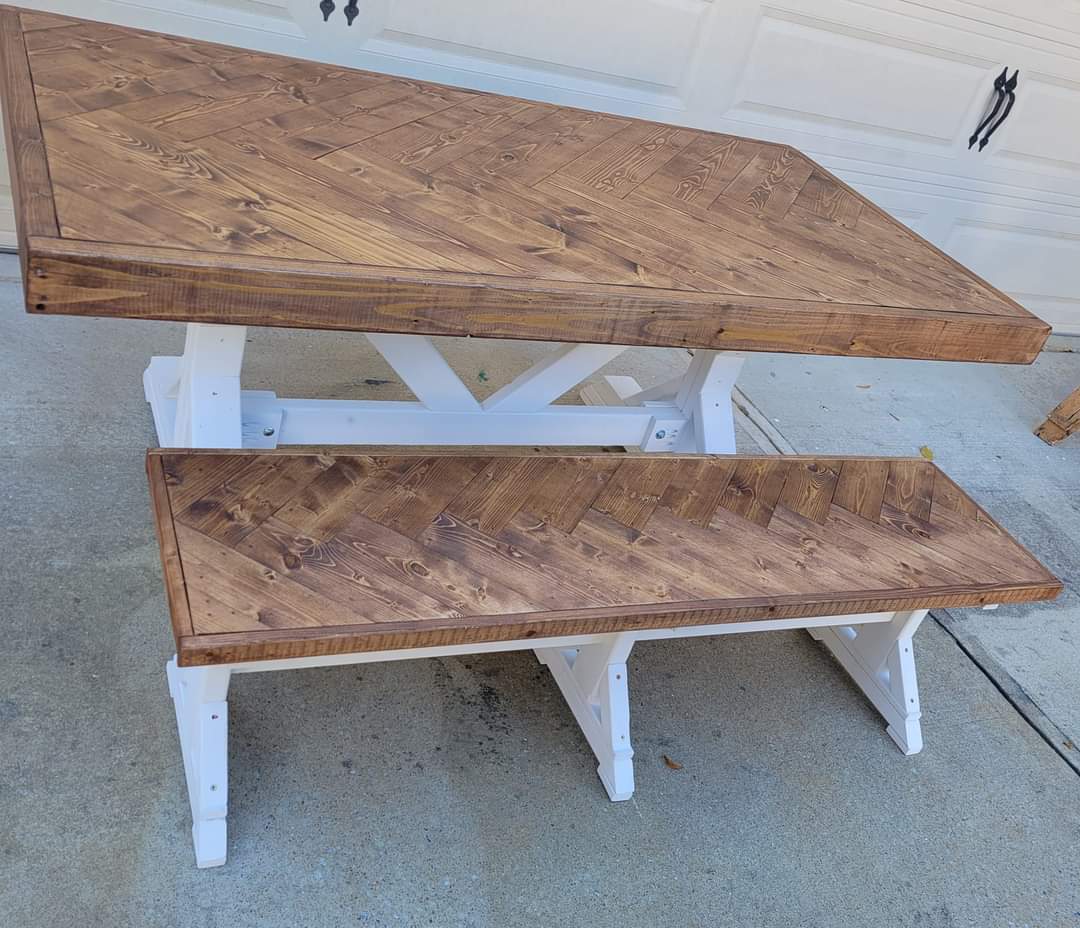
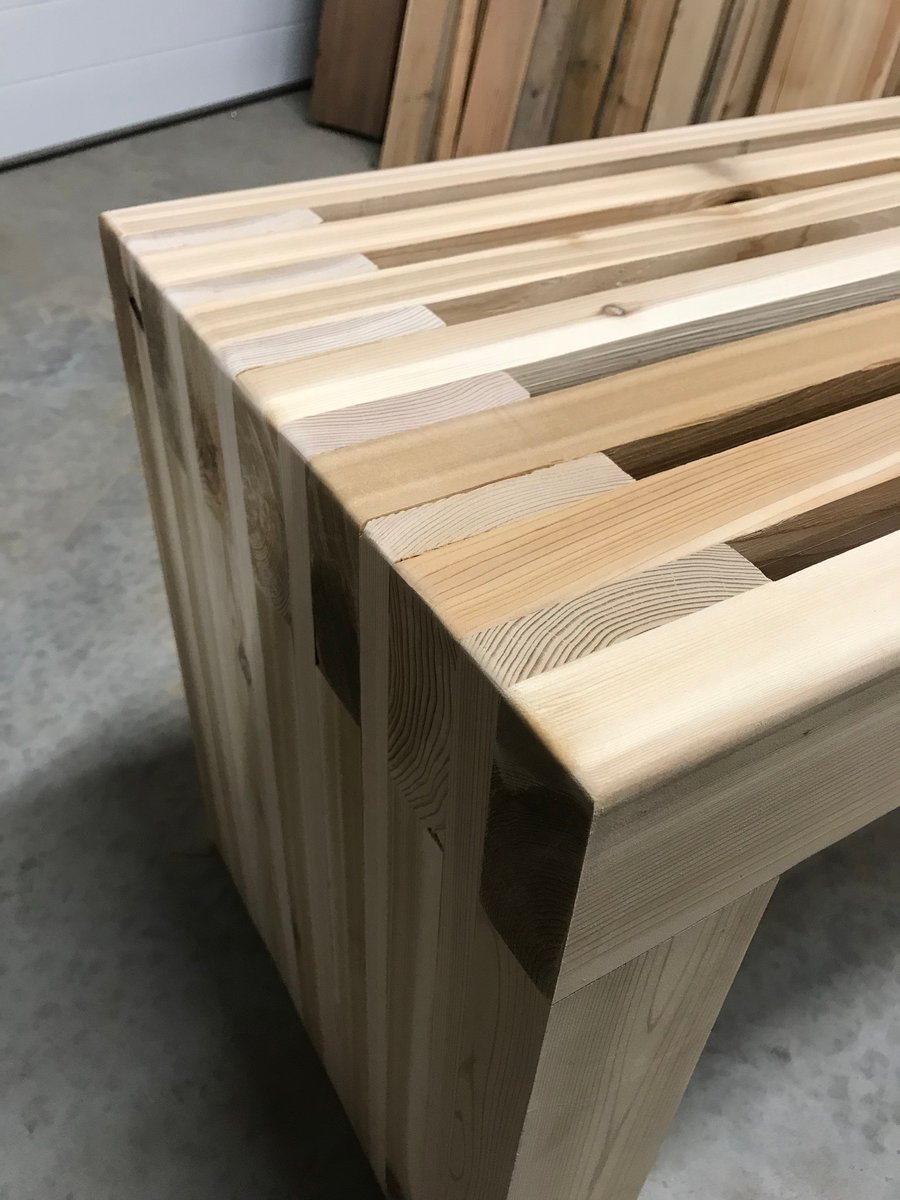
Put a fancy twist in this tabletop and bench top. We like the 45 degree angles that the top and legs both have to compliment each other. The top is stained with minwax special walnut.
Tue, 11/16/2021 - 19:18
You've been busy, this is gorgeous all the way around!
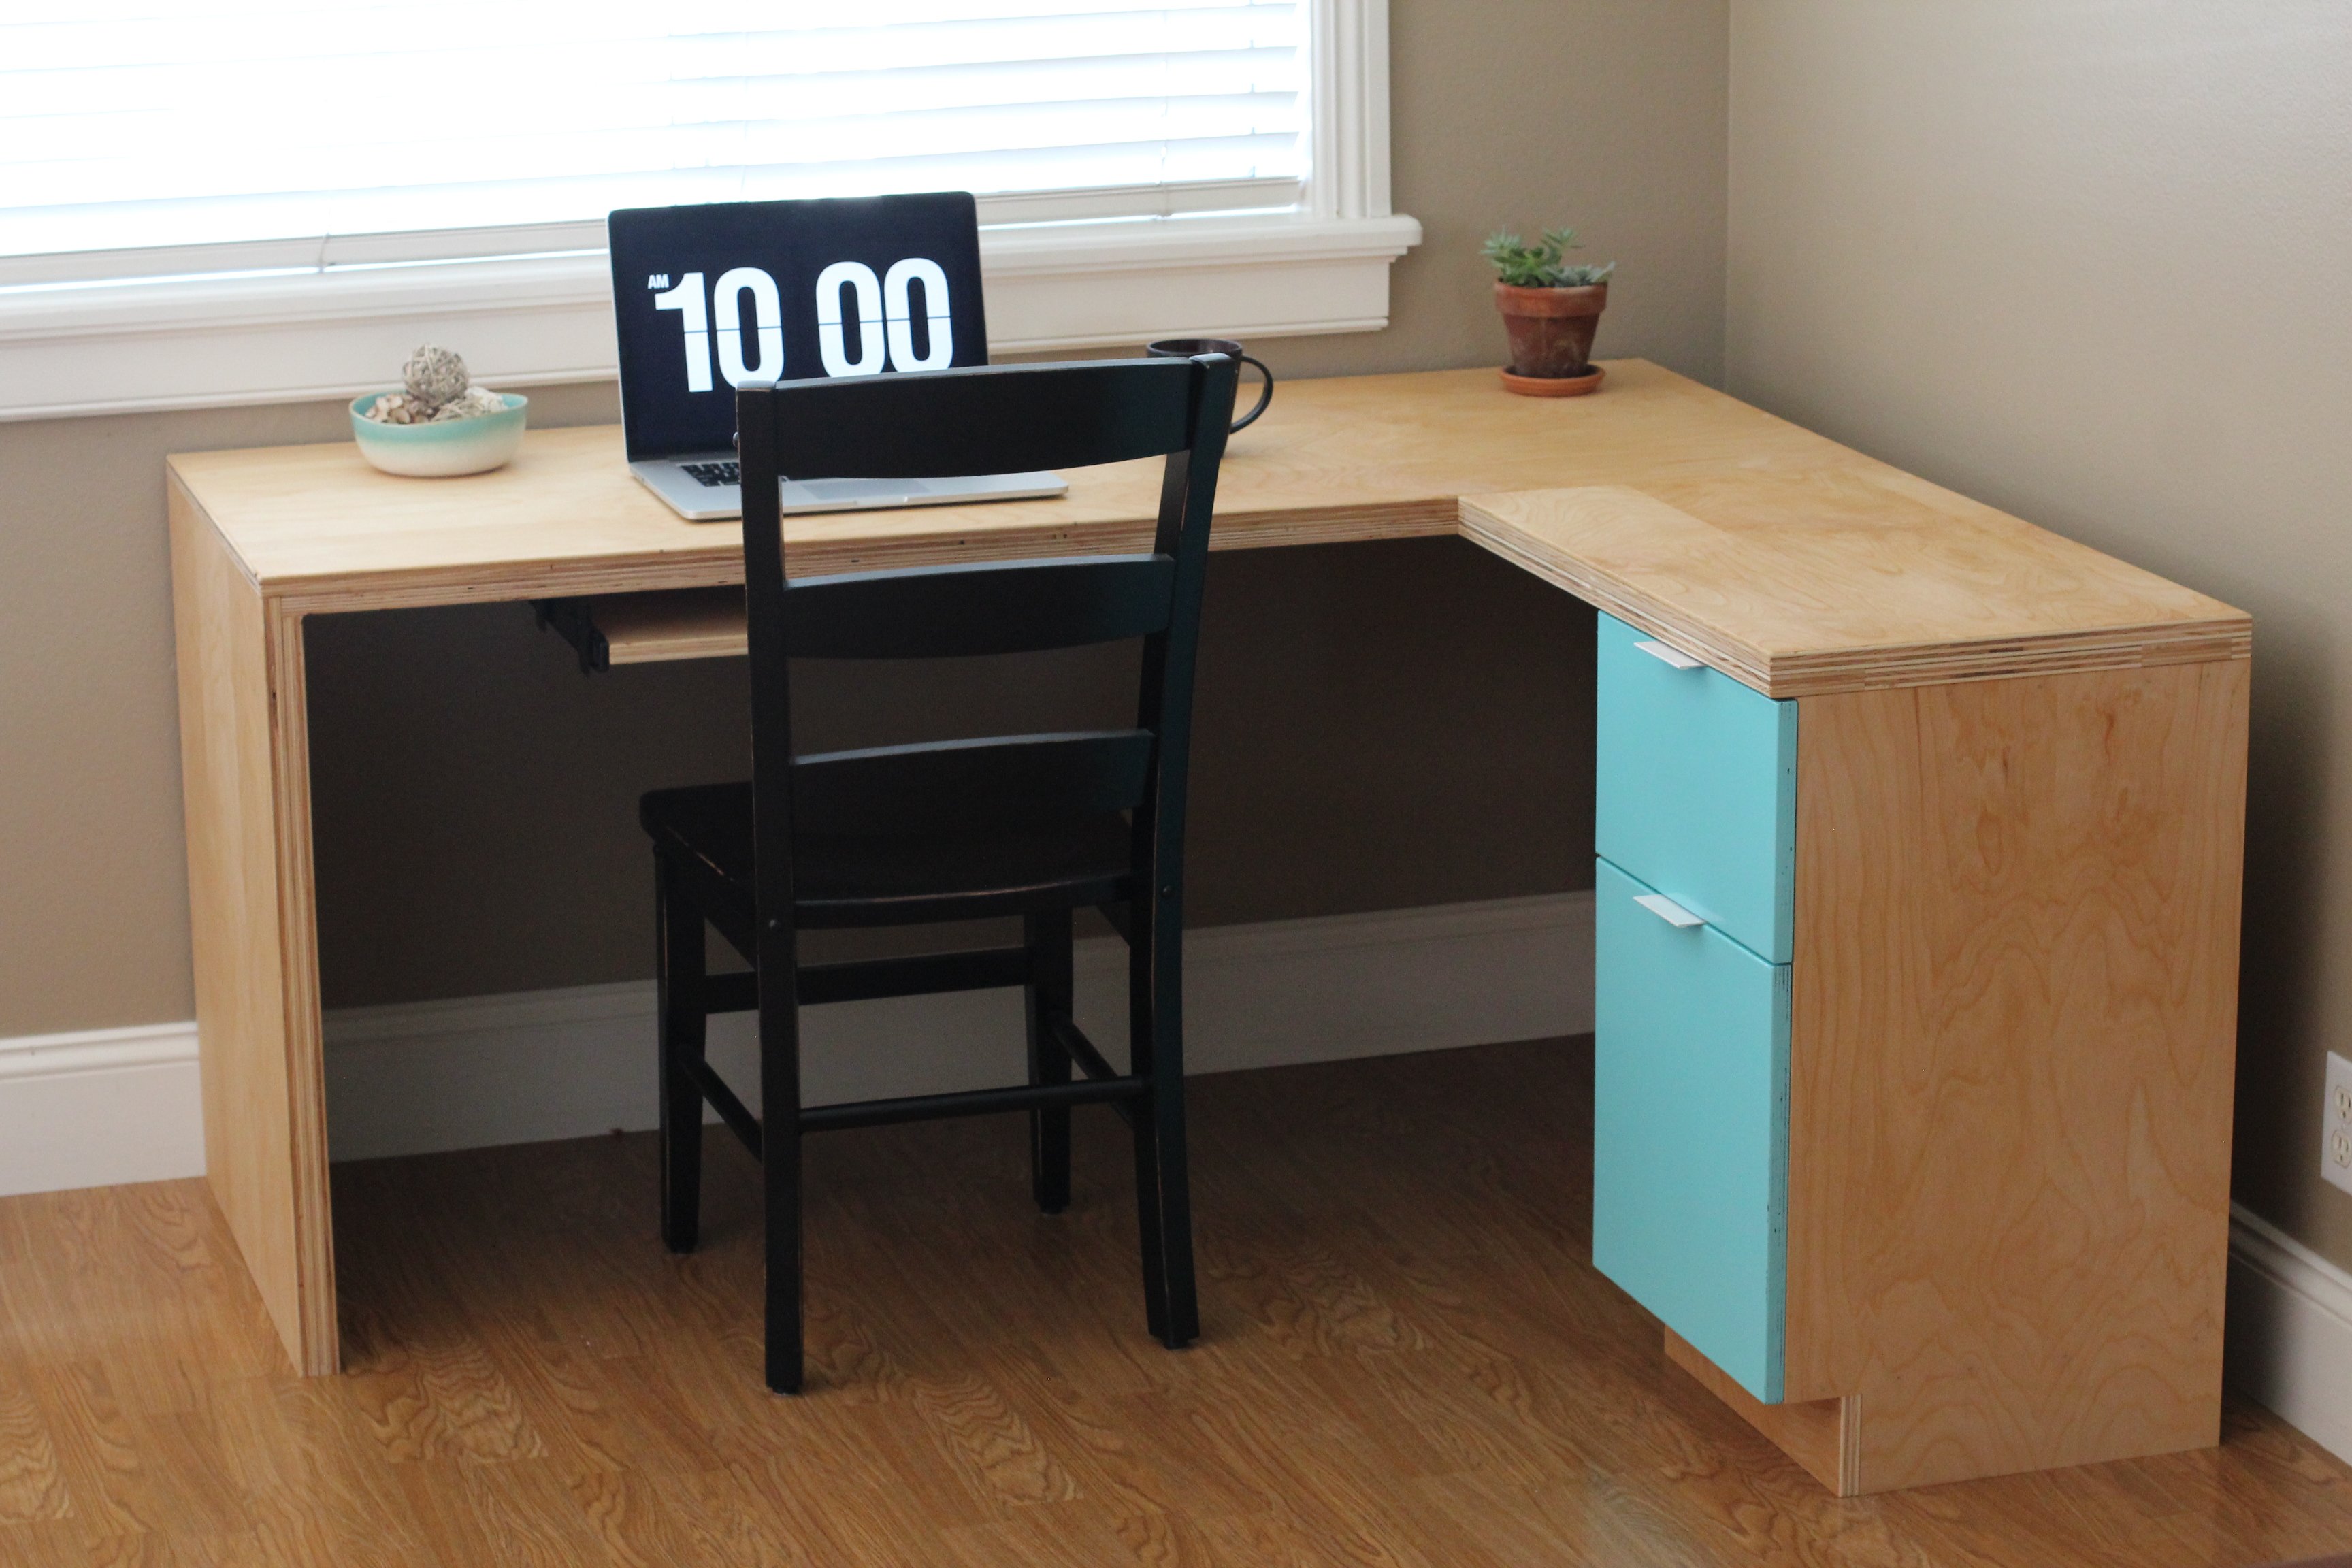
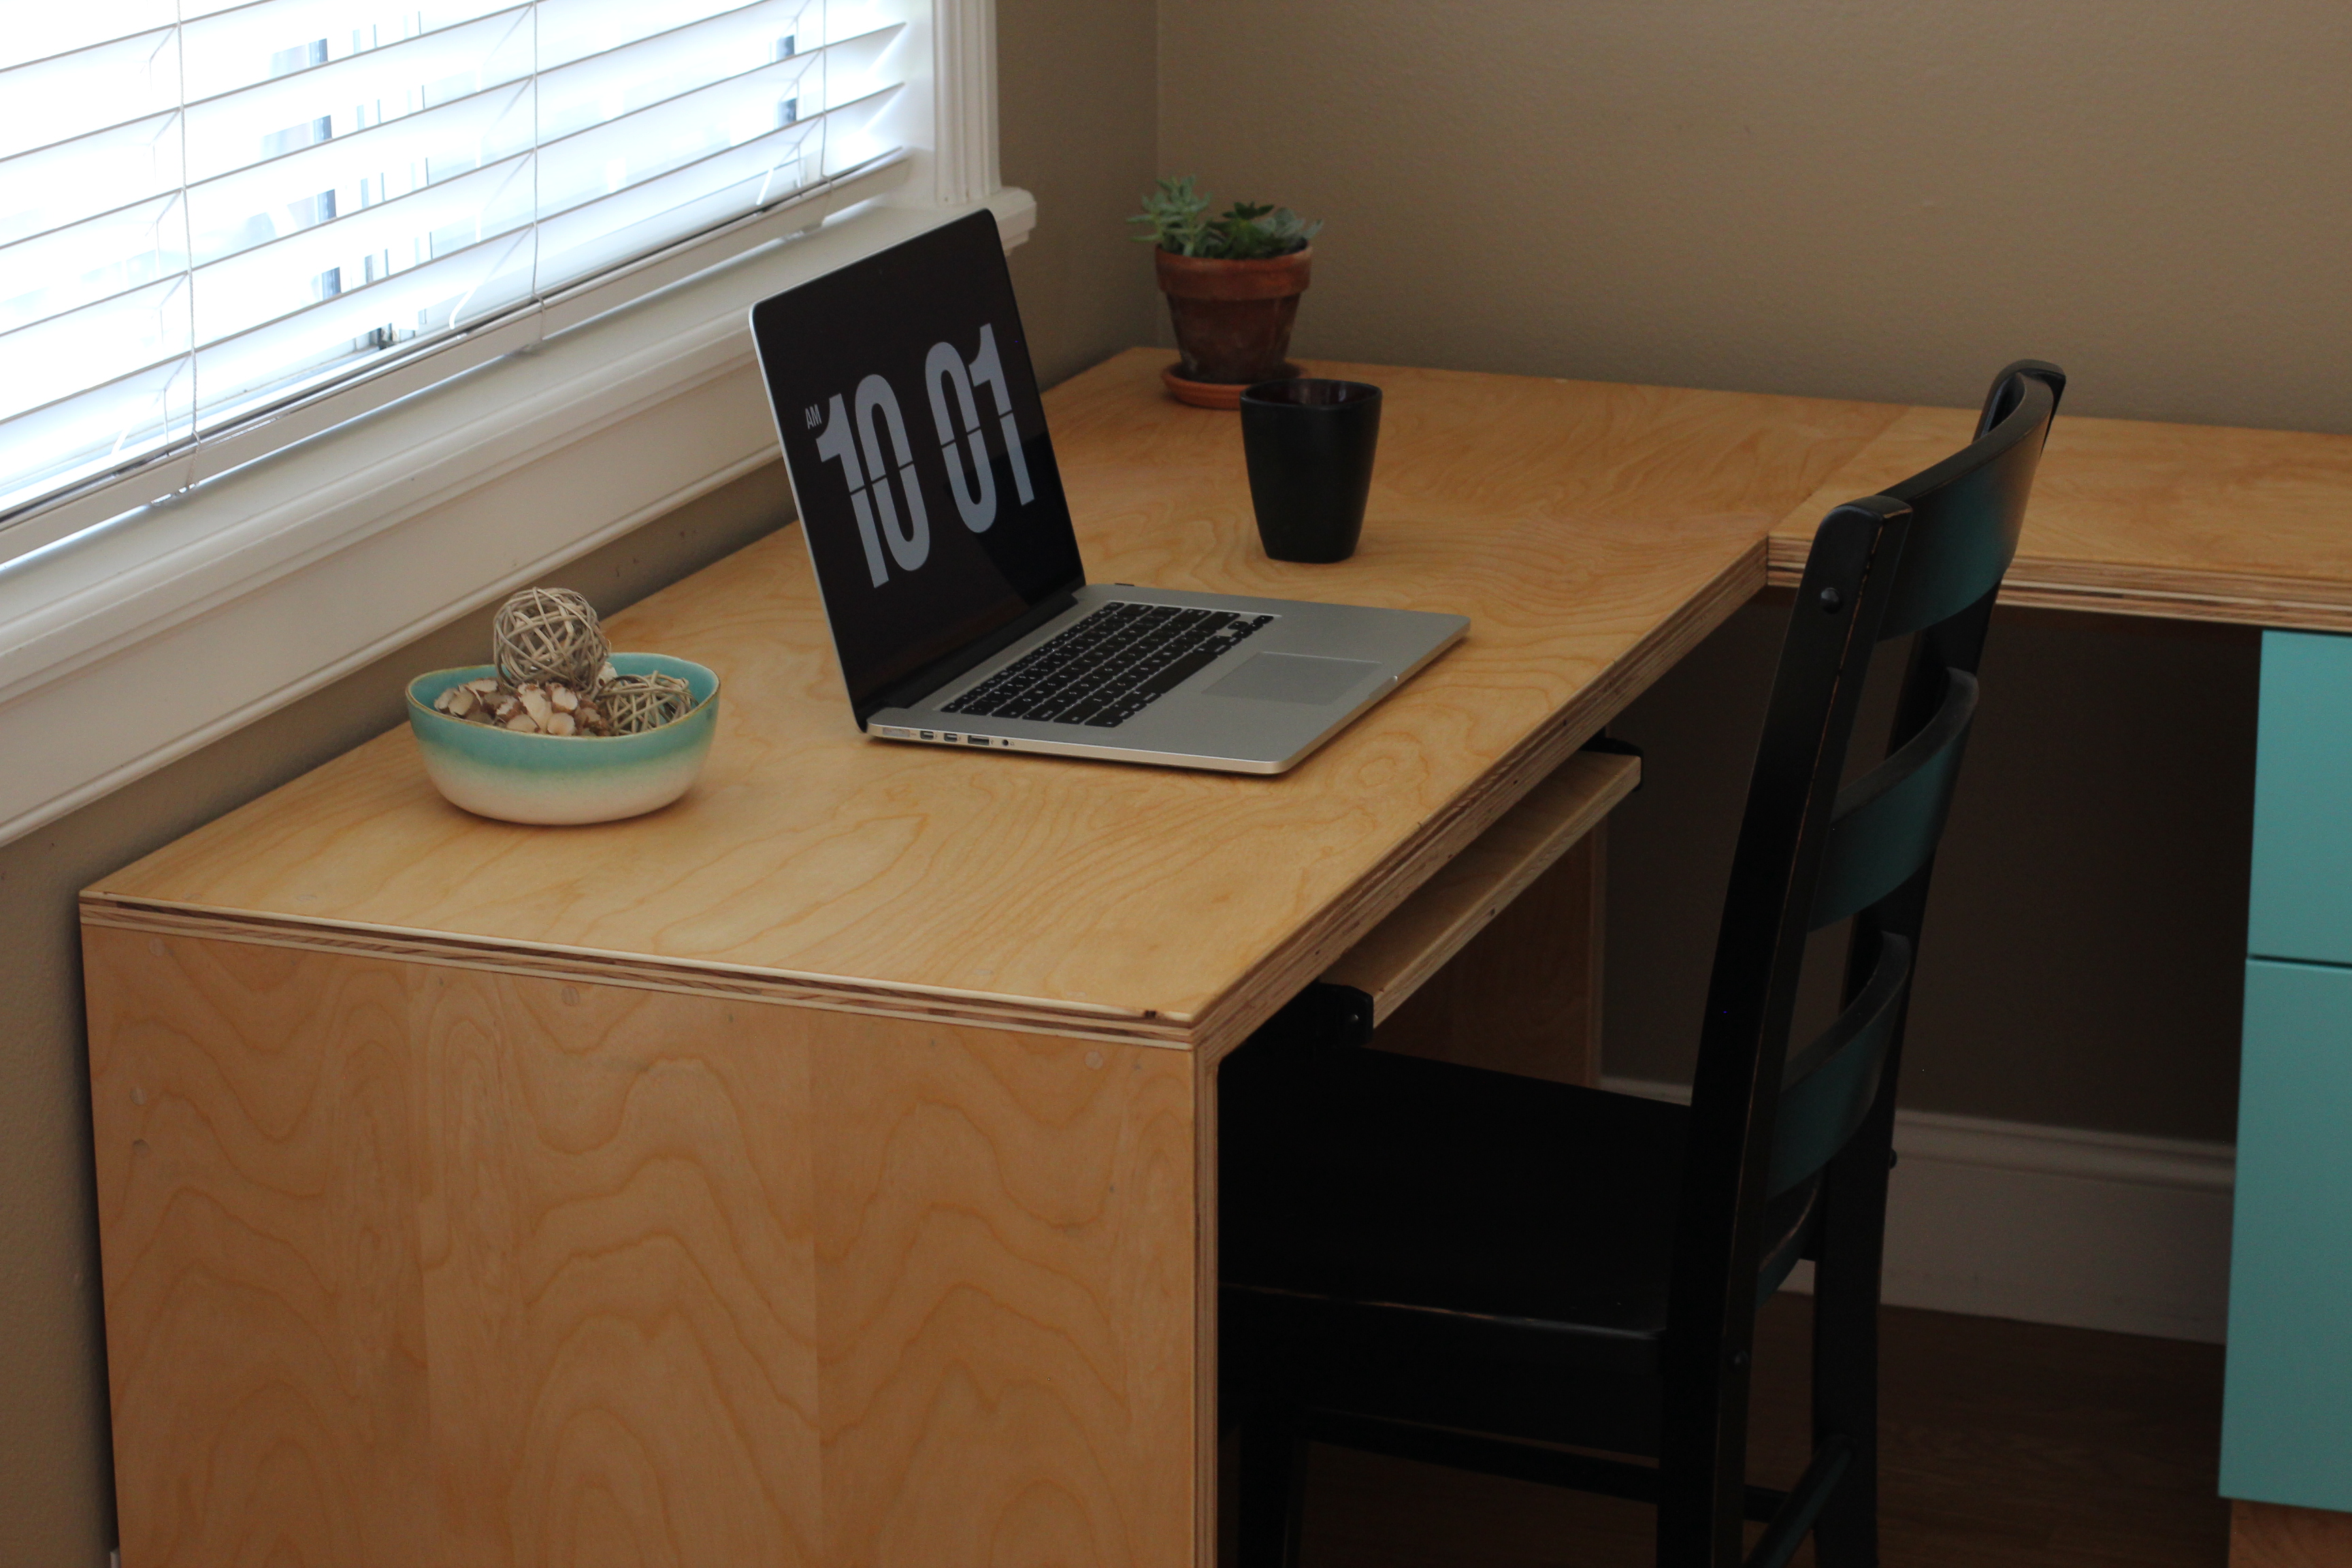
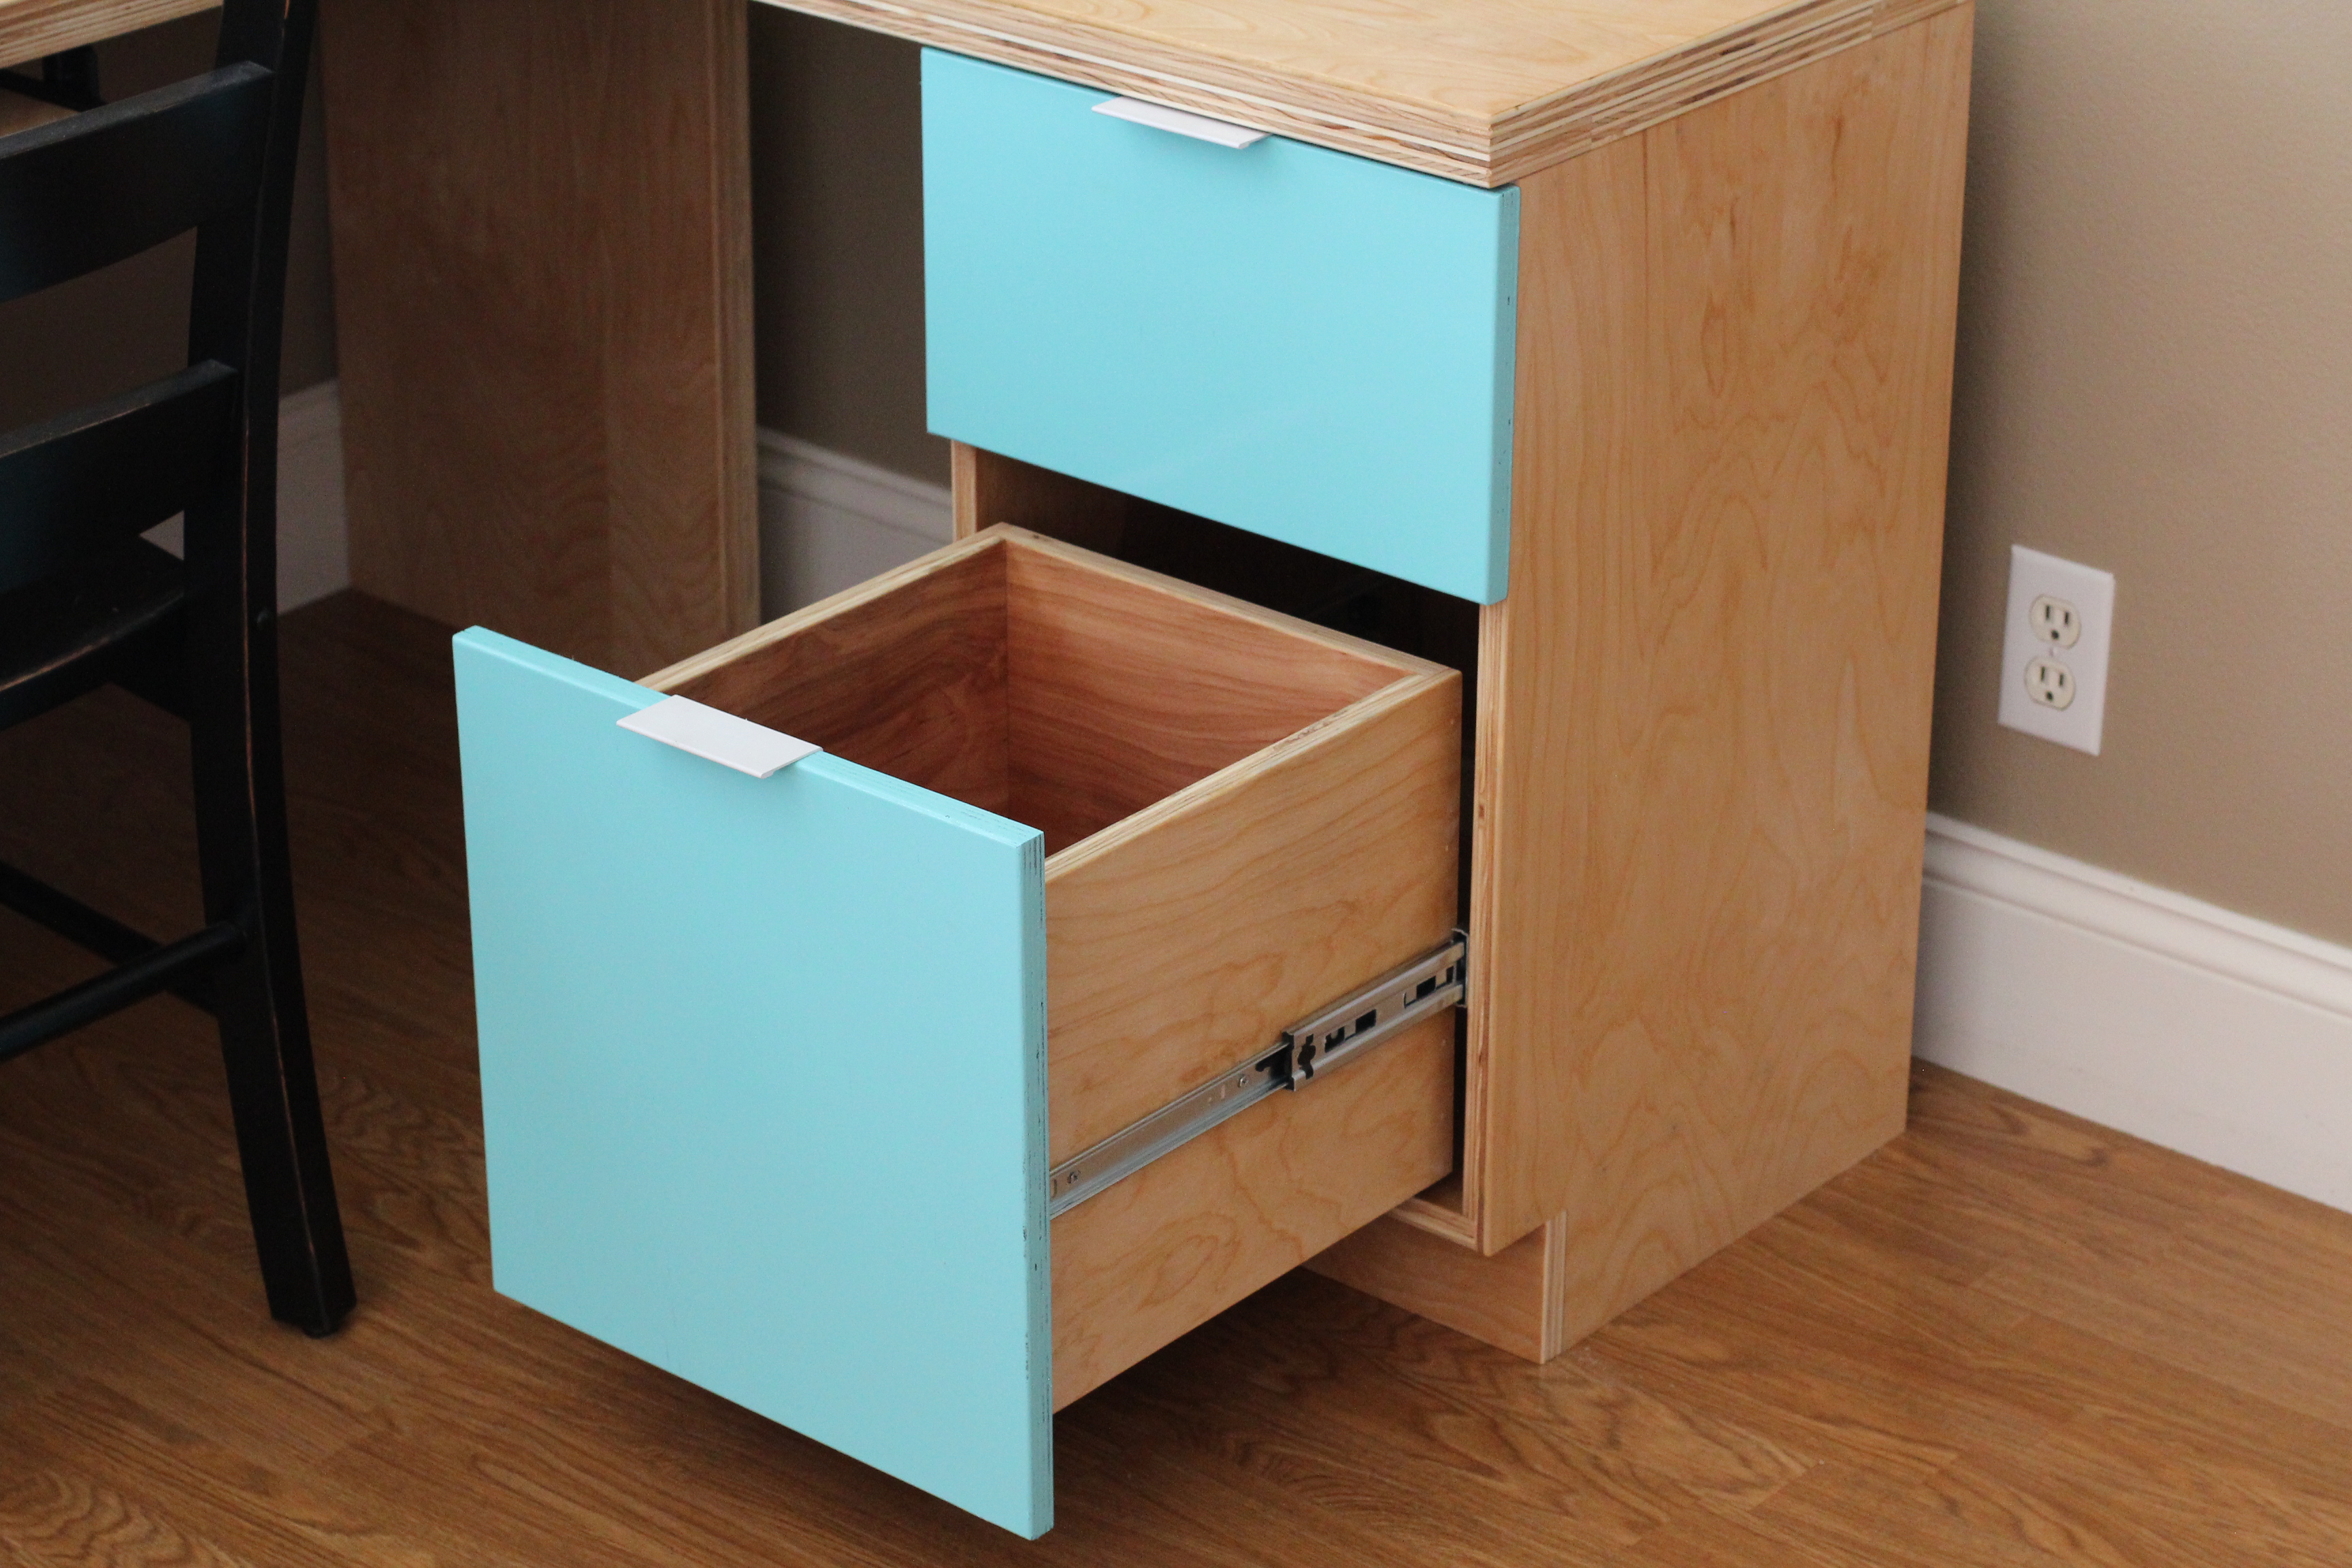
I constructed this desk all from birch plywood. It features a pull out keyboard tray, modern drawer finger pulls, and full extension drawer slides. The plywood was finished with a hand-rubbed danish oil for a natural wood appearance.
Great little project. Finished just in time for Thanksgiving.
Andy
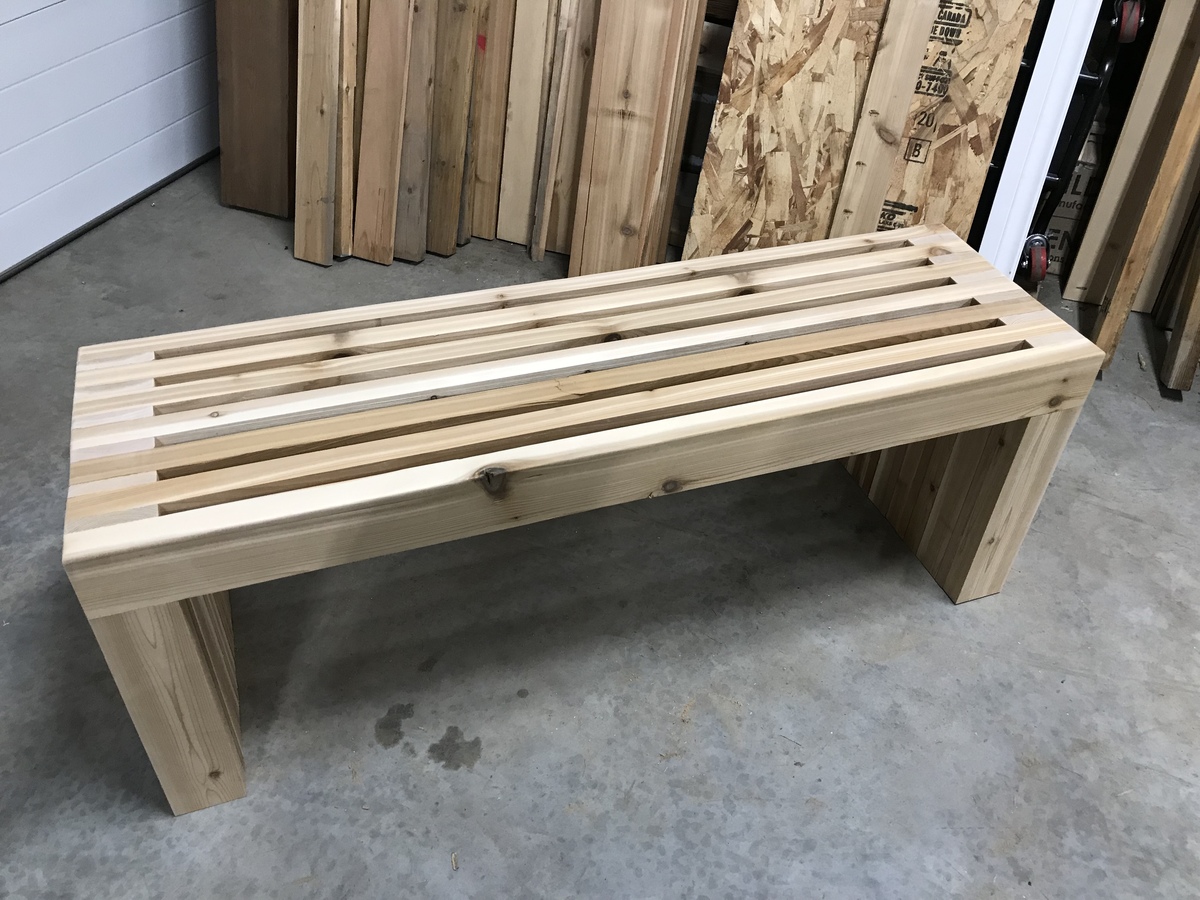
I really enjoy making this bench. I build them out of cedar and vary from 4’-6’. My customers love them. Simple prep work consisting of planing all boards to same dimensions can save a lot of time in sanding. Building 3 more this week.
Wed, 02/16/2022 - 07:12
do you have the plans for the Cedar Slat Top Bench?
