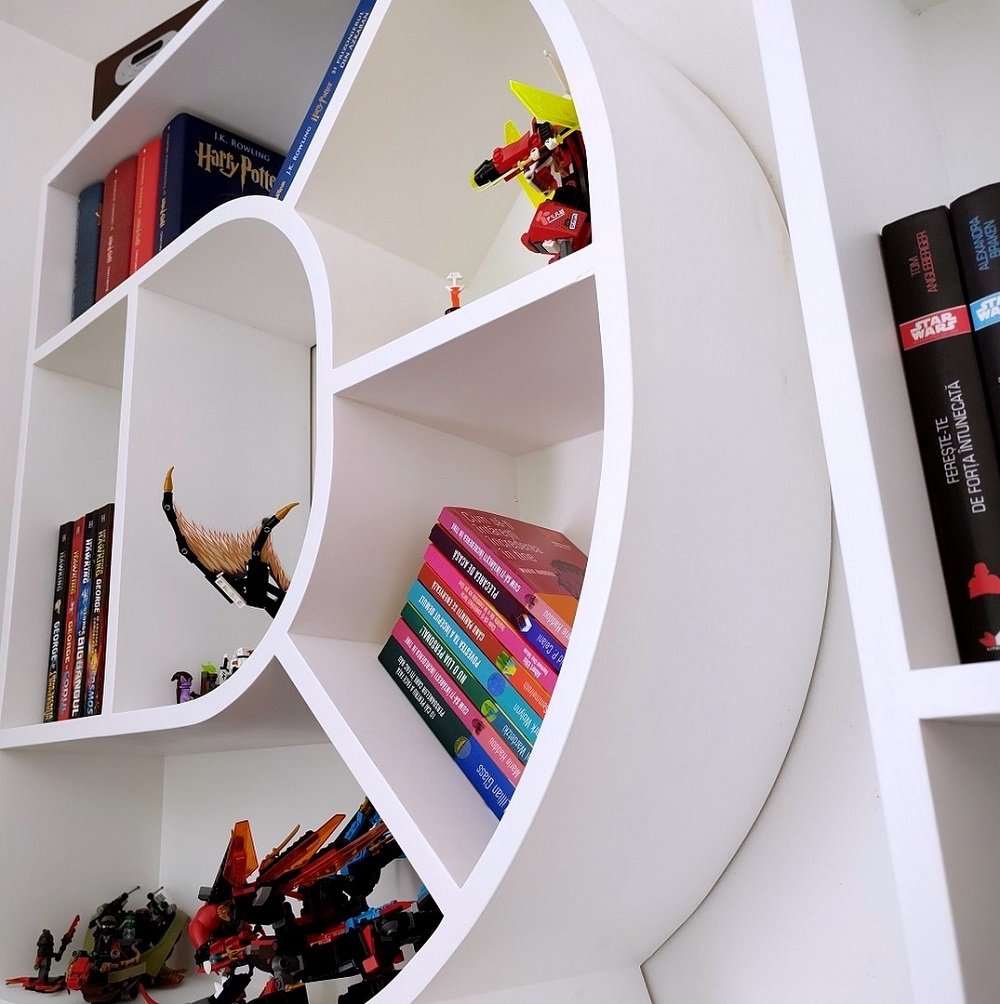
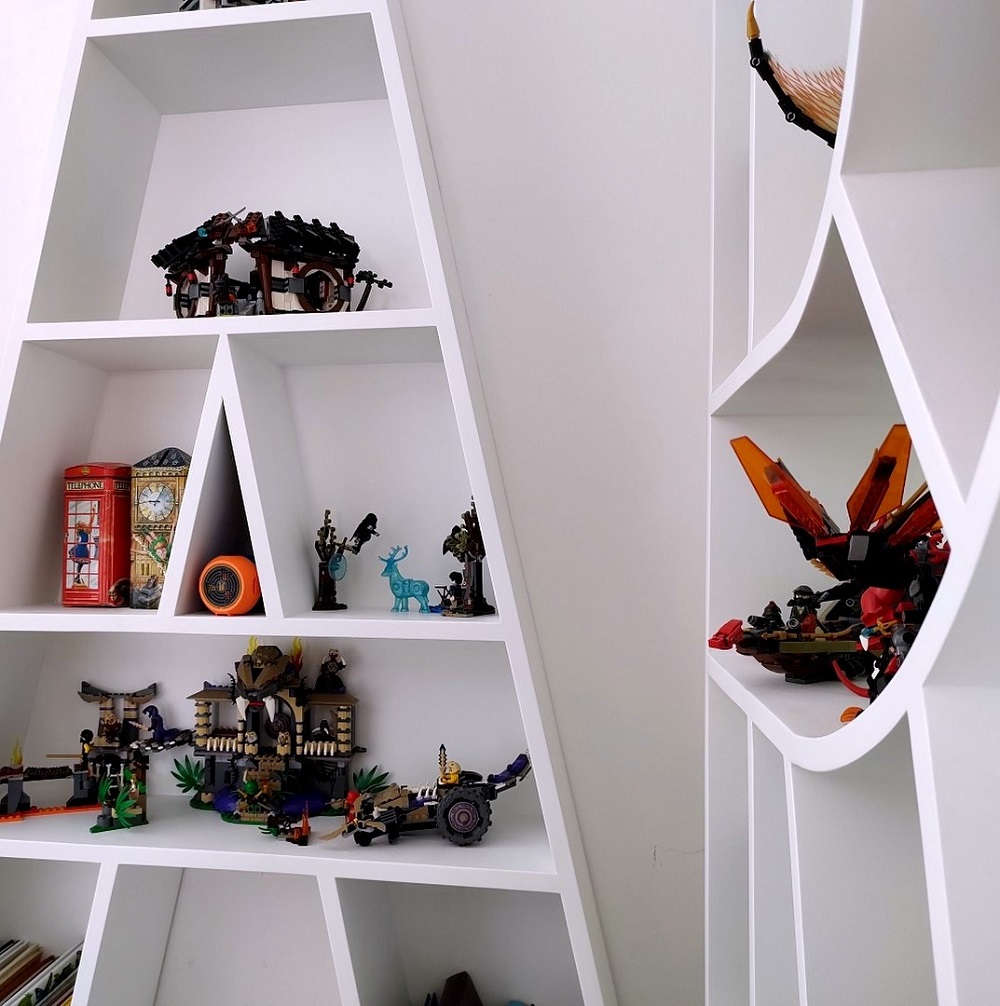
Nursery Book Ledges
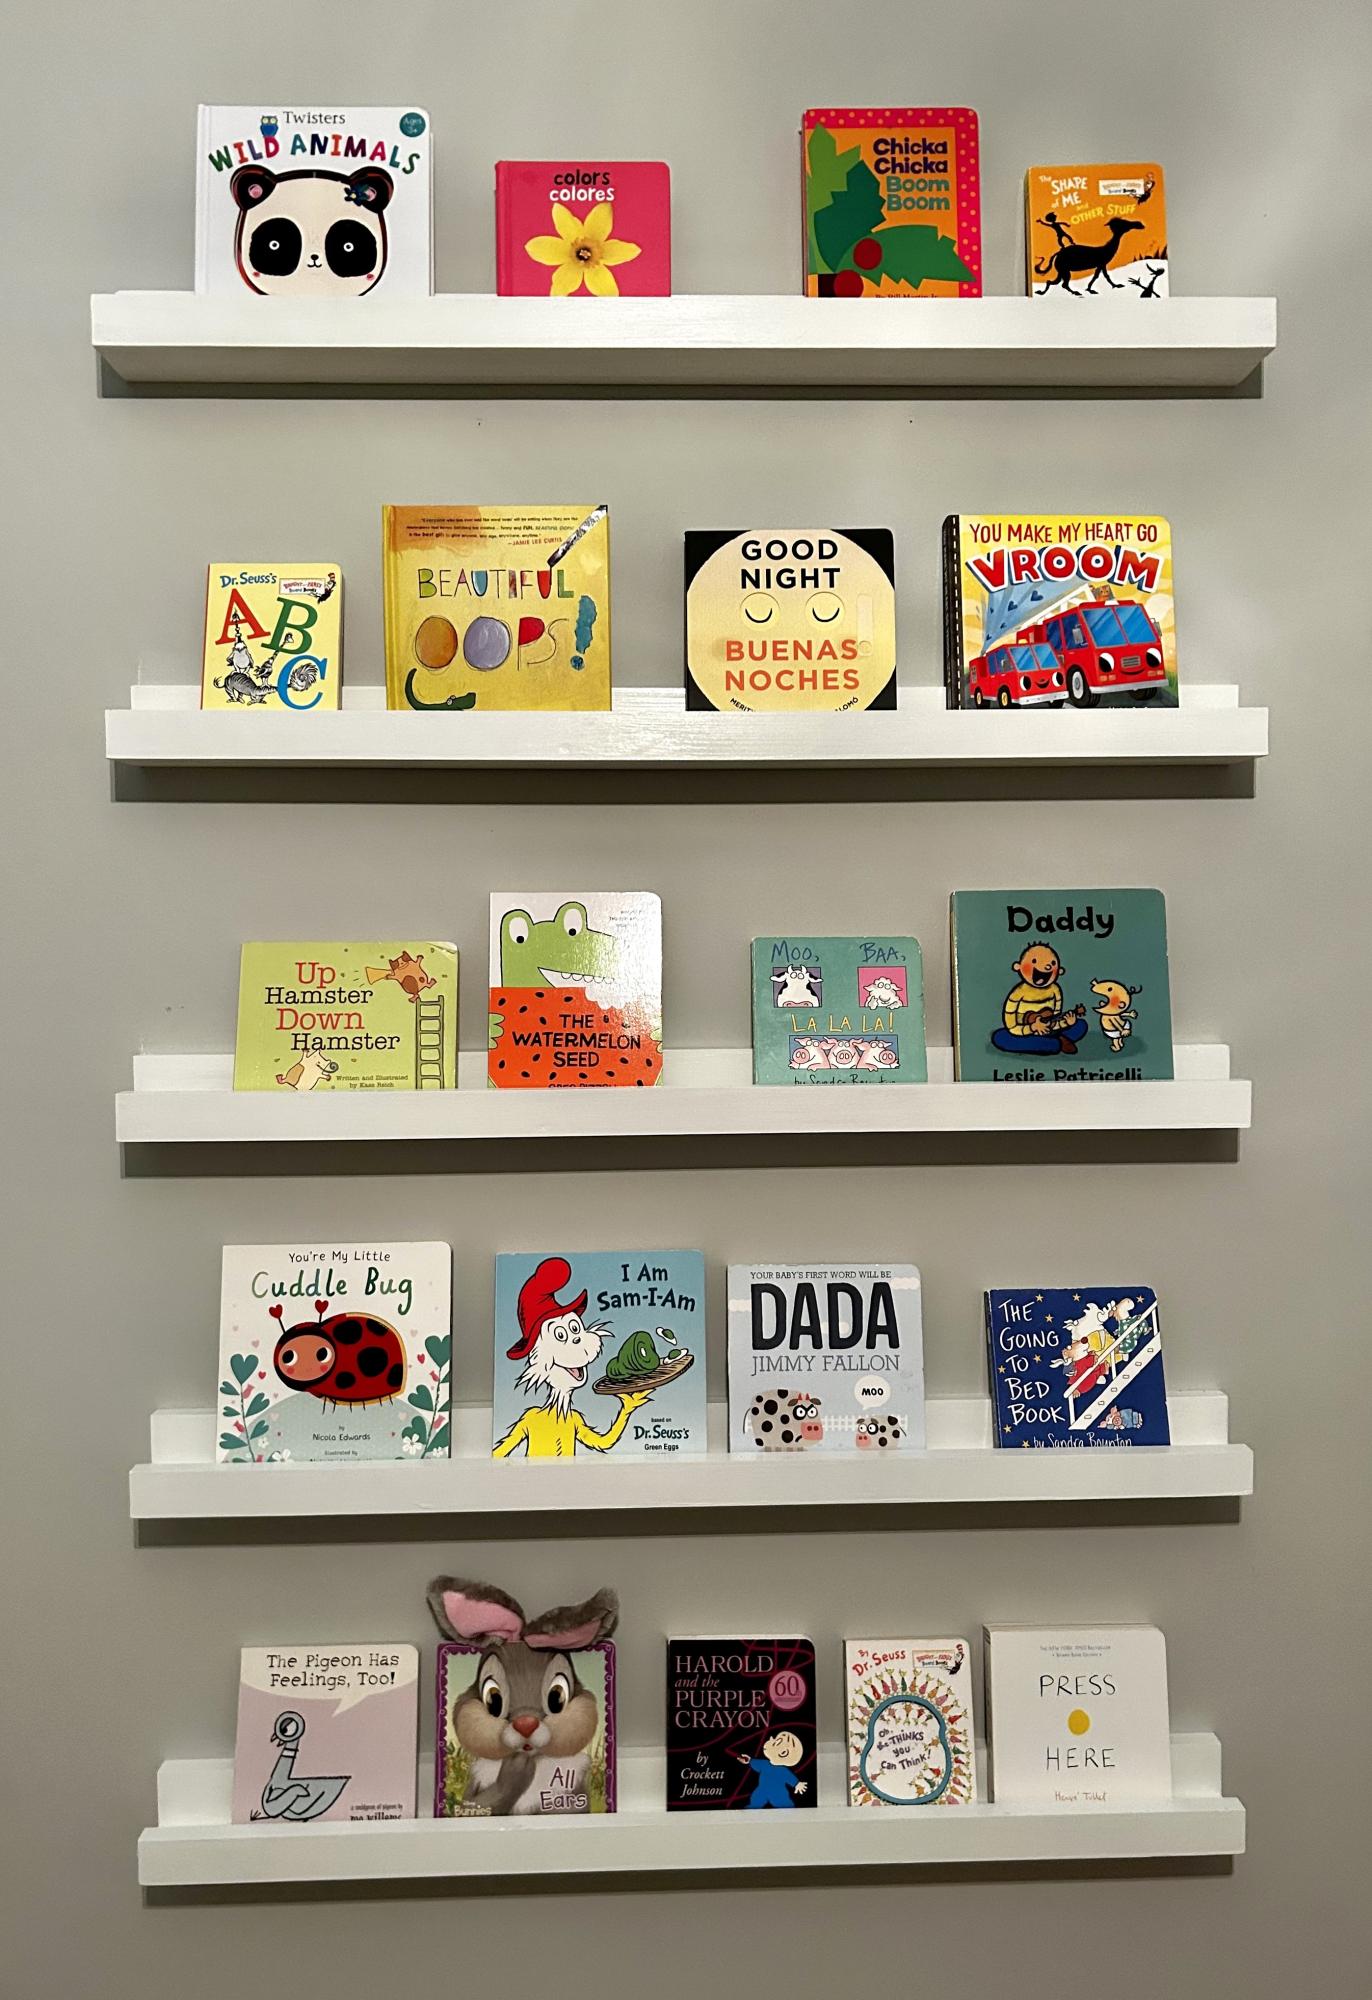
Nursery photo ledges. Shortened the shelf depth using a 1 x 2 instead of a 1 x 3.
Built from Plan(s)
Nursery photo ledges. Shortened the shelf depth using a 1 x 2 instead of a 1 x 3.
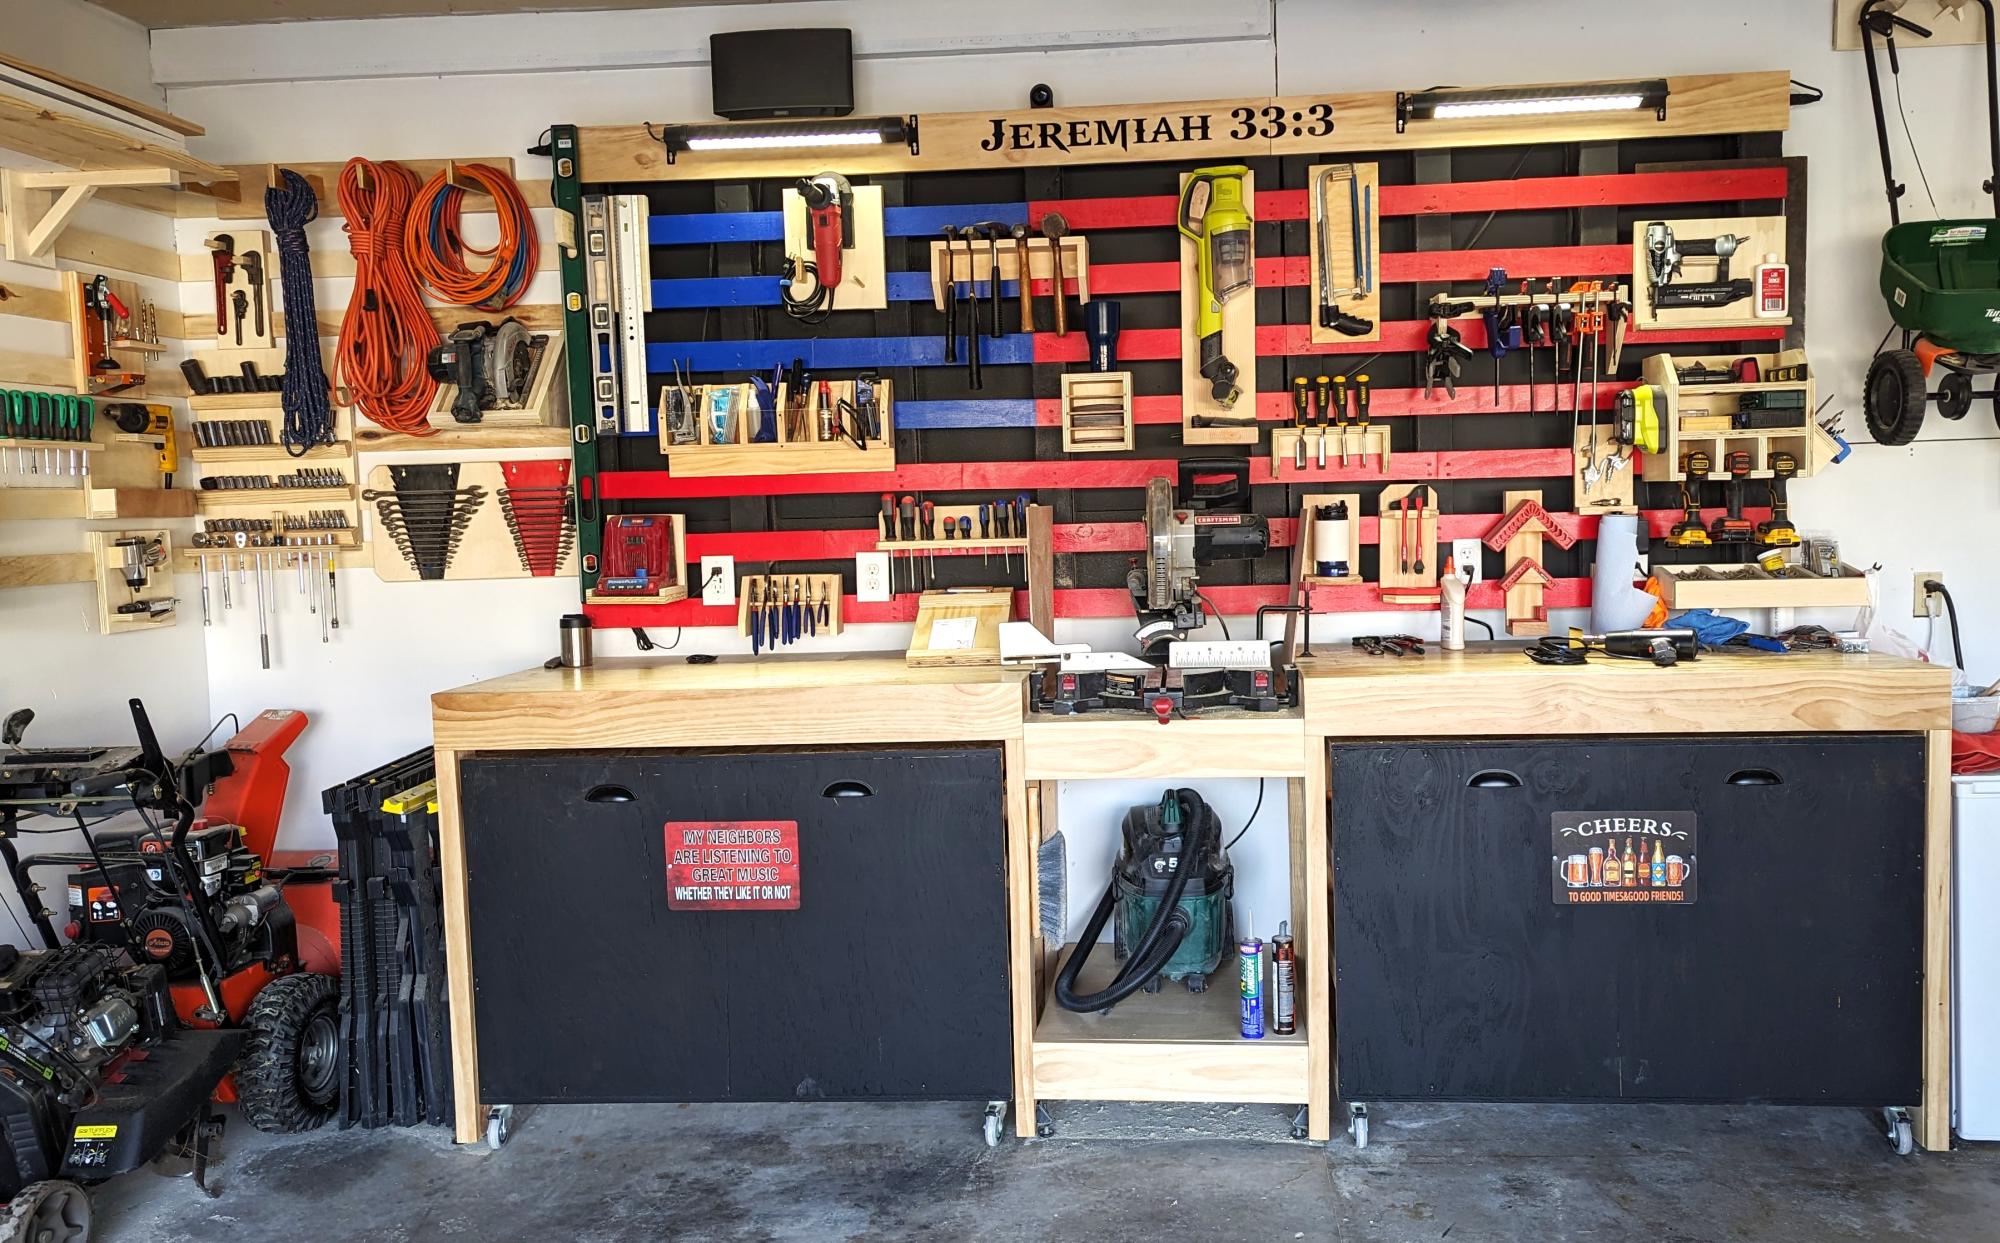
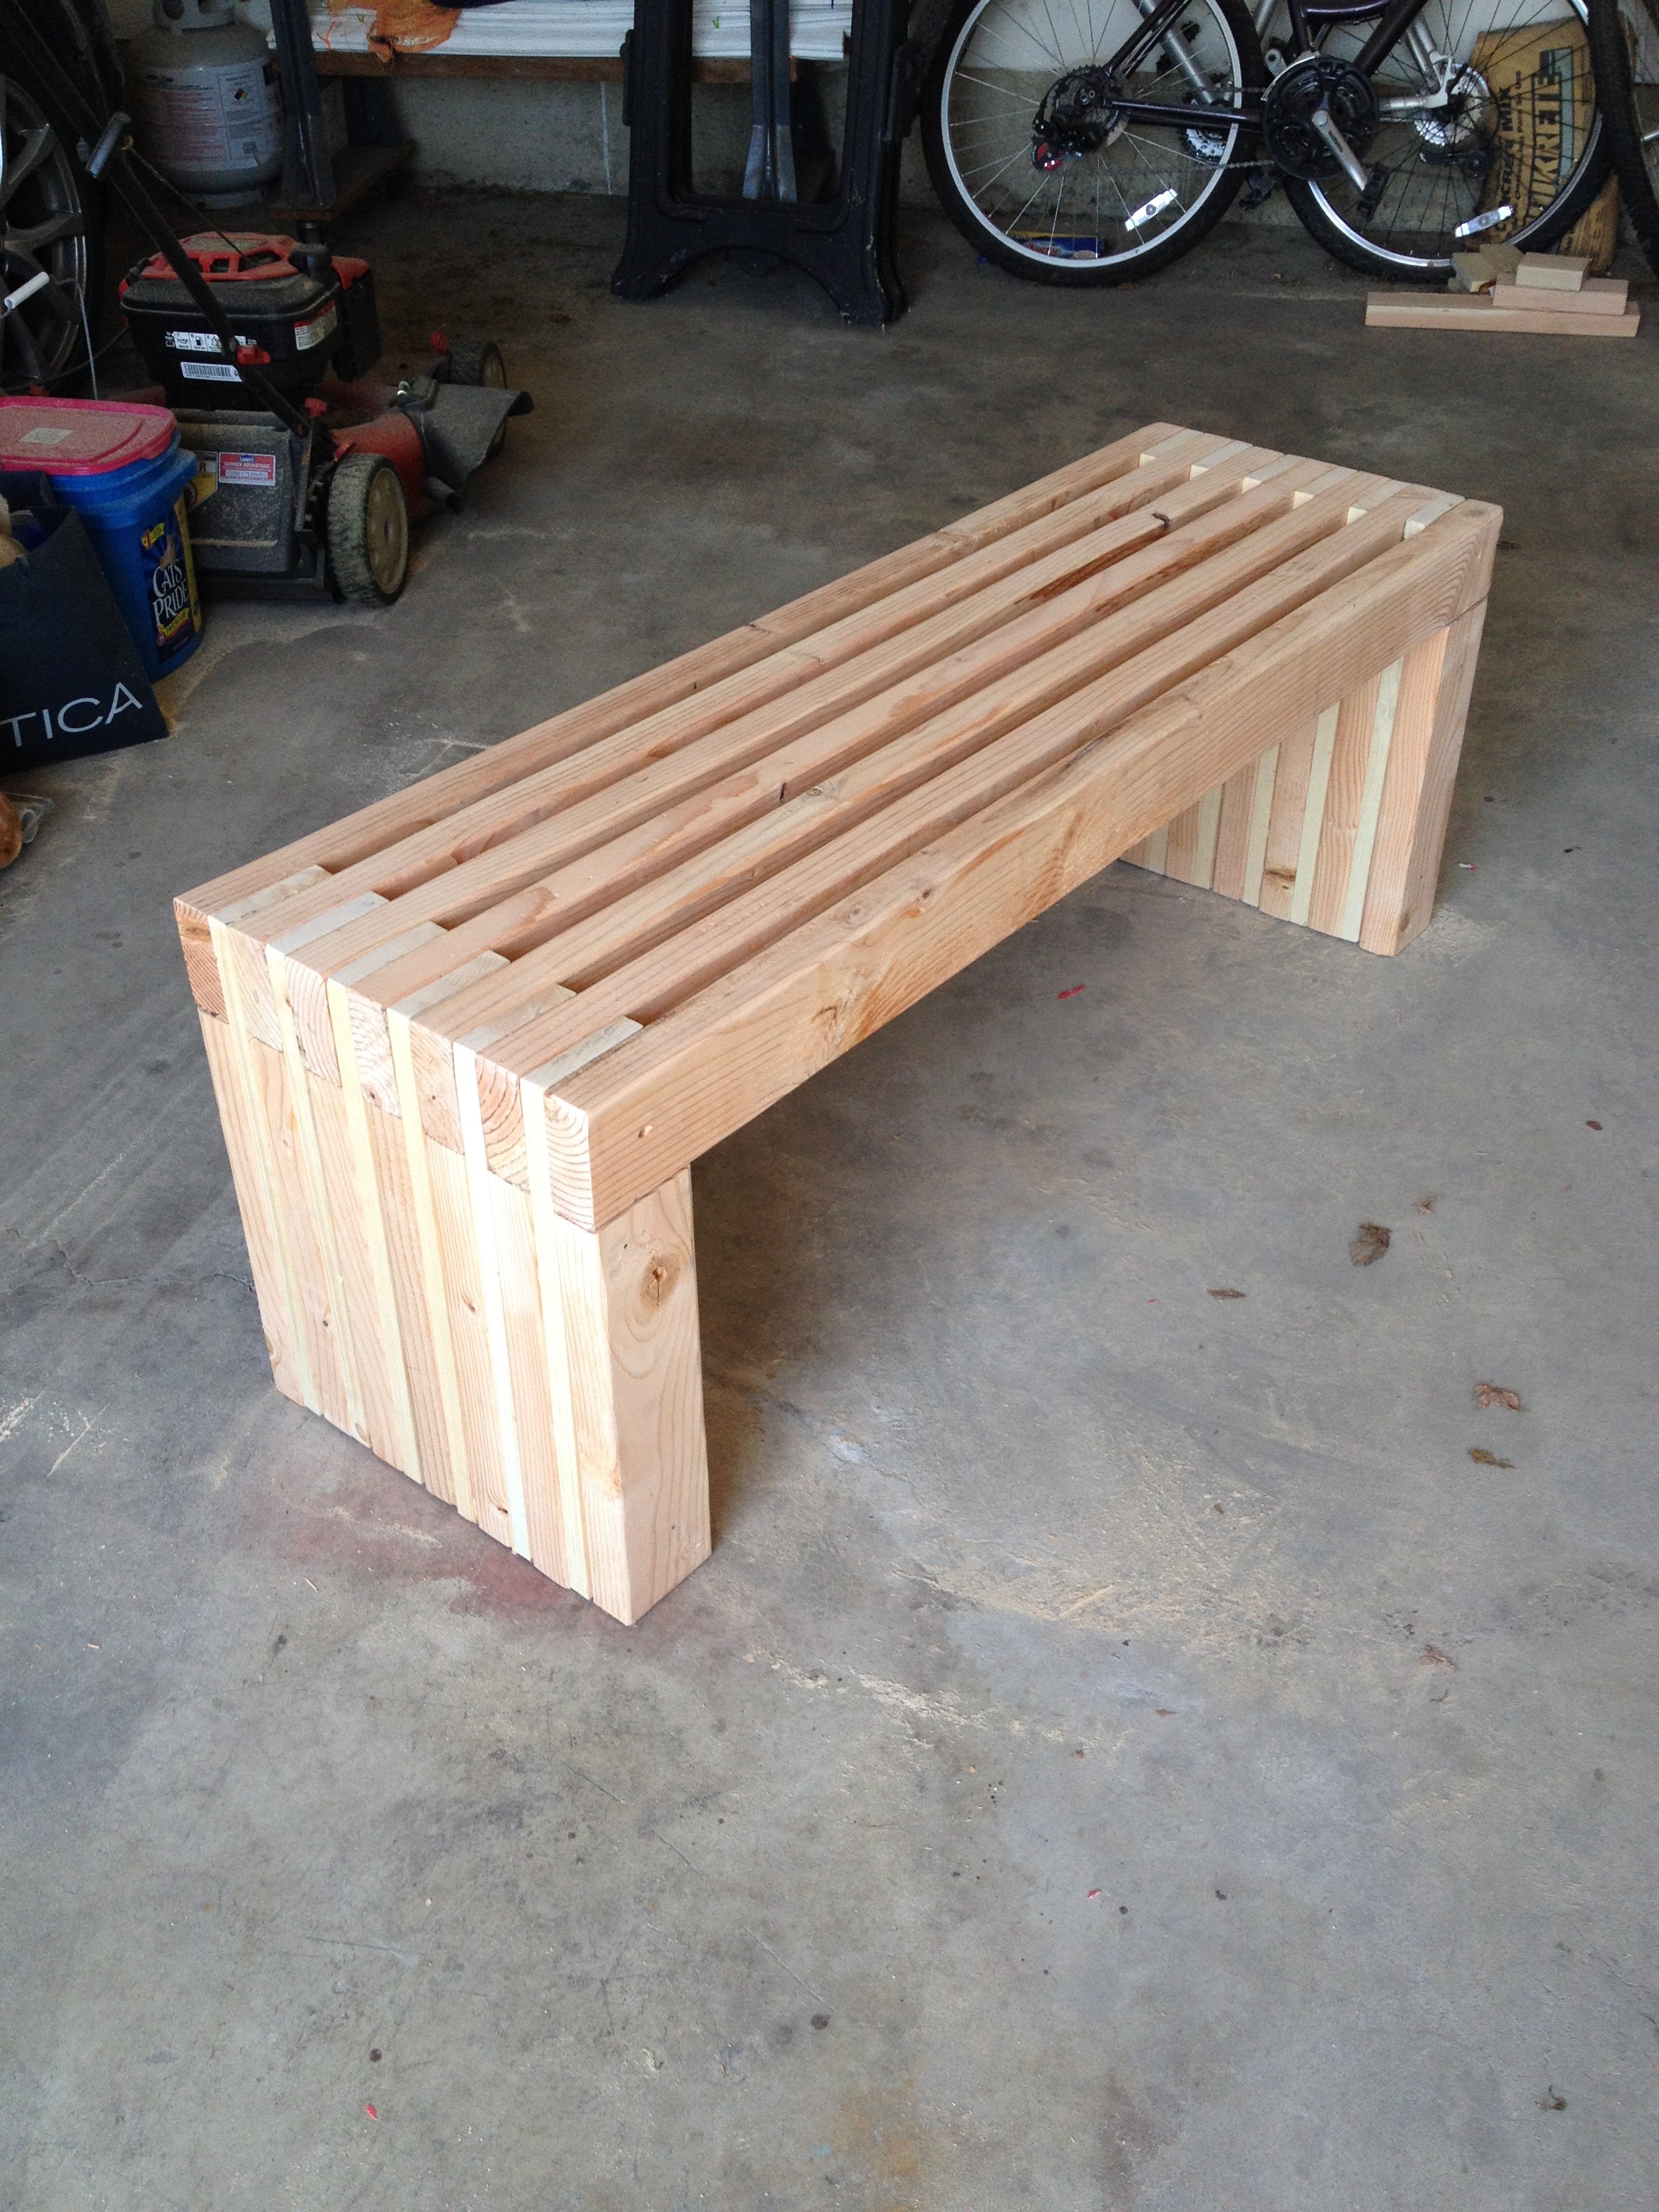
My garage needed an overhaul and I wanted to start a hobby in woodworking.
I found my way to Ana's website and found some of the best ideas and decided to try my attempt at building the Ultimate Roll Away Workbench with Miter Saw Stand.
This helped inspire me to augment my garage and build that workbench and new french cleat wall.
Thank you Ana for having such an awesome website and offering up ideas for free!!
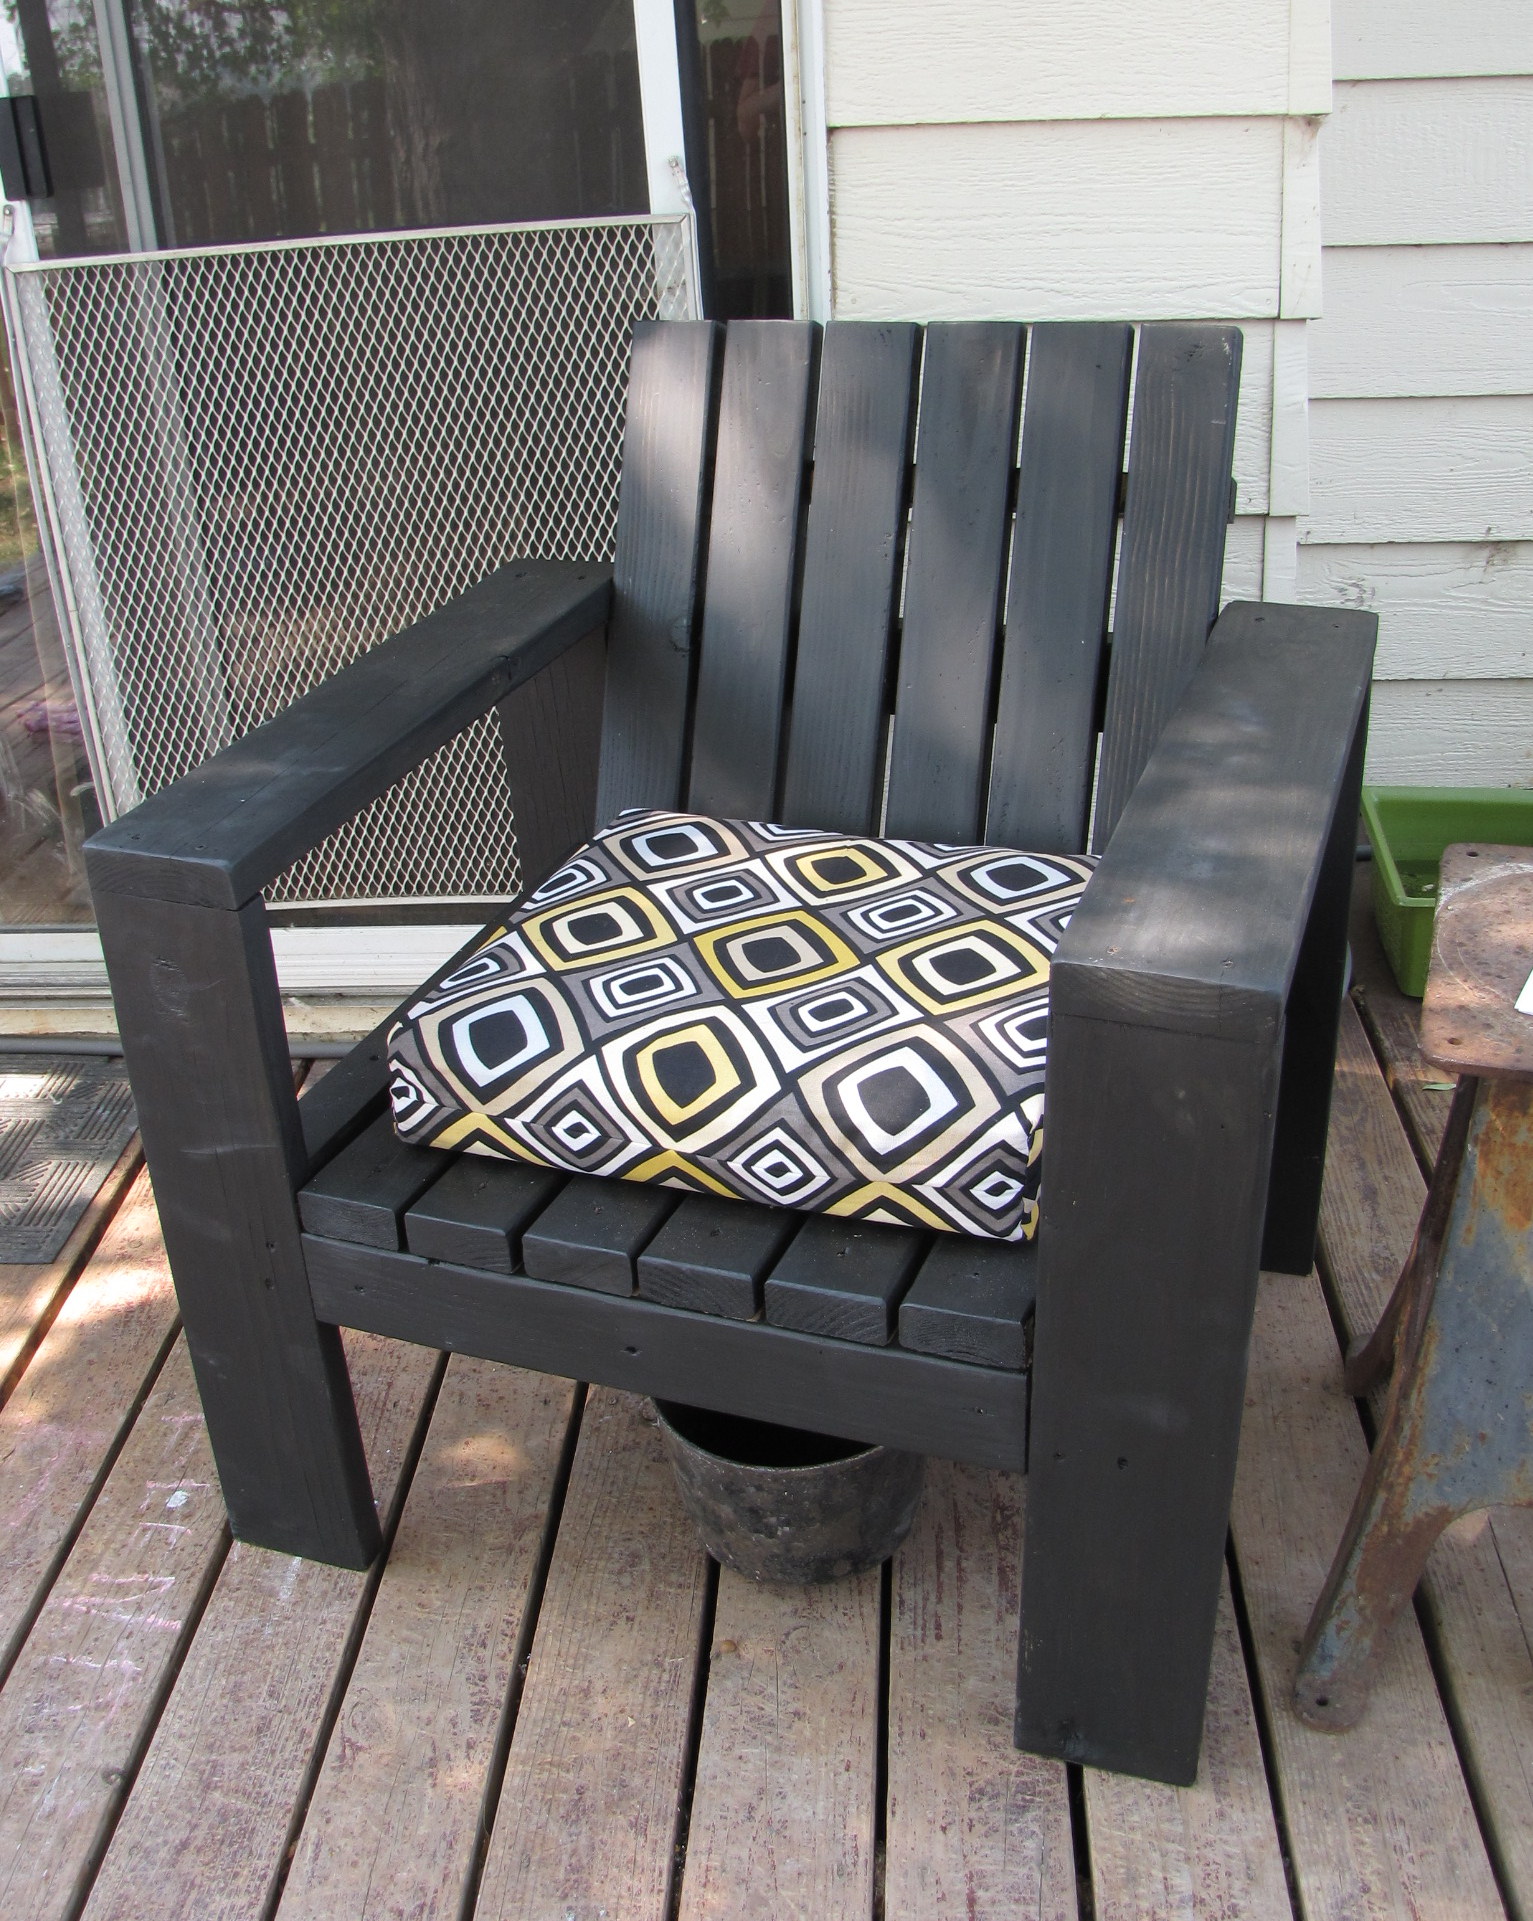
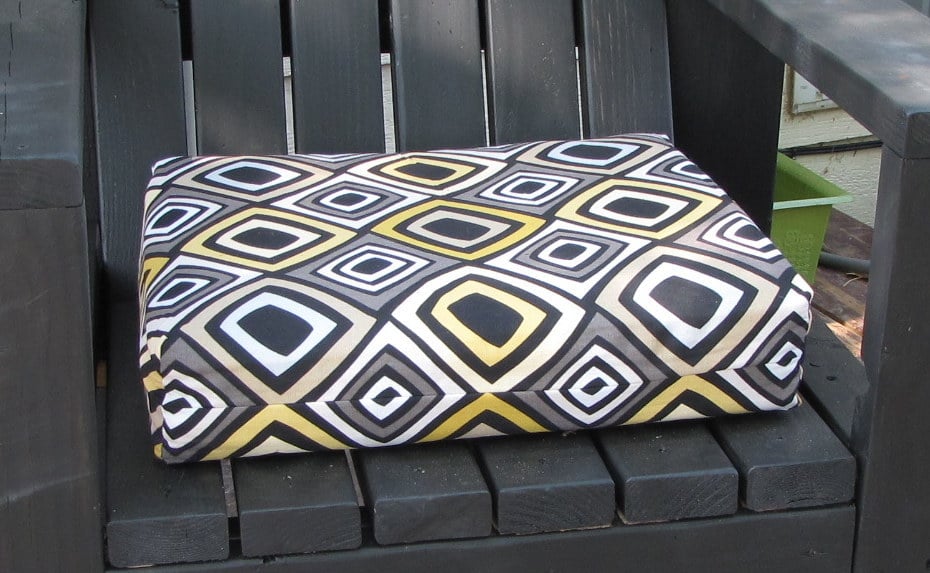
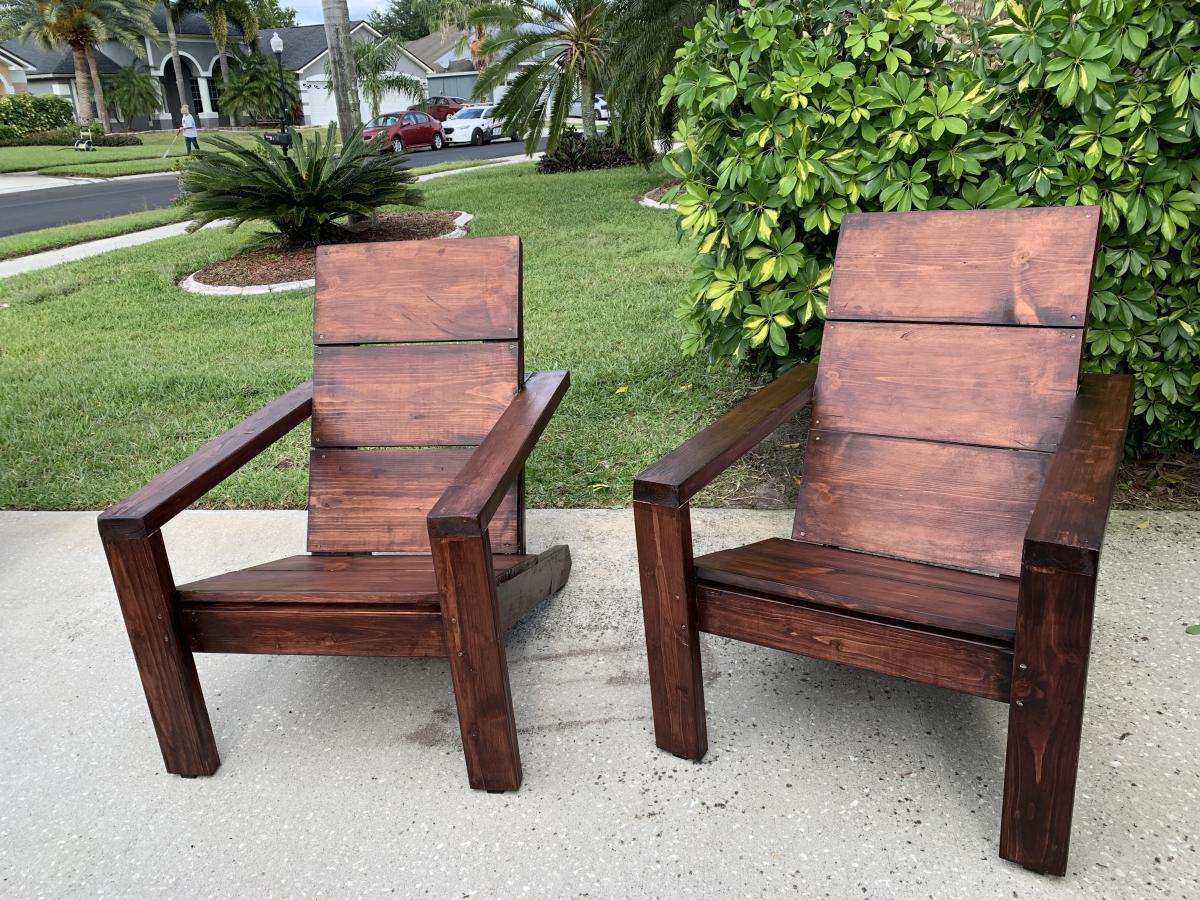
Loved building this chair. Super simple to put together and very sturdy once everything came together.
I modified it to create a larger and taller chair, using 2x6 and 2x4 lumber. Because of this change I felt like my math challenged brain was completing some sort of quiz, but to keep things simple I cut the pieces step by step recalculating lengths as I went.
I marked up the plan as I went, so if anyone is interested just let me know & I'll add the changes.
http://radcrafter.com/2012/06/simple-outdoor-chair-beefed-up/
Sun, 08/19/2012 - 08:29
I would love to see your changes and build the beefier version! Please share!
Thu, 07/26/2018 - 07:05
I have a large (400+) family member who I need to make chairs for. This plan looks perfect (even though I will have to probably adjust width and add additional support) Can you please send me your plans?

Sat, 08/10/2019 - 21:14
Hi just joined your website. This is exactly what I was looking to build. Any chance plans will be shared?
Thanks.

In reply to Plans on the horizon? by tintin66
Sun, 08/11/2019 - 10:25
Hi, yes, I am planning to update this collection of plans to include the "beefed" up modifications. It may be a few weeks though.
Cost: $45
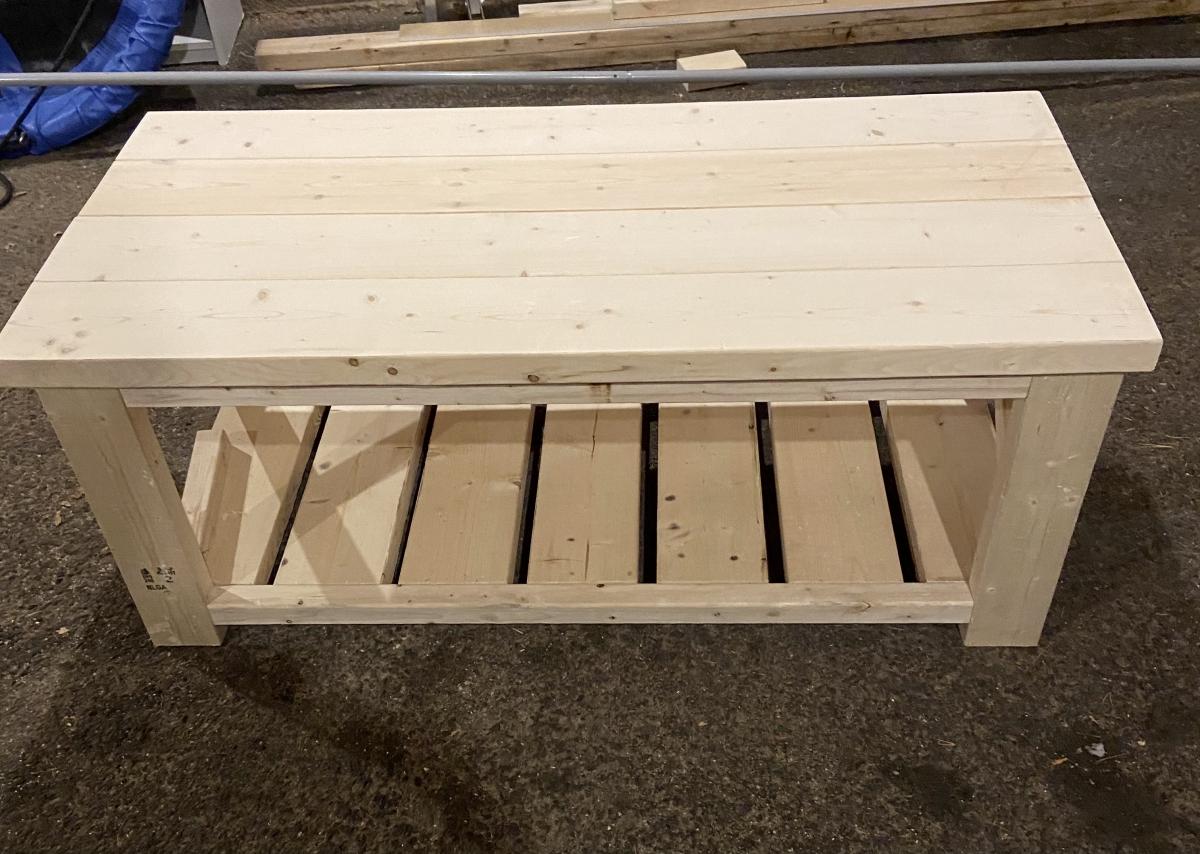
Made this bench smaller than the plan so it measures 48" X 18". Using it in a spare bedroom so it will eventually get stained to match the wood furniture.
Mon, 12/04/2017 - 09:17
That was my idea as well, to shorten it. My wife just asked me if we could part with a few chairs on the back side of our dining room table and if i would make a bench or two across the back wall. Well "of course" i said hahah!! Nice job on yours!! :{)
Sun, 09/13/2020 - 06:45
That's really beautiful. I think I'll look up the plans and try make one myself.
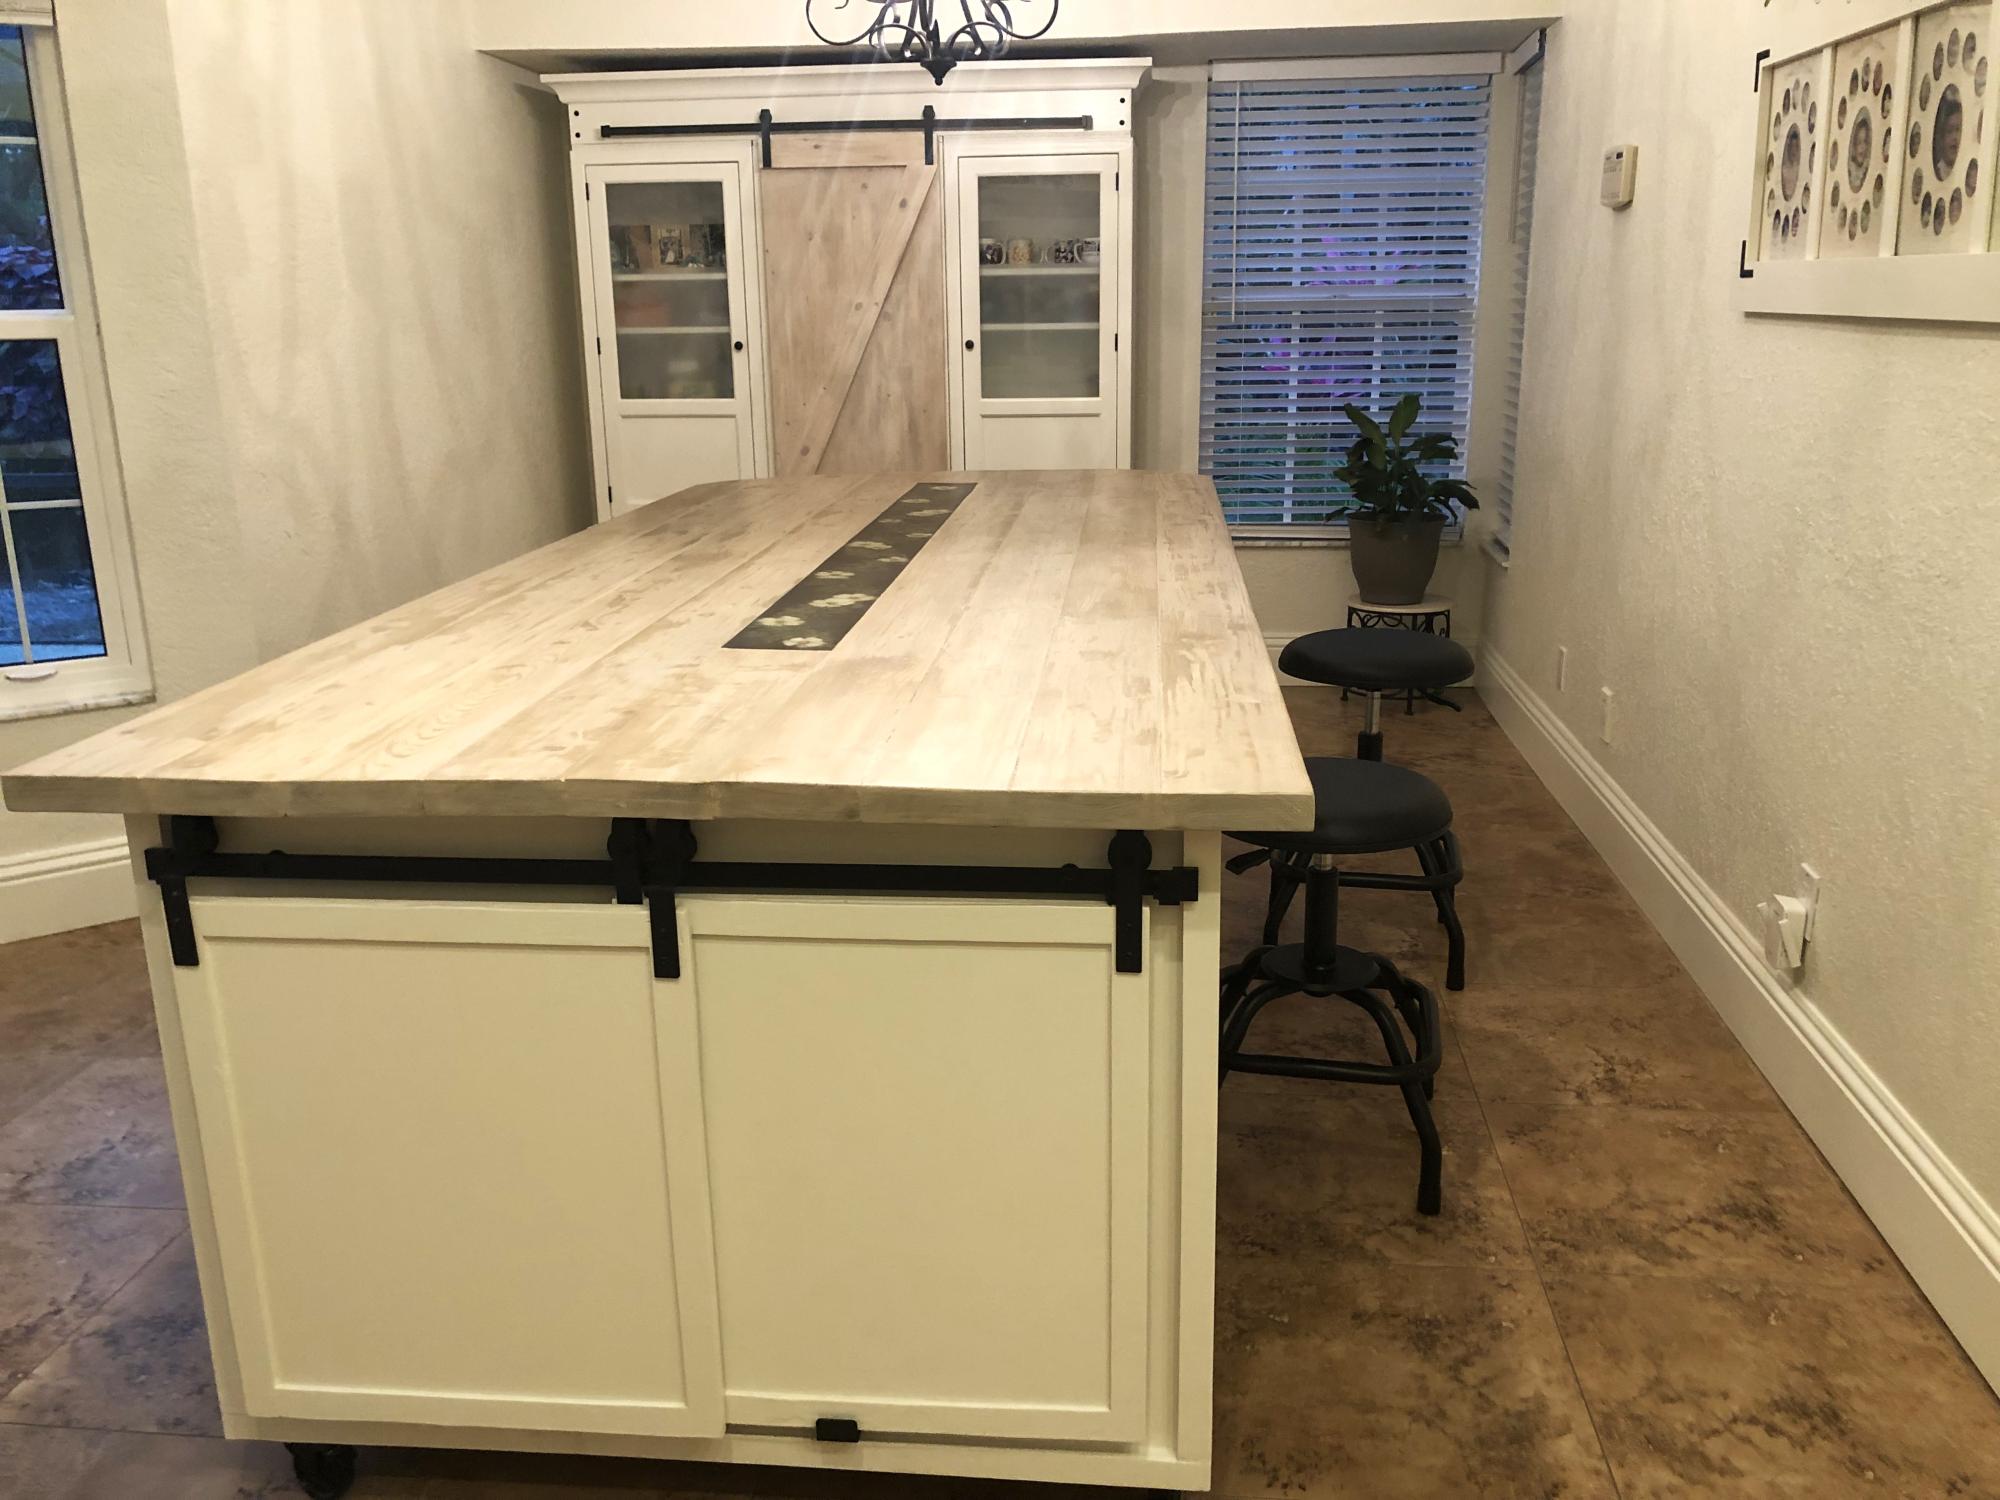
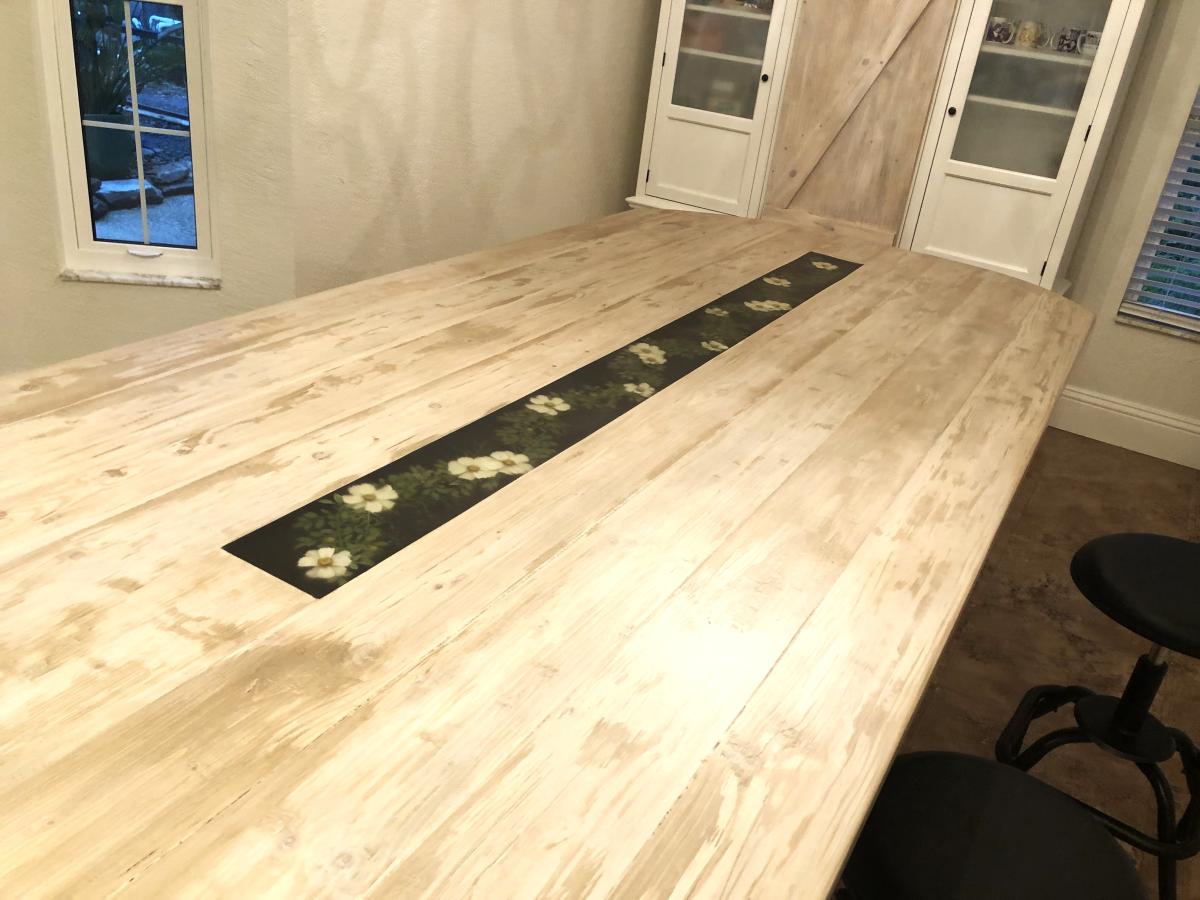
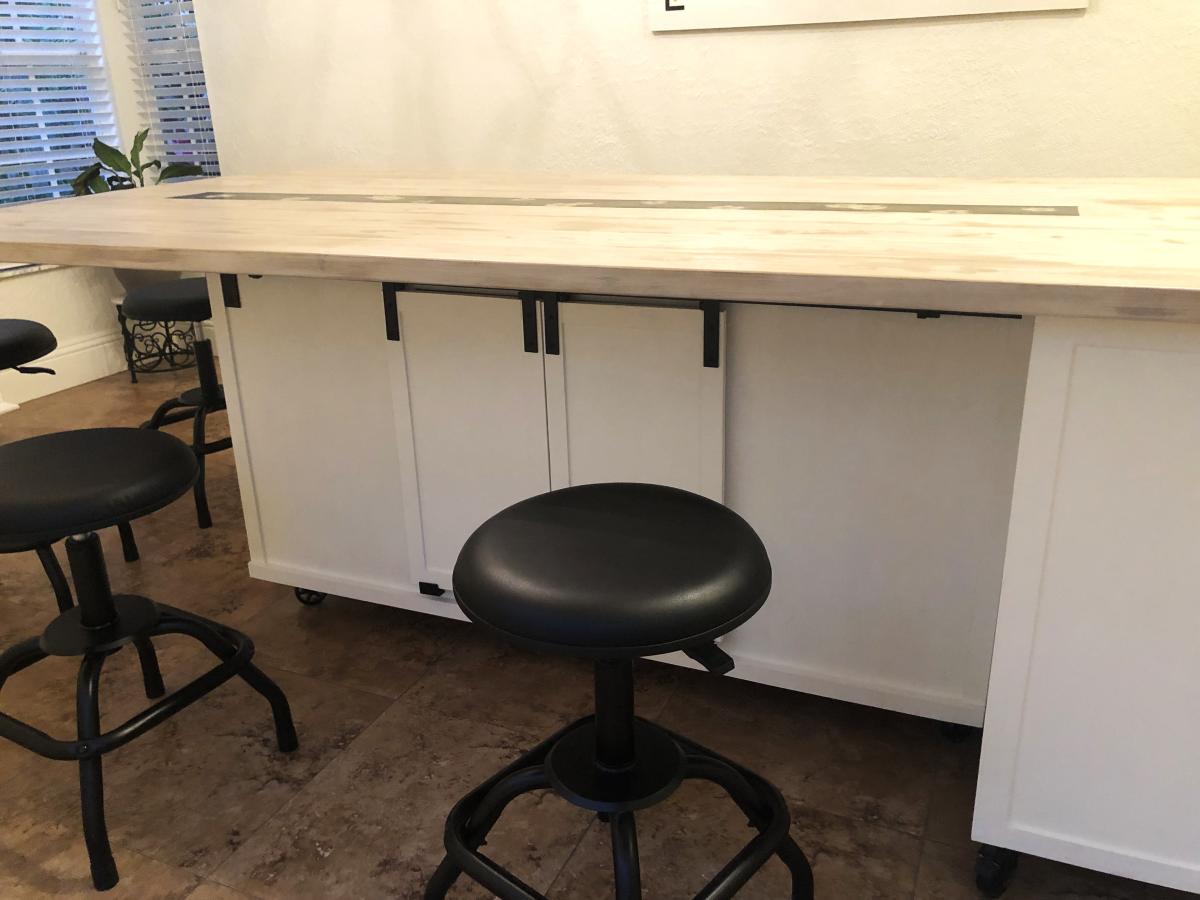
So I made a 4ft and a 6ft put them on casters joined them like a “T” shape, it is a moveable kitchen island dining table! The top has epoxy in the middle with flowers to give it some pop! Everyone loves it that comes over! Thanks for all your ideas on your site; it was my inspiration!!!

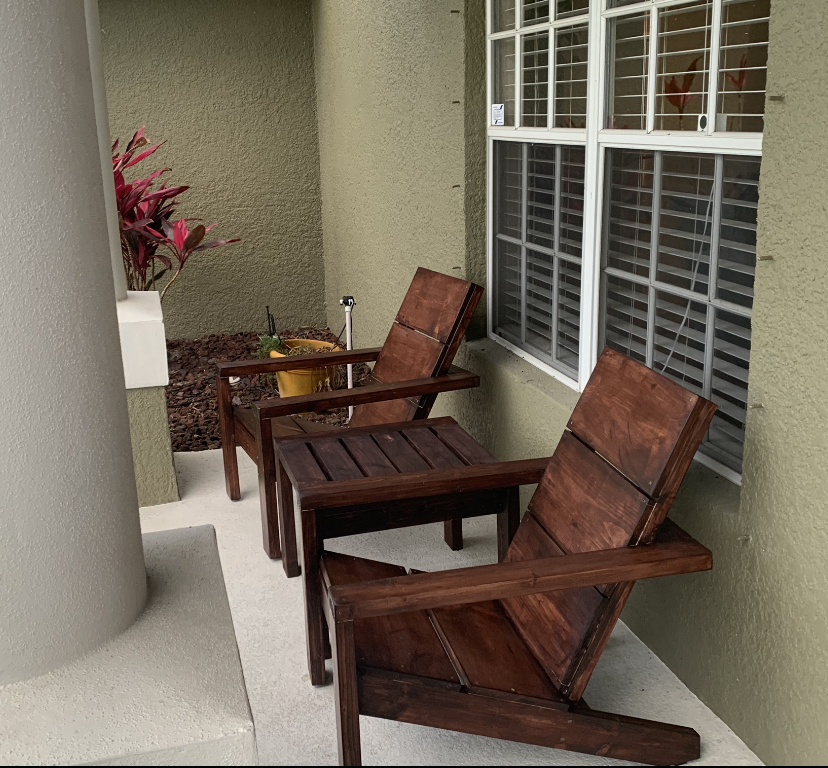
Modified with a high back and modern adirondack arms.
The base of the chair is built exactly to the plan except that the arms are done in a modern adirondack style.
The back was made independently to fit inside the base and then attached to the plan base.
Very comfortable but very heavy chair even without the modified back.
Not stained yet obviously.
Cushions are hard to find I think I would make it slightly smaller next time and maybe even find the cushions first and alter the plan to fit.


Tue, 06/09/2020 - 09:11
Stained with Saman: Urban Grey mixed with some left over brown 4:1 and now has a companion side table
Wed, 06/24/2020 - 07:33
Do you have the plans for the table you built? Im a brand ne beginner. I am trying the modern outdoor chairs and live this table with them.

Hello everyone,
I collected unwanted wood and I put them in a good use. Transform them into planters . Many people throw excellent wood . Either, they aren’t aware or they purchased new furniture.
Thank you Mrs. Anna . She has inspired me with her excellent ideas. God bless you
Jean Abinajem

This was my first project. It was relatively easy but I did make some mistakes that are now design features


I started learning woodworking several weeks ago and came across your video and plans for the Farmhouse Counter Stool. It was easy to follow, and I love how it turned out! I made one first as a test, and I think I'll make three more. Thanks Ana!
Fri, 09/25/2020 - 14:57
Welcome to the woodworking community, it looks fantastic! Thank you for sharing:)
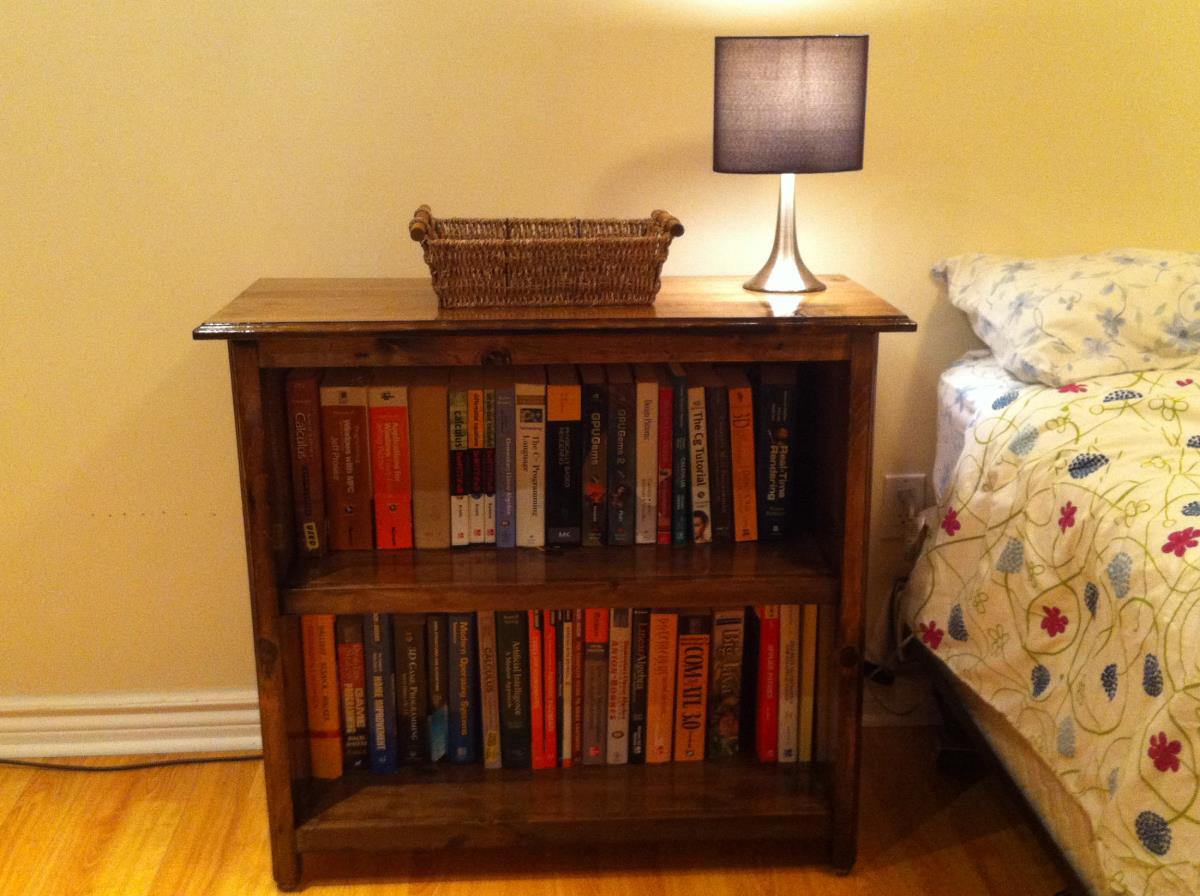
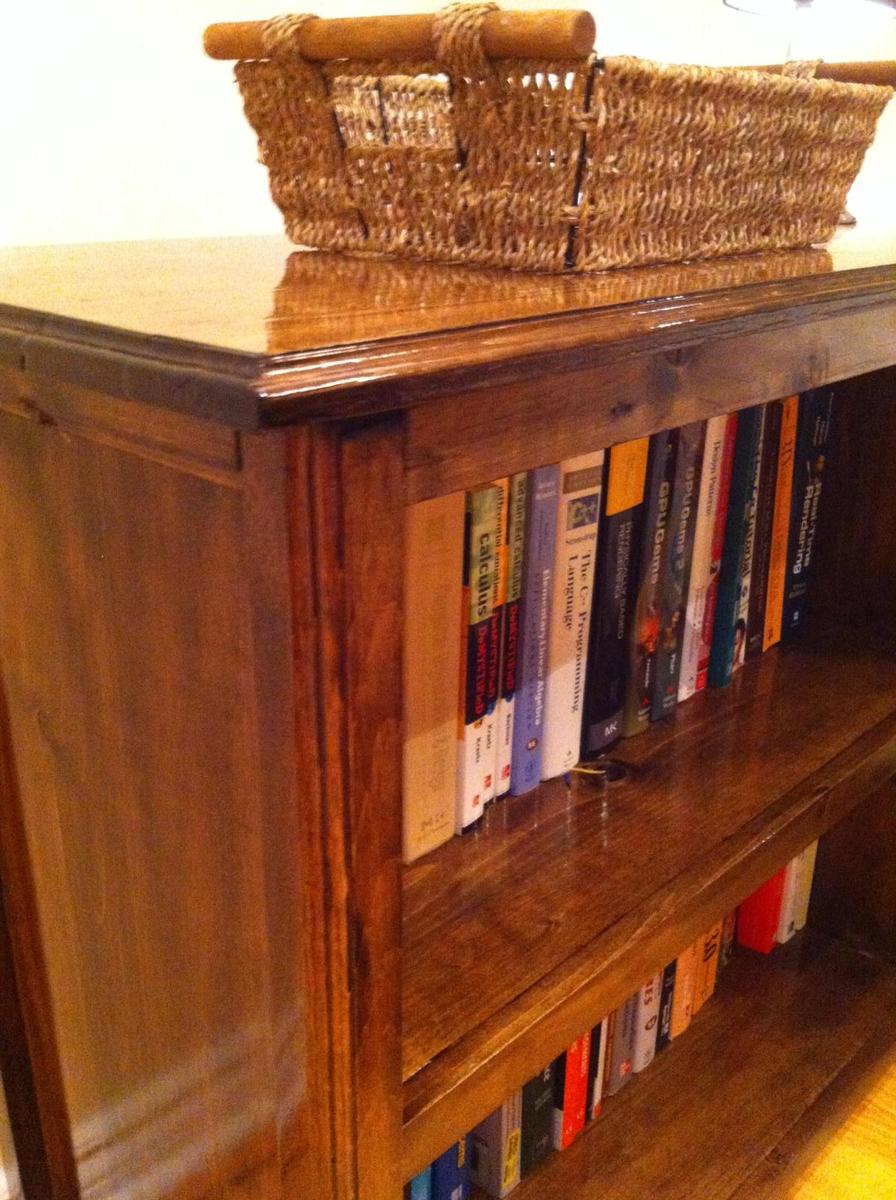
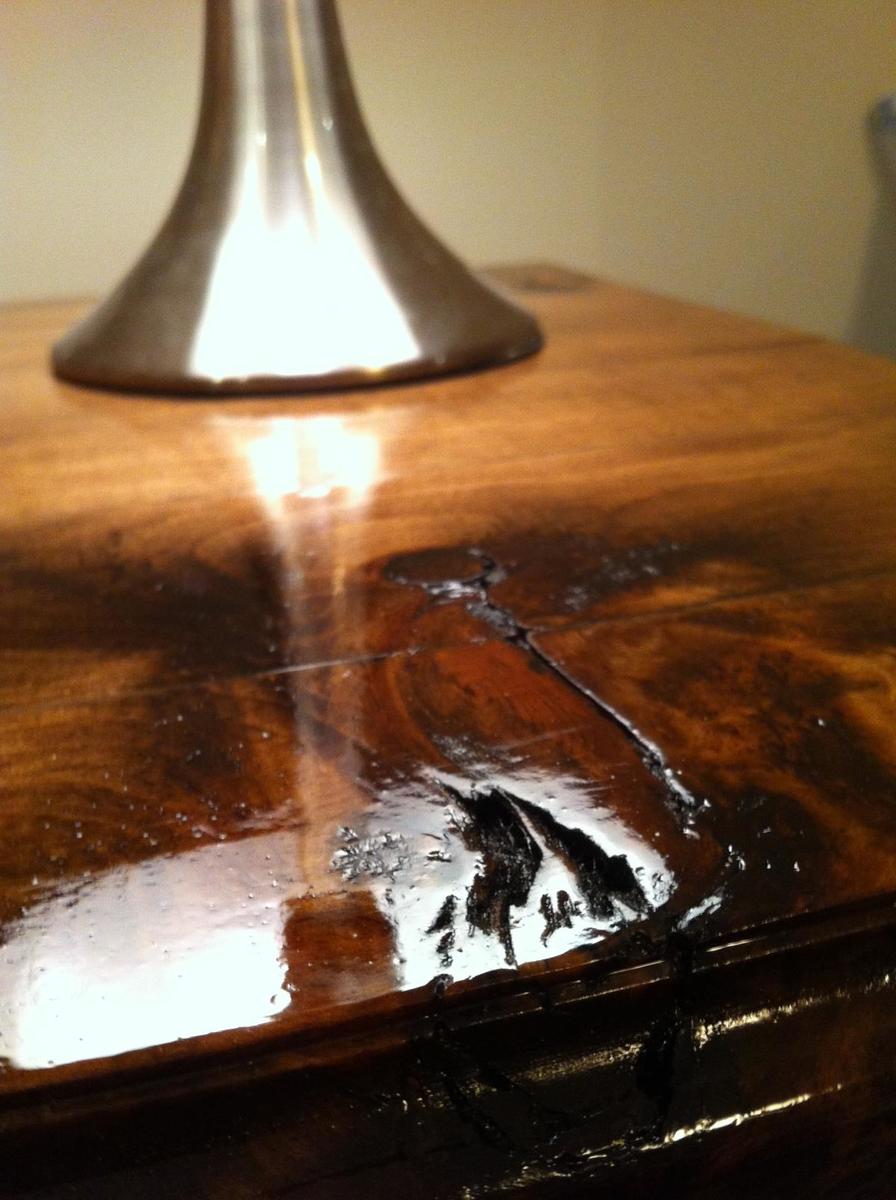
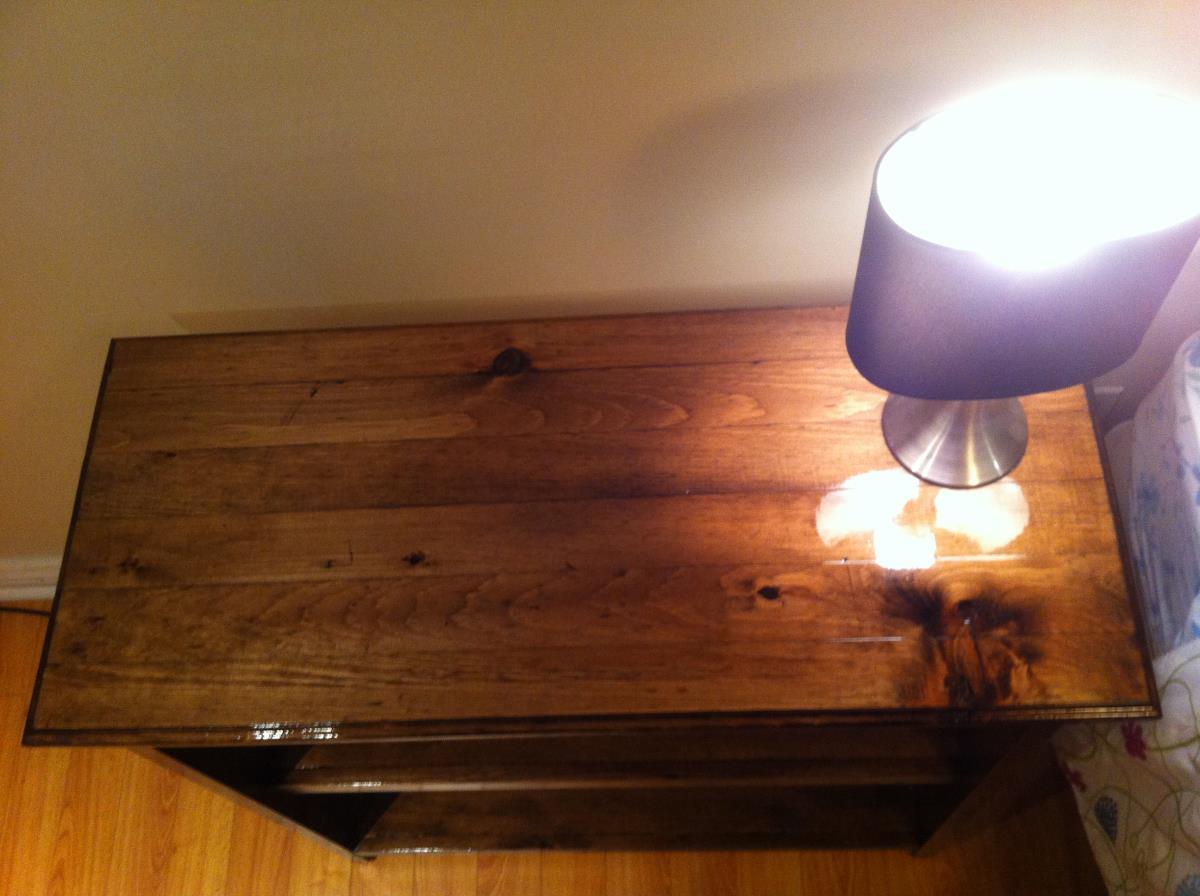
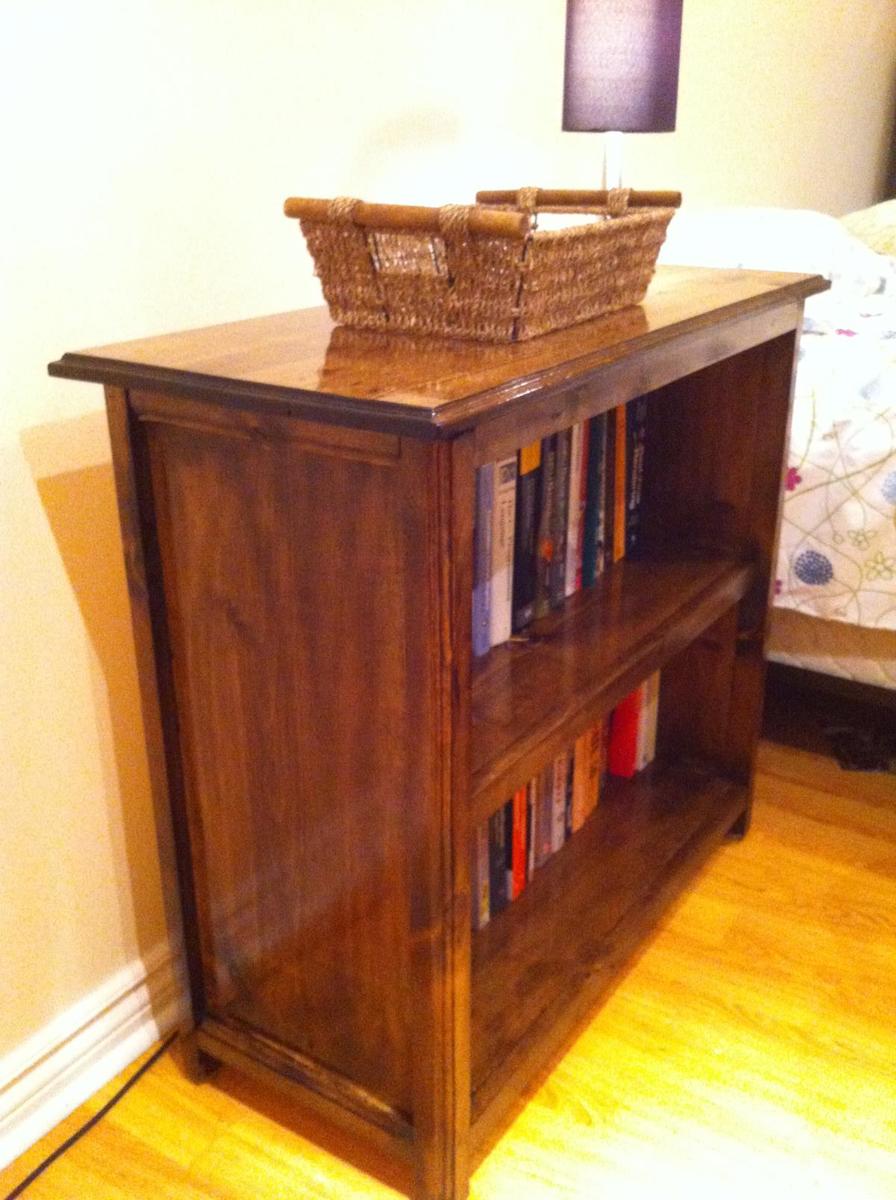
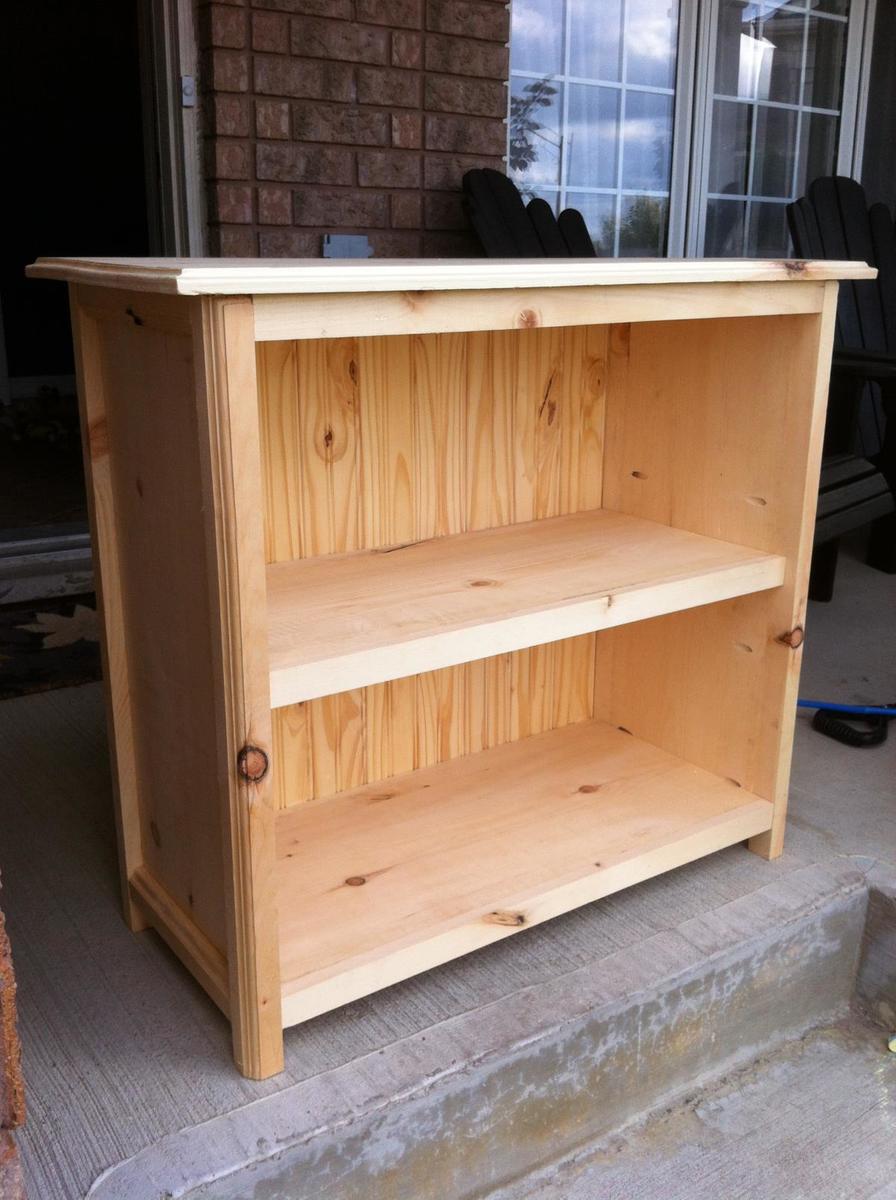
This is a modified version of the Kentwood Bookcase to be shorter and wider to fit my space. I used my router for the first time on this project giving the legs and top a little bit of flair. I also wanted it super glossy, so I applied three coats of Minwax high gloss polyurethane.
One lesson I learned for my next project is that "stainable" wood filler isn't actually stainable. I'm quite disappointed with how visible my Kreg pocket holes are on the front - I'll be sure to make sure they're all hidden next time.
Mon, 10/13/2014 - 13:32
This is beautiful! You did a good job, and I love the finish. I can't see the pocket holes in your finished pictures even after you pointed it out.
I used wood filler that was tinted the same color as the stain last time, and it was great.
Mon, 03/30/2015 - 20:23
Wow!!! This is so beautiful, and the stain job on pine...just wow!! You did such a great job with the router and I can't even find the kreg jig holes even though you said it. The plugs made for those work out perfectly though and are pretty cheap for a huge bag to have around.
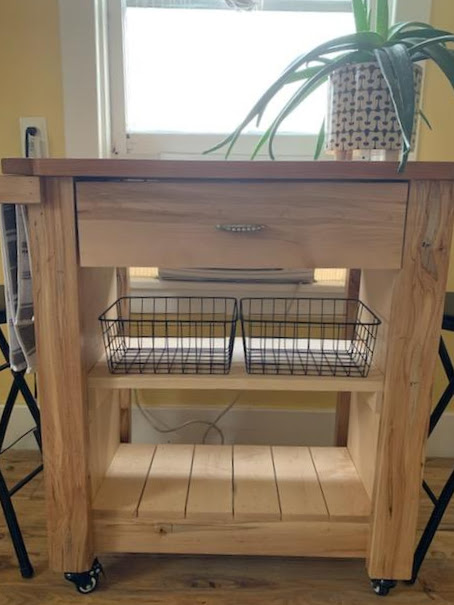
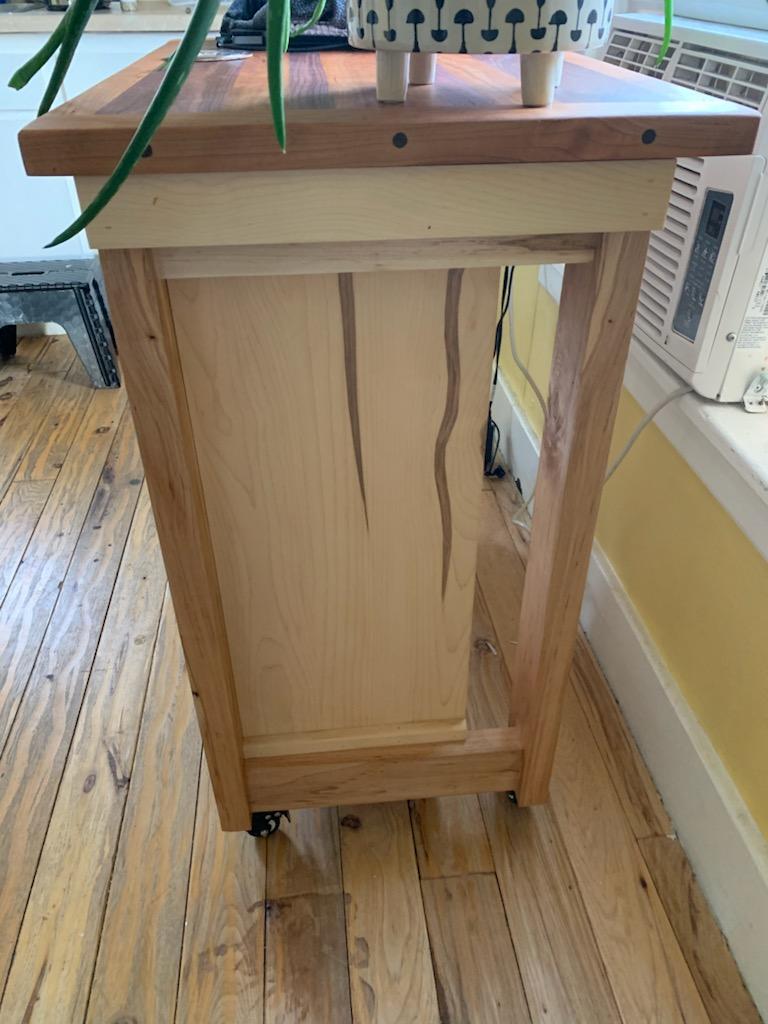
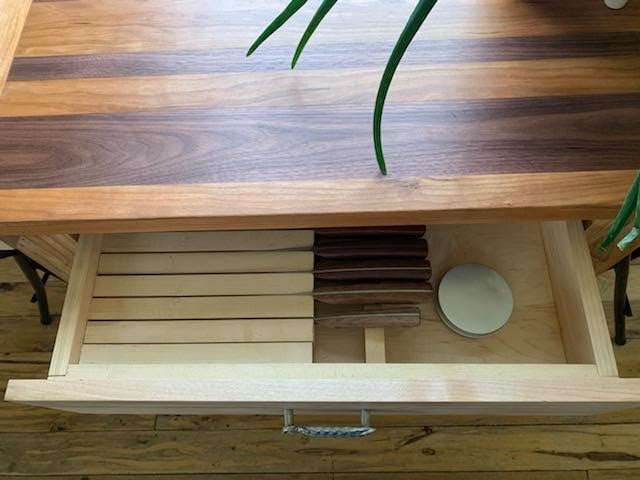
Used your plan as a base to make this kitchen island for my daughter. It is made from ambrosia maple and soft maple, has an integrated knife block in the drawer (also from one of your plans), and has a cutting board top made out of cherry and black walnut.

Wed, 01/27/2021 - 12:12
This is beautiful, love the cutting board top and knife block!
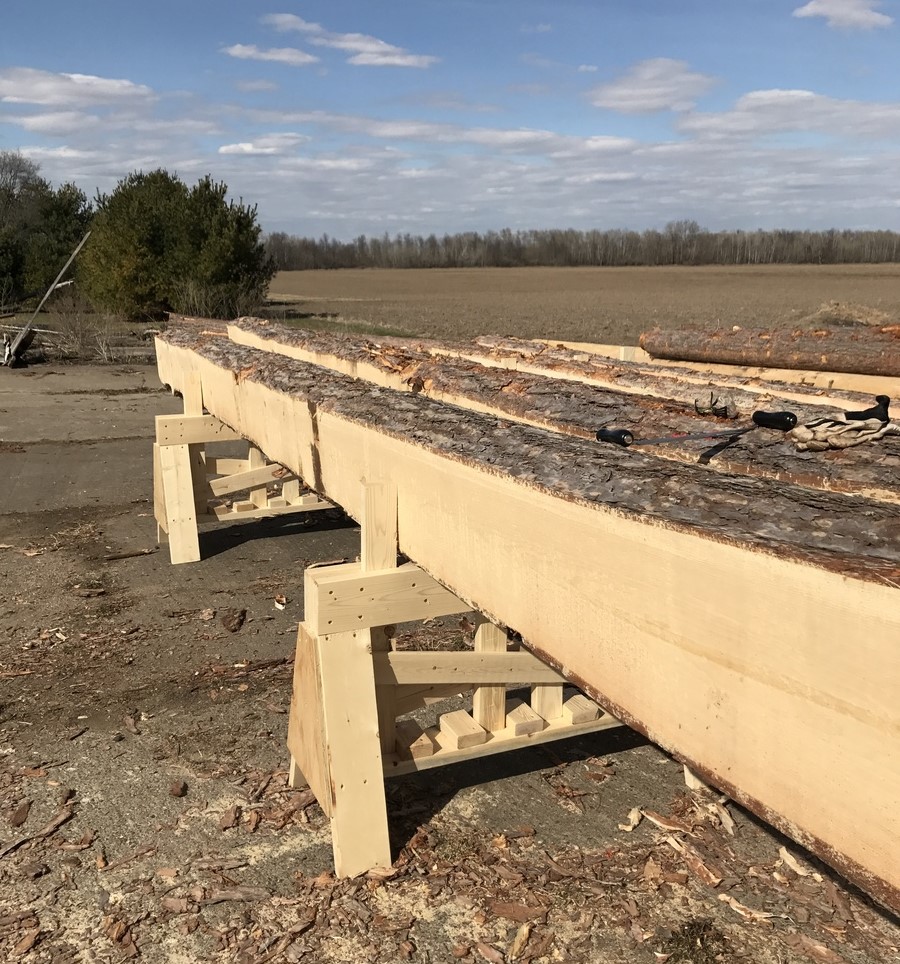
I modified Anna's plans to make these heavy duty saw horses.
This was my first project and had tons of fun building it. Can’t wait to build to end tables to match.
The plans are so easy to understand. The only change I made was instead of exposed screws I used the pocket hole method


Fri, 01/12/2024 - 08:33
This is beautiful and just the look I'm going for with the color scheme. I am wondering if it would be easier to paint the wood before constructing it? Also, what is the pocket hole technique? I think I would like the screws hidden too.
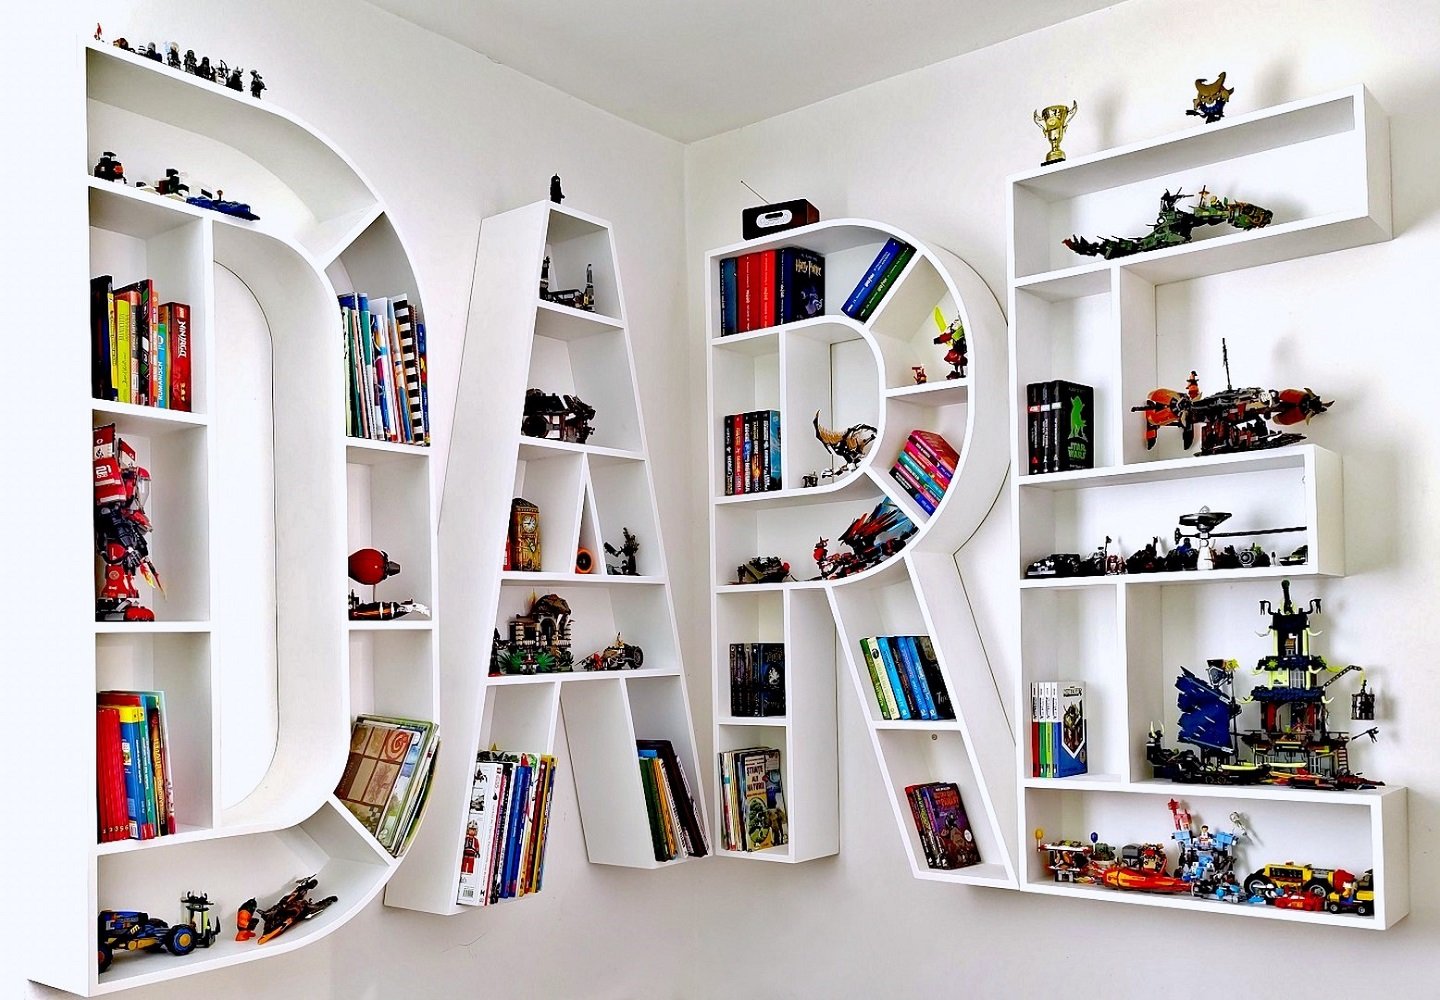
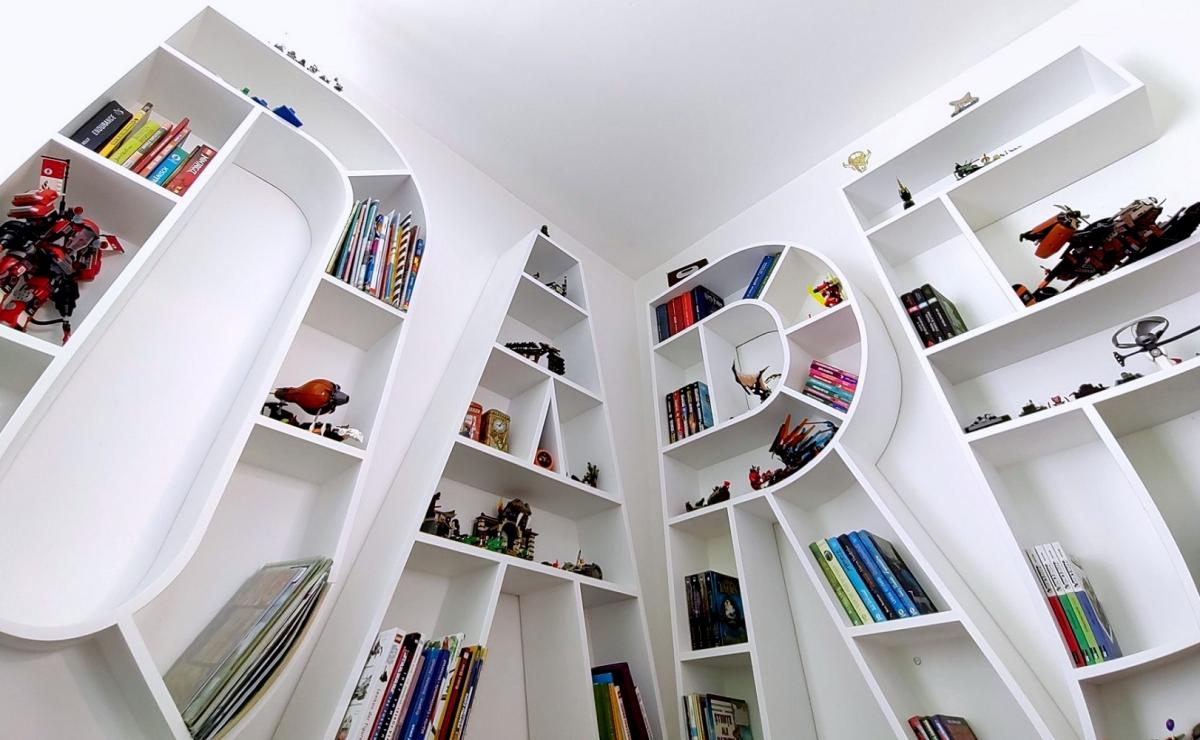
We built the letters bookshelves for our kids' room. First, we wanted to write READ on the wall, but in the end, we arranged them as DARE. We hope it will be a motivational message for our kids to have the courage to make the impossible possible.
The letters are built entirely out of MDF. The hardest thing was to make the curved walls. We cut a lot of curved MDF strips and glued them together to get the rounded shapes.
We described better the process on our blog!
Hope you like them as much as we do!
Sat, 04/23/2022 - 09:59
Congrats! I am so proud of them. I wish I also could write good essays, but it is very difficult for me to express myself and organize my thoughts and ideas. This is why it takes me a lot of time to write a good essay. So, sometimes I pay for paper writing because I like it when everything is done at the highest level. However, I really hope that these essays will help me to achieve my goals especially since I feel very motivated right now. Wish me good luck!
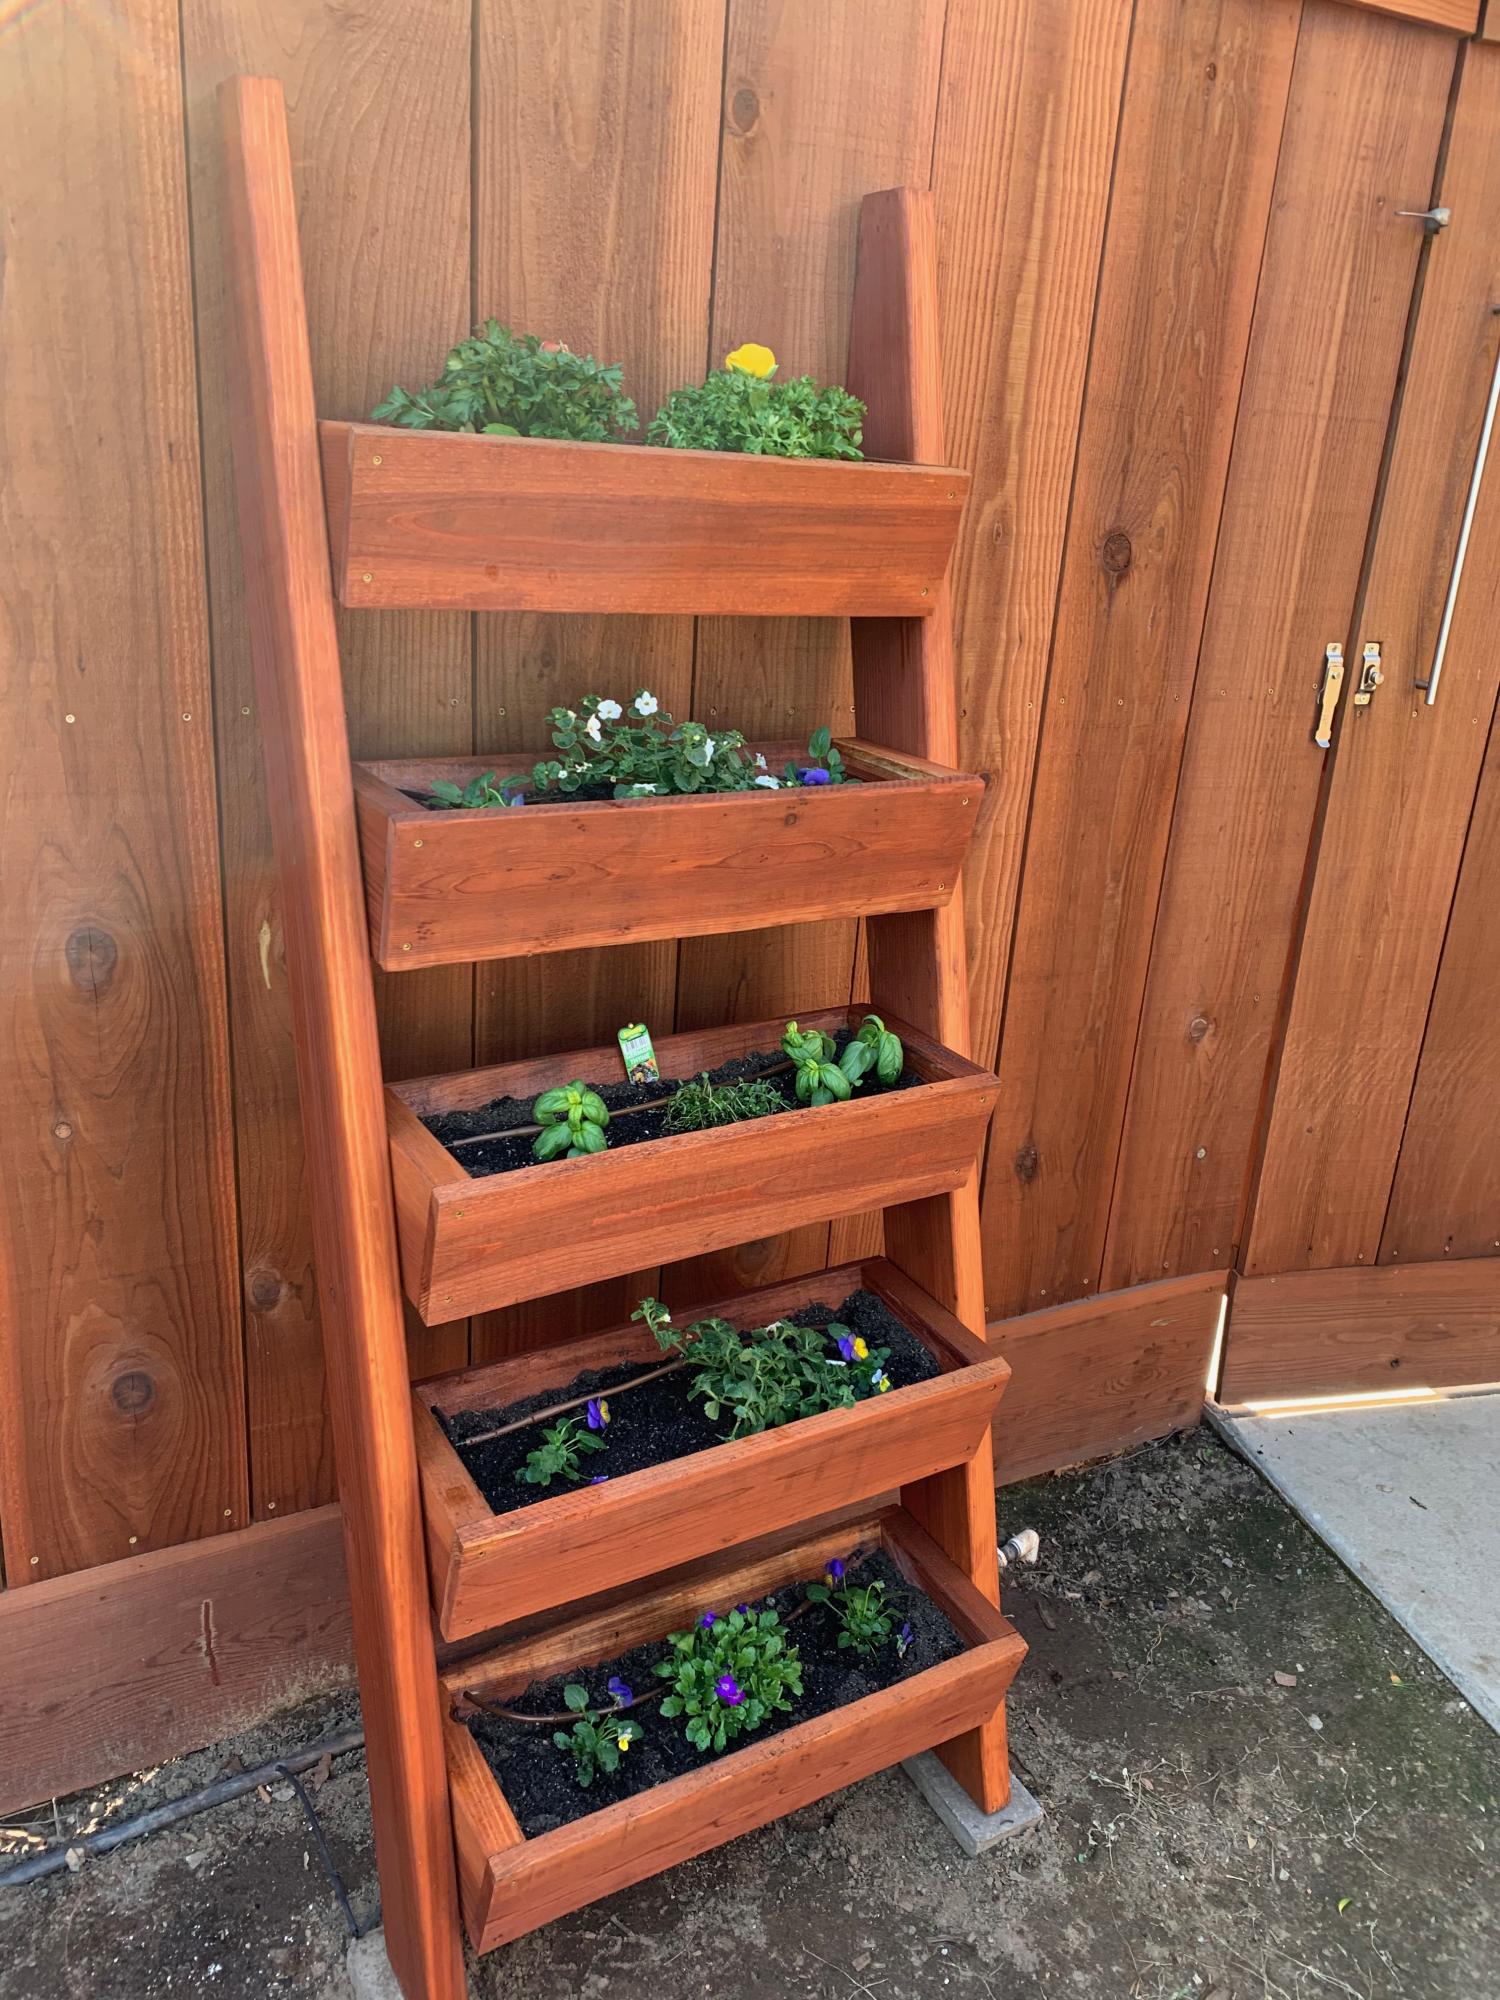
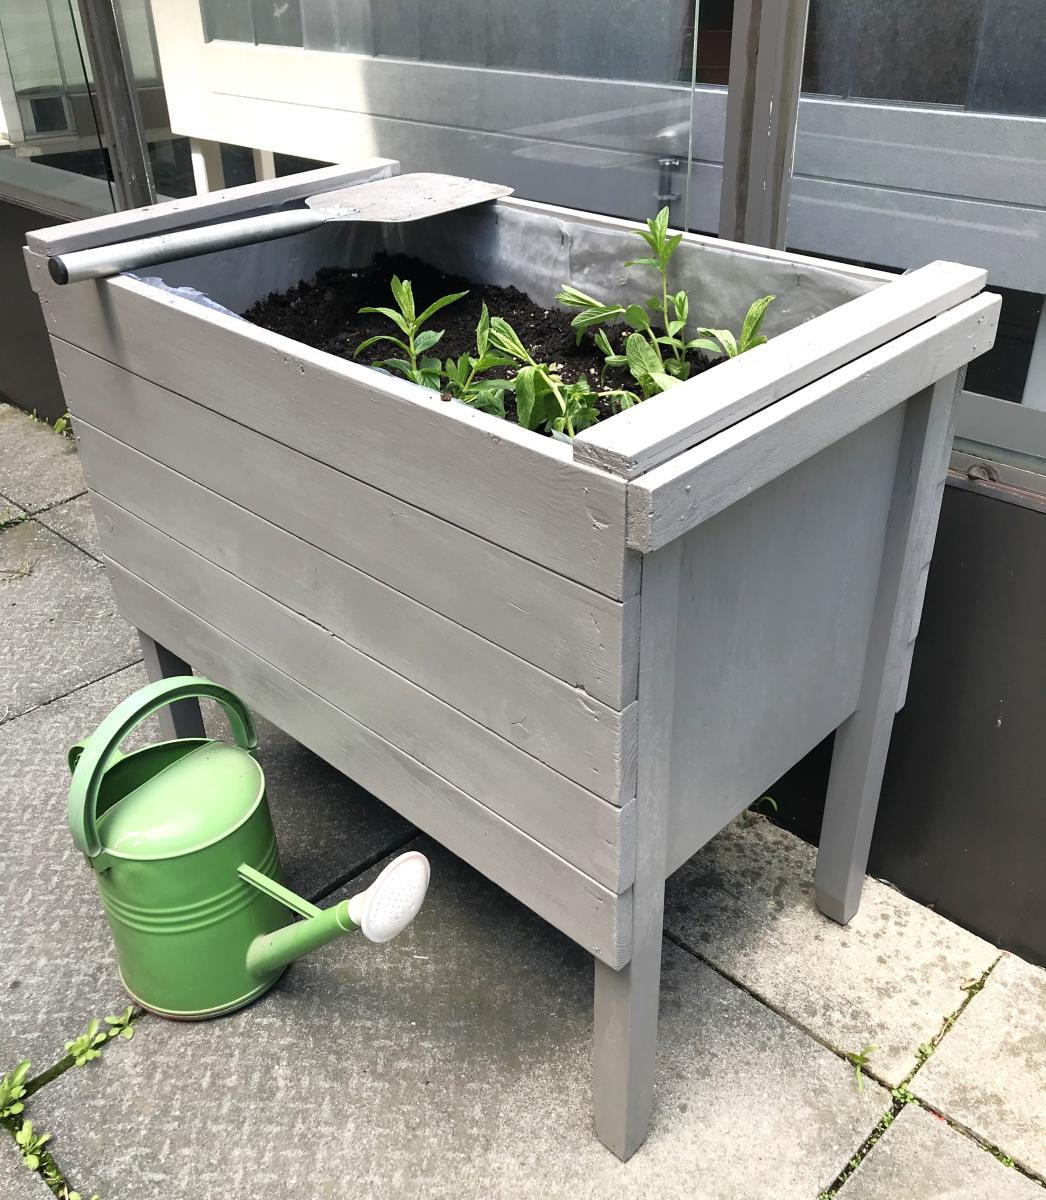
I learned so much for this first project. I used redwood instead of cedar and finished it to match our fence. I coated the inside with flex seal. Next time, I'll drill drain holes nearer to the front edge of each box so they drain into the box below a bit better. I angled the bottoms of each box with a band saw on a 15 degree tilted platform. They fit like a glove! Thanks for a great plan.
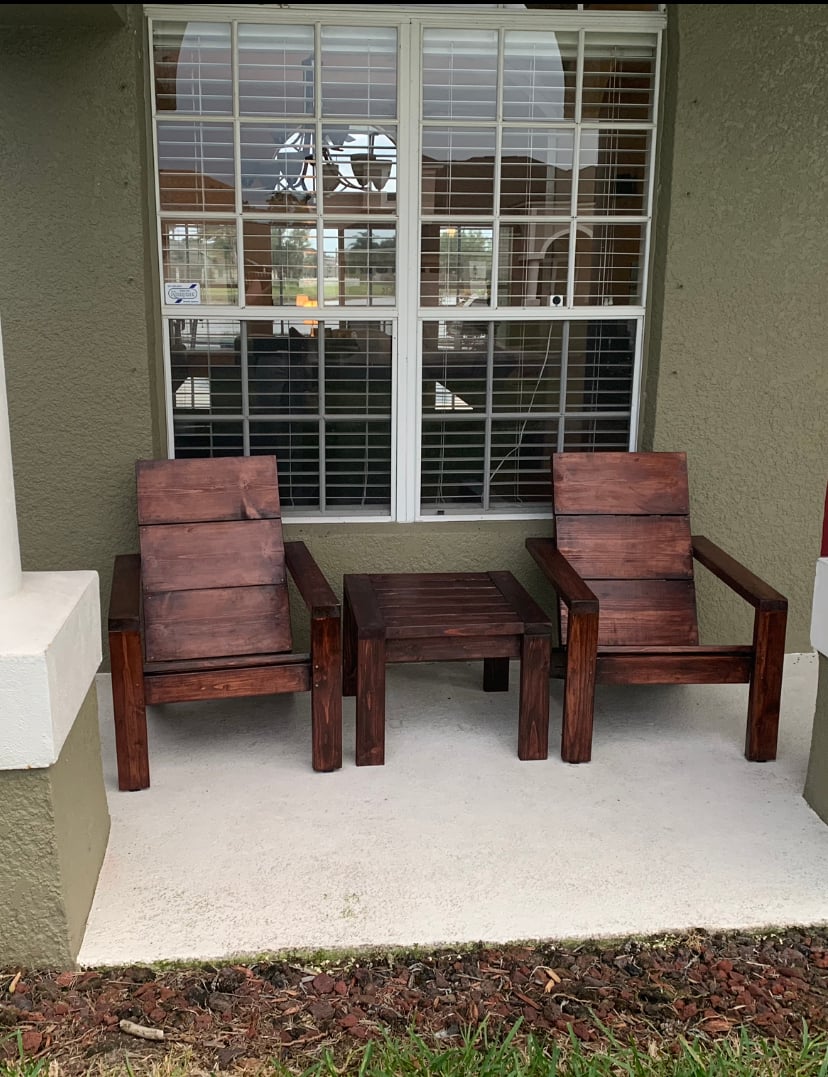
These modern Adirondack chairs were my first wood working project ever and they turned out awesome! I wanted to build a small table to complete the set and Ana’s new side table plans were exactly what I was looking for. I am truly amazed at how easy these projects were to make and how great they look on our front patio. Ana’s step-by-step plans make it so simple. My wife and I can’t wait to build some more of these projects for our backyard lanai and pool area.


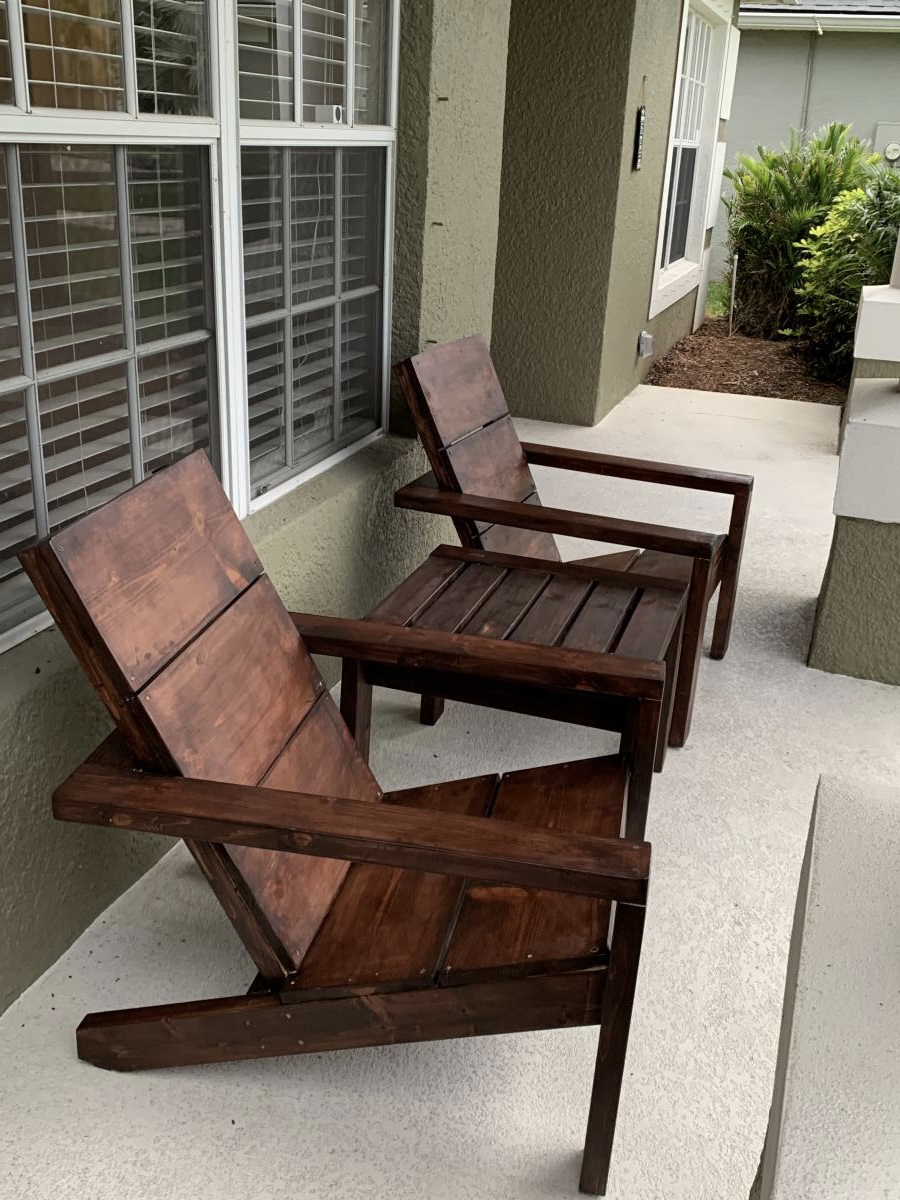
Mon, 04/12/2021 - 10:21
Amazing job on your first build, I see more handmade pieces in your future!
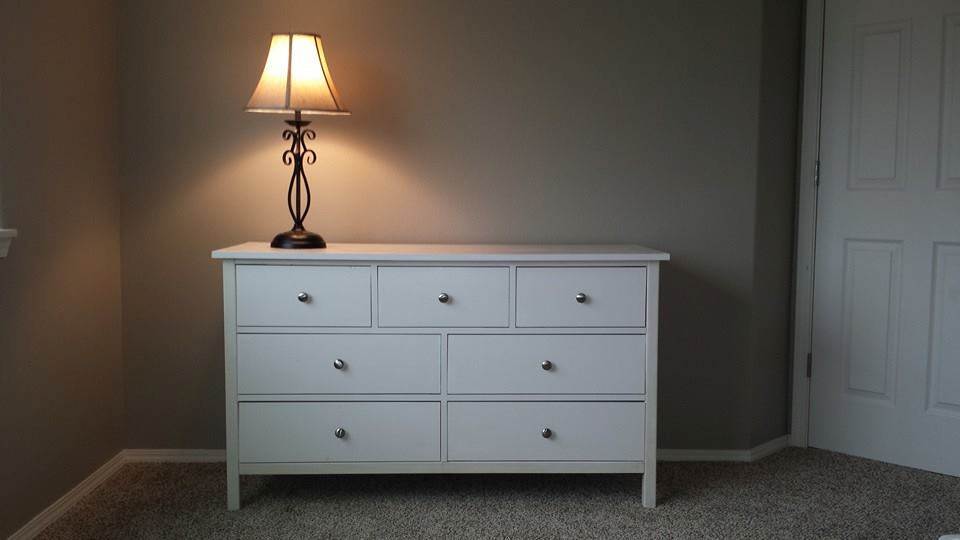
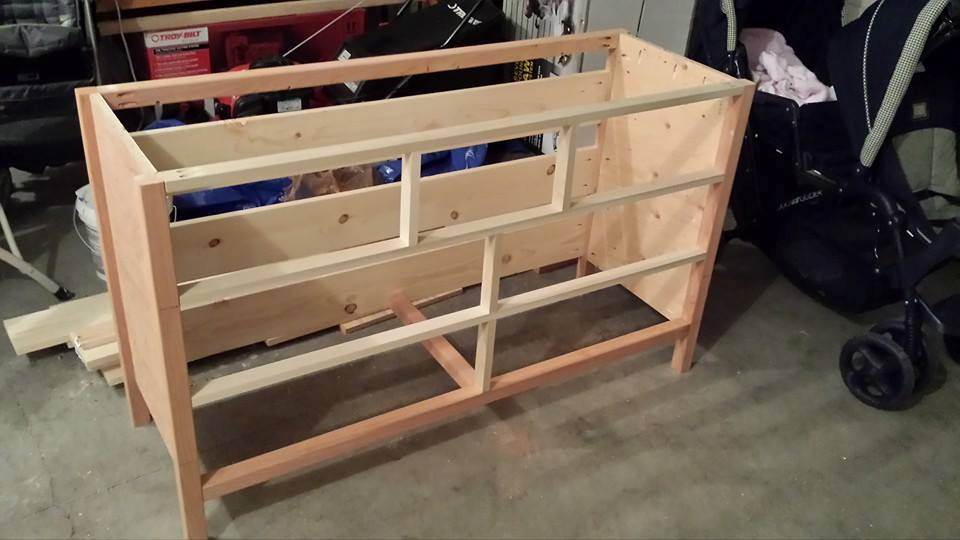
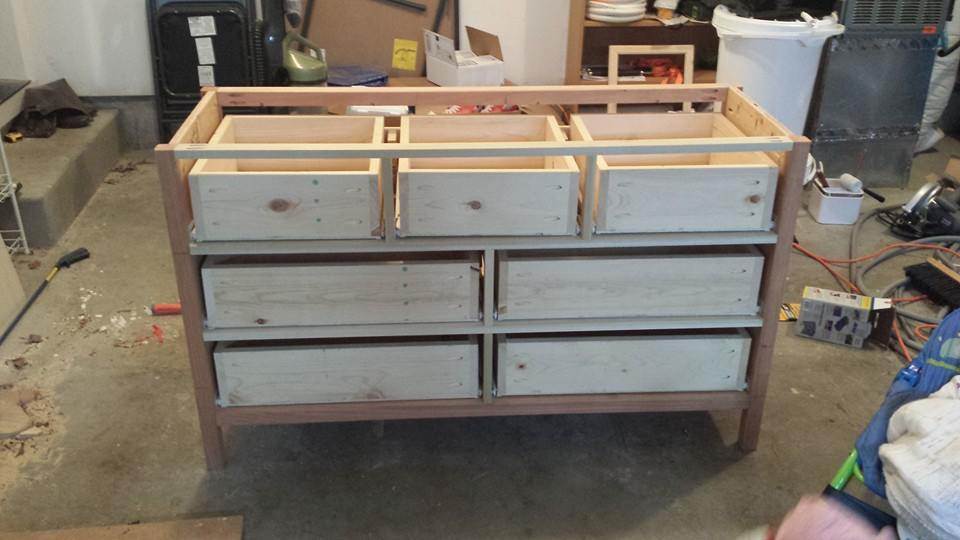
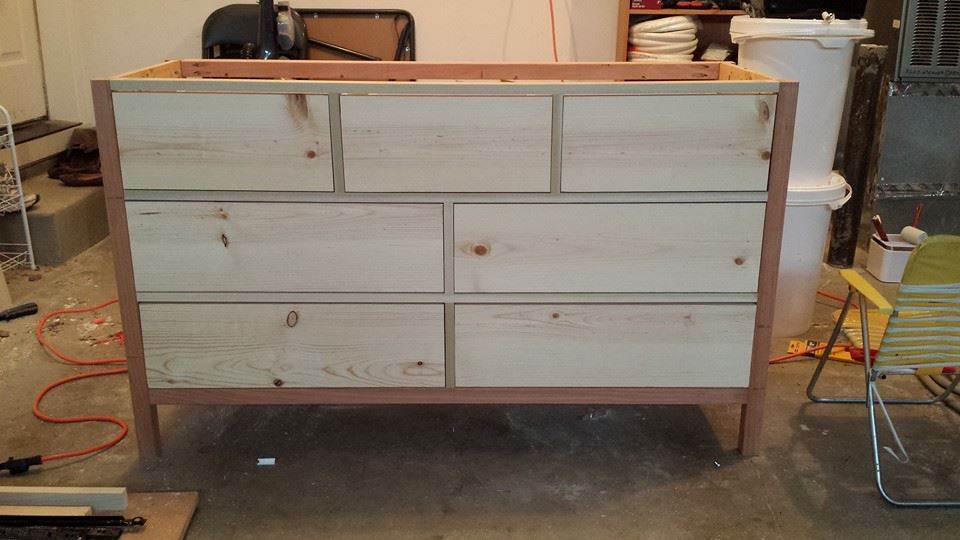
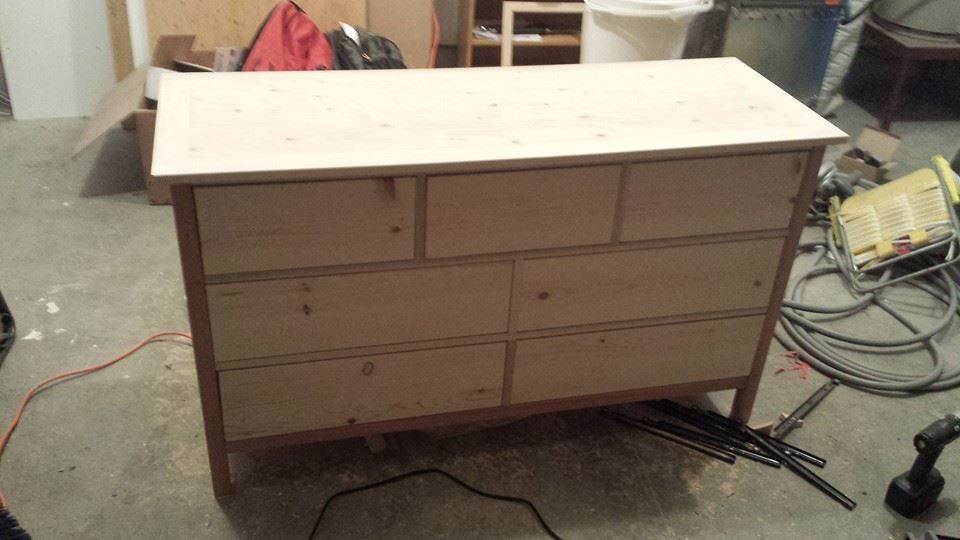
This is the first dresser that I have ever made. There was a learning curve, but not much. It was a lot of fun and I hope you enjoy it!
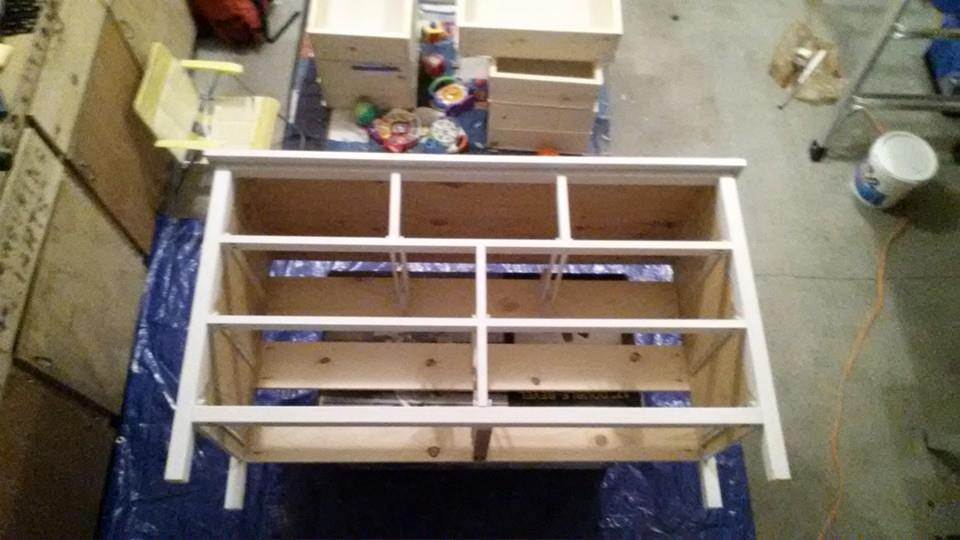
Tue, 02/16/2016 - 10:40
what kind of wood did you use to build the drawers? i have used 1X6 and 1X8 as per the plan and the drawers dont fit in the frame. sliding doesnt work properly. plewase let me know, thnks
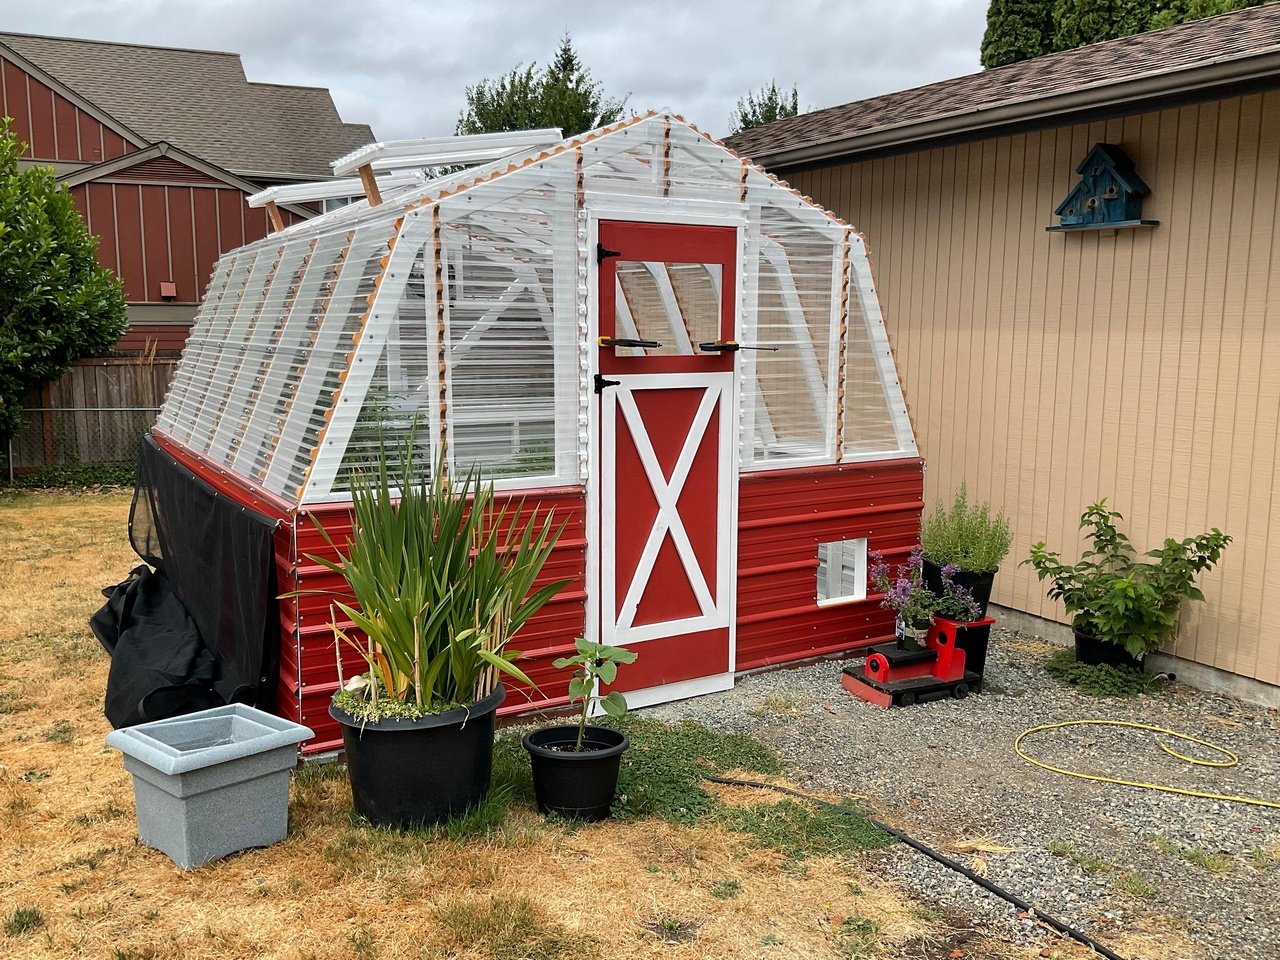
This was the perfect post-retirement project for me. It was a lot of work, but very rewarding.
I documented most of it on my blog.
We sure love this greenhouse!
Tue, 08/31/2021 - 12:23
Gorgeous, those skylights are the ticket! Thank you for sharing!
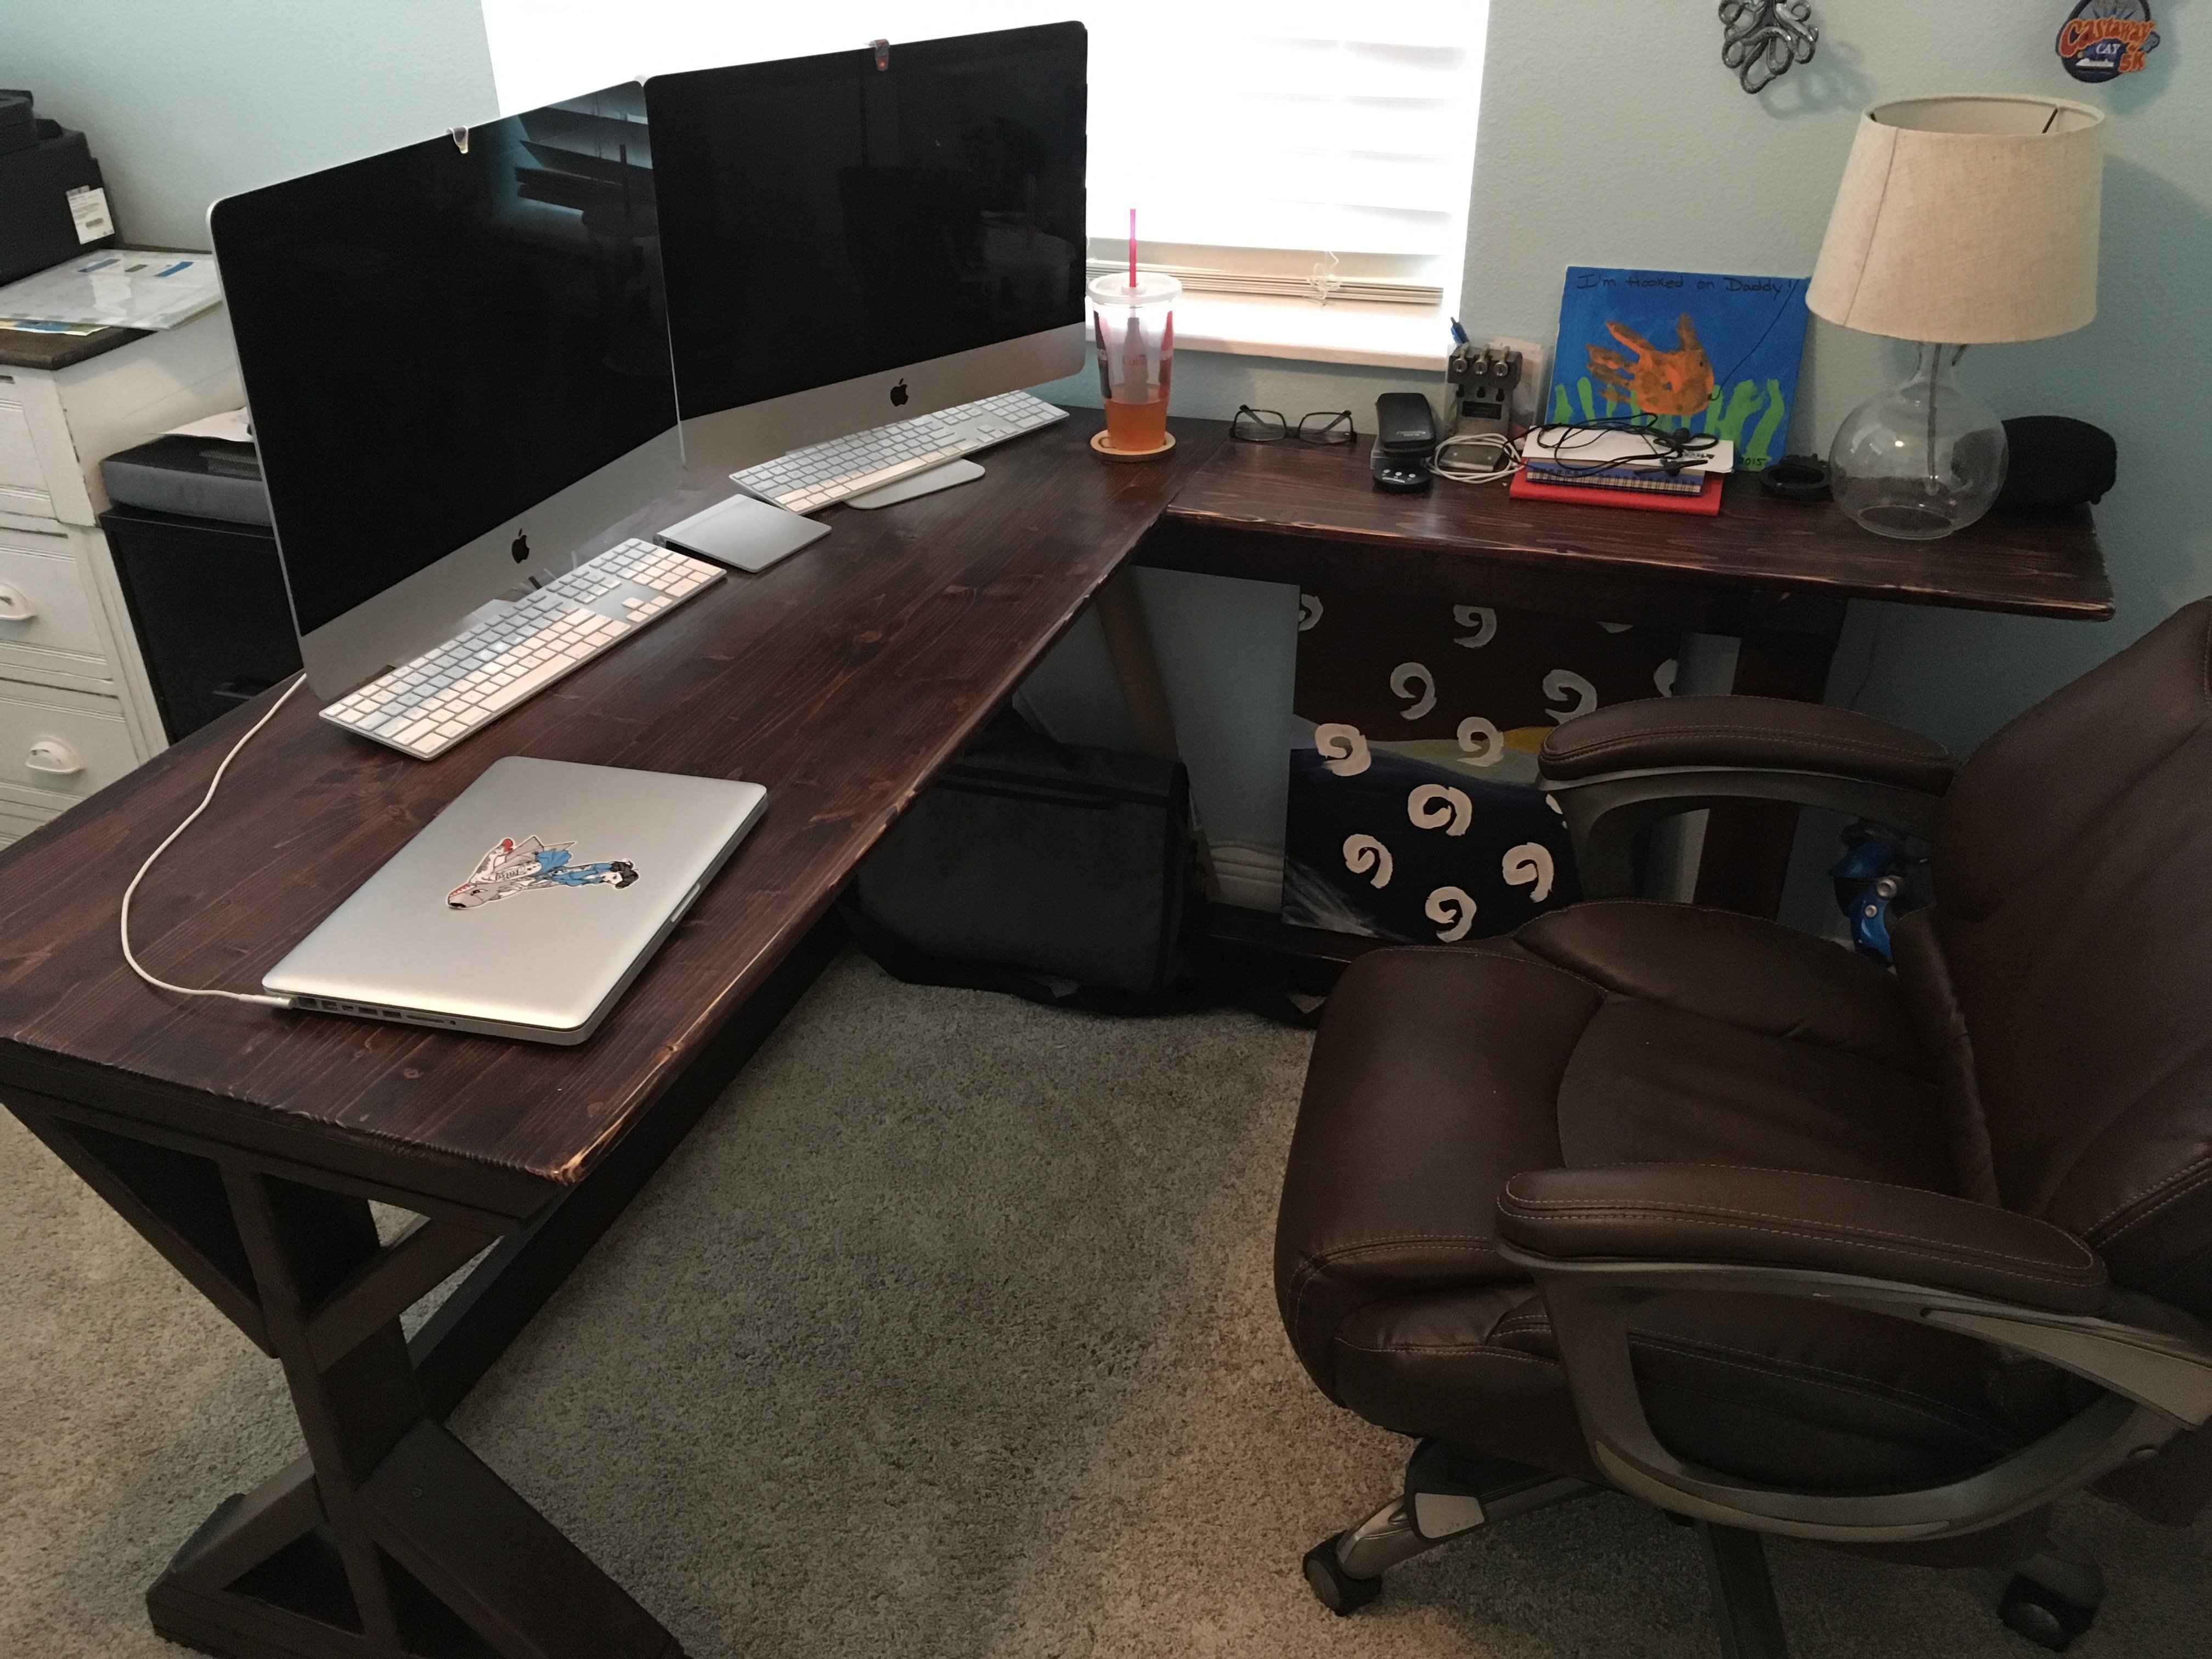
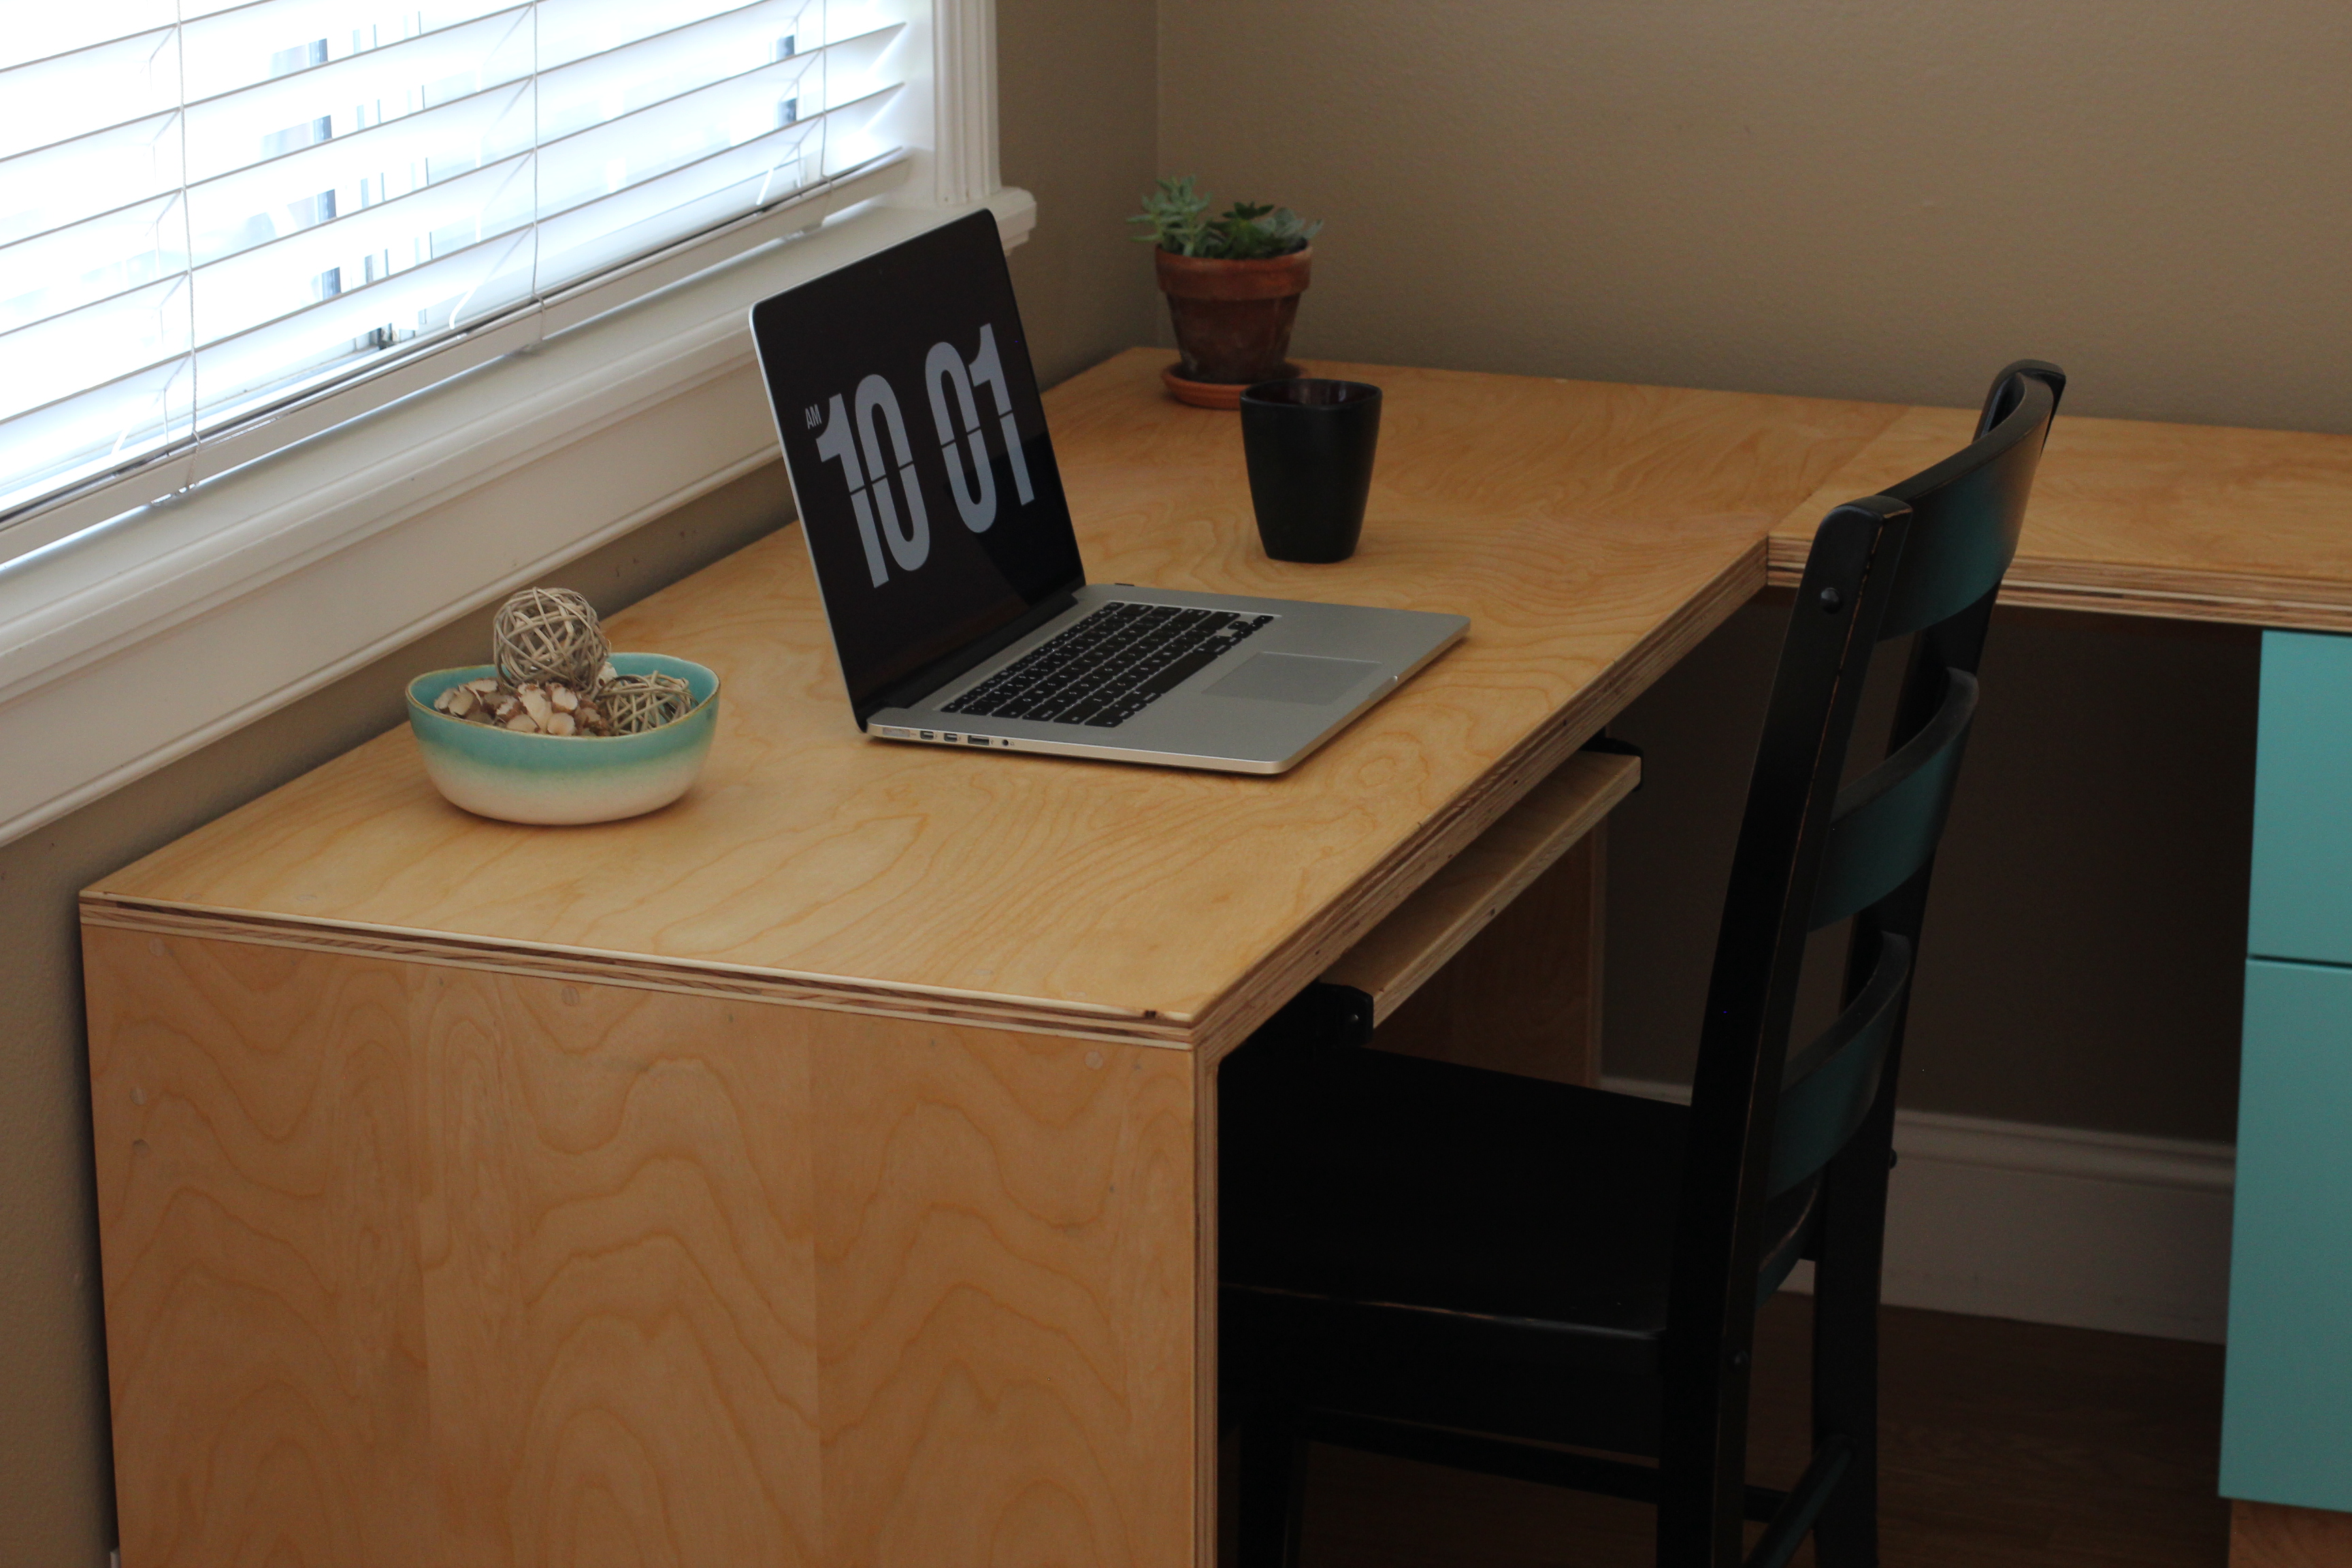
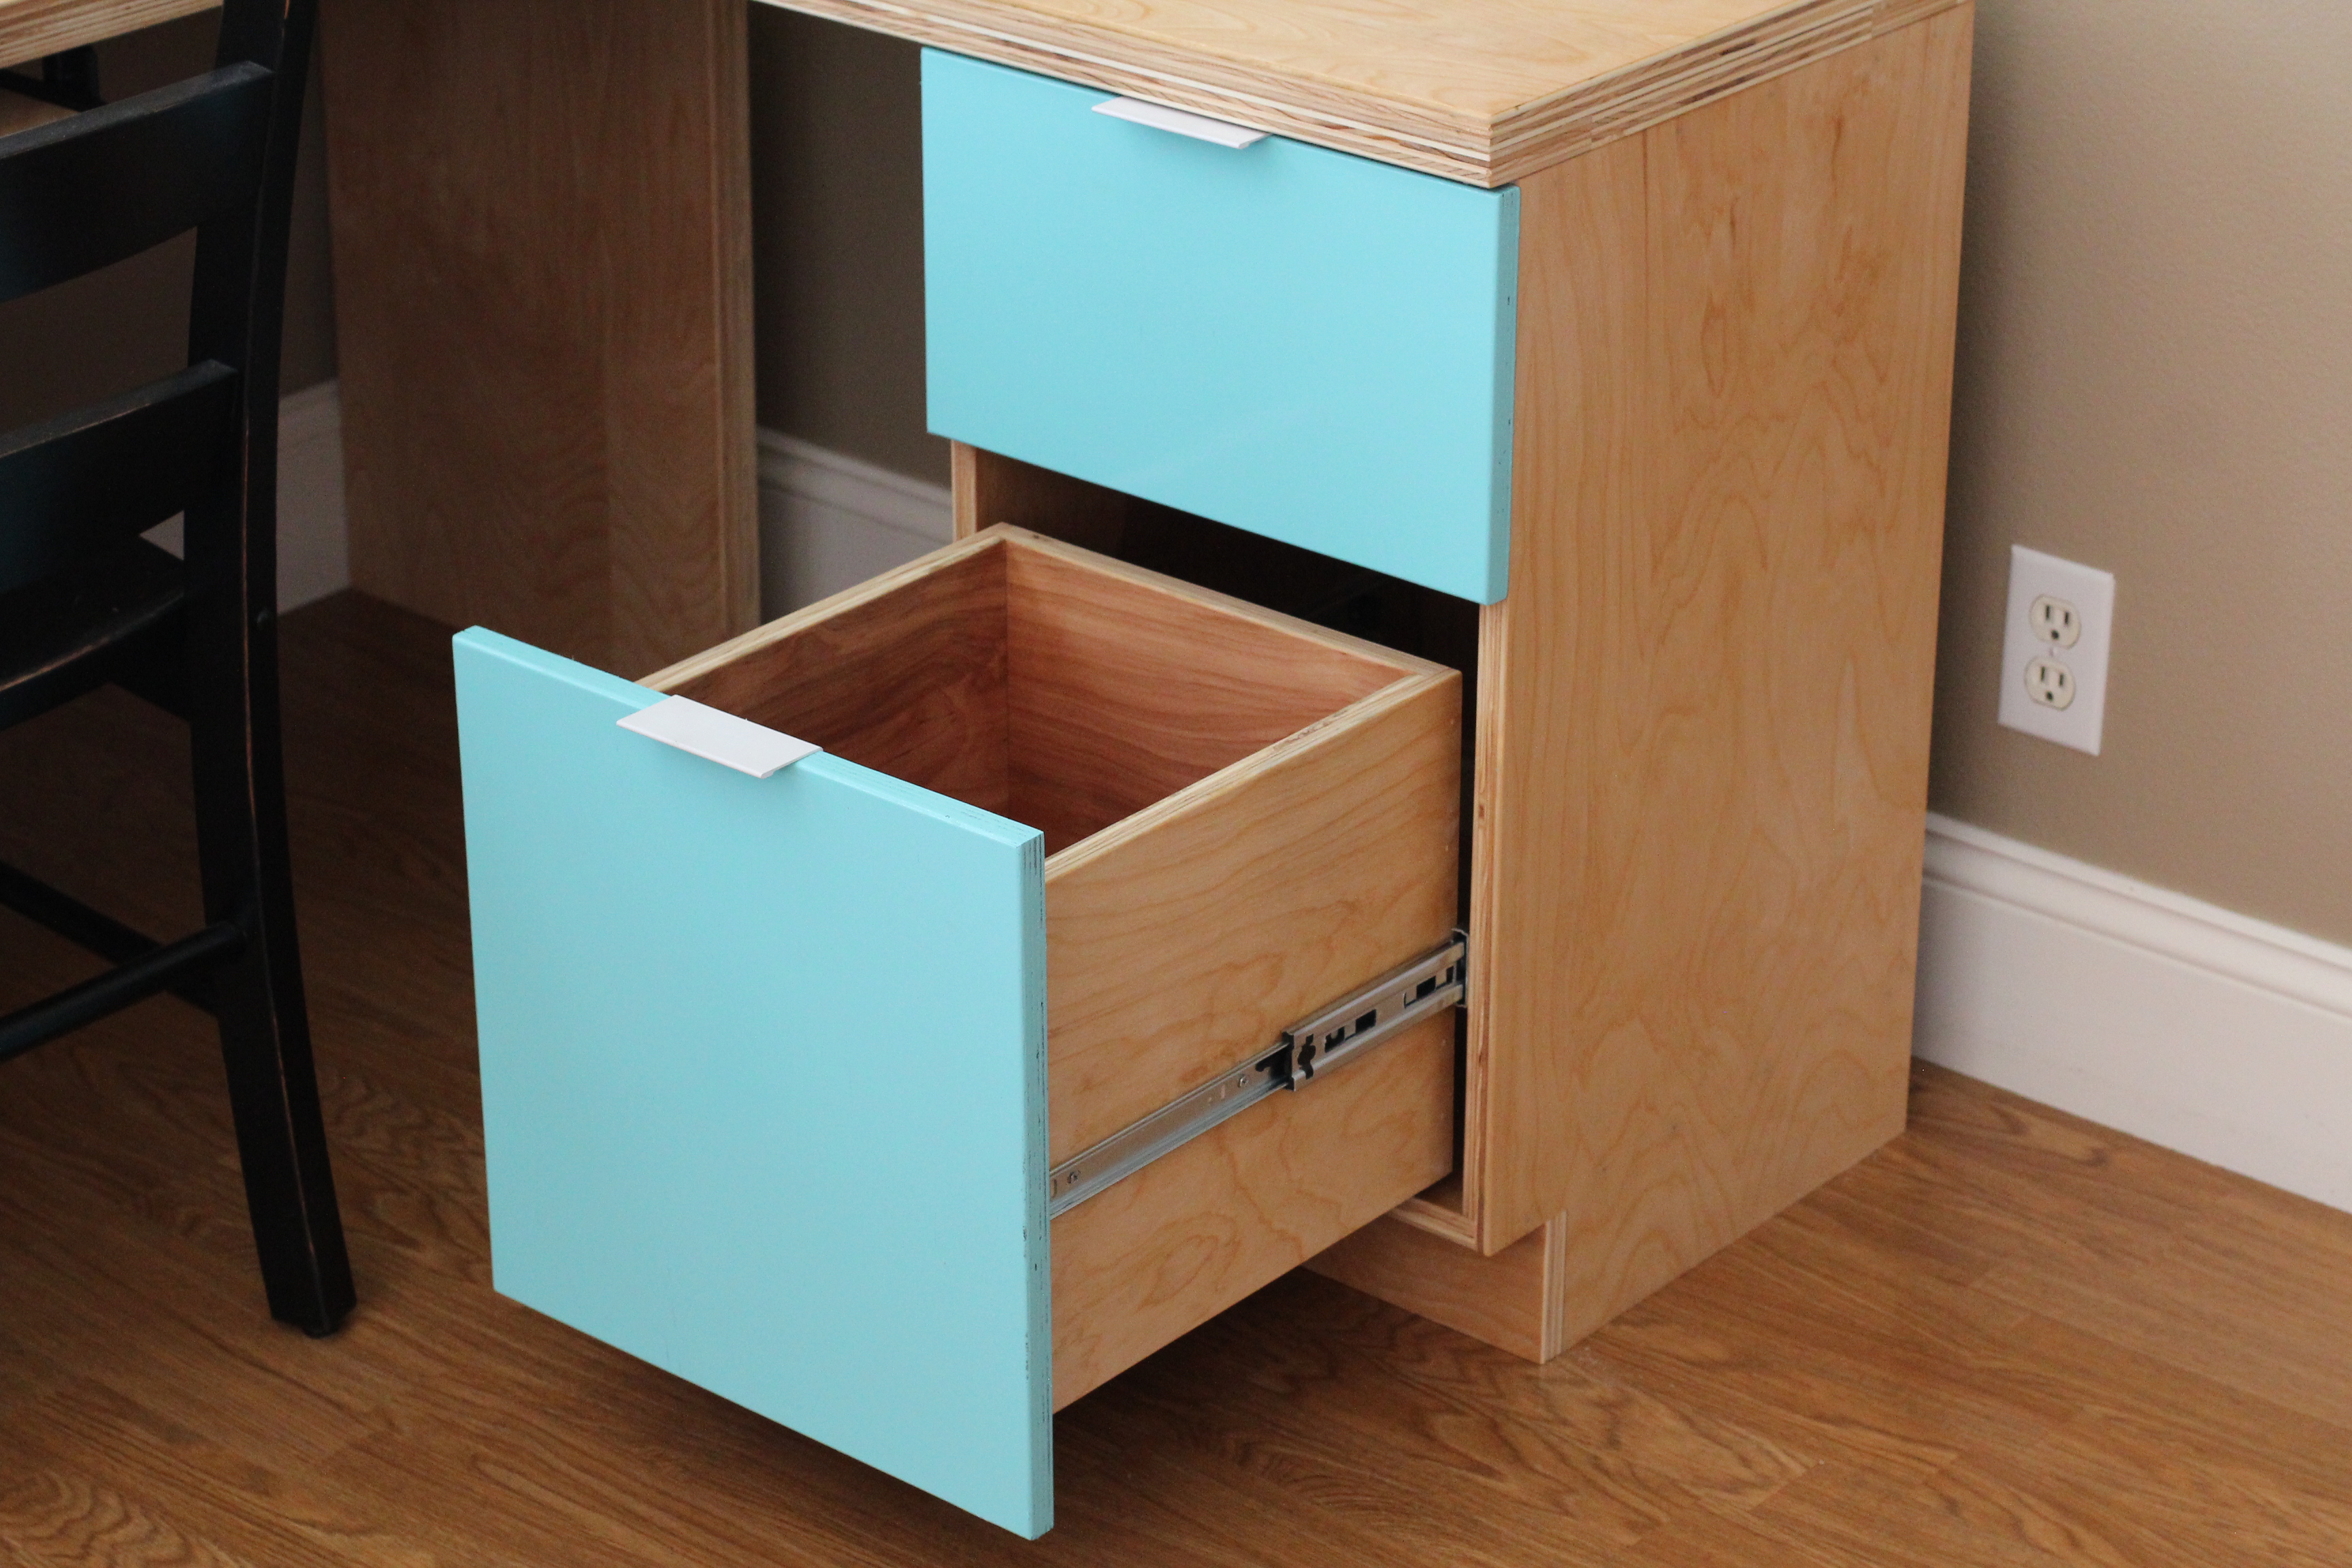
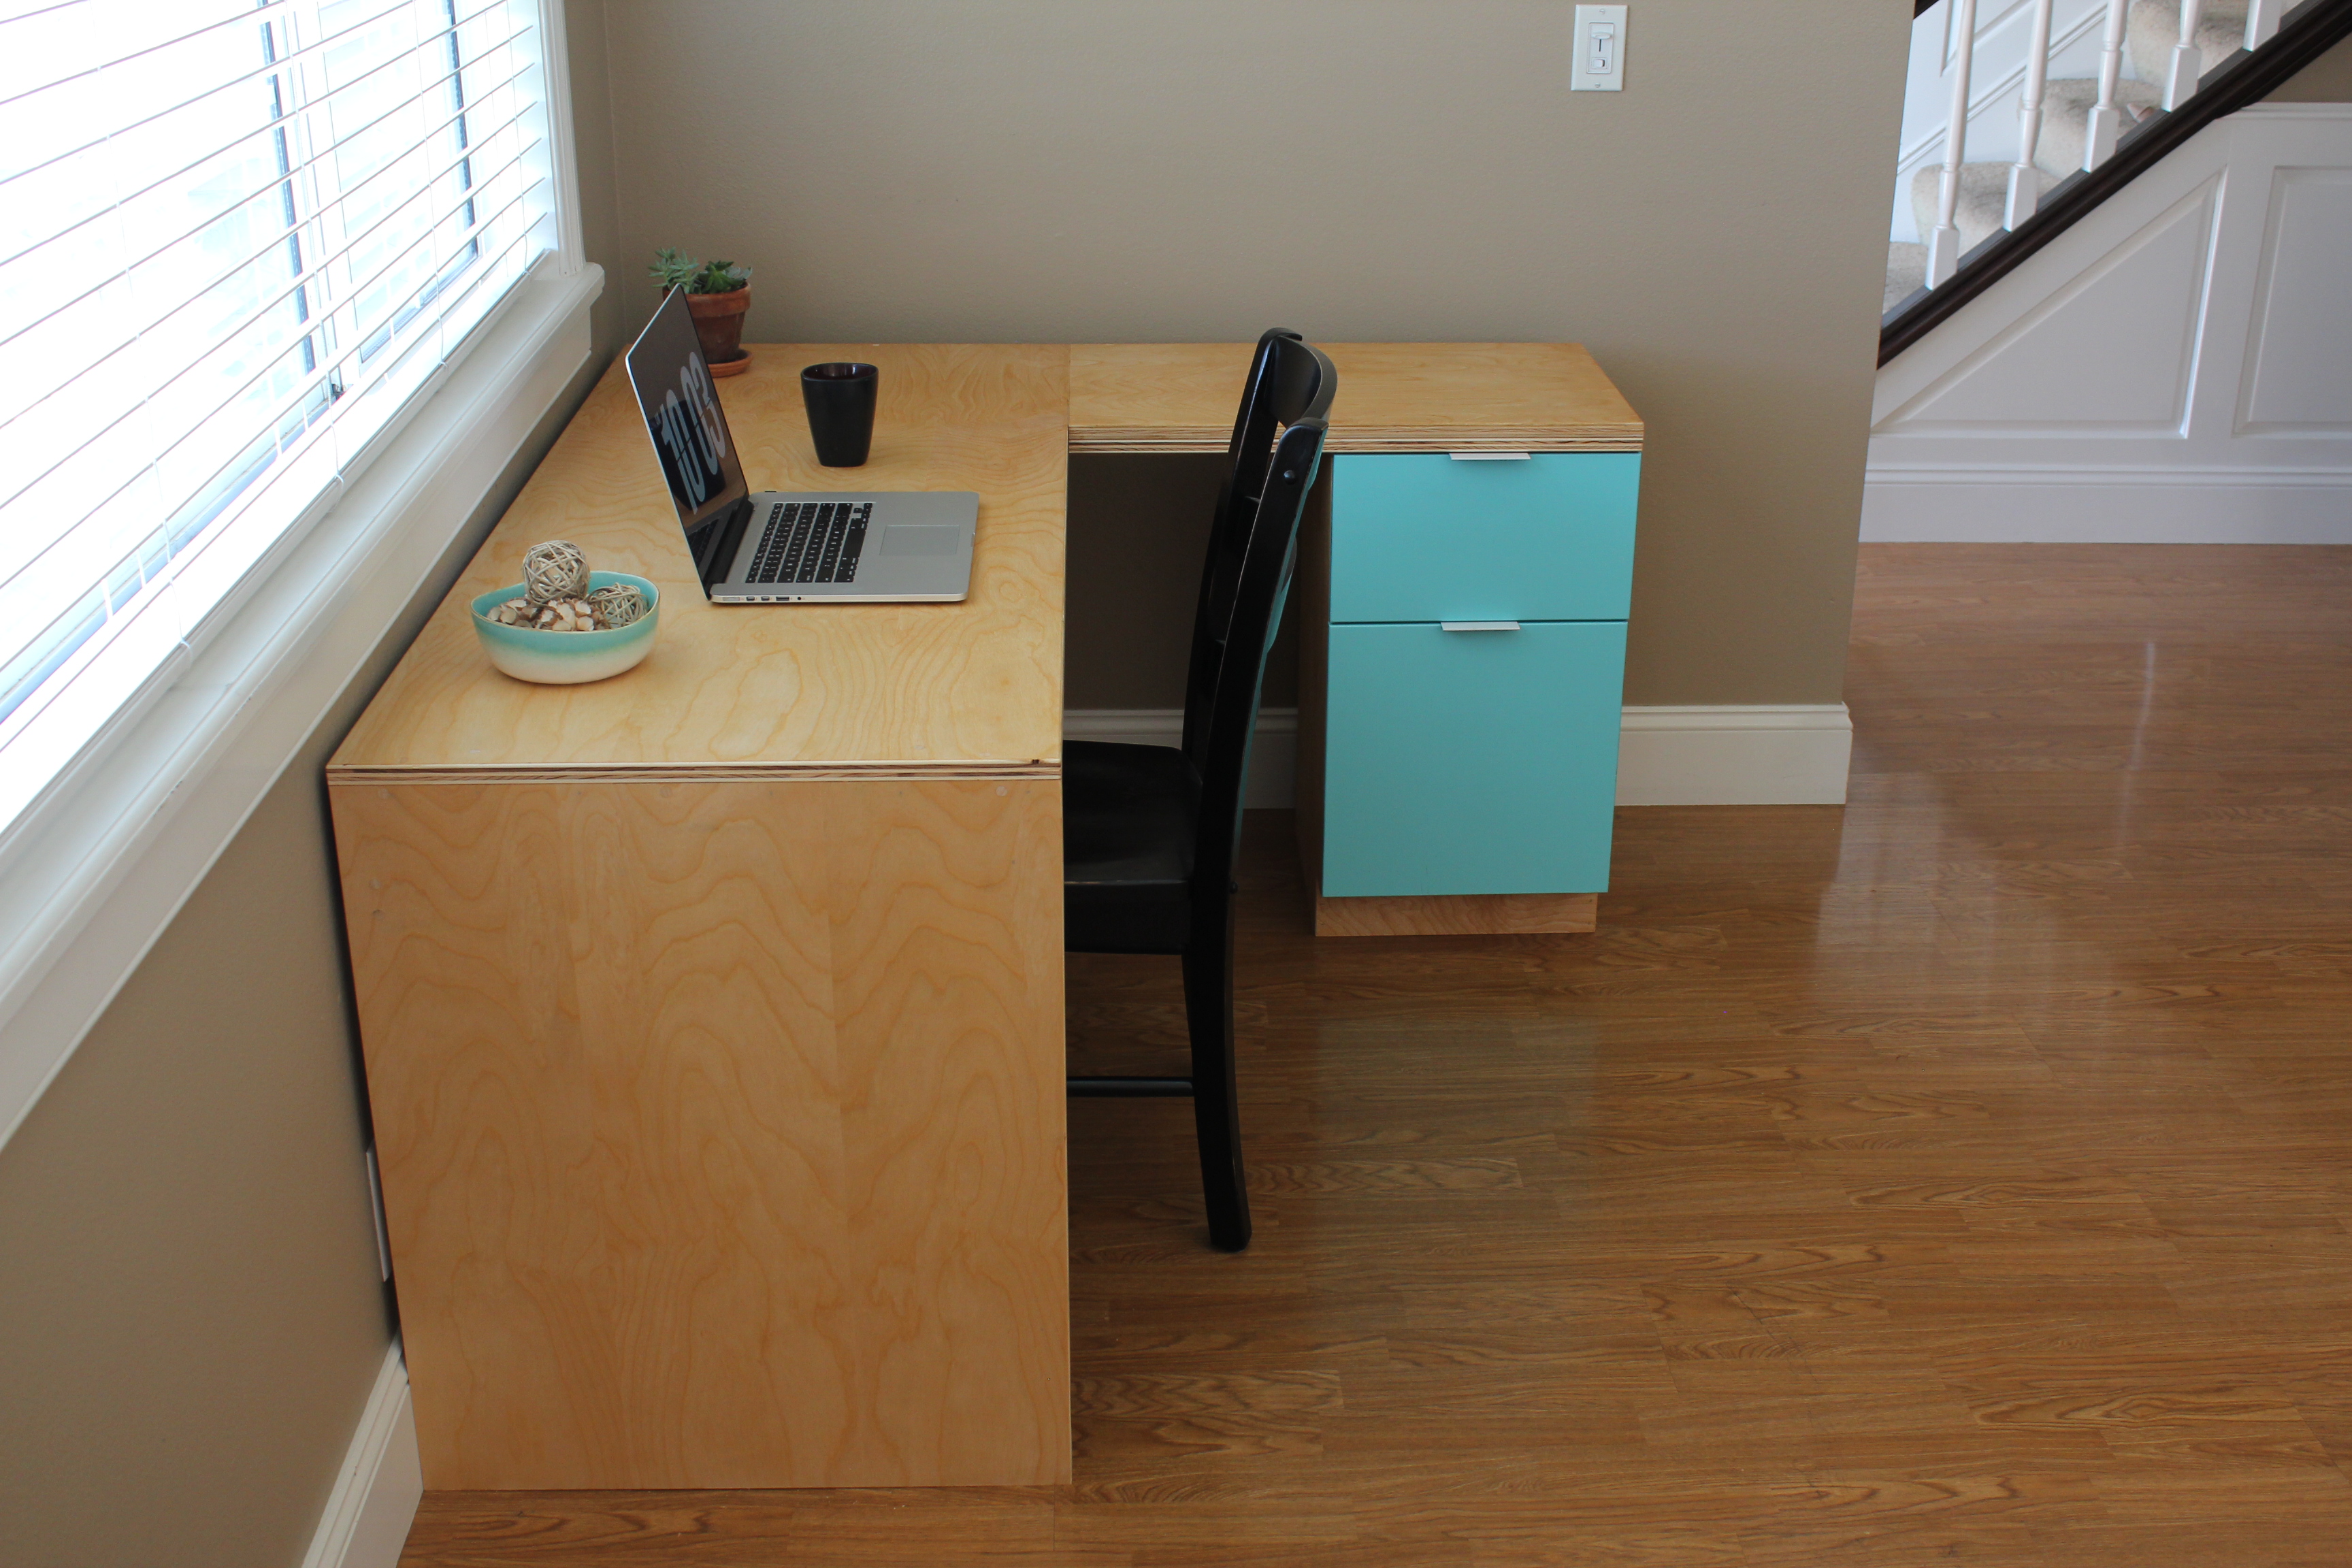
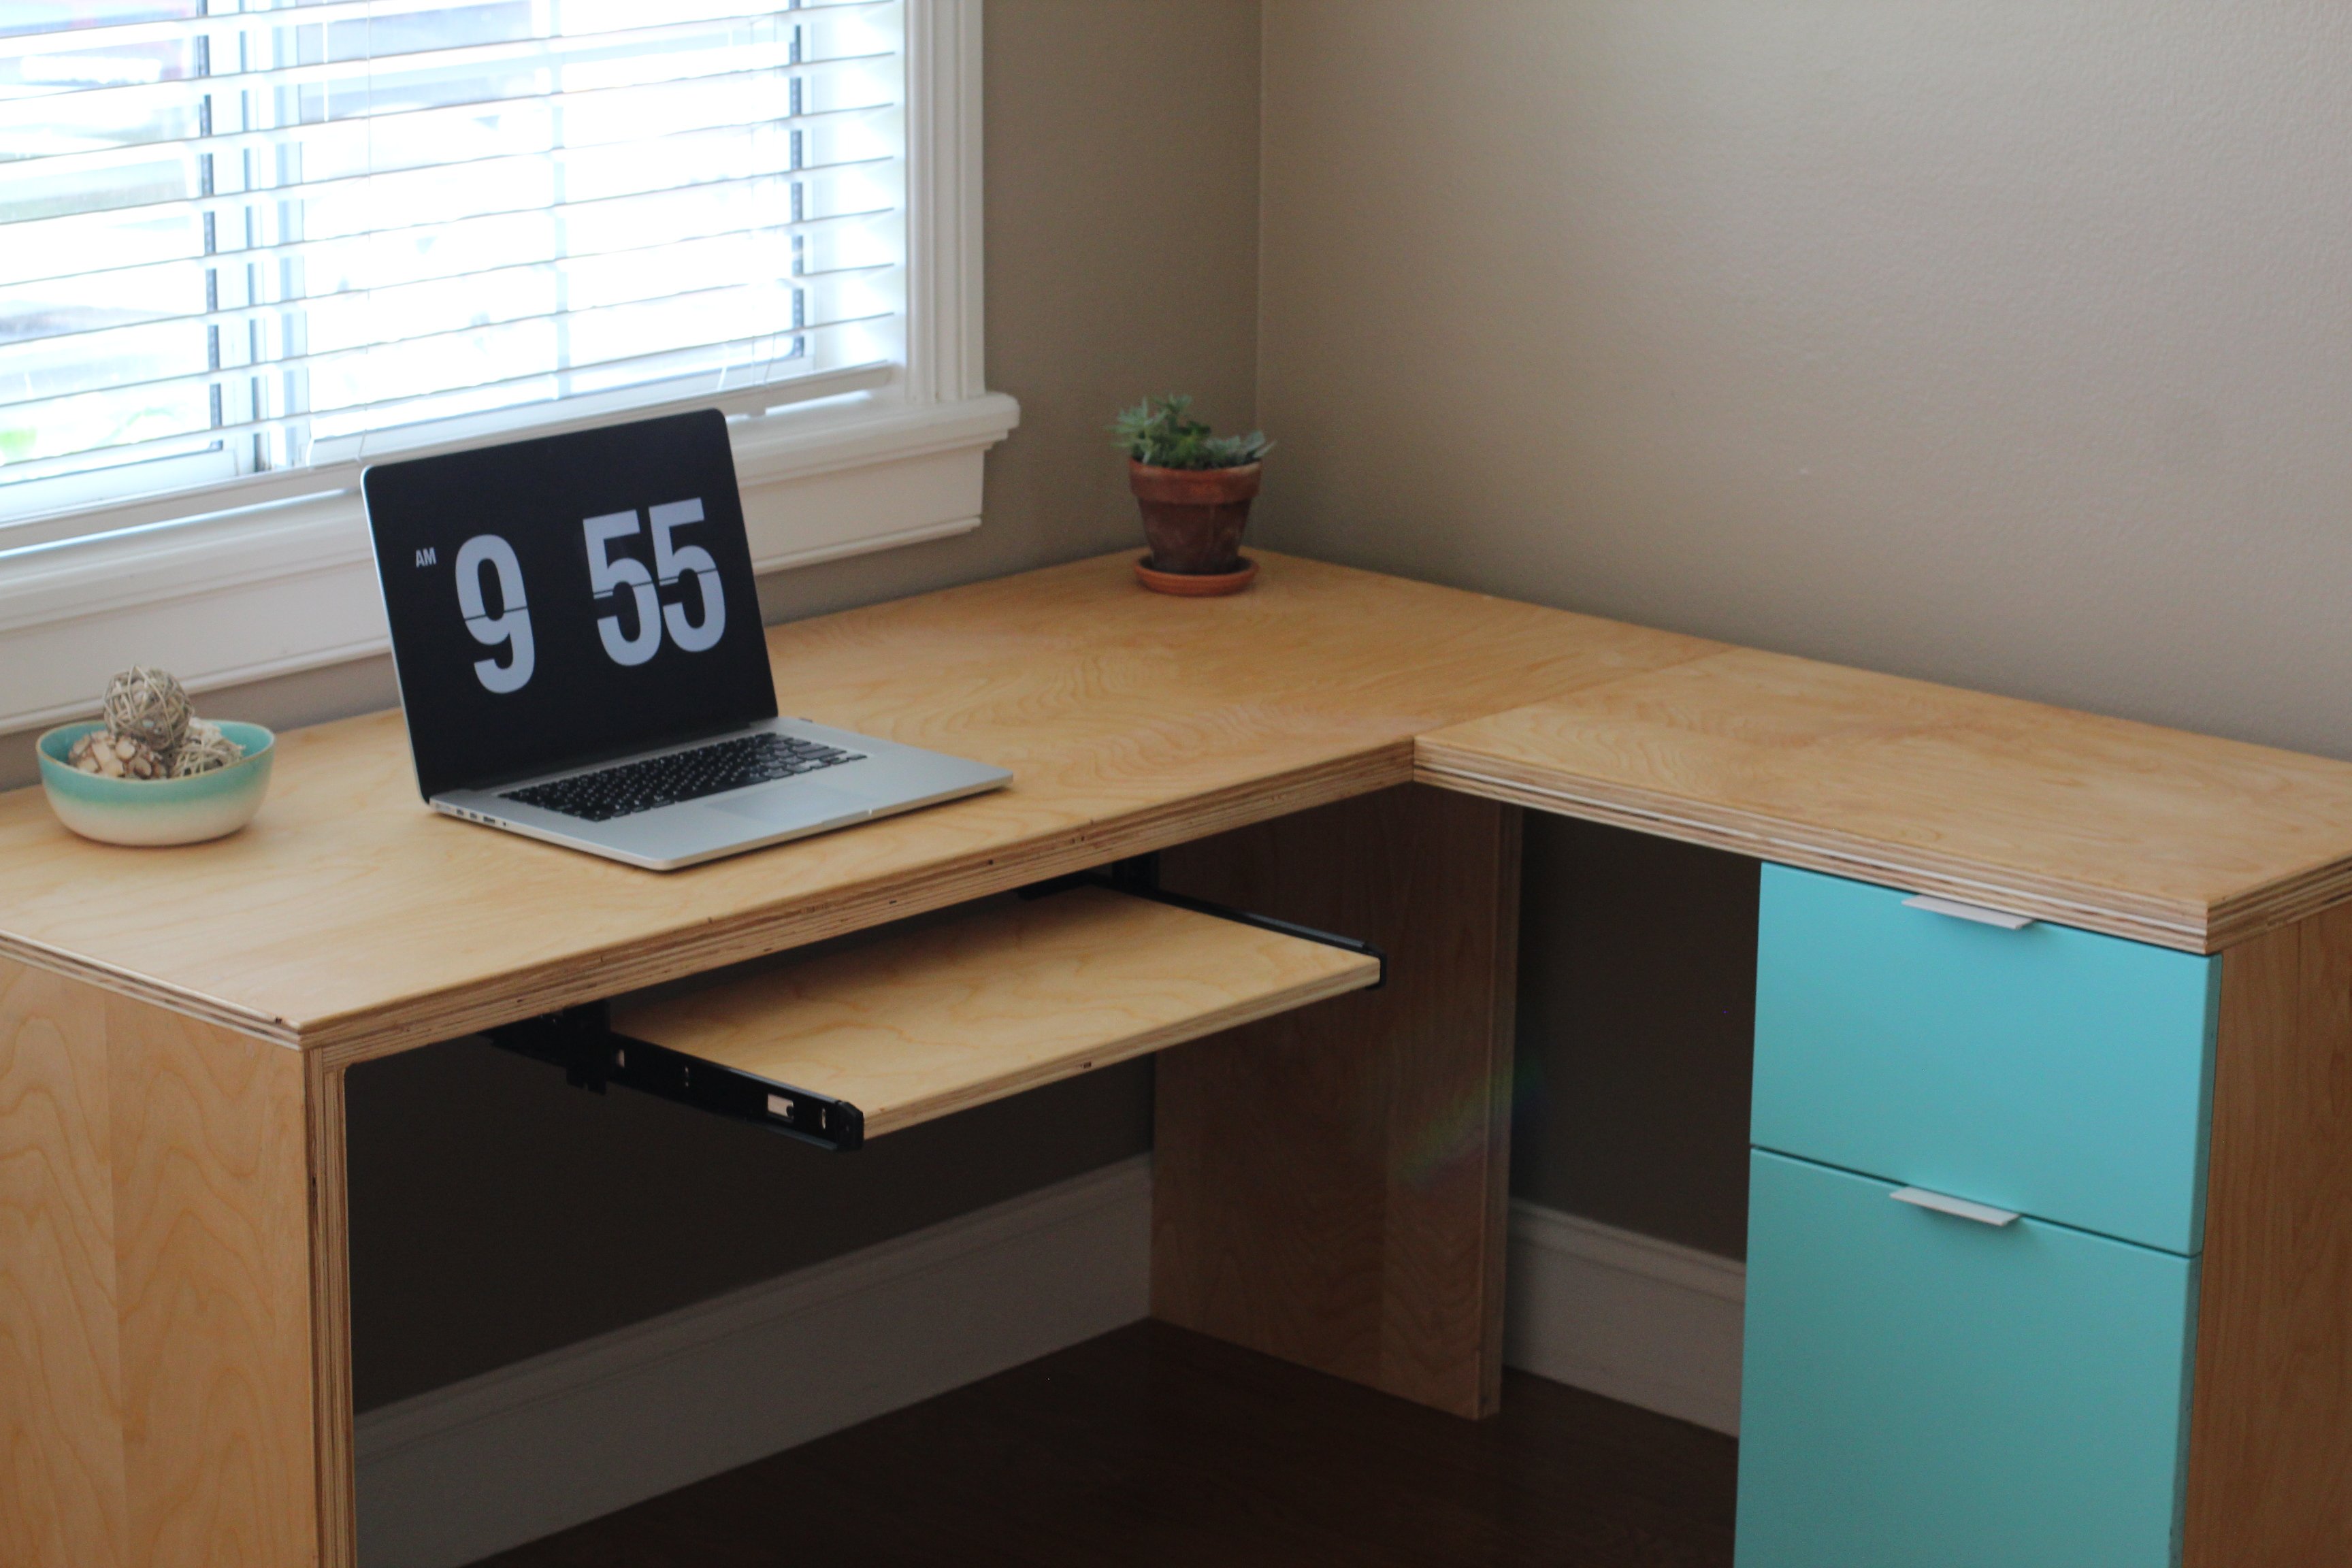
Added an L section to the Fancy Desk to increase usable space So far it still stands strong for me. Thanks Ana
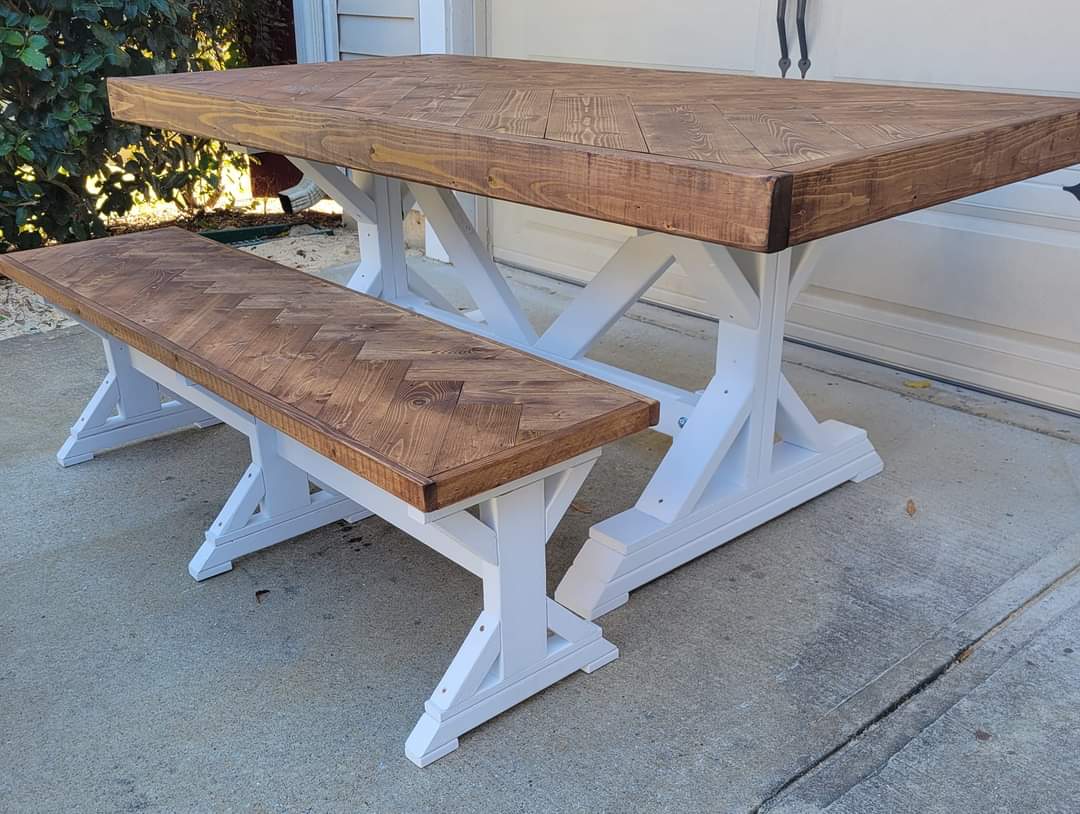
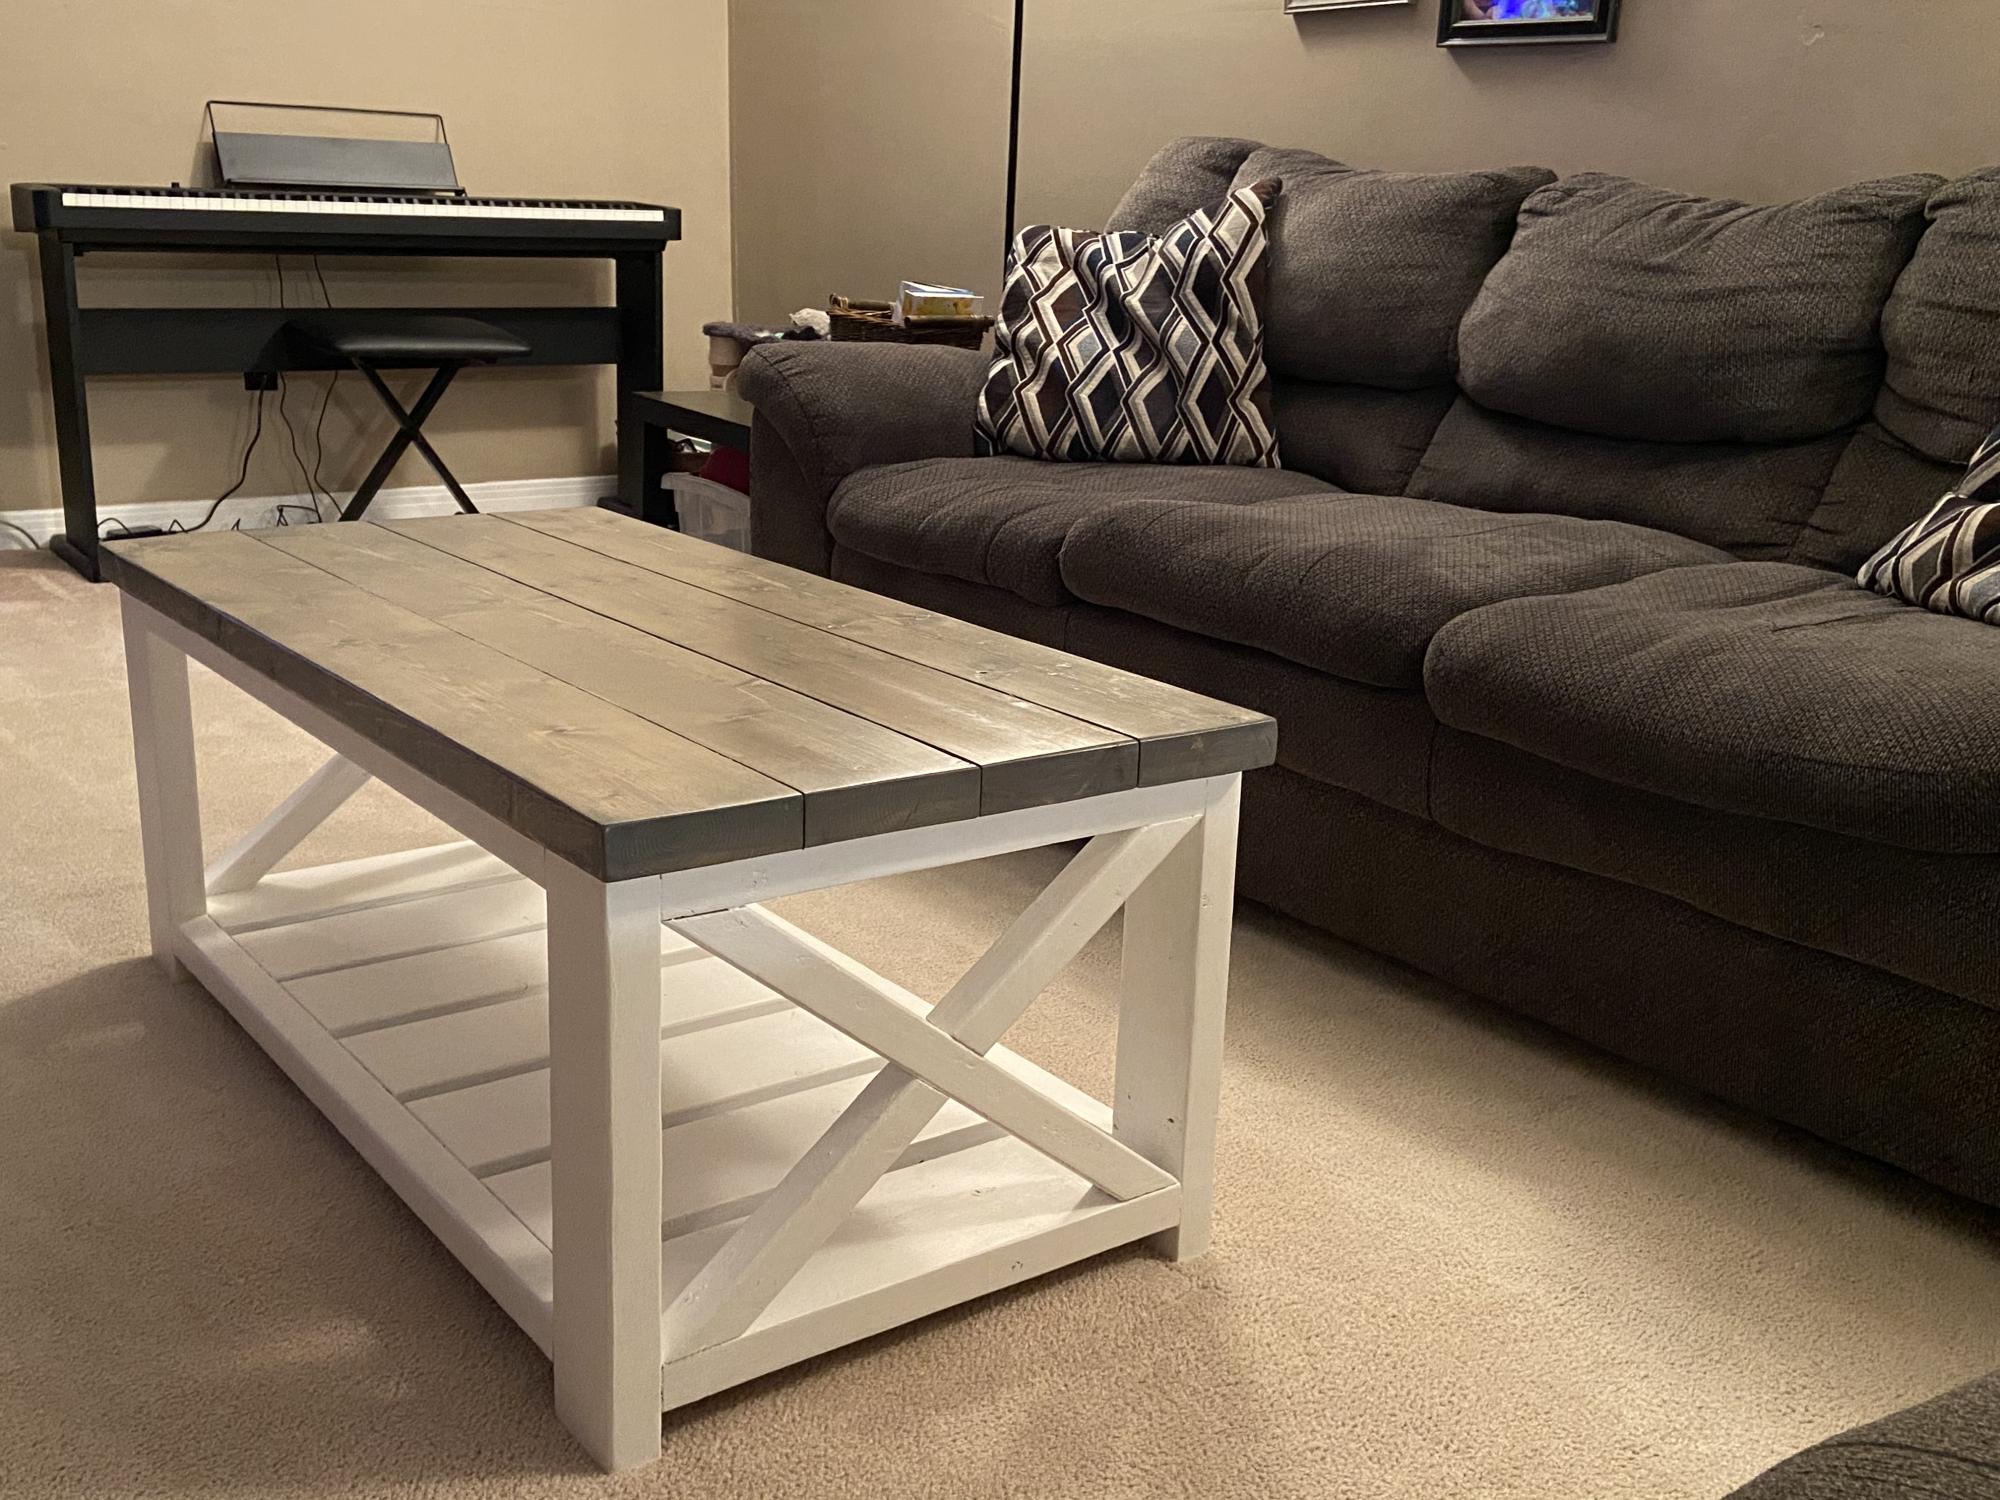
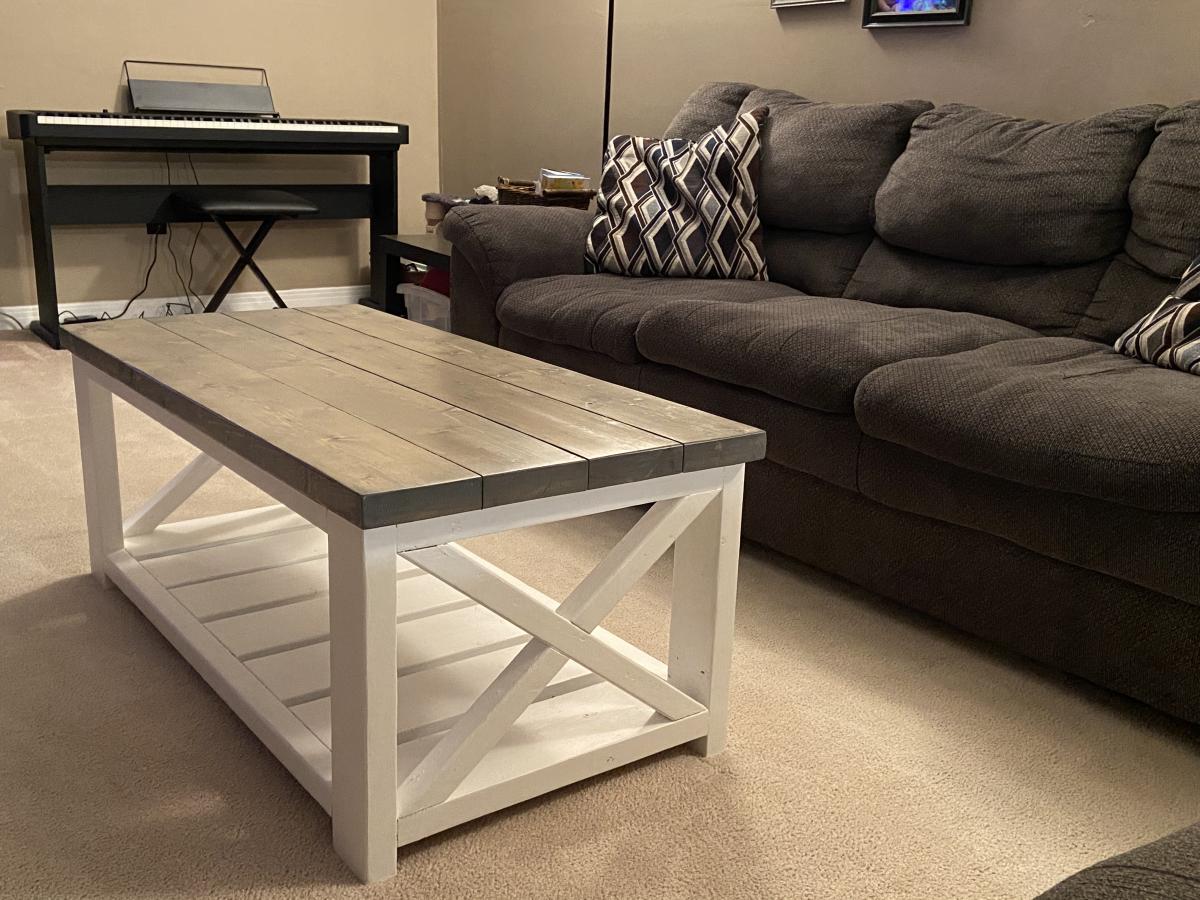
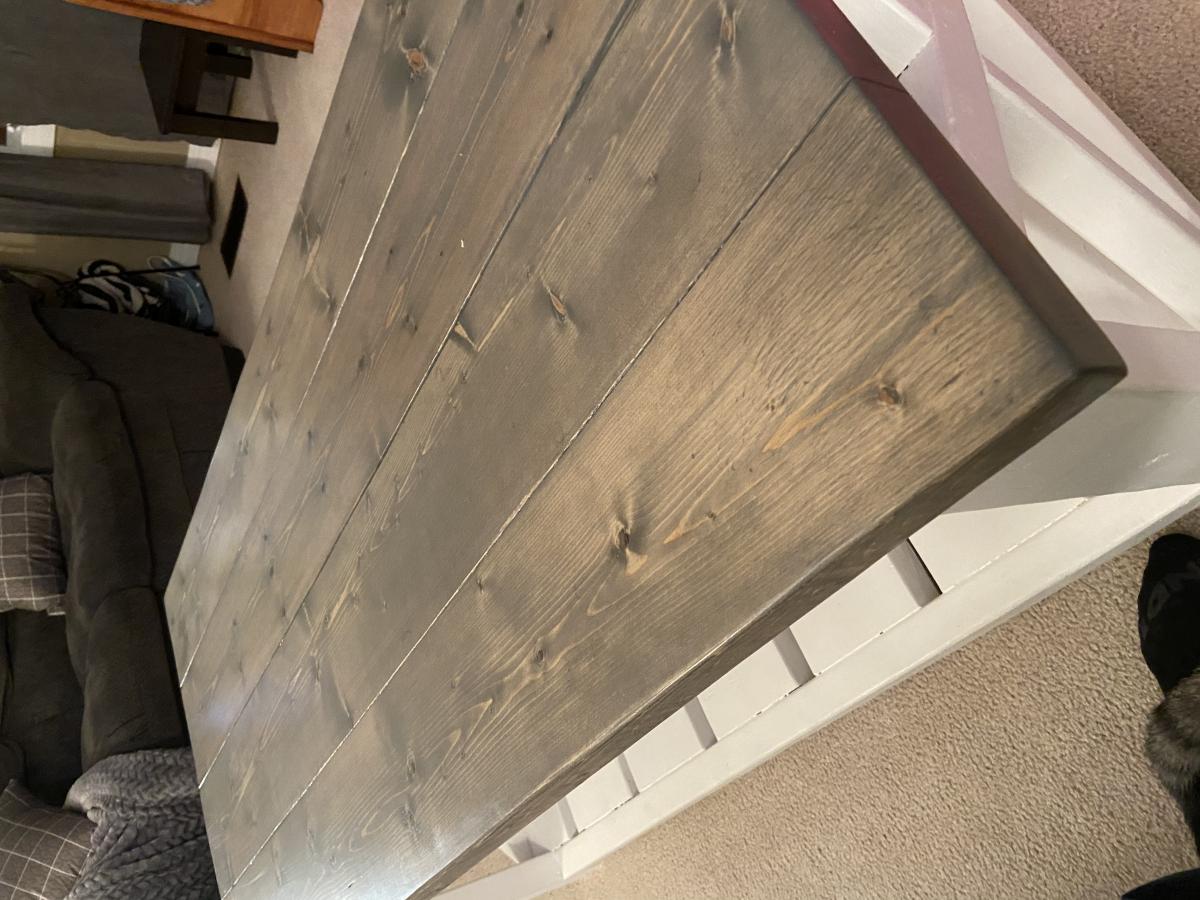
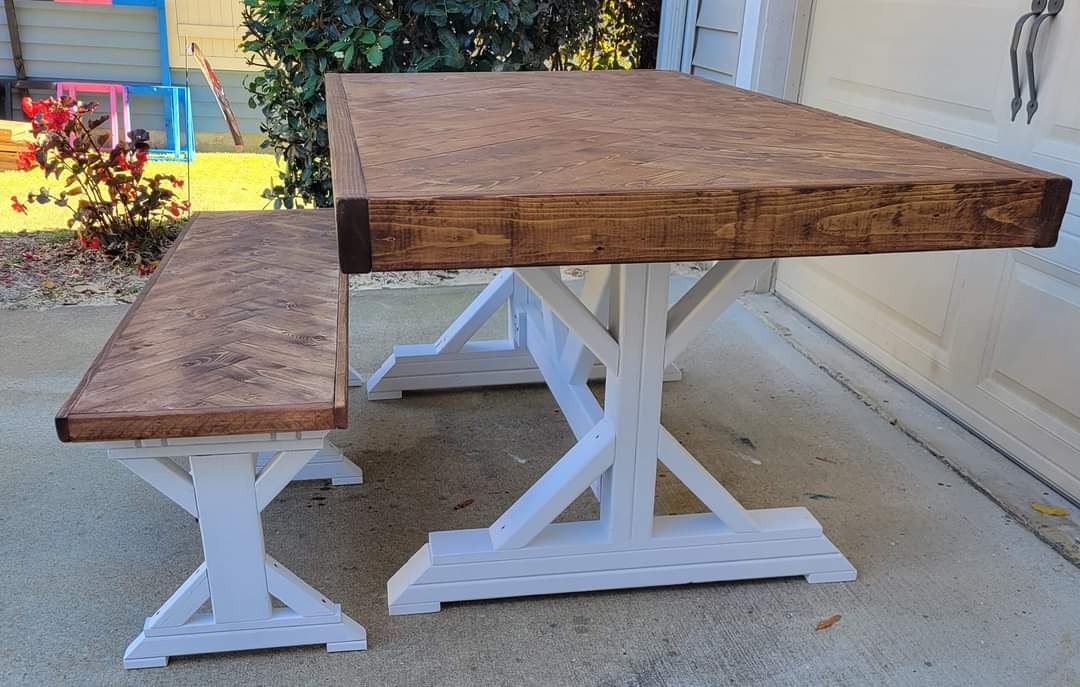
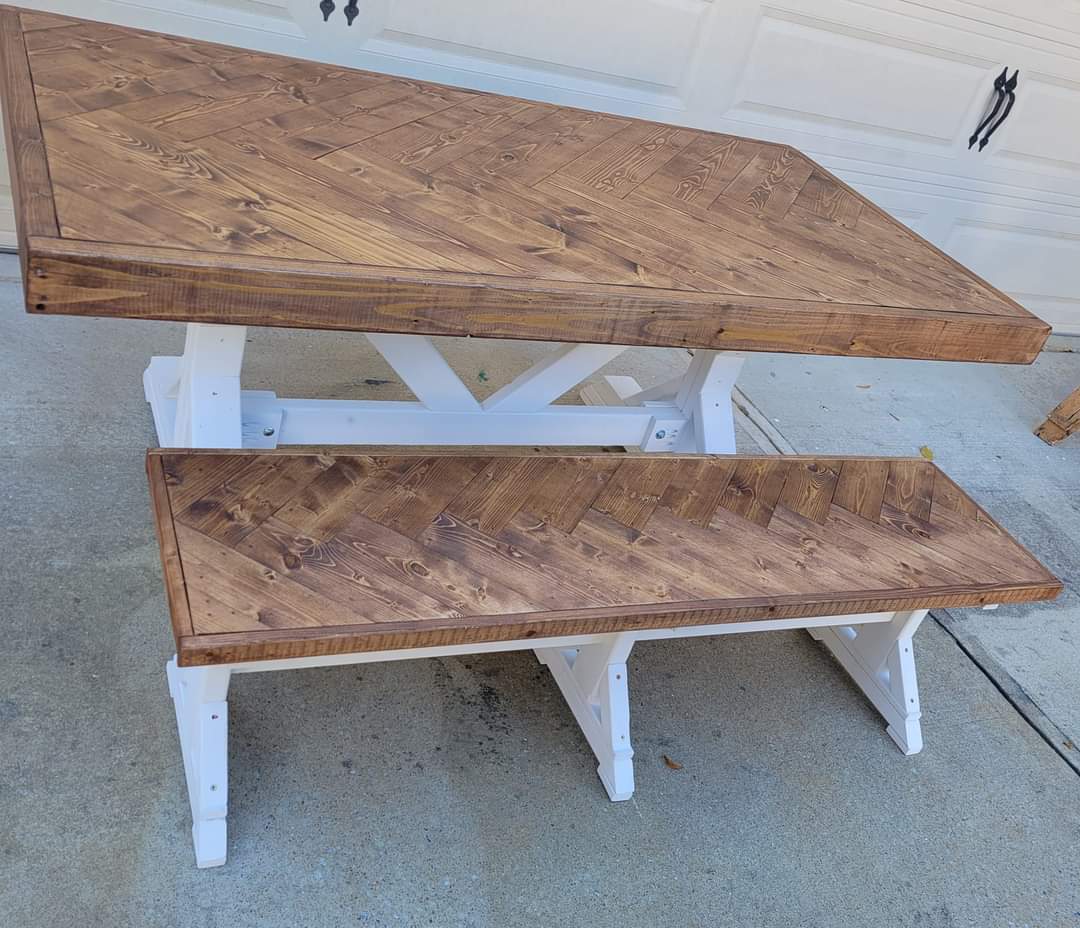
Put a fancy twist in this tabletop and bench top. We like the 45 degree angles that the top and legs both have to compliment each other. The top is stained with minwax special walnut.
Tue, 11/16/2021 - 19:18
You've been busy, this is gorgeous all the way around!
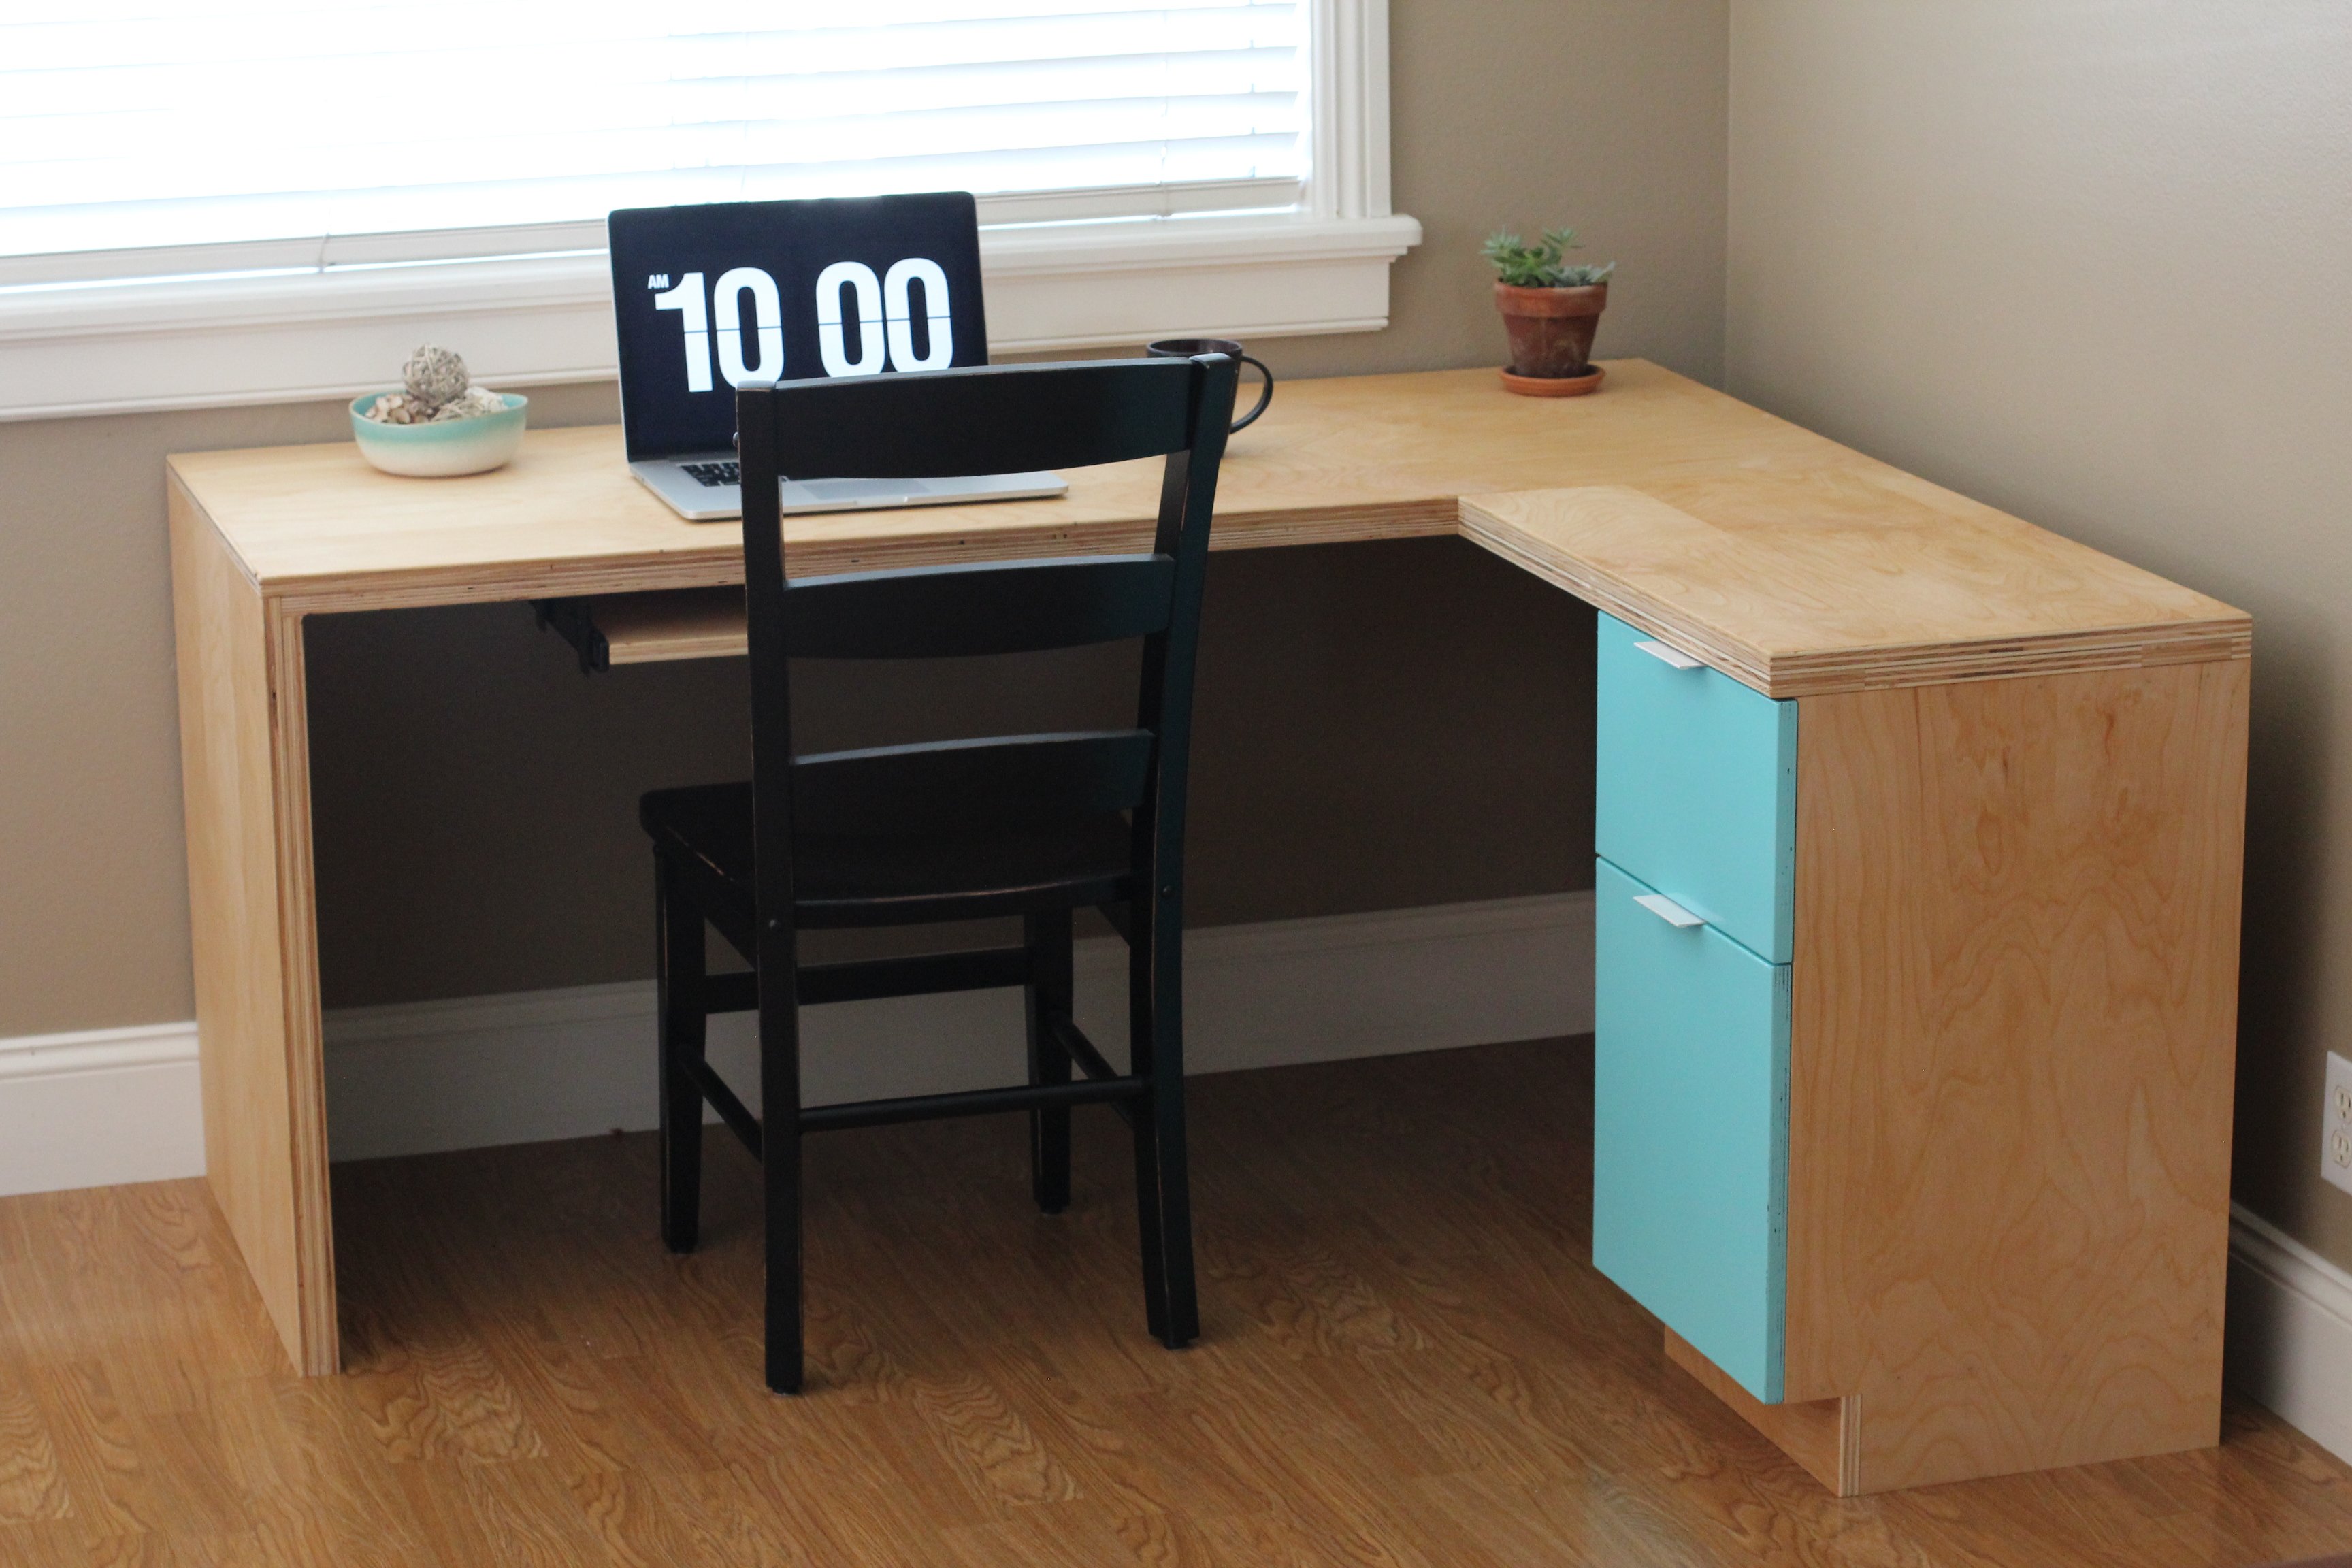
I constructed this desk all from birch plywood. It features a pull out keyboard tray, modern drawer finger pulls, and full extension drawer slides. The plywood was finished with a hand-rubbed danish oil for a natural wood appearance.

Comments
nifof17547
Mon, 04/08/2024 - 01:07
I love this idea!
I love the idea of book cornices for the nursery! Reducing the depth of the shelves is a smart modification that makes them more suitable for children's books. It is very important to customize the furniture so that it perfectly suits your needs. Using 1 x 2 instead of 1 x 3 will give you a more customized solution. Books are a storehouse of knowledge! Speaking of knowledge, for students looking to adapt their learning process, platforms like Edubirdie https://essays.edubirdie.com/assignment-help offer reliable assignment help services. Edubirdie can help you tailor your academic assignments to your specific requirements. It's all about finding the right option for your needs, whether it's organizing children's books or tackling academic assignments. Great job on the customization!
LuckyGirl
Mon, 05/06/2024 - 14:40
A very cool ledges for books…
A very cool ledges for books, especially useful for those who like to read like me. Moreover, I dream of writing a book myself. For this I must develop strong writing skills, often refined through literature review tasks. Yet, these assignments very complex for me. I prefer turning to professionals https://literaturereviewwritingservice.com/ for help. It provides students with the help needed to succeed in crafting compelling writing papers.