Community Brag Posts

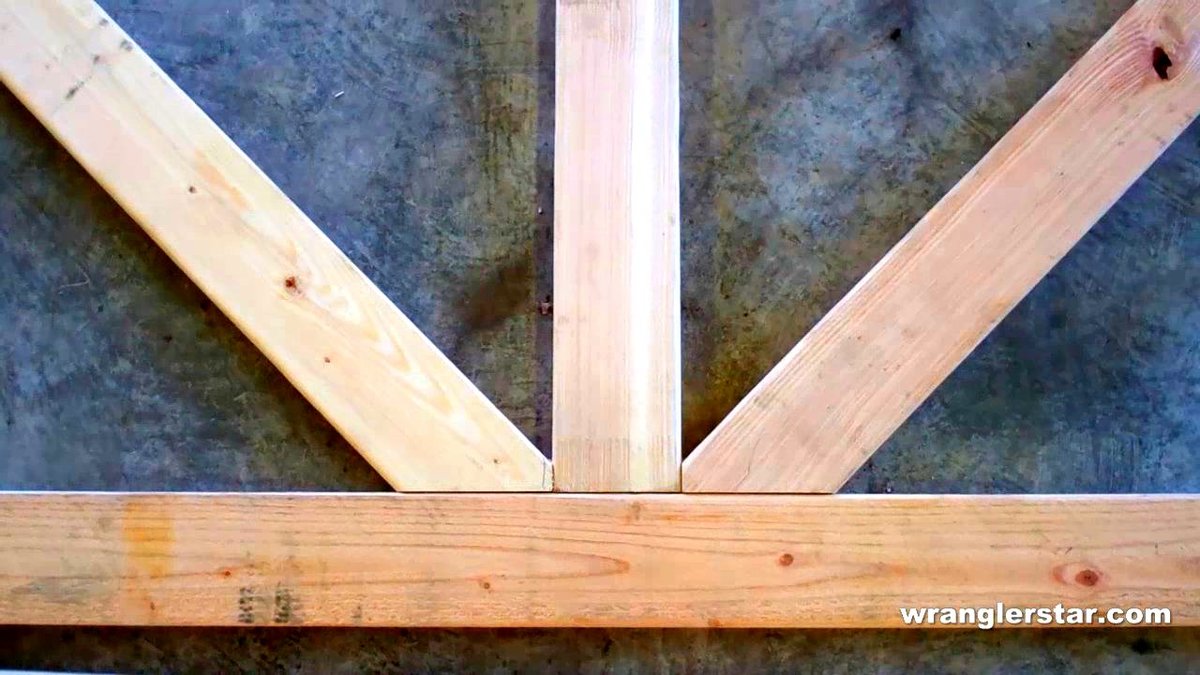
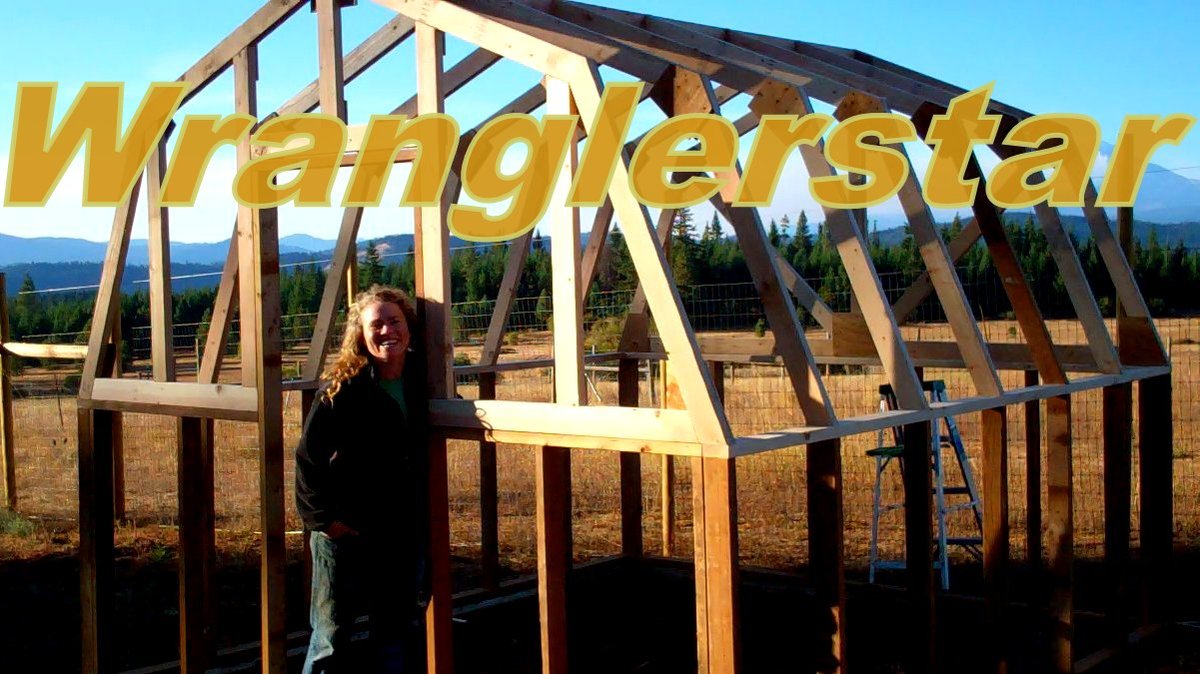
Wranglerstar Greenhouse

Thank you Ana for the excellent plans. We have been talking about this for months and are excited finally have a greenhouse. We live in the mountains and this will help extend our growing season. Please tell Ram thank you from the Wranglerlerstar family.

Built from Plan(s)
Estimated Cost
$750
Estimated Time Investment
Week Long Project (20 Hours or More)
Finish Used
stain
Recommended Skill Level
Advanced

Comments

jnow8687

Sat, 08/31/2019 - 12:34

Did you extend the base height? I want a greenhouse to enclose trees that do not do well in the winter and I think I would like to raise the base height a foot or so.

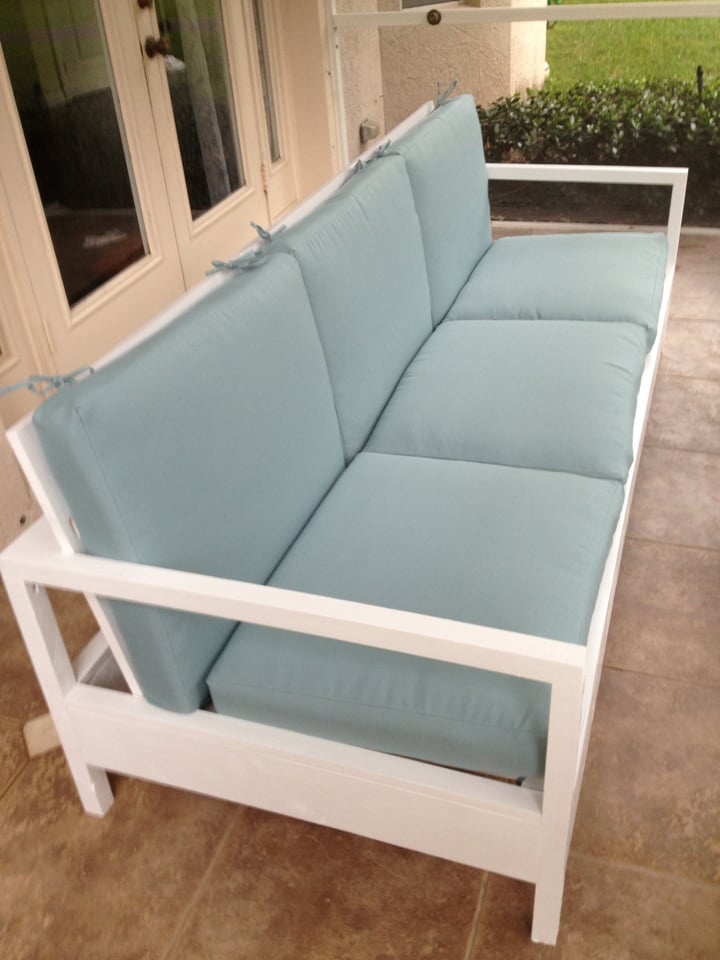
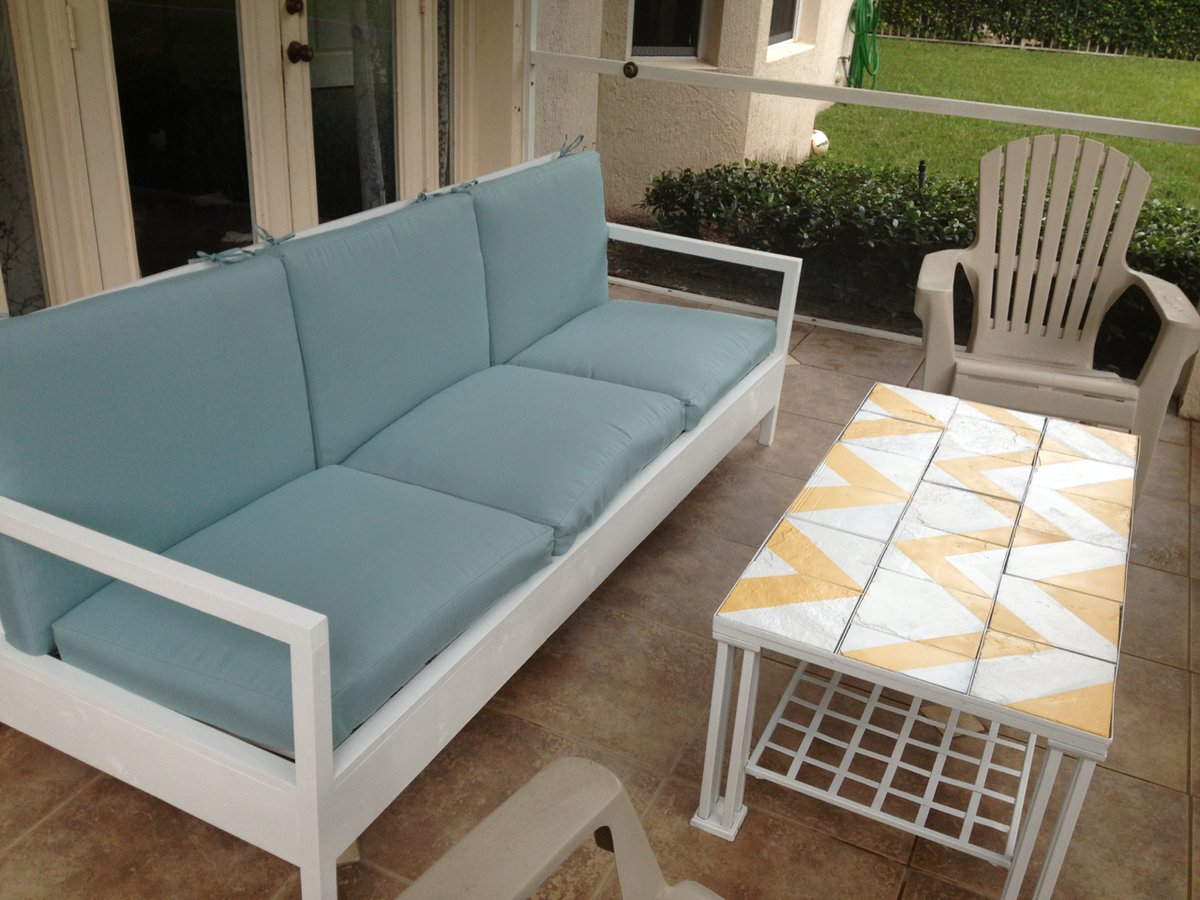
Simple White Patio Sofa

This was one of my favorite DIY projects. It's so much more affordable than buying patio furniture, and the building instructions make it sturdy as ever.

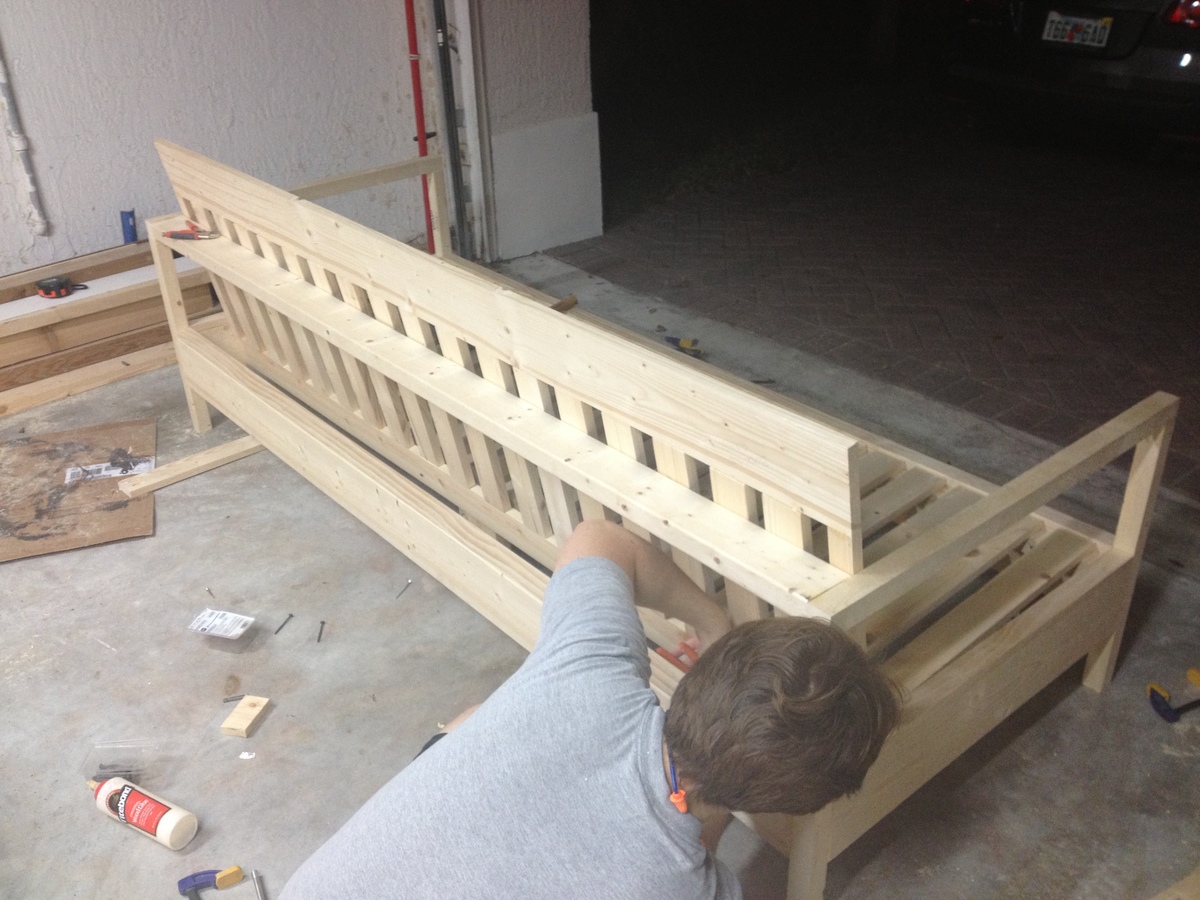
I built this with my fiance, who you'll see in the image of the in-progress bench. It was a snap for us, since we have a fair amount of experience building our own furniture. With the right tools, this project can take only two days, including wait time in between coats of paint and varnish.

We made our sofa to fit the cushions we found, and thus, the sofa is actually 84" wide, instead of 72" wide. By doing this, we also eliminated the need for a love seat, and instead are in the process of making two chairs to match this sofa. All in all, our patio will seat 6, which is what we were aiming for.

TOOLS
The most important part of making this an easy, fun project is having the right tools. I highly recommend you purchase or borrow:
- Compound miter saw
- Kreg jig
- Square head screws (stripping these is nearly impossible)

Estimated Cost
$300 (including cushions)
Estimated Time Investment
Weekend Project (10-20 Hours)
Finish Used
Exterior satin white (stay away from spray paint, since it's less efficient and more costly)
Exterior spar varnish in aerosol can for extra outdoor protection
Recommended Skill Level
Intermediate

Comments

Fence Picket Shed

Submitted by EDempsey on Tue, 08/04/2020 - 11:45

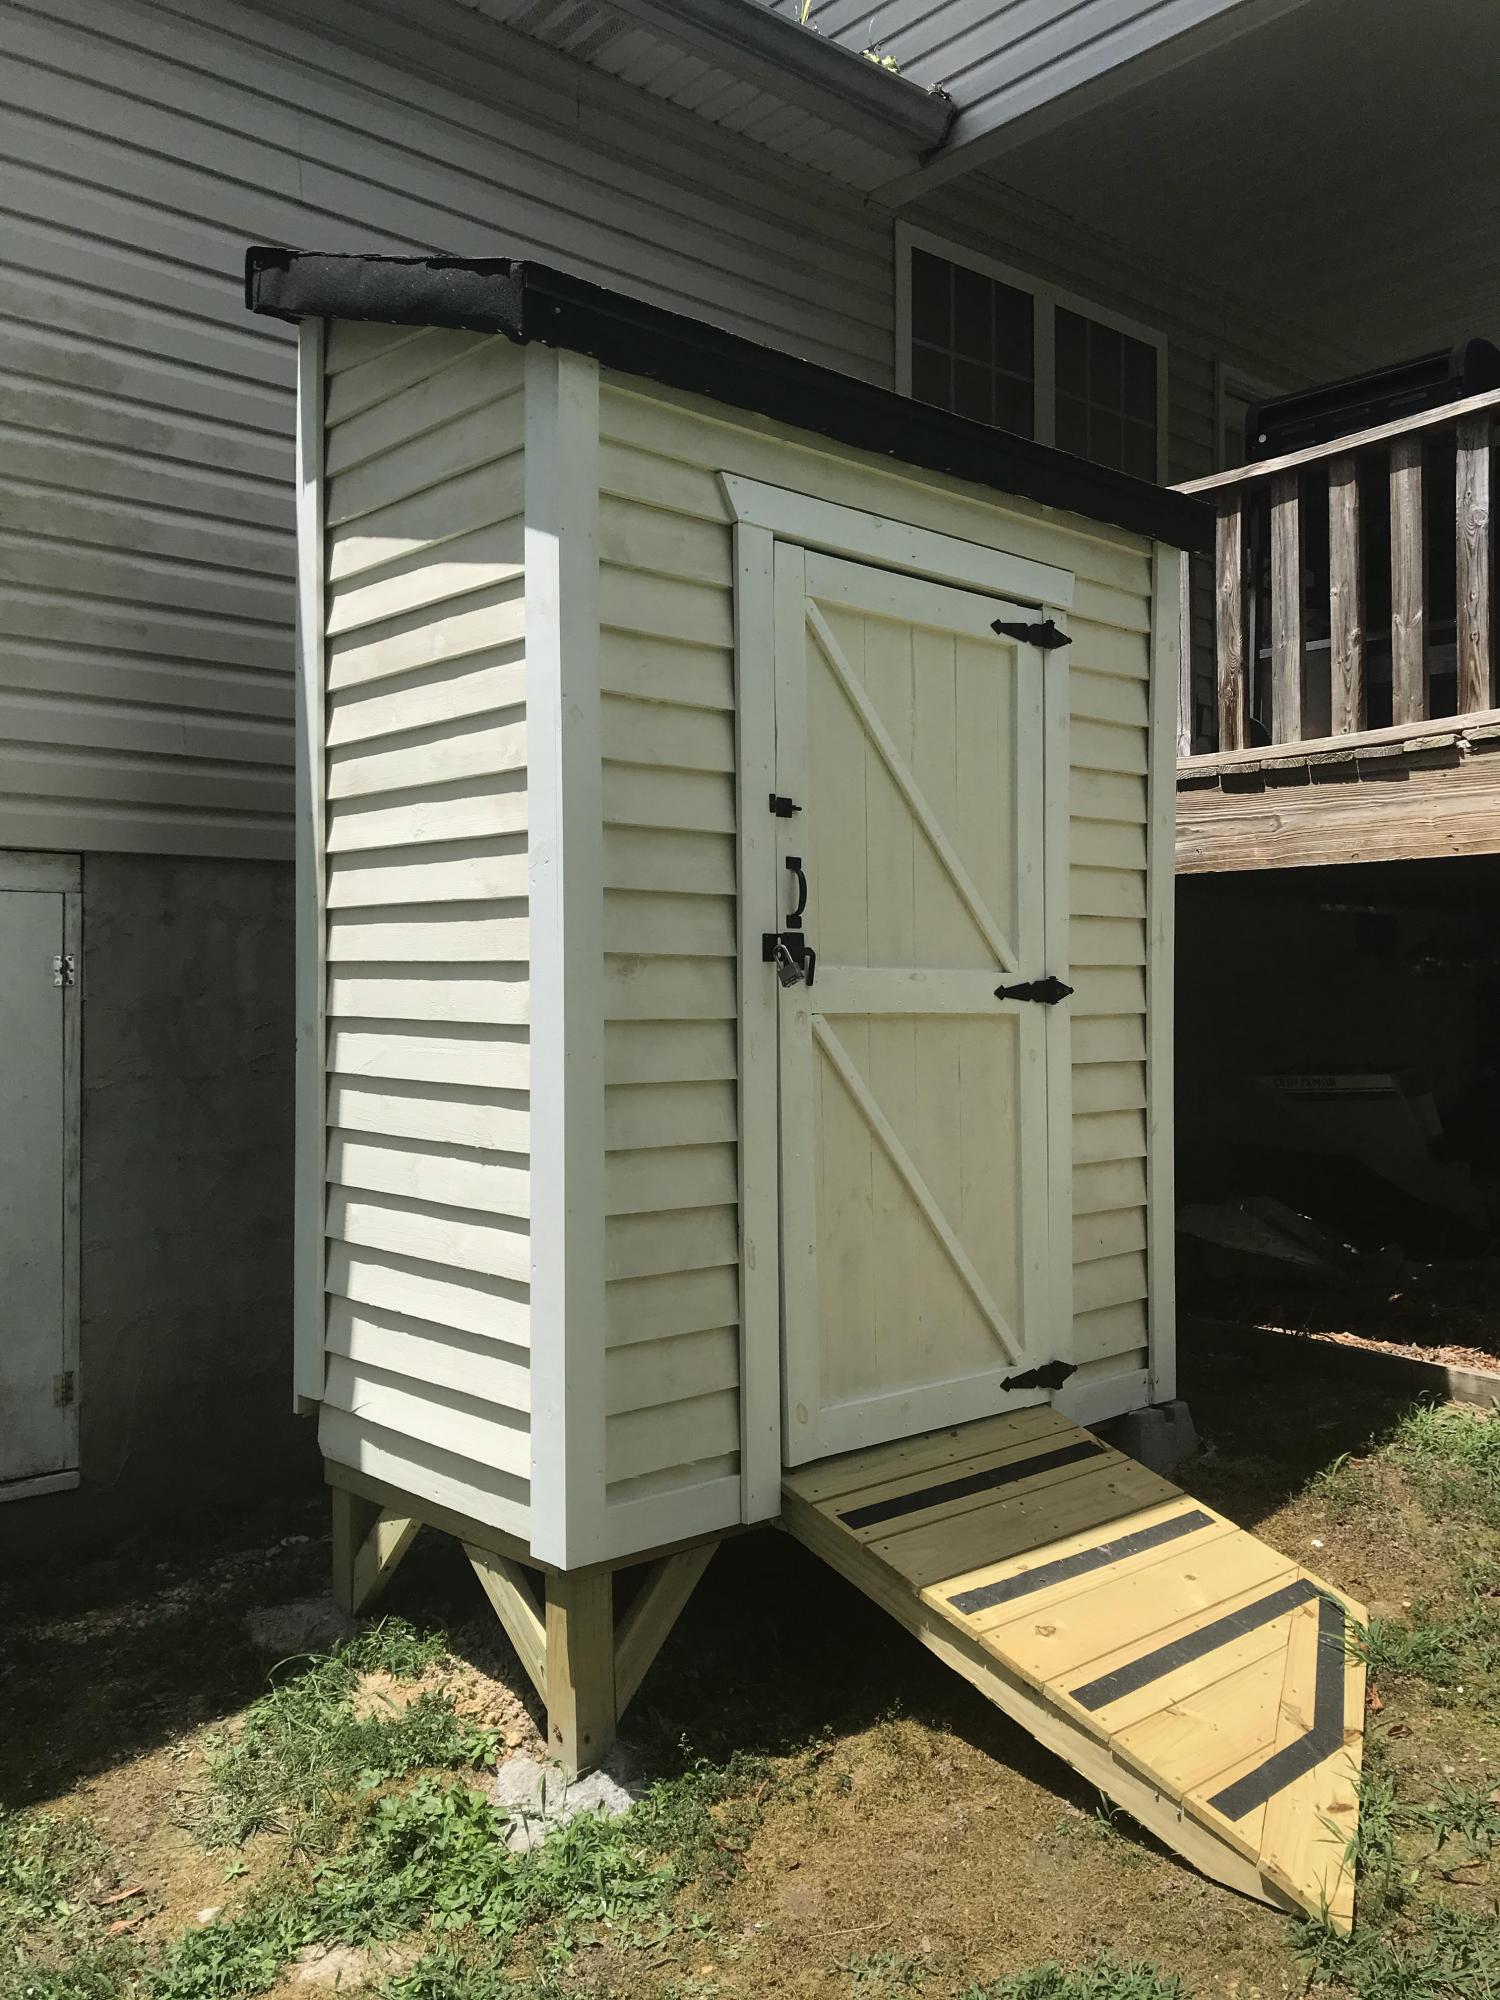
Using the Small Cedar Shed plans as inspiration, I created this 3'x6' shed using pressure treated fence pickets as the siding. I also made the shed one foot taller than the original plans to have a taller single door instead of the double door in the plans. Used 2x4 framing to strengthen the shed. Overall, I am pleased with the results. This was my first time constructing any type of building.

Estimated Cost
$475
Estimated Time Investment
Weekend Project (10-20 Hours)
Recommended Skill Level
Beginner

Modified firepit bench

Submitted by kkushner on Sat, 08/15/2020 - 23:11

I built the one bench using the original plan with the storage and table top unit but needed two additional seating benches to go around the firepit without the bulk of the backside of the bench.

I modified the original plan as follows:

Shopping List:
(2) 2X6X8
(3) 2X4X8
(2) 1X6X8

Cutting List:
(2) 2X4X17" front legs, 15 degree cuts, parallel long to short
(2) 2X4X23" back support, 15 degree cuts, parallel long to short
(2) 2X4X20.75" back legs, 15 and 60 degree cuts, not parallel long to long
(2) 2X4X24.75" under seat, 15 degree cuts, not parallel long to long
(2) 2X4X30" bottom support, 15 degree cuts, not parallel long to long
(1) 2X4X42" bottom cross brace between leg sets, 90 degree cuts
(2) 2X6 cut equally in half, 3 for the seat and 1 for the top plate
(2) 1X6 cut equally in half, 3 for the back rest and 1 to be tucked under the seat overhang

Estimated Cost
$40.00
Estimated Time Investment
An Hour or Two (0-2 Hours)
Finish Used
Brown outdoor wood preservative.
Recommended Skill Level
Beginner

Comments

jwood4

Thu, 09/08/2022 - 11:23

Great work! Have you had any tipping issues with the benches without the table back? If you kneel on the bench backwards and lean on the back do you think it would tip? Ha I clearly have kids around to be asking such strangely specific questions... TIA!

kkushner

Sat, 02/25/2023 - 08:56

I built these for my daughter/son-in-law and their young family. I have grandkids that use them and have never tipped them. However a strong wind gust 100km/hr did flip one over but not the other. I would suggest adding a horizontal ground level ‘foot’ extension on one or both back legs to alleviate any concerns of tipping.

Modern Adirondack Chair, Super Sized

Submitted by Anonymous (not verified) on Fri, 08/21/2020 - 10:39

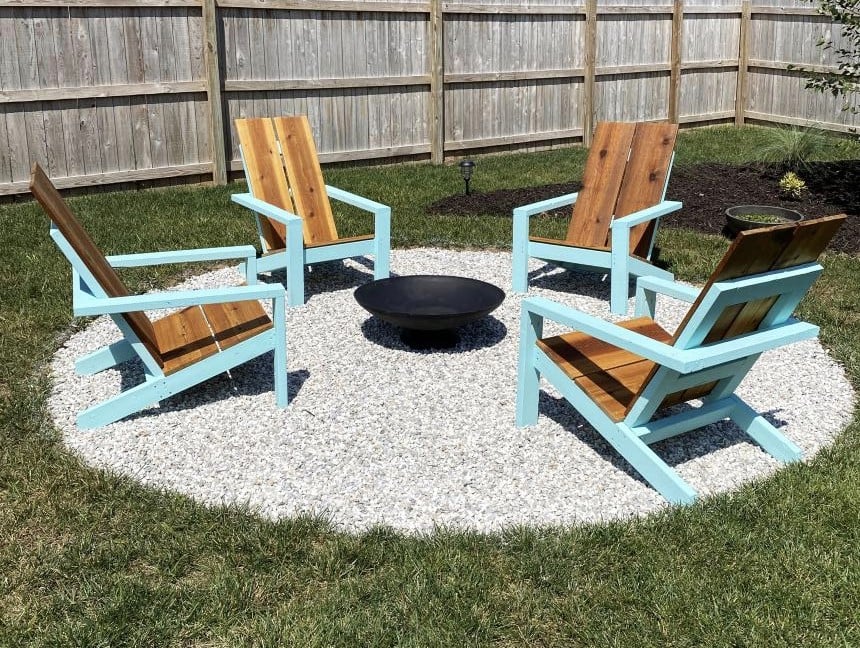
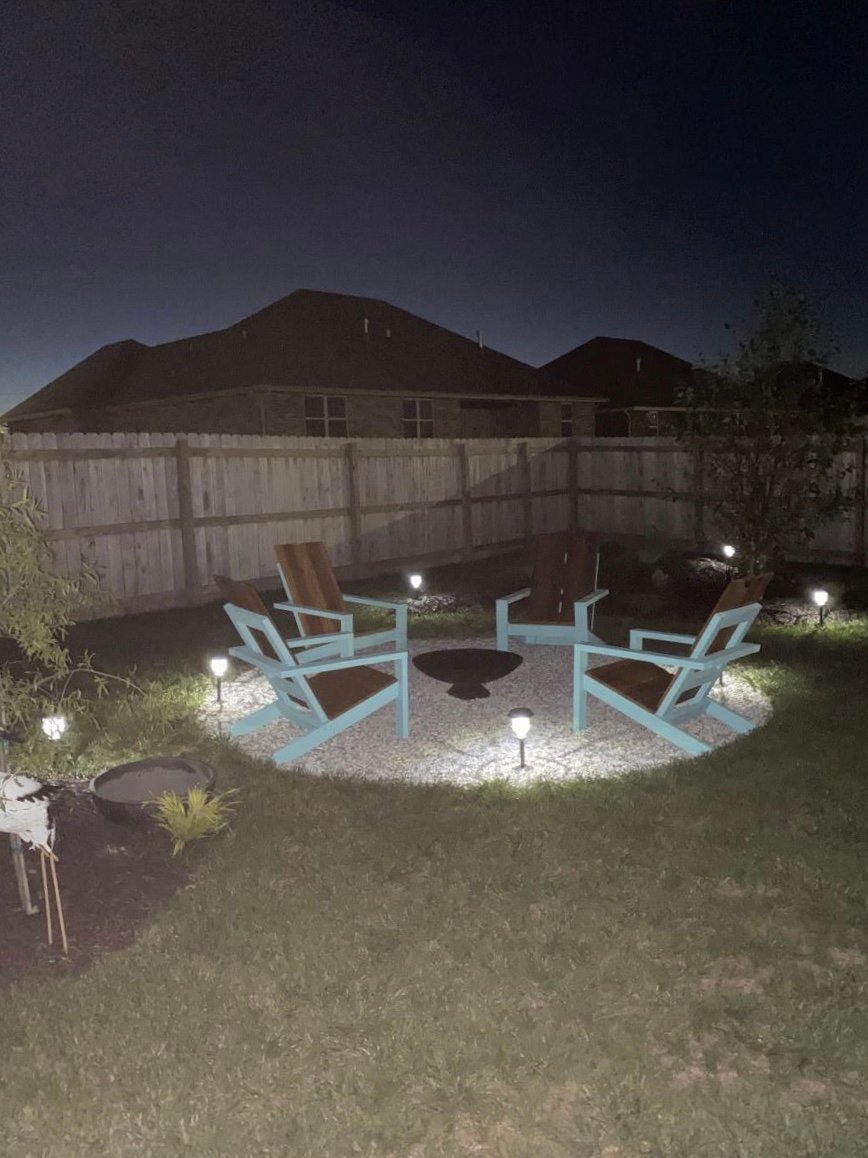
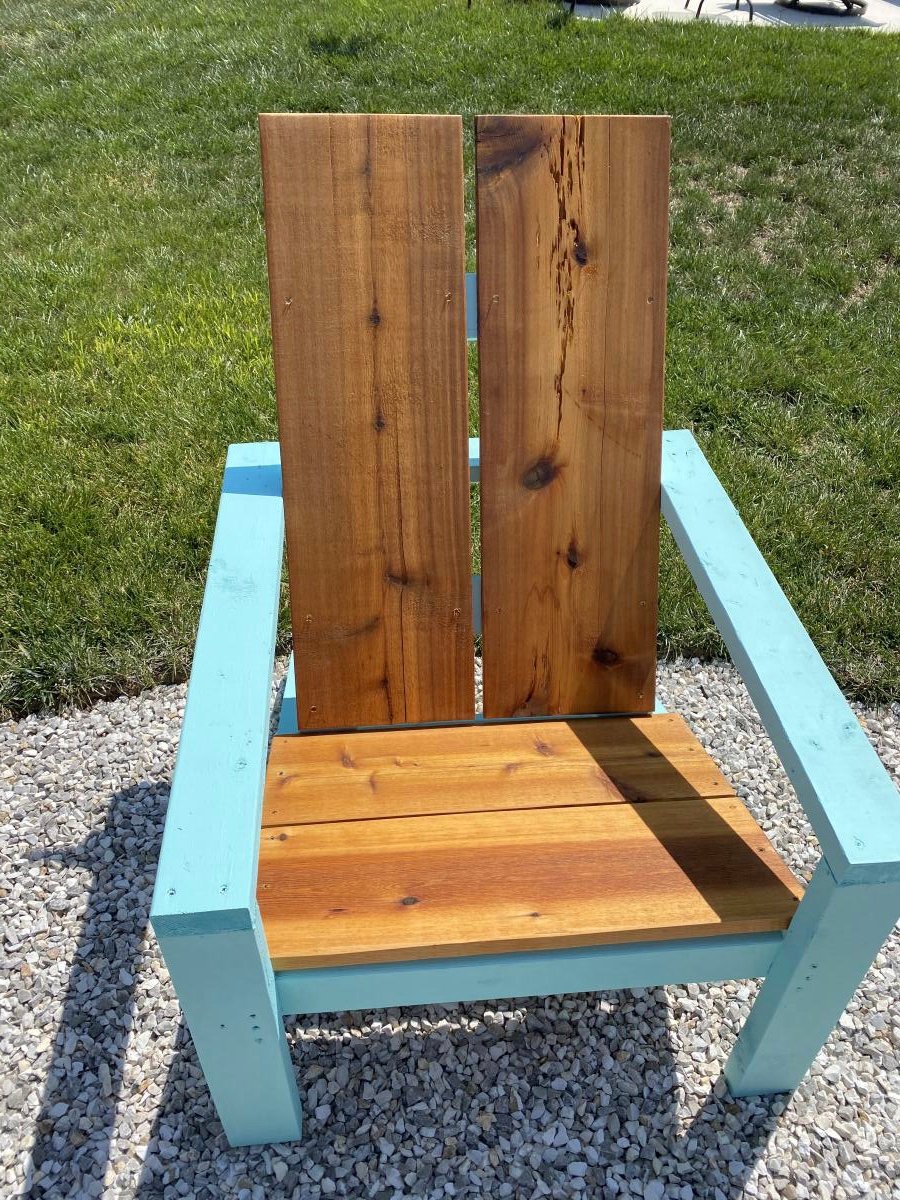
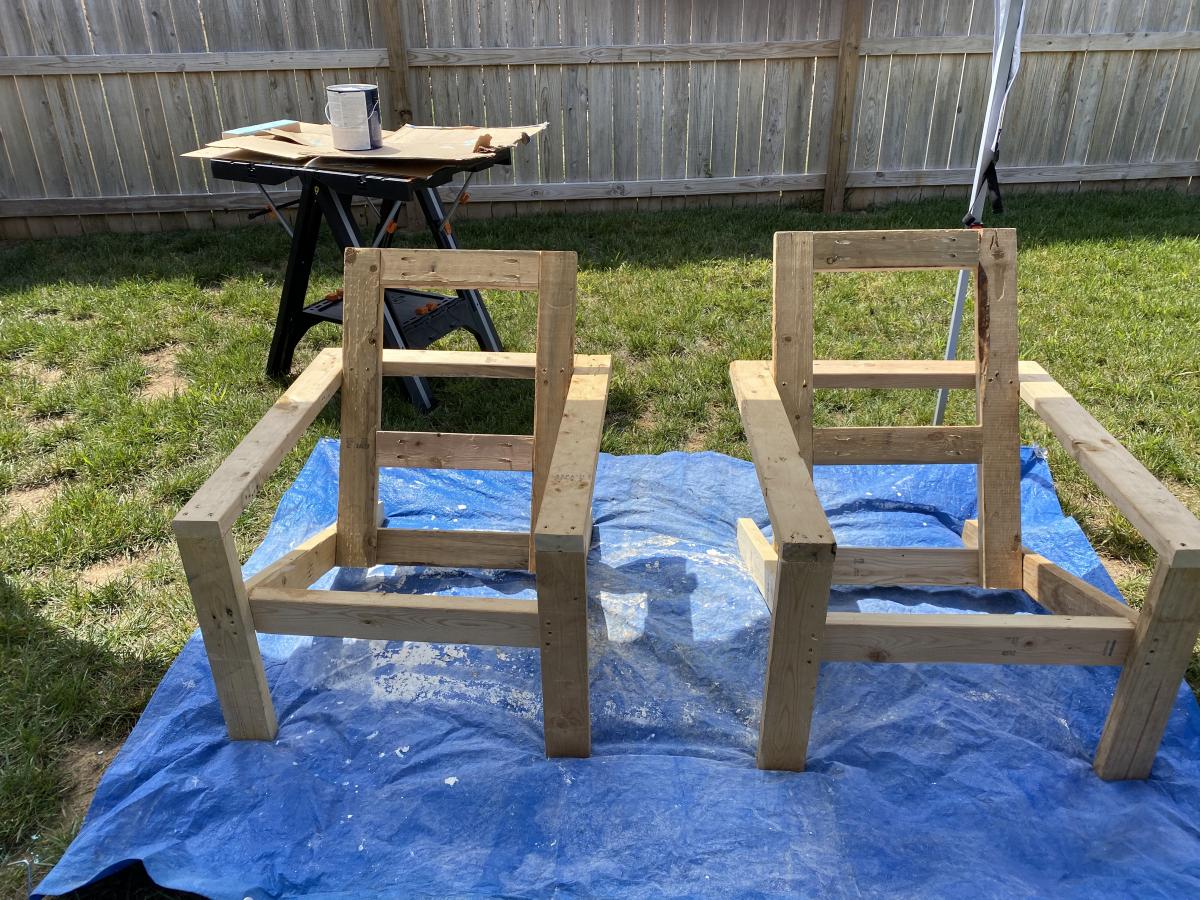
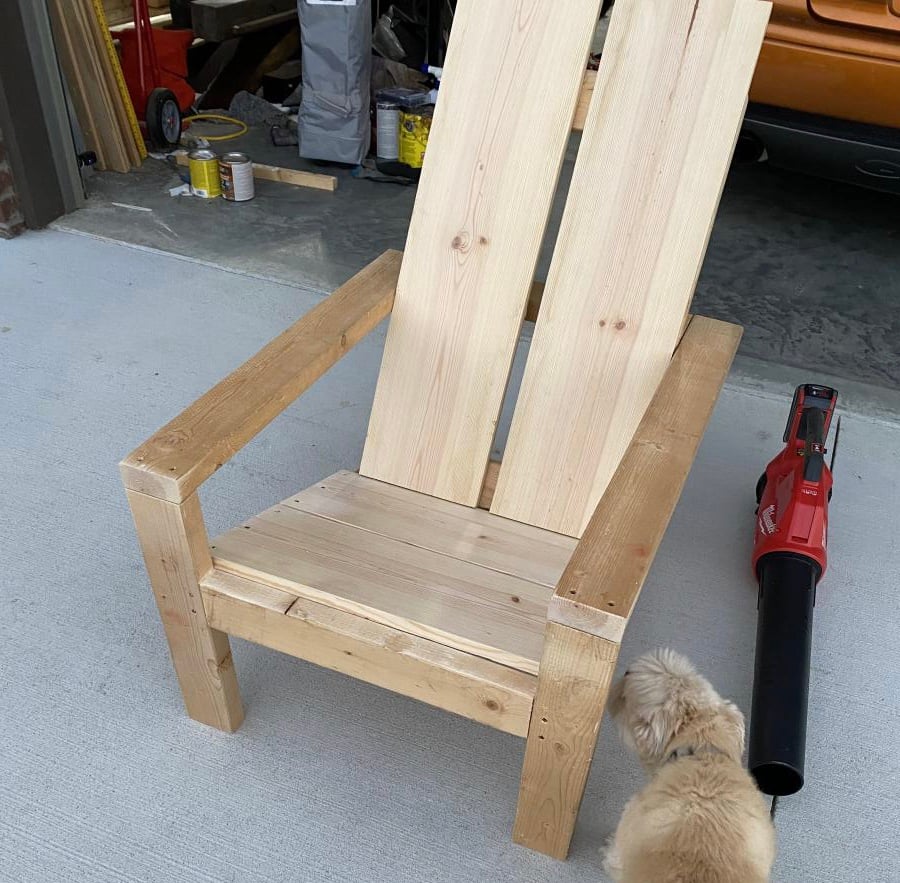
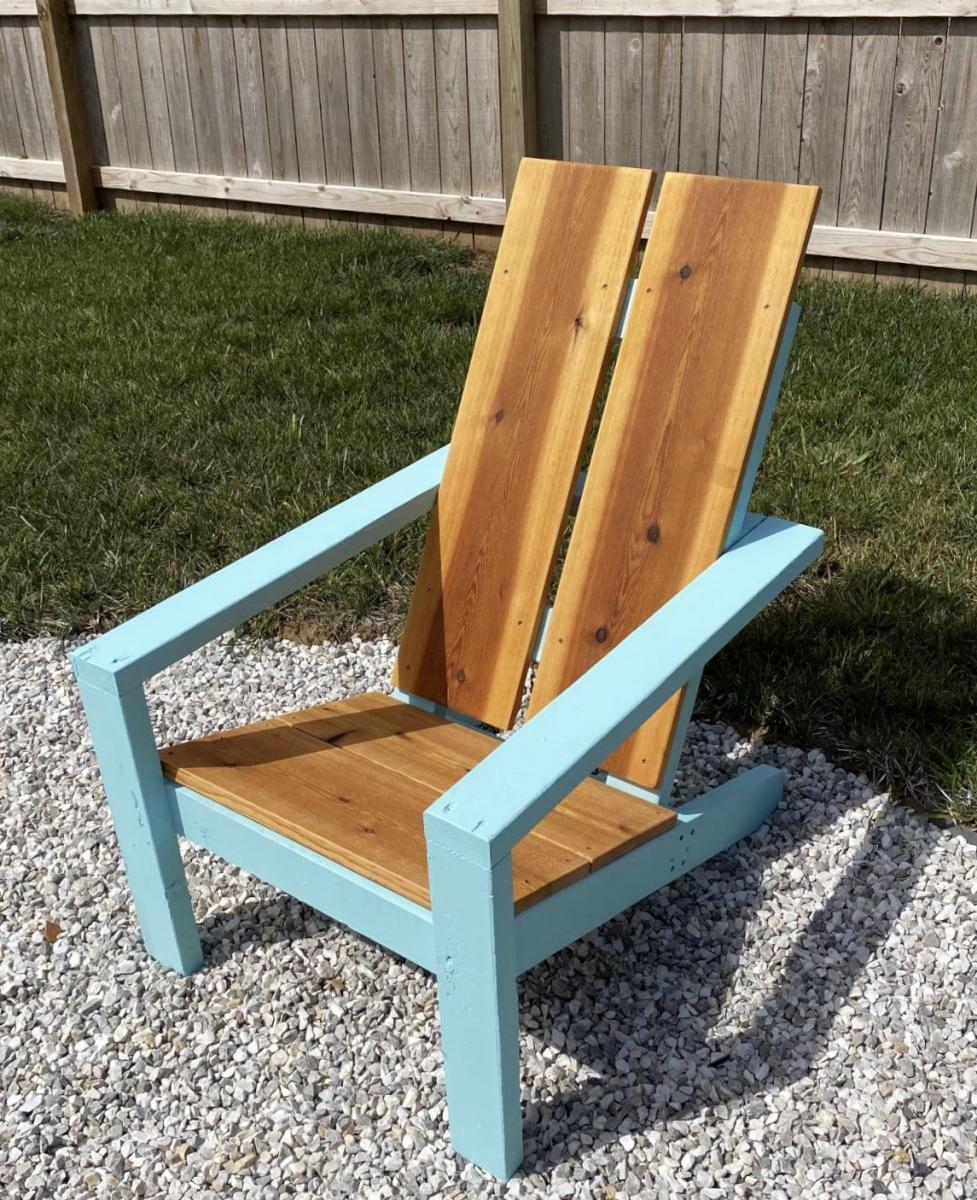
Am a big fan of Ana's work, and have used several of her plans in prior builds including the more traditional Adirondack chairs. Those stayed with my old house, and I wanted something different for my new house. Really liked her Modern Adirondack design with the floating arm rest. However, plans are like recipes to me--a guideline. I wanted the back boards to run up and down, and I am a bit more robust than the lovely and petite Ms. White, so they would need to be wider after I built the first one at 19 1/2" wide per plan. The next three I made 22" wide and that worked well without throwing off the geometry and angles of the other parts. Since I ran the backboards up and down, I needed some cross beams for stability and to give an attachment point for the middle of the boards. Cut some 2x4s at 15" wide, drilled pocket holes in both ends, and attached in between the back supports with the pockets facing up to be hidden by the back boards. All of the 2x4s were leftover cut-offs from the houses being built in my neighborhood. Since the frames were free, I splurged and went with cedar boards for the backs and bottoms. With the wider frames, I had to use 1x12s ripped down to 10 3/4" to get the right look (about a board's width in between). Needed some color, so I painted the frames Teal Seaglass from Menards. Cedar was stained with a natural deck stain from Sherwin Williams. I experimented with salt paint (mixing unsanded grout with the paint) to give a heavily textured and weathered finish but this was unecessary--the wood was distressed enough and I am a terrible painter. It also toned down the color so I skipped that step and just went with 2 coats of plain paint. It looks like outdoor furniture should up close. As always, am pleased with Ana's plans. Thank you for doing all the hard work!

Estimated Cost
about $200 for all 4 chairs due to cedar and paint
Estimated Time Investment
Weekend Project (10-20 Hours)
Finish Used
Paint - Pittsburgh matte exterior with Dutch Boy coloring Teal Seaglass
Stain - Sherwin Williams Superdeck stain, Natural finish
Recommended Skill Level
Starter Project

Comments

Seasonal And Holiday

Catio heaven

Submitted by bhoppy on Fri, 09/04/2020 - 15:43

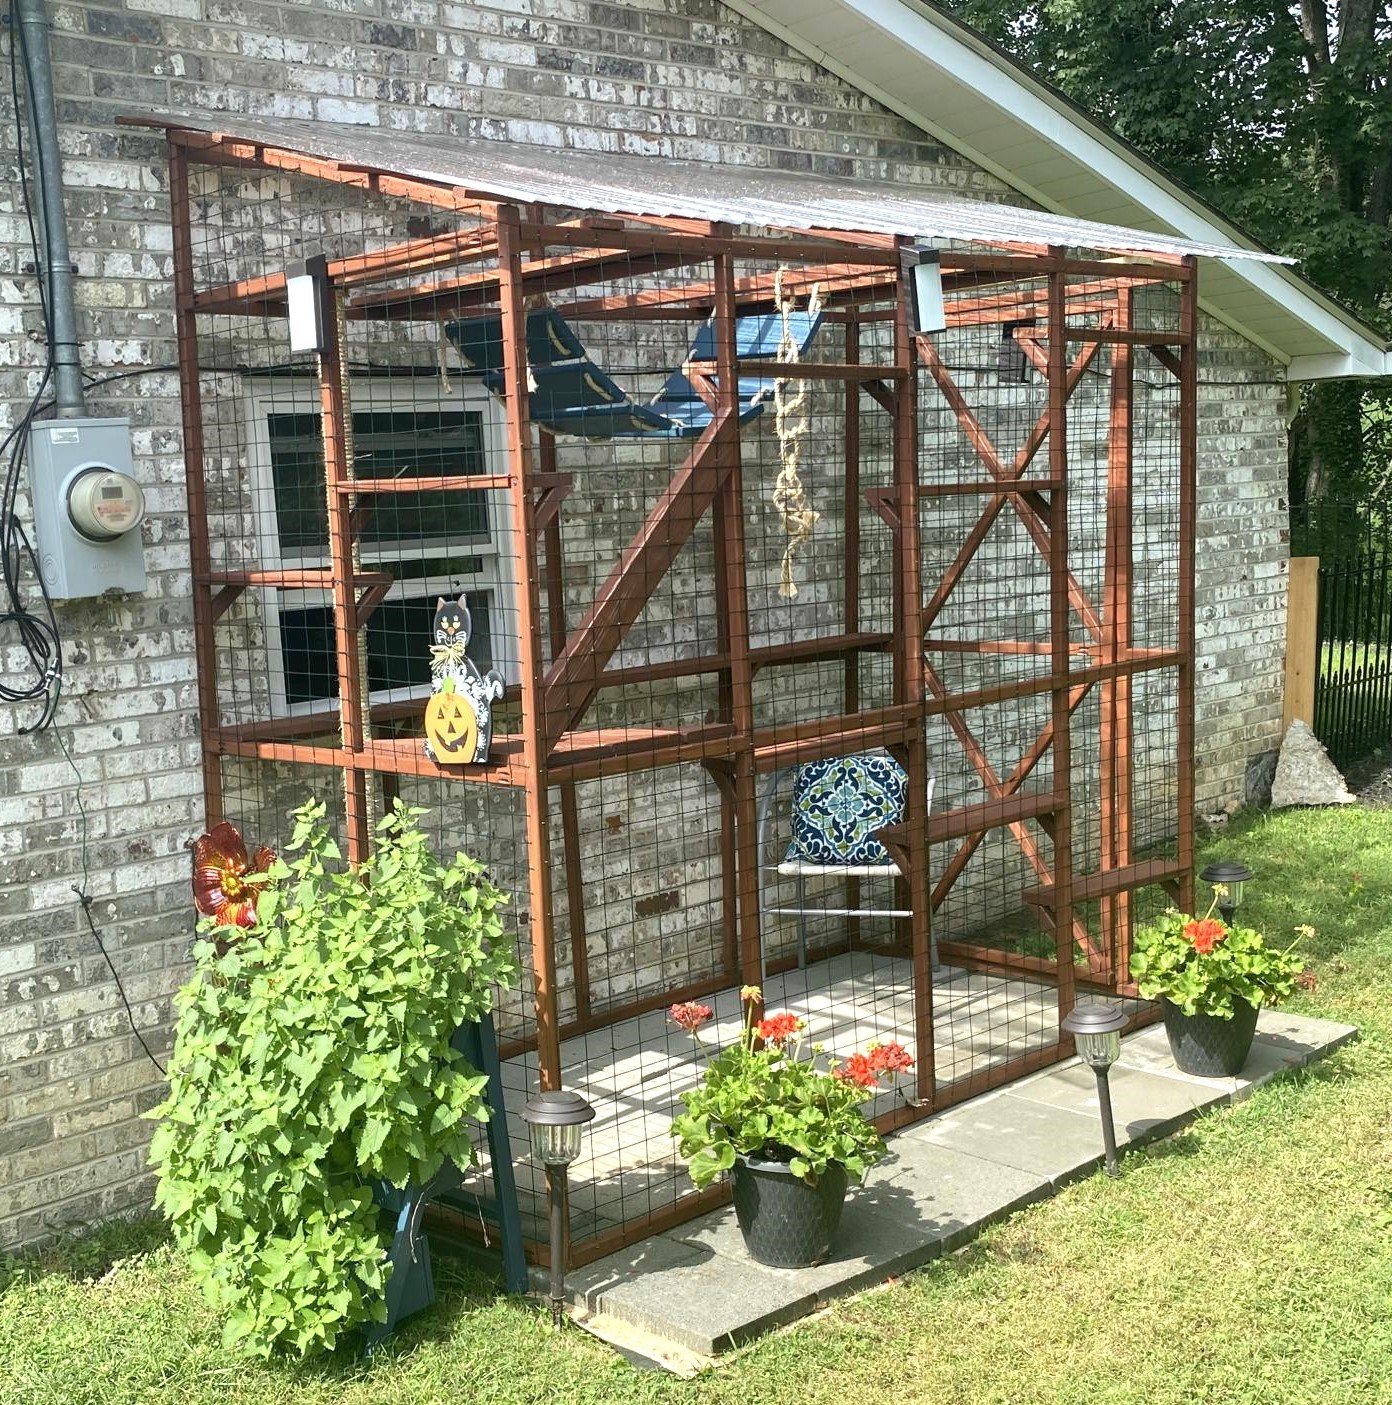
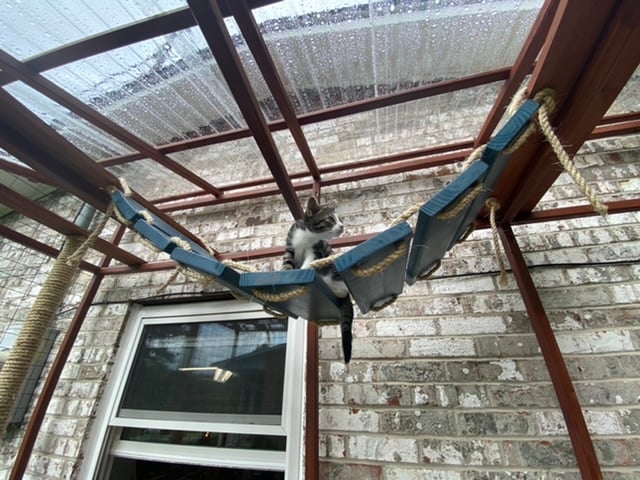
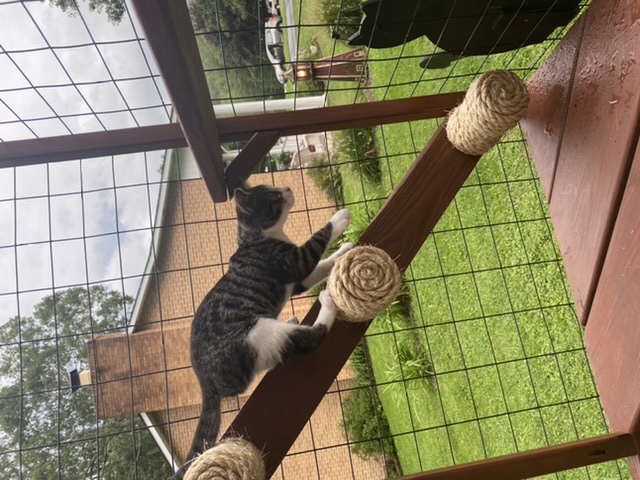
Ana doesn’t have a plan for a catio but she does for a playhouse and a cedar shed made from 2x2’s. I sort of combined my knowledge from making her plans over the last 10 years and came up with this for my cats. It was fun to make!! My baby kitten is loving it. I used garden fencing and stapled it to the outside and pocket holes for the walls. I made each wall individually like the playhouse then connected them once in place.


Estimated Cost
$250
Estimated Time Investment
Week Long Project (20 Hours or More)
Finish Used
Cabot semi transparent outdoor deck and fence stain. ($9 oops section)
Recommended Skill Level
Intermediate

Comments

Wifey

Wed, 06/09/2021 - 12:36

Thank you for sharing! My daughter wants a cat for her birthday but it can't be inside due to our son's allergies. Roaming outside isn't really an option because we have coyotes. We are going to use one of these in combination with an underground electric fence.

Seasonal And Holiday

Modern Outdoor Collection

Submitted by Anonymous (not verified) on Tue, 10/27/2020 - 16:06

Great plans - thanks so much! Started with two chairs, and kept going...

MODS: Once built, we felt there wasn't enough back support, so added a 2x4 then 4x4 on top. Also added a 2x2 in back of the seat bed, so our 25" x 25" seat cushions didn't float around.

Recommend paint gun vs. painting by hand.

Estimated Time Investment
Weekend Project (10-20 Hours)
Finish Used
Two coats of Behr waterproof stain + sealer (BM swiss coffee)
Recommended Skill Level
Beginner

Comments

Seasonal And Holiday

Upholstered Toy Chest

We made these toy chests for baby shower gifts.  We followed the plan for the most part.  We skipped the notching on the front of the chest, and opted to upholster the top.  I added names to the front as well to personalize them a bit as well.  Overall, it went pretty smooth, once we got going.  The plans were clear and easy to follow.  This was our first build off of plans from Ana-White, and I think they turned out pretty nice! 

Built from Plan(s)
Estimated Time Investment
Day Project (6-9 Hours)
Recommended Skill Level
Beginner

Comments

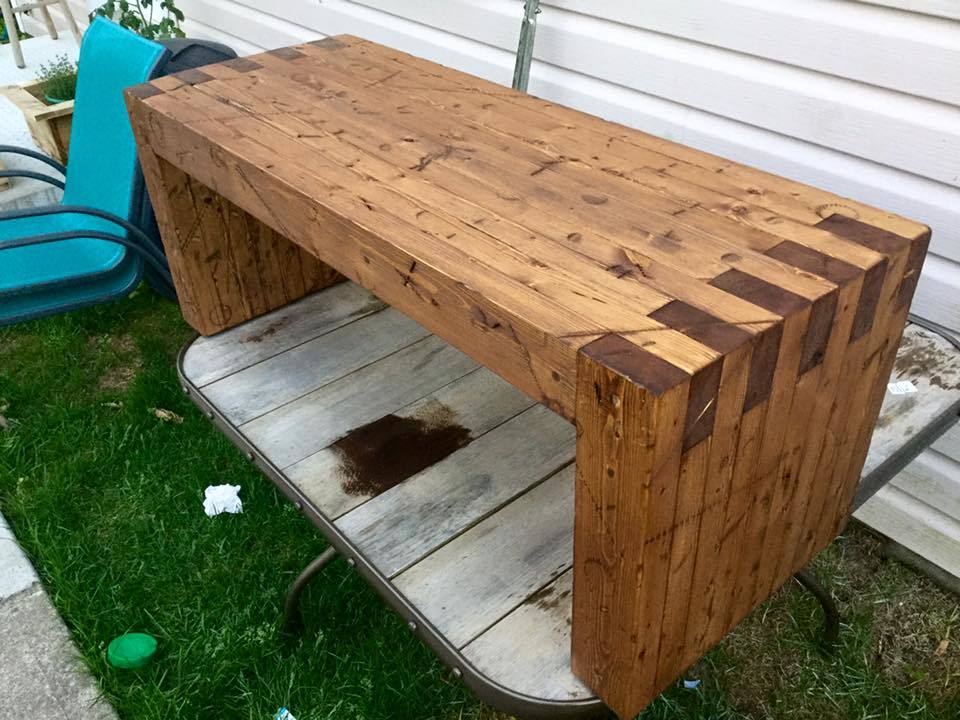
Modern Slat Top Outdoor Wood Bench (Customized)

Submitted by worrow on Mon, 02/20/2017 - 07:21

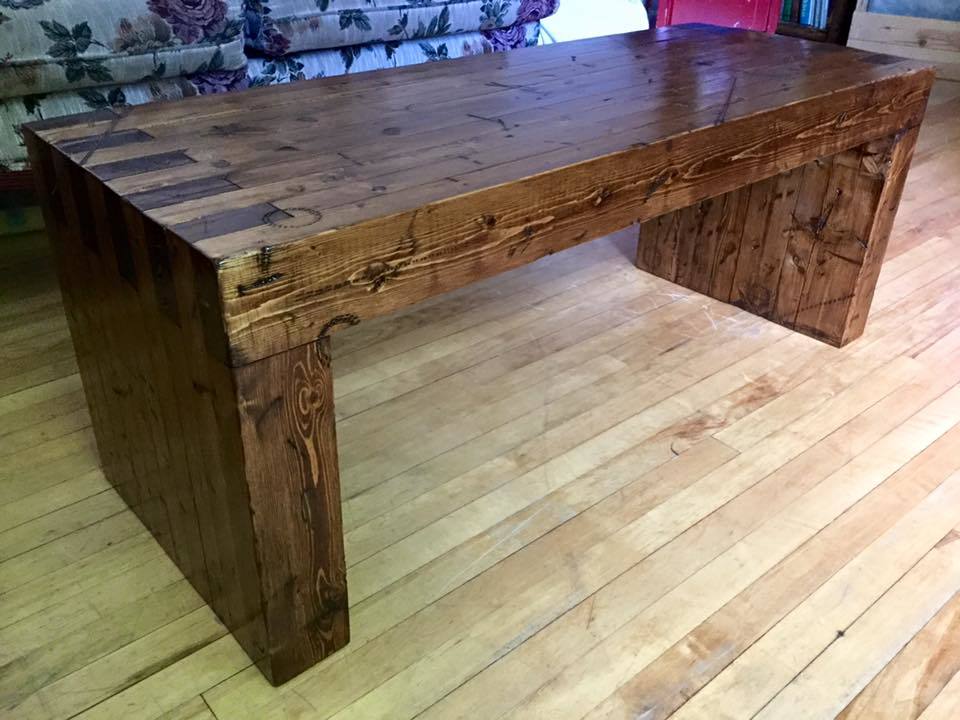
We had seen the modern slat bench before, and stumbled upon the plans on Ana-White, we did look further to see if we could find a style for us and had seen one made entirely out of 2x4's that also cam with plans, http://diycandy.com/2015/06/modern-williams-sonoma-inspired-diy-outdoor…

I thought I would share mine as it differs slightly, I opted to age my bench before staining as well as added adjustible feet so I can level it no matter where I put it. I am using mine as a coffee table, and if I have too many people over, I just use it as a bench to accomodate.


I hope that everyone enjoys the look of how my bench turned out. To reproduce the look of mine I described and linked the 2 products I used for the finish. But I also used the following power tools, Table Saw, Drill and Sawzall, belt sander and palm sander. I used the sawzall as I made a slight error and had some overhang that needed trimming. We used numerous items to get the outside beat up prior to the stain and sealer. The finished product looks amazing and I don't fear someone running away with it at 80lbs.

Estimated Cost
$35 (CAD)
Estimated Time Investment
Weekend Project (10-20 Hours)
Finish Used
Minwax Dark Walnut Stain (Home Depot) https://www.homedepot.ca/en/home/p.wood-finish---dark-walnut.1000406356.html?autoSuggest=pip

Varathane Triple Thick Matte (Home Depot) https://www.homedepot.ca/en/home/p.triple-thick-clear-matte-946ml.1001004379.html
Recommended Skill Level
Beginner

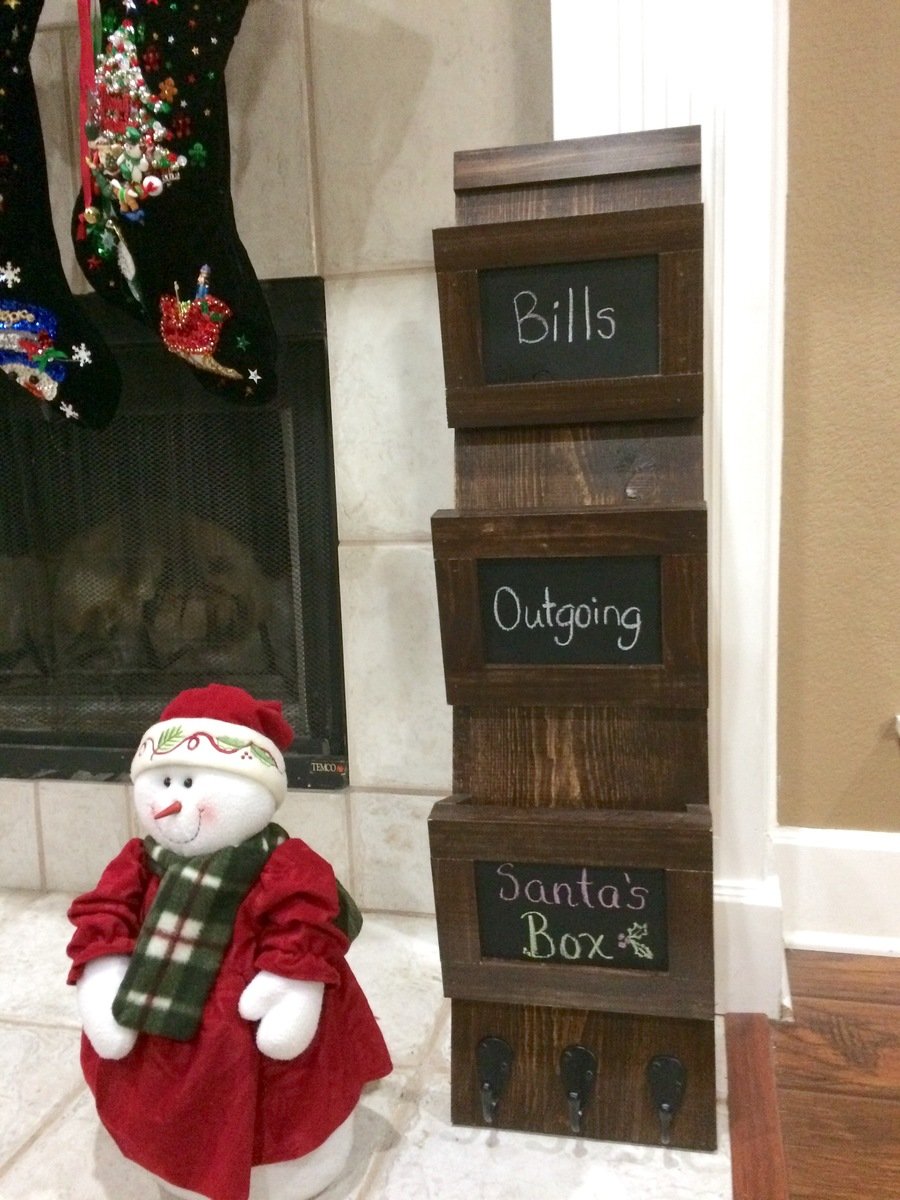
Wood Mail Sorter with Santa Box

Great quick project. Made two so that I could give one as a gift. Used chalkboard paint so I could change box names. Made bottom box a Santa box for the Christmas season. 


Built from Plan(s)
Estimated Time Investment
Afternoon Project (3-6 Hours)
Finish Used
Used a dark walnut miniwax stain and a polyurethane varnish
Recommended Skill Level
Beginner

Slatted double vanity - FINALLY finished!

I was a bit over my head with this one but I am so far very happy with the project. It is not quite finished. The marble was installed last week and we are awating the plumber to come back to hook up the sinks. I will install the second slatted shelf once the plumbing is in. Will post finished pictures soon. The mirror is made from 6x6 posts from the lumber yard. We had a friend cut them to size using a band saw. We made the mirror frame based on a picture I found on Houzz.com. The mirror glass was something I picked up off of craigslist for next to nothing and removed from the original frame. It is HEAVY (~200lbs) and attached to the wall with metal brackets. We purchased the sinks/faucets on ebay. 


Estimated Cost
For the vanity alone: $200-250
Estimated Time Investment
Weekend Project (10-20 Hours)
Finish Used
I used Hilary's vinegar/steel wool solution to age the wood, then sanded and finished with the vermont natural coatings polywhey in satin.
Recommended Skill Level
Intermediate

Comments

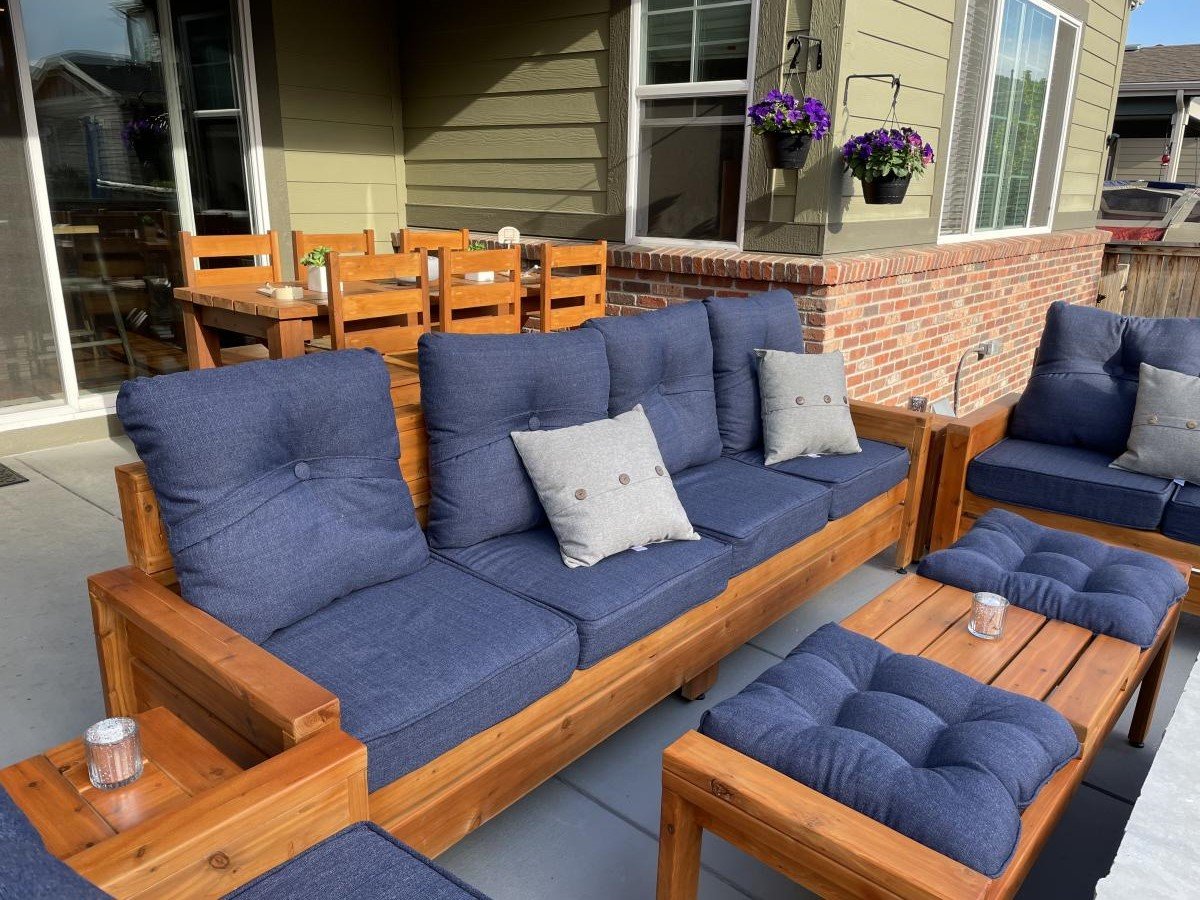
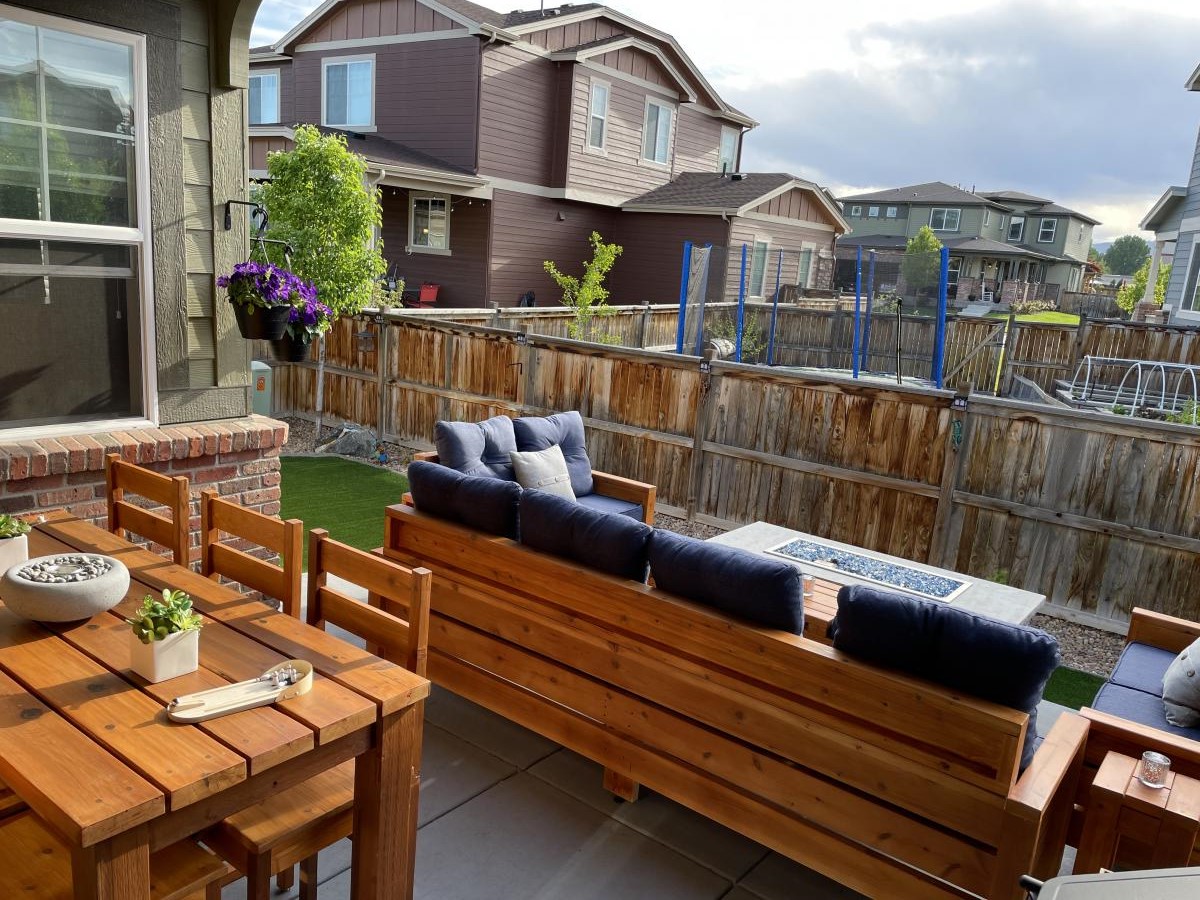
Outdoor Entertaining Space

Submitted by ikeymedesu on Sun, 05/30/2021 - 06:09

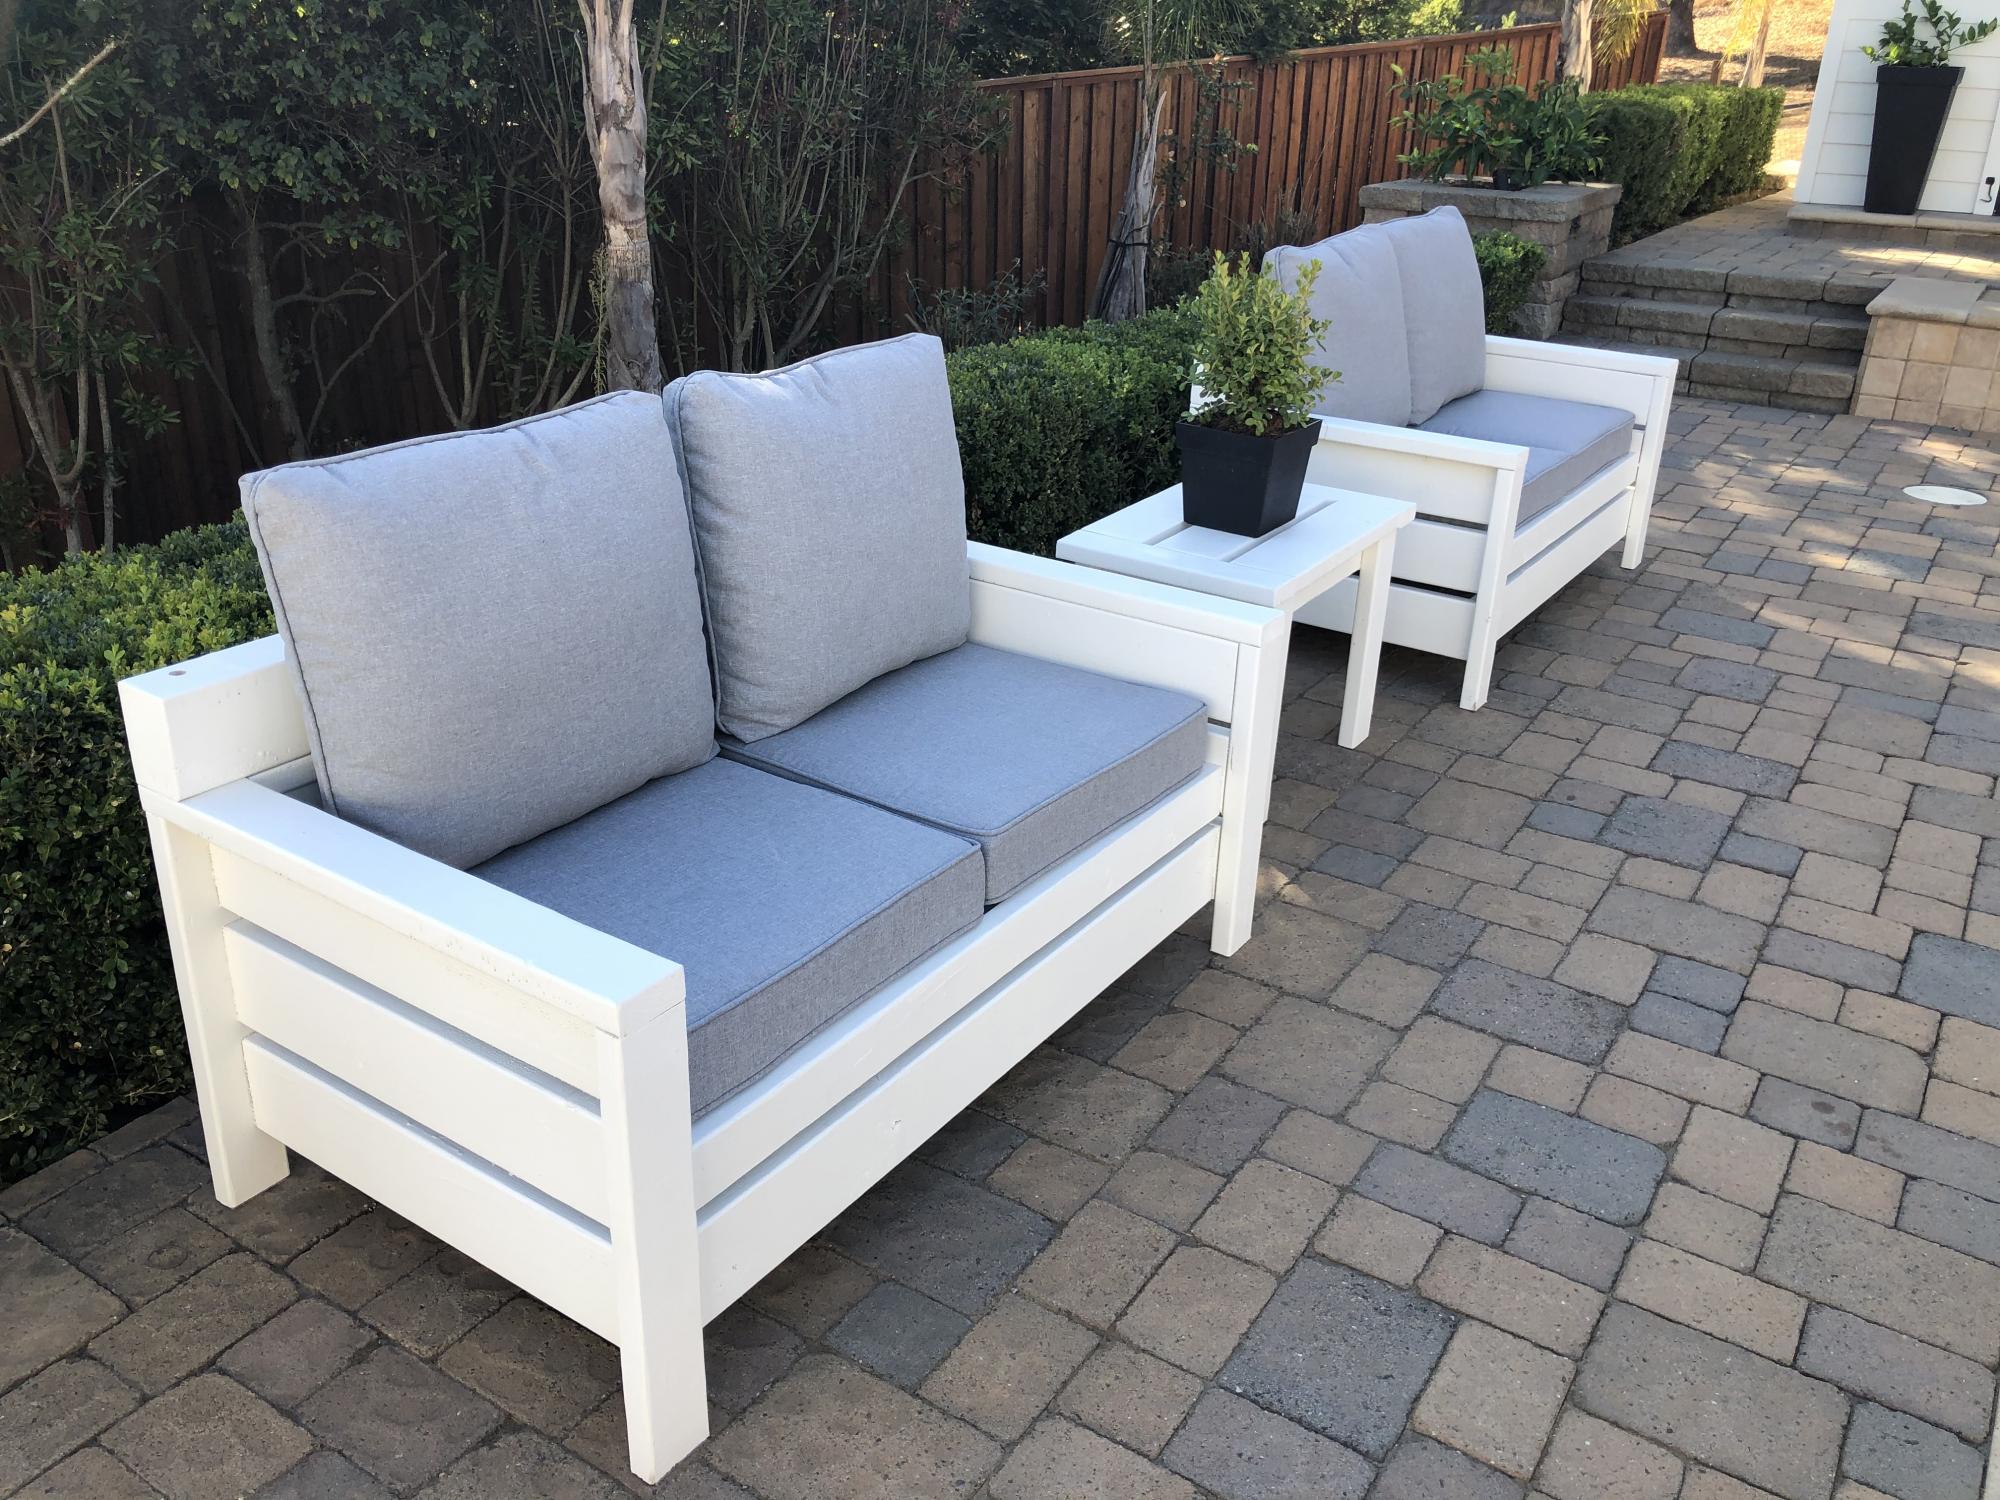
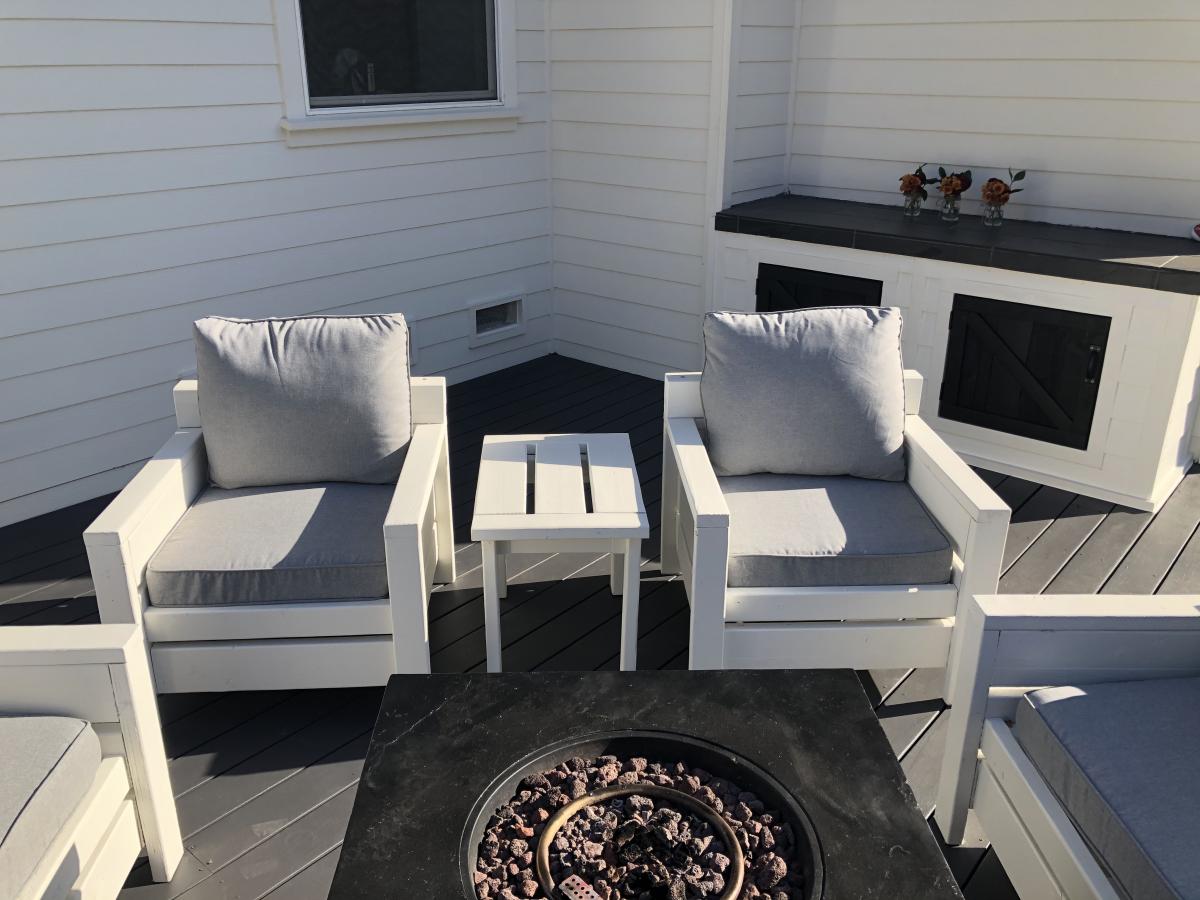
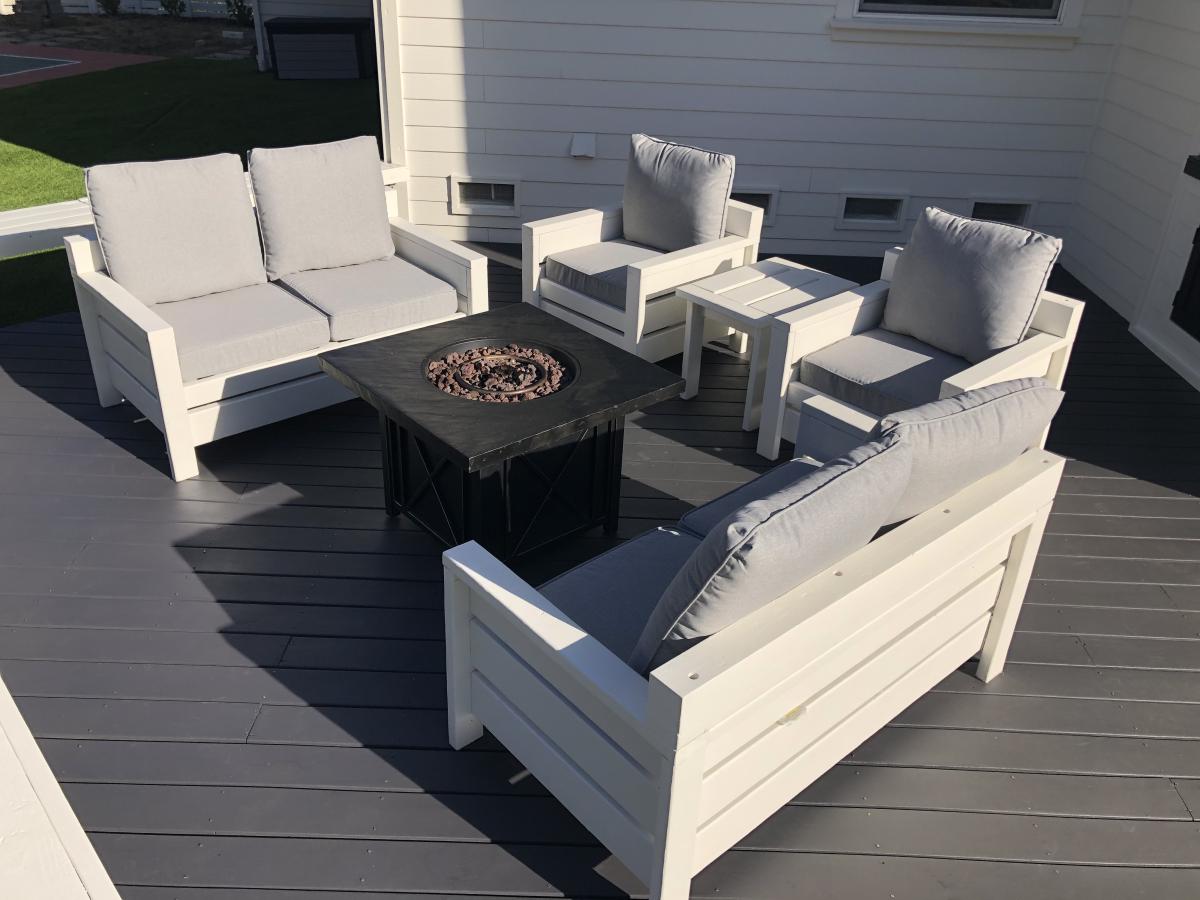
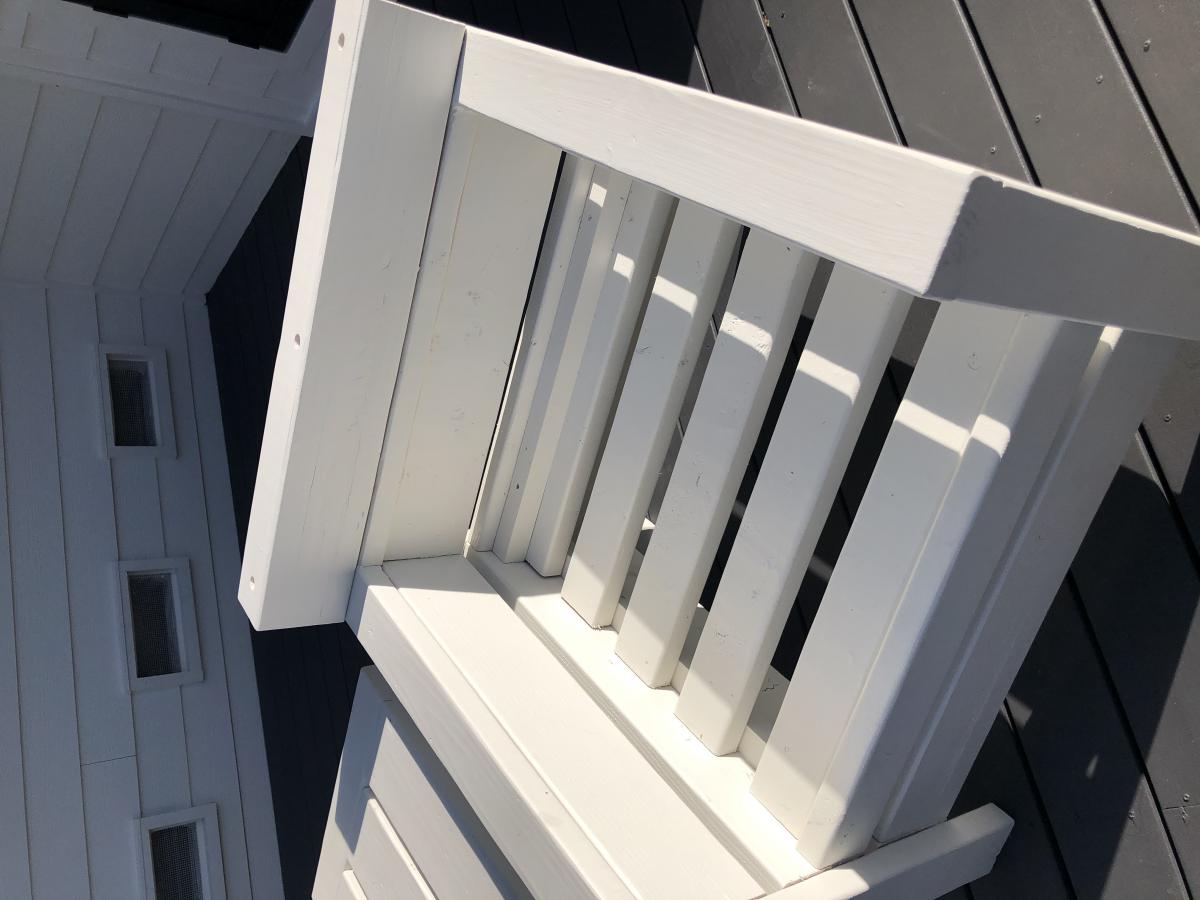
A 2-month long project to create an entertaining space in our small backyard. I started with a dining set for 6, then went on to seating around our firepit. I actually doubled the size of the Modern Outdoor Loveseat and built a 4-seat couch (added a center section for support. I also built 2 loveseats, 2 small side tables, and took some creative liberties to design a coffee table/foot rest combo. The major modification I made to the couch and loveseats was adding a back for some additional height. This really improved the comfort when leaning back. Had a great time completing this project! When lumber prices come down I'll continue the build. (2 pictures keep uploading and converting to an upside down image - no idea why, but sorry for the weird view)

Estimated Time Investment
Week Long Project (20 Hours or More)
Finish Used
Behr Premium Transparent Natural Cedartone Weatherproof
Recommended Skill Level
Intermediate

Comments

Ana White Admin

Sun, 05/30/2021 - 09:58

Love the coffee table foot rest, would love to see more of the outdoor table as well! It all looks amazing and came together perfectly! Thank you for sharing, check out our Facebook page, just shared!

Seasonal And Holiday

Square Picnic Table Project

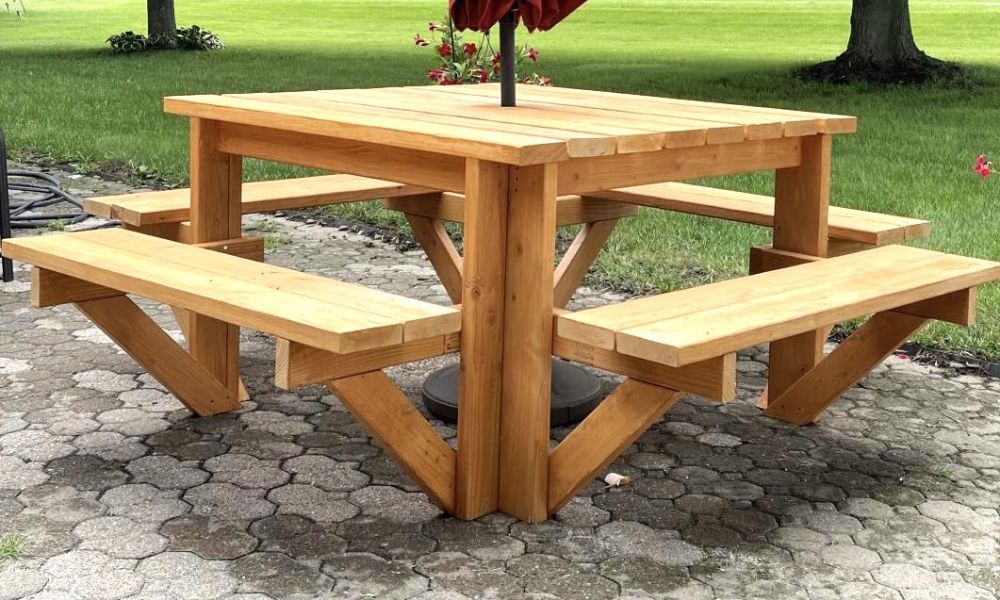
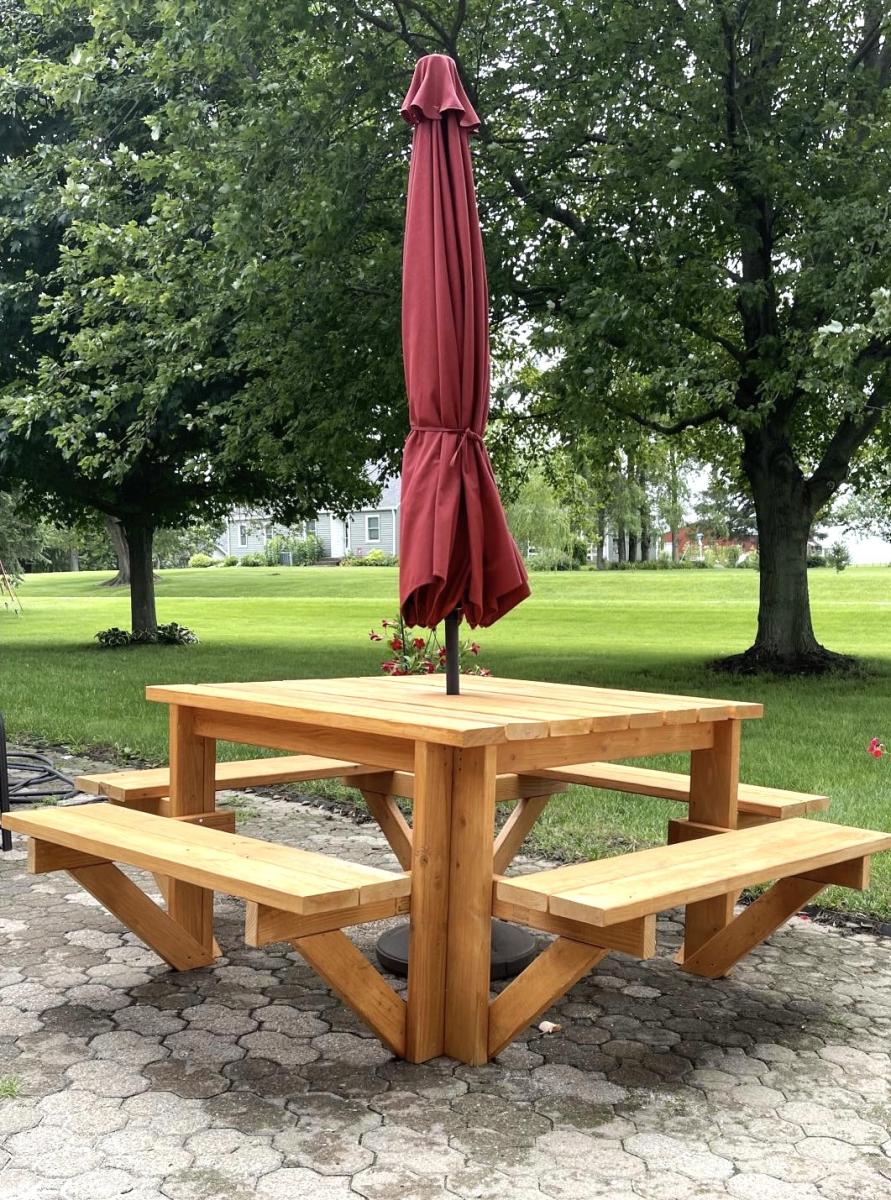
This was a great summer project. The table looks great and it was any easy build. Doesn’t get any better than this. I added a hole in the center of the table for my umbrella and used the longer screws for more frame stability.

Built from Plan(s)
Estimated Cost
$200.00
Estimated Time Investment
Day Project (6-9 Hours)
Finish Used
Used semi transparent cedar tone stain. Lightly sanded edges and surfaces. Applied stain with a brush before assembly.

Comments

Seasonal And Holiday

Easy DIY Workbench

Submitted by Anonymous (not verified) on Mon, 10/04/2021 - 14:32

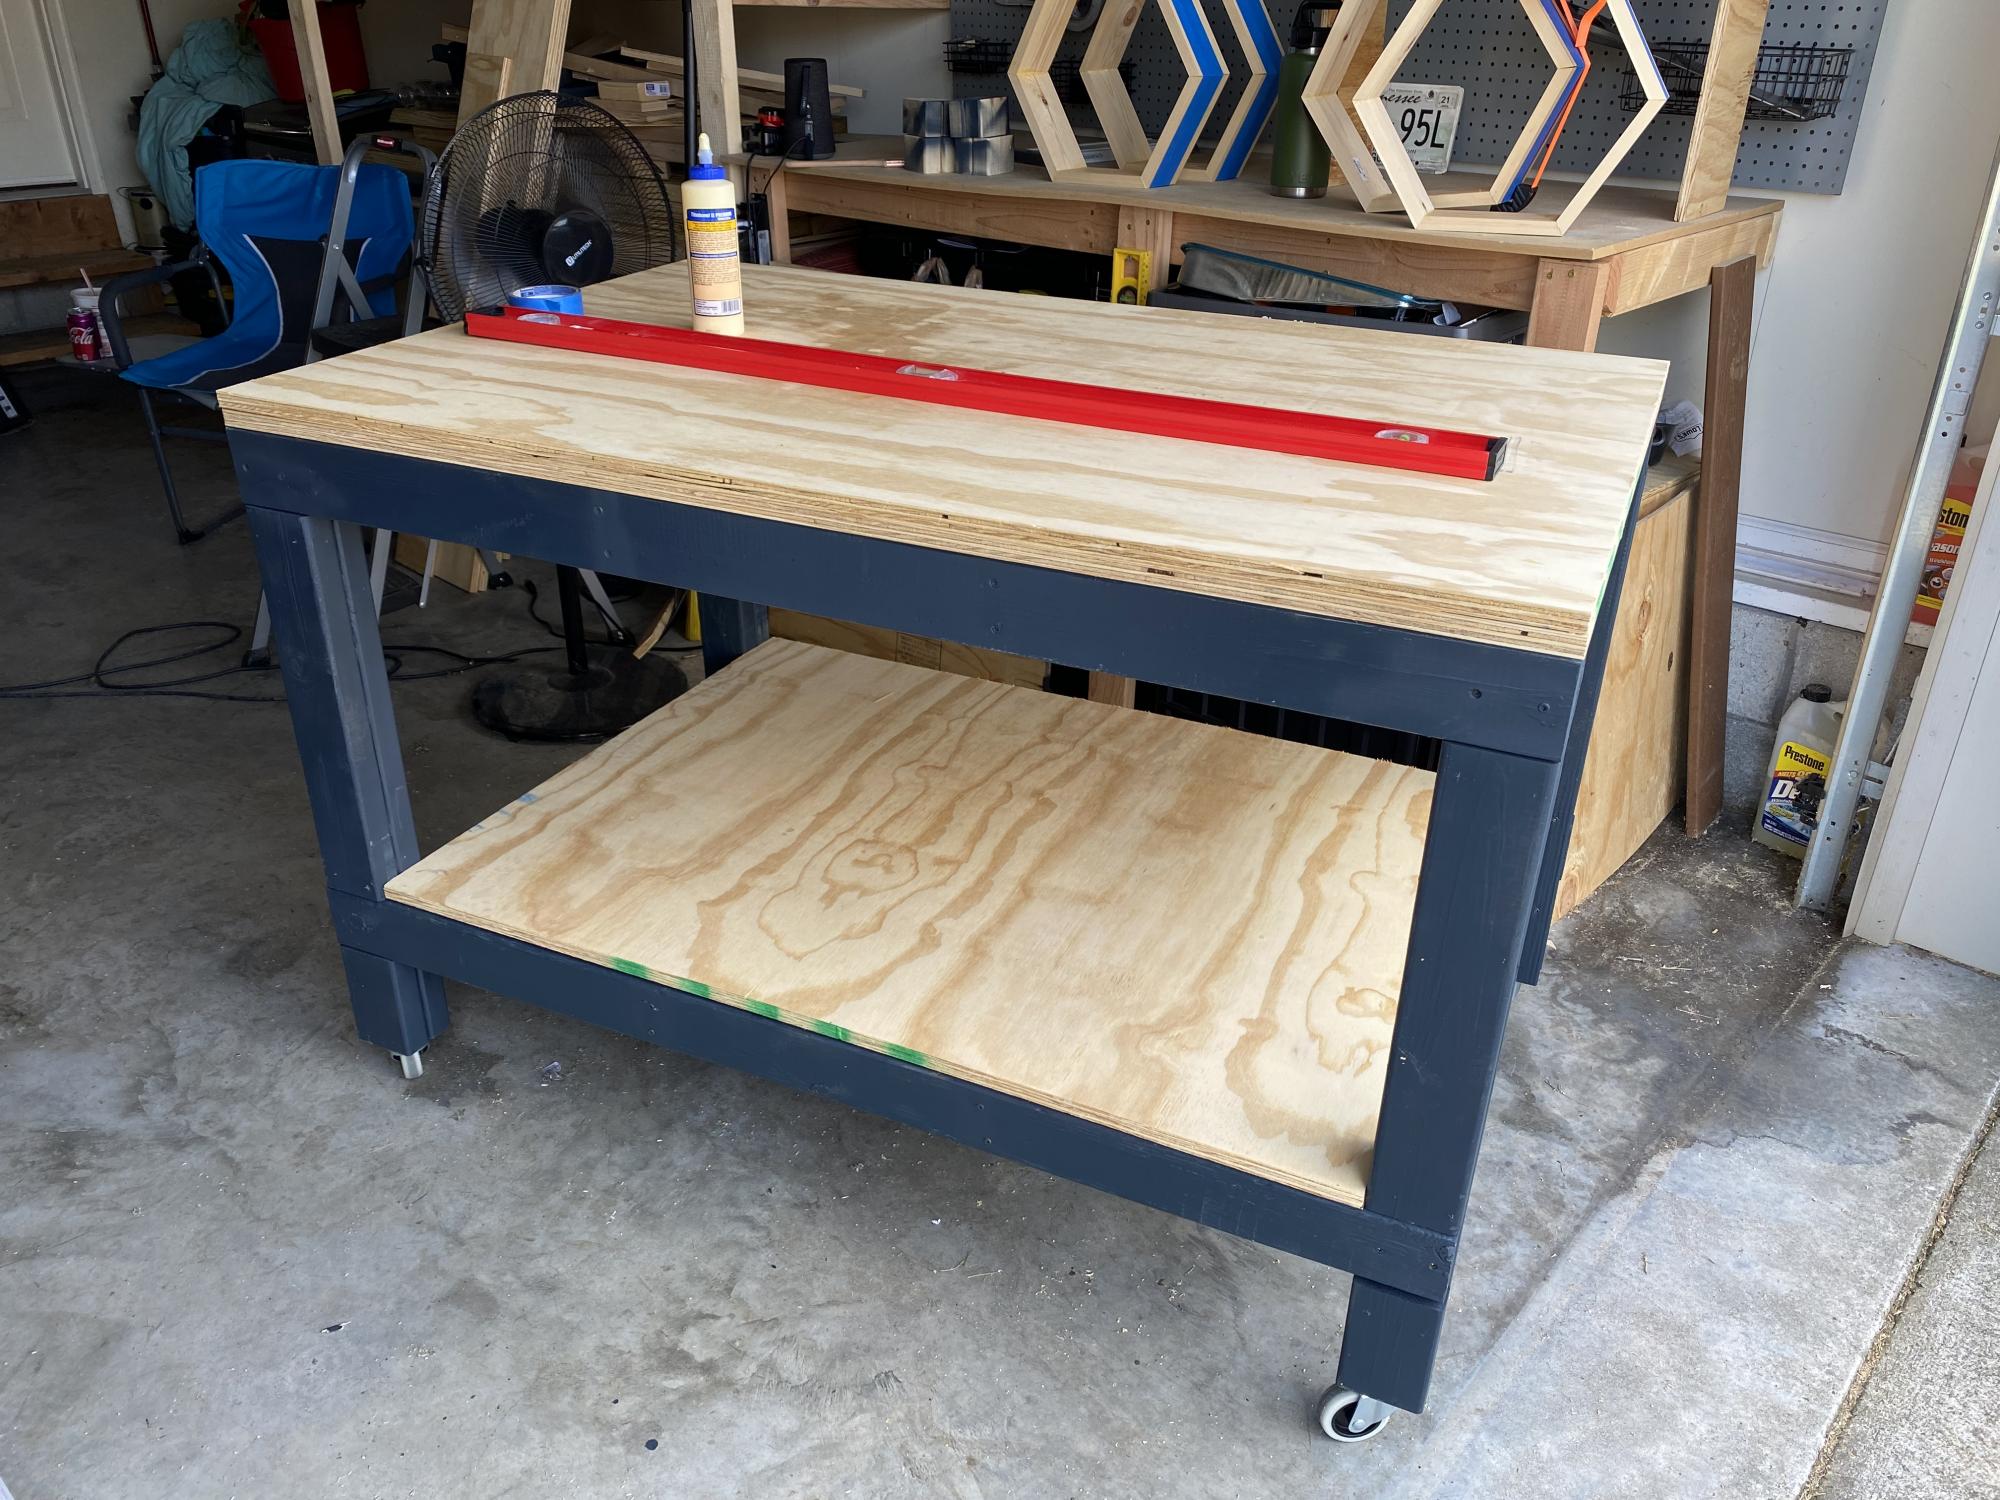
Ana I’m new to wood working and I really love your plans. They are so much easier to follow than a lot of other plans that I’ve seen. It makes me feel like I can build almost anything. Thank you.

Brandy

Comments

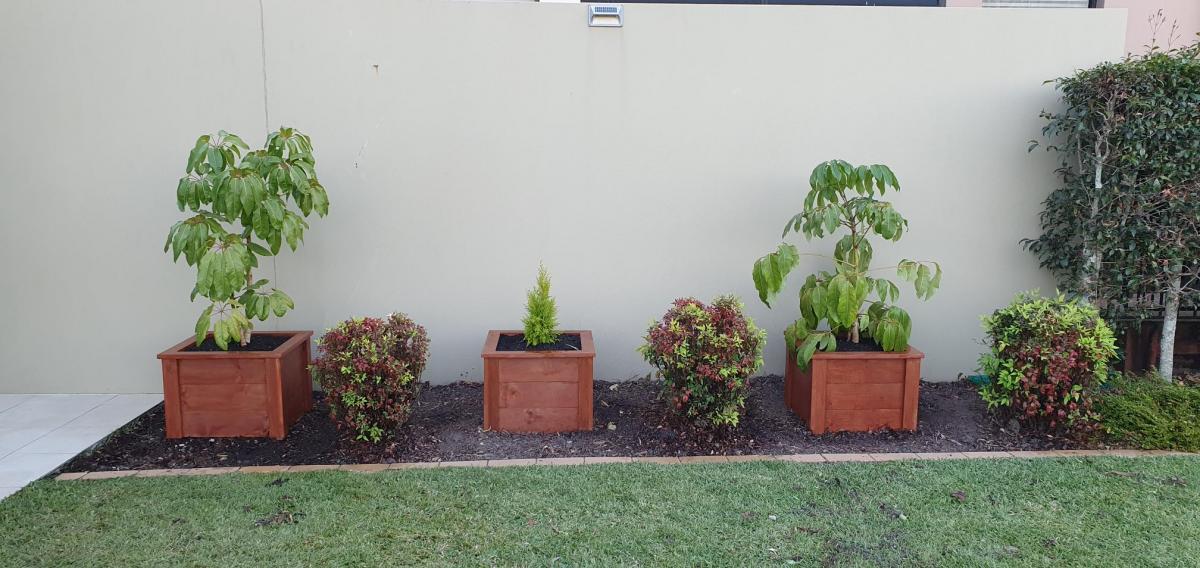
Planter boxes made in Australia

Submitted by Anonymous (not verified) on Wed, 10/06/2021 - 00:41

Greeting from from Queensland, Australia.

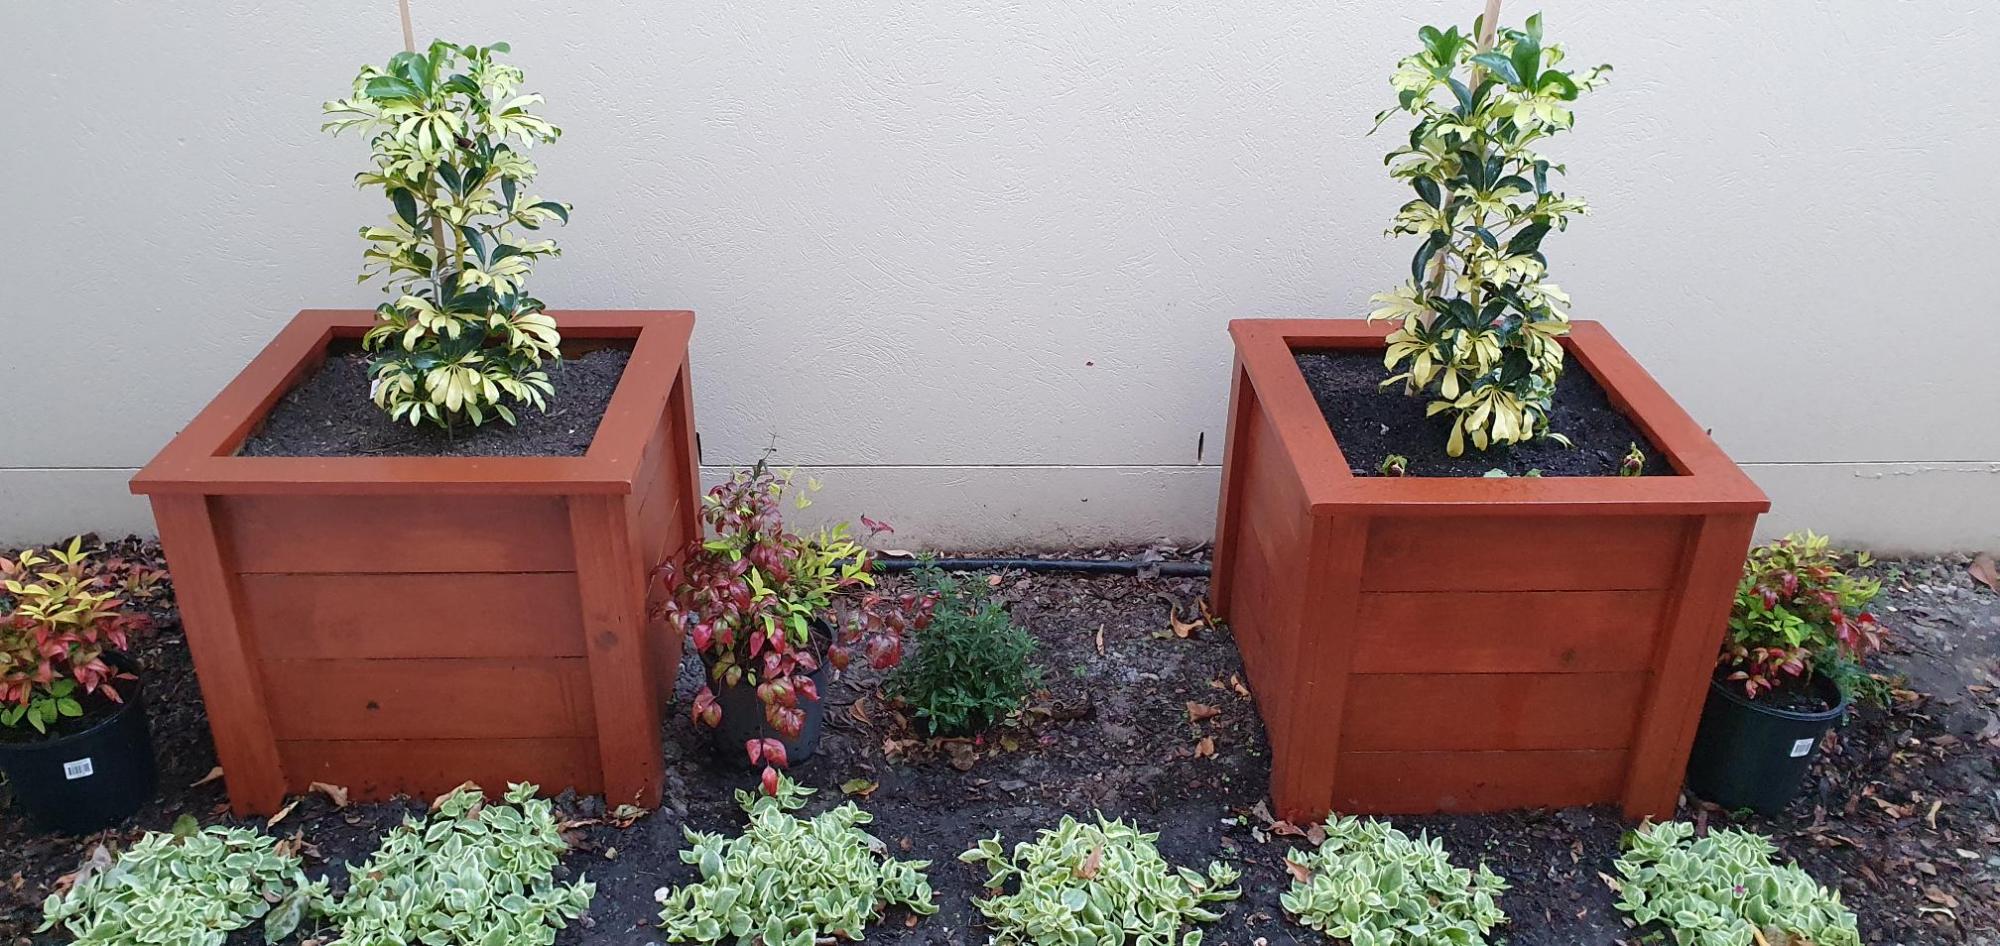
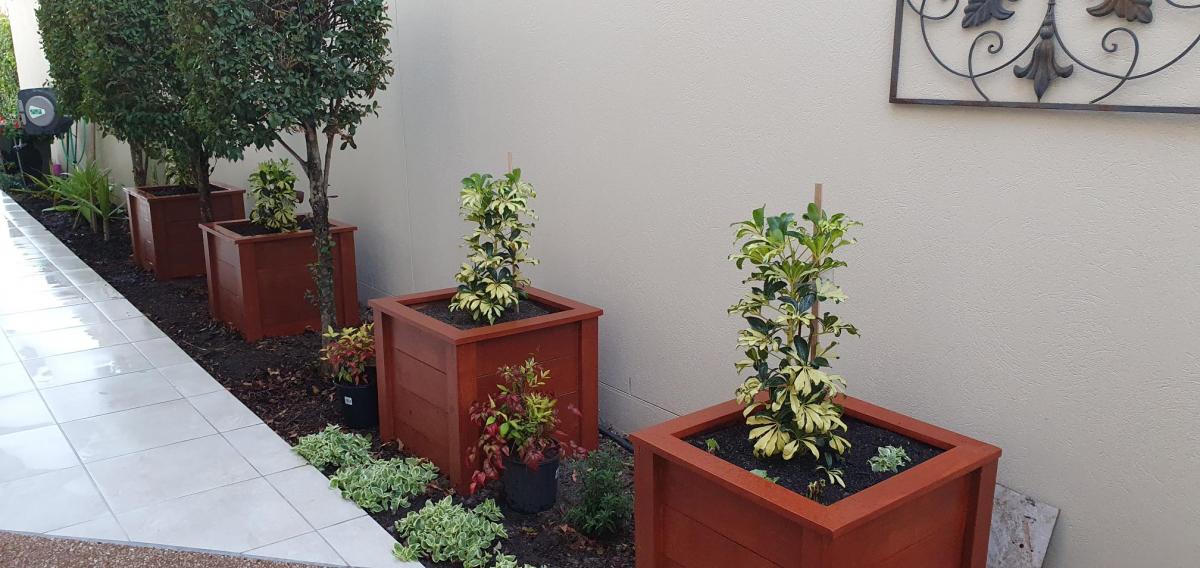
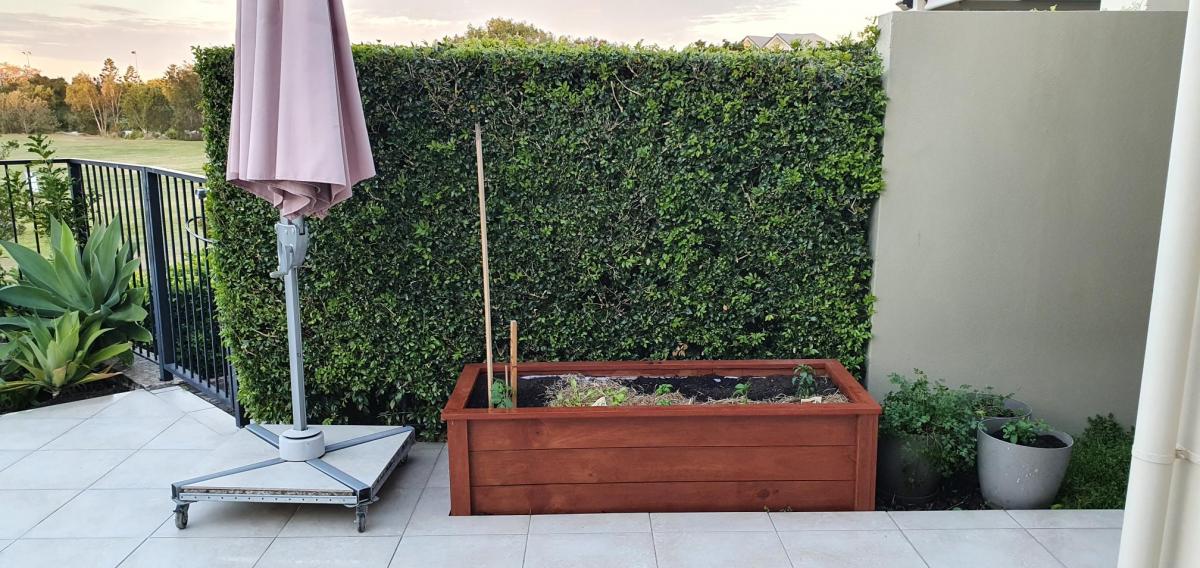
I decided to make a couple of wooden planter boxes for our garden at home, after watching Ana's video on the “Easy Build DIY Planter Box” made from cedar and painted white. I downloaded the plans, and then converted the measurements to metric. I did make a couple of alterations from what was shown in the video. Whilst I do not have a workshop at home, I attend a local "Men's Shed" where there is a large range of woodworking machinery available to use. Firstly, I used rough sawn treated pine 150mm x 25mm boards, which I dressed and cut down to size. The dressed timber looked great once I stained the boxes. Secondly, I have made the boxes without legs, so that they sit directly in the garden, and are filled with potting mix soil.

After making the first 2 planter boxes, my wife asked if I could make another couple. After that we decided another 3 planter boxes in a different part of the garden might be nice, so I made these the same. Then I made a longer planter box of the same style for vegetables and herbs.

Thanks so much, Ana, for the great plans and video, as well as the inspiration. Mind you, my planter boxes took a lot longer to build than the time you indicated in your video, but that is fine.

Cheers Noel
Comments

Seasonal And Holiday

Outdoor storage box

Submitted by mdsandell on Mon, 09/18/2017 - 10:46

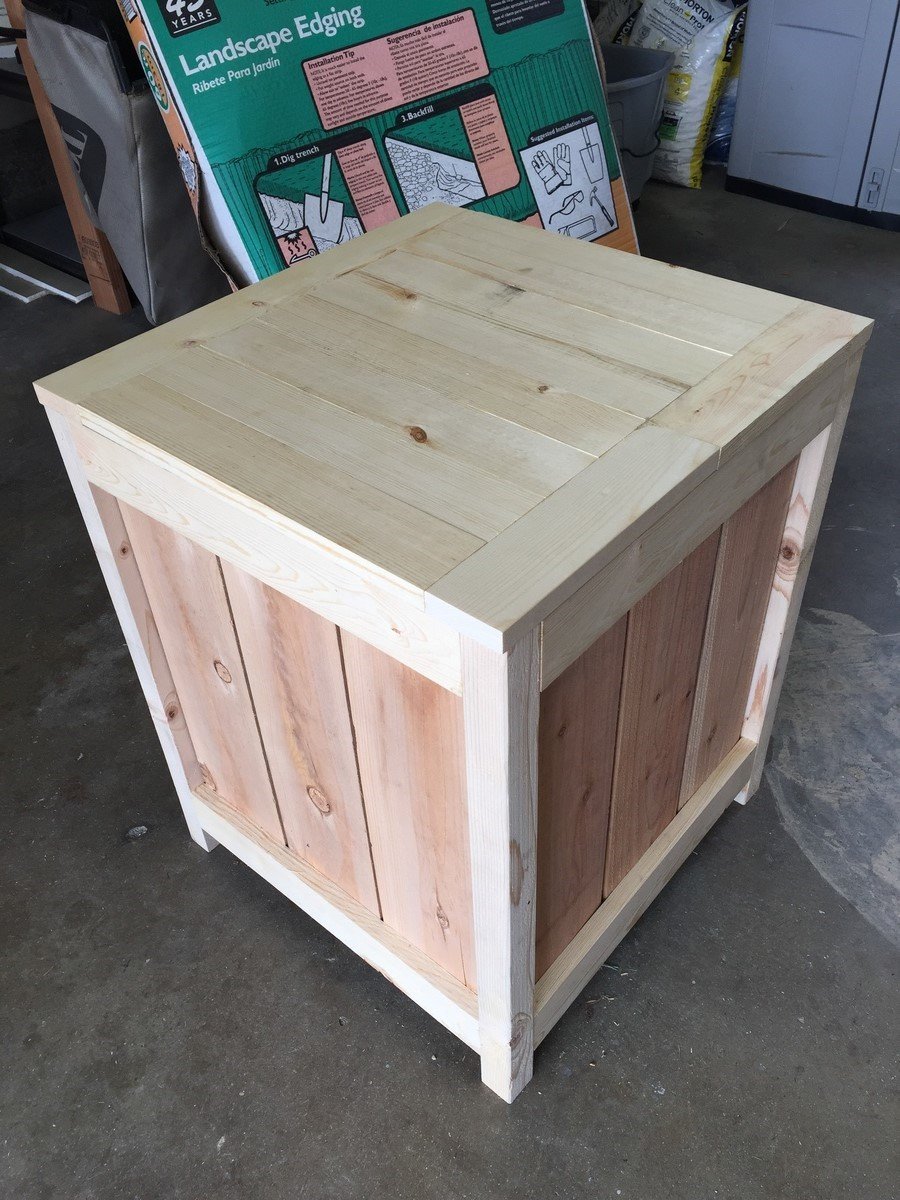
I modified the plans slightly to go taller so it could fit a standard propane tank. I also added a hinged lid based on an image I found on Pinterest that did something very similar. I still need to sand and stain it next weekend.

Like others, I had a little trouble keeping the fence planks from splitting when screwing them to the 2x2 legs, since there was about an 1/8” gap between. I tried to find some scrap to fill in the gap and didn’t overtighten the screws. The lid was made entirely of 1x3”.

Built from Plan(s)
Estimated Cost
$35
Estimated Time Investment
Weekend Project (10-20 Hours)
Recommended Skill Level
Intermediate

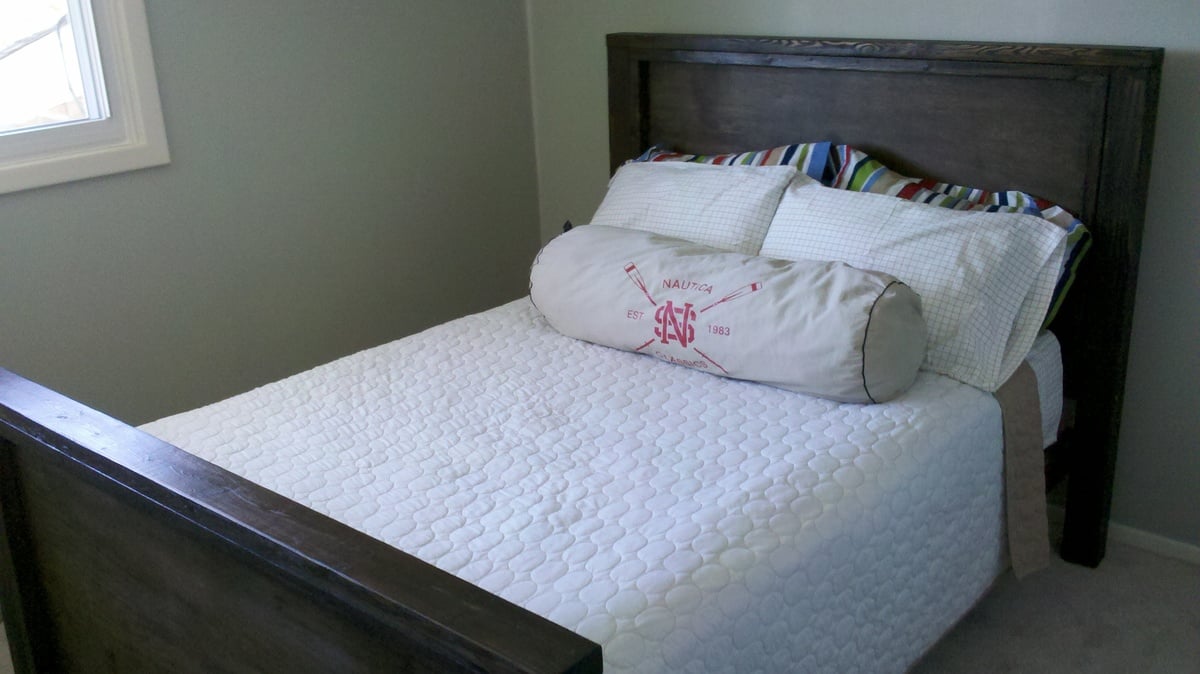
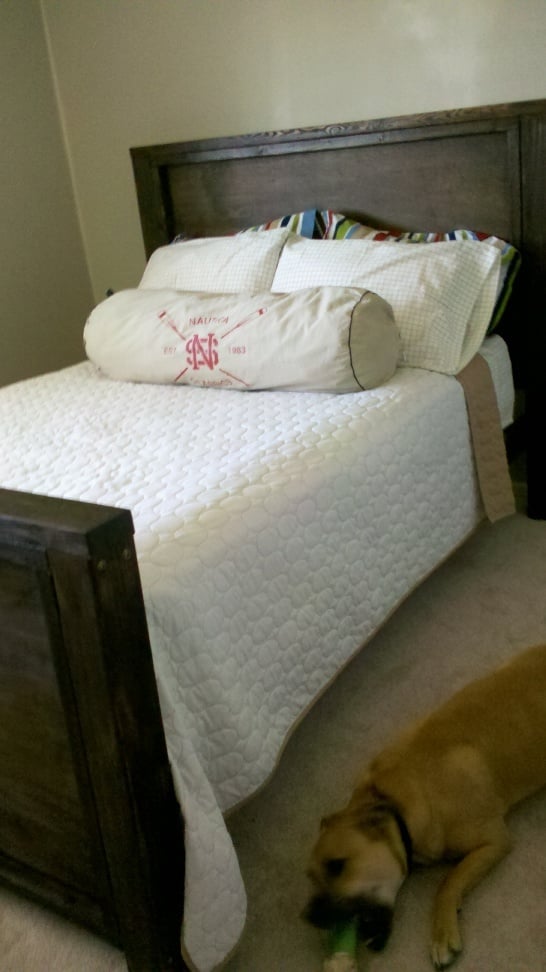
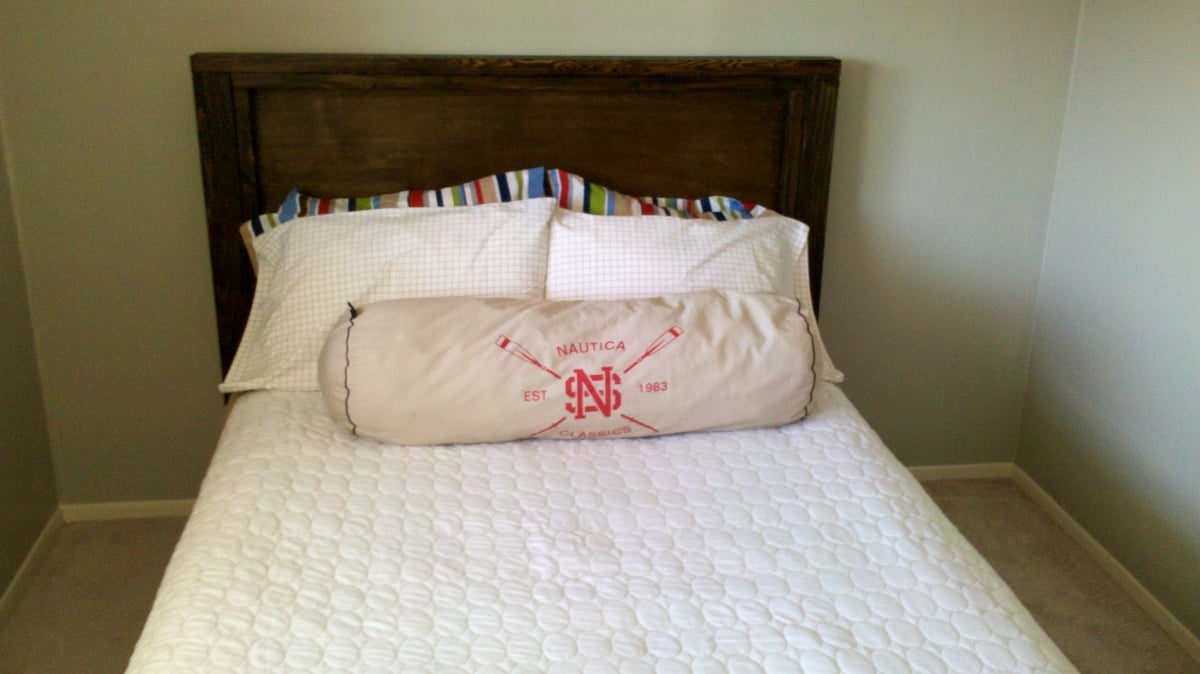
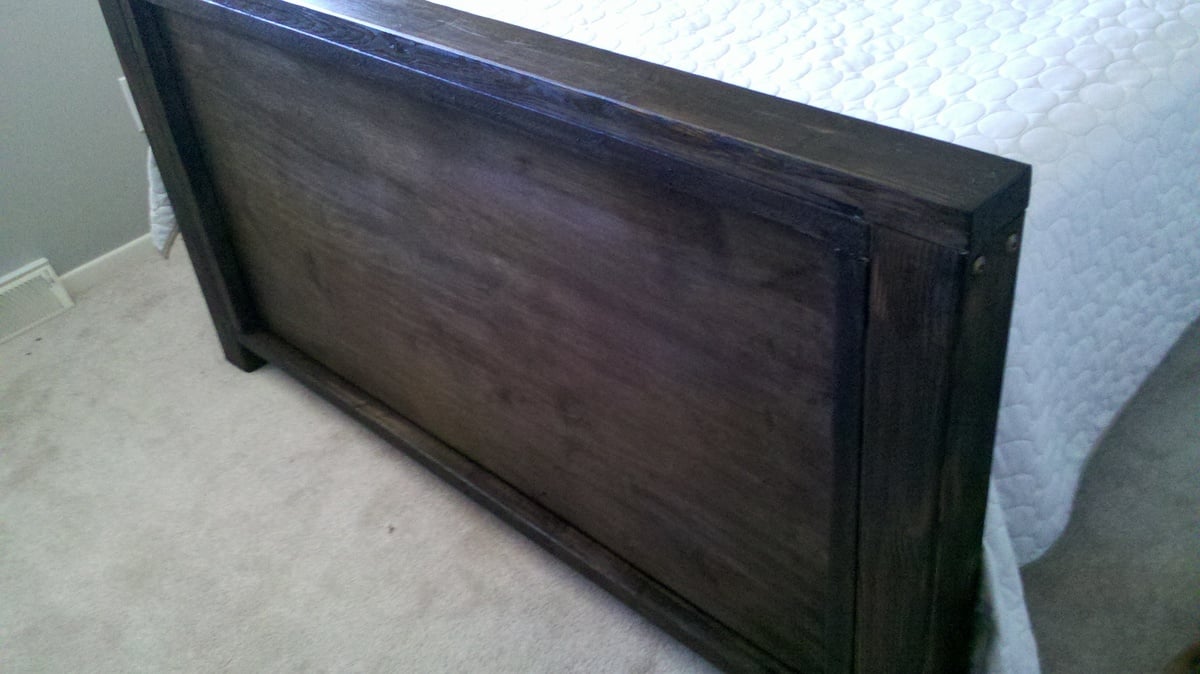
PB & Ana Inspired Hampton Bed

This started out a project driven by inspiration. I wanted a bed similar to the Hampton Bed in the Pottery Barn Teen Catalog, and I wanted a handful of beds from the newest Crate and Barrell Catalog. So, I sat down with a piece of paper, and a felt tip marker, and sketched out the bed. I had just built the farmhouse bed, and knew it was strong, so thats how I designed the frame. Then I used plans from the Simple Bed to get another reference point and for full size dimesniosn. Then I built it. I journaled each step of the way on my blog, if you want more info on how building went, or the learning process. I am truly very proud of this bed. Thank you Ana for giving me the courage to do this one without step by step instruction. You rock. 
Estimated Cost
$100
Estimated Time Investment
Day Project (6-9 Hours)
Finish Used
General Finishes Water Based Stain: Walnut
General Finishes Polyacrylic top coat, 4 coats
Recommended Skill Level
Intermediate

Bunkbed with bookshelves, stairs and storage bins

Submitted by ECAAC on Sun, 06/09/2013 - 17:45

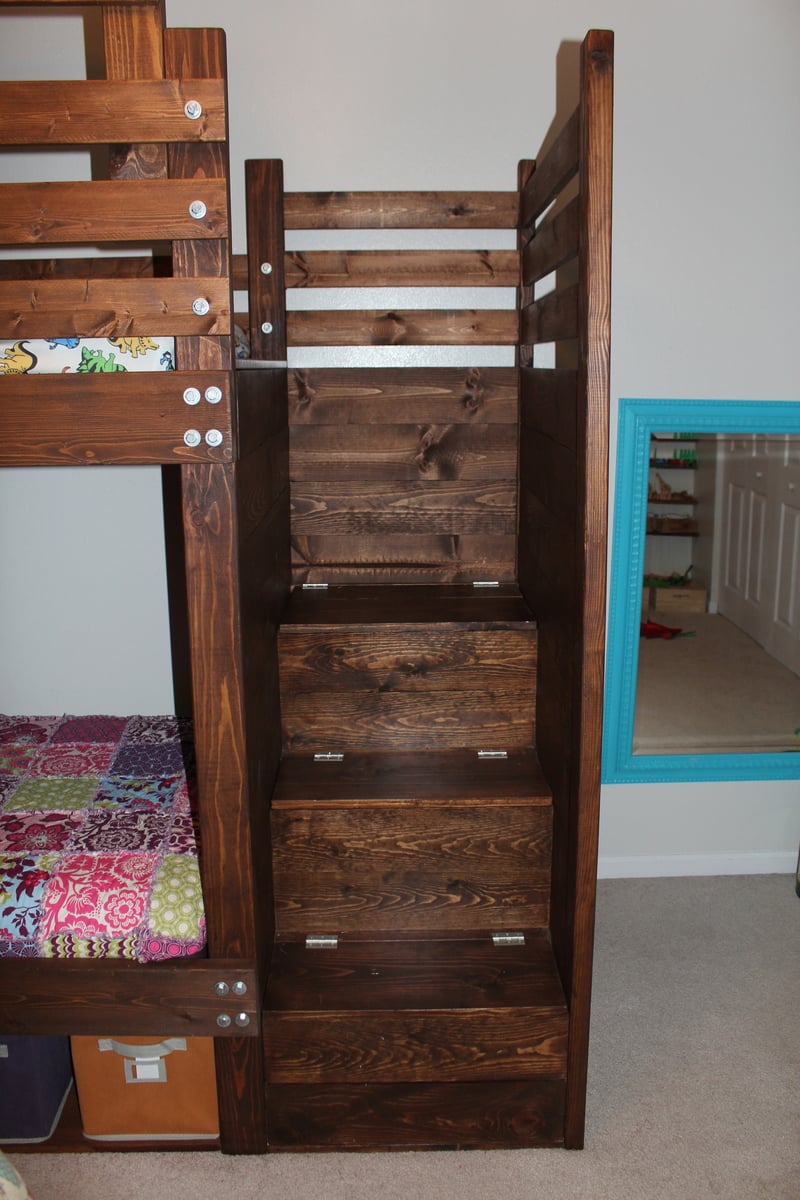
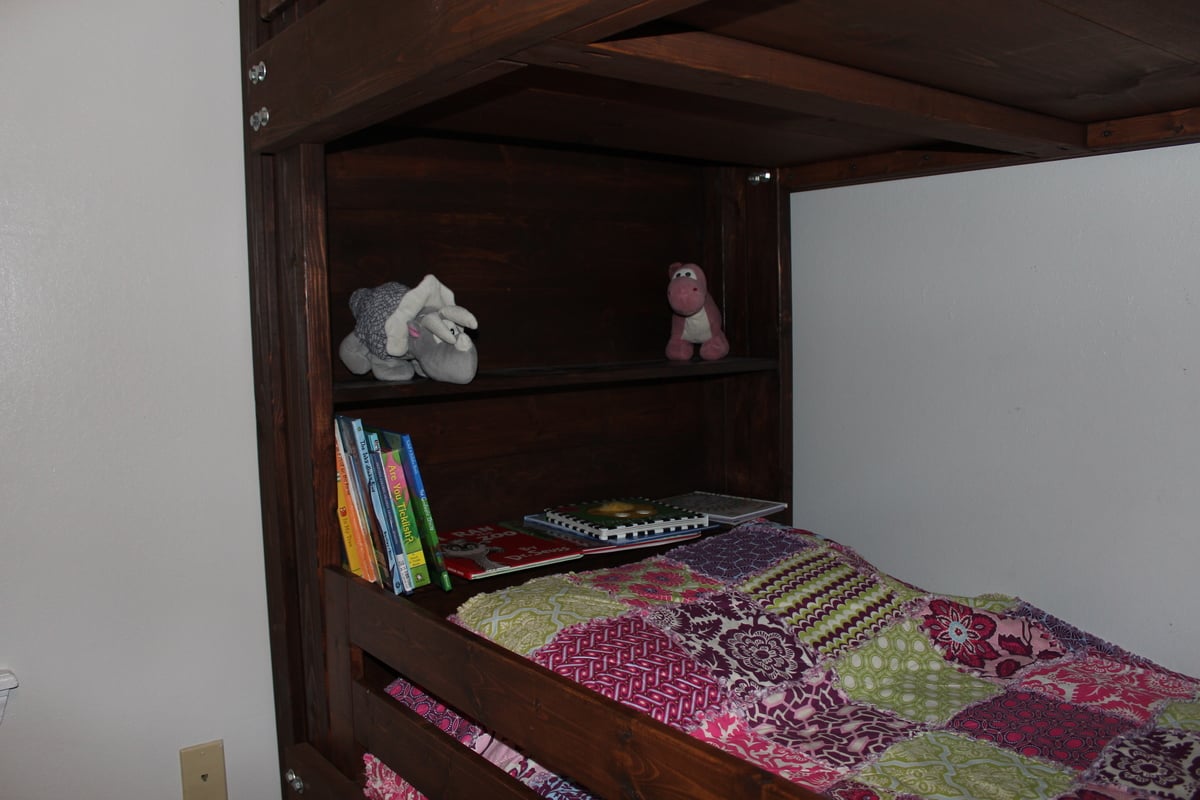
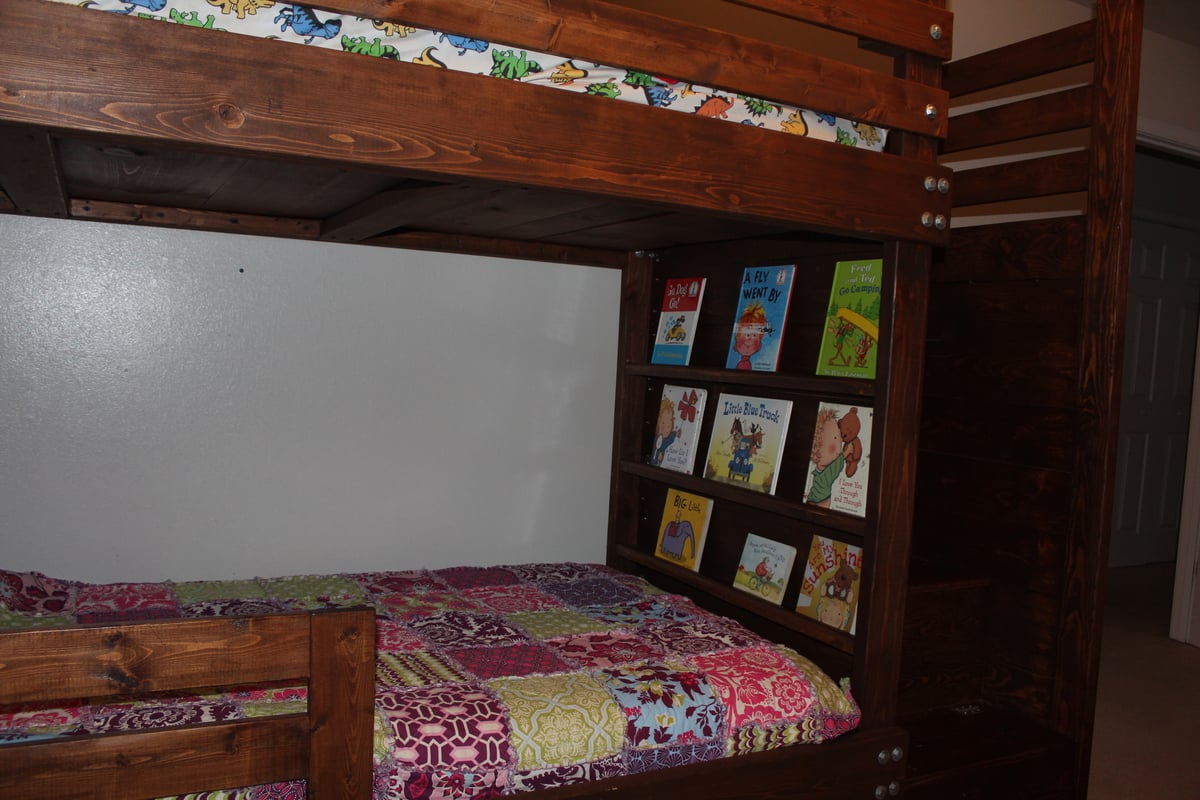
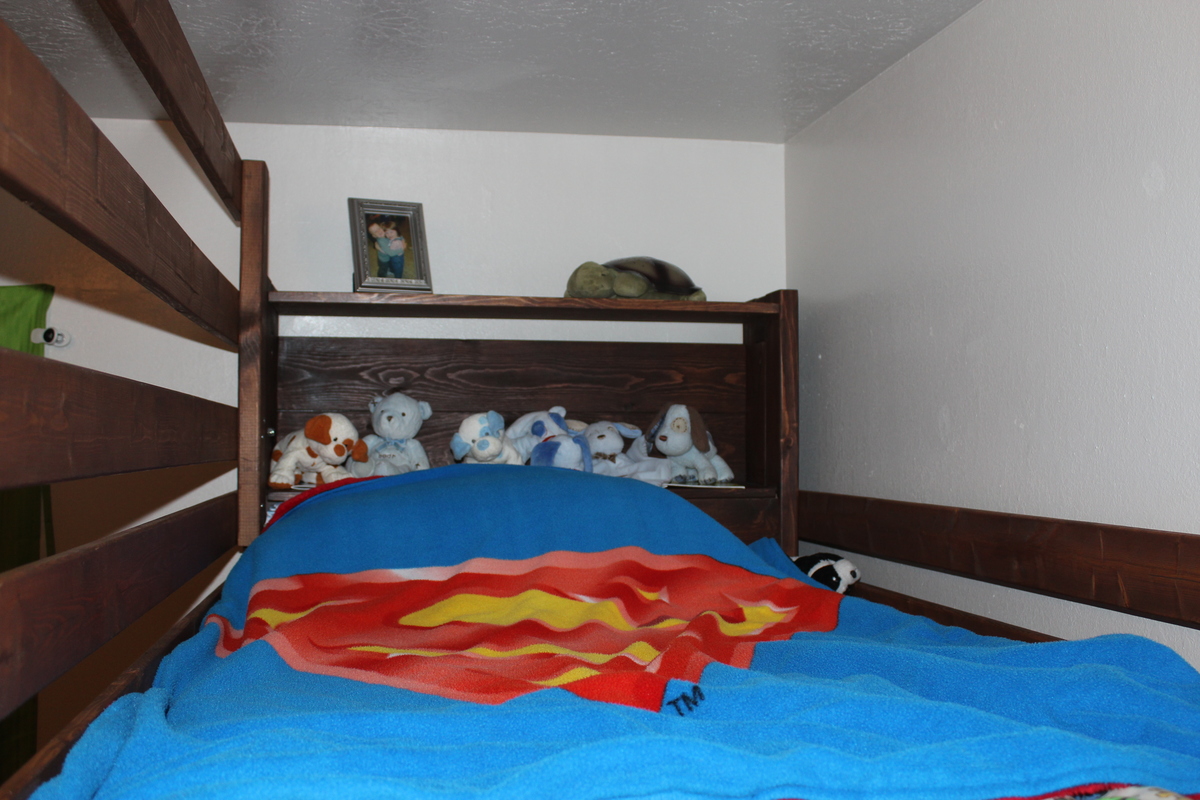
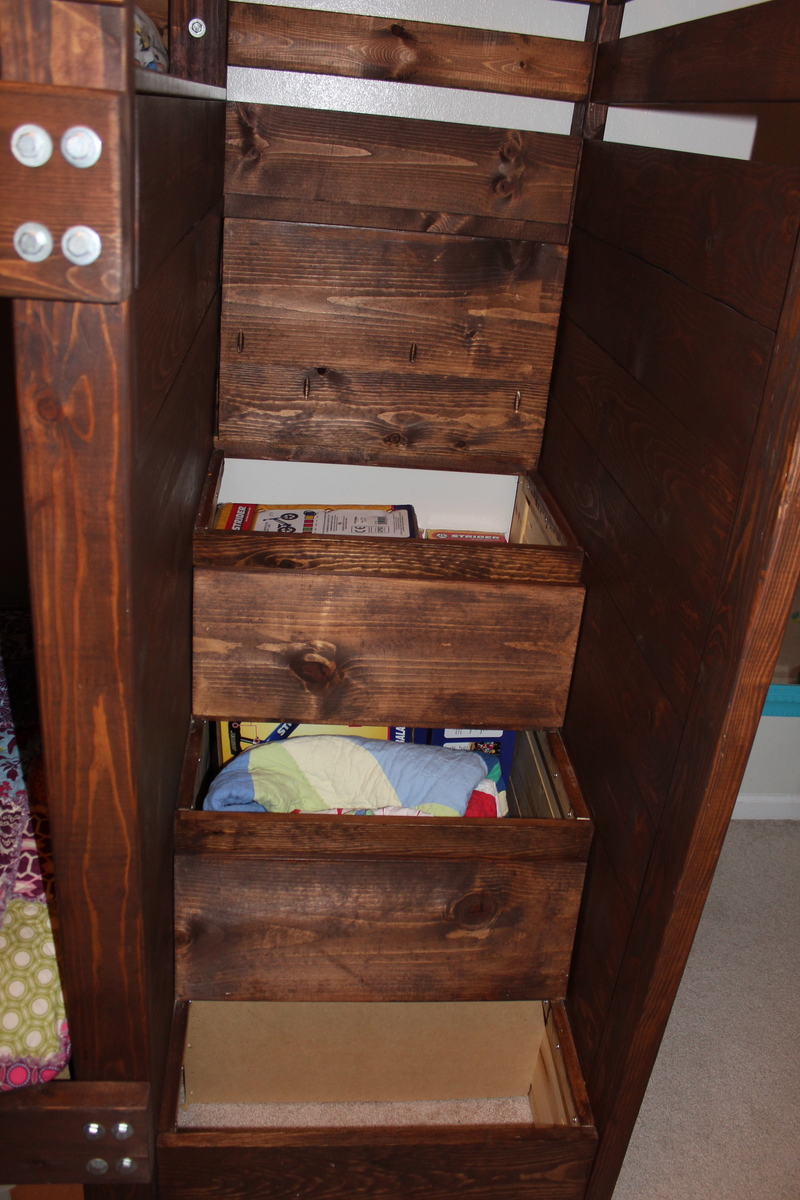
We needed bunkbeds for our 4 and 2 year old before baby 3 came along. We used the basics of the side street bunk bed, combined it with modified plans of the playhouse stairs and then added bookshelves as the headboard and storage bins underneath. It took us about 4 different weekends plus to finish it. We used mostly 2x4s and 2x6s for pieces holding it together and 1x6s for most of the sides. We absolutely love how this turned out! Both kids have plenty of room for books and animals on their headboards. There are skinny shelves at the foot of the bottom bunk for books and the storage bins are awesome for cars, dolls, dinosaurs, etc. The stairs store blankets, toys, misc (there is alot of storage under the bottom bed too...just more difficult to get to...we cut 3 pieces of plywood for bottom bunk so we could access things underneath). The boards underneath the top bunk are 1x10s. The stairs were the most difficult part of this project. Hopefully this bunkbed will be passed down to grandkids! We had a great time building it! VERY sturdy too.

Estimated Cost
400
Estimated Time Investment
Week Long Project (20 Hours or More)
Finish Used
Rustoleum stain
Recommended Skill Level
Beginner

Comments

melodyshurkey

Wed, 02/05/2014 - 15:44

Is there a place to download plans for this bed? I would love to make this for our boys!

AlaskaSoul

Mon, 03/03/2014 - 15:53

Hi Ana!
This is an AWESOME bunk bed! I need to build two of these. Is there any chance that the plans will be uploaded soon? Thanks for everything that you do!

kcjumper

Fri, 05/09/2014 - 07:02

Curious if these plans had been posted anywhere? Looking to build this style for my nieces this summer.

mconnelley

Thu, 08/07/2014 - 08:40

This is a great design and I would love to build it for my kids. Has anyone gotten the plans by chance?

Ac13

Sun, 09/07/2014 - 22:31

I would love to build this for my kids, any access to the plans?

pcianciulli

Fri, 09/19/2014 - 13:15

Looks fantastic would love to make something similar for my twins. Are there any plans that are out for this bed. Please let me know thank you.


Ana White Admin

Tue, 12/09/2014 - 07:02

Thanks for your request Bauertravis. We are unable to commit to plan requests at this time. Thanks for your support and understanding!

annechatman

Sun, 01/11/2015 - 17:55

Hi! These beds would be perfect for our girls! Are you able to provide the plans for this?

Thanks!
Anne

Rustic Bathroom Vanity

Submitted by ivyfamily5 on Wed, 12/15/2021 - 09:51

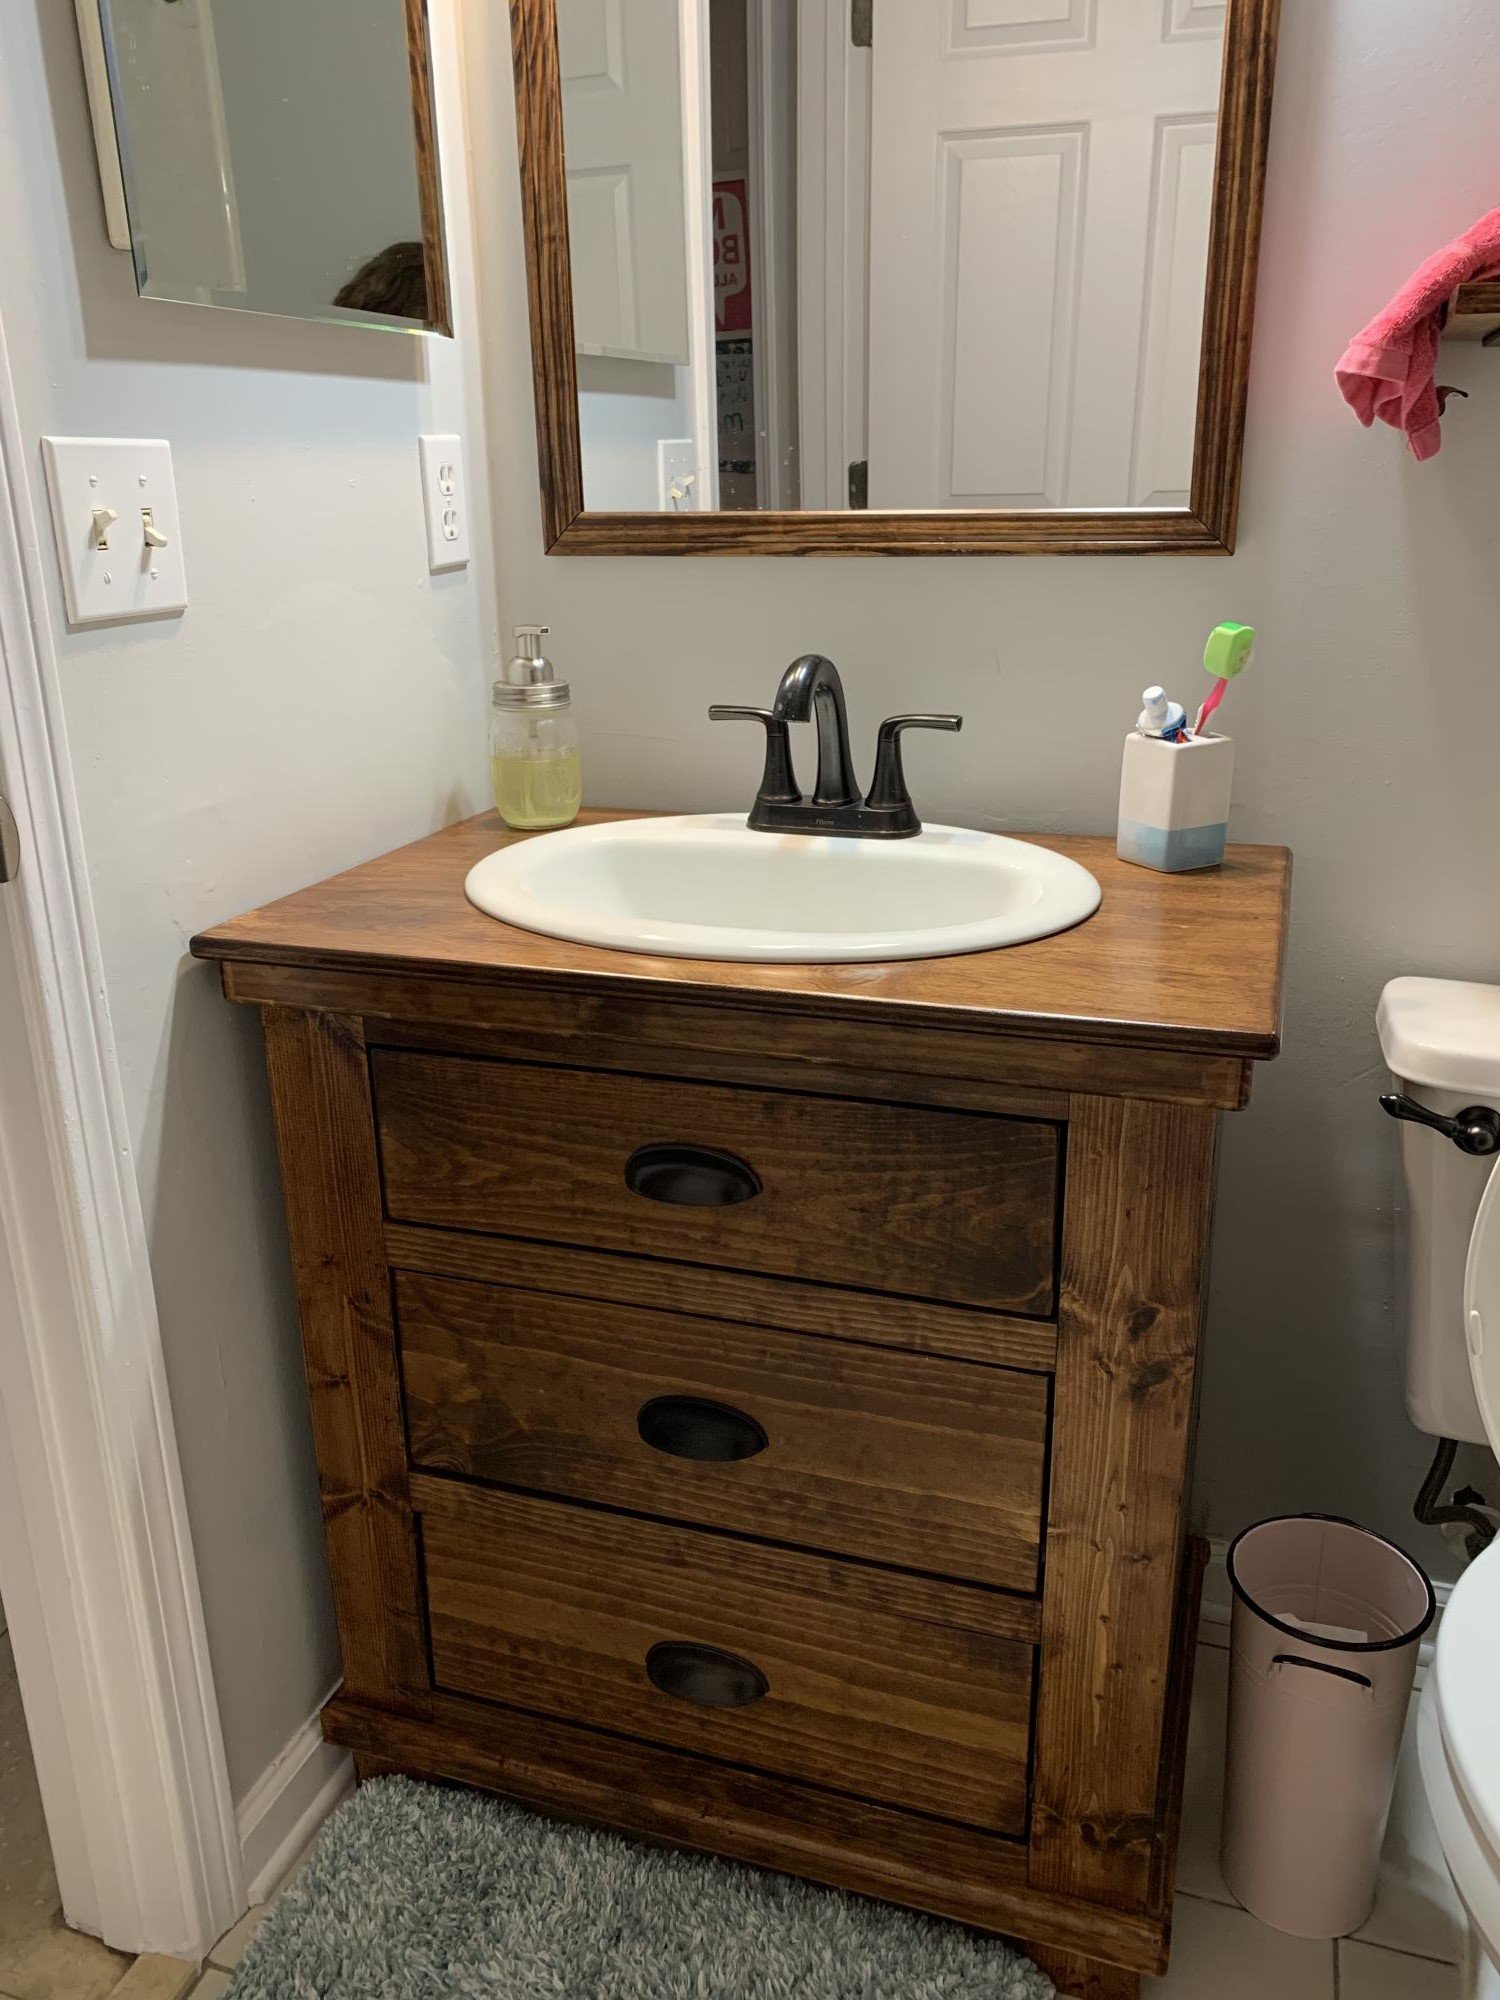
I built Ana Whites Bathroom vanity with drawers. I love how easy the plans are to follow and even adjust. I tweaked the measurements to fit the space I had. After supplies, I spent a bit less than a store bough vanity, and it is solid wood rather than the cheap materials the less expensive store bought one. It turned out beautiful! I also built the mirror frame and the shelves to match. Thank you, Ana, for your amazing website, plans, videos, and confidence to tackle the projects myself. My daughter chose the mahogany stain because she loved the way it sounds..."It's Mahogany!"

Built from Plan(s)

Comments

Christmas Gift

I built this as a Christmas gift. The overall length was shortened to 6' long, I only used two legs, however I built the bench with three legs overall length 6'.  Finished to match chairs purchased from overstock.com

Estimated Cost
$275.00
Estimated Time Investment
Weekend Project (10-20 Hours)
Finish Used
Custom with four coats of Simi gloss polyurethane.
Recommended Skill Level
Beginner