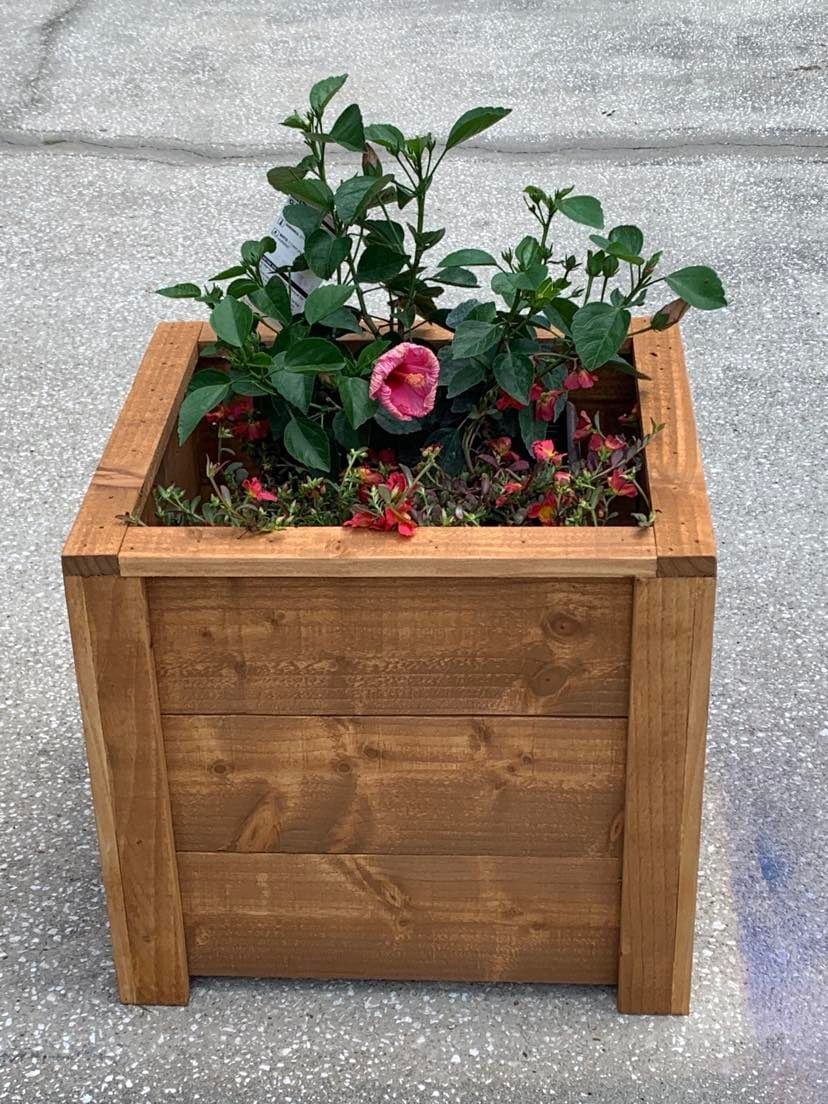
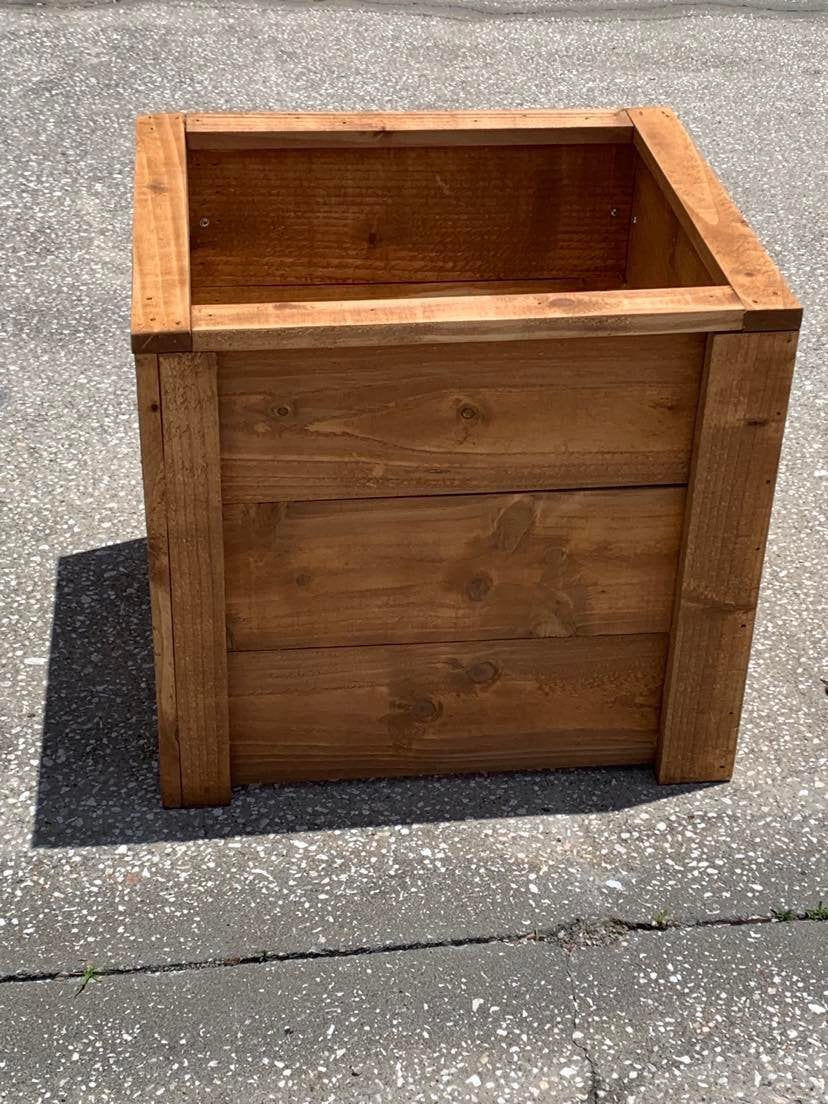
Planter
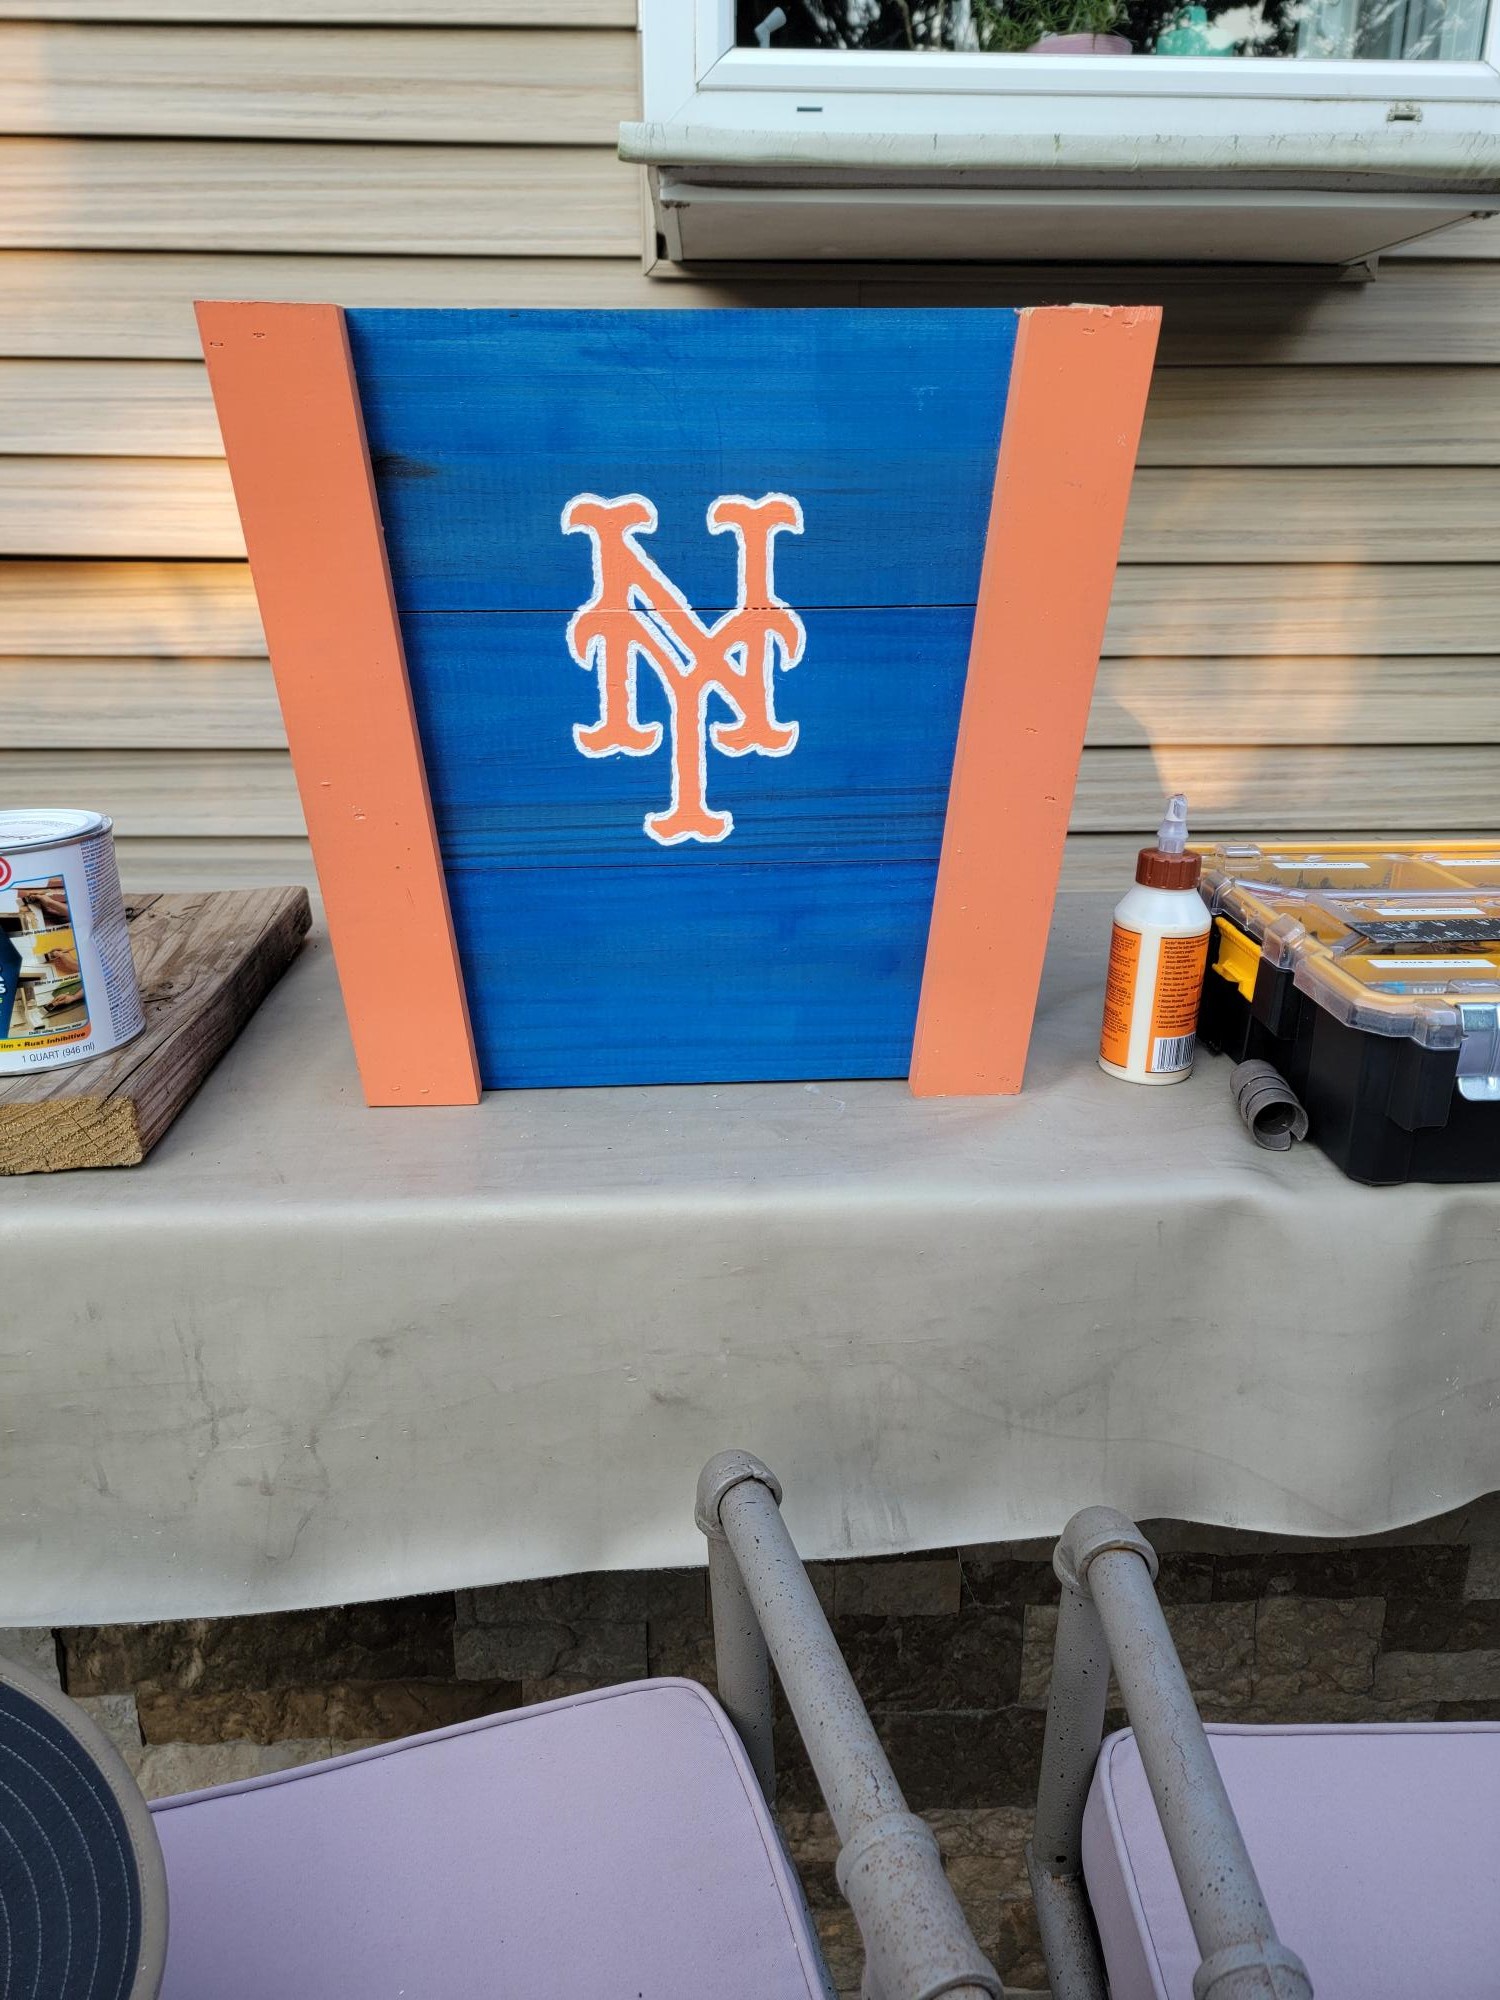
Started with the 3 plank plans from Anna's project, then dremeled the logo.
Built from Plan(s)
Started with the 3 plank plans from Anna's project, then dremeled the logo.
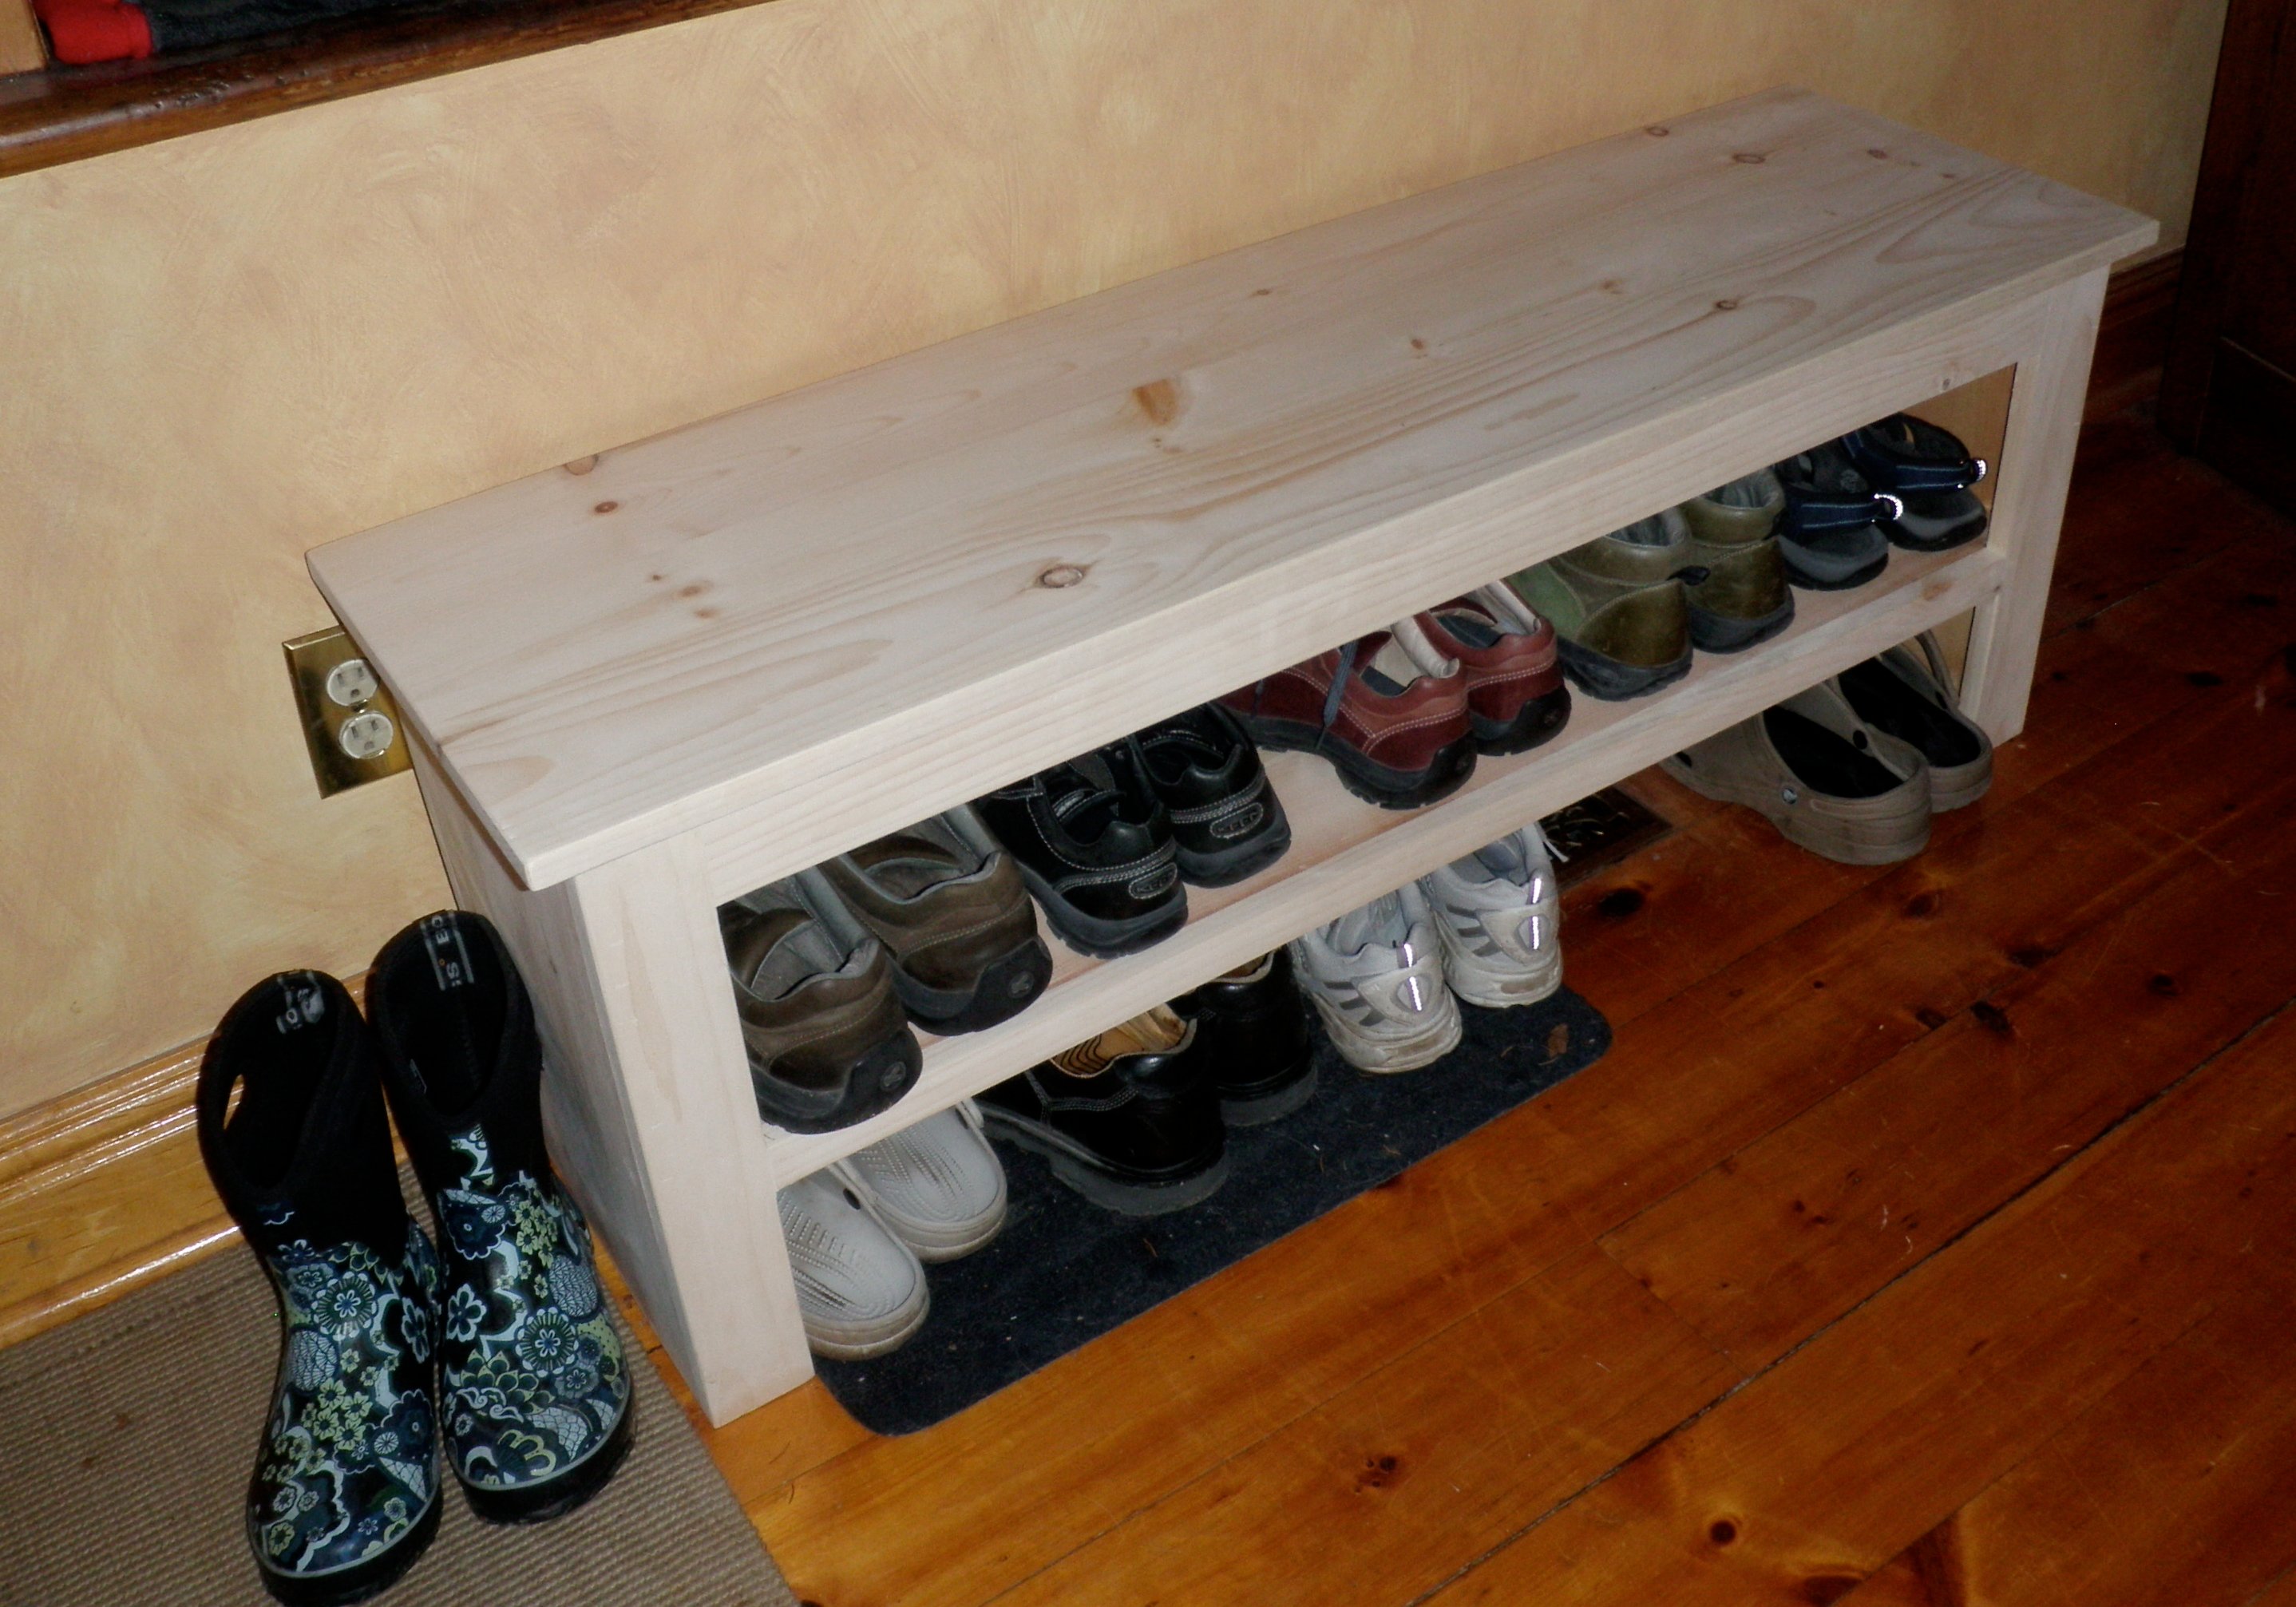
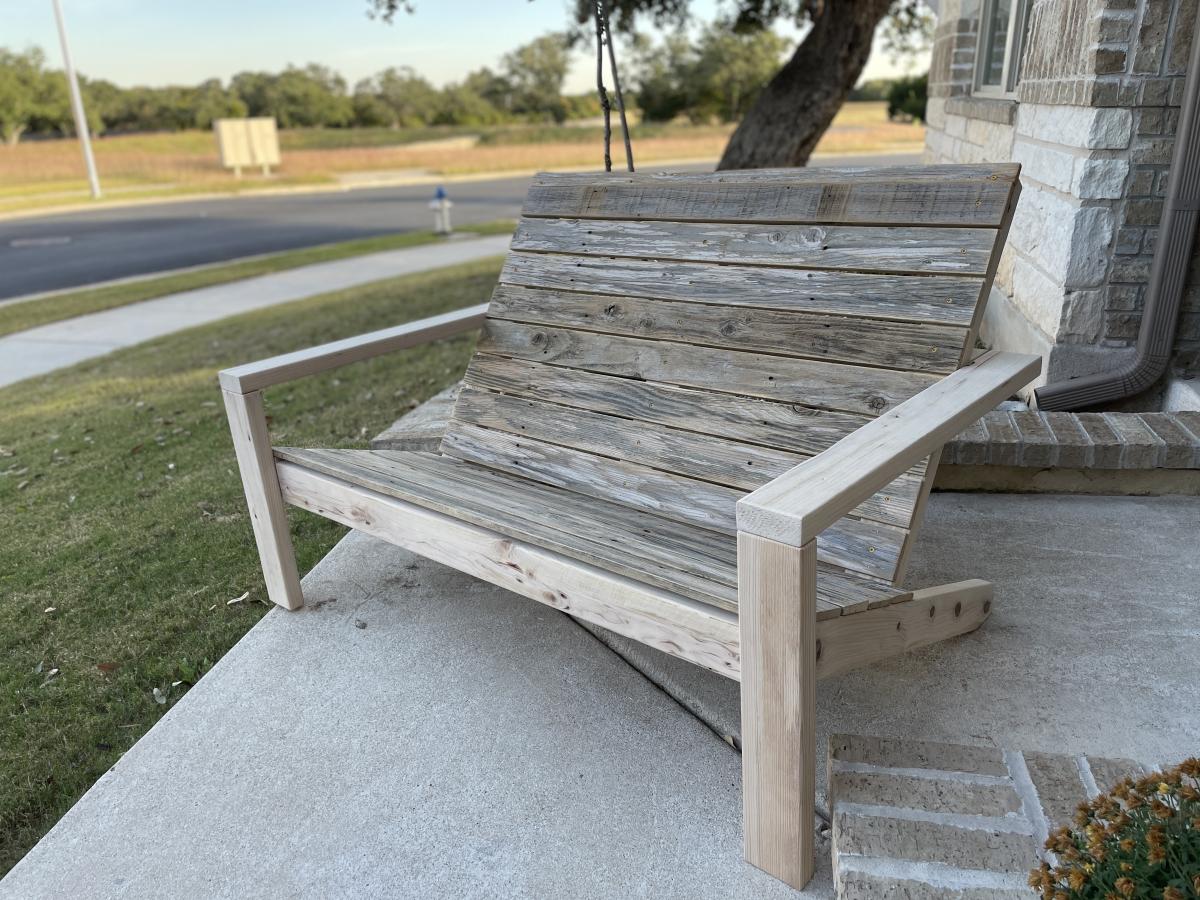
I've officially stopped stalking and started building! First project a modified spa bench. Still have to stain it, but it already makes the big pile of shoes by the door look neater! I'm a hands-on person and not afraid of power tools (got a band saw for my birthday!) but it's still a challenge building a piece of furniture. I've already learned lots of do's and don't do's for next time!
Thanx a bunch for your site, Ana! It definitely gets the mind plotting great projects to come!
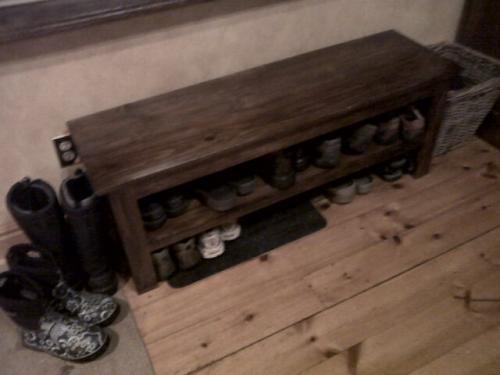
Love this! My husband used this project to help boys learn to use power tools and work with wood. They made one and he did the others. THANK YOU!
Wed, 10/06/2021 - 10:15
Great way to get the kids involved, it looks very nice, organized and functional! Thank you for sharing~
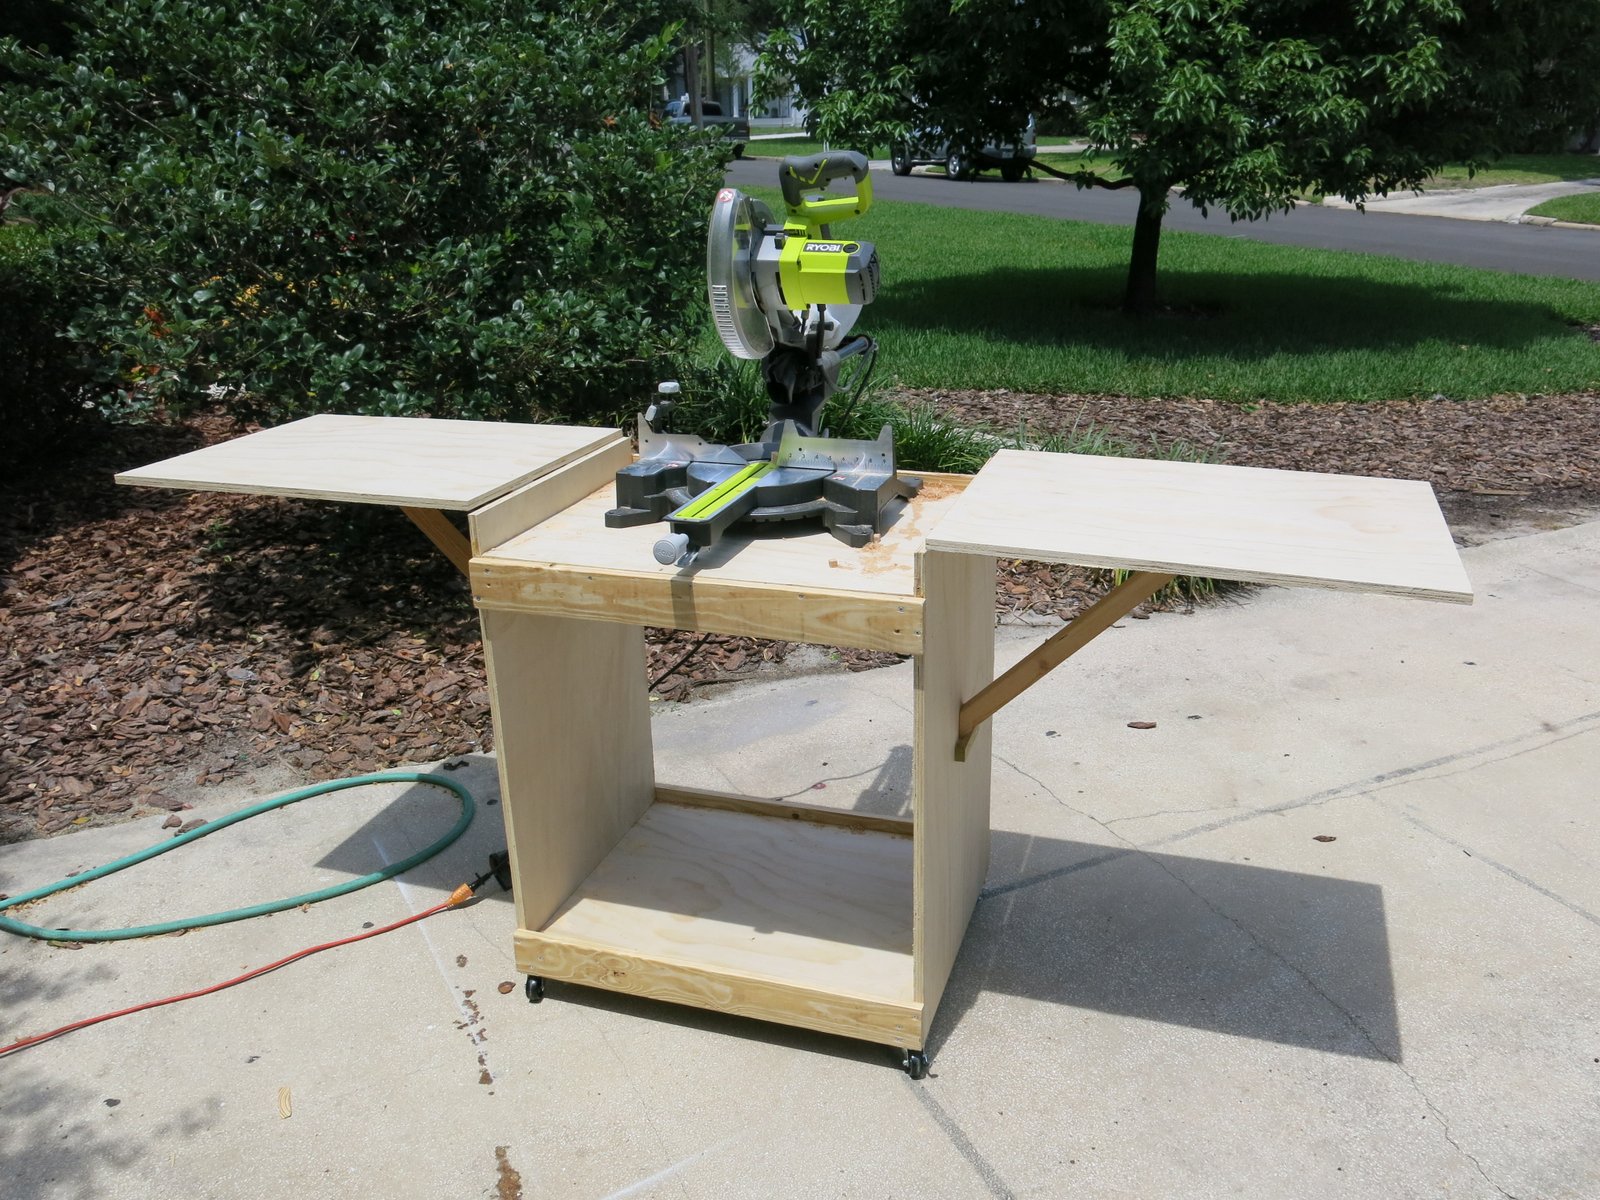
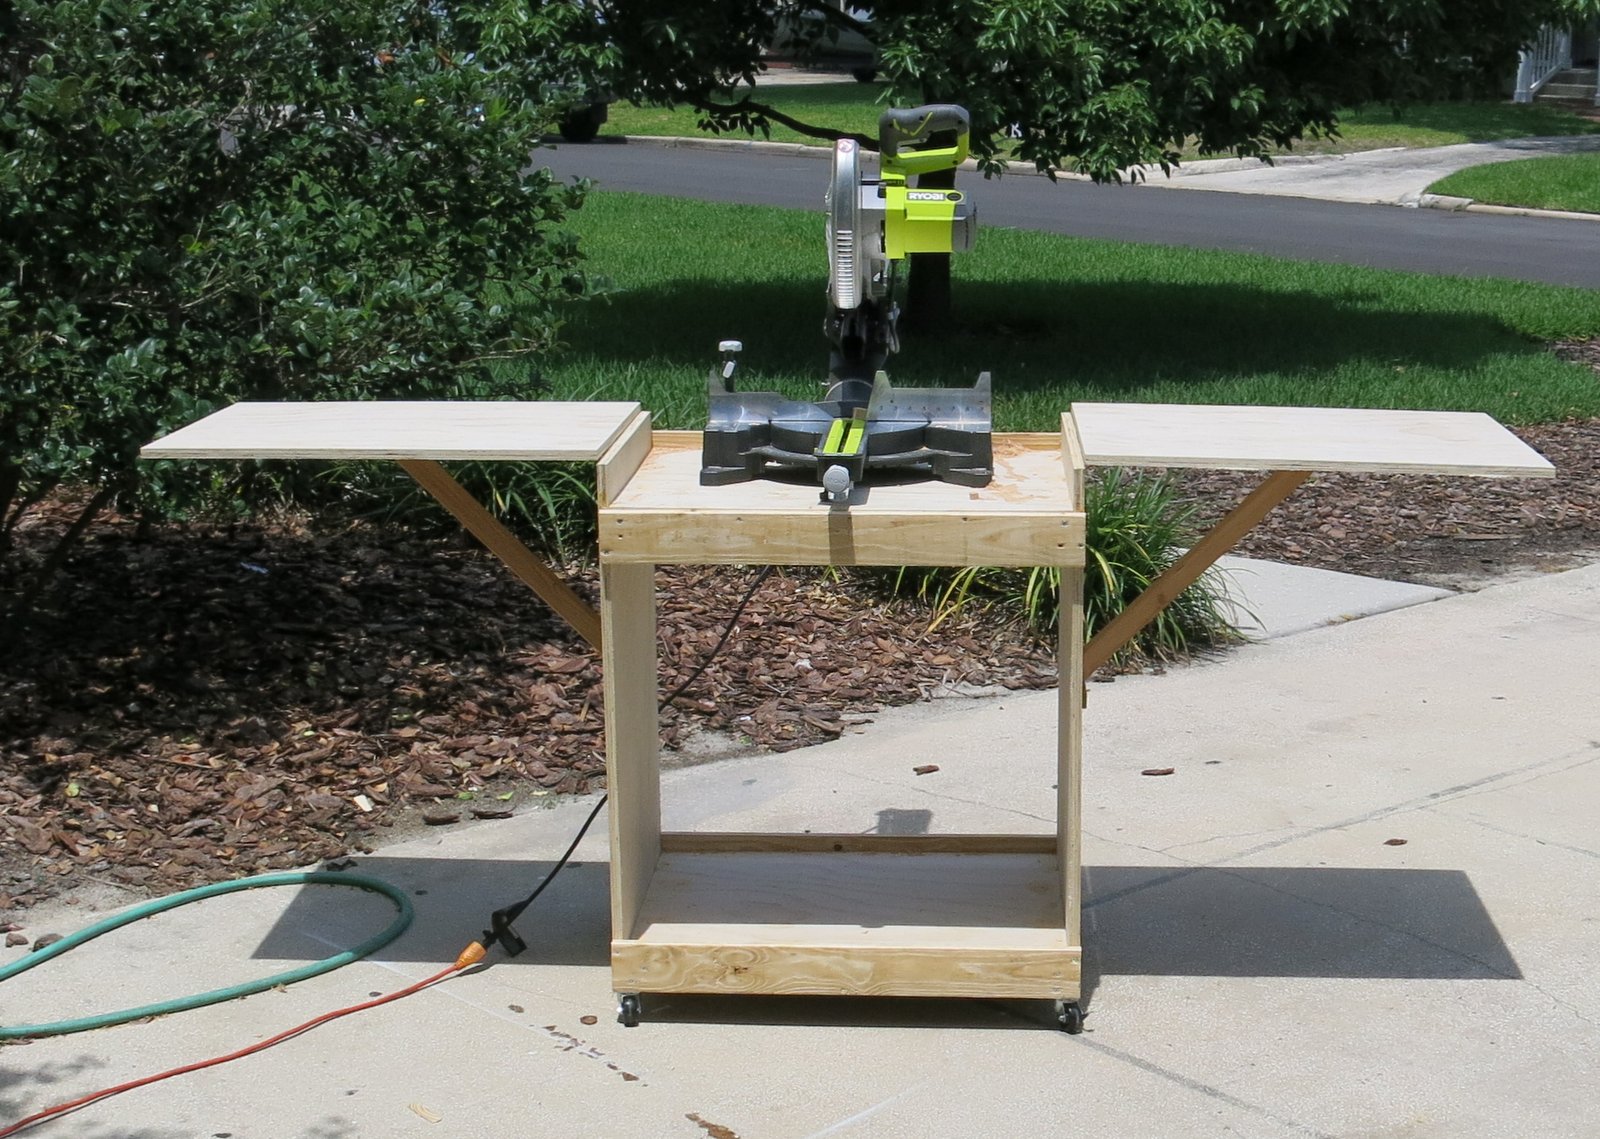
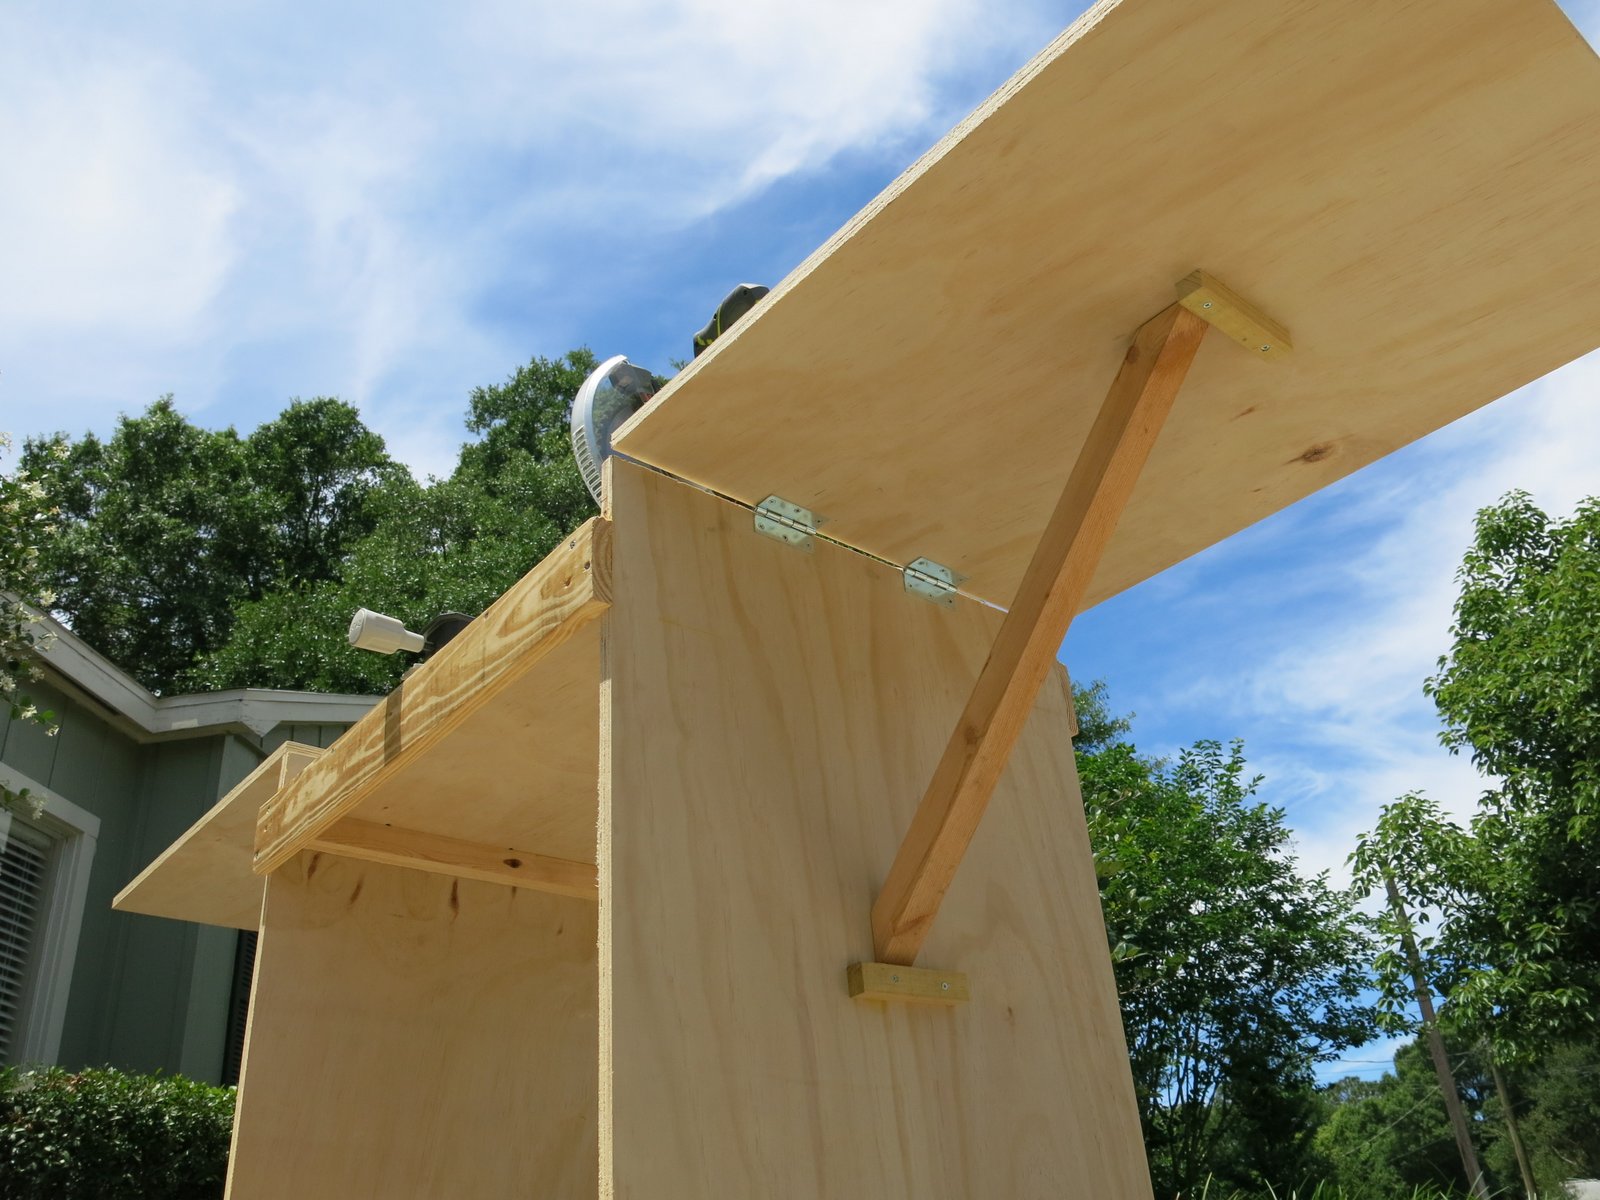
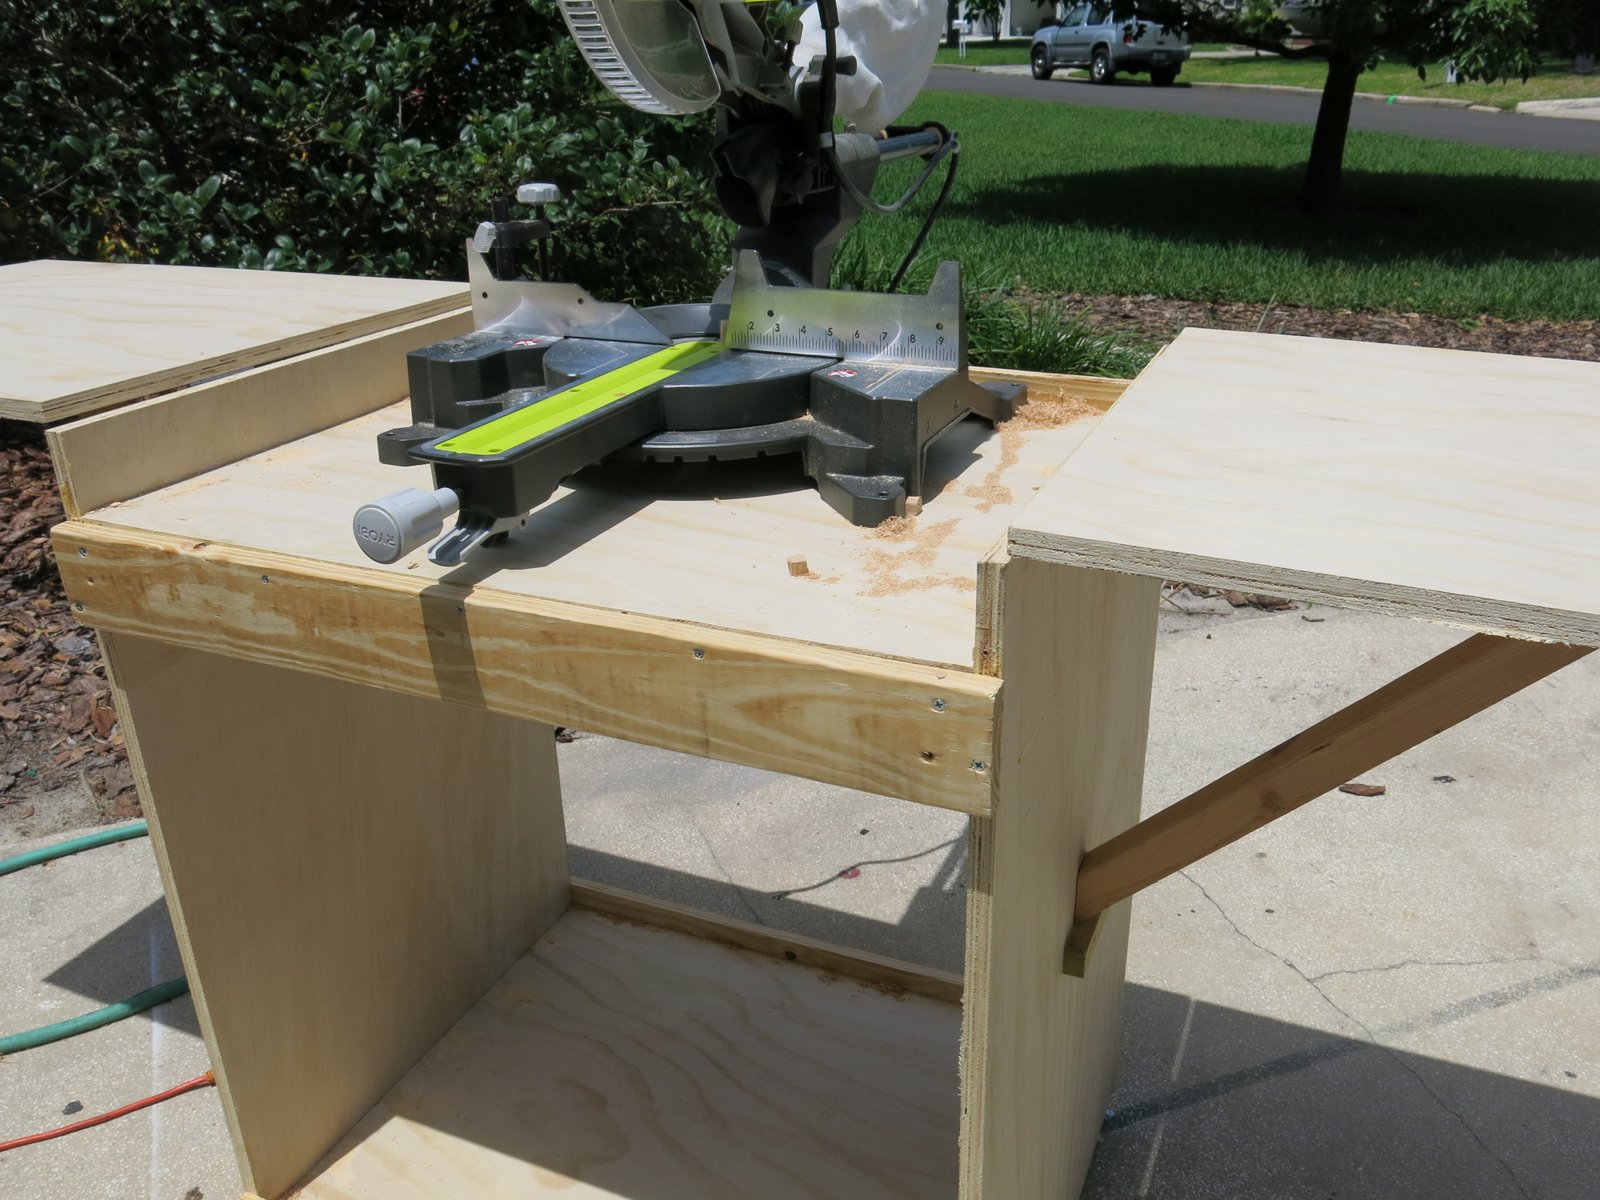
I essentially stuck to the main plan - except to support the wings I used 2X2 boards and standard hinges.
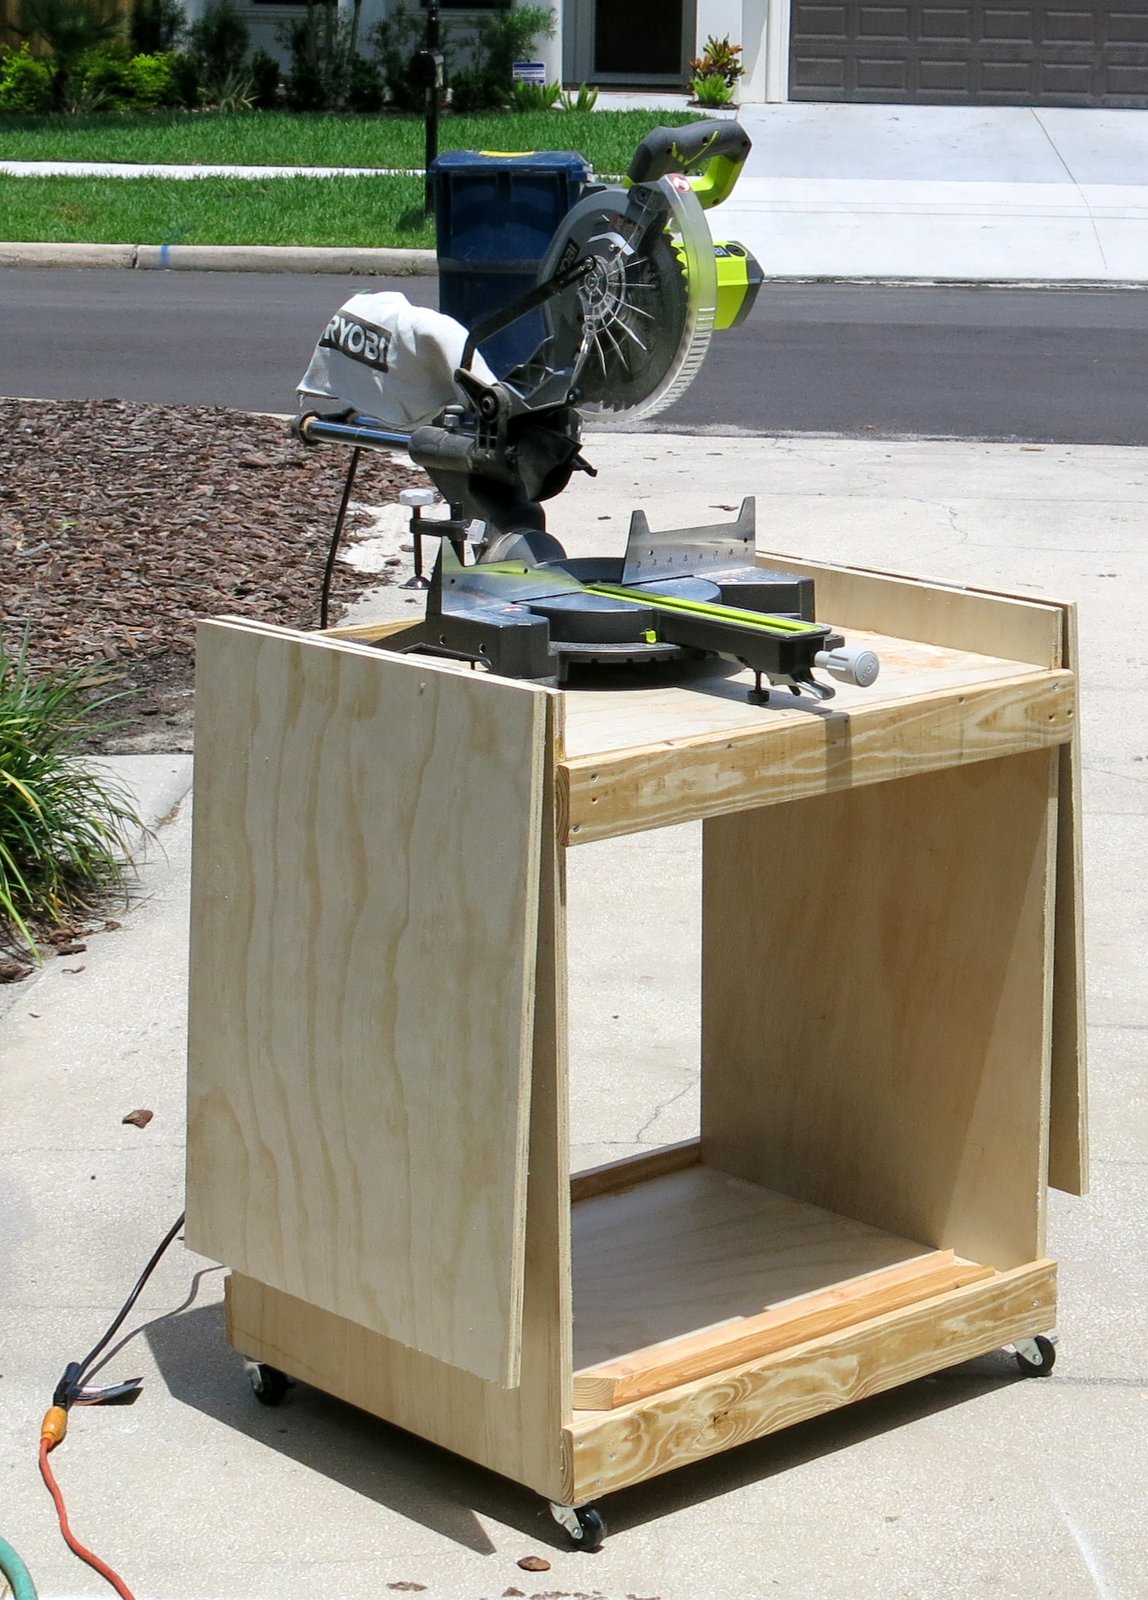
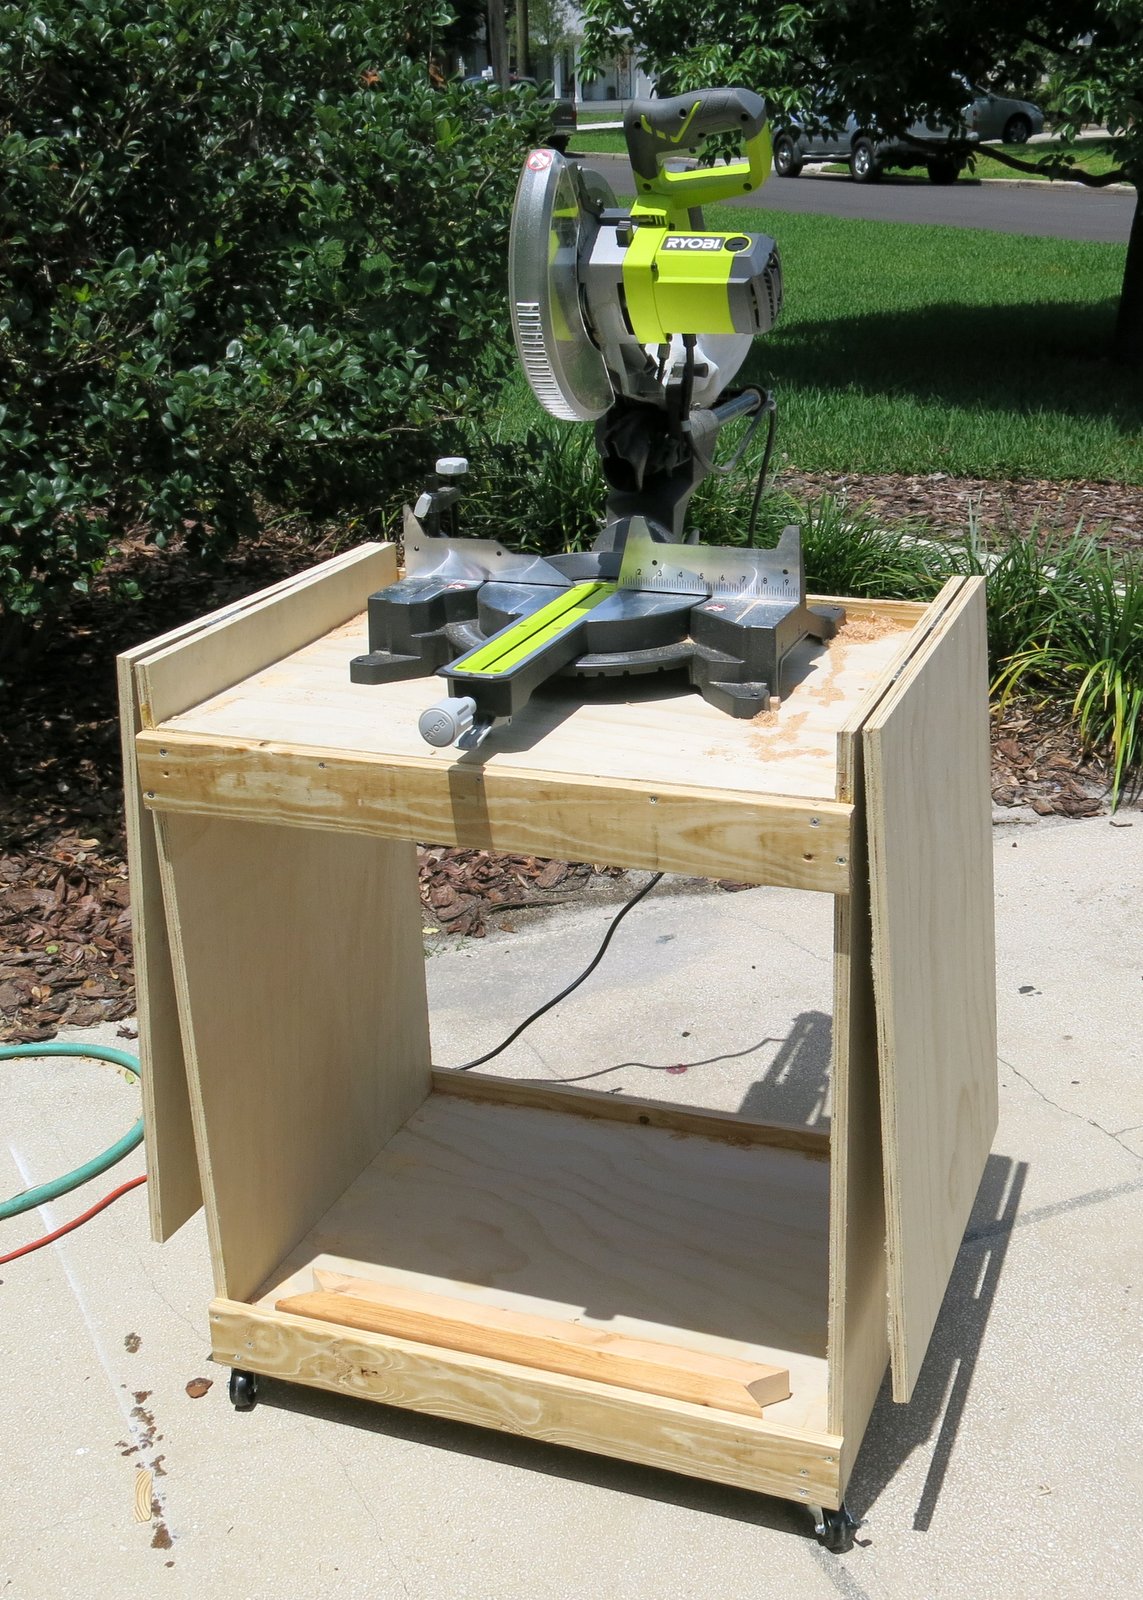
I was worried that there may not be enough space for my Ryobi 10" sliding miter saw because of the slide however, it fits nicely and there is plenty of space.
Thank you for the wonderful plan. This was my first project of this size and I am very happy with the results!
Fri, 05/01/2015 - 08:10
This is great. I am currently getting my Dad's help to turn an old kitchen cabinet into a miter saw cabinet with wings like this. (it was a 1940's solid wood kitchen cabinet we took out of the house when we remodeled). I really like your 2x2 support struts. Have you considered putting a shelf in the middle of your box? It would add extra support and also more room to store stuff.
Sat, 05/02/2015 - 09:09
Good idea. I did consider adding a shelf however I have now decided to use the lower area to store my small router table. I discovered that it would fit in the spot however it leaves not enough room for a shelf.
Mon, 05/18/2020 - 14:12
I know it’s been a while but do you remember the angle you used on the 2x2 supports? I struggle when it comes to cutting angles.
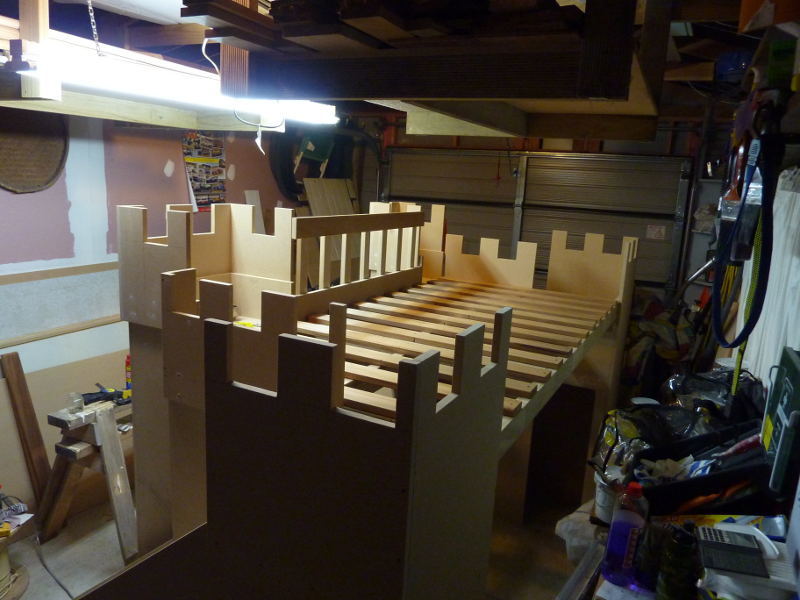
A big thanks to FSMumford for drawing this in Sketchup. I had to re-draw it to take into account metric wood dimensions and bed sizes here in NZ, and also to remove a foot or so from the length.
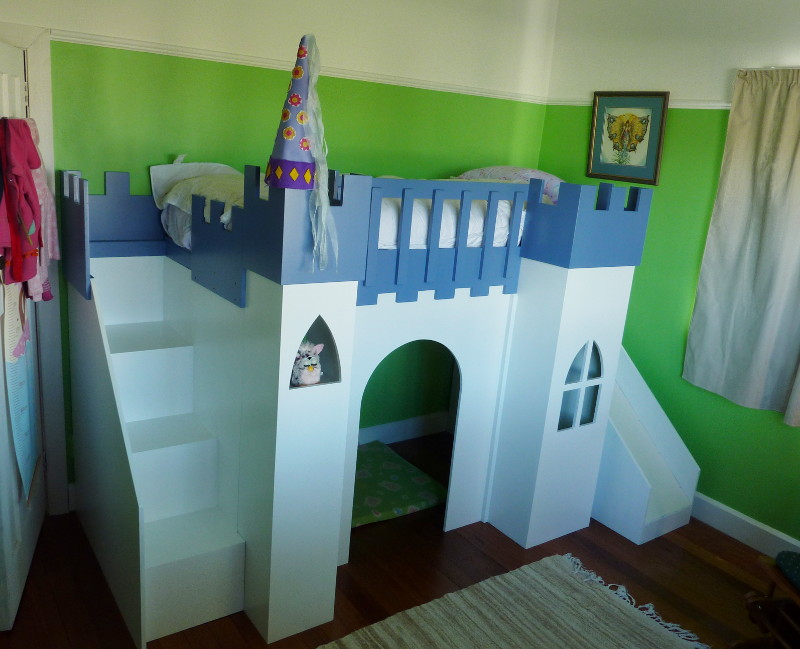
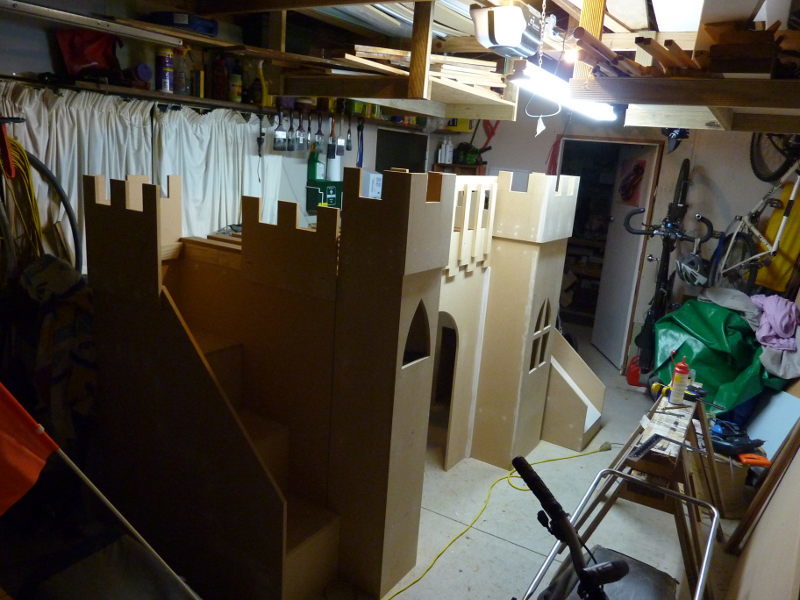
We just gave it to my daughter today, and already I need to make some modifications. I immediately put some vertical grab rails at the top of the steps and slide. The steps are too big for a toddler (she's 3 today) and I didn't take into account how thick a pillow top mattress is! I really needed to make the end guards higher. In fact, were I to make it again, I'd probably make the towers taller and lower the height of the bed by 8-12 inches. While this would lower interior room, it might make the steps a more reasonable height for a littlie. If you're building for a 5 or 6 year old, this may not be an issue. Also, it would make the angle of the slide shallower (it's a bit steep, I reckon). I used 7 sheets of 16mm MDF but if I'd laid them out like FSMumford did in her plans I would have used less. Our (one car) garage is too small and the whole build process, including painting, was a royal pain in the bum. Fun, but a pain. Speaking of painting, next time (riiiiight) I'd try to paint as much as possible before assembling. I built mine in modules but even so it's hard to get a nice coat of paint on the insides of things. Edges of MDF need to be painted and sanded at least twice to look nice. Don't underestimate the time needed to get a good finish - I spent a third of my build time finishing (mostly, again, due to limited space). A narrow foam roller is great for cutting in but doesn't seem to get enough paint on to cover well on larger areas. In places I have three coats and can still see my pencil marks. I used Dulux Aquanamel.

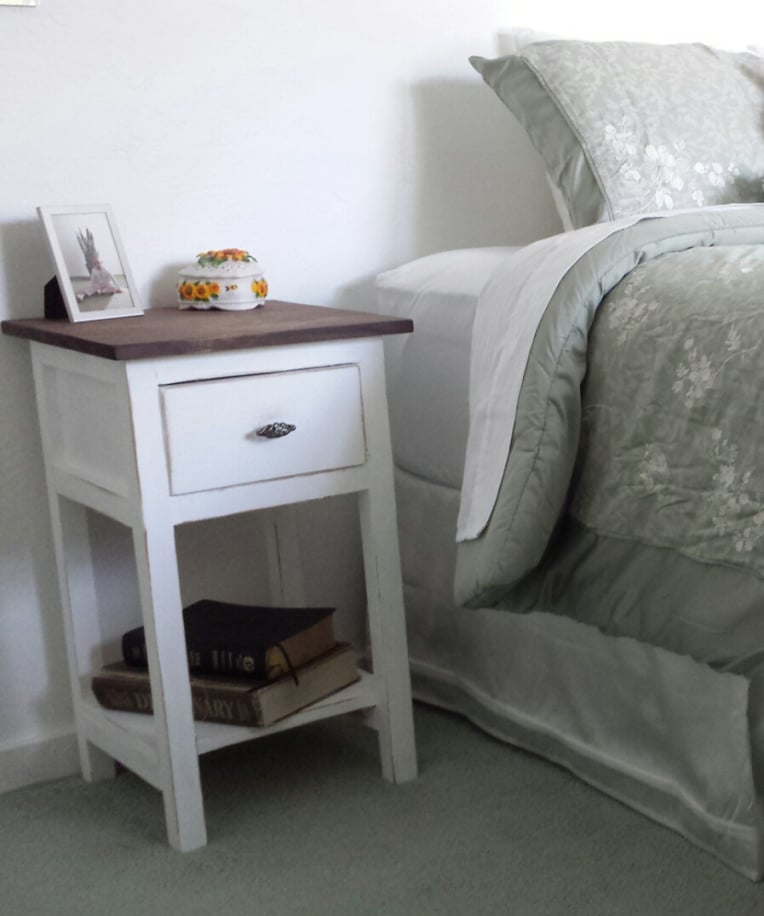
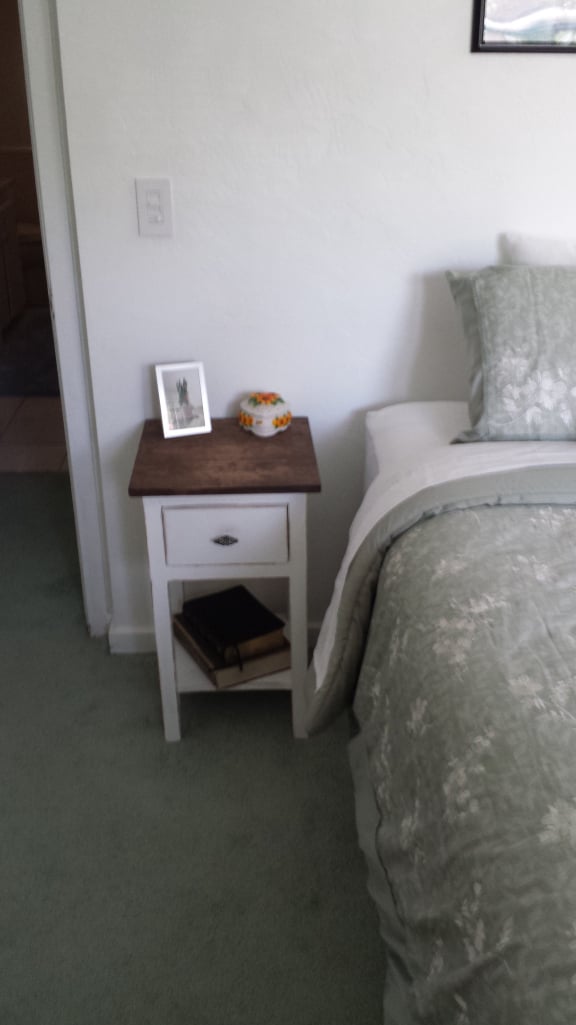
I built this nightstand when my wife and I purchased a new bed. We had to rearrange the bedroom and as such, I no longer had a desk or table on my side of the bed. I wanted something "country" style and after searching through several different plans I found a brag post that fit exactly what I was looking for. Well, technically, I found the original Farmhouse Bedside Table plans and modified them to fit what I needed. It wasn't until after I completed the project that I realized there was a "Mini" version as well. What can I say, I'm not that great as using search. I actually built this over a year ago at this point, and it was the second project I ever built. I learned quite a bit on this project, including the fact your project will only come out as good as your lumber selection! This build actually created my addiction for DIY and woodworking. Thank you Ana!
Mon, 09/14/2020 - 18:41
this is going to be a perfect first project for me and my daughter to tackle!
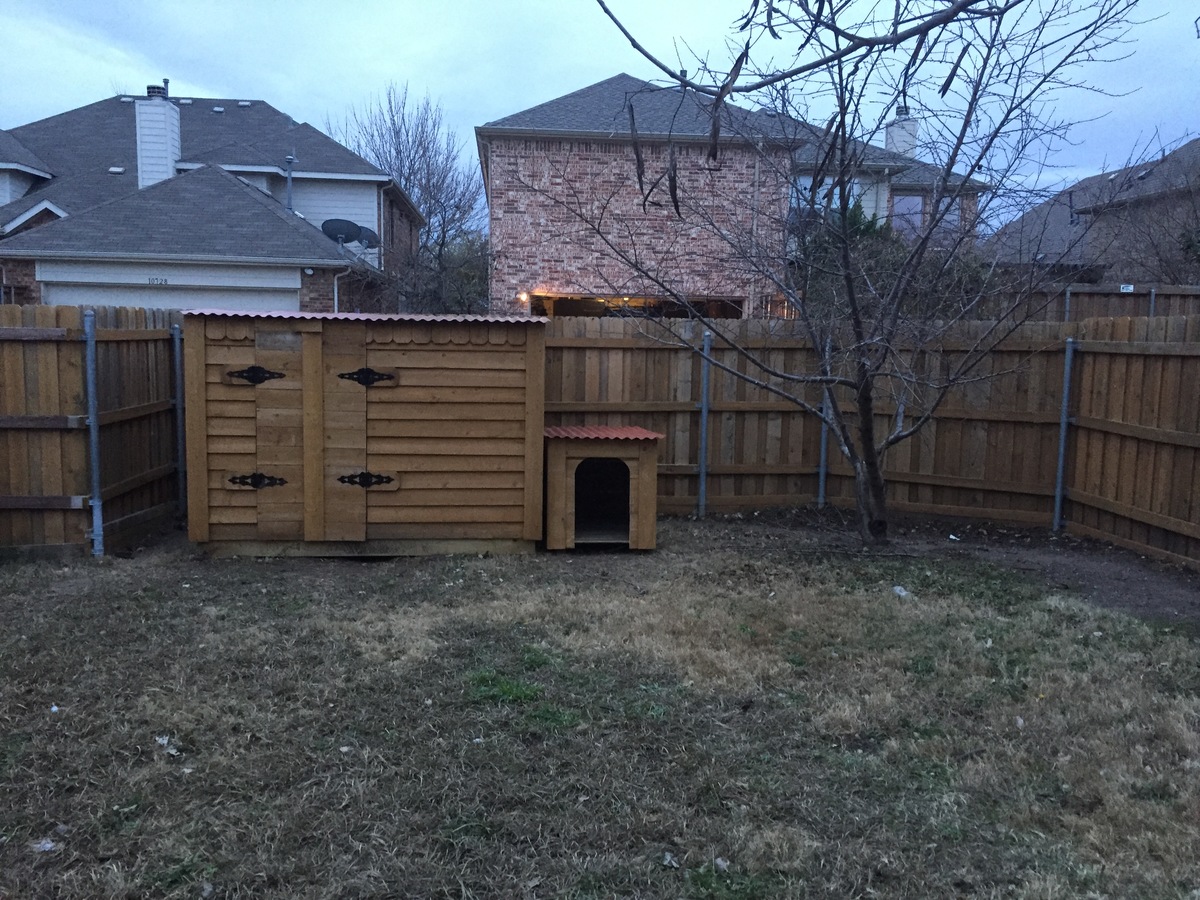
I needed a shed to get my outdoor and seldomly used equipment out of my gargage. But I needed the shed to be small so it doesn't take up too much space in the back yard and my HOA will not allow it to be taller than my fence. So I needed a small/short shed. I didn't use any plans, but it would probably have been quicker if I had. I did it with free time during a week, but could probably be all completed during a weekend. It was probably a few hundred total. I tried to reuse existing hardware/wood where possible. I'm a cheapskape. Here's my blogpost I did with additional pictures...
https://drowland.wordpress.com/2017/12/22/small-short-storage-shed/
You can see I also added a matching doghouse.
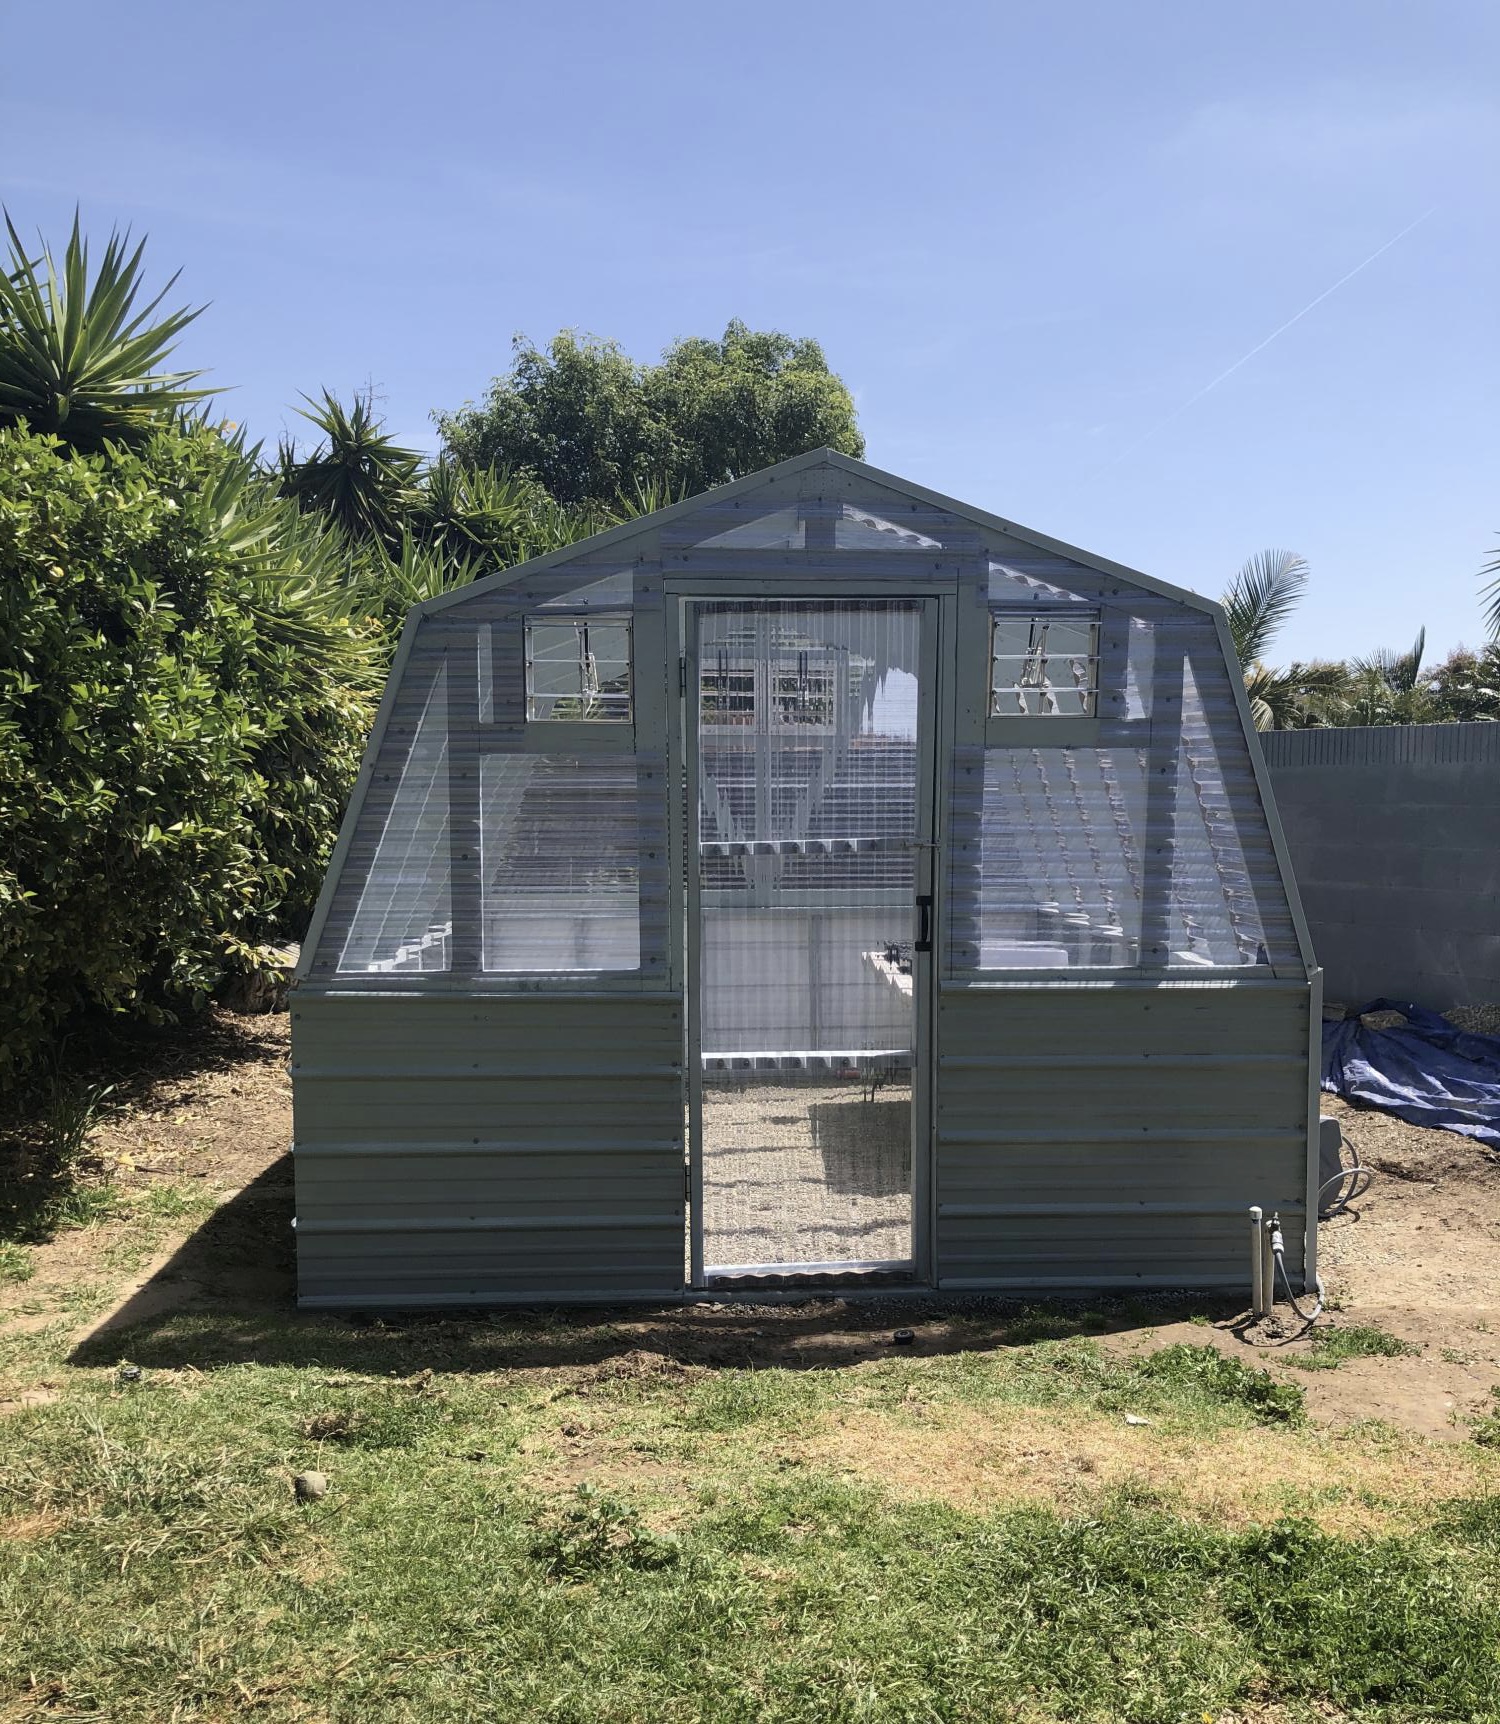
Love my new greenhouse !

I didn't build this shoe dresser because I particularly needed one, but it looked so lovely that I couldn't resist.
- I modified the plans by building 3 bins instead of 2 so it could hold more shoes.
- I decided against the dowel stick and opted for hinges instead, which were surprisingly not too difficult to assemble. I found that I didn't even need the magnets after installing the hinges as the doors stay closed.
- I used 7" chains on both sides of each bin instead of a belt to make it extra sturdy.
- I added two back legs.
Et voila! This is the end result. I'm very pleased.
PS. Those flopping bins are a pain when you're trying to build!! An extra pair of hands is definitely recommended.


Fri, 07/05/2013 - 22:49
Pretty :) Good Job. Now if I only had the space for one thats 10 rows high :P I like the stain color too. Shanty 2 Chic always uses Rust-o-leum. I think its called dark walnut. Dont quote me though. I love the stain and spray paint combo colors they use.
~Melody
In reply to Nice Job by SoCaliforniaMel
Sat, 07/06/2013 - 20:00
Rust-o-leum, that's the one!
Yes, if only every woman could own a 10-row cabinet for all her shoes! :)
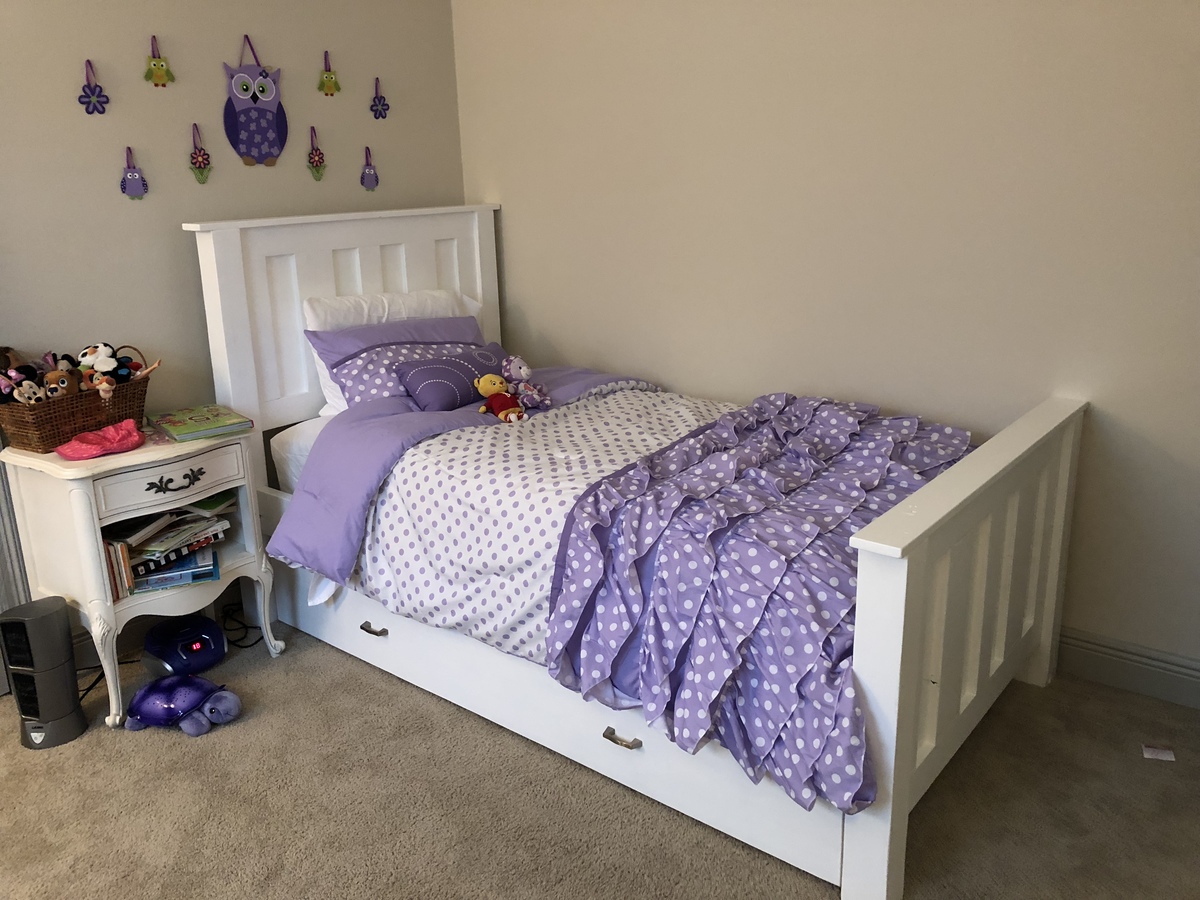
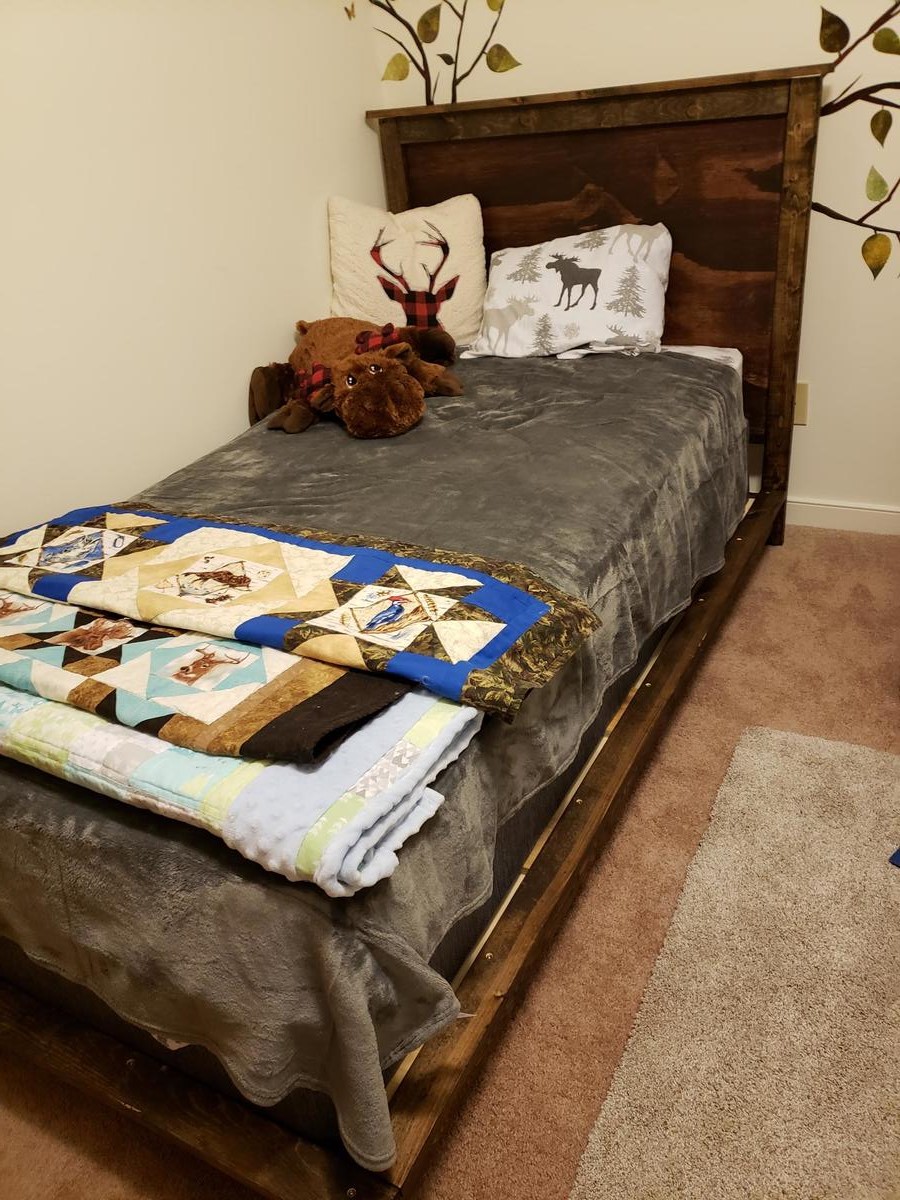
It was time for Addison to get a big girl bed. We used the Kentwood design and the trundle bed plans.
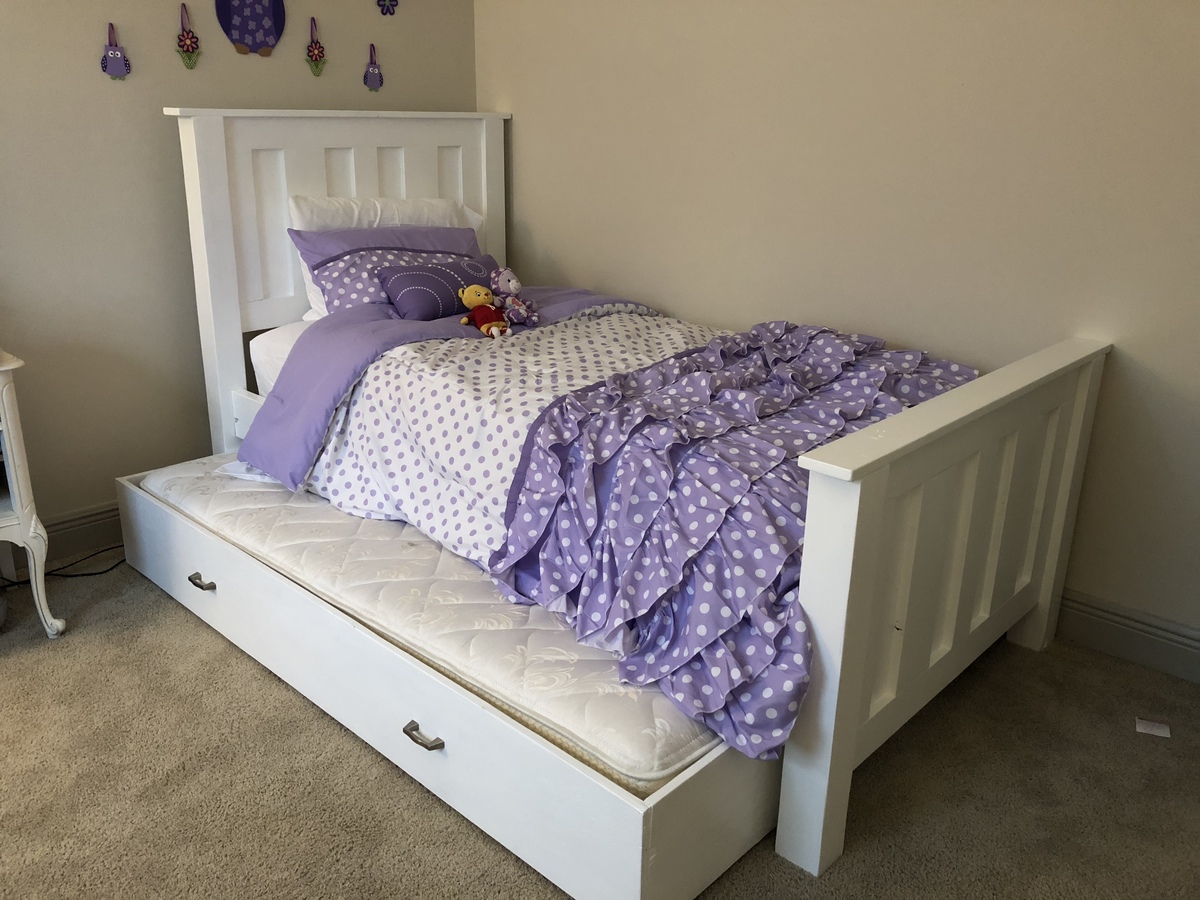
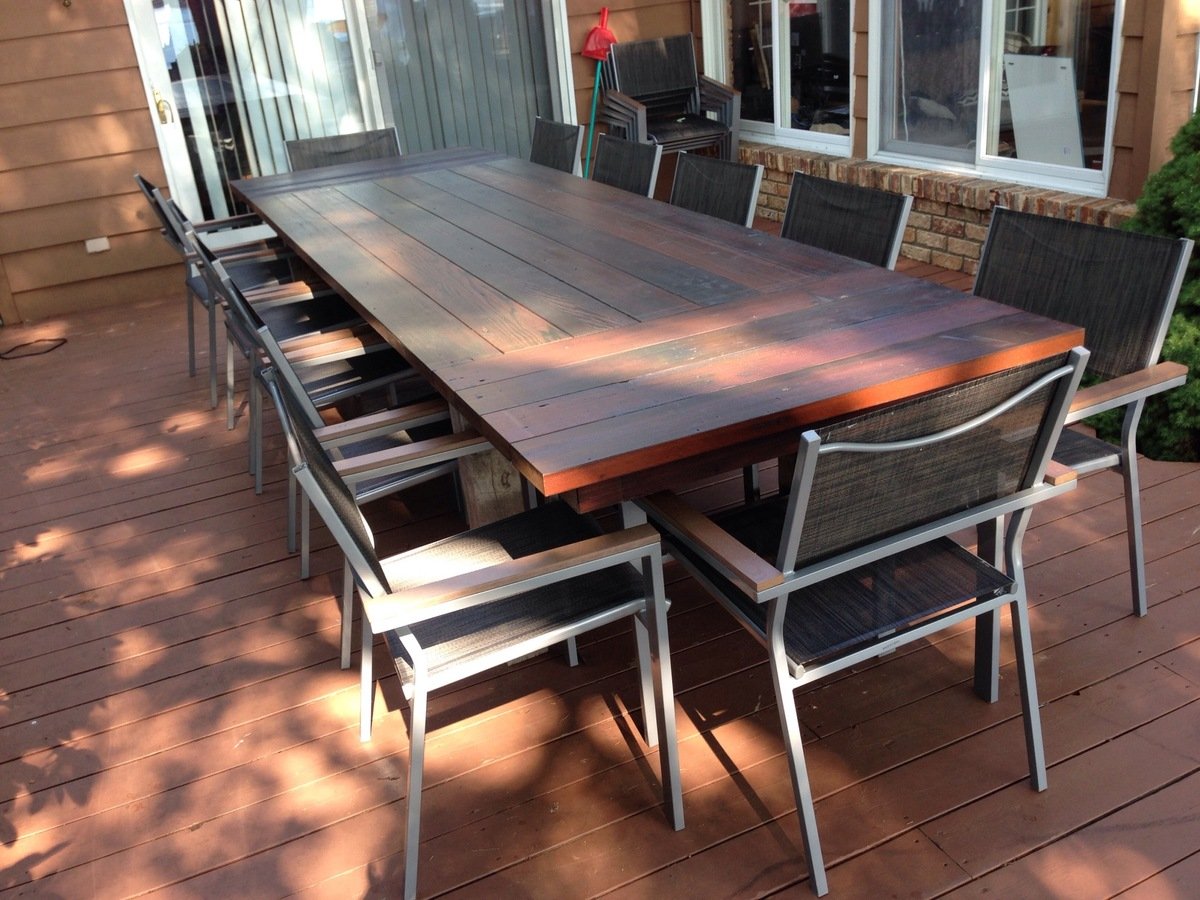
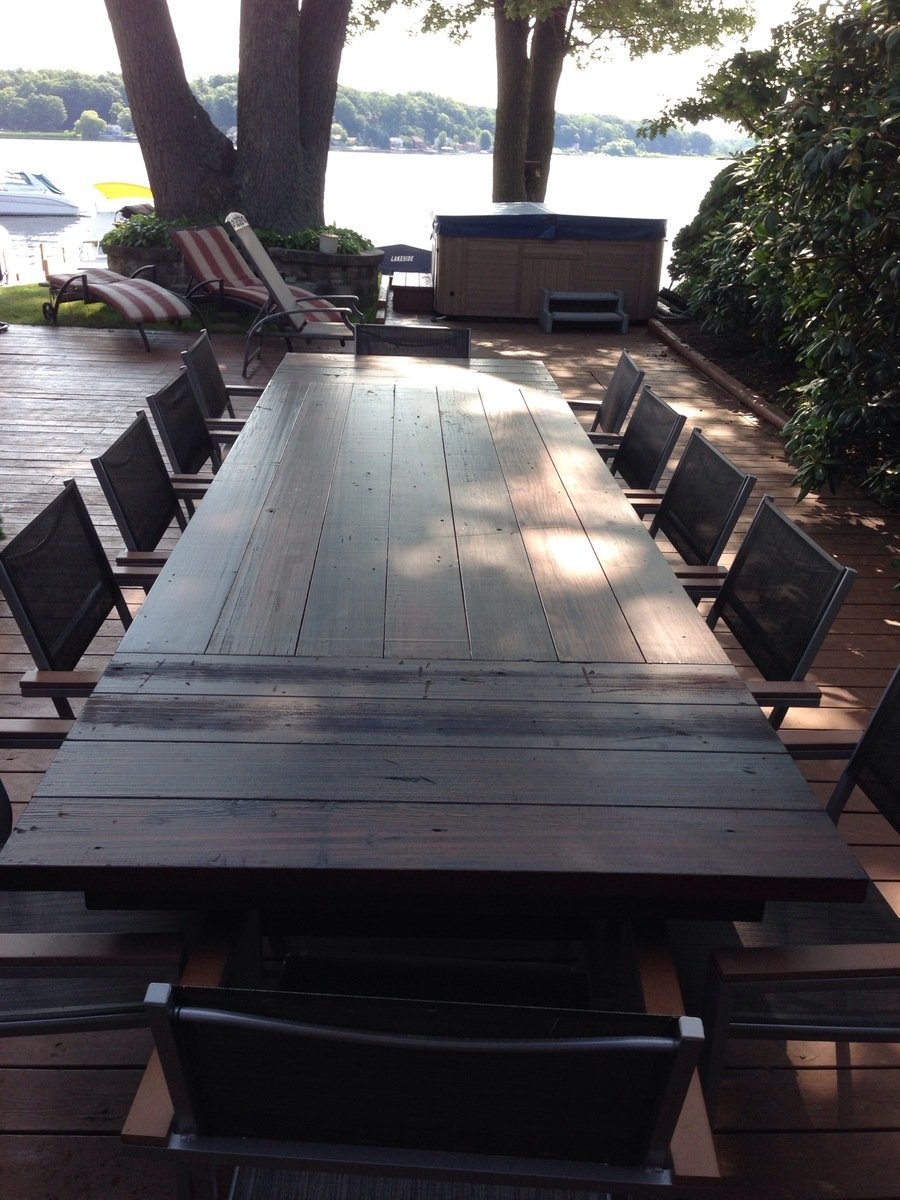
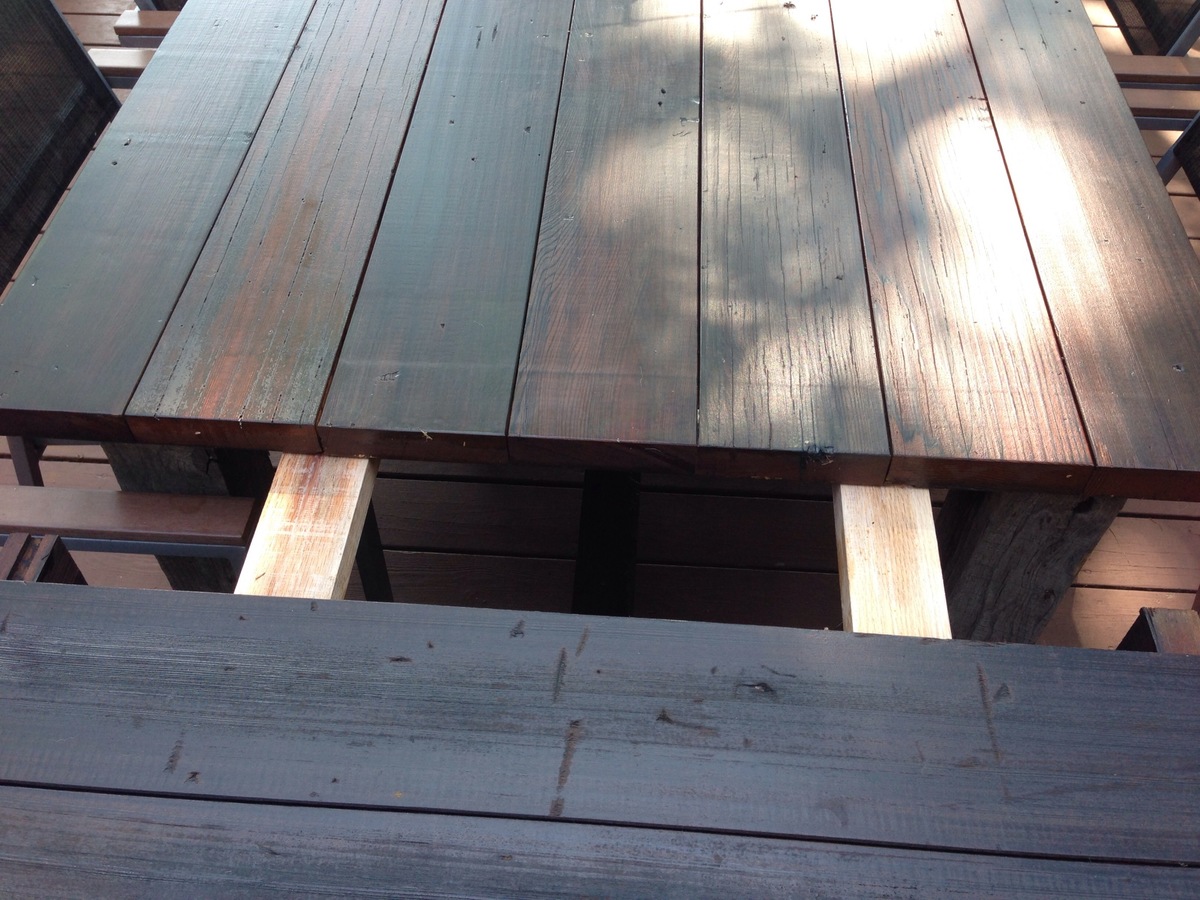
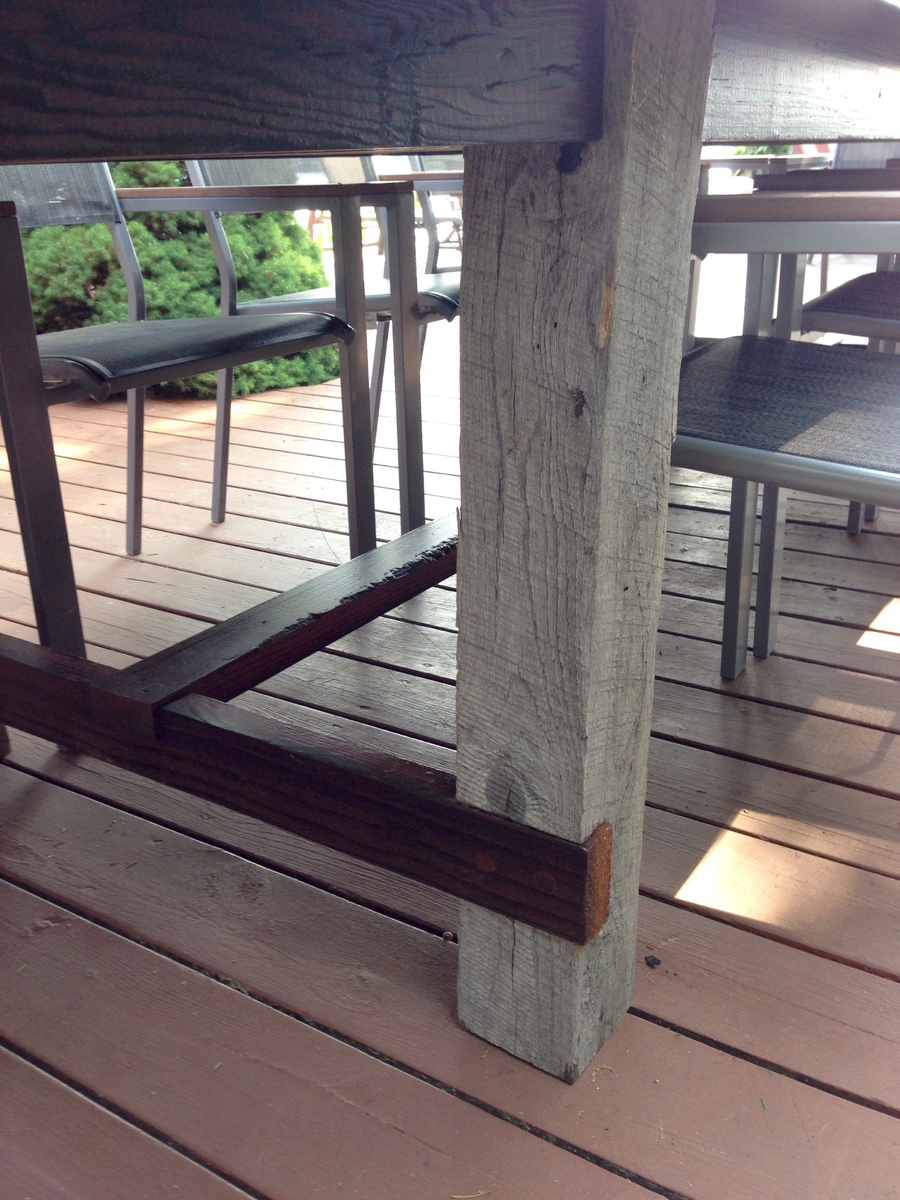
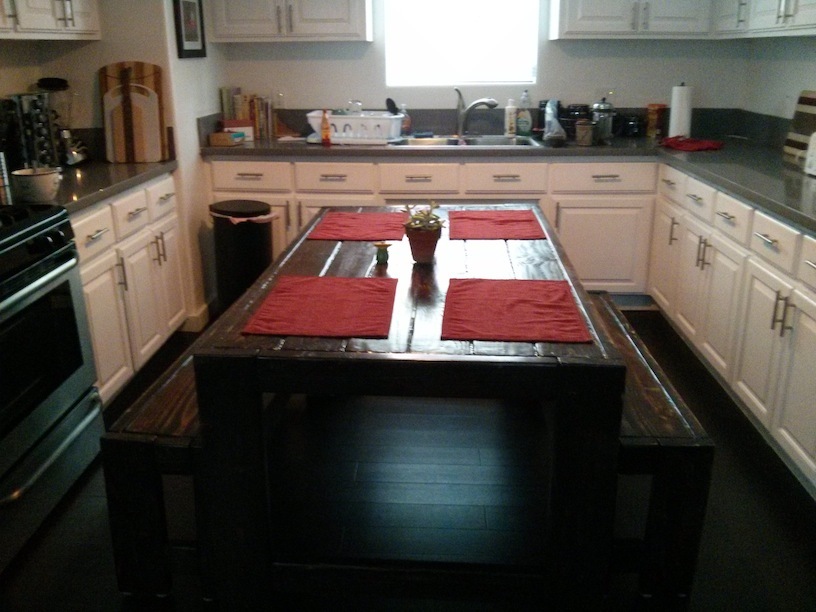
I had no experience building furniture prior to this project but I wanted a 12 ft outdoor table and could not find one. This tables center section is 8 ft and was built roughly following the plans for the farmhouse table. I added two 2 ft extensions at each end making the overall table 12 ft. The extensions included aprons so when installed they look to be part of the table. The extensions just plug into the end apron of the center section with 2x4 oak braces which engage in the apron and under the table approximately 2 ft from end. There is no visual sagging of the extensions. I finished the table with Sikkens DEK finish.
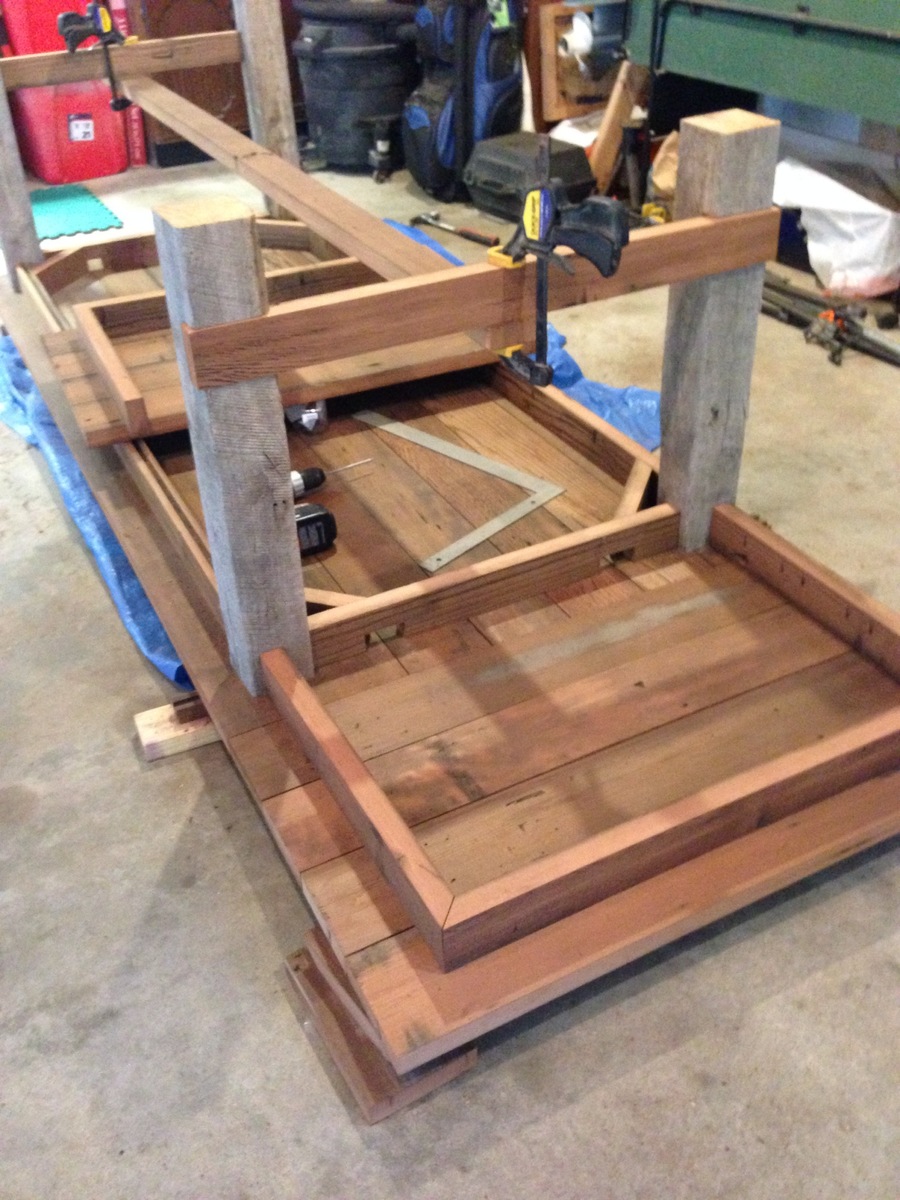
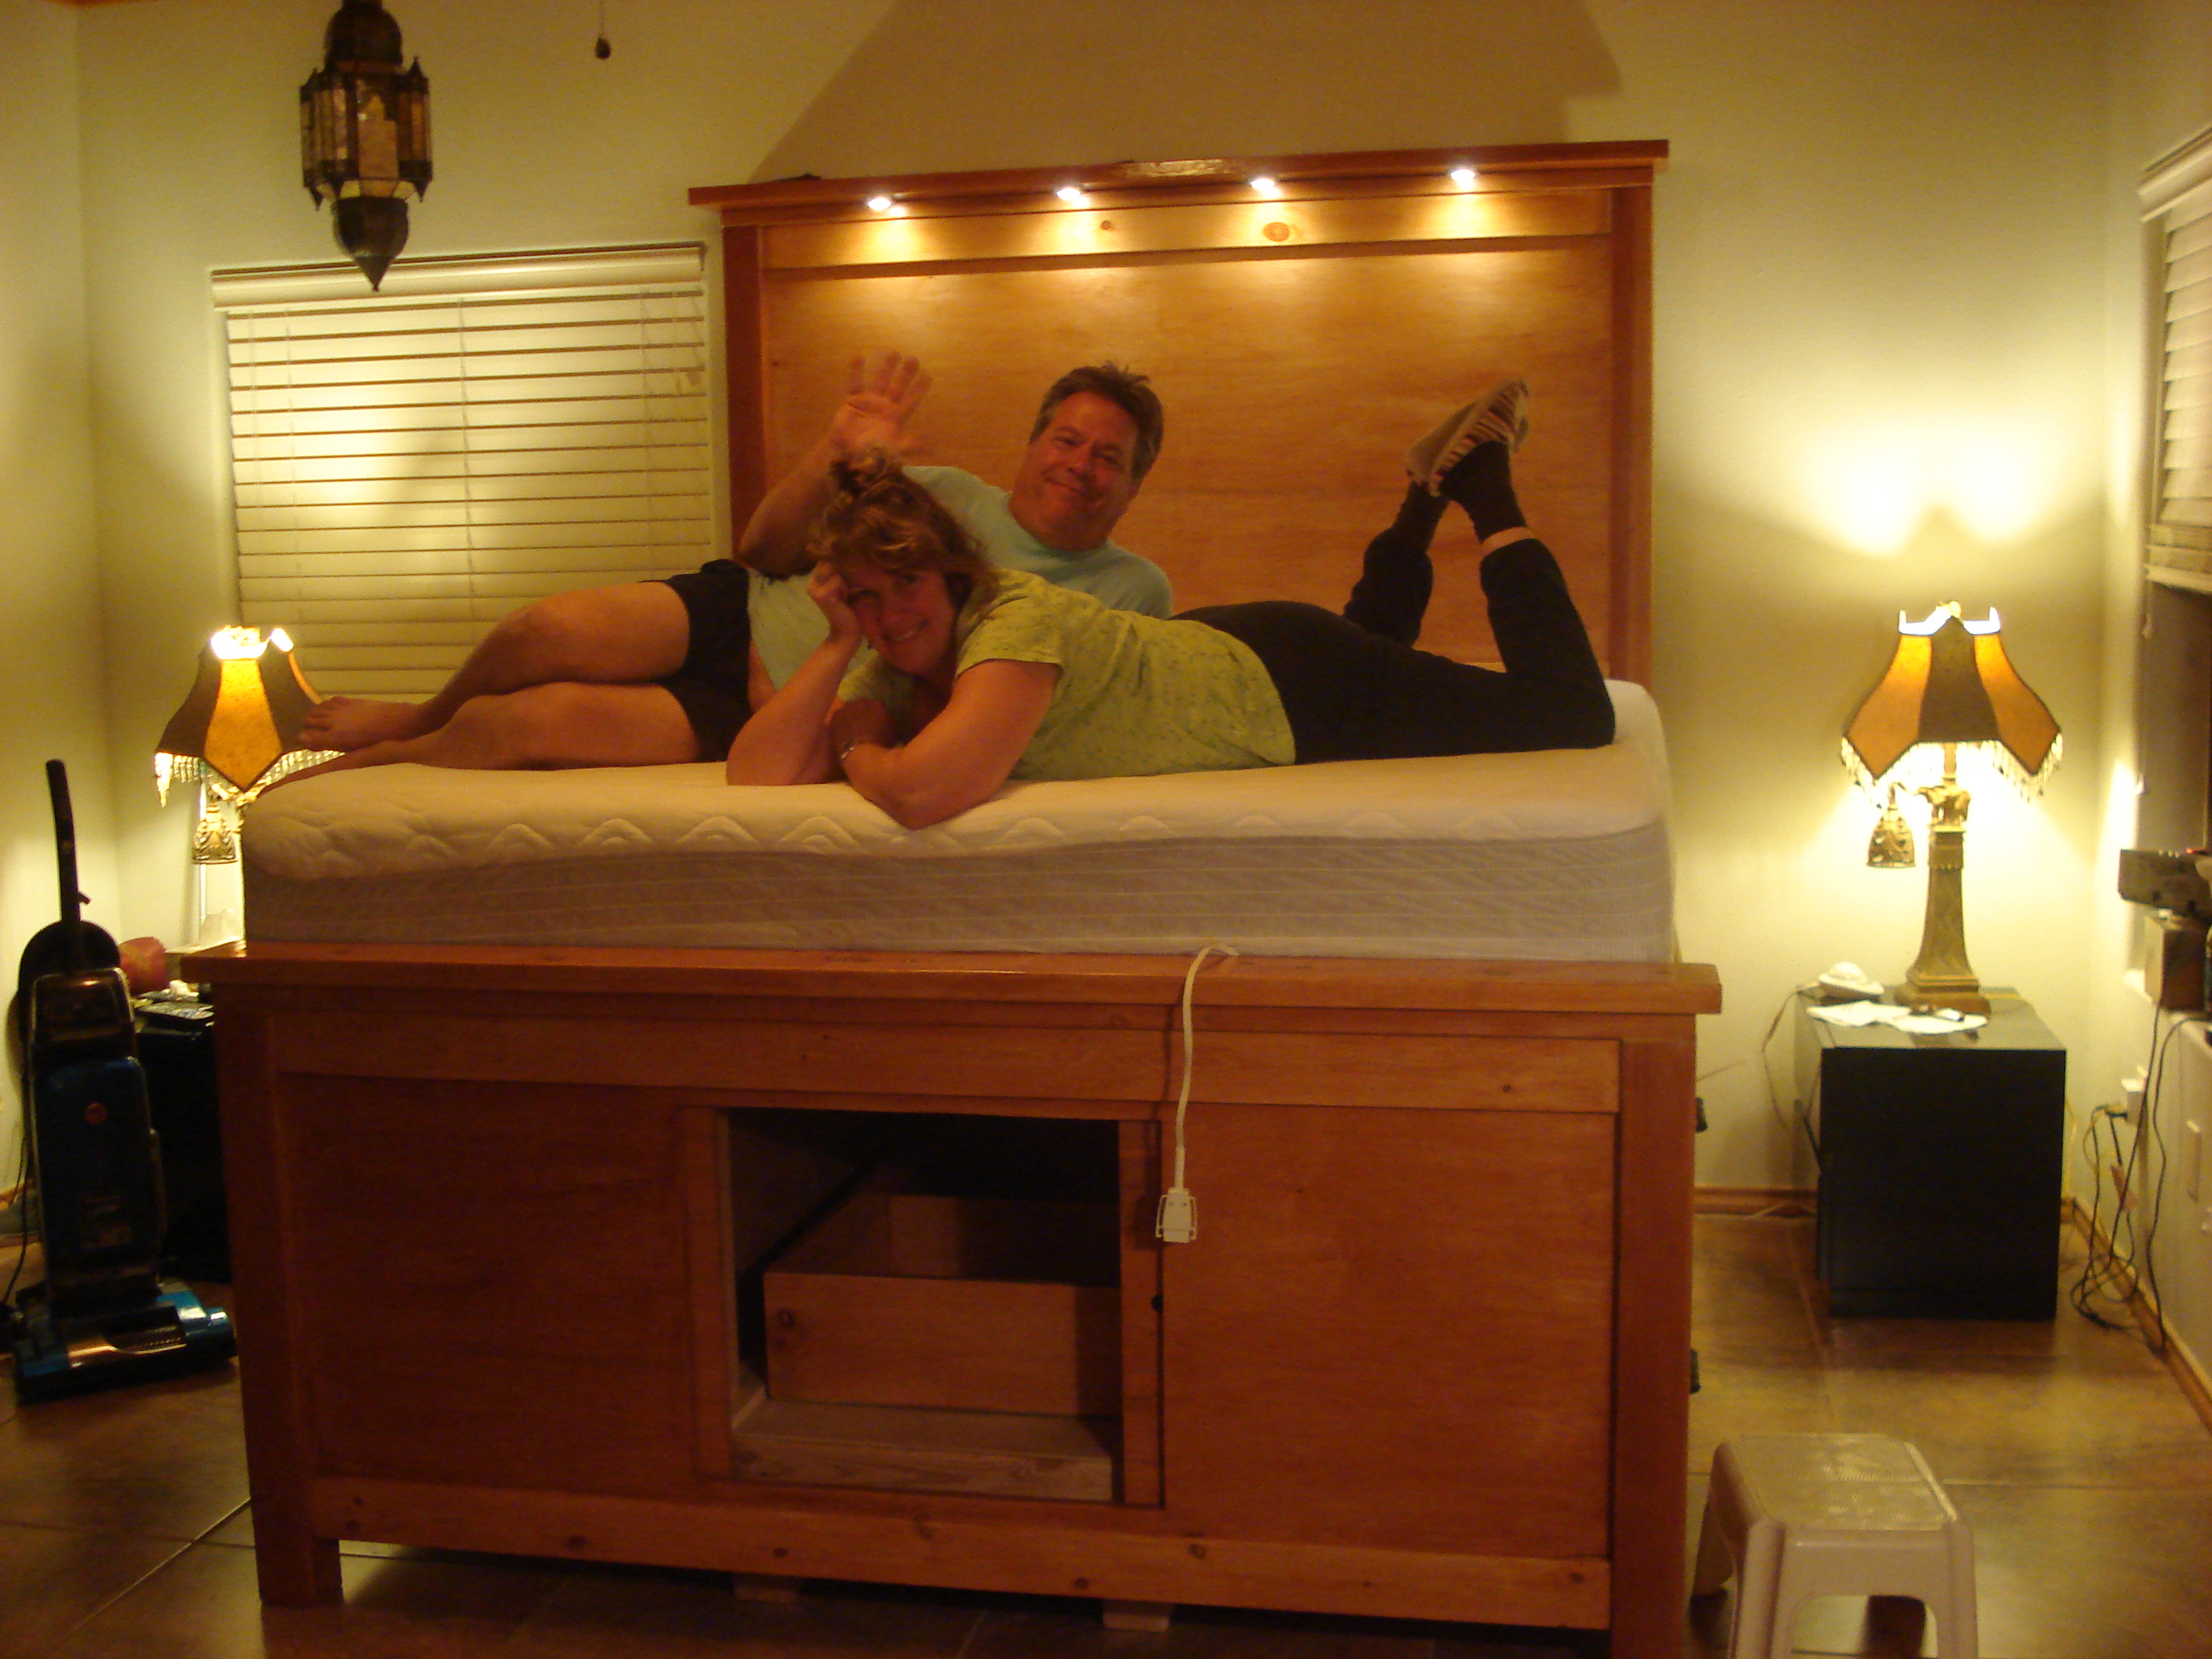
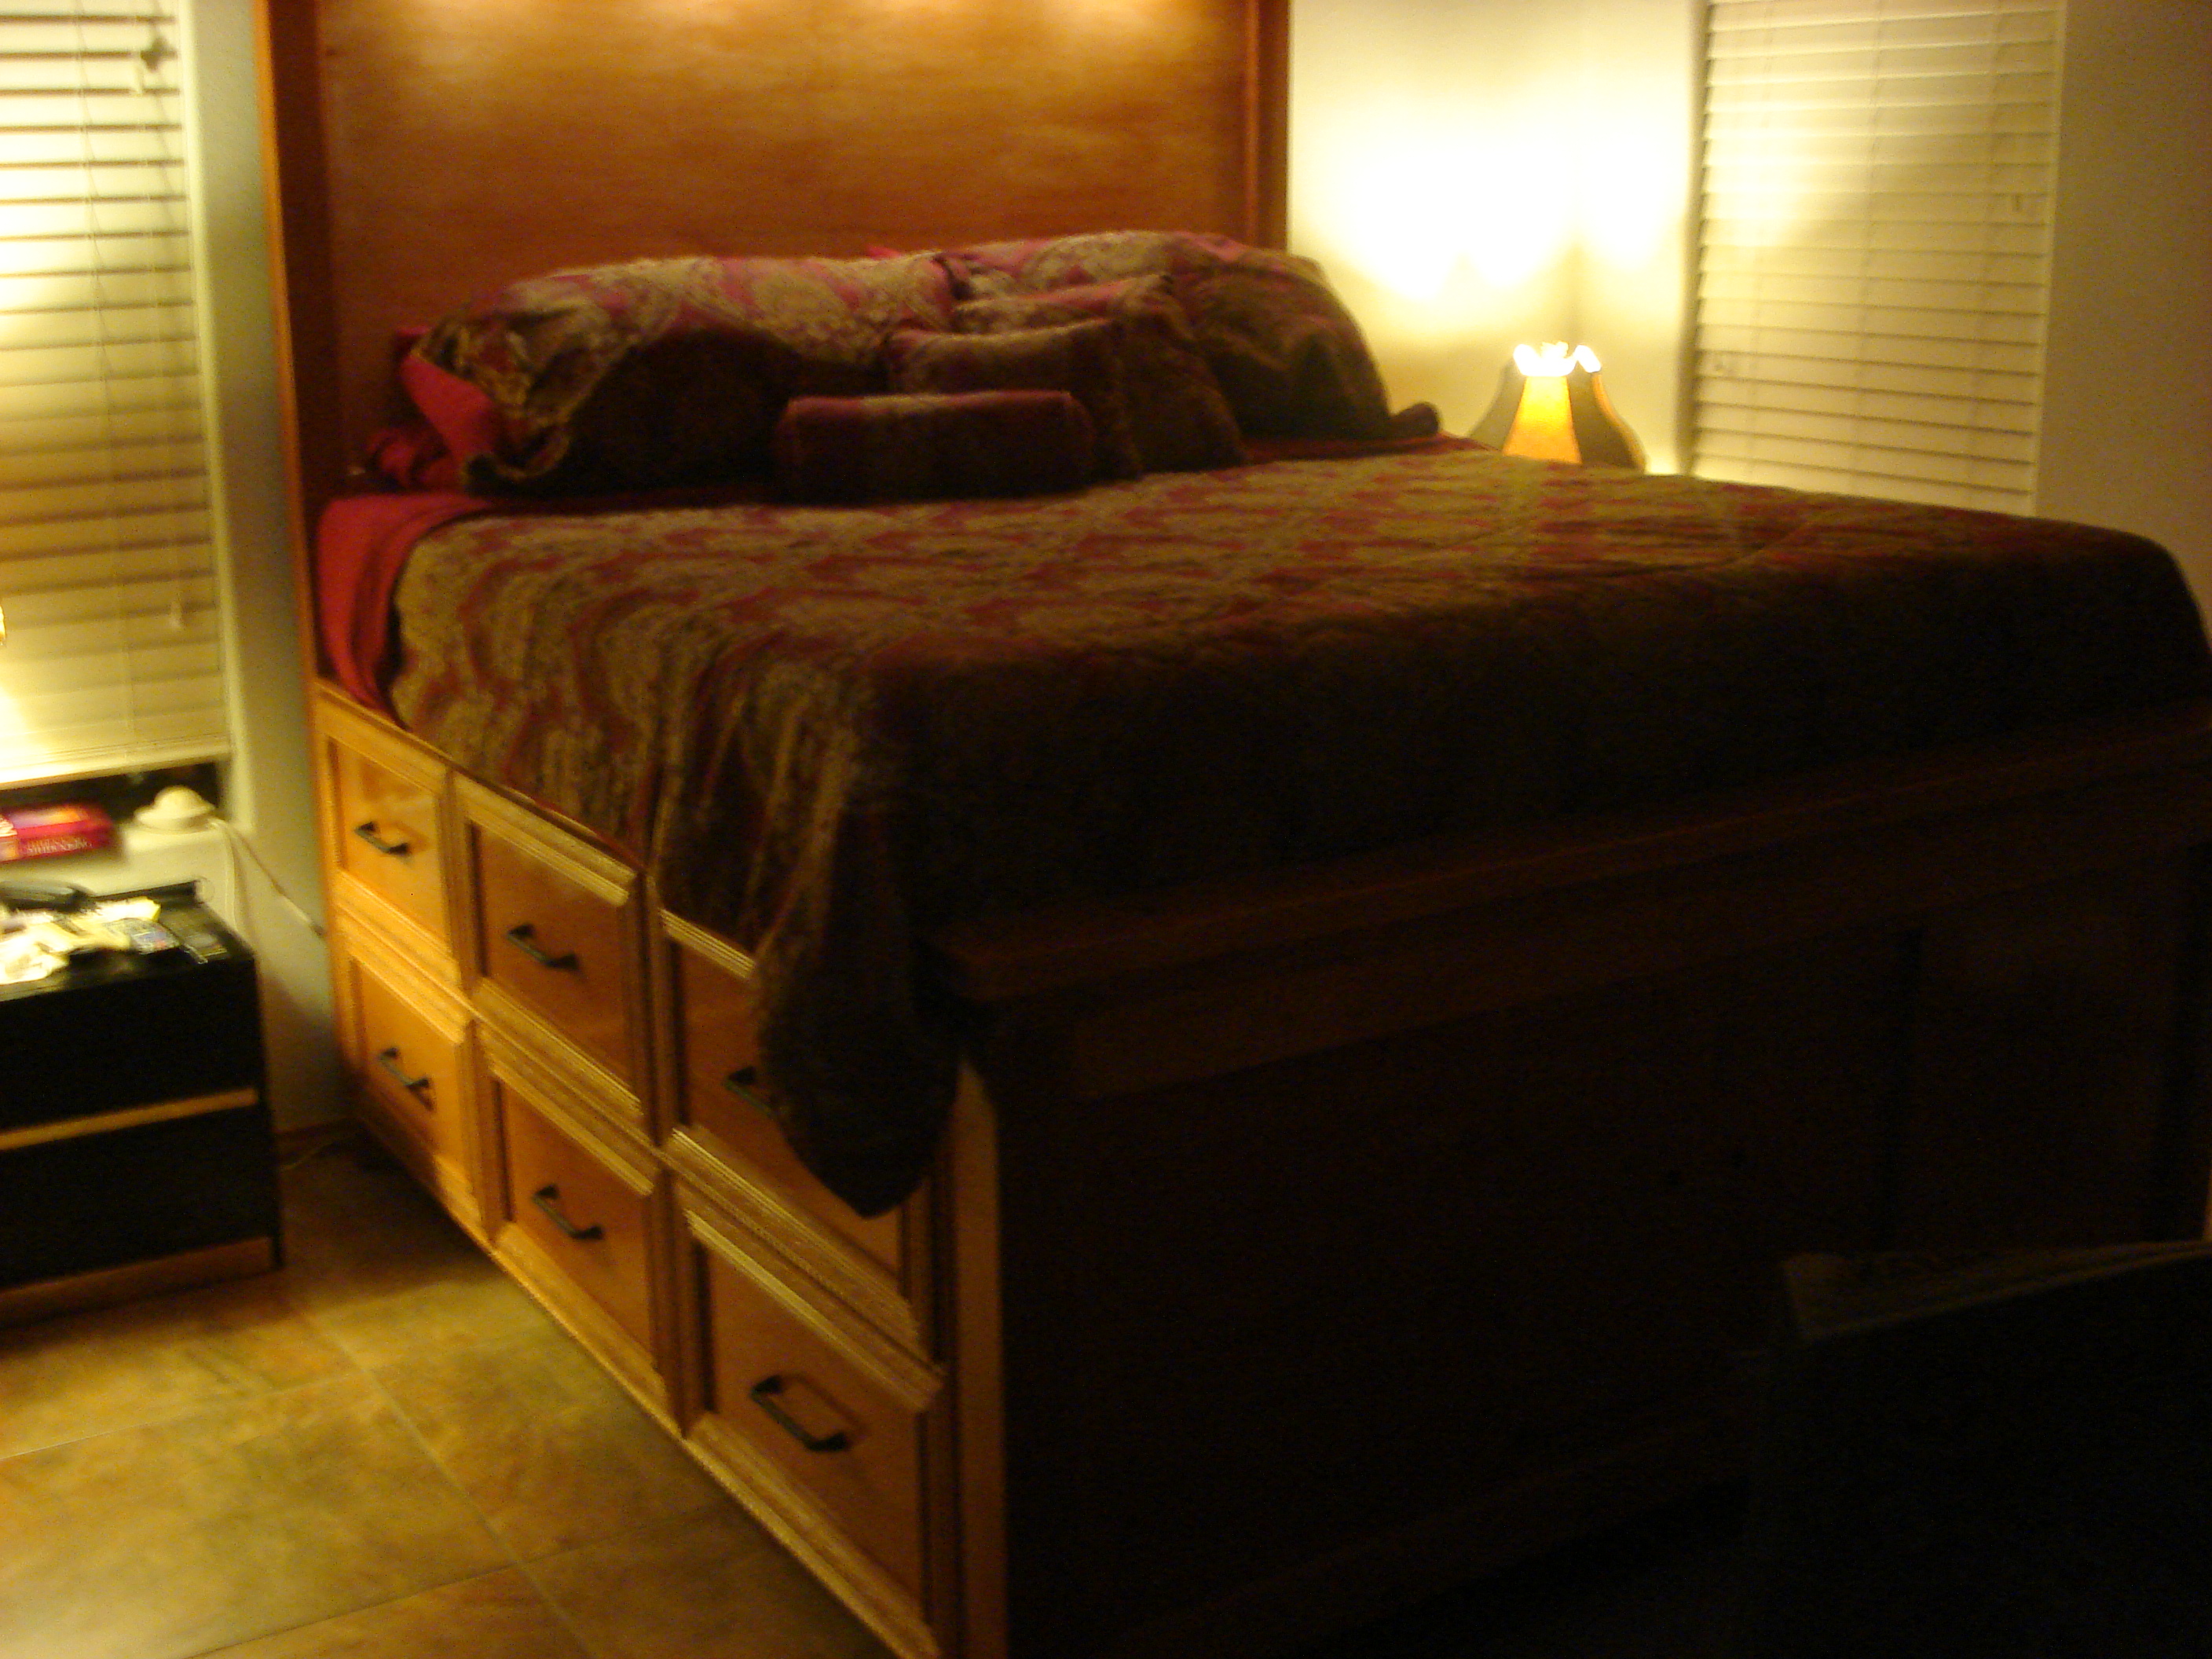
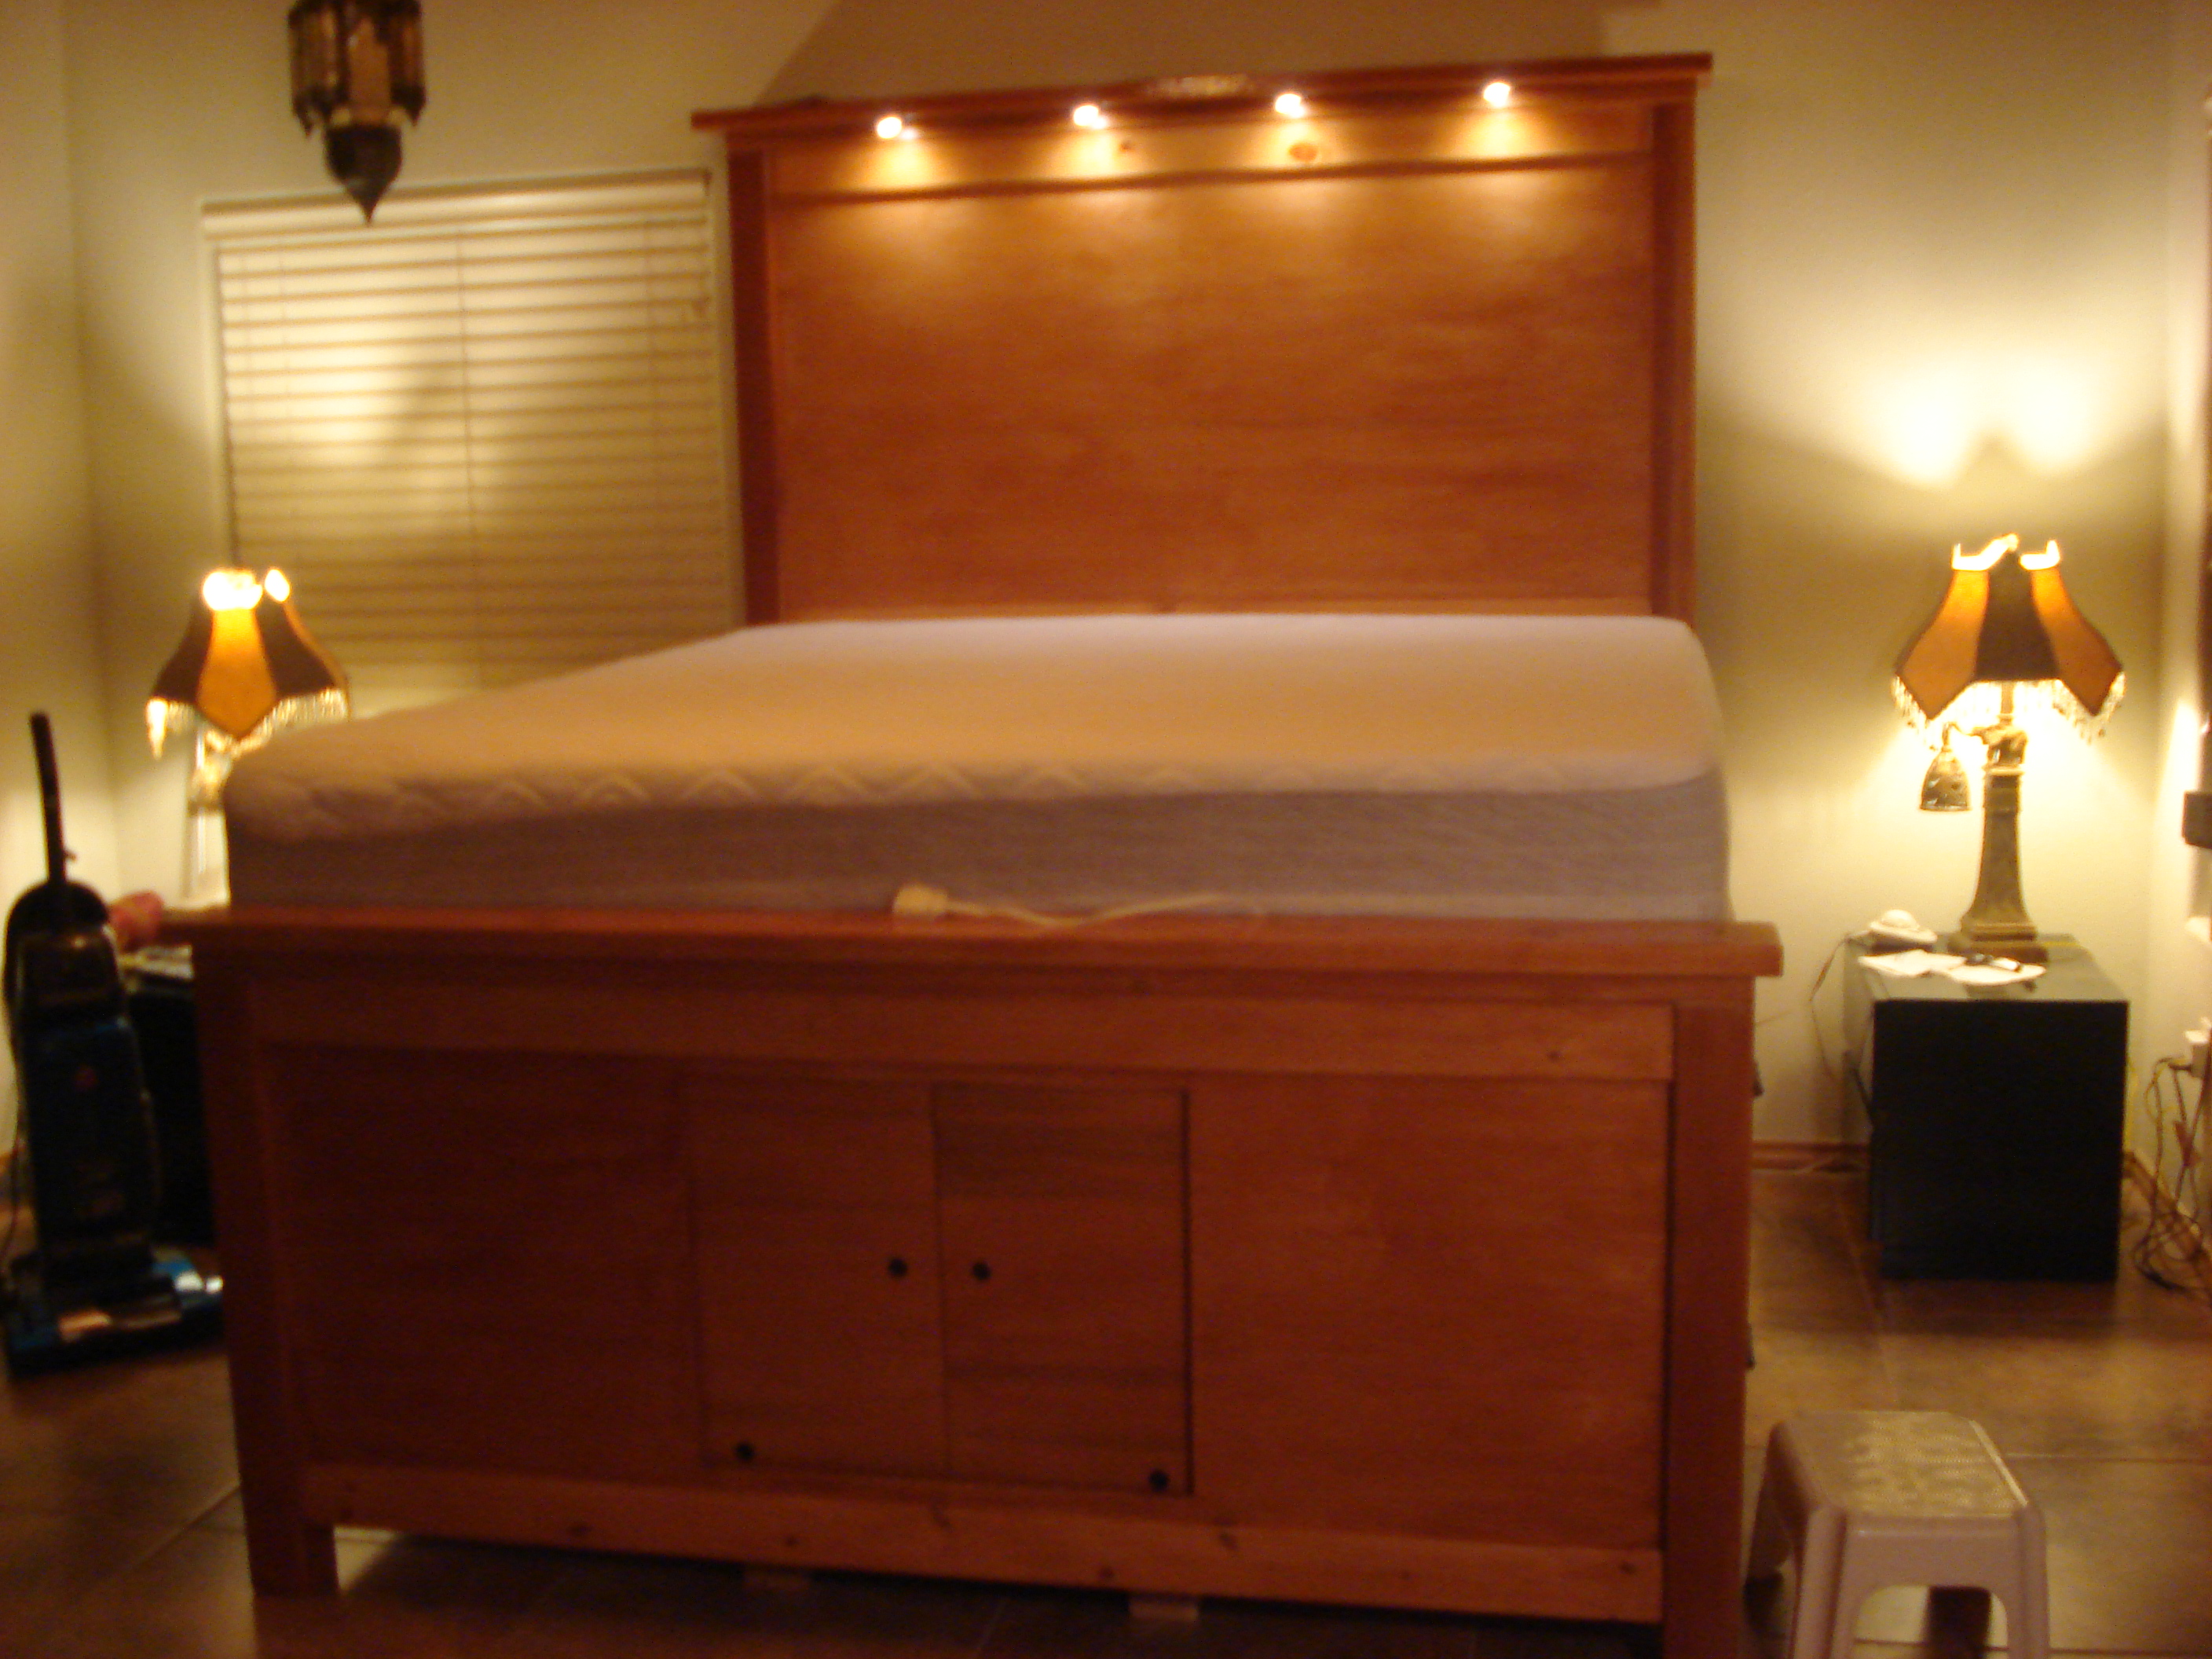
We had bought a house in New Mexico that was sadly lacking for closet space, as well as square footage for furniture. I was looking at Ana White's website, and saw the plans for the Farmhouse storage bed. It was good, but needed some steroids. I got out the calculator, and started upsizing EVERYTHING. What happened was, BEDZILLA!! King sized bed with 12 giant drawers. I also added lighting to the headboard for reading. It was a blast to build, and I was very pleased with, and proud of the finished product.
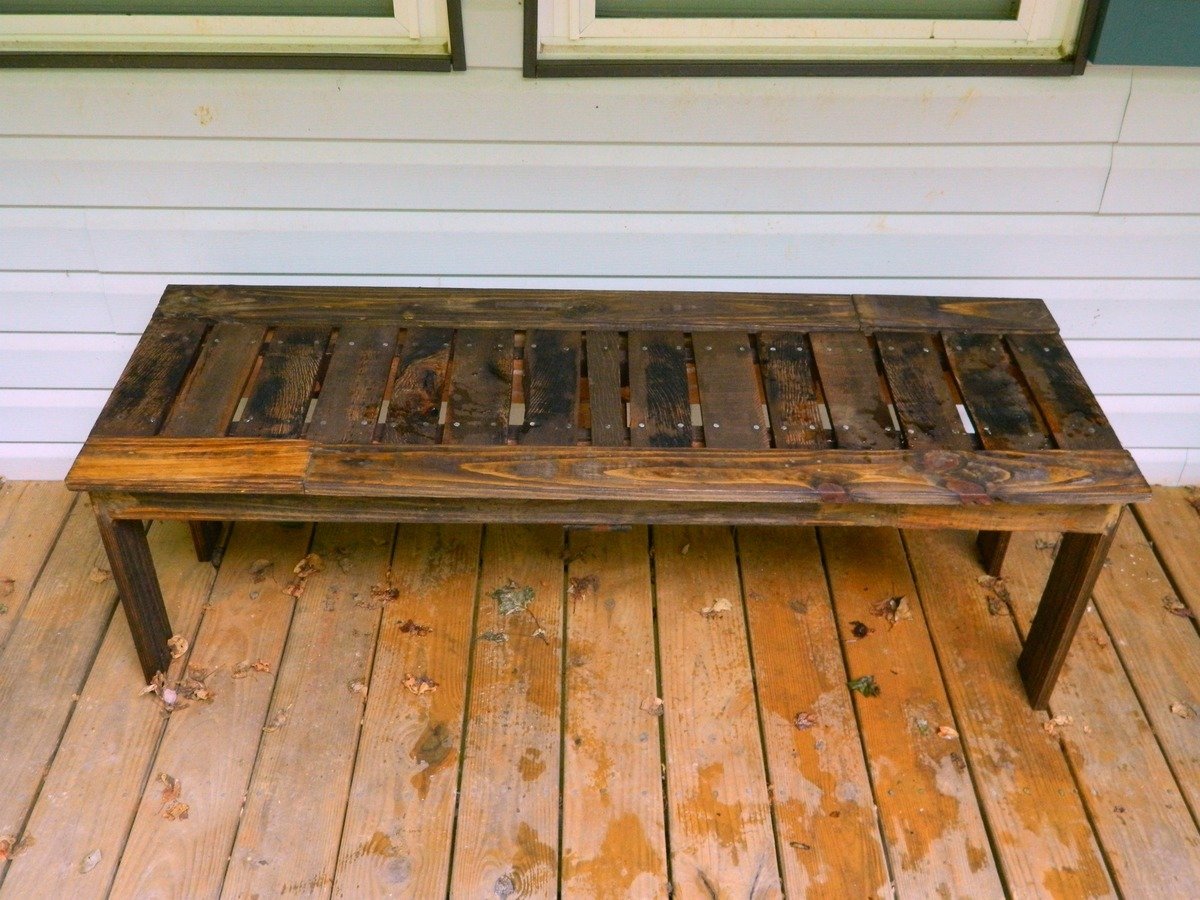
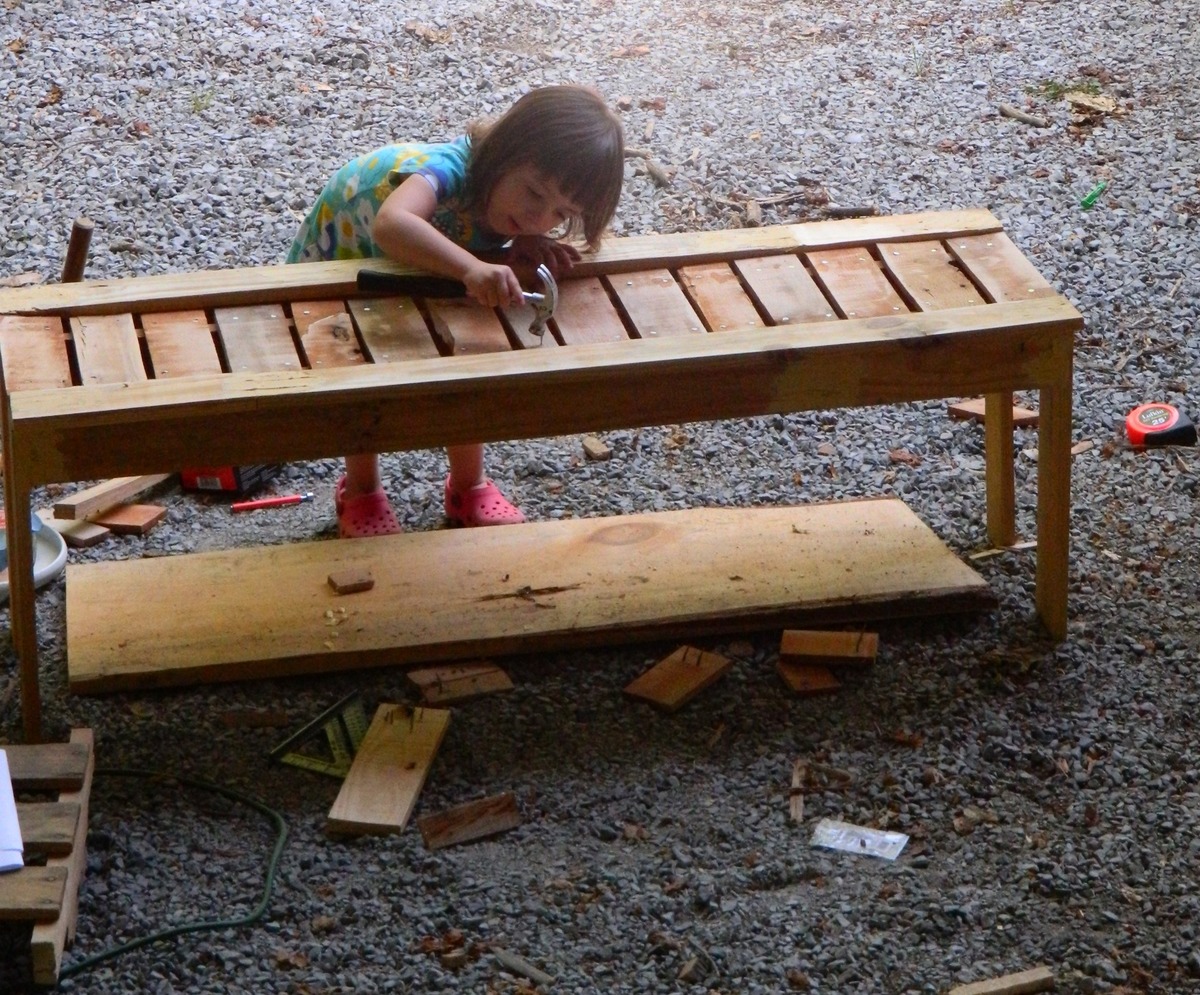
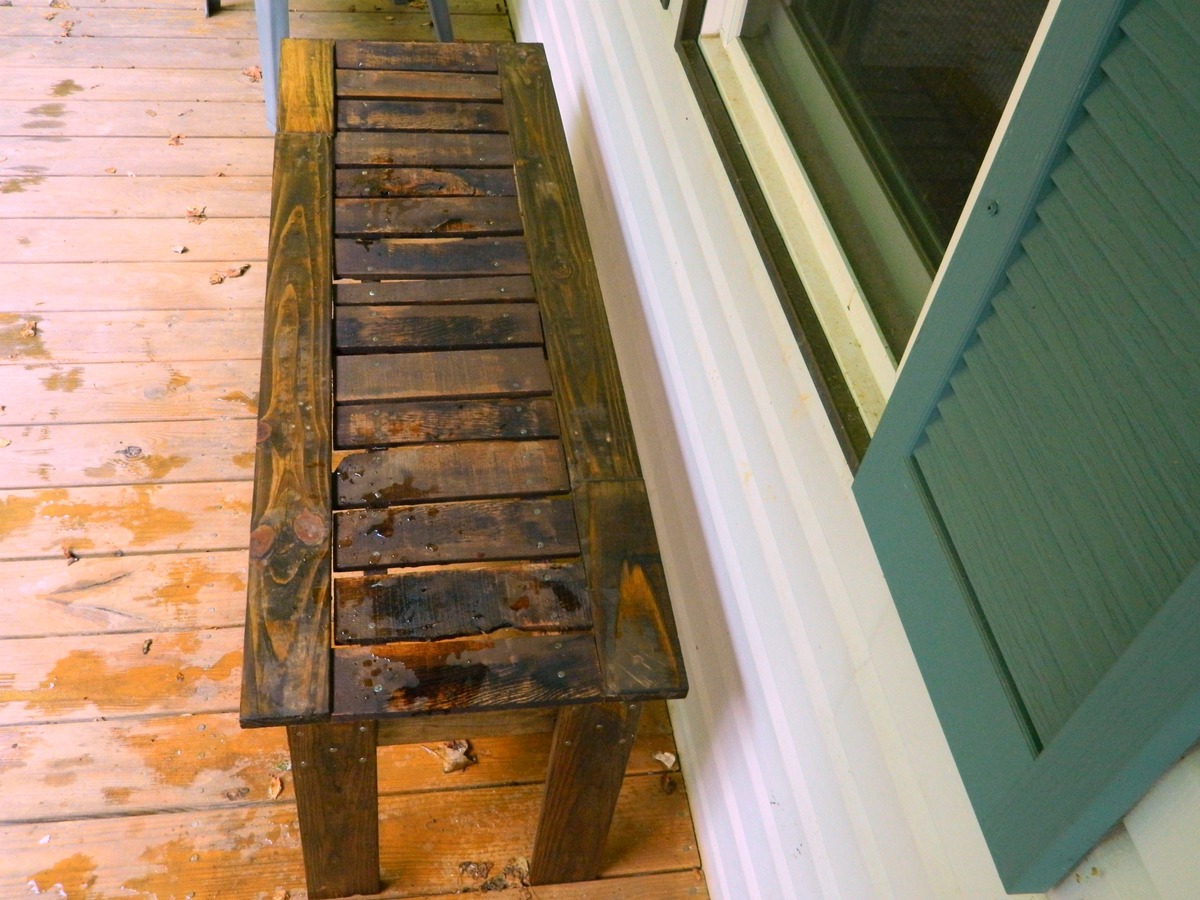
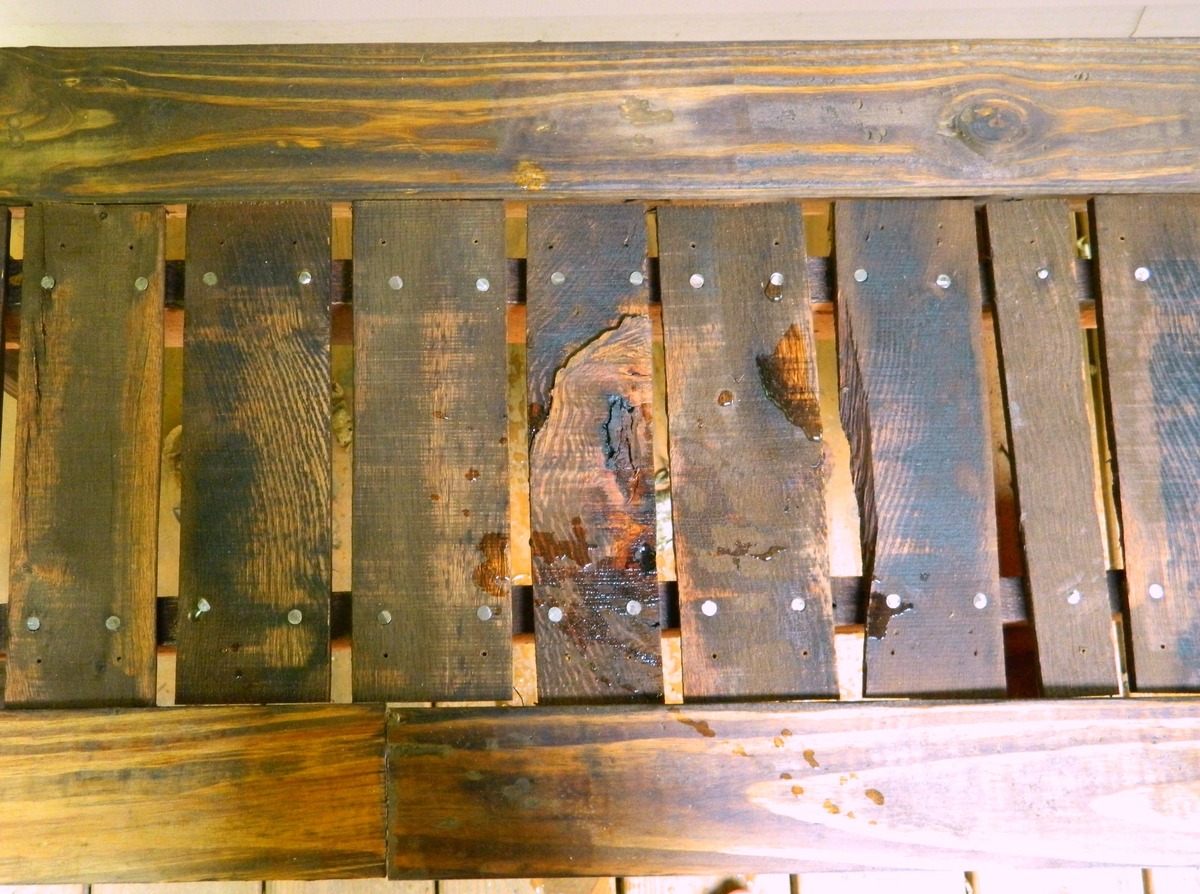
I had some left over wood from pallets and I really liked the look of the simple outdoor bench. One pallet was made out of some type of red colored wood and I decided the slats for the seat would look good in the red colored wood. The rest of the bench was from a lighter colored pallet. I used nails and glue to attach the seat slats so that my daughter could help. She loves to help, but does not like my drill even if she has hearing protection. See more at http://www.makeitlovely.com
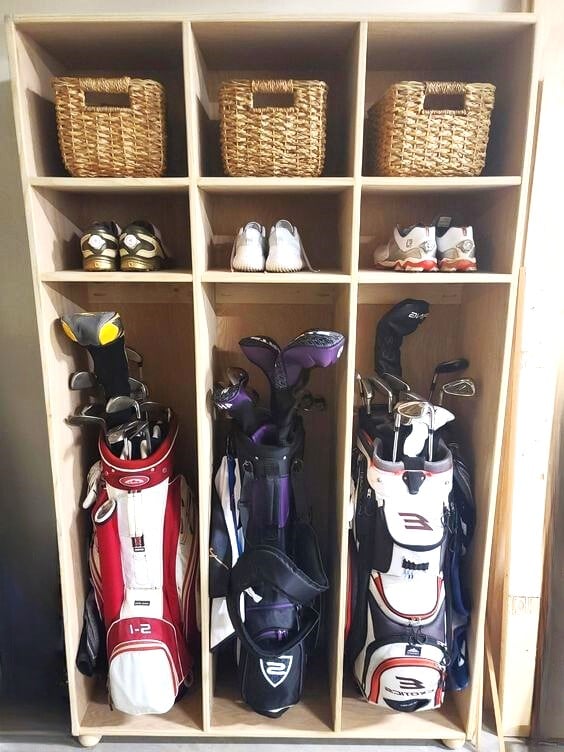
Utilized the plan for the Locker Book Shelf-Full Size and modified it a bit to convert to a golf club locker. Definitely keeps all the clubs, shoes, and accessories organized and eliminates the clutter. My wife loves it, course she added the baskets, which makes it look awesome! Actually this is how I stumbled upon Ana White's website. I was looking high and low for a plan for golf club lockers, and found Ana's website as part of the process. Best google search I've ever done!
Mon, 04/11/2022 - 14:51
WOW, that looks awesome and is the perfect storage solutions for all the golf gear! Thank you for sharing.:)
This was my first project. I learned a ton through the process. Ana's directions were very easy and straightforward.
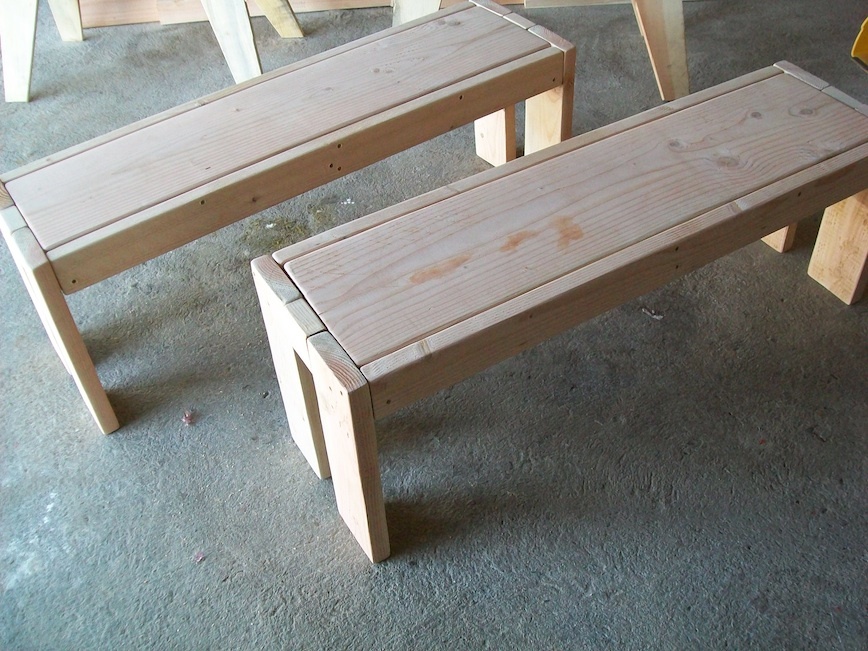
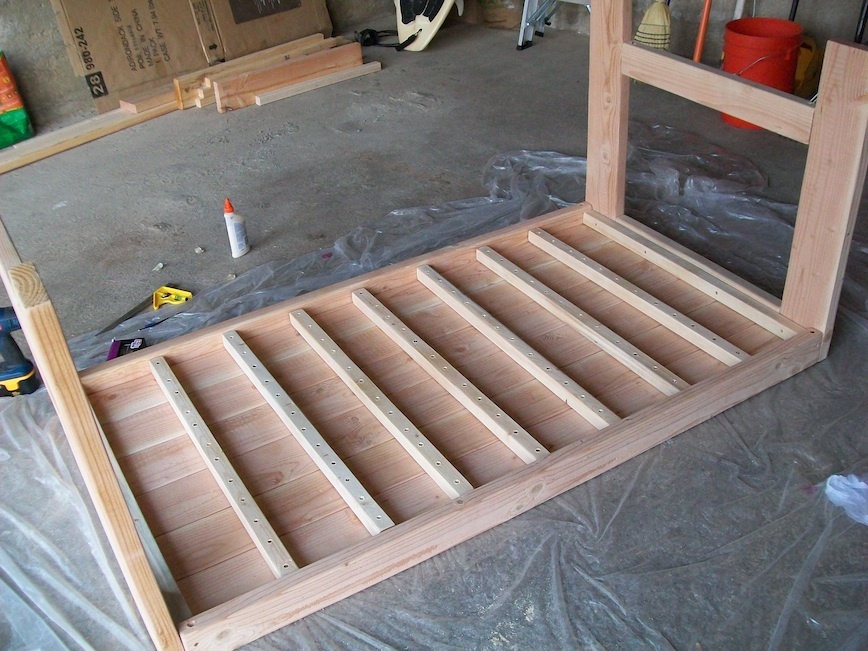
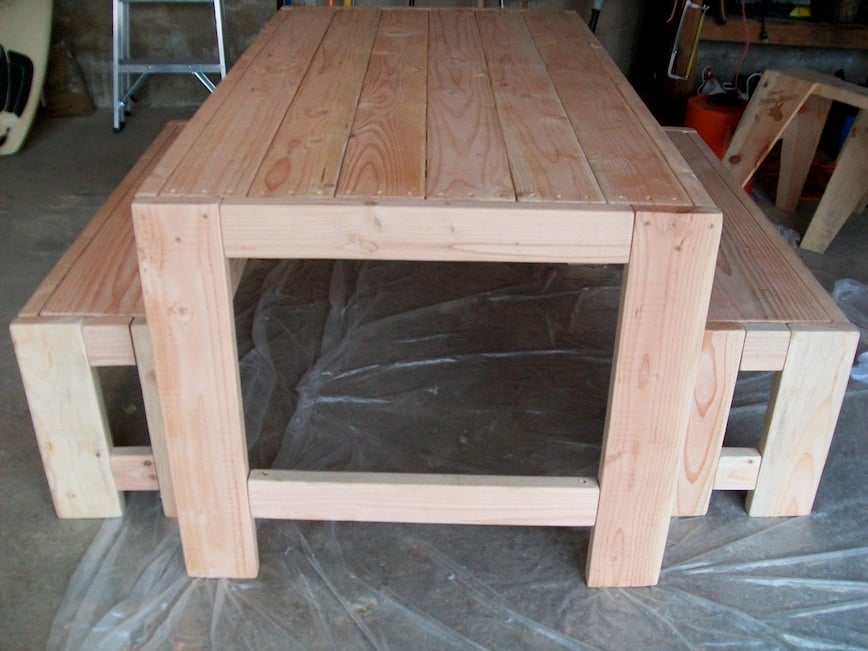
I purchased the wood (Doug-Fir) from Lowe's and cut it at home with a circular saw. I filled the gaps in the table/benches with a crystal clear silicon caulk - I have mixed feelings about this, since it dried kind of shiny. The coats of polyurethane helped to dull the finish a bit. For the stain, I used Rustoleum Kona, and Minwax Helmsman Spar Urethane Semi-Gloss for the finish.
Like others have suggested, I built the benches first, then the table. This was a great tip, since you can learn the design on a smaller model before tackling the beast of table (it's heavy). I also added some horizontal supports on the ends of the tables/benches, not in the original plans. I just duplicated the end aprons of the table and countersinked/screwed them in at an angle.
Cutting and building the project didn't take nearly as much time as the sanding, staining and finishing. The back-end part of the project was very detail-oriented and stretched out over several days.
Overall, very pleased with the finished project. It was very empowering to know that I can build something like this. Thanks Ana and all of the others with their tips and suggestions! My wife and I know have a long list of other projects to tackle :)
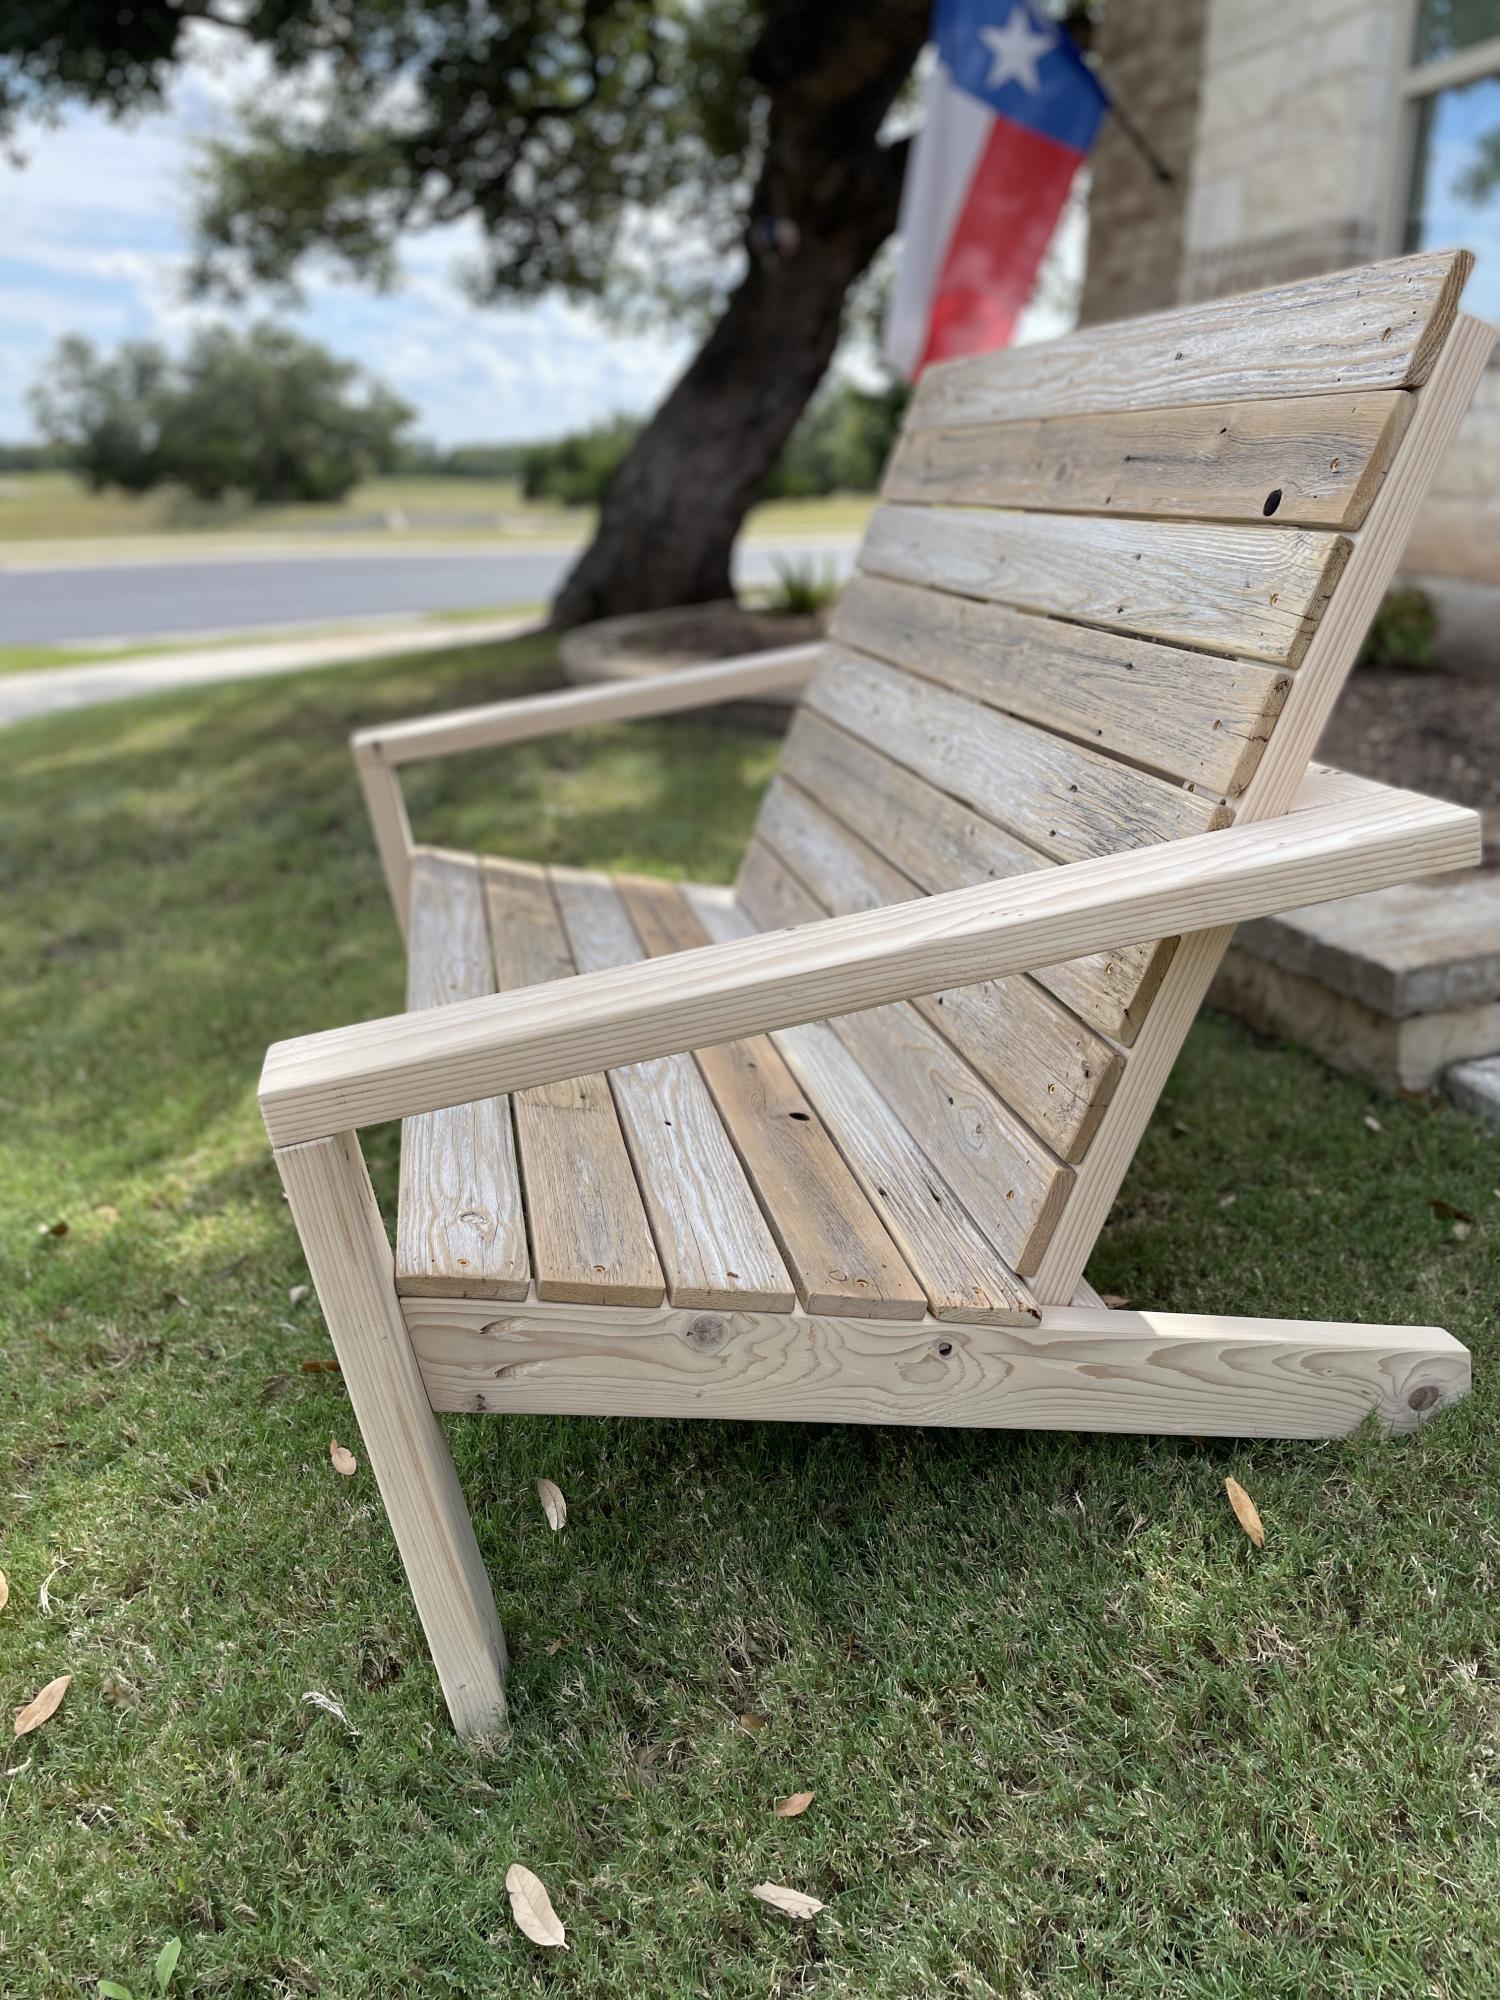
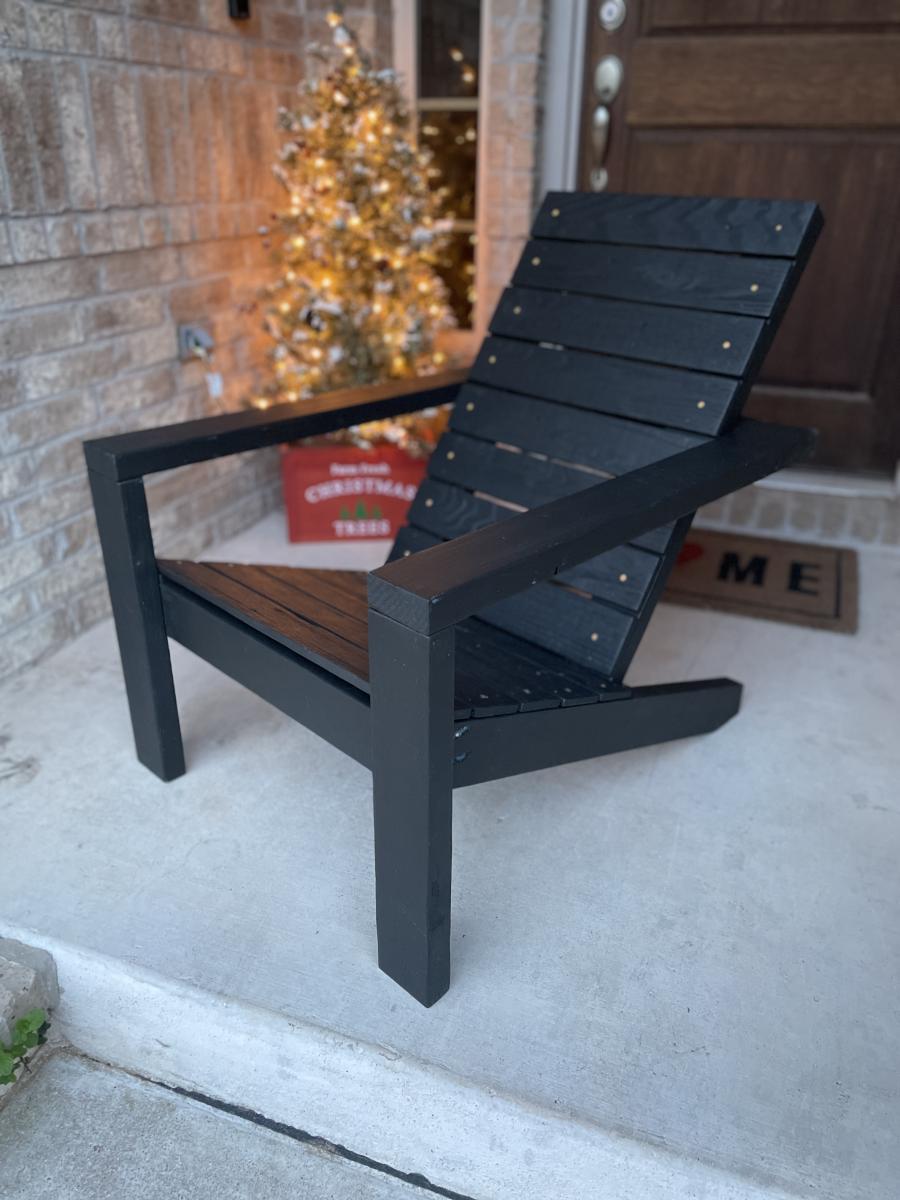
Great adaptations to the adirondack chair plan!
by Kevin
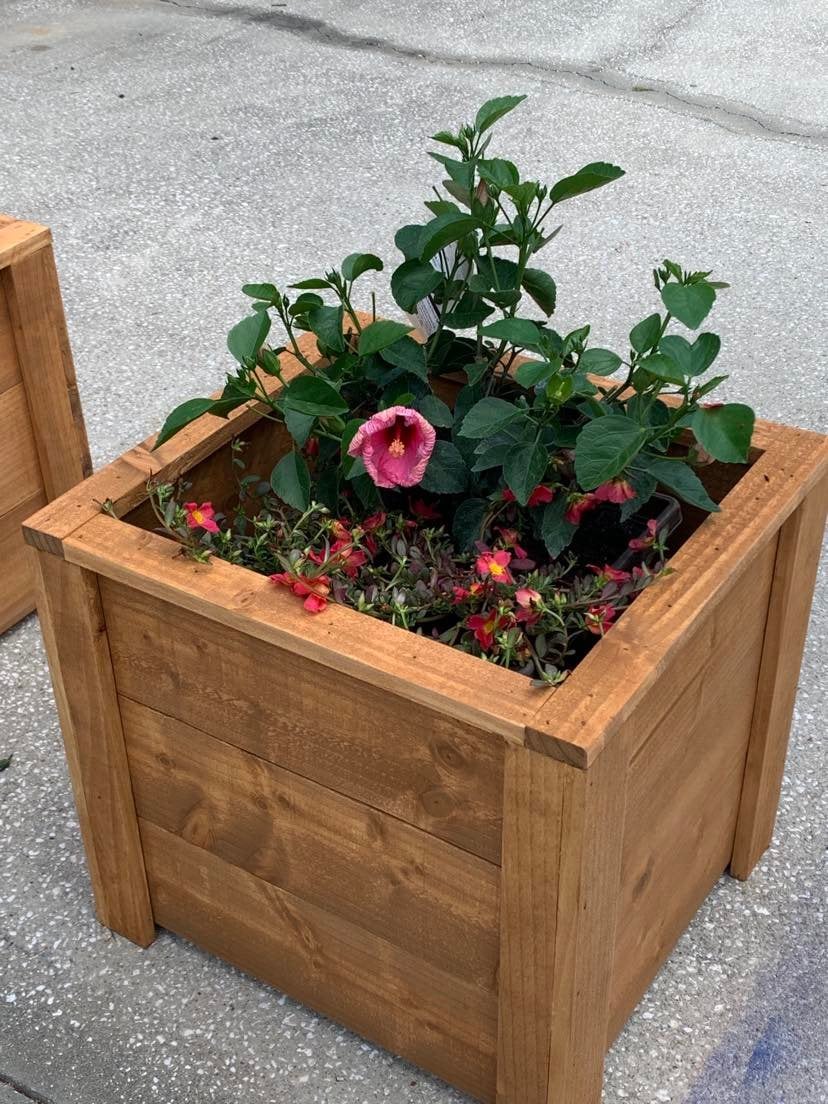
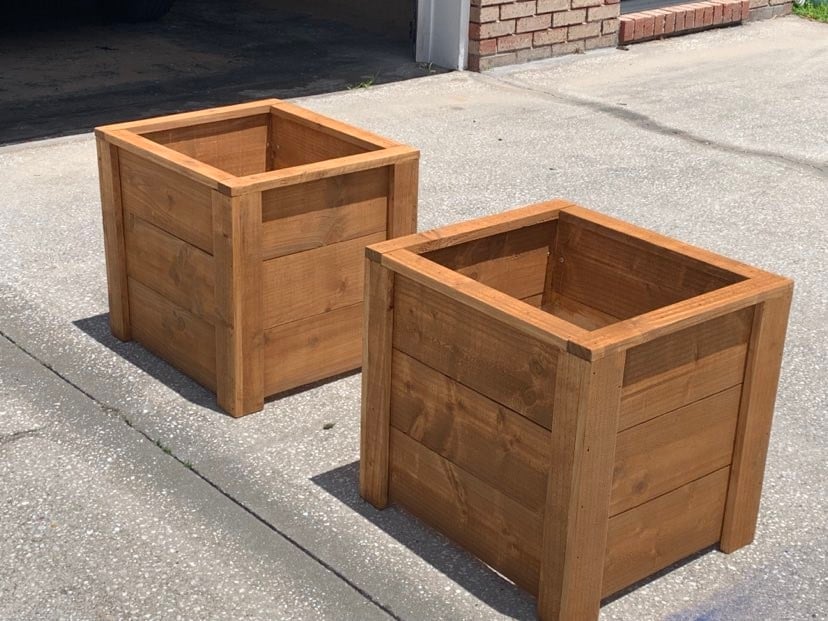
Thanks Ana, I built your planter box, actually built 2 of them, one for each mom. The were a huge hit and I already have people asking me to build them one.
So loved building this planter box. Thanks for all you do for your fellow woodworkers!
Dale G
Callahan, FL
Tue, 05/10/2022 - 07:05
Love these, wonderful idea for a mother's day gift, thank you for sharing!
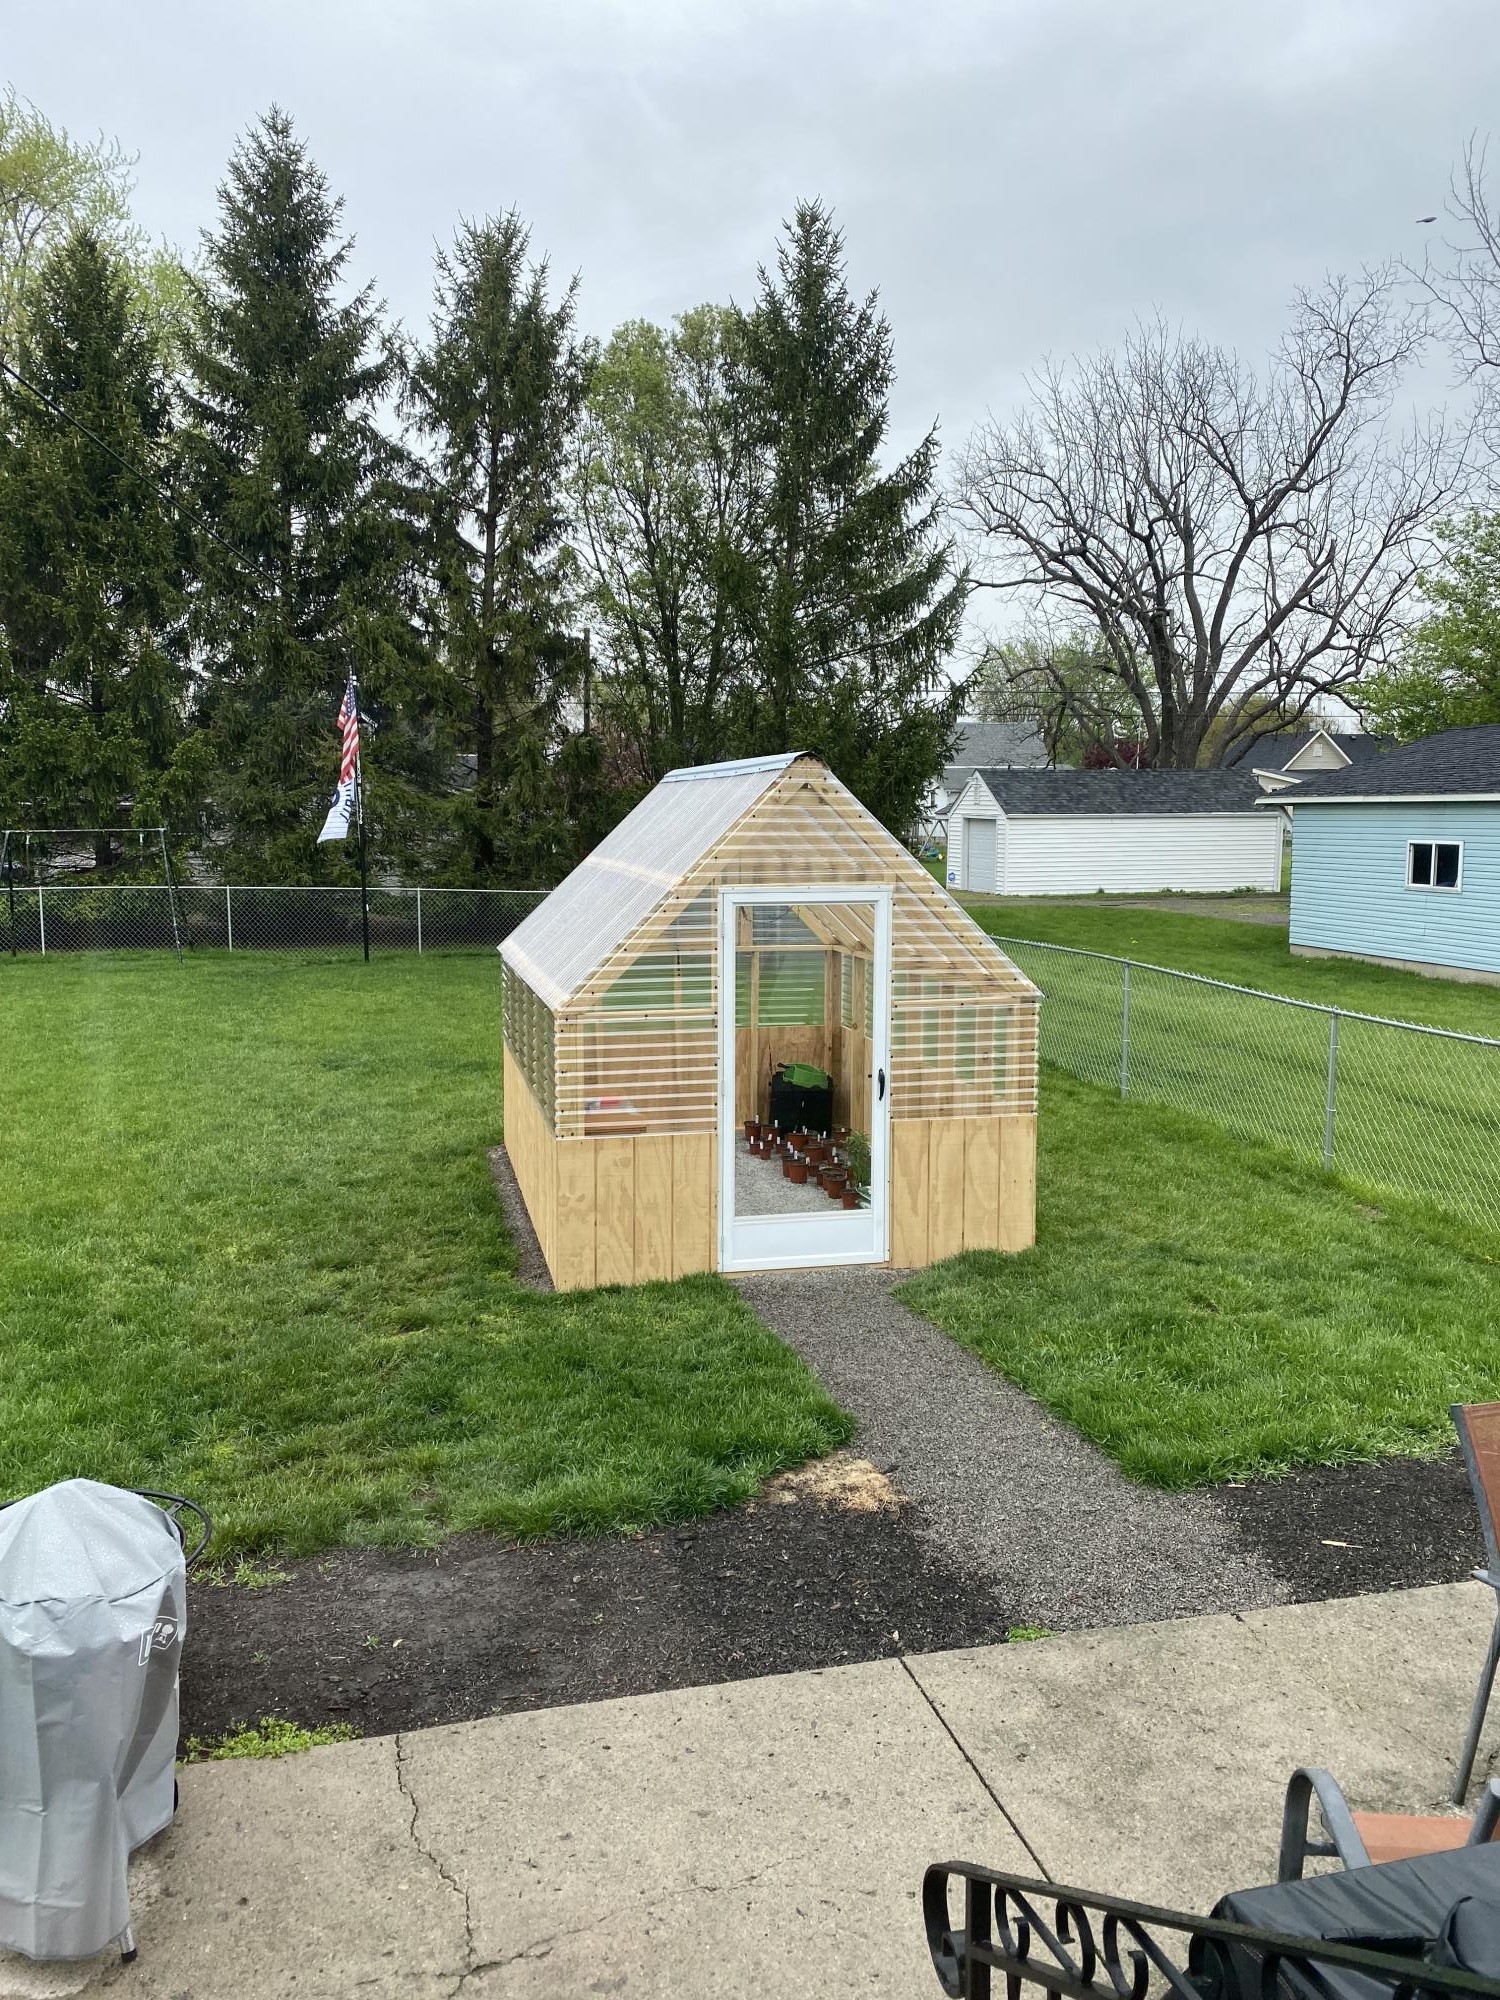
I am so in love with my greenhouse, it is amazing the plans were perfect and it went up without any problems, your designs are amazing and beautiful. We are going to do the chairs next!!!
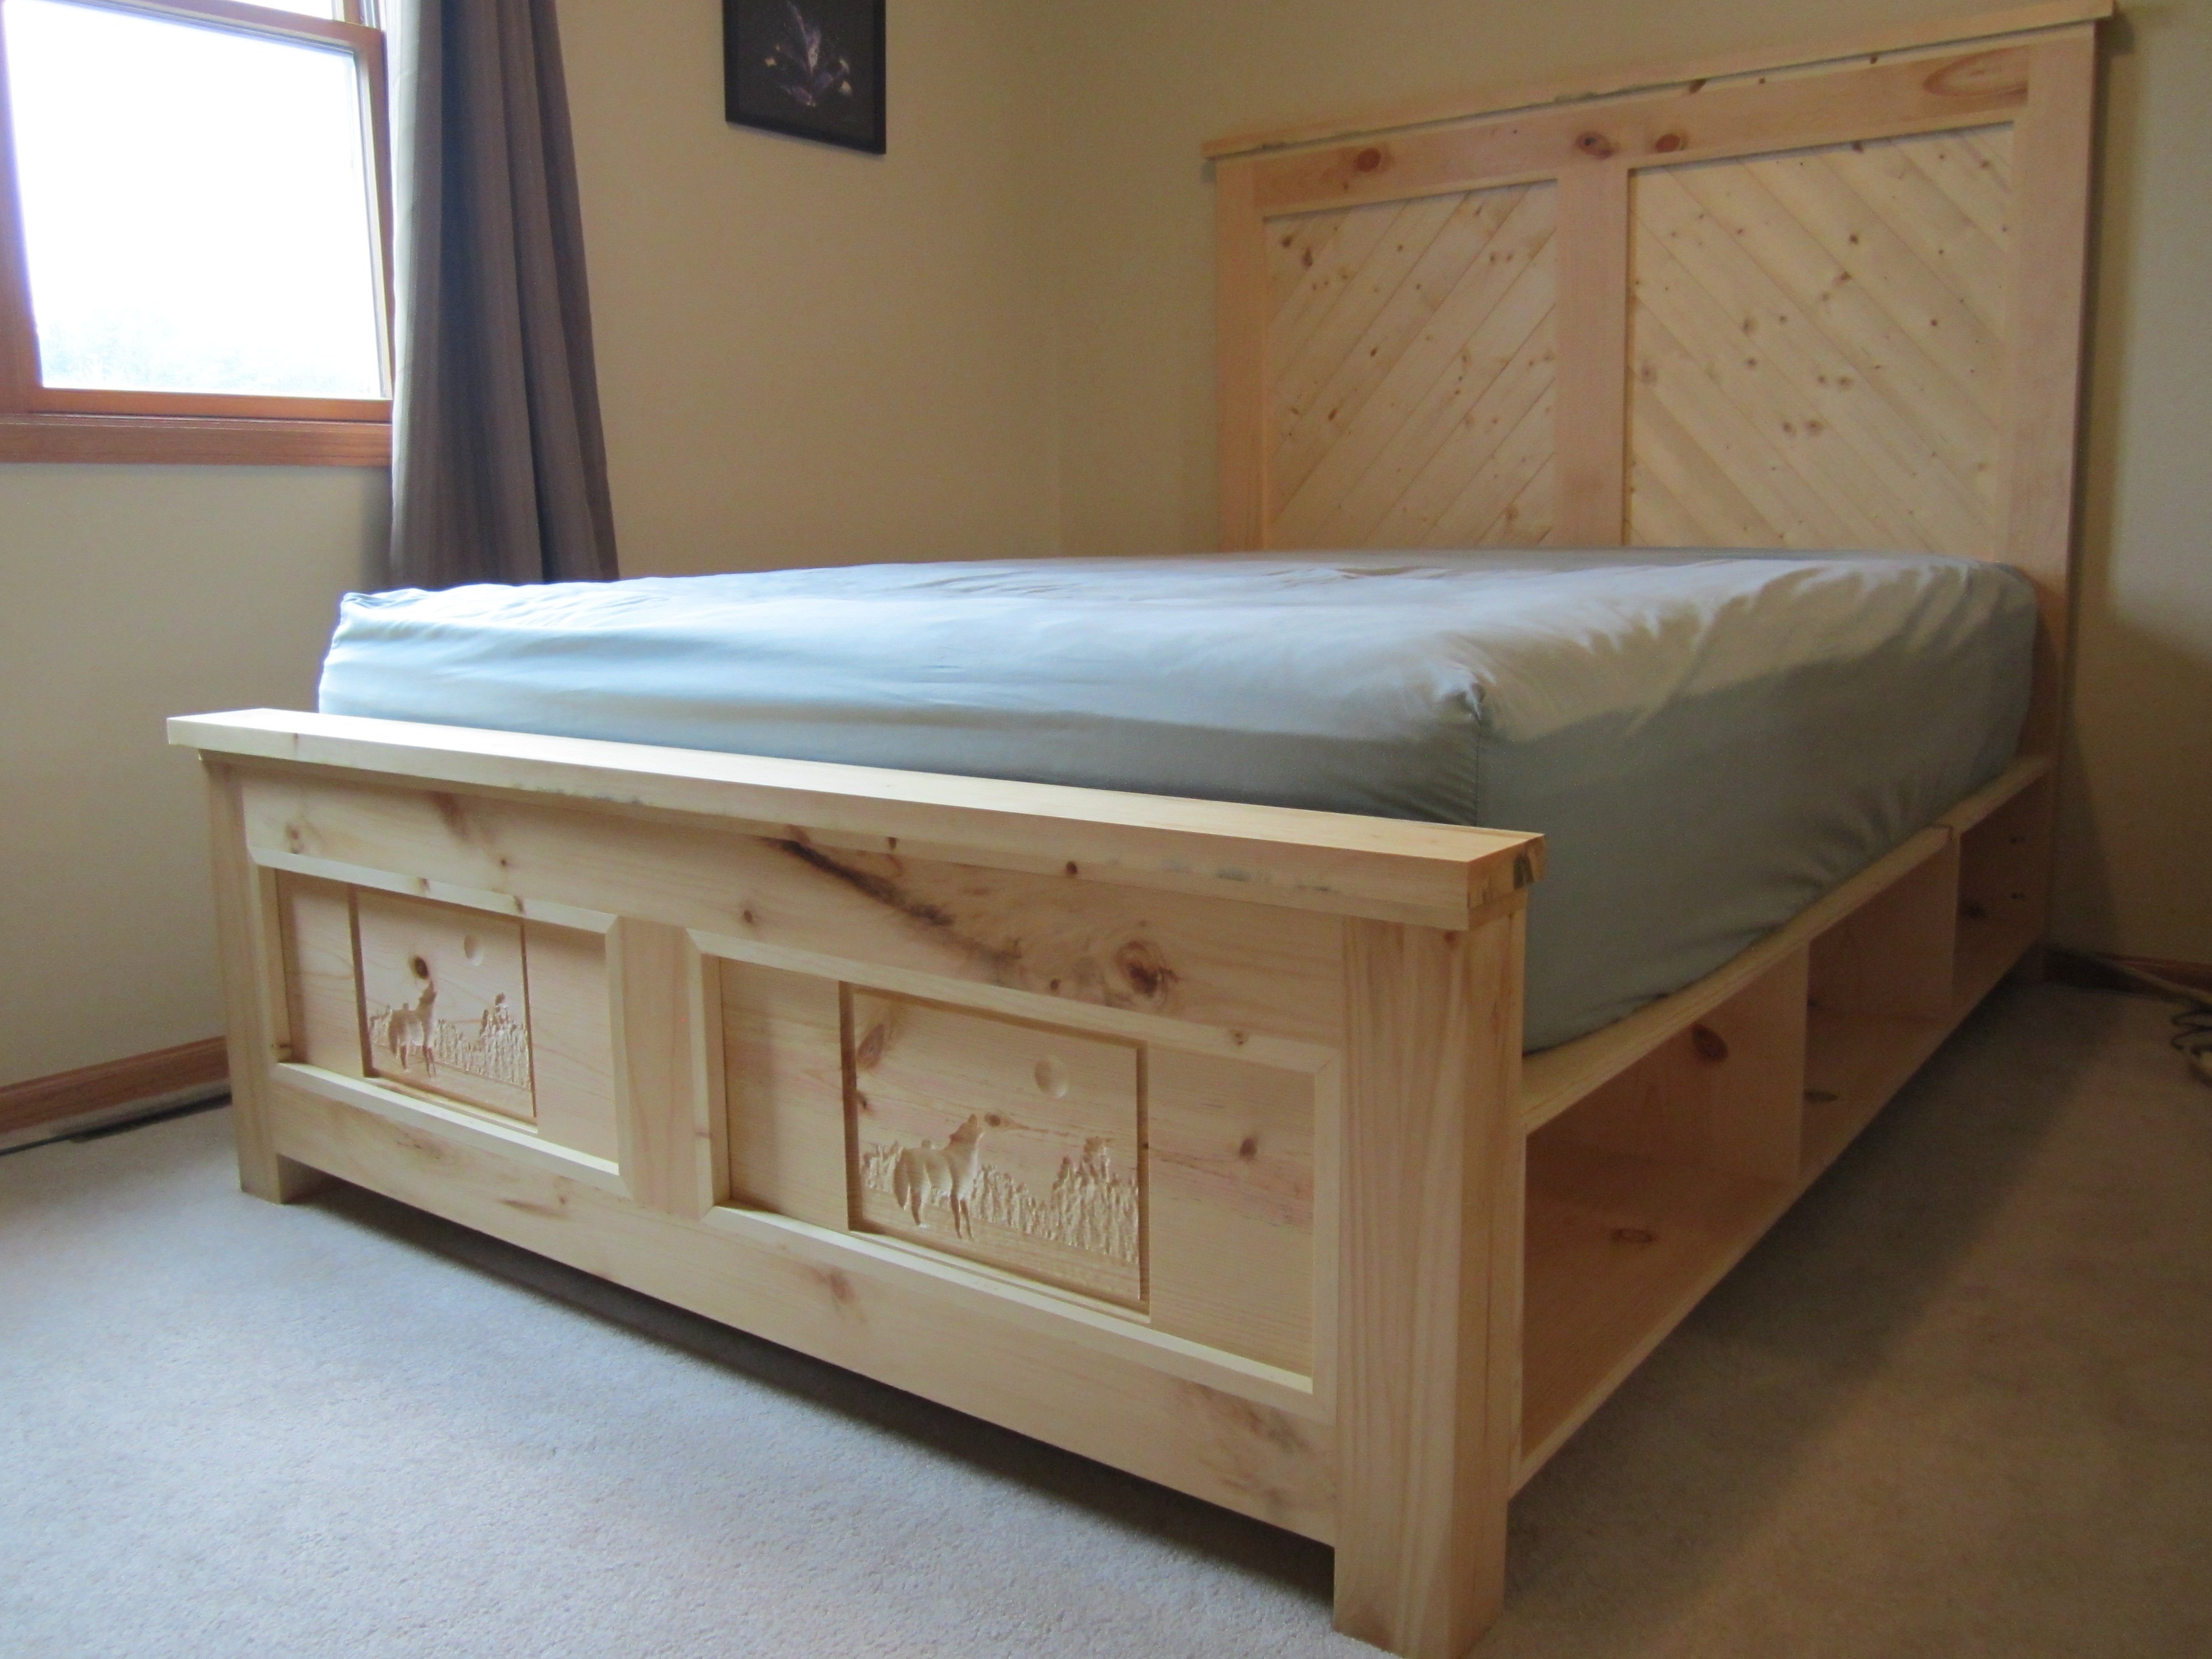
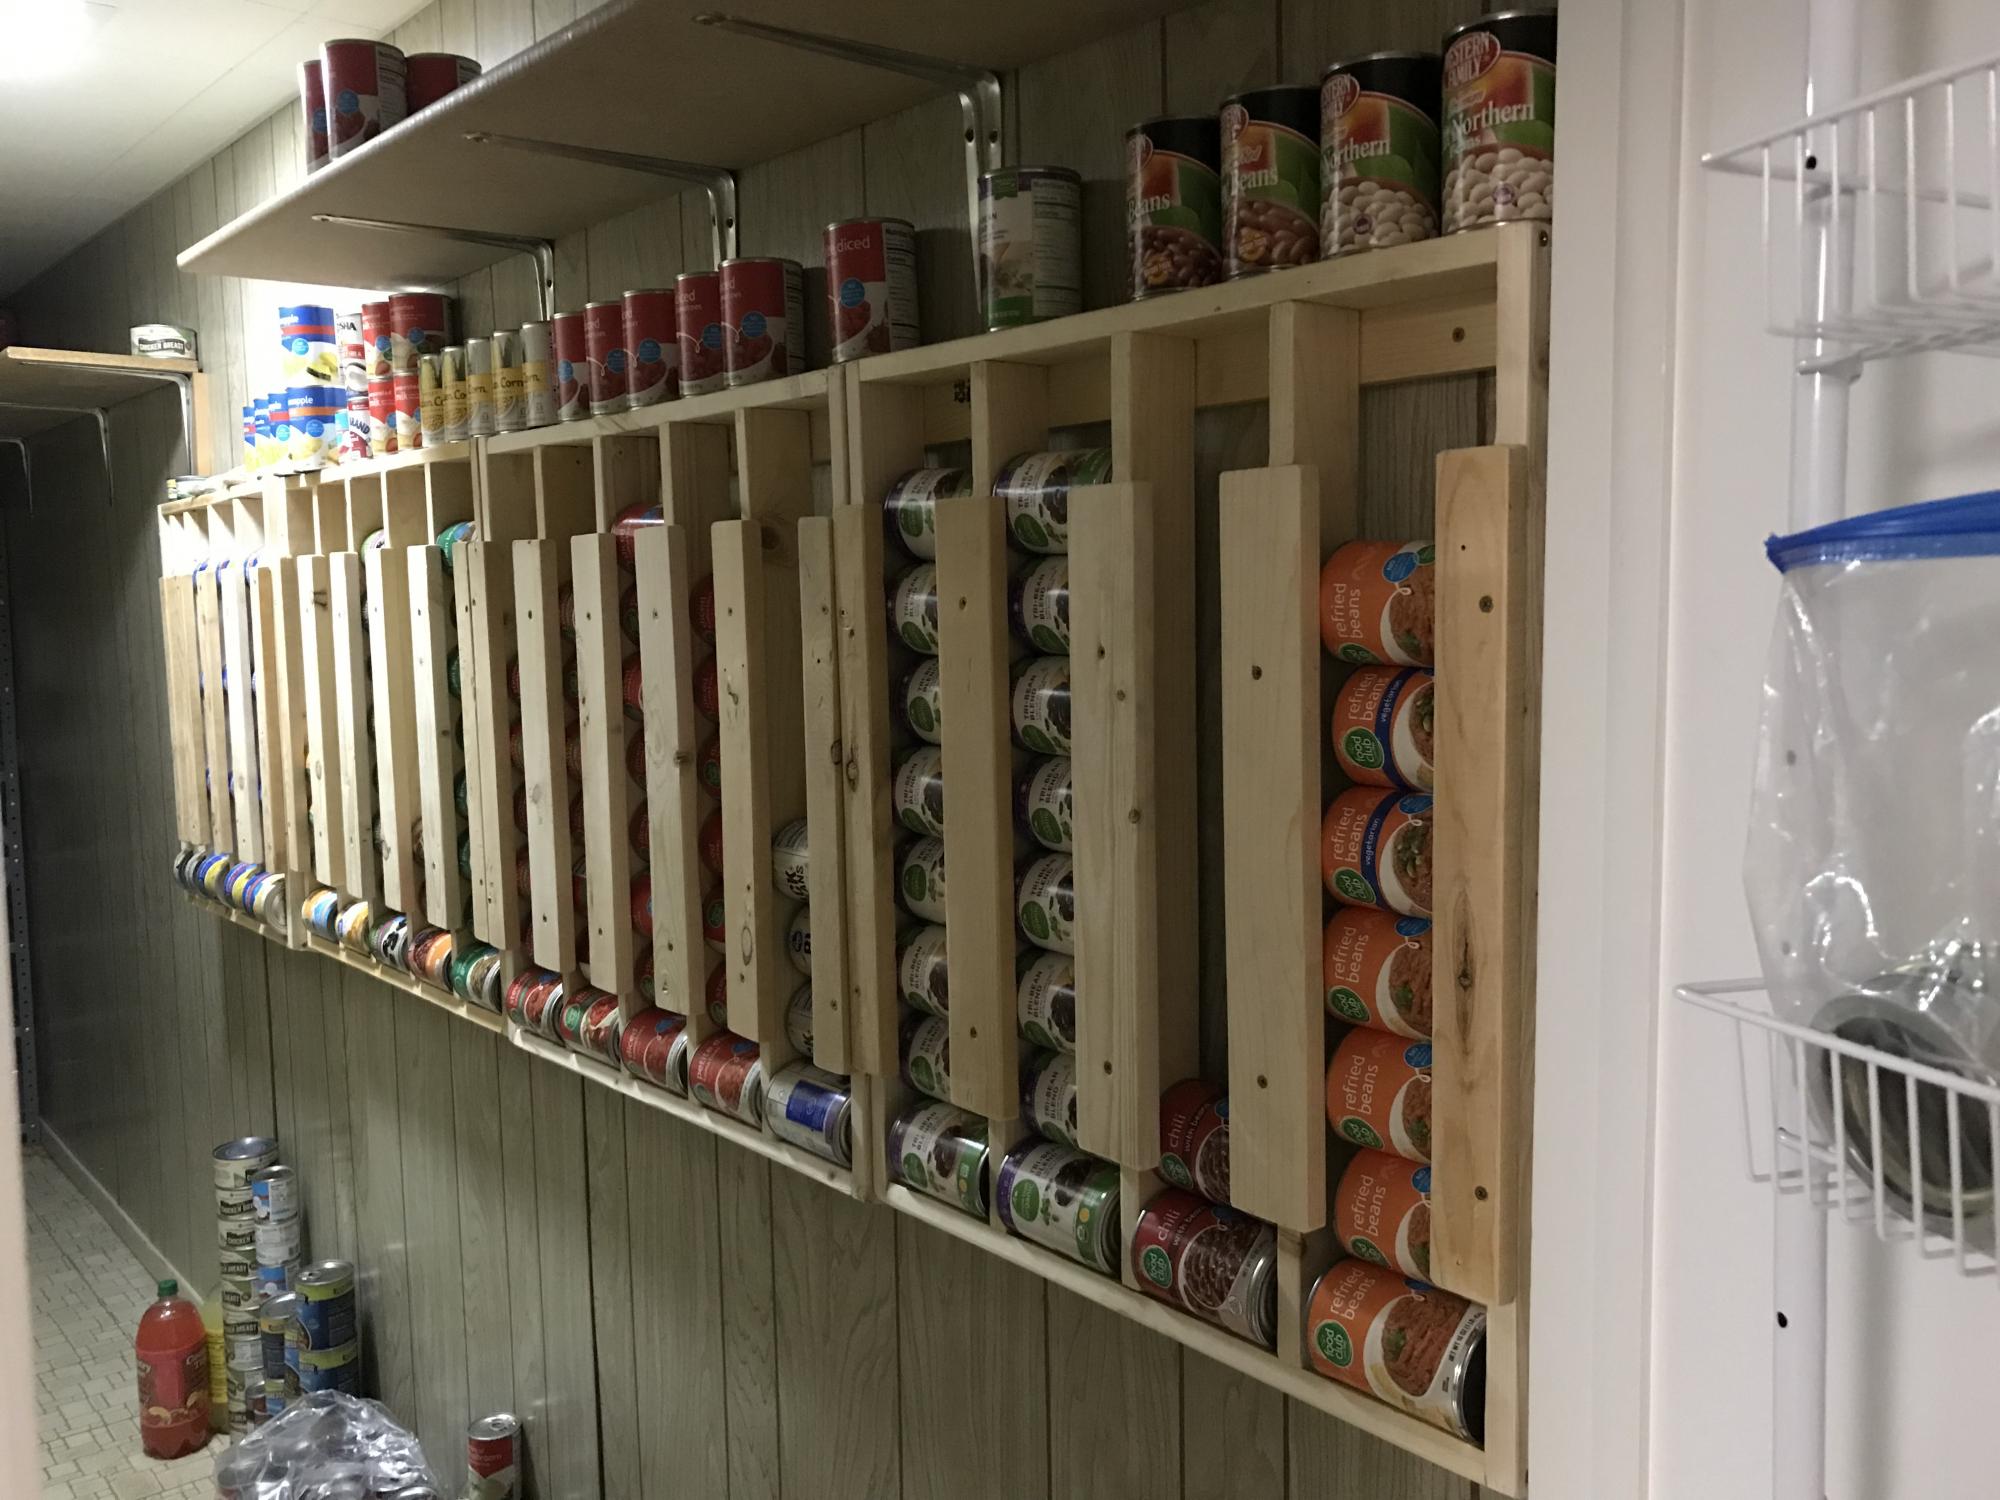
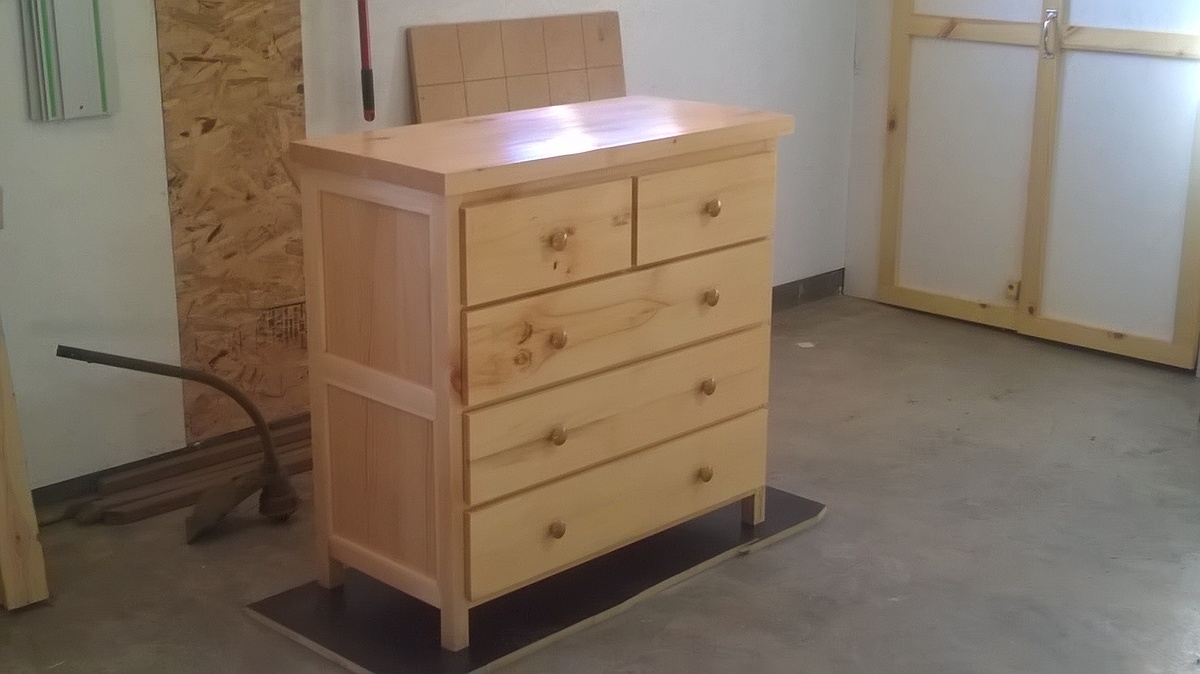
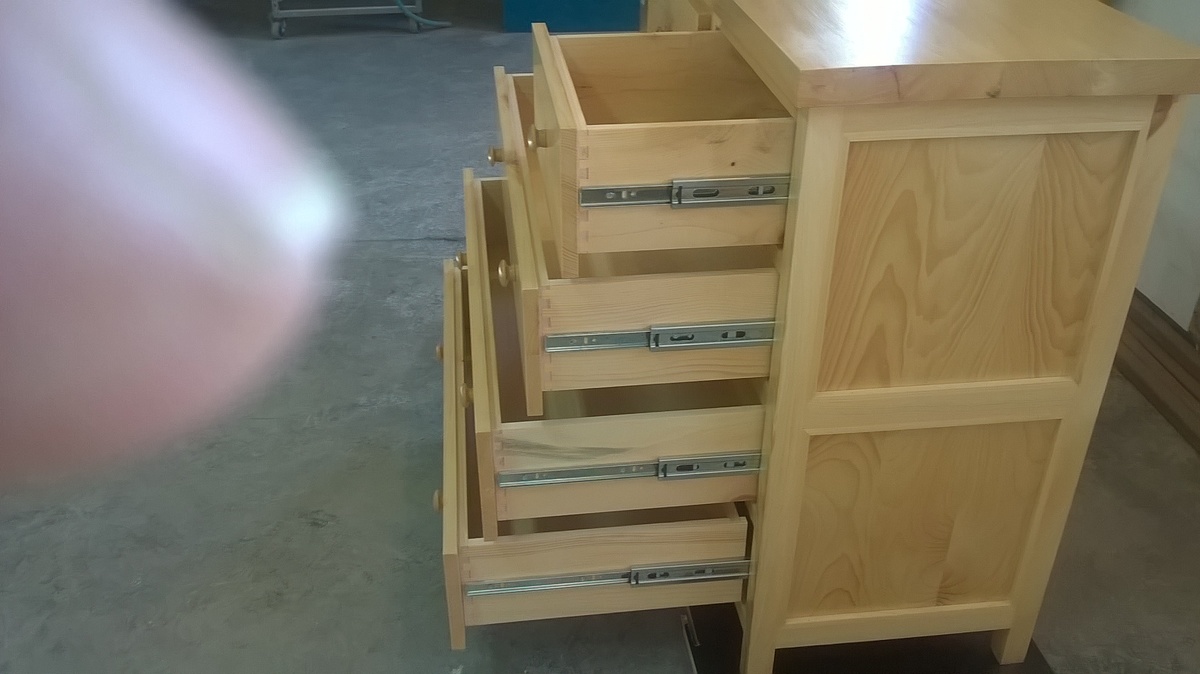
In need of outfitting the spare bedroom for overnight guests I came upon this site and found the storage bed plan we liked. After building the bed of course a dresser was in order. My sawyer has some northern white pine that came from the Wisconsin Northern State Fair grounds in Chippewa Falls. Having never worked with white pine before I found it rewarng and was happy with the finished product. Hope our guest enjoy it as much I had building it
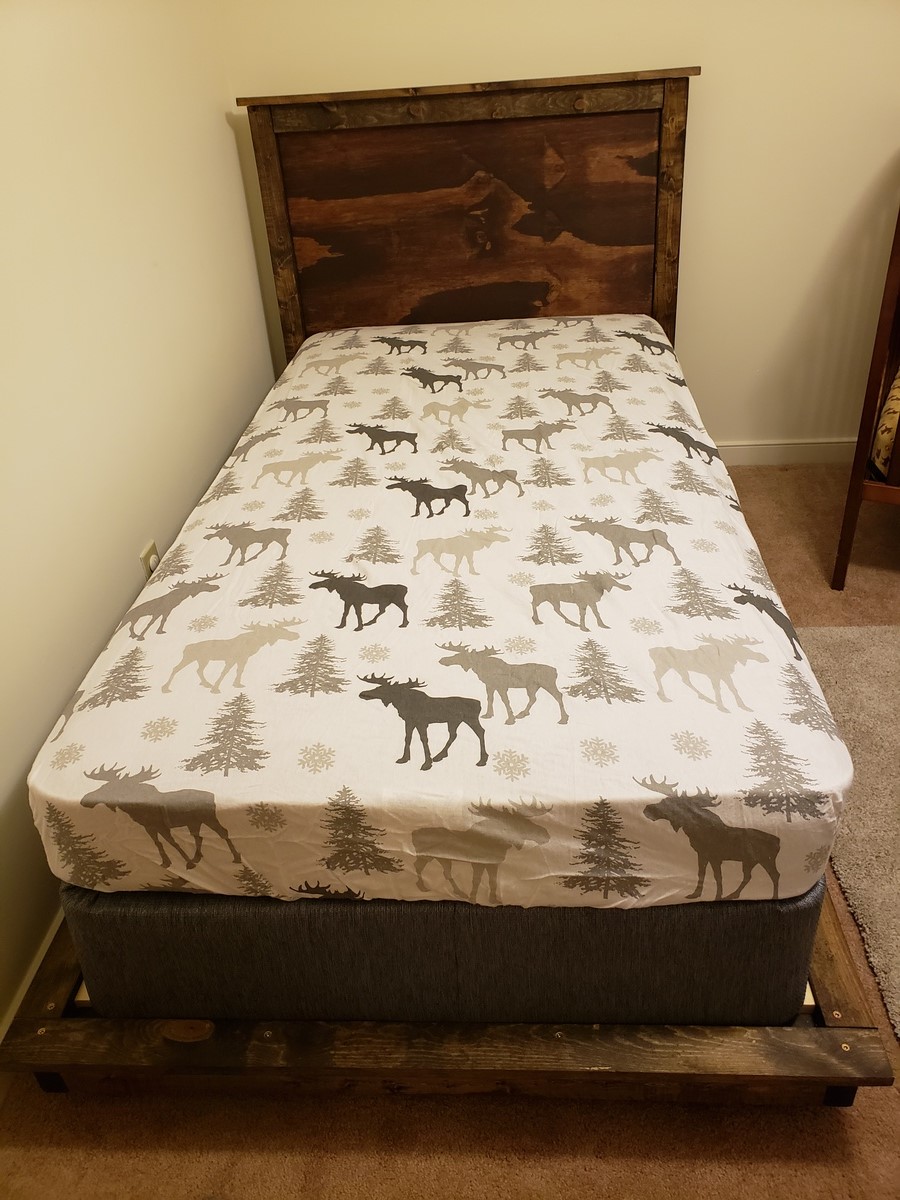
Our little guy decided at about 2 years old that his crib just wasnt going to cut it anymore. My wife and I had a blast throwing this together. A good tip is to use leftover pieces from the headboard to cut slats. We love our wood projects, check out our facebook page. Wyvace woodworking.
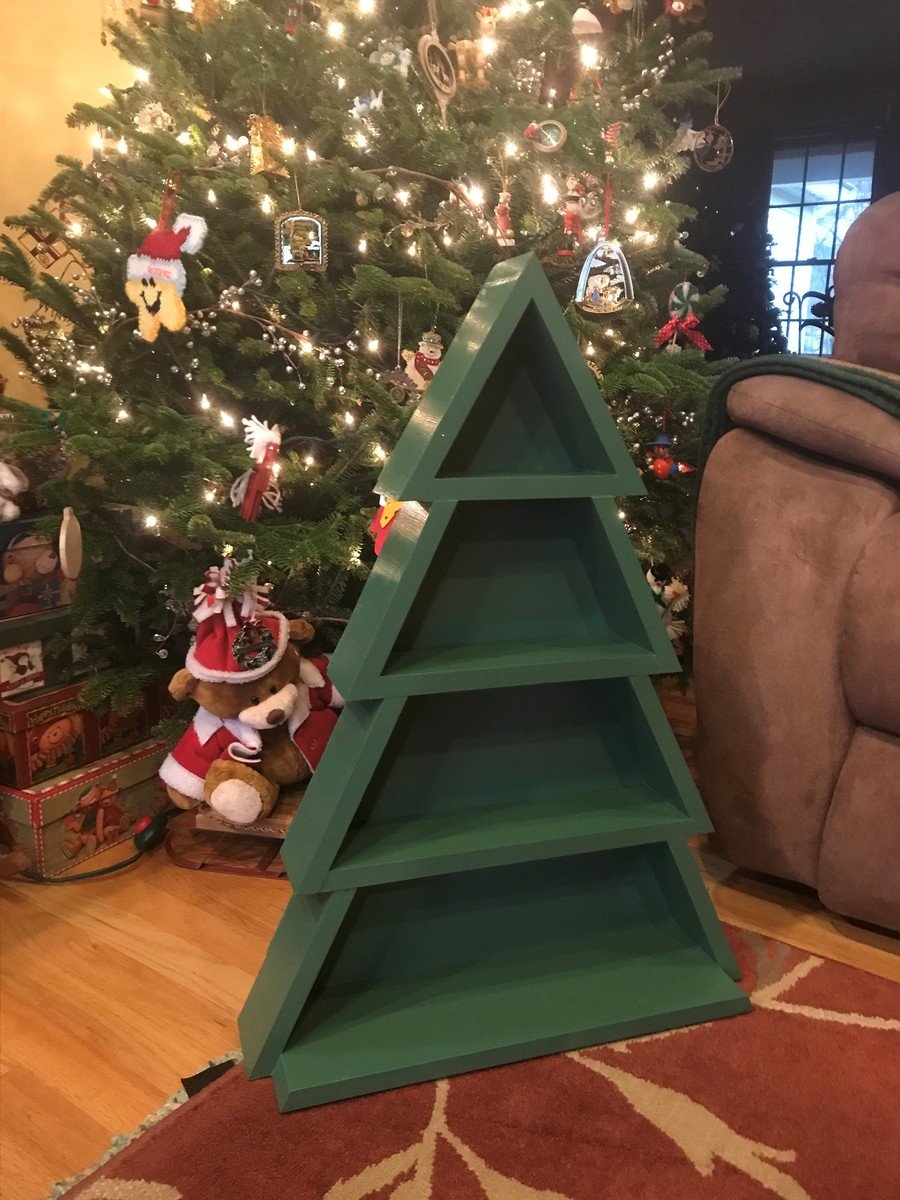
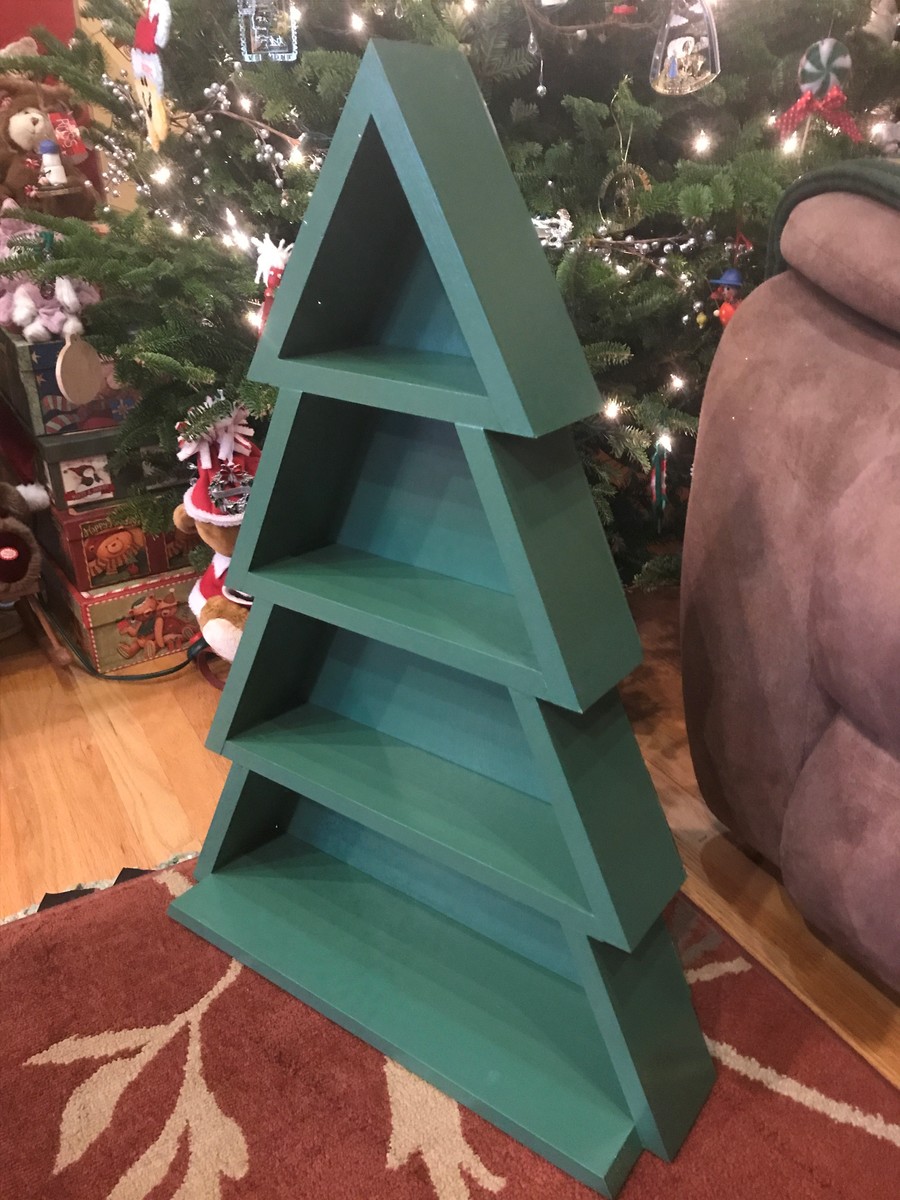
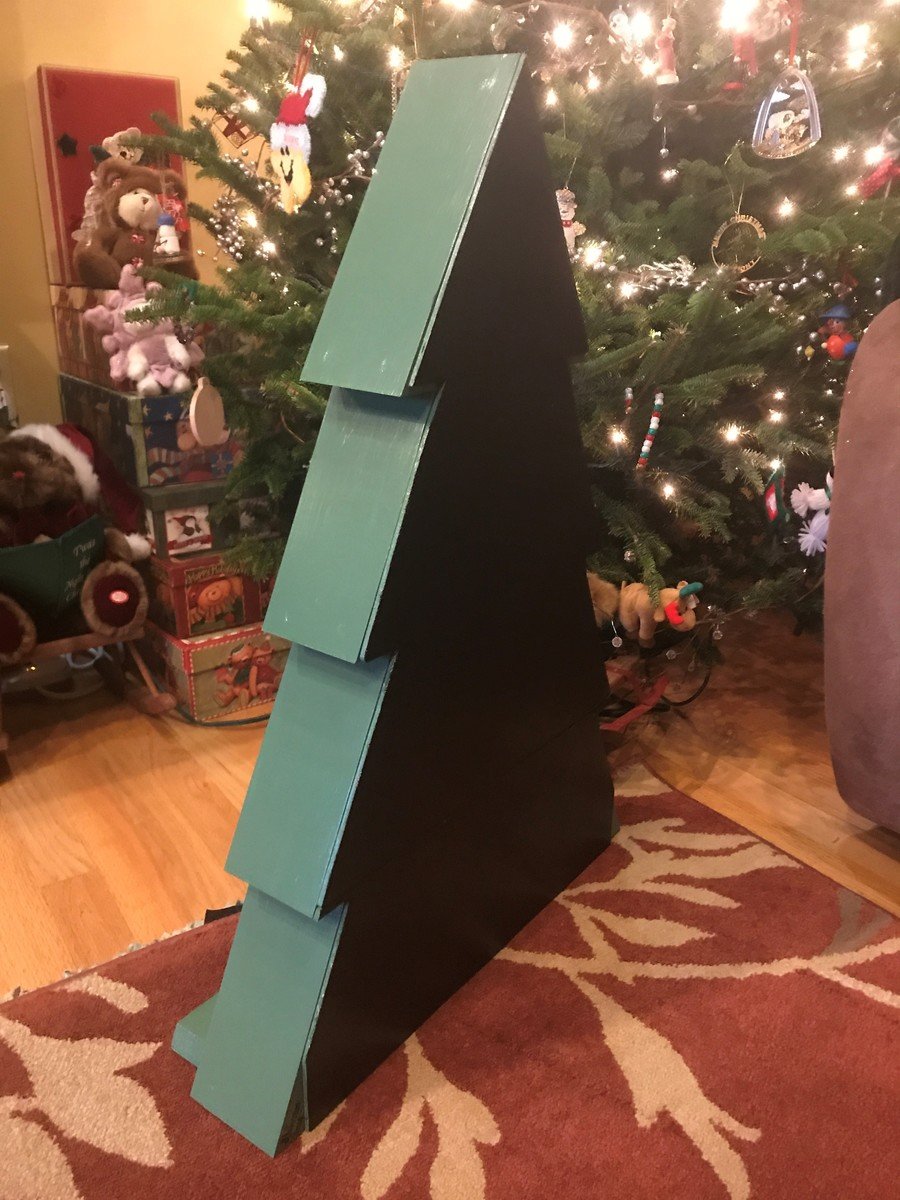
I found the Christmas tree shelf plans and since I had drawn my wife's aunt's name for this year I knew she'd appreciate this build. I chose 1x6 top choice pine and a wider piece for the base since she may decide to set this on the floor instead of hanging it. I also had some oak plywood I used for the back. I screwed all the pieces together, countersunk and filled the screw holes with wood putty. The paint I used was Benjamin Moore, the color was Balsam (567) and I really like how the color came out. I painted the back and the bottom with standard black interior paint just to protect the wood a little. I coated it with a couple of coats polycrylic and bought a couple of Christmassy items for the shelf to get her started. Can't wait to see what she thinks on Christmas day.
This can easily be built in less than a weekend depending on your skill level. I had to recut one of the boards when I caused some damage while putting it all together. The sanding, painting and finishing takes as long as you want depending on the finish and care taken.

Comments
Ana White Admin
Tue, 10/05/2021 - 11:32
COOL PLANTER!
Fun project, thank you for sharing!