Community Brag Posts

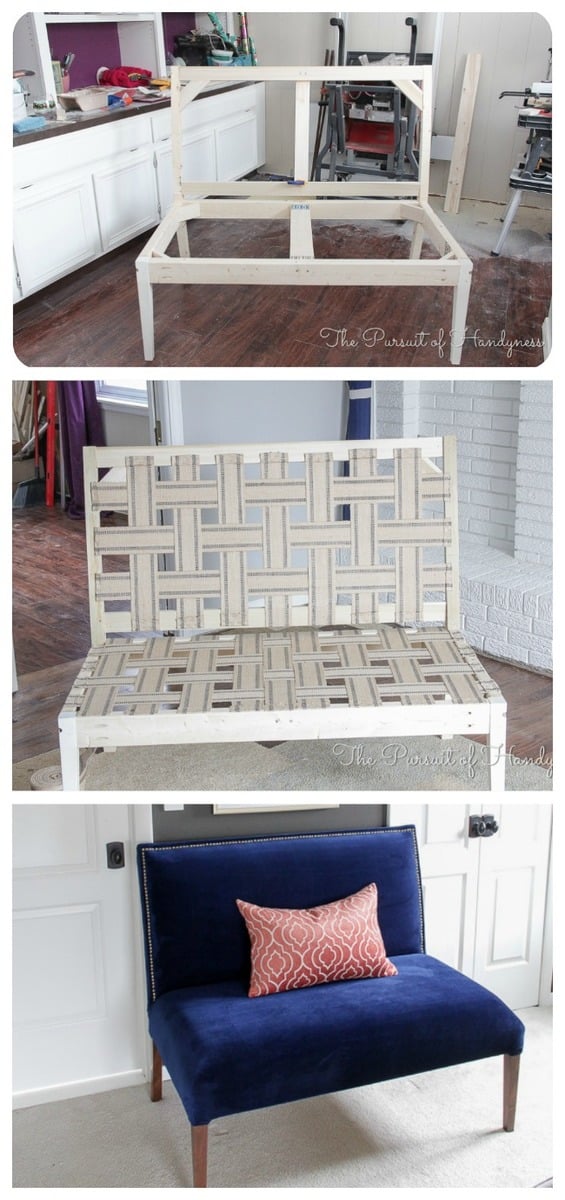
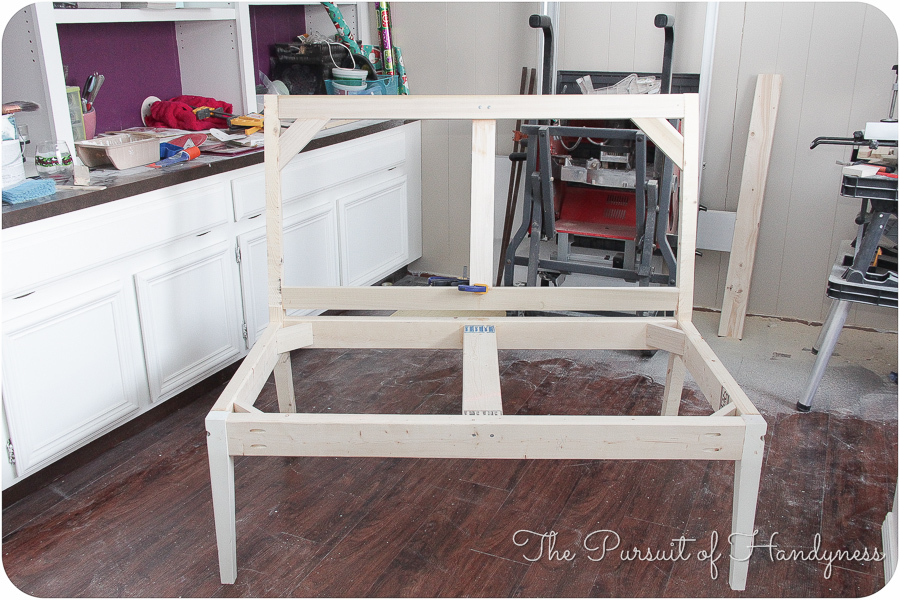
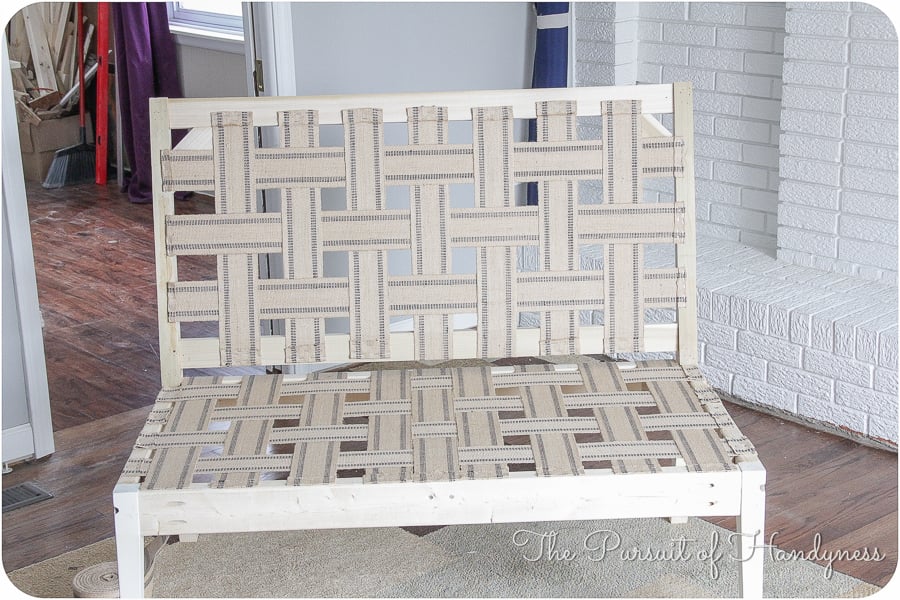
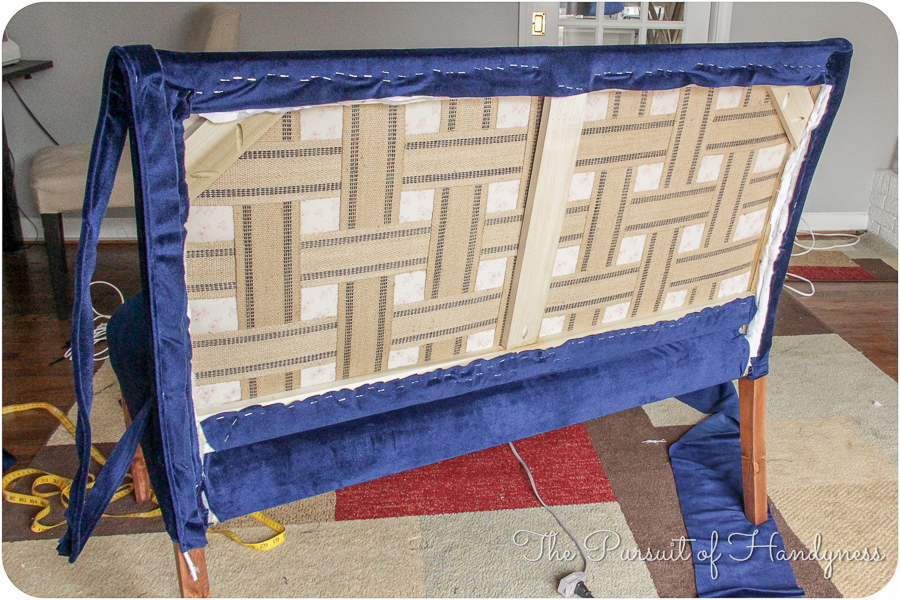
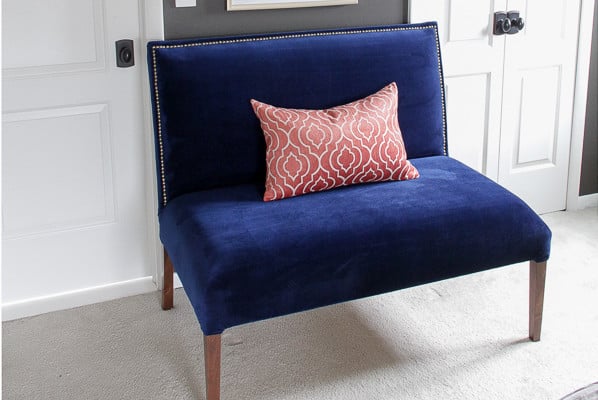
Diy Upholstered Settee

I started off with Ana's plans and kinda went rogue from there. The idea of creating those curved back legs scared me so I thought I'd sacrifice an Ikea dining chair and use it as the legs. When I ruined one of the legs I decided that I'd come too far to back out and that I must continue. I adapted many conventional methods to make the settee but I'm super pleased with the outcome. For the full step by step on how I completed the settee, please check it out here Part 1 Part 2 Part 3


Built from Plan(s)
Estimated Cost
150
Estimated Time Investment
Weekend Project (10-20 Hours)
Finish Used
Rustoleum Ultimate in American Walnut, Rustoleum Ultimate Polyurethane in Satin.
Navy Blue Upholstery Velvet, French Natural Nailhead Trim.
Recommended Skill Level
Intermediate

Comments

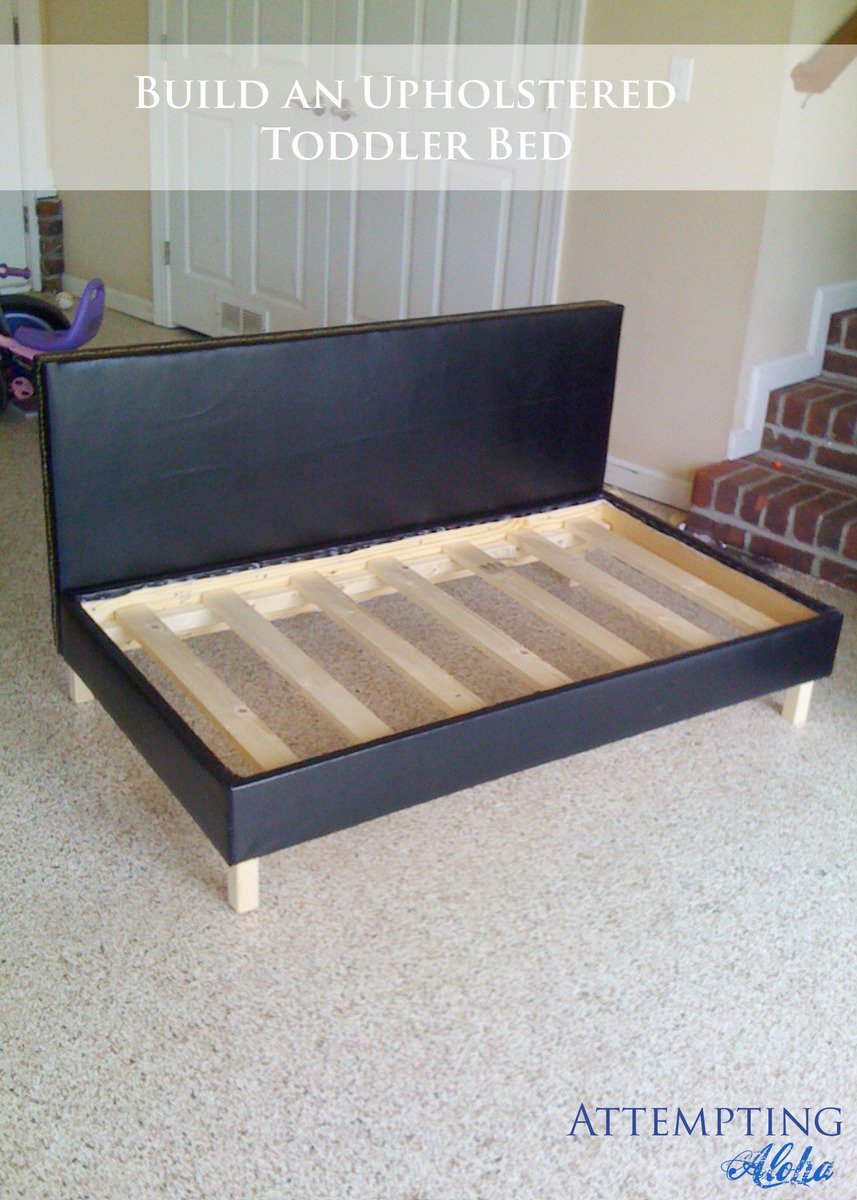
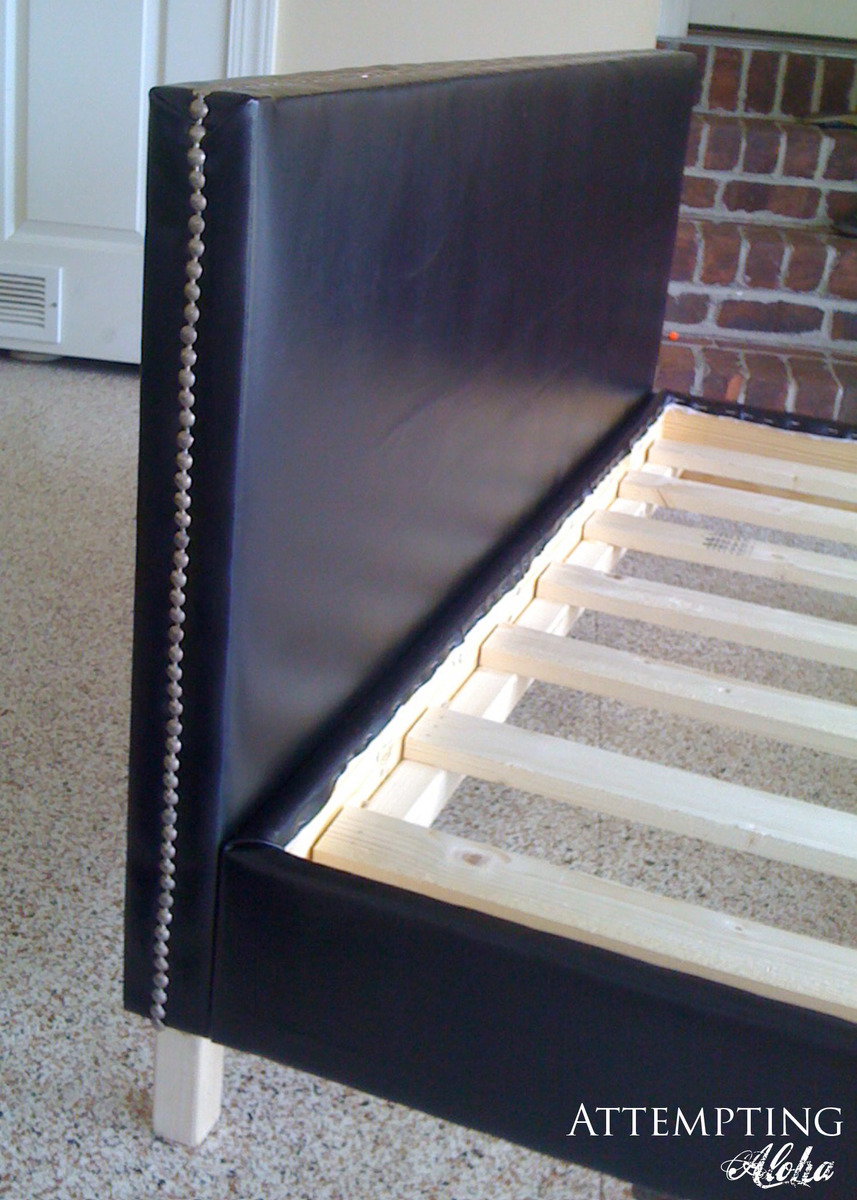
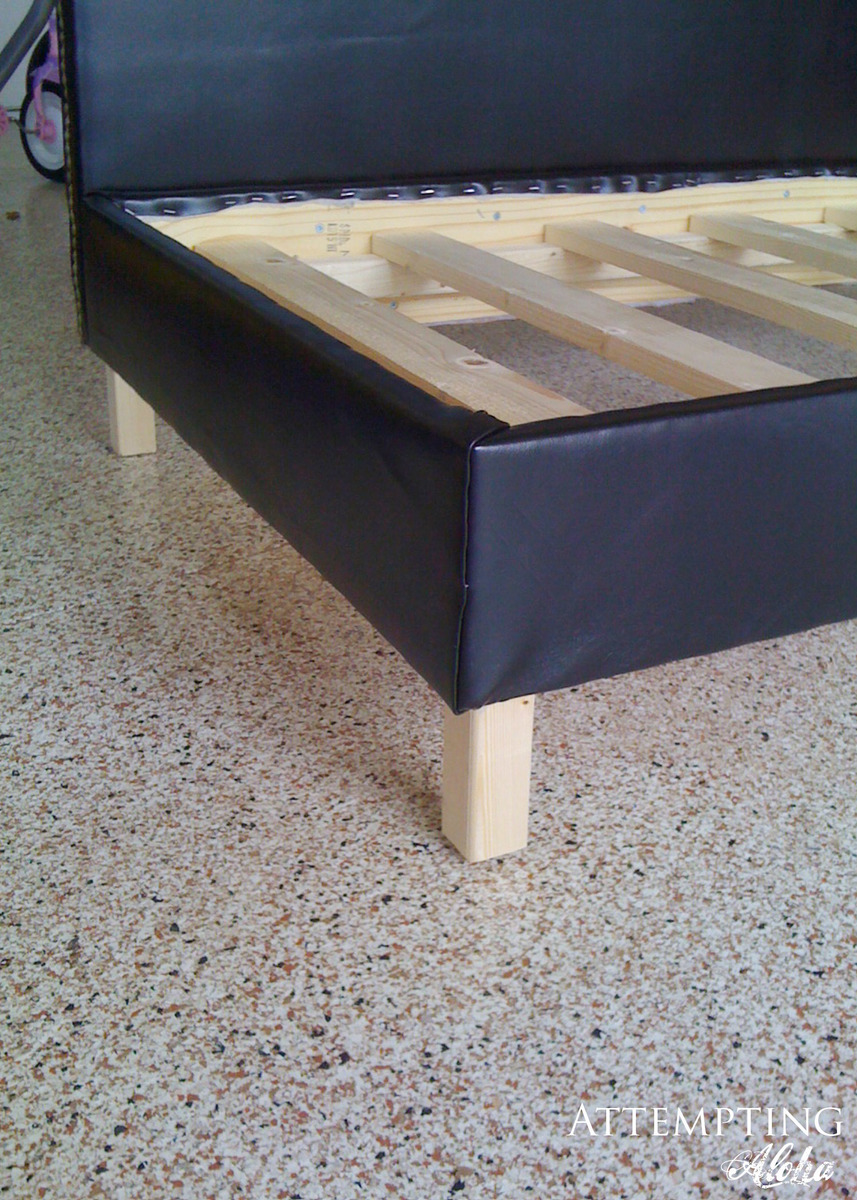
Little Boy's Upholstered Toddler Bed

Such a darling bed and plans. I'm so glad I found it! I built it with a friend for her little boy, so he could use it as a couch later on, and it is just darling with the black pleather and nailhead trim she picked out.

I marked it as an intermediate project more for the upholstery part of it. I'd call it a beginner building project, though. :)

Thanks, Ana!!

Built from Plan(s)
Estimated Cost
$60
Estimated Time Investment
Day Project (6-9 Hours)
Recommended Skill Level
Intermediate

Comments

Pam the Goatherd

Wed, 07/04/2012 - 04:34

That looks great! I never would have thought of doing it with pleather. I've been trying to decide what seating to make for my son who lives in a one bedroom apartment and needs a place for his sister or friends to crash when they come to visit. I'm going to show him this and see what he thinks.

Storage Dining Bench

Submitted by Anonymous (not verified) on Fri, 03/22/2024 - 07:34

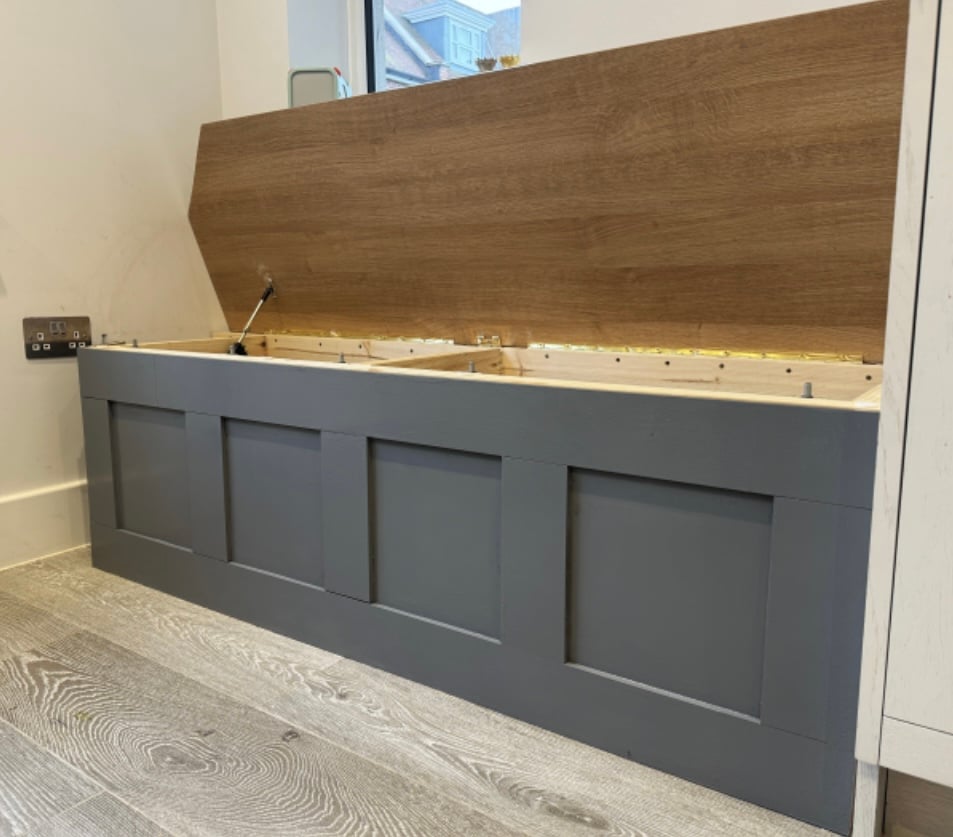
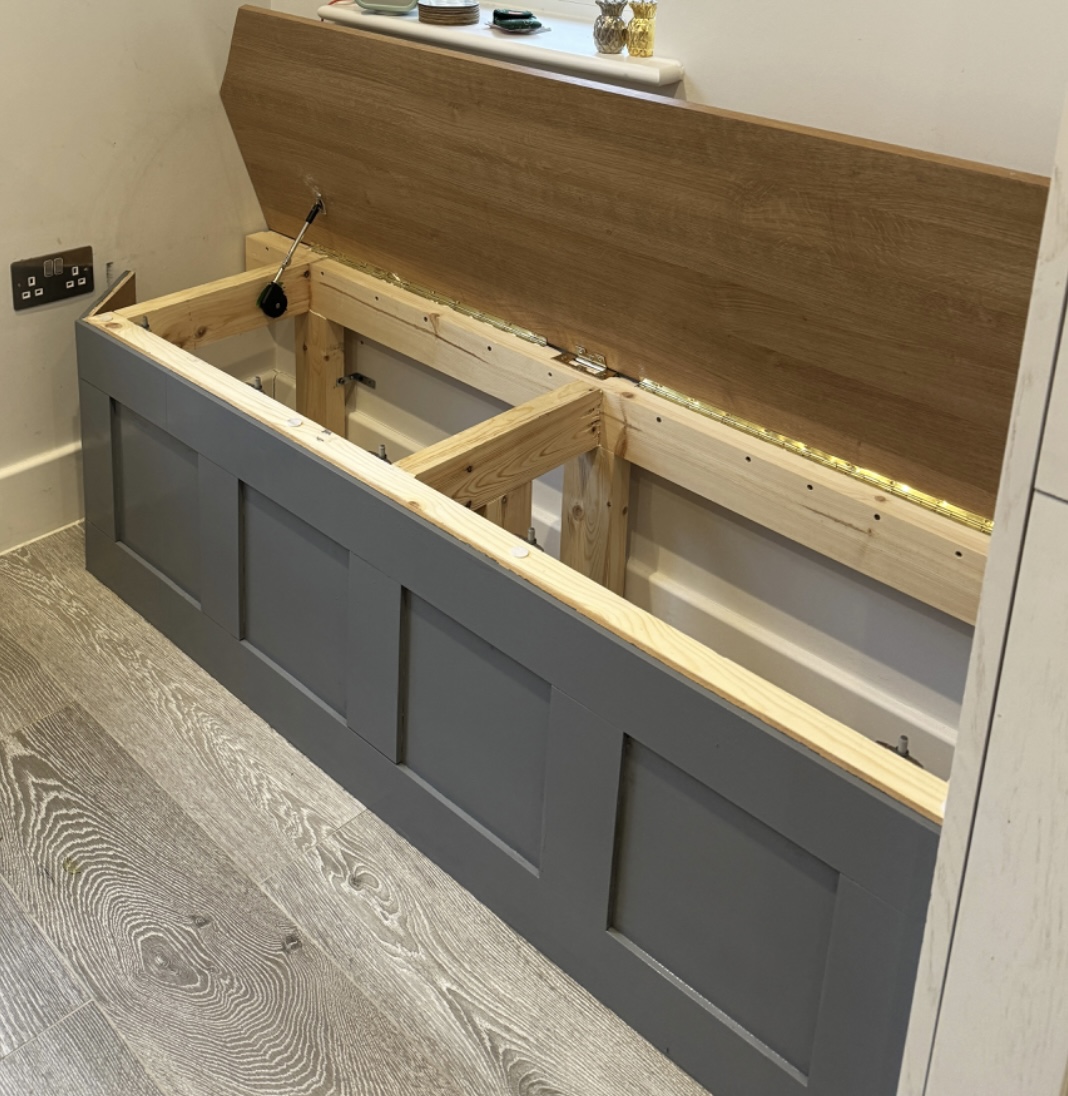
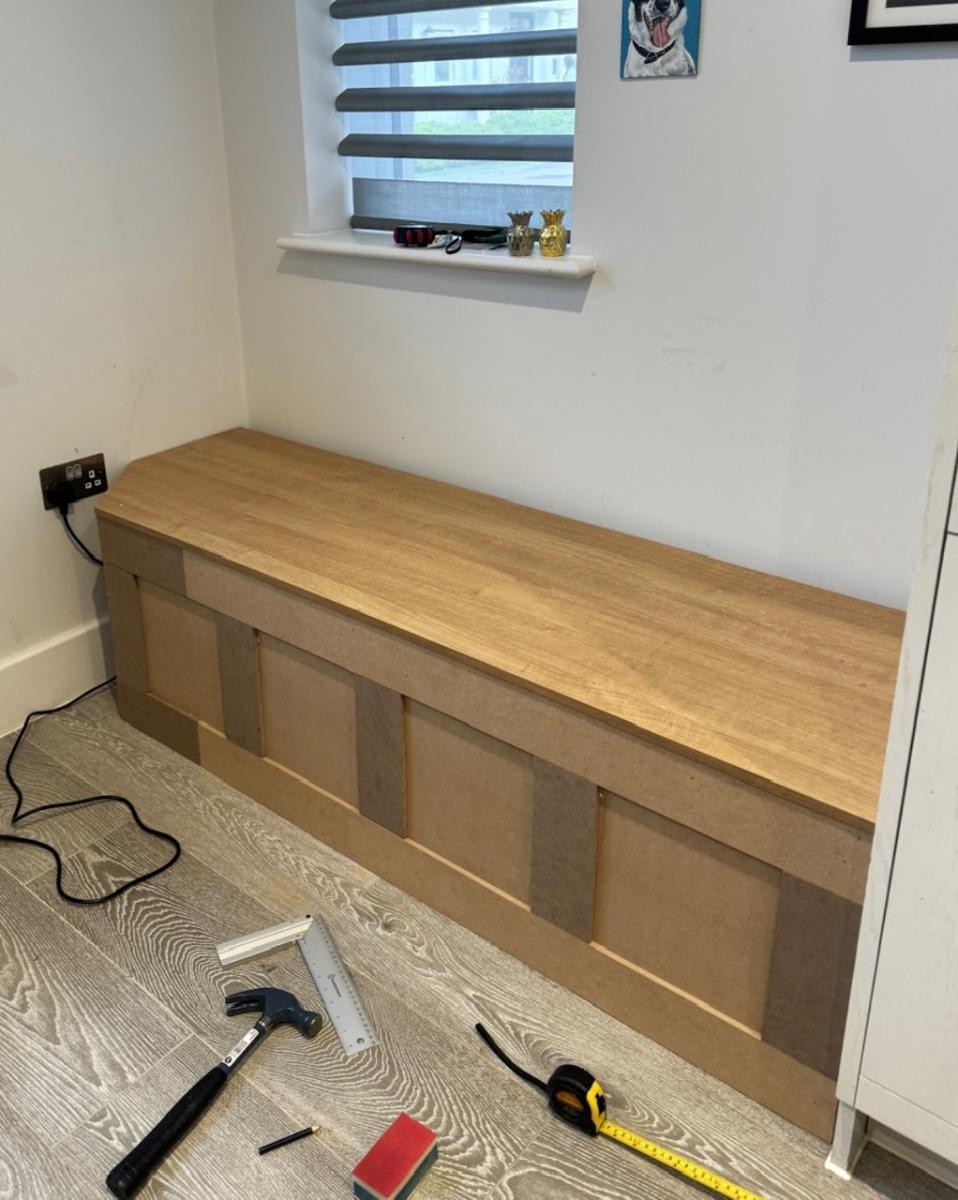
Kitchen dining bench with storage. Due to the plugs being in an awkward position, I opted to build this bench with a facade as opposed to adding a back and sides. This also meant it had to be panelled in situ which was a fun challenge! It has piano hinges as well as soft close pistons making for a great storage bench that is in keeping with the rest of our kitchen.

Basement Storage Shelves

Submitted by Eddie A on Sun, 08/30/2020 - 22:59

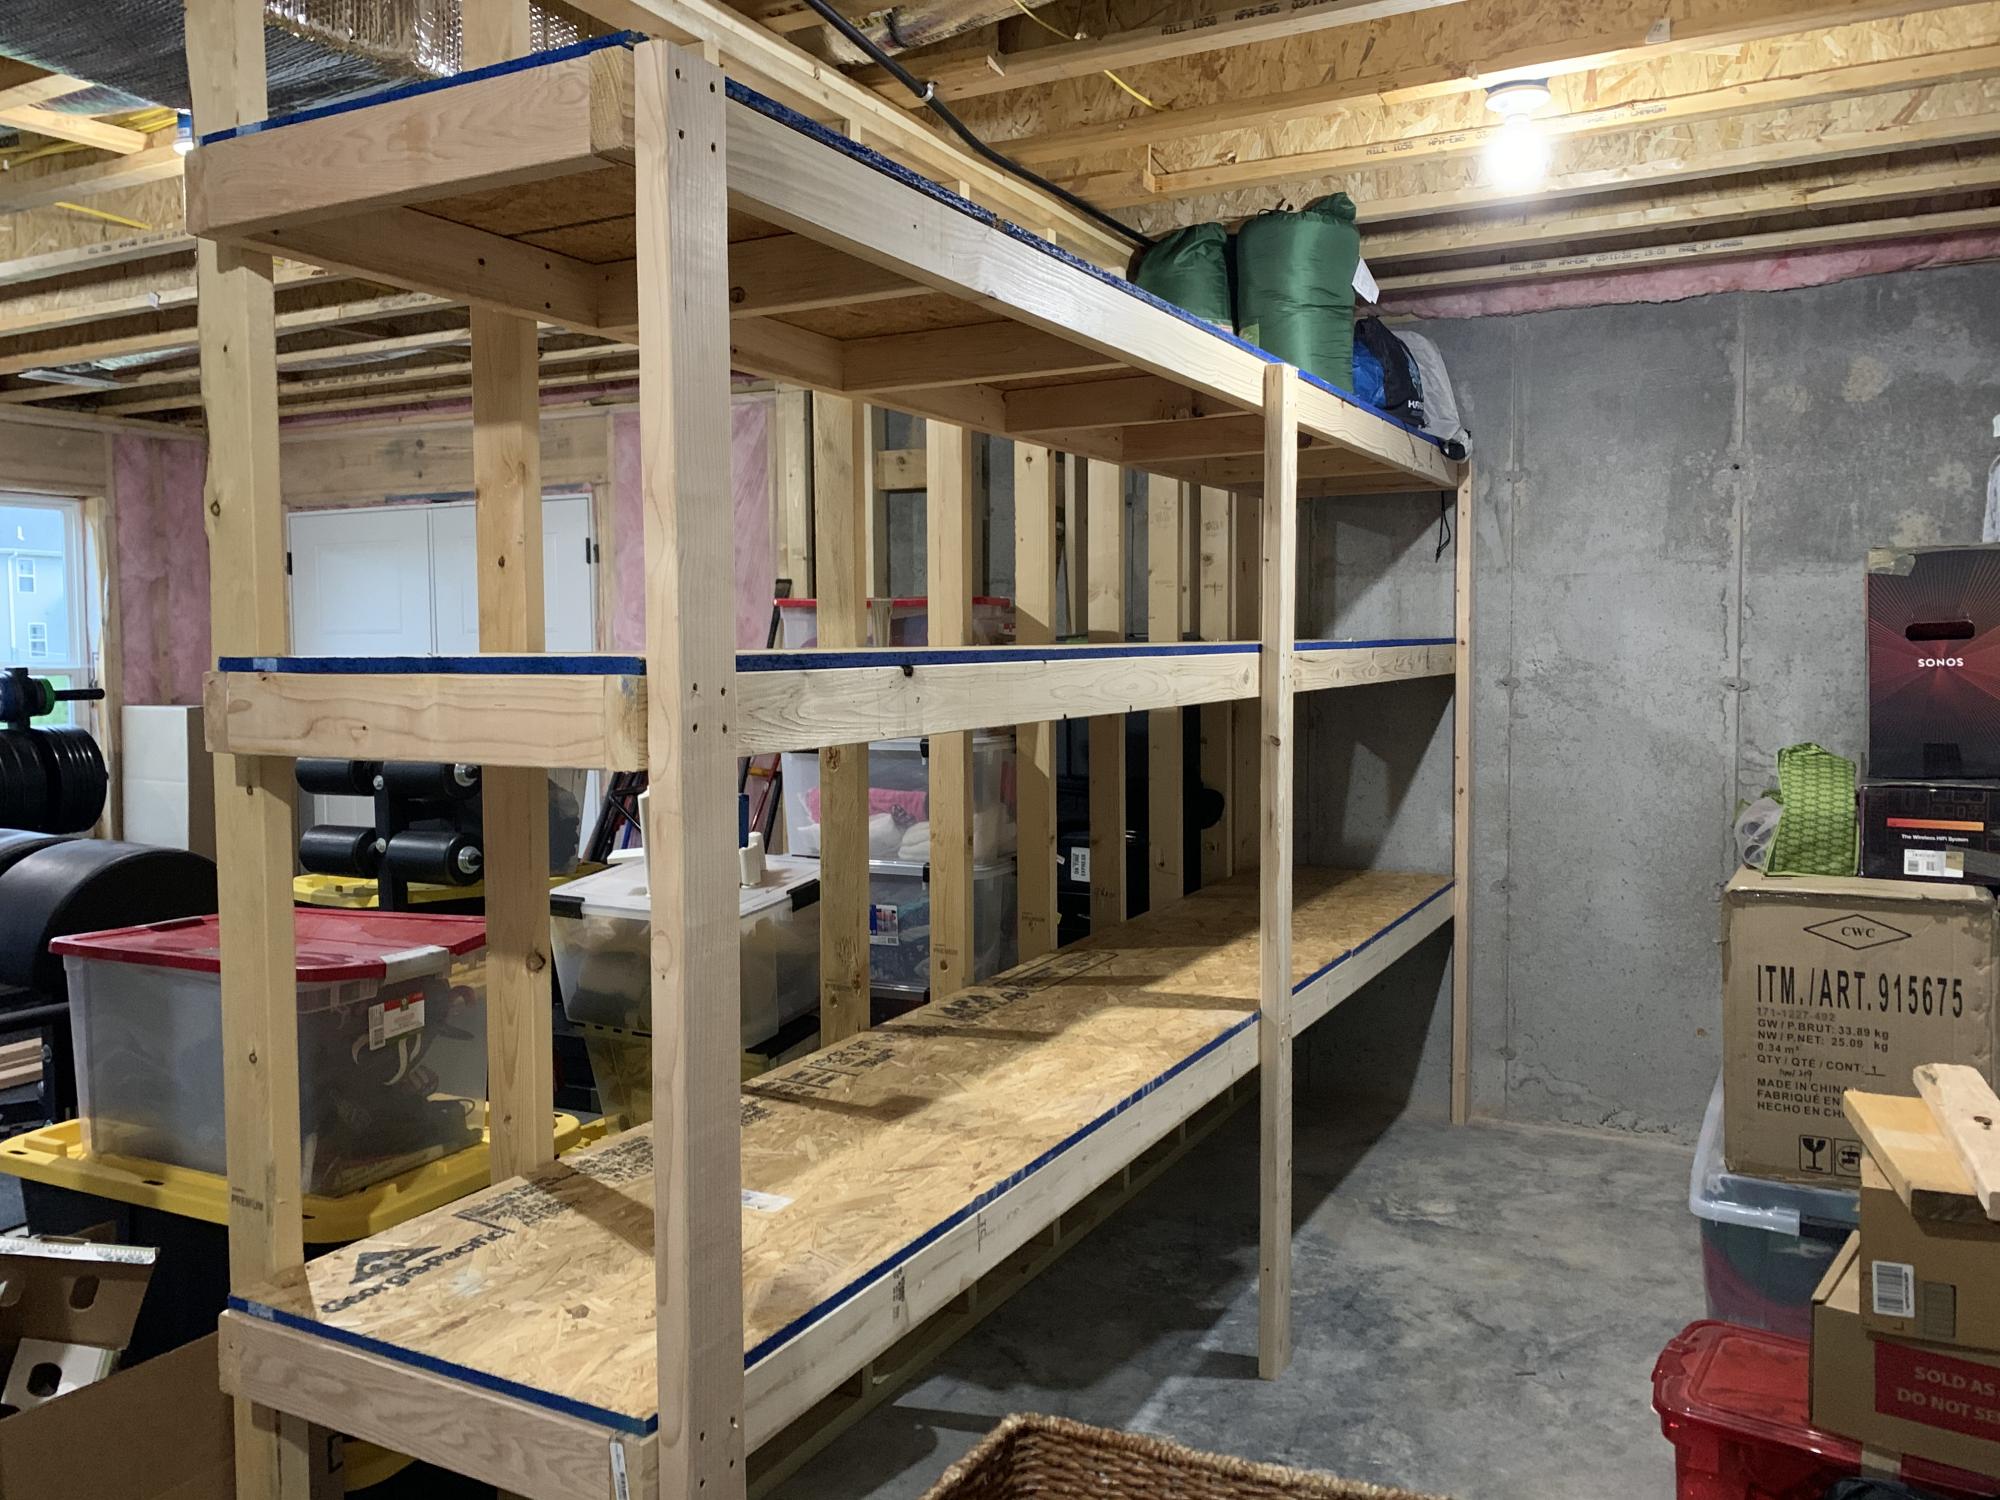
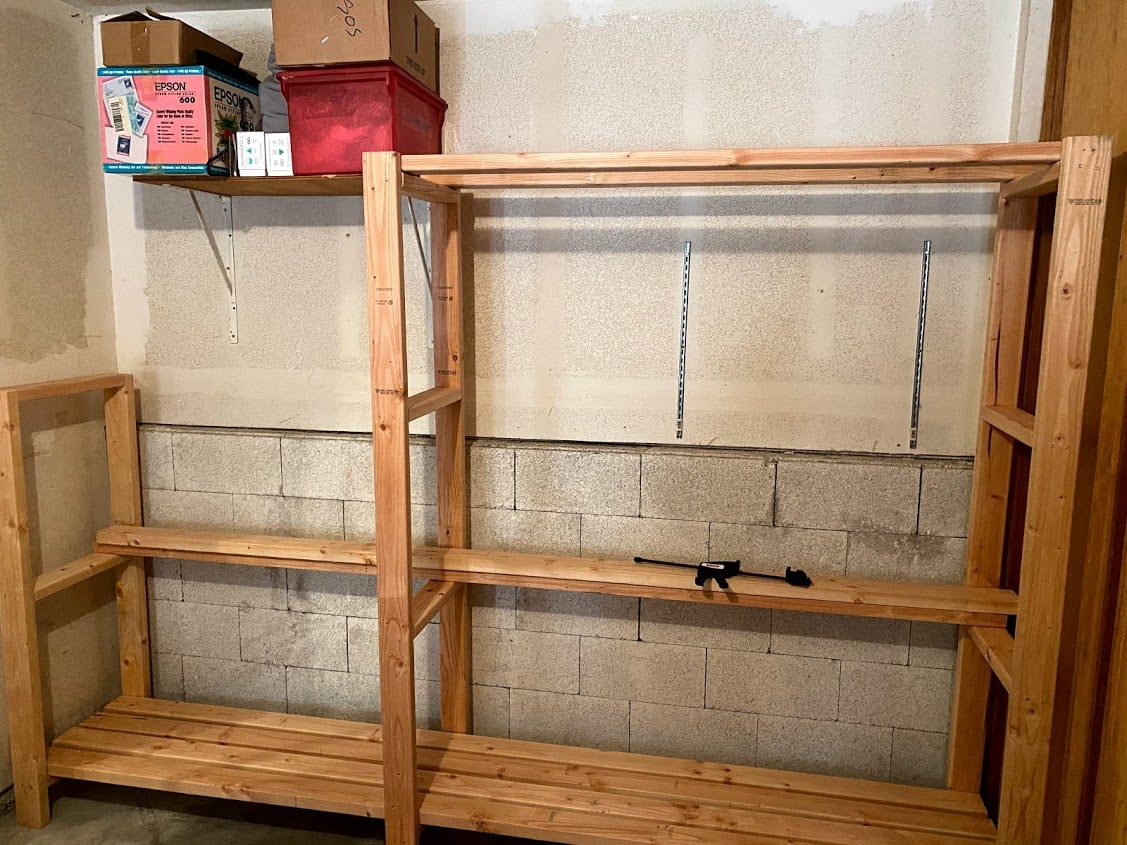
We just moved into a new home and had a huge open storage area in the unfinished portion of our basement and we’ve got a lot of stuff so we needed to make the best use of that space and these shelves deliver big time. This shelf is 12’ long by 2’ deep with 2 each 24” and 18” tall shelves. Really simple construction and I got to use my Kreg HD jig for the first time on the cleats so these bad boys are SOLID! My wife love this one so much I’m building another one in the opposite side of the wall with all 4 shelves at 18” tall.

Estimated Cost
150
Estimated Time Investment
Afternoon Project (3-6 Hours)
Recommended Skill Level
Beginner

Garage Shelves - Freestanding (Modified)

Submitted by Anonymous (not verified) on Tue, 09/15/2020 - 20:45

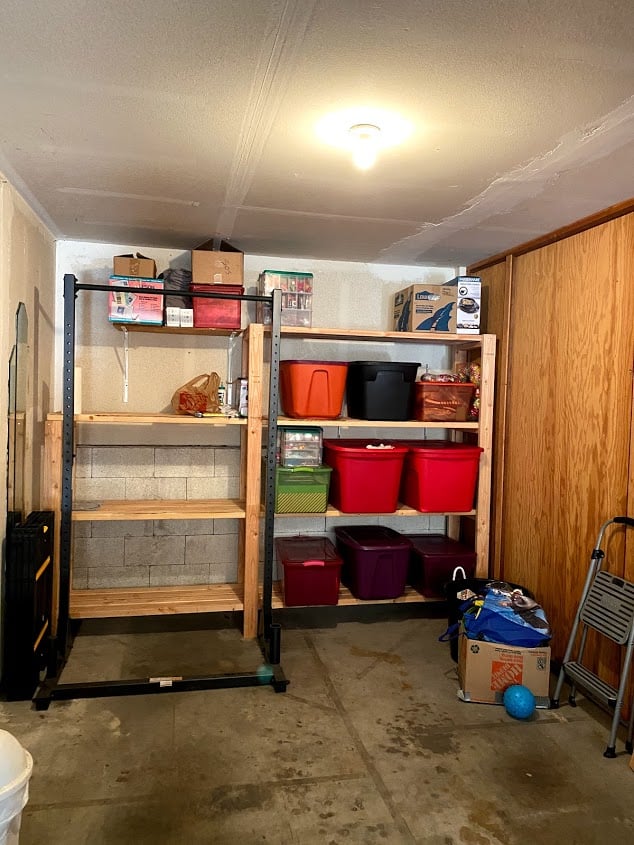
First project ever! I have been planning to build this for at least a year, and I finally did it! I had to modify the plan to fit my space, but it worked out well. They cut the wood for me at the store, so I did not make any cuts myself, just assembled all of the pieces together. I used all 2x4s, 8' and 10', cut down to my measurements. I did not finish the shelves since it is just for the garage, but I did sand rough board edges and some of the faces. I just used an palm sander and coarse sandpaper (80 grit). Please double check all measurements and lists because I forgot to add my shorter shelf supports to the list and had to go back to the store. I also forgot to add the width of the top shelf to those two shorter supports, so the shelf boards are resting on the top instead of nestled into the supports. It turned out not to be a functional problem, but a good lesson to learn. I also learned to make sure my driver battery is charged fully before starting - that took a large chunk out of my first day building and I had to finish the next day. My husband helped with some lifting and holding, but I mostly did this on my own in one weekend, so you CAN do it! Don't wait like I did - it is soooooooo useful and it looks great! All of my friends are really impressed and it feels so good to have made something like this! Thank you Ana!!

Estimated Cost
$180
Estimated Time Investment
Weekend Project (10-20 Hours)
Finish Used
N/A
Recommended Skill Level
Beginner

Comments

Three story doll house for my granddaughter

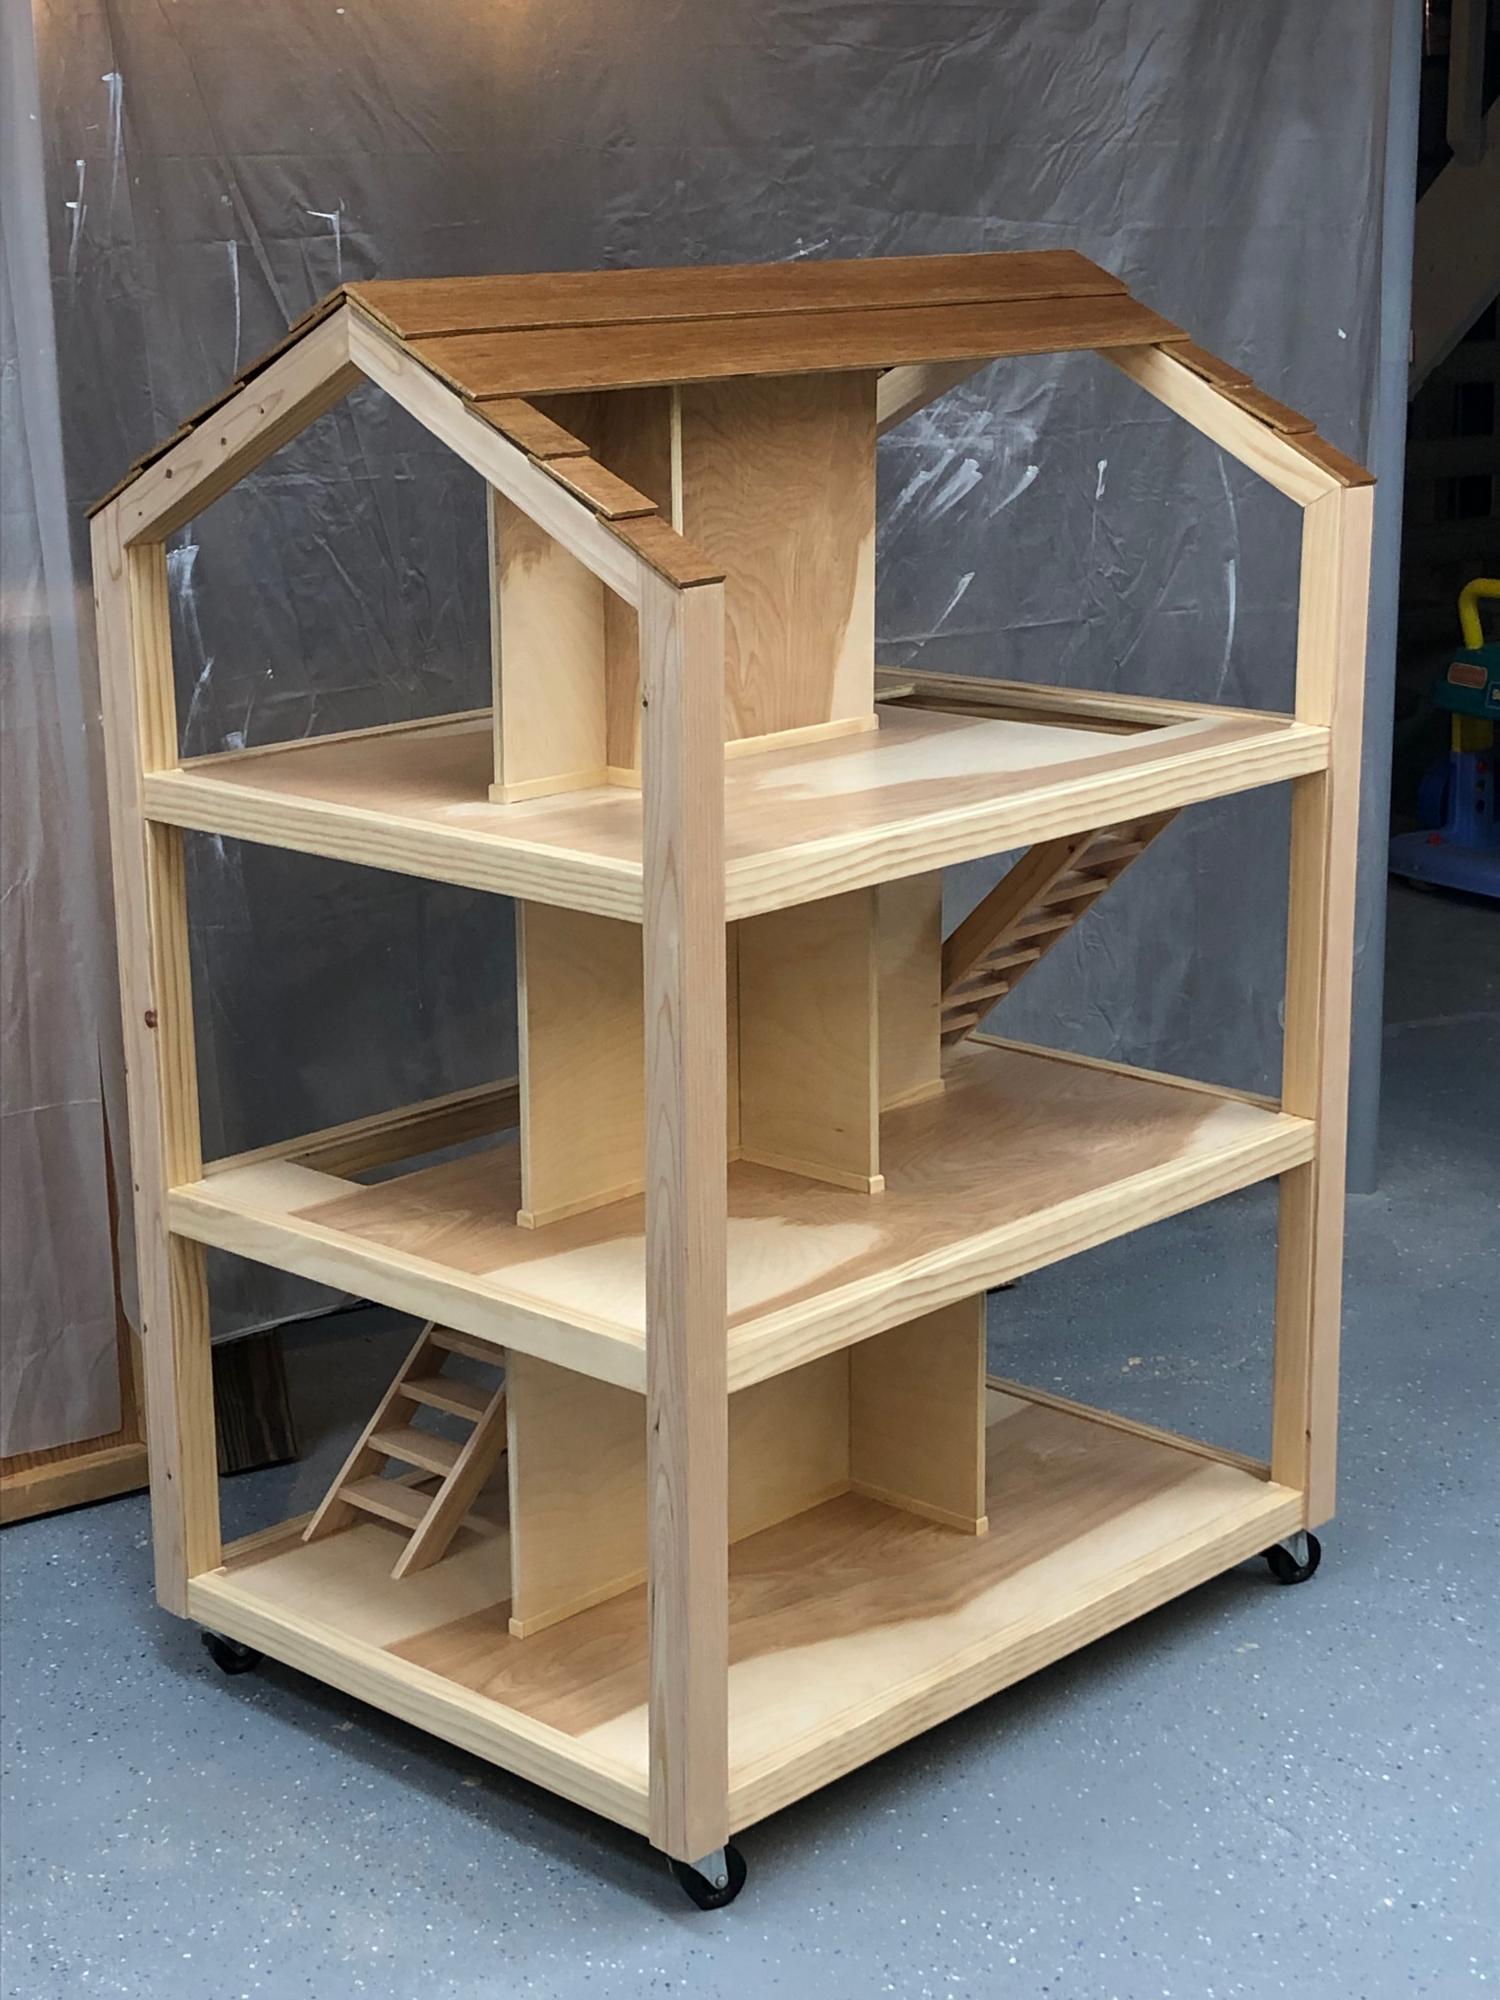
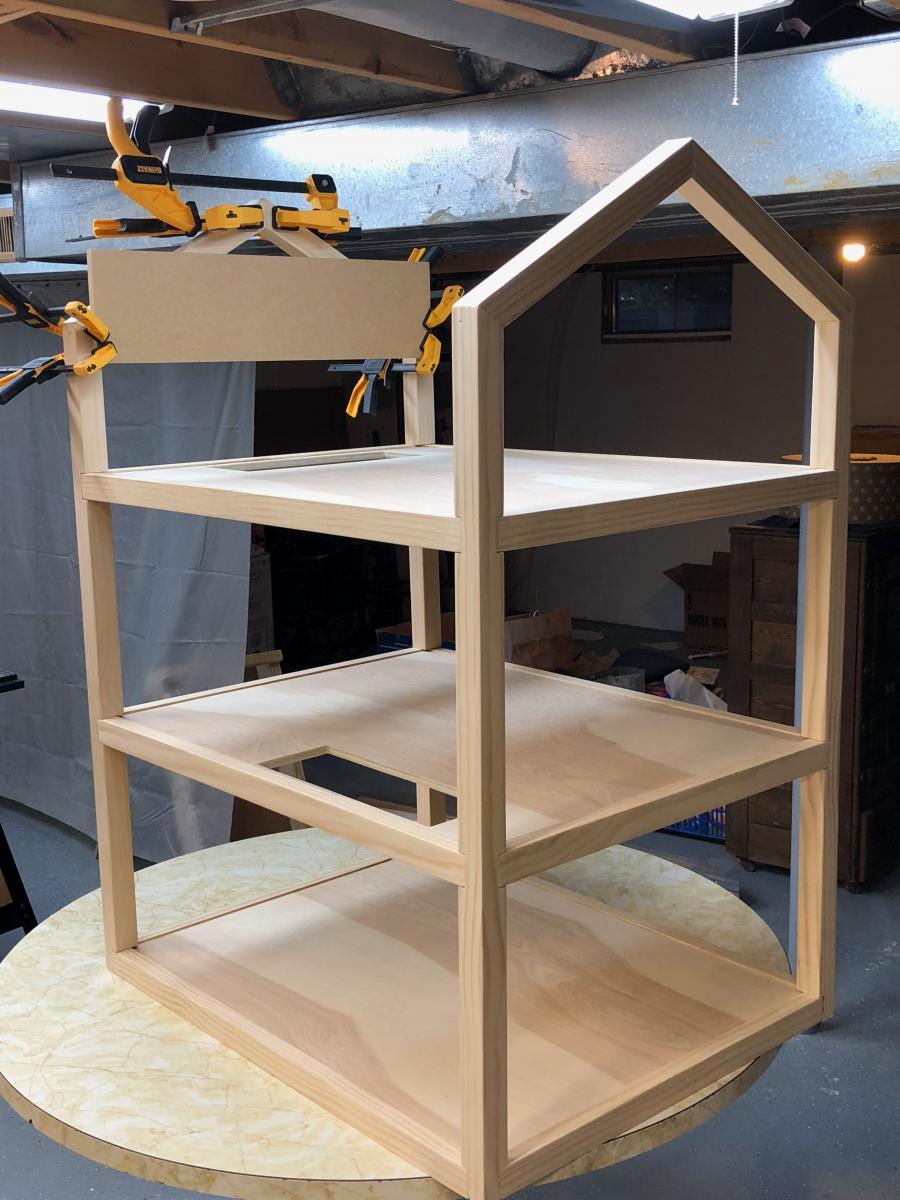
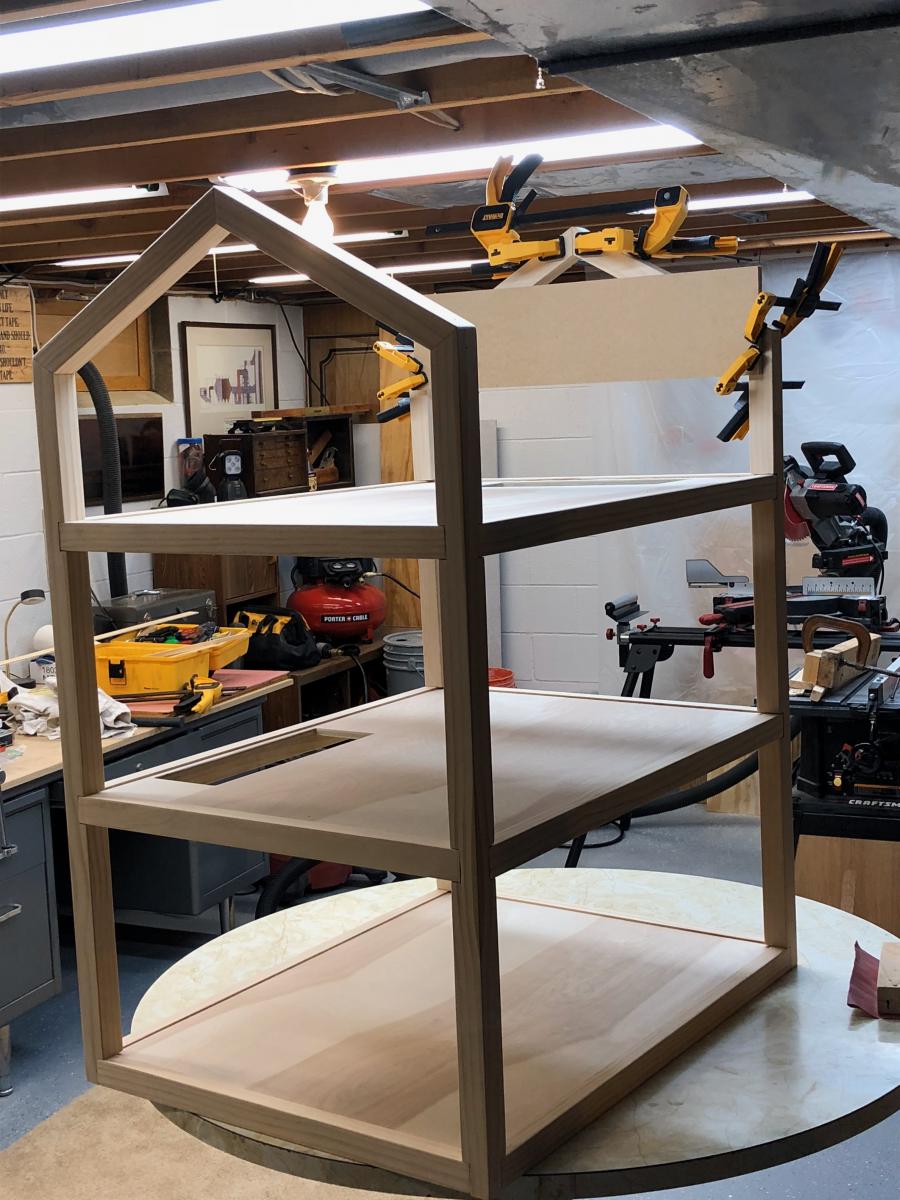
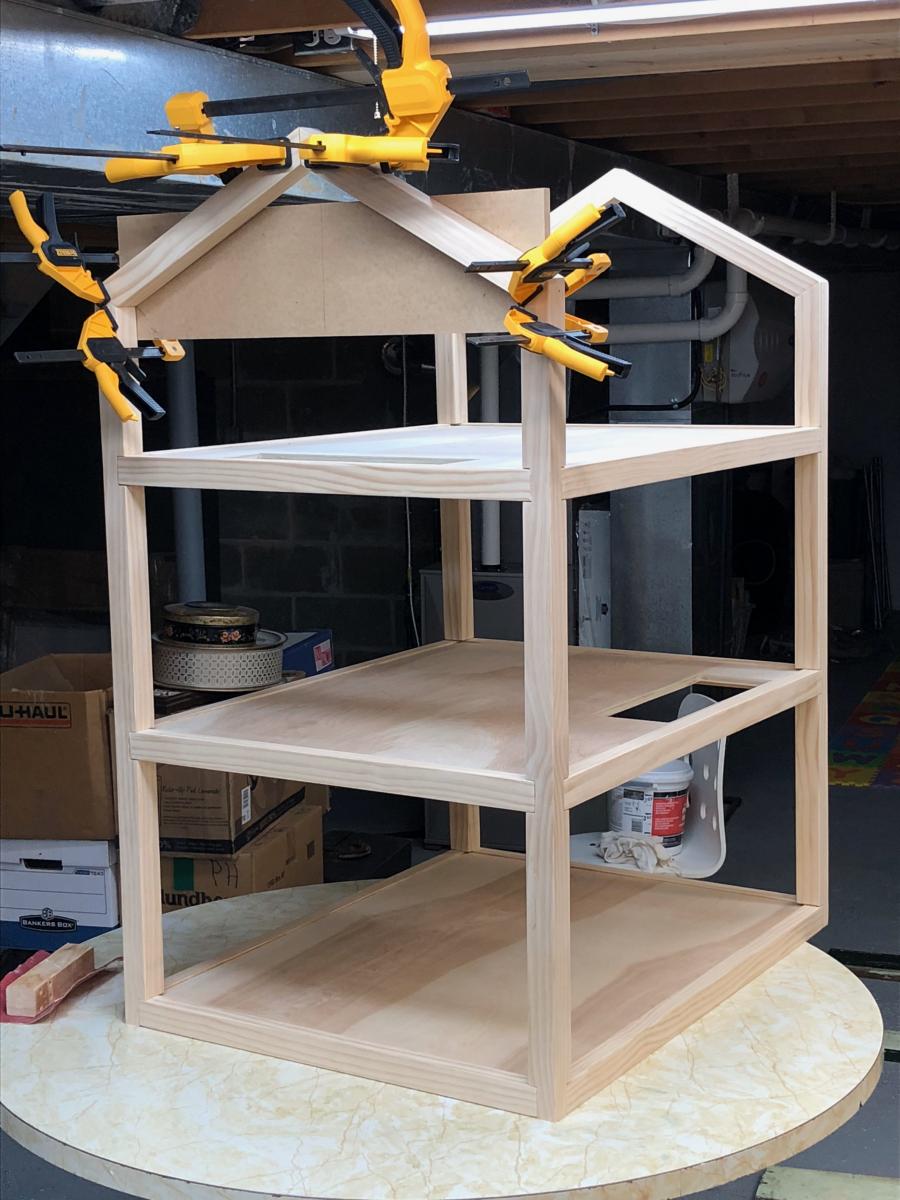
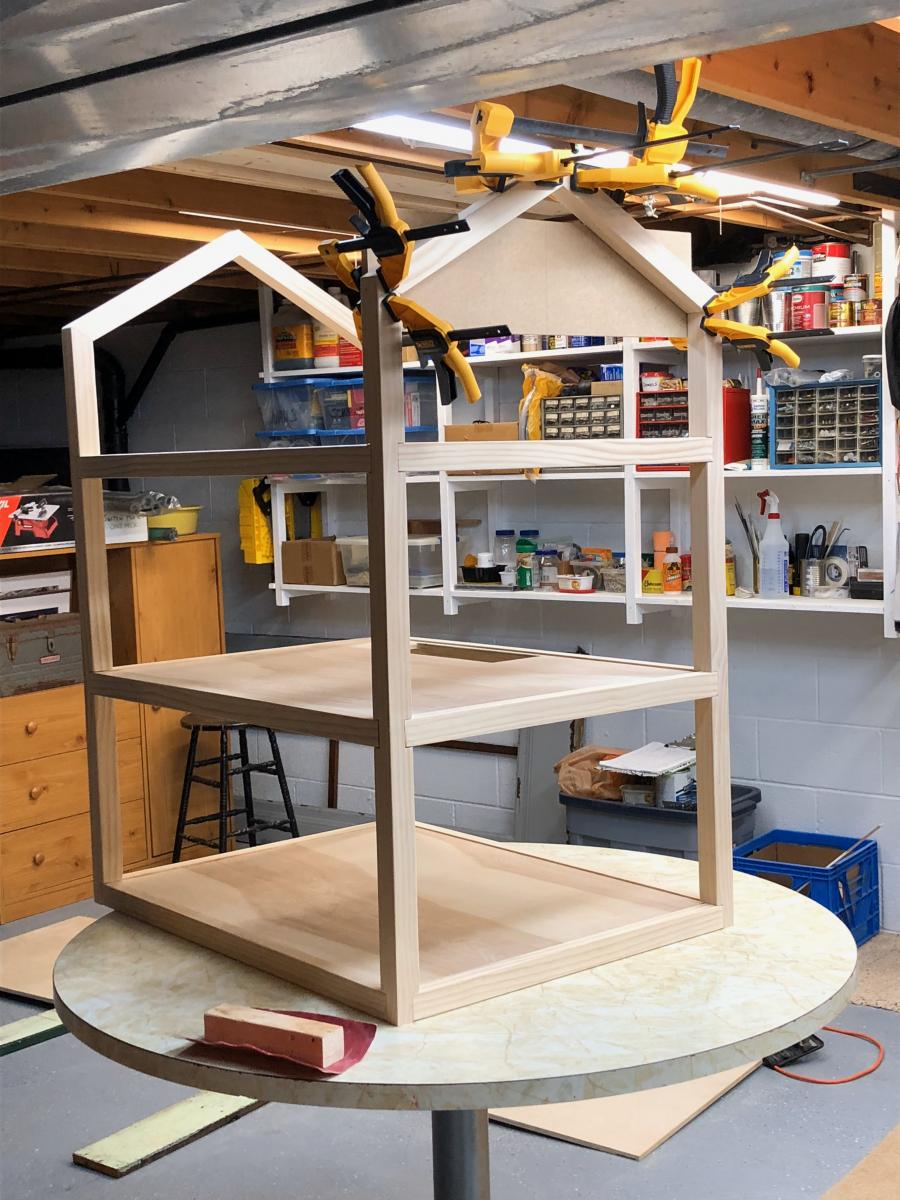
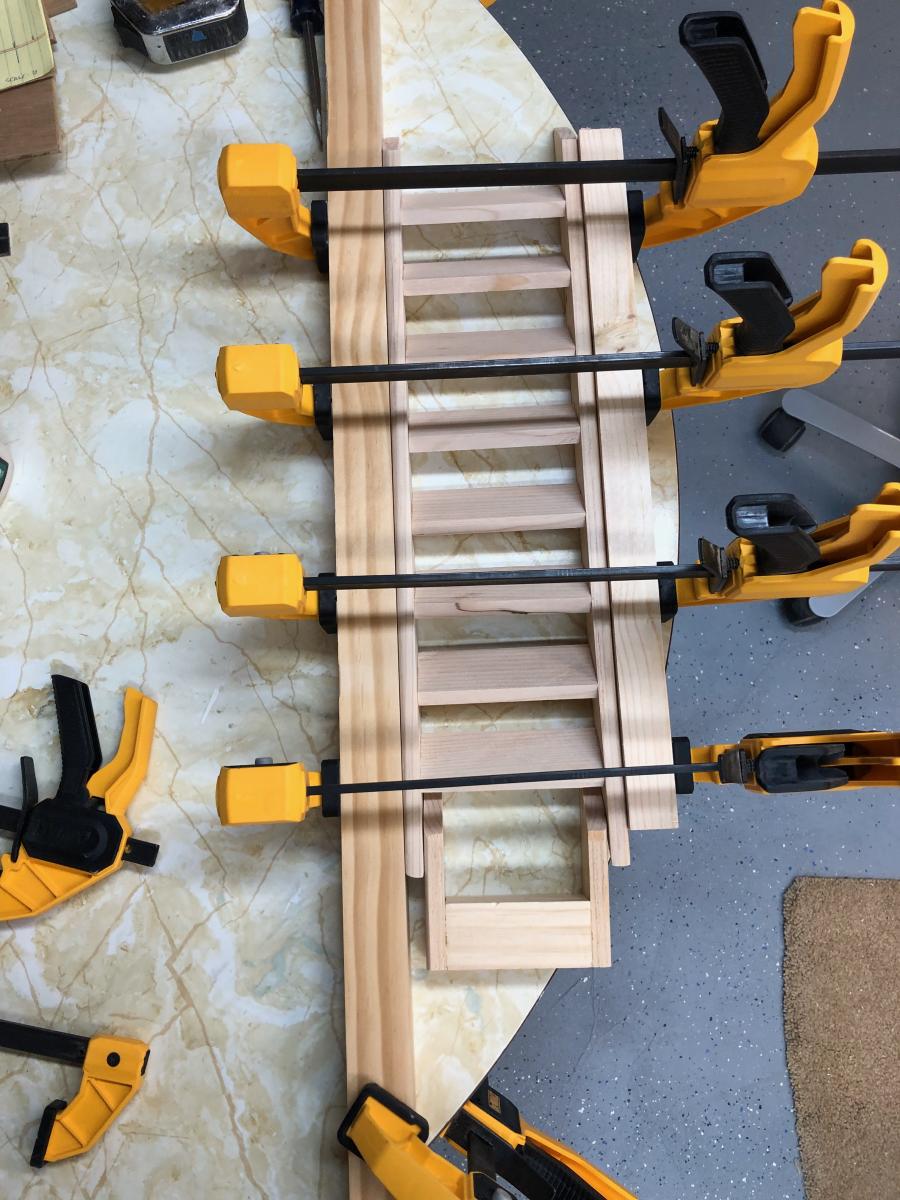
Here's my version of the Dream Doll House. Three stories, made with birch plywood and pine, featuring realistic stairs, baseboards, crown molding, exterior corner battens, and left in the natural state with just a few coats of water-based poly. Put the whole thing on casters for ease of rolling around the playroom. Fun project and the hugs were all the reward I needed!

Estimated Cost
Maybe around $100.
Estimated Time Investment
Weekend Project (10-20 Hours)
Finish Used
Water-based polyurethane
Recommended Skill Level
Beginner

Comments

Sewing Table for Small Spaces

Submitted by Linda7 on Sun, 02/03/2013 - 16:51

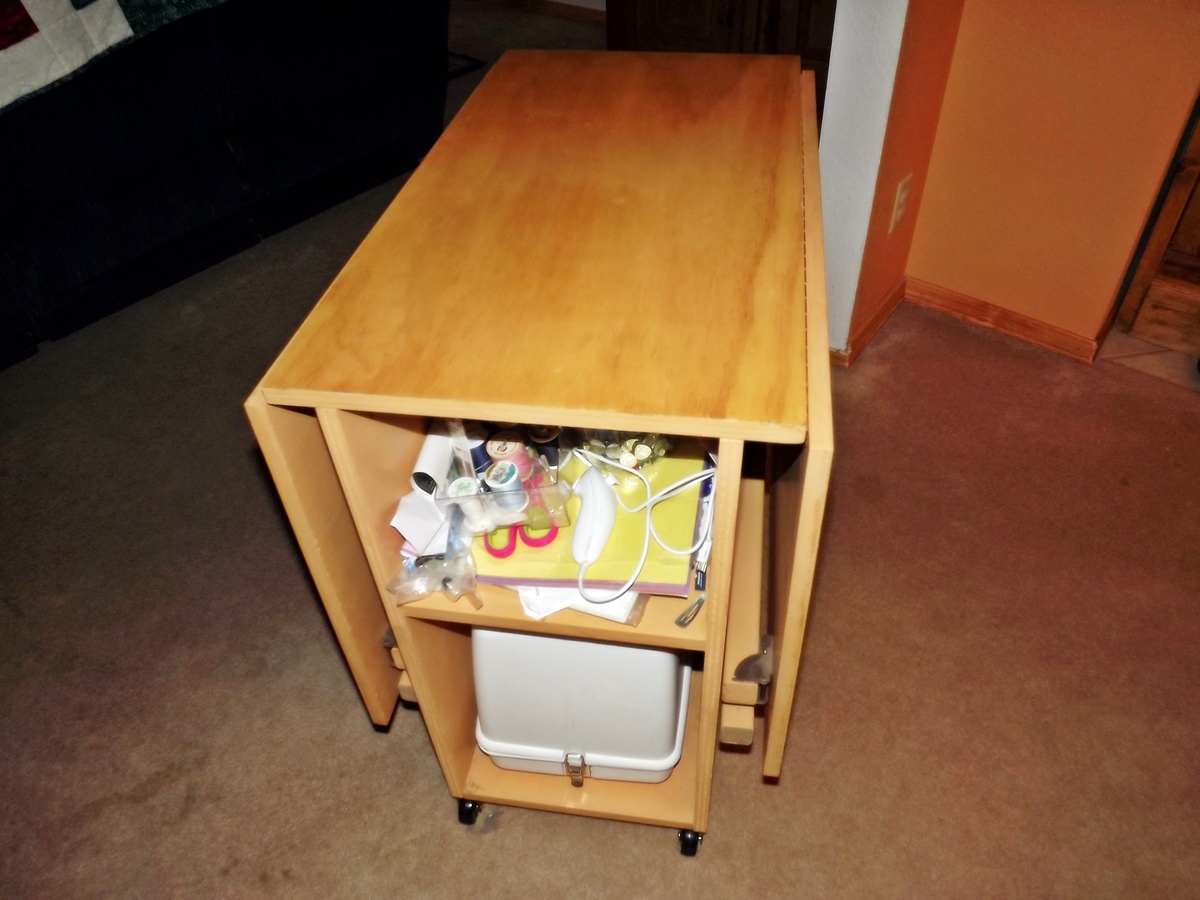
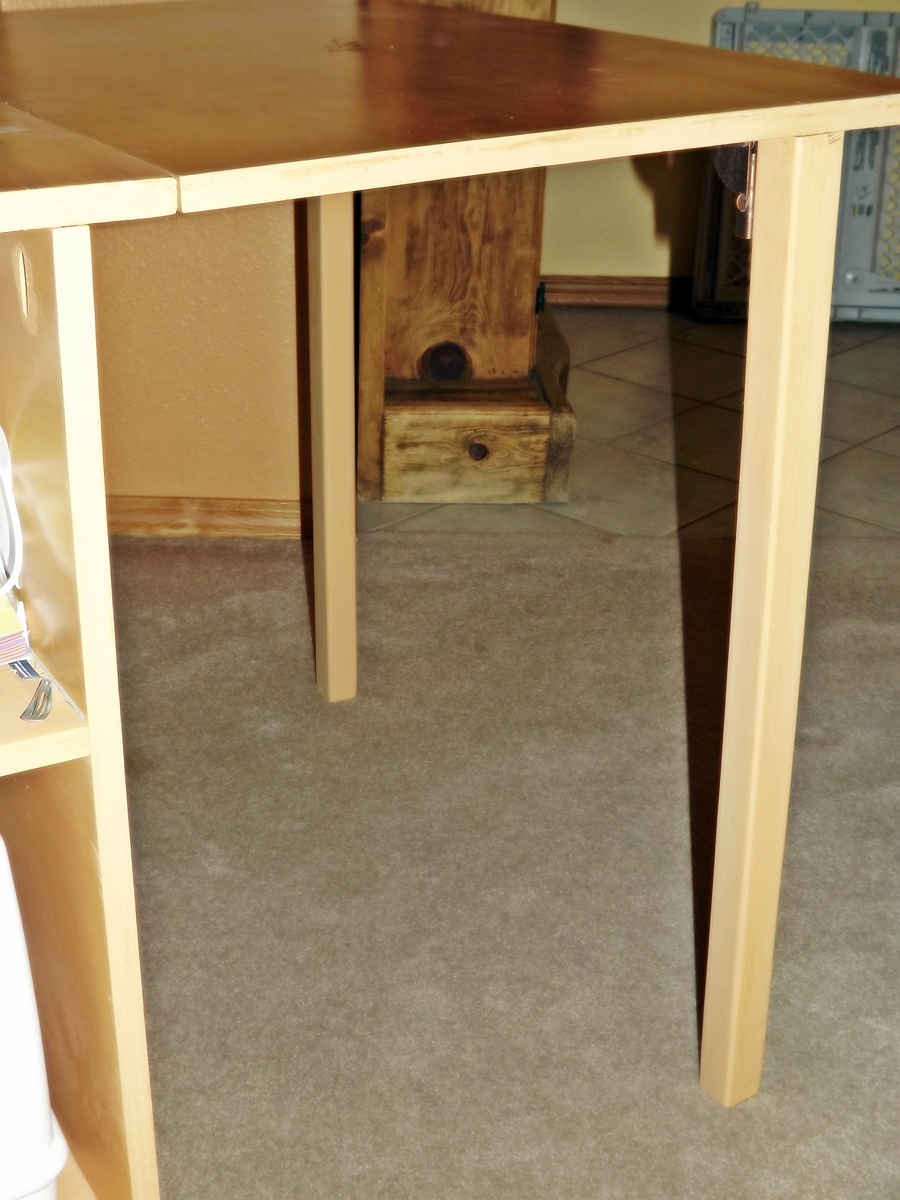
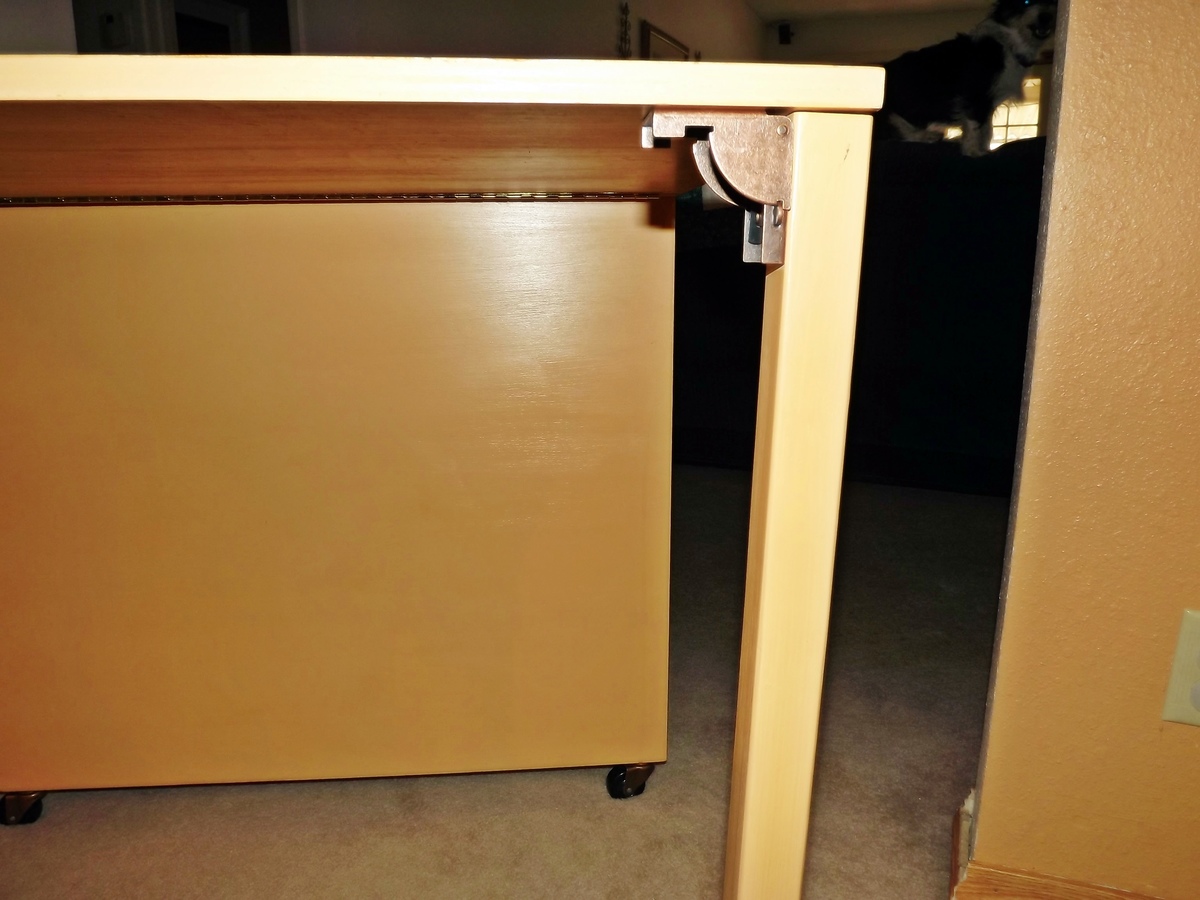
My daughter-in-law needed a compact sewing table, and this plan fit the bill perfectly! I did use 2 x 2 legs instead of 1 x 2s. This makes the table considerably more stable if you plan to use this table with your machine. If you do use the 2 x 2s for legs, you will need to widen your table top dimensions from 15 1/2" to 17" to accommodate the larger diameter of the legs. I also used a piano hinge for each drop leaf. They weren't much more expensive than the hinges listed in the plans, but again, they provide more stability (imho).

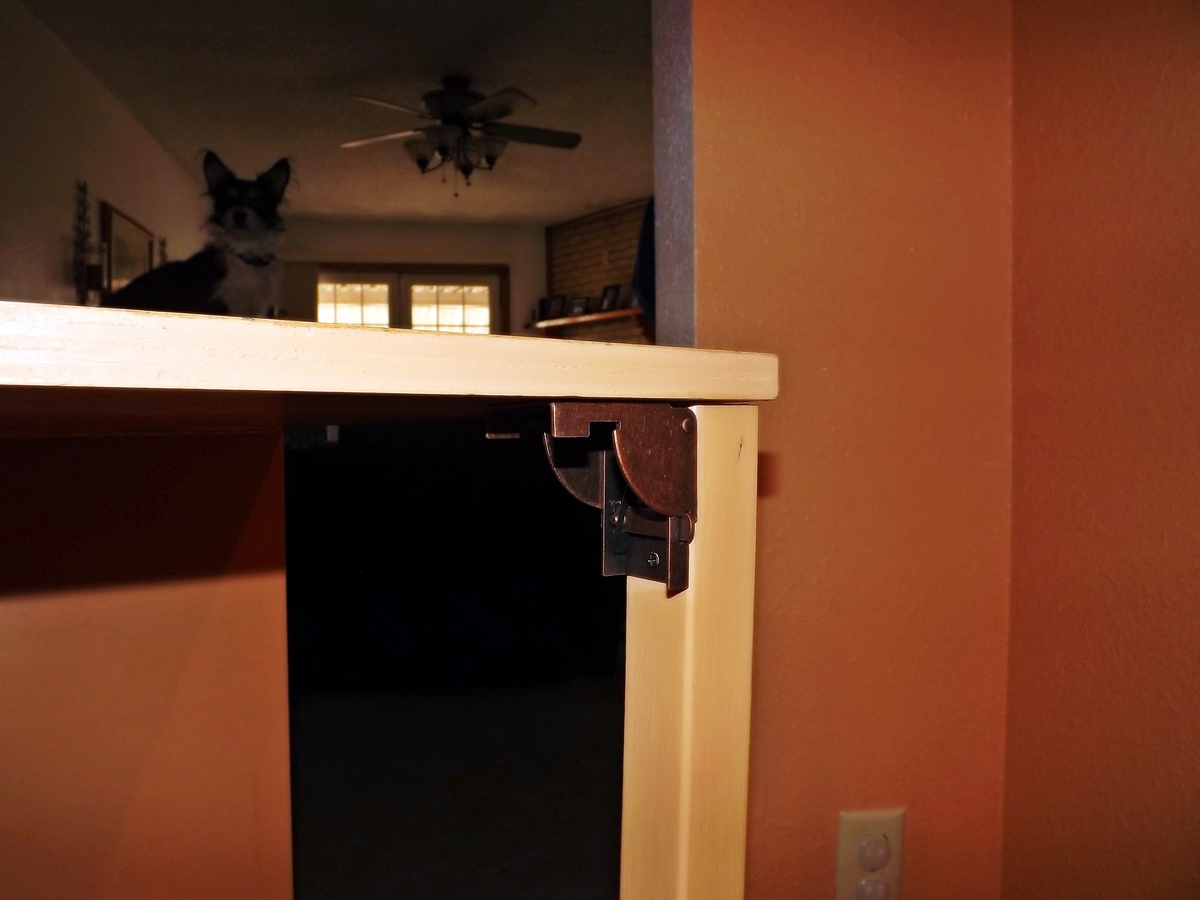
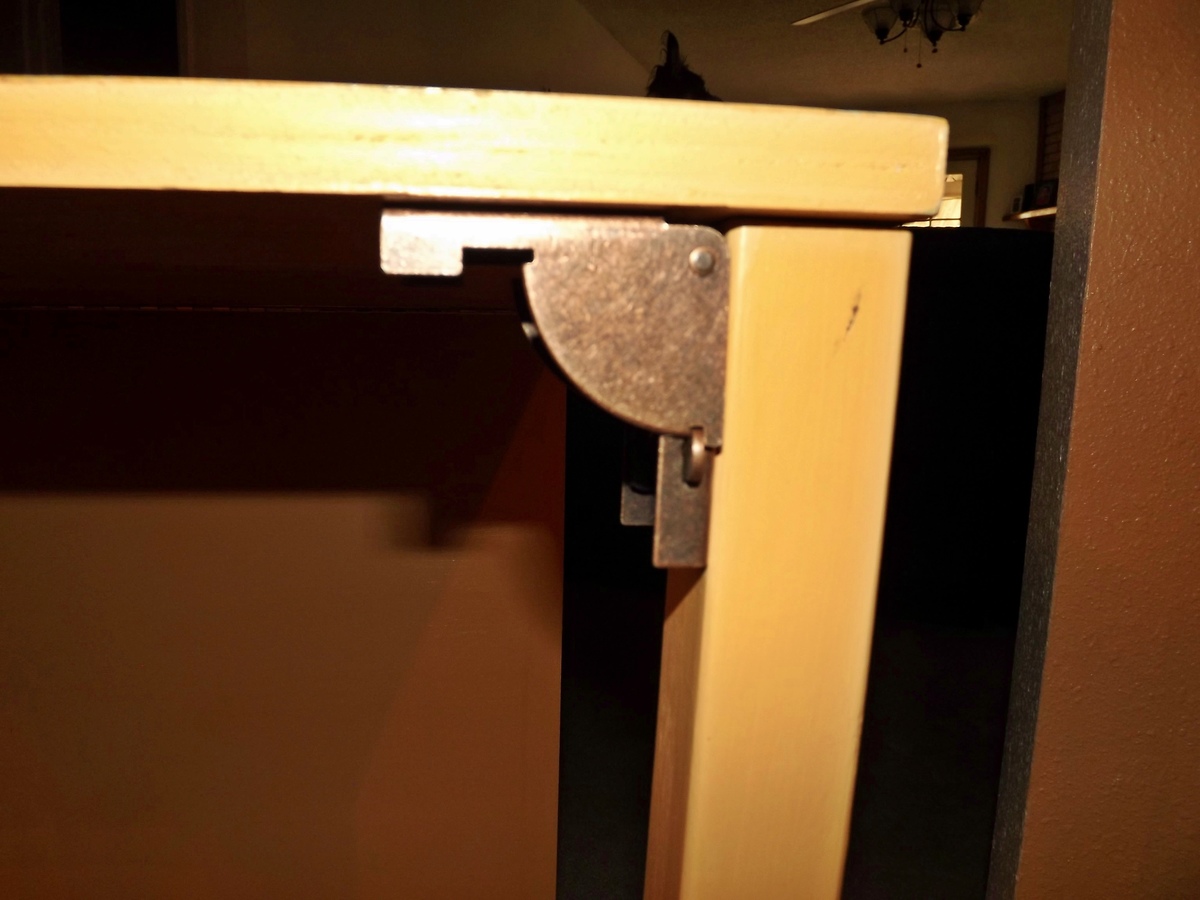
I wanted to show the locking mechanism for the legs in detail. I love these as they hold the legs in place when the drop leaf is down, and they pop into place when the leaf is in use. Called "folding leg fitting" it is part S-149L at $3.65 each at the following link:

http://www.hardwaretree.com/proddetail.php?prod=S-149L

When my daughter-in-law received her gift on Christmas Eve, she wouldn't even let me keep it for another day or two so I could touch-uppaint some spots...she loves it.

Thank you, Ana, for the wonderful plans!!

Built from Plan(s)
Estimated Cost
Around $75.00 not including stain and paint, which I had on hand.
Estimated Time Investment
Weekend Project (10-20 Hours)
Finish Used
Top and leaves stained with pine; box and legs painted w/ semi-gloss wall paint from my daughter-in-law's house (can't tell you the color, but it's from the terracotta color family). Three coats of poly on stained top.
Recommended Skill Level
Beginner

Comments

ACM

Mon, 02/04/2013 - 07:49

The table for my sewing machine costs almost as much as the machine did! This is a wonderful build. You have a very luck daughter-in-law.

sksan

Mon, 02/23/2015 - 14:33

The hinges that hold the leaves look like they run the width of the table as opposed to separate hinges. What did you use? Thanks!

Linda7

Fri, 04/17/2015 - 18:58

I'm sorry. Just now seeing your question. Yes, I used piano hinges so that they would run the entire length. The worked well.

Mud Room

Submitted by Anonymous (not verified) on Sun, 01/24/2021 - 20:03

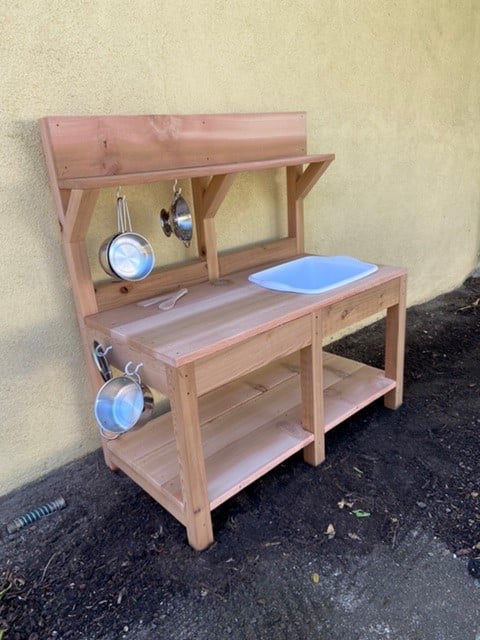
This was so easy and fun! We splurged a bit on nice cedar because apparently the cedar mills are down due to covid so the less expensive fencing isn’t so readily available. The hubs helped me rip down the larger boards, then I cut and assembled it all. Not including the buying and ripping, this took me maybe 4 hours to complete and we ended up with a beautiful kitchen for my daughter’s 5th birthday! Thanks for these super easy to follow plans!

Built from Plan(s)
Estimated Cost
$150
Estimated Time Investment
Afternoon Project (3-6 Hours)
Finish Used
None
Recommended Skill Level
Beginner

Comments

Free Standing Closet

Submitted by Anonymous (not verified) on Sun, 03/28/2021 - 09:13

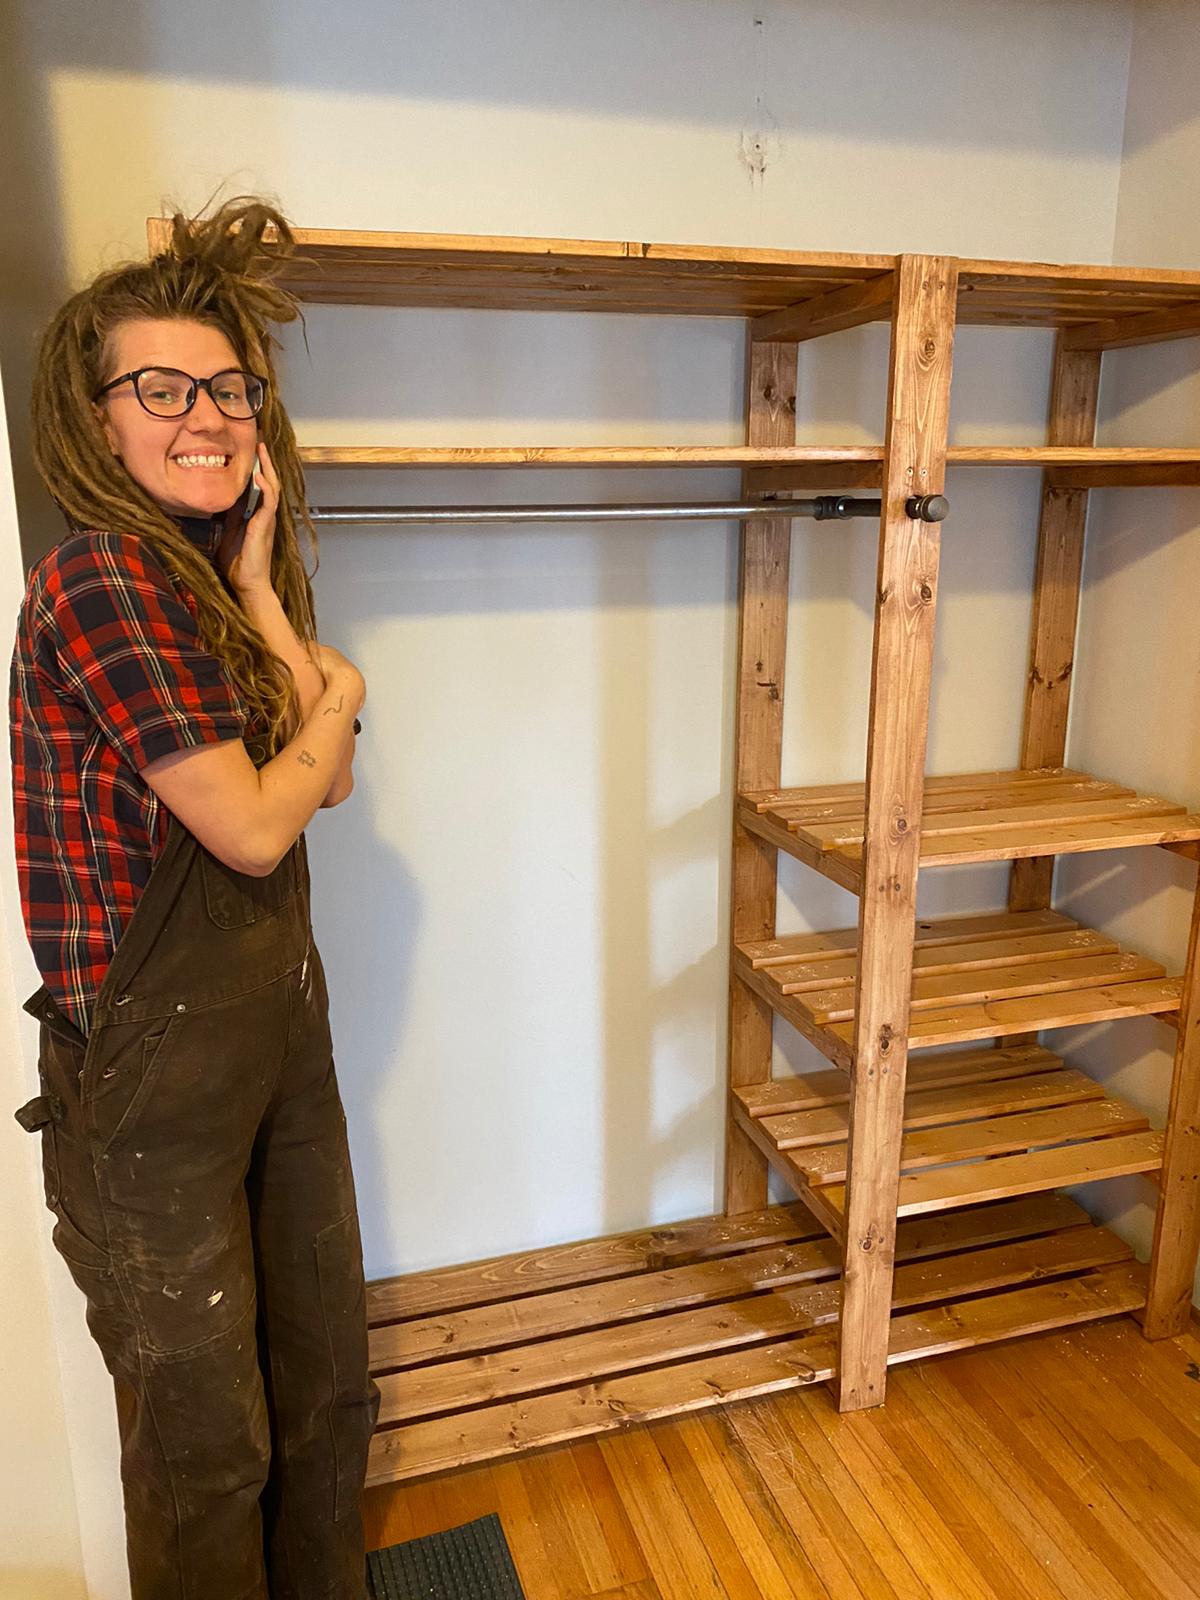
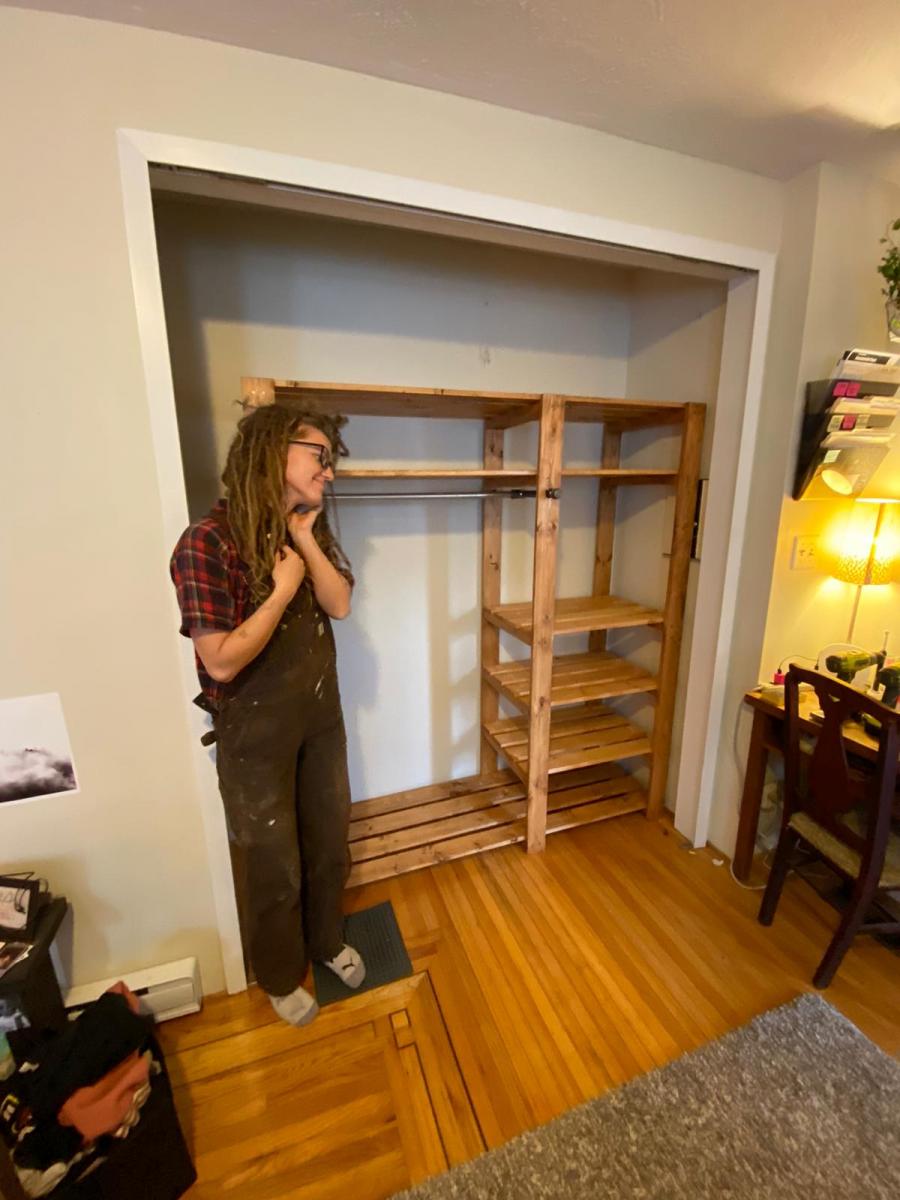
thank you so much for these plans! We cut the original design in half, so it would fit the space- we used pine so the boards were a little warped but eventually everything screwed down into place and now it really does free stand and its all level! We may add a crossbeam at the back for extra stability. Stained with Ipswitch Pine by Verathane , 2 layers with sanding between, basic piping from the hardware store. Well under $200 total!

5.5 feet tall, 6 feet wide, 2 feet deep

Thanks again, your plans were thorough and easy to follow.

Built from Plan(s)
Estimated Cost
200
Estimated Time Investment
Week Long Project (20 Hours or More)
Finish Used
Laquer - semi gloss
2 coats, sand in between
Recommended Skill Level
Beginner

Comments

Farmhouse Bench

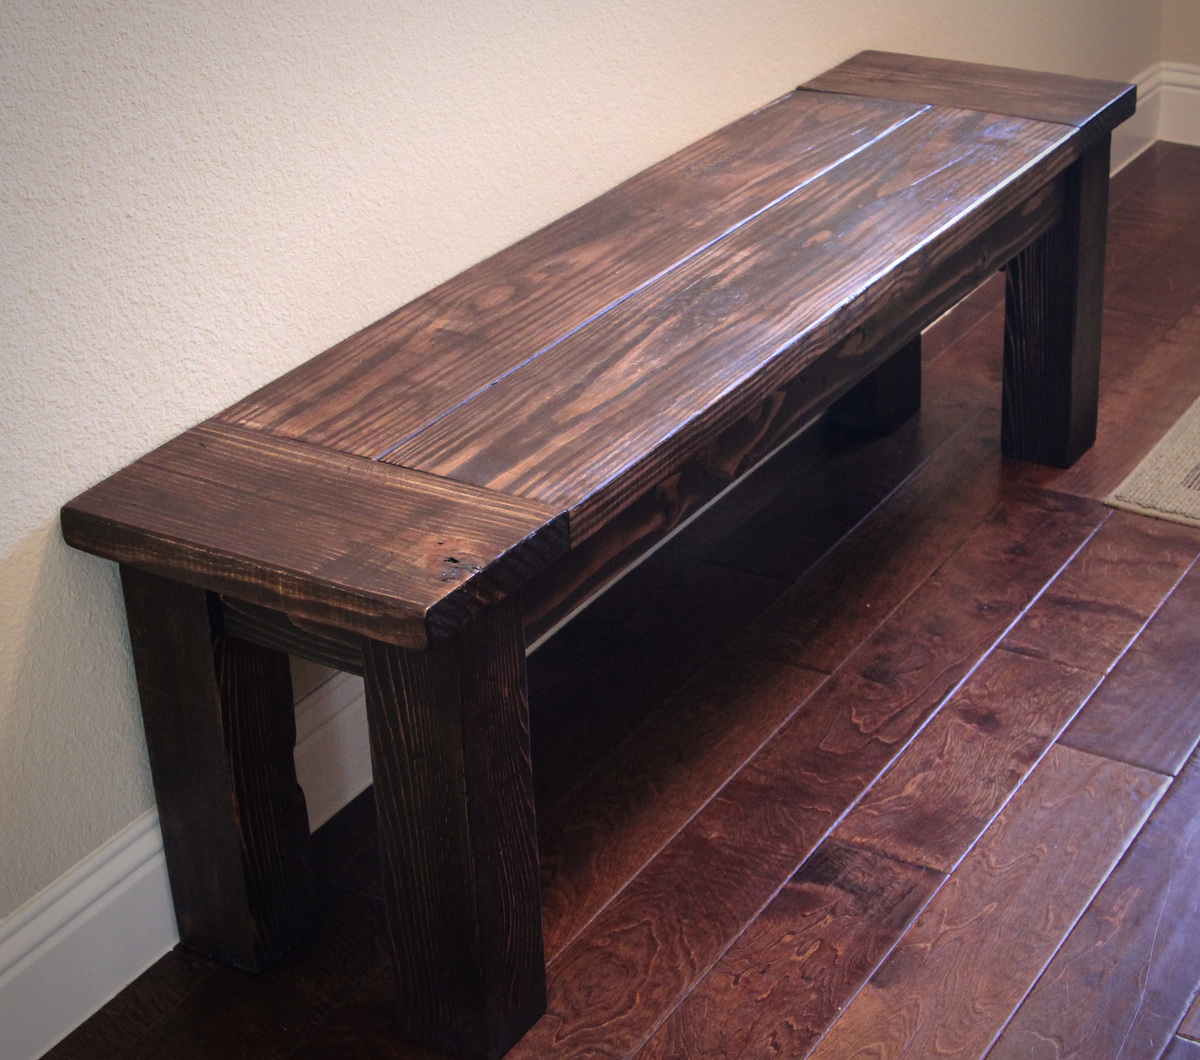
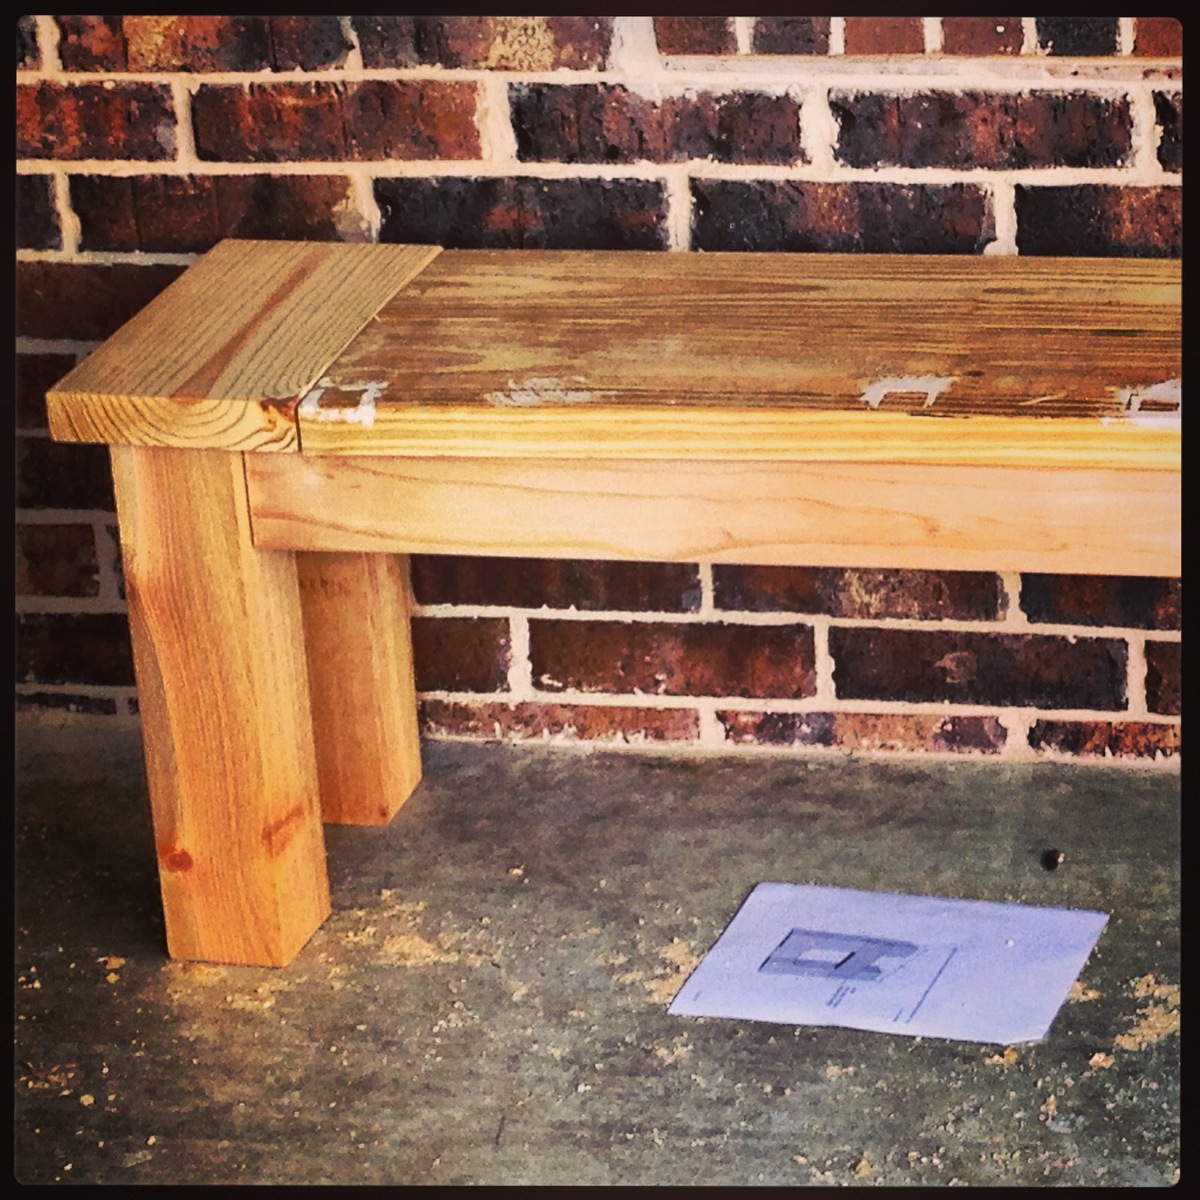
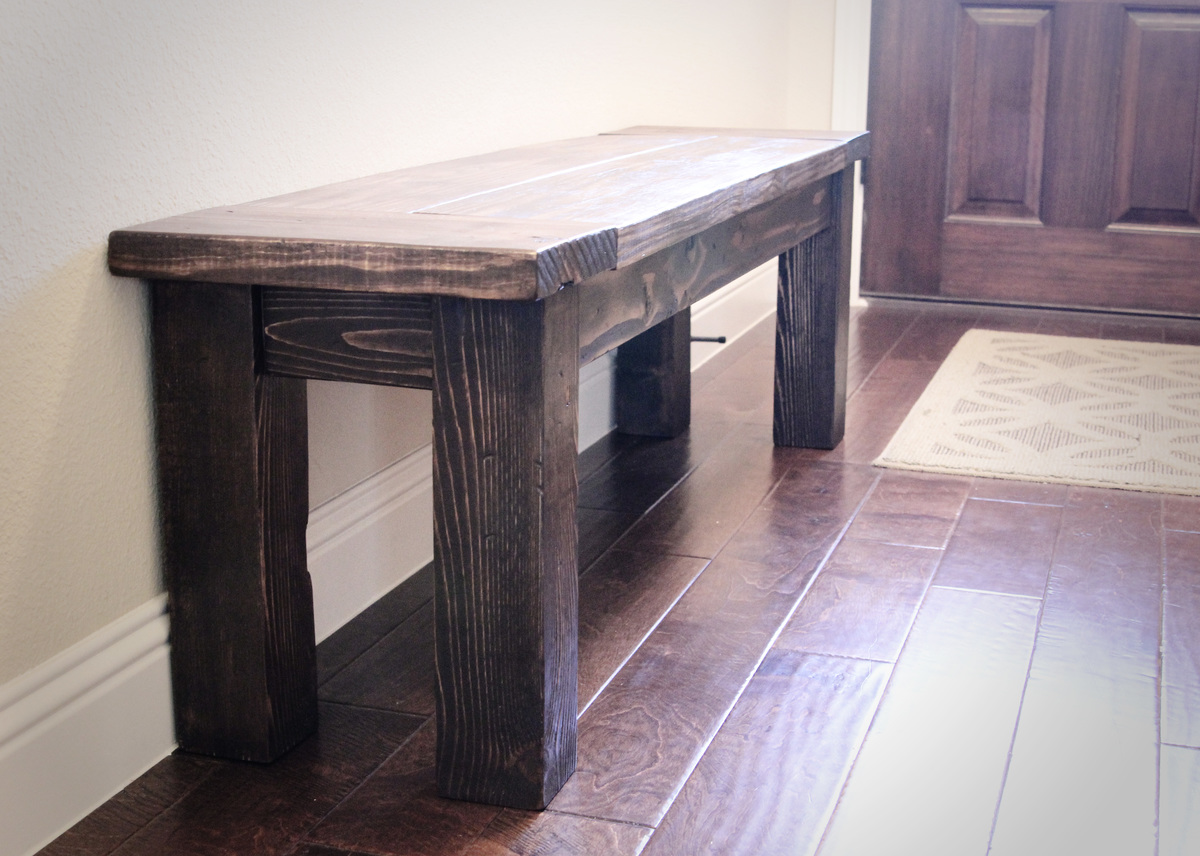
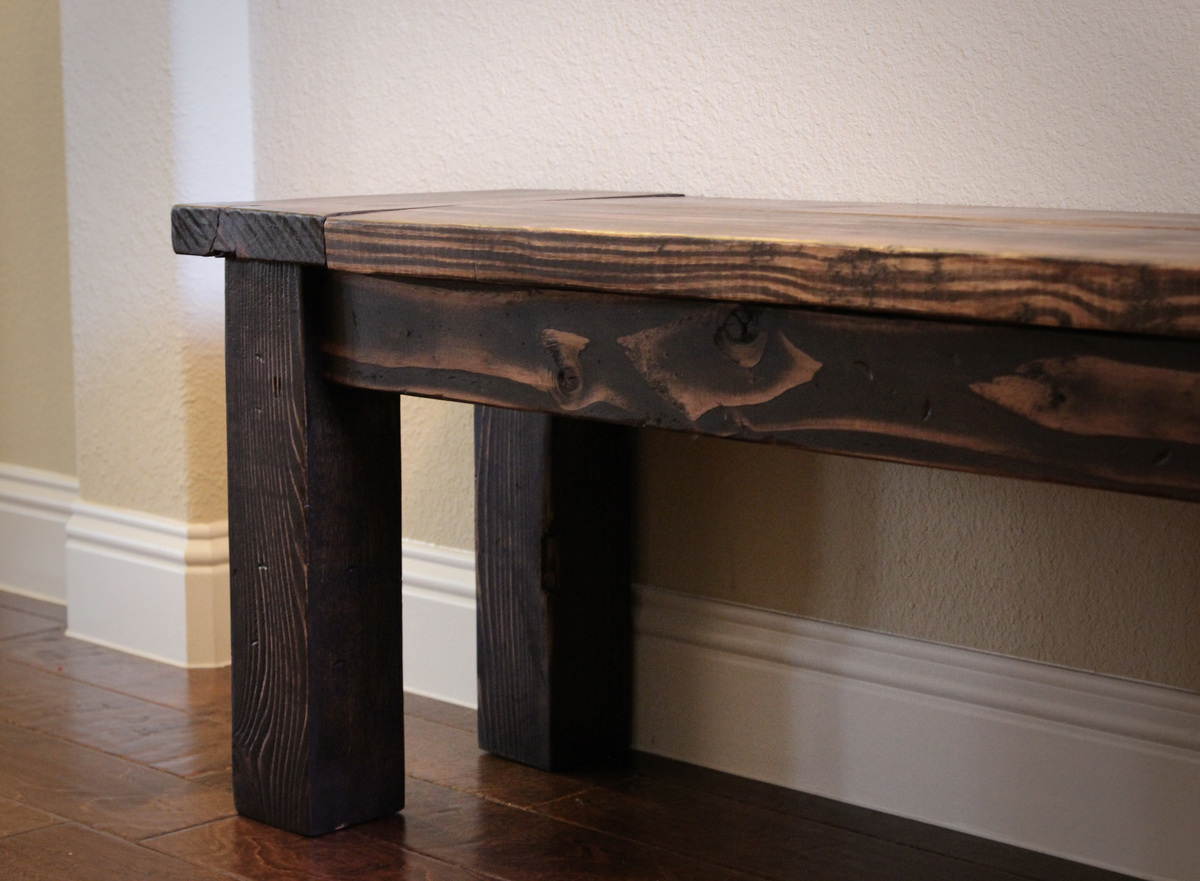
With lots of leftover wood from previous projects (farmhouse table and sideboard), I decided it was time to start another project. (I did head out to Lowes to get a piece of 4x4 for the legs...they only had Cedar. My friend found some Fir at Home Depot for a buck more).

Found the plans for the Farmhouse Bench, looked at other brag posts and their suggestions...then got to work!

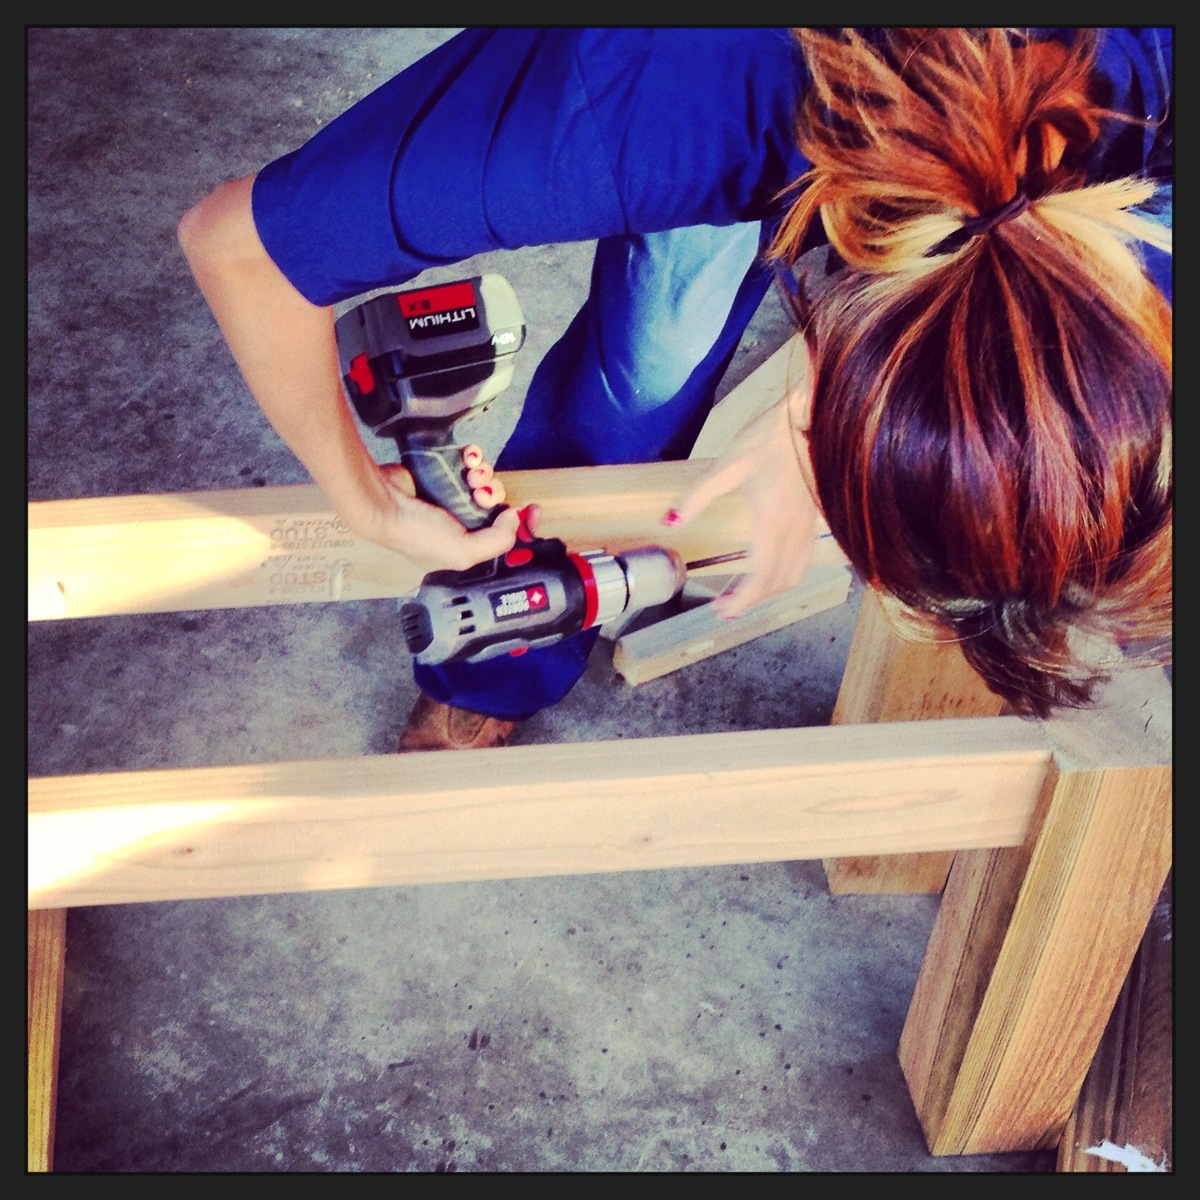
Cutting the pieces was fast and relatively easy. Predrilling the pocket holes also went quick. Putting the pieces together was also very fast (though I did have to add extra pocket holes here-and-there so that the legs and two end-aprons were more sturdy).

Sanded the piece, then added a coat of Rustoleum Dark Walnut Stain, and then a couple coats of Deft Satin varnish.

Estimated Cost
$20 (for extra lumber and materials). Already had leftover lumber from previous projects.
Estimated Time Investment
Day Project (6-9 Hours)
Finish Used
Rustoleum Dark Walnut
Deft Satin Clear
Recommended Skill Level
Starter Project

Cedar Tiered Flower Planter

Submitted by Anonymous (not verified) on Tue, 05/04/2021 - 14:30

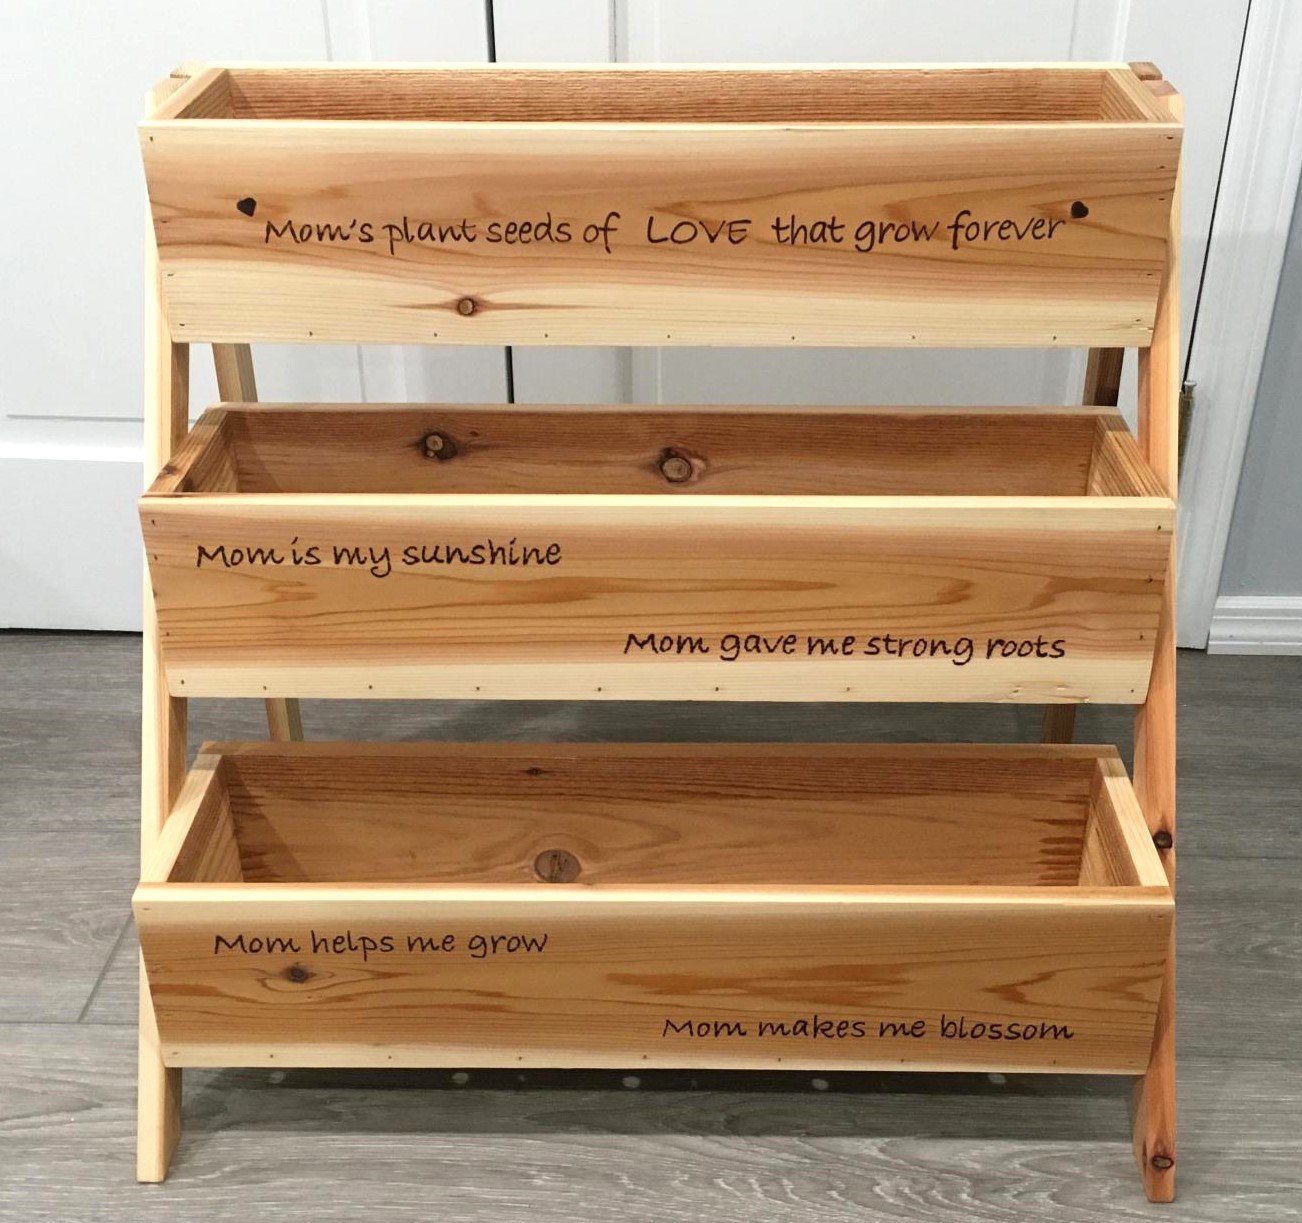
We made this tiered planter for a Mother's Day gift for my wife. It was a simple build and the plans are very easy to follow. I couldn't get any cedar fence pickets so I used standard 1x6x8 cedar boards that were available at the local big box store; that's why the cost is a little high. The planters were made 24" wide for more room instead of 16'" wide as per the plans. We personalized it by adding the quotes to the boards and burning them into the wood with a pyrography pen.

Estimated Cost
$50
Estimated Time Investment
Afternoon Project (3-6 Hours)
Finish Used
Varathane Classic Penetrating Wood Stain - Natural
Recommended Skill Level
Beginner

Comments

Farmhouse Nightstand

Submitted by Anonymous (not verified) on Fri, 06/02/2017 - 04:52

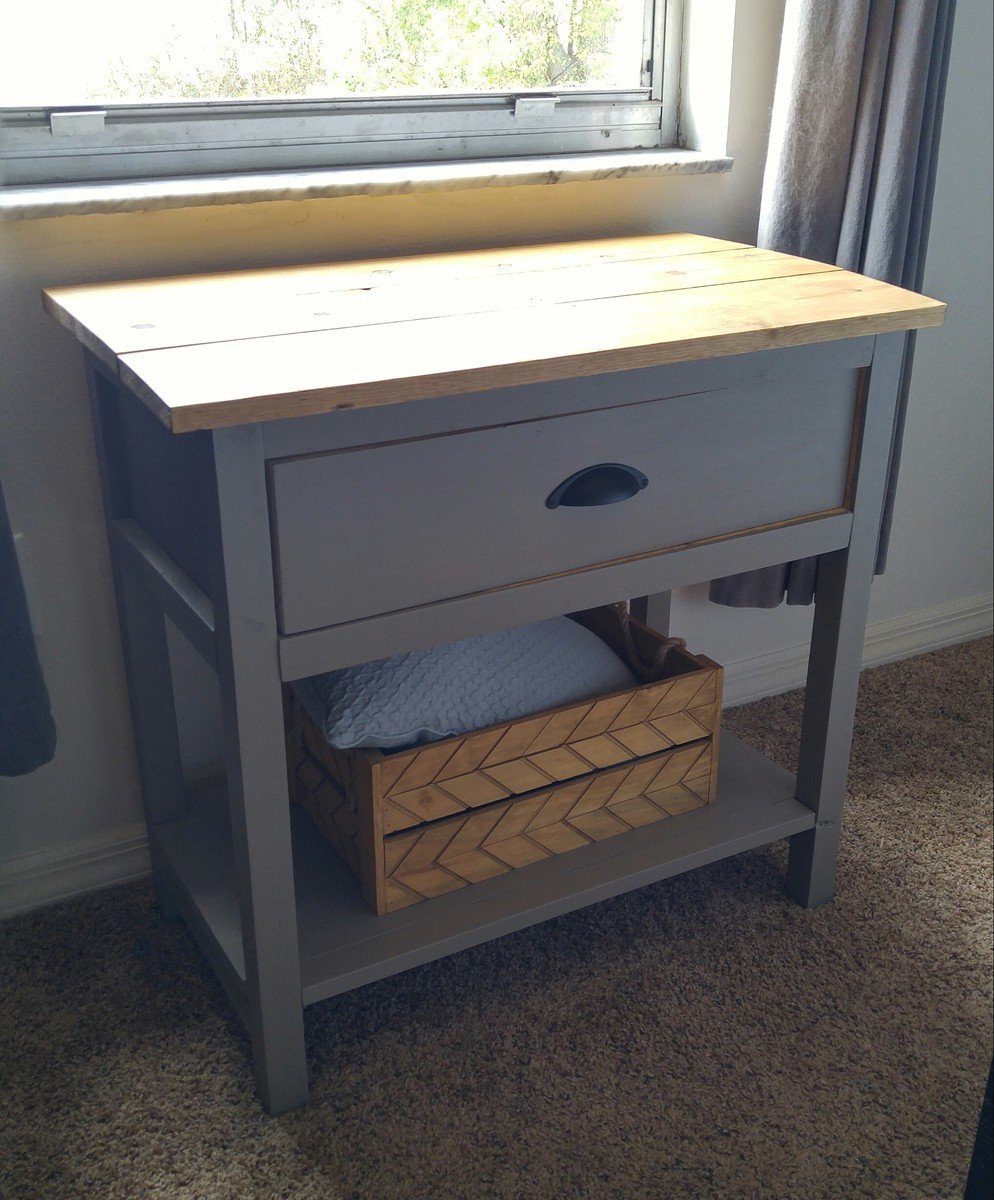
My first build. Wanted something to put in front of my window for my cats to sit and look out on.

Built from Plan(s)
Estimated Cost
$40
Estimated Time Investment
Weekend Project (10-20 Hours)
Finish Used
Artminds Trellis chalk paint, weathered oak and provincial stain
Recommended Skill Level
Beginner

Custom Dog Bath

Submitted by dananicb on Thu, 07/22/2021 - 07:21

Tego needed a raised dog bath. No, I needed a raised dog bath. Specifically, my knees needed a raised dog bath for Tego. So, after looking at Pinterest and Ana's plans, I decided what I really wanted to do was customize something to fit my needs (and knees) and build it myself. Overly ambitious for a first-time woodworking project, but hey, raise the bar.

I started by reading and rereading Ana's beginner's woodworking guide (very informative). I also learned so many other things along the way. There's a reason, besides looks, you need flat boards (they need to screw together tightly). Unfinished basement floors are so not level (especially near the walls). Screw lengths matter (need shorter ones for thinner boards). The big-box store doesn't make precise cuts (but they can make a lot). Planning for the finishes will save you time (know your basket sizes). Just to name a few.

It's going in an unfinished basement, so I wasn't going to tile and add glass doors. I wanted to keep it relatively simple, basic.

The stairs were the hardest to measure and build (math matters) - and I might re-do. I made the steps smaller, dog-sized, but she finds them awkward. I'd stick with typical riser heights, but it depends on the size of your dog.

Plumbing to link the tub drain to the utility sink drain was the most expensive. Probably I could have done it myself, but I decided not to learn both plumbing and woodworking for one project.

Overall, I'm pleased with the result - and Tego is learning to love it.
Estimated Cost
$250 in supplies (plus plumbing)
Estimated Time Investment
Week Long Project (20 Hours or More)
Finish Used
Exterior paint in semi gloss
Recommended Skill Level
Beginner

Comments

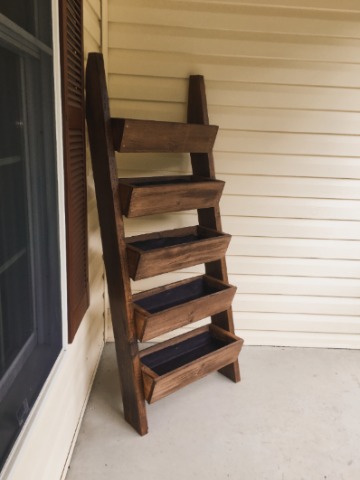
5-Tier Wood Planter

This plan was easy to follow, accurate and came together in just a few hours. I used some reclaimed barn wood for the 2x6s and dog-ear pickets for the remainder.

I made it harder for myself than it had to be. I didn't follow the directions closely enough and cut the box ends at 5 1/2" instead of 5 1/4". That meant that the bottoms had nothing to press-fit against. So, I had to do a little workaround to fix that. I made a 1" shelf at each end of each box so that the bottom could sit on these little shelves. The upside to this mistake is that there was now a drainage slot all along the front and all along the back of each planter box. 

I stained and sealed it. Finally, I lined each planter box with weed matting that I'd cut to size and cut drain slits in. The matting doubles as a way to keep the planting mix from falling out of the long drainage slots while allowing water to drain through the little slits I poked in the fabric. (I poked drain slits only along the front edge so that water would drain into the planter box below instead of onto the ground.)

I'm happy with the plan and the finished planter!

Estimated Cost
$35
Estimated Time Investment
Afternoon Project (3-6 Hours)
Finish Used
One coat of Cabots Premium Stain and Sealer in Gingersnap. One coat of Minwax Helmsman Spar Urethane.
Recommended Skill Level
Beginner

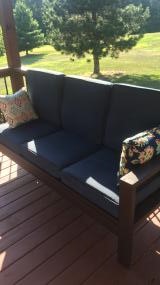
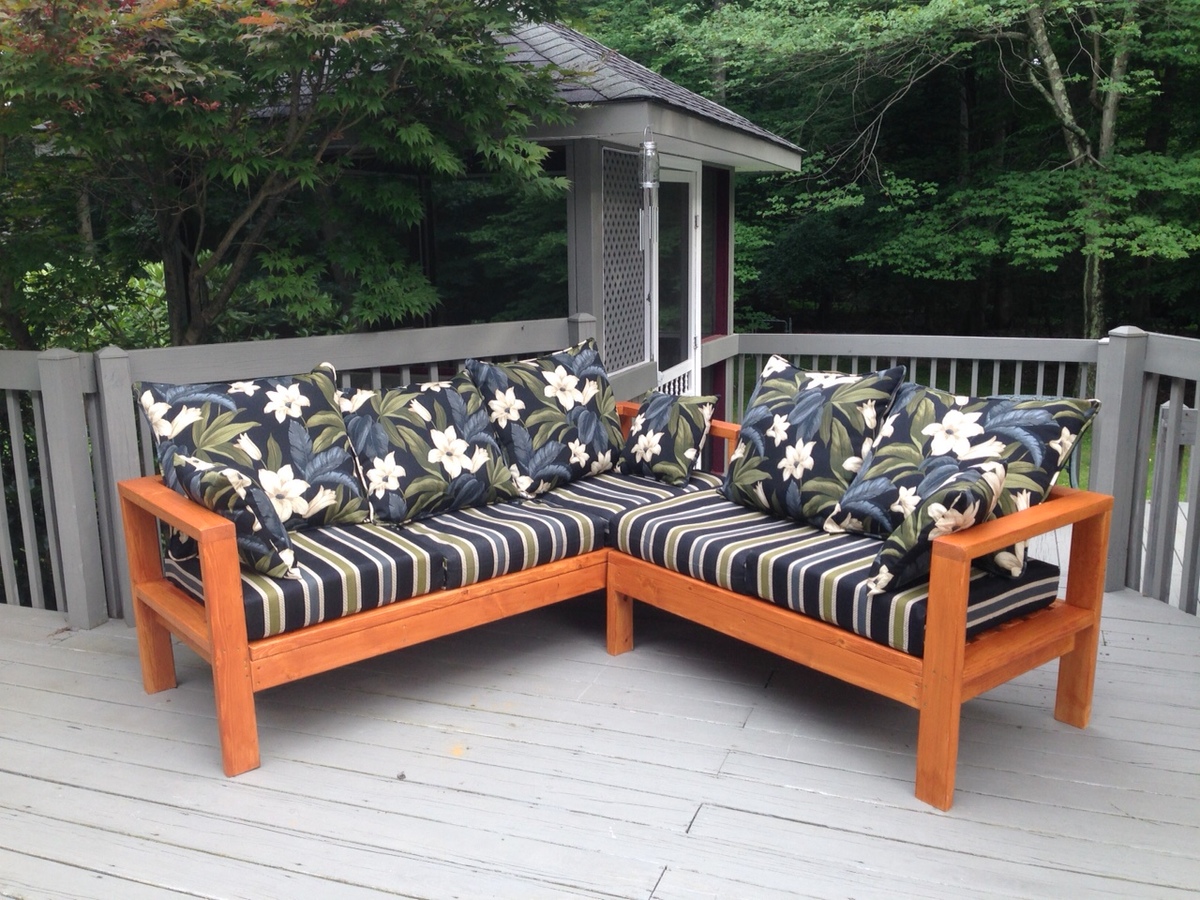
Outdoor Sofa from 2x4s for RYOBI Nation

Submitted by BuilderJ on Thu, 07/13/2017 - 16:45

We've been wanting to tackle some outdoor furniture for a while and finally took advantage of a coupon to get a bunch of outdoor cushions. With a big mound of cushions taking up space, we had to force ourselves to get to it. We spent more time talking about cushion and stain colors then it actually took to cut and screw it together. This is a great solid project to start with. Don't be intimidated by it. We can't wait to start on some chairs to go with it. 

Estimated Cost
The cushions are from atHome. It's hard to say exactly because we bought a lot of them (for some upcoming projects) when we had a 20% off coupon. For these three sets and accent pillows, probably $125. Probably $25-30 for the lumber. $29 for a gallon of Behr deck coating (used maybe 1/4of it). $9 for a box of deckmate screws (used 75% of them).
Estimated Time Investment
Afternoon Project (3-6 Hours)
Finish Used
Behr Deckplus solid color waterproofing wood stain in cordovan brown.
Recommended Skill Level
Starter Project

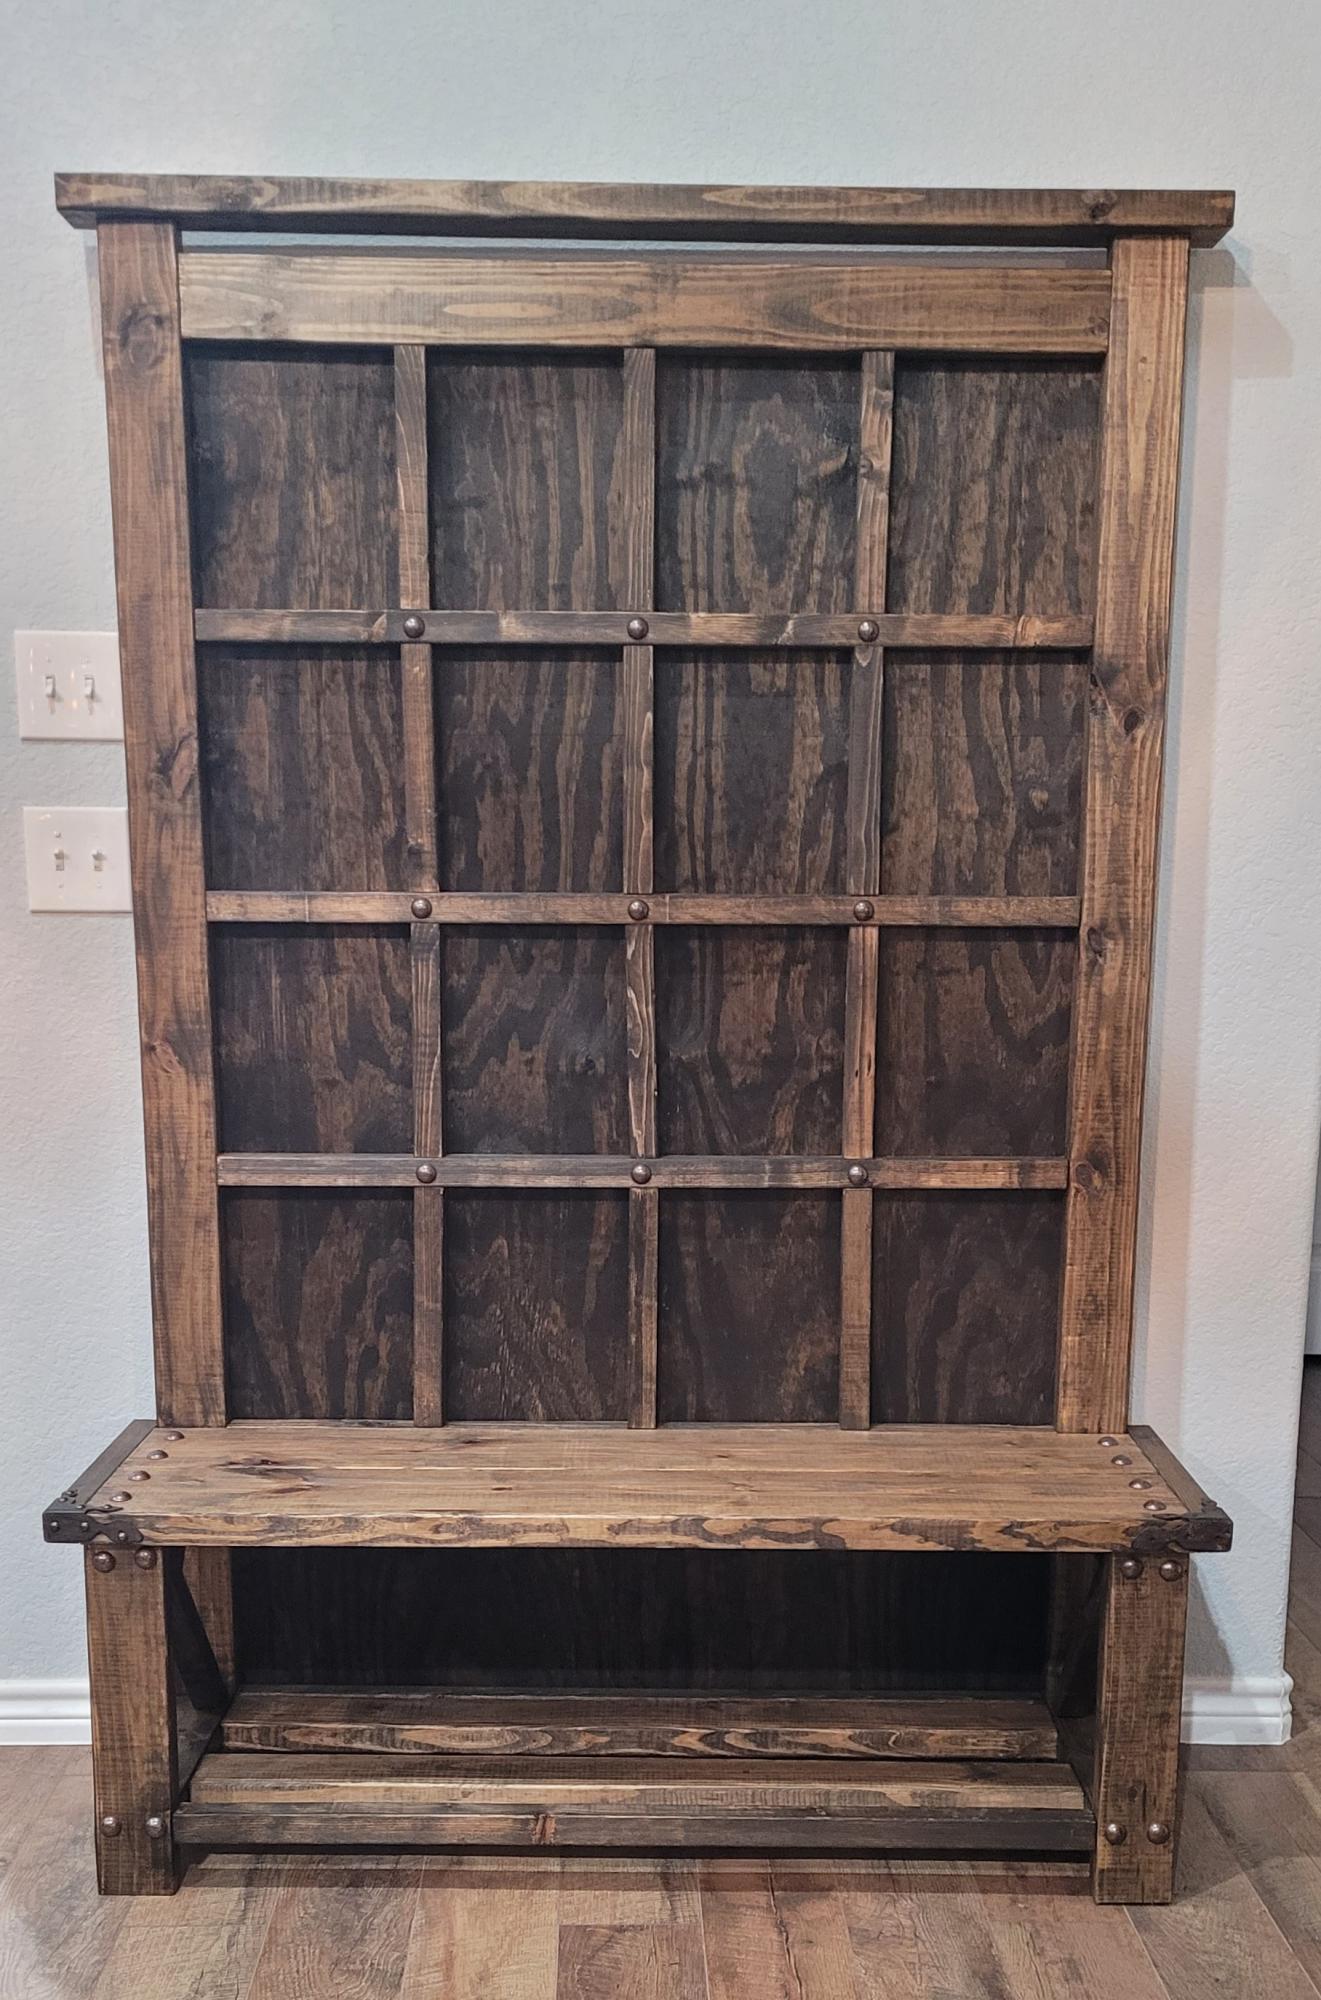
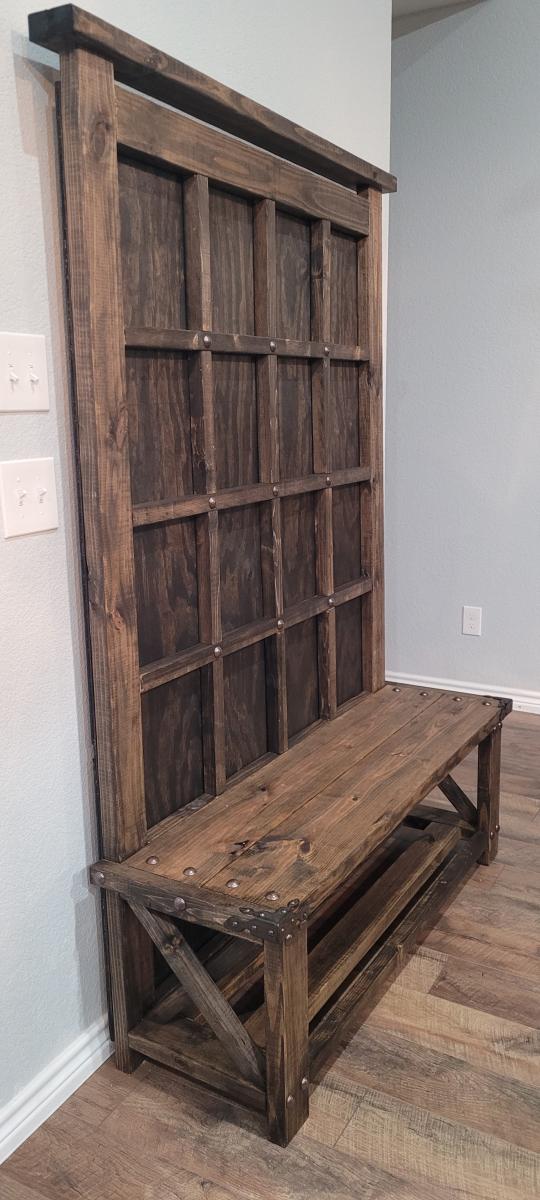
I learned to use a Kreg Jig for the Rustic X hall tree

Submitted by msbiochem on Tue, 12/21/2021 - 19:31

I made this headboard-inspired version of the rustic X hall tree in about 8 hours with the help of my hubby and son-in-law. I own a miter saw and basic tools, but no Kreg Jig. I thought I would be able to make it without one since I made a similar entry table just screwing the pieces together and hiding the screw heads under the dome-shaped clavos. I planned to do the same with this project but soon realized that the way the 2x4s were attached to one another it would not be possible. My son-in-law allowed me to borrow his Kreg Jig and showed me how to use it. I used the clavos and iron accents to match the sofa table and love the way my version of the rustic X hall tree turned out! The finish is Varathane Classic Wood Stain in Jacobean and the corner accents were purchased from Hobby Lobby.
Built from Plan(s)

Comments

First time project

Submitted by keahunter on Sat, 07/04/2015 - 03:17

This was my first attempt at making anything. Thank you to Ana for providing such easy plans and the encouragement to try something. I think I'm hooked!

Estimated Time Investment
Day Project (6-9 Hours)
Recommended Skill Level
Beginner

Comments

Seasonal And Holiday

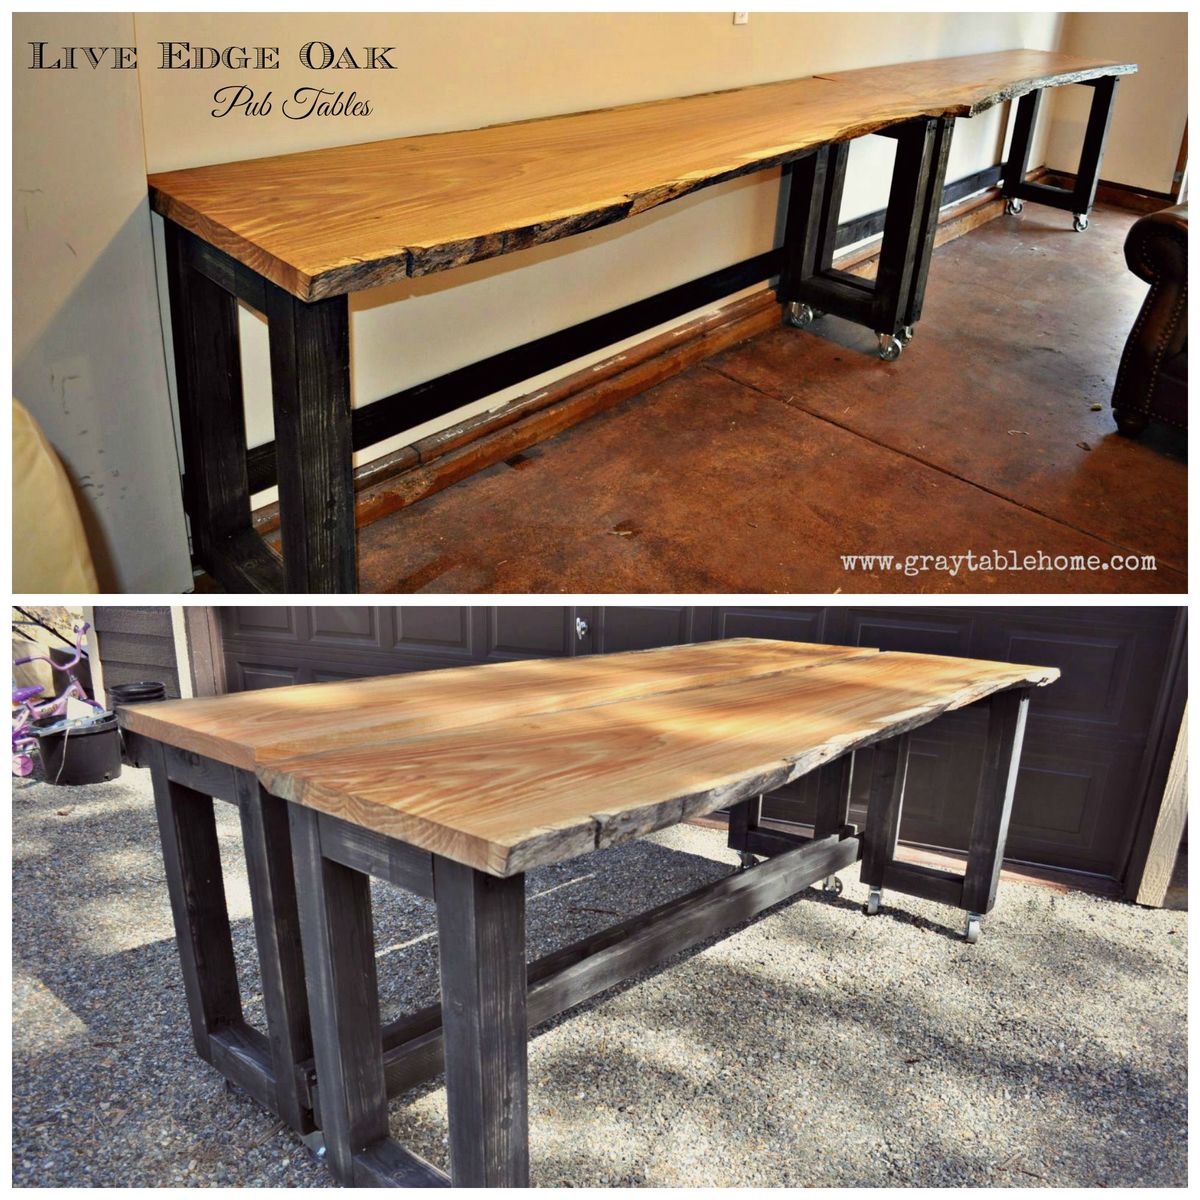
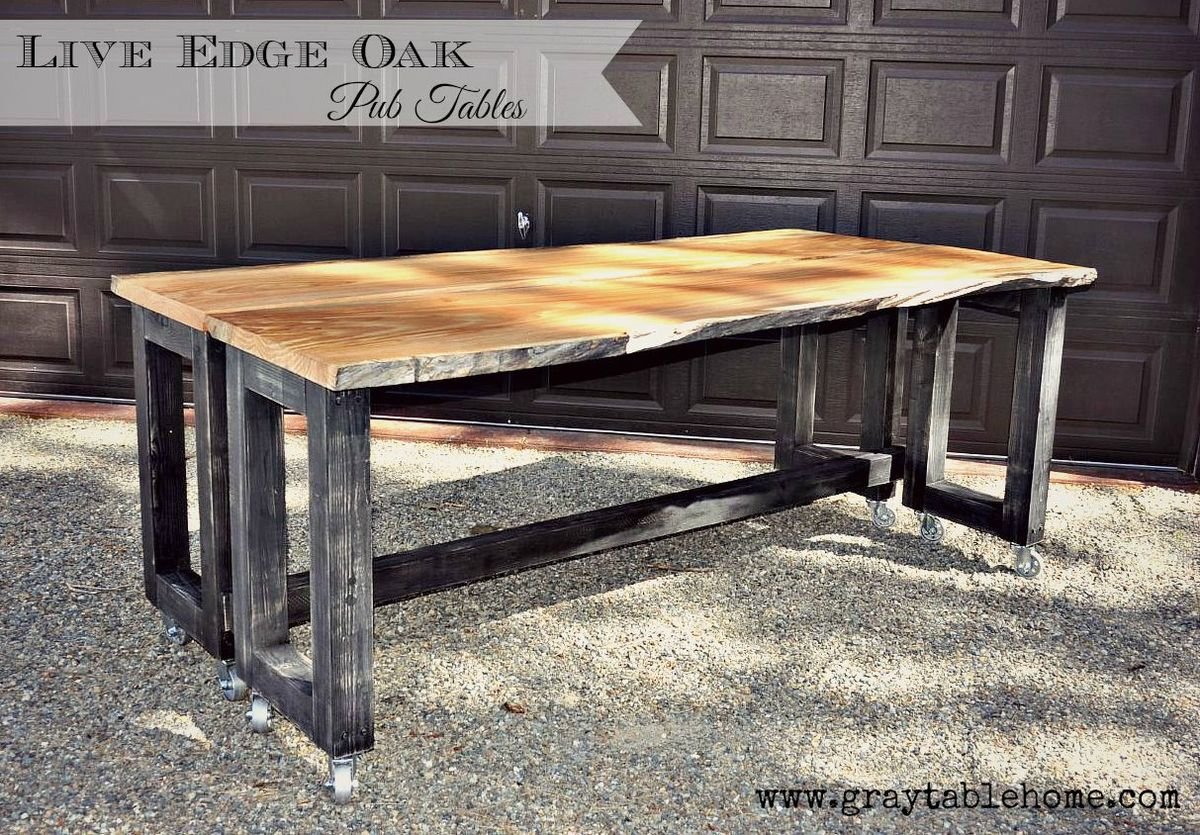
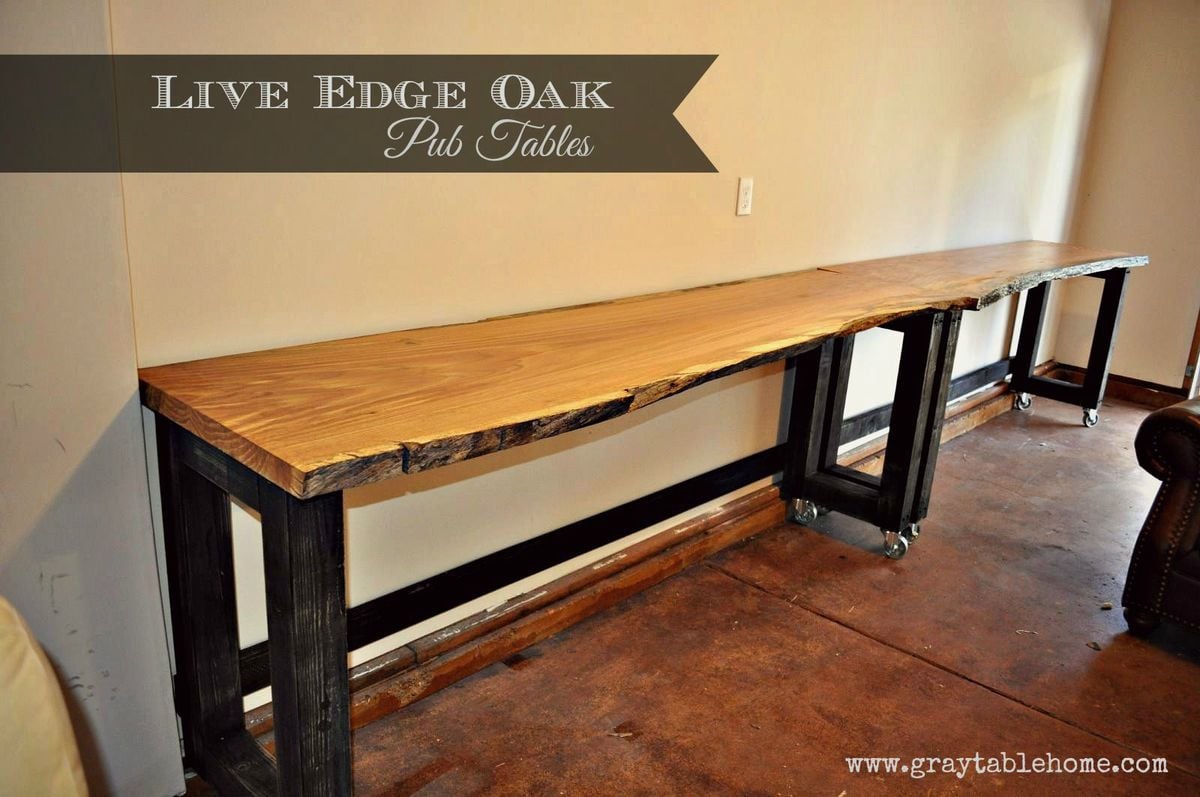
DIY Convertible Bar / Pub Table

Submitted by susanshamp on Thu, 07/30/2015 - 16:38

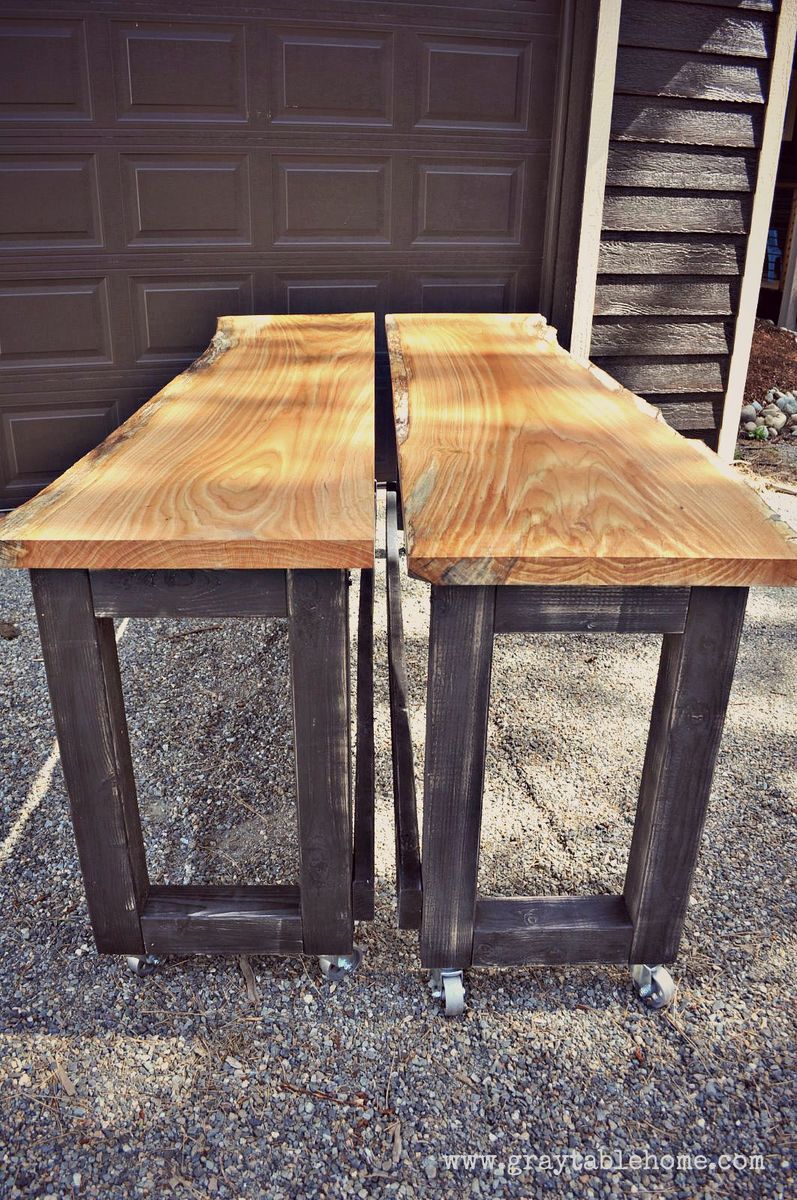
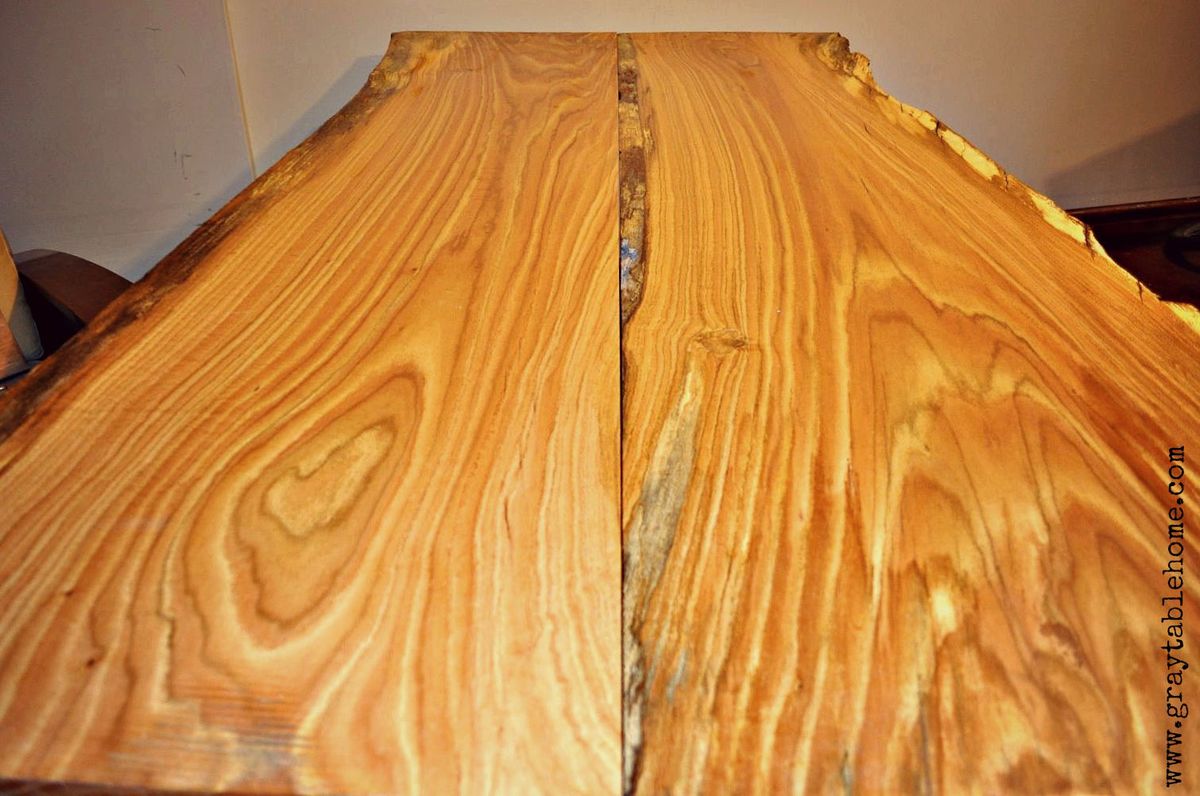
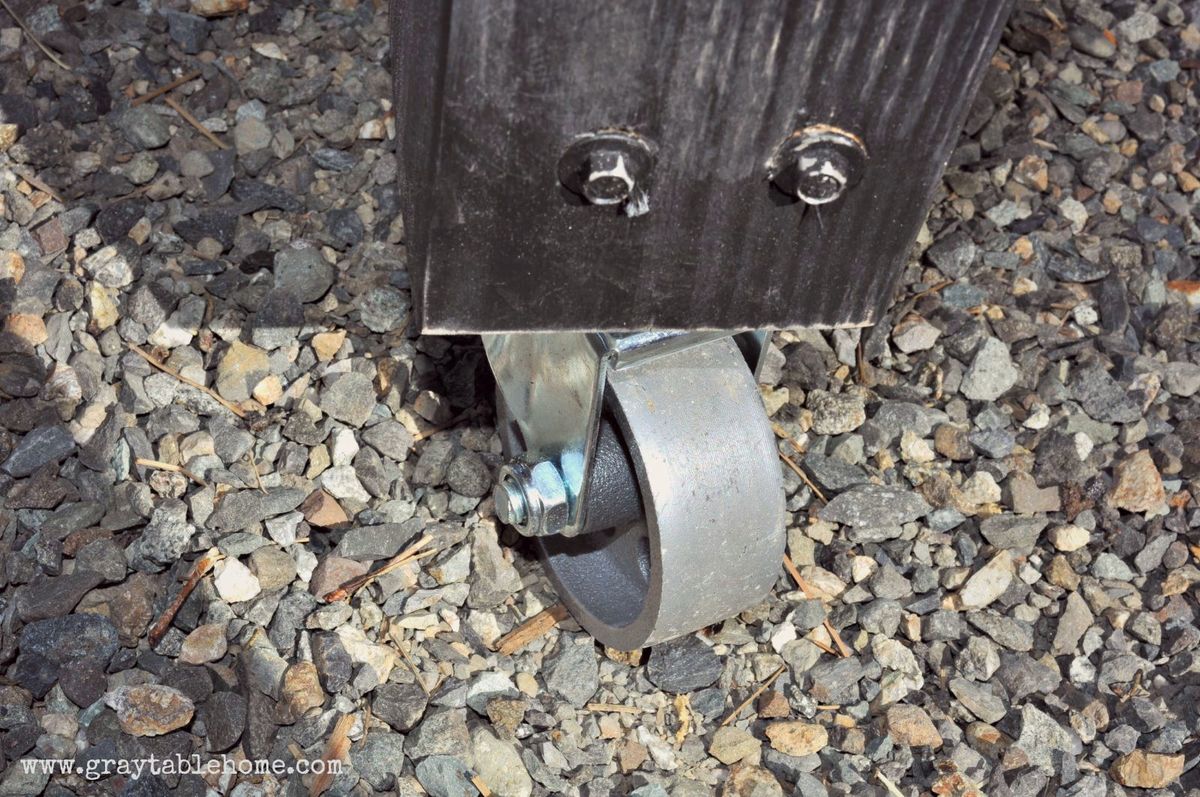
This rustic modern version of a pub table has multiple uses - it can rest along a wall to make a 16 foot long bar, or rolled together to form an 8 foot long pub table. It is standard counter height 36" and will accomodate seating for 8-10 counter stools. If you don't have live edge wood slabs, you can also use construction lumber (2x8s or 2x12s) to achieve similar dimensions and versatile use in a more cost effective way.

Estimated Cost
Using construction lumber, approx. cost is $50 per table
Estimated Time Investment
Afternoon Project (3-6 Hours)
Finish Used
Poly on slabs, distressed black paint on base
Recommended Skill Level
Beginner

Comments

kev117s

Fri, 07/31/2015 - 04:10

Awesome idea! I think I will have to try for a dining table version of this table. Do you happen to have a way to lock the 2 pieces together? 

My version of the Madison dresser

Submitted by Medickep on Sat, 08/08/2015 - 22:37

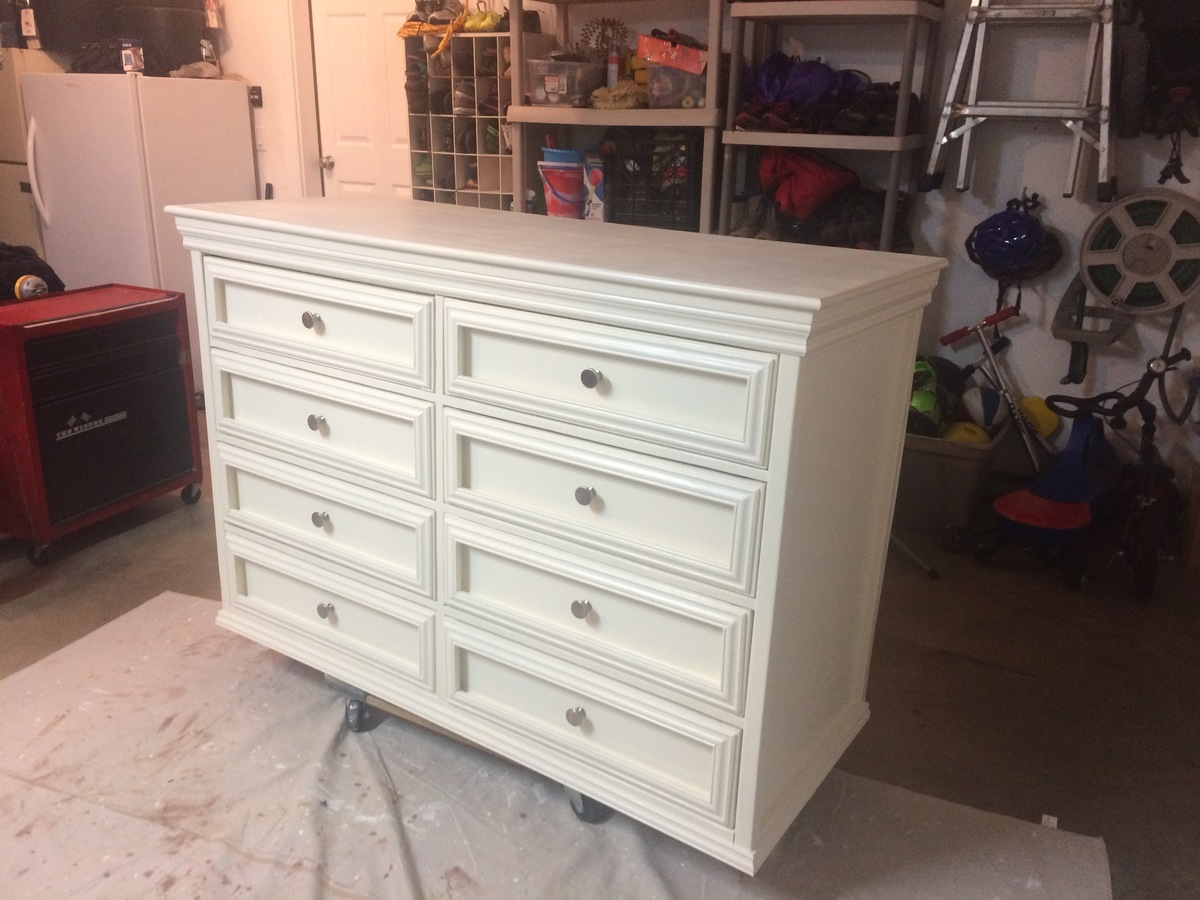
I made this dresser to replace two cheesy dressers my wife and I had when we first moved out on our own.  The style was taken from the Madison dresser design.  I added two more drawers as we were condensing two dressers to one and  I wanted to ensure I was able to use it!!

Built from Plan(s)
Estimated Cost
150-200
Estimated Time Investment
Week Long Project (20 Hours or More)
Finish Used
Behr marque paint. Advertises one coat on any surface but I did two coats to sand down grain.
Recommended Skill Level
Intermediate

Comments

Back