Community Brag Posts

2x4 garage shelving

Submitted by mjberger85 on Sat, 05/23/2015 - 15:07

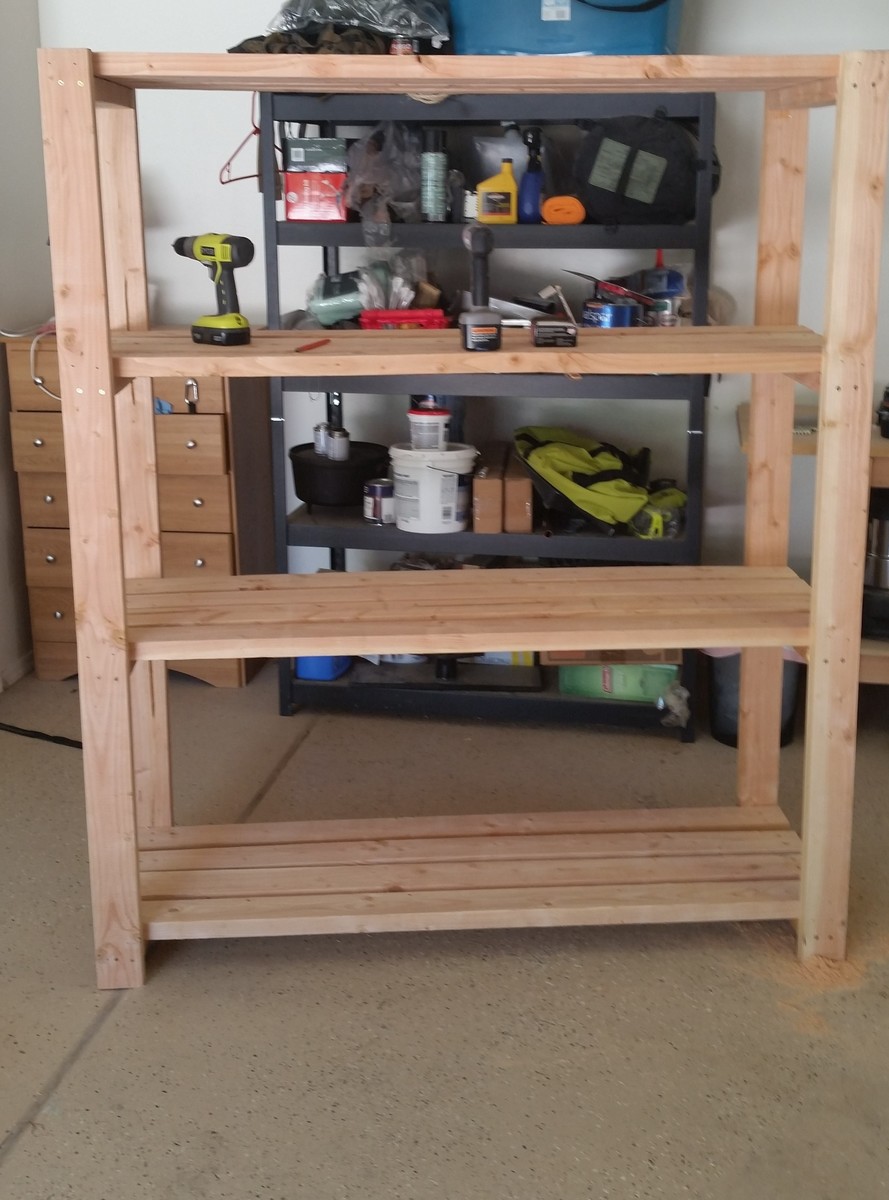
I built this to fit inside a closet that I have in my garage to store all my camping stuff. I built it 5 feet long so I only had to buy 2x4s that were 10 feet long. I also built the bottom shelf closer to the ground to allow just a little bit more space between the first and second shelf. All in all it was a very easy and fulfilling project. I was a little worried about how sturdy the shelves would be but they are very solid. Thanks Ana!

Estimated Cost
$60
Estimated Time Investment
An Hour or Two (0-2 Hours)
Recommended Skill Level
Beginner

Comments

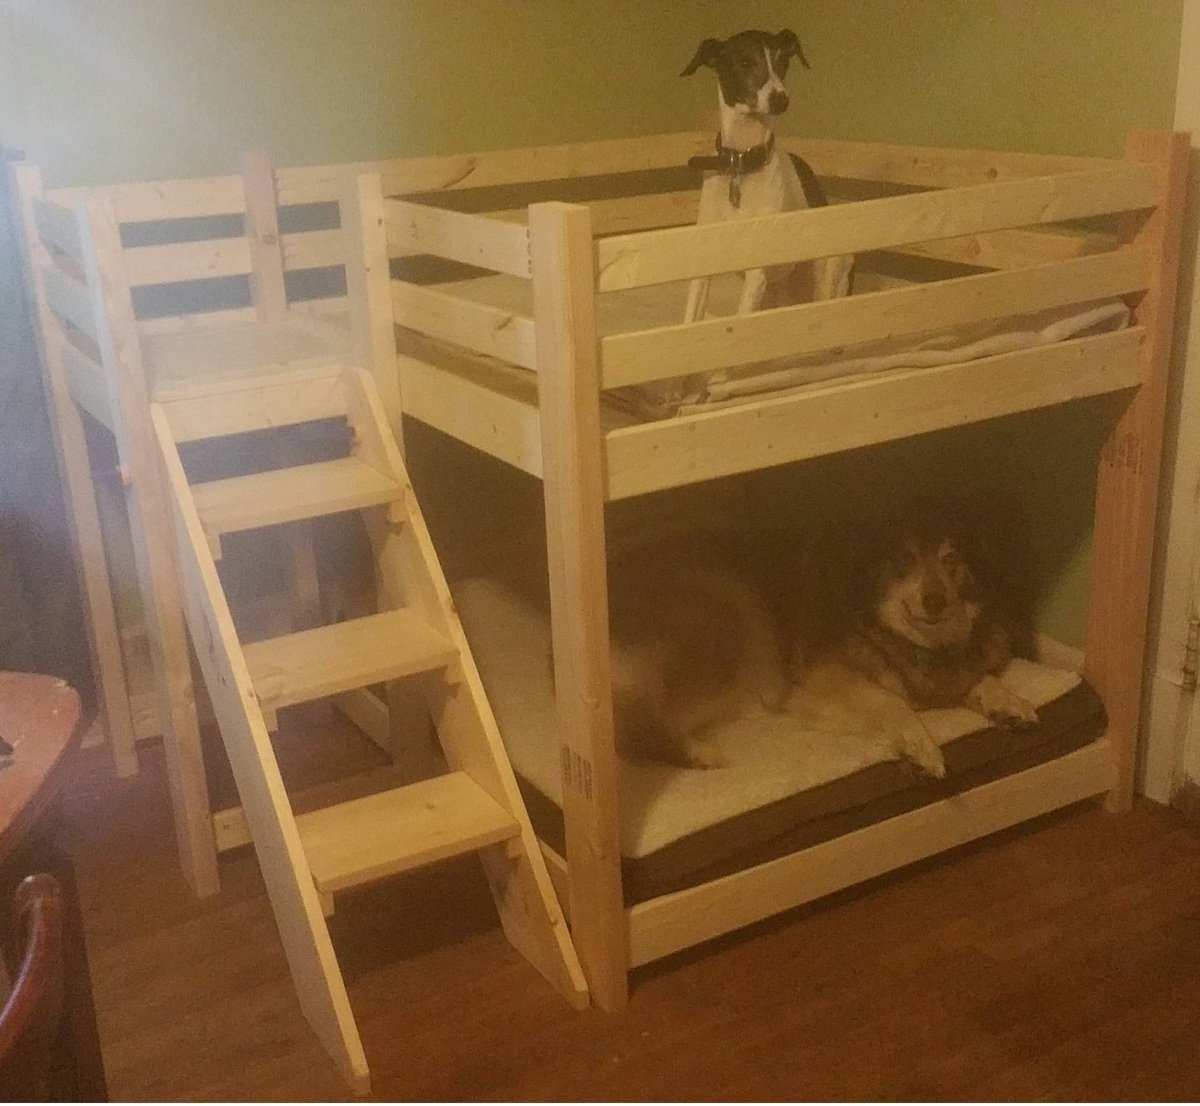
Dog Bunk Bed

We’ve been looking around for some plans for a doggy bunk bed for a while now, but couldn’t find anything that we liked so I decided to build it from scratch. This is a huge bunk bed that was built based on the size of our larger dog’s bed which is 44 x 35. This was pretty simple to build although the stairs we’re quite challenging as I have never done them before so if I can make it, anybody can.

I must stress that before I found Ana’s website about 6 months ago I could barely cut a piece of wood straight. Over this time I have made several things based on the easy to follow plans on this website which ultimately gave me the confidence to go it alone and build this bunk bed. Friends and family are shocked at some of the furniture I’ve made and some don’t even believe I made them and think I’ve bought them from IKEA. My wife has got a list of furniture she wants to make now including a TV console, an armoire and a twin bed for one our daughters. Every spare second I have now is spent is making furniture and I LOVE it.

For anybody who has never built anything and is apprehensive to do so I would just say, do it. Grab what you need and dive right in. You may get frustrated and scream a bit at first, but the reward at the end is well worth it and each project you do will get easier and easier. Be warned though. The better you get, the more people will pester you to make things for them.

Thank you, Ana.

This was made using cheap 1 x 3 and 1 x 4 furring strips for the railings and bed slats, 2 x 4s for the posts and 1 x 10 board for the stairs.

Estimated Cost
$75 - $100
Estimated Time Investment
Weekend Project (10-20 Hours)
Finish Used
I haven't sanded or finished this yet as we are still deciding on what to do with it.
Recommended Skill Level
Beginner

Comments

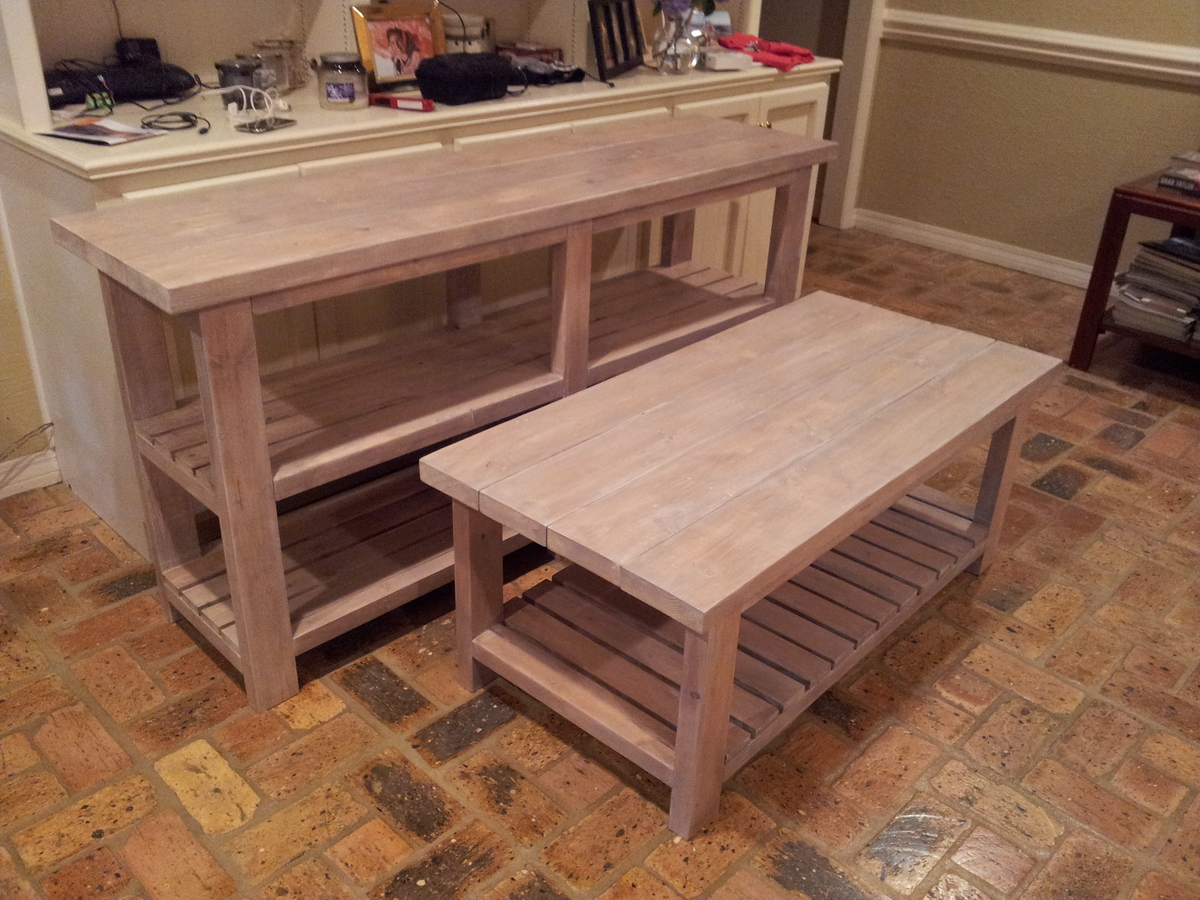
Rustic X Console, Coffee and End Tables

Submitted by deblynn42 on Thu, 07/16/2015 - 12:29

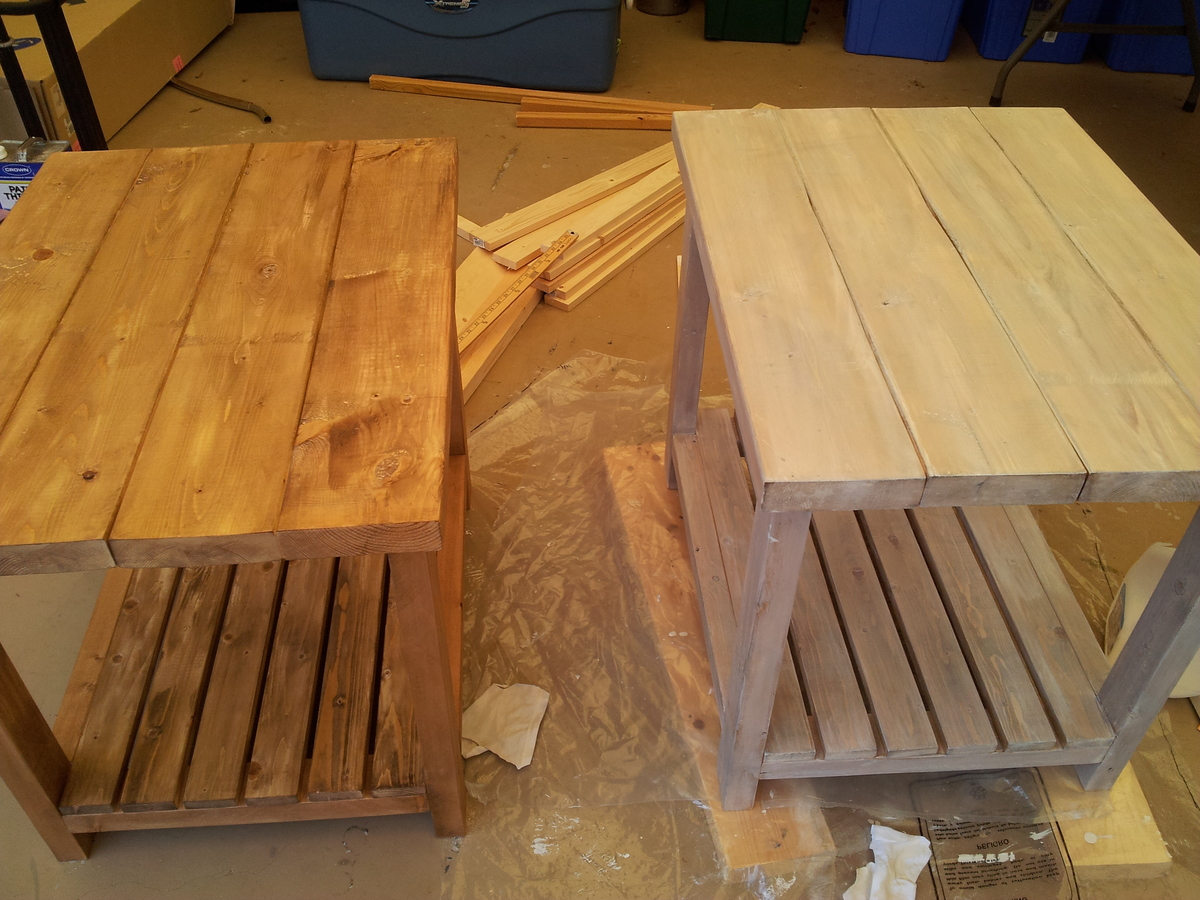
I modified the Rustic X plans by removing the X's on the sides and using 1x3in slats on the shelf.  They were made for a beach condo so I wanted a more open look.  I wanted a white washed finish and after trying several ideas from the internet I came up with this process:  First, I used rags to rub on Minwax Special Walnut stain as lightly as I could.  Second, I diluted latex satin white paint, at least 50-50, and brushed it on a small area and immediately wiped it off with a clean rag.  I used Minwax Polycrylic as my protective layer.

Estimated Time Investment
Week Long Project (20 Hours or More)
Finish Used
Minwax Special Walnut stain, white latex satin paint, Minwax Polycrylic Clear Satin
Recommended Skill Level
Intermediate

Comments

amati5

Mon, 07/20/2015 - 10:28

What kind of joint did you use?  I don't see any holes or screws and very nice looking finish.

deblynn42

Mon, 07/20/2015 - 14:57

The Rustix X plans use the hidden pocket screws using the Kreg Jig tool.  It really makes a strong joint.  All the hidden pockets are on the underside of the trim pieces.   The top and slats are screwed on with normal wood screws, again from the underside.

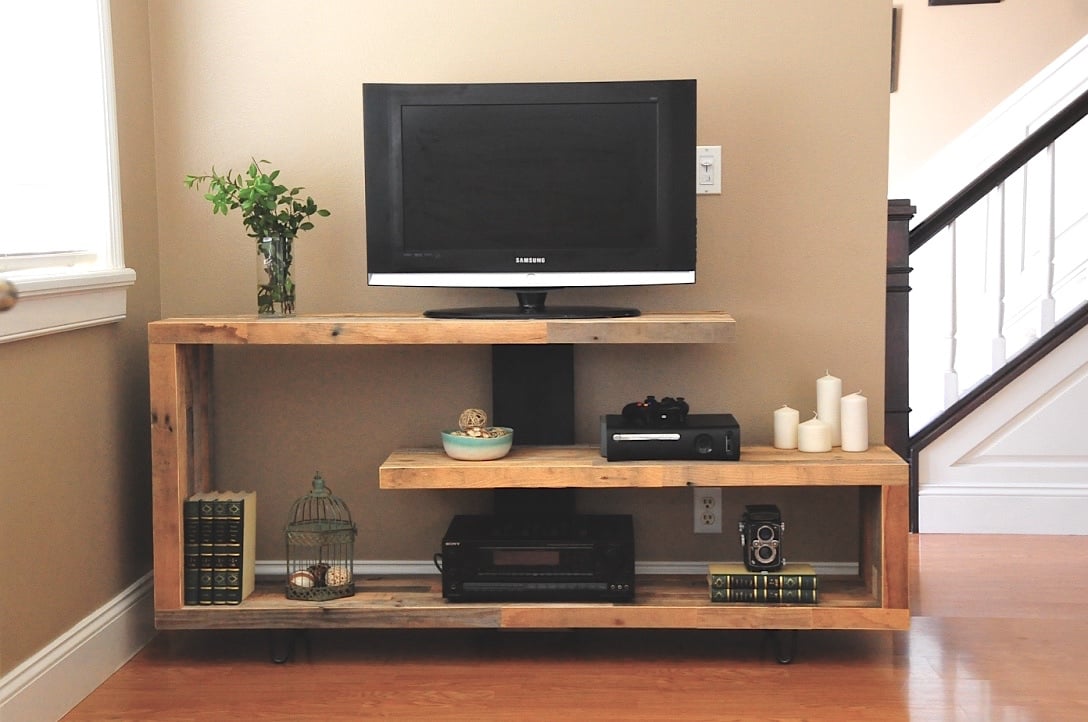
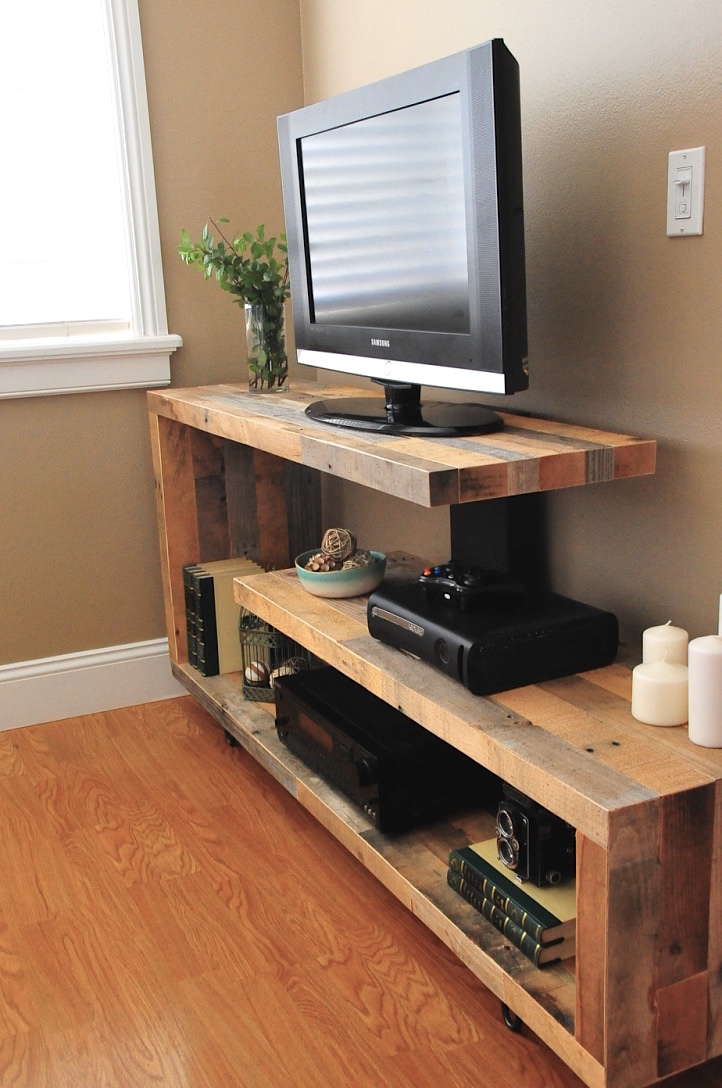
Rustic Modern TV Console

Just finished up this unique TV console.  Built from reclaimed pallet wood. 

Estimated Cost
$150.00
Estimated Time Investment
Weekend Project (10-20 Hours)
Finish Used
Clear coat of wax
Recommended Skill Level
Advanced

Comments

Templar

Mon, 12/02/2019 - 22:10

Hi there Im new to site and also have the issue of not seeing the plans for this Rustic Modern TV Console. Are they available and Im doing something wrong or??

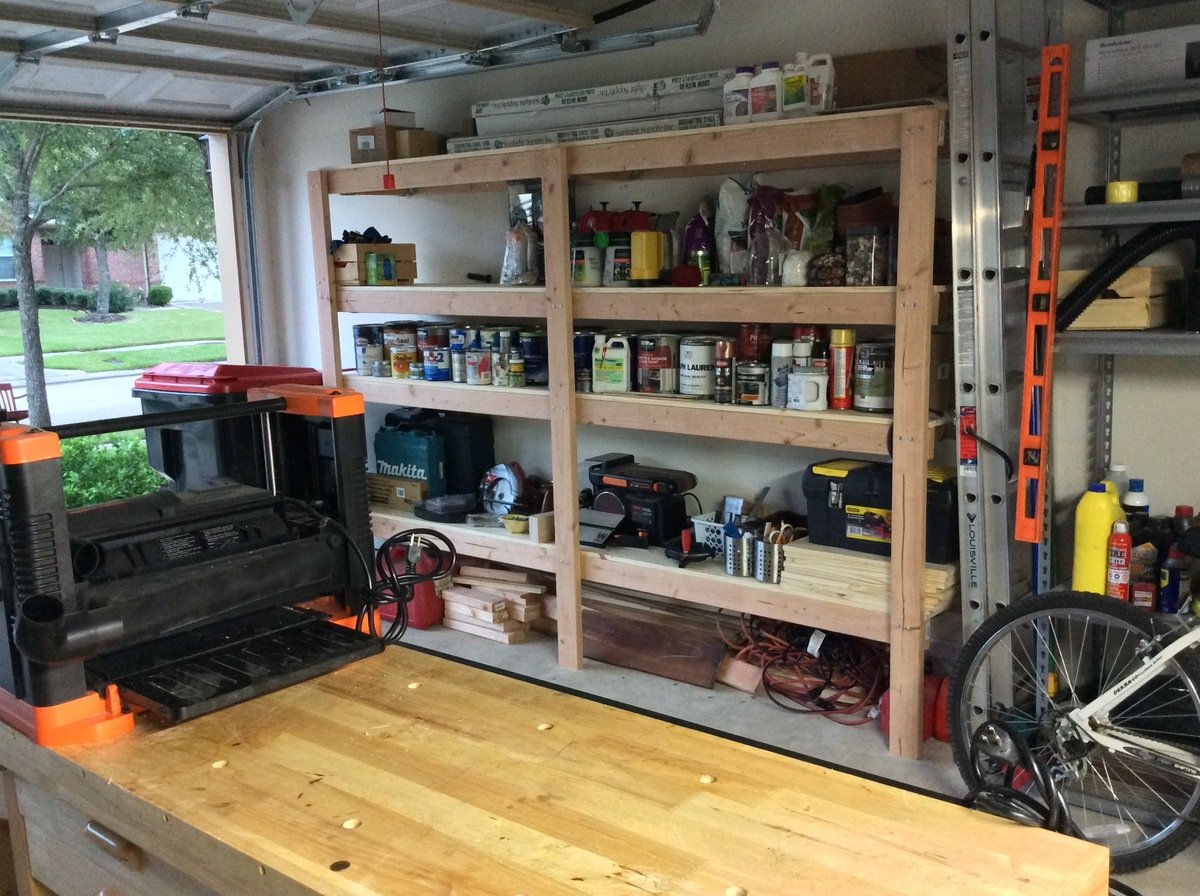
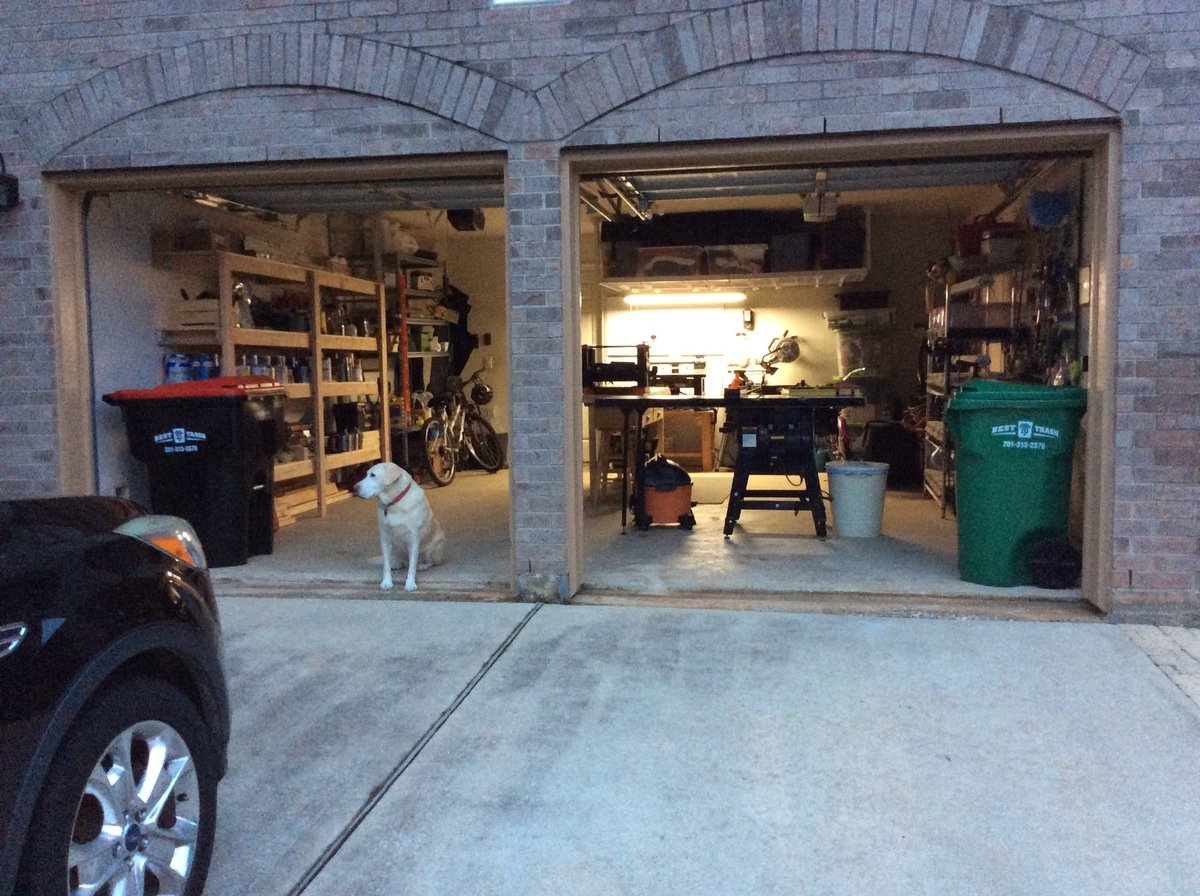
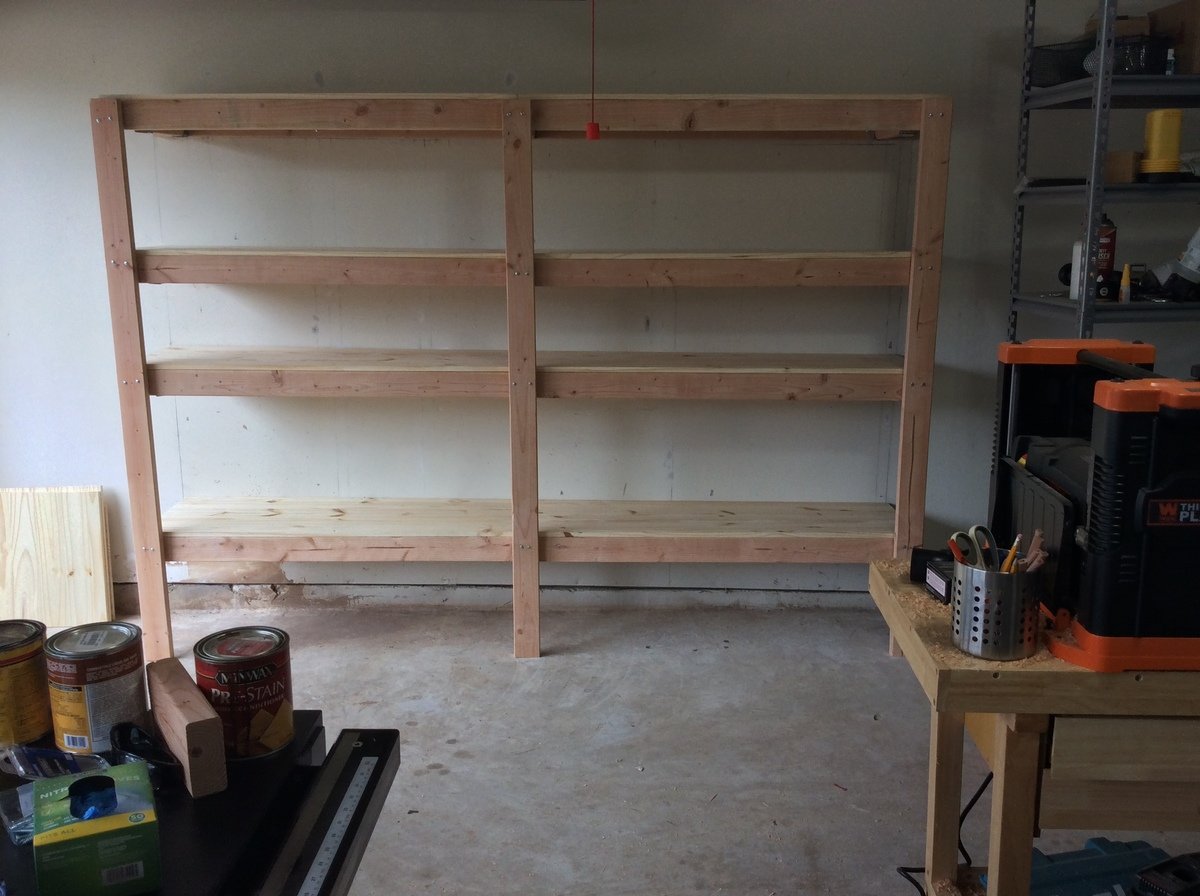
Garage Shelves

Submitted by Anonymous (not verified) on Wed, 10/24/2018 - 08:43

This was a pretty easy project, but I had to adjust the vertical legs to accommodate the sloping garage floor. I drew a  horizontal line for the top edge then measured to the floor at the spacing I wanted the vertical legs. I used these measurements to cut the three vertical legs. It’s level and straight, even though my garage is sloped. 

Estimated Cost
$300
Estimated Time Investment
Week Long Project (20 Hours or More)
Finish Used
Garage shelving
Recommended Skill Level
Beginner

Easy night stand!

Submitted by Medickep on Thu, 10/15/2015 - 08:33

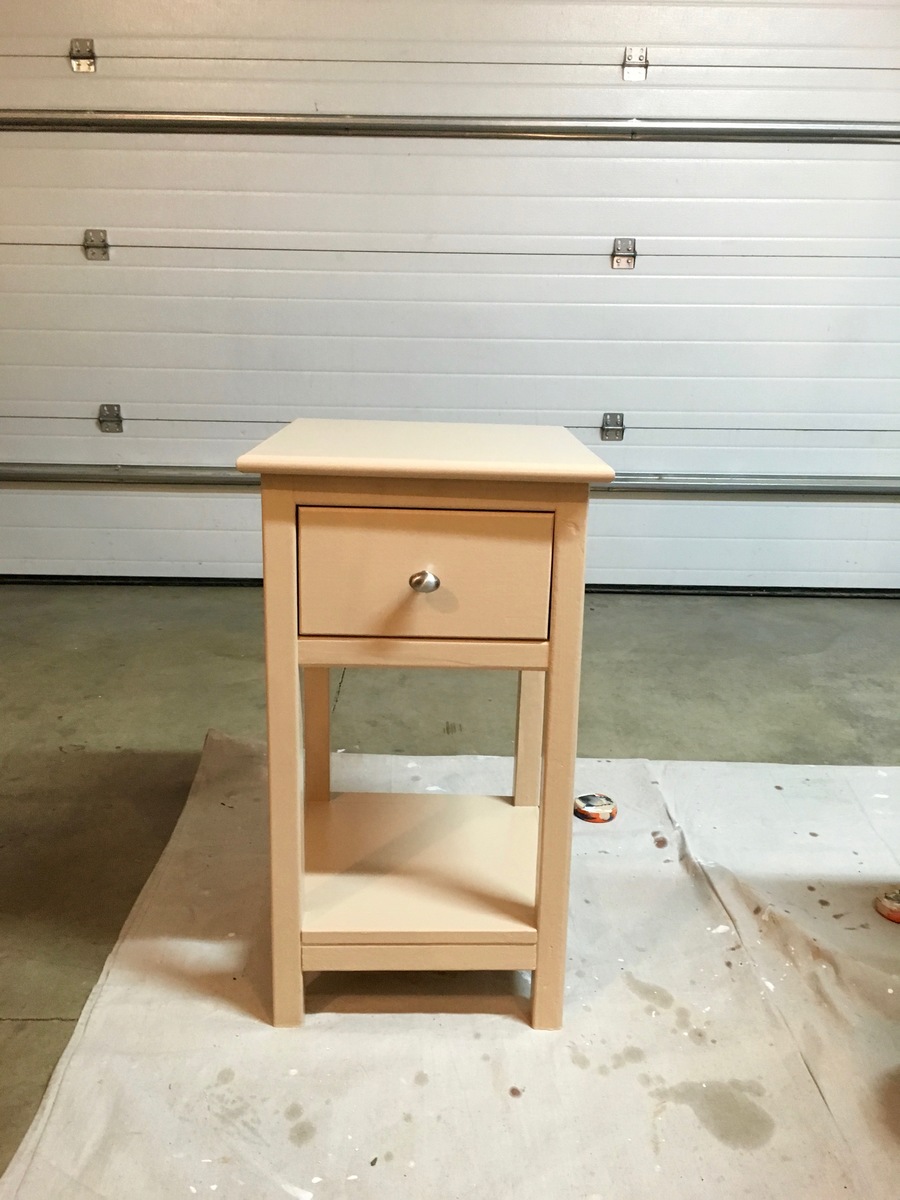
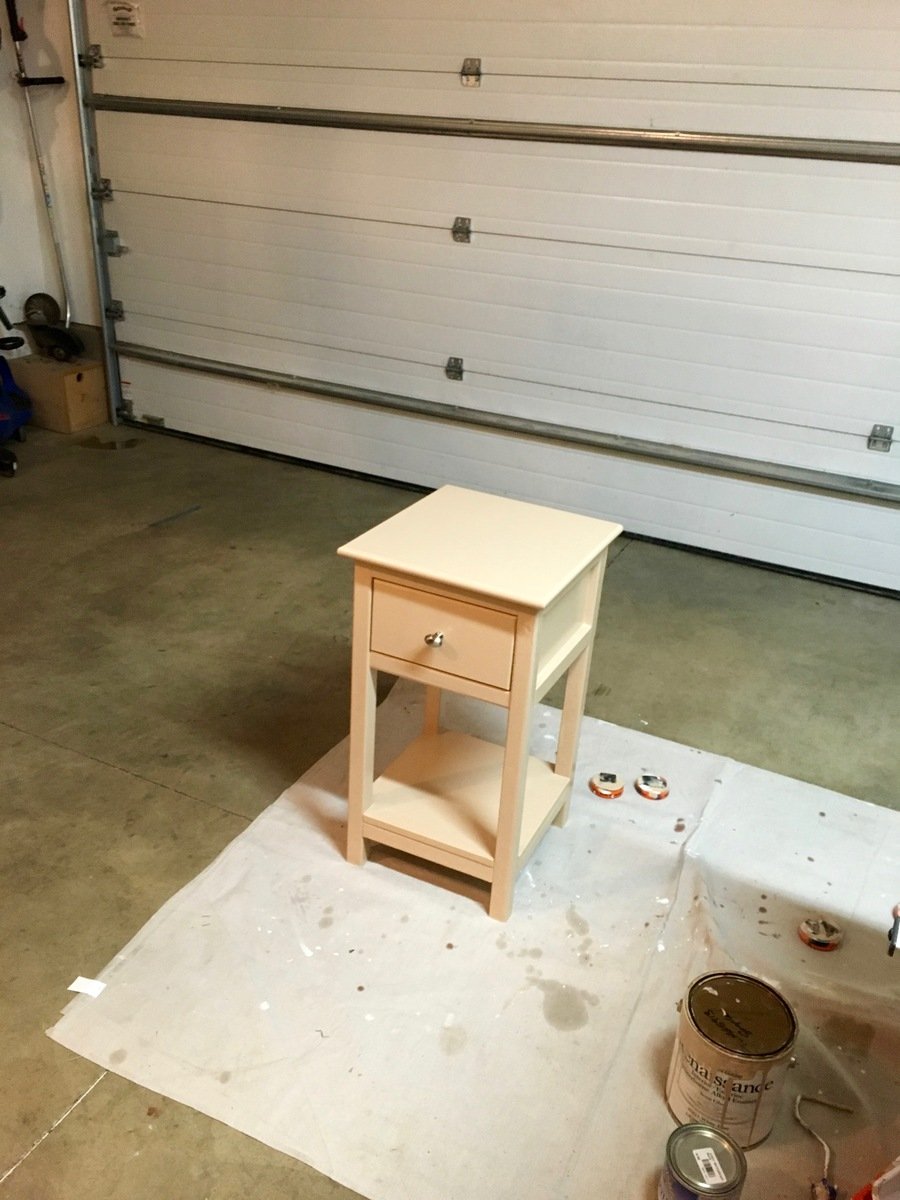
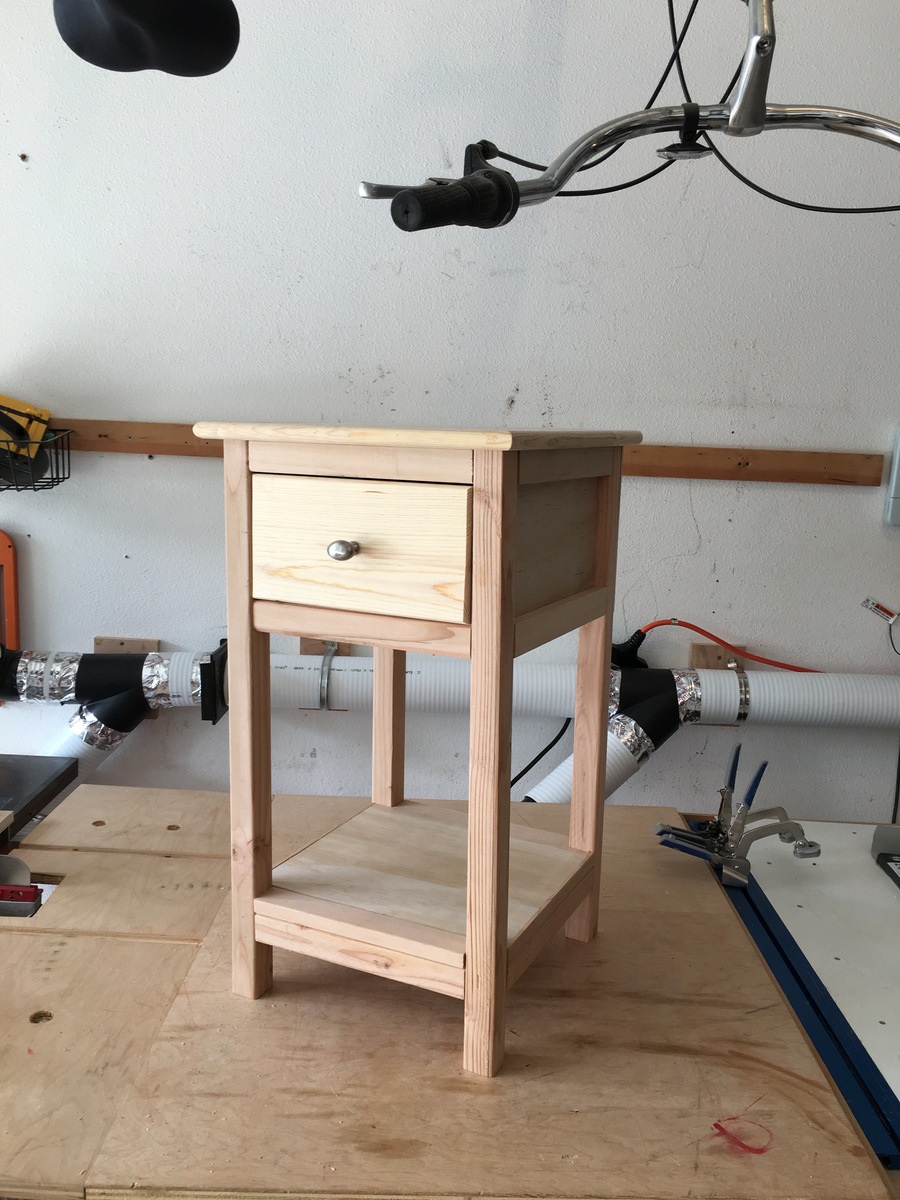
I made this fast and easy table, I was using as a small night stand in a small bunk room at my work for a coworker.  I used scraps that I had and had him choose a paint I had on hand! Covered the top with polyacrylic to add some protection!

Estimated Cost
Free, since I used stuff on hand, otherwise 40-50???
Estimated Time Investment
Afternoon Project (3-6 Hours)
Finish Used
I used two coats of an old based primer and than two coats of paint, which was Renaissance Alkyd paint. 3-5 coats of polyacrylic on the top surface.
Recommended Skill Level
Beginner

Comments

My version of the Mom's Lego Table

Submitted by dspguy on Thu, 09/01/2011 - 06:09

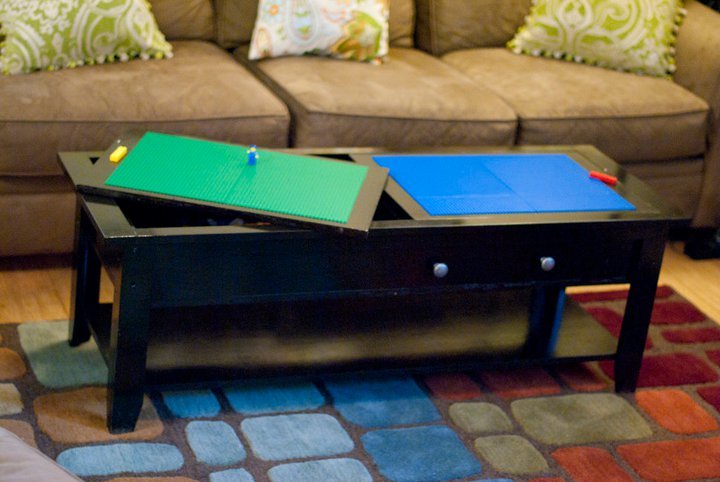
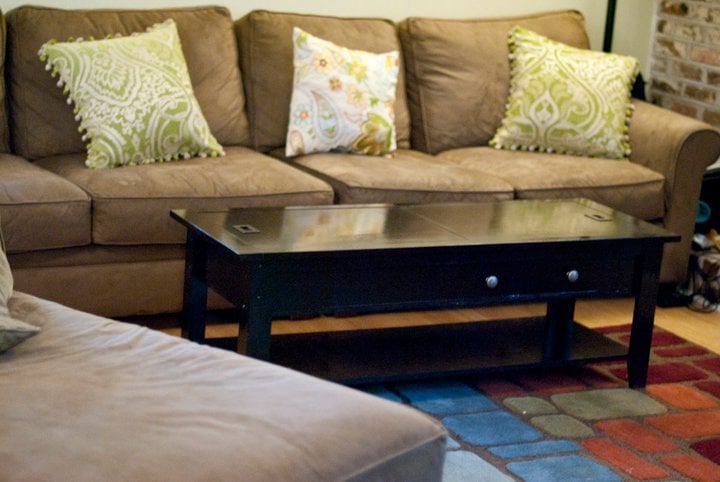
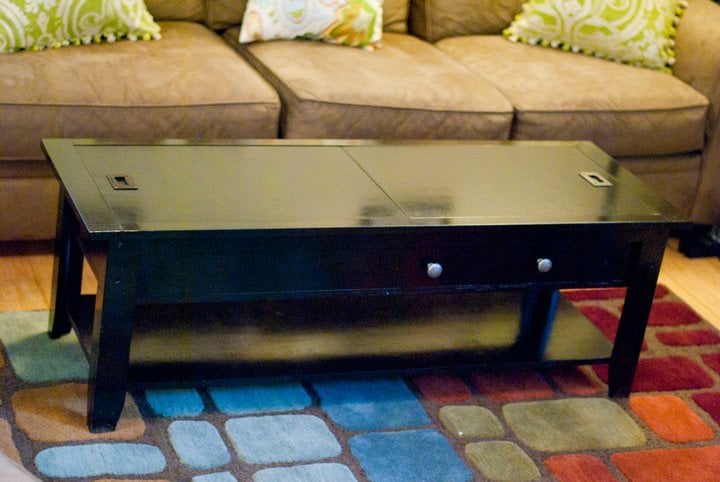
This is my second woodworking project. I picked up this hobby with some spare time and with my tools that were collecting dust after I completed most of my home renovations. Cost: $80 wood ($35 just on plywood) $35 hardware (2 recessed handles and 2 drawer pulls) $20 finishing products $40 lego baseplates On the lego baseplate side, I stained but only poly'd just enough so that the border around the plates would be covered. Baseplates had to be cut in order to get the custom size I wanted. The "play area" on one side of the table is 20 inches x 13.75 inches. Each side of the table is made with three 10x10 inch plates. Two 10x10s are side by side. The other 10x10 was cut with a razor to make it into two 10 x 3.75 inch pieces. I cut the plates so that I always had a "smooth edge" on three sides. I affixed the baseplates with epoxy. Simply butting up the baseplates does not work as the gap between plates is too small. To get the proper size, hold the baseplates together with lego pieces. Wipe any excess epoxy with mineral spirits. (Note: I tried liquid nails first on a test piece. The glue heats up after application and slightly warped the lego baseplate. Not recommended). The "mom side" of the coffee table has two recessed handles. The handles on the "lego side" are made with lego bricks. I drilled a tiny hole in the lego bricks. I threaded 50 lb fishing line through the lego brick to the hidden recessed area of the "mom's side handle" and tied off the line in there. Project took me over a month of time (probably 20-25 hours of labor). It could have and should have taken less, but I'm a newbie and am very cautious with my work.

Estimated Cost
$175
Estimated Time Investment
Week Long Project (20 Hours or More)
Finish Used
Brushed on Minwax wood pre-stain (1 application) Minwax Kona (3 applications) followed by 2 applications of Minwax Clear Gloss Poly (400 grit sanding and wiping down with a damp cloth to pick up leftovers), followed by 3 applications of Minwax Satin Gloss Poly (600 grit sanding, and wiping up any dust).
Recommended Skill Level
Beginner

Comments

connorsmom24 (not verified)

Thu, 09/01/2011 - 08:26

I am in LOVE with the area rug in this photo. Where can I get one???

FurnitureDreamer

Sun, 08/20/2017 - 07:16

Thanks for the detail on how to cut and glue the lego plates.  I like the recessed handles you used.  Do you remember where you got them.  Looks great!  

$6 Bench

After seeing benches like these on a wedding blog, I really wanted to build my own. It was a super easy project, and really cheap! Here's what you need:

• 2 – 2x6x8′ boards. They cost about $3 each at Home Depot.
• Screws, sandpaper and stain.

Cut List:
3 – 2×6 @ 47″
4 – 2×6 @ 16″

That’s it! I decided how long I wanted my bench to be (which was 47" long by 16" tall). Then, I cut out my pieces. I decided to do 45 degree angle joints on the ends, as opposed to having a flat edge exposed on the sides. I had to use my table saw to get the 45′s on the legs and two flat boards. This was very effin’ scary. Using my Kreg jig, I drilled holes in both of the flat boards that sandwich the tall center one. I offset my holes so that the screws wouldn’t hit each other. You can see in the picture that I accidentally drilled holes in my center piece too. Builder fail. That side will just have to face the back ;)

Attach your 3 top boards together. Then screw in your legs. I decided not to countersink and fill, kind of because I like the industrial look, but mostly because I’m lazy. Then you just sand that sucker up and voila! You’ve got a gorgeous bench perfect for any home. I decided to get a little fancy with my finishing and do a two-tone stain. It took about an hour to do the two colors and not drip on everything, as opposed to the 15 minutes one color would take. I think the extra time was definitely worth it!

Estimated Cost
$6
Estimated Time Investment
An Hour or Two (0-2 Hours)
Finish Used
Minwax stain in gunstock and walnut
Recommended Skill Level
Starter Project

Comments

LoriQ (not verified)

Mon, 03/12/2012 - 16:58

How is the center top board attached to the ones on either side? I've never built anything before, so this is probably obvious to everyone else. :-/

LoriQ (not verified)

Mon, 03/12/2012 - 17:00

How is the center top board attached to the other top boards? I've never built anything, so this is probably obvious to everyone else. :-/

Guest (not verified)

Mon, 03/12/2012 - 20:39

I used a kreg jig to join the 3 boards. If you don't have a jig you can "toenail" the screws by drilling them from below at a 45 degree angle. I would join the vertical into one side at a typical 90 degree angle, then toenail the other board. You could add extra security with L brackets

claydowling

Tue, 03/13/2012 - 03:57

The usual solution for cutting a long piece like this on a table saw is to build a crosscut sled first. There are a lot of good guides on the internet for how to build a crosscut sled.

I build something that is a bit oversized, so much so that I had to incorporate a box for some weights so it's stable on my table. But I can easily support a three foot board on this sled with room to spare before it runs off the end.

The sled supports the board and makes it so you aren't fighting your work in a dangerous situation. This sled made my saw completely non-scary to use.

One thing I've noticed about a table saw is that when you buy the saw, that's only the start of the tool. You'll spend a lot of time refining it with add-ons and jigs that you build for it.

Alicia47

Sat, 01/25/2014 - 11:12

I wanted to make this bench, went and bought the supplies, got home to cut it, and the measurements are off. I cannot figure out any possible way to make this bench 47 inches long without running out of wood. Is it possible that the measurements are off? Or can I just not figure out how to cut it so I don't fall short on my wood? Someone please help!

Coffee bar project!

Submitted by Anonymous (not verified) on Fri, 04/07/2023 - 13:43

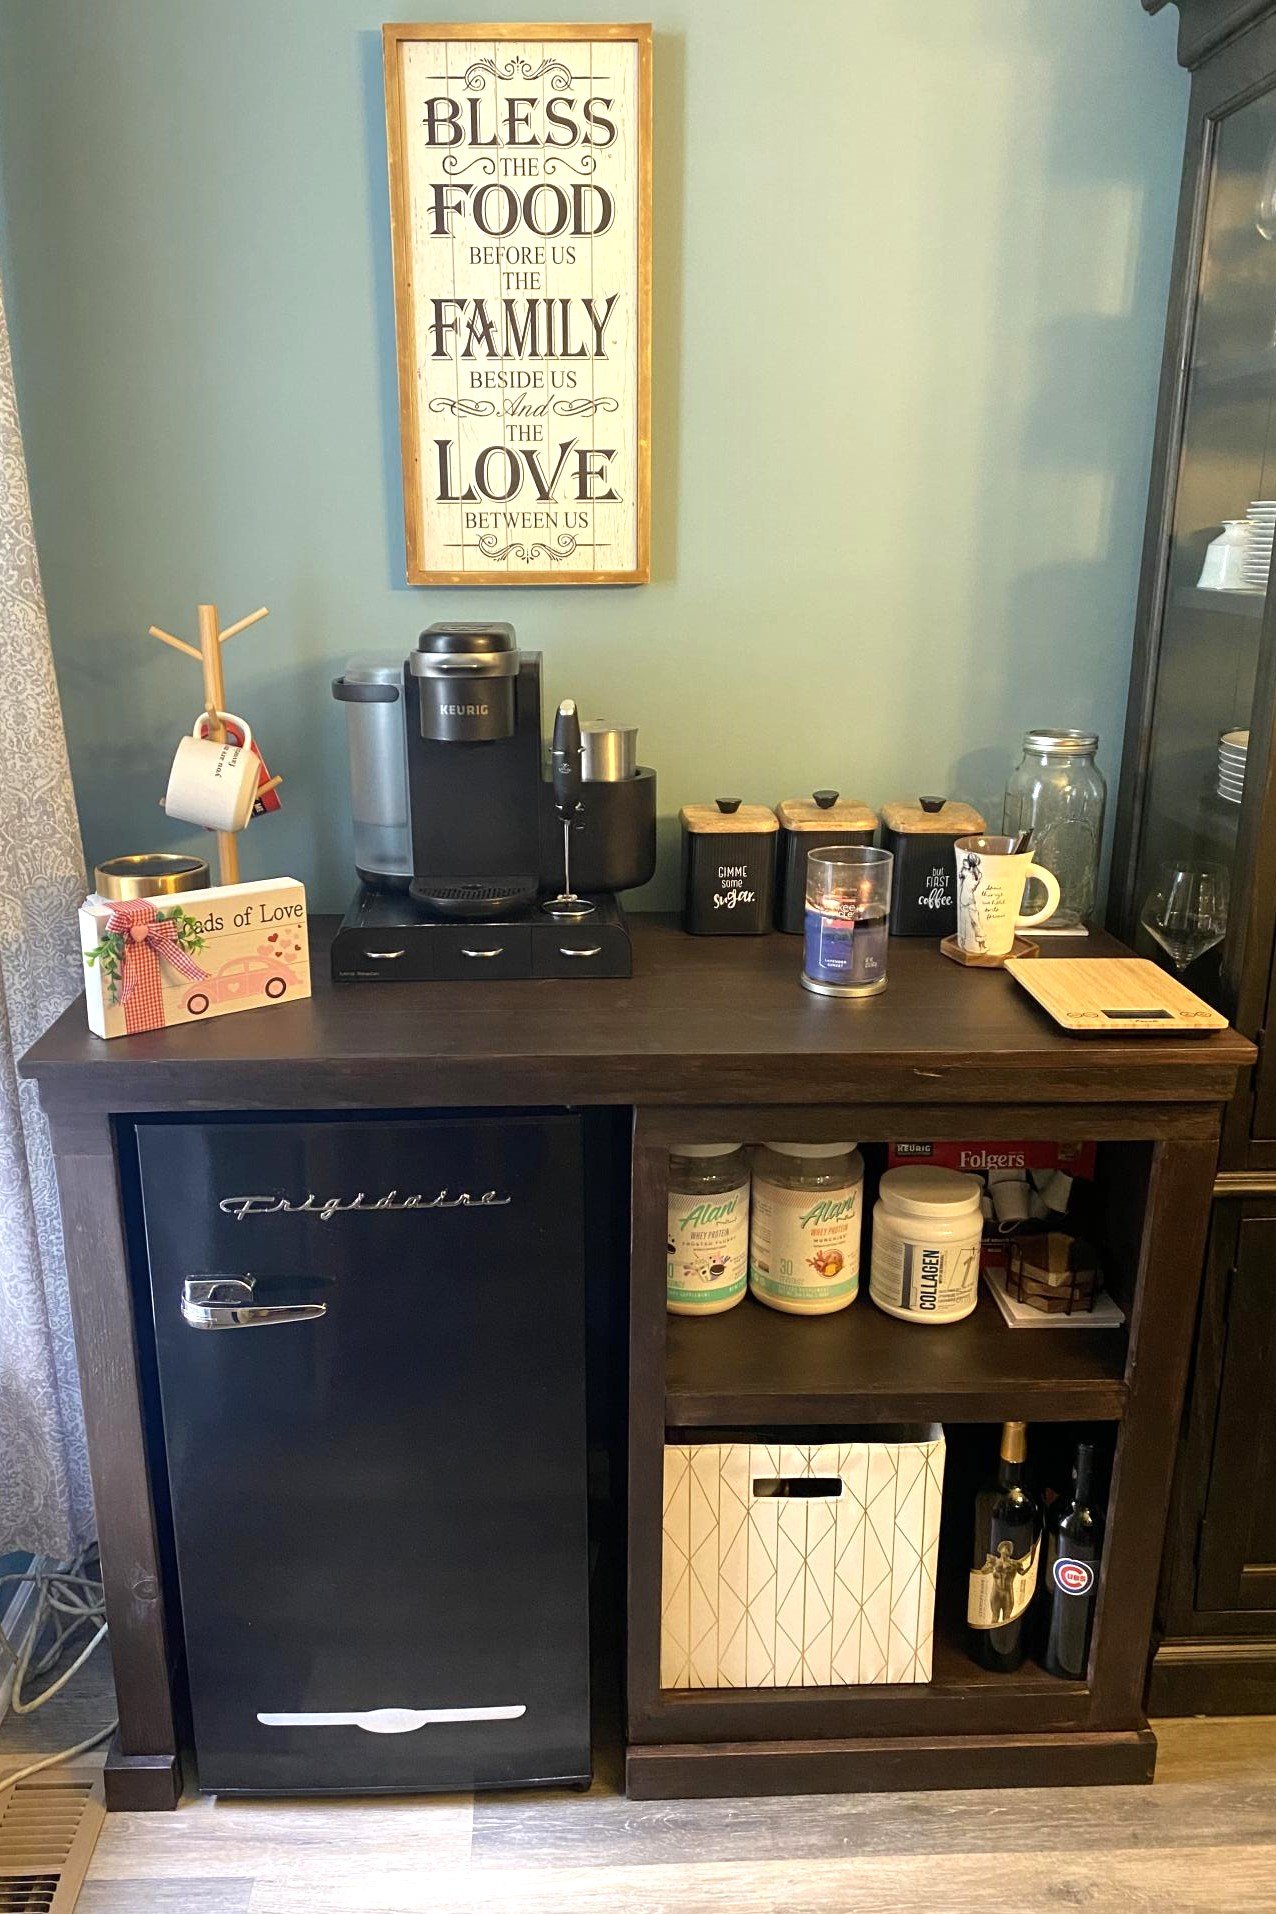
My wife had been wanting a buy a coffee bar for our dining room so we could declutter the kitchen. I came across the plans for this on Ana’s site and made some slight modifications to fit our space and fridge. It turned out incredible! Friends and family say it’s the best piece I’ve made. Thank you Ana for the plans!

Comments

(Mini) Modern Park Bench

Submitted by philuk on Mon, 07/15/2019 - 15:16

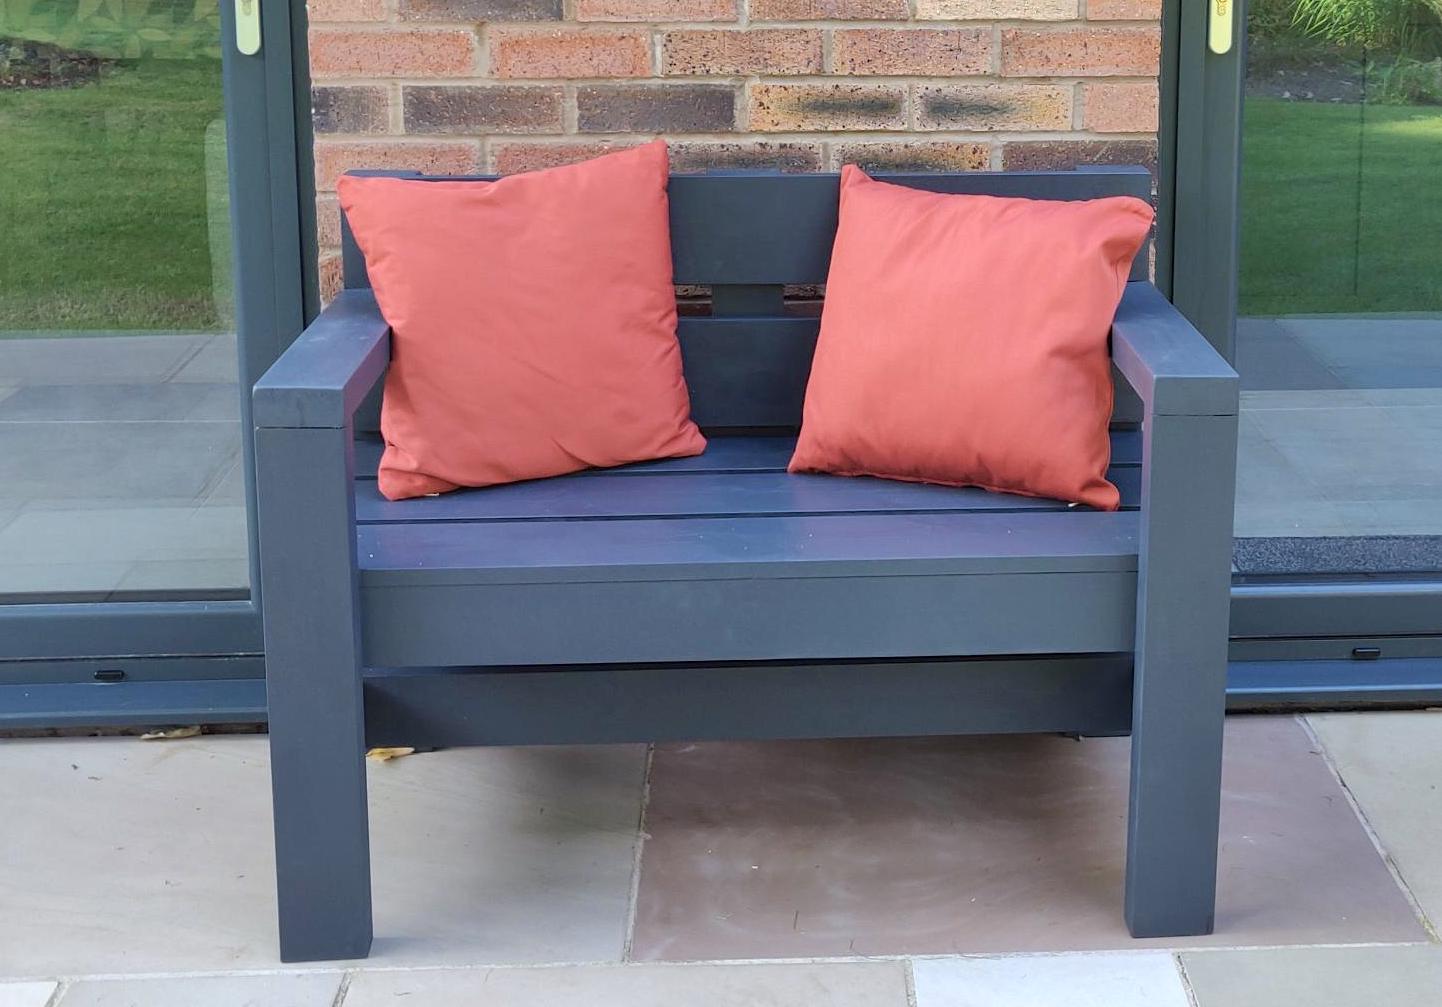
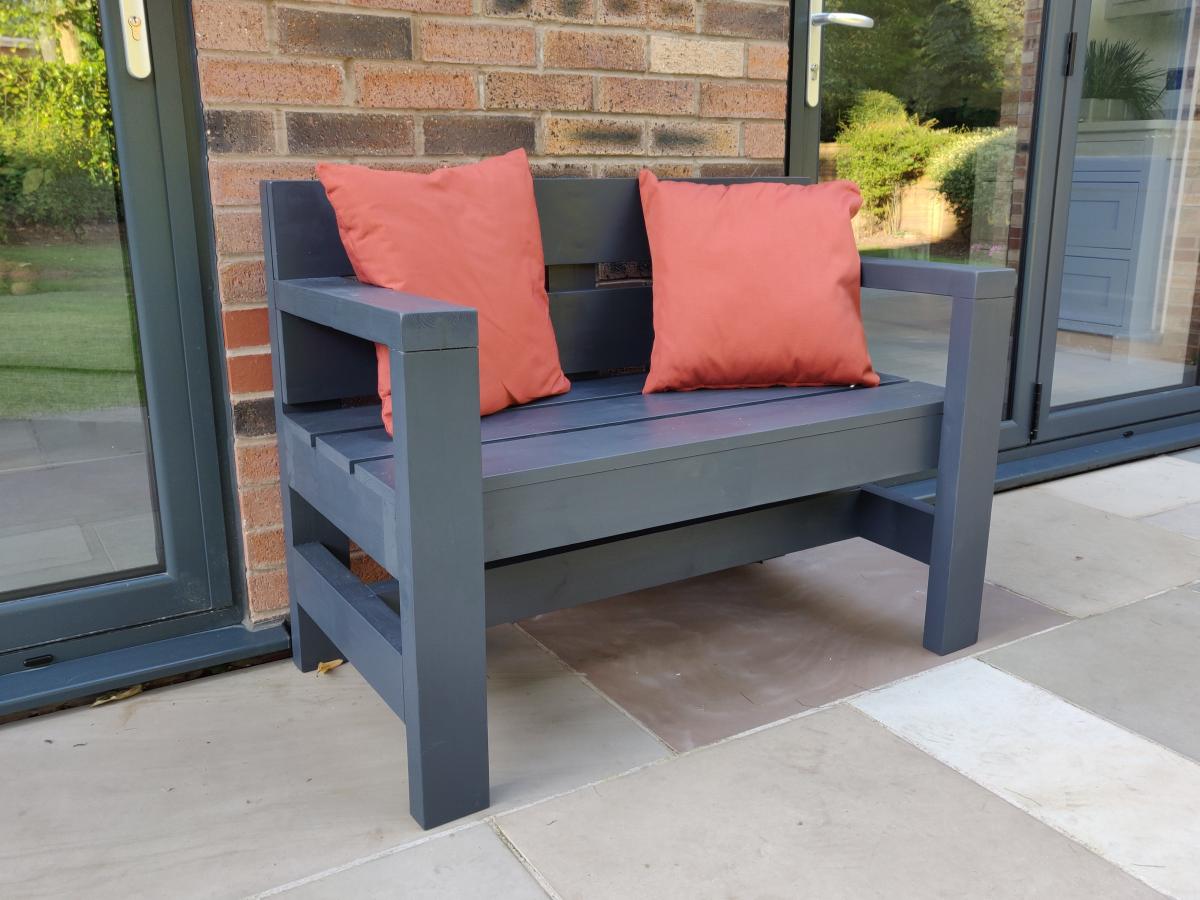
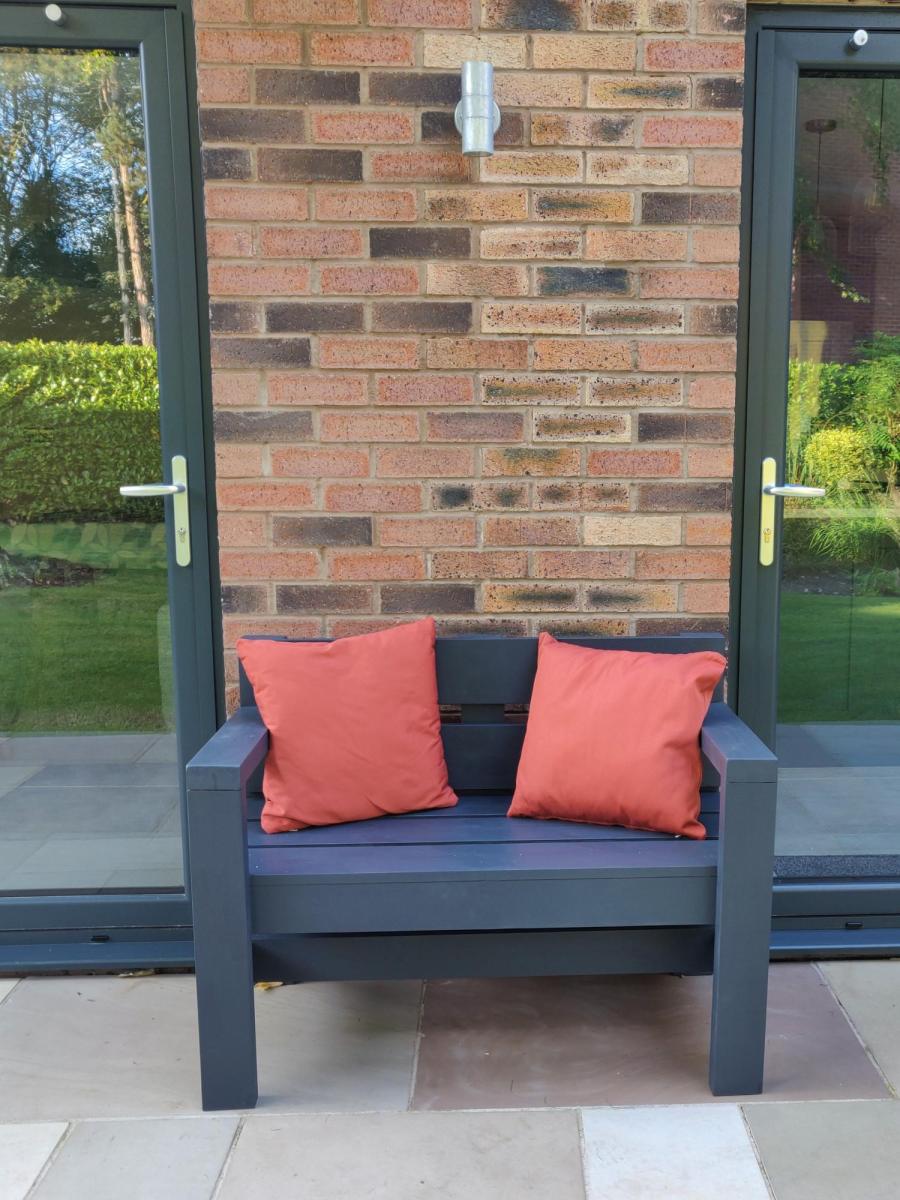
I needed a replacement outdoor bench to fit a small space between two door openings. Reduced the length of the Modern Park Bench to about 44". Also reduced the depth by removing one of the seat planks to retain a sense of proportion.

Had some issues with some of my 2x4s being a bit twisted which impacted the overall build quality but I'm happy with the end result considering the price/time invested.

Tip: spend some time in the lumber yard picking out your own wood - I wish I had.

Built from Plan(s)
Estimated Cost
£35 in timber.
Less than £5 for the finish.
Estimated Time Investment
Afternoon Project (3-6 Hours)
Finish Used
Two coats Cuprinol Garden Shades in 'Urban Slate'
Recommended Skill Level
Beginner

Comments

Raised Planter Box

Submitted by Anonymous (not verified) on Tue, 05/16/2023 - 11:59

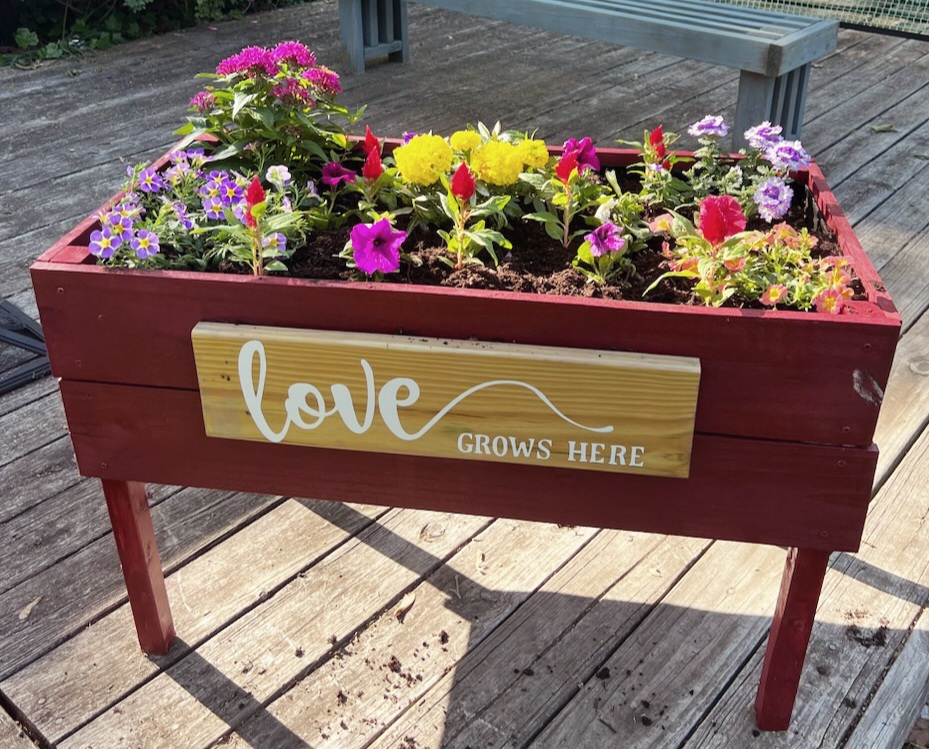
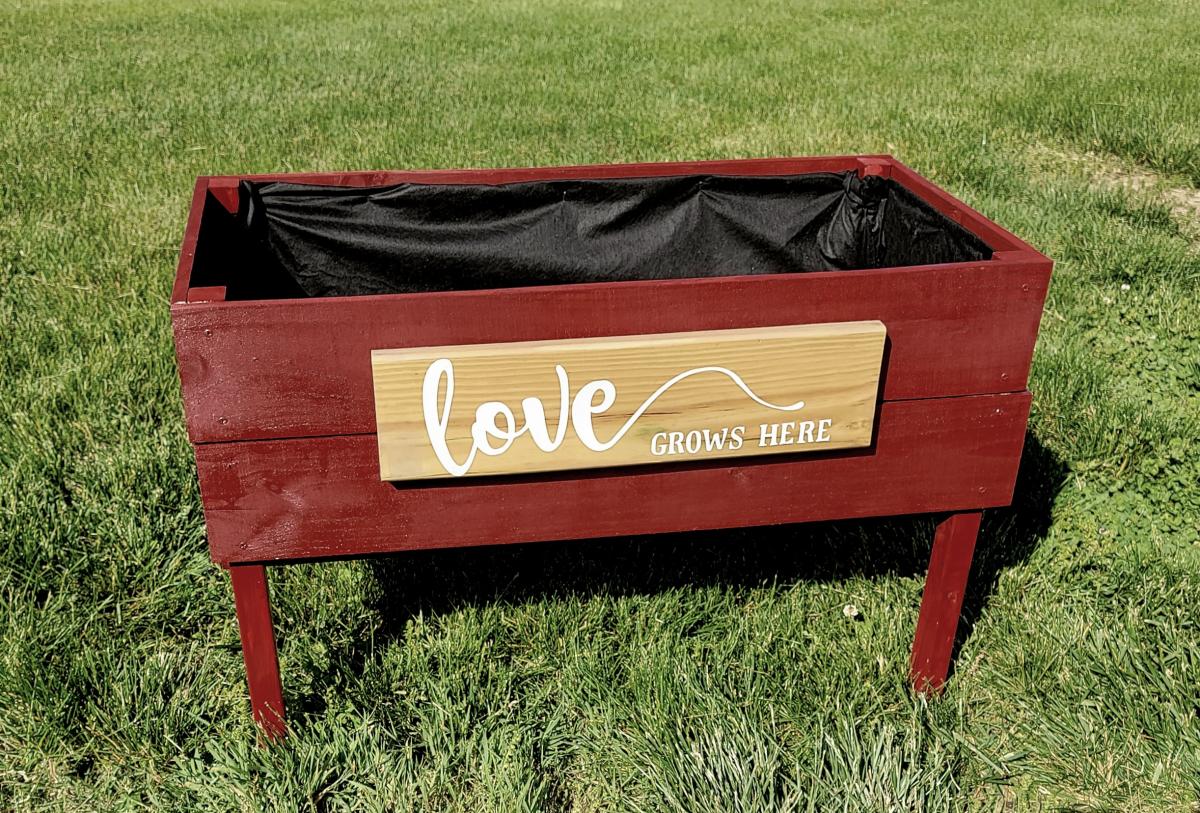
I helped my 3 grands make this for their mom for Mother's Day. They loved it and she was over the moon!

Built from Plan(s)

Comments

Pantry Cabinet

Submitted by JoanneS on Mon, 03/05/2012 - 16:57

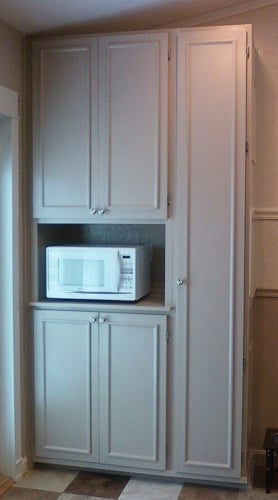
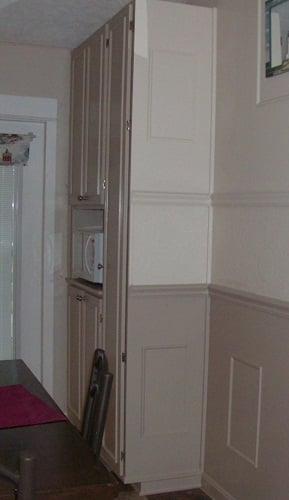
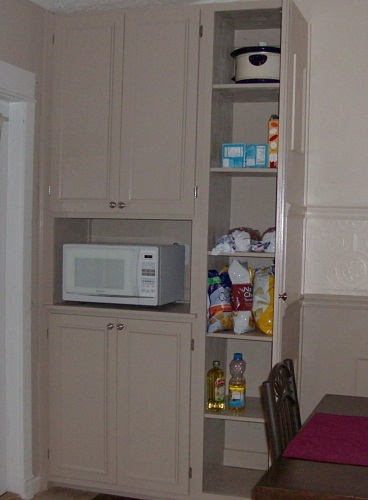
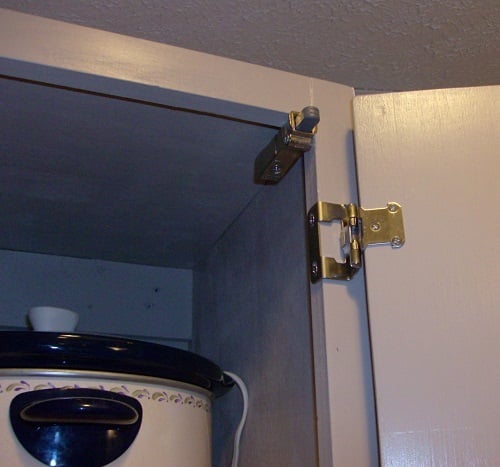
Pantry cabinet, with lots of room, Ana-inspired. We combined ideas from the Momplex kitchen, simple armoire, and benchmark storage, and we are super pleased with how this turned out. We built it in 2 pieces, attached together and then secured to the base and wall studs so it’s a ‘built-in’. Then we added lots of trim and painted to match the dining room. The opening at the left is large enough to fit pretty much any size microwave, and there’s a dedicated outlet behind it in the opening. The shelves are spaced wide enough apart for tall cereal boxes, tall bottles, and chip bags to stand upright. Overall finished cabinet size is 48" wide and 95 3/4" tall. This took us several days to complete. Since the doors are tall and kind of heavy, we added the Blum cabinet door dampeners from Rockler (these things really work!). Ana, thank you so much for the inspiration. I don’t think we would have tried this if it wasn’t for you. We love our new pantry!

Estimated Cost
$600
Estimated Time Investment
Week Long Project (20 Hours or More)
Finish Used
Ace Royal semi-gloss in Wishbone (front and bottom side), and in Crushed Peanut (upper side). We did 3 coats, sanding in between coats.
Recommended Skill Level
Intermediate

Comments

Debi_G (not verified)

Wed, 03/07/2012 - 00:05

Fantastic!

yogashell

Sat, 07/21/2012 - 07:44

It looks amazing! What a great idea to add it as a built-in. Nice modification for the microwave.

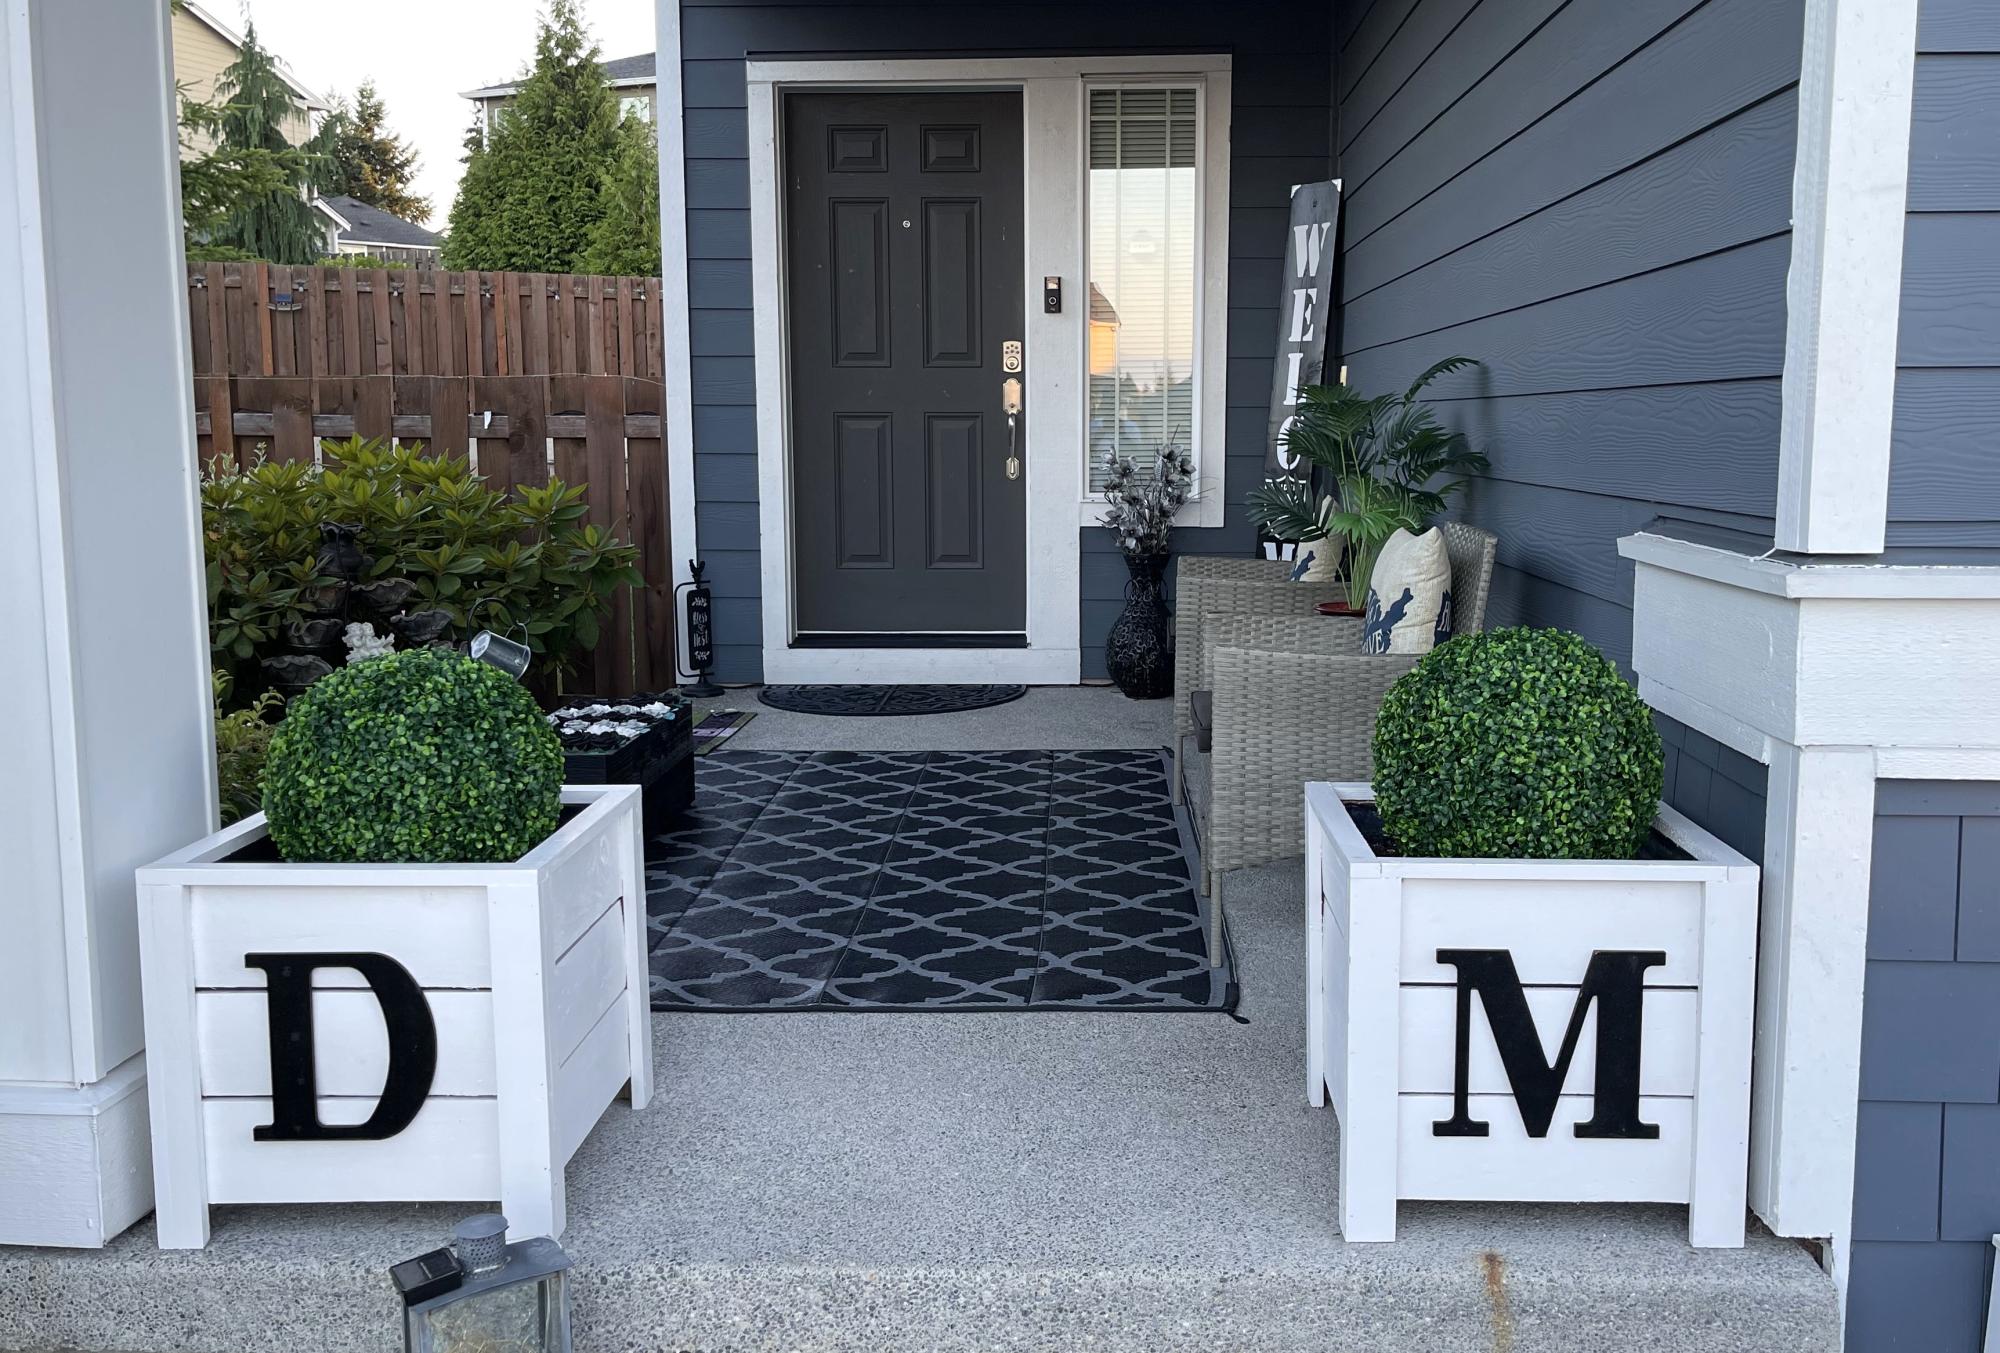
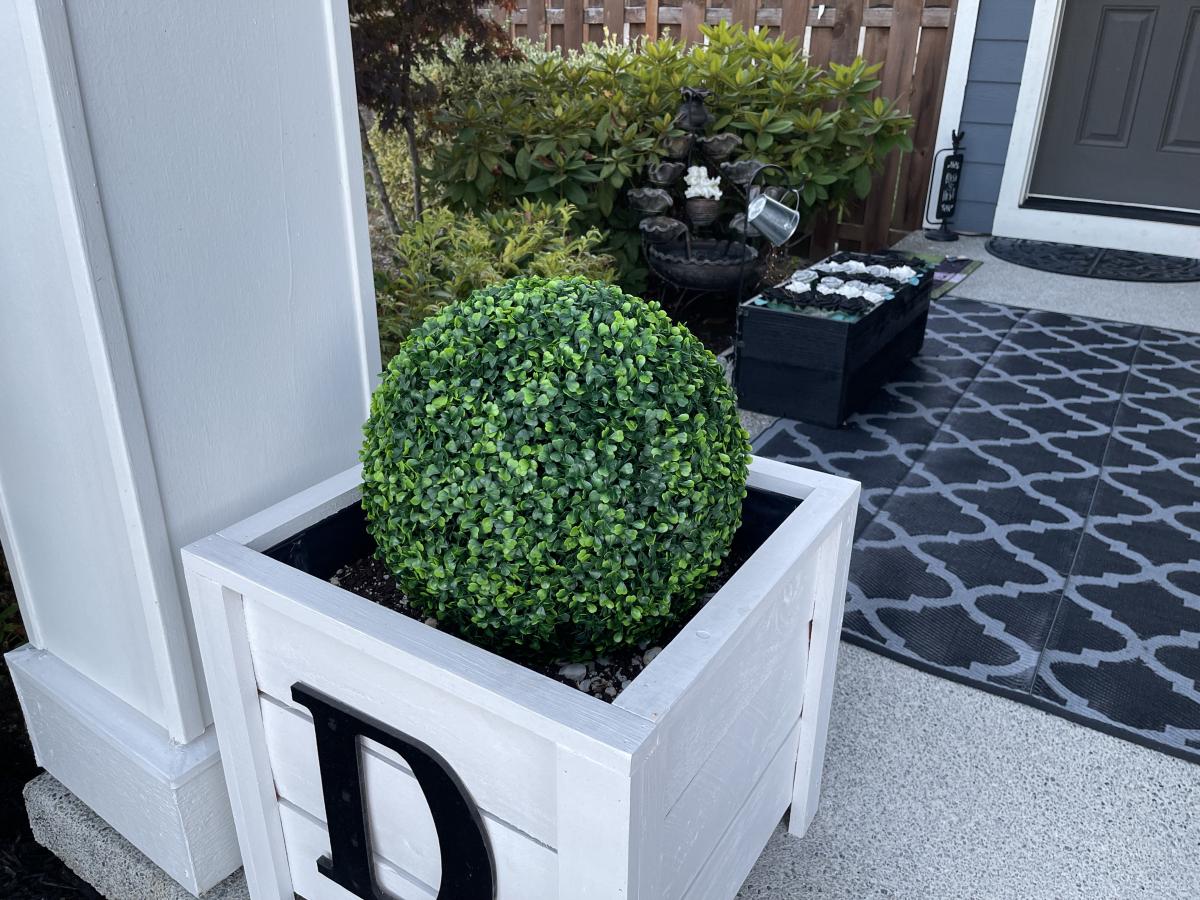
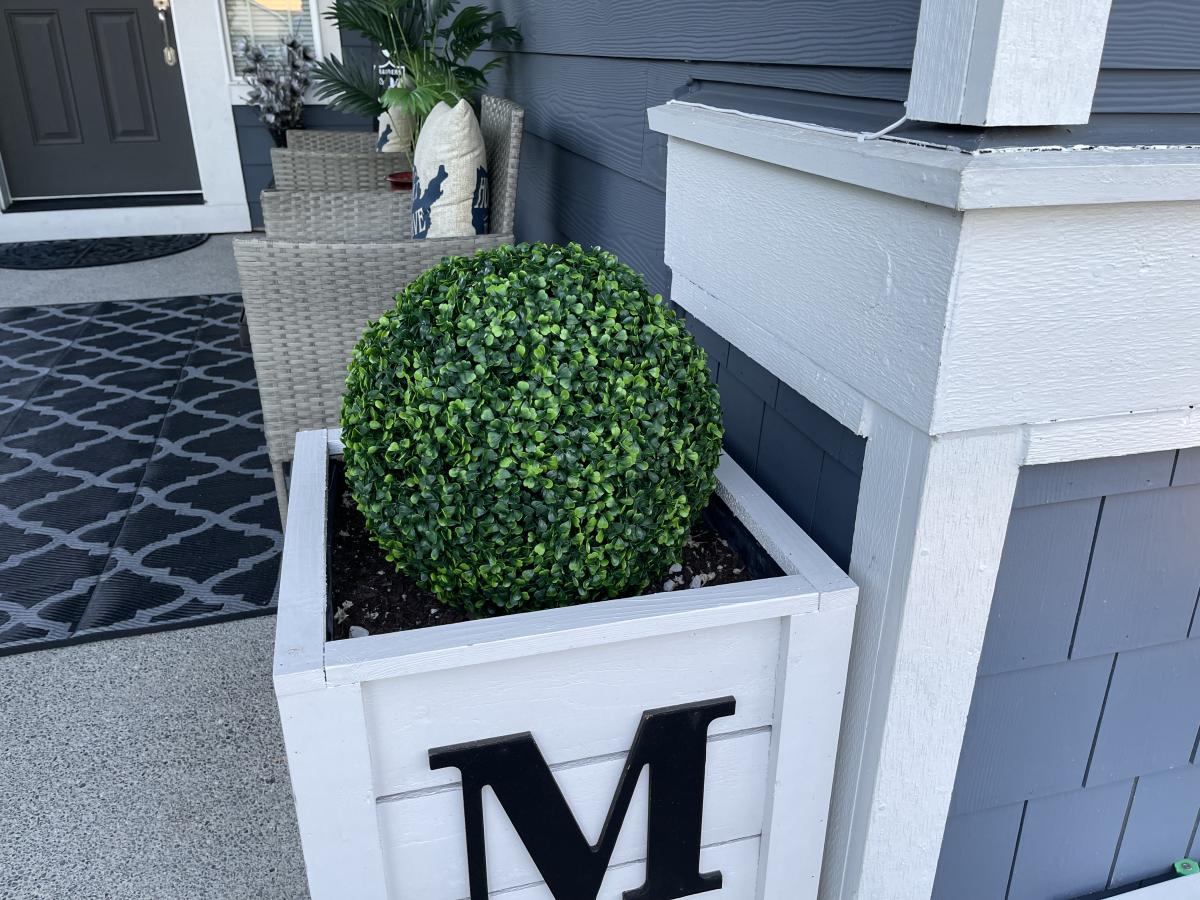
Porch Planters

Submitted by Anonymous (not verified) on Mon, 07/24/2023 - 13:40

This build was a lot of fun! Thanks ANA!

David Marks

Comments

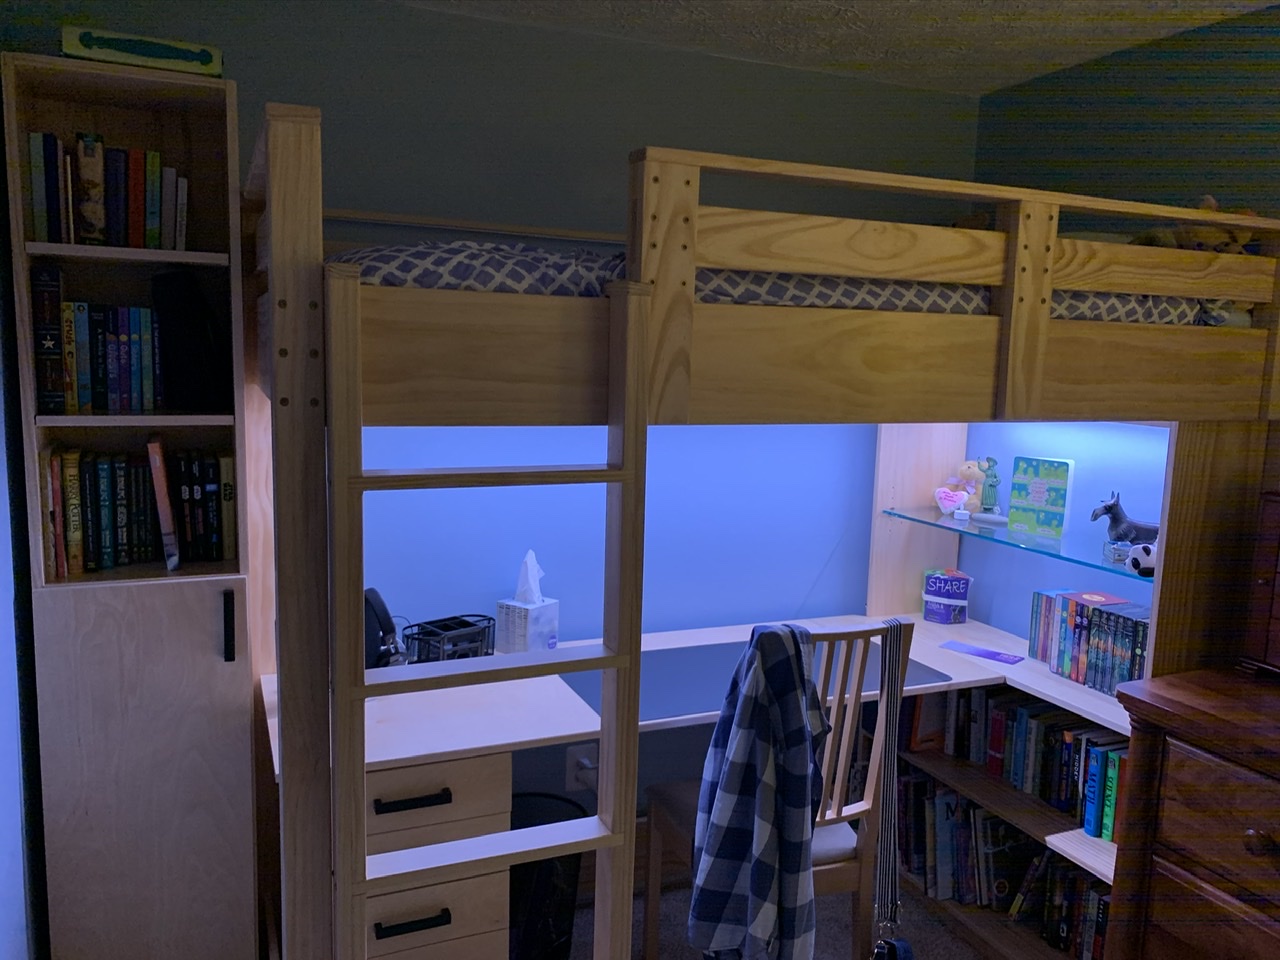
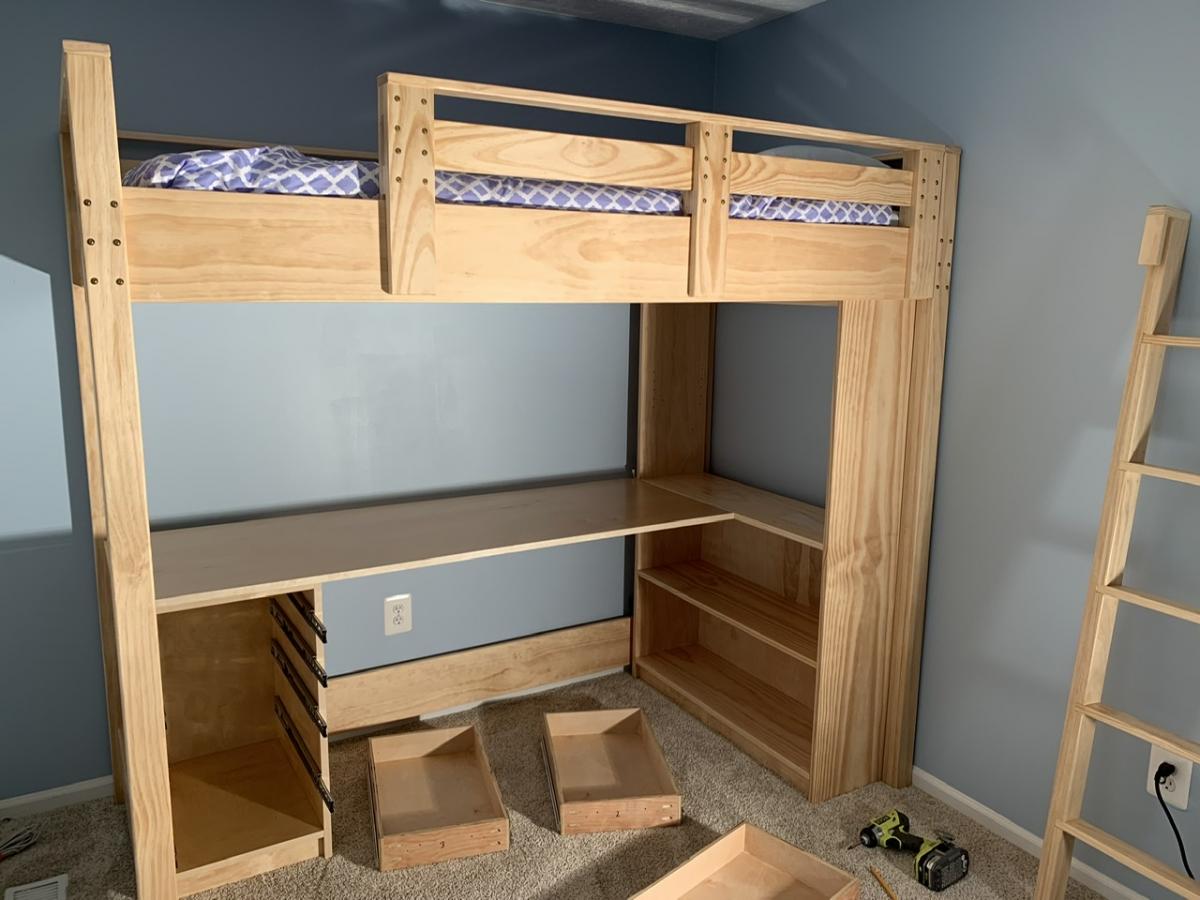
Modified and Expanded Loft Bed, Shelves, and Desk

Submitted by mickelsn on Mon, 11/25/2019 - 20:09

My daughter desperately needed a new loft bed for her small bedroom as she became a teenager. After looking a long time, I finally decided to   take the plunge and make something custom after we couldn’t find a bed that met her needs (she’s VERY tall for her age). Thank you for posting the loft bed and bookshelf plans to this site, as they were great to work from and customize! This is my first woodworking project of any kind, and it came out great with these plans.

We followed the Loft Bed and Loft Bed Bookshelf plans pretty closely, but we did make some changes as we went...

First, we tweaked the guard rail design to make it removable by adding back vertical posts. This way, the front and back posts slide over the front rail and it no longer needs to be screwed in place. This is a nice tight grip for safety, but it’s much easier to make the bed by removing the guard rail and dealing with the mattress. If you do this, just make sure the back vertical posts are shorter than the front ones to make room for the cleats and slats on the inside of the rail! This also means the top of the rail is made with a 1x3 instead of the 1x2 in the instructions.

We also decided to use a vertical ladder design rather than an angled ladder. We did this for space considerations in the room; it’s a bit harder to get up the ladder, but not that much. This also helped avoid any weird angle cuts with my basic tools. We also made the ladder about 3” wider than the one called for in the plans.

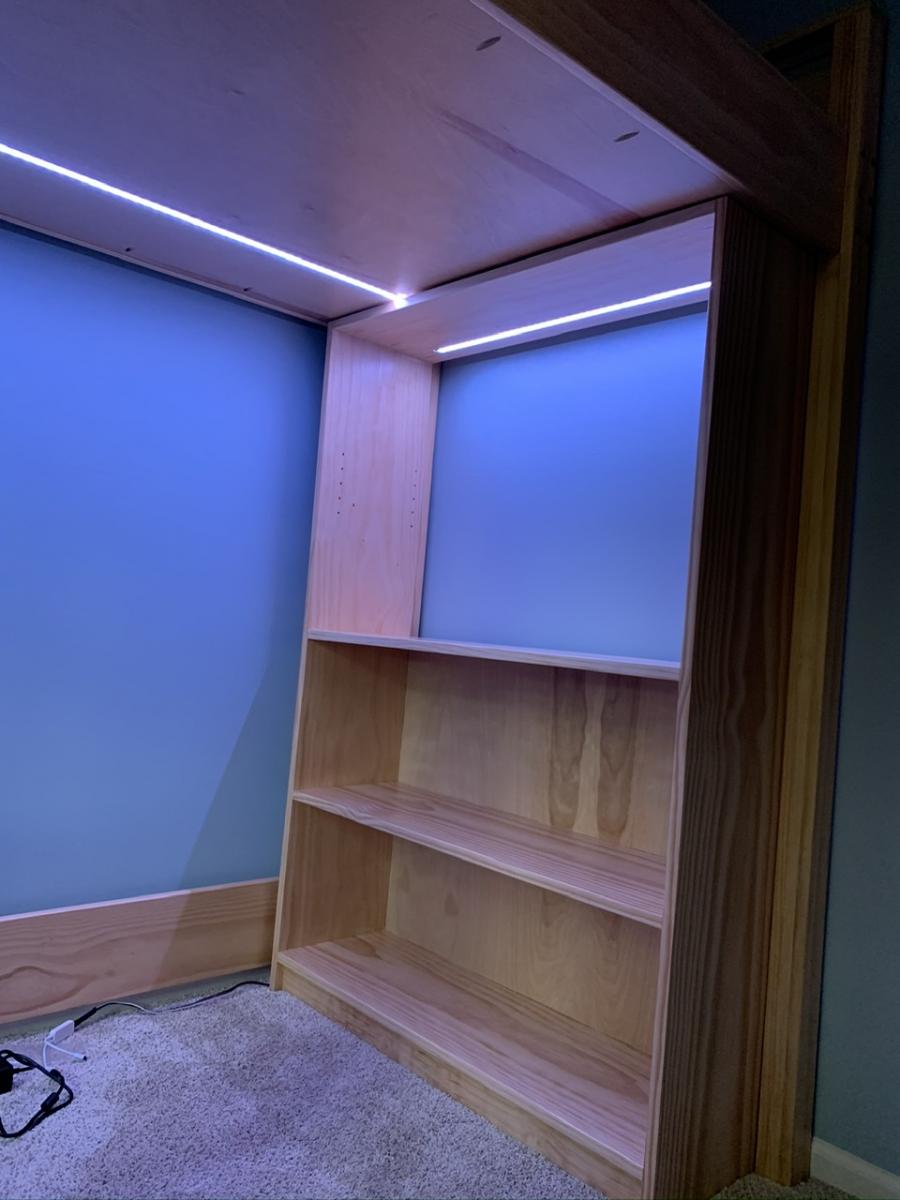
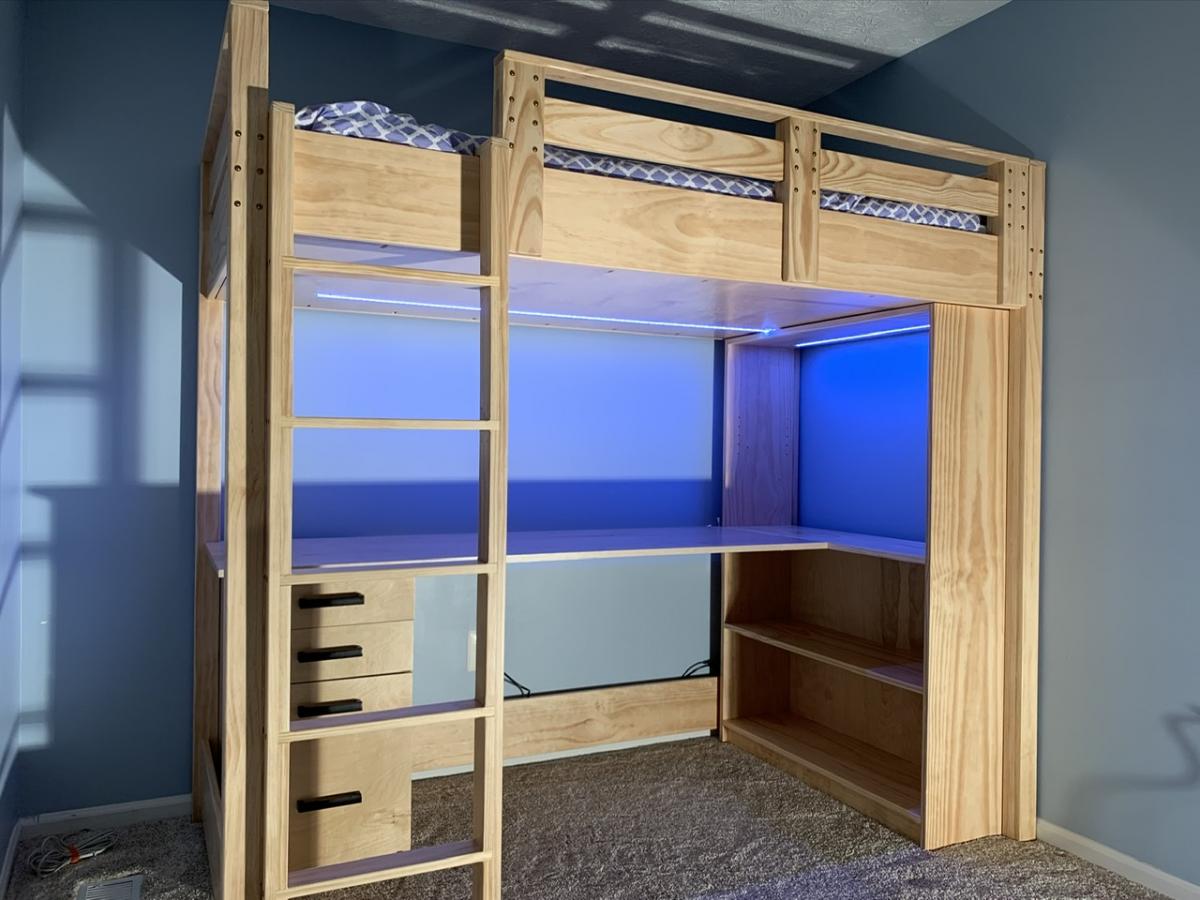
One of my favorite features was adding a 3/4” plywood “ceiling” above the desk. We did this by moving the long side cleats upward by 3/4” of an inch in the plans, and using pocket holes roughly every 10 inches around the perimeter of the plywood. We used this to hide the bottom of the mattress and all the bedding from view when sitting at the desk. It also provides for LED strip lighting above the desk, which is installed by routing out a pathway in the board and installing the lights within an aluminum channel for heat dissipation and to allow installation of a plastic diffuser over the lights. The wiring for the lights lives in the ~1.5” gap between the board and the slats thanks to the 1 x 2 cleats.

In the shelving, we made the upper shelf in the wide bookcase adjustable with the help of a Kreg shelf pin jig. We also ordered a 3/8” tempered glass shelf for this area to let more of the LED light strip we installed in the top of this shelf shine down as well. Again, this was installed in a routed-out pathway that holds an aluminum channel, and the wiring goes up through both the bookcase top and the plywood bed “ceiling” panel to join into the power. We got the strip lights, aluminum channel with diffusers, power supply, and controller from Amazon.

To get power to the LED lights, I routed out a channel for 5-conductor wire in the middle board of a rear leg assembly. Before gluing up the leg, I coated the wire with silicone spray to avoid the glue adhering to it so I could slide the wire around as needed. With a little bit of chiseling, this wire is able to come out of the slide-in joints for the upper and lower wide rails on the back of the bed. On the top, these wires go into a splitter and then to the two sets of LED light strips. On the bottom, the wires to into the LED controller which is mounted to a scrap board along with the power supply that stands on end in the 3/4” gap between the back side wall of the bookshelf and the bottom bed rail.

We created a custom-designed file drawer unit as the pedestal for the desk opposite the wide bookshelf. This was modeled roughly after Ikea Alex drawers with three narrow drawers and one file drawer. The carcass is about 14 1/2” wide by 21 3/4” deep by 29 1/4” tall and made of 3/4” plywood. The drawer boxes are approximately 12” wide by 20” long made of 1/2” plywood with 3/4” plywood fronts. We used full-extension soft-close drawer slides and positioned the cabinet so they have nearly full extension behind the ladder. Four wooden dowels are used on the top corners to align and secure this end of the desk surface.

Speaking of the desk, it is a piece of 3/4” plywood approximately 24” deep by 64” long. One end rests on the file drawer cabinet, and the other end is flush with the middle shelf of the bookcase and attached using two 6” by 5” 14-gauge galvanized T-straps usually used in framing applications. These are screwed upwards into the bottom of the desk and shelf from below, and are holding up quite well. This avoids the need for desk legs by the bookshelf.

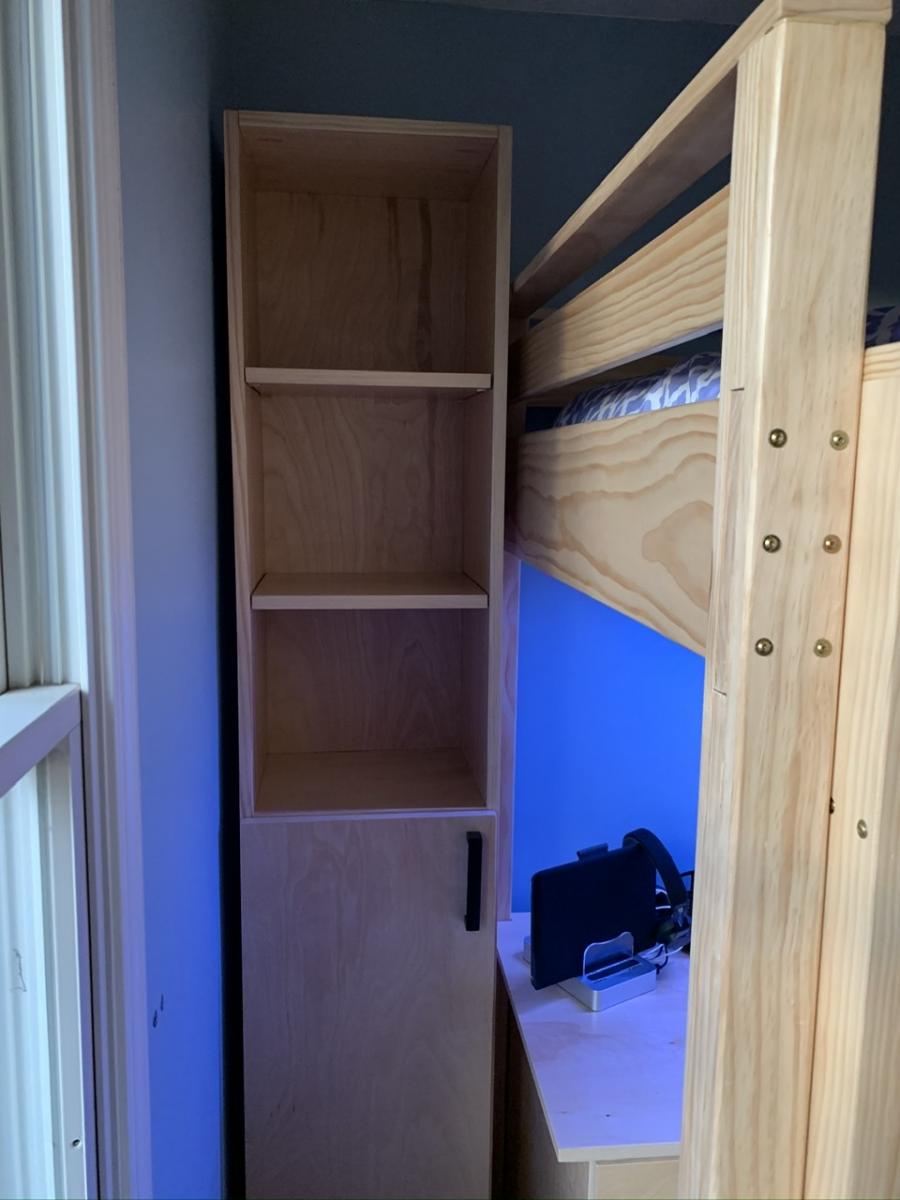
We then adapted the techniques used for the wide bookshelf to build a narrow bookcase (79” tall, 14 1/2” wide) out of two more 10-foot long 1x12 boards. This bookcase sits between the end of the bed and the corner of the room to finish out the look and provide more storage. The top, middle, and bottom shelves are fixed and there are a total of four adjustable shelves (two in the top half, two in the bottom half). We also cut a door and installed it using a pair of full-overlay euro hinges. With these dimensions, the tall bookcase is also capable of working with 11” x 11” x 11” storage cubes just like the wide bookshelf.

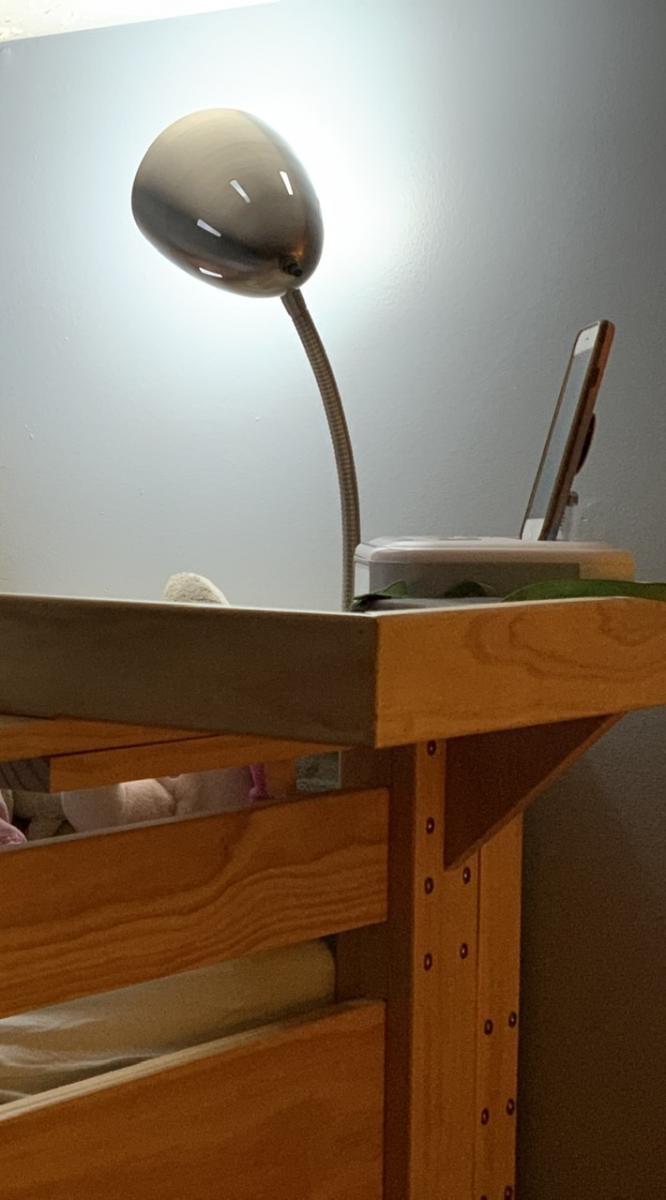
The finishing touch was to create a shelf that attaches to the guard rail and provides a place for my daughter’s alarm clock to sit and be within easy reach. This shelf is made around a piece of the scrap 3/4” plywood that is approximately 21” long and 9” deep. I used leftover 1x3 pine that I glued and nailed to the outside perimeter of the plywood flush with the bottom to hide the layers in the plywood while providing walls around the shelf. I also glued and screwed another 1x3 piece to the front of the plywood, this time flush with the top, as the first piece of a U-shaped grip to slide over the top of the guard rail. Another 1x3 scrap was then positioned, glued, and brad nailed to this front piece to finish the grip. I then cut a triangular piece of wood from a 1x6 to provide additional support under the shelf against one of the vertical pieces of the guard rail. This piece is held in place with counter-sunk screws that go through the top of the plywood shelf down into E-Z Lok threaded inserts in the top of the triangular wood support. The whole shelf assembly is only attached to the guard rail so that I can still easily remove the rail to change bedding on the mattress.

The whole project is constructed out of Home Depot select pine boards and birch plywood. Throughout construction, I used a 3/16” round-over bit in a router to eliminate sharp corners pretty much everywhere on the bed itself (legs, rails, ladder, etc.). I didn’t use this on the bookshelves, the file drawers, or the desk. Edge banding was used to hide any exposed plywood edges. I used 200-grit sanding discs and an orbital sander to sand the various pieces during construction and before finishing. The entire thing is finished with two or three coats of Minwax Polycrylic water-based polyurethane, sanding between coats, which gives this a nice smooth finish and lets the richness of the wood grain come through.

Hopefully the pictures I’ve posted can help understand the write-up on modifications to the project. I enjoyed building this a lot, and my daughter really loves what this did to her room to make it much more usable! That was worth all the effort and time right there.

Ana, thanks a million for the plans!!
Estimated Cost
$750 in materials for wood, LED lighting, tempered glass shelf, etc.
Estimated Time Investment
Week Long Project (20 Hours or More)
Finish Used
Minwax Polycrylic, Satin finish. Used Shur-Line 3.5” x 7” White Fiber pads to apply on most flat surfaces, with foam brushes to get into corners and apply to edges. For complex pieces like the ladder and guard rail, used Minwax Polycrylic Satin spray. Sanded between coats with 320-grit sandpaper in all cases. Used two coats when doing pad application; four coats when doing spray application.
Recommended Skill Level
Beginner

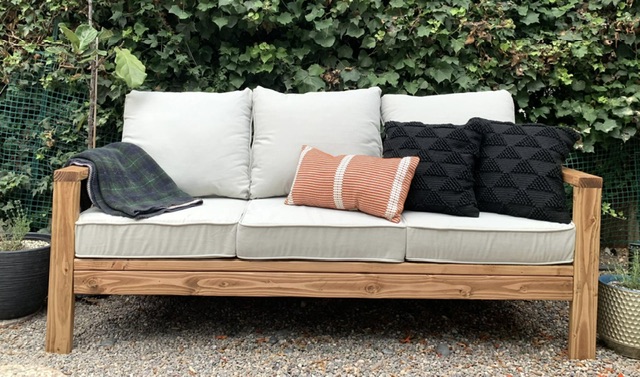
First Ever Furniture Build - Outdoor Sofa

Submitted by Anonymous (not verified) on Wed, 08/02/2023 - 10:30

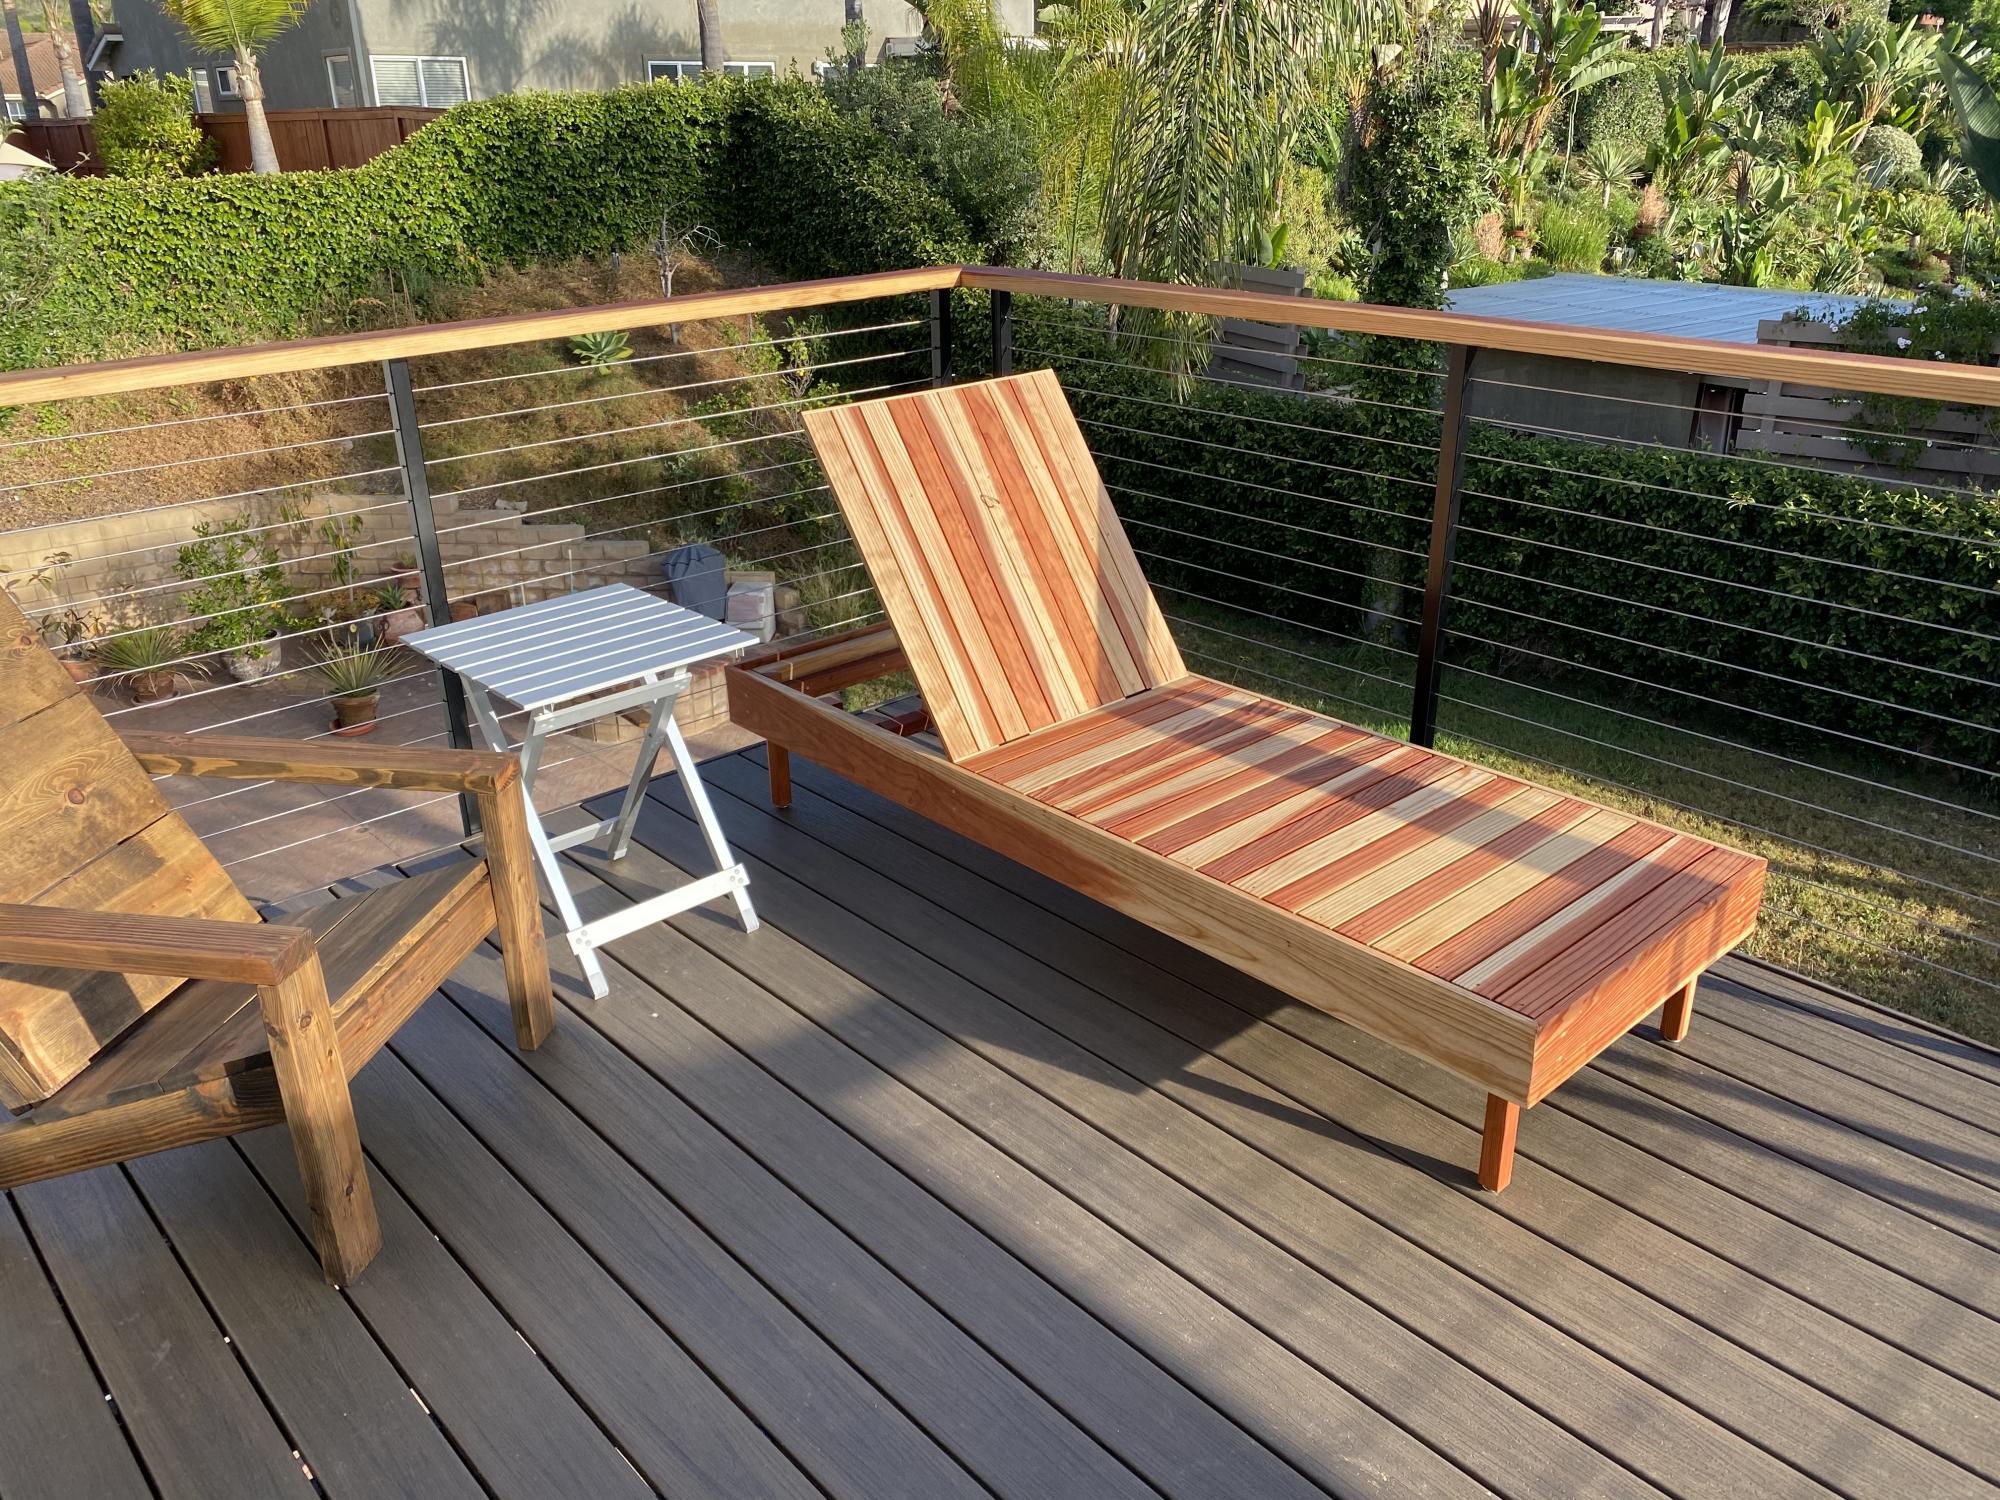
This was my first ever piece of furniture that I made and it was so much fun! I’ve got the furniture making bug now!
Melissa Pilcher

Built from Plan(s)

Comments

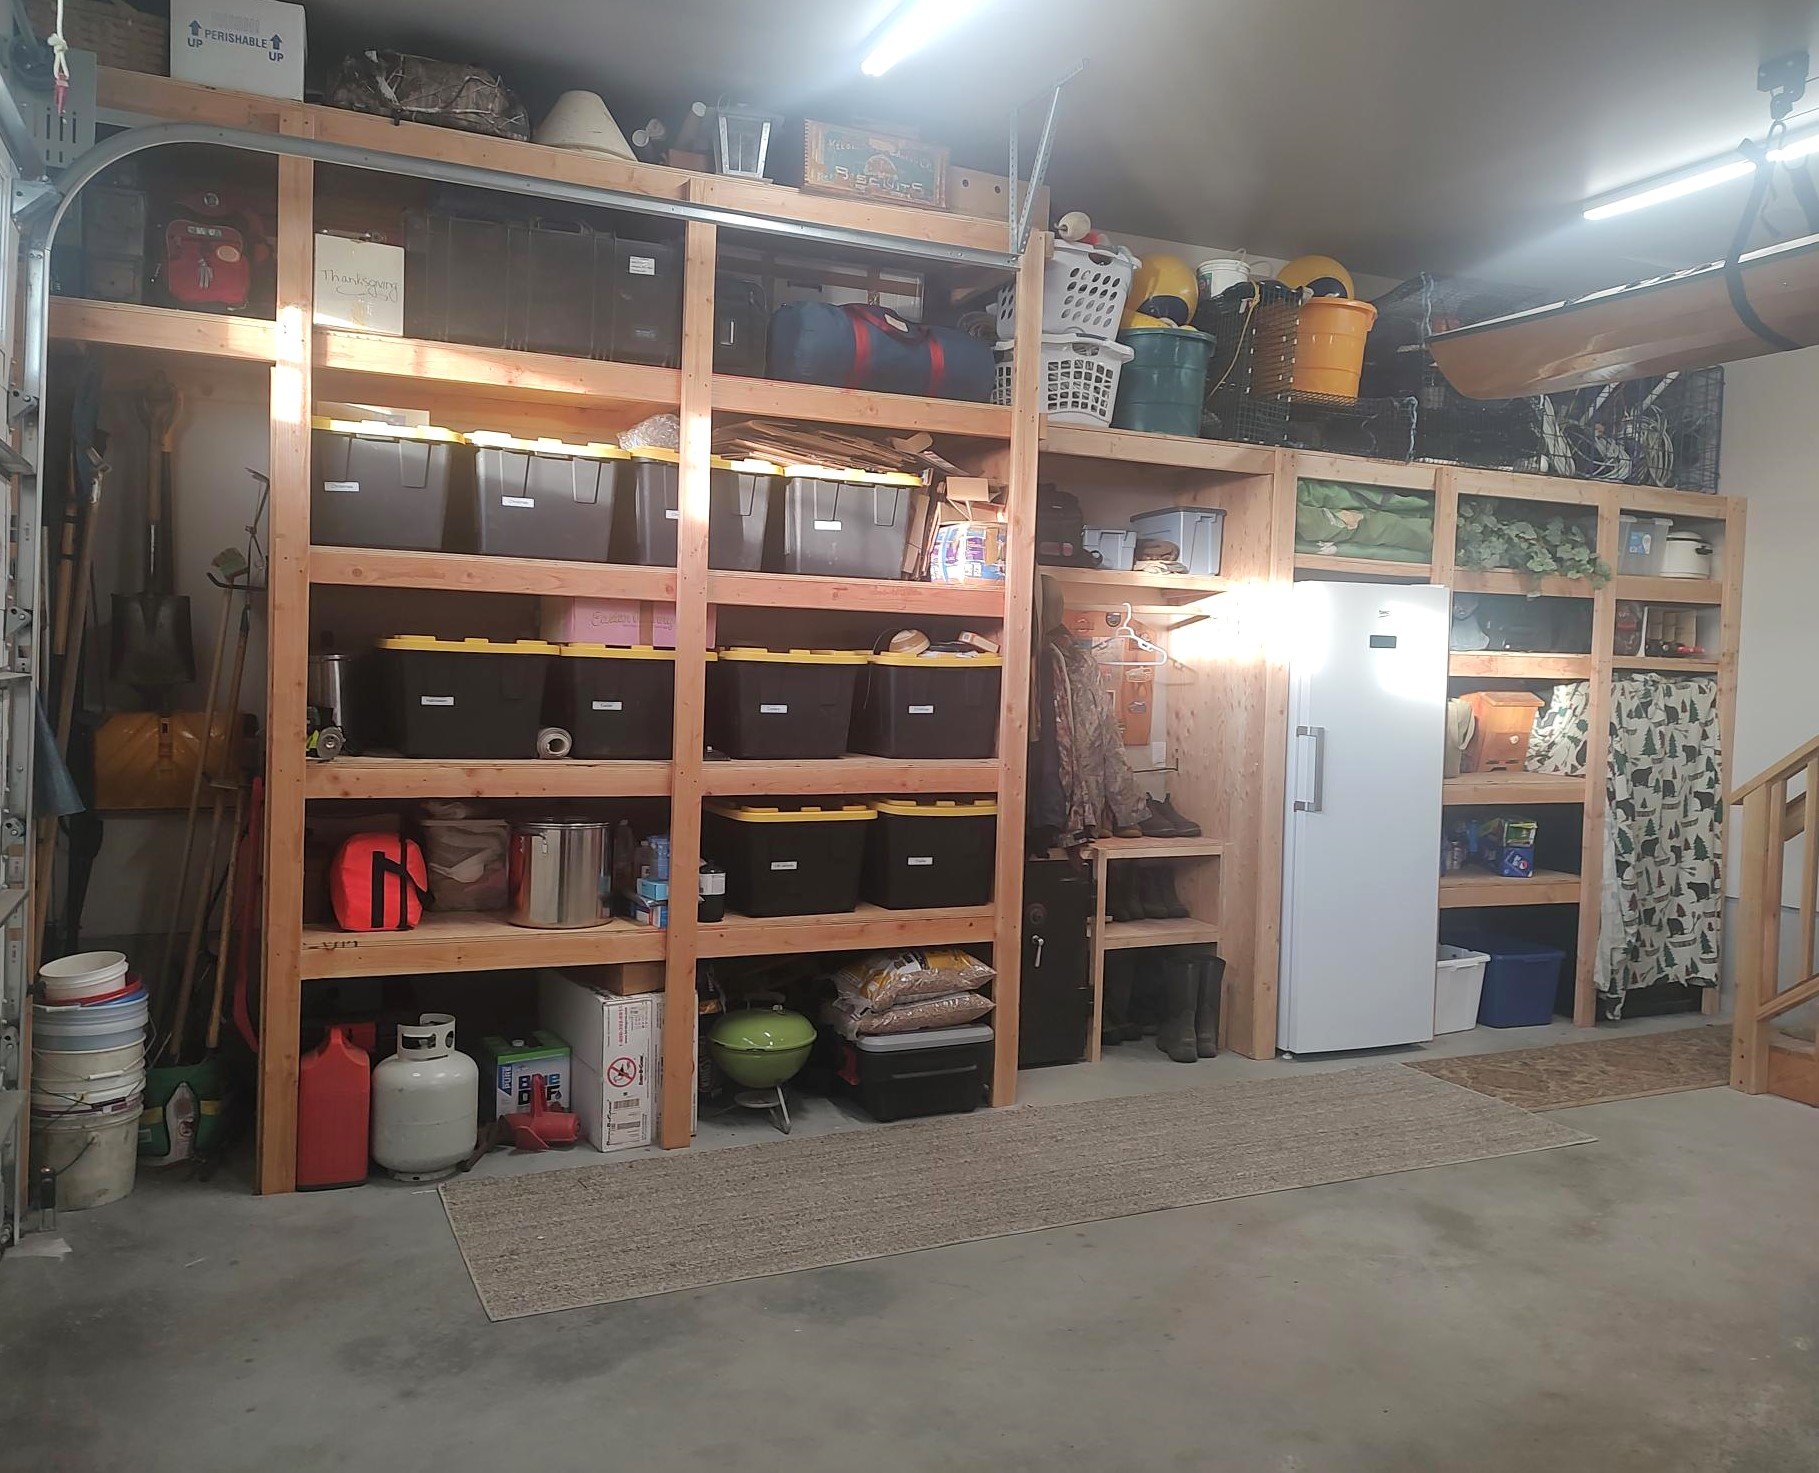
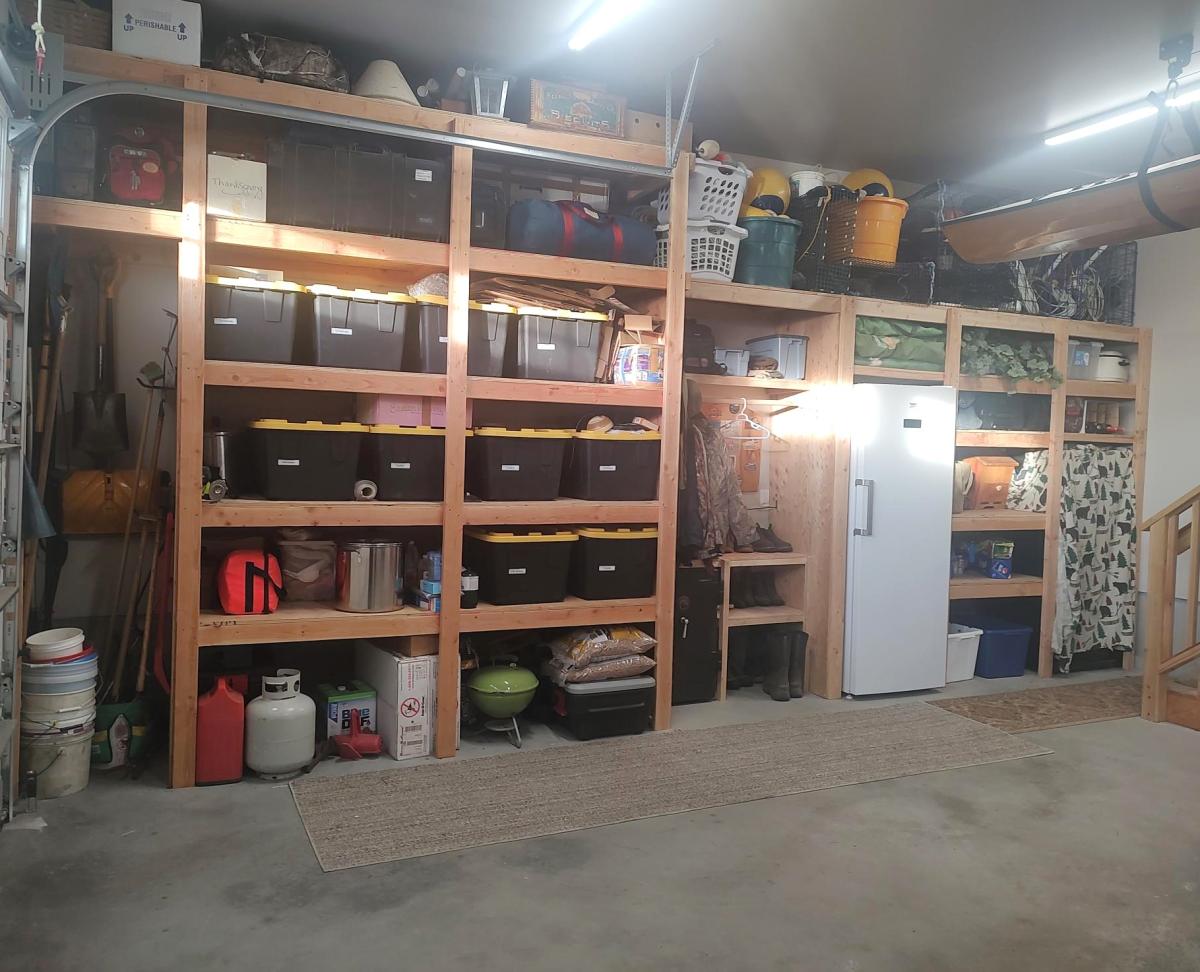
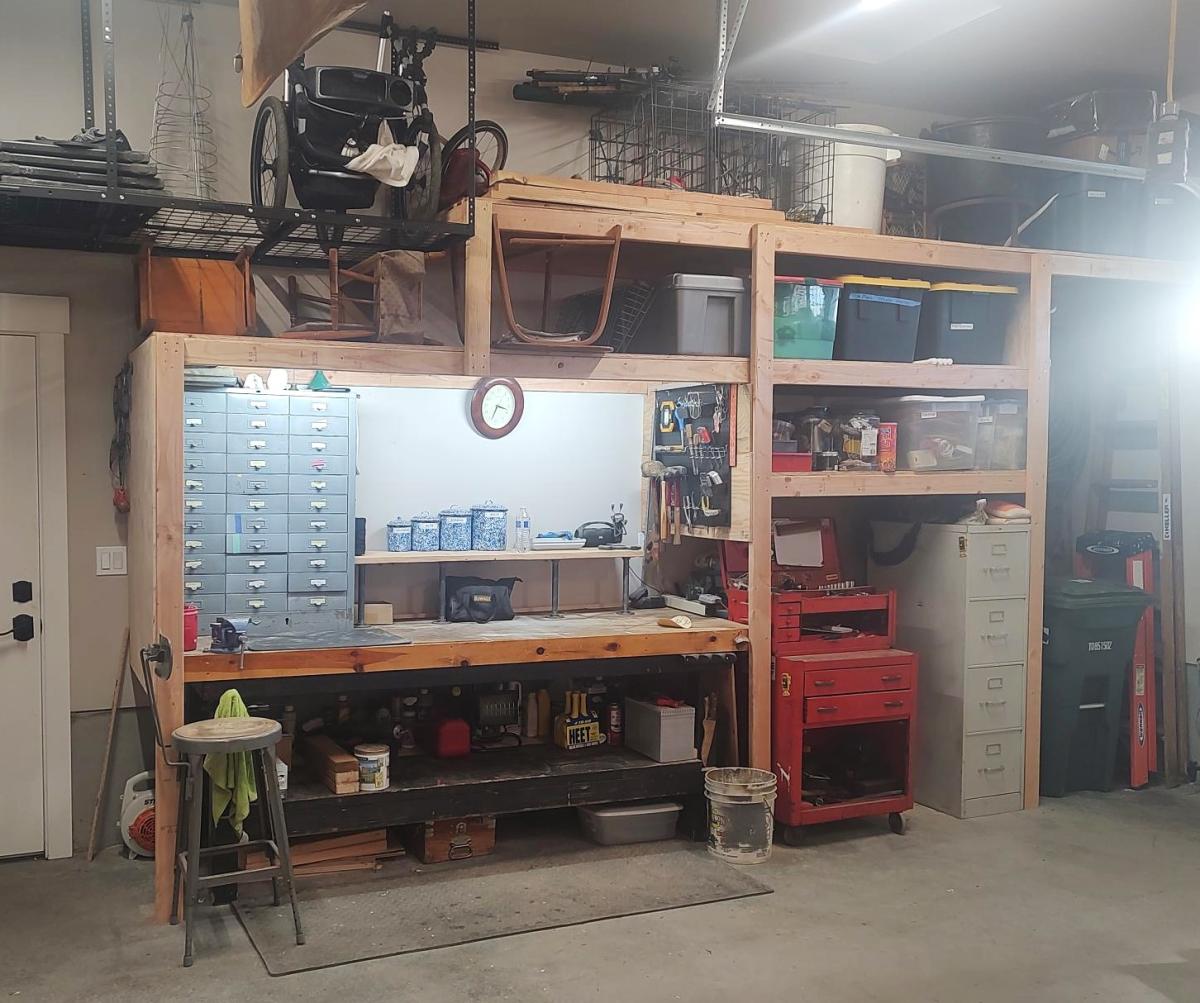
Custom Garage Shelves

Submitted by Anonymous (not verified) on Tue, 01/16/2024 - 17:19

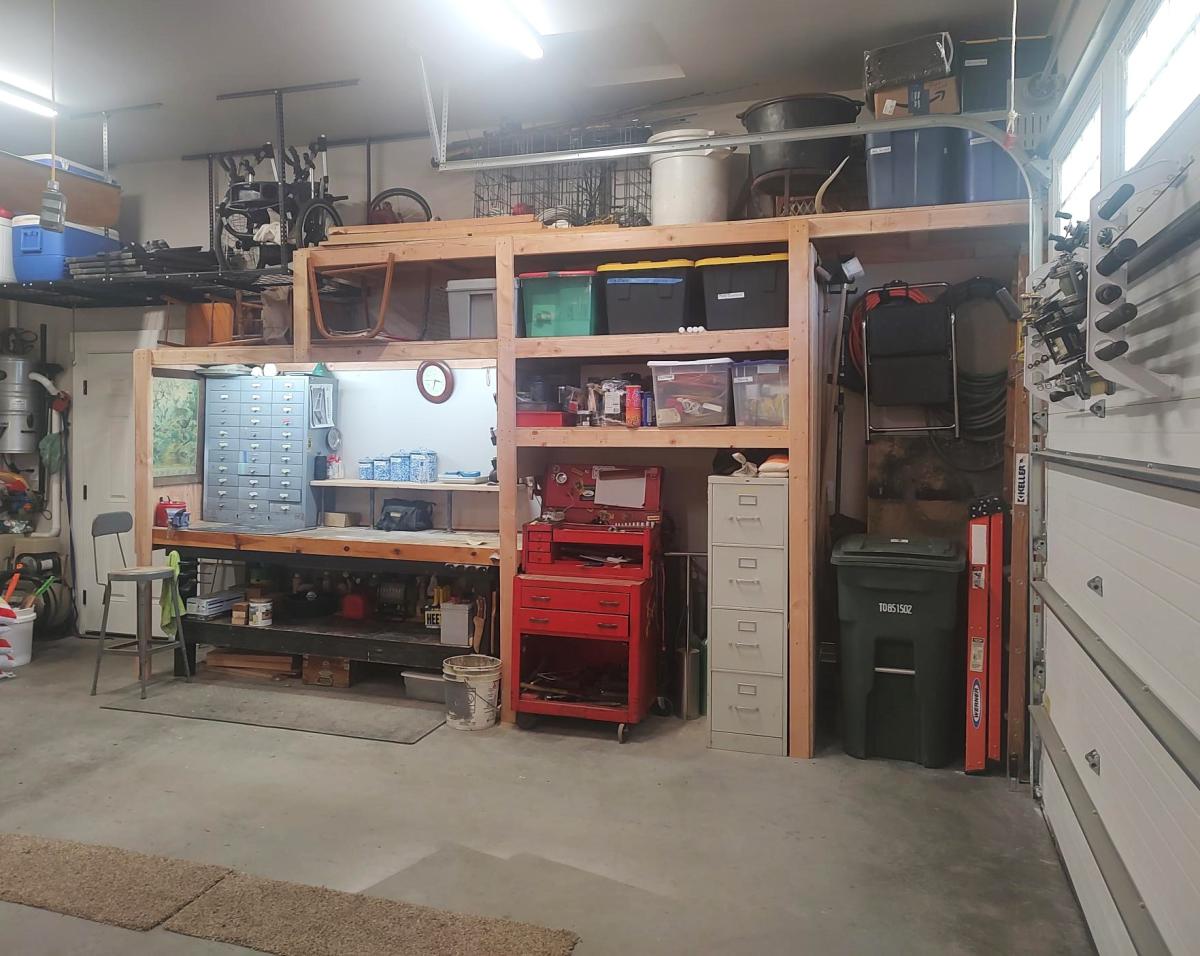
I just finished shelves on both sides of my garage using your video.  I built a coat rack and boot rack.  I also made space for tall items like tools and ladders near the garage door.  I had to also build in a gun safe, freezer and my work bench.  Everything came together and now I have everything in bins on shelves. 

Gary Hoffman

Our New Patio Table

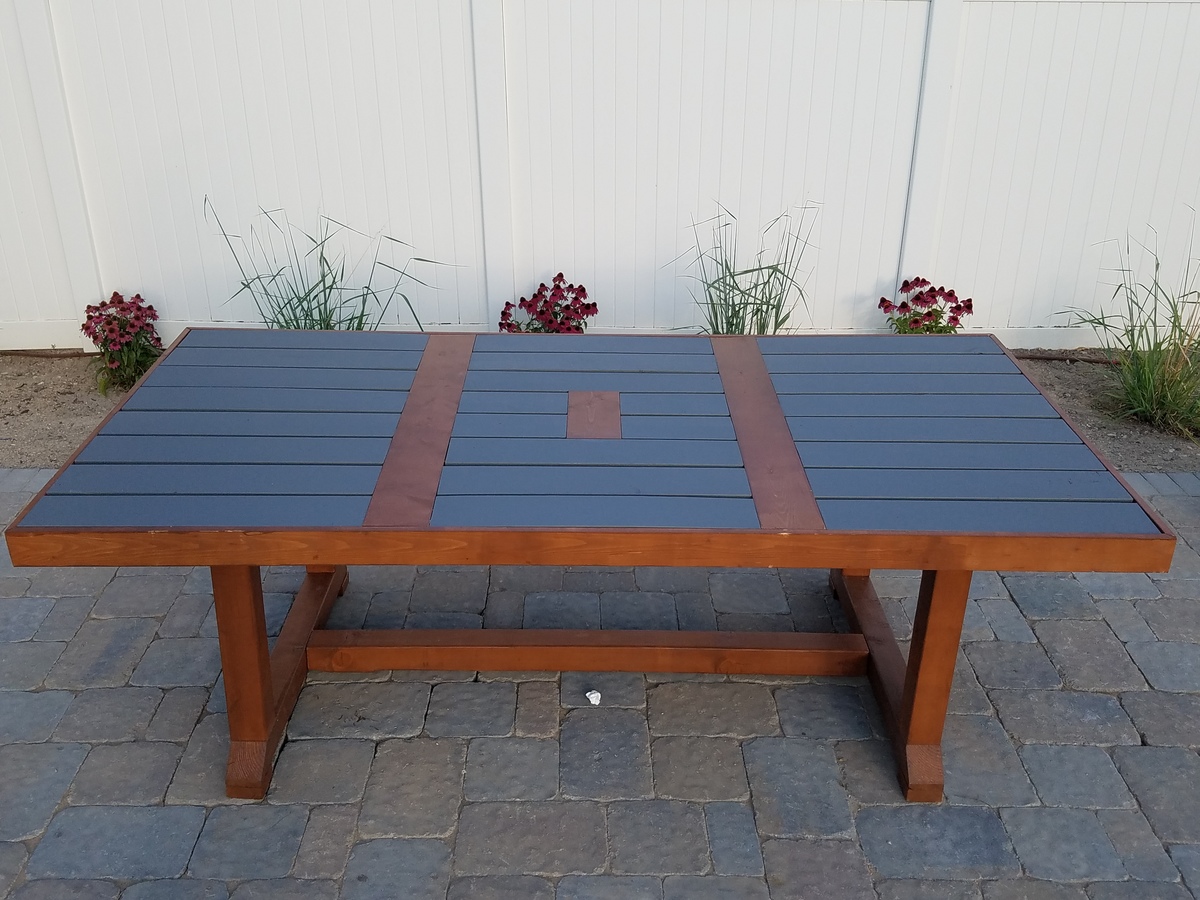
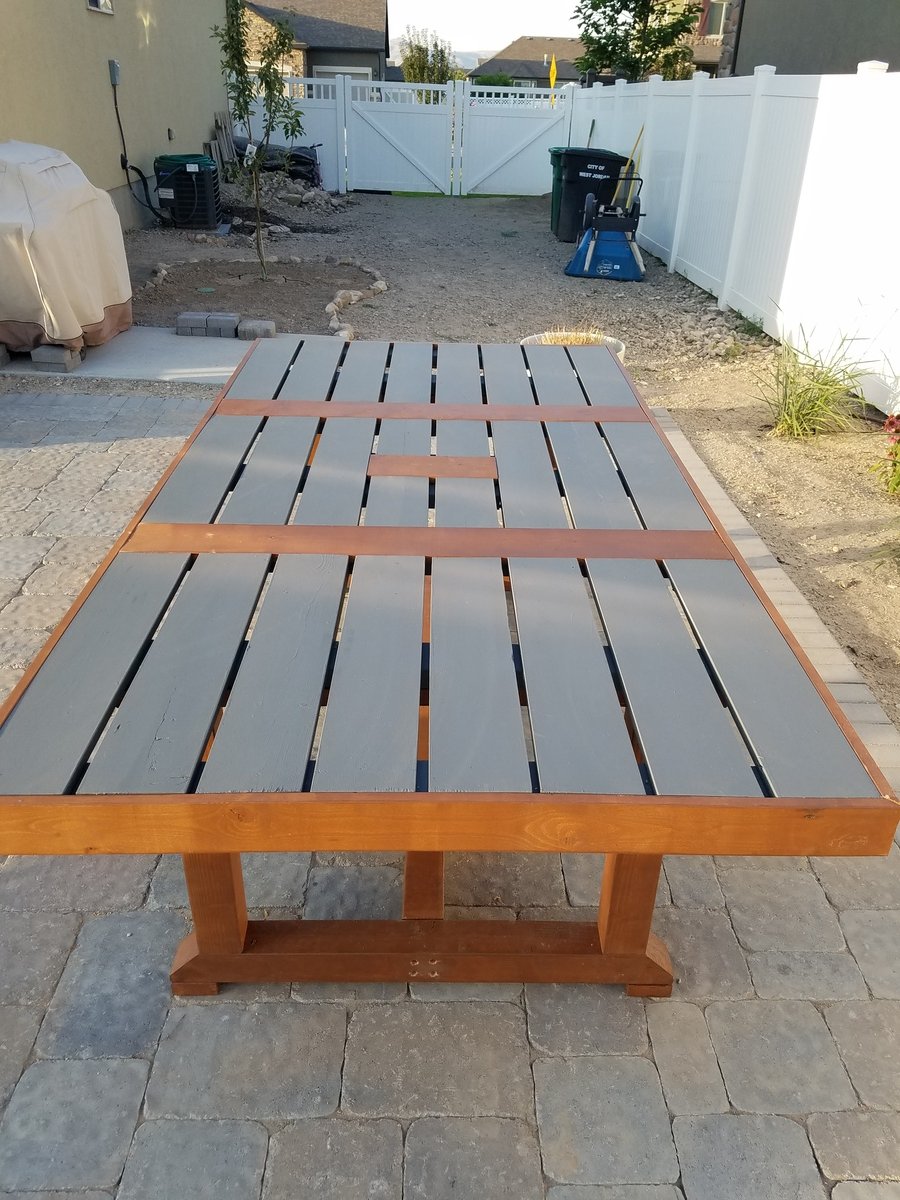
This took new novice DIYers about 25 hrs. Also this table is really heavy when complete so build it where you want it to sit or build in it one place and right before you are about to finish move the 3 built peieces separely where you want it to sit and finish assymbling it. Also, when completed this is counter height. We are going to take ours apart abit and shave 6in or so off the legs to be normal table height.

Built from Plan(s)
Estimated Cost
About $175
Estimated Time Investment
Weekend Project (10-20 Hours)
Finish Used
Bear Solid and Semi- Transparent Stain
Recommended Skill Level
Beginner

Mobile Workbench with Drawers

Submitted by Anonymous (not verified) on Fri, 03/22/2024 - 08:08

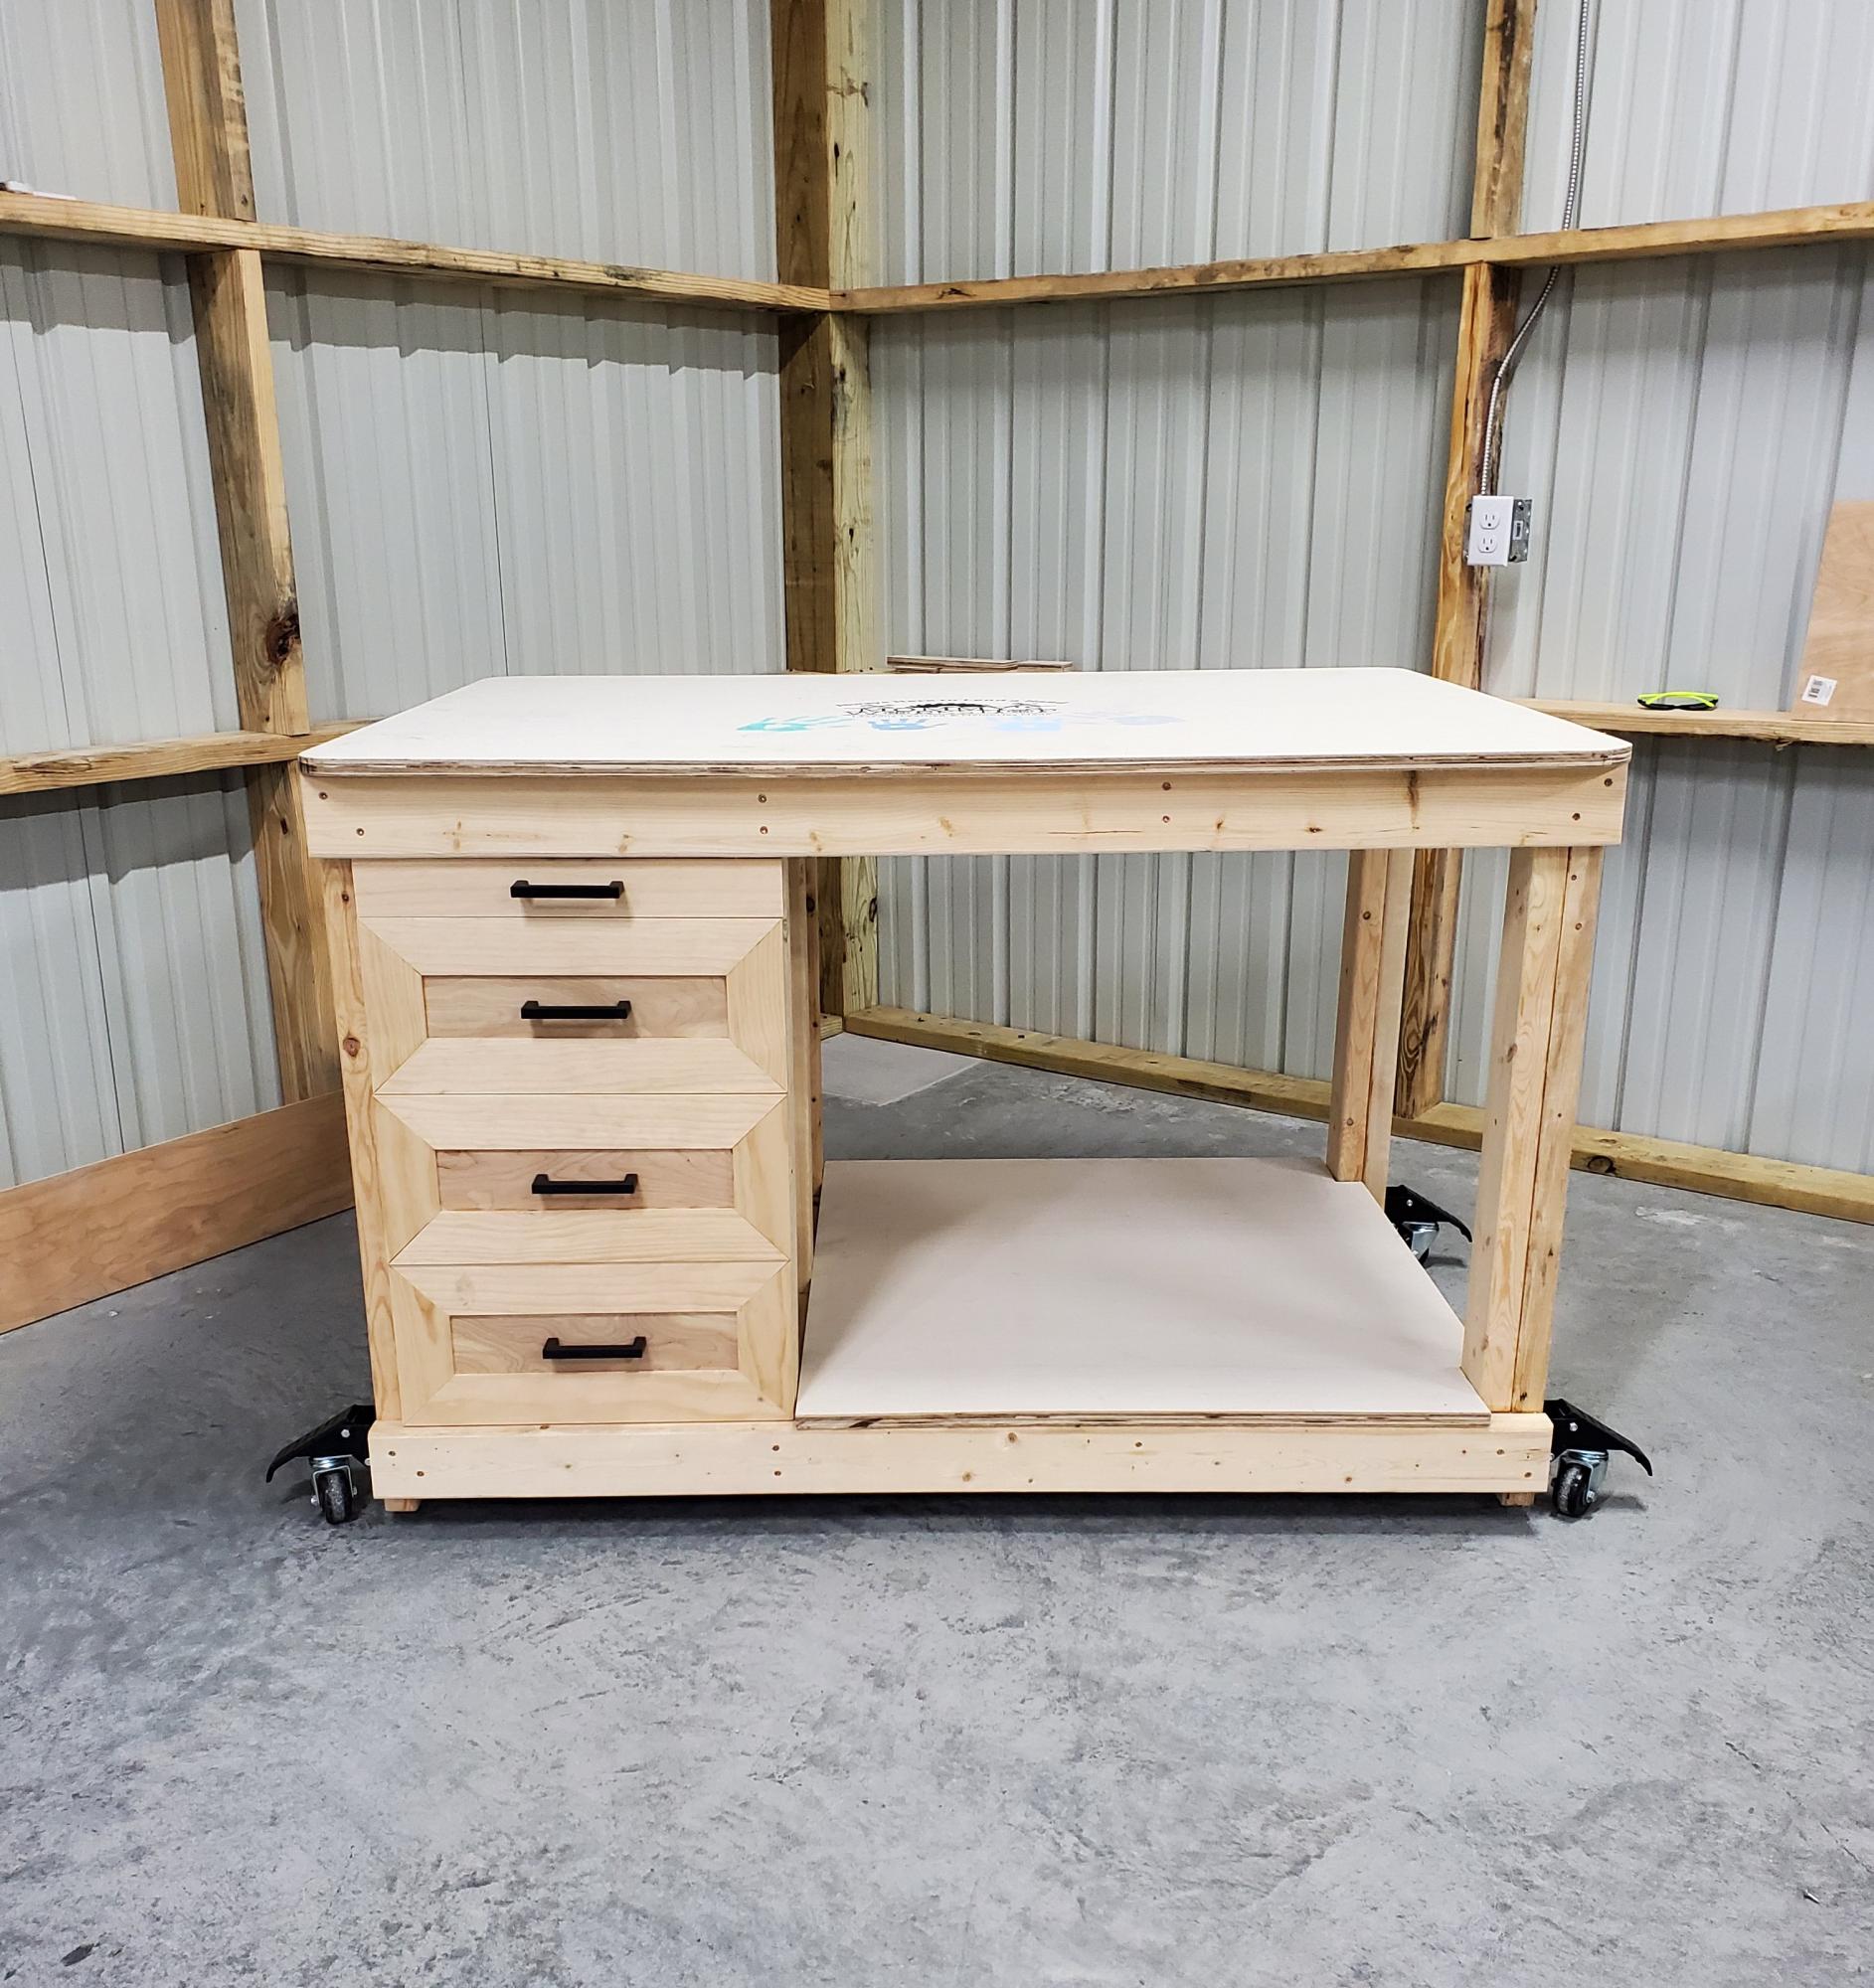
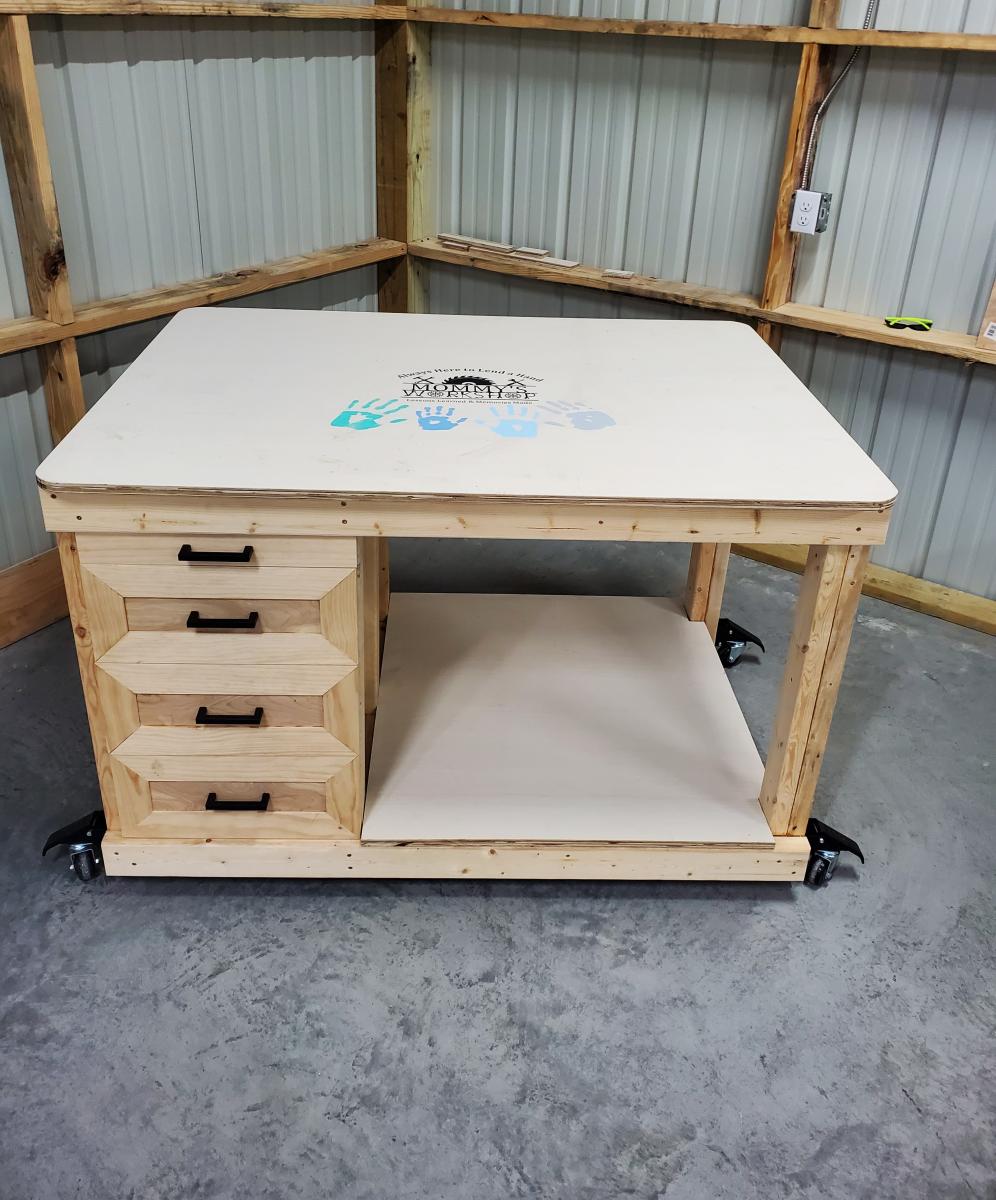
I recently had a workshop built and I have been trying to now work on the furniture for it. My first project was this workbench inspired by the plans "garage workshop workbench". I added drawers on each side and will probably end up adding a shelf in the open area as well after letting my kids finish decorating the top. It's already a nice addition and I may build a smaller version for my garage. I added casters and have the option to roll the table around or have it stationary.

Tonie

Back