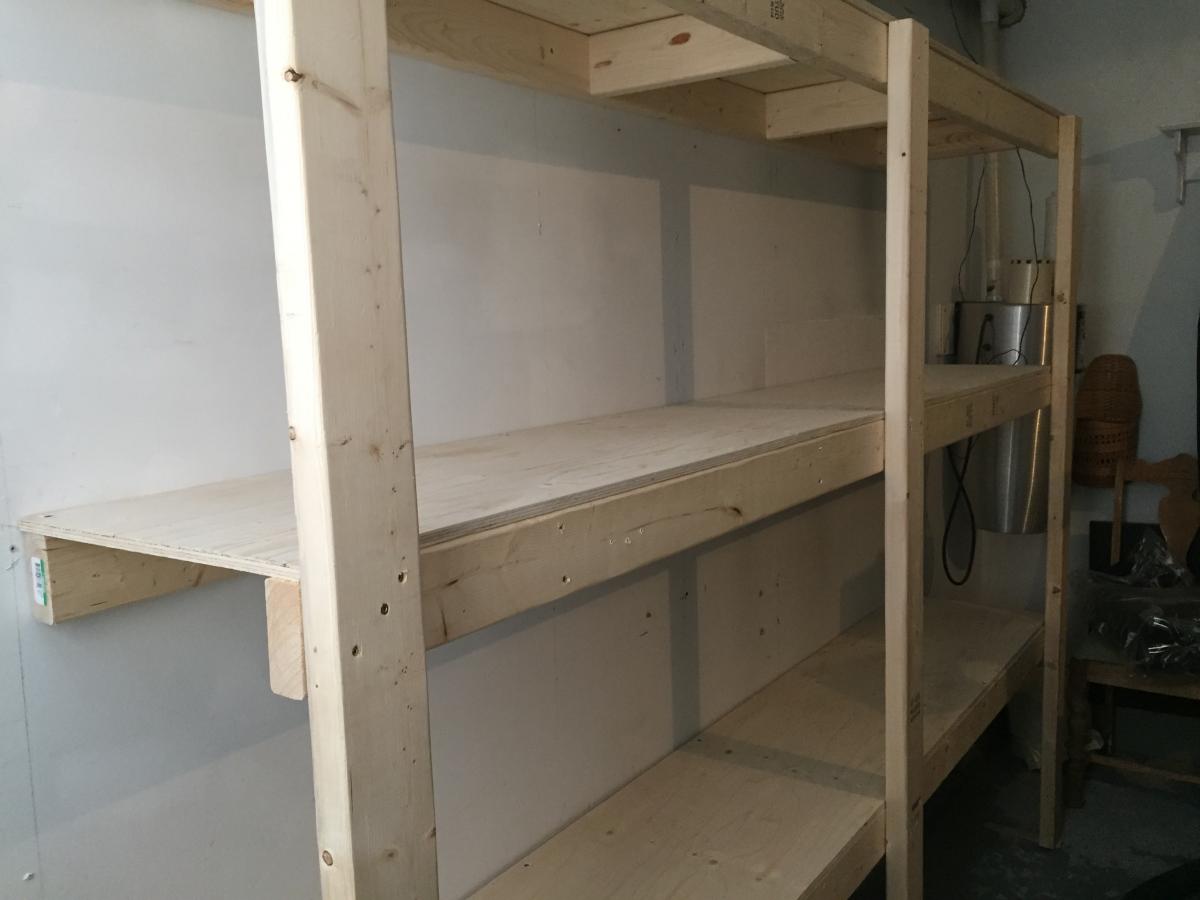
Garage shelving
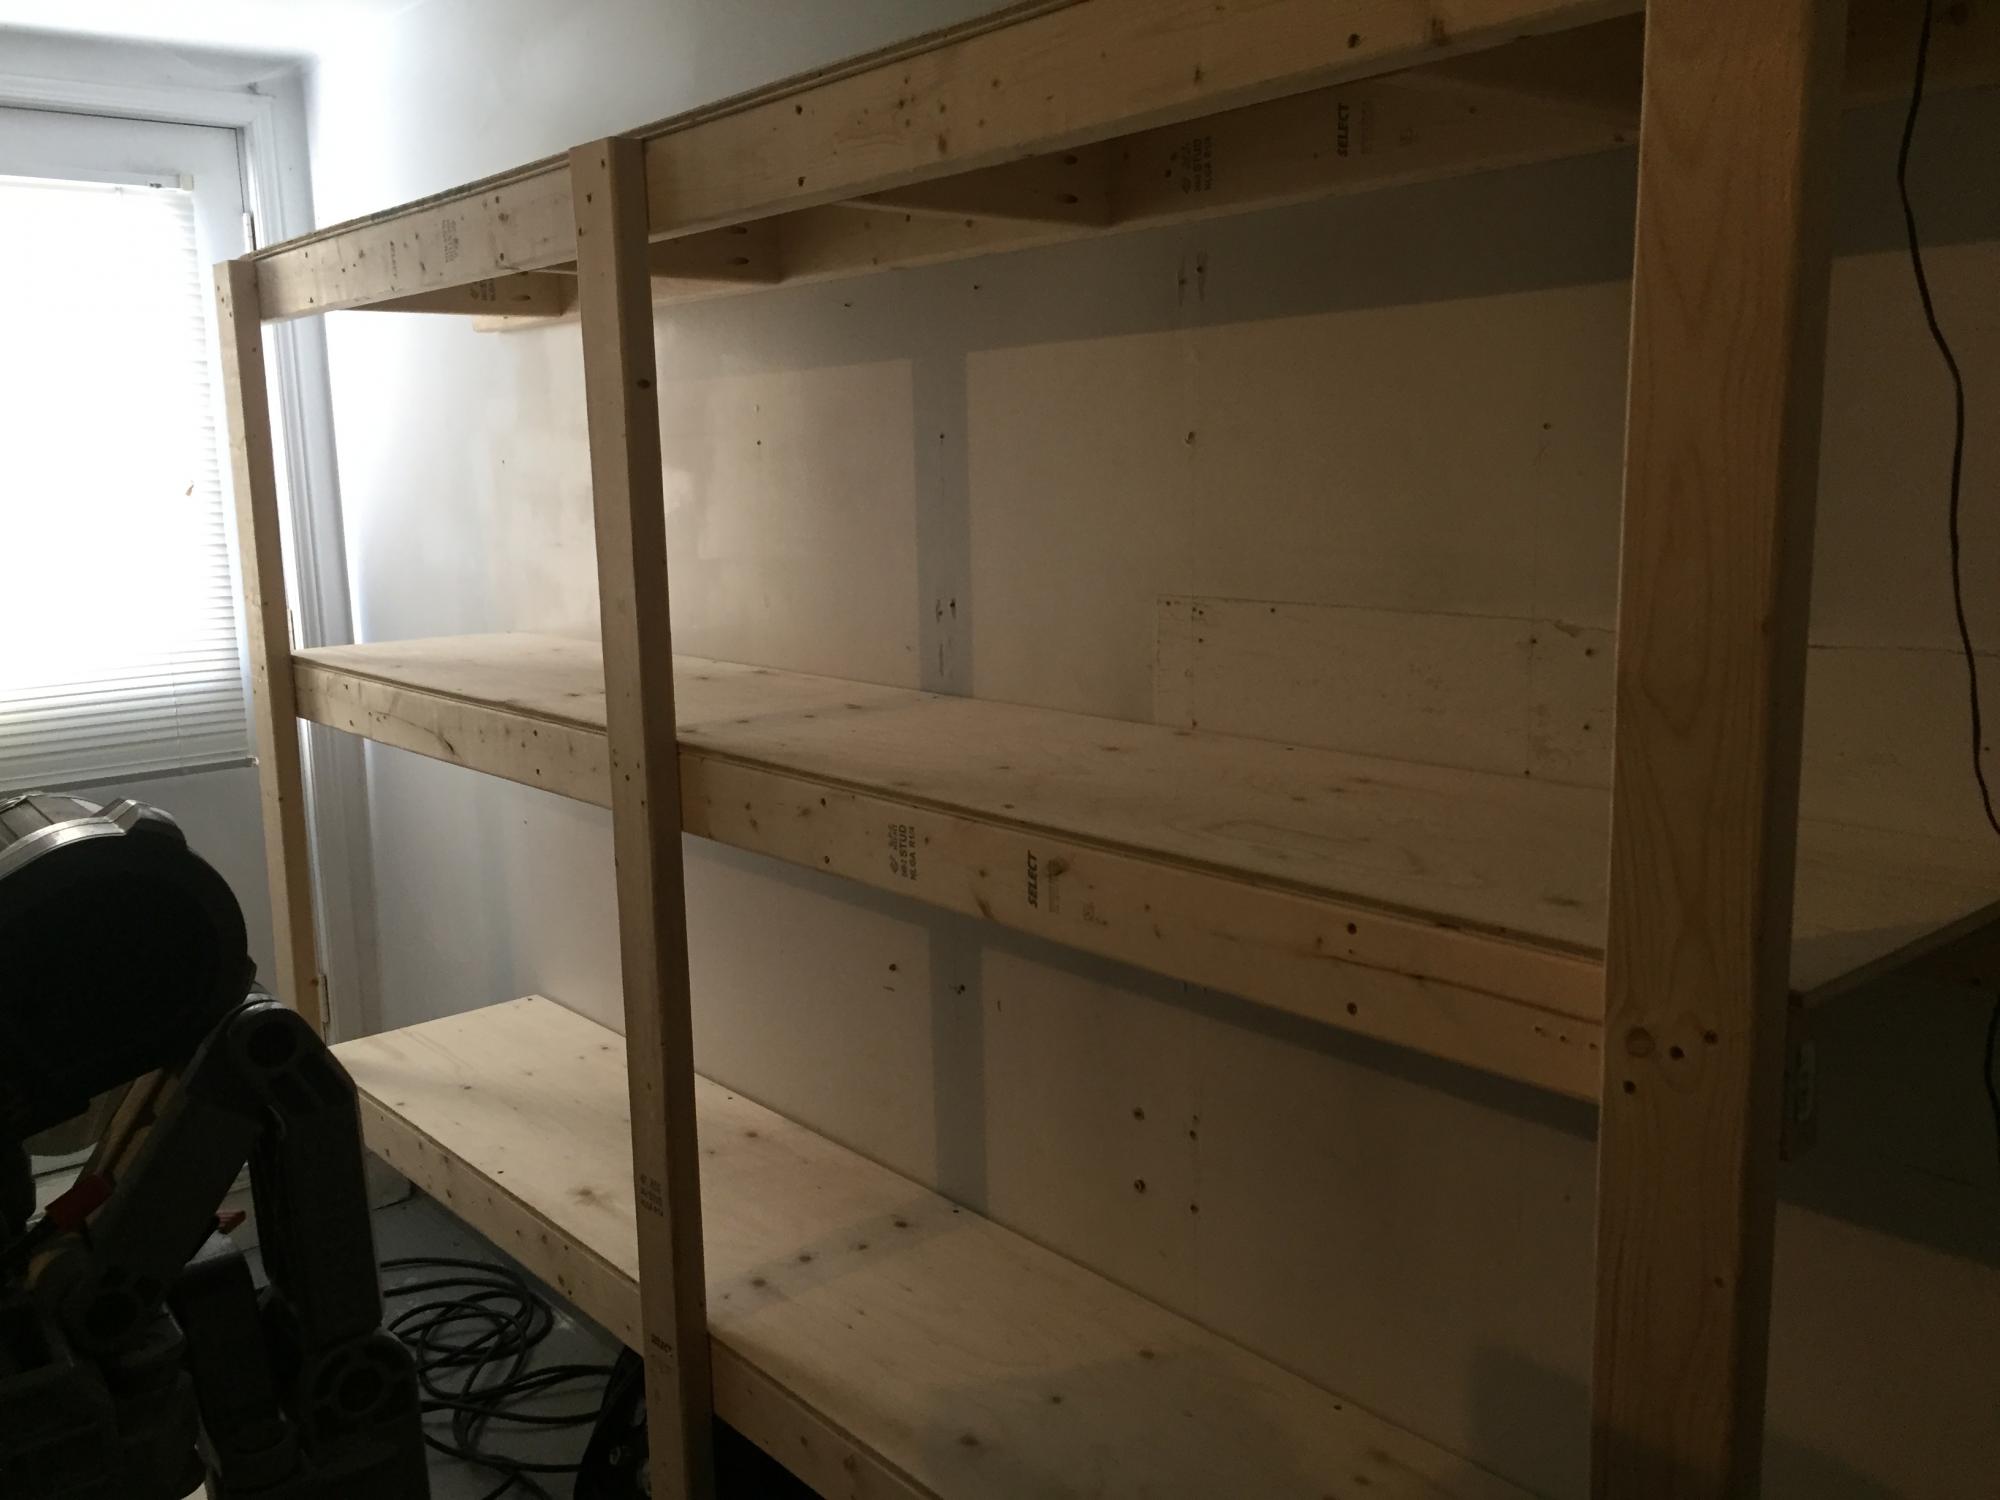
These shelving were great for our garage storage.
Built from Plan(s)
Finish Used
None
Recommended Skill Level
Beginner
These shelving were great for our garage storage.
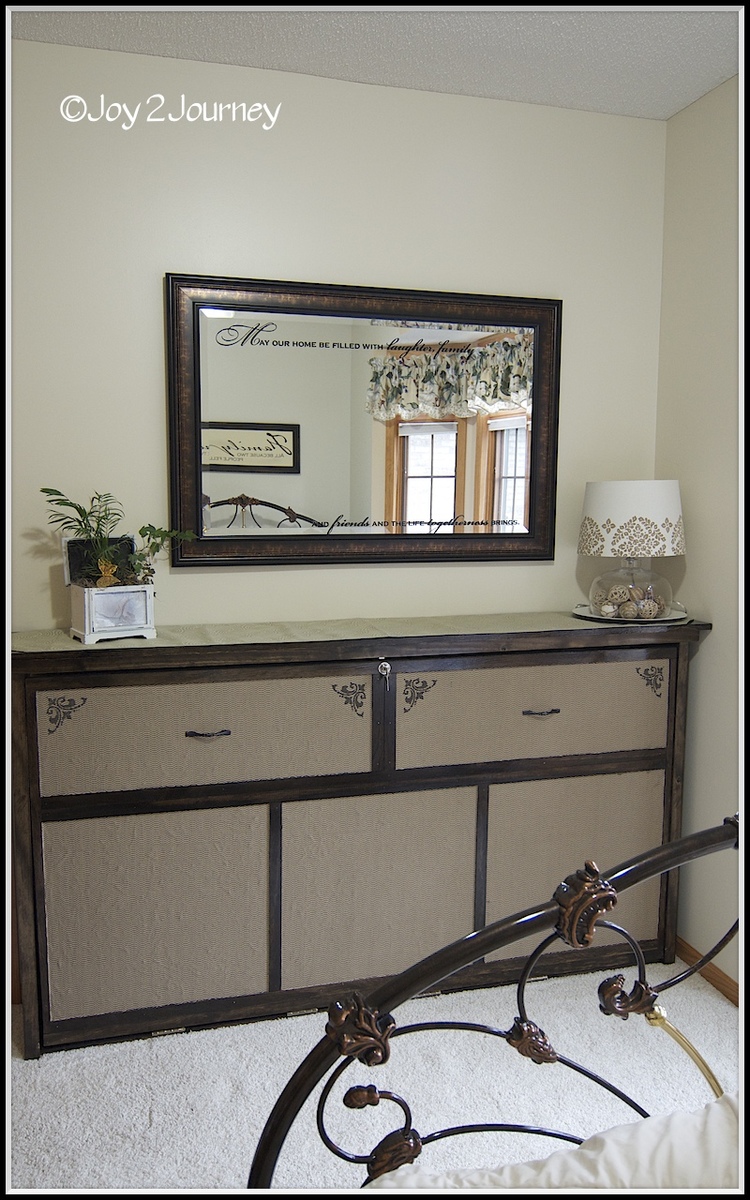
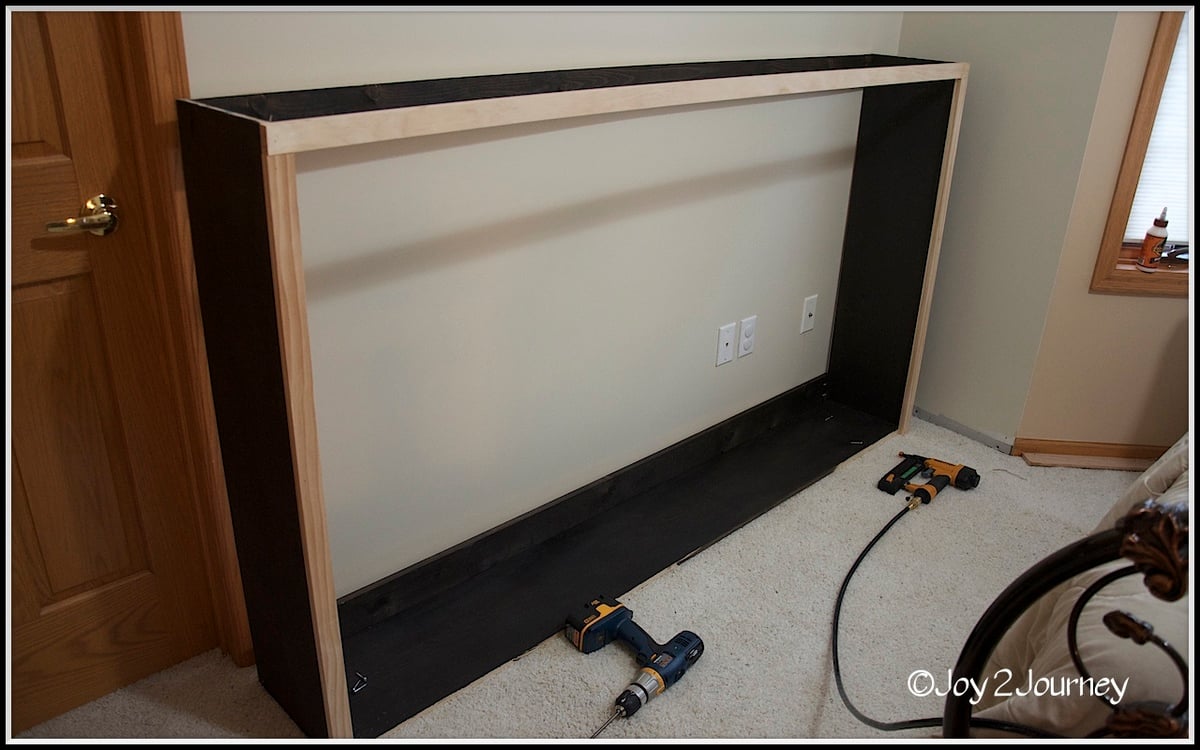
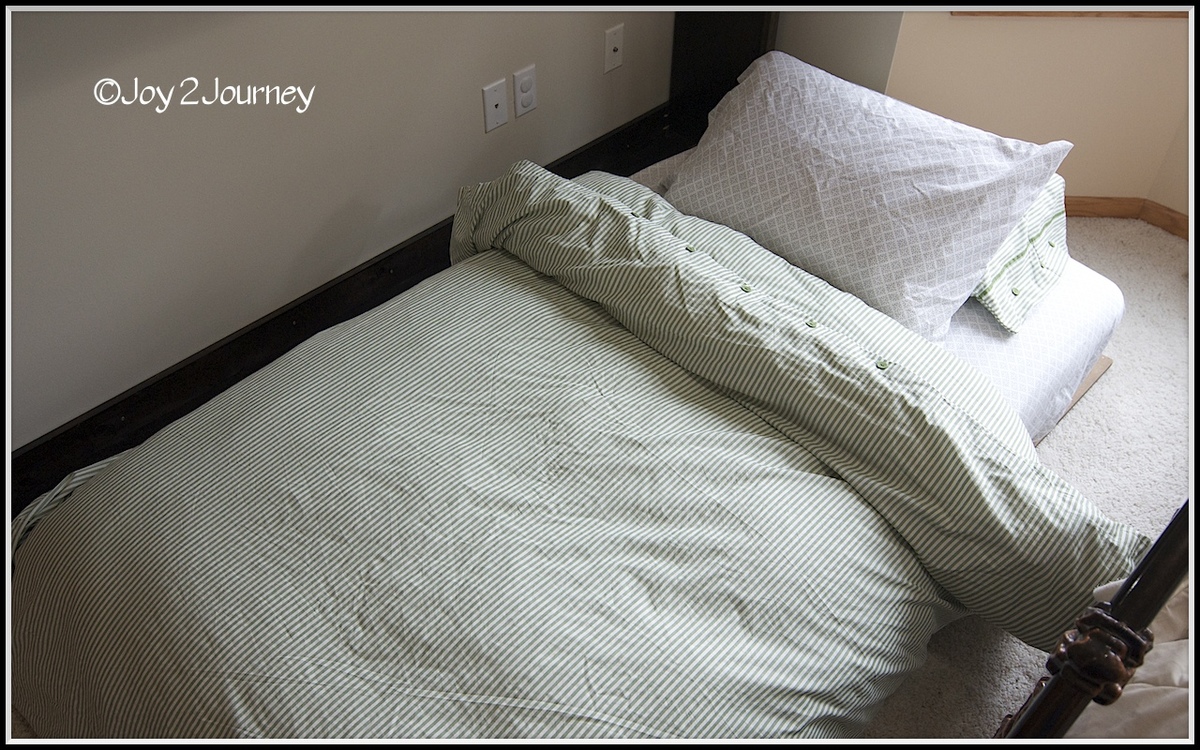
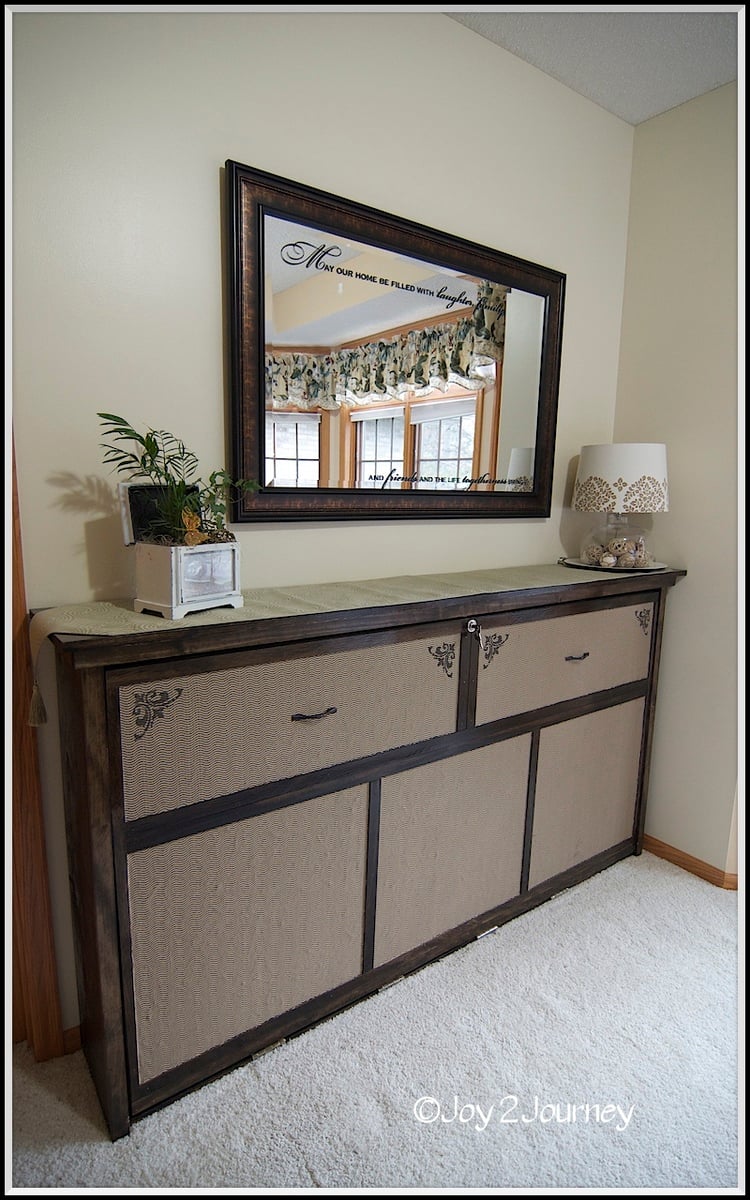
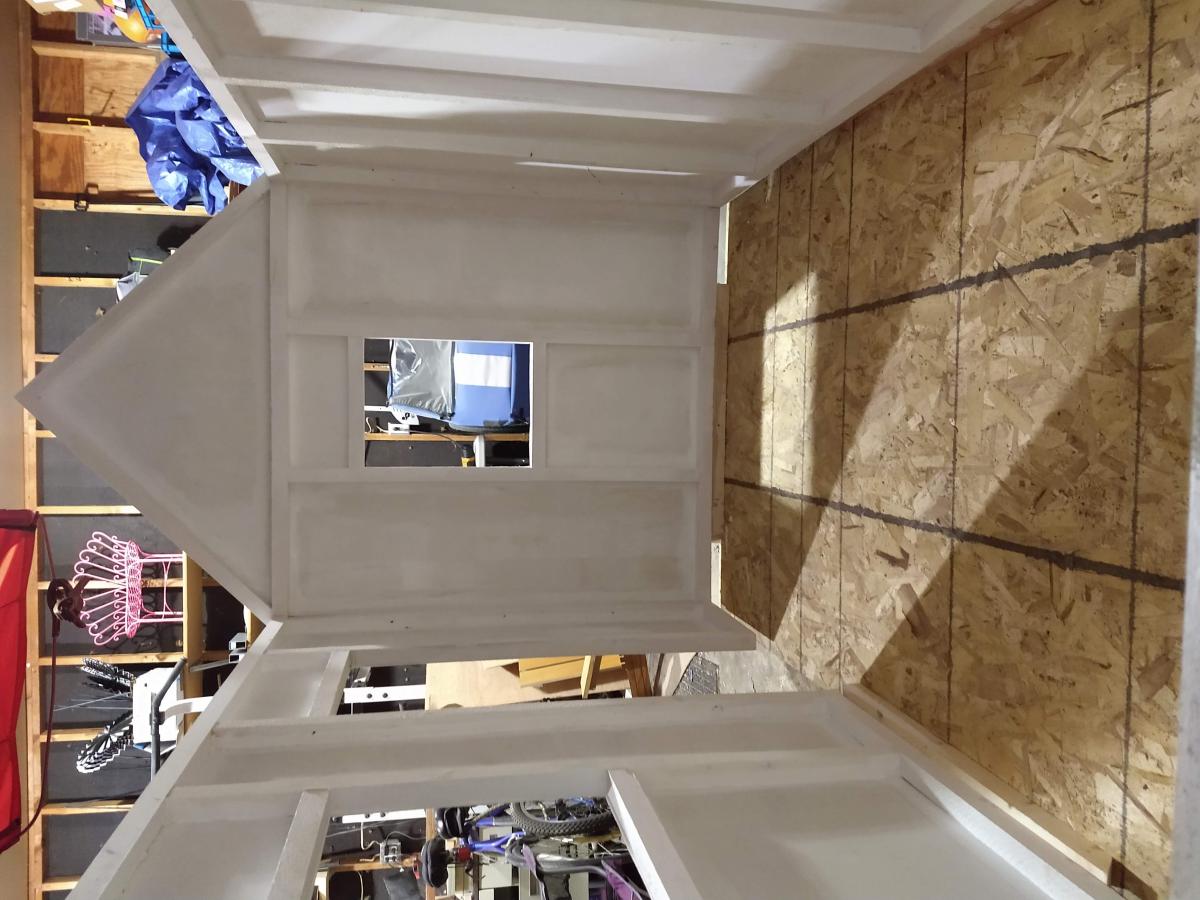
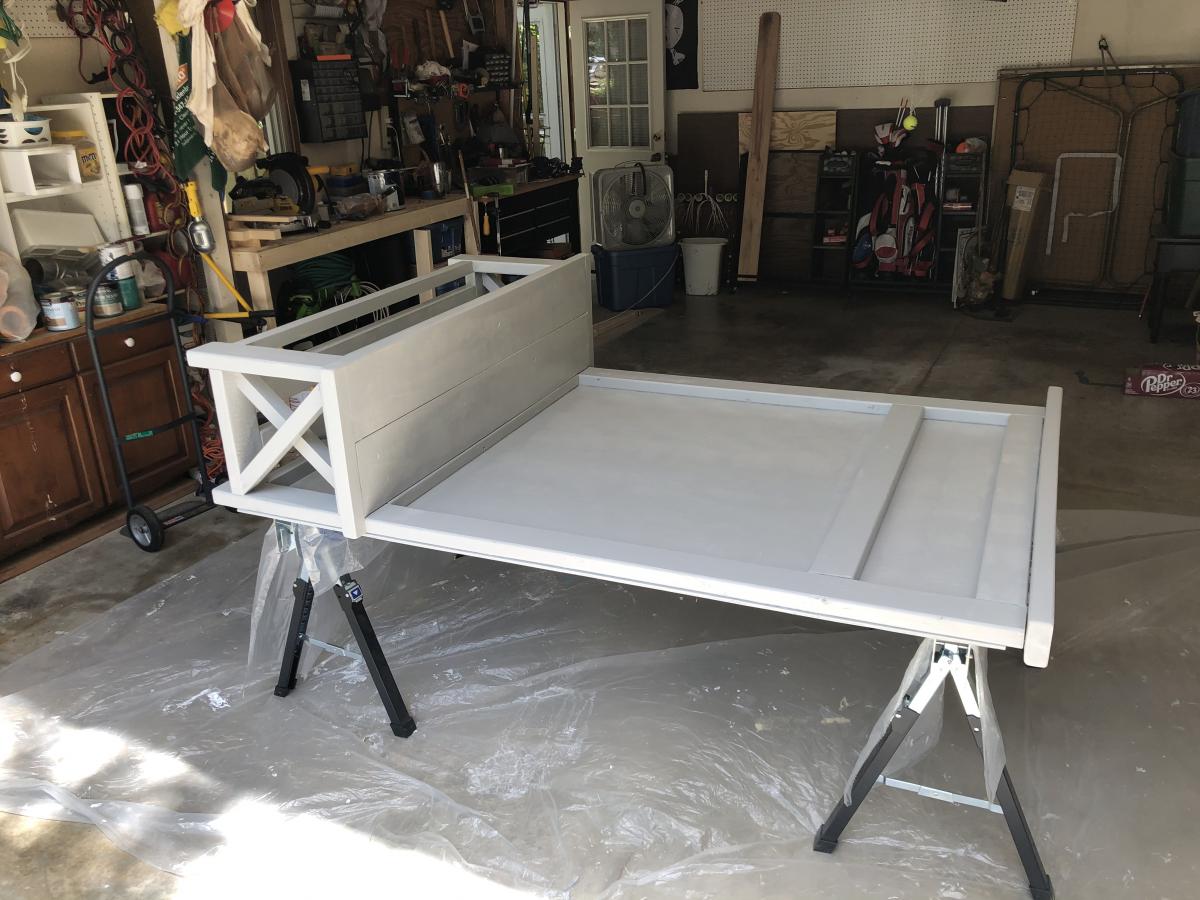
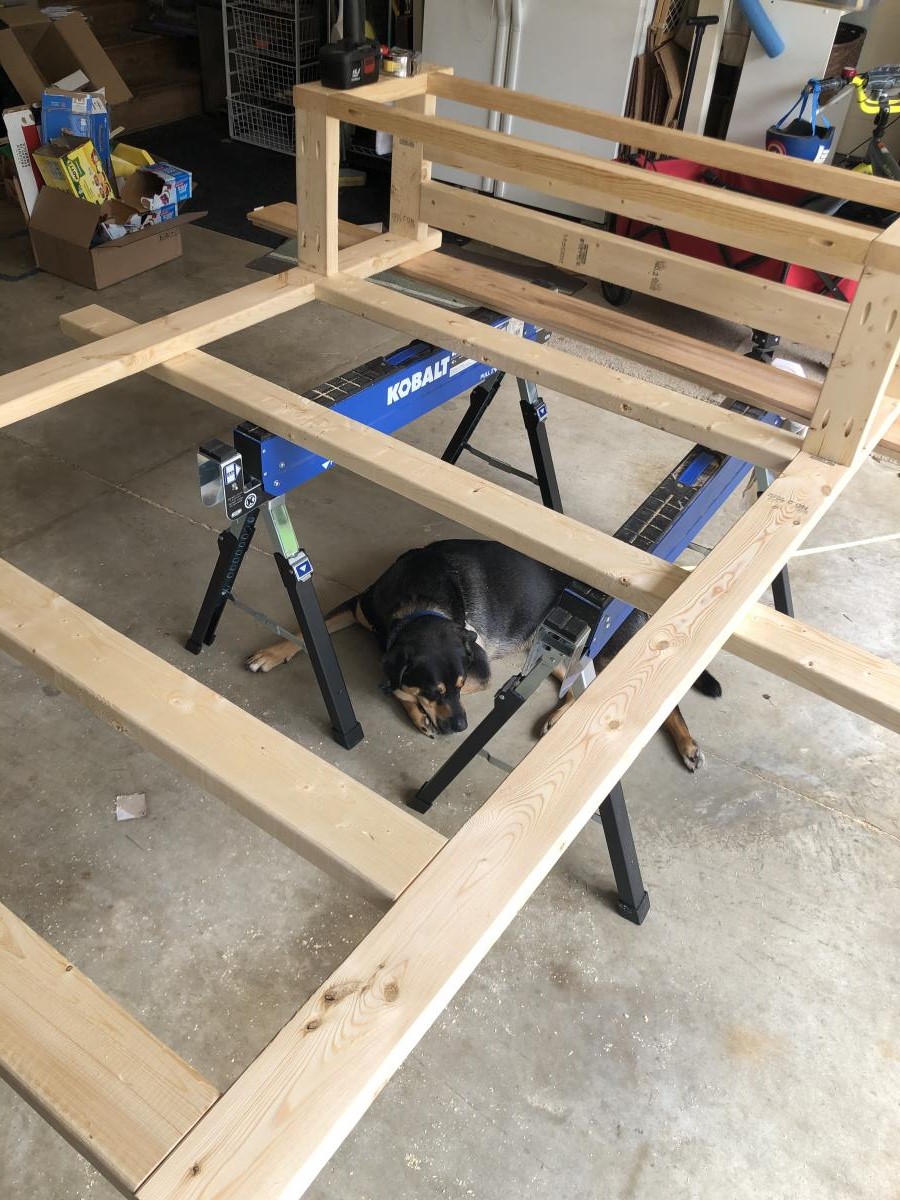
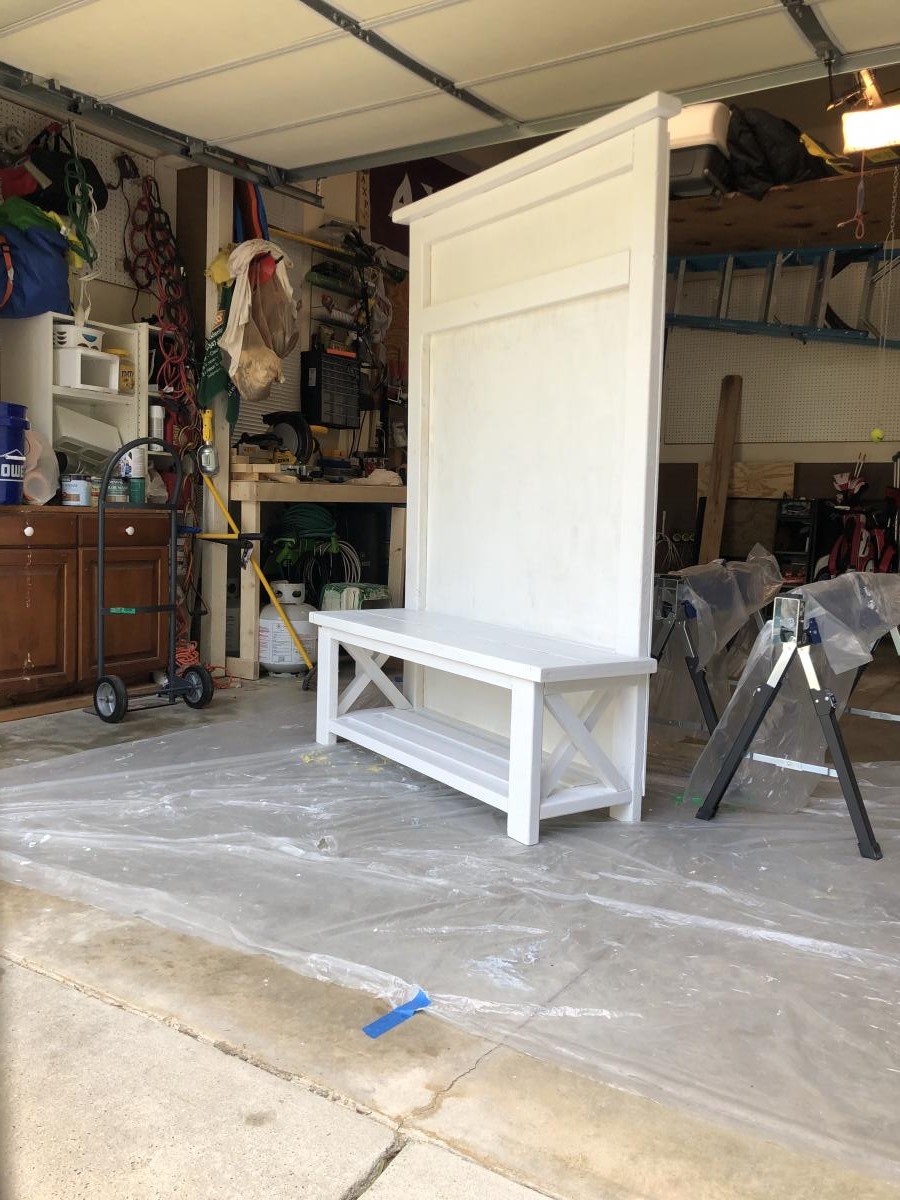
I used the Murphy Bed Plan that Ana had on her website. I modified it so that it would look more like a dresser and would fit into the space that I have. It is perfect and I have used it myself just to see if it was comfy. It was!!! :)
This project took me longer to do as I had a creativity issue that you can read about here .. http://joy2journey.blogspot.com/2012/04/m-is-for-murphy-bed-its-finishe…


Sun, 04/15/2012 - 11:37
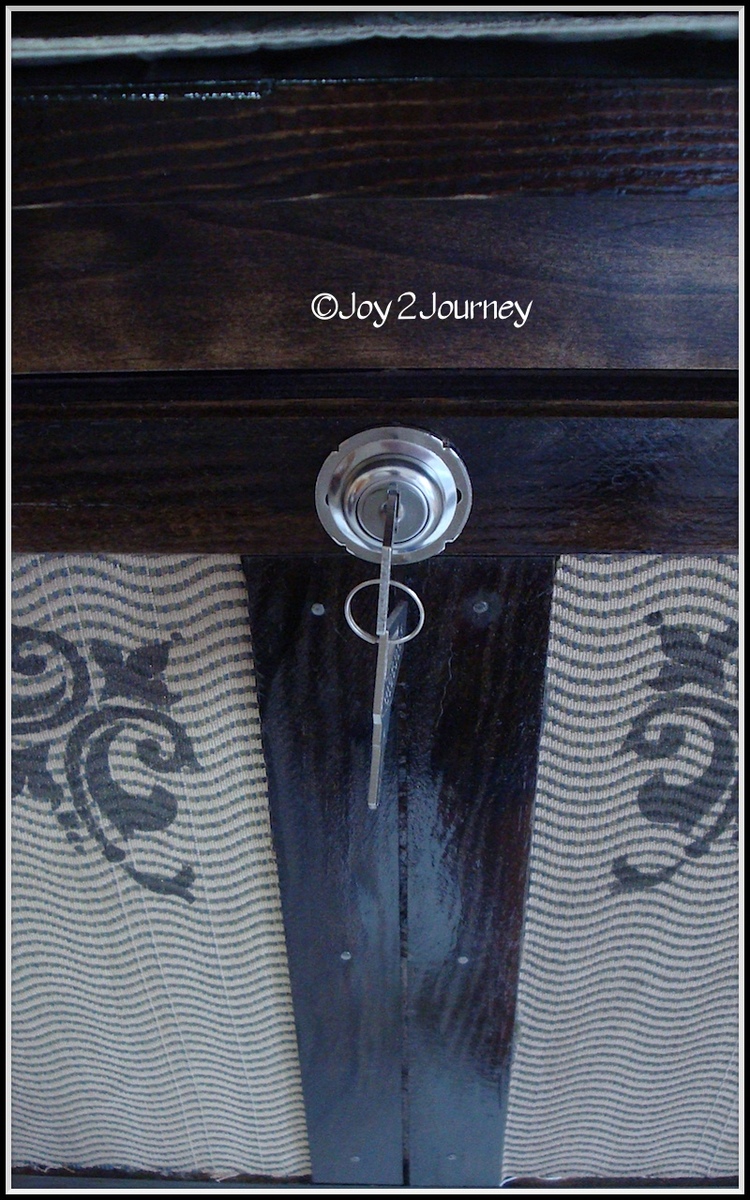
What an amazing job! Really looks just like a dresser. The lock closure is a great idea for keeping it securely closed. Beautiful finish, and the fabric and stencils are so creative!

In reply to Amazing job! by JoanneS
Sun, 04/15/2012 - 11:54
I was afraid little hands would pull it open ... hence the idea of a lock. Now I just have to spray paint it to have it blend in :)
bj
Fri, 12/14/2012 - 03:36
Things derived in this material will surely have some impact on the process of making of a classical overview. You should bookmark this page and http://allfreepapers.blogspot.com for the future. The question about it is a very important for the contemporary society. They have become proclaimed national standards recently.
Wed, 02/13/2013 - 11:42
Just curious did you buy the jig called for? If not what did you use instead? Camille
Wed, 01/08/2014 - 12:28
You did a fabulous job on your murphy bed. Good to know it can be made horizontally too. Thanks for the inspiration! =]
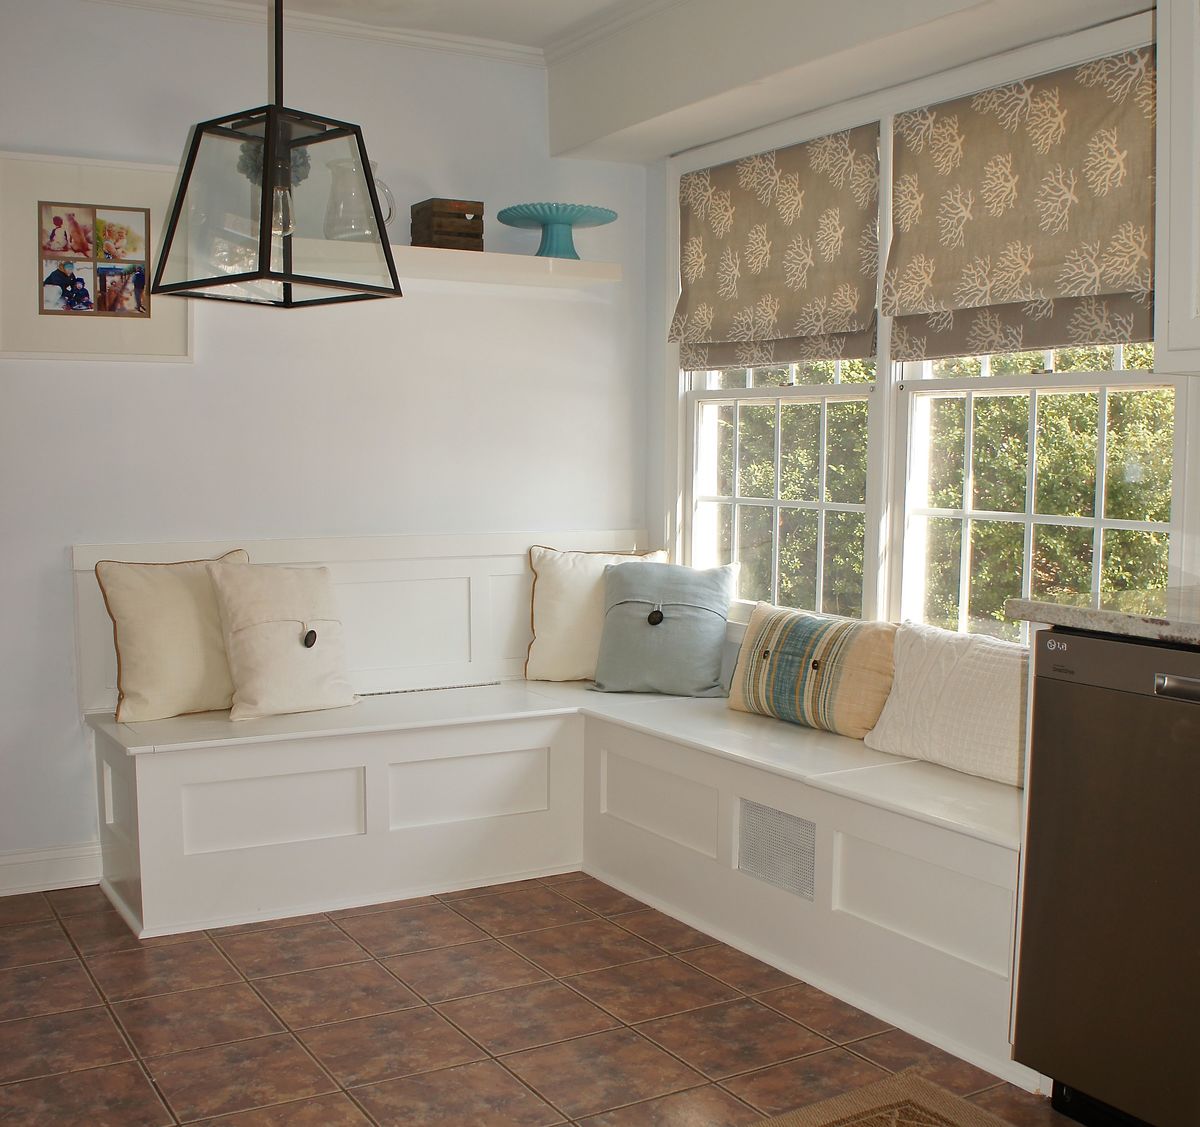
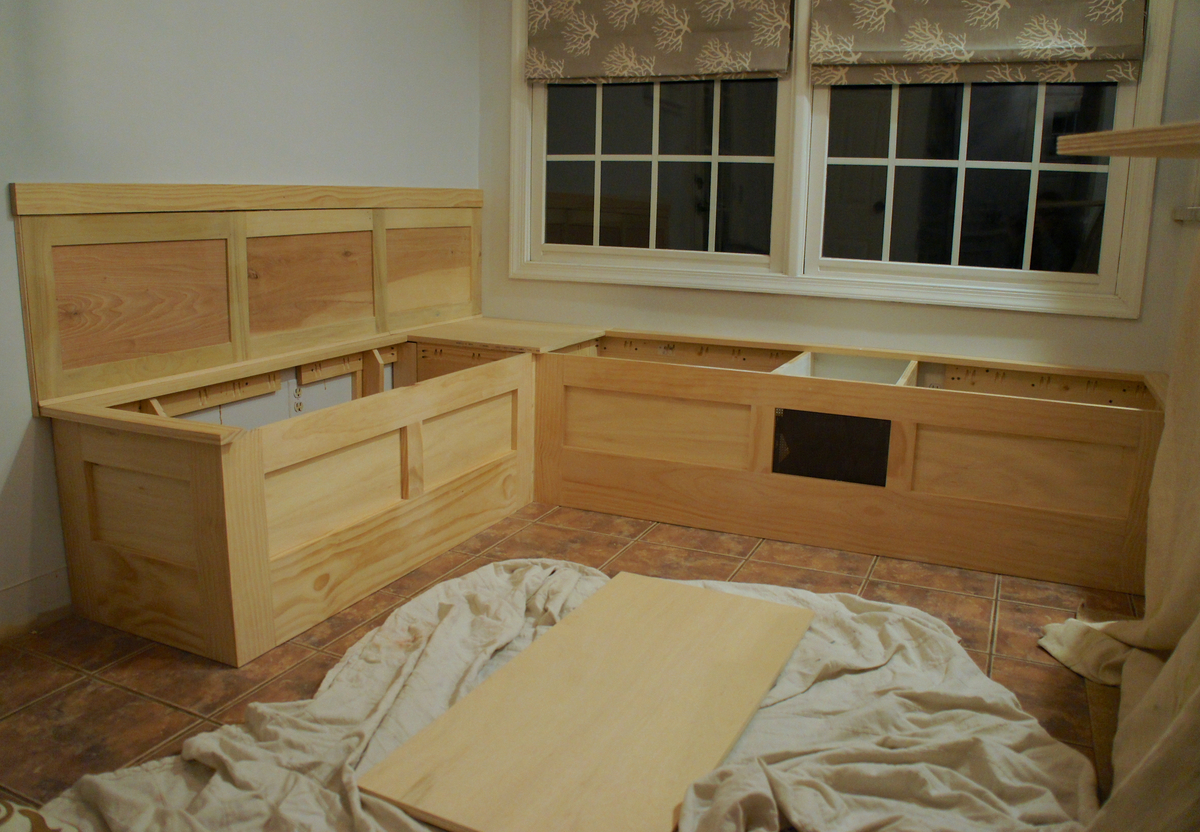
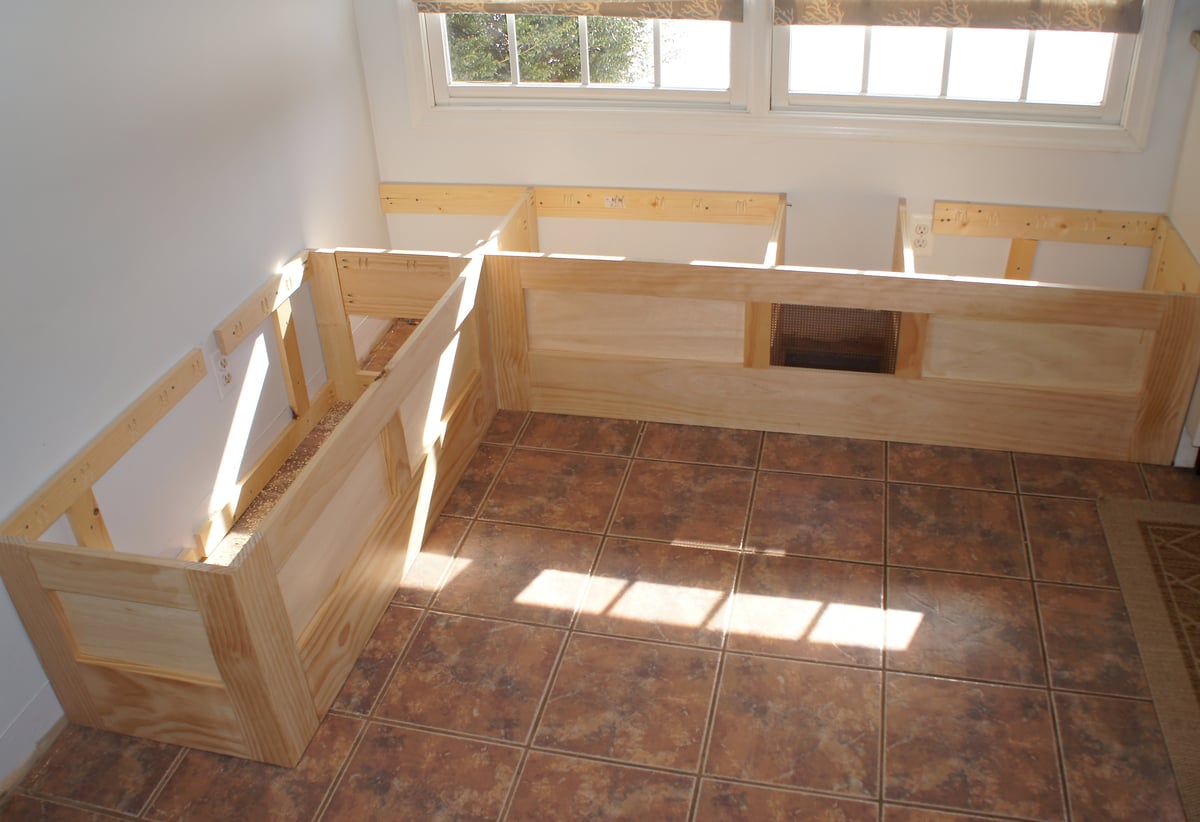
I wanted to make a built in storage bench for the breakfast nook in our eat-in kitchen, but wasn't entirely sure how to go about the process. After seeing Ana's "Mimi's Storage Bench" I thought the plan could be modified to fit our space, so I convinced my husband to give it a shot. We've done a fair amount of carpentry in our house, but this is the first piece of furniture that we have ever built. Thanks to Ana's plans and our new Kreg jig, it turned out better than I ever imagined. We absolutely love the new bench, where my toddler spends every morning eating his breakfast while staring out the window and giggling at the squirrels in our backyard.

Fri, 08/02/2019 - 21:25
What did you use in the area of the floor grate? I’m going to be doing a built in bench over a floor grate too. Thanks!
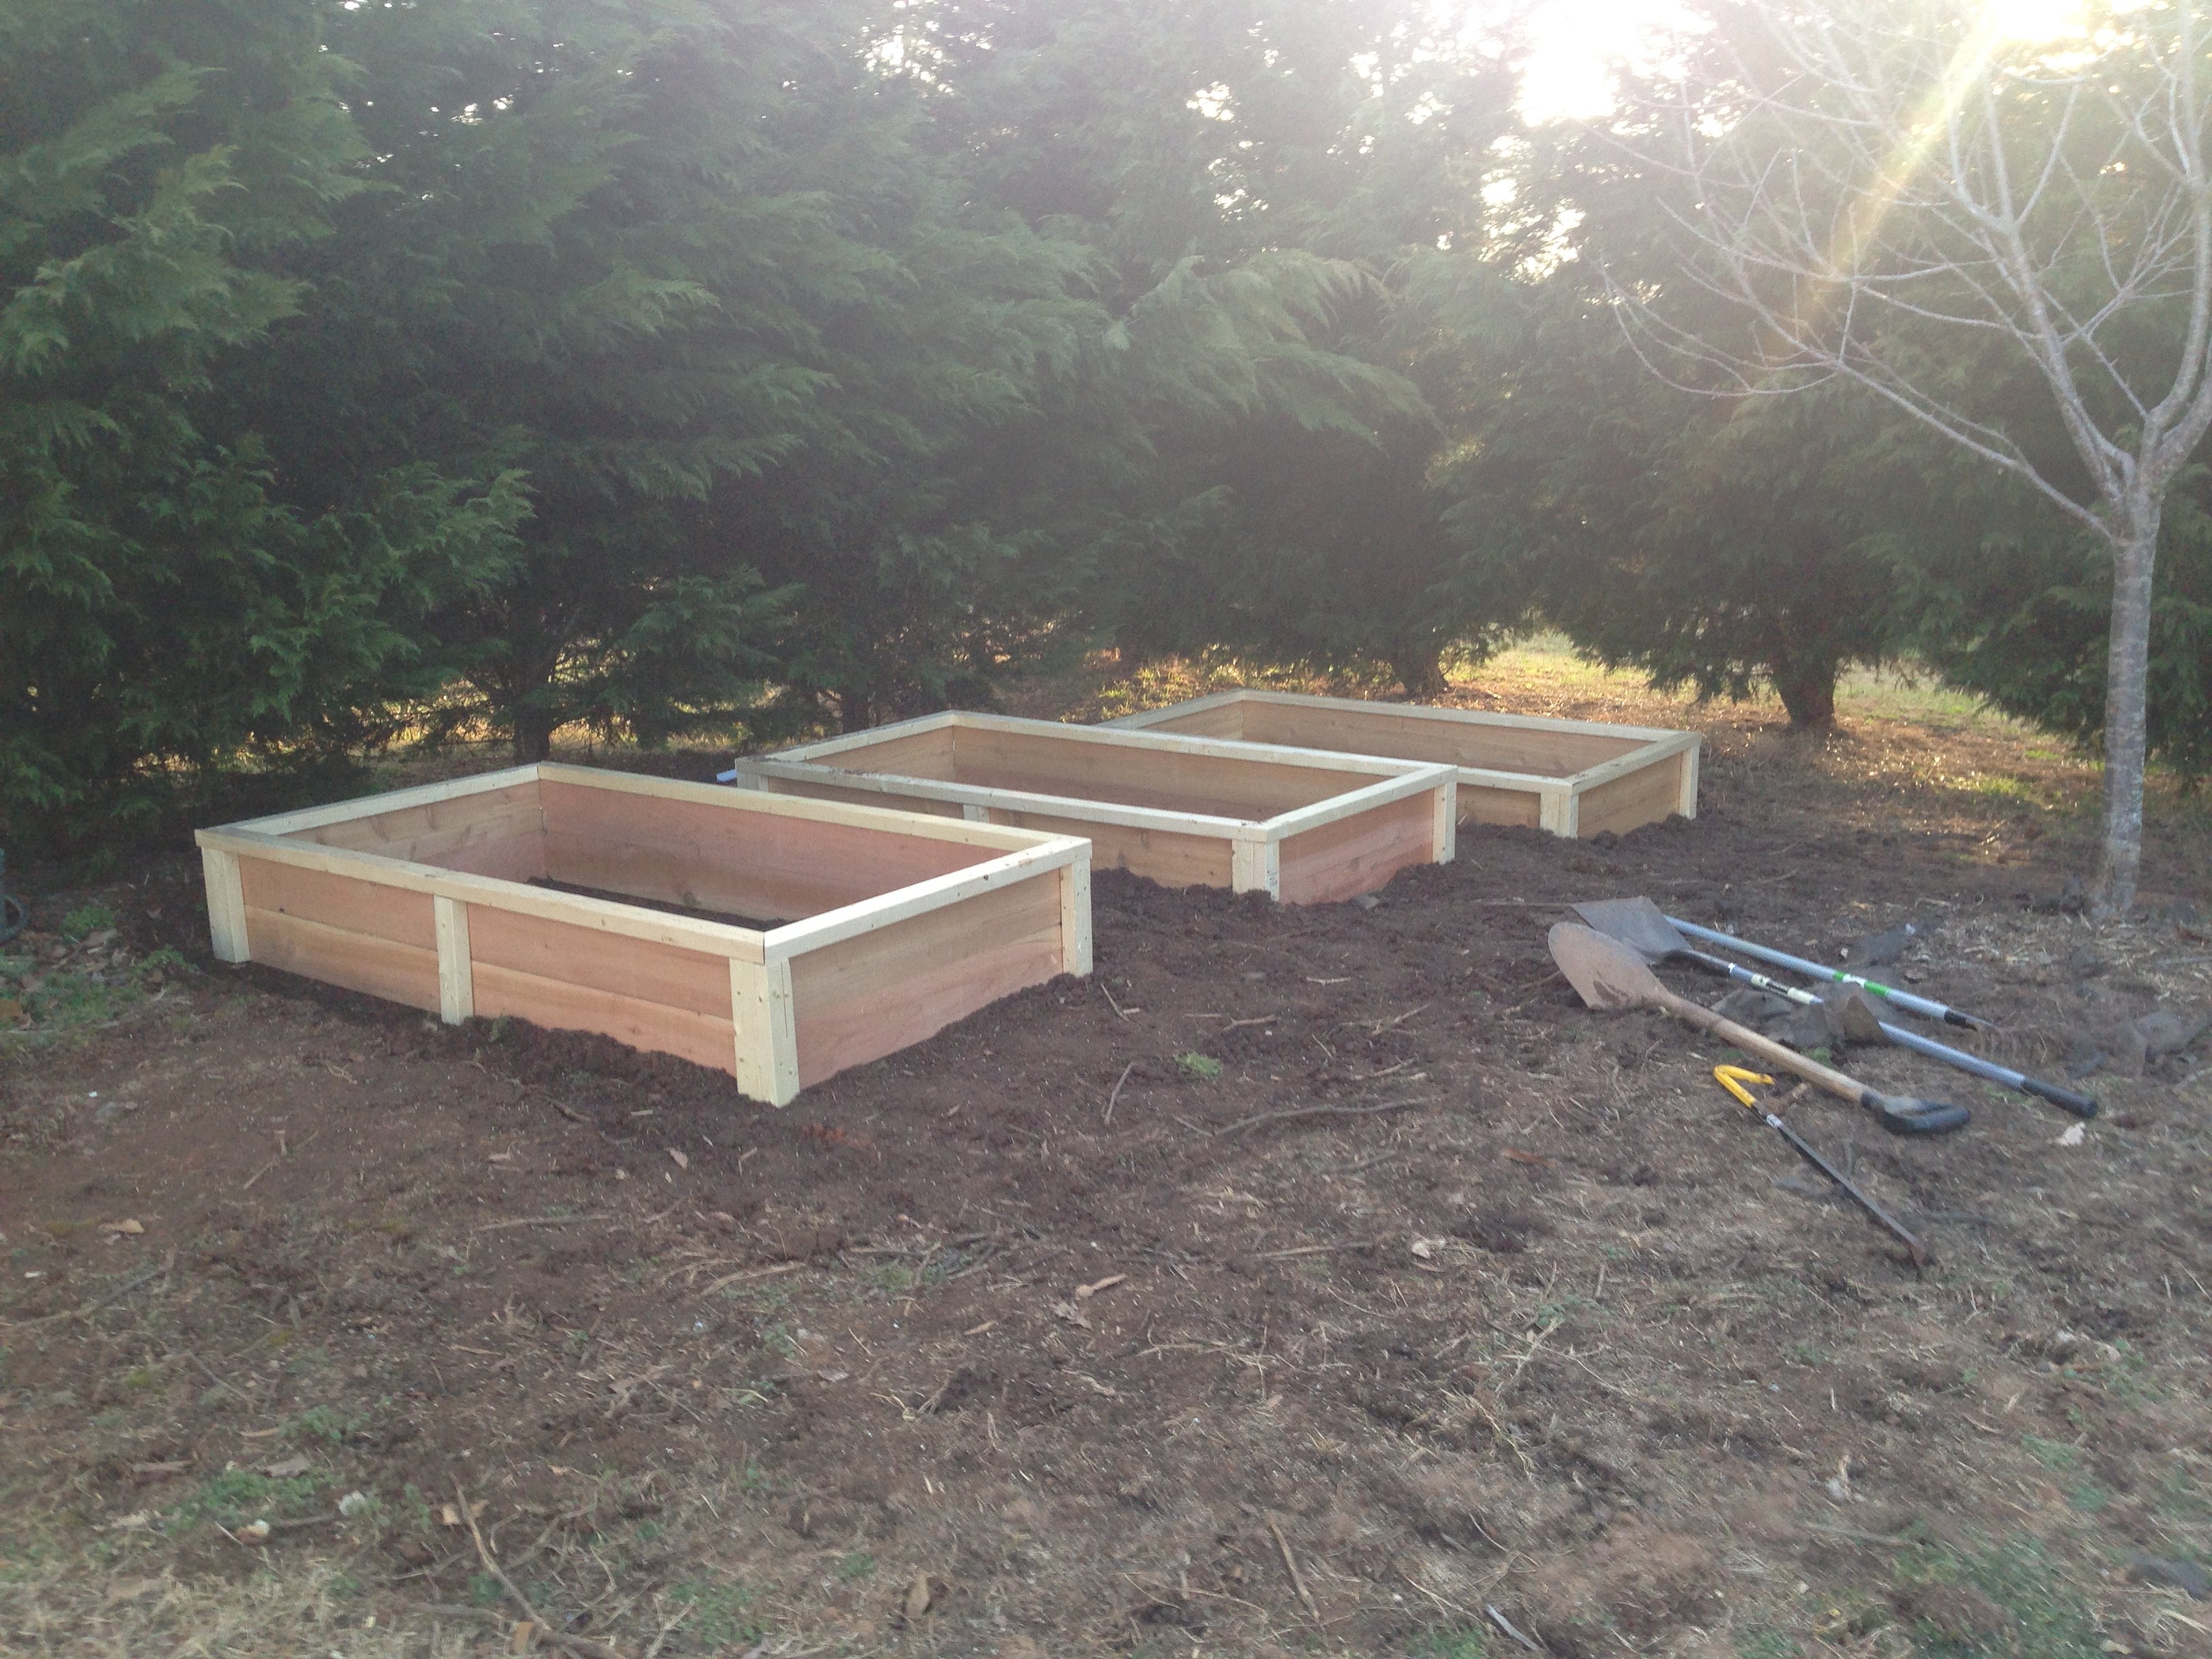
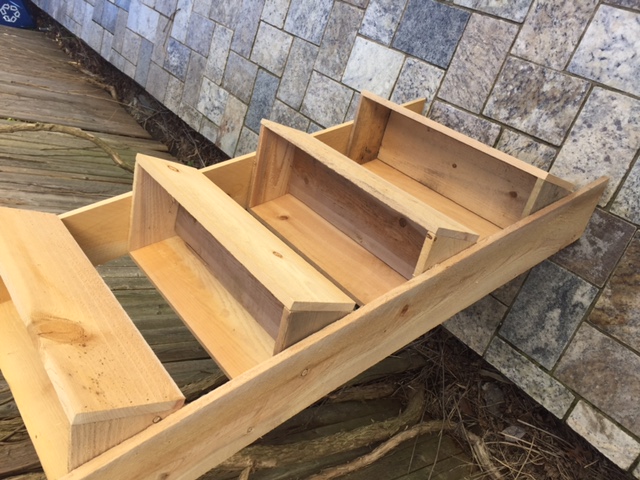
Using Ana's 10 dollar raised garden planter box idea, I made my own using the cedar fence boards and then used 2 x 3 x 8 studs for the L corner supports and mid center support along with top rail. This photo is the first 3, I will have a total of 6 boxes. Will post more as I progress.
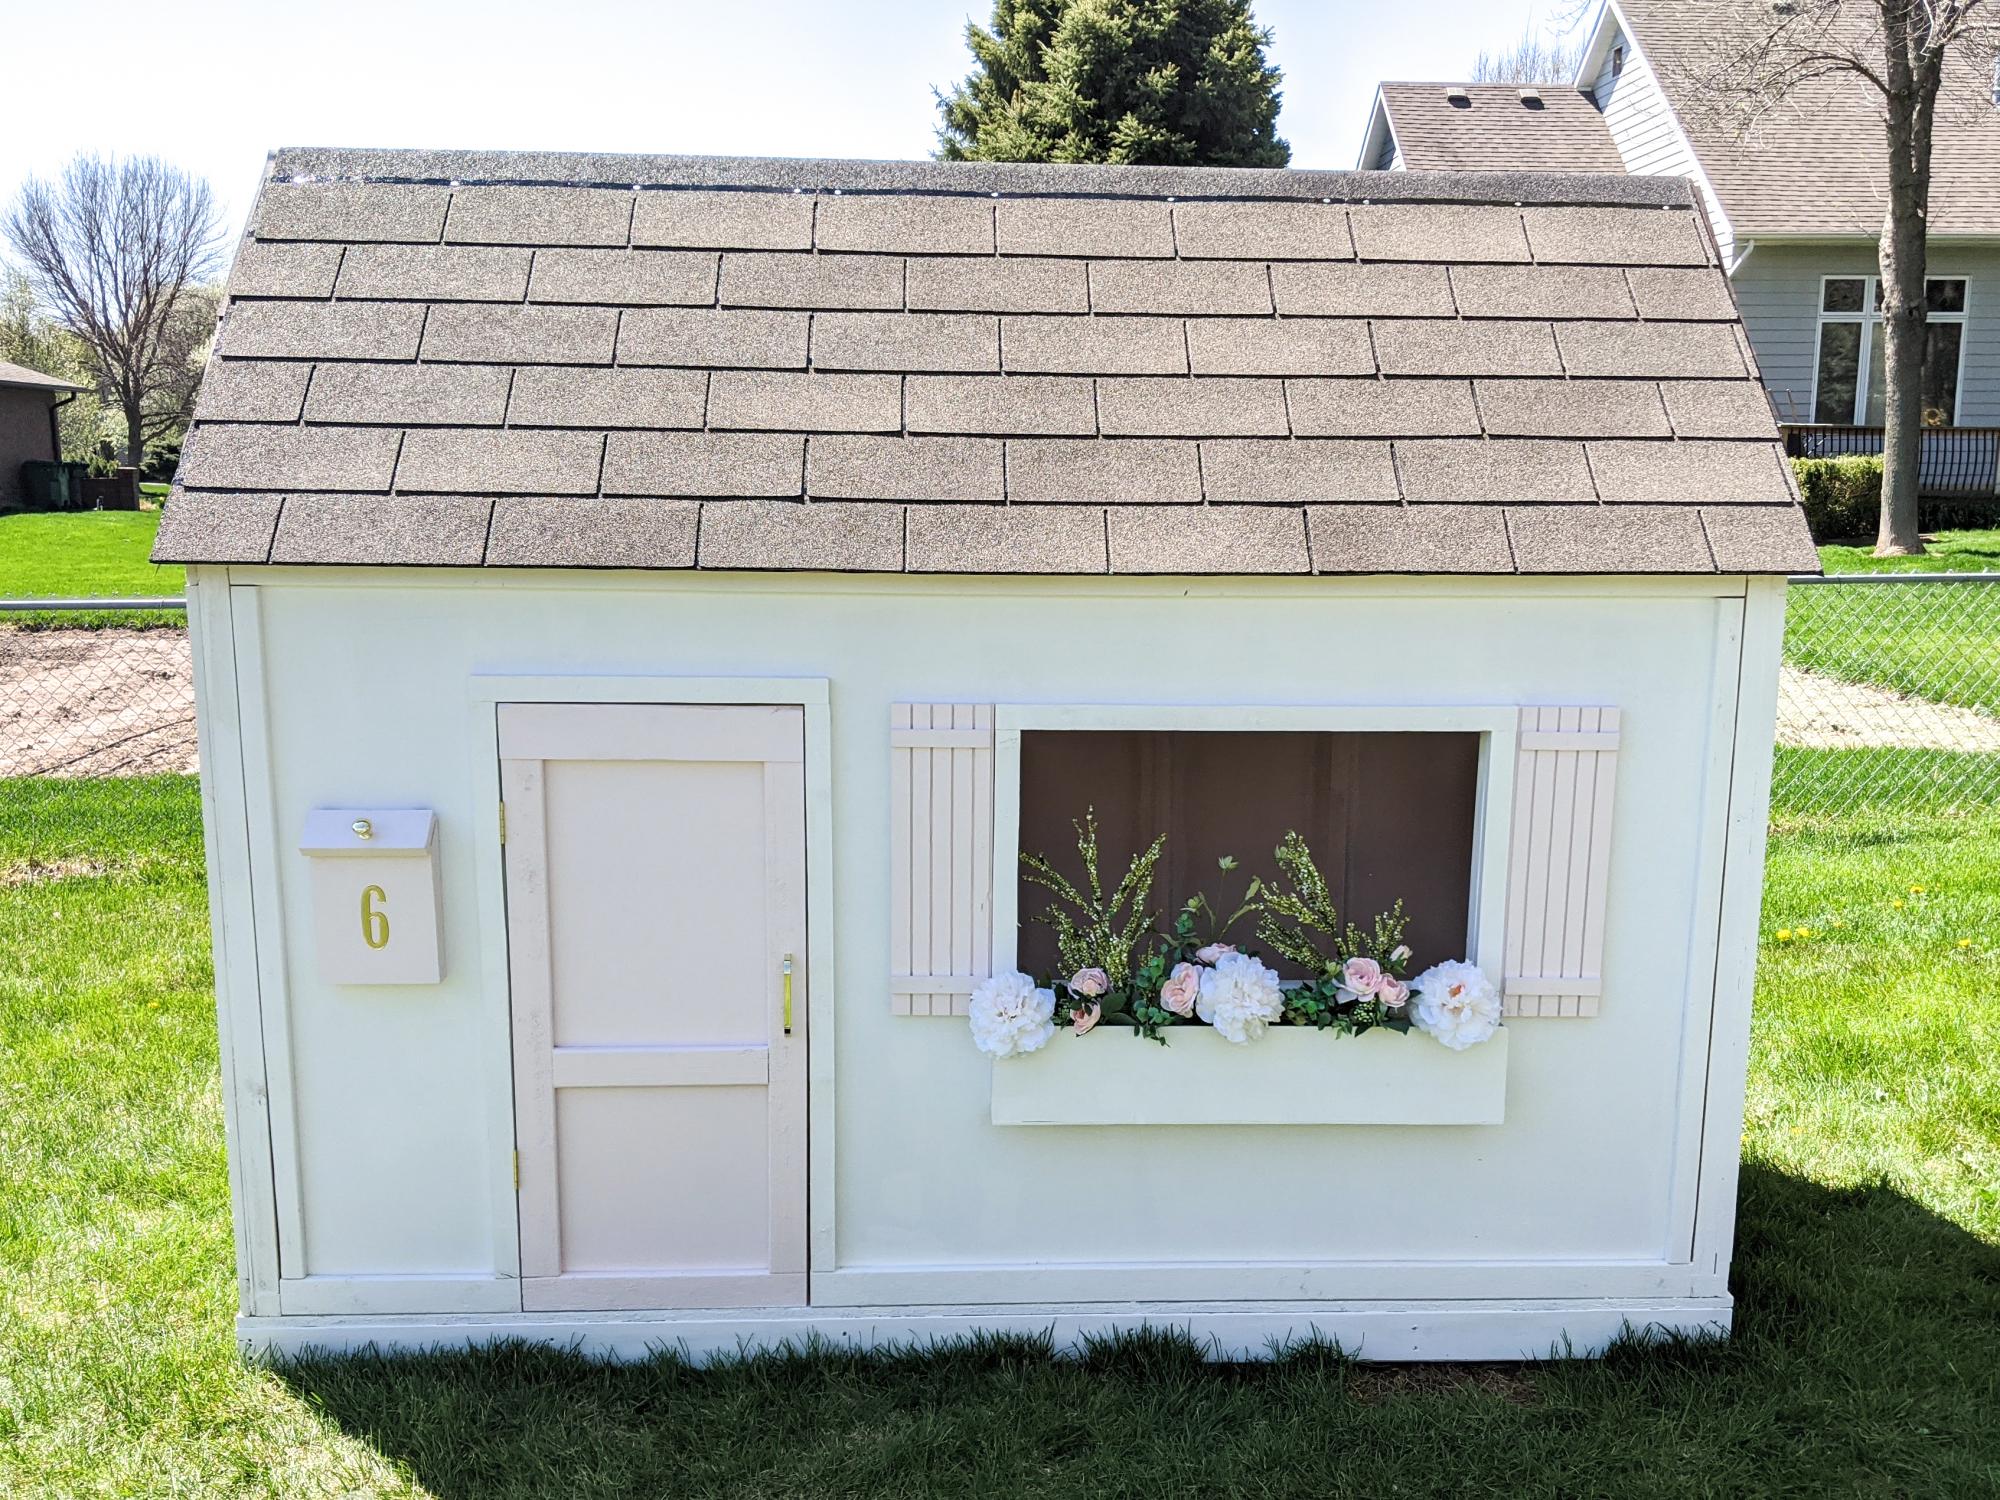
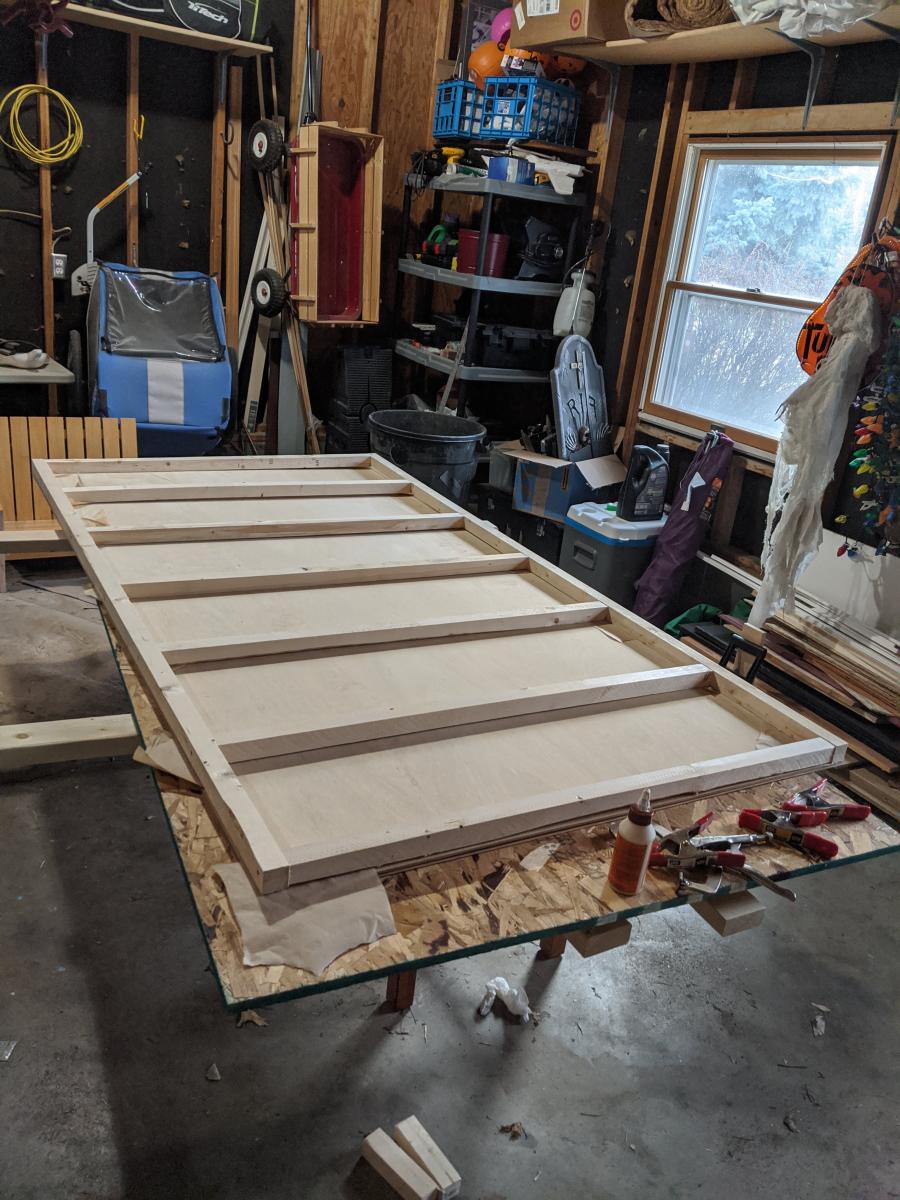
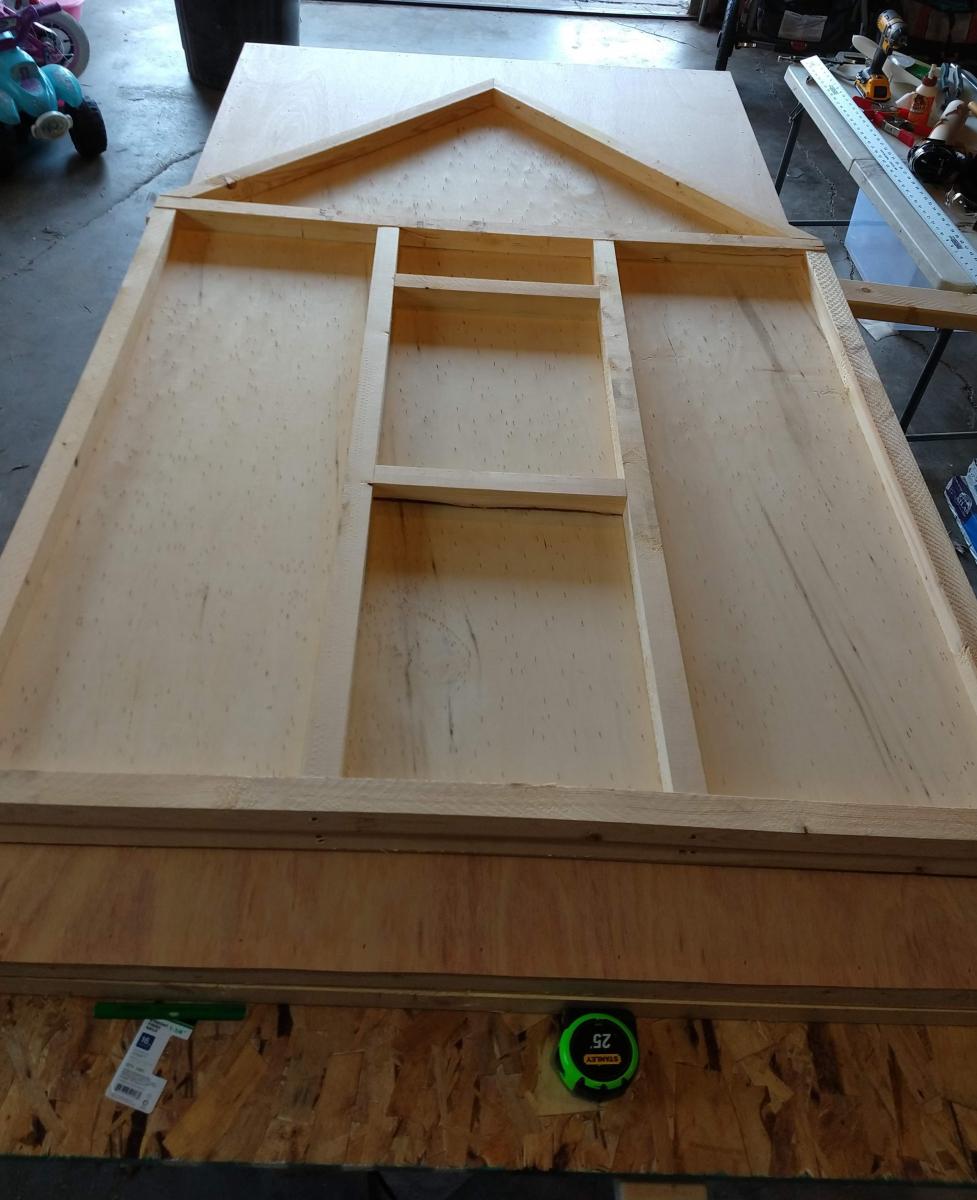
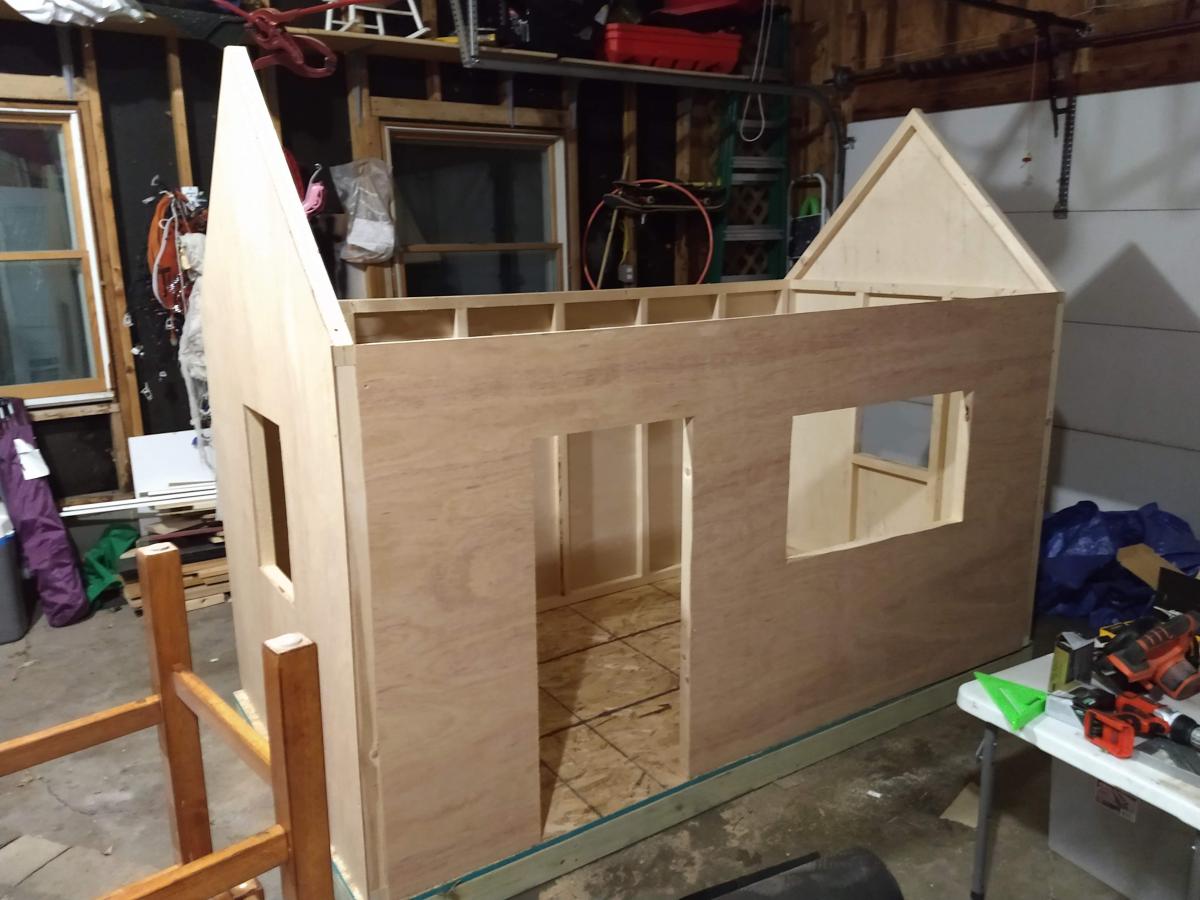
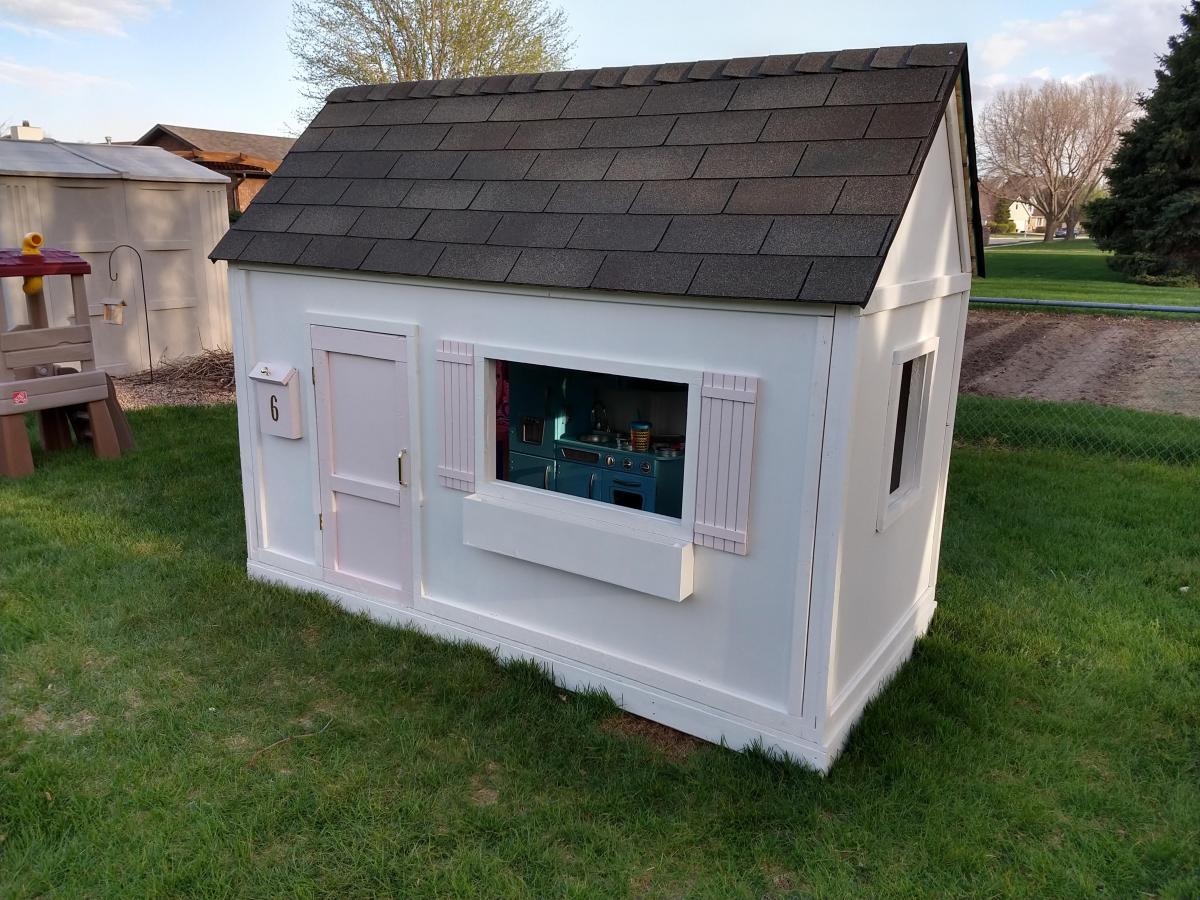
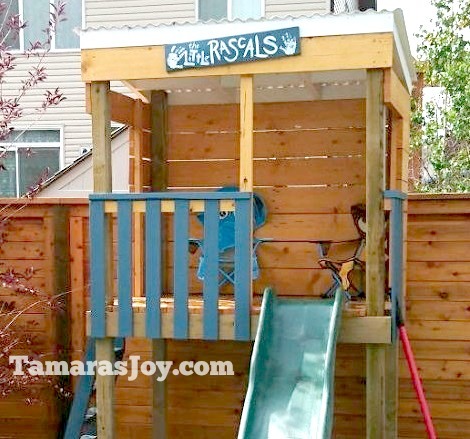
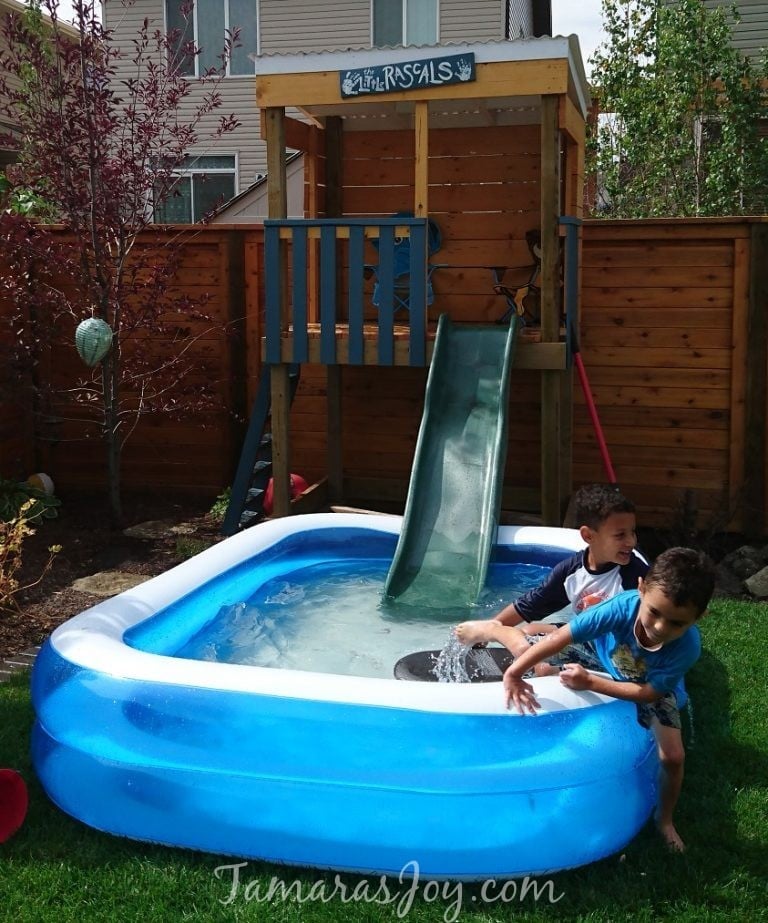
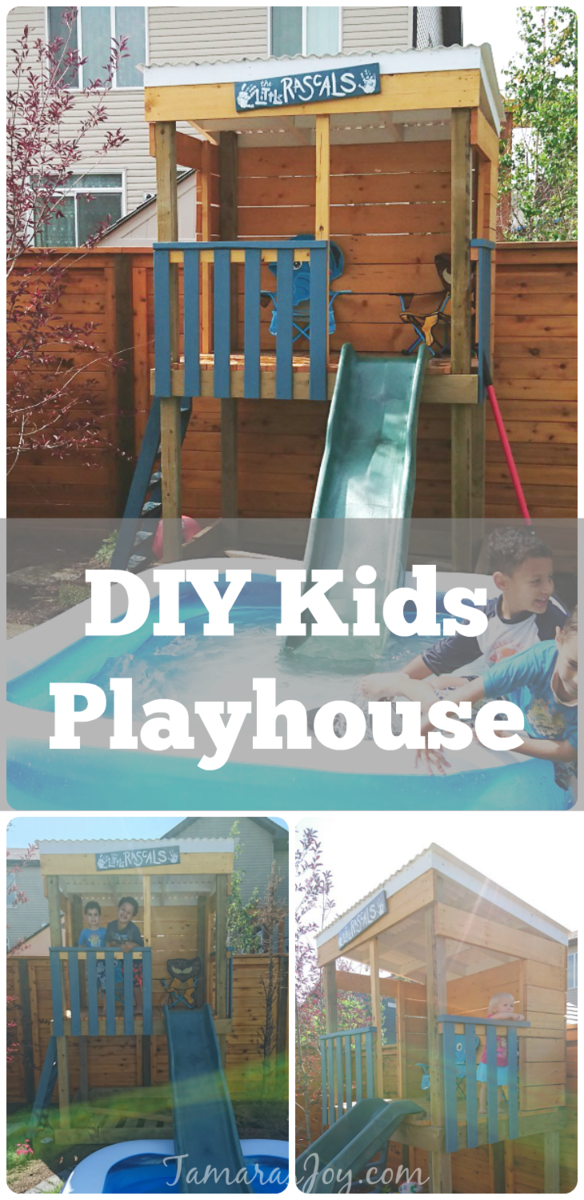
We built this playhouse for our daughter's 6th birthday. She absolutely loves it! We were looking at purchasing one, but they were way out of our budget. Ana saved the day with these plans :).
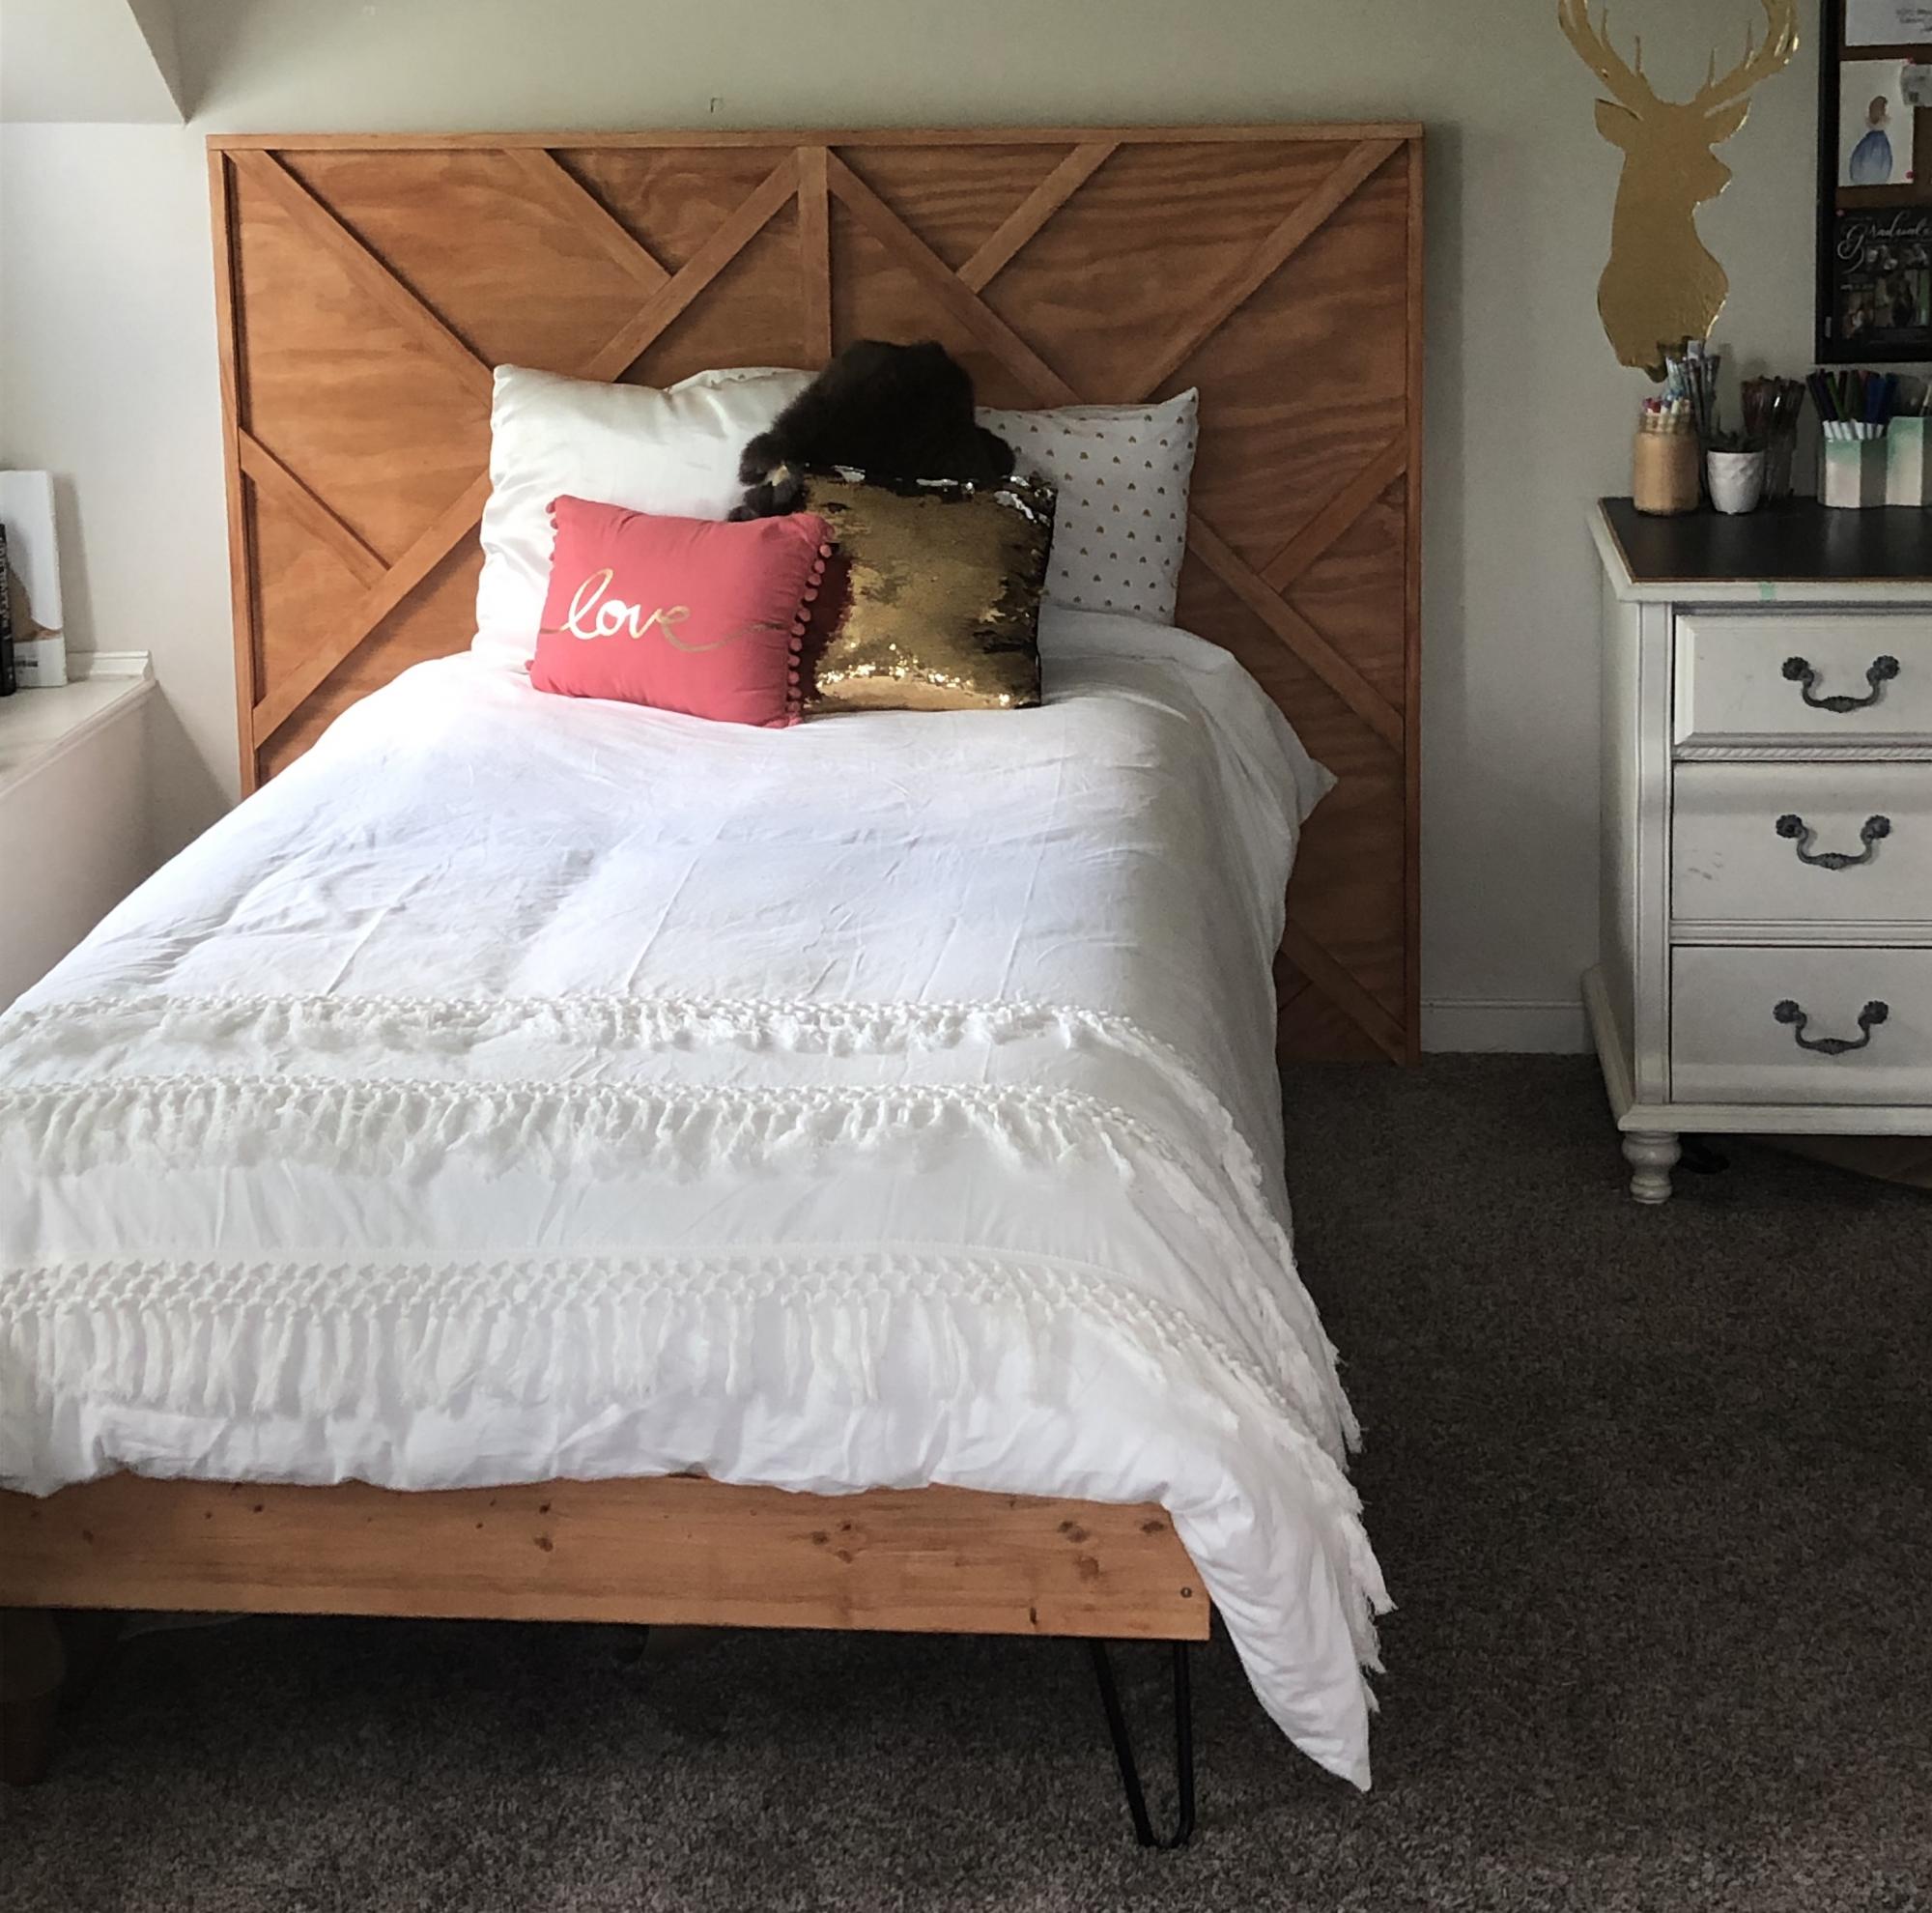
This was a fun build. I let my daughter design the slats on the headboard, and as long as all slats are either 90 or 45 degrees, the cuts and application are simple. Thanks, Ana!
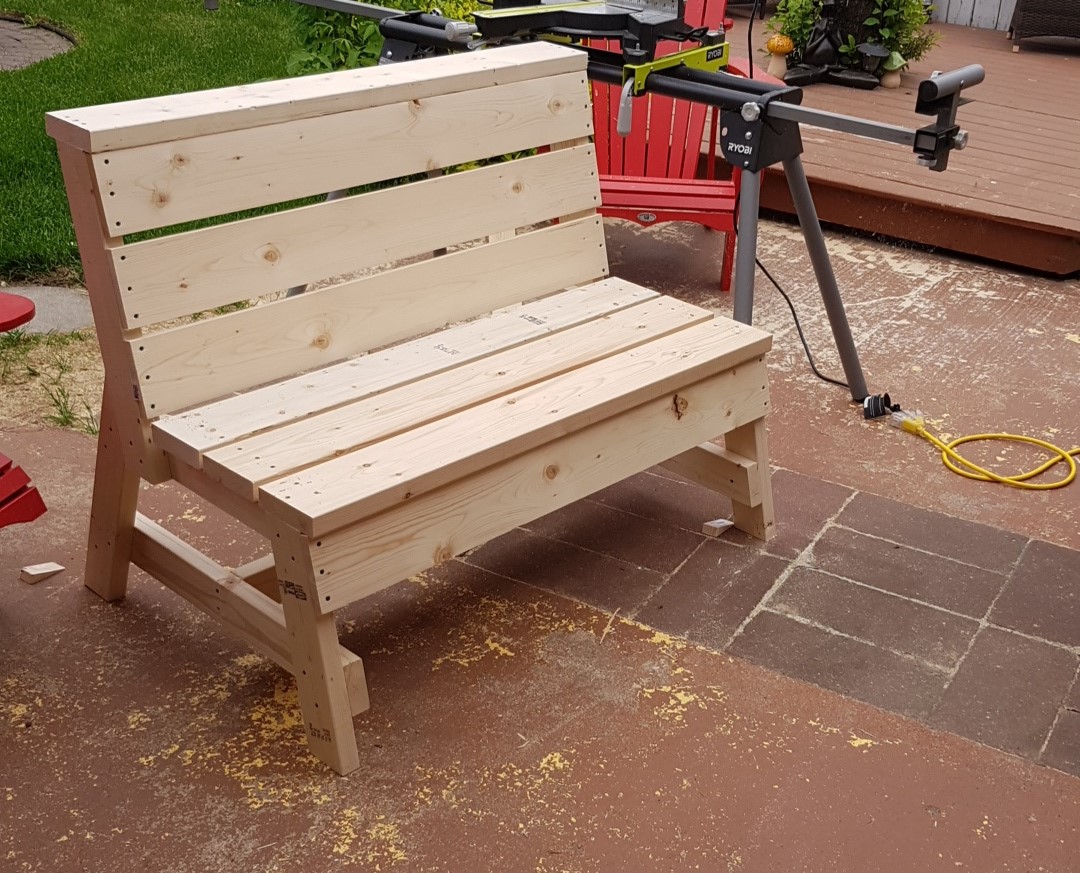
I built the one bench using the original plan with the storage and table top unit but needed two additional seating benches to go around the firepit without the bulk of the backside of the bench.
I modified the original plan as follows:
Shopping List:
(2) 2X6X8
(3) 2X4X8
(2) 1X6X8
Cutting List:
(2) 2X4X17" front legs, 15 degree cuts, parallel long to short
(2) 2X4X23" back support, 15 degree cuts, parallel long to short
(2) 2X4X20.75" back legs, 15 and 60 degree cuts, not parallel long to long
(2) 2X4X23" Back support, 15 degree cuts, parallel long to short
(2) 2X4X24.75" under seat, 15 degree cuts, not parallel long to long
(2) 2X4X30" bottom support, 15 degree cuts, not parallel long to long
(1) 2X4X42" bottom cross brace between leg sets, 90 degree cuts
(2) 2X6 cut equally in half, 3 for the seat and 1 for the top plate
(2) 1X6 cut equally in half, 3 for the back rest and 1 to be tucked under the seat overhang
Sat, 08/15/2020 - 22:52
I am the individual who submitted this modification on June 14, 2020. I was making a change to the submission but somehow sent it before correcting the cut list. The "(2) 2X4X23" back support, 15 degree cuts, parallel long to short" is repeated twice and should be only once.

I've been wanting to buy or make a sandbox for my son for a couple of years now. Since seeing this on Ana White I knew I had to make it. My son is 4 yo and I didn't think the 4' square sandbox would be big enough for him, so I made it bigger. Ours is 6' square.
Materials:
4@1x8x6'
12@1x6x6'
2x4 - used leftovers from another project
8 hinges
4 handles
decking screws
Cut lengths:
2@1x8 cut to 71.5 (long sides of the box)
2@1x8 cut to 70.5 (short sides of the box)
did not cut the 1x6 boards (top planks) - actually designed the other boards to fit their length to prevent cutting (saving time) (note that original plan uses 1x4 planks - I used 1x6s so I could use the same number of planks but cover a larger area)
4@2x4 cut to 11.5 (arm rests)
4@2x4 cut to 18.5 (back supports)
followed instructions for assembly otherwise. At my husbands suggestion we put the handles on the sides and can easily open from either side - prevents having to lean over to the middle to open (back saver)
I finished the project in 4 hours including clean up and a couple of small breaks. This is my first Ana White project. It was a lot of fun to build and I hope my son will enjoy it for years to come!

Sat, 09/01/2012 - 20:59
Wow, this is just what I need! I've been wanting to make a sandbox for under the playhouse but the other plan was too small. This would be great for the little guys. Thanks!
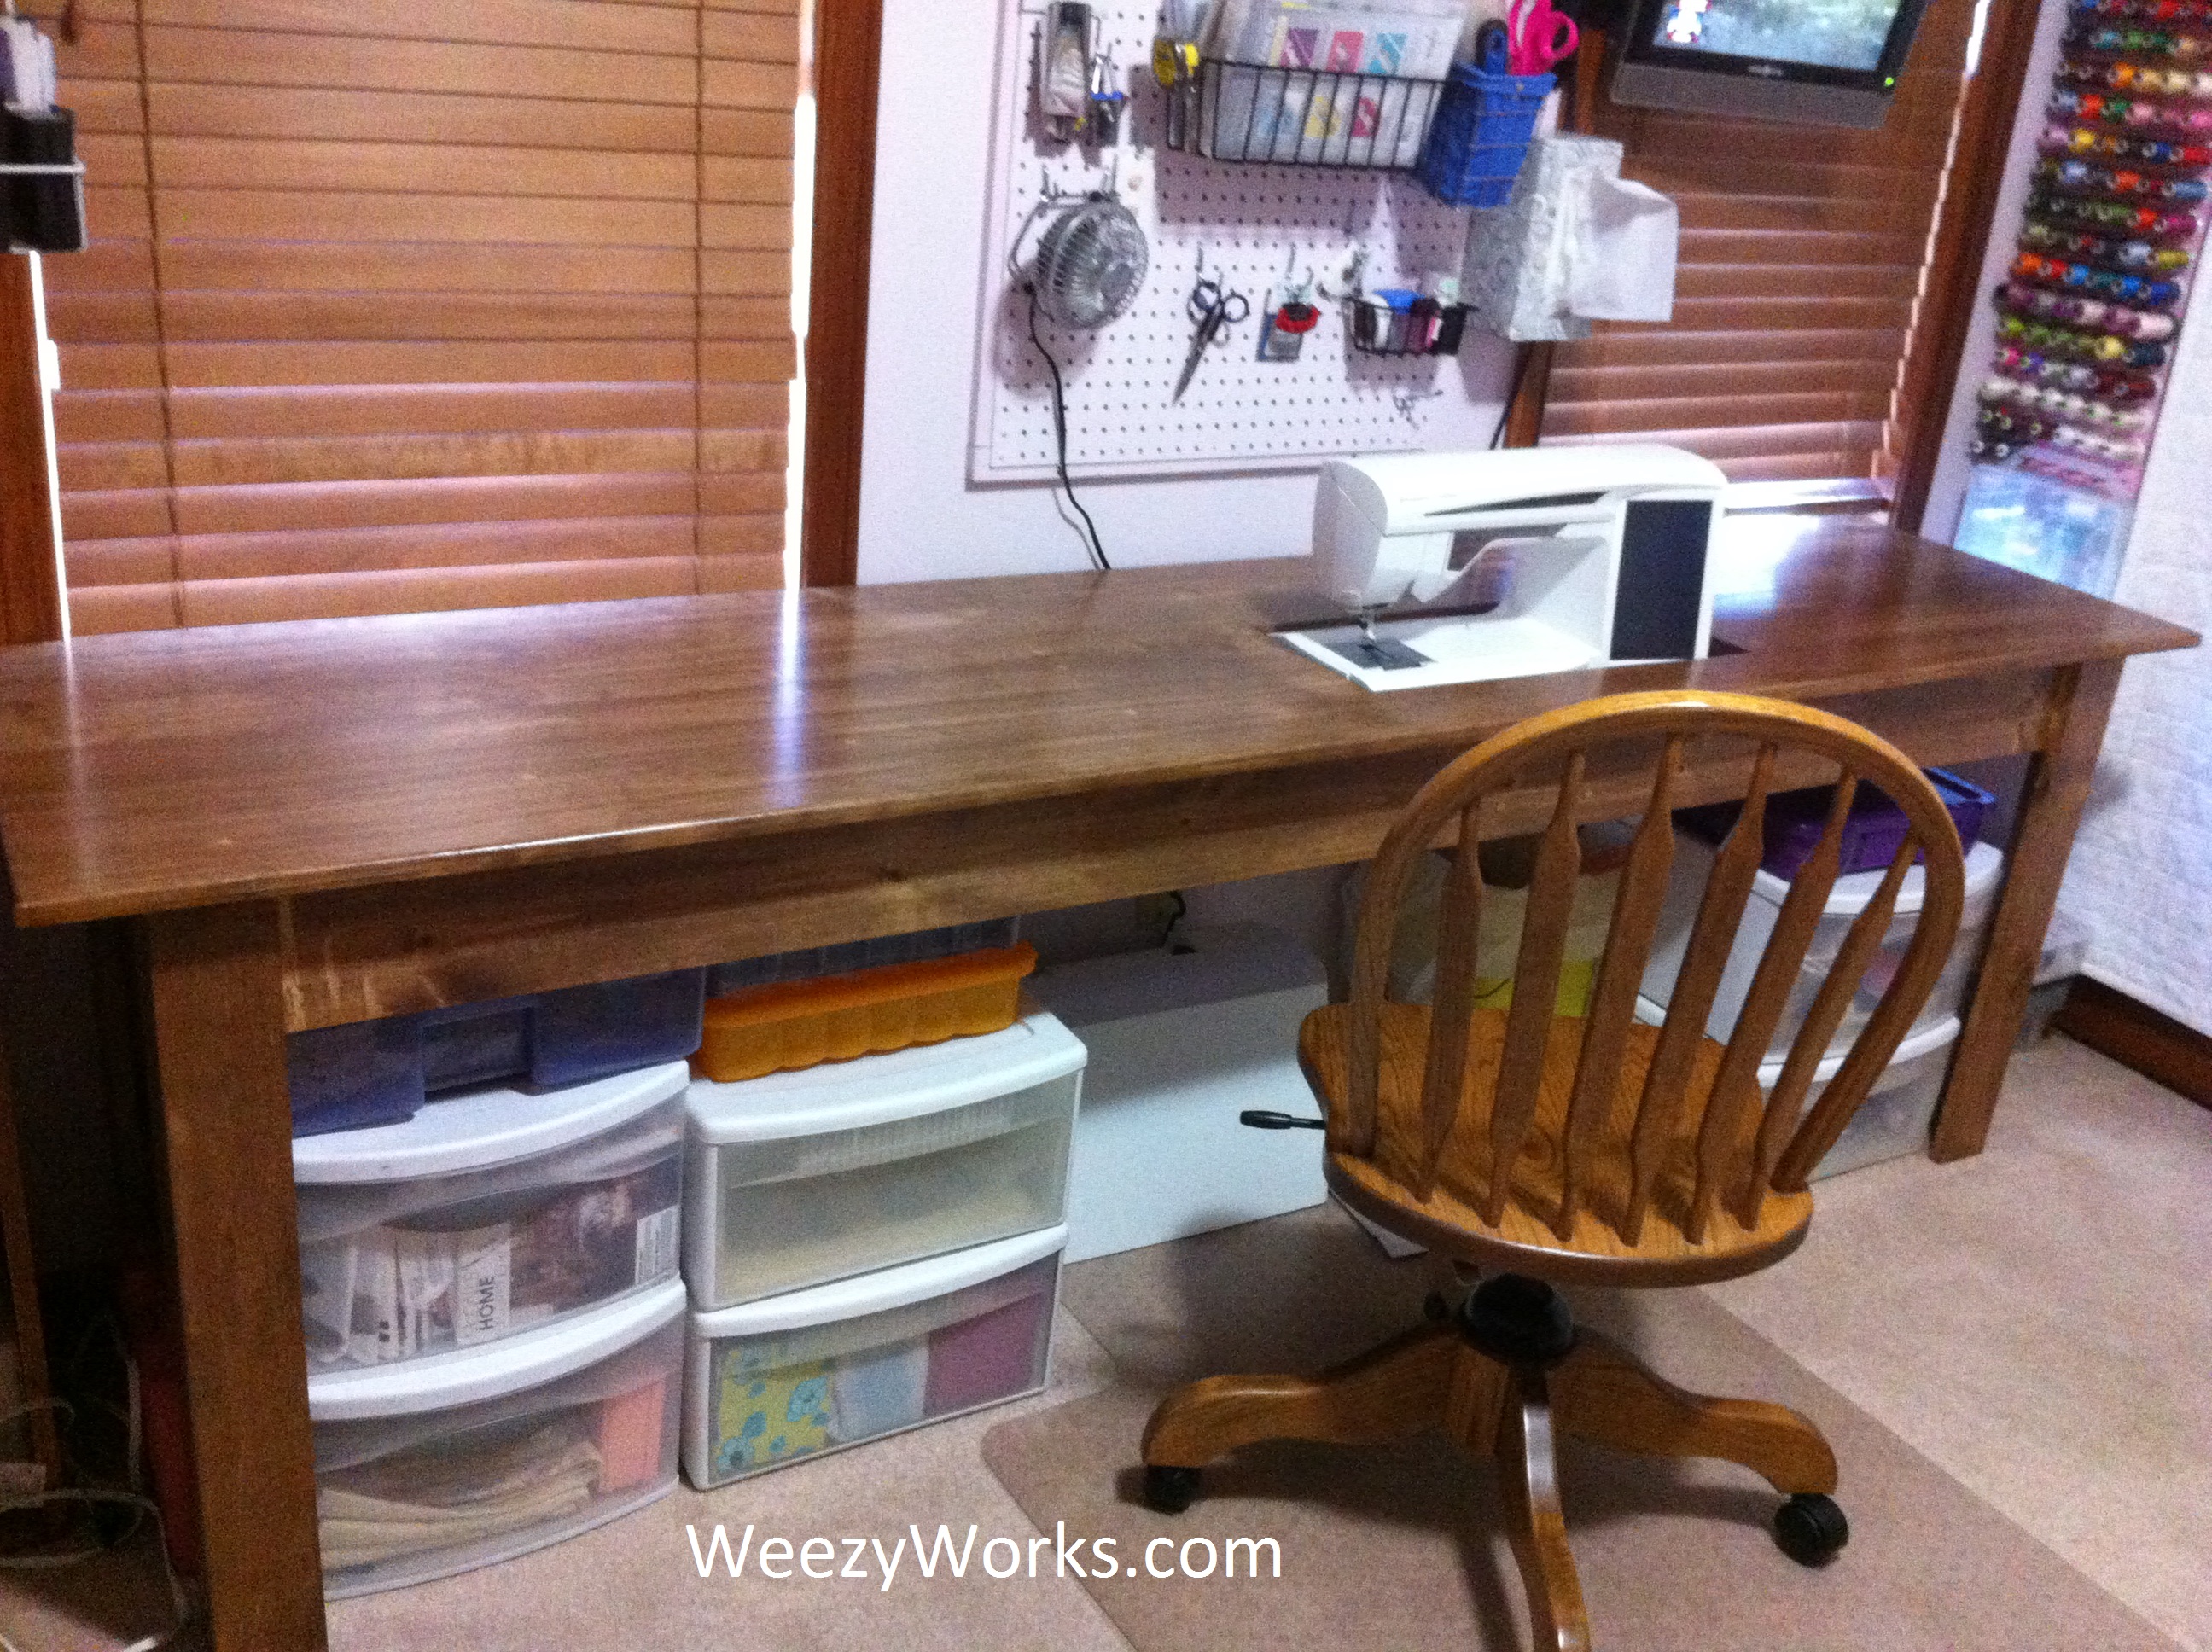
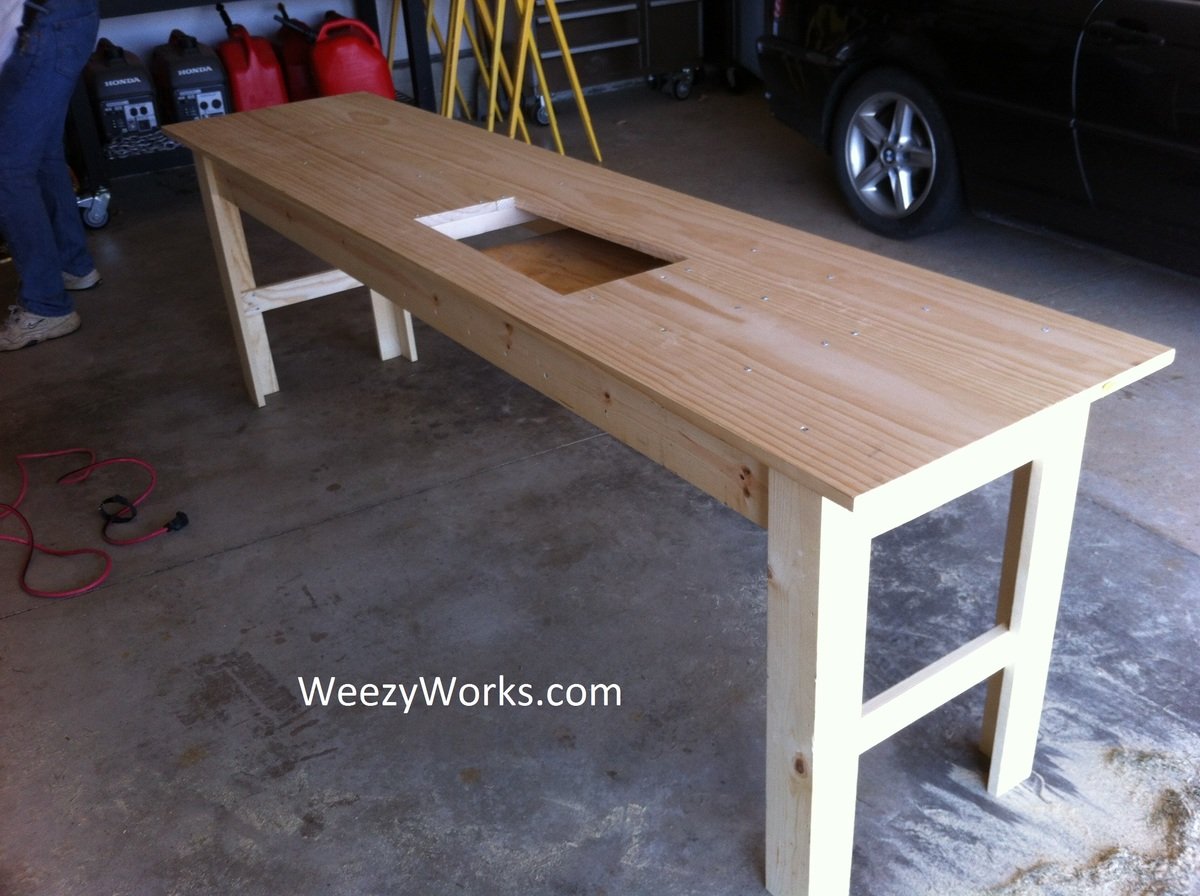
Ive been looking for a sewing table to fit my space. but found none for less than $500 and they were quite small. I found a post at quiltedcupcake.com that linked me to another blog, linking me here. I modified the plan to be about 2 feet wide and cut a hole to fit my sewing machine. There is a support in the bottom to hold my machine level with the tabletop. When I make this in the future, I will splurge on a fine hardwood. This plan was easy to build and looks great! Just what I was looking for :D
Sat, 09/15/2012 - 16:38
Thank you! This project was very easy to build and would be very easy to make in a smaller size. I'm so glad I did it, free motion quilting is so much easier with this table.
Wed, 08/26/2020 - 07:13
Good morning Ana,
Where can i get the plans for this table.
Sun, 09/16/2012 - 10:11
Now, I've just got to make it! I love to free motion quilt and that would make it easier. With each baby I've had my quilting space has diminished (of course it's worth it) but now I think I will reclaim some space ;)
Tue, 02/26/2013 - 14:14
Cannot seem to find the plans for this project. Please post them.
In reply to Plans Please by SinKitty71
Tue, 02/26/2013 - 17:40
I used the plans for the narrow farmhouse table (search in the plans tab) and made a few modifications for my sewing machine.
Thu, 06/20/2013 - 12:27
What size boards did you use for the top of the table?
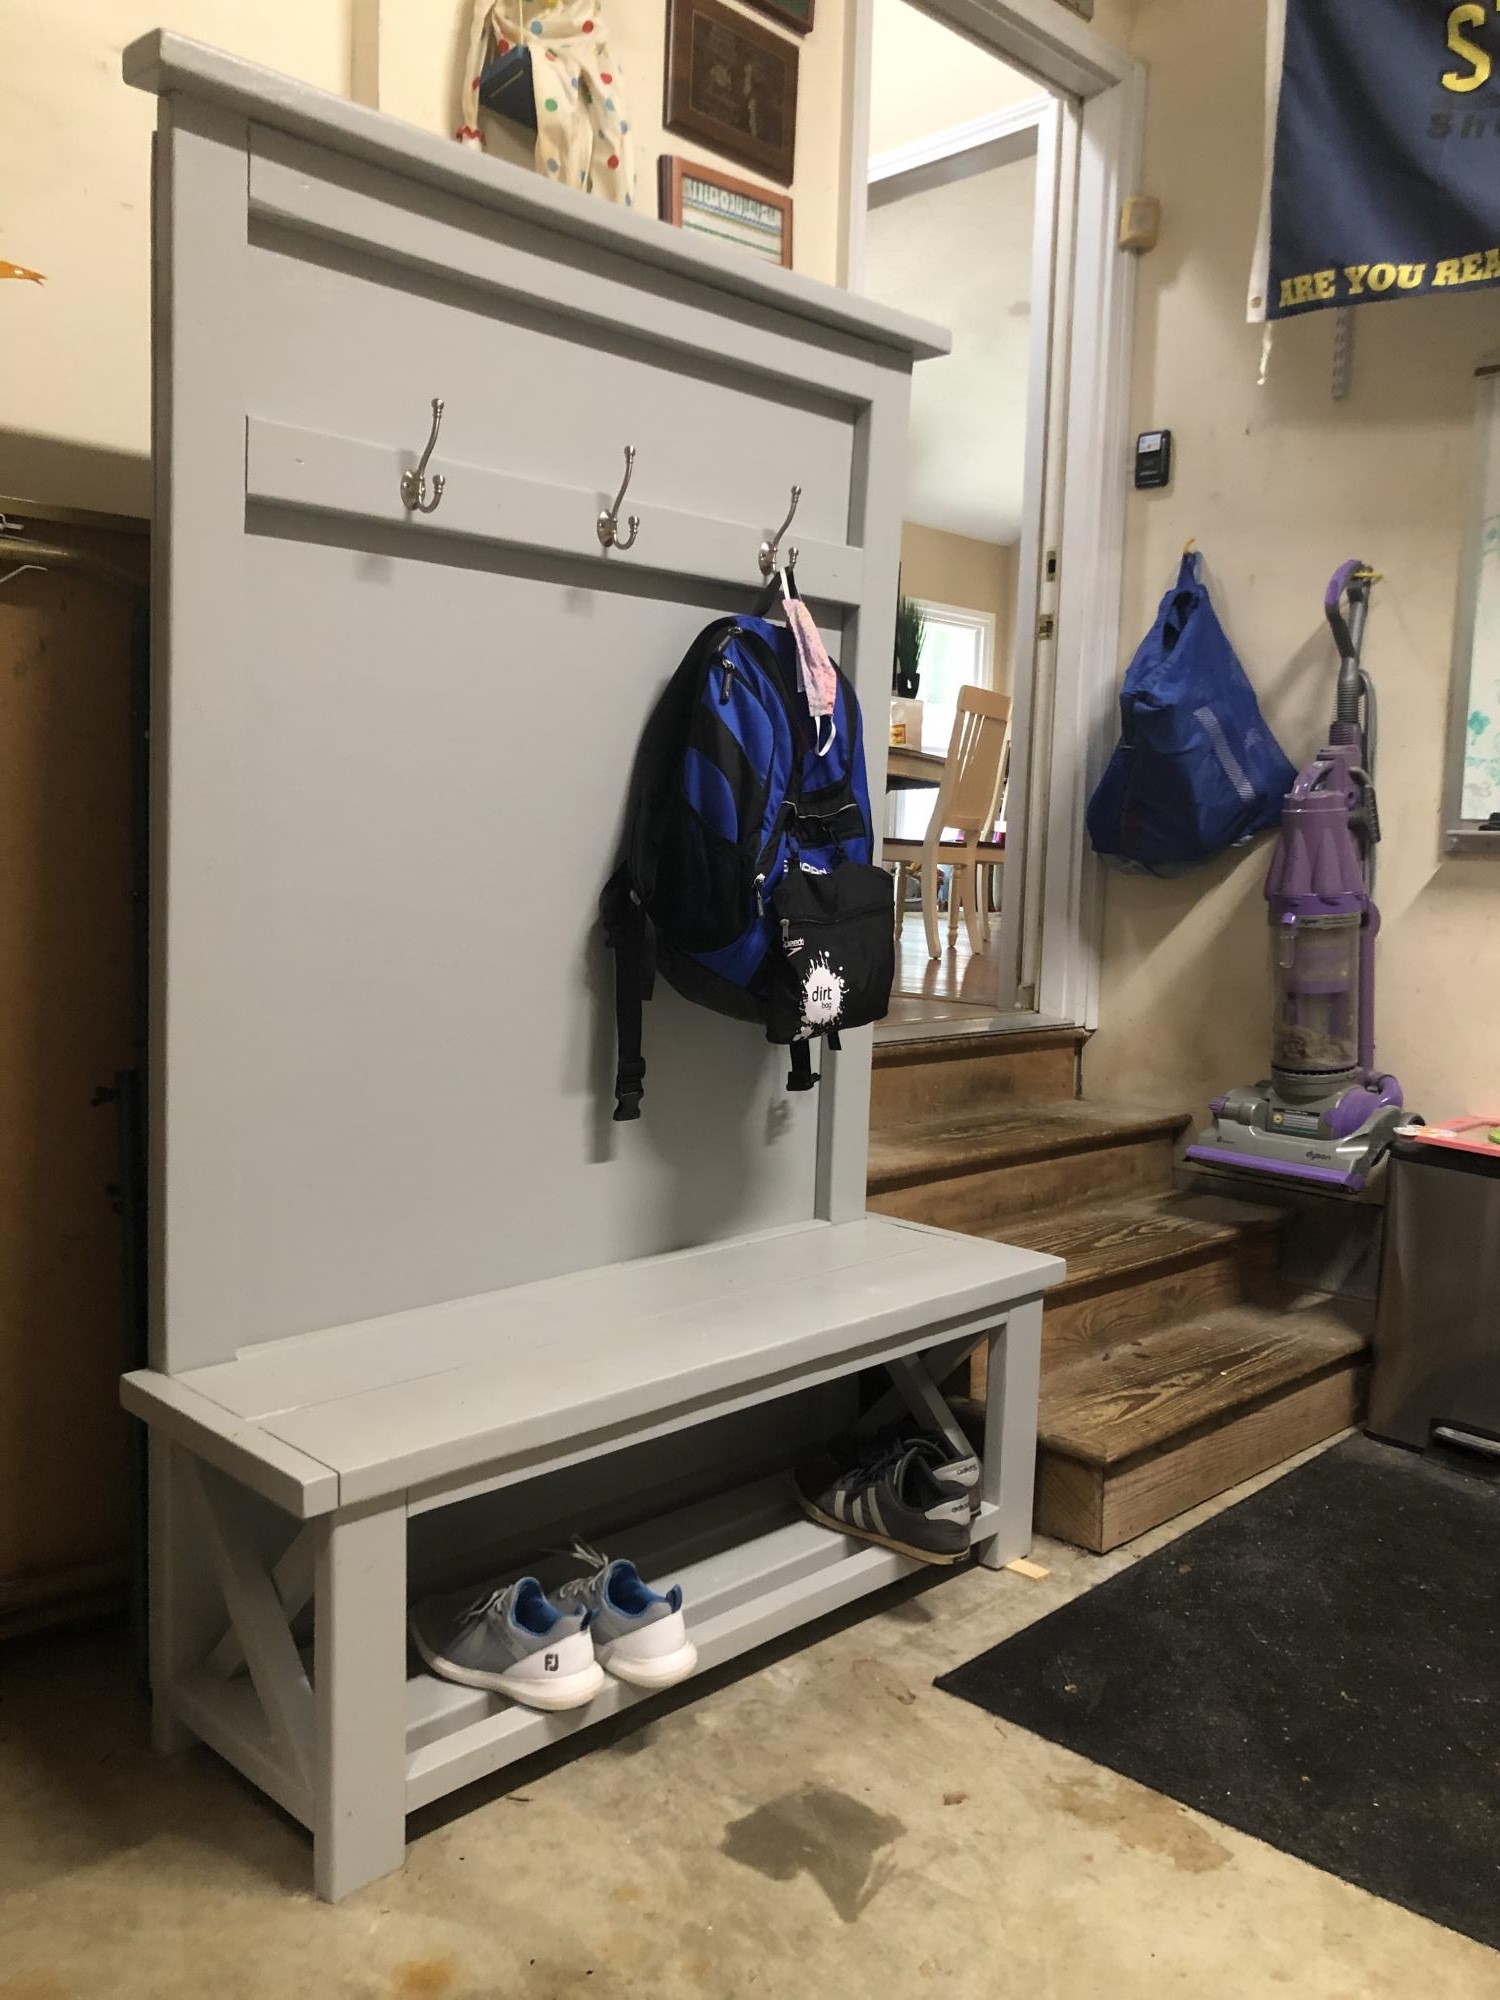
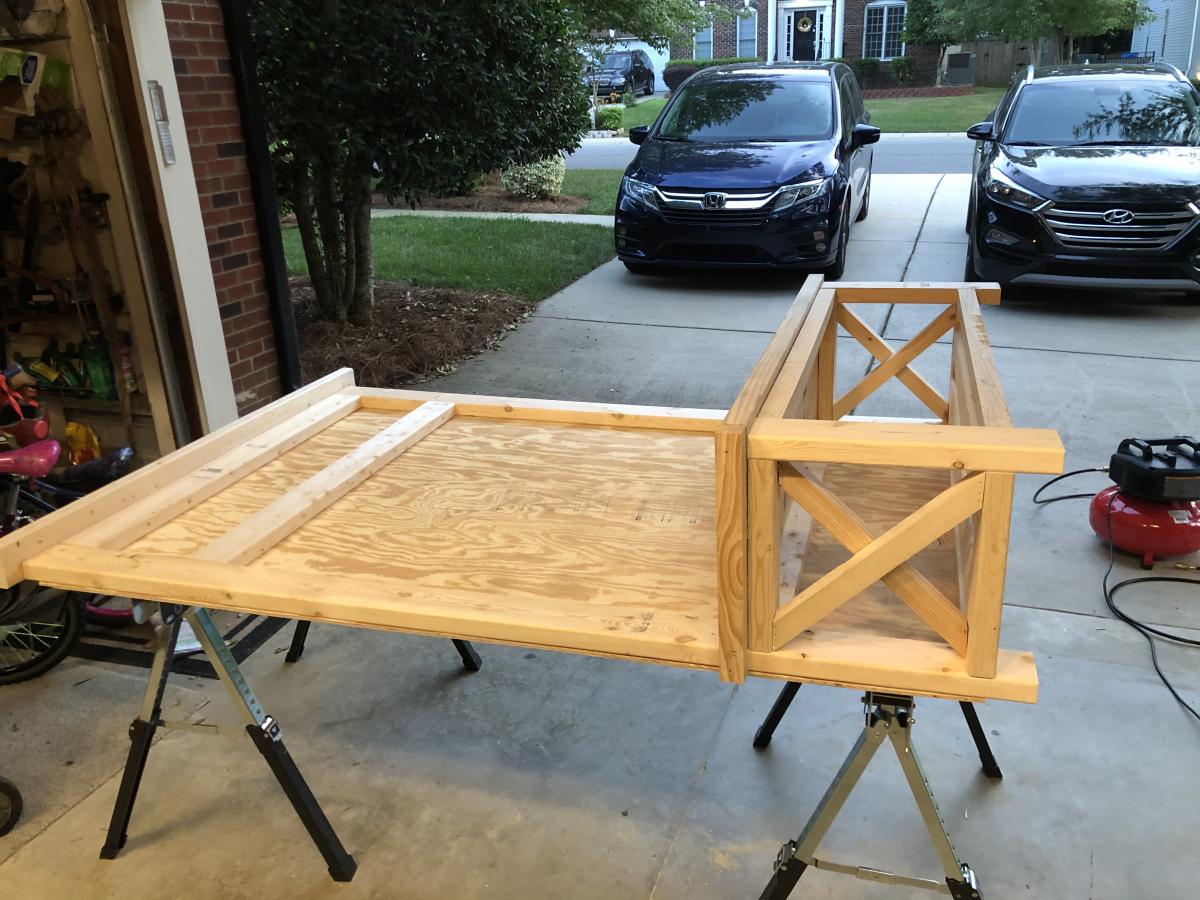
Fun project. Had the kids helping with the build. Easy to follow directions. Made the x side by side rather than cut. Sanding and painting took the longest. Had to put 2 good coats to protect it. Thanks!

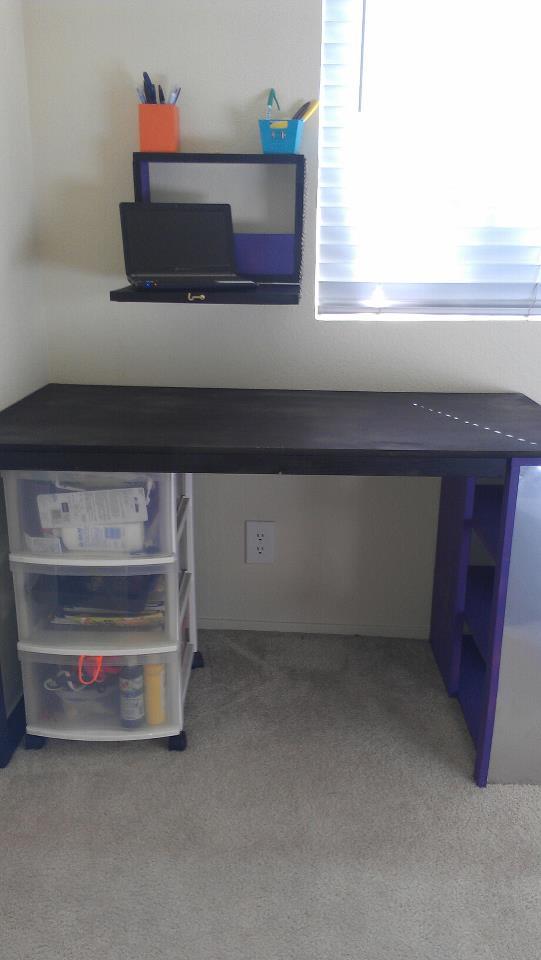
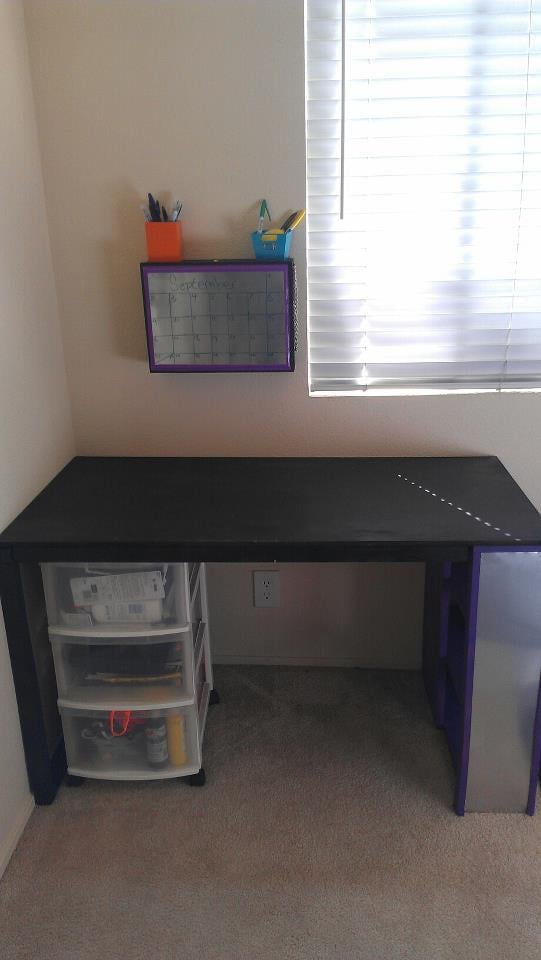
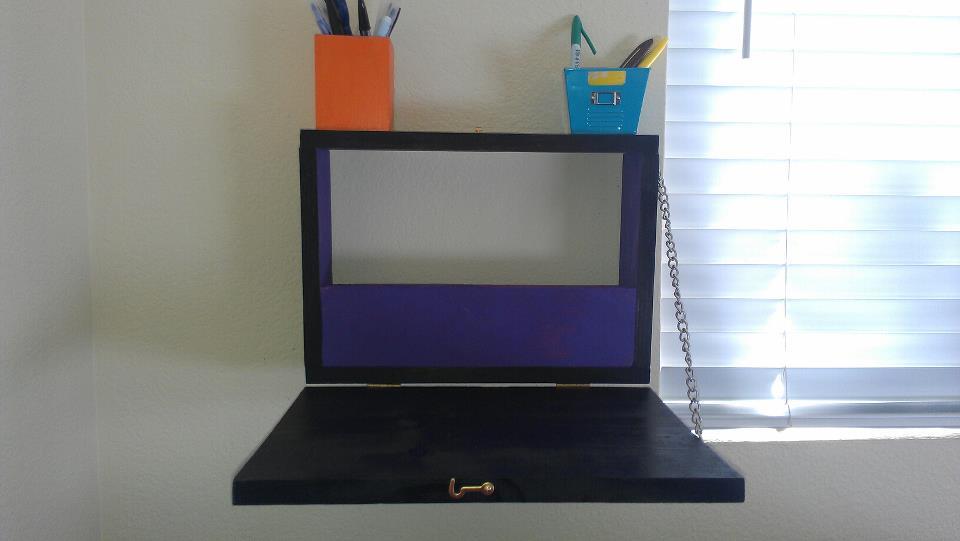
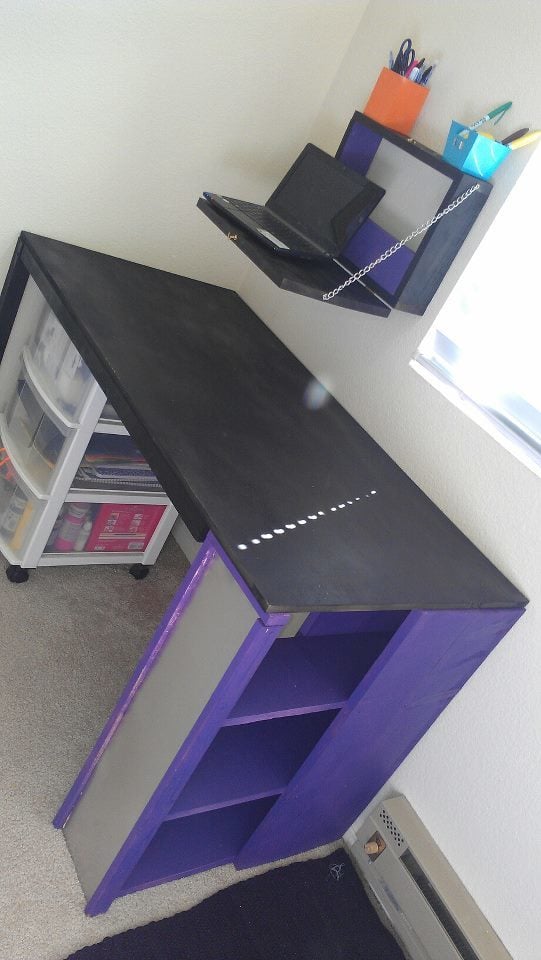
I combined the Dorm Desk and Flip-down Children's art desk plans to make a perfect combination for my school work.
The Dorm Desk was designed to be used with bar stools, so it would be rather tall. I simply made the dimensions shorter to fit with a computer chair. I also tweaked the children's art desk a bit for use as a laptop desk, just took out the shelves and put a piece in to hold binders and whatnot.
Another note, most of the materials used were scraps from other projects, so the dimensions are a little different there too. For instance, I had some 6" strips of 3/4" plywood sitting around, so I used those for the shelves instead of 1x8's, and I used a piece of 1x12 for the front of the wall-mount desk instead of plywood.
The estimate cost is not at all what it would cost if you were starting from scratch. The only things I payed for up front for these two projects was the D-ring hangers for the wall-mount desk, a piece of plywood for he desk top, some tin flashing, and a 2x2 for the frame.
*the tin flashing I got ended up not being magnetic, which was disappointing, but it ended up working well with wet-erase markers (the kind teachers use on overhead projectors) so at least it still has a function. I may also end up puting a cork border around the edges so I can still hang things from there.
Hint: I used an old wallet chain for support on the wall-mount desk. I also found some left over hinges and a small clasp I had bought for a keepsake box I made years ago. If you're pretty handy, you probably have plenty of stuff you can use just lying around the house.
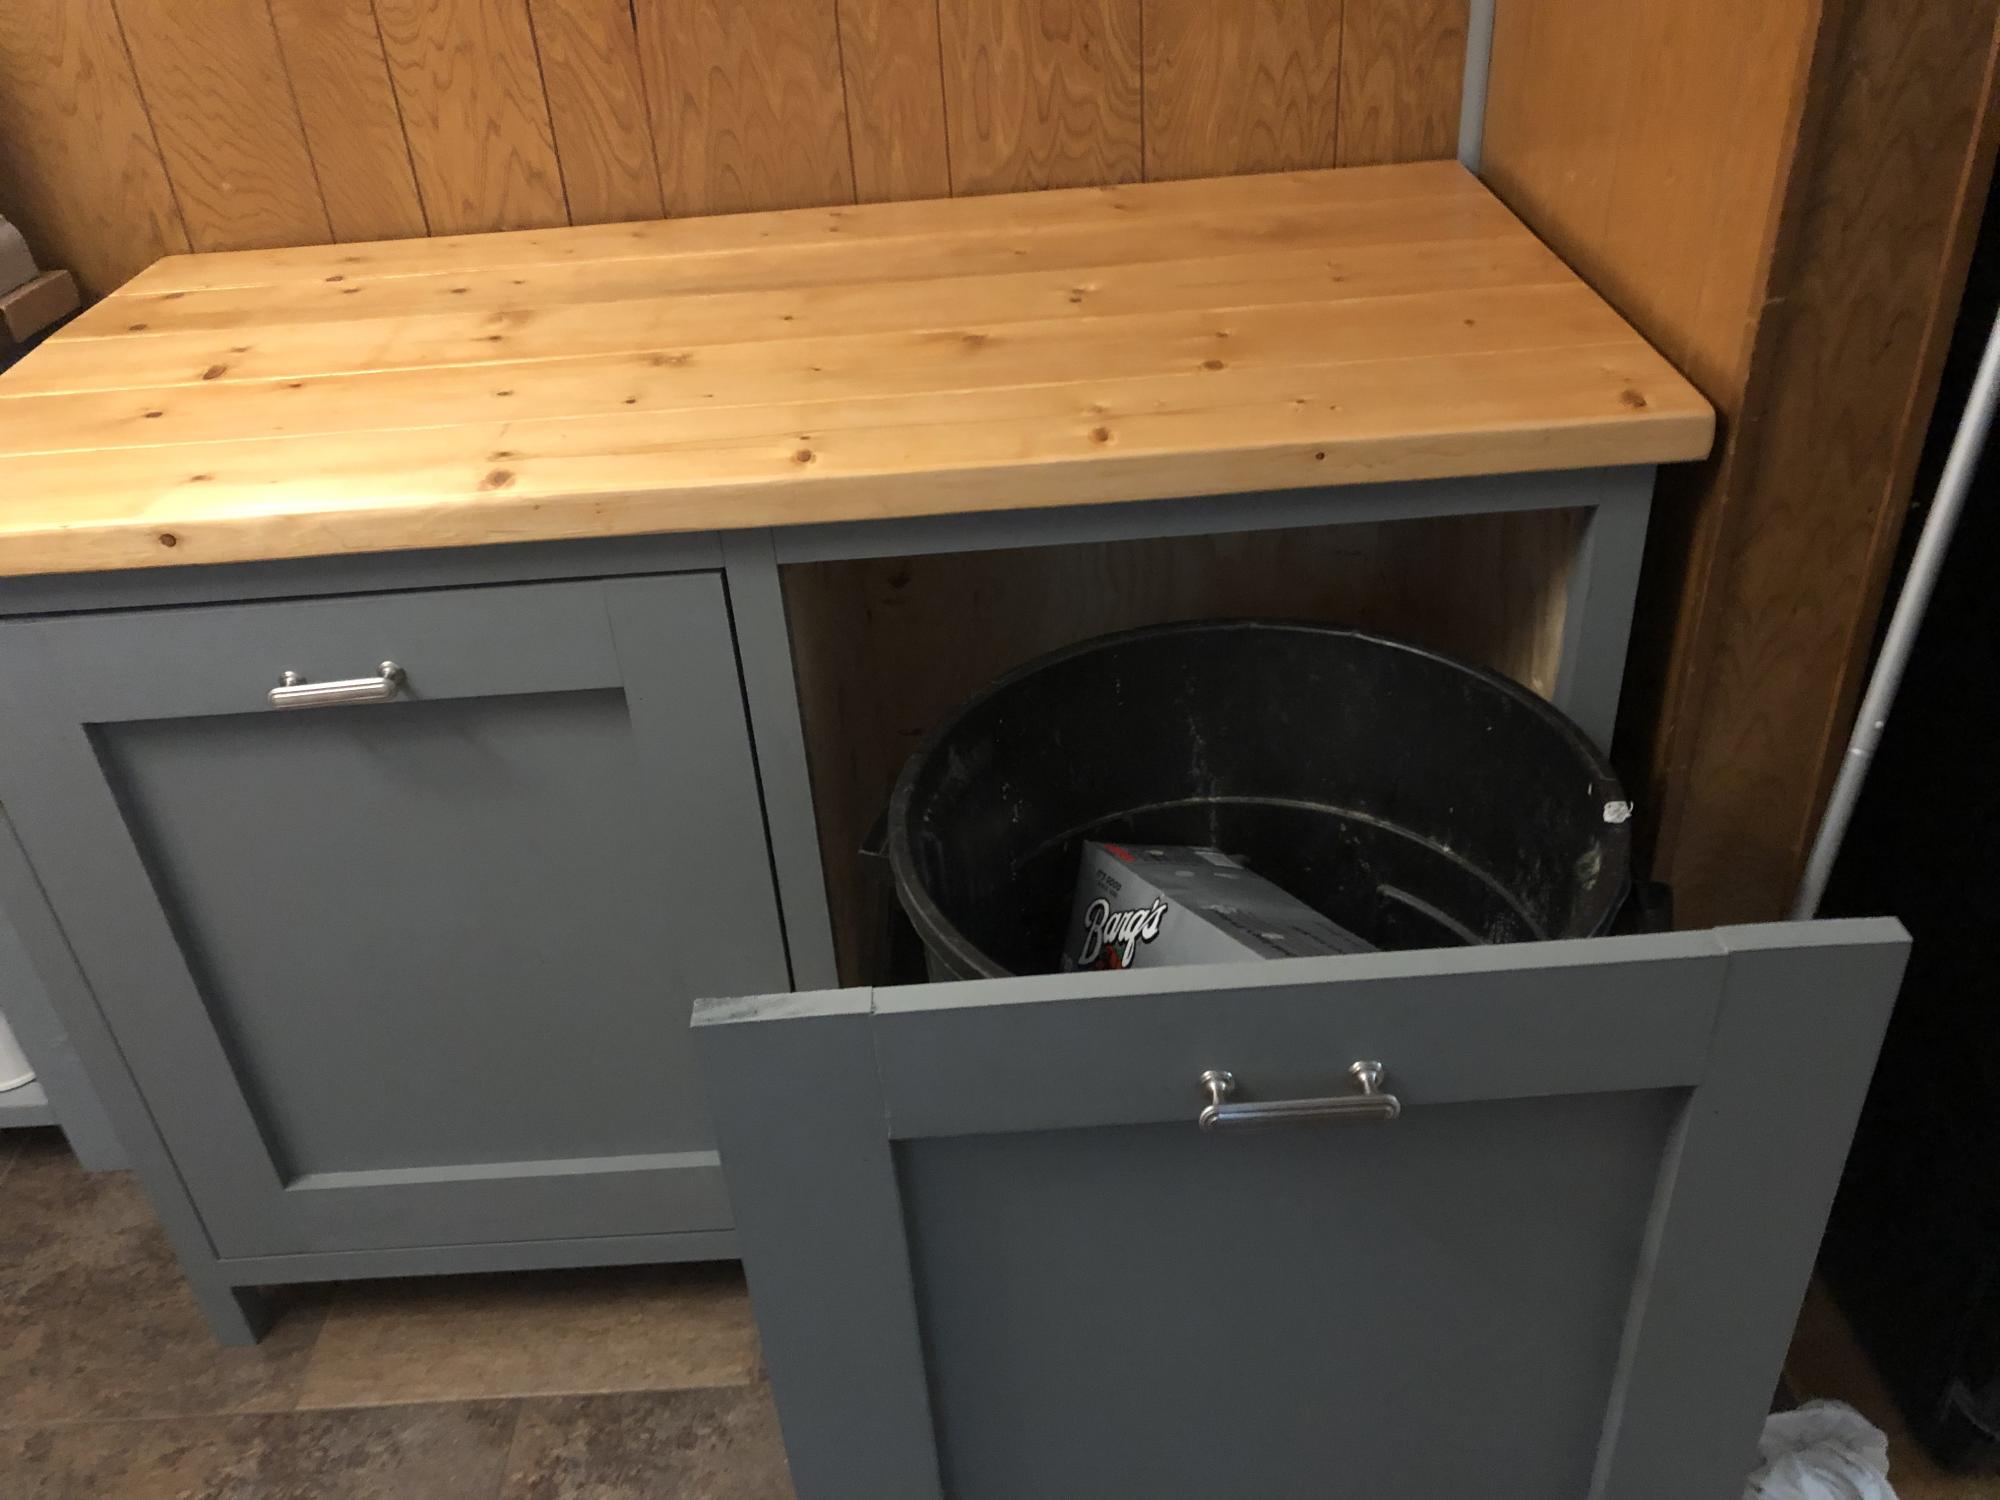
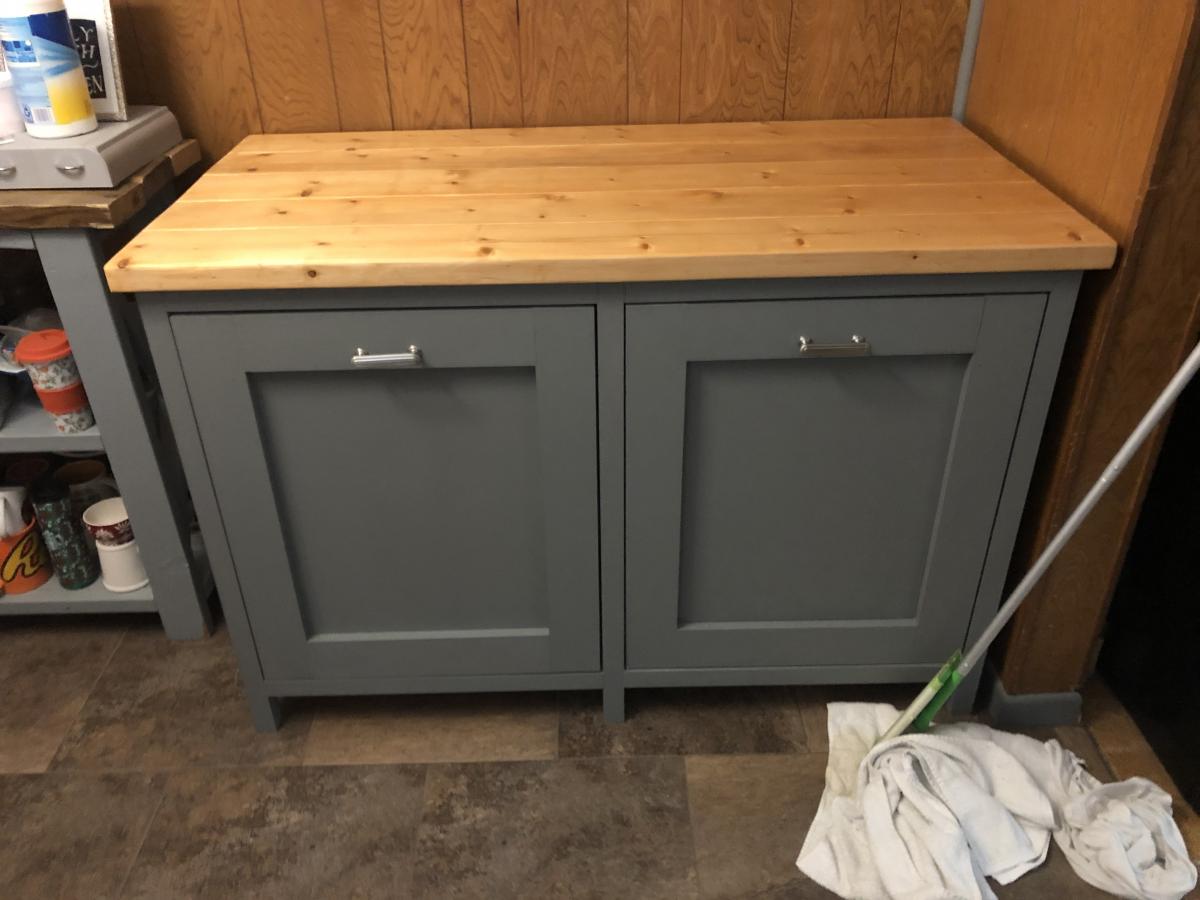
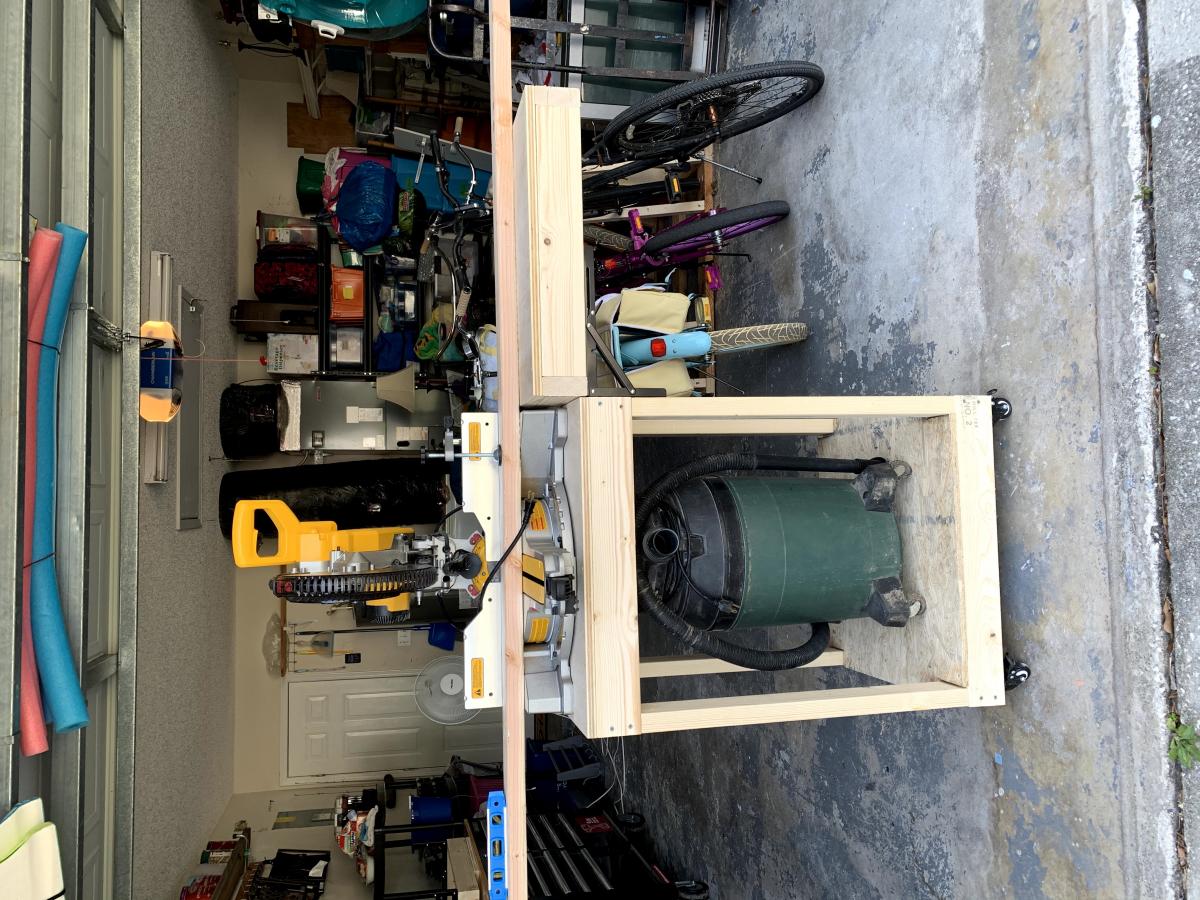
This was based on the "Small Kitchen Island" Plans but needed to put 2 - 33 Gal Trash cans in. I used Select Square edged Pine. The depth remained the same as the plans but the width changed dramatically (52" wide). I also increased the height to match the other furniture (3' High). I added 4 - 1 X 2's to the top of the cabinet to secure the top.

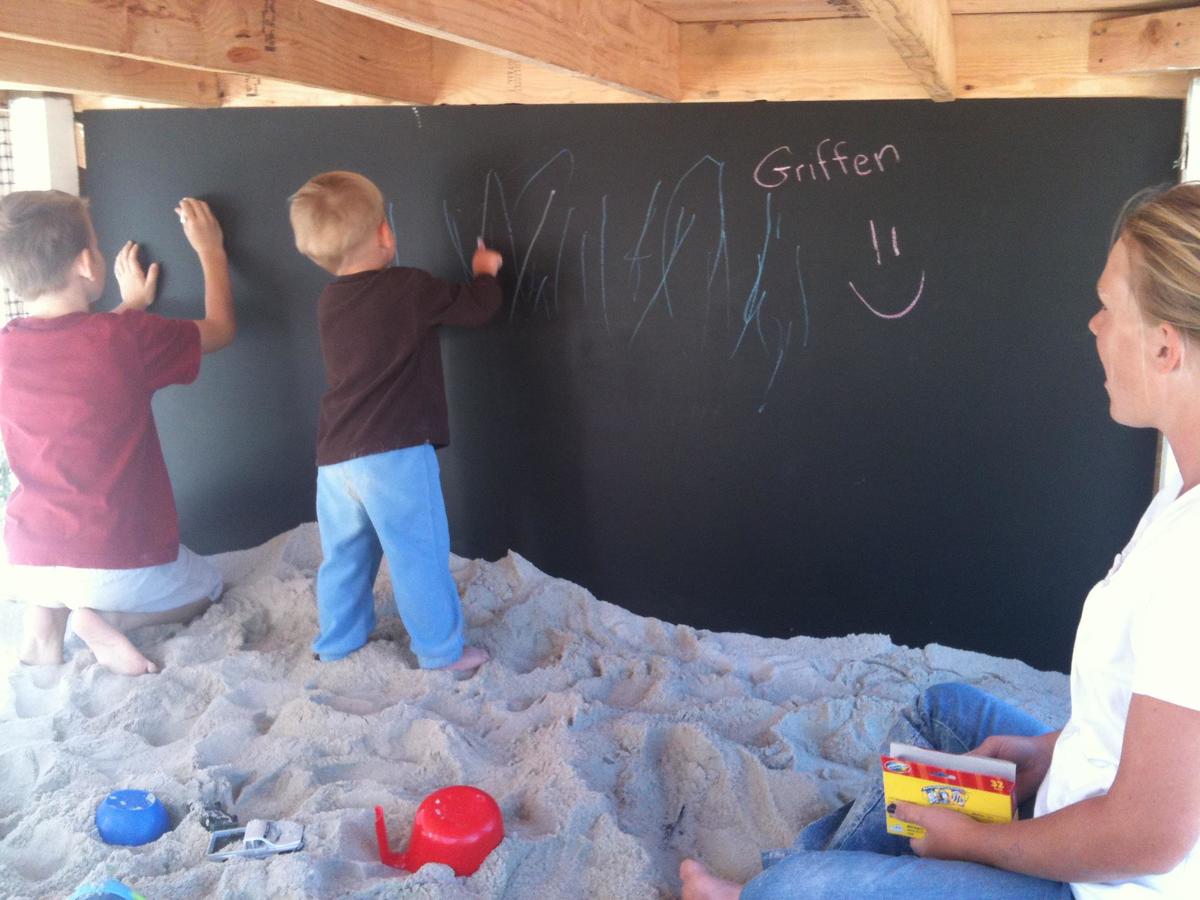
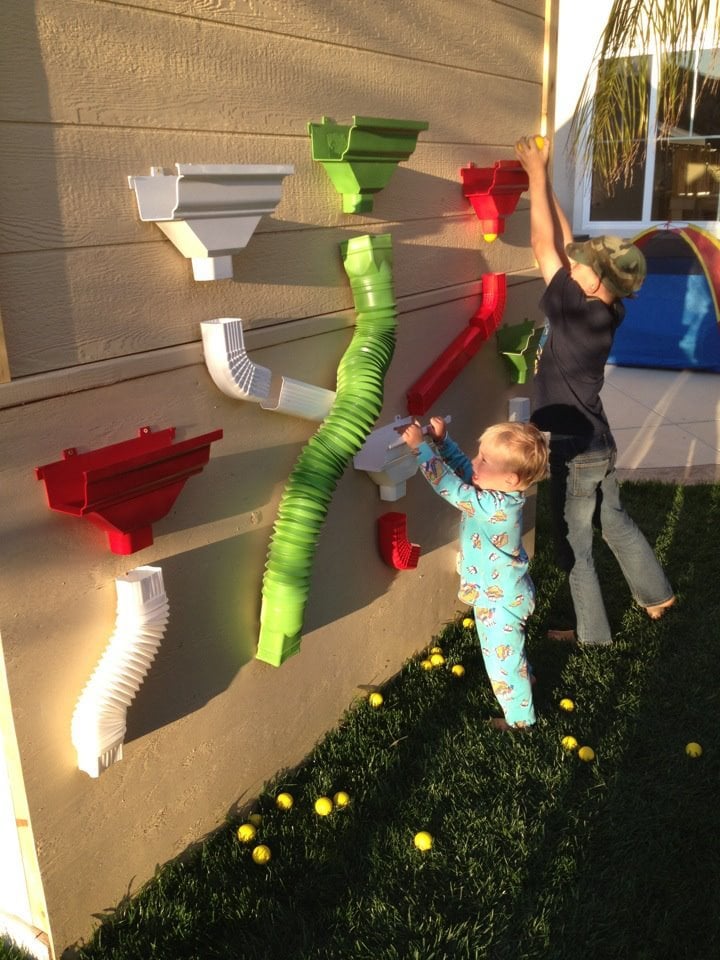
This was so much fun to do! Very easy and I added some personal touches. I made the lower level an enclosed sandbox area with a chalk board on the back wall. On the outside of the back wall, I added a "ball wall" that my kids love. I enclosed the bottom sandbox with plastic "chicken wire" to keep the cats out. :)
Thu, 11/22/2012 - 13:05
This is an awesome build. love the colours too, could you share them with us, including the roof colour. Thanku
Thu, 11/22/2012 - 15:34
Thanks! Glad you like it!
The paint was from Dunn Edwards: Roof was "Louisiana Mud", playhouse walls were "Drifting" and then the white was a snow white from Lowe's.
The slide and accessories were also from Lowe's.
Tue, 04/15/2014 - 09:35
I LOVE this! This is exactly what I'd like to build. Do you have plans you can share with us? I think I'd also like to add a couple of swings on one of the sides too. Thanks so much!
In reply to Love this! by m7hennen
Sun, 04/27/2014 - 08:39
I know I messed with the dimensions a bit but I don't remember exactly. I made the playhouse larger (deeper and taller than original plans) . I also cut the roof line on the deck side for more room. I put aluminum over the wood on the roof and then painted. The Ball Wall was made out of plastic gutter pieces that I painted and we used practice rubber golf balls to throw into them. I hope that helps! We sold that house, so I can't go out and measure it :)

In reply to Plans for Playhouse by Dawnybb
Thu, 05/28/2020 - 15:32
You may not get this as this is an old post. Did you dig post holes? I have older kids and I am thinking about building a plan like this but at a 6ft height. Wondered how much it moves around when there are a bunch of kids on there. The house I will build is also 6 ft heigh.
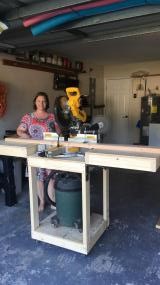
I love this Miter Saw Cart. The plans were easy to follow and tweak to work with what I had on hand. I love all of Ana White's plans, passion, and inspiration. Happy Building!
Sat, 09/19/2020 - 20:55
I can imagine a lot of projects being built there! Thanks for sharing:)
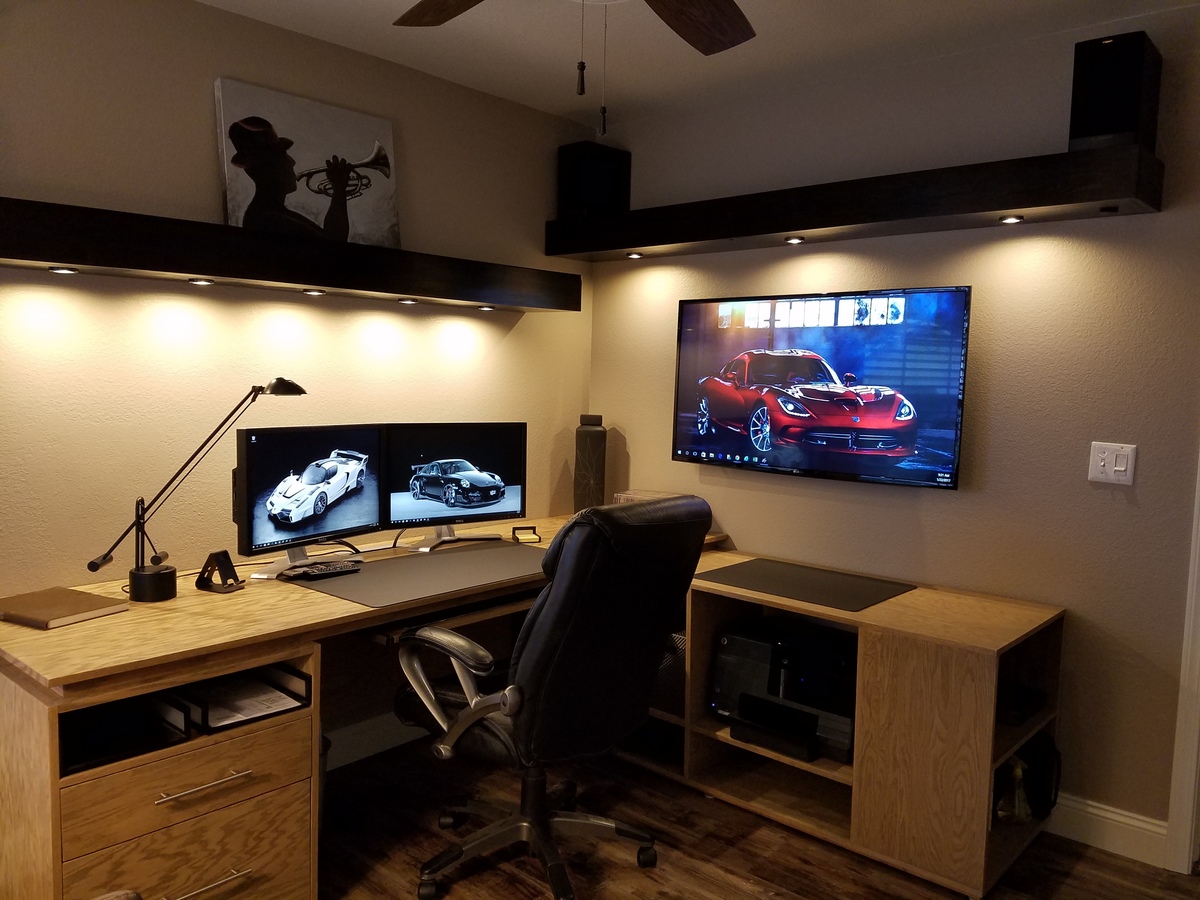
This was my first real project. I started with the base instructions from this site and plugged them into Sketch-Up. From there I modified them a bit to fit my space better and to accomodate my PC and Audio/Video equipment. The desk fir perfectly in the room. My wife and I put the flooring in plus new baseboards, window sills, and paint. I also used some plans for floating shelves from another site and incorporate lighting to complete the look of the room. Can't wait for my next project!!!
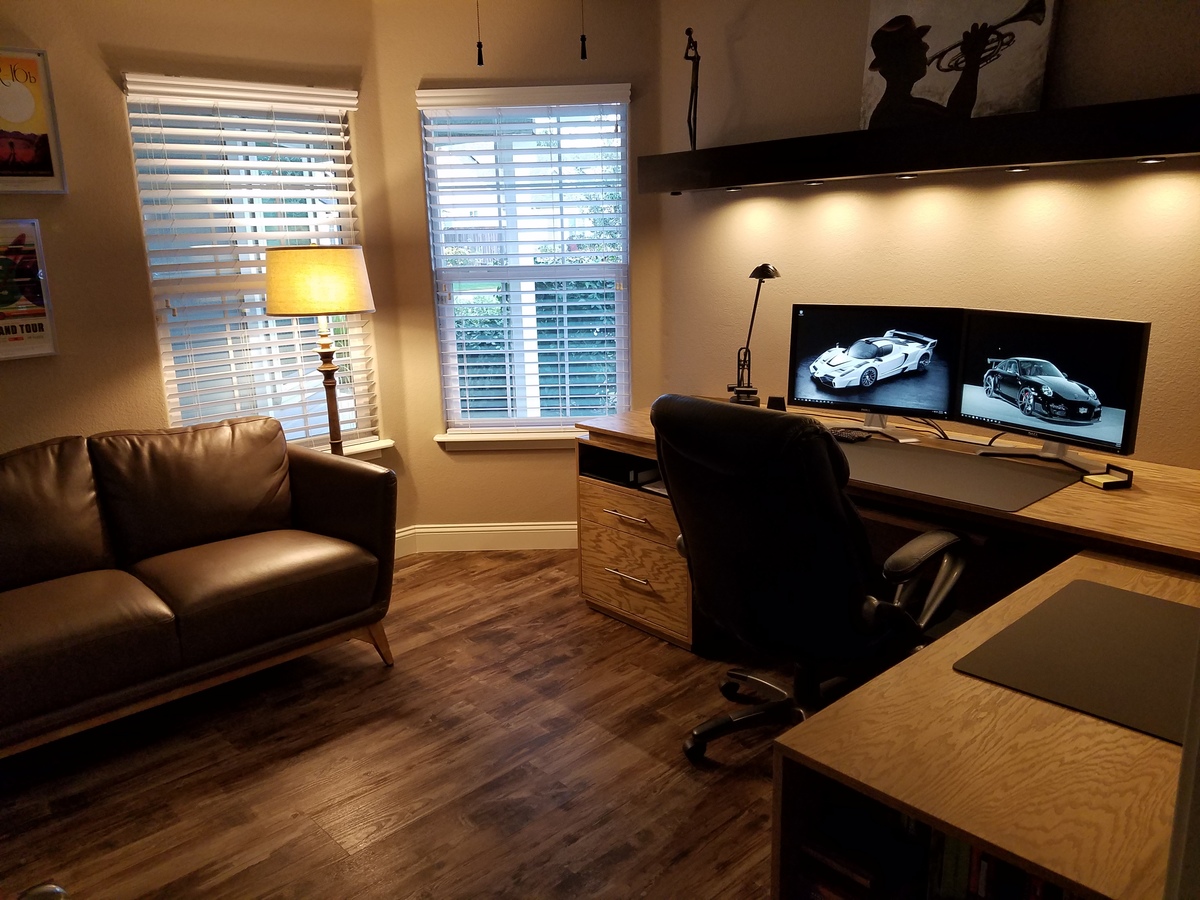
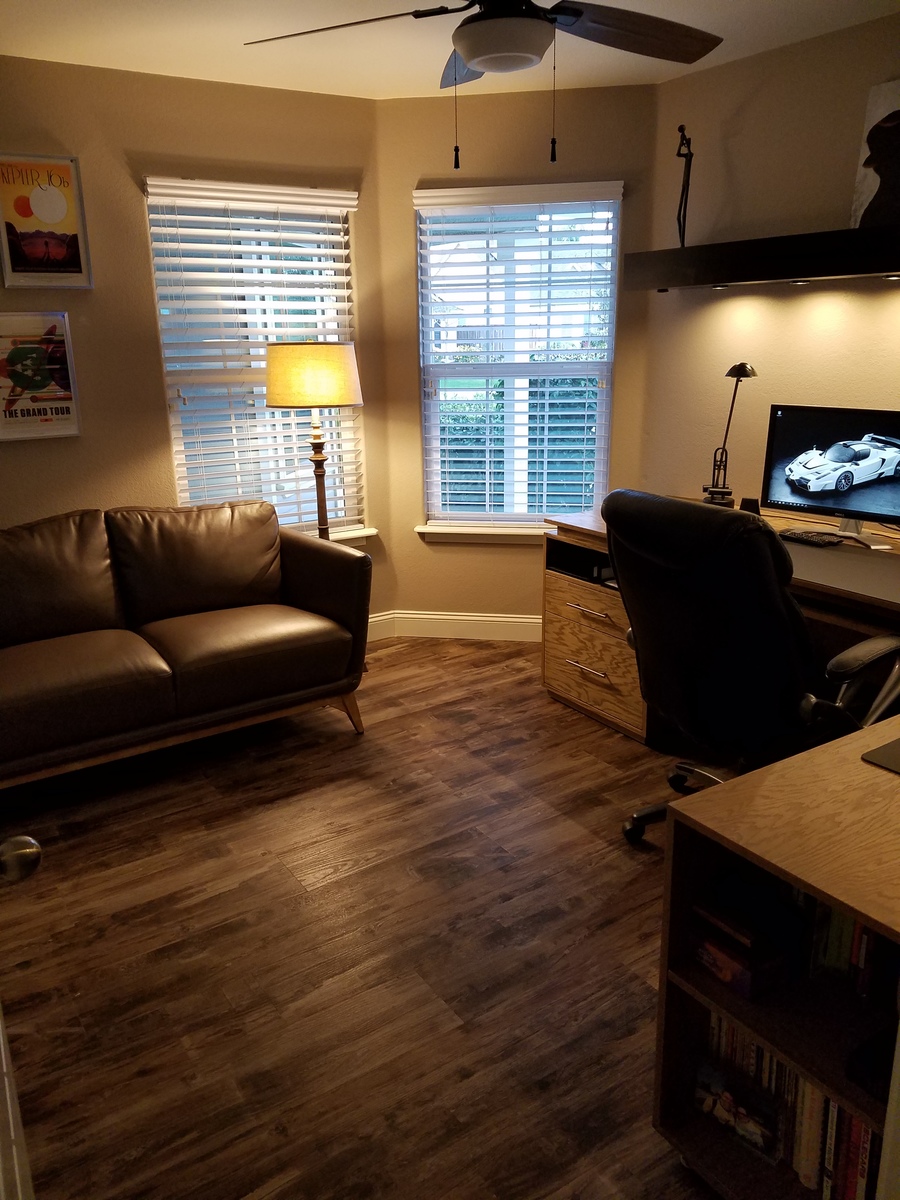
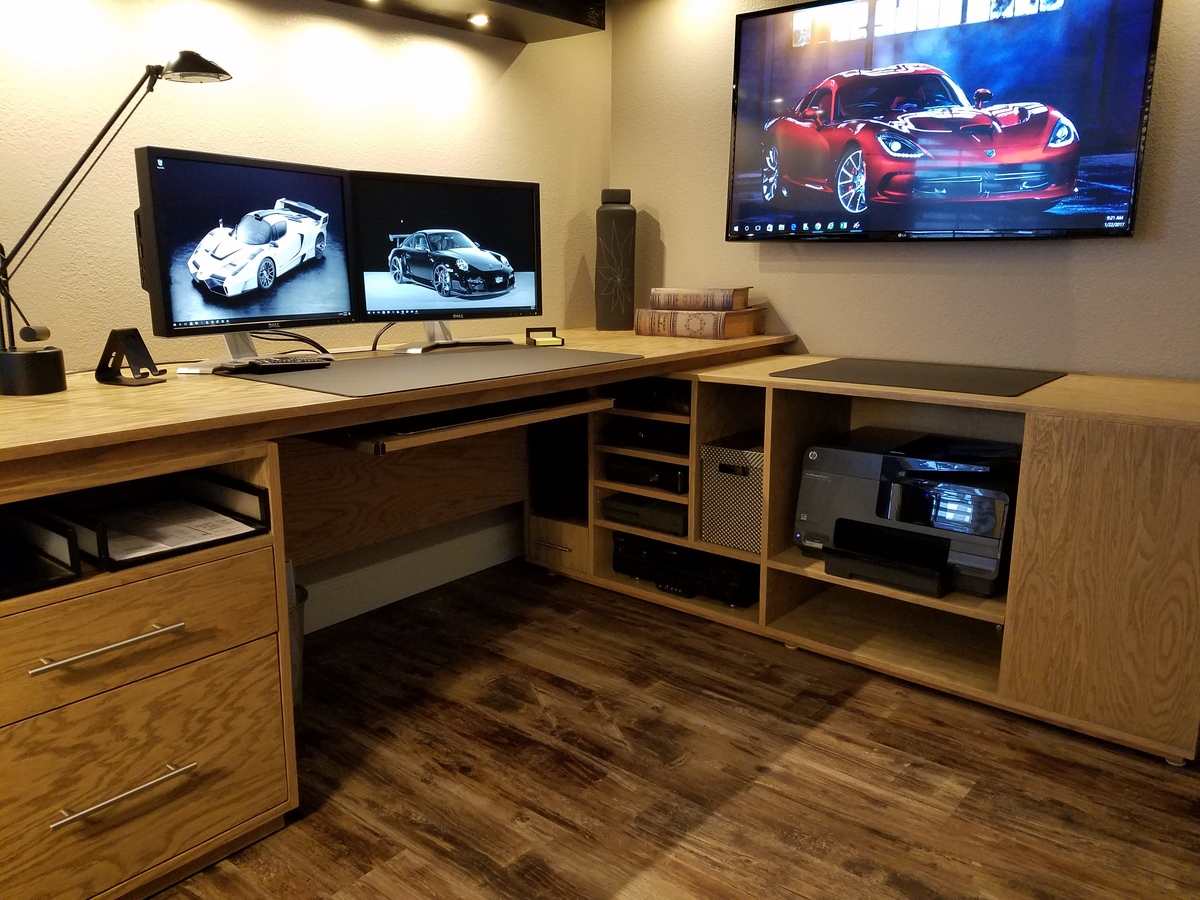
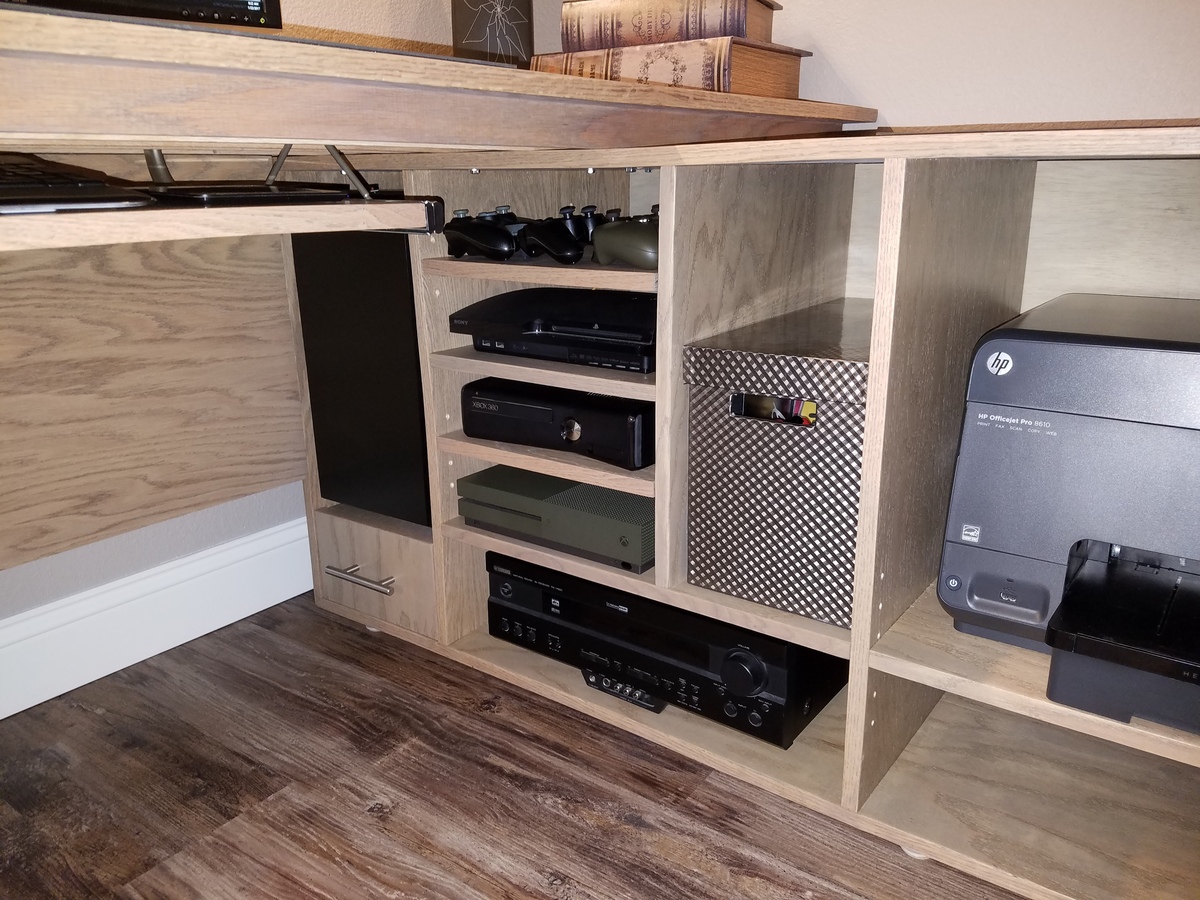
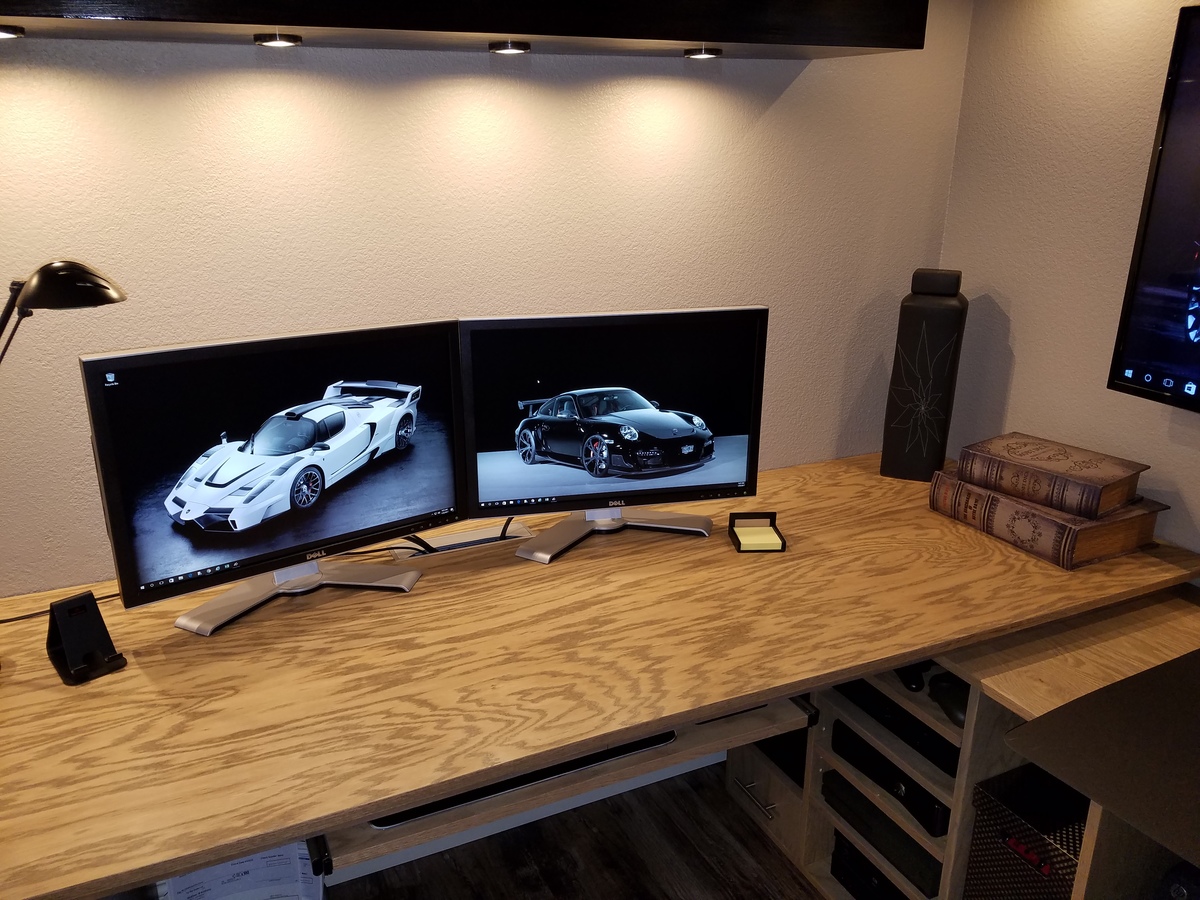
Full Tutorial with a LOT more photos on the Blog HERE
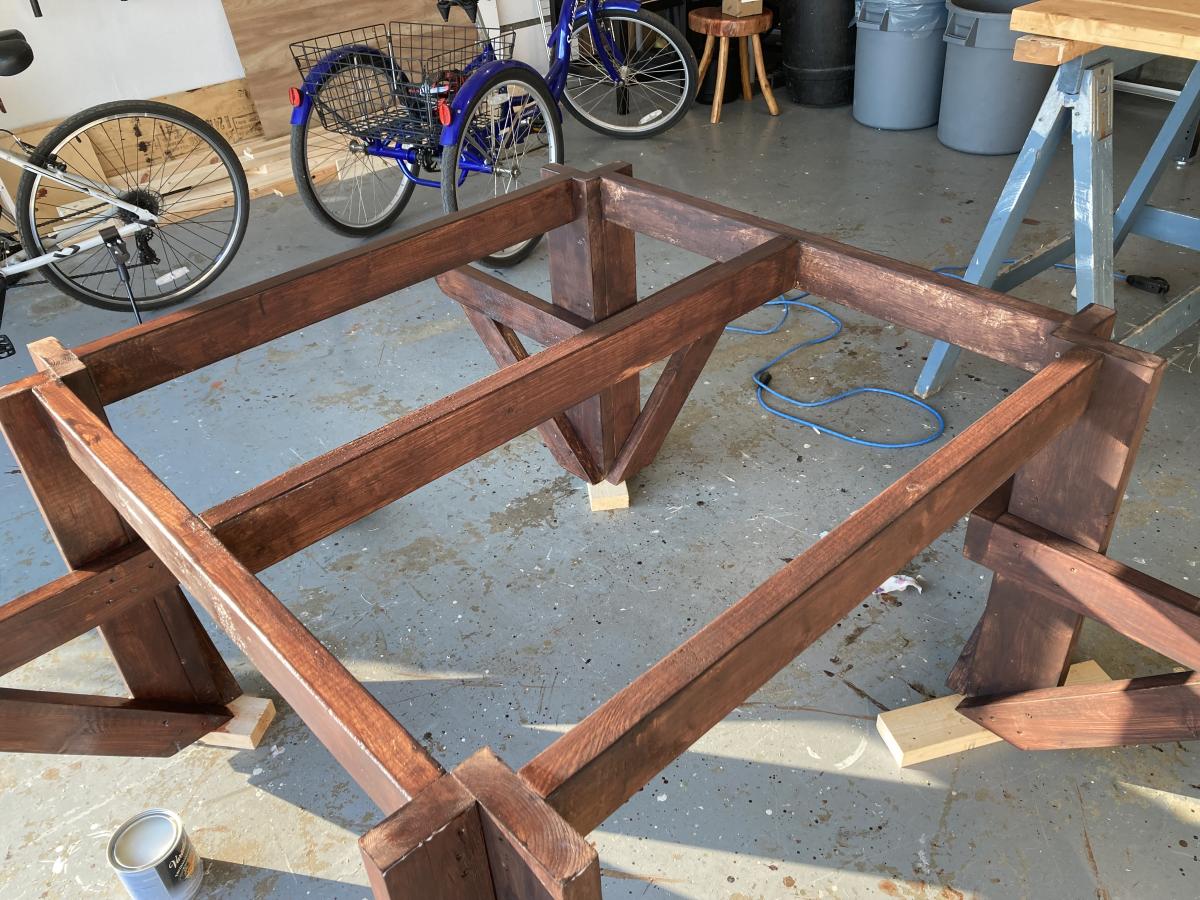
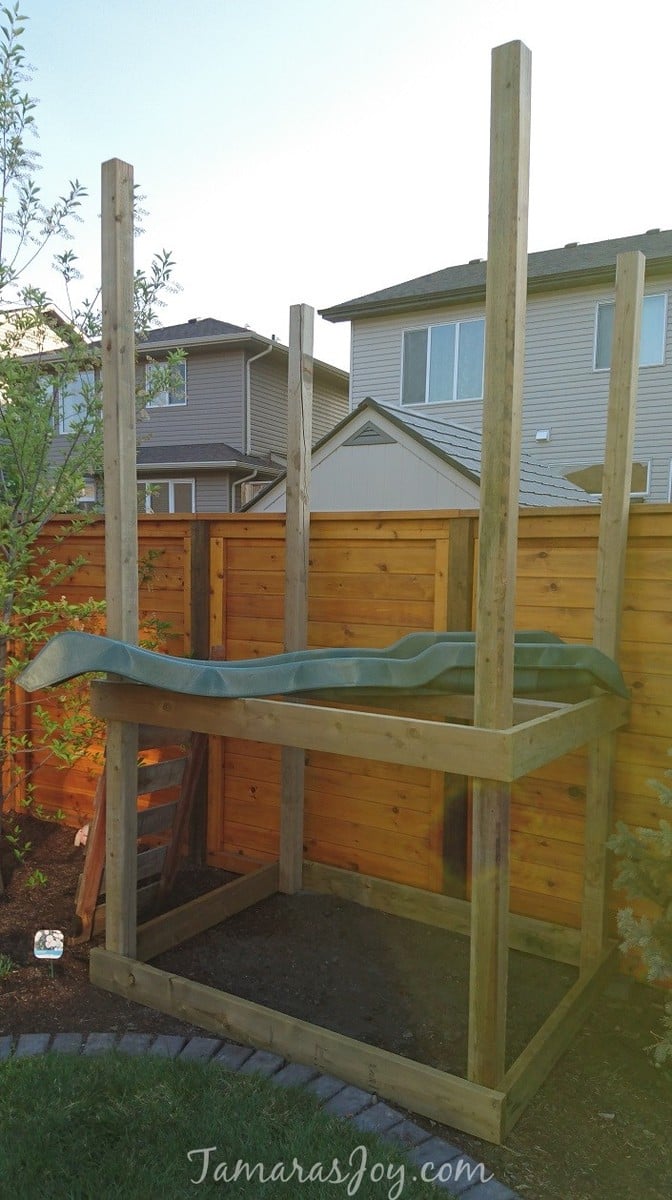
We had measured the garden space so we could build this frame to fit the space. The deck frame was made to be the correct height for the slide that we would attach later.
Once all the boards were put onto the frame I added some rails for safety of course. Then stained everything....
PS This IS a beginner project! I promise!!!! I am a beginner and I built it, it's still standing so you can do it too! I promise!

This is my first project and I am thrilled with how it turned out. Thank you Ana, you have empowered this stay at home mom!

Sat, 11/08/2014 - 12:03
I love the color of stain on this one! It really works well in this room!
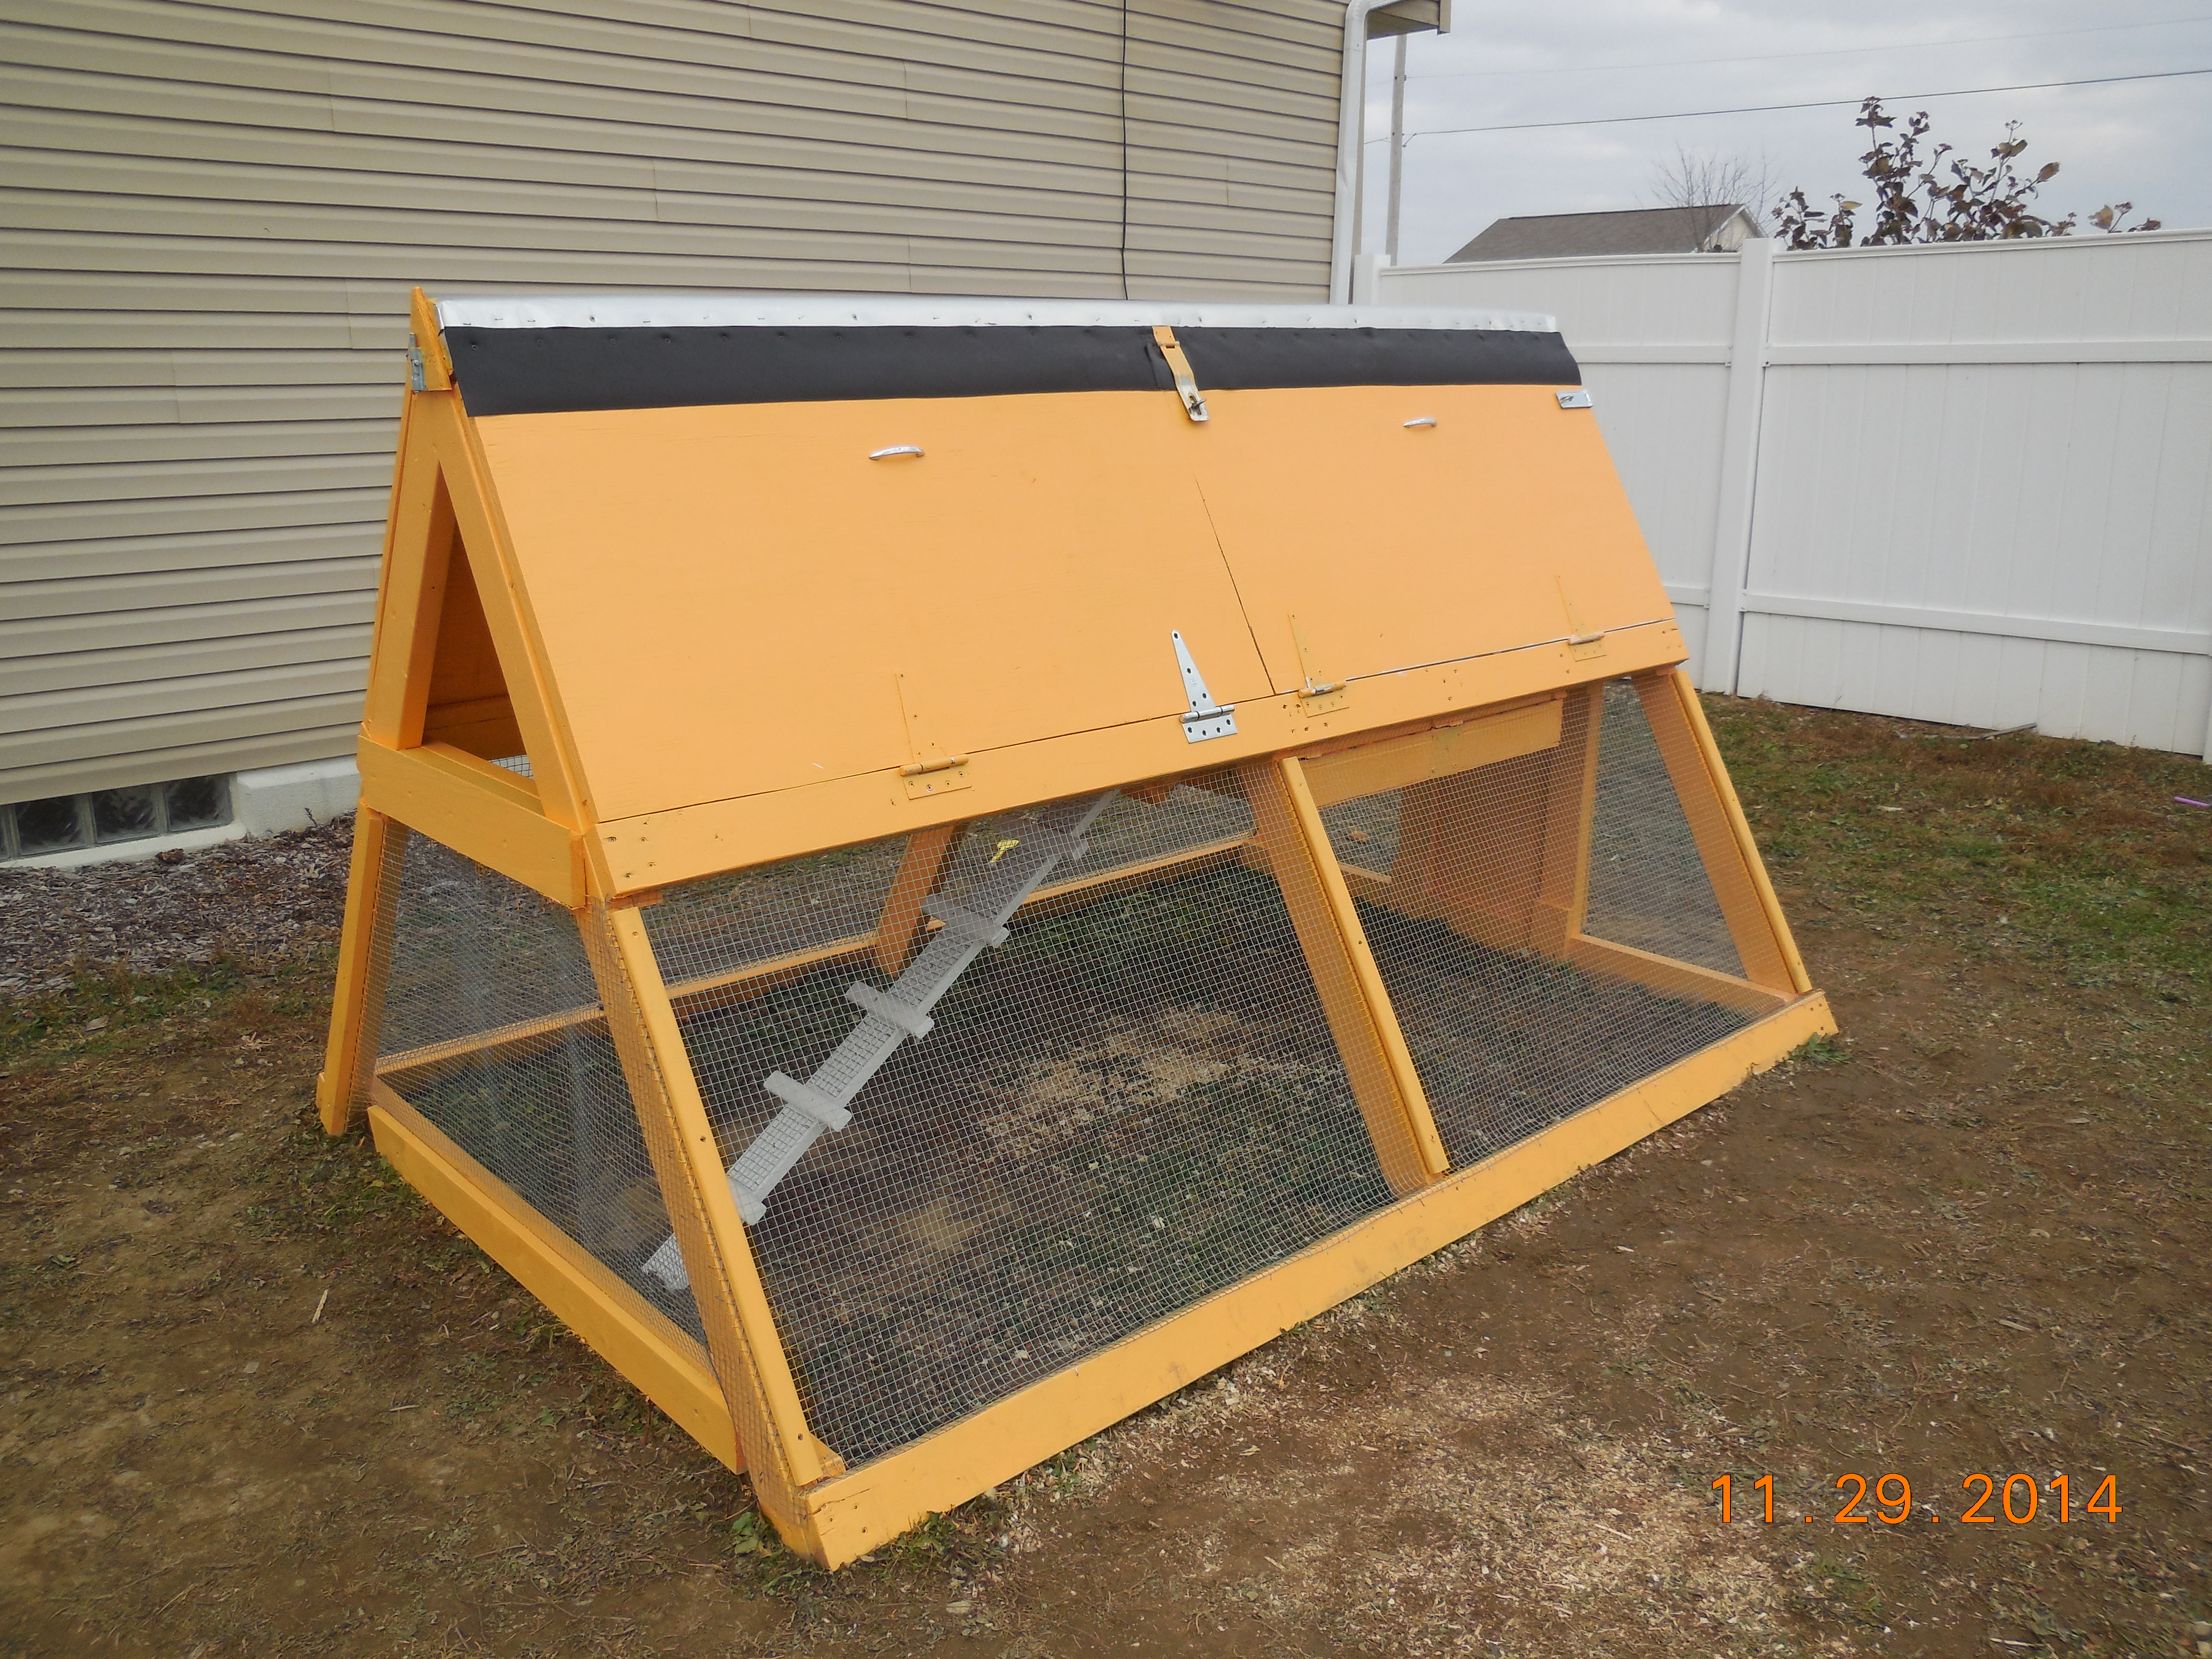
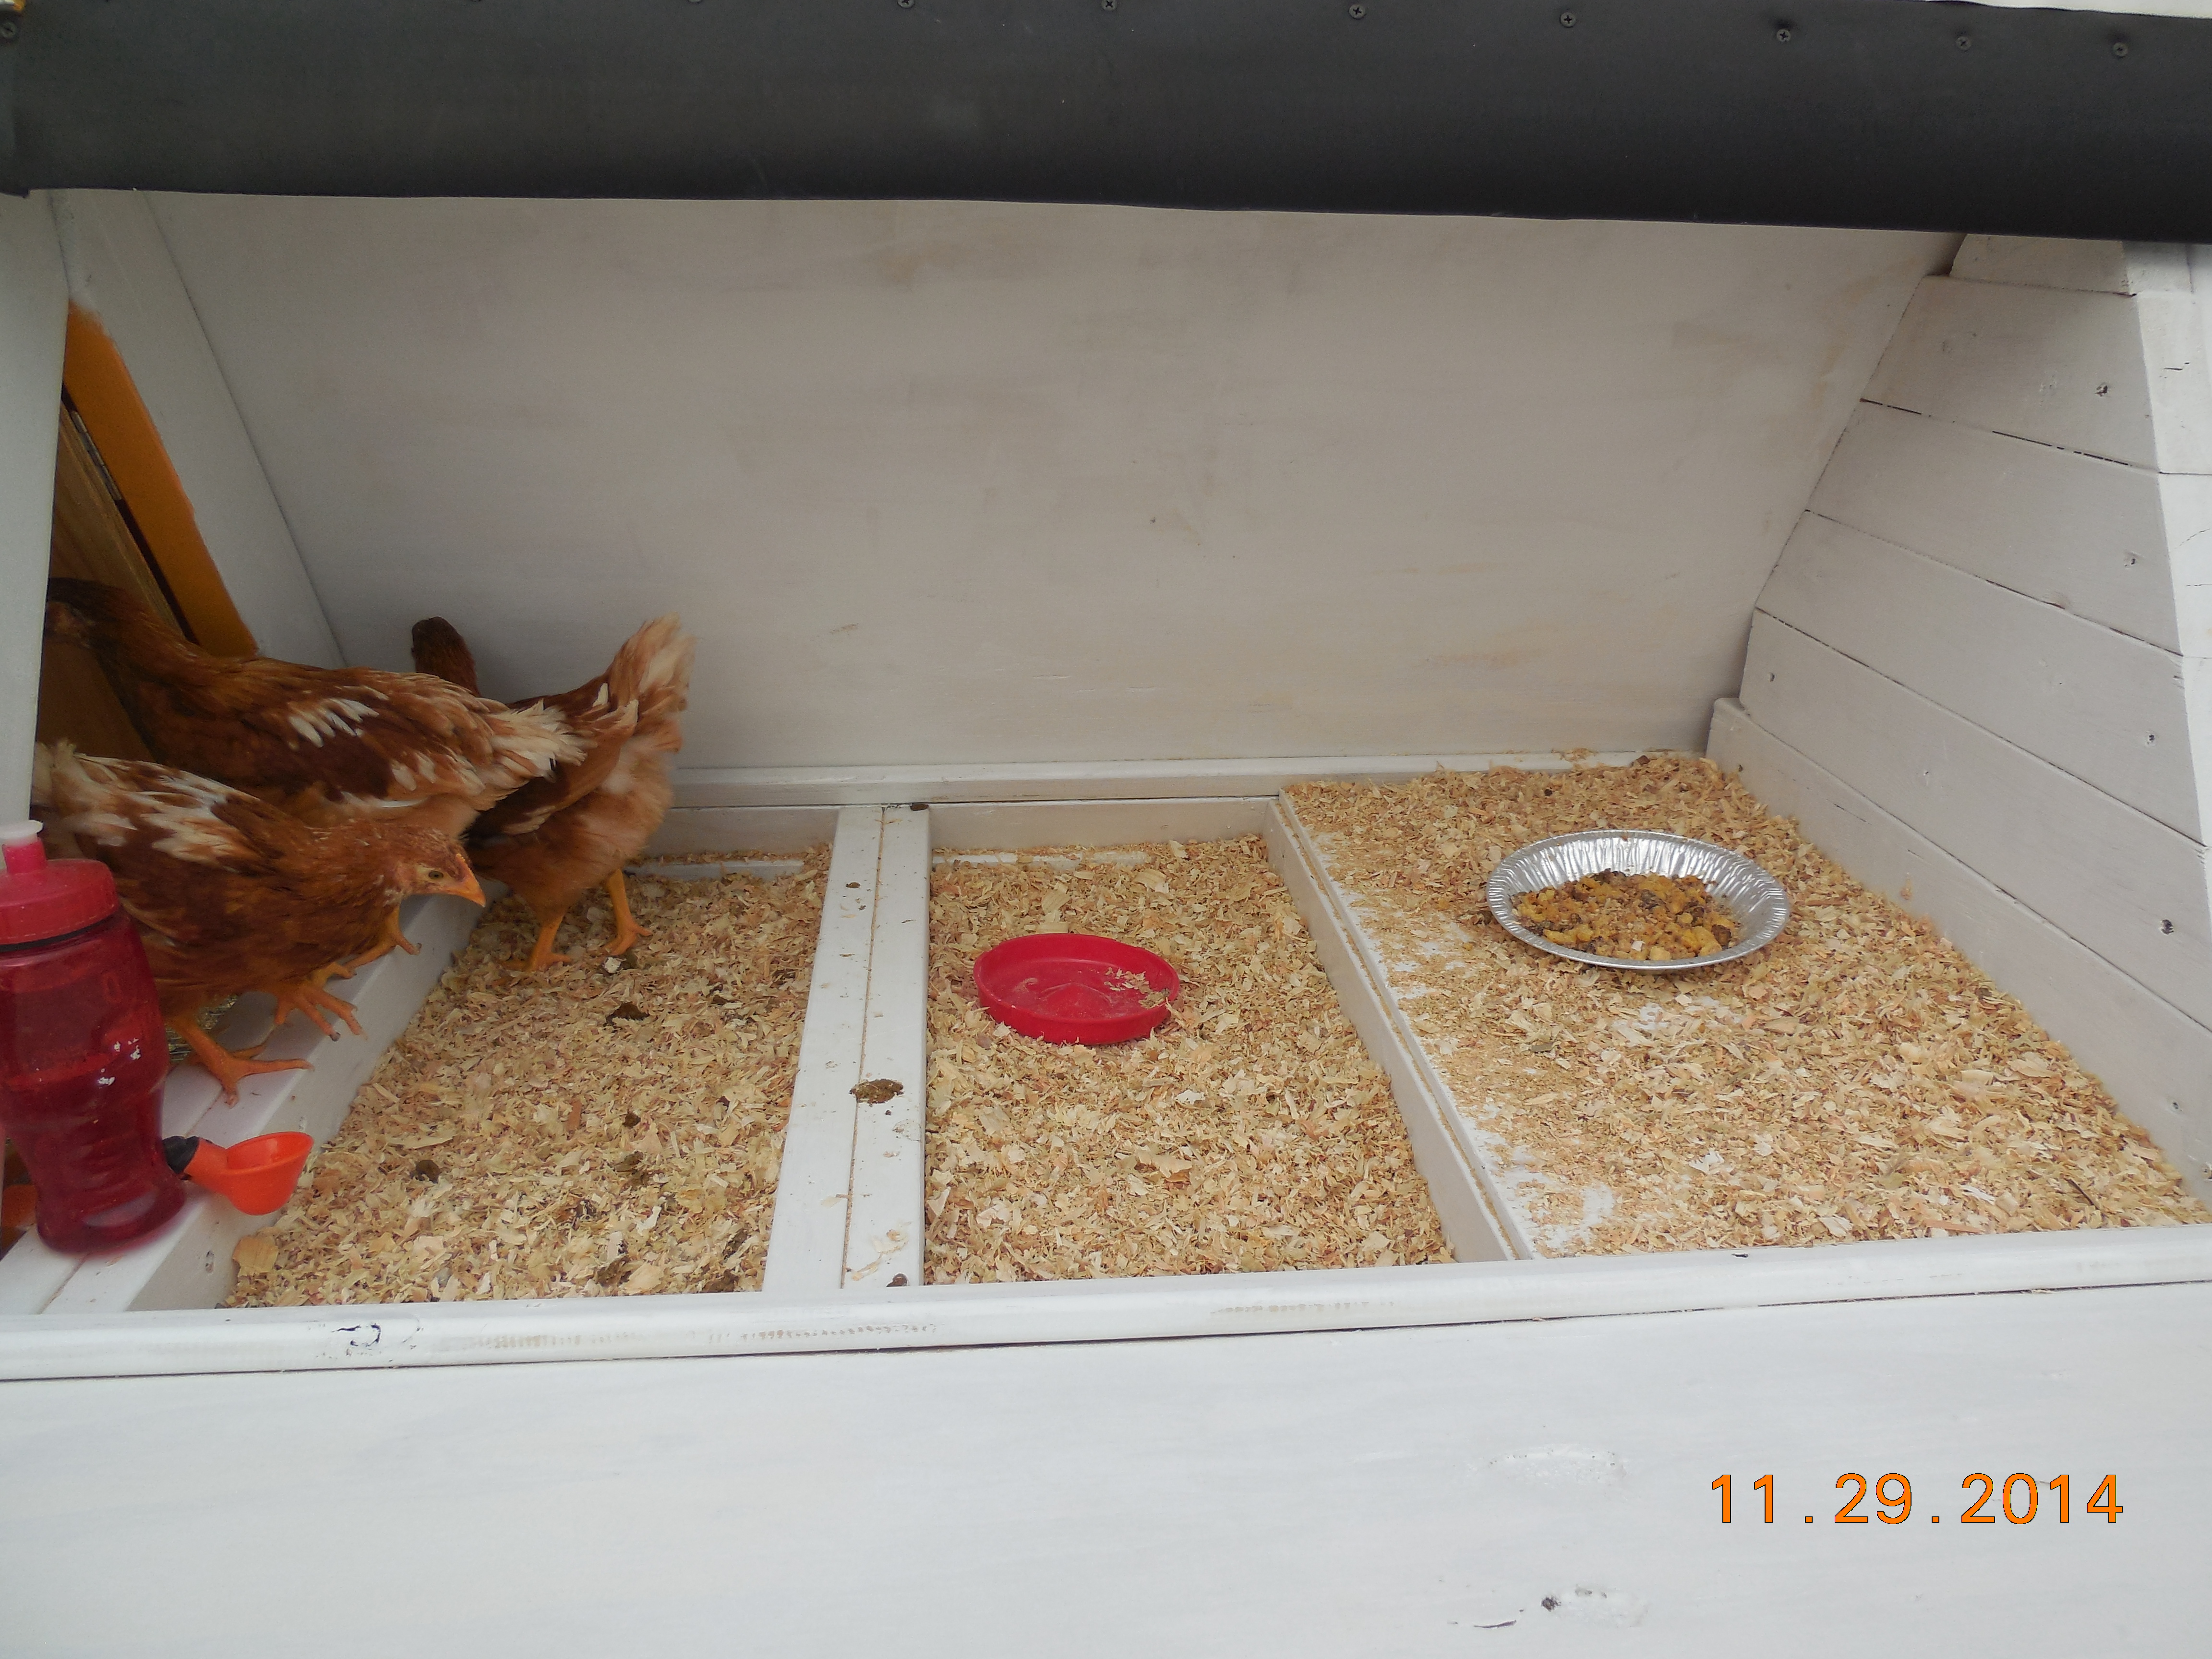
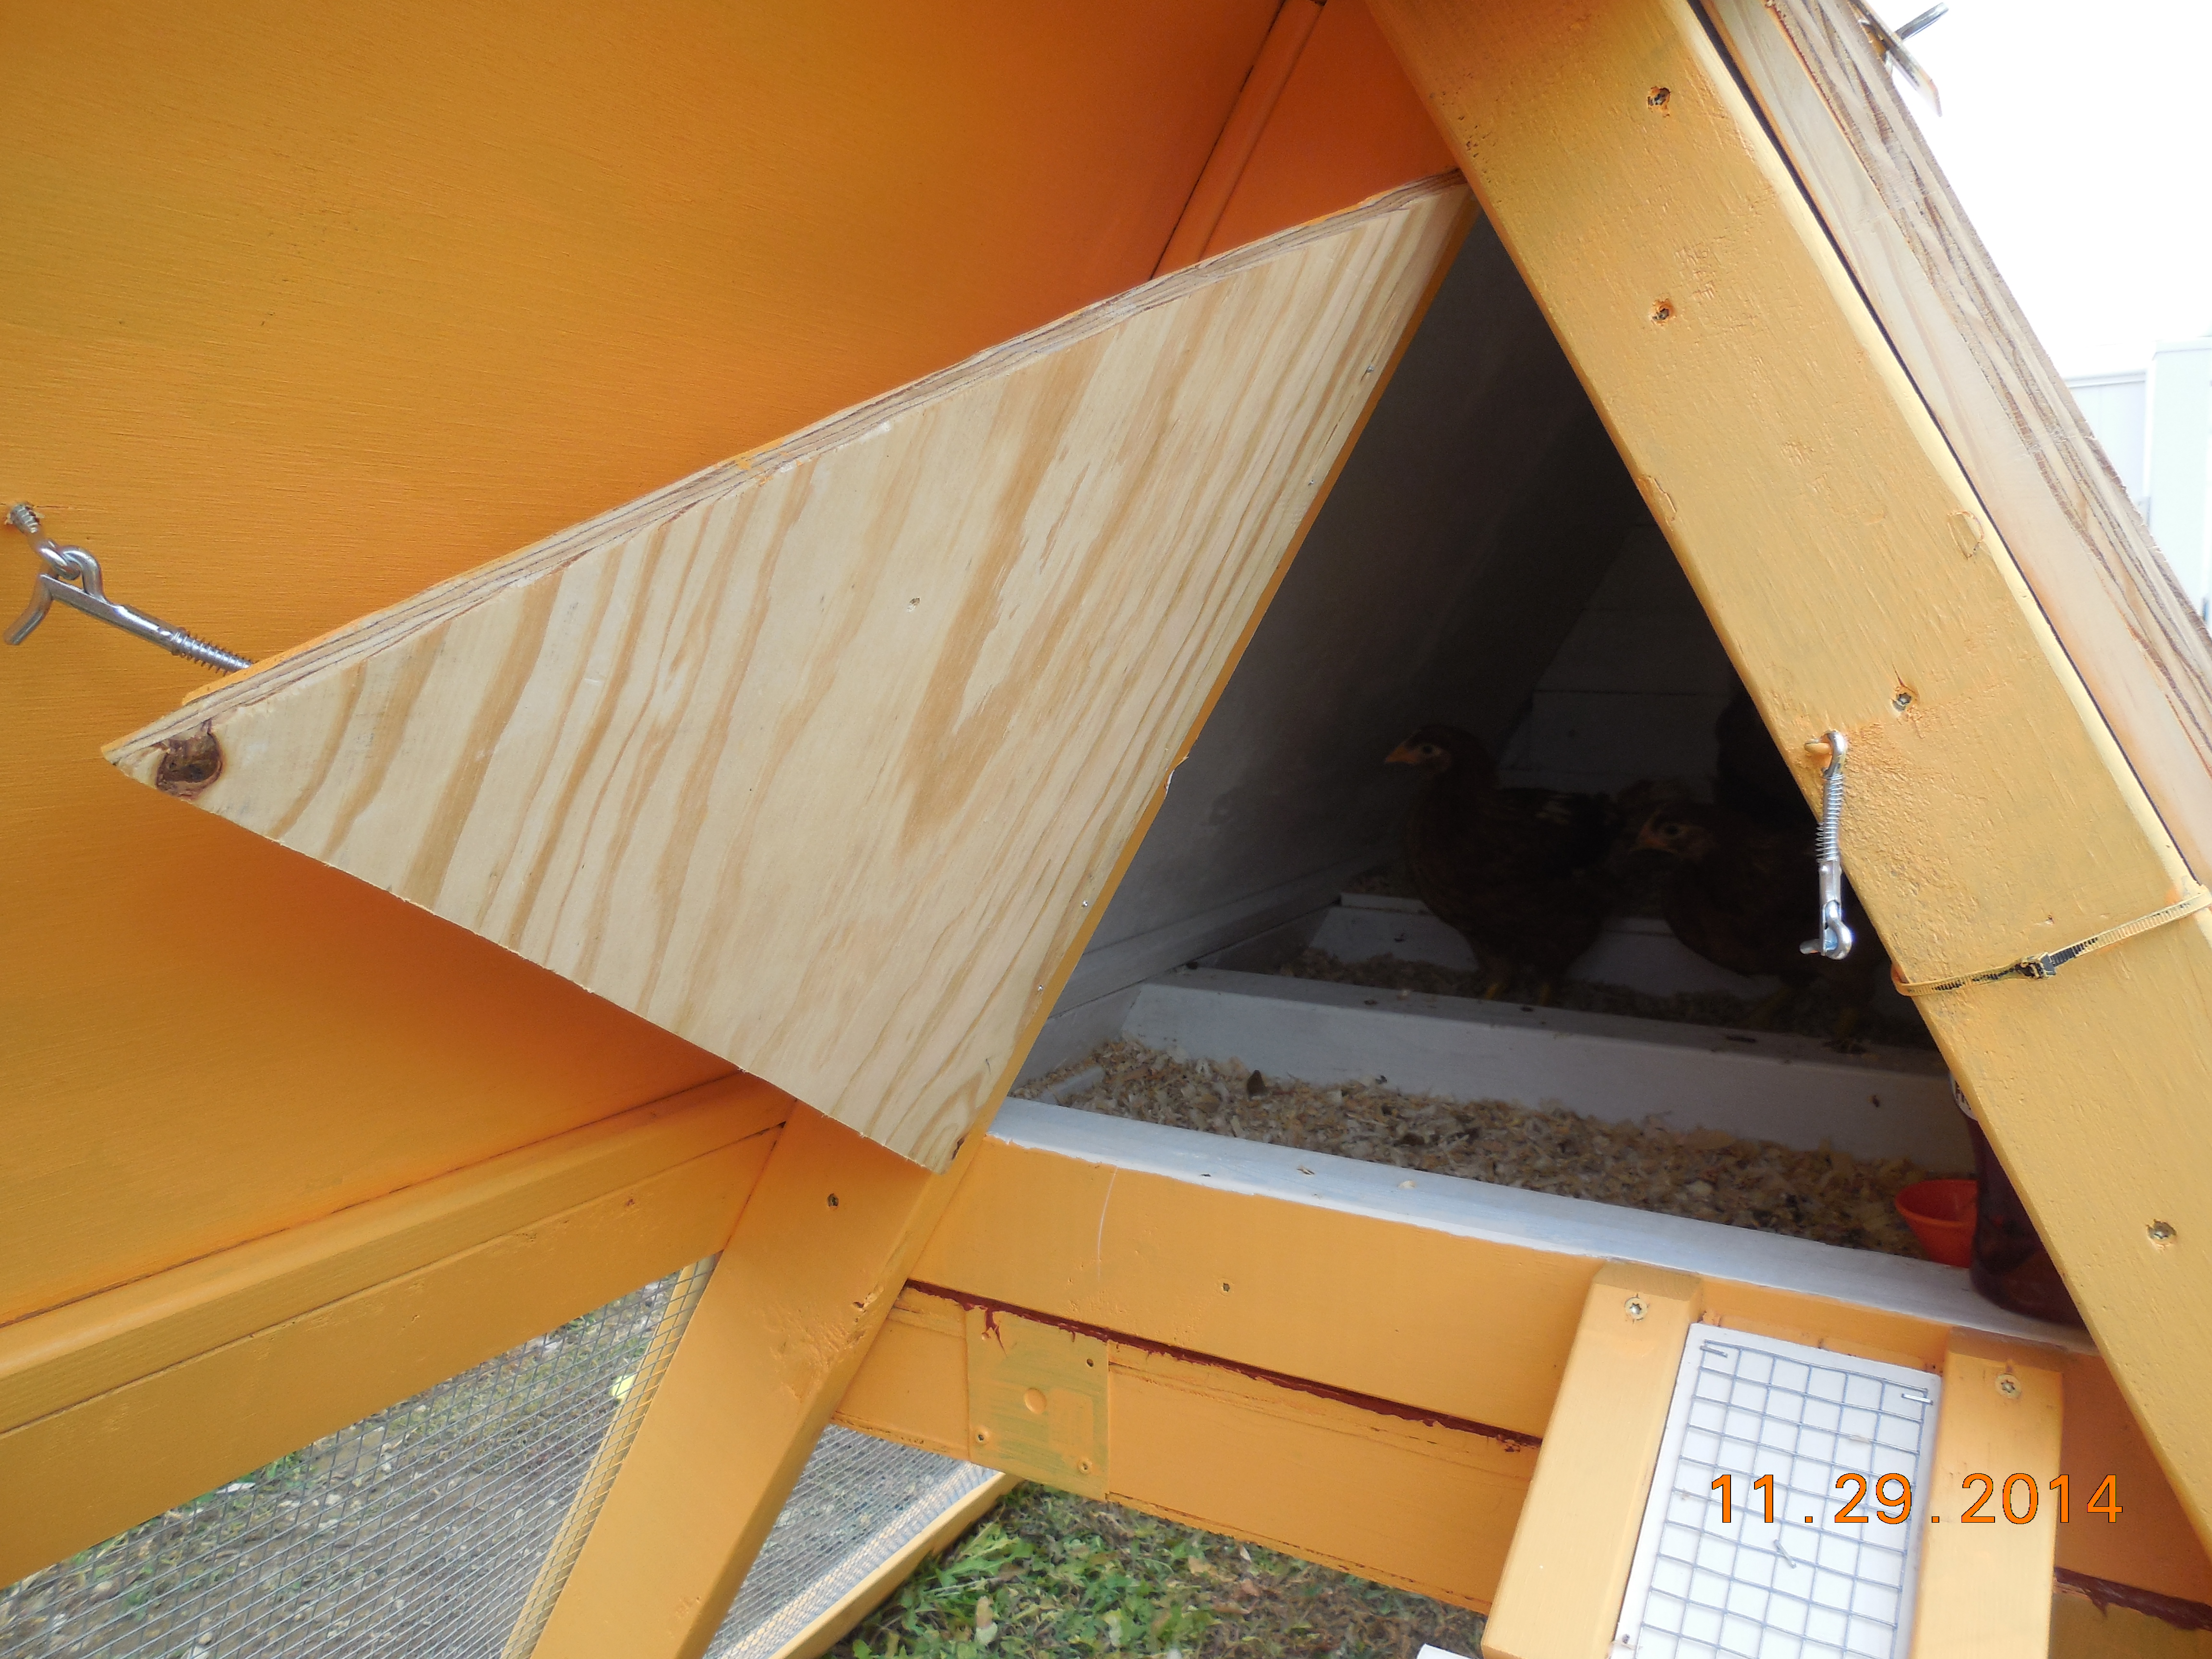
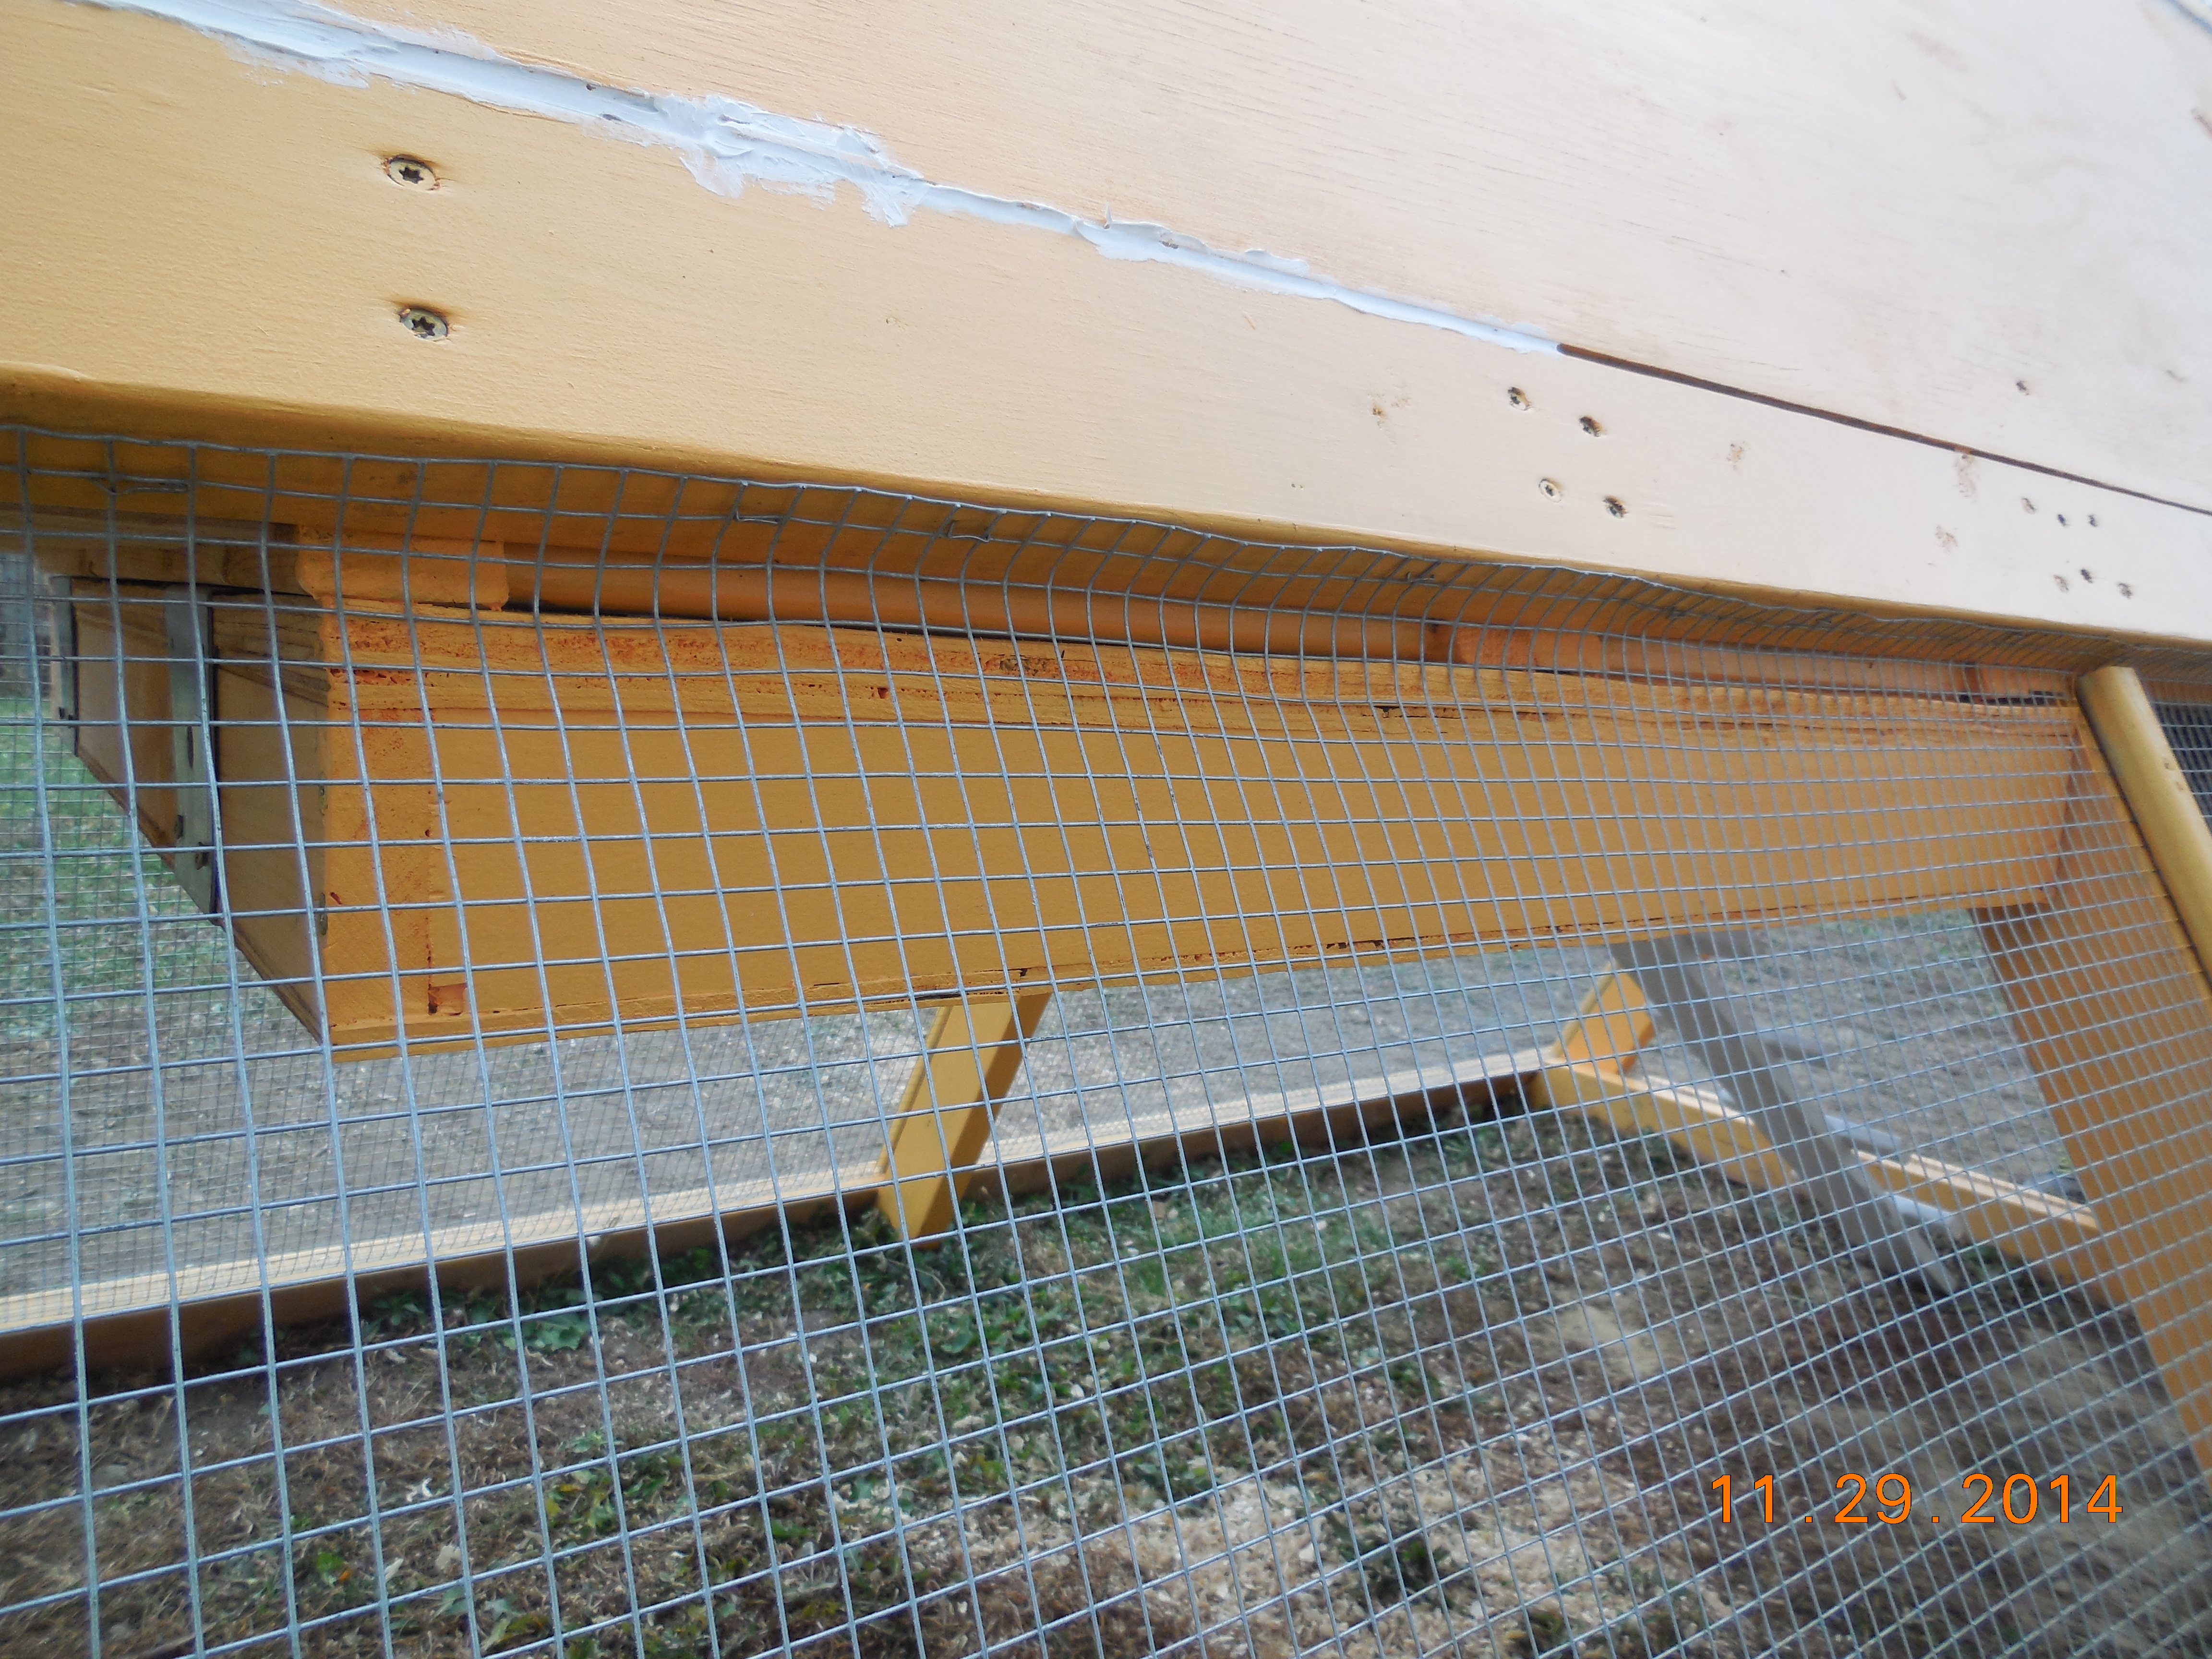
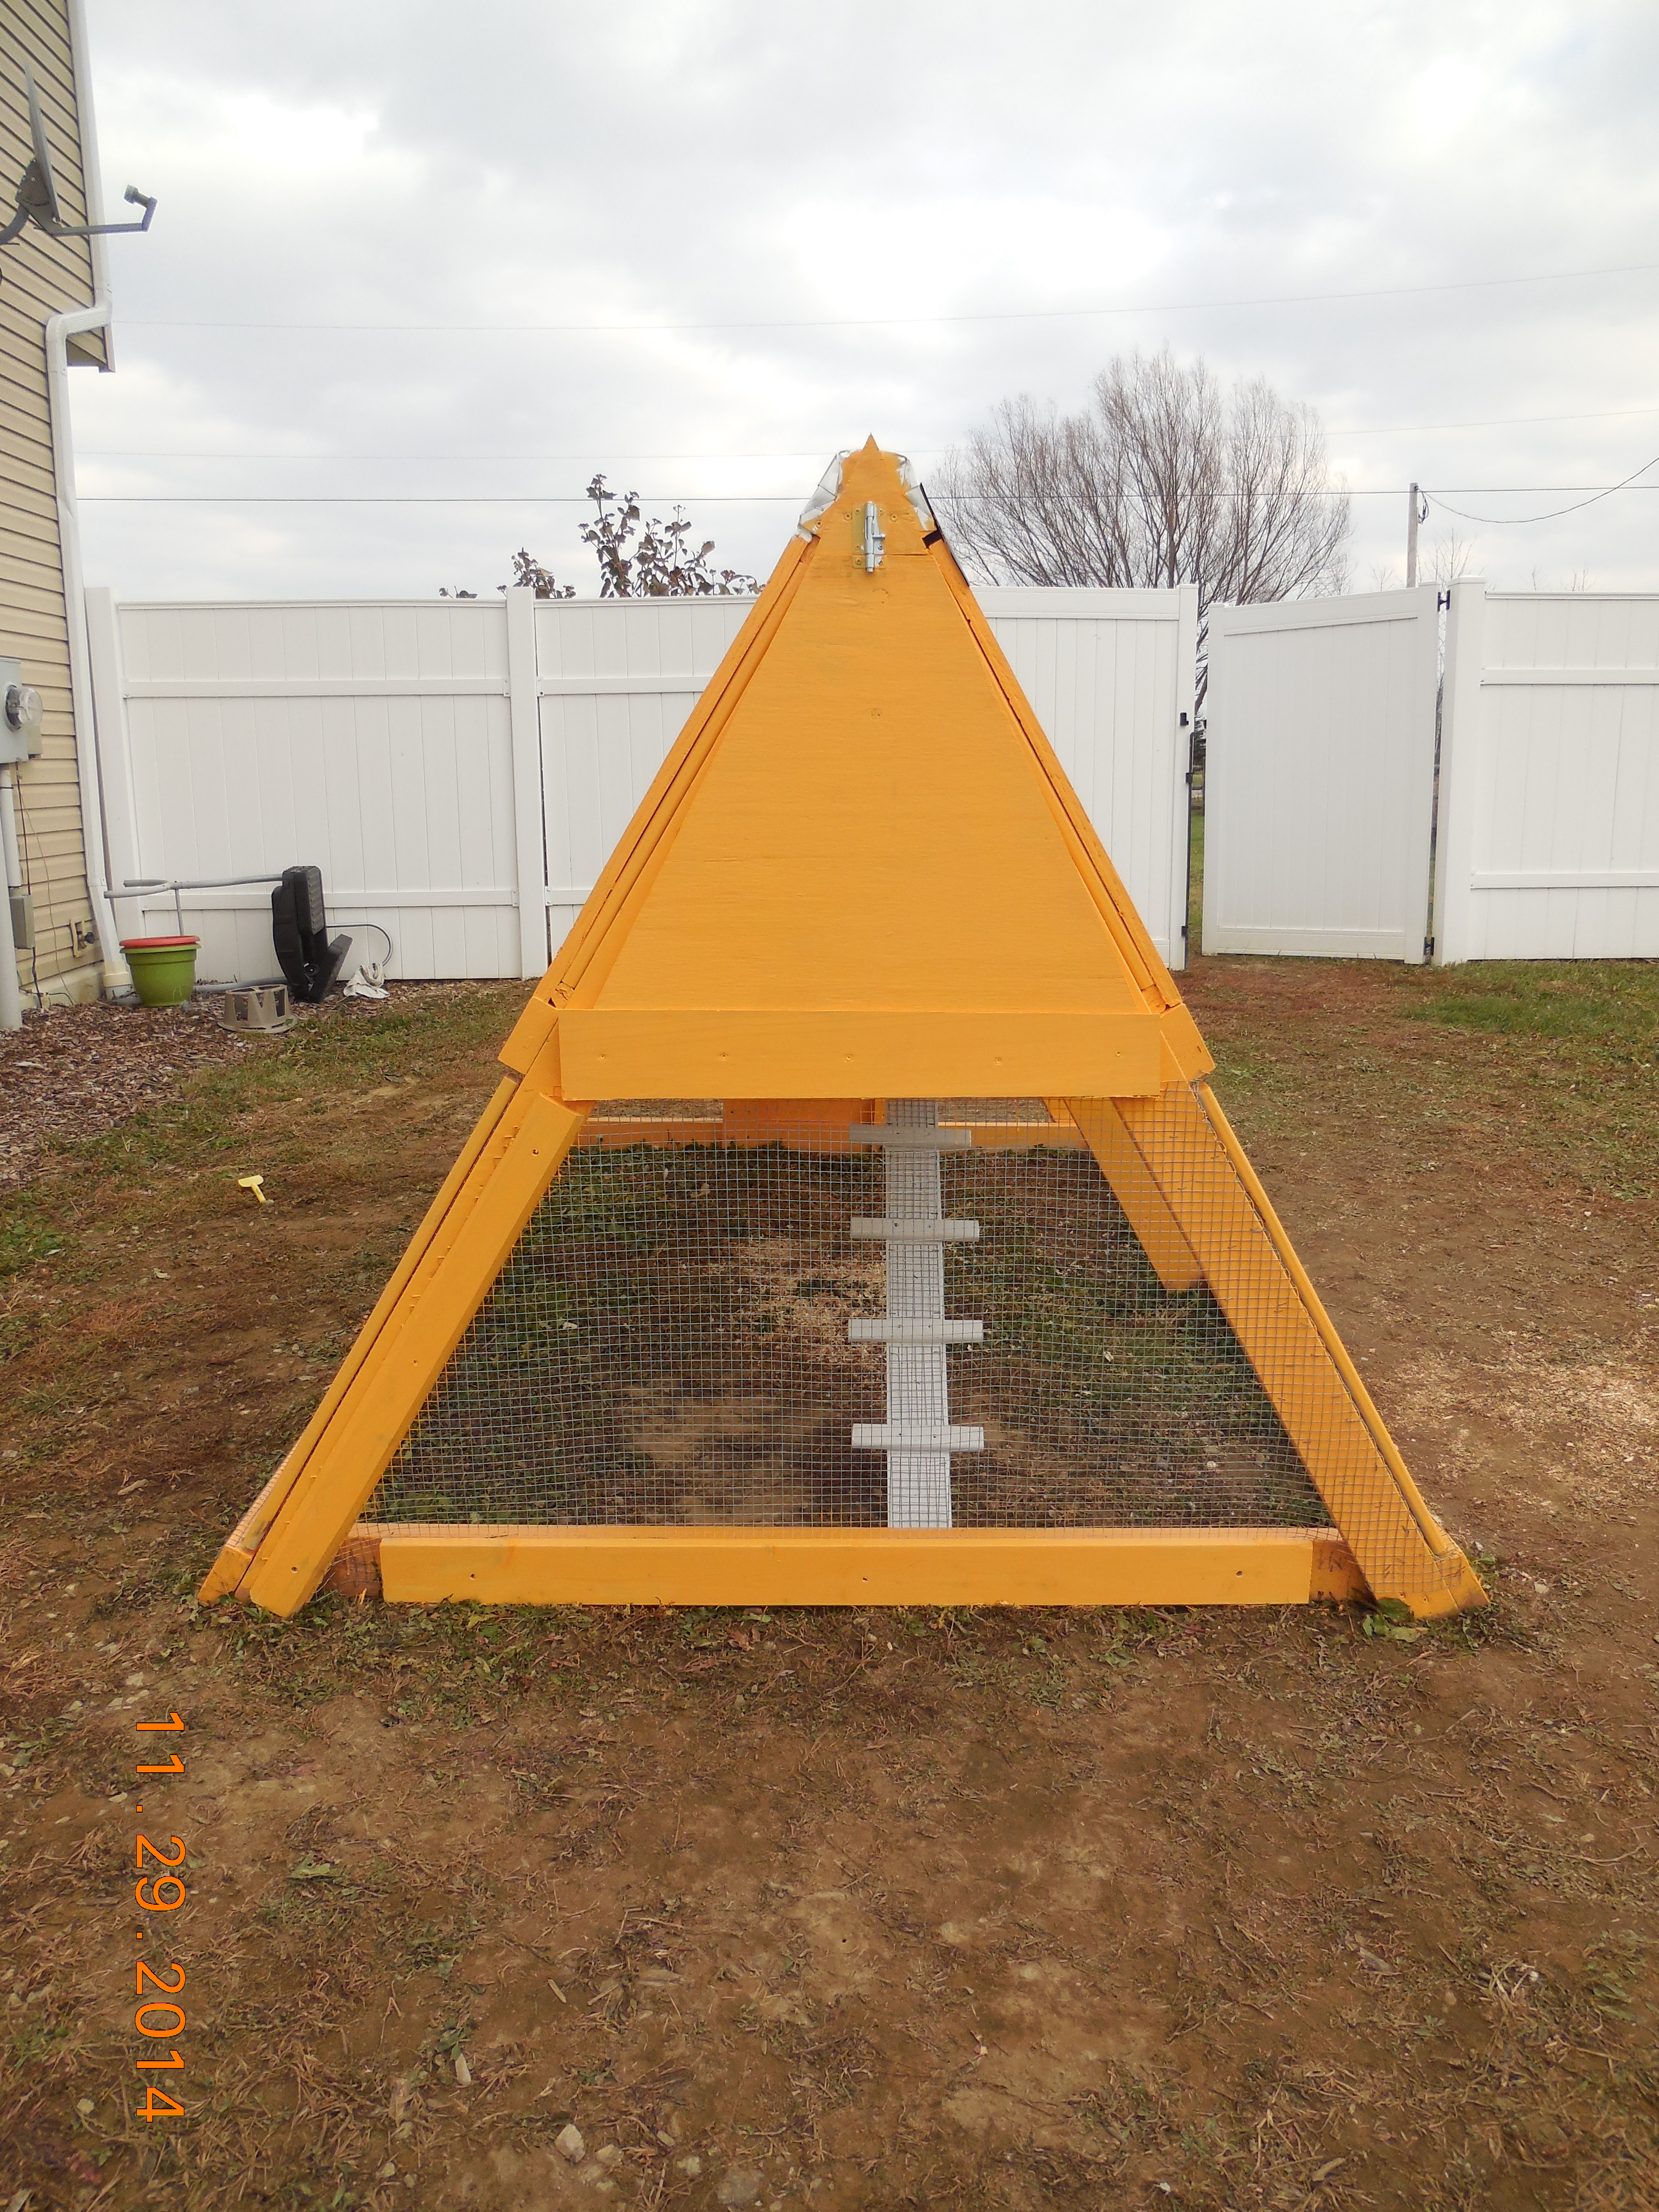
The plans are so easy to follow! They are a great jumping off point for customizing the coop for your own needs! We added a run door, ladder support, insulated floor and wall, removable window, and a loft door. The girls LOVE it!

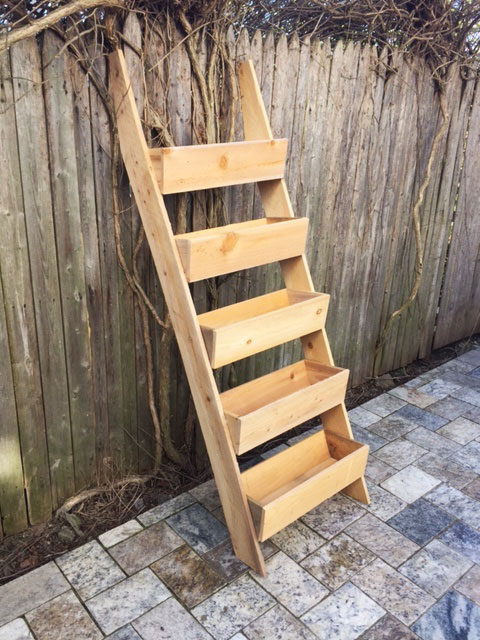
Instead of the 2X6, we used an additional cedar board to complete the sides and the ends of the planters. This was more cost effective and still provides enough support to hold the planters. This is a great alternative to the more expensive items we found online. We will be building multiple to put in an unused space in our yard. Great project!!

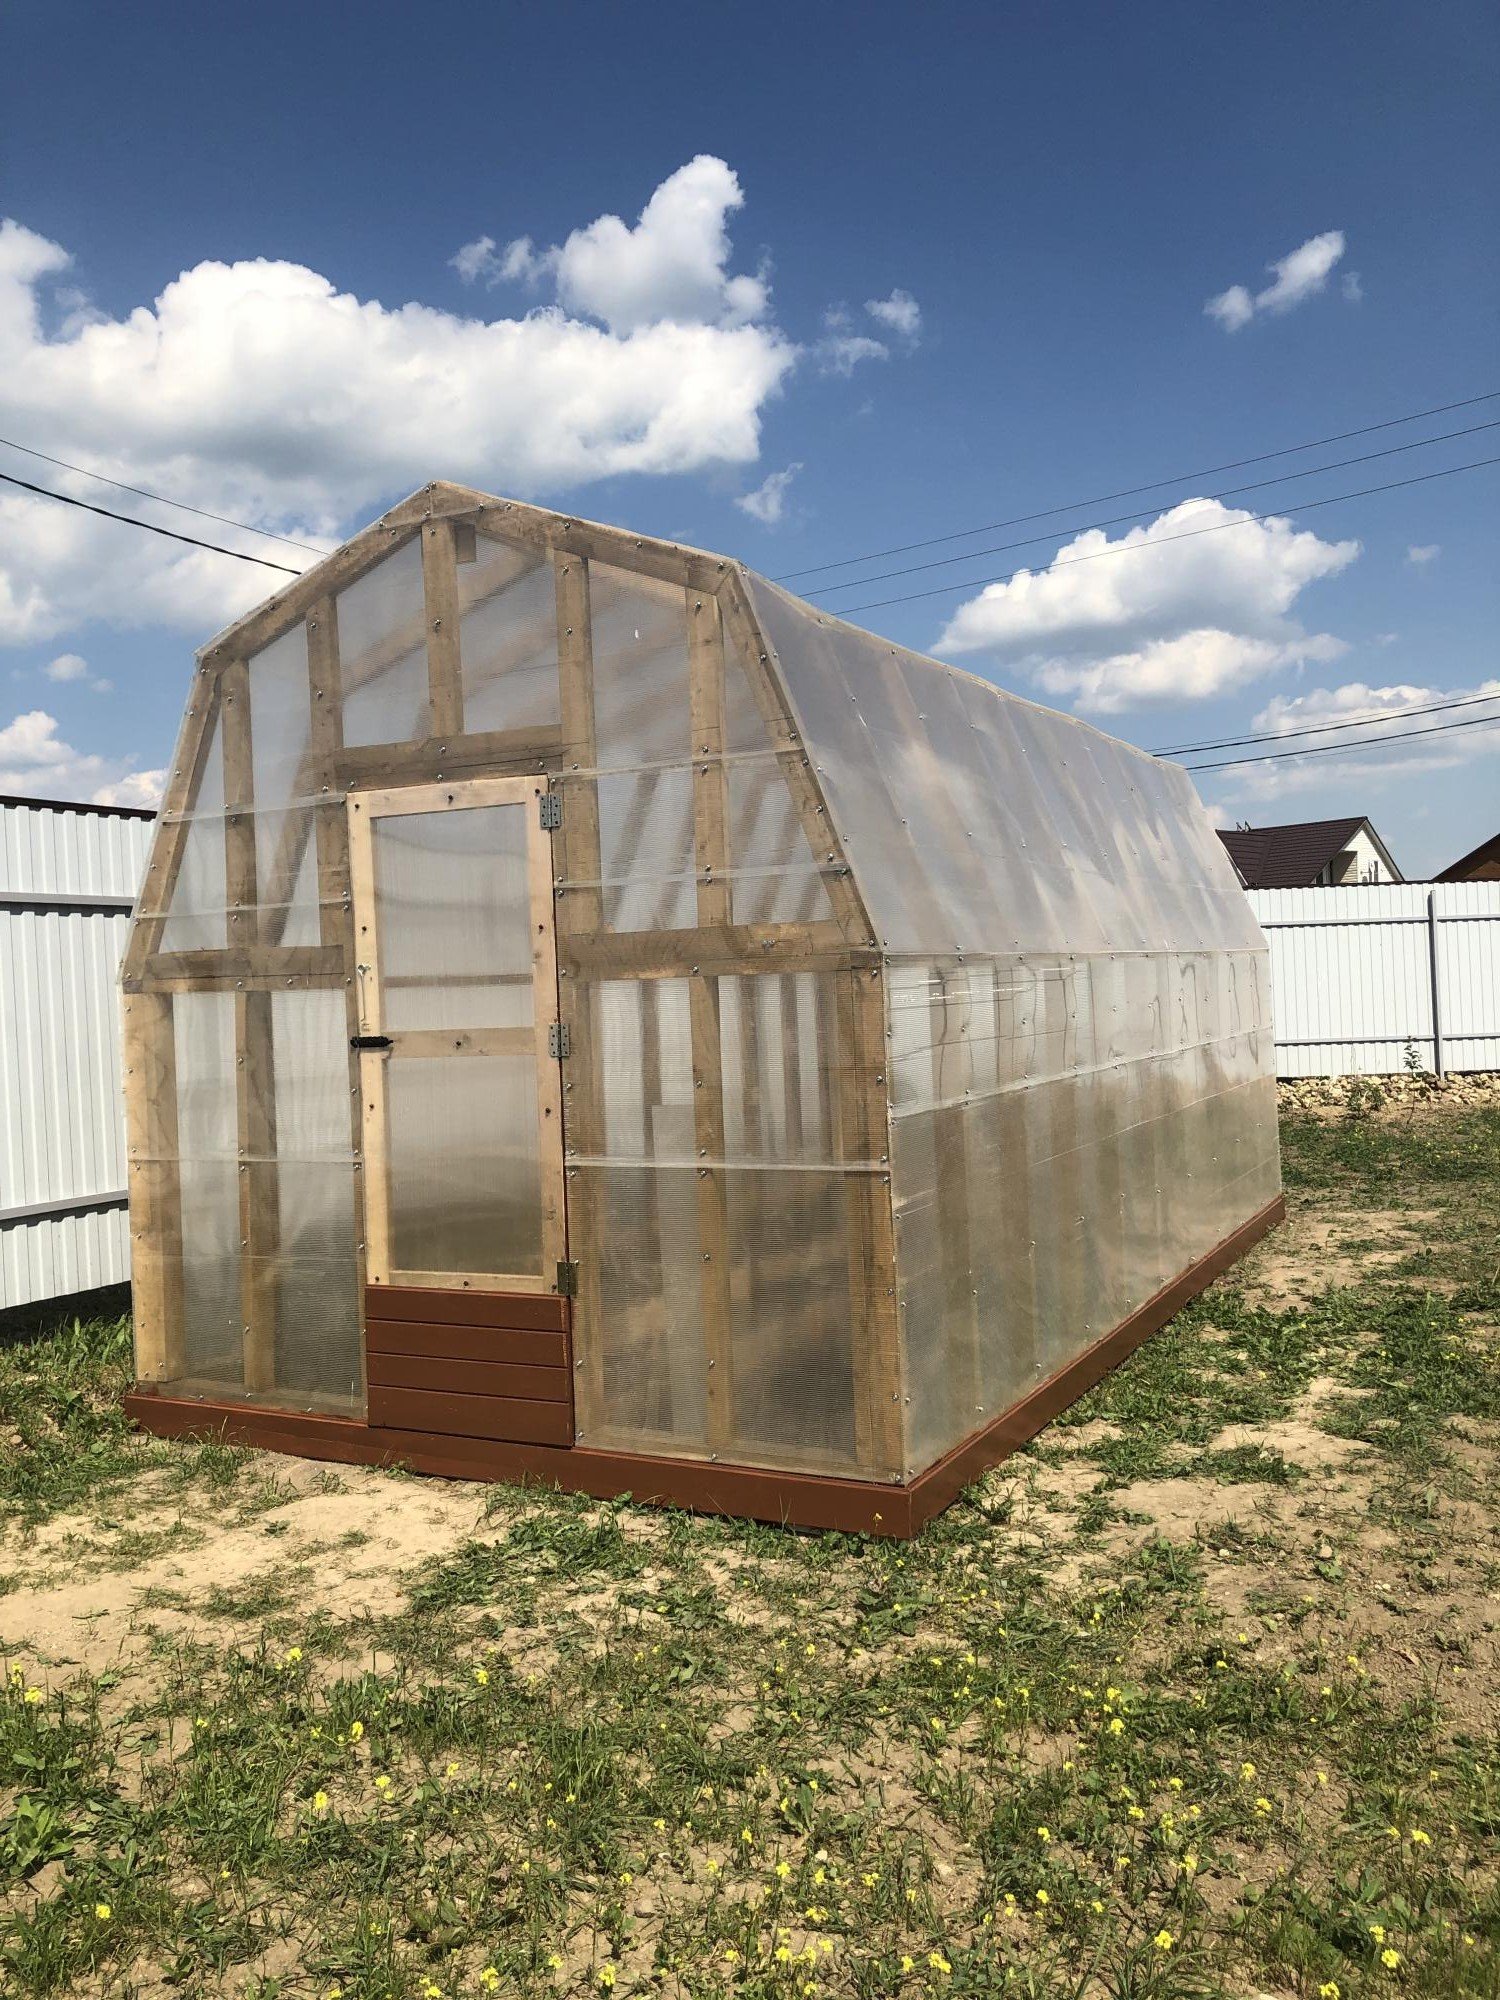
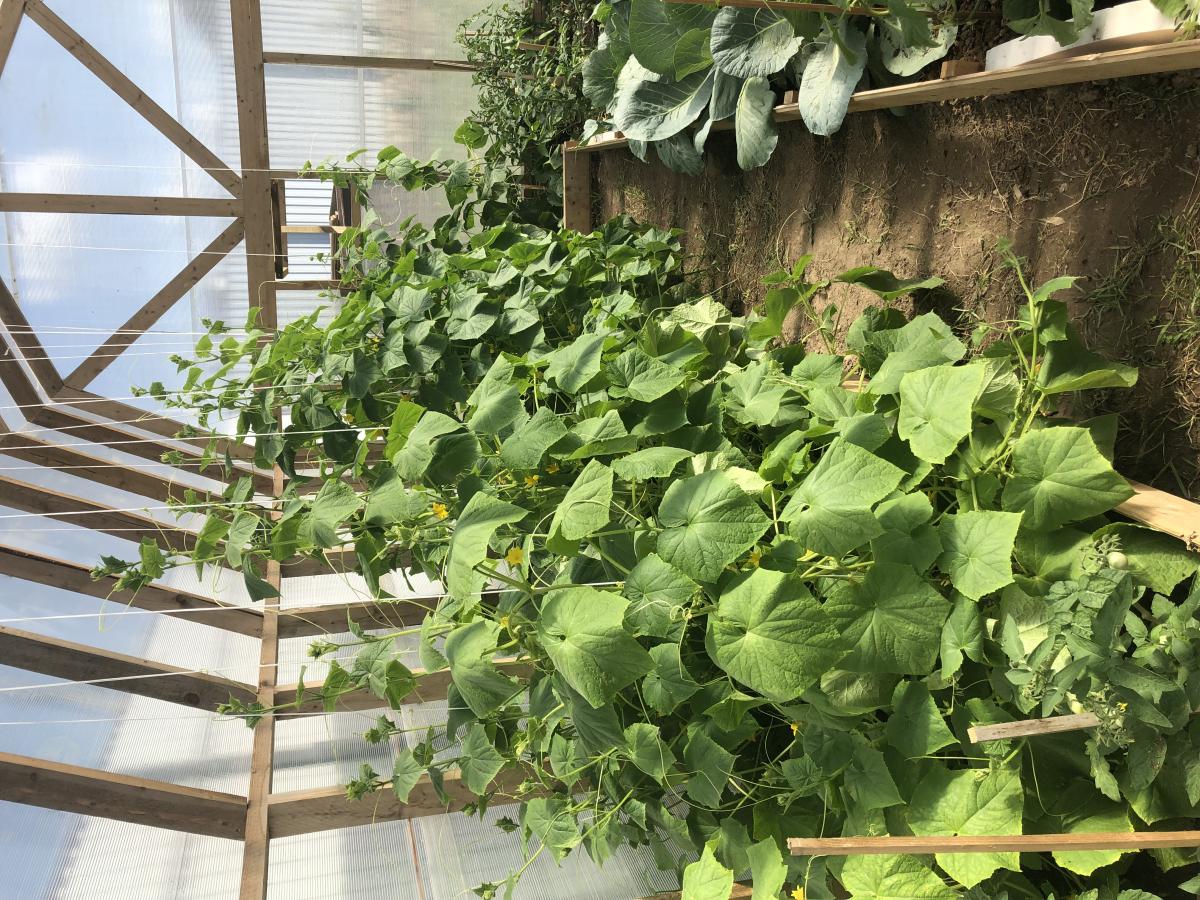
This was my first attempt at building a greenhouse. I wanted my cucumbers to be able t climb high so I made the house higher than the plans showed. It's also a little larger too. Since I am in Europe my dimensions are in meters. The overall size is 3 x 6 meters. I also built it on top of 100mm x 100mm lumber (the equivalent of 4x4's). It took 5 sheets of 6mm thick polycarbonate in 2 x 6 meters.
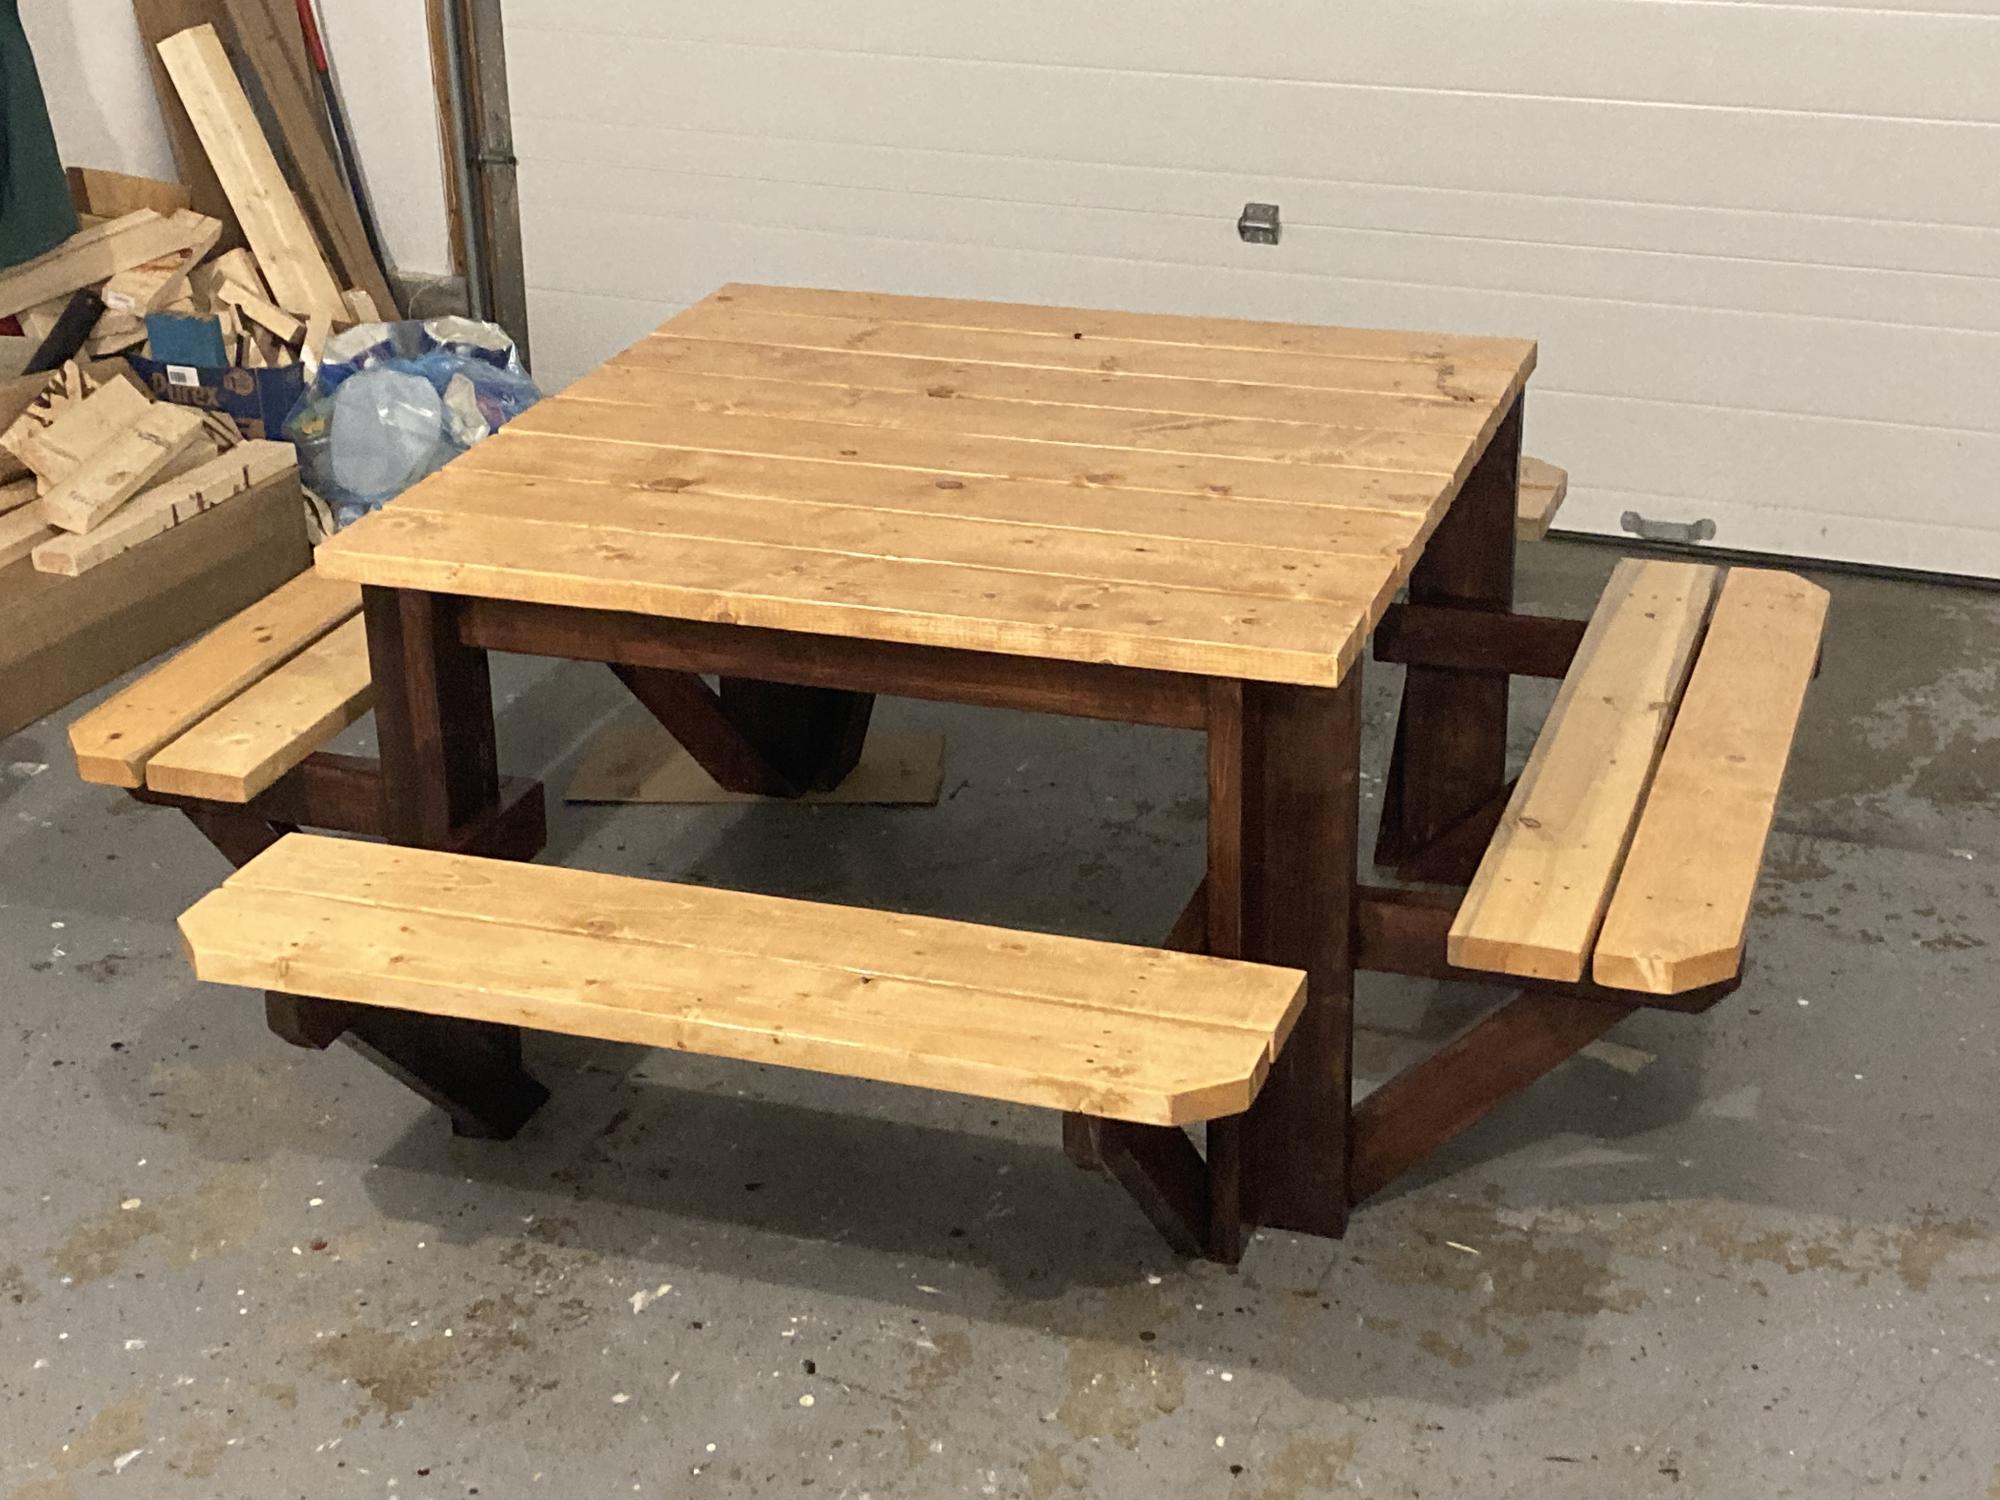
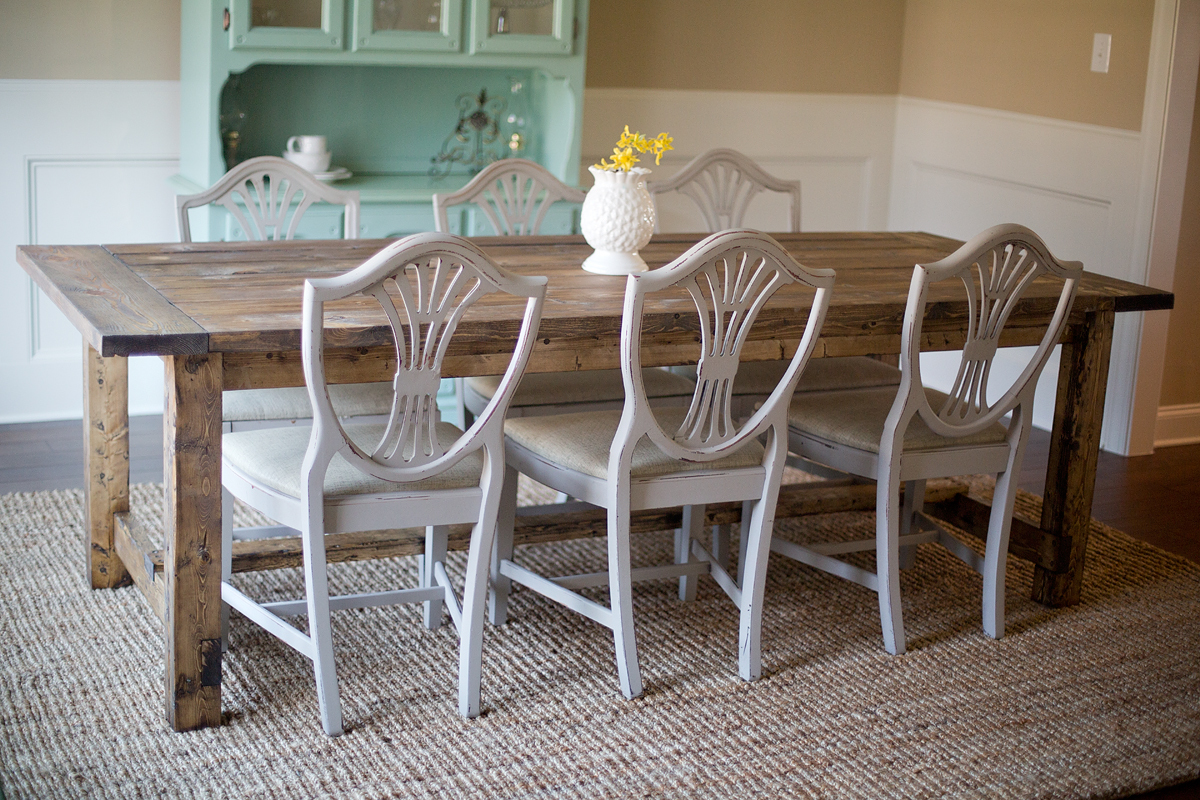
Enjoyed this project although with the price of lumber it was a little expensive to build. The only modification I made was to put a cross brace in the centre of the table top. That allowed me to attach the top boards a little more securely as some of them were a little bowed. I'll add a better photograph once I get it out of my garage and on to the back deck. It is a little heavy.