Community Brag Posts

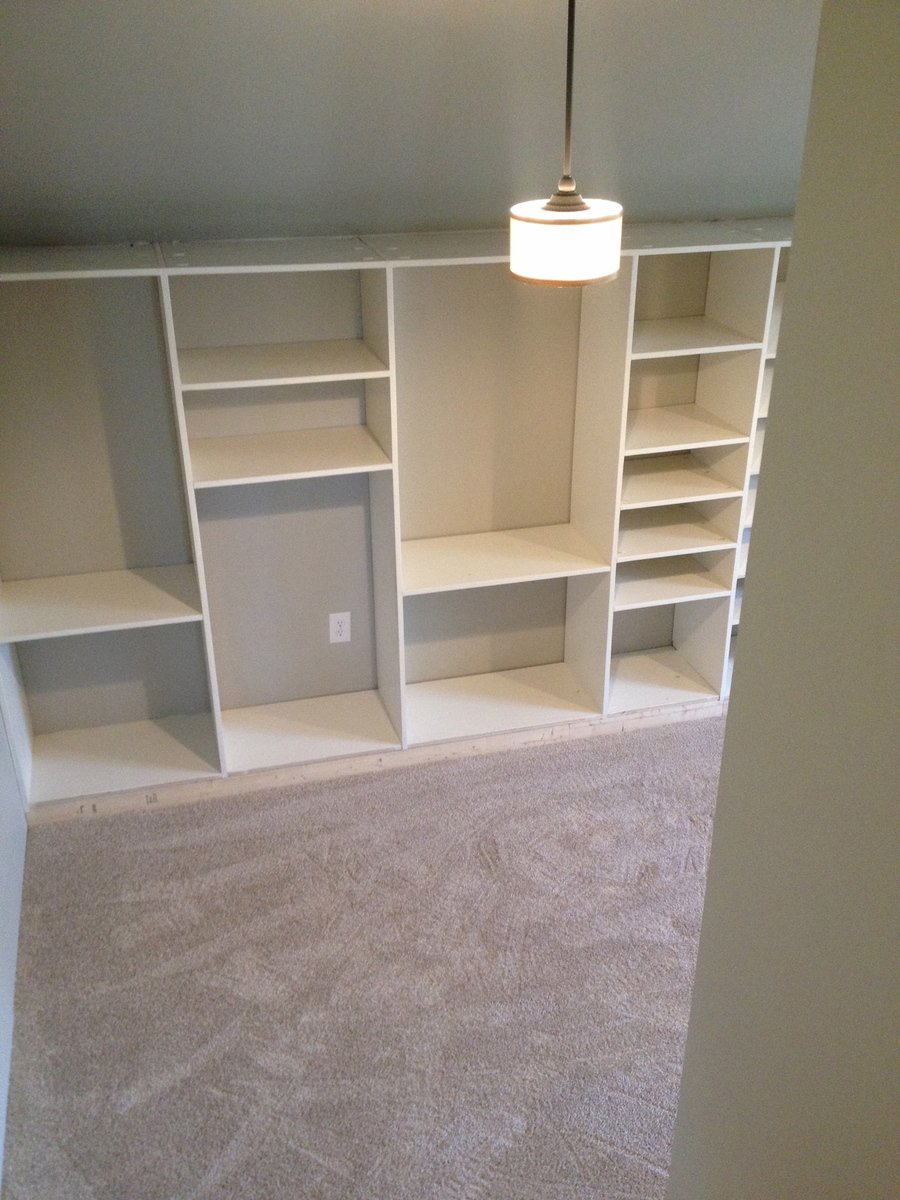
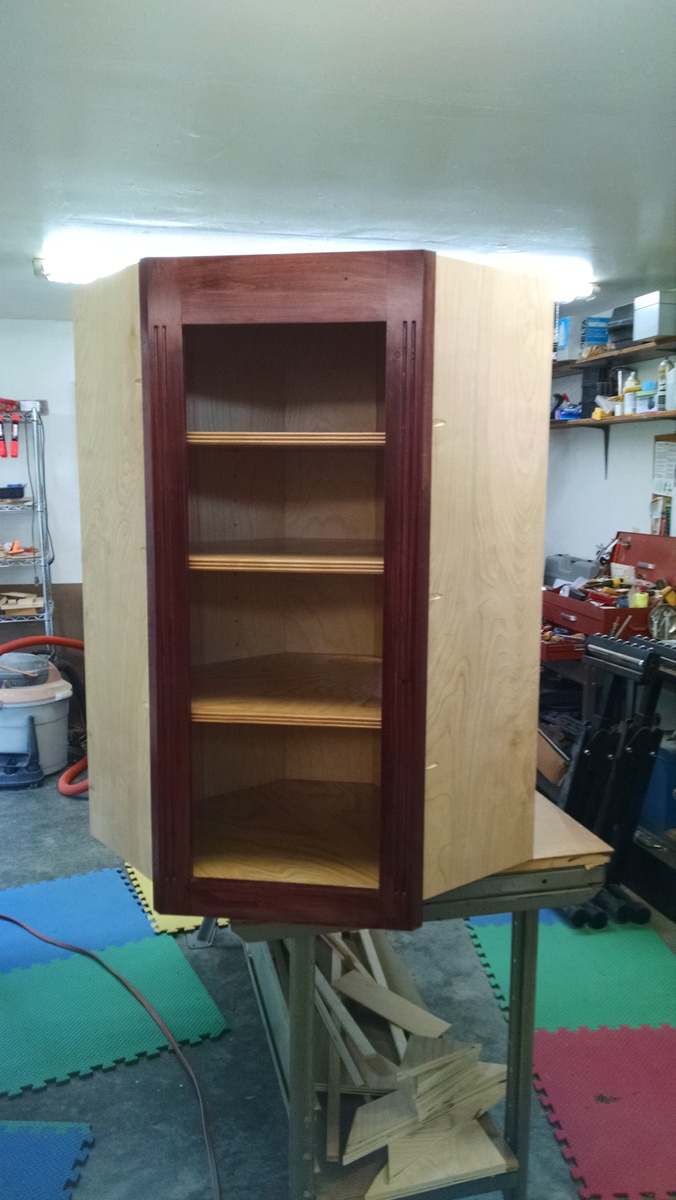
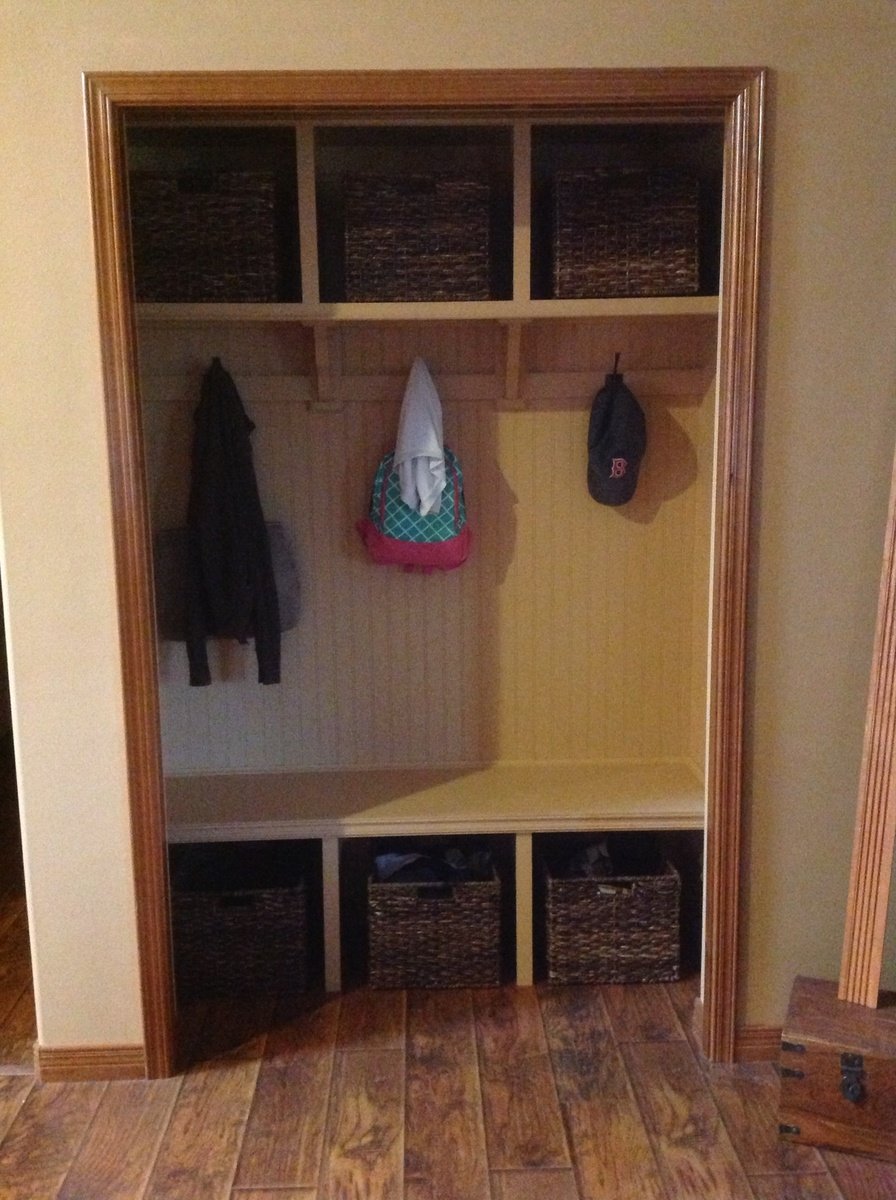
Master Walk In Closet with Bookshelf Door

Submitted by valpal5 on Thu, 04/16/2015 - 20:26

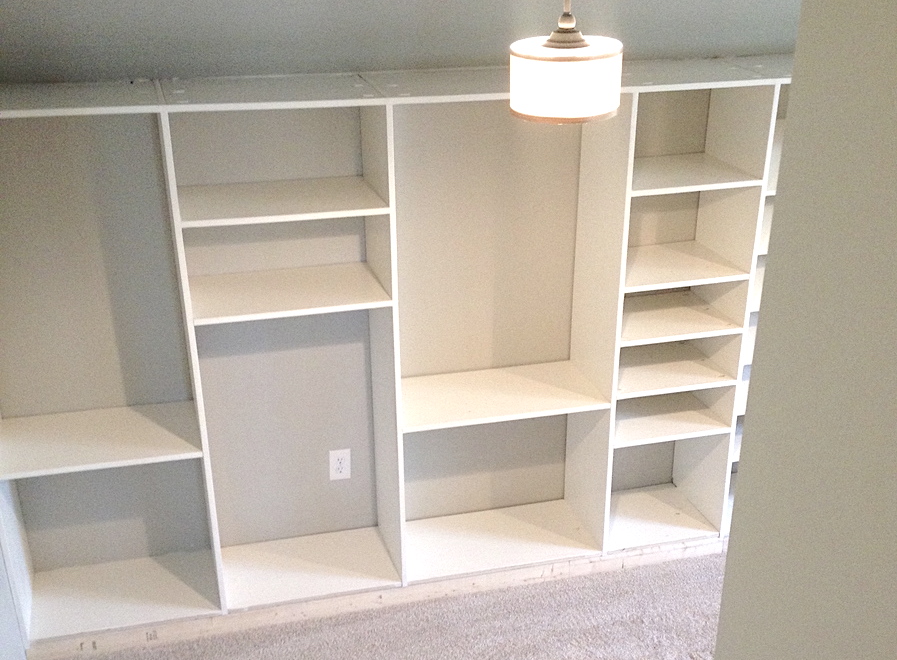
We used an unfinished attic space above our garage that was connected to our bedroom to make a walk-in closet with great shelving.  This project took a lot of time but we are so happy with the results!  There is a side for my husband and a side for me.  Although it is hard to see we also incorporated a small door/bookshelf into the room to allow us access to attic storage space.

closet shelving
 

Estimated Cost
$500
Estimated Time Investment
Week Long Project (20 Hours or More)
Finish Used
White painted finish.
Recommended Skill Level
Intermediate

Comments

Best Workbench I have ever had!!!

Submitted by Anonymous (not verified) on Tue, 10/05/2021 - 03:45

I have been searching for a way to maintain some neatness in my garage. Search stopped the second I found these plans. I am able to fit everything I need while keeping the garage neat and full of open space! I would most definitely recommend this build for anyone looking to save space, build something that is practical, and is completely customizable. Also, it took a buddy of mine and myself a day of hanging out to get the project done to include breaks for pizza!

inside corner wall cabinet

First cabinet in my kitchen remodel.


Built from Plan(s)
Estimated Time Investment
Weekend Project (10-20 Hours)
Finish Used
Sherwood by Sherwin Williams. Special purchase 5 gallon minimum. Water based lacquer. Dark Mahogany stain, HVLP sprayed on lacquer.
Recommended Skill Level
Intermediate

Pergola

Submitted by dekew on Fri, 06/07/2013 - 13:33

Built this great pergola from Anna's Weatherly Pergola Plan. I am very pleased on how it turned out. This was a fairly simple build and I added a few of my own touches to it. I used Red Cedar as my wood of choice. I also added a great Olympic Stain + Sealer to help keep it looking brandnew. I hope y'all enjoy the pictures.

Built from Plan(s)
Estimated Cost
$650
Estimated Time Investment
Weekend Project (10-20 Hours)
Finish Used
Olympic Stain+Sealer 704 Redwood

Pieces where first cut to size then sprayed with a Graco TrueCoat Plus. After drying the pergola was assempled.
Recommended Skill Level
Intermediate

Comments

dwm22

Thu, 06/27/2013 - 15:33

I like the red color and the added touches (lights, bird feeder, and "wall"). I finished mine in May and like the idea of adding small lights for the evenings. Well done!

jbayer80

Sun, 04/13/2014 - 11:17

I just wanted to say that 4th picture is so cool looking. Love the dark clouds and blue sky. Very nice pergola, by the way.

Bookshelf Hidden Doors Over Closet

Submitted by Anonymous (not verified) on Mon, 10/23/2017 - 10:13

Hidden door bookshelves hide a furnace closet.  Built by Kraig Faulkner

Built from Plan(s)
Recommended Skill Level
Advanced

Comments

charkue

Thu, 09/17/2020 - 08:01

I'm currently working on a basement renovation project. I'm probably going to incorporate a feature like this for my mechanicals, too.

One important safety note for anyone who wants to do this: It's recommended that your furnace be a minimum of 30" away from any combustible materials. That includes walls and partitions. The image of this project displayed is right next to the furnace, which is not a good idea.

My incredible chicken coop and run!

This was my first attempt at building anything....ever. It was so incredibly fun and I certainly learned a lot. My 8 little chickens are loving their new home and I can't wait to build my next project!

Estimated Time Investment
Week Long Project (20 Hours or More)
Recommended Skill Level
Intermediate

Comments

GreenLaLa

Wed, 06/19/2013 - 11:51

Hello! Could you repost the picture / info on your chicken run? I keep getting "page not available" and I've been trying for days :O) I think I want to build that chicken shed (too big for 3 hens?? It's just so cute!) and a run like that to go with it! Thanks! Have a great day!

Raised Garden Bed Variations

Submitted by biz_kid1 on Sun, 04/03/2011 - 19:57

Our 1x6 cedar fence posts were like $2.39 each, but the 1x4's were $1.17 each, so $9.36 for the cedar plus about $2.50 for the trim.  But on the 2nd bed, we opted to use 4x4 @ 8' cedar that I got for half off (@$8) because there were 3 "beat up" pieces left.  So our total was @ $13 each.  

Estimated Cost
$13.00
Estimated Time Investment
An Hour or Two (0-2 Hours)
Finish Used
No finish
Recommended Skill Level
Starter Project

Nativity stable

Submitted by Anonymous (not verified) on Sun, 11/28/2021 - 14:45

Stable made from scrap wood I had on hand (plus a few toothpicks).

Built from Plan(s)

Comments

Fantastic Garden Beds

These garden beds are fantastic! They were so easy to build and look great in our backyard. We have always found ourselves with a garden covered in weeds or plants out of control. Our garden this year looks wonderful and we have hardly any weeds in the beds. Thanks for the great plans!

Estimated Cost
$15 each
Estimated Time Investment
An Hour or Two (0-2 Hours)
Finish Used
None
Recommended Skill Level
Starter Project

Comments

Seasonal And Holiday

Office Desk

Submitted by Anonymous (not verified) on Sun, 12/26/2021 - 15:13

Used these plans to make this office desk for my daughter!

Built from Plan(s)

Comments

End table- modified smaller plans!

Submitted by crgates89 on Wed, 01/03/2018 - 07:32

I wanted to build my wife a matching set of bedside tables for her birthday and loved these plans! However when I measured the space on either side of the bed found that these plans were too large. Some quick calculations later I modified the plans to create some smaller tables and it worked out perfectly! I removed two 2x4s from the top and the bottom shelf and took 7 inches off each of the aprons and voila, smaller tables!


i used minwax wood conditioner, “honey” stain and two coats of polyurethane. Very pleased with how they turned out and the wife was so surprised and happy! Thank you!

Estimated Cost
$50
Estimated Time Investment
Weekend Project (10-20 Hours)
Finish Used
Minwax honey stain with wood conditioner and polyurethane
Recommended Skill Level
Intermediate

Closet mud room

Submitted by Smaynes on Wed, 07/31/2013 - 08:44

We were replacing the floors in our house so we decided to build a closet mud room. We used the plans for the smiling mudroom and altered them slightly. We didn't end up building the partitions because the left and right seats would have been too closed in. We installed bead board on the back wall and used moulding on the shelf and bench. The only hard part was that we had to actually assemble the shelves and bench in the closet because they wouldn't have fit in once built! The Kreg Jig was extremely helpful and well worth the purchase.

Built from Plan(s)
Estimated Cost
$150
Estimated Time Investment
Weekend Project (10-20 Hours)
Finish Used
Paint / Matte Polyurethane
Recommended Skill Level
Beginner

Comments

mandiebuth

Thu, 01/02/2014 - 13:37

I am going to do this in our laundry room which you walk into from the garage - what do you suggest doing when you remove the doors for the current closet? I do not want to install all new trim since that was just done recently, before the mudroom idea came! Thanks!

Great Shelves - made to measure!

Submitted by tailspin10 on Fri, 09/04/2015 - 08:54

Thanks for the plans Ana!

I stuck to the design but changed the dimensions to suit the space and the boxes we intend to store. This made the shelves 7.5 feet high by 8.5 feet wide. The timber was supplied in 17’ lengths so this also meant very little wastage. The frame is composed of 2x4’s, the shelves are 4.5 x 1.5’s  - as I wanted the shelves slightly shallower this meant I could get away with three boards for each shelf instead of 4 as on the plans. 

For the short cross pieces I used woodglue and screws – to attach the long shelf pieces I just used screws. I predrilled holes in the first piece for each of the screws, but I didn’t drill a pilot hole in the next piece, the screws were self-tapping and didn’t need one.

The back wall is concrete block and I screwed each upright to the wall using wall plugs and screws. I’ve 2 young children and as the shelves are quite high I was afraid they might climb on them and tip them over otherwise. The attachment to the wall definitely makes the whole thing feel much sturdier – the structure is completely rigid.

The only real issue I encountered was that some of the boards were slightly twisted or warped – and I had to apply some force to keep everything square when I was gluing up. Overall I’m very happy with the end product, and found it reasonably easy to put together. Now its time to put the shelves to good use and start tidying up the garage!

Estimated Cost
$180 including screws - I'm in Ireland and unfortunately wood seems to be more expensive here :-(
Estimated Time Investment
Day Project (6-9 Hours)
Finish Used
I gave it a quick wipe of some old danish oil I was going to throw out, I'm not that bothered about finish as the shelves are in the garage.
Recommended Skill Level
Beginner

Ana's Pockethole Farmhouse Table

Submitted by Angie C. on Sun, 10/18/2015 - 19:50

My cousin and I fell in love with the farmhouse table so, when we discovered some old barn wood at my dad's house, we knew we had to build that table using the barnwood for the top.  I love each and every imperfection in the barn wood.  This was a fun project and I look forward to building another of Ana's plans.

Estimated Time Investment
Day Project (6-9 Hours)
Finish Used
Polyacrylic on the top and primer/paint on the base.
Recommended Skill Level
Beginner

Simple 2x4 potting bench modified to include antique window.

Submitted by Anonymous (not verified) on Mon, 08/08/2022 - 10:57

I made this for my mom for her birthday. I just modified the measurements to accommodate the window and added some cool hardware.

Built from Plan(s)

Comments

Tilt-Out Trash Can (Slightly Modified)

We built this tilt-out cabinet for our trash and plan to build a matching one for our recycling. We modified it a little and used bead board on the face of the cabinet to match some other elements in our kitchen. We painted it bright red using some leftover paint and absolutely love it!

We ended up not using any mechanism to prevent the drawer from falling to the ground - the trash can we purchased is JUST big enough that it stops the drawer from opening all the way, which is great!

There are more pictures below and on our blog, http://strawbridgestuff.com

Estimated Cost
$25
Estimated Time Investment
Afternoon Project (3-6 Hours)
Finish Used
We painted the cabinet using Valspar's "Fabulous Red" in semi-gloss.
Recommended Skill Level
Beginner

Comments

rosie4bw

Tue, 05/15/2012 - 14:00

Hi, I really like the way you did the brash bin with the beadboard door. Could you
tell me what size the door frame is. I just started doing different projects and are still new at it. THanks Linda.

Jodieth

Fri, 09/07/2012 - 12:35

Your trash bin looks great. I too love the beadboard. I am putting a lot of beadboard in a small house I am planning on renting until my kids are out of college, then I want to make it into a place I can teach sewing and make furniture covers.

scothershman

Thu, 10/29/2015 - 08:51

Is there a sketchup file for this plan? I would like to modify it alittle but it would take me awhile to reproduce due to my bad sketchup skills.


Thanks!

Wooden Heart

Sun, 03/27/2016 - 01:31

I love this! I live in a one bedroom apartment and I just have a space between the fridge and a cabinet for pots and pans where the bin sits. I've always found this ugly to be honest but haven't known how to change it but this is perfect, thank you!

Cornhole Boards

Submitted by Anonymous (not verified) on Wed, 02/08/2023 - 18:09

I made one set for my son, the one with the stained top. His friends liked it so much and kept borrowing his set, that he wanted to surprise them with their own and asked me to build them one with the LSU colors. Thought they turned out great! Thank you for the plans!

Comments