Community Brag Posts

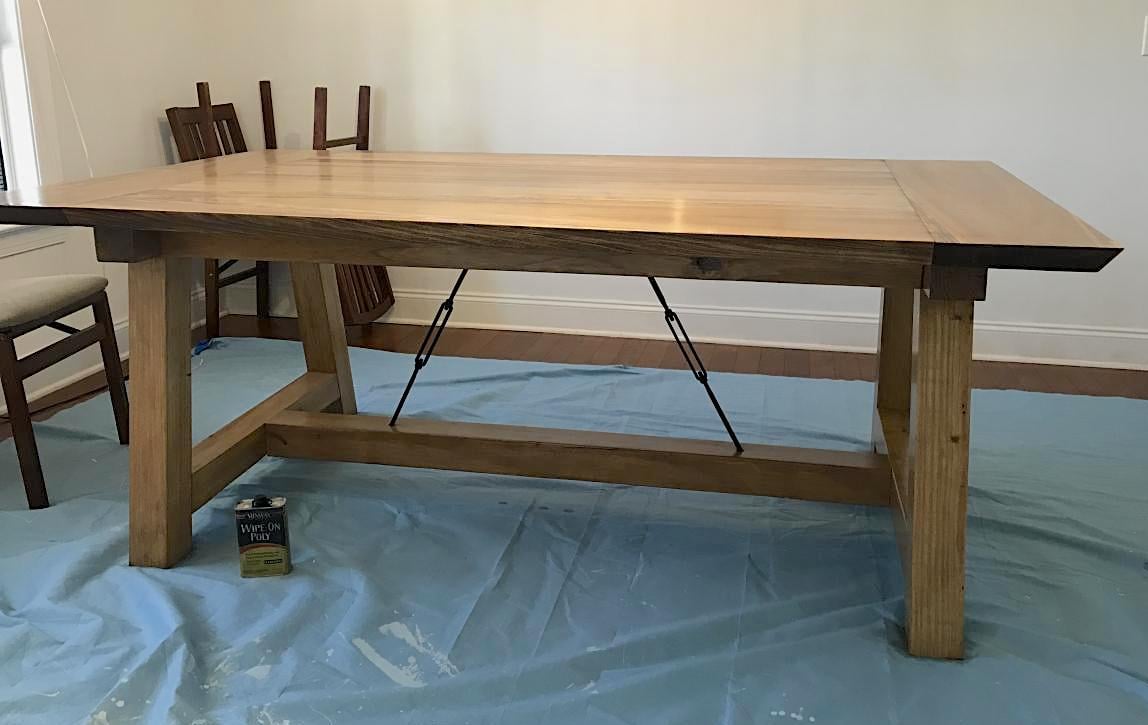
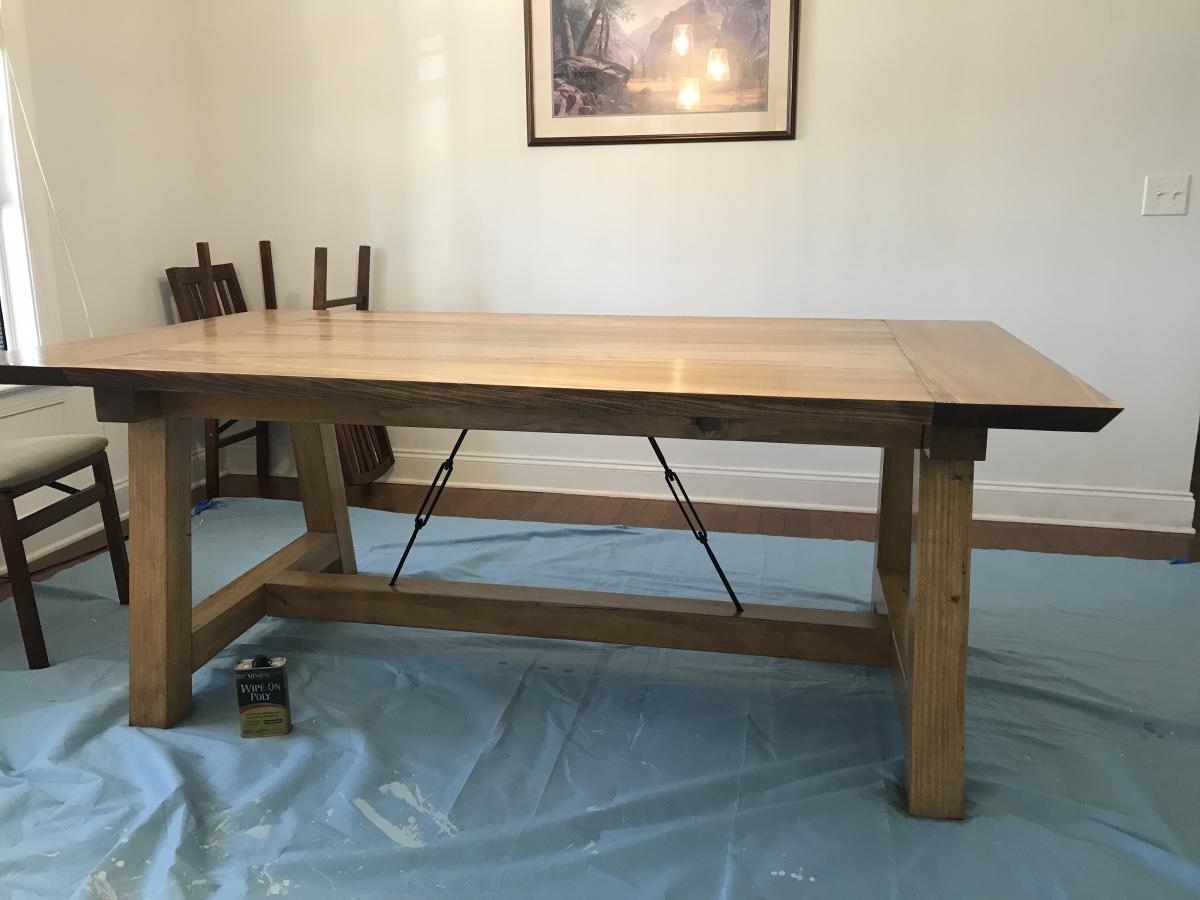
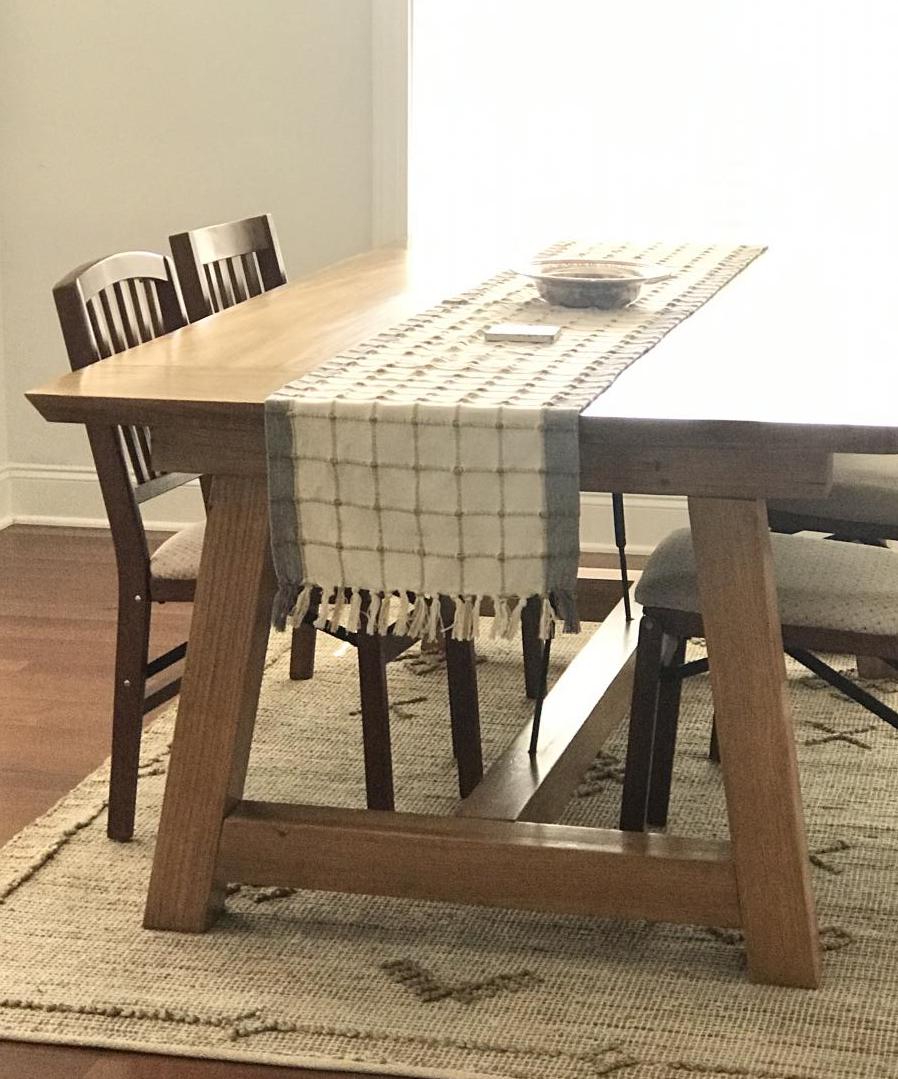
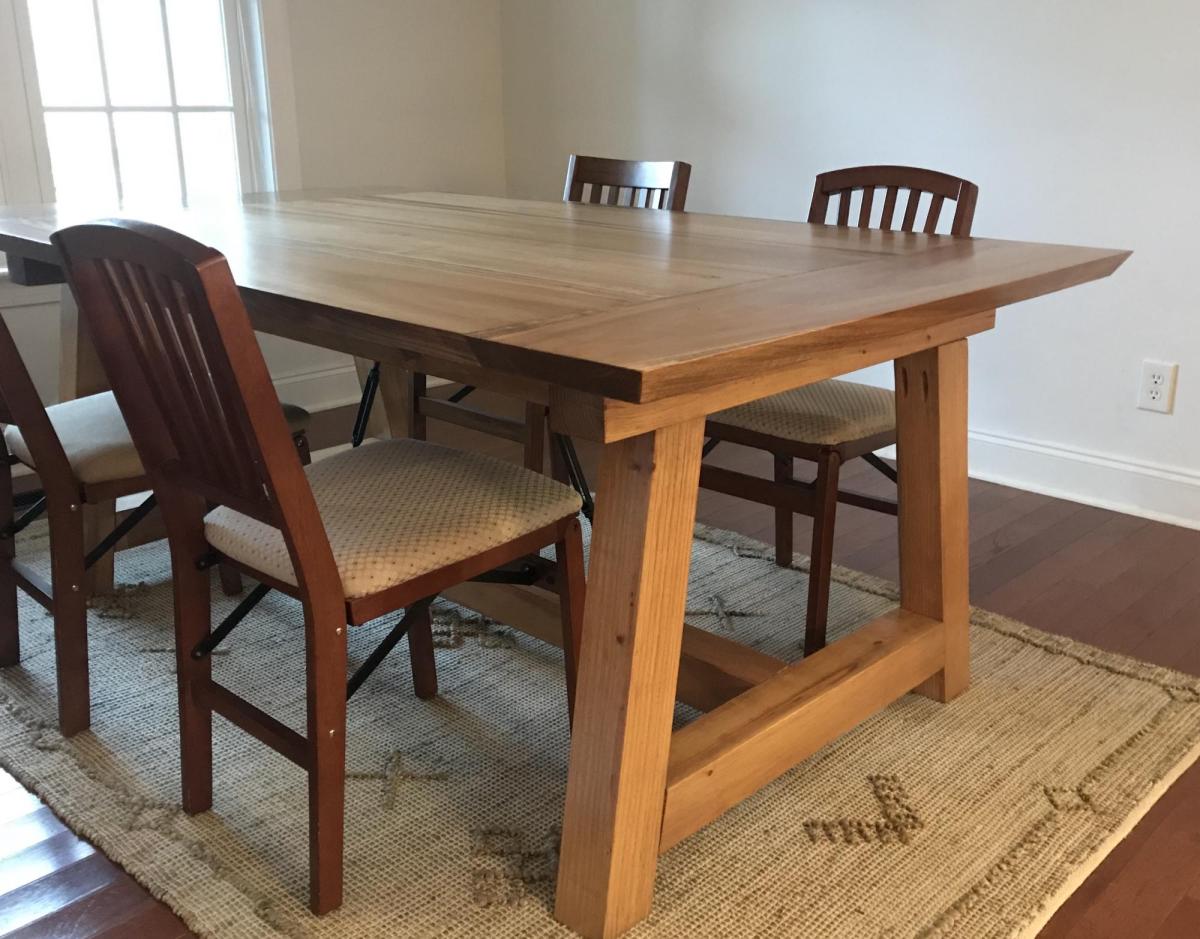
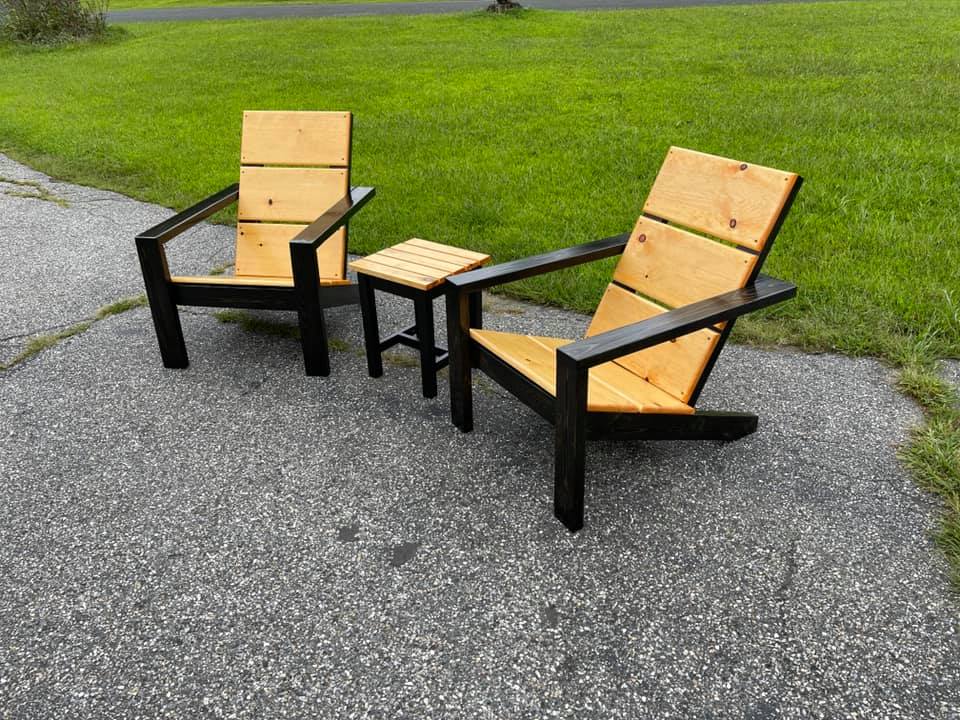
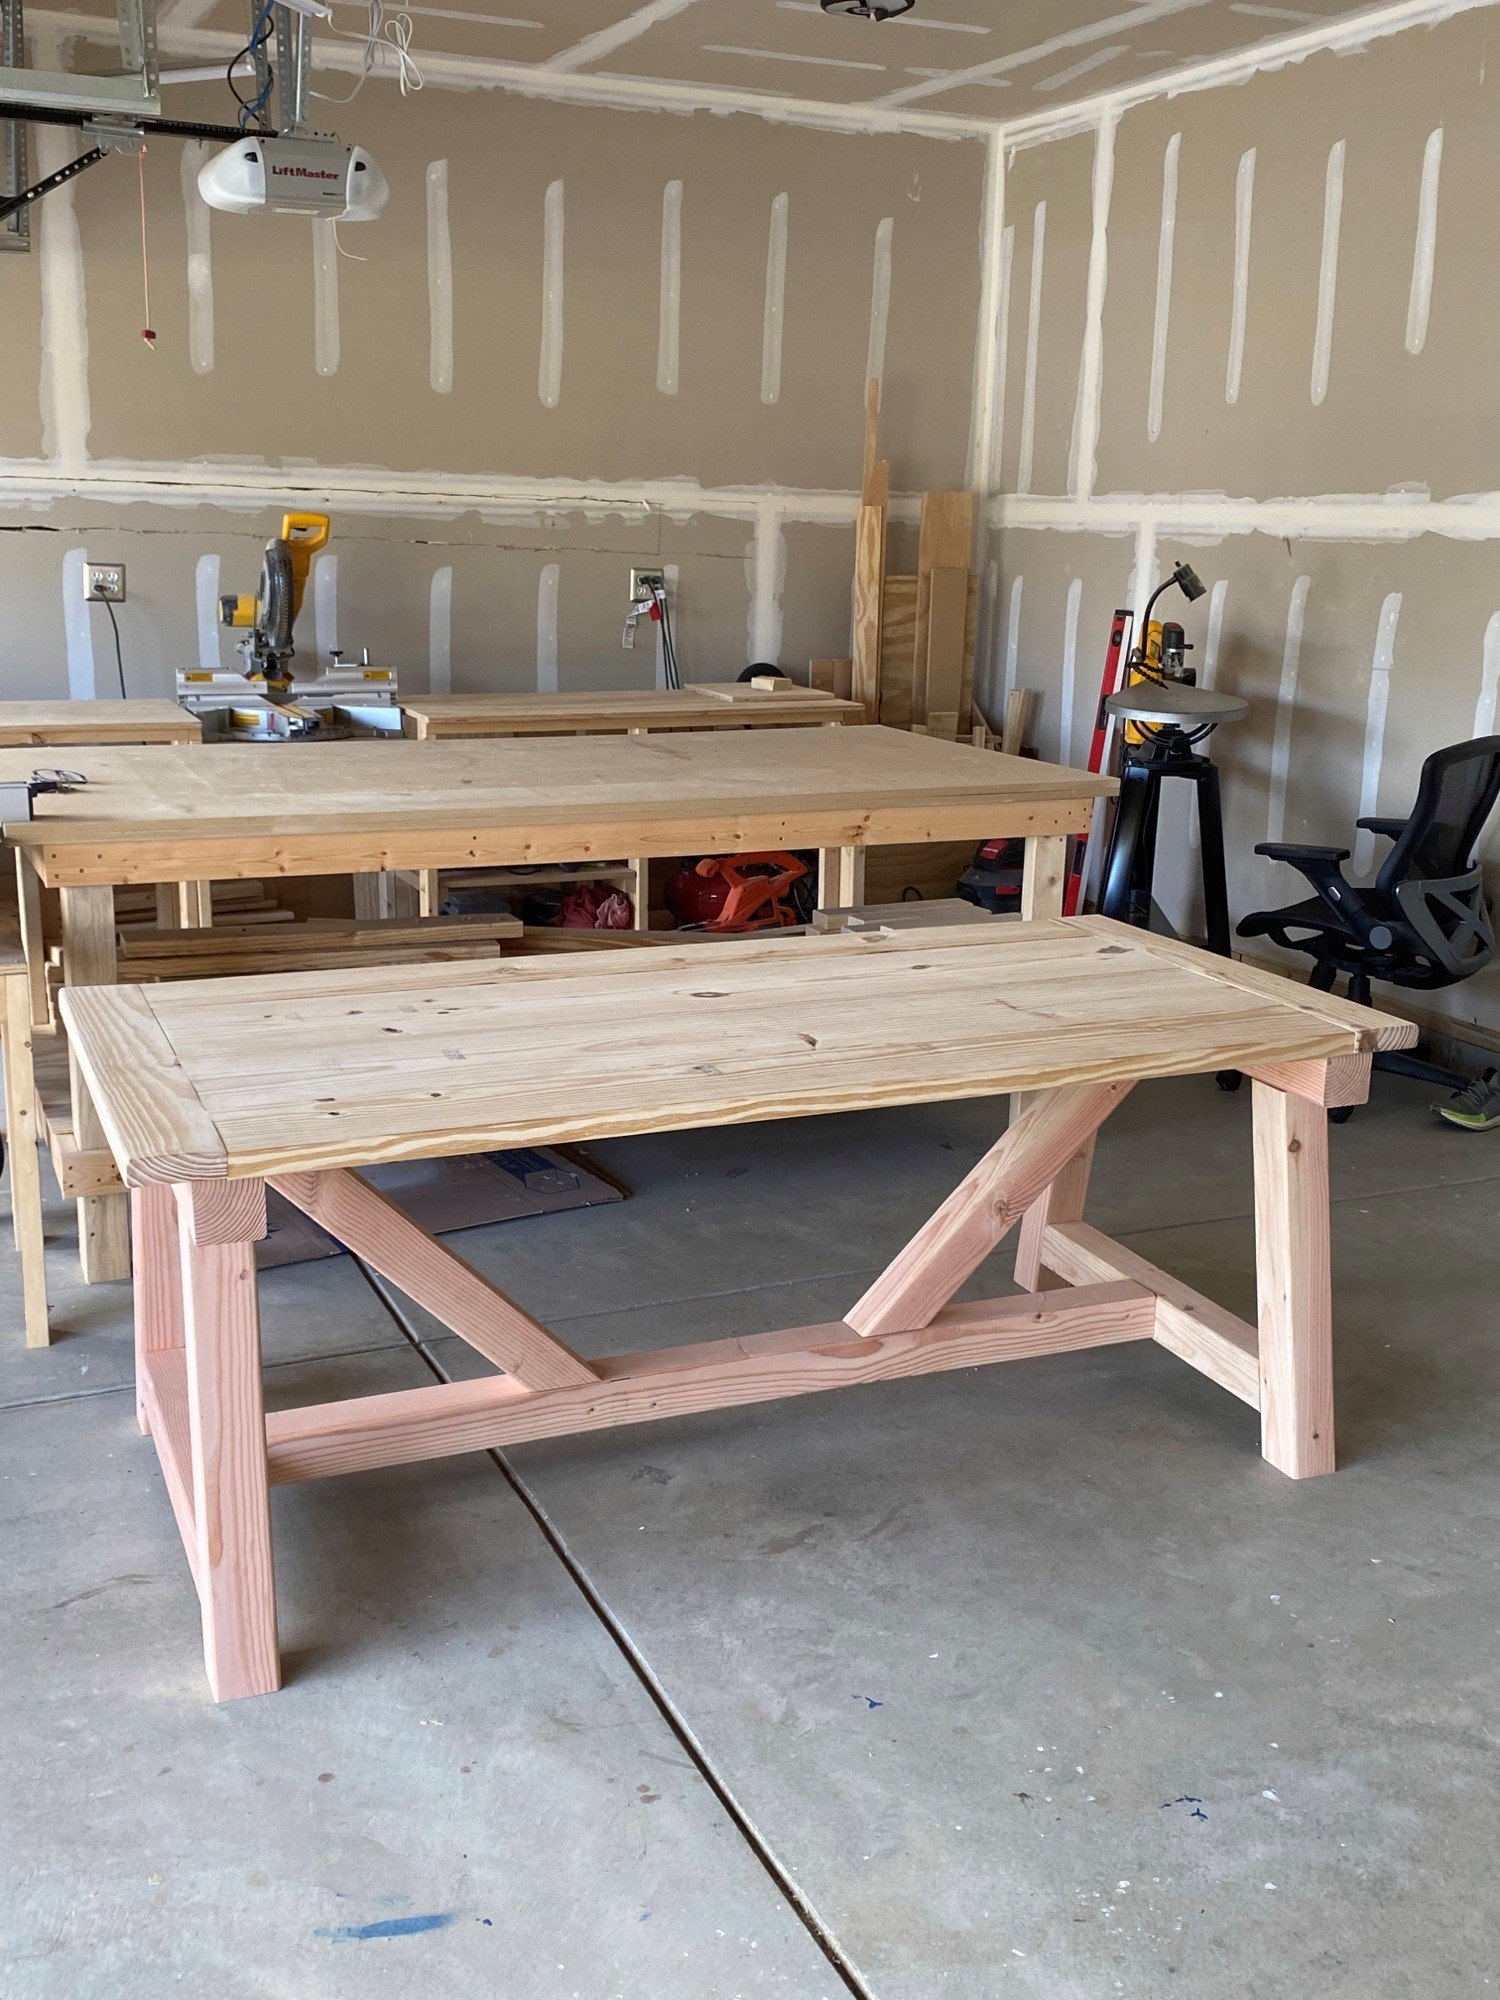
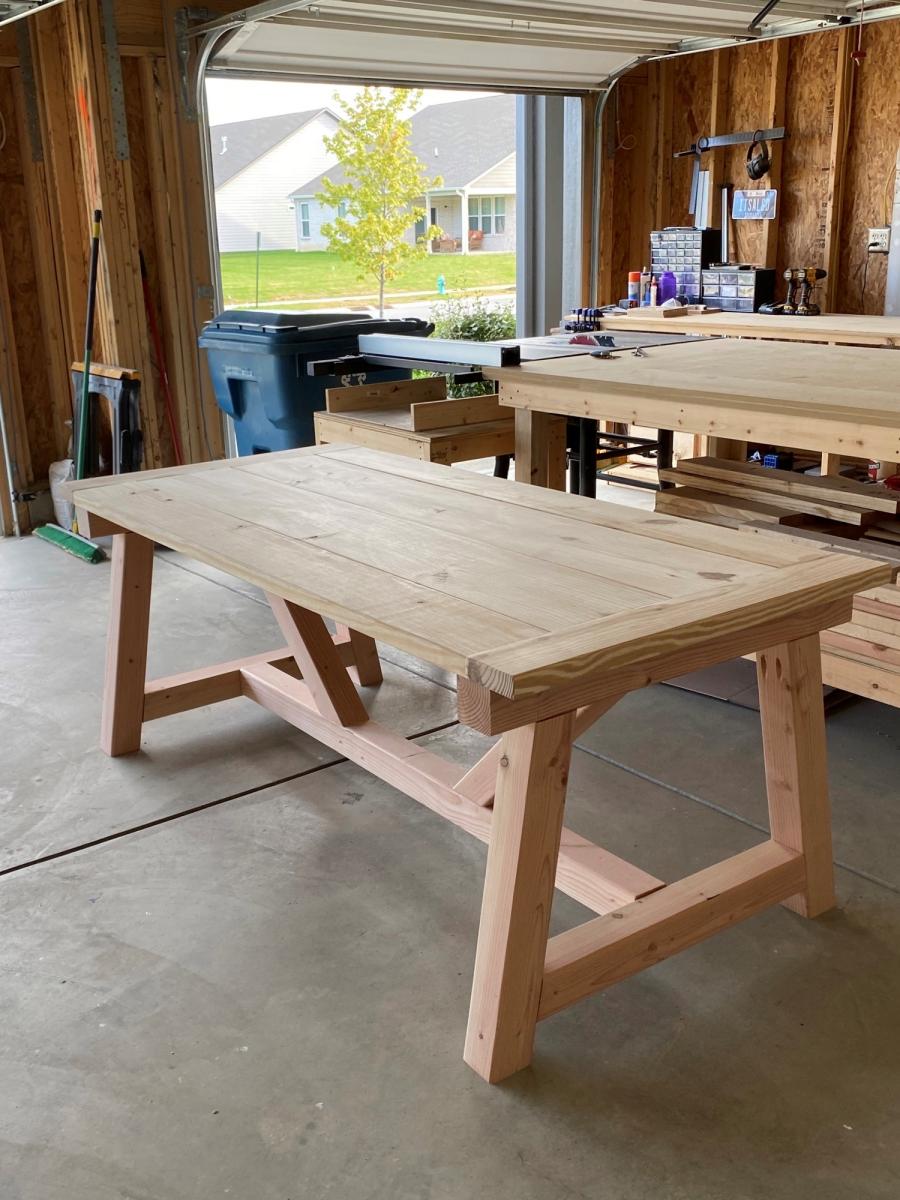
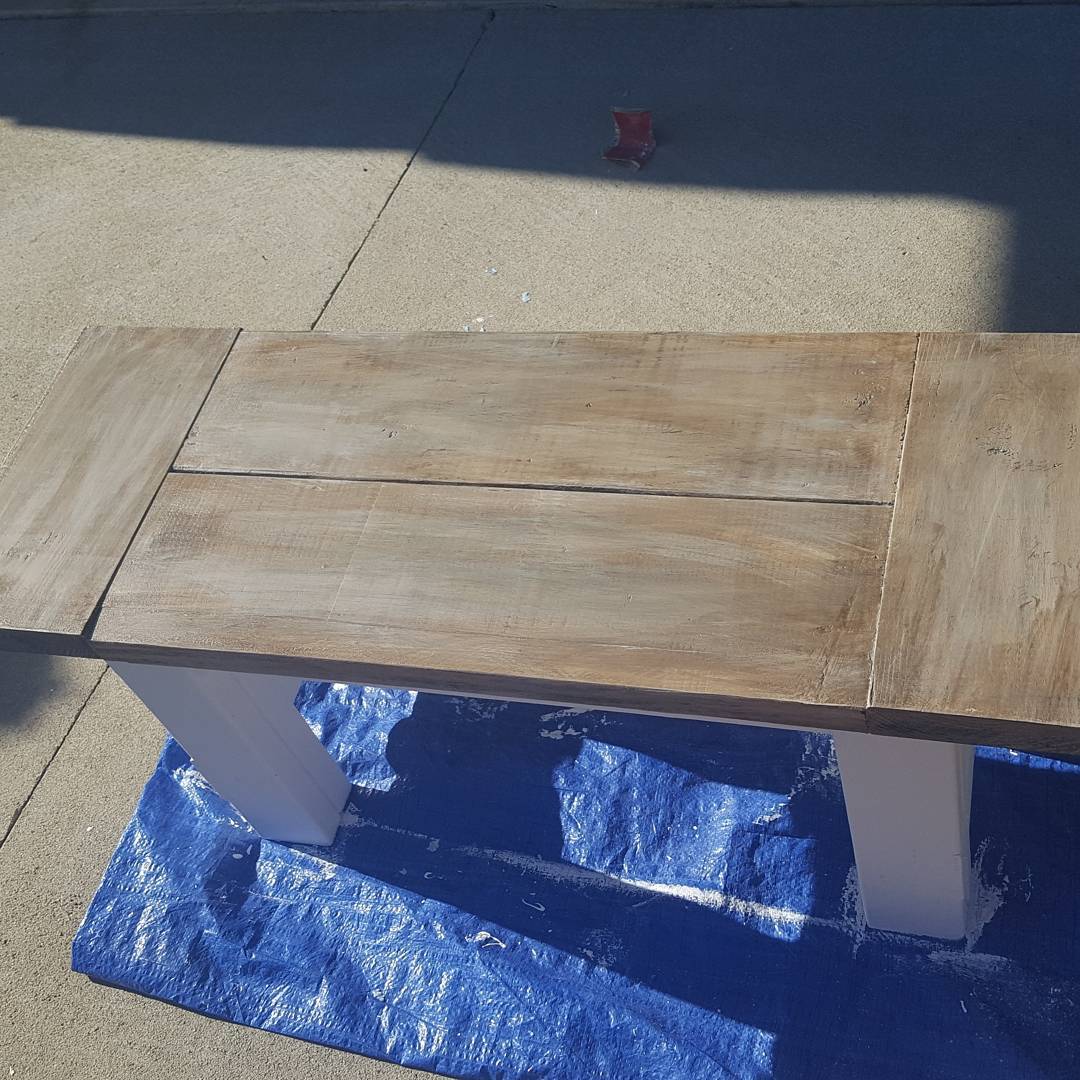
Farmhouse table and bench - white base with stained top

Submitted by Anonymous (not verified) on Mon, 05/15/2017 - 19:36

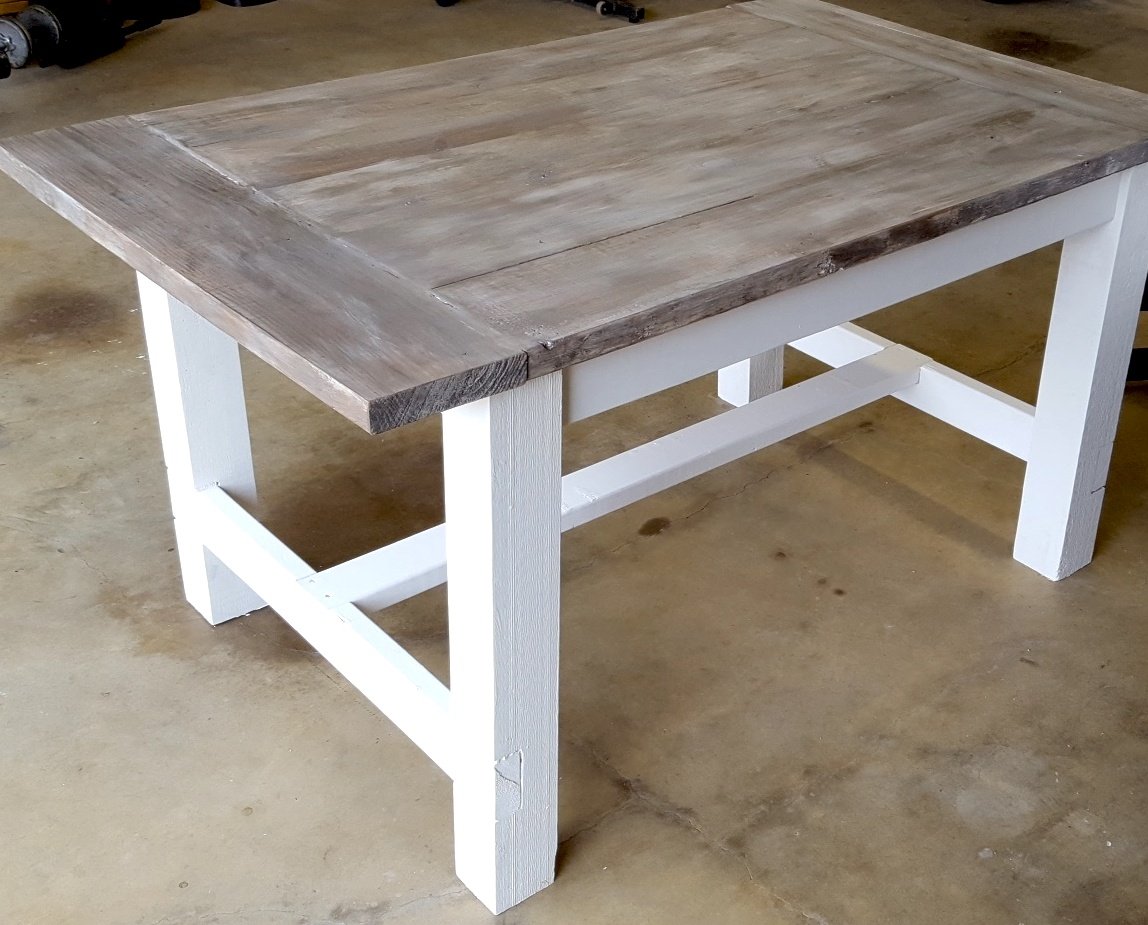
We went off the Farmhouse table and bench design but had to customize the length of the table and bench so that it fit in our kitchen space. The table was our first ever project and we made a few mistakes but learned from them and built the bench and are hoping to move up to the Farmhouse bed and then the fullstorage bed. 

Estimated Time Investment
Afternoon Project (3-6 Hours)
Finish Used
Used everlasting in chalk paint for bottom and top then brushed blue over the top let dry then stained the top with minwax dark walnut and wiped off. Applied a few layers until desired look. Dry brushed more blue and white in between stain layers then used polycrylic semi gloss finish
Recommended Skill Level
Starter Project

Bike Storage

Submitted by vendo on Wed, 10/13/2021 - 10:10

I live in a smaller rental with limited garage space, so I needed a place for my kids bikes. This is what I came up with. It required minimal screw holes in the treated fence posts and I attached a rail system(rubbermaid fasttrak) for the bikes to hang from. I used Ana's easy shelves plan for the upright supports and then just added some corrugated roofing and cedar fence pickets (which I had on hand) to finish off the top.

Drop down murphy bar

Submitted by nick_h on Tue, 12/06/2016 - 10:54

My attempt at the murphy bar featured on this site. Still have to add the sash locks. Added pallet crossmembers at the back, an x in the leg, and a french cleat to mount to the wall. 

Estimated Cost
$45
Estimated Time Investment
Day Project (6-9 Hours)
Finish Used
Special Walnut Minwax on the bar top and shelves, crisp linen matte latex and dry brushed casual gray for accents/aging. 2 coats of polycrylic for protection. If built again would pre stain and base coat all the wood before build time, then assemble, add accent brushing and spray the polycrylic.
Recommended Skill Level
Beginner

Comments

zannej

Tue, 12/31/2019 - 11:49

This looks awesome! I want to help my friend build this for his kitchen. I've looked at the plans in the link & I'm wondering what modifications you made for the X pattern-- how much did it alter the material & cut list?

Would you please share your material & cut list for this?

Poolside Towel Cabinet from Benchmark Cabinet Plan

Submitted by Anonymous (not verified) on Thu, 03/23/2017 - 11:21

My father and I made this awesome poolside towel cabinet using the Benchmark Cabinet plans. A super easy 1 day build and it looks amazing on the patio. Bring on the pool weather! 

Estimated Cost
$60
Estimated Time Investment
Day Project (6-9 Hours)
Finish Used
Chalk paint/Poly topcoat
Recommended Skill Level
Beginner

Ana White Cabinet Builder Google Sheet converted to Microsoft Excel

I was trying to use the google sheets cabinet calculator that Ana posted and found that others were accessing and editing the master at the same time. I thought perhaps a Microsoft Excel version of the calculator to download may be useful.

I wasn't able to upload to this site so I've created a Brag Post to link to it on my site.

UPDATE: Ana's website has been updated and the file is now an Excel Spreadsheet which can be downloaded.

Estimated Cost
none, just converted the functions and calculations to work in excel
Estimated Time Investment
An Hour or Two (0-2 Hours)
Recommended Skill Level
Intermediate

Glider

Submitted by Seansg5 on Sun, 08/09/2015 - 20:24

The bench was easy to build with great instructions. I had Home Depot make my cuts for this first project and then I went and bought a miter saw and other power tools for future ones. So much fun. 

Built from Plan(s)
Estimated Cost
$100
Estimated Time Investment
Afternoon Project (3-6 Hours)
Recommended Skill Level
Beginner

Comments

Cross35

Mon, 03/14/2016 - 08:35

Great work.  DId you do anything different to the swing itself?  How did you build the frame.  I'm looking to do this exact thing for my patio.  I don't have anywhere to hang the swing.


Thanks for sharing any info.

mbarland

Sat, 06/13/2020 - 16:54

Made the chair and then built the glider frame for it just eyeballing the picture. I can't figure out how to upload a photo of my design, but can try to describe it.

I made mine with a 4x4 on the base of each leg, but a 2x4 would work as well, it was just what I had on hand. The base board on each leg I made 48". From there I put two 48" vertical boards. The vertical boards were centered and from the front edge of the first board to the back edge of the second board. Two 16" boards were then used at the top and bottom of the vertical boards to hold them in place. Cap it off with a 30" board on top of the verticals. This is where you'll attach your eye bolts. I put both eye bolts 3 1/2" back from the front (a scrap of 2x4 works well as a guide). To join the two legs, I used two 52" boards on top of the base 4X4 of the verticals (one in front of the legs and one behind).

Twin Farmhouse Bed with Trundle

Took the farmhouse plan and added a Trundle.   Was initially going to build two farmhouse beds for my two girls, but thought adding the Trundle would free up some much needed floor space.  The girls love it!

Estimated Cost
$150
Estimated Time Investment
Day Project (6-9 Hours)
Finish Used
Latex paint
Recommended Skill Level
Intermediate

Patio Living

Submitted by Anonymous (not verified) on Mon, 06/20/2022 - 11:44

We had a new backyard patio installed this spring and after a tree fell last year and crushed most of our mix-matched furniture I knew it was time to build a new set. We opted for the chair and loveseat from the outdoor seating set. We did make one small adjustment which was to tilt the back so that the back of the seat was 8” from the back base - super small adjustment but we find the angle to be more comfortable. It only require recurring the seat slats and we secured the back to the frame through one screw in the back rest of the pieces. We get a ton of compliments on this and while super heavy and durable, we can move it easily on the patio stone to sweep and clean.

Comments

Custom Modern Chicken Coop

Submitted by Anonymous (not verified) on Wed, 08/30/2023 - 08:49

I made this coop twice as wide like Ana suggested since I have 4 chickens and wanted to make sure there was some extra wiggle room in case “chicken math” got the best of us. I made a nesting box to mount on the outside. I also used plywood for the sides like Ana did in the video. I installed a Run Chicken automatic door that opens at sunrise and closes at sunset. I added some hasps and clasps to make sure all my doors would close tightly. I put hardware cloth across the top before installing the roof panels. I stapled and buried hardware cloth around the perimeter for predator protection. I also spray painted the hardware cloth flat black so that it would be easier for us to see inside the coop. I stained the rest of the wood with Varathane Semi-Transparent stain, color “Carbon Gray.” I also added some roosts and cedar shingle siding for some extra protection during our New England winters at to match our house. Working 2-4 hours a day, off and on, with a bum shoulder and weak hands, this took me about a week! Thanks for the great plan, Ana!

Built from Plan(s)

Comments

Seasonal And Holiday

Cedar Planter Boxes

Submitted by KaityJene on Wed, 07/17/2013 - 19:59

They were simple to make and the plan was easy to follow. The only modification I made was adding the 1x3 topper in place of the longer legs sticking out of the top.

Built from Plan(s)
Estimated Cost
$23
Estimated Time Investment
Day Project (6-9 Hours)
Finish Used
Thompson's Water Seal which I just brushed on using a cheap paint brush.
Recommended Skill Level
Beginner

Comments

Debi G

Fri, 07/19/2013 - 06:36

Adding these to my to-do list for spring (yes, I plan ahead). I'm thinking of elevating and elongating them to fit around a bay window.

Tall Corner Media Console-Barn Door Twist

Submitted by dcraible on Wed, 09/02/2015 - 09:46

This project was modified from the original plan in that it is not as tall, the shelving was configured differently as well as the doors. I wanted a sophisticated yet rustic appeal to it. Thus, I made vertical long doors with a barn door design. 

Built from Plan(s)
Estimated Cost
$200.00
Estimated Time Investment
Week Long Project (20 Hours or More)
Finish Used
Rustoleum Driftwood Stain with a water based satin polyurethane. This project has 2 coats of stain and 3 coats of poly.
Recommended Skill Level
Intermediate

Comments

Garage shelves

Submitted by Queequeg on Thu, 03/31/2016 - 14:35

This is my first project ever built. I can't thank you enough for this site. I already have several other projects I want to build around the house because of this site. Thank you so much!

Estimated Cost
$150 for the wood. And some extra for the stain.
Estimated Time Investment
Weekend Project (10-20 Hours)
Finish Used
Minwax walnut water-based stain
Recommended Skill Level
Beginner

Comments

Queequeg

Thu, 03/31/2016 - 14:36

Didn't realize the photos were rotated. Can't figure out how to fix that!  Oh well.  :)


Farmhouse Storage Bed With Hidden Drawer

Submitted by Beekeeper on Wed, 12/10/2014 - 17:35

Ana, thanks for these plans! They inspired me to make my first bed build. I also want to thank all of you that added brag posts! They gave me ideas for some of the modifications that I made. I did this build by mixing your Queen Farmhouse and Queen Farmhouse Storage bed plans. I also added a number of modifications to suit my own preferences. The drawer boxes I changed by building a faceplate (I didn't want the plywood ends exposed), and by increasing in depth to maximize some additional storage. Since I increased the drawer sizes, I went with the euro roller bearing slides. I increased the foot-board height to be slightly higher than the mattress. I also designed the footboard to have a removable inner section with hidden latches on the inside. I did this because I wanted to make use of the "dead space" between the drawer boxes. I then used this space to house a hidden drawer, that is approx six feet deep (I couldn't help myself-I love hidden drawers wink
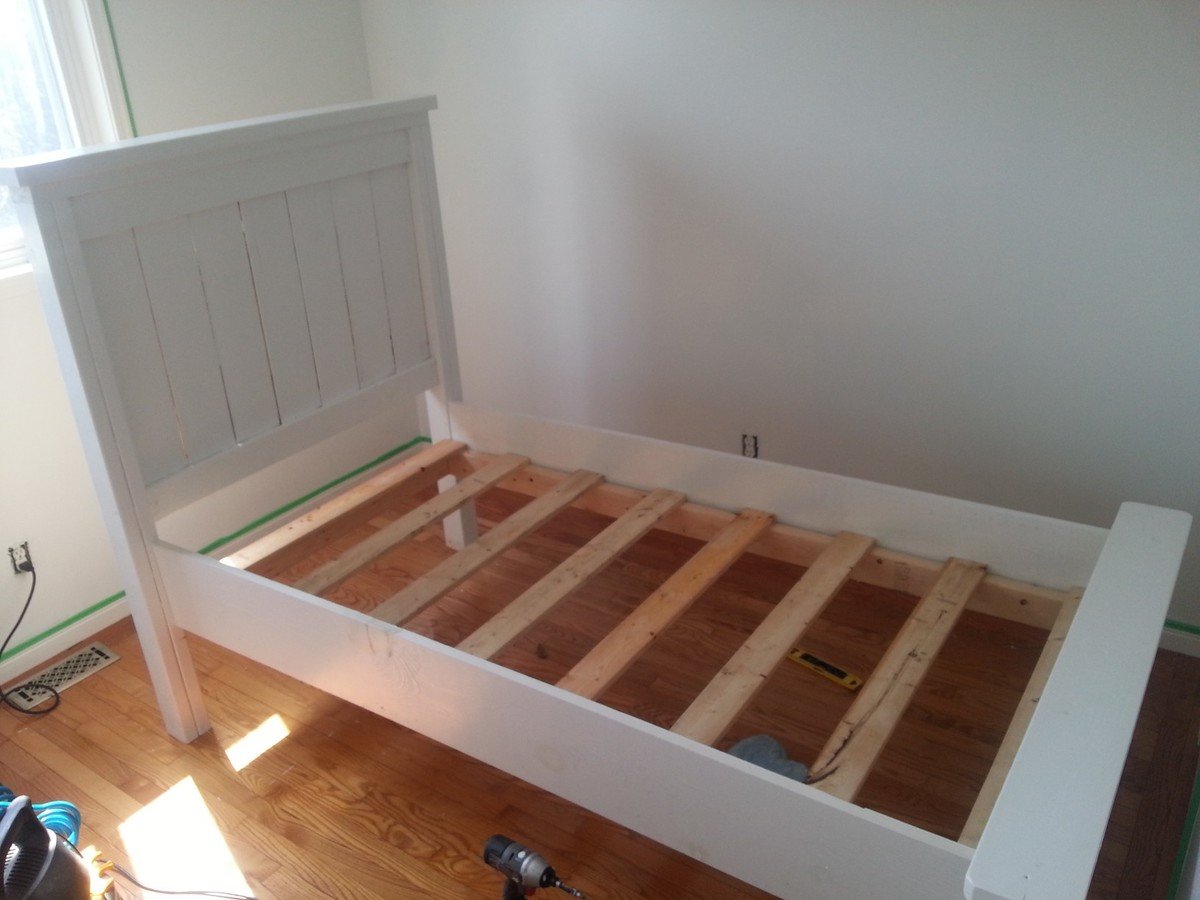
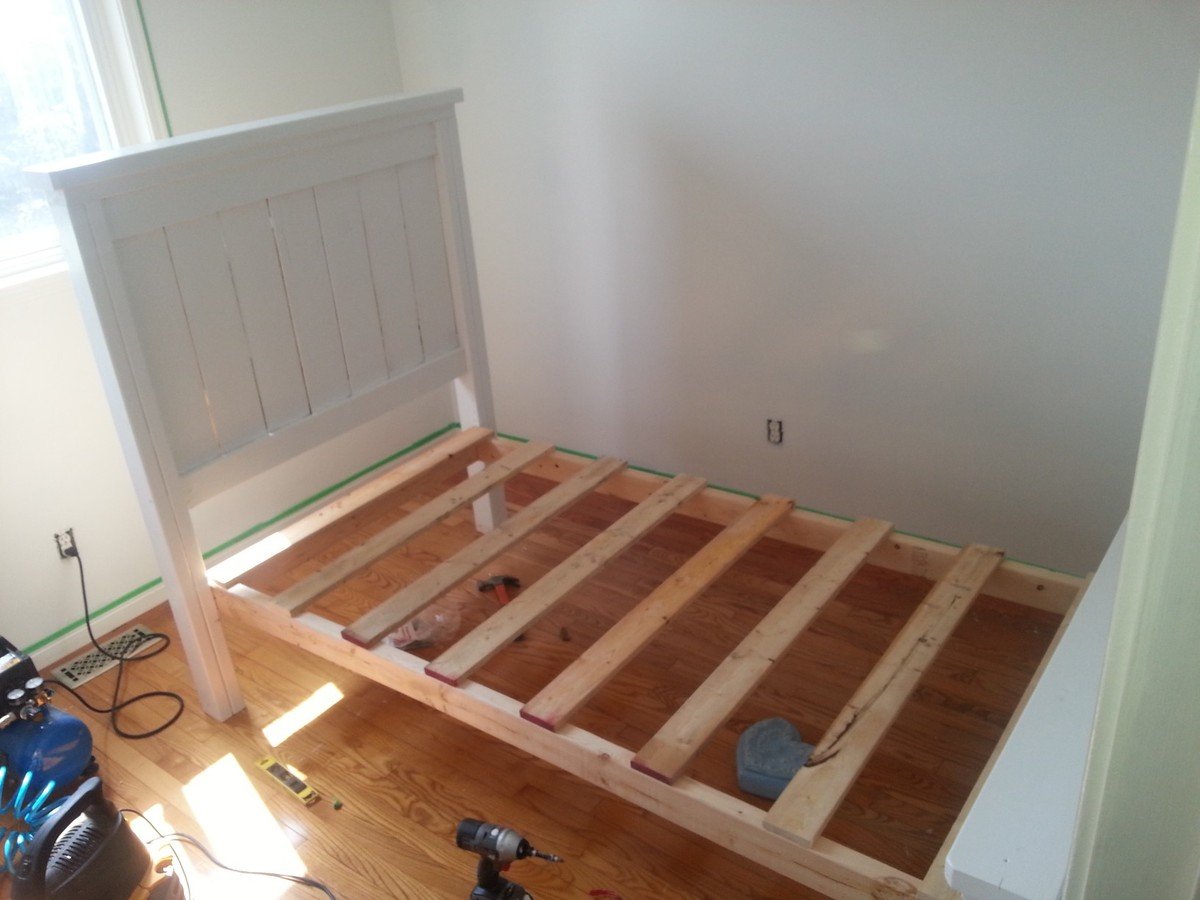
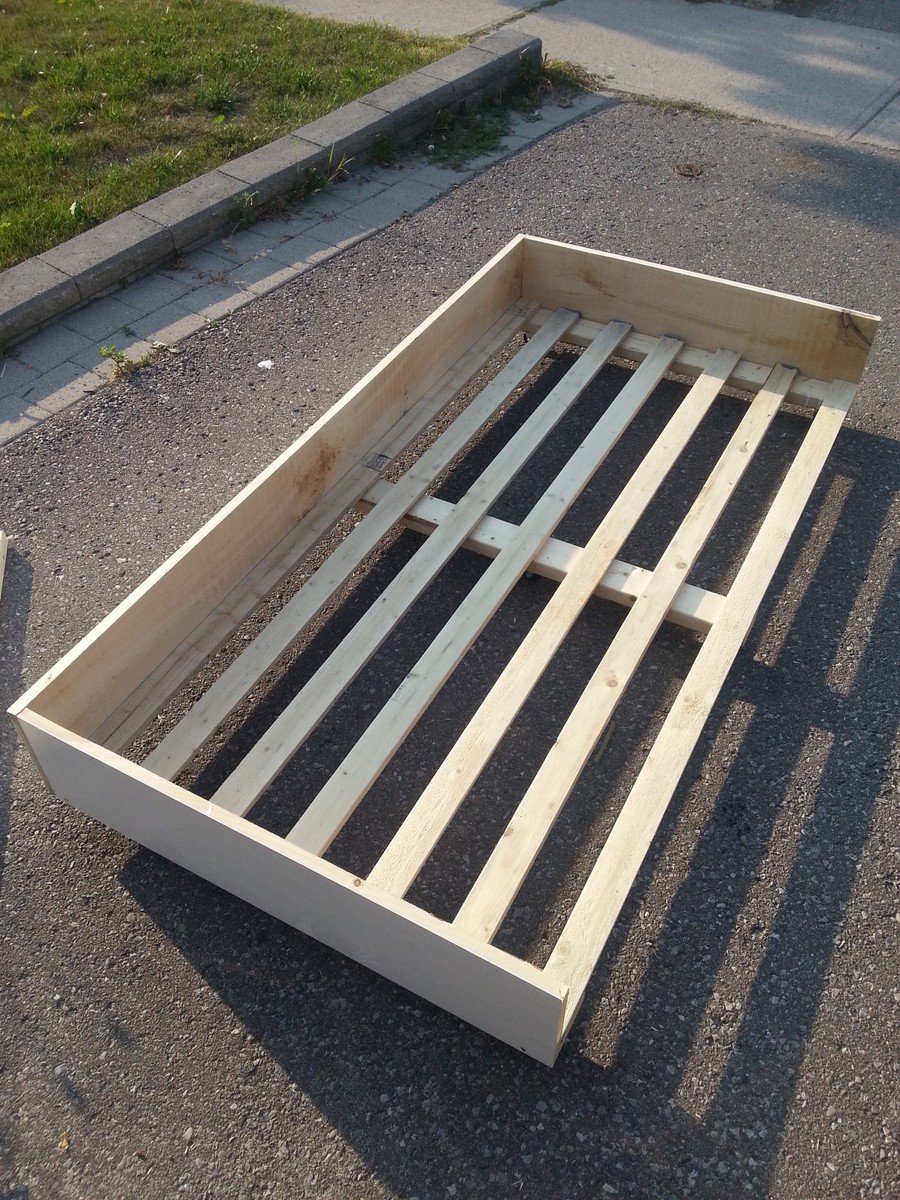
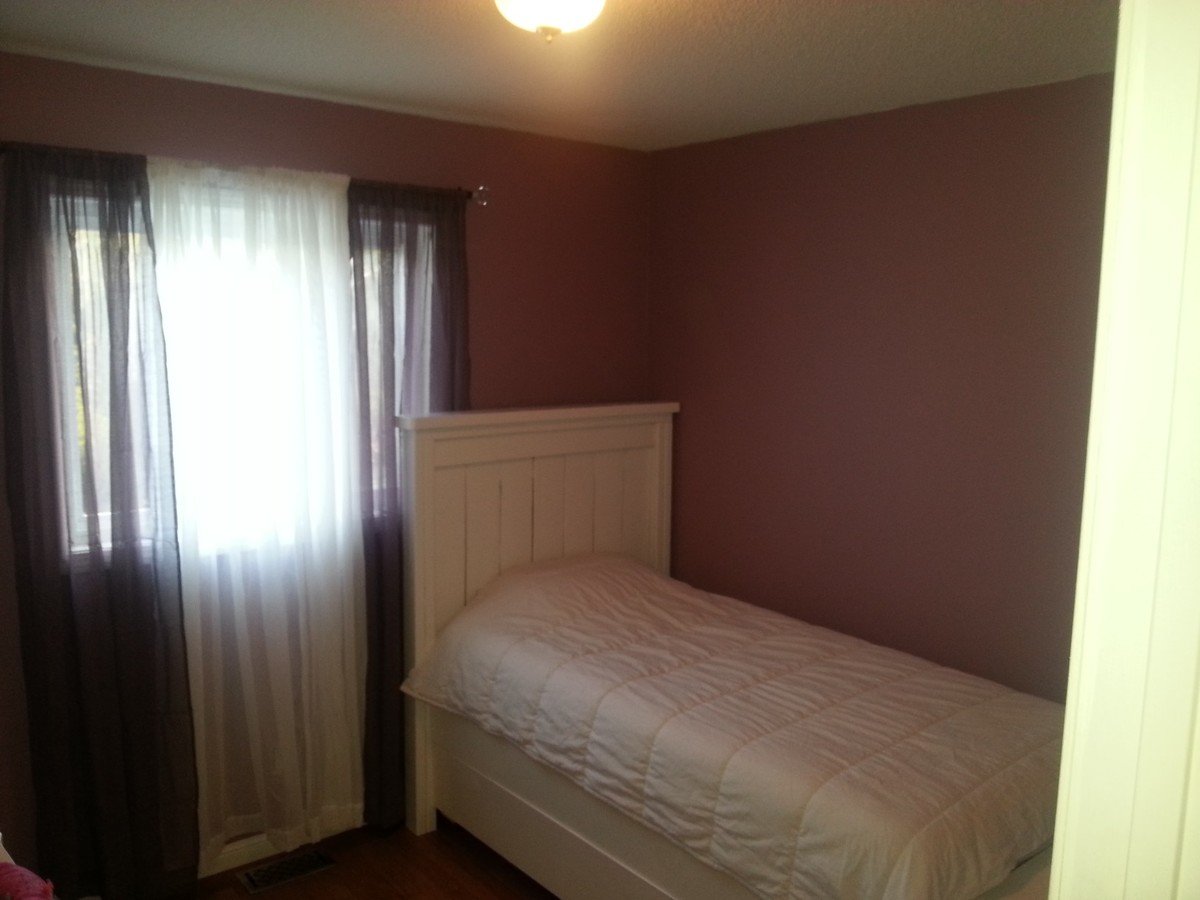
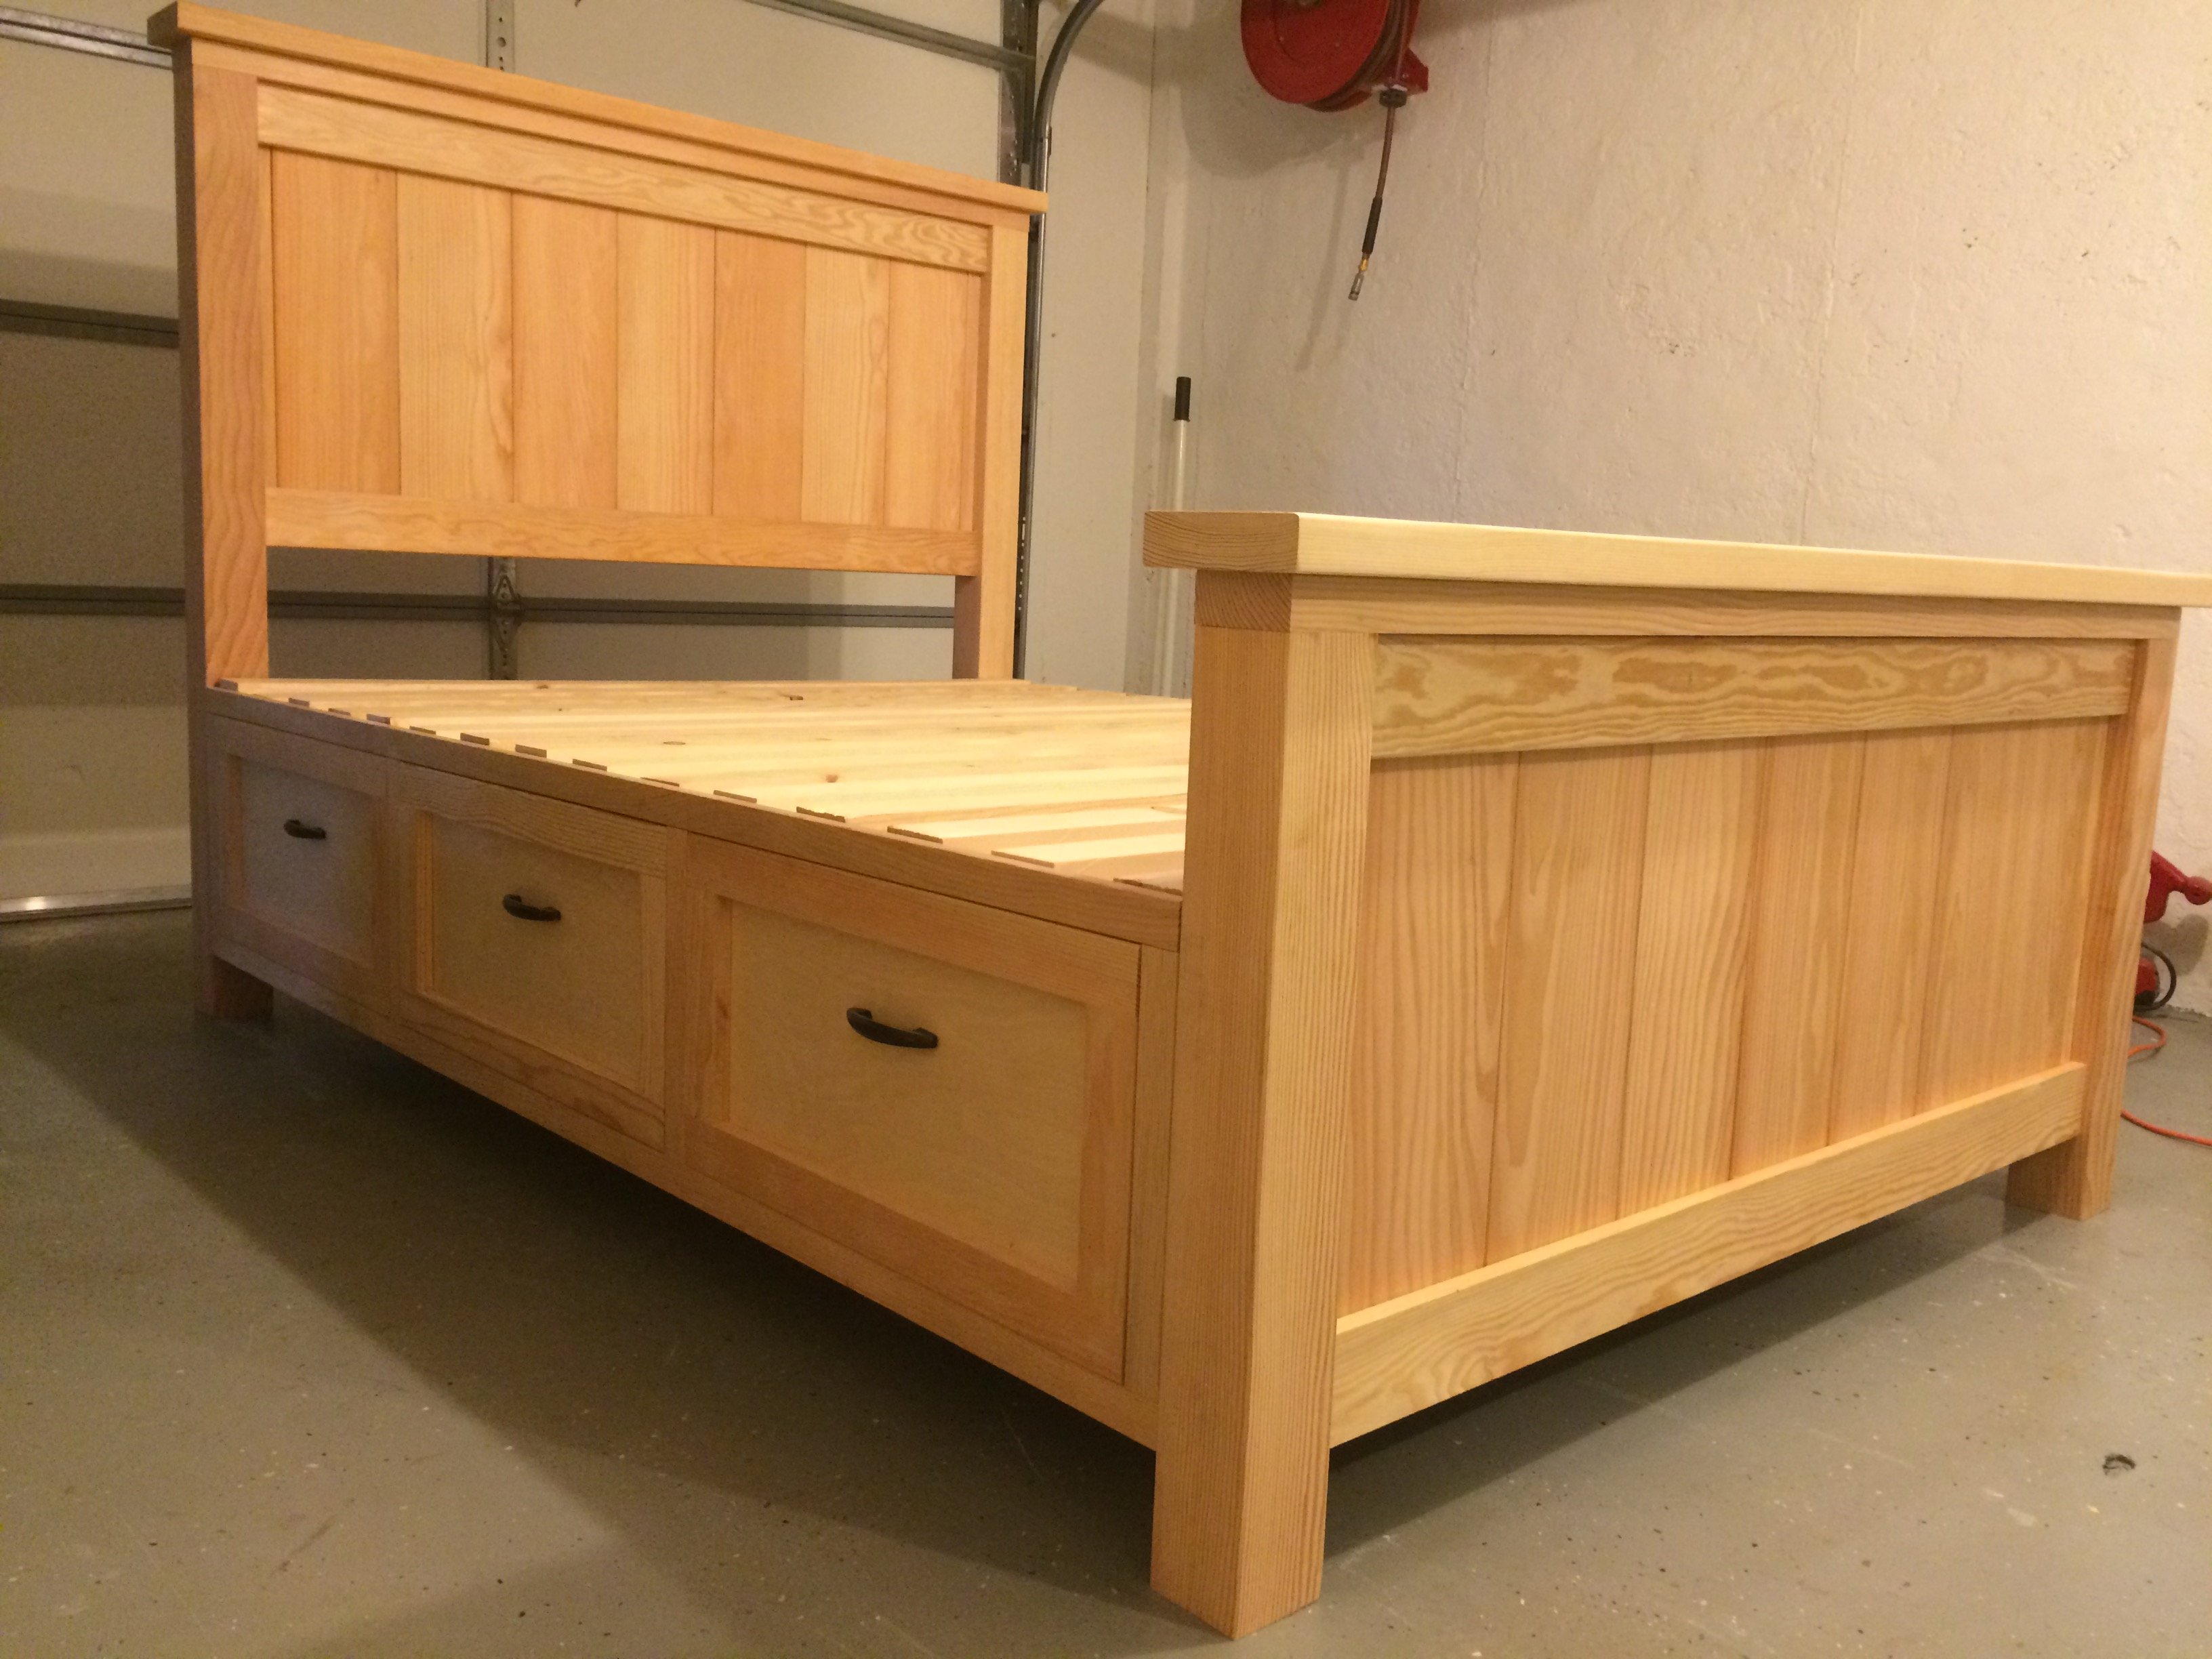
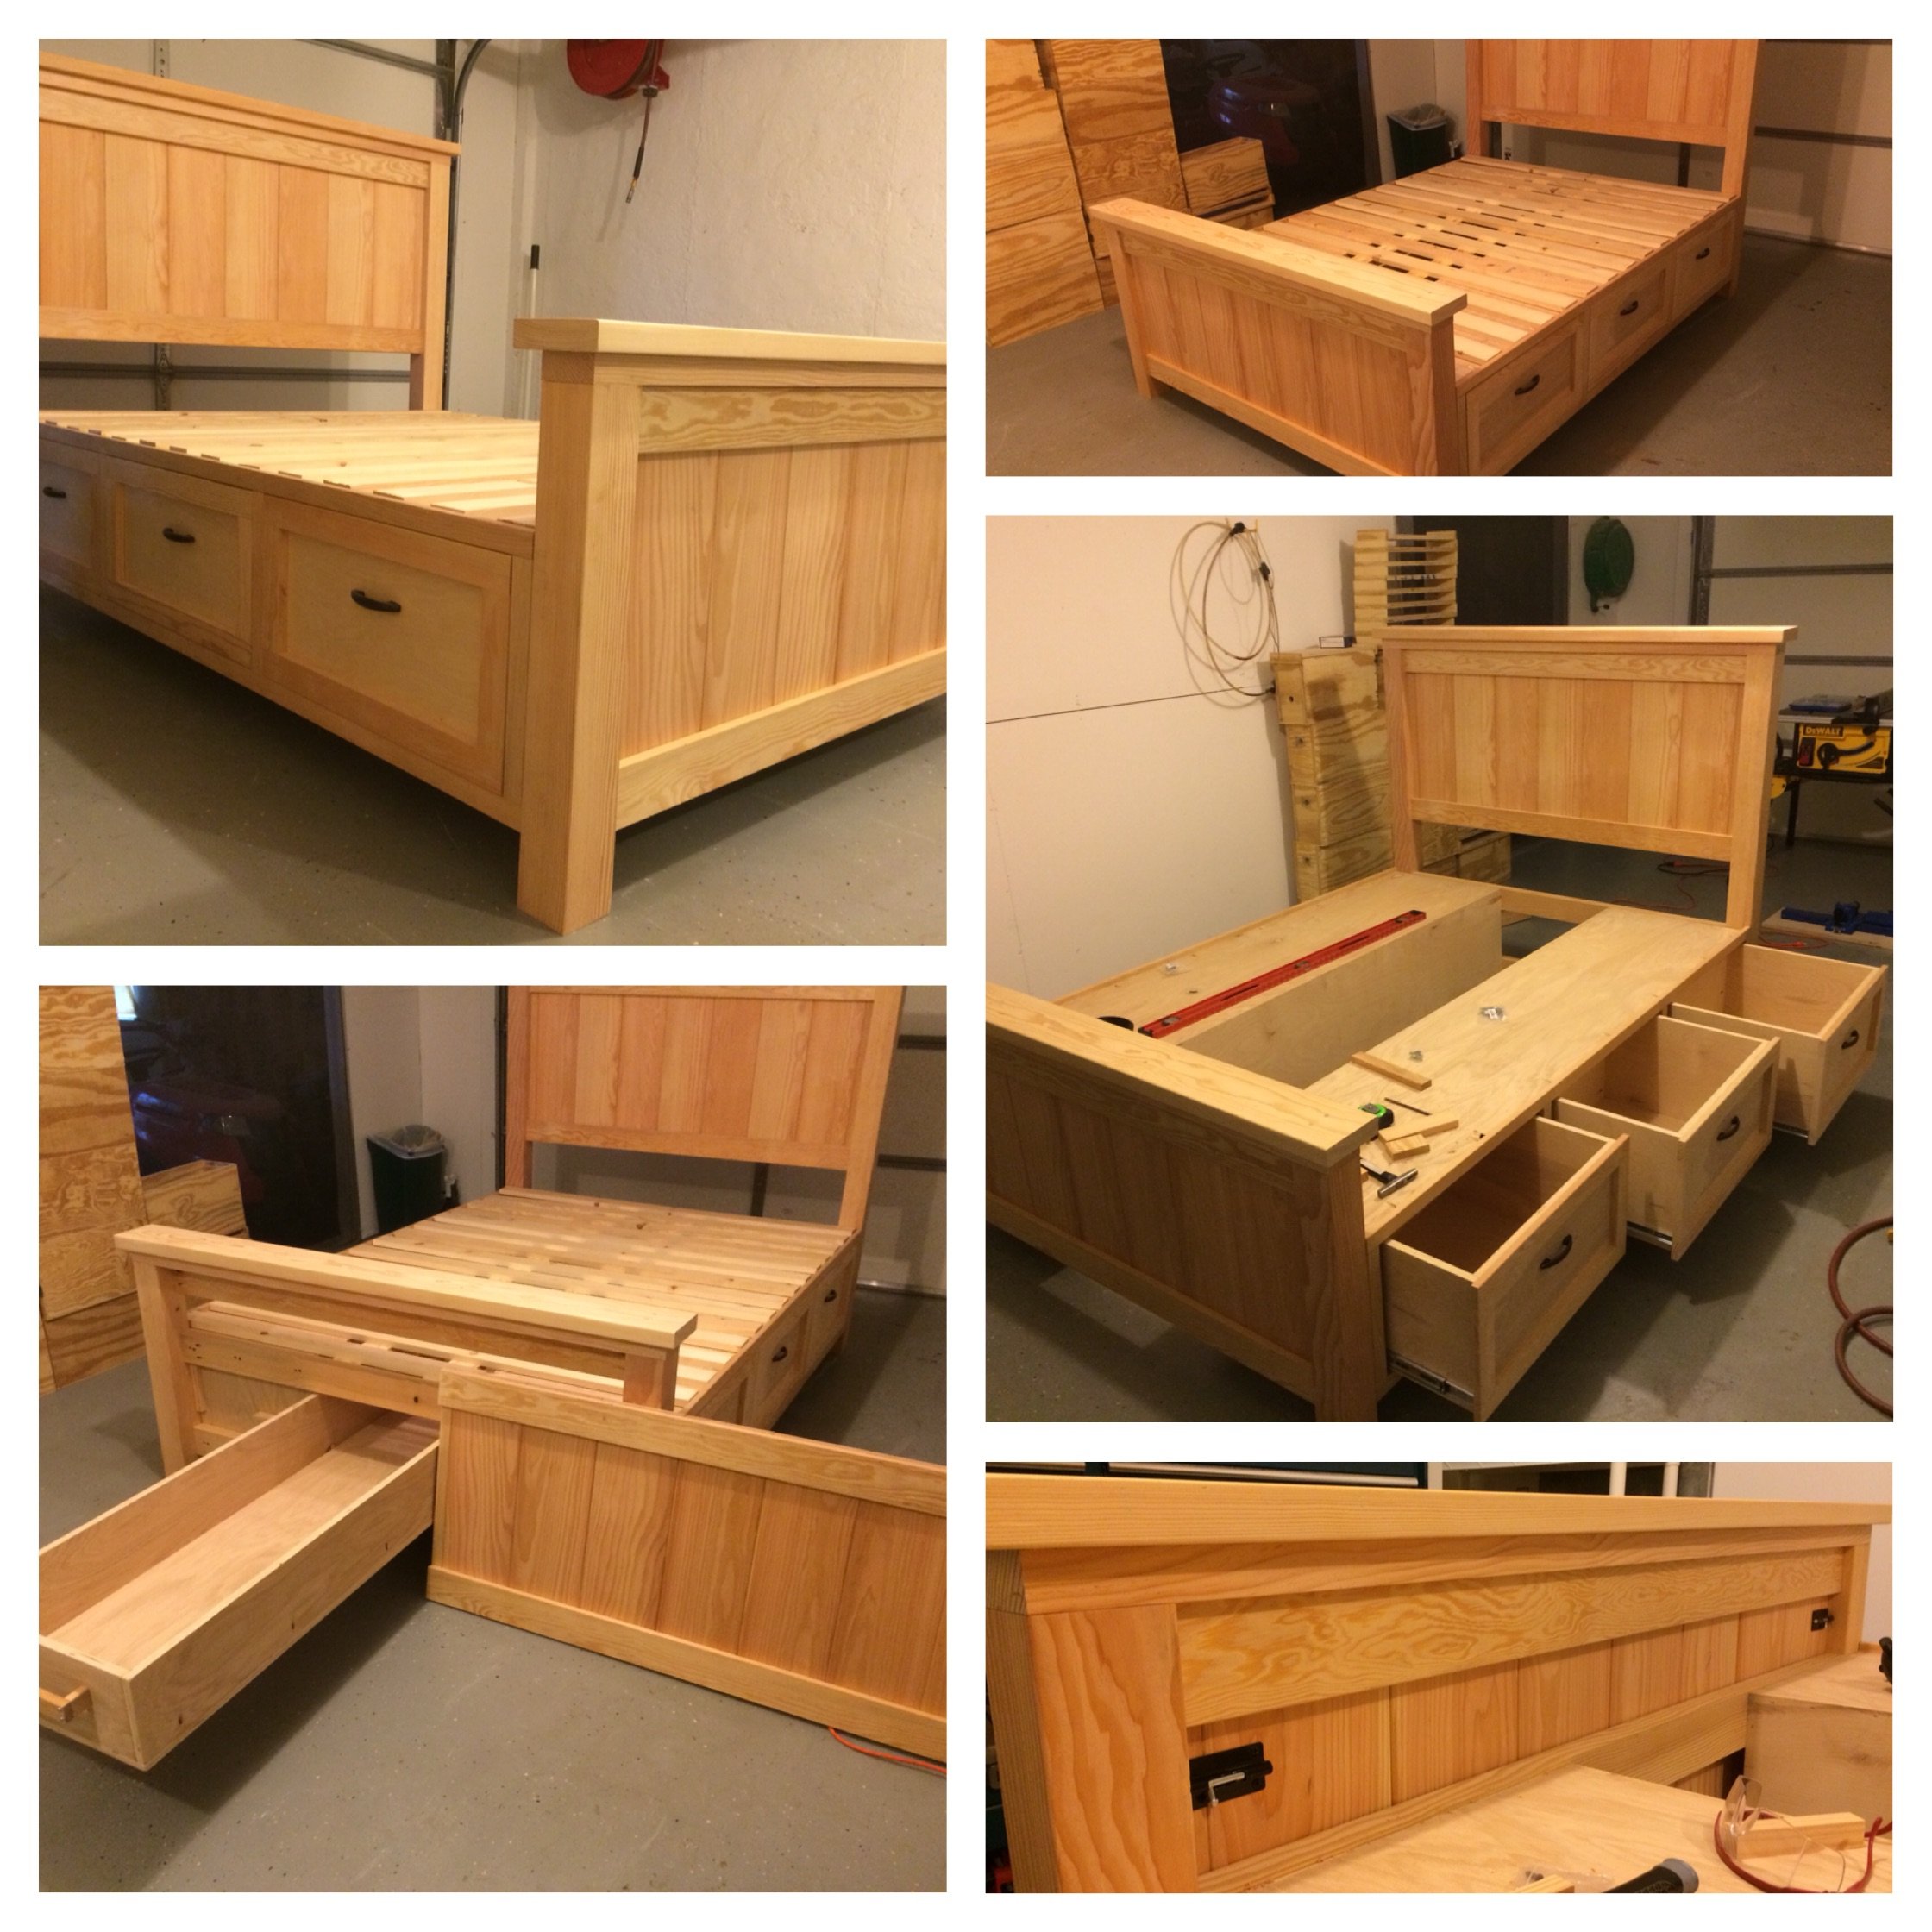
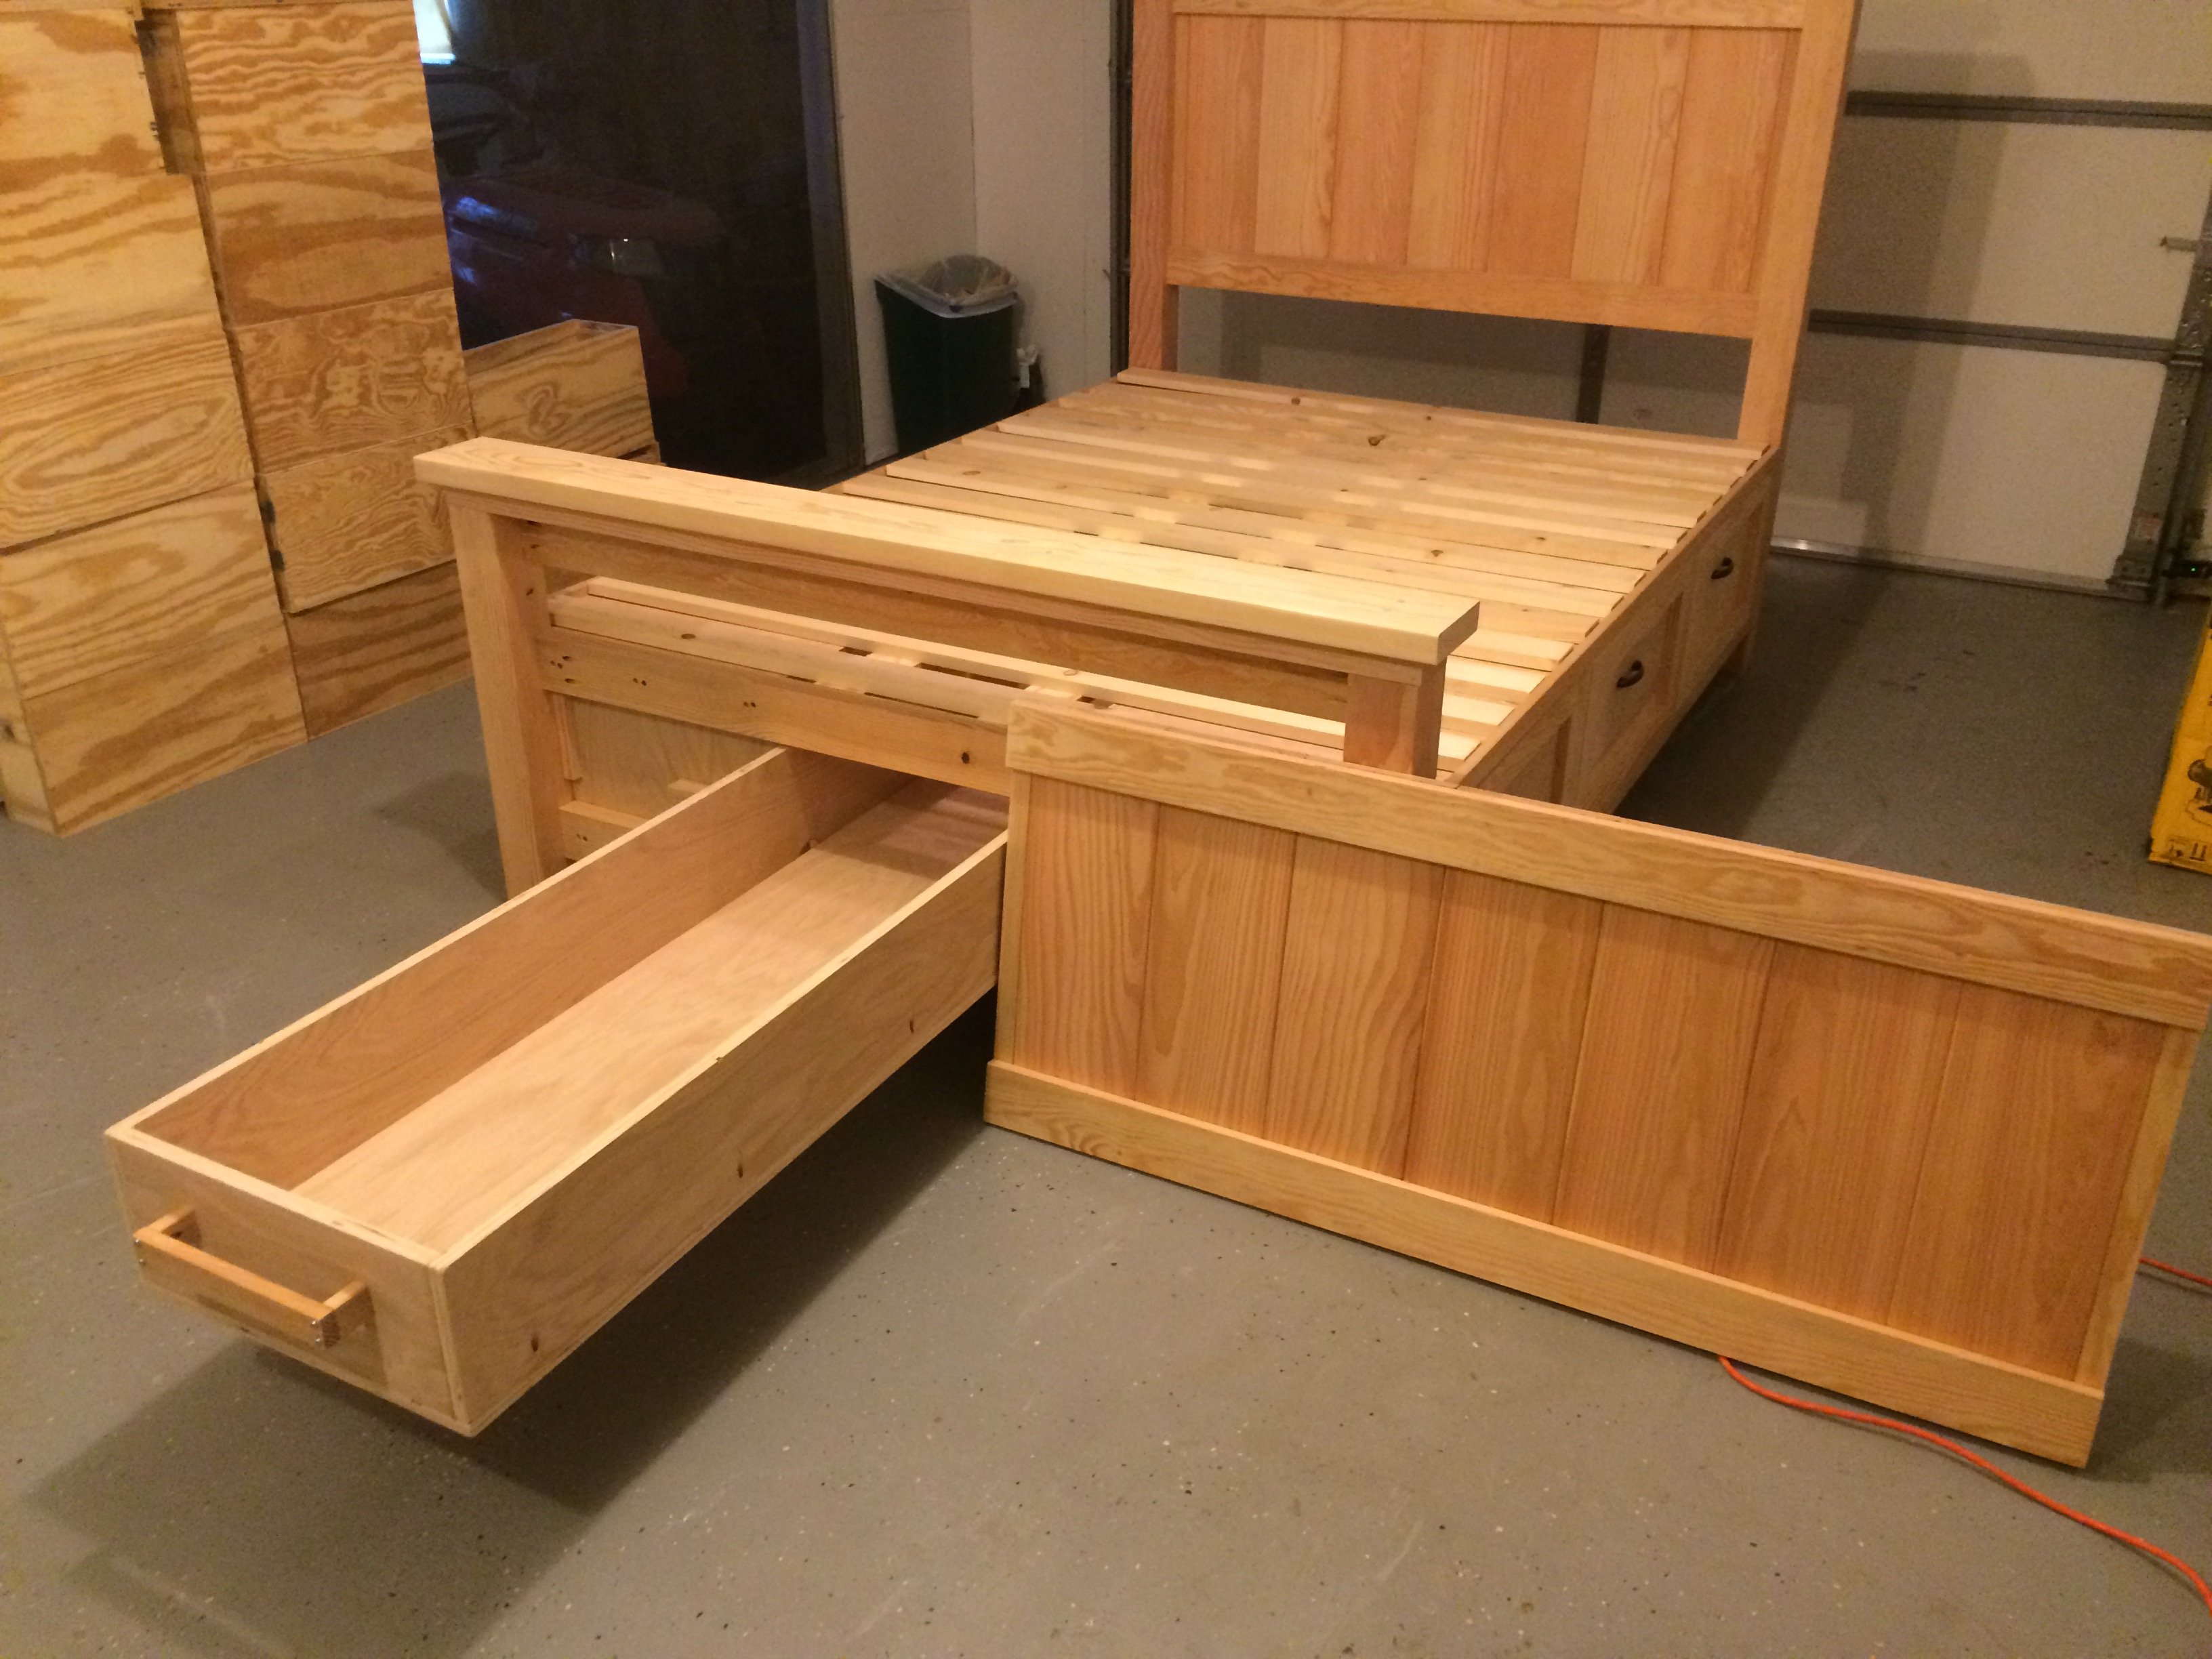
). Because I added the hidden drawer, I changed the opptional center support to 4X4 blockes that were pocket screwed under the center of the boxes. I ended up using birch plywood and fir for this build. For my first bed build I'm fairly happy with how it came out. Thanks again!

Estimated Cost
I didn't keep exact track of the cost of this bed, but I think it was about $800.
Estimated Time Investment
Week Long Project (20 Hours or More)
Finish Used
I haven't got there yet, but I am planning on putting a mahogany stain and then a polyurethane. All
Recommended Skill Level
Intermediate

Comments

spiceylg

Thu, 12/11/2014 - 07:41

This is your first build and you did all of those awesome modifications?! Really impressive and it looks perfect! Congrats and welcome to the community!

In reply to by spiceylg

Beekeeper

Sun, 12/14/2014 - 06:03

Thanks for the compliments! It was a fun learning experience. Making all the modifications definitely slowed down the build, but also made it more rewarding!

beckbg

Fri, 12/12/2014 - 13:18

I just started my bed (mostly out of Baltic Birch) and am wondering where you were able to find such nice 4x4s. Your bed is gorgeous! No luck here. I bought redwood, but really wanted fir for the sharper edges. It's my first project, too. I also bought same drawer slides, but the soft close. Didn't want the slam. I figure building it will be the easy part compared to procuring nice 4x4s! Hope you can help!

In reply to by beckbg

Beekeeper

Sun, 12/14/2014 - 06:01

Thanks! The 4x4s I found at a place called Better Living Building Supply. They had a pretty nice assortment of fir, including the 4x4s, so that is why I chose it for the build. Finding the 4x4s slowed down my start on the build. Our local Lowes only had them in treated pine.

athingvall

Sat, 09/05/2015 - 20:47

Thank you for the pictures, the bed turned out Awesome.  I was wondering about the latching system for the foot of the bed.  Do you think a piano hinge on the lower would work too?  Also on the center drawer did you use rollers or is it just friction?  Can't wait to start the build.

Thanks

Codding58

Mon, 02/15/2016 - 14:11

This is excellent!!!   I really like this, so much in fact that the wife is going to have to get used to it too. lol   But really, GREAT work!    Any chance you could post a pic and or comment about how you attached that removeable end?    i think this is the best part!    Cheers!

Kmaynard19

Tue, 12/10/2019 - 08:42

Beekeeper,  Awesome build!!!  Have you posted your altered plans anywhere?  I'm very interested in your build, I was wondering about some aspects of it and how you approached it.  Plans would clear it up instead of bothering you with all my questions.

NinjaPinky

Sat, 06/20/2020 - 09:06

I, like many others, have been wondering if you'd share your plans for this modification. It just looks so great!

tammis50401

Mon, 11/16/2020 - 15:42

Bed turned out awesome. I was wondering if you have the plans for the bed with a list of supplies it took to make this bed. I so want this bed it's just what we are needing

Great job

Farmhouse Table with Industrial Hardware

Submitted by Anonymous (not verified) on Sun, 01/17/2021 - 11:26

My hubby and I used the tressle table plans to make this awesome table. We changed it up, adding the turnbuckles like a Pottery Barn table that we wanted. I think this turned out way better!

We used yellow pine for the lower portion and poplar for the top.

Built from Plan(s)
Estimated Cost
200
Estimated Time Investment
Week Long Project (20 Hours or More)

Comments

Modern Adirondack Chairs and Adirondack Table

Submitted by jer727 on Mon, 08/30/2021 - 12:18

This is one of my first wood working projects I have accomplished and these two plans were some that I really enjoyed making.

Comments

Seasonal And Holiday

4x4 Truss Beam Table

Submitted by Anonymous (not verified) on Mon, 10/04/2021 - 13:07

I followed the plans for the 4x4 Truss Beam Table and it turned it out great! I definitely recommend the Kreg Jig HD for the 4x4's. I used non HD Kreg screws for the table top.

It's much easier to build it upside down to ensure you get all your pocket holes underneath. Also, use duct tape to keep the 45 degree angle posts clamped as it's much easier when screwing together.

As a bonus for the family I built it for, I cut their name out with my scroll saw and added as a personal touch for the piece.

Built from Plan(s)

Comments

Best Chairs Ever!

Submitted by Anonymous (not verified) on Tue, 06/09/2020 - 18:16

I made these modern Adirondack chairs for our business in Anchorage. GREAT and easy to build design by Ana - we upgraded the arms to tapered 2x6 and they're awesome!

Modern Laundry Basket Sorter

I built this project totally from pallet wood and leftover 2x4's. I already had the paint and stain from other projects, so the only cost was for the baskets, which were $6 a piece at Ikea. This project turned out even better than I expected and I couldn't be happier.

Built from Plan(s)
Estimated Cost
$20
Estimated Time Investment
Day Project (6-9 Hours)
Recommended Skill Level
Beginner

Comments