Community Brag Posts

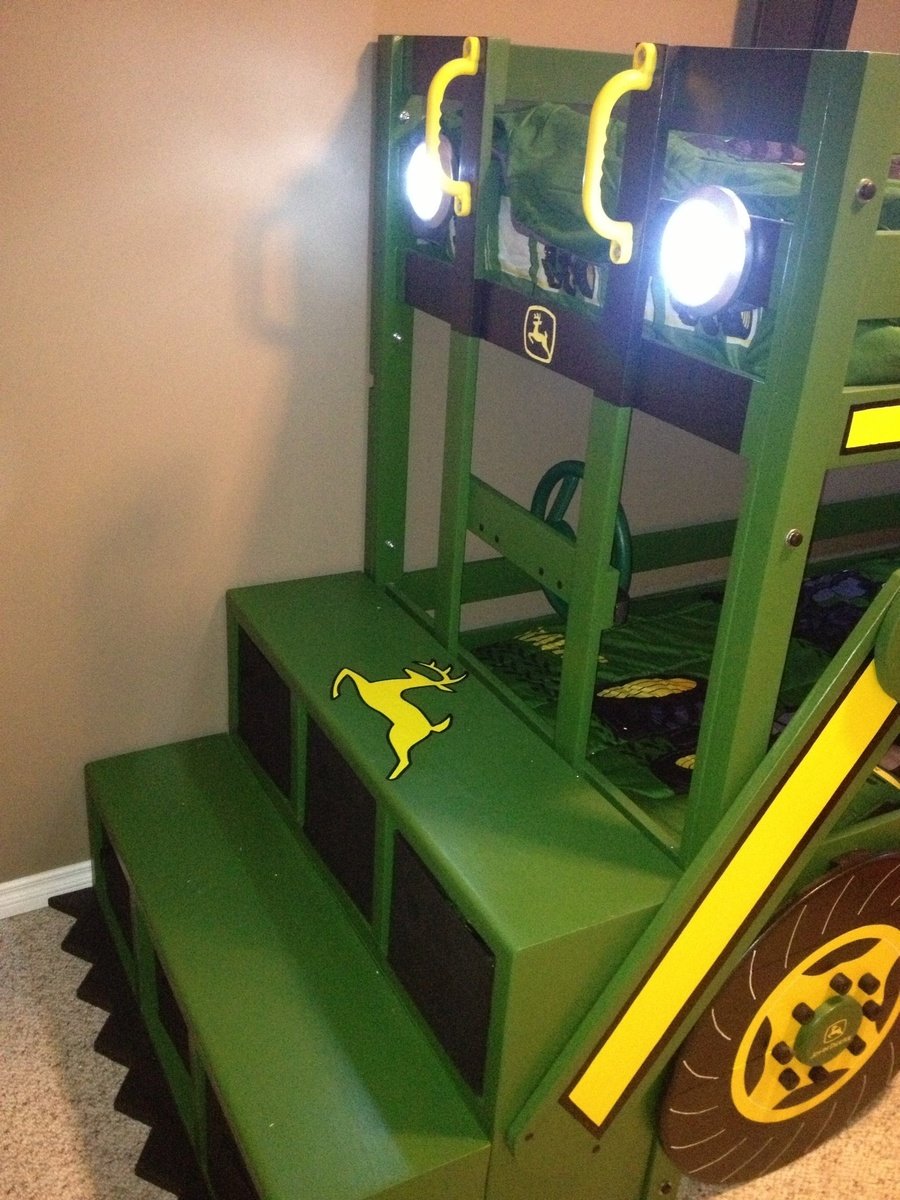
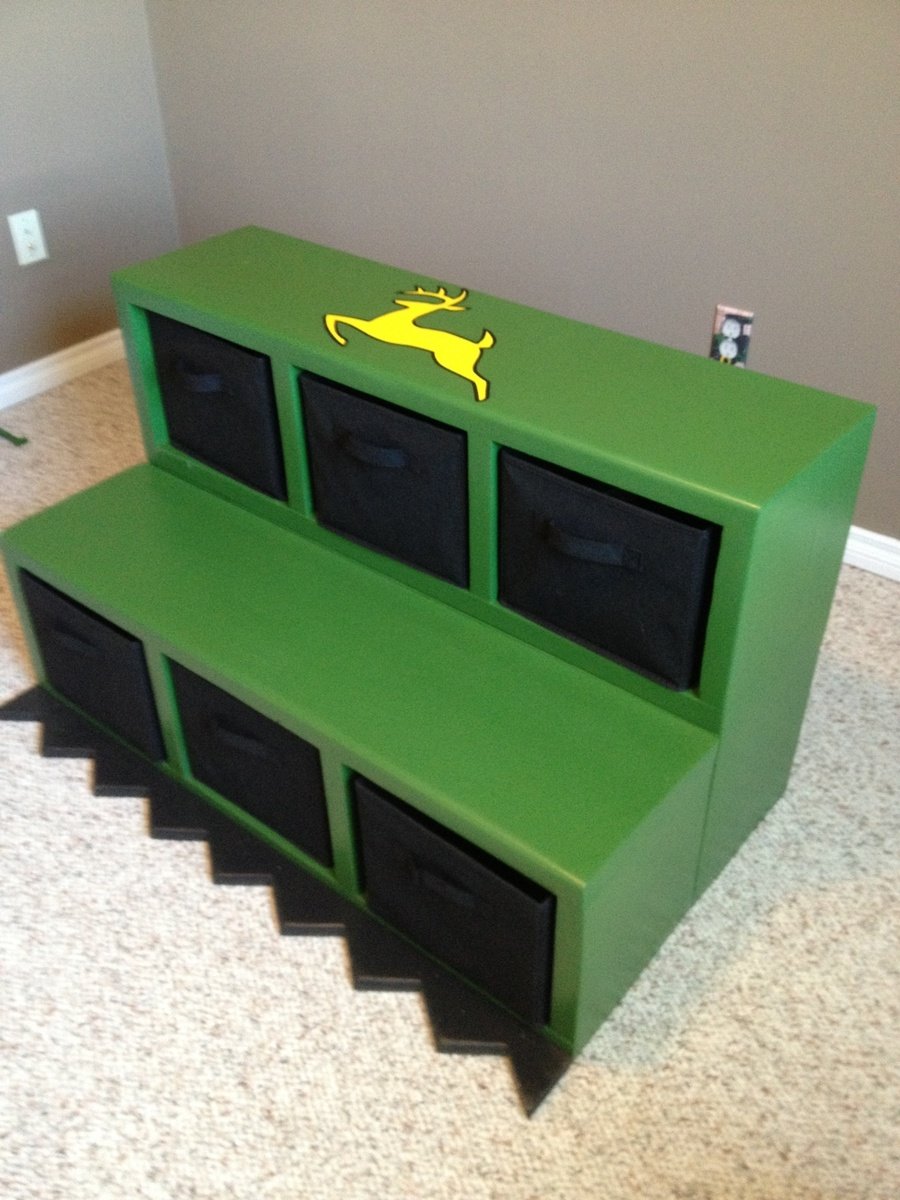
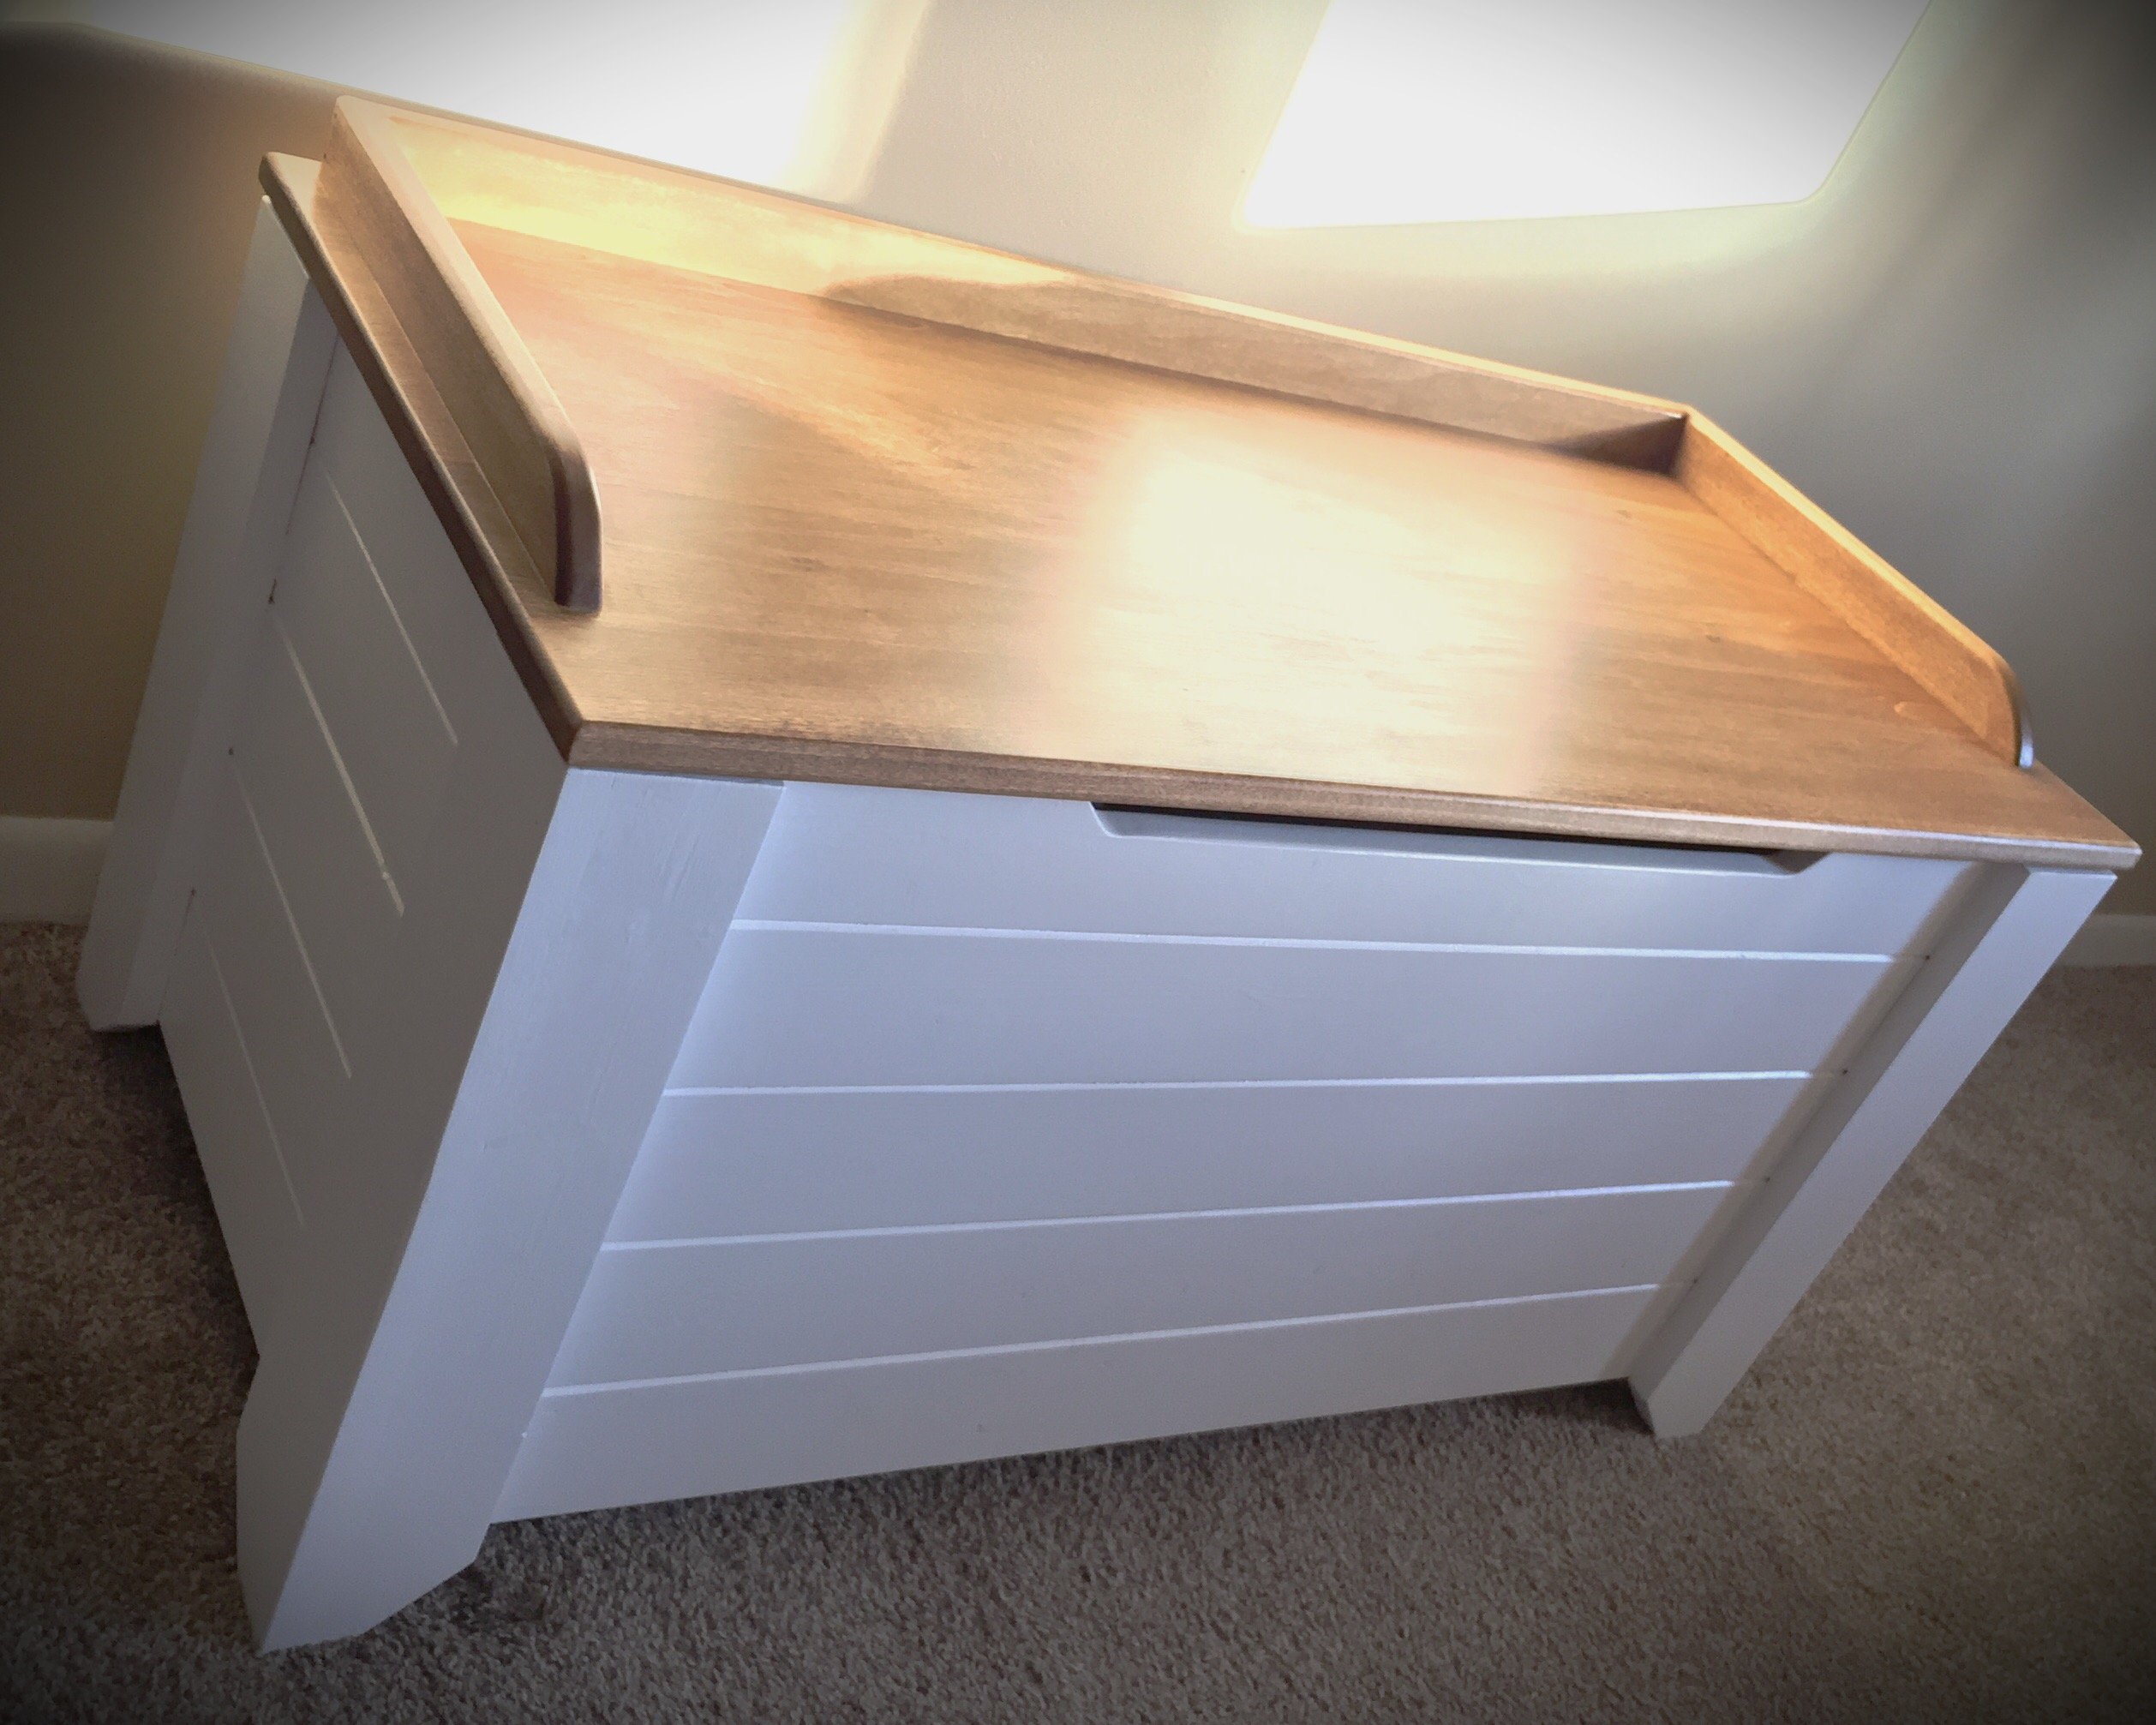
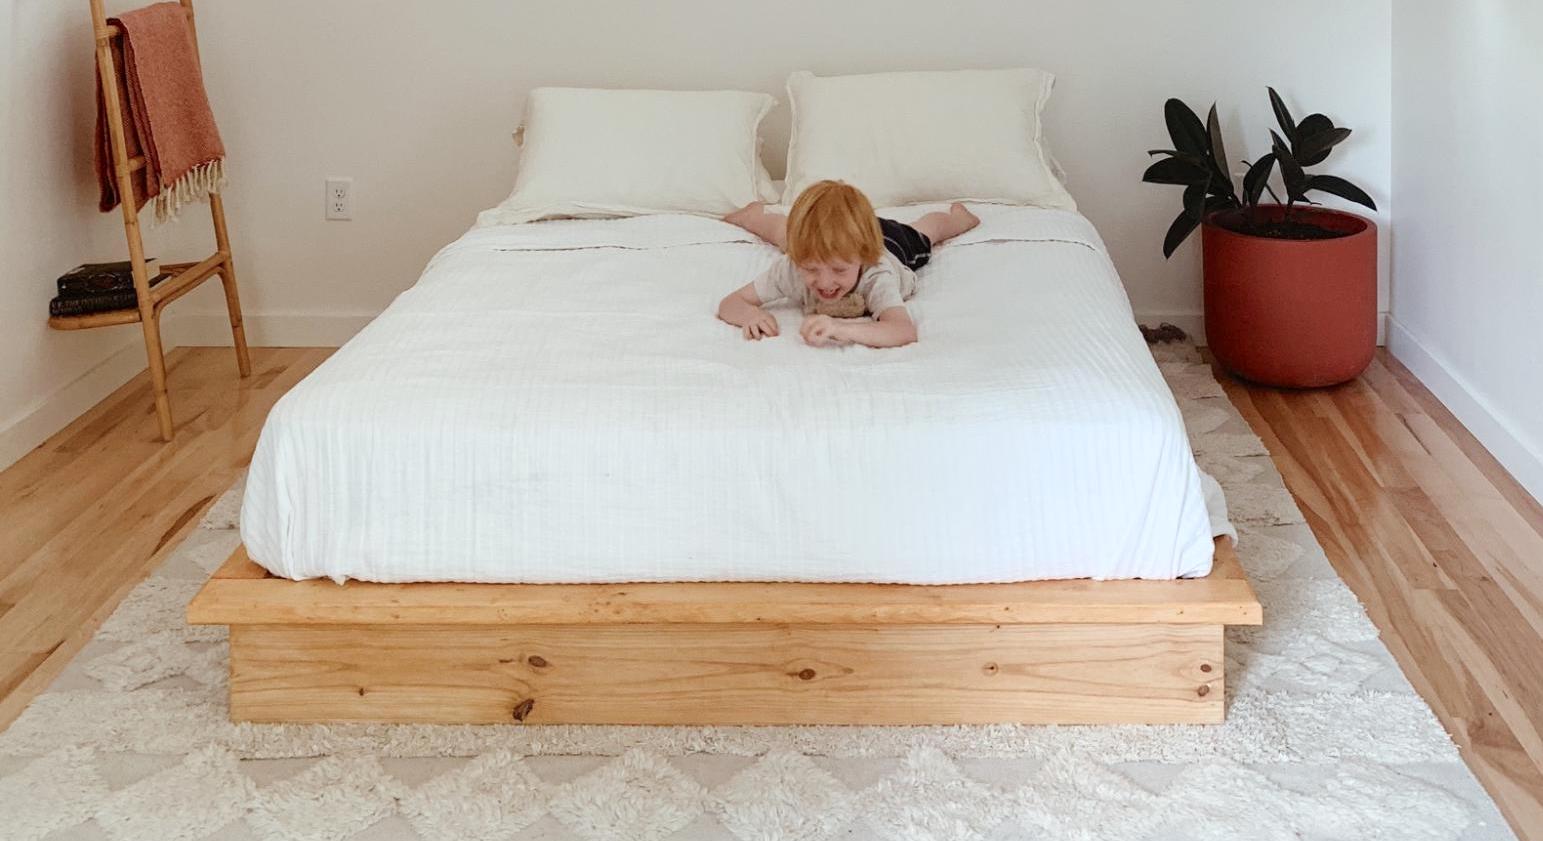
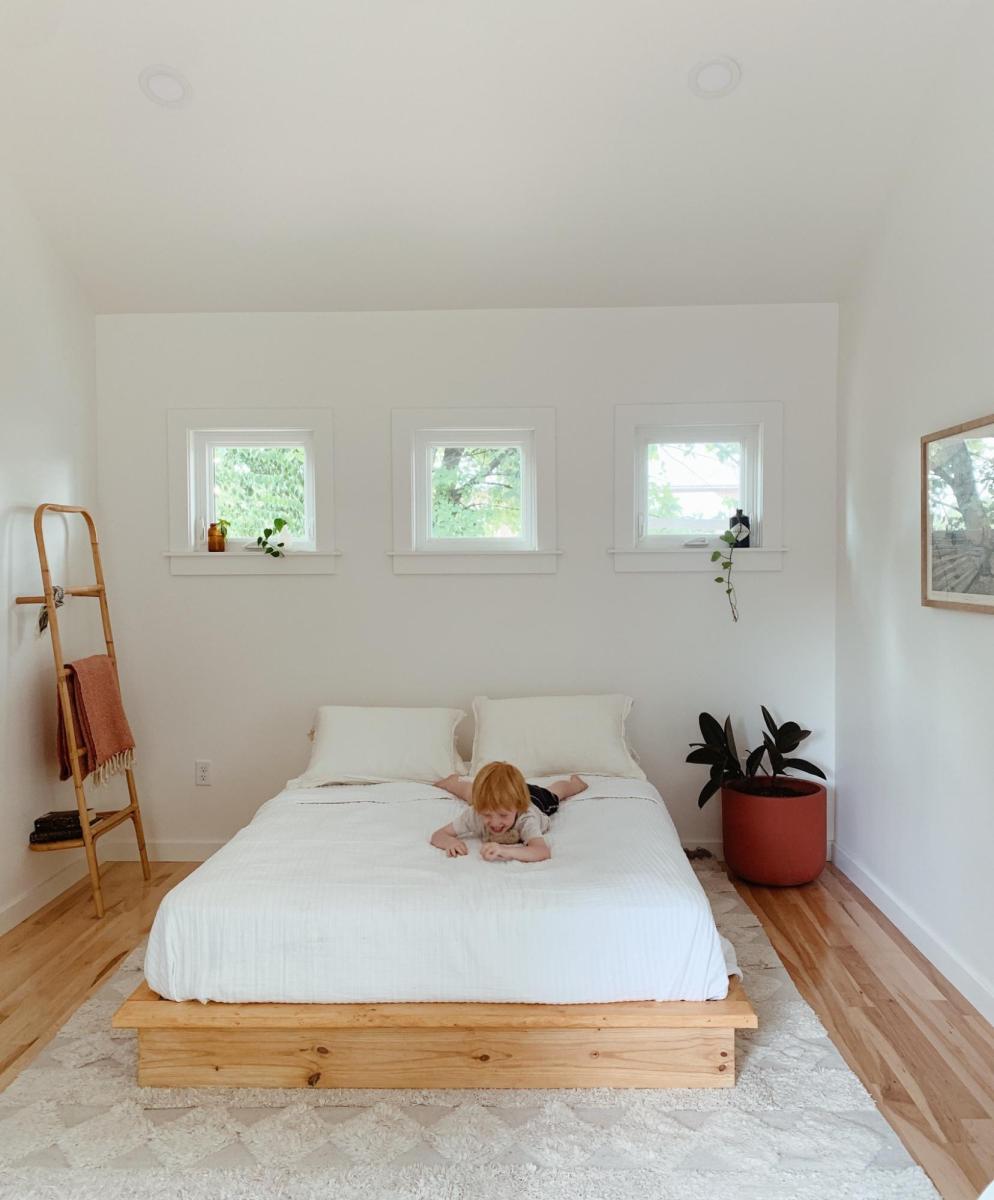
Daybed with Storage Trundle Drawer (Modified)

Submitted by Honeyb65 on Sat, 09/26/2020 - 10:05

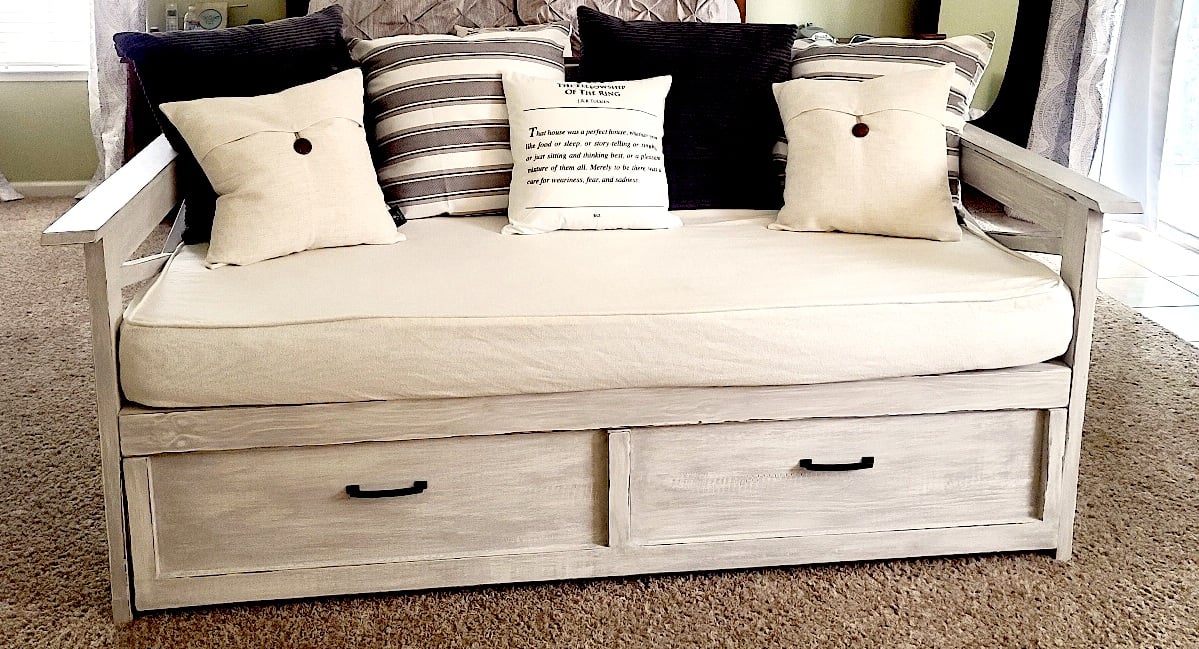
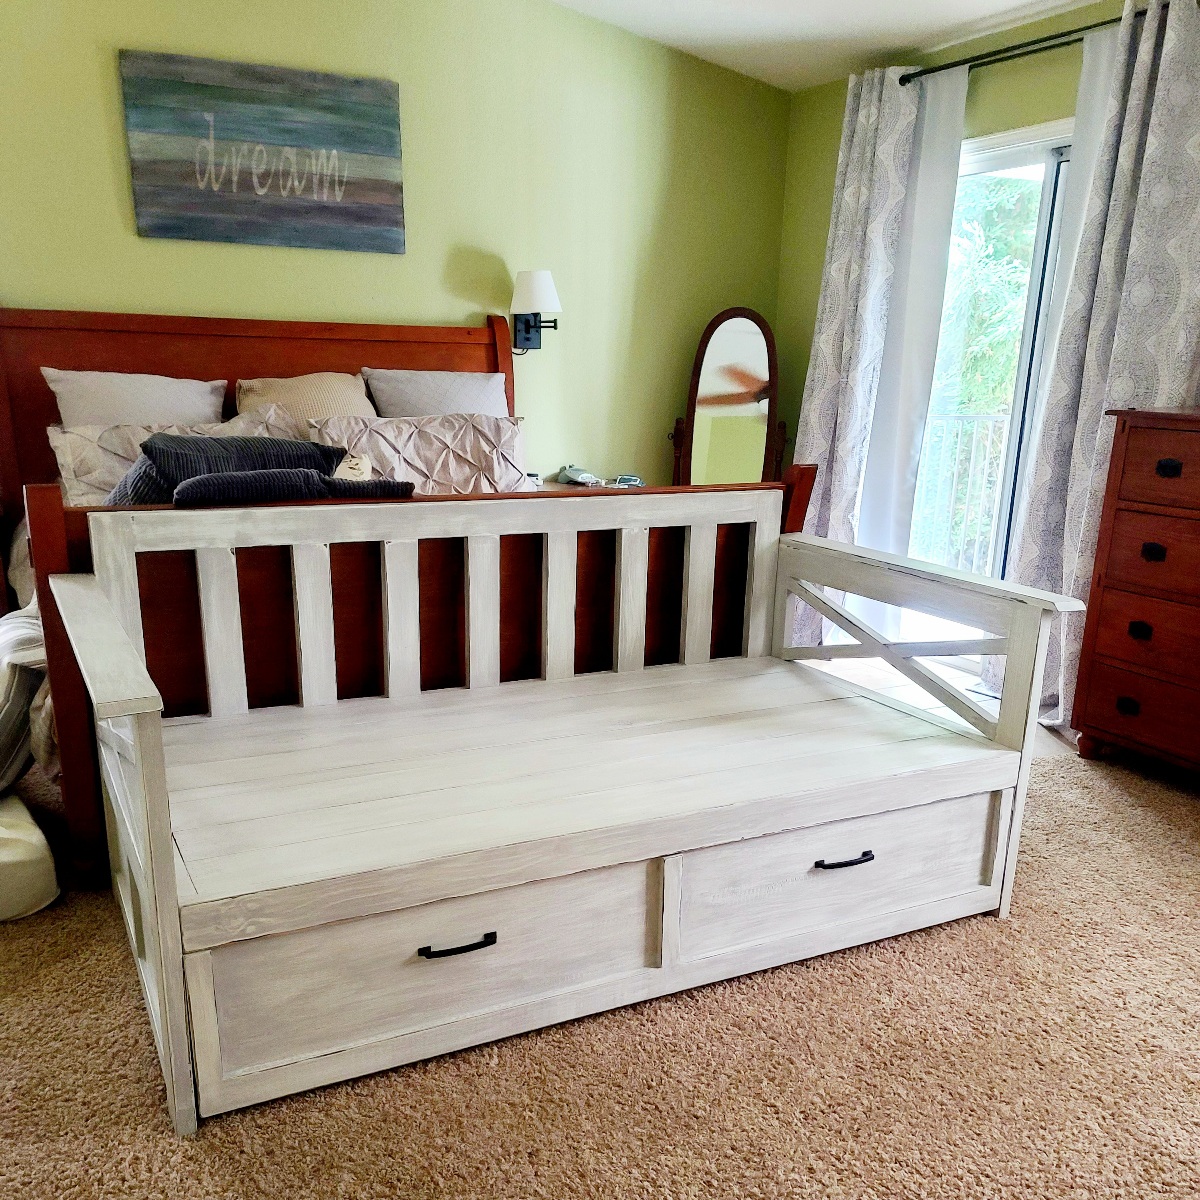
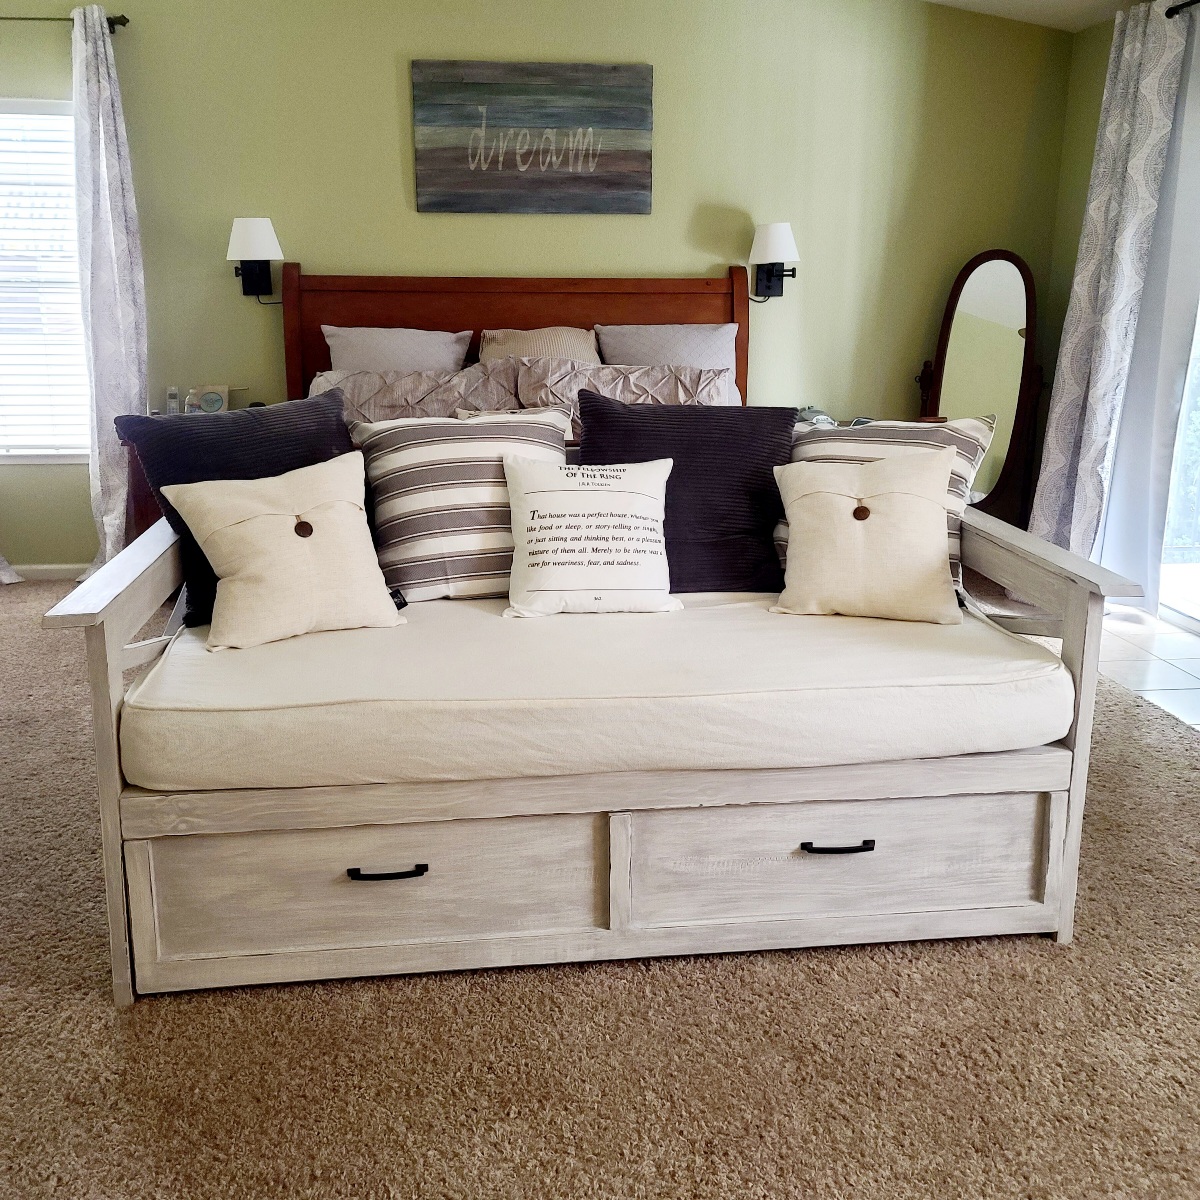
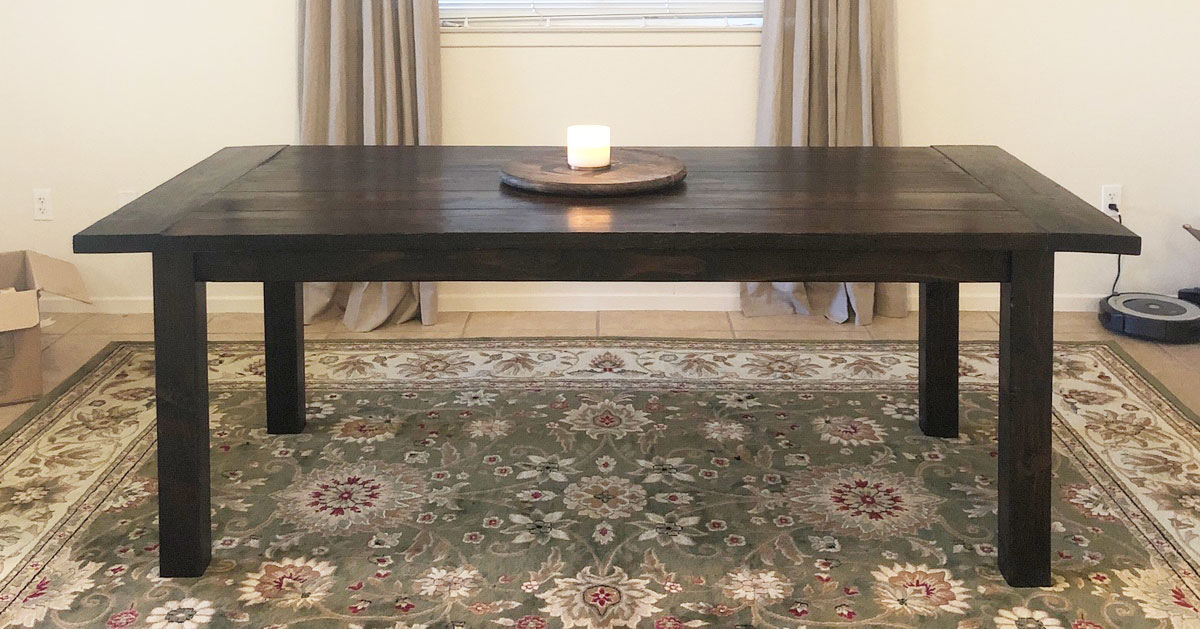
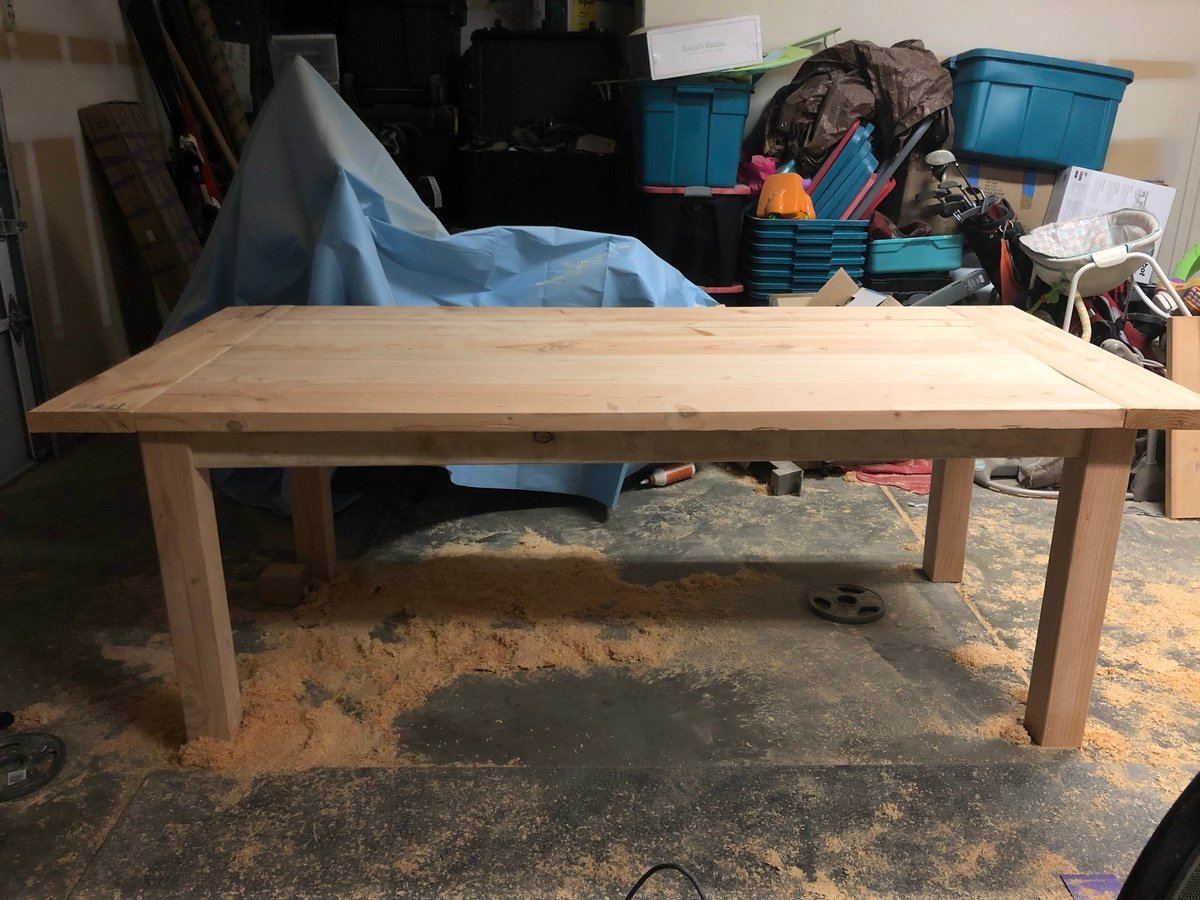
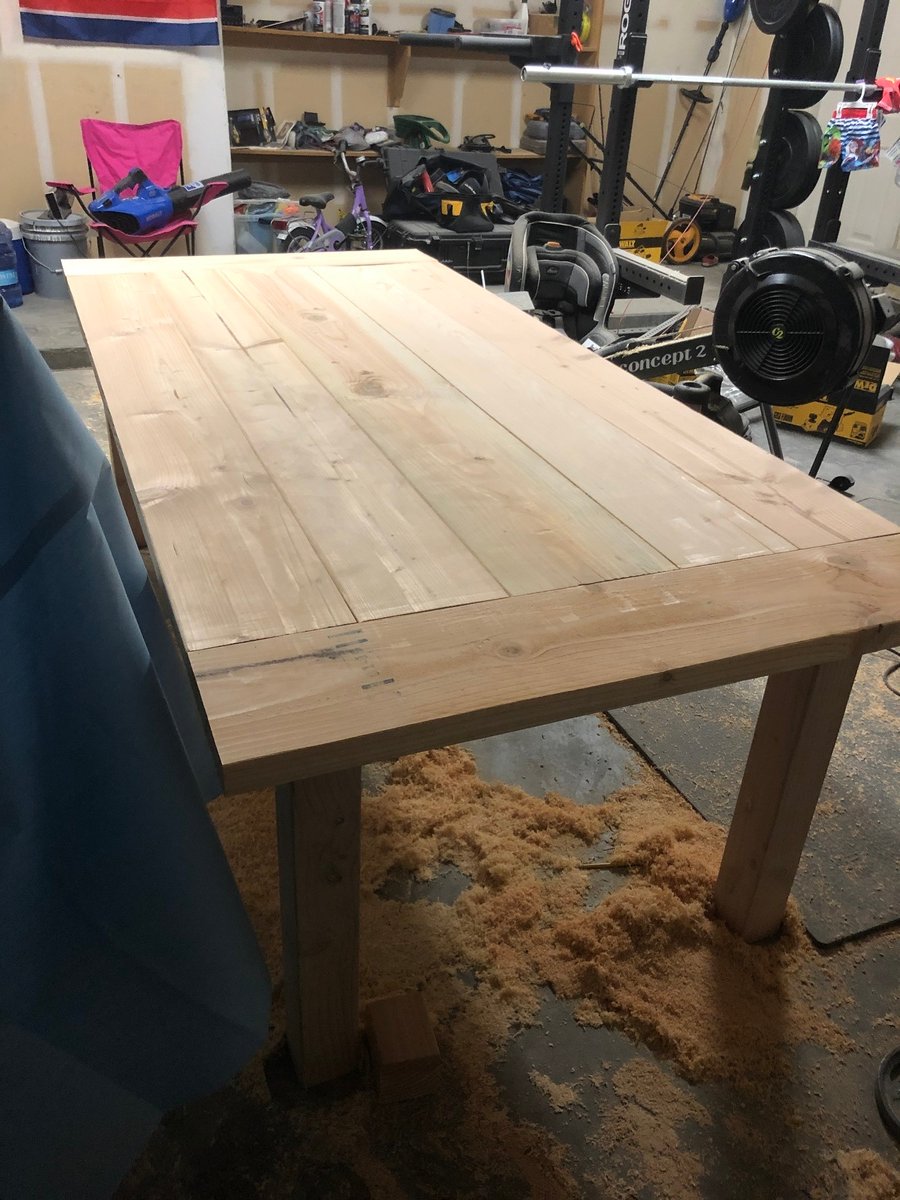
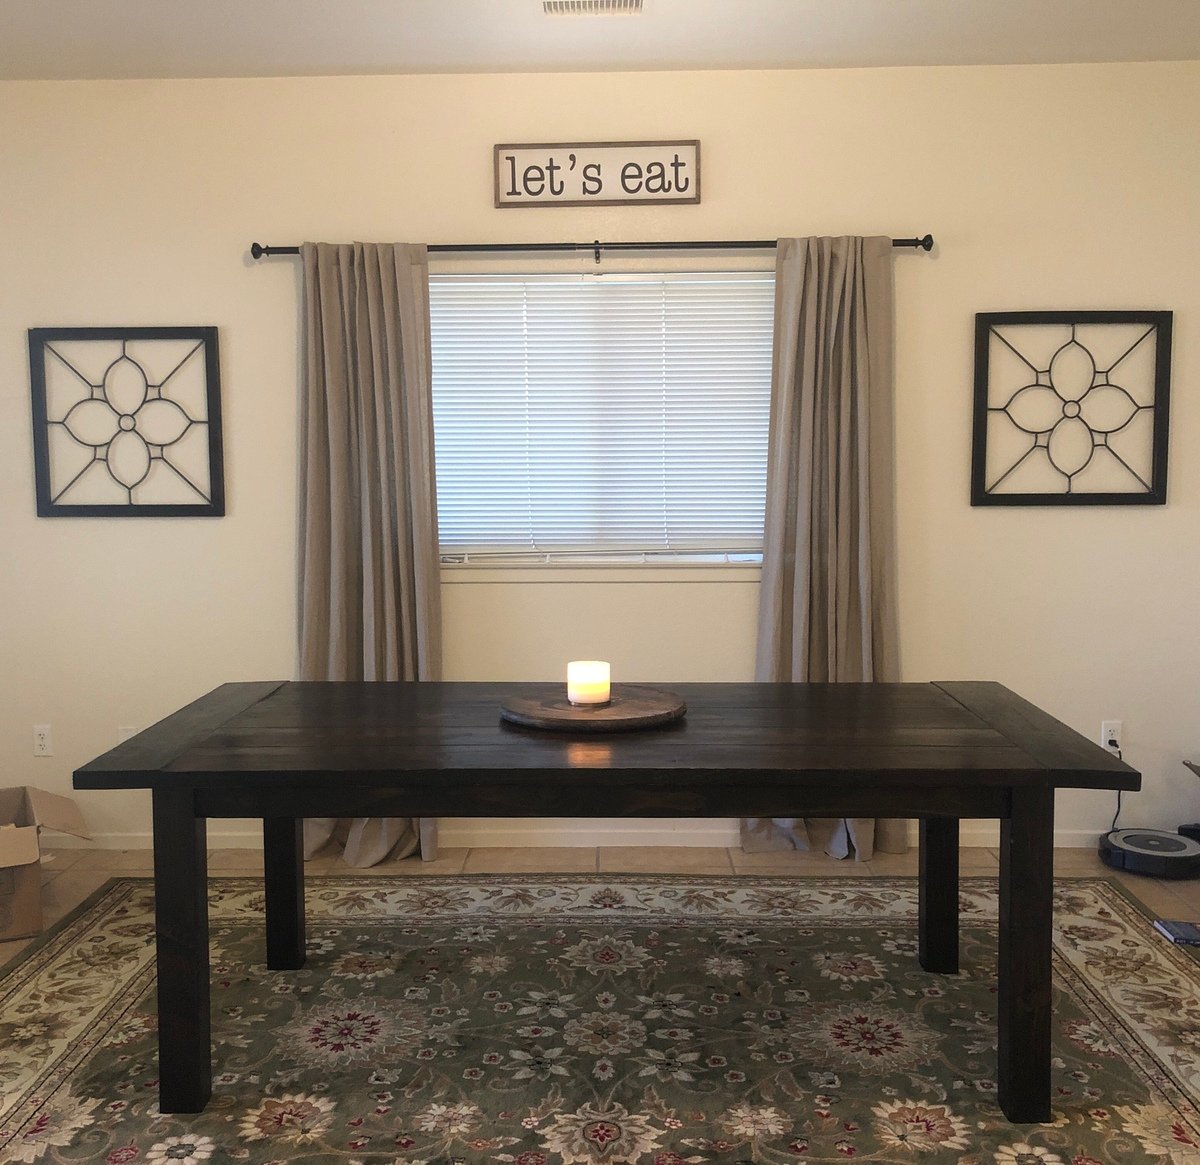
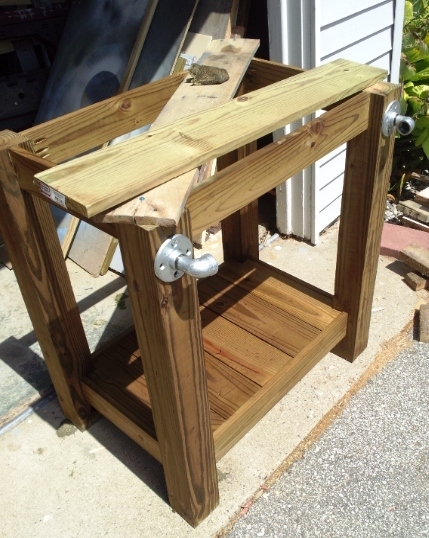
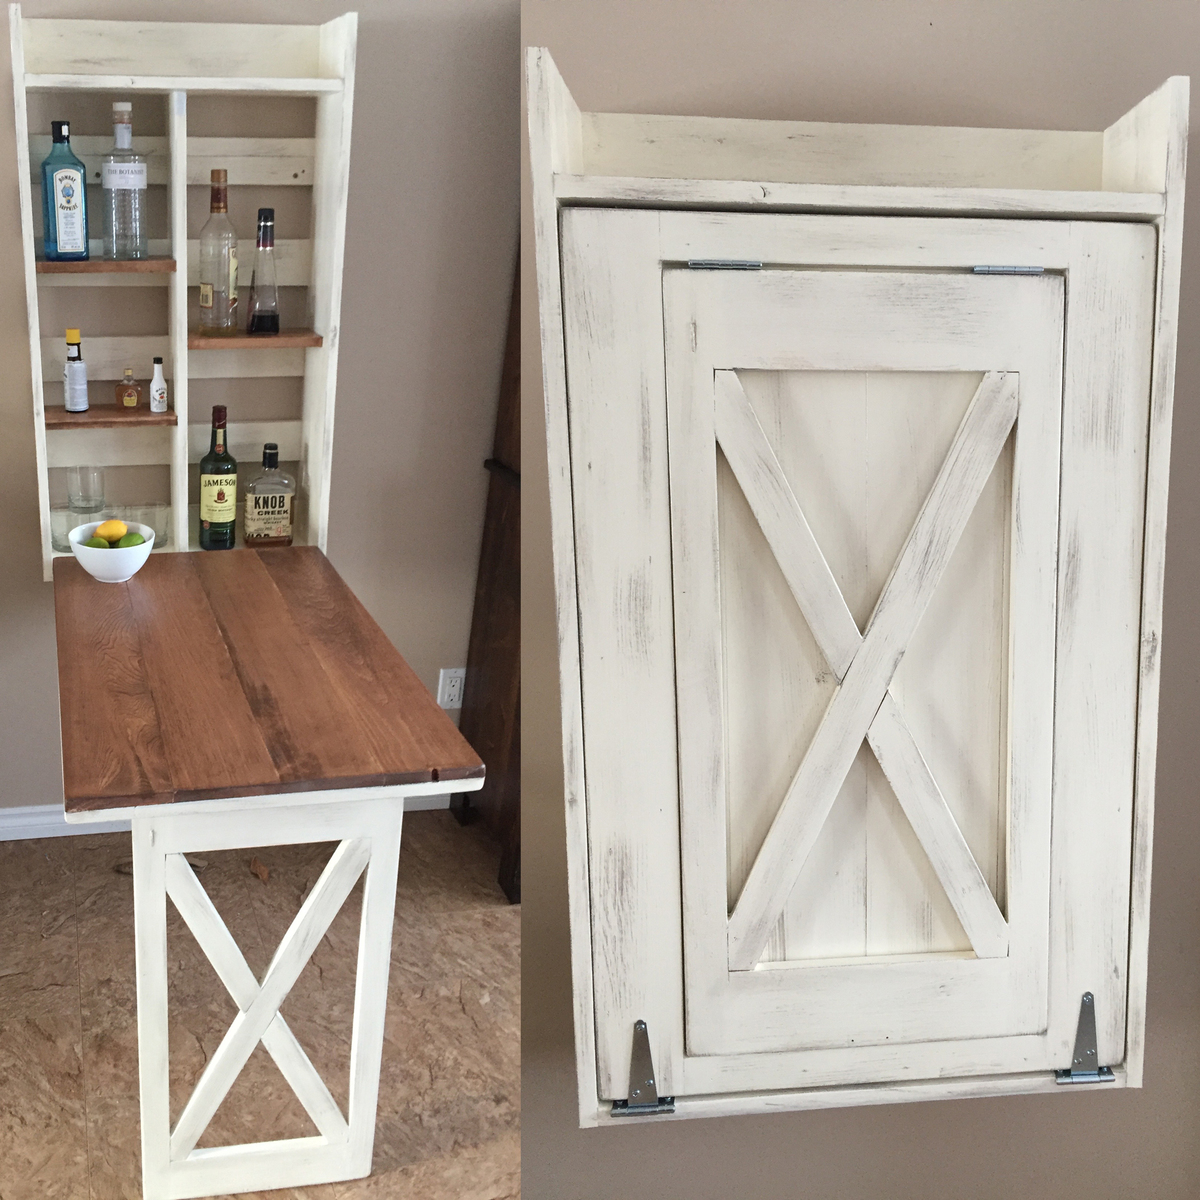
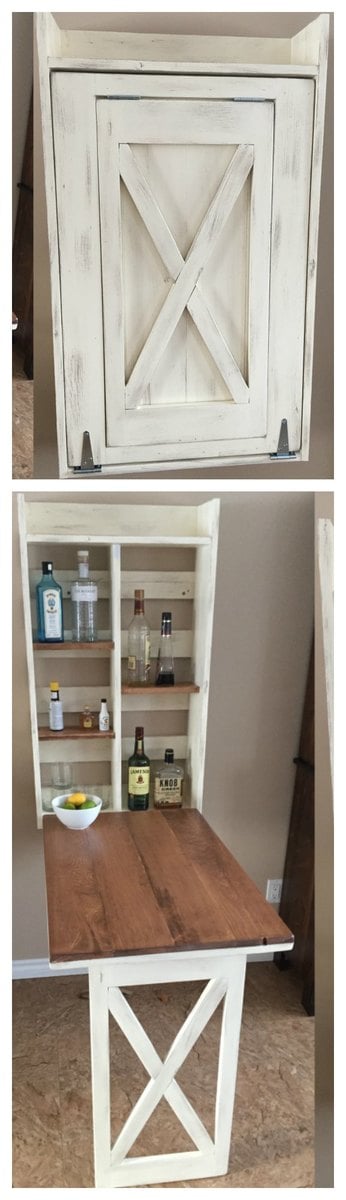
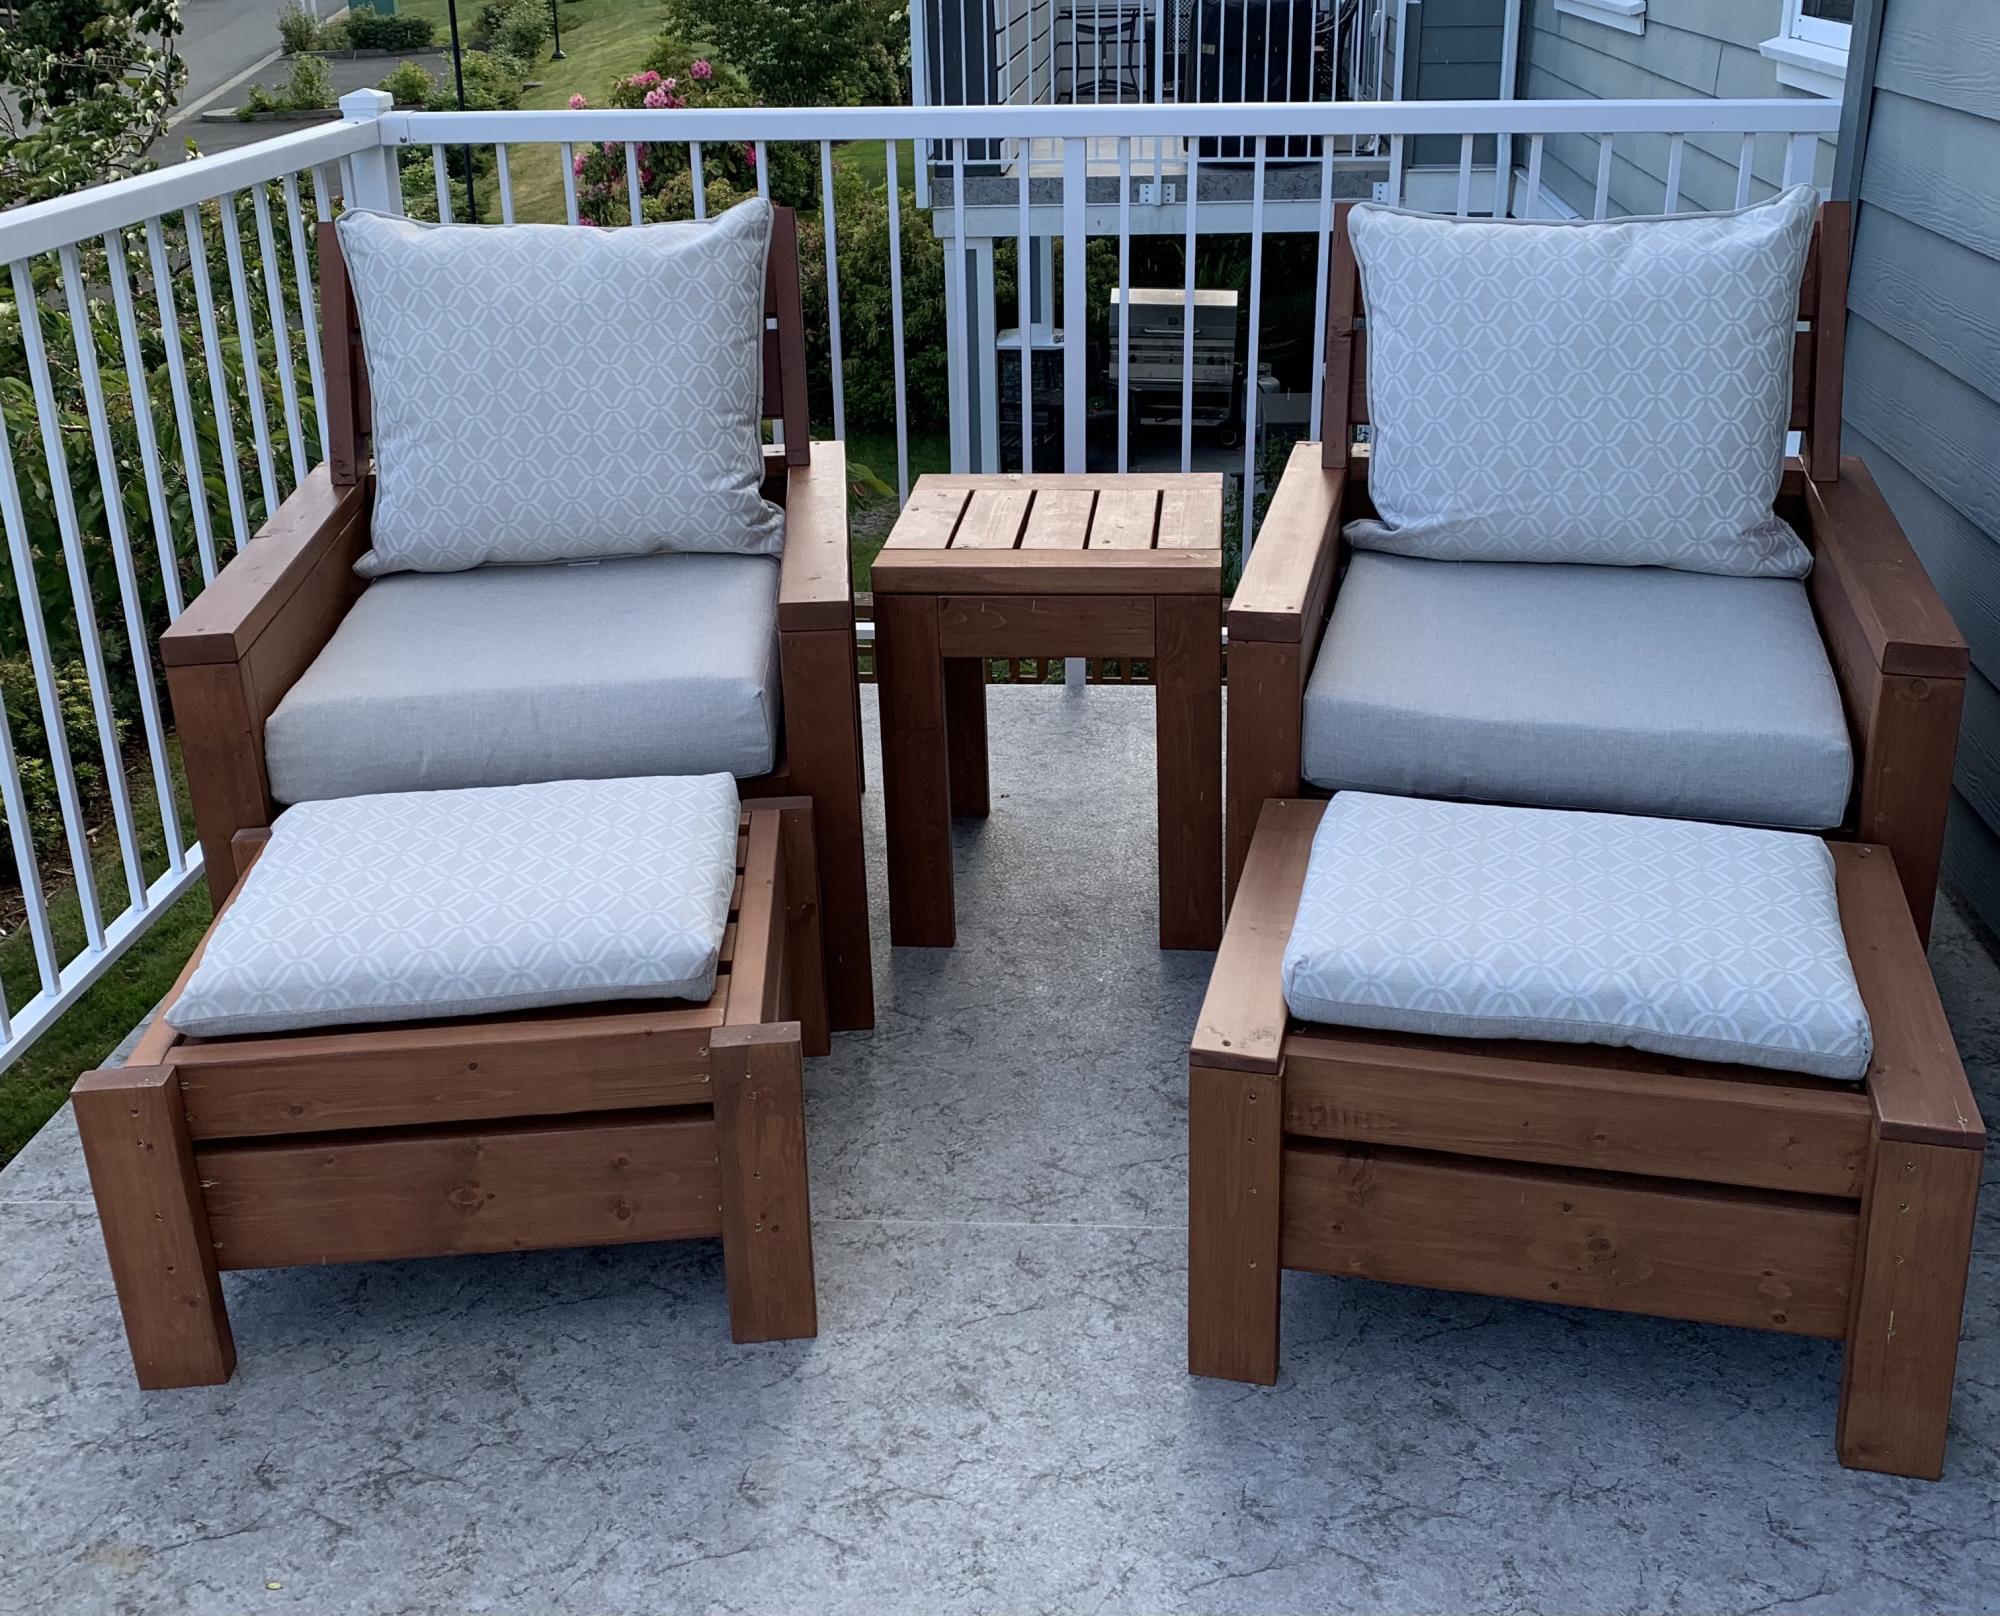
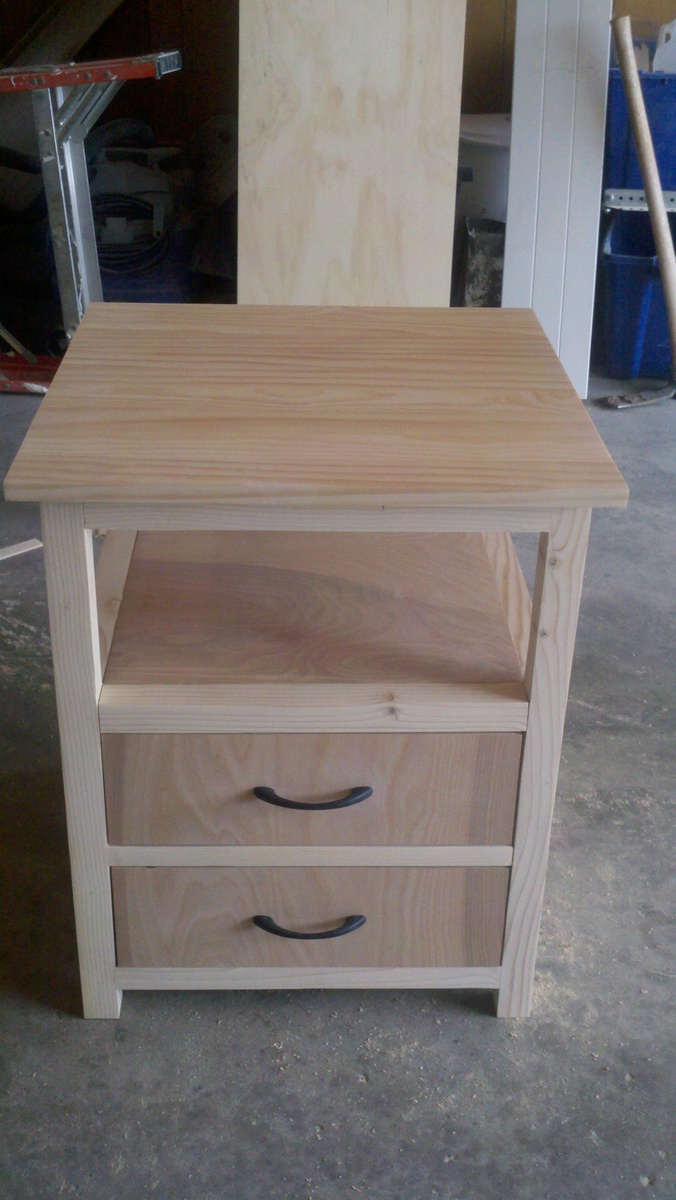
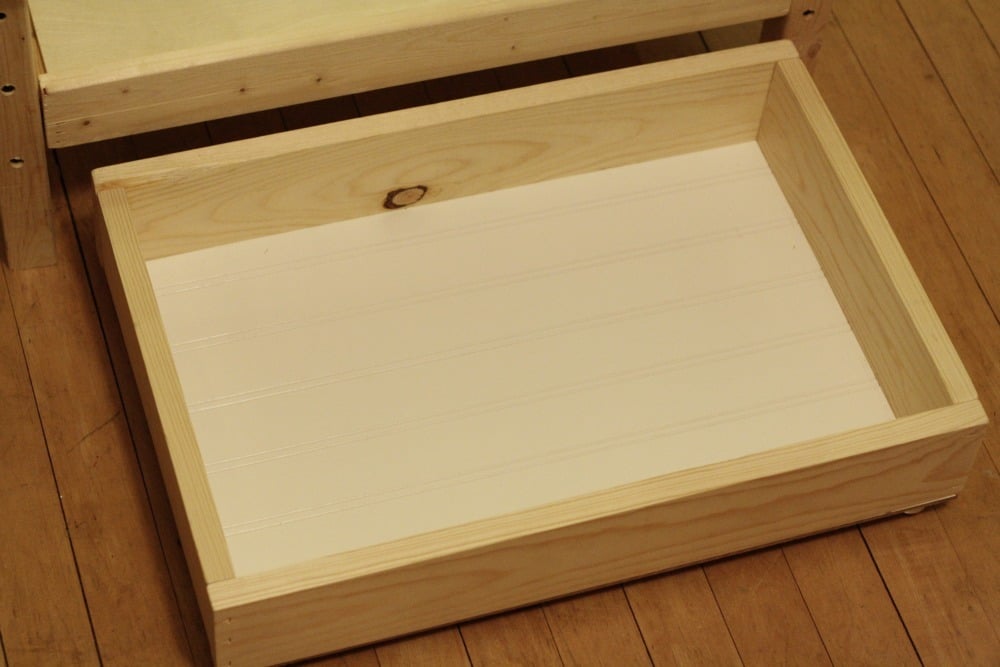
Great plans for a really useful storage daybed! I modified the plans to include a slat back and rustic x sides, as well as changing the Trundle drawers to a single drawer to fit my exercise equipment. I finished the daybed with stain and chalk paint in old white and Paris Grey distressed for the perfect shabby chic look!

Estimated Cost
$200
Estimated Time Investment
Weekend Project (10-20 Hours)
Finish Used
Varathane stain in Dark Walnut, Annie Sloan Chalk Paint in Old White, color wash over the white with Paris Grey and then sanded for the white and some of the stain to show through.
Recommended Skill Level
Intermediate

Comments

Custom Dog Bath

Submitted by dananicb on Thu, 07/22/2021 - 07:21

Tego needed a raised dog bath. No, I needed a raised dog bath. Specifically, my knees needed a raised dog bath for Tego. So, after looking at Pinterest and Ana's plans, I decided what I really wanted to do was customize something to fit my needs (and knees) and build it myself. Overly ambitious for a first-time woodworking project, but hey, raise the bar.

I started by reading and rereading Ana's beginner's woodworking guide (very informative). I also learned so many other things along the way. There's a reason, besides looks, you need flat boards (they need to screw together tightly). Unfinished basement floors are so not level (especially near the walls). Screw lengths matter (need shorter ones for thinner boards). The big-box store doesn't make precise cuts (but they can make a lot). Planning for the finishes will save you time (know your basket sizes). Just to name a few.

It's going in an unfinished basement, so I wasn't going to tile and add glass doors. I wanted to keep it relatively simple, basic.

The stairs were the hardest to measure and build (math matters) - and I might re-do. I made the steps smaller, dog-sized, but she finds them awkward. I'd stick with typical riser heights, but it depends on the size of your dog.

Plumbing to link the tub drain to the utility sink drain was the most expensive. Probably I could have done it myself, but I decided not to learn both plumbing and woodworking for one project.

Overall, I'm pleased with the result - and Tego is learning to love it.

Estimated Cost
$250 in supplies (plus plumbing)
Estimated Time Investment
Week Long Project (20 Hours or More)
Finish Used
Exterior paint in semi gloss
Recommended Skill Level
Beginner

Comments

Farmhouse Writing Desk with Turned Legs

Submitted by kwildman on Mon, 01/07/2019 - 08:53

I modified the Small Old English Style Farmhouse Dining Table plan to build a writing desk.   I used five 1x6 boards for the top for a width of 27.5 inches.   I made my desk 56 inches in length.  I put the drawer on the long side like a pencil drawer.   I did use the legs that Ana recommended in the plan.   I love how it turned out.  I used dark walnut danish oil and dark wax for the finish.  

Estimated Cost
225
Estimated Time Investment
Day Project (6-9 Hours)
Finish Used
I used Watco dark walnut danish oil and Minwax dark paste wax.
Recommended Skill Level
Intermediate

Comments

kwildman

Fri, 10/04/2019 - 21:46

Thank you!  I used Watco Danish oil and I used Minwax dark wax.  I've tried alot of different wax brands and I always come back to Minwax.  It dries the hardest in my opinion.

Farmhouse dining table

Submitted by Anonymous (not verified) on Wed, 04/24/2019 - 23:11

This was our first build together and first furniture piece from woodworking. The kreg jig really helped out and we didn’t have any major issues while building except for some board being warped but we fixed it with a planer.

Finished building the entire table in one day and staining and coats of poly took 2 extra days. It was a very easy build. When we move to a new area that has better access to lumber I’d like to remake this using oak/maple.

Estimated Cost
$125
Estimated Time Investment
Weekend Project (10-20 Hours)
Finish Used
Minwax Jacobean
Recommended Skill Level
Beginner

Outdoor sectional

Submitted by Anonymous (not verified) on Wed, 10/02/2019 - 04:17

Made the outdoor sectional. The coffee table was made out of left over pieces!

Estimated Cost
$260
Estimated Time Investment
Weekend Project (10-20 Hours)
Finish Used
We used a semi transparent stain applied with brush. We would recommend a hand sprayer instead.
Recommended Skill Level
Beginner

Comments

6' Square Sandbox

I've been wanting to buy or make a sandbox for my son for a couple of years now. Since seeing this on Ana White I knew I had to make it. My son is 4 yo and I didn't think the 4' square sandbox would be big enough for him, so I made it bigger. Ours is 6' square.

Materials:
4@1x8x6'
12@1x6x6'
2x4 - used leftovers from another project
8 hinges
4 handles
decking screws

Cut lengths:
2@1x8 cut to 71.5 (long sides of the box)
2@1x8 cut to 70.5 (short sides of the box)
did not cut the 1x6 boards (top planks) - actually designed the other boards to fit their length to prevent cutting (saving time) (note that original plan uses 1x4 planks - I used 1x6s so I could use the same number of planks but cover a larger area)
4@2x4 cut to 11.5 (arm rests)
4@2x4 cut to 18.5 (back supports)

followed instructions for assembly otherwise. At my husbands suggestion we put the handles on the sides and can easily open from either side - prevents having to lean over to the middle to open (back saver)

I finished the project in 4 hours including clean up and a couple of small breaks. This is my first Ana White project. It was a lot of fun to build and I hope my son will enjoy it for years to come!

Built from Plan(s)
Estimated Cost
$190
Estimated Time Investment
Day Project (6-9 Hours)
Finish Used
Sand and stain with sealer included
Recommended Skill Level
Beginner

Comments

Mrs. Chellebelle

Sat, 09/01/2012 - 20:59

Wow, this is just what I need! I've been wanting to make a sandbox for under the playhouse but the other plan was too small. This would be great for the little guys. Thanks!

John Deere Tractor Bunk Bed

Submitted by Veronica P on Sun, 07/06/2014 - 16:43

With another baby boy arriving in August, my one and three year olds are moving to a "big boy" room. My oldest decided he wanted a bunk bed and as they both are obsessed with tractors, when I saw the "John Deere Tractor Bunk Bed" plan, I was sold.

We would be needing a twin sized bunk bed though not a toddler. I used the classic bunk bed plans and simply modified them to suit our needs. I moved the ladder to the front, added a rail on the bottom bunk and added a small ladder to the side for my one year old to climb into the bottom bunk.

Once the the frame of the bed was complete, I added the tractor accessories. A couple of storage cubby shelves with fabric baskets for toy tractors which act as stairs up to the ladder and make the tractor bucket at the front. Also, the wheels which are made from joined 1x6s as I find plywood hard to sand and paint to the quality of finish I like. A cab & roof from 1x4s framed together. A side mirror that I decoupaged a picture of another tractor on. I used push lights for the headlights as well as a reading light above each bed (they're on timers so they'll turn themselves off). A steering wheel (play equipment access from toys r us). Also, I built and mounted by the head of both beds a "flat wall book holder" so they would have somewhere to store a few books.

My boys and I are fairly new to building so I spent a lot of time planning and measuring to ensure it would all come together in the end. It paid off because it all went smoothly (even with "help" from my boys). It's not perfect but they're very happy with the result. We also built a John Deere themed "Just my size closet" and even finished with over a month to spare before the new baby arrives! :)

Just want to say a quick thank you to Ana both for the amazing plans and also the inspiration to take on these projects. The time spent with my boys building as well as the resulting treasures are priceless and I would have never realized what we were capable of had I not stumbled upon your website and been so inspired by you and everything you've accomplished. Thank you!

Estimated Cost
$550.00
Estimated Time Investment
Week Long Project (20 Hours or More)
Finish Used
John Deere Green paint (home depot was able to color match a toy tractor), marigold yellow and black and polyurethane.
Recommended Skill Level
Beginner

Comments

Ana White Admin

Mon, 07/07/2014 - 12:13

I love this, such a great build and eveything came together perfectly! Thanks for sharing!

spiceylg

Thu, 07/10/2014 - 19:12

What an incredible build! I agree with Thriftygirl, I love all of the details!

carongirls

Tue, 09/30/2014 - 05:35

I am in the process of copying your bed right now. Just mine will be a toddler loft bed. Thank you for the ideas!

busymomof3

Thu, 10/09/2014 - 14:12

I am new to this and I was wondering were to find the measurements for the twin size bed?  I would love to make this for my boys!!

Veronica P

Mon, 11/03/2014 - 07:48

Sorry for the slow response to those requesting plans. For main structure of the bunk bed, I used Ana's "Classic Bunk Bed" plans. For all of the add-ons, I made up my own plans. I'm pretty low tech so unfortunately they're just pencil & paper plans but I'd be happy to scan and email them to you if you're interested. Just message me and I'll send them your way. :)

MartyC

Wed, 01/28/2015 - 14:08

Hi Veronica, Well done fantastic job! Two little men who want to move in together because of a new addition on the way. Their request though is a John Deere Bunk Bed! would be grateful if you could forward on your plans if you have time, Kindest regards.

tkdiver1

Tue, 05/26/2015 - 18:13

These are just what my grandsons need. I would love your plans.

Thank you

tkdiver1

Tue, 05/26/2015 - 18:14

These are just what my grandsons need. I would love your plans.

Thank you

Mimi64

Sun, 09/06/2015 - 10:06

Dear Veronica,

Our grandson, 6 years old, will absolutely adore this bed.  He loved riding on Grandpa's real JD tractor.  Please send me your plans for the attachments.  They are just darling and I could not do any better.  Thanks for your generosity!

bmeche

Fri, 09/13/2019 - 21:11

Hi Veronica. My 3 year old just loves the tractor bunk bed. I was wondering if you would mind sending me the plans you have. It would be greatly appreciated. My email is [email protected]   

Thanks in advance 

MyMaw

Wed, 10/16/2019 - 17:56

If you're still sharing, we would love a copy of your add-ons plans. 

Thanks,

MyMaw and PawPaw

Veronica P

Tue, 12/16/2014 - 07:21

I just emailed those plans. There should be nine attachments. Please let me know if you don't receive any of them.

cnejones

Thu, 12/18/2014 - 21:51

Could you please email me the plans for this project my son would love this

Veronica P

Tue, 01/06/2015 - 08:21

Hello all. I've tried emailing plans to all those who've requested them. I had some trouble attaching the files as they were large so if you didn't receive them, please let me know and I can resend. Thanks

Alwardt2708

Tue, 01/06/2015 - 11:53

Hi Veronica. I did not receive an email. Woul you have time to try again? If you email me your address I can send you my fax number if that's easier too. Thank you so much! I can not tell you how much I appreciate your dedication to this! [email protected]

Farmhouse Style Toy Box / Blanket Chest

Submitted by Anonymous (not verified) on Tue, 01/17/2017 - 11:17

I built this for my daughter after Christmas sinse she had the living room covered in toys. The dimensions are 37" x 18" x 20" 

Estimated Cost
$75
Estimated Time Investment
Weekend Project (10-20 Hours)
Finish Used
Watco Danish Oil - Medium Walnut (2 coats) with a light sanding between coats with 220 grit, I allowed 24 hours between each coat to dry. To protect the surface I used water based polyurathane matte finish (3 coats) with a light sanding - 400 grit.
Recommended Skill Level
Beginner

Comments

jwelch

Wed, 01/18/2017 - 13:06

Great job! Can you share more about how the legs were constructed and joined? Was this project based on Ana White's "Simple" toy box plan? Any info appreciated.

jgreaff

Tue, 01/09/2018 - 05:51

HI Anna, 

Can you provide more pictures or instructions on how you assembled this toy box? i want to make one just like it! 


Thanks!

apezz

Wed, 03/10/2021 - 16:31

Looking at the wall panels they look like the long edge of each panel has a small bevel cut on it. This gives each panel edge a more pronounced or well-defined edge? Is this true? Was it done with a router?

A-Frame Chicken Tractor

Submitted by Tonya P on Tue, 07/09/2013 - 19:46

New to raising chickens, but eager to jump right in to it.
We bought a pre-made coop for the main home for our new chicks and it's very nice, not something I could do myself since I'm not yet at that level, but I saw this chicken tractor and thought it would come in handy for what I have in mind so I made up my mind to build it.
The lumber, chicken wire, staples, and wheels are all store bought new and came to about $75. The materials we had on hand were the screws, hinges, plastic coated metal shelving (used in the nesting area, I thought that would make it easy to clean), paint, and the corner piece of vinyl siding for the roof cap (hubby's brilliant idea, and I painted it green with spray paint for vinyl).
I did not try to build it quickly, I don't really know how much time it took me, but if I had to guess I'd guess total time would amount to about 3 afternoons, by myself.
I wanted to leave the top on the one side open with the option to slap on the other boards if/when the need arises. I have the other t1-11 panels that can sit right in those areas because I stapled the chicken wire in a way that would allow it.
I also added a flip up panel as seen in the pictures for access. I didn't want a small door that I would have a hard time getting to things in there. I'm so glad I added this feature, it sure gives plenty of room for me to maintain the food and water dispensers as well as get in there and catch the little chickies :)
I wanted it green to blend into the wooded background in our backyard. I didn't want to take any beauty away from the cedar greenhouse and fencing we added last year, and this tractor would be moved from time to time and I felt this green that we had on hand was perfect to help it blend in rather than stand out.
This thing is heavy! I have a hard time moving it around and usually need my husband to move it so I won't hurt myself. I am considering some options... I don't like the rope I have on it to pull it, any suggestions would be appreciated.
As with the other items I've made with Ana's plans, this was fun and pretty easy to make. I love this site! Soon I will take on my next project, I've bought and gathered the materials, I'm anxious to get started :)
Thank you for looking :)

Built from Plan(s)
Estimated Cost
$75 - $85 for the new materials listed
Estimated Time Investment
Weekend Project (10-20 Hours)
Finish Used
Green exterior paint we had on hand.
Recommended Skill Level
Intermediate

My laundry basket dresser with doors

Submitted by jensimmons on Sun, 07/03/2011 - 20:19

I wanted to use our laundry basket dresser as a collector for dirty laundry in our bathroom, and wanted it to have doors so it would blend in better. I also made the shelf above for our towels. It is painted white with a faux-zinc finish on the top. I made the top slightly larger so it would overhang and added cute little bun feet. My talented friend Carli helped me build the doors (and by helped I mean I handed her things while she impressed me with all her tools and skills!) and frame.

Built from Plan(s)
Estimated Cost
$75-100 (can't remember exactly)
Estimated Time Investment
Weekend Project (10-20 Hours)
Finish Used
white semi-gloss paint, zinc faux finish: layer 1 dark charcoal paint, layer 2 dark pewter metallic glaze, layer 3 white paint thinned with water & rubbed on/off.
Recommended Skill Level
Intermediate

Comments

Guest (not verified)

Fri, 07/29/2011 - 23:37

this is perfect! i totally need a bunch just like this! I love the added doors!

Pam in Colorado (not verified)

Sat, 09/17/2011 - 12:48

This is the look I'd like, fit the baskets and hide them behind doors until you are ready to do the laundry. These could be made for bedrooms, bathrooms, toy rooms (okay, toys instead of dirty laundry)...

Guest (not verified)

Fri, 11/11/2011 - 08:05

I absolutely love this! Could you please add instructions on how to make/paint and install the doors? I am a newbie to making my own furniture. Thanks!

Guest (not verified)

Wed, 01/11/2012 - 08:29

I love this idea! I will have a new bathroom soon and I think this will get used! What are the dimensions, or what style cabinet would you suggest to look for? TIA!

Jennifer Simmons (not verified)

Fri, 02/17/2012 - 05:57

The dimensions are the same as Ana's plan: http://ana-white.com/2010/11/laundry-basket-dresser except that the top is slightly bigger (3/4" overhang on front/sides) to look more like a countertop. On the doors we just made a frame w/ angled pieces, routed a notched line on the back & glued/nailed some beadboard in from the back. Sorry I can't be much more detailed on that, a friend did most of the doors for me!

Guest (not verified)

Sun, 02/19/2012 - 07:42

I actually got the plywood to do this project and I was going to add doors. I looked at the baskets suggested but it seems they would stick out the front. I was just curious, did you use different baskets that would fit inside the cabinet or did you make the cabinet slightly deeper?

Jennifer Simmons (not verified)

Sat, 02/25/2012 - 05:36

Actually I discovered the same problem after it was built. I just didn't put a back on and they stick out a tiny bit in the back. I actually kind of like it that way because it lets some air in (being in the bathroom and putting towels in I could see it getting mildewy without much circulation). But if I had gotten the baskets first I probably would have made it about 2" deeper, then leave some open space, but not all, on the back.

Grill table with stainless steel top

Submitted by krochelle on Tue, 08/20/2013 - 08:00

I made this table to go next to an outdoor grill to be used as a food prep area or just a surface for holding ingredients (instead of using the deck railing!). The top is stainless steel which fits tightly over 2 3/4" pieces of plywood laminated together. The bar/handle in front is made out of galvanized pipe. All wood was treated.

Legs - 4x4 posts
Bottom shelf - 1x6's
Sides - 1x4's
Top - 2 pieces of 3/4" plywood laminated together with a stainless steel top (custom fit) over top
Towel bar - galvanized pipe (cut and threaded to size at Lowe's), floor flanges and 90 degree elbows

Estimated Cost
$120
Estimated Time Investment
Day Project (6-9 Hours)
Finish Used
I used Kona stain but since it was over treated wood the stain did not take as dark as it should have. I will have to restain this piece after it has completely dried out.
Recommended Skill Level
Intermediate

Comments

spiceylg

Tue, 08/20/2013 - 09:07

Love this. Where did you get the stainless steel top? Did you have to special order to fit?

In reply to by spiceylg

krochelle

Thu, 05/15/2014 - 10:33

Sorry about the late reply! Yes, I just gave my dimensions to a local steel supplier and they made the top. I think I have about $40 into the stainless. They didn't weld the corners but I've never had an issue with them.

krochelle

Thu, 05/15/2014 - 10:46

No...I didn't have any plans when I built it but it's a very simple concept. I chose to use all treated wood since I knew it would be sitting outside unprotected. However, my 4x4 posts weren't square so this caused a lot of problems and everything was built to fit. I believe I just used 4x4's, 1X6s (for the bottom shelf) and 1x4s for the sides (top and bottom). For the top, I just laminated 2 pieces of 3/4" plywood together to bulk it up and then had the stainless top built to fit. It fit perfectly so I didn't glue it to the plywood. This makes it easy to remove and clean, if necessary. For the galvanized pipe (towel bar), I bought it at Lowe's and had them cut/thread it to fit my dimensions.

Drop down murphy bar

Submitted by nick_h on Tue, 12/06/2016 - 10:54

My attempt at the murphy bar featured on this site. Still have to add the sash locks. Added pallet crossmembers at the back, an x in the leg, and a french cleat to mount to the wall. 

Estimated Cost
$45
Estimated Time Investment
Day Project (6-9 Hours)
Finish Used
Special Walnut Minwax on the bar top and shelves, crisp linen matte latex and dry brushed casual gray for accents/aging. 2 coats of polycrylic for protection. If built again would pre stain and base coat all the wood before build time, then assemble, add accent brushing and spray the polycrylic.
Recommended Skill Level
Beginner

Comments

zannej

Tue, 12/31/2019 - 11:49

This looks awesome! I want to help my friend build this for his kitchen. I've looked at the plans in the link & I'm wondering what modifications you made for the X pattern-- how much did it alter the material & cut list?

Would you please share your material & cut list for this?

Modern outdoor chairs

Submitted by Anonymous (not verified) on Tue, 06/08/2021 - 08:01

Love these plans! Made a modification and added backs to the chairs. Also, built ottomans to match the chairs which can also be used as additional seating.
Many compliments on the set. Thanks Ana!

Comments

First nightstand

Submitted by juliec on Sat, 04/02/2011 - 13:24

We used ana's plan but modified the top

Built from Plan(s)
Estimated Cost
$35
Estimated Time Investment
Weekend Project (10-20 Hours)
Finish Used
We will use espresso general finishes and several top coats of poly.
Recommended Skill Level
Intermediate

Comments

bridgetschaefer

Thu, 05/30/2019 - 13:00

This is EXACTLY what I'm looking for but I can't find the plans that were used to build it. Do you happen to still have the link for them?

Modern Patio Chairs/Love Sear

Submitted by Anonymous (not verified) on Sun, 09/25/2022 - 15:57

Super easy and fun project! We altered the original plans to build a loveseat and had zero issues. We did add some extra support below.
I did not find 25”x25” cushions within our price range so I settled for 25”x22.5” and they work but ultimately 25x25 works best.

Outdoor Cedar Higher Chair

Submitted by Tea Granny on Wed, 03/06/2013 - 06:29

I used cedar deck boards and rails to make this chair - A little more costly, but definitely worth it!

The seat and back rest were made using 5/4 x 6" boards. I cut them 1/2" to 3/4" longer so that they would overhang the supports - for a more finished look. The 2x2 rails came with an angled cut, so I decided to use that to my advantage on the back supports - I made them a bit longer so they would sit higher on the back rest, and I think the angled cut looks a little more "friendly". All screws were left exposed, since this is an outdoor cedar chair.

The table in the photo is an original picnic table from the 1920's, complete with the original paint. It folds flat for storage. I hope to measure it someday and make a plan to build a reproduction - If that ever happens, I will post it on Ana's site.

Thanks Ana for the great plans!

Built from Plan(s)
Estimated Cost
approx. $20 to $23
Estimated Time Investment
Afternoon Project (3-6 Hours)
Finish Used
Left unfinished.
Recommended Skill Level
Beginner

Comments

Doggy loft bed!

Submitted by Anonymous (not verified) on Sat, 06/03/2017 - 17:31

My dog loves to people watch all day while I'm at work and she needed a new bed so I took the plans for the lower platform and modified them so it would stand alone. Took the platform and put it on the bottom so that her bed would sit inside instead of on top where she could more easily fall off.

I tried building without PH screws at first and all I ended up with was a lot of cracked and wasted lumber. Got the PH jig and finished the whole build myself in 2 hours. Sanding, staining, and sealing tomorrow but I'm just so excited about it I had to post now!

Estimated Cost
With the two sets of lumber, having to buy the jig, hardware, stain, and electric sander it cost me about $130
Estimated Time Investment
Afternoon Project (3-6 Hours)
Recommended Skill Level
Beginner

Comments

Finally Built a Platform Bed!

Submitted by Anonymous (not verified) on Mon, 07/25/2022 - 10:39

I've been wanting to build this bed for awhile and finally got around to it. I made a few small changes to the plans:

-I used 2x8's instead of 2x6s, so it wouldn't be so low to the ground.
-I ripped 3/8" off of the 2x8 supports in the middle so the mattress would nest inside the frame and not slide around
-I didn't add the headboard because it seemed a bit chunky/rustic for my taste. I will come back and do something else for the headboard. Maybe a cool paneled wall with built in sconces? We'll see!

Love these plans though, appreciate it!

Comments

Treehouse/Playhouse

Submitted by Bigbill99 on Sun, 01/10/2016 - 00:07

Thank you! You've helped me look like a true carpenter who knows what he's doing! My whole family is impressed with my woodwork lately, and now I'm addicted. I've done your seesaw, bar table and stools plus the treehouse in 2 weeks. Thank you for sharing your plans!

Estimated Cost
$500.00
Estimated Time Investment
Week Long Project (20 Hours or More)
Finish Used
Spar urethane
Recommended Skill Level
Beginner

Easy Build DIY Planter Box

Submitted by Anonymous (not verified) on Tue, 04/18/2023 - 07:46

I was looking for planter boxes for my front door and these were easy and super sturdy. I absolutely love them and how they enhanced this area! Thank you Ana for this simple yet impactful plan!

Comments

Seasonal And Holiday

Built-in Bookshelves

Submitted by keribeth on Fri, 07/06/2012 - 14:55

These built-in bookshelves were my first project, and were loosely based on the Willy bookshelf plans, although I changed the dimensions, set them on a 2x4 base, and added trim to the sides and molding on top.

Built from Plan(s)
Estimated Cost
~$120 in lumber
Estimated Time Investment
Weekend Project (10-20 Hours)
Finish Used
Benjamin Moore white dove in advance
Recommended Skill Level
Starter Project

Comments

smoser

Sat, 08/11/2012 - 05:58

hello,

Just wondering how the sides and middle part are built. They look like thicker than 1/2 in.Is it a trim or a 1x2? or did you use some 2x4 too?
I am looking at building a bookcase too but i wanted something more massive than 1/2 in. like yours.
Thanks

Great job!! looks awesome

keribeth

Tue, 08/21/2012 - 05:31

I made the two bookshelves separately so I could move them in my house easier. Each has 1x12 sides (so 3/4" thick), and and that's 1x2 trim over the side and middle.

Thanks!