Community Brag Posts

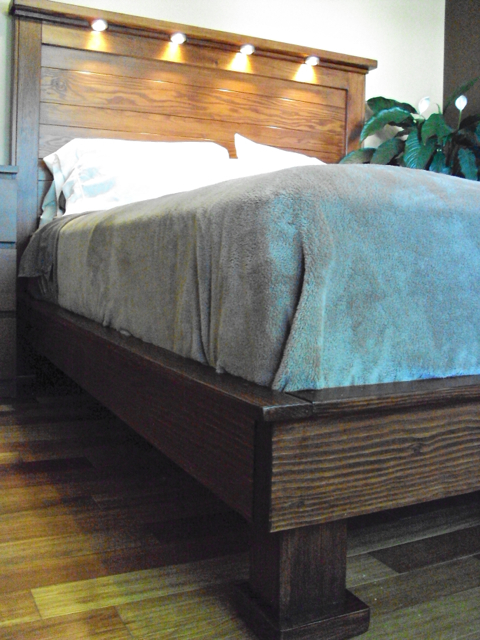
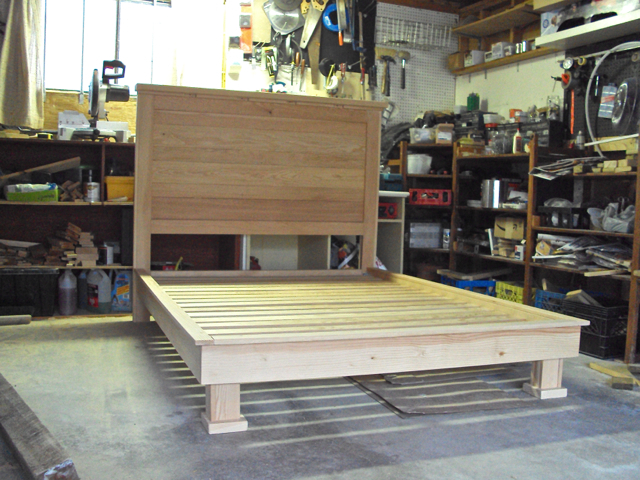
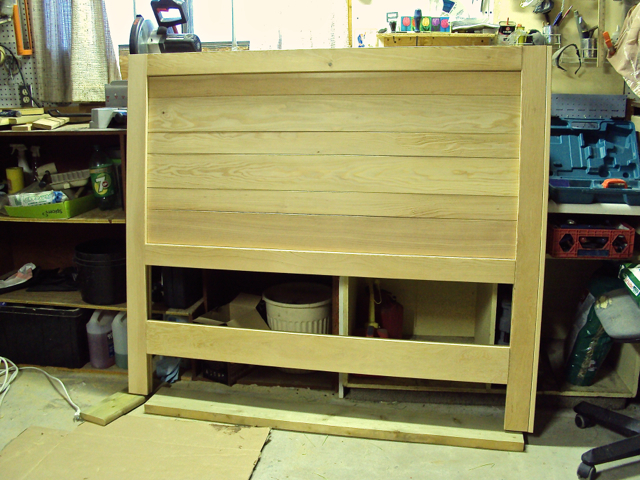
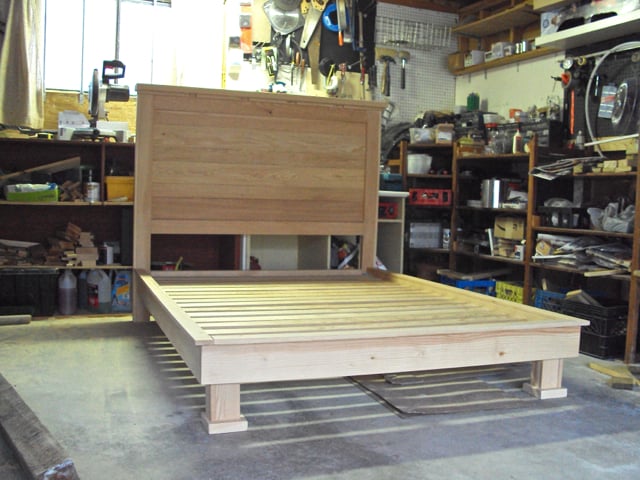
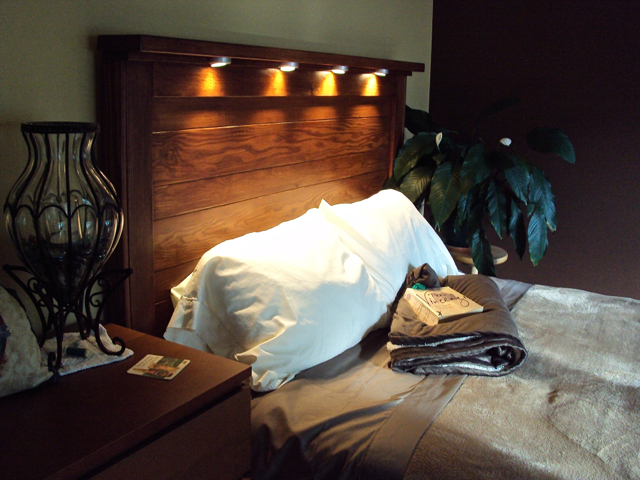
Platform Bed with Light up Headboard

Submitted by bjcanada on Wed, 07/09/2014 - 11:36

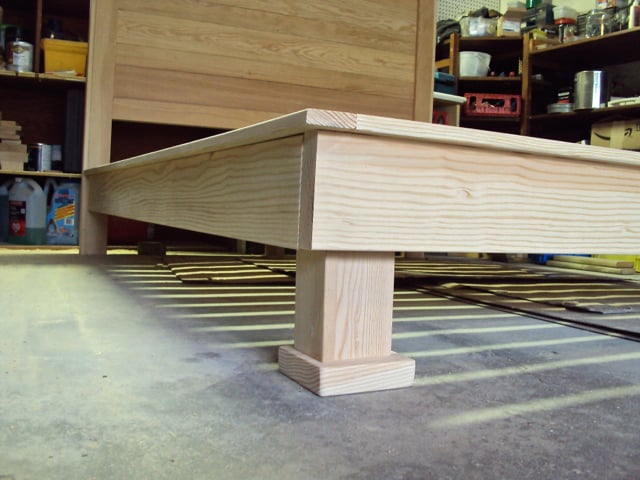
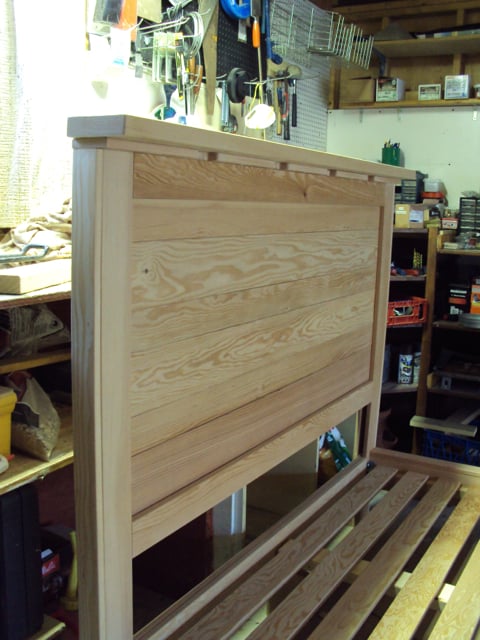
I combined the Reclaimed-Wood Headboard with the Hailey Platform Bed patterns, both found here on Ana's website to make my queen-sized bed. Alterations to the general instructions include: A 1x6 was sandwiched into the lower portion of the headboard to create the head of the bed platform (same as the panel pieces of the headboard). Another 1x6 was fastened from the back, the same as the other trim pieces. 4 holes for the light wires were chiseled out of the top trim, then a 2x6 was fastened across the top of the headboard to allow more room for the mounting of the lights. (these last 2 pieces flush to the back of the headboard instead of centered.) So the project was not too top-heavy I added a 2x6 center leg to the headboard. For even more stability I added a 4 x 4 leg to the center support of the bed portion. The lights are LED (Ikea) and the wires are fastened to the back of the headboard to keep them safe from pets, etc. The corners of the platform bed are held together with screwed-in knock-down hardware (Lee-Valley). Dis-assembly was important to me, so the bed could be moved from the garage to the house! I am not an experienced wood worker by any means, nor am I particularly fast. The plans I downloaded from this site were very detailed. The project was both fun and full-filling!

light up headboard

Estimated Time Investment
Week Long Project (20 Hours or More)
Finish Used
Cabot Stain + Sealer, Colour: Autumn Glow, Finish: Satin
Recommended Skill Level
Beginner

Comments

bjcanada

Wed, 07/09/2014 - 20:44

The only wood cheaper than hemlock is pine! : ) I bought the wood at Windsor Plywood in Calgary, Alberta, Canada. It took the stain very well and I am very pleased with my choice. It is a softer wood than some, sands down very easily.

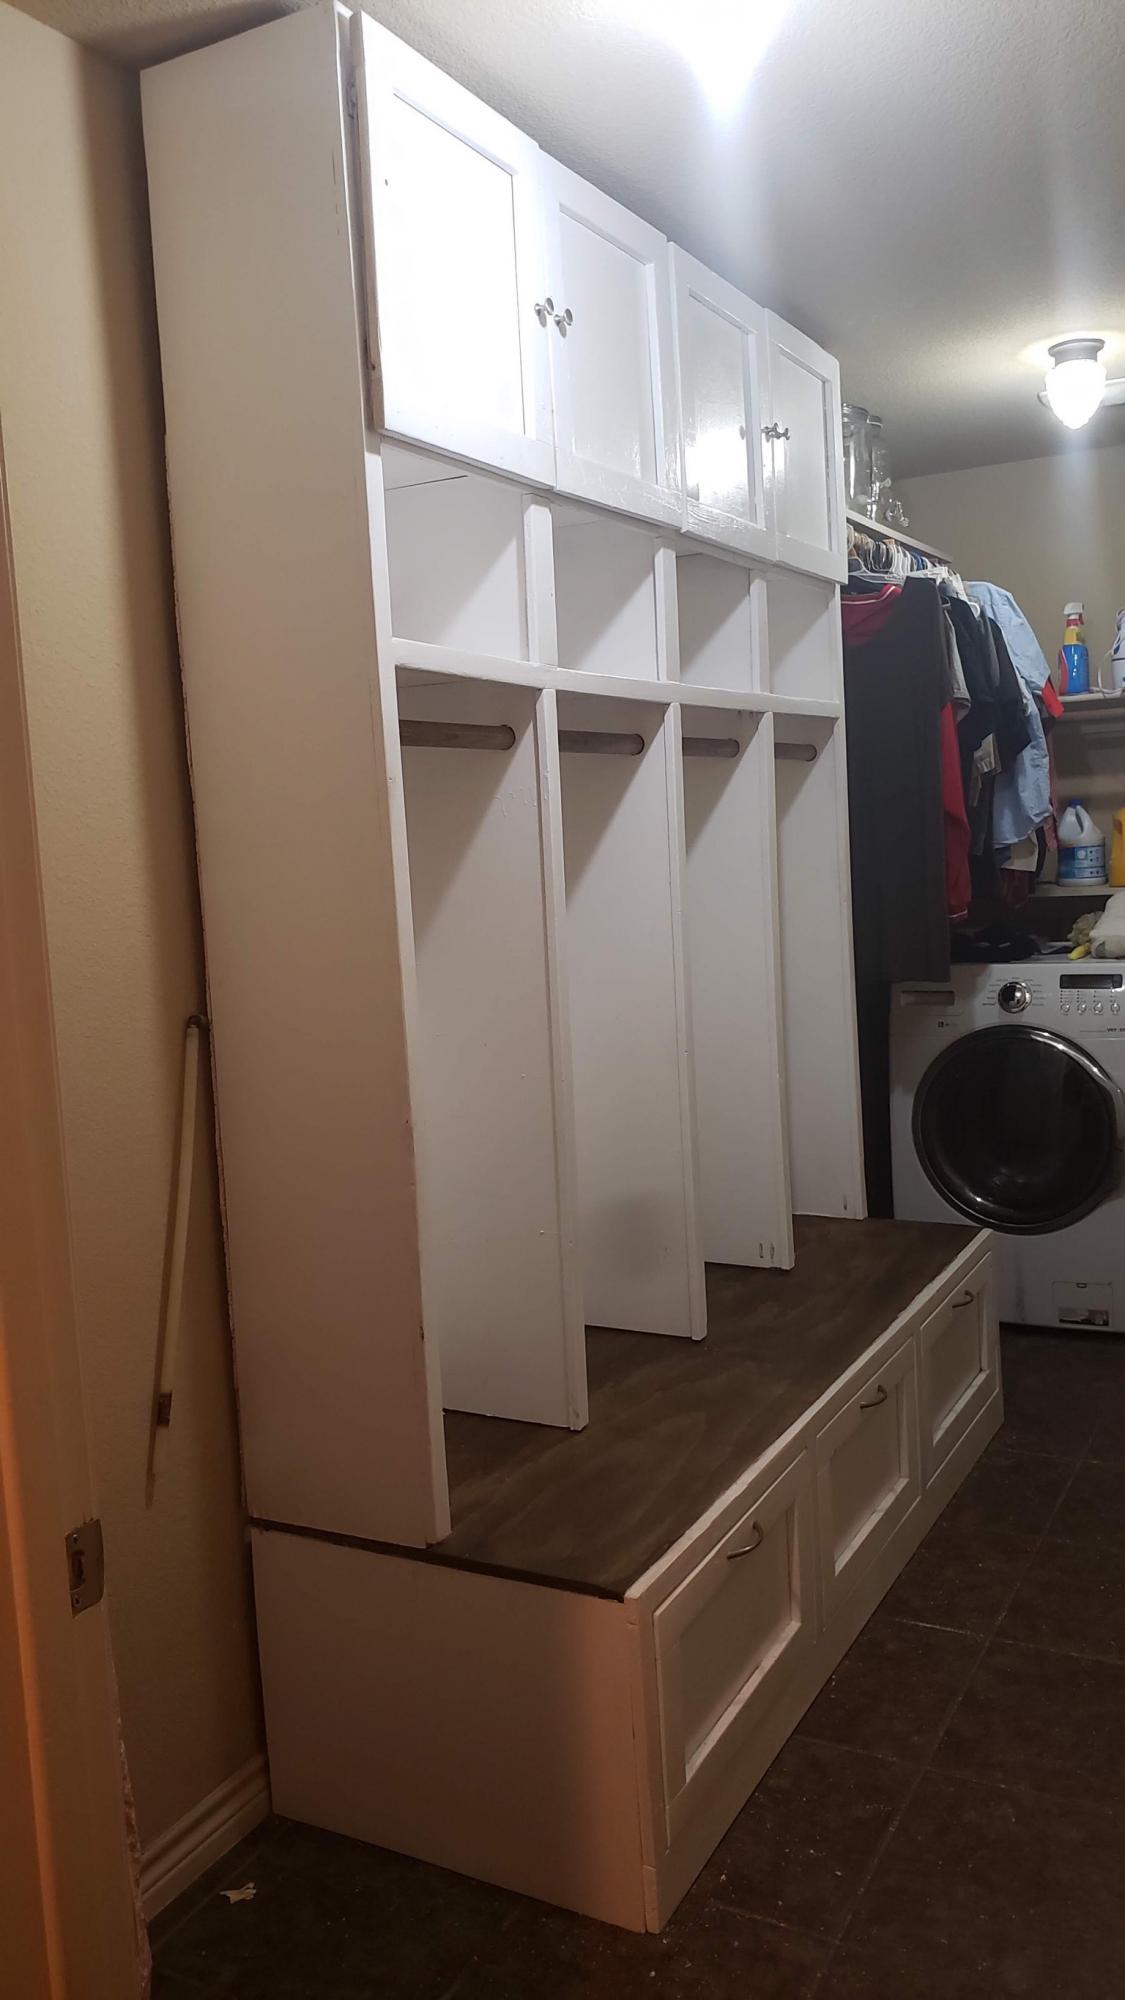
Mudroom Bench and hutch

Submitted by Anonymous (not verified) on Mon, 07/13/2020 - 17:41

I really liked the mudroom bench, so we created our own version. Thank you!

Built from Plan(s)
Estimated Cost
$500
Estimated Time Investment
Week Long Project (20 Hours or More)
Finish Used
Paint
Recommended Skill Level
Intermediate

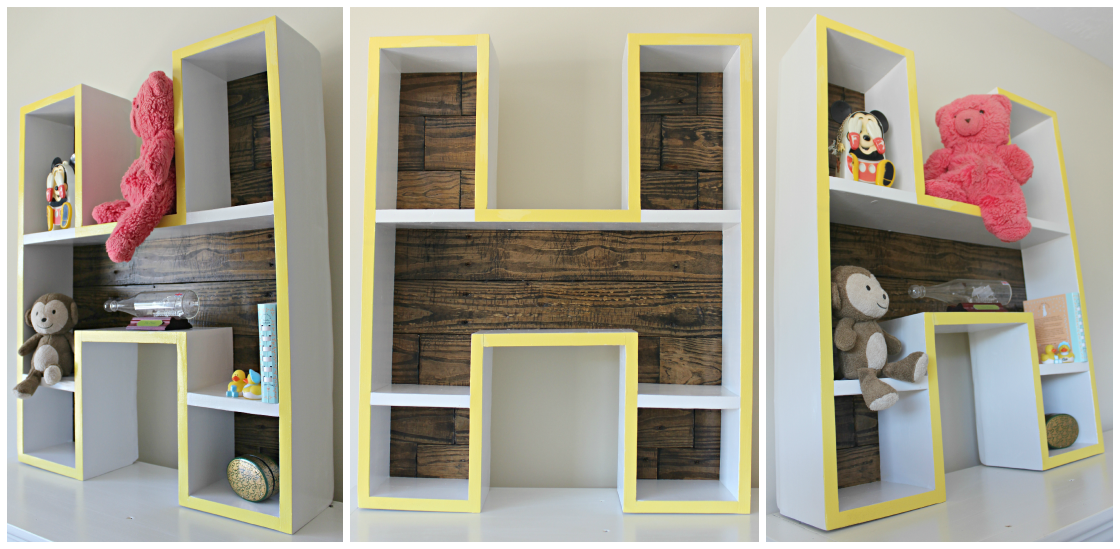
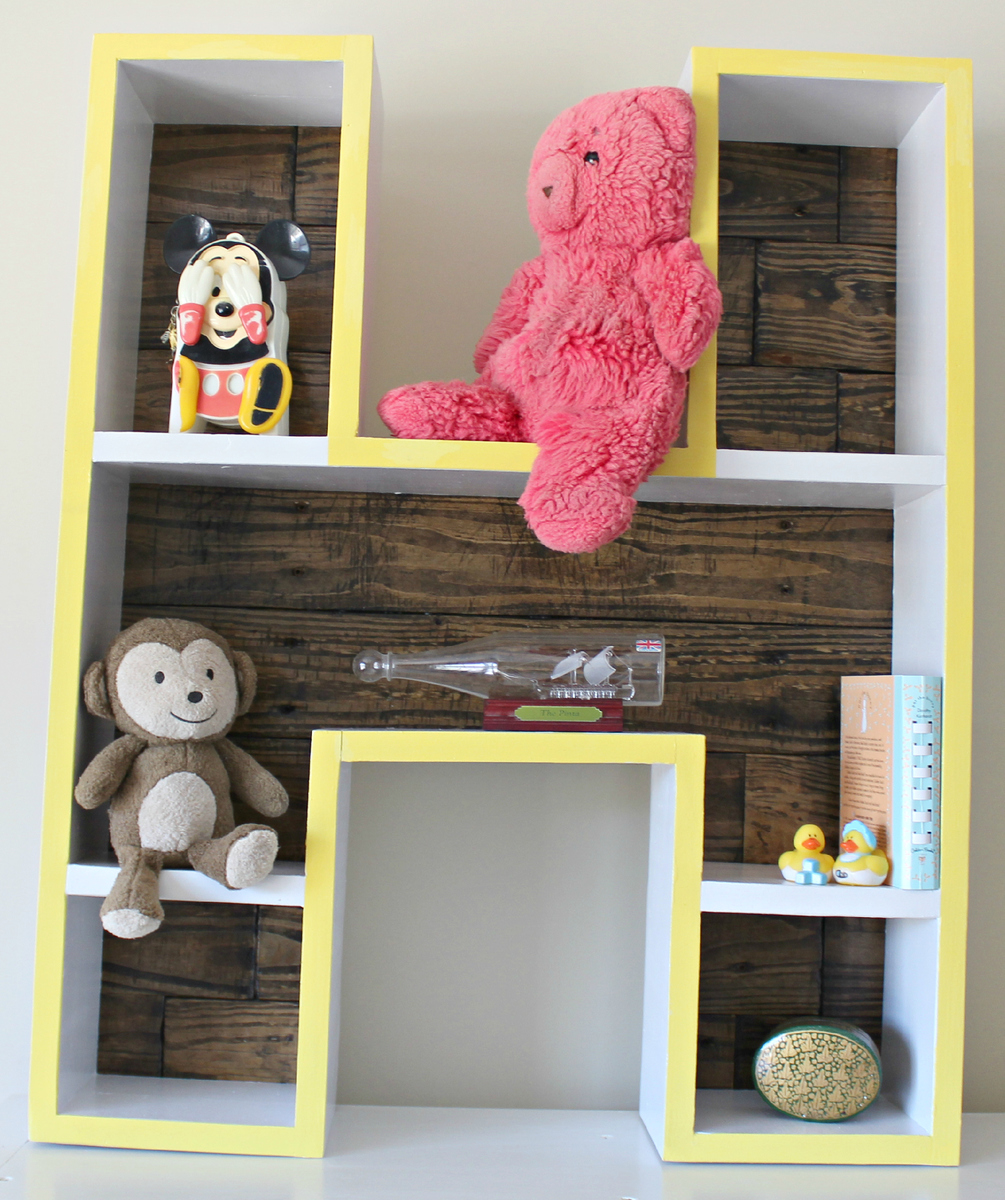
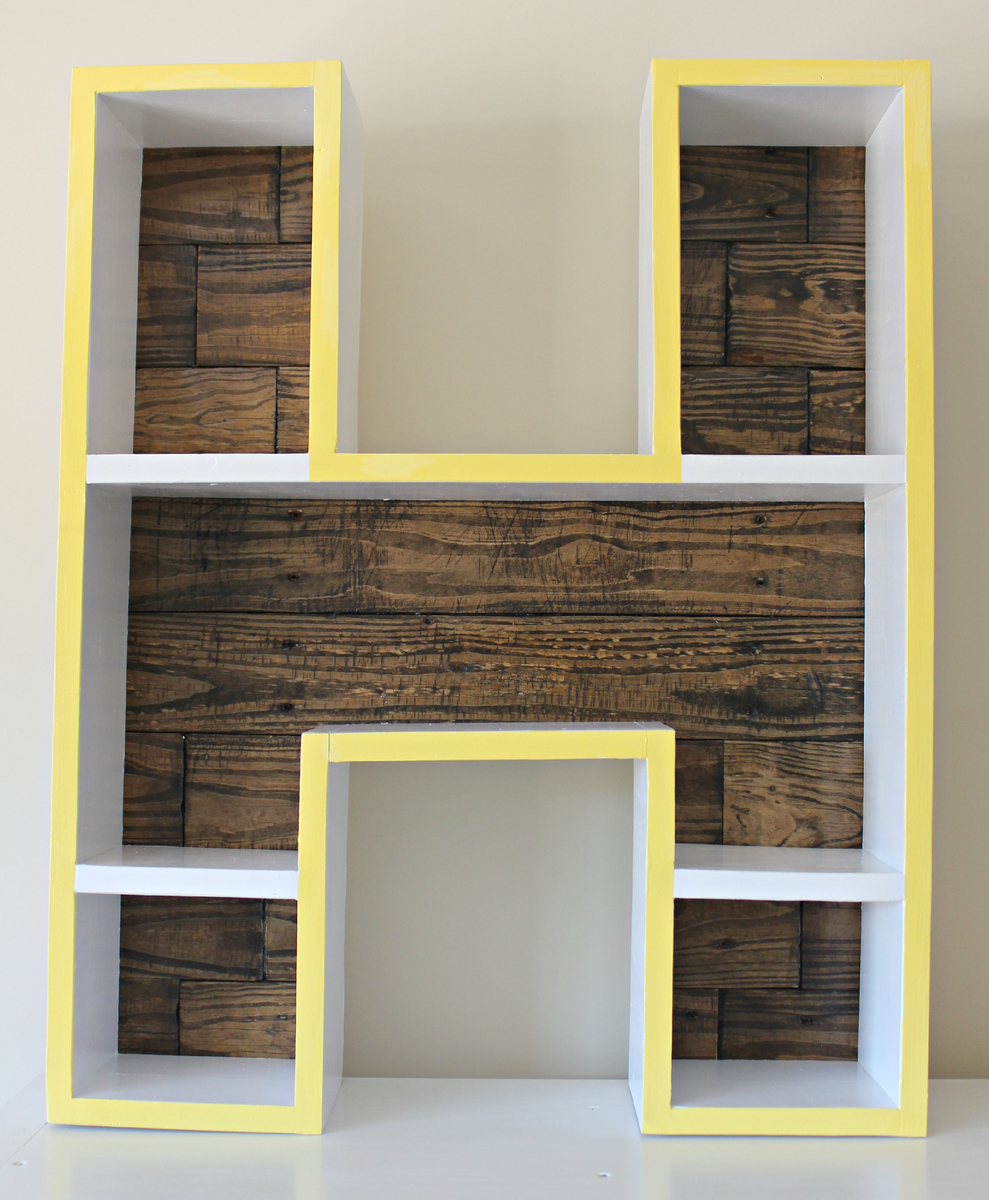
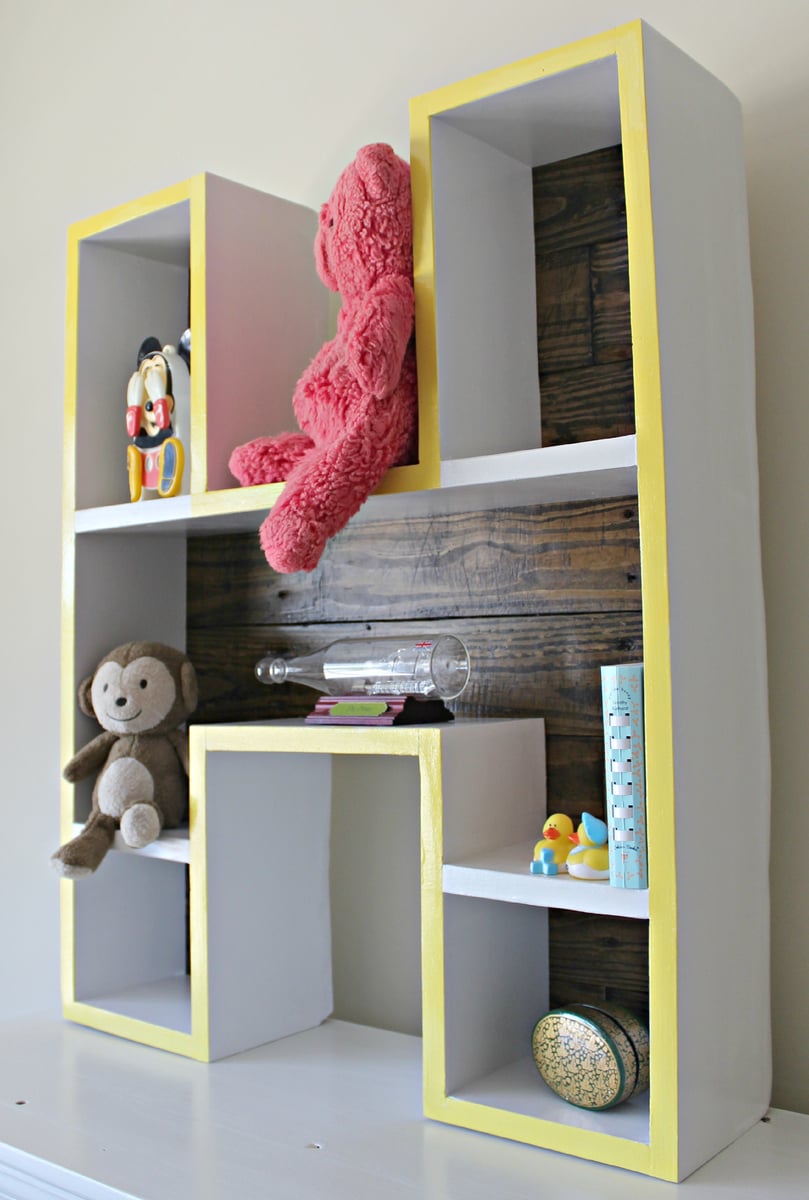
Letter H Shelf

Submitted by Huthbert on Tue, 10/09/2012 - 15:07

We're expecting a baby in November and we picked this as our first Nursery Decor project!

We were originally inspired by the Letter Z project we found on here on Ana's site. So we went ahead and made our own design on google sketch-up. It was a good first project for us to learn how to use Google sketch-up (although we still aren't very good at it).

We wrote about building the project on our blog here: http://thehuth.blogspot.com/2012/10/brought-to-you-by-letter-h.html

This was a fun project and we love the way it turned out!

Built from Plan(s)
Estimated Cost
25-30
Estimated Time Investment
Day Project (6-9 Hours)
Finish Used
-Behr Paint- Irish Mist
-Polycrylic (We used Minwax Polycrylic Protective Finish)
Recommended Skill Level
Beginner

Comments

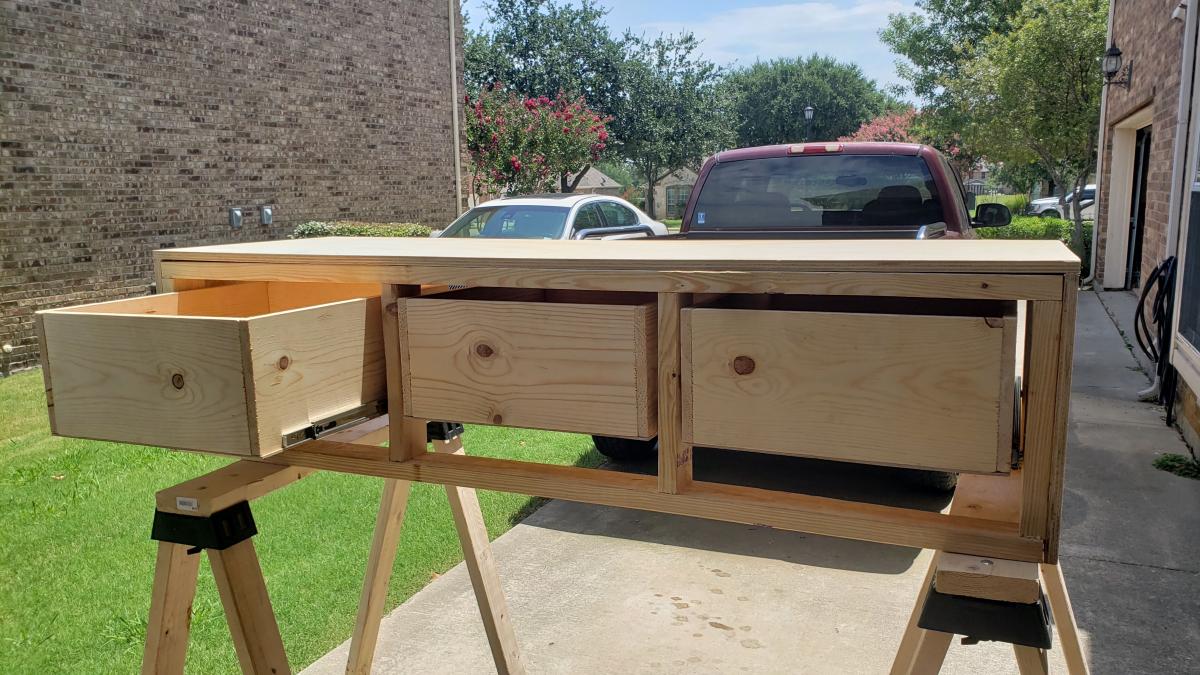
DIY sofa couch / slide in coffee table

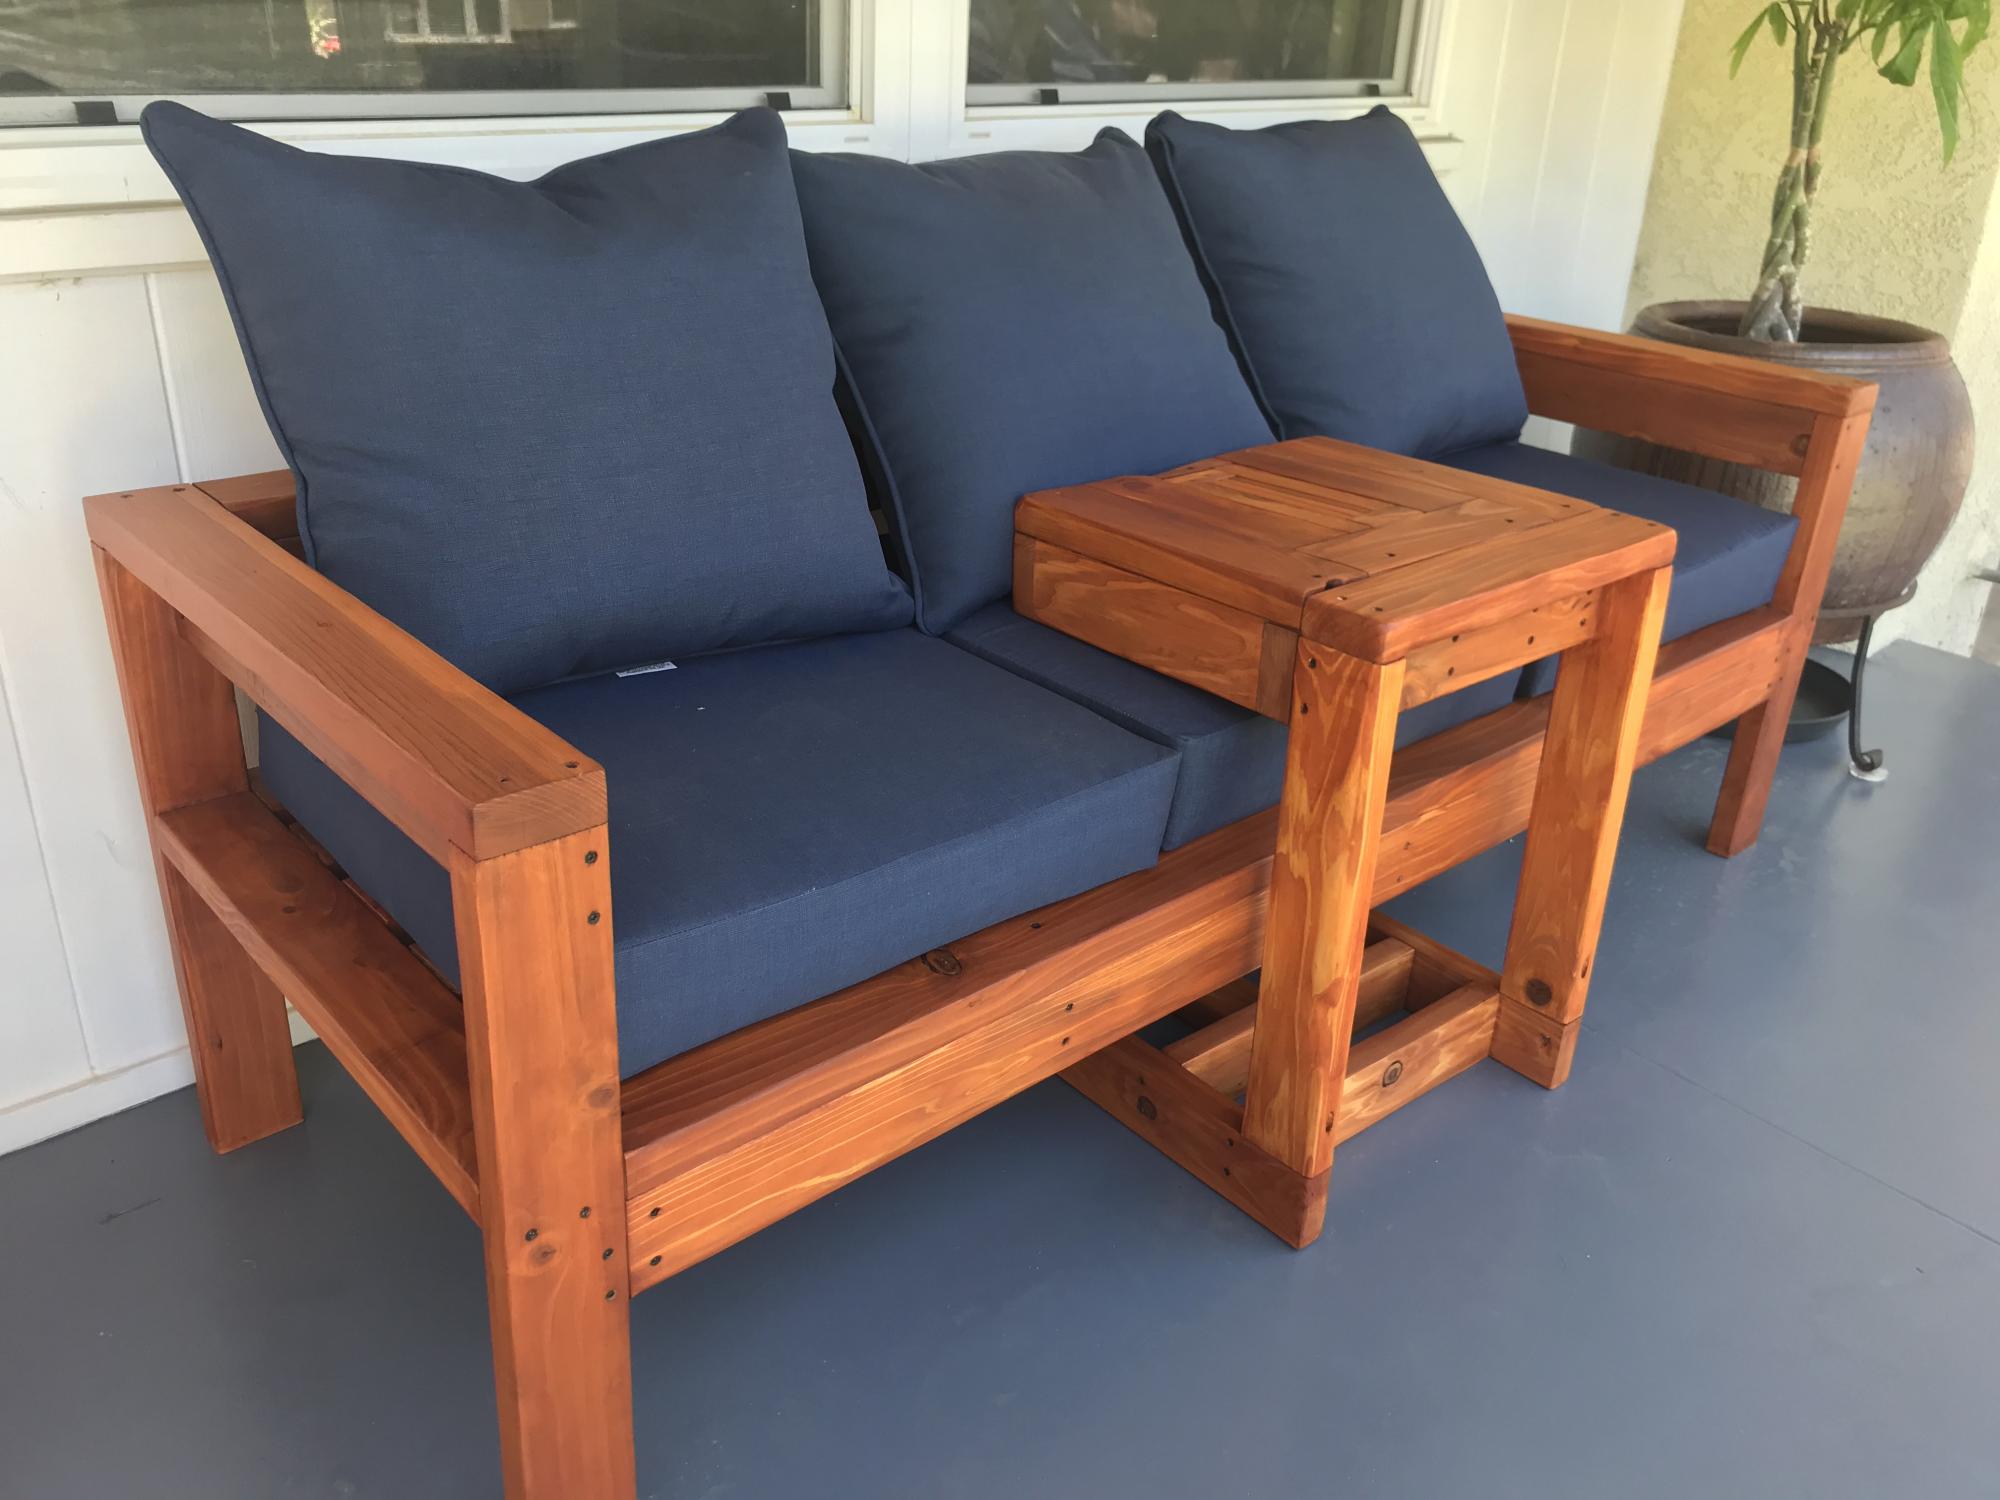
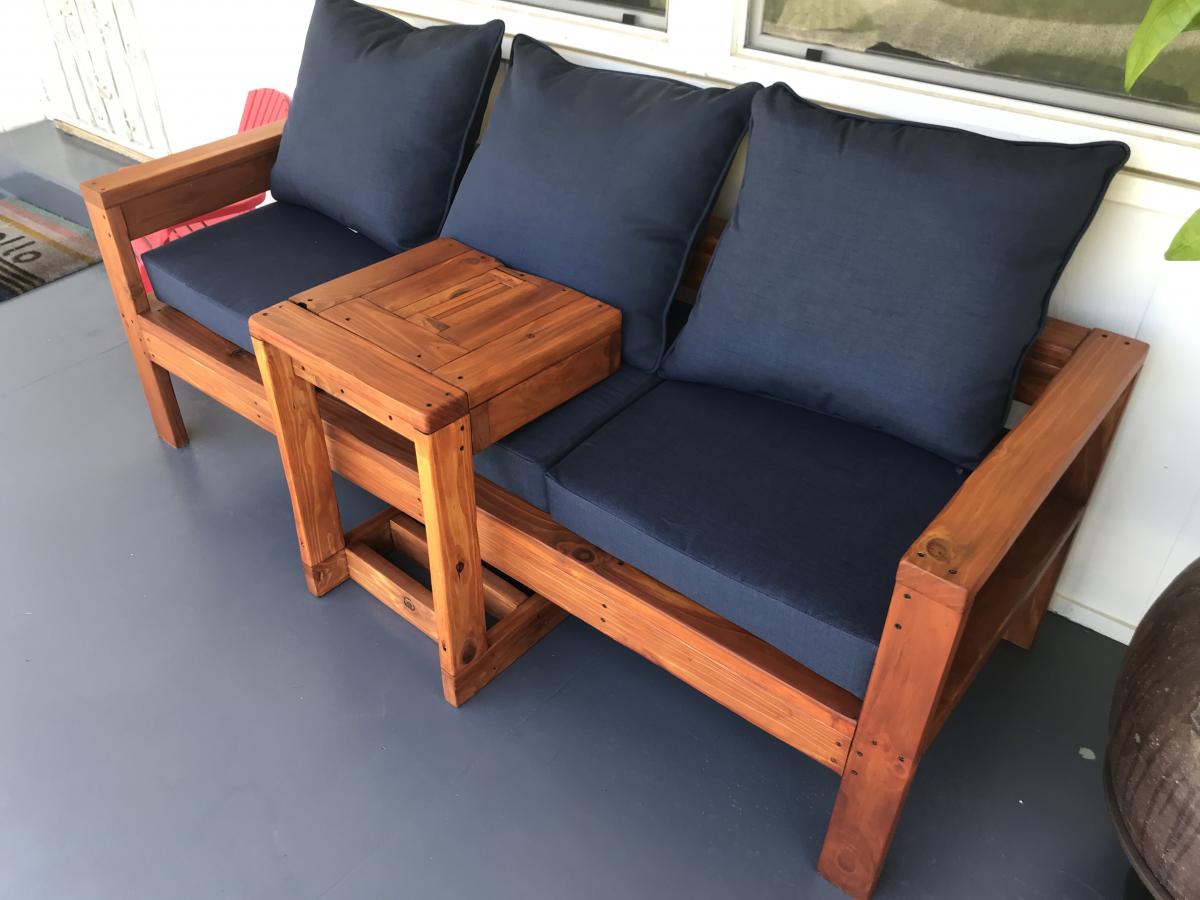
Ana has great instructions, definitely have been using her alot. During the pandemic picked up a couple new hobbies and tools. I did the sofa couch from her plans. The coffee table I created off the whim but used her basic instructions on how to make table tops / benches. These came out super nice, surprised me and my wife :)

Estimated Time Investment
Weekend Project (10-20 Hours)
Finish Used
Sanded several times varying 120 / 180 / 220. Stained with Valspar semi-transparent natural redwood naturaltone.
Recommended Skill Level
Beginner

Comments

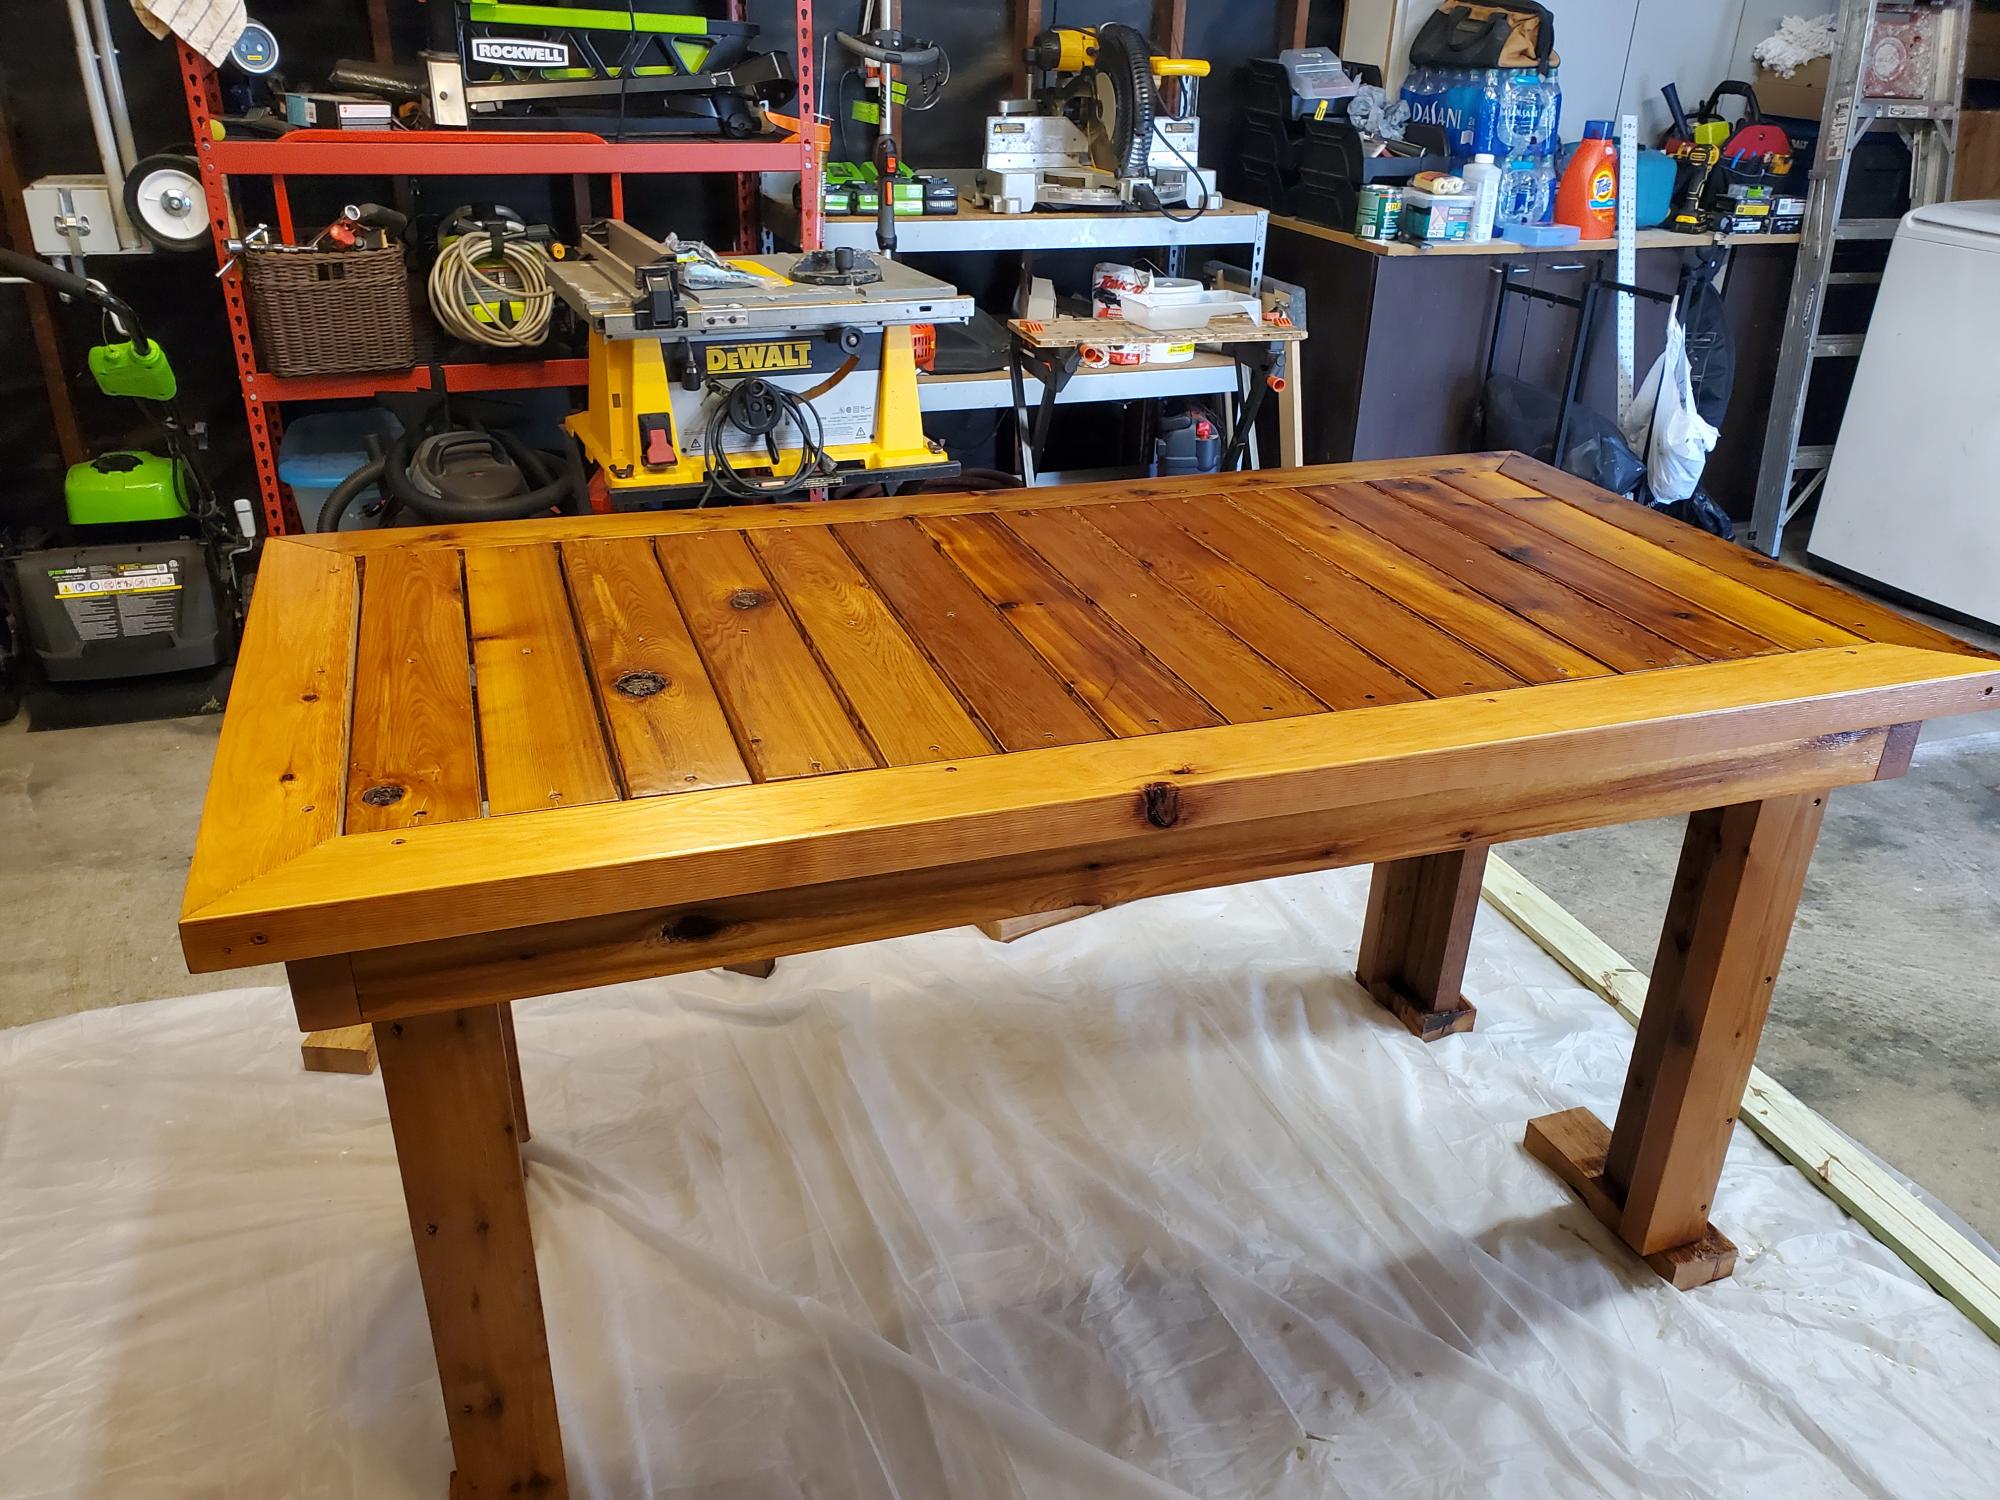
Chunky Barnwood Farmhouse Table

Submitted by jgioulis on Wed, 12/14/2016 - 12:27

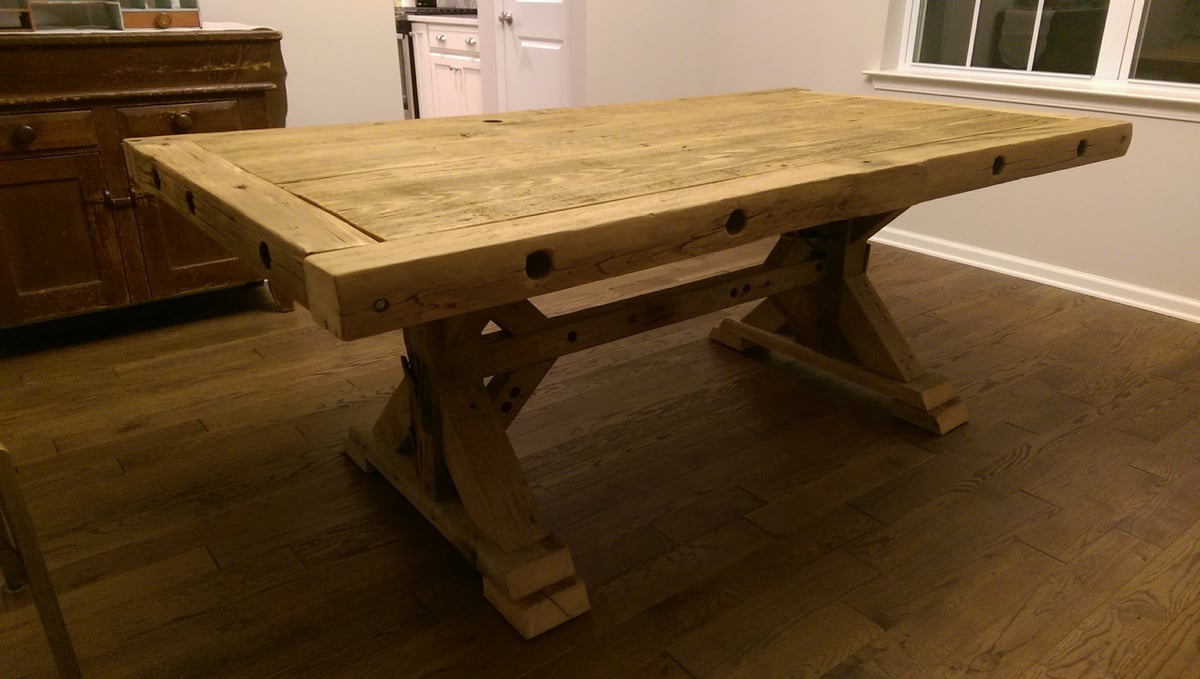
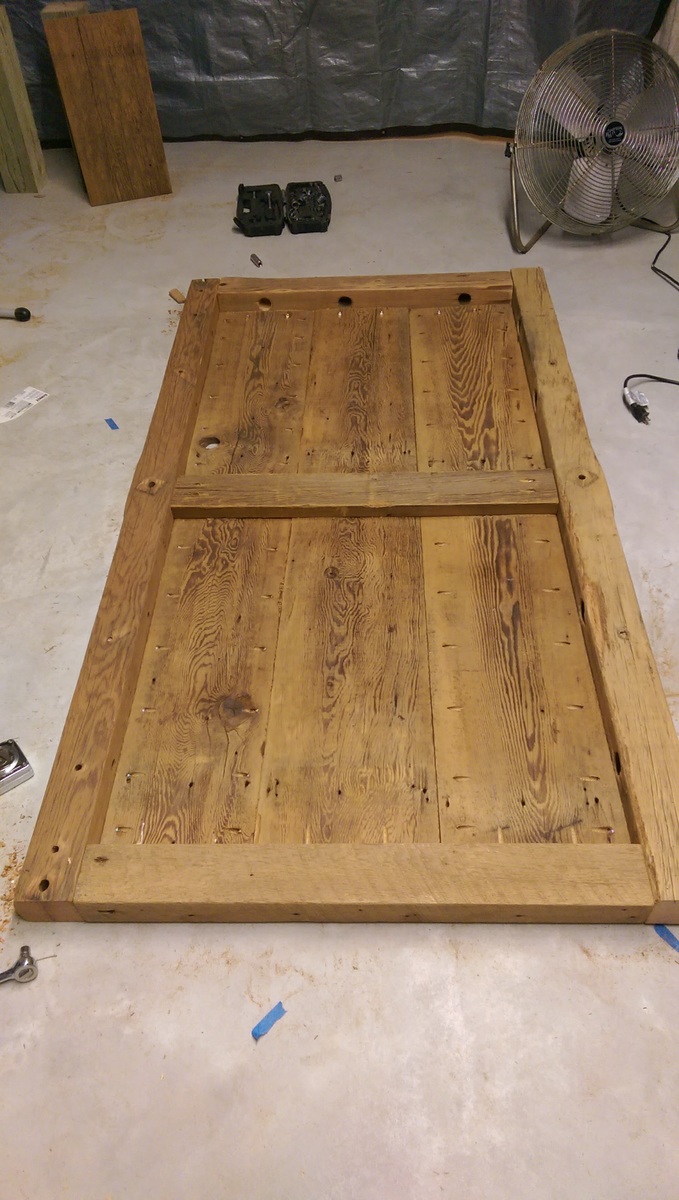
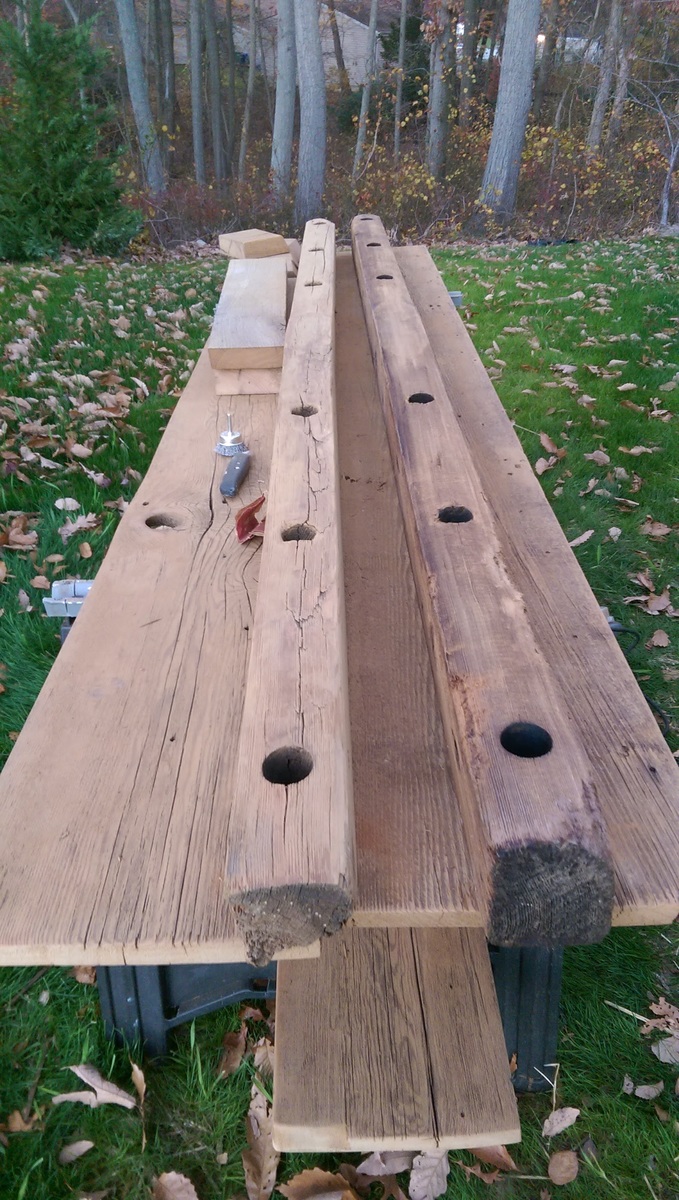
I was lucky enough to know someone who's property had 4 barns that were on the virge of falling over.

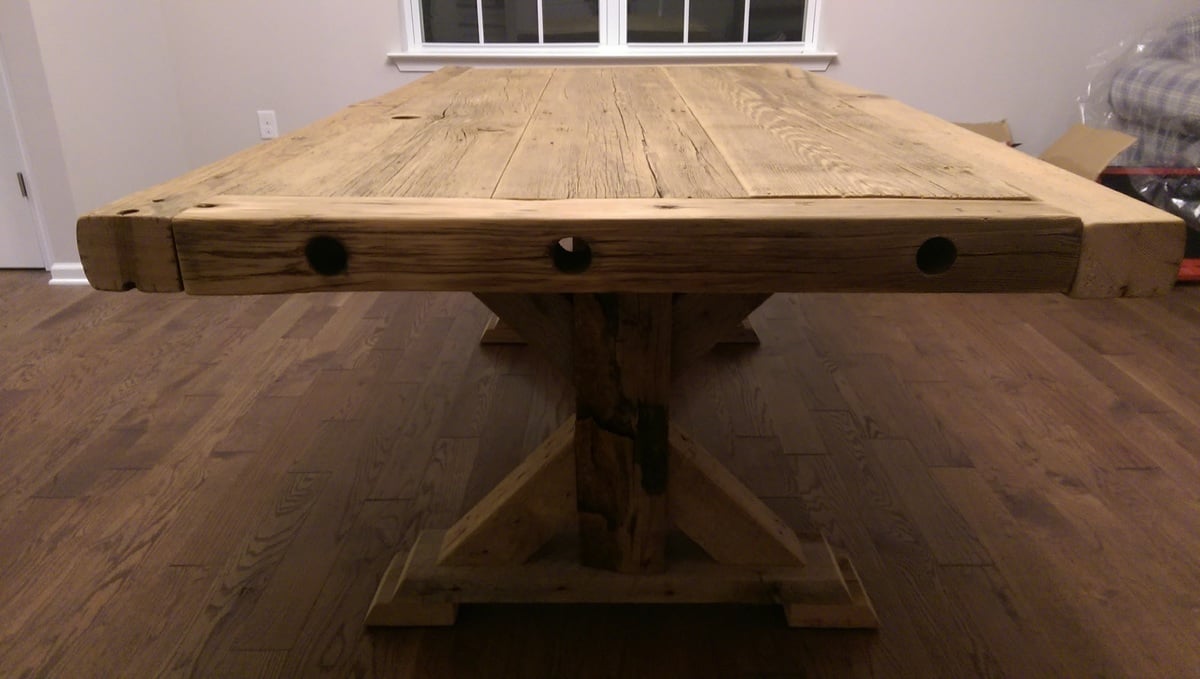
I removed wood from the barns I needed, some wood was just inside the barns. The thick pieces with holes going around the table were actually old telephone poles (horizontal section). 


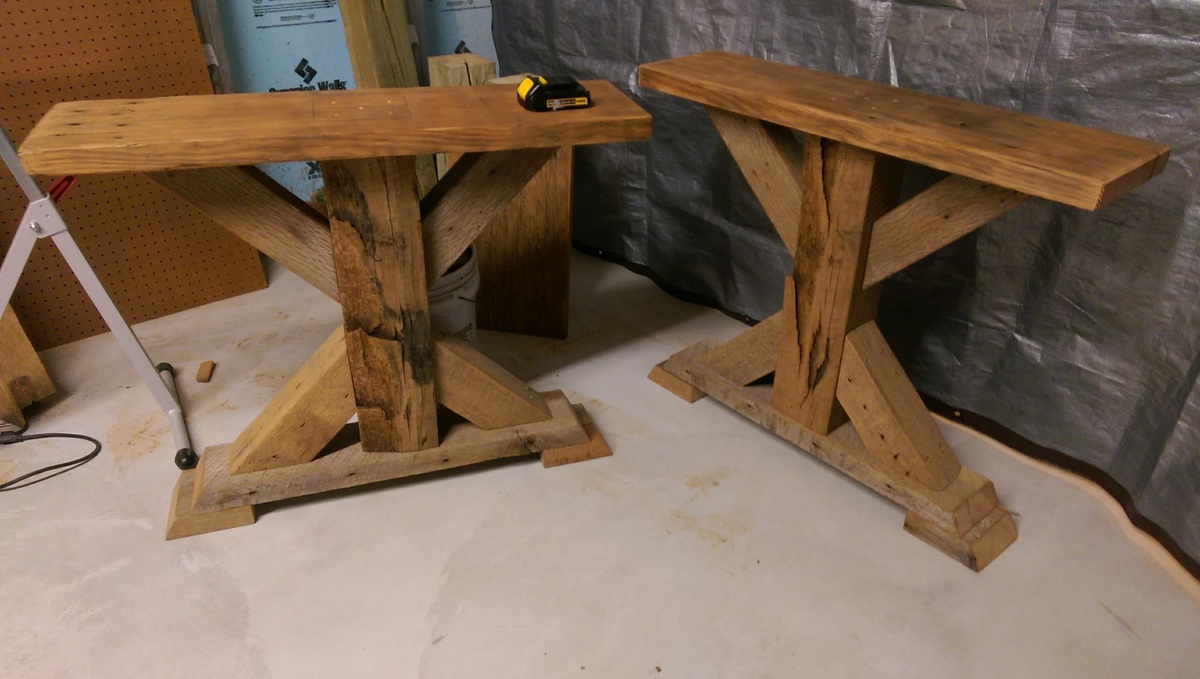
The plans were straight forward, but prepping, cleaning, sanding the wood from an old barn was the most time consuming. Also hardly anything was straight or square! 

Estimated Cost
cost of tools I didn't have... pocket hold jig, belt sander, 36" clamps
Estimated Time Investment
Week Long Project (20 Hours or More)
Finish Used
unfinished
Recommended Skill Level
Intermediate

Kids Home School Desk and Chair

Submitted by Anonymous (not verified) on Thu, 08/27/2020 - 12:42

We have the covid home school season in effect here in Texas. I built this for my grandson who is in kindergarten. He really likes it and I enjoyed building it. The table is made from pine primarily 2"x 3" boards and a 2' x 4' panel desktop. It is 25" high and 24"W x 48"L. I used the Ana White X Design for the frame.
The chair is 30" high with the seat being 15" high. It is 12" wide by 14 1/2 long. I made the rear legs from a 2" x 6" boarded ripped at 2 1/2 inch wide and the back rest angle at 6 degrees off center. The front legs from 2'' x 2".
I installed adjustable threaded glide felt pads to both the chair and table legs.
I painted and distressed for the older used look.

Estimated Cost
$40 with my 10% military discount for material.
Estimated Time Investment
Weekend Project (10-20 Hours)
Finish Used
Sanded 120 grit and used Glidden white for frame that I had from an old job. Dark wax tabletop.
Recommended Skill Level
Beginner

Beginner Farm House Table w/ pocket holes

Submitted by Anonymous (not verified) on Wed, 09/02/2020 - 19:28

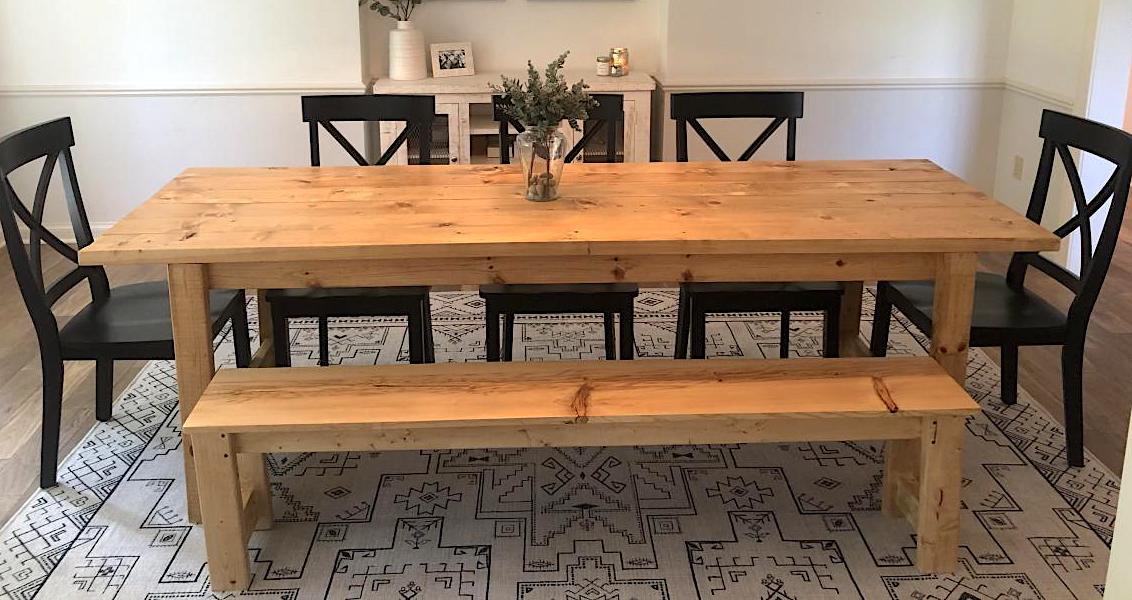
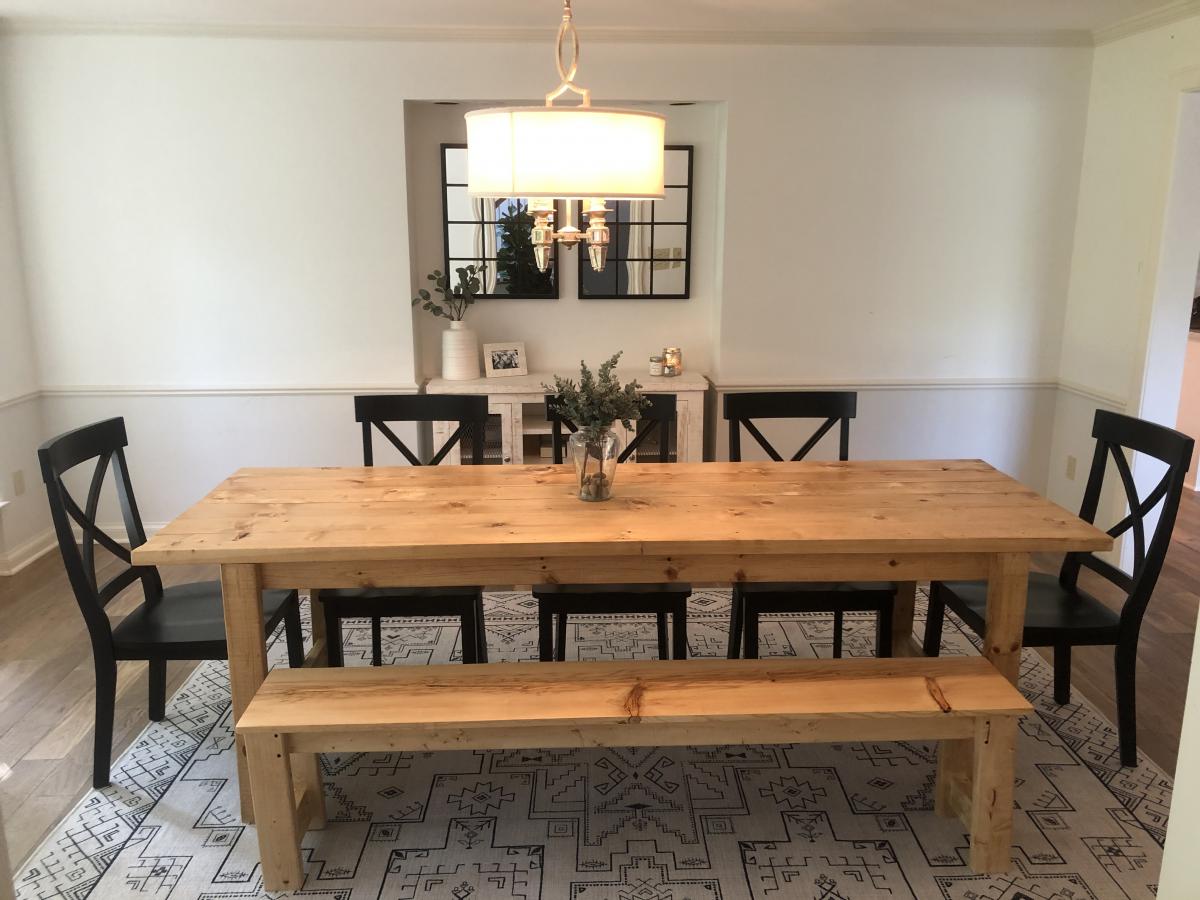
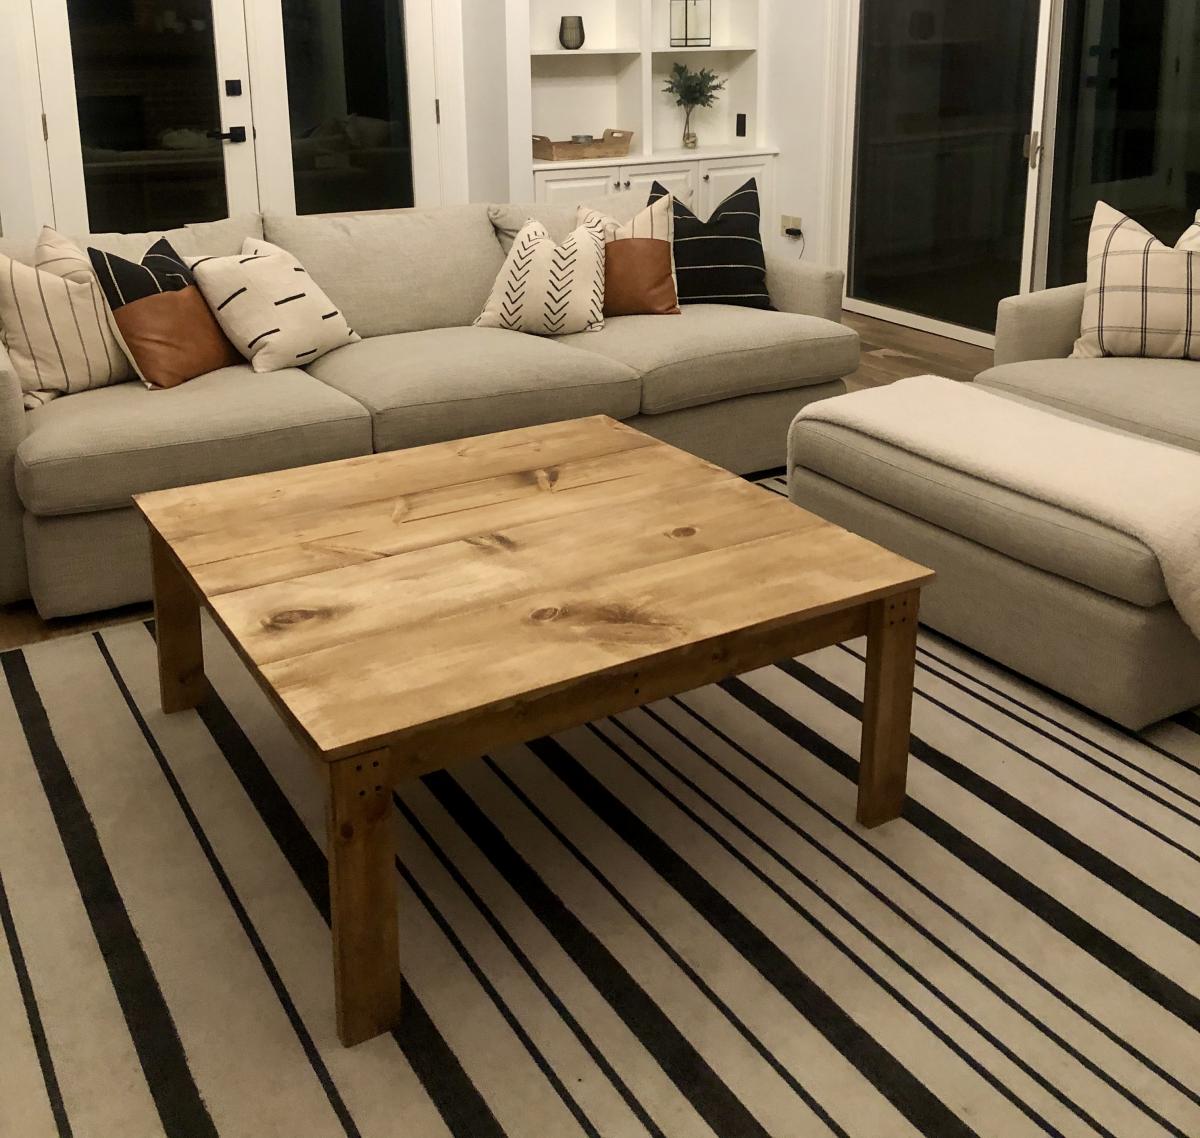
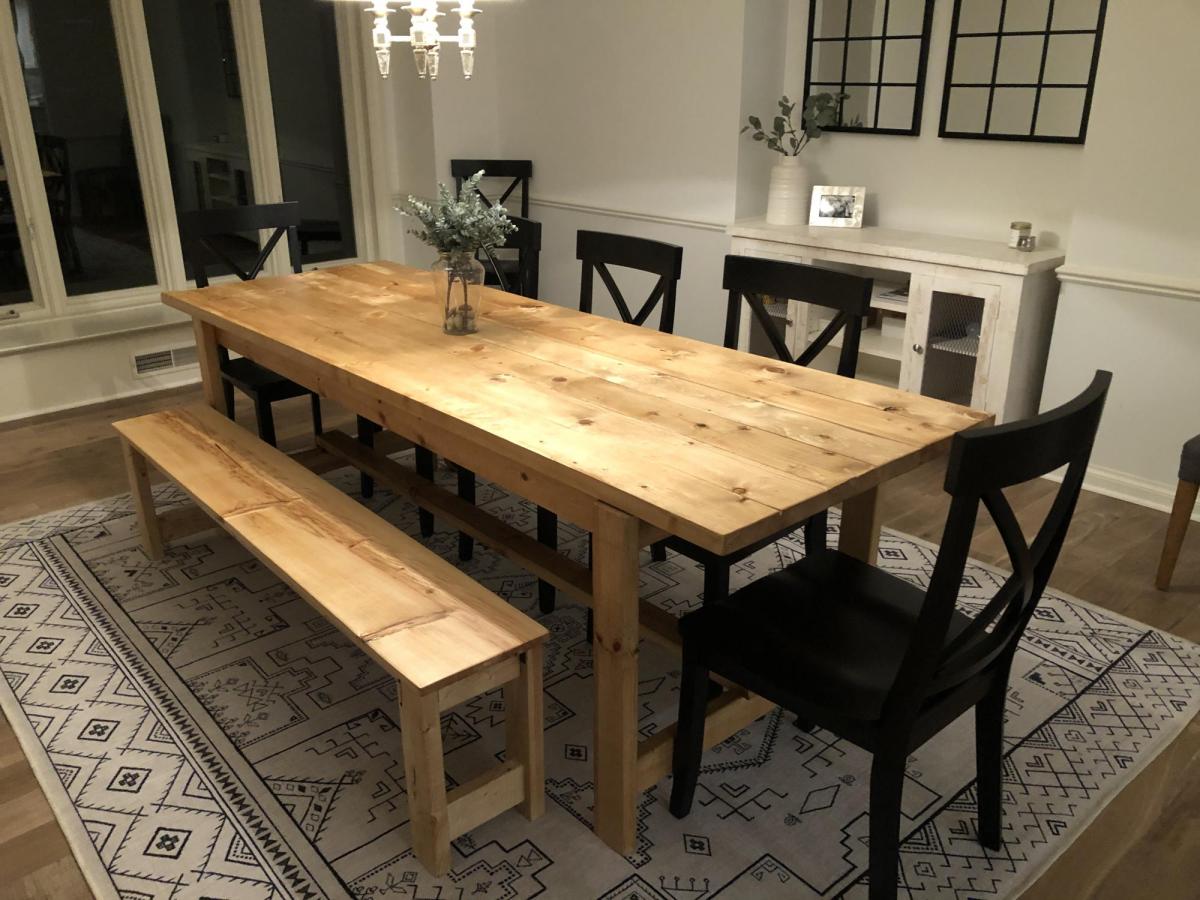
Love this! The farm house table and bench (1st photo) were my first 2 wood project ever. They came out great so I decided to make a coffee table using modified dimensions (2nd photo) and used poplar for the table top instead of pine. Poplar took to the stain I used really well. The farm table is Danish Oil, Light Walnut and the coffee table is in Danish Oil Dark walnut. I used wipe on Poly to finish both tables and I used matte black wood screws for an accent on the base of the coffee table. Everything else was assembled with a compact circular saw and pocket holes w/ a Kreg Jig. Thanks for the plans!

Estimated Cost
$200
Estimated Time Investment
Weekend Project (10-20 Hours)
Finish Used
-Danish Oil Light Walnut - 2 coats (dining table)
-Danish Oil Dark Walnut - 1 coat (coffee table)
-Wipe on Poly, Gloss - 2 coats (both)
-Sanded all wood w/ orbital sander prior to assembling (I find it easier to get all the splinters, scratches, and stamp marks out if I do it before assembling)
Recommended Skill Level
Beginner

Comments

Simple Bird Feeder

Submitted by mtairymd on Thu, 12/29/2016 - 12:58

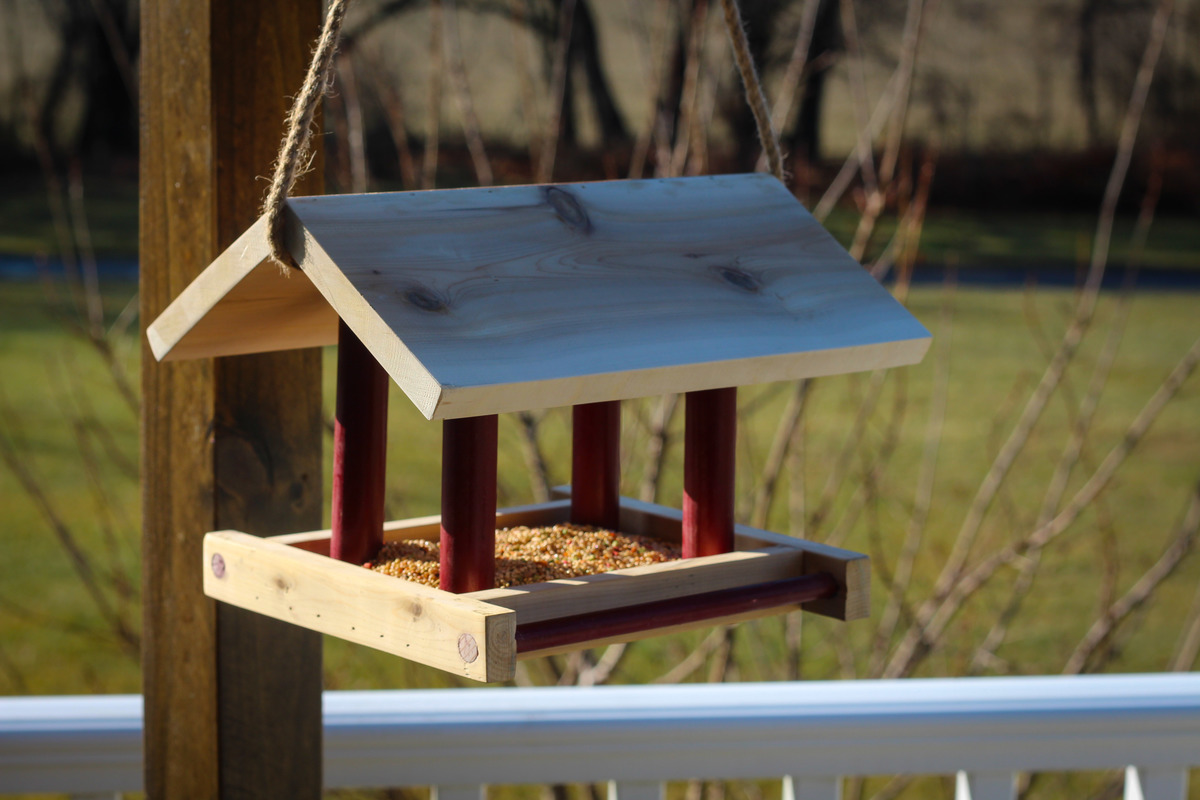
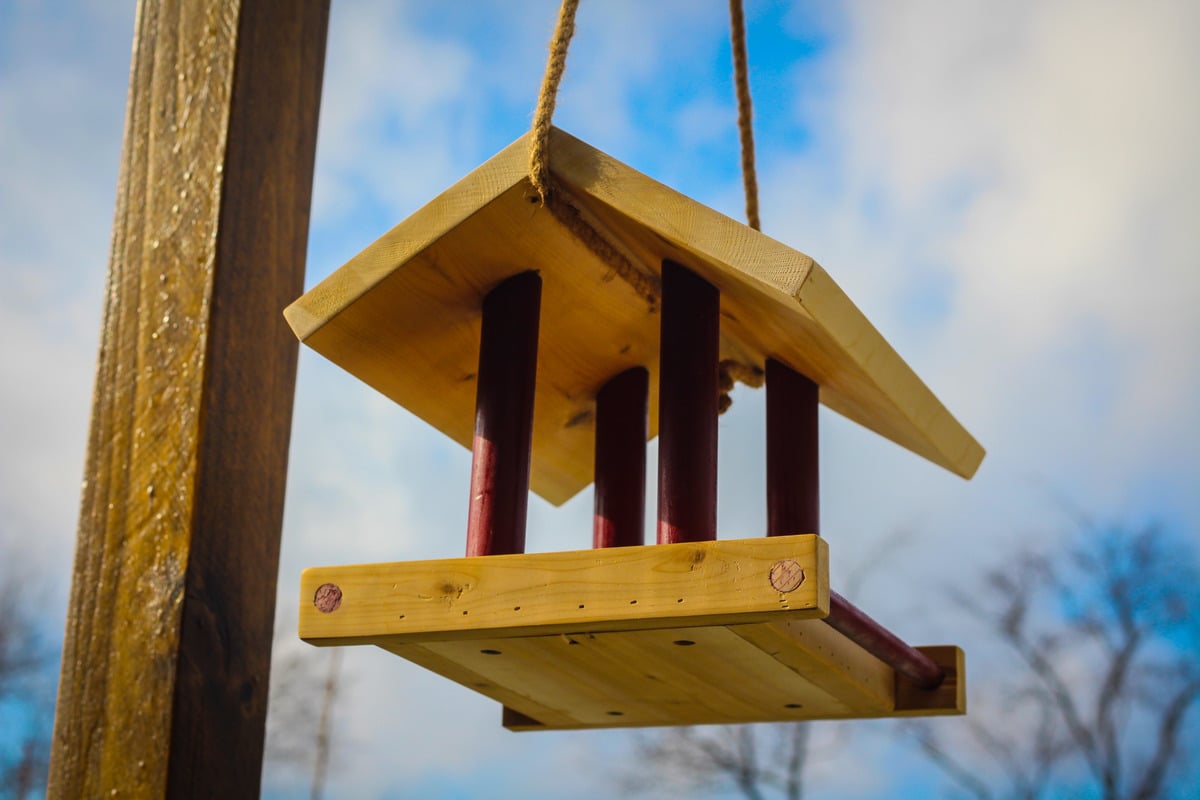
This is a simple project for the beginning woodworker. There are a variety of bird feeder designs available on the web but I wanted to try something a little different. Anyway, this is my try at a simple bird feeder.

Build Instructions:

http://www.instructables.com/id/Simple-Bird-Feeder-1/

Estimated Cost
$10
Estimated Time Investment
Afternoon Project (3-6 Hours)
Finish Used
Paint for pillars and perch
Recommended Skill Level
Starter Project

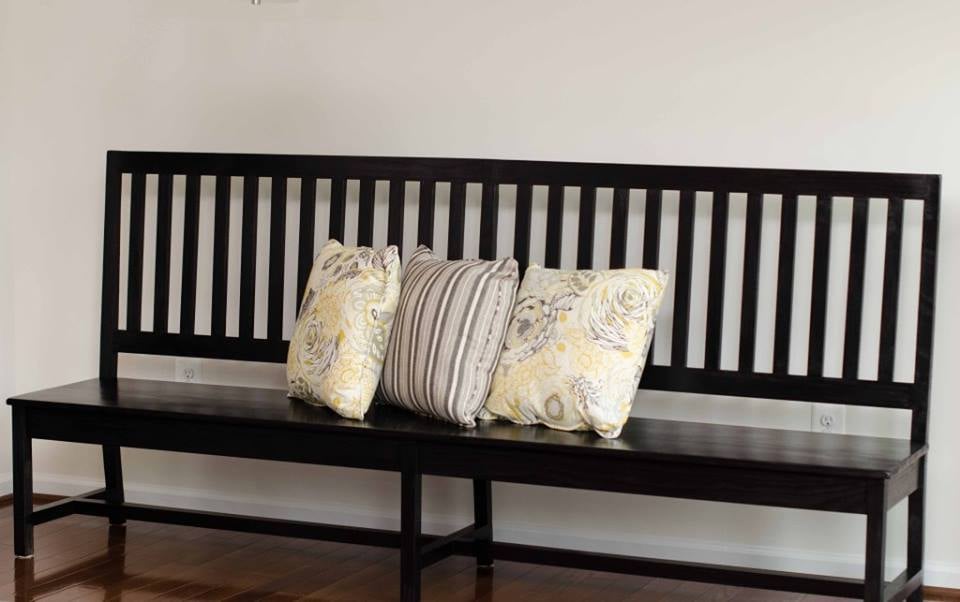
Extra Long Bench

Submitted by lrsummers on Thu, 09/18/2014 - 10:37

This was a custom build for a friend. It's nearly 8 feet long and I used the plans from the classic chair made simple for the back legs and support for the seat. Everything else was customized to fit her needs. =) Lots and lots and lots of pocket holes but this piece turned out better than what was pictured in my head! 

Built from Plan(s)
Estimated Time Investment
Week Long Project (20 Hours or More)
Finish Used
Rustoleum black in Satin
Recommended Skill Level
Intermediate

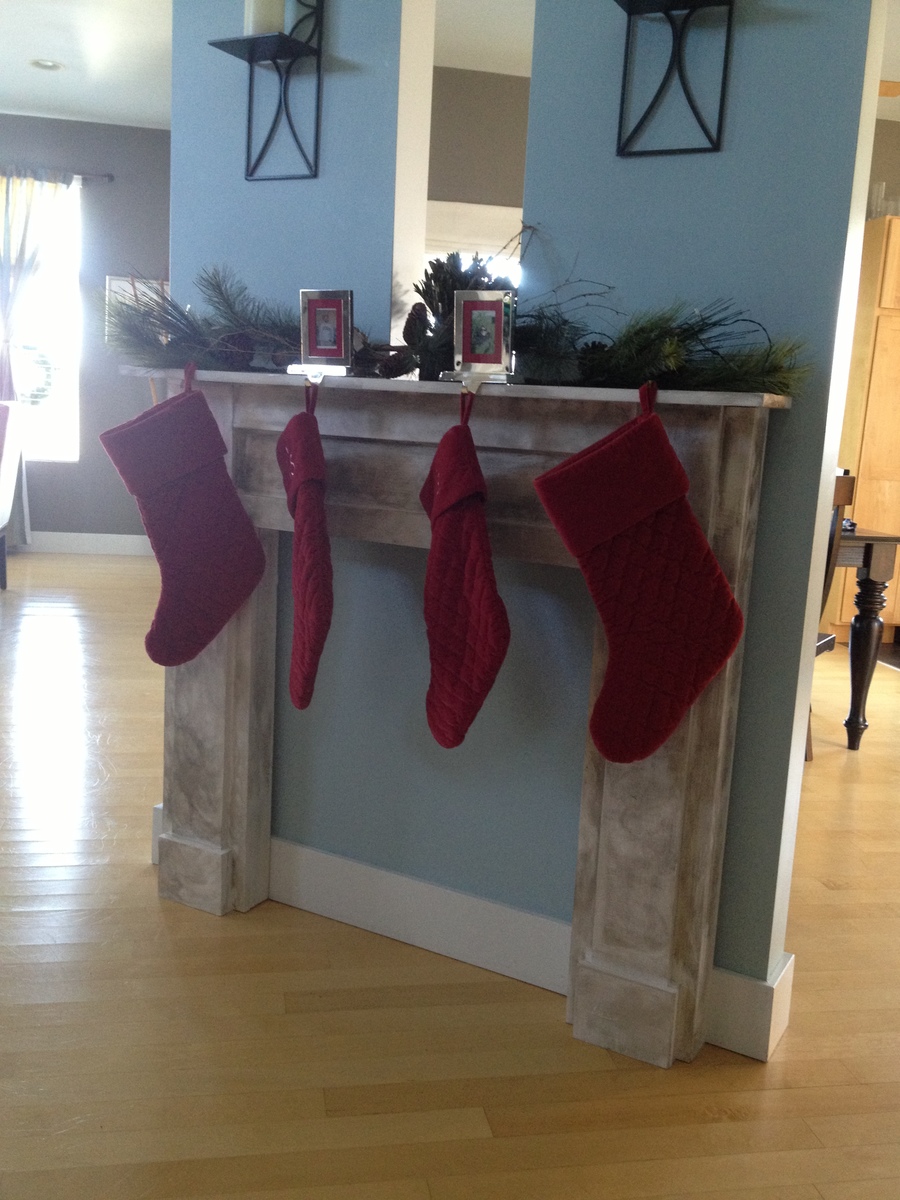
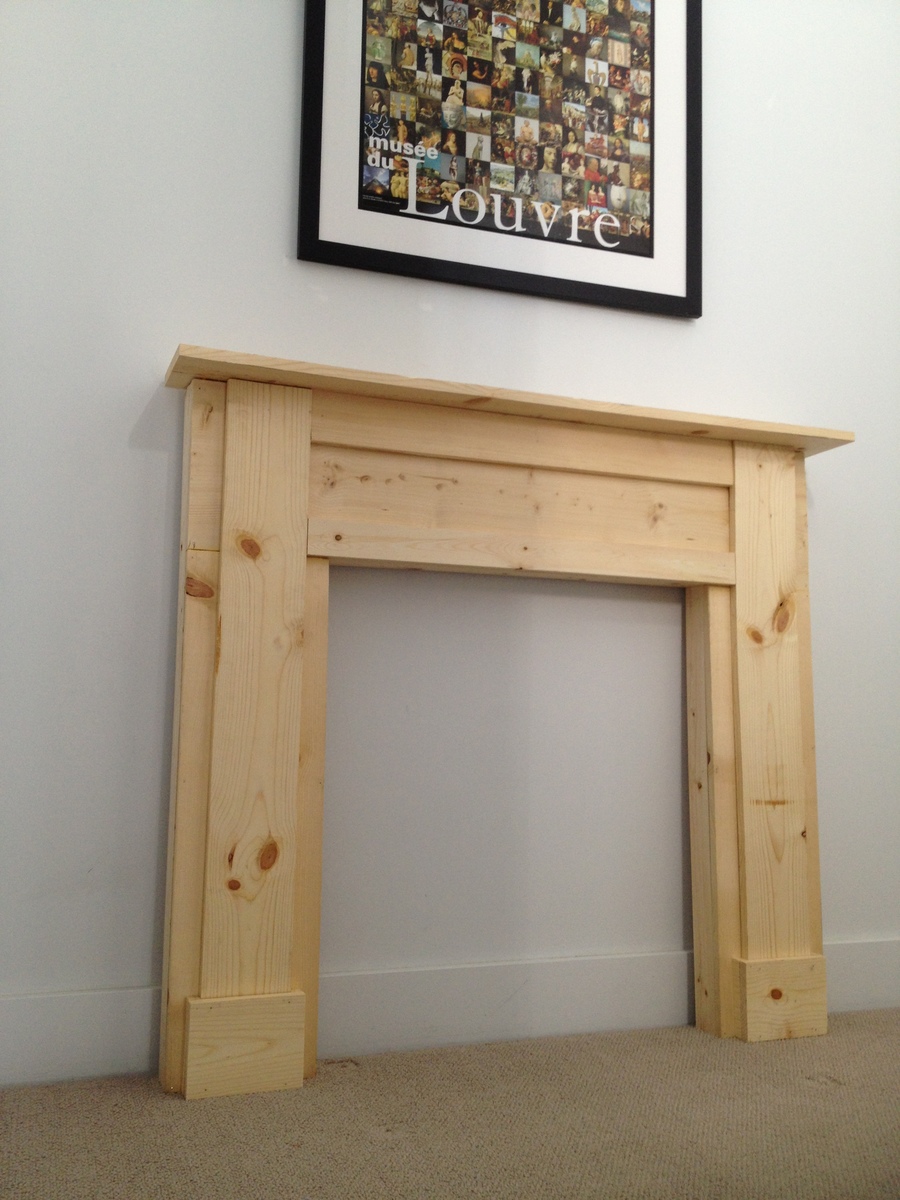
Mimi's Faux Mantle

Submitted by adriannew on Fri, 12/07/2012 - 22:06

Our home (like many) does not have a fireplace or mantle. So, I decided to build one. Thank goodness for Lowes. They pre-cut all wood for me. I was afraid to use a drill (I'm a rookie), so I nailed all pieces of wood with 1 1/2 inch nails. Wood glue was fabulous prior to using the hammer. I omitted decorative molding too. I think I used too much antique paint, but I can always re-paint it next year. I don't think I'll have the mantle up all year long, but it's great for a Christmas decoration. I hope this gives hope to anyone out there considering this project. If I can do it, YOU can totally do it! Thank you SO much for helping a novice builder like me add something to our home.

Estimated Cost
$80.00
Estimated Time Investment
Weekend Project (10-20 Hours)
Finish Used
antique paint and clear finishing spray
Recommended Skill Level
Starter Project

Comments

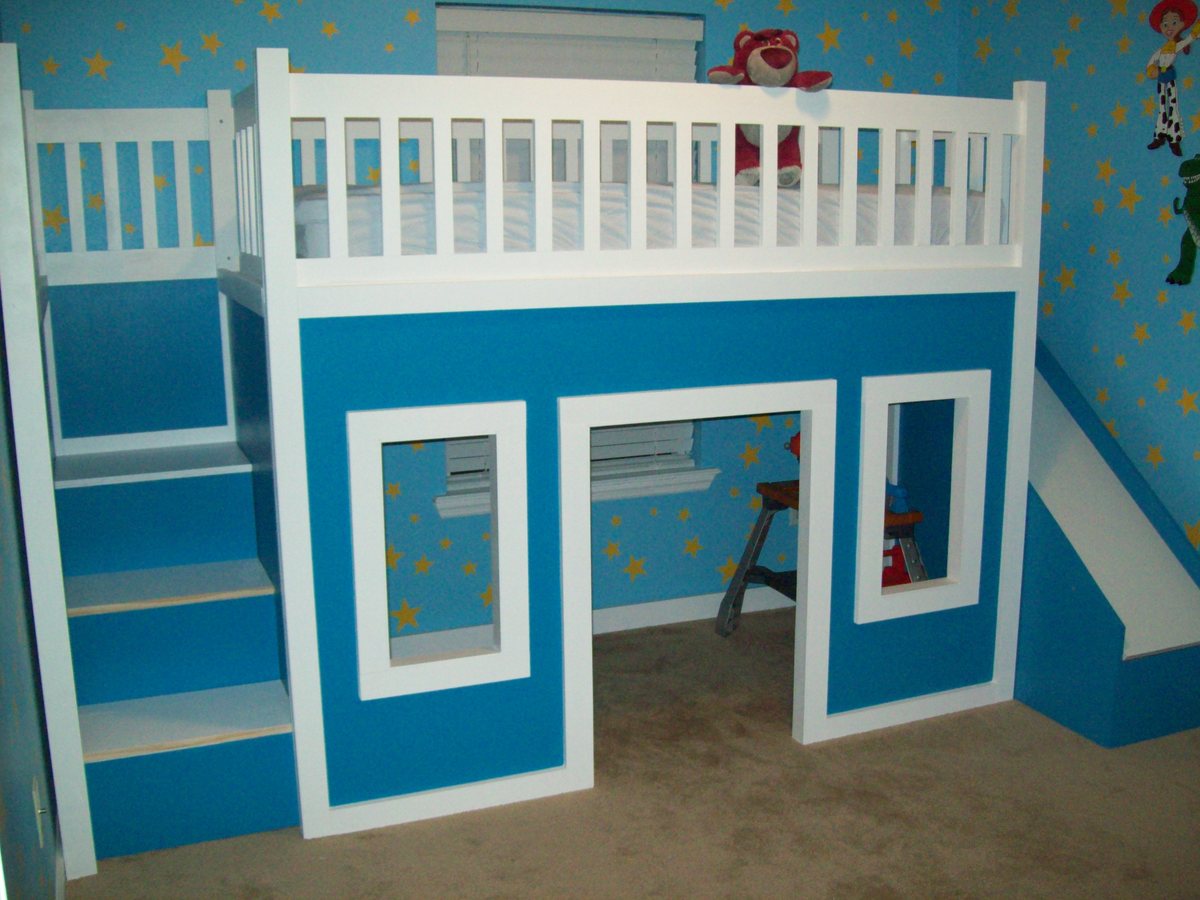
Playhouse Loft Bed With Stairs And Slide, Playhouse Loft Bed, Loft Bed

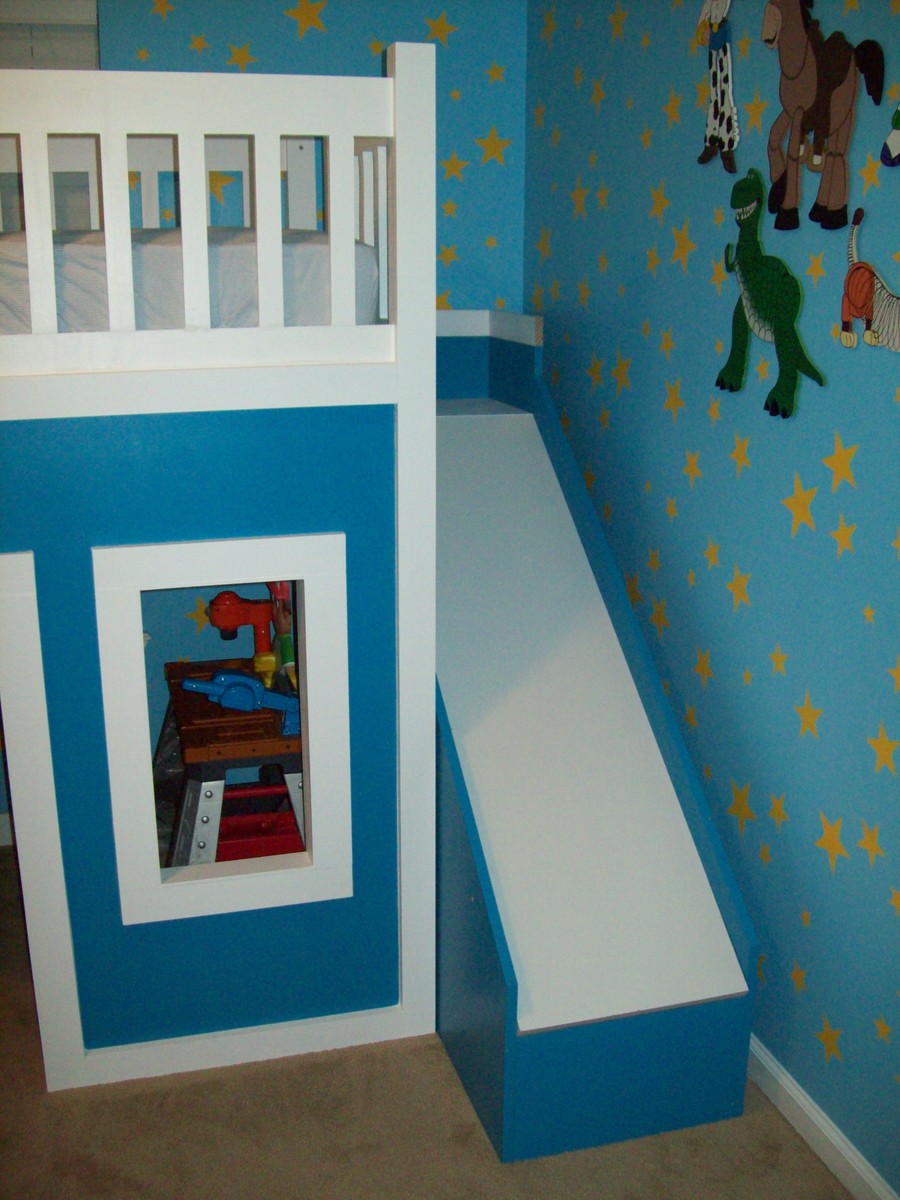
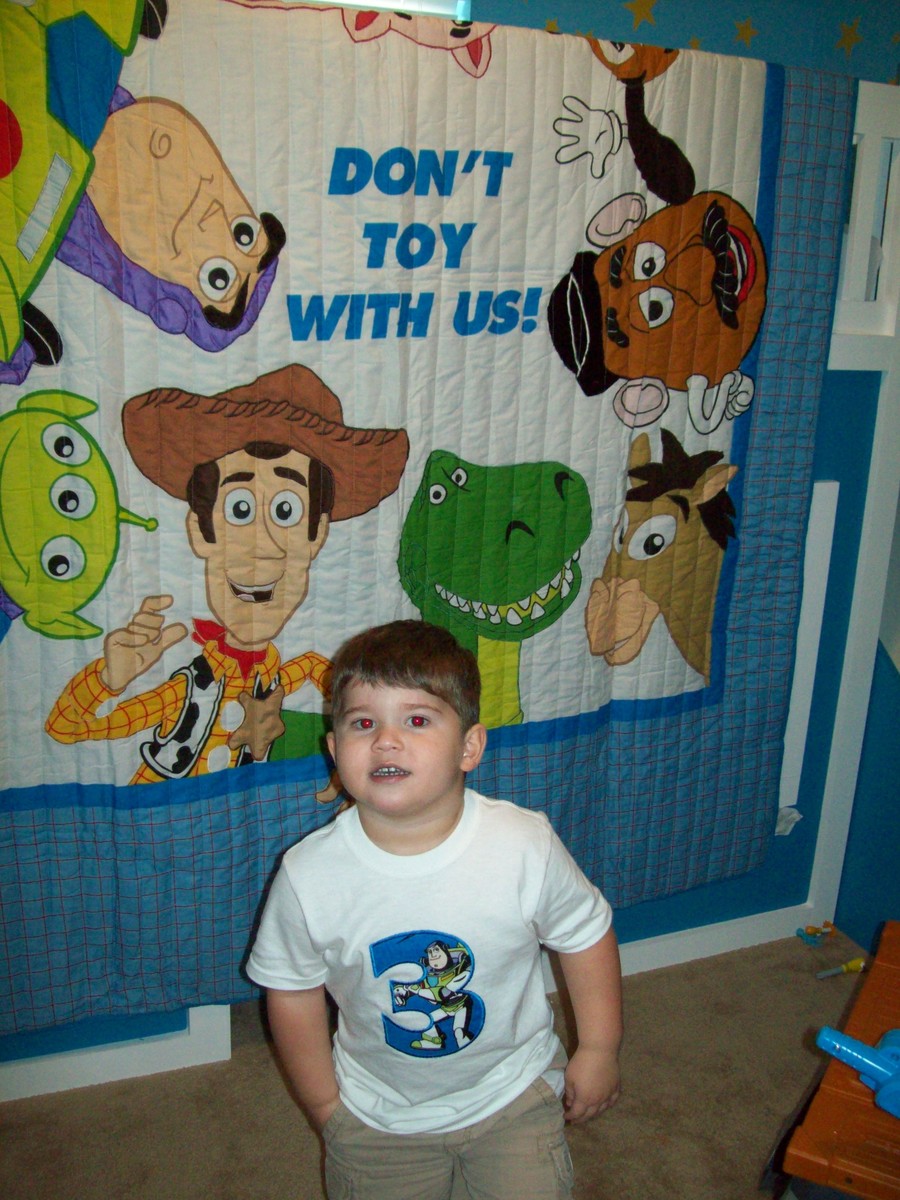
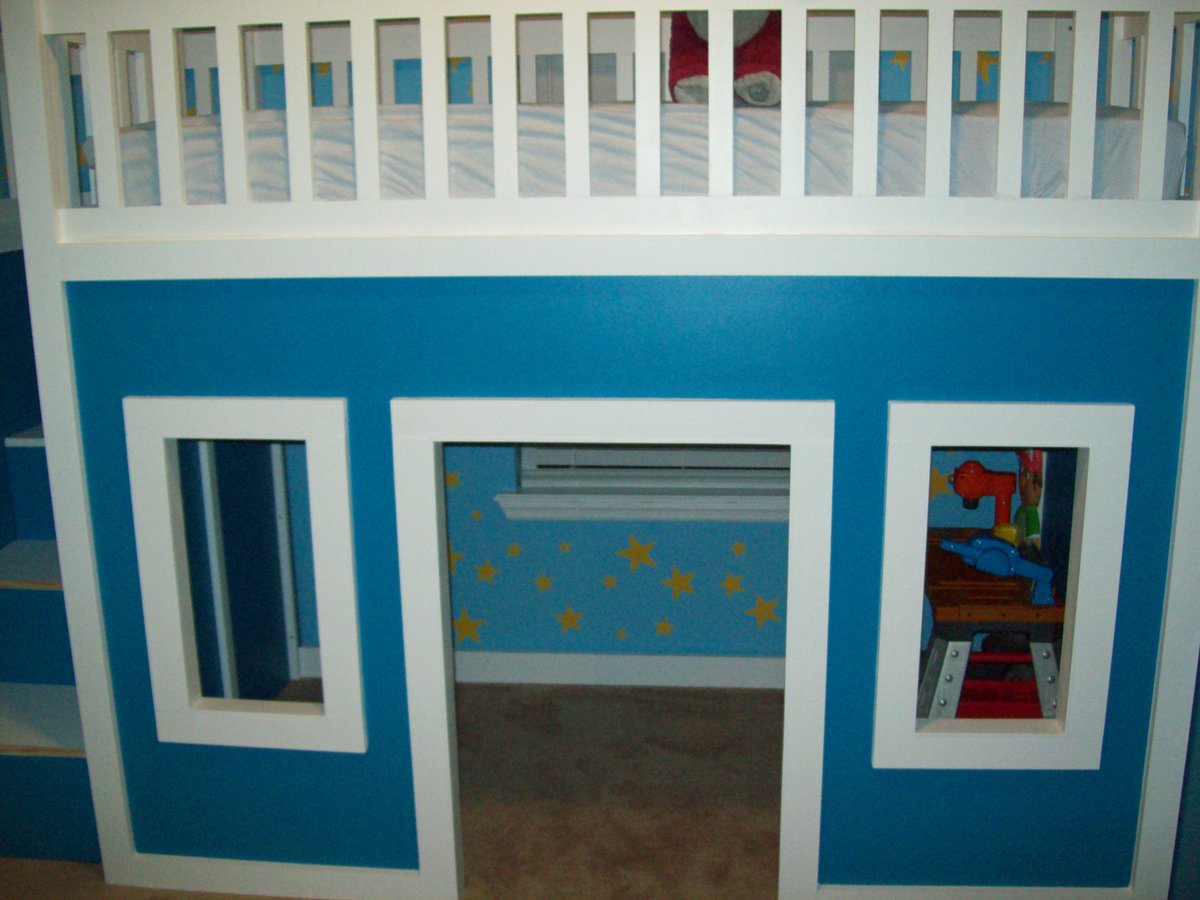
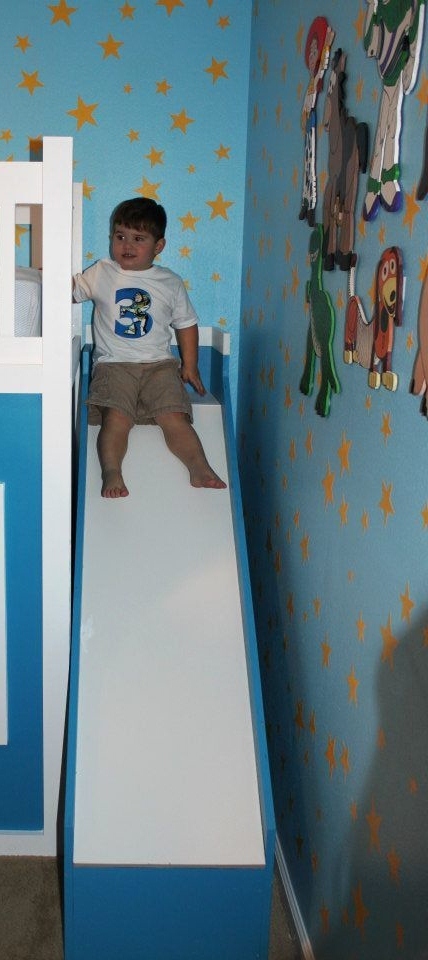
My son was about to turn 3 and I really wanted to redesign his bedroom as a birthday surprise. We went with a Toy Story themed room, he just loves Toy Story. I started off by painting the walls blue with yellow stars like Andy's room in the movie. I added some custom painted art work and then it was off to find a cool playhouse bed. My husband and I were shopping around and we could never really find what we were looking for in the store. So we decided to build one ourselves using plans from this website. I used the playhouse loft bed and the playhouse loft bed stair plans, for the bed and the stairs. I used the castle loft bed plan as inspiration for the slide. The project took us about 5 weeks from start to finish. We both have full time jobs and we did most of the work on the weekends. I looked at each plan very carefully and made notes. I had to modify the stair plans slightly to fit the space where we wanted to put the bed. The stairs look narrow, but they work just fine. My husband and I can both use them to get up in the bed. The stairs feature hinged stair tread with built in storage. We built them like that at first, but then later decided to make them stationary stair treads, with plywood. I didn't like the way the hinges looked and the top stair was so deep that I was worried my son would fall in there and get stuck. The storage idea was neat, but his safety was more important to me. The bed turned out really nice and VERY sturdy. Both my husband and I are able to get up there with my son (not at the same time). Another modification that I made was instead of slats to hold on the mattress, I used a piece of plywood. I wanted the roof in the playhouse to look finished, and I didn't want to see his bedding hanging down from the slats. I painted the top of the plywood white, where the mattress goes to blend in with the slats, and the other side was painted blue to match the walls inside the playhouse. I did modify the playhouse front facade to have 2 windows and one door. I like the symmetrical look. The total project cost about $400. I used birch plywood and select pine boards, and about 6 quarts of paint. I noticed AFTER we had finished the bed using the birch plywood, that Home Depot had cabinet grade plywood on a random end cap, that was just as nice for $12 less a sheet. If I could do it all over again, I would definitely use that!. I wanted the paint to have a nice smooth finish, without having to do a lot of sanding or patching. We had Home Depot cut the plywood to the dimensions we needed. I had my husband cut the rest of the wood dimensions listed in the plans, and then I painted all of them before we put the pieces together. I used a small roller and self priming paint. The paint finish looks great. After assembling the bed I can not imagine what I would have gone through trying to paint it after the fact. The slide was a bit tricky, I looked at the plan for the castle loft bed and attempted to use those dimensions, and for the most part they worked. But when we went to assemble the slide, we did end up recutting some of the wood to different dimensions. I used a piece of the melamine coated closet shelf material for the slide. It is already finished in white and its nice and slick, like a slide should be! I hate MDF, but for this it seemed the best fit. We cut the top edge at an angle to meet up with the slide platform. PLEASE BE CAREFUL with this material. After it was angle cut the edge was razor sharp and I sliced my fingers up. Once it was installed it butted up perfectly to the slide platform, and the edge was hidden and not a danger. But use caution during the install. Clamps are your friend! We used Kreg clamps for everything. They kept the wood in place while we were screwing the parts together. The coolest thing that my husband came up with was clamping two identical pieces for plywood together, and drawing the template for the slide support walls. Then he used his circular saw to cut them out. We ended up with two mirror image pieces. They looked awesome. I left them clamped together when I sanded the edges as well. We really didn't have any building experience other, than building tables and chairs for children, We got the deluxe Kreg jig kit and a miter saw on Craigslist for $50 each and they were both practically brand new. This was the first time we had ever used a Kreg jig and we are both addicted. That thing is the bomb. We locked my son out of his room for a week while we assembled everything. We had the big reveal at his birthday party and all of the guests were excited to see it after seeing my facebook teaser posts of our progress. There were 8 kids up there at one time and the bed did not budge. They all enjoyed the slide. I did the planning and paint and my husband did an awesome job making all of the cuts and sanding everything. We are both very proud of the final product. My son love his new big boy bed. DISCLAIMER: This bed is not recommended for a child under 6 years old. My son is mature for his age and we monitor him carefully.
Estimated Cost
$500
Estimated Time Investment
Week Long Project (20 Hours or More)
Finish Used
BEHR PAINT IN BRIGHT WHITE AND RIVIERA PARADISE SATIN FINISH
Recommended Skill Level
Beginner

Comments

krissy2696

Wed, 07/06/2016 - 10:05

Hi, my husband is building this bed for my 6 yr old daughter, but in purple blue and white. We adding the slide too. May I ask what size bedroom you guys have for your son, and did the bed fit well? Did you have to make any adjustments for it to fit in the bedroom?  Thanks in advance! Your bed looks great! I hope ours turns out as good.

Christine N in PA

Potting Bench - RYOBI Nation Projects

Submitted by olivier on Sun, 10/25/2020 - 04:47

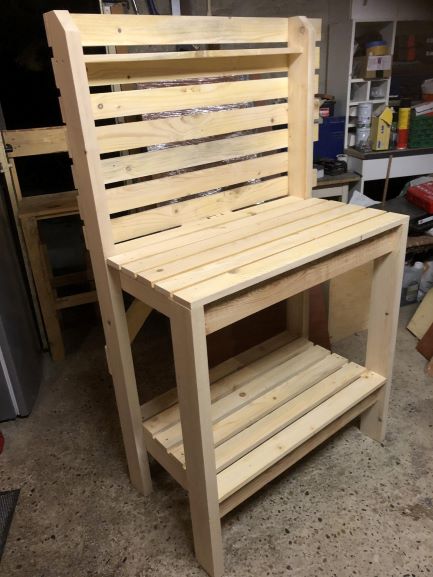
bonjour j'ai réaliser ce projet avec du bois de charpente (récupération) , projet très facile à réaliser avec peut de matériel, le plus compliquer à été de transposer les dimensions de pouces en cm. est-il possible de recevoir des plans en cm ????

Estimated Cost
0
Estimated Time Investment
Day Project (6-9 Hours)
Finish Used
aucune
Recommended Skill Level
Beginner

Small Hall Tree

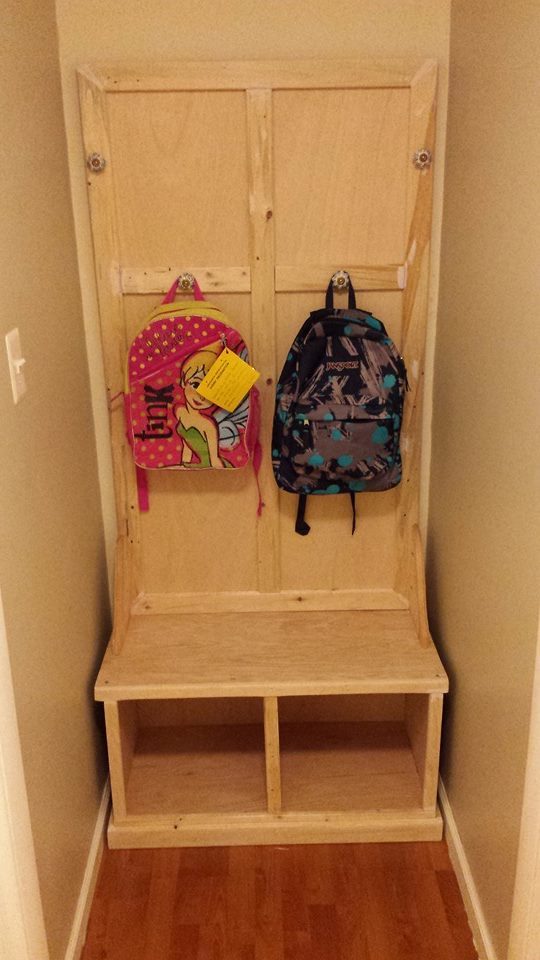
This project was something my wife wanted, but I didn't want to spend alot of money. I managed to build this project for less then $25.00 minus the paint. We are not sure what color it's going to be and I think I might add a shelf to it at a later date. We had to cut this down by 19 inches to fit it into our hall way. Hopefully I will get the rest of it finished in the next month or so depending on the weather.
Built from Plan(s)
Estimated Cost
$24.30
Estimated Time Investment
Afternoon Project (3-6 Hours)
Finish Used
No clue yet.
Recommended Skill Level
Beginner

Rustic X coffee table

Submitted by Anonymous (not verified) on Mon, 03/20/2017 - 19:01
Estimated Time Investment
Afternoon Project (3-6 Hours)
Finish Used
Tudor stain from minwax, then used chalk paint diluted with water. Dippped a rag into the water/paint mixture then squeezed it out, wipe on in small sections and then wipe off excess with another damn rag
Recommended Skill Level
Intermediate

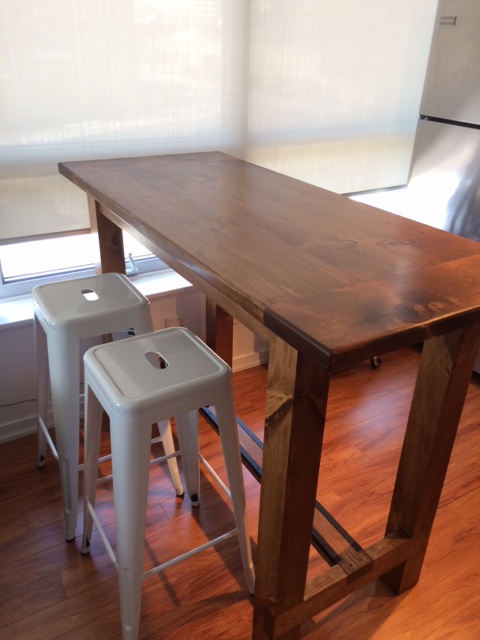
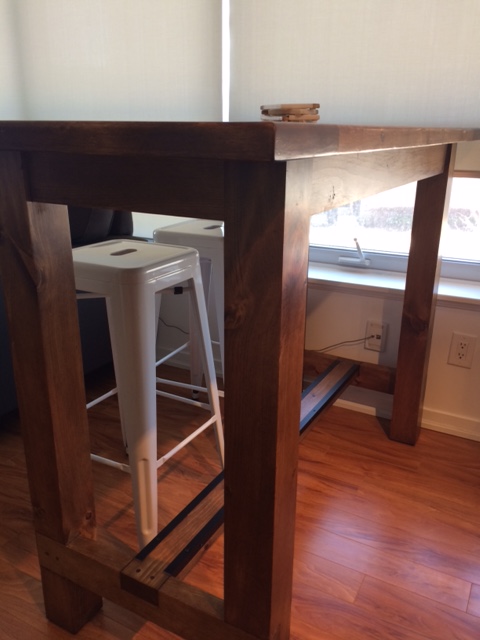
Bar Height Farmhouse Table

Submitted by Anonymous (not verified) on Fri, 03/24/2017 - 06:13

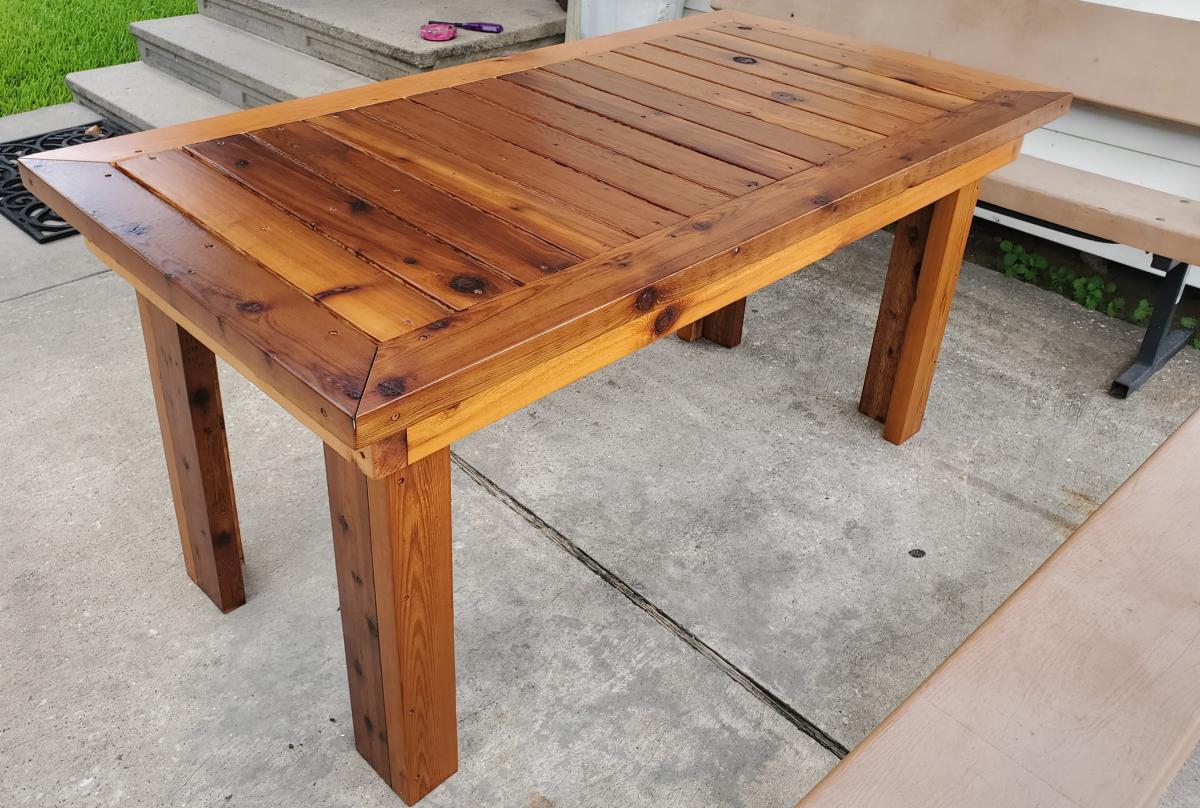
Variation on the Farmhouse Table plans. Built from knotty pine and finished with Minwax Early American stain.

Built from Plan(s)
Estimated Time Investment
Week Long Project (20 Hours or More)
Finish Used
Minwax Early American and Polyurethane Clear Satin
Recommended Skill Level
Intermediate

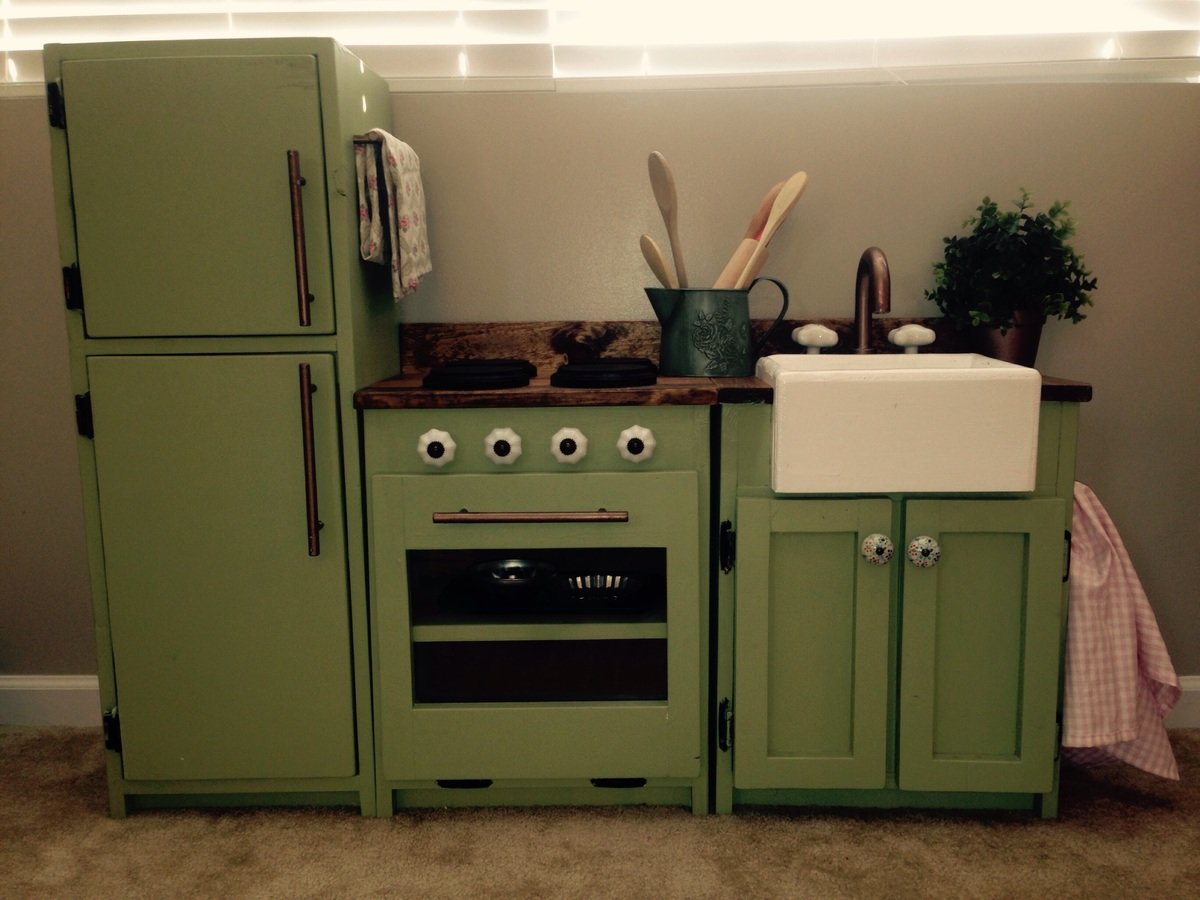
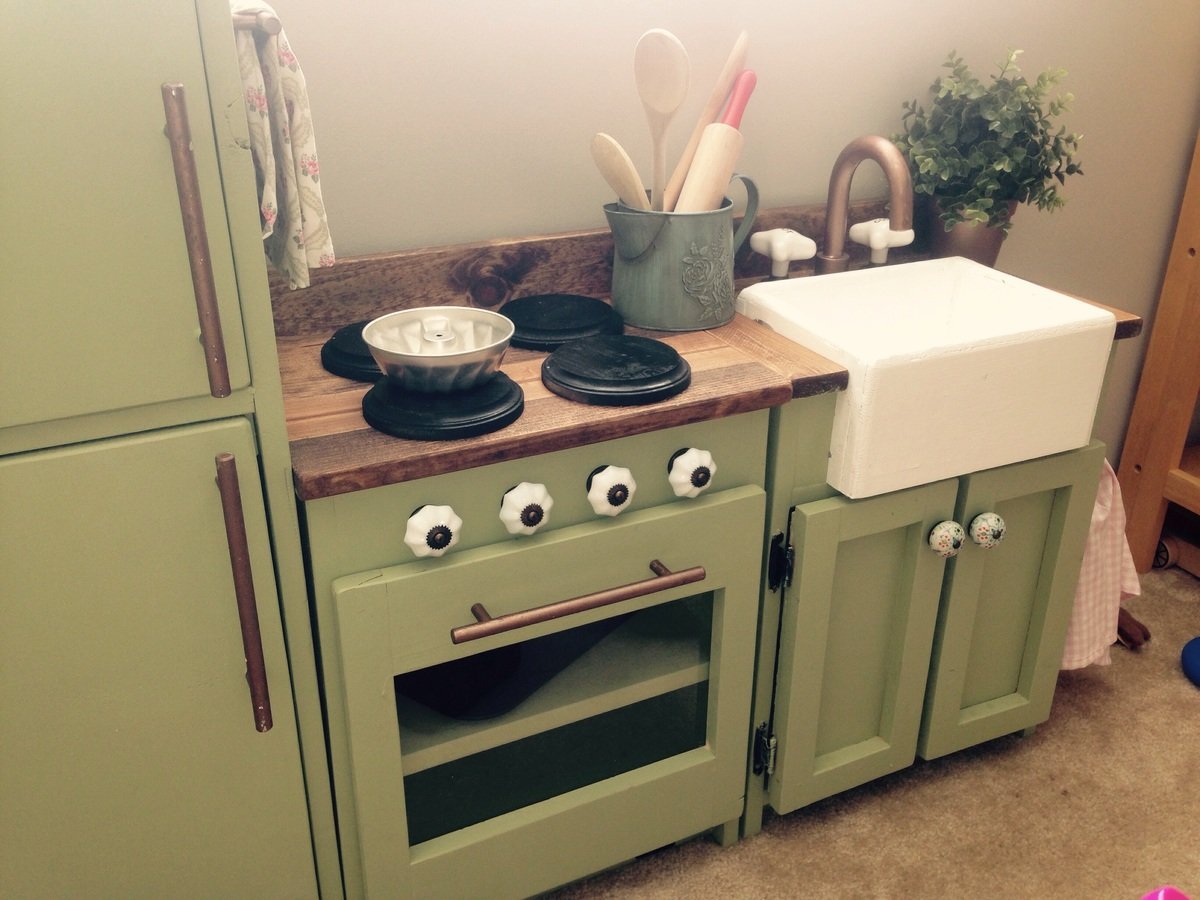
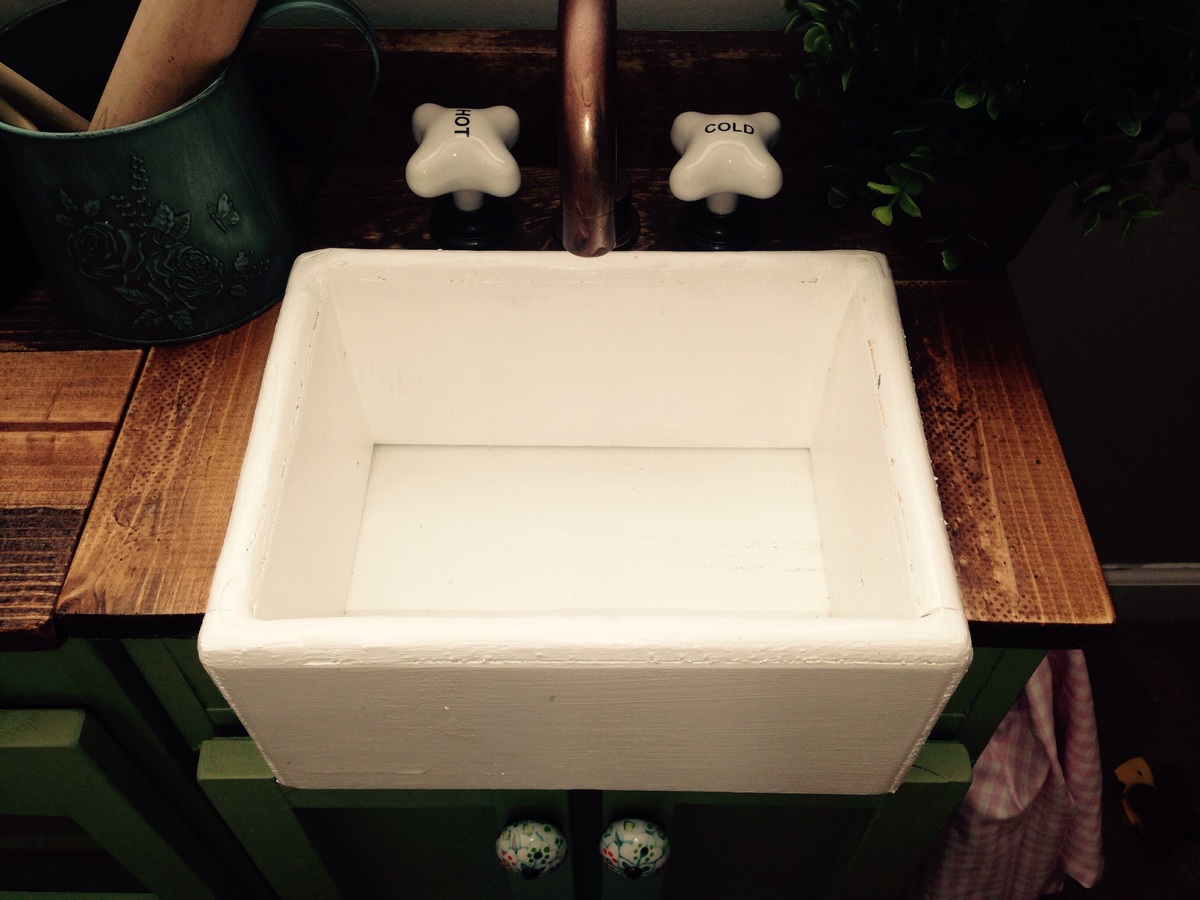
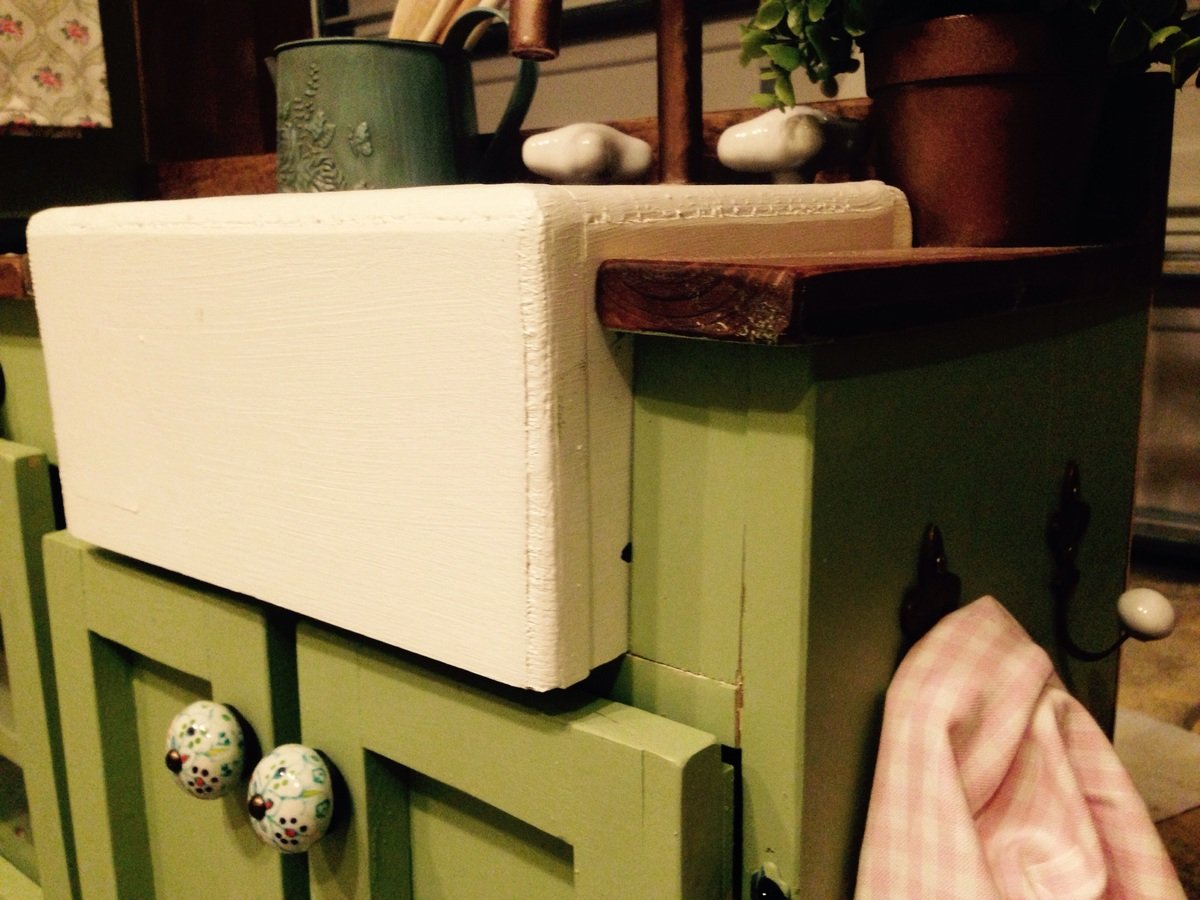
Ava's Play Kitchen

Submitted by tcalford on Wed, 12/31/2014 - 09:10

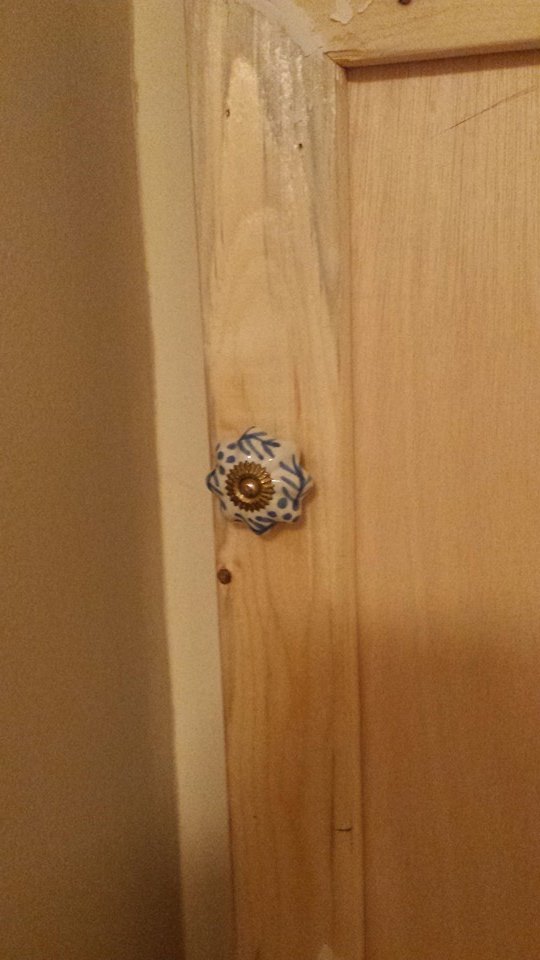
We really wanted to give our 2 year old a play kitchen for Christmas. We also didn't want to spend the money on the likes of the Pottery Barn set, and weweren't sold on the lesser-expensive options. Fortunately, a quick internet search led me to Ana White's website and plans for this play kitchen. As someone who has never built anything before, the plans seemed very doable. All of the brag posts were also inspirational and sold me on starting this project. I worked on this an hour or so after work for a couple of weeks, and then a few longer nights running up to Christmas Eve (always a bit of a procrastinator!). As neither my wife or I know how to sew, we decided to turn the space underneath the sink into a cabinet. The paint color was left over from painting our kitchen and family room, and we decided to stain the stove and counter tops. Overall, we are very pleased and proud with how this turned out, and our 2 year old loves playing with the set!

Estimated Time Investment
Weekend Project (10-20 Hours)
Recommended Skill Level
Beginner

Comments

JoanneS

Wed, 12/31/2014 - 13:15

This looks awesome! Love all the details and the green color with the stained counter. Great job!

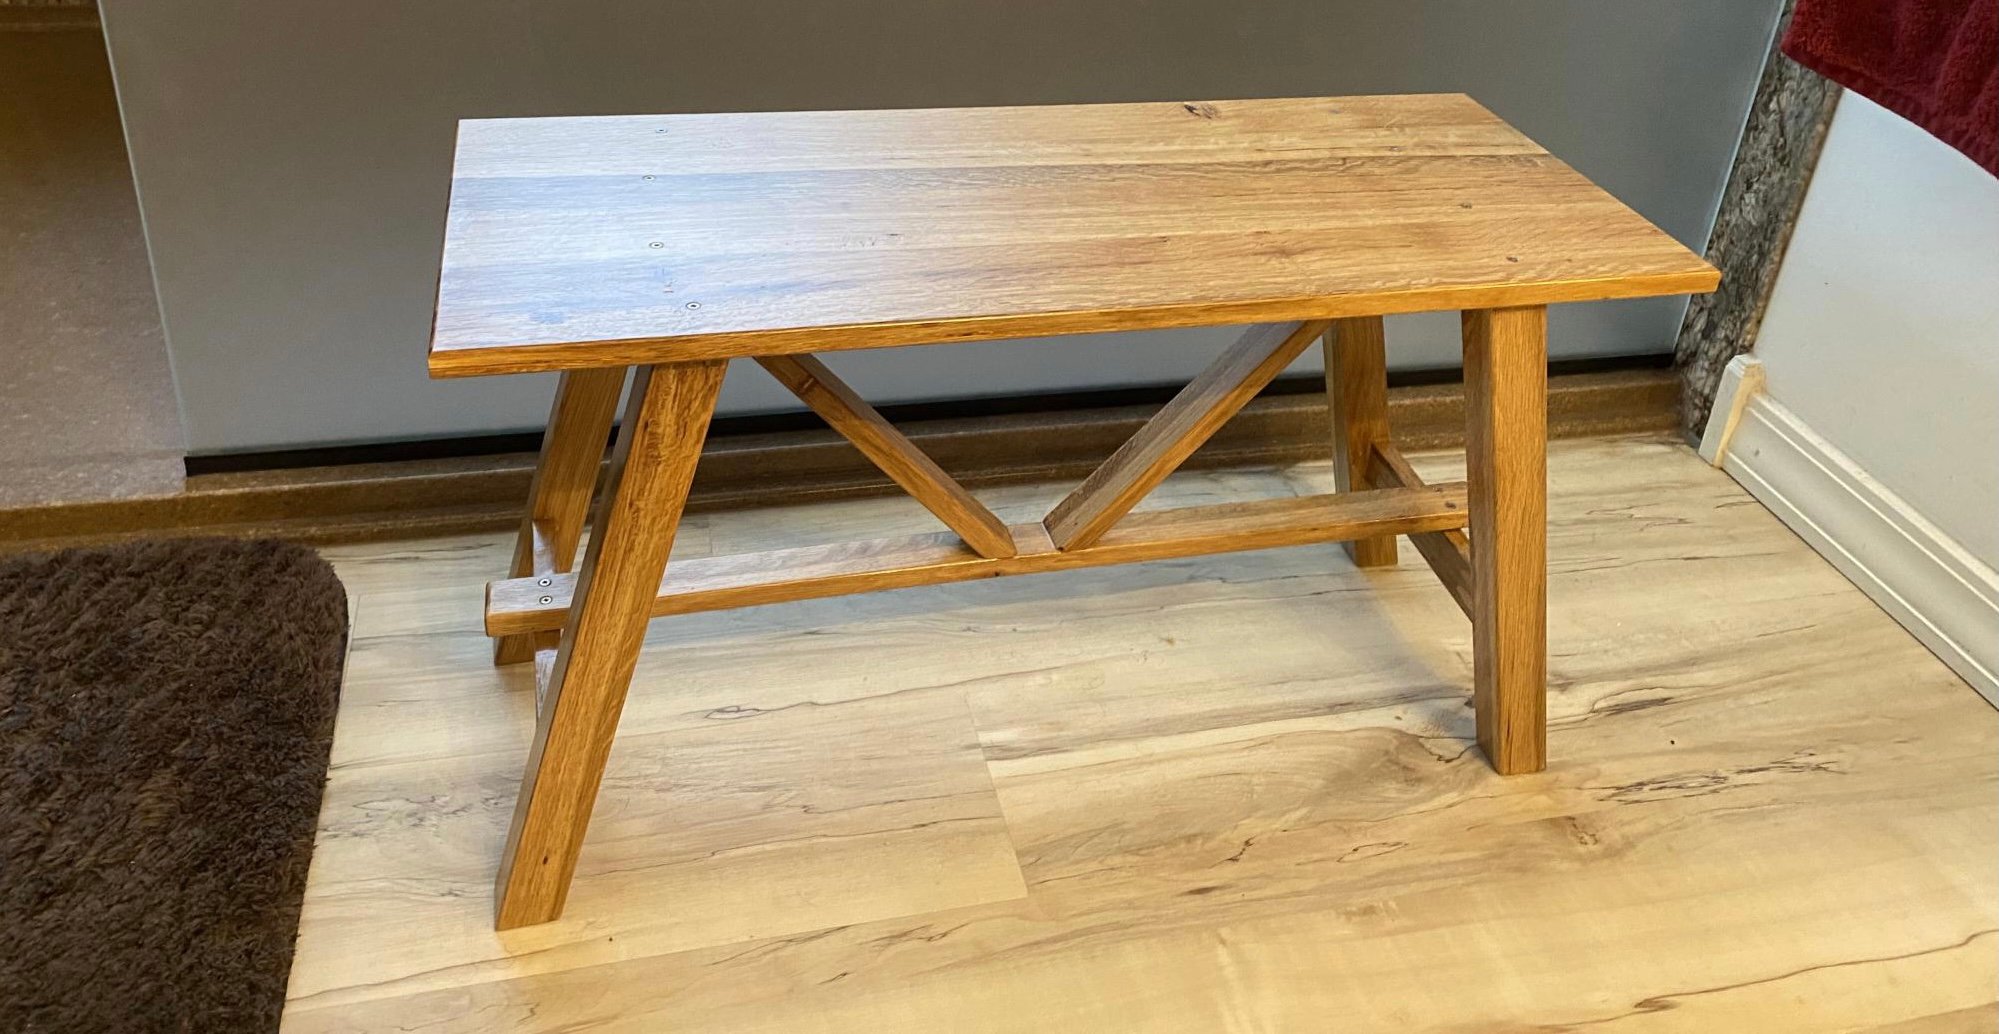
Rustic Bench

Submitted by Anonymous (not verified) on Tue, 02/09/2021 - 14:53

This rustic bench is perfect for our remodeled bathroom. It is made from post oak lumber harvested from my property and milled myself using a friend’s sawmill. No stain, just polyurethane.

Built from Plan(s)
Estimated Cost
$10
Estimated Time Investment
Day Project (6-9 Hours)
Finish Used
Polyurethane
Recommended Skill Level
Intermediate

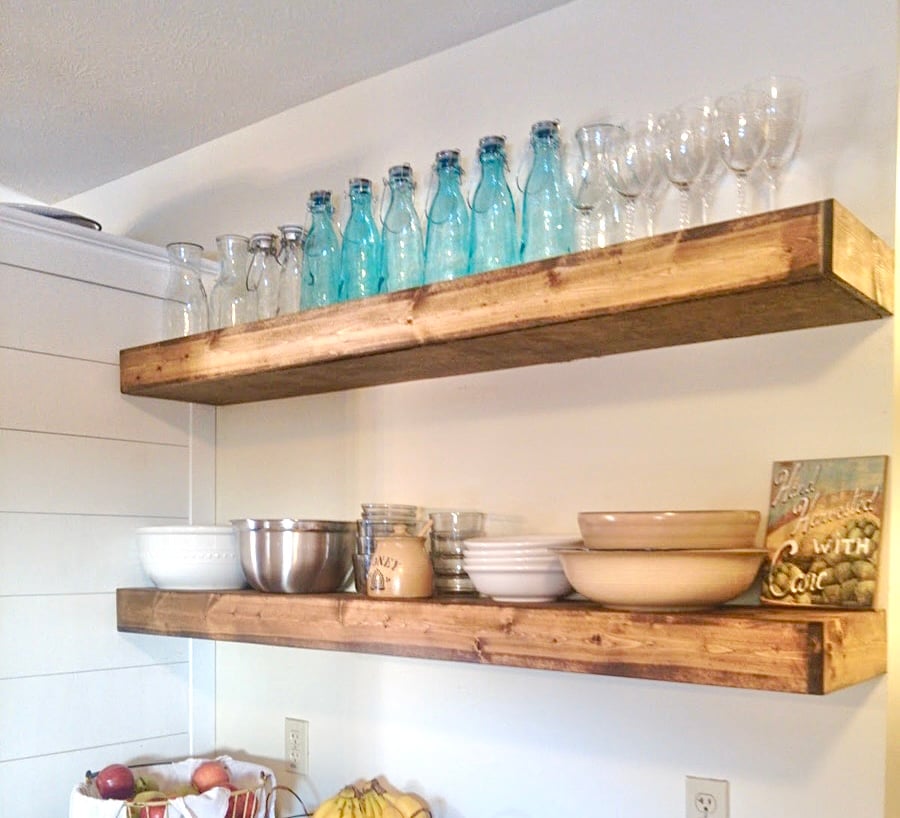
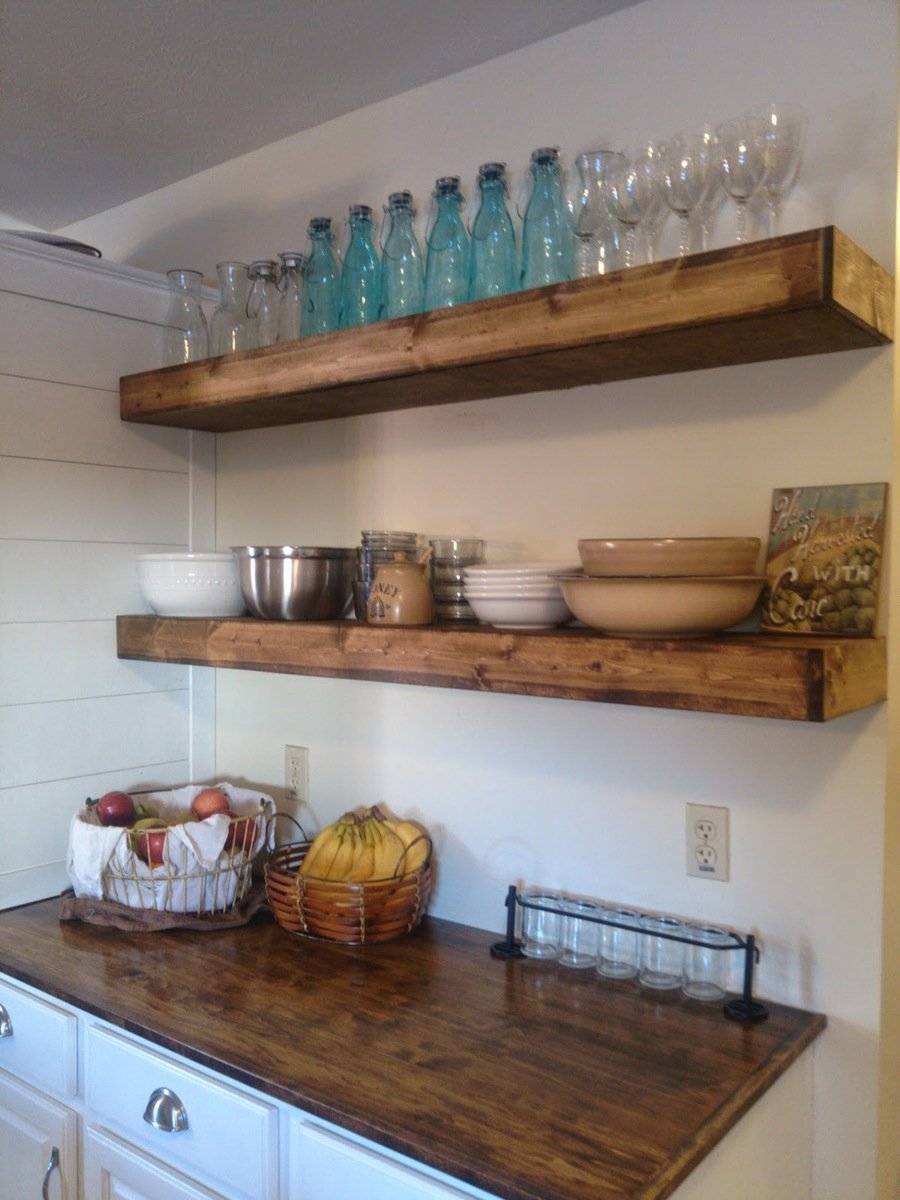
Floating Shelves

I built these shelves in an afternoon and they were really simple.  I'm fairly new to building and using powertools so these are quite an accomplishement!

Built from Plan(s)
Estimated Cost
$20 each shelf
Estimated Time Investment
Afternoon Project (3-6 Hours)
Finish Used
Provincial Stain and distressing.
Recommended Skill Level
Beginner

Comments