Community Brag Posts

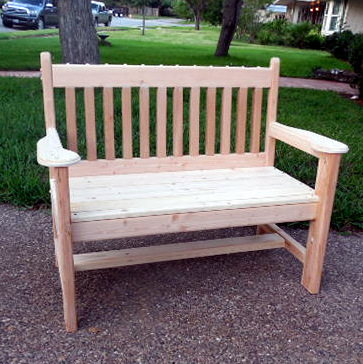
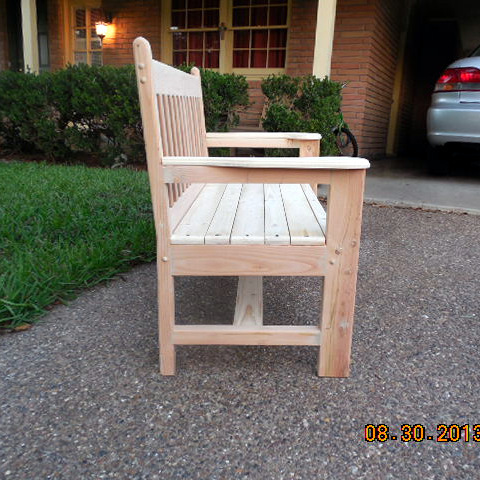
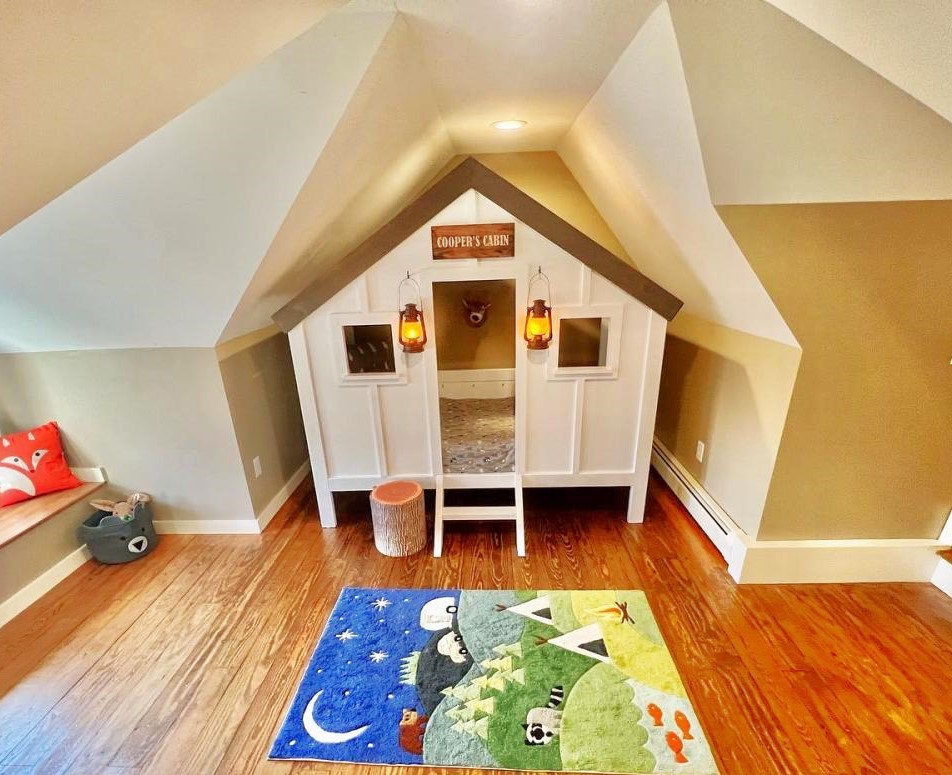
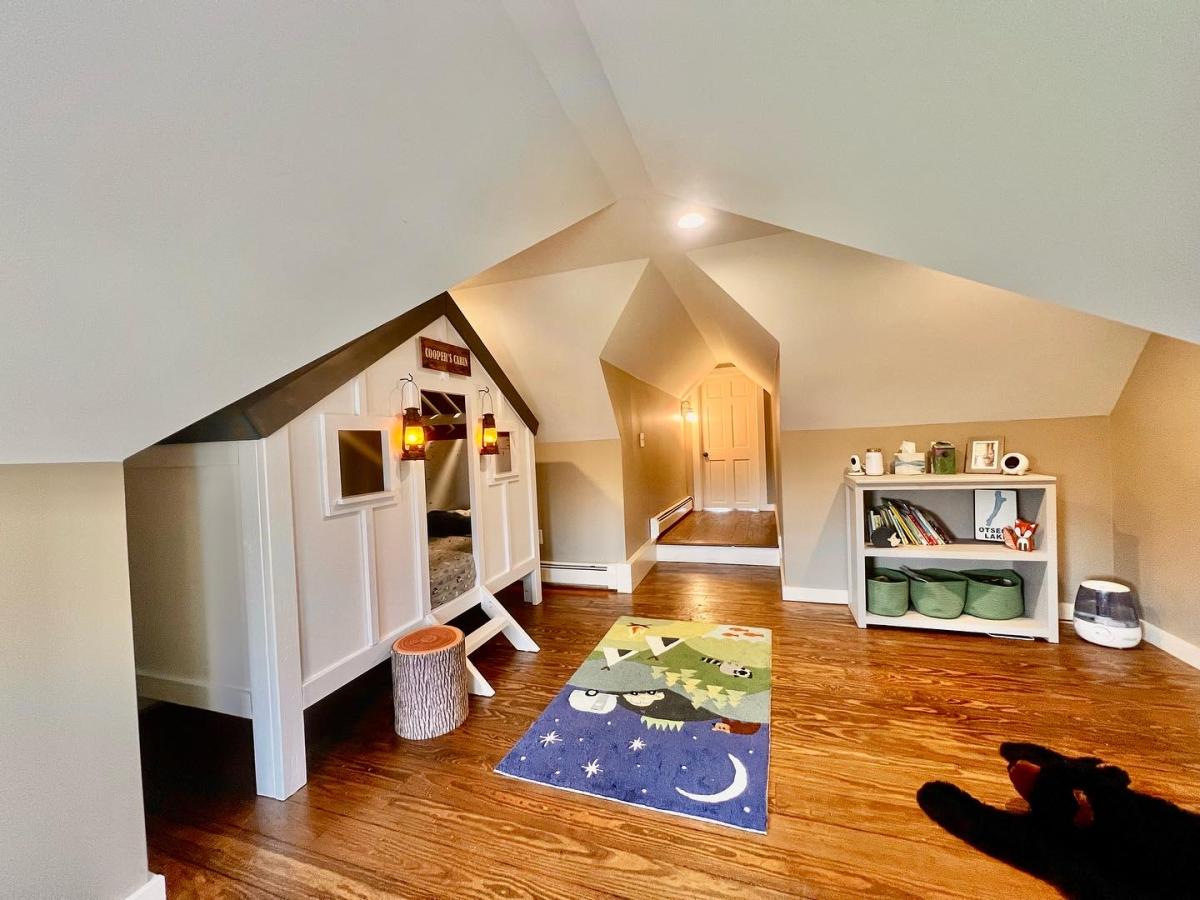
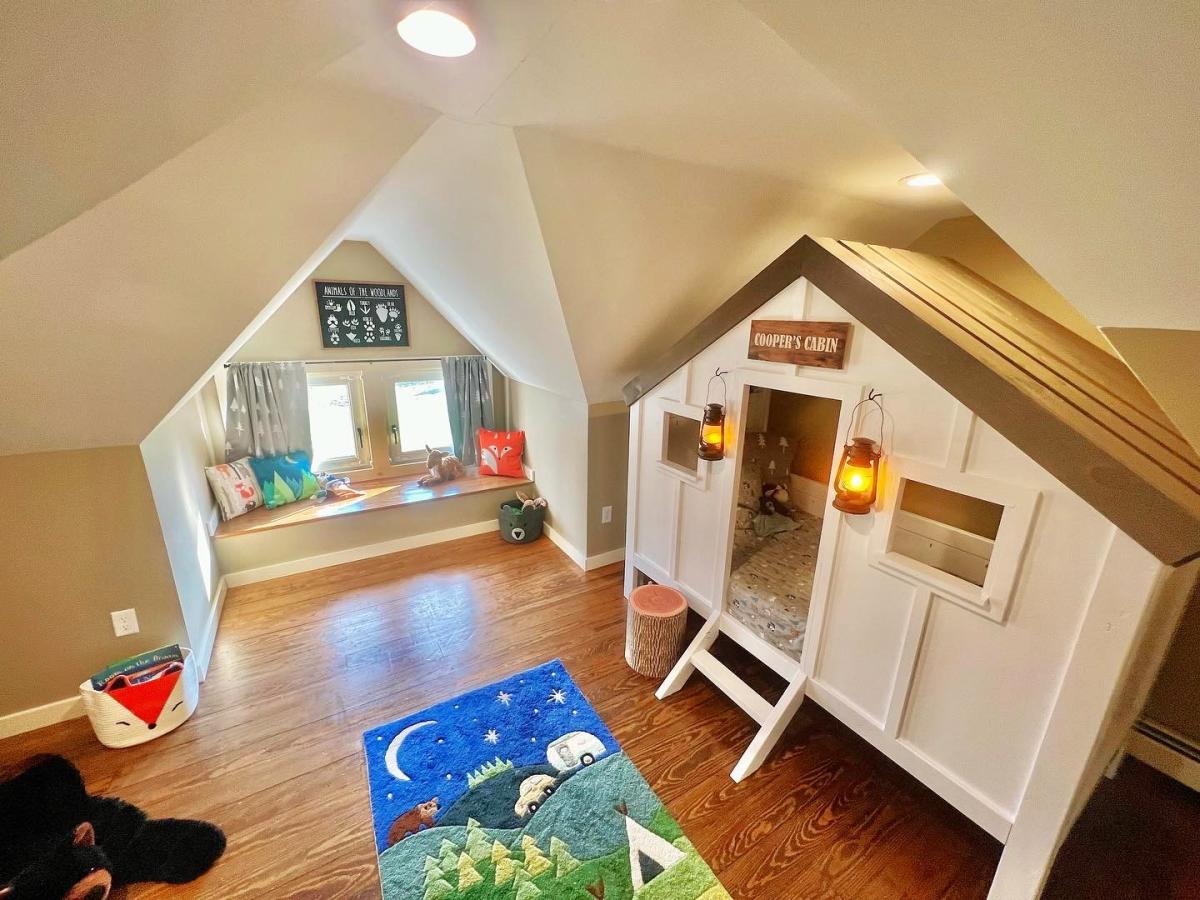
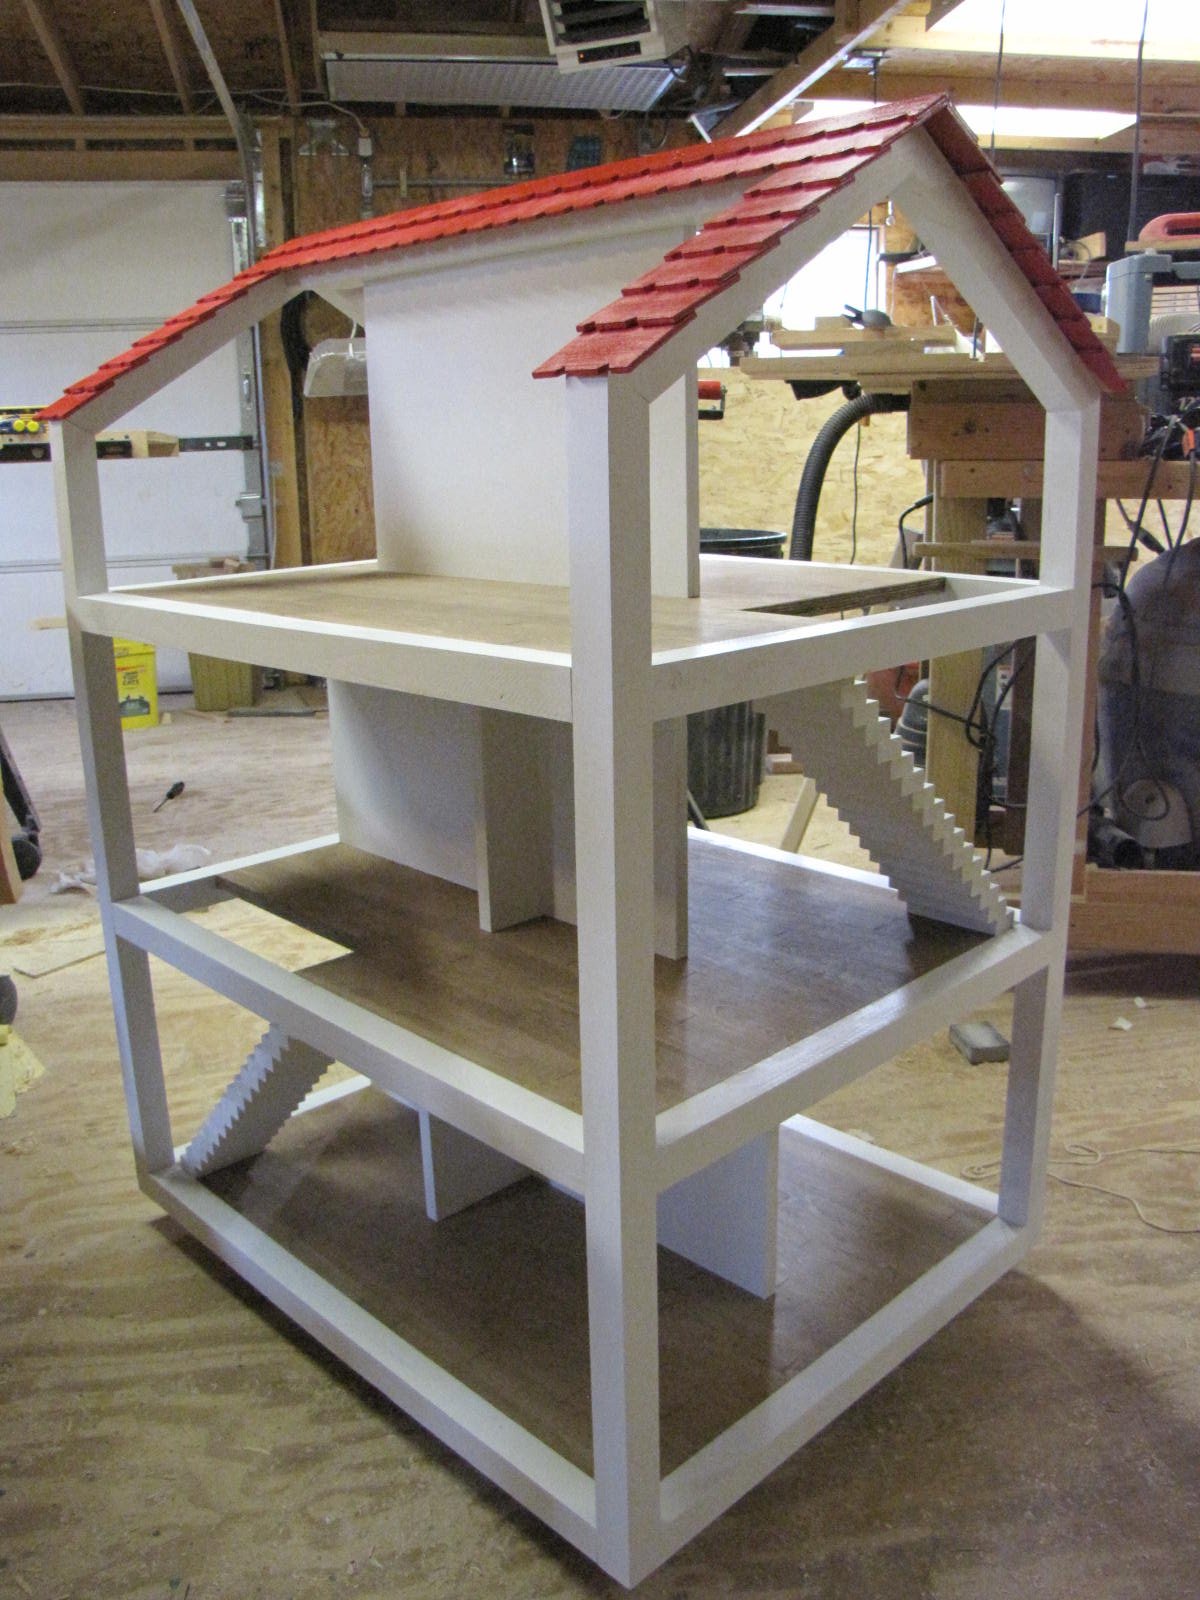
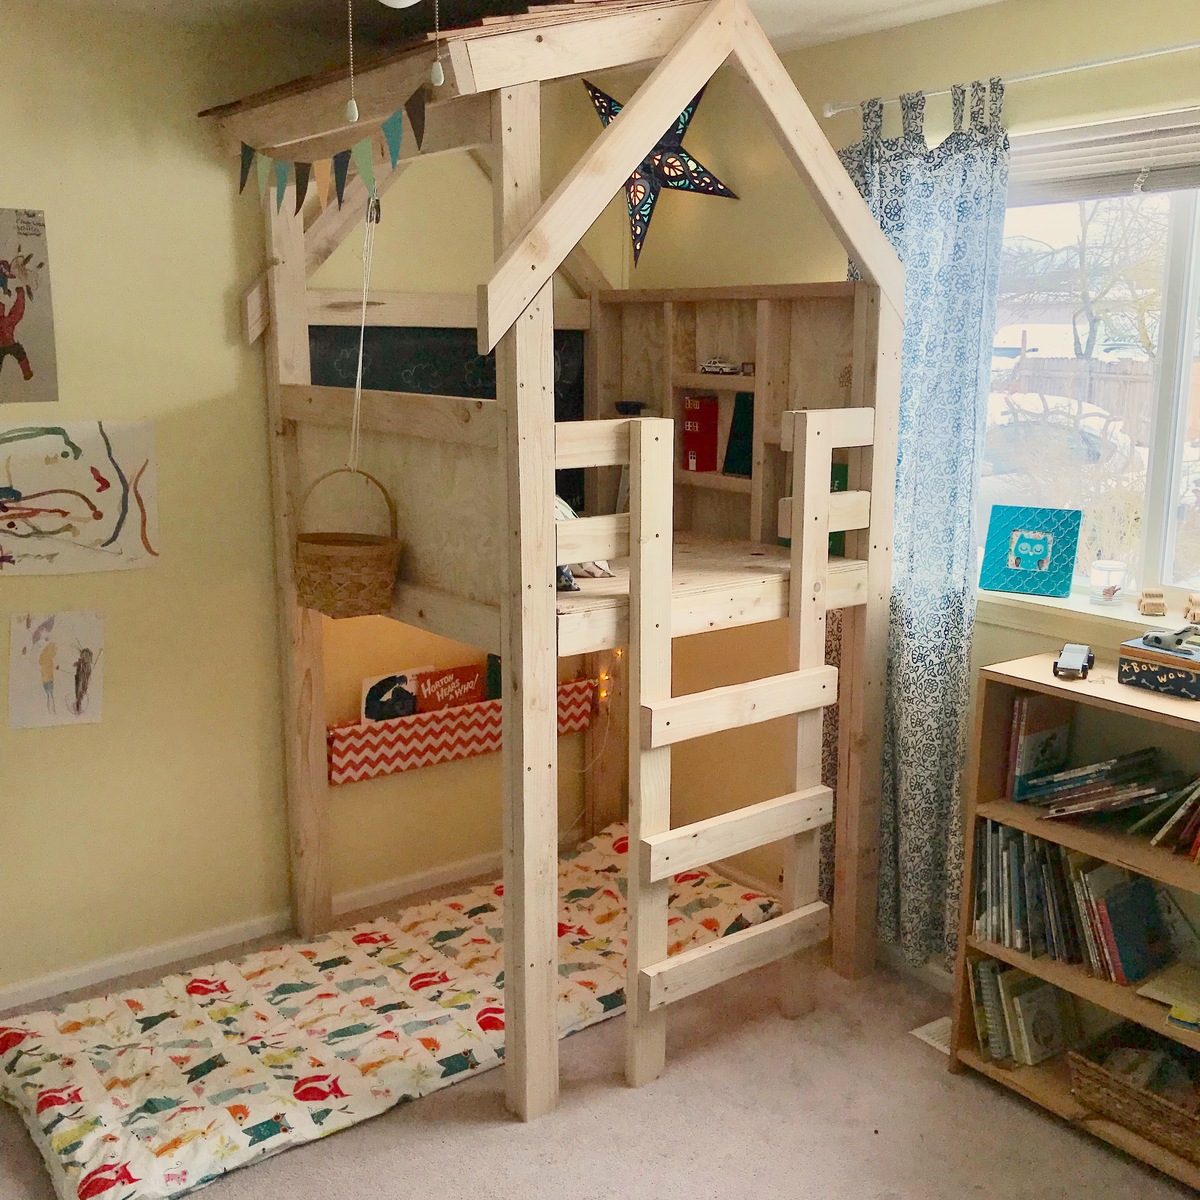
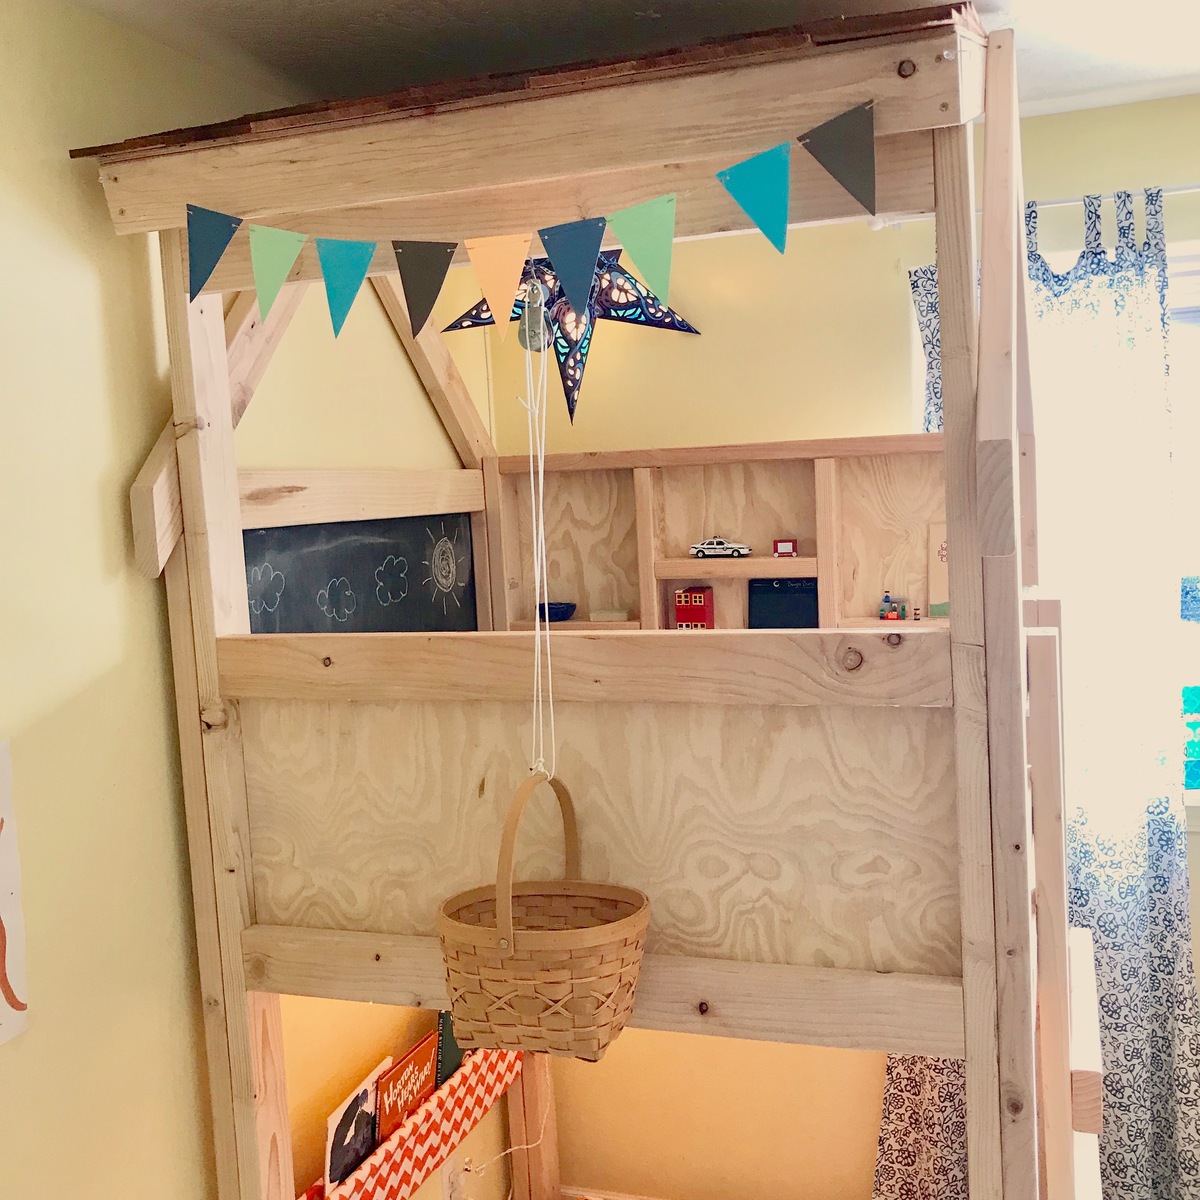
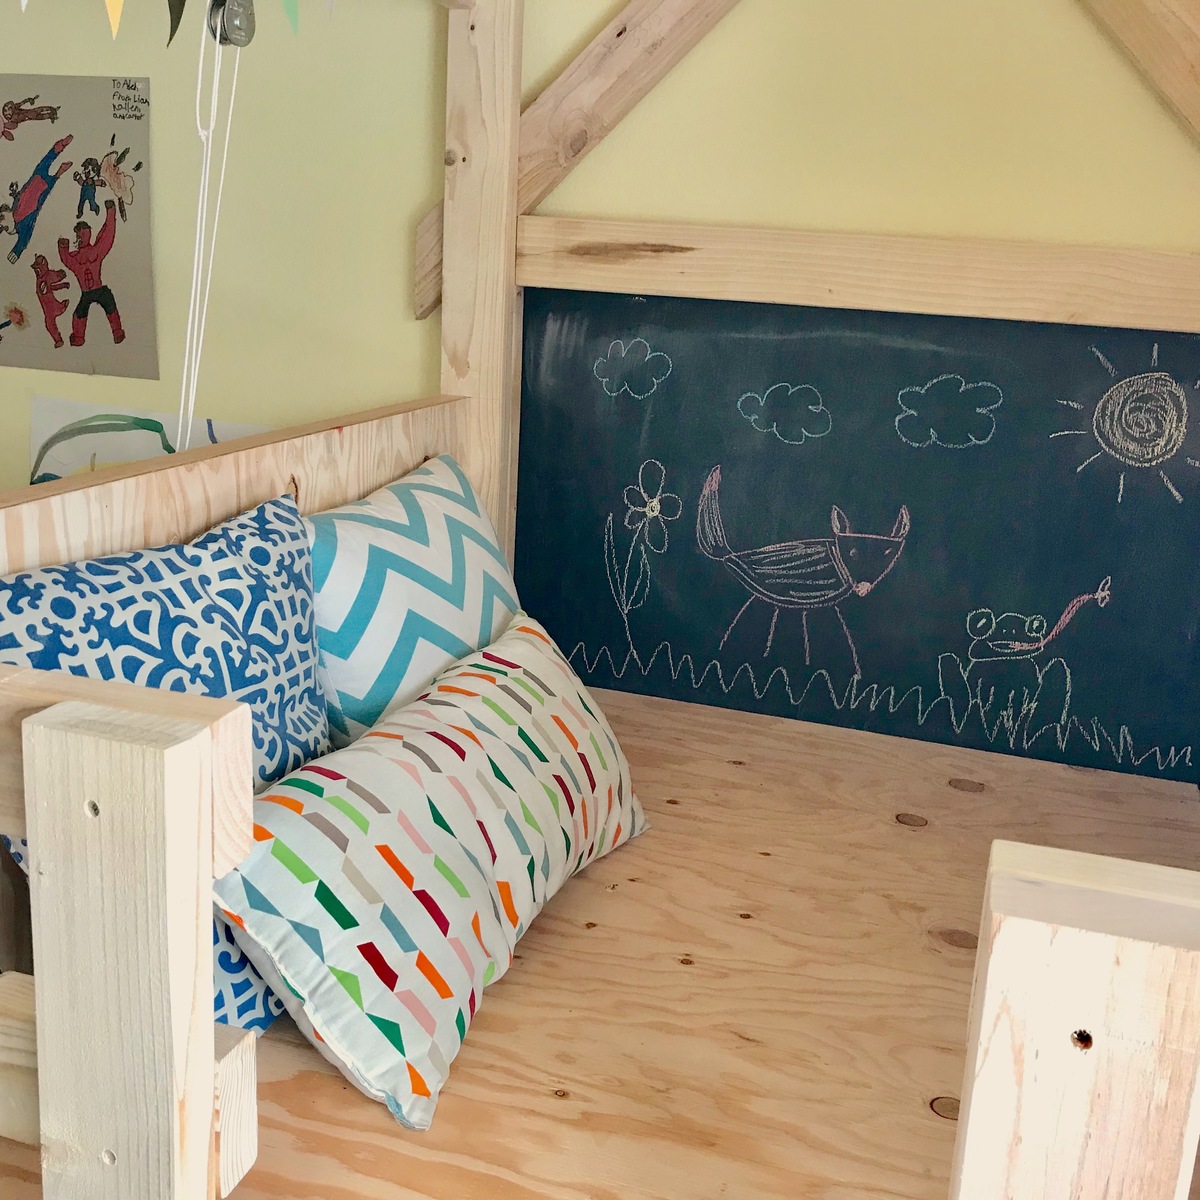
Altered Camp Loft Bed w/ stairs

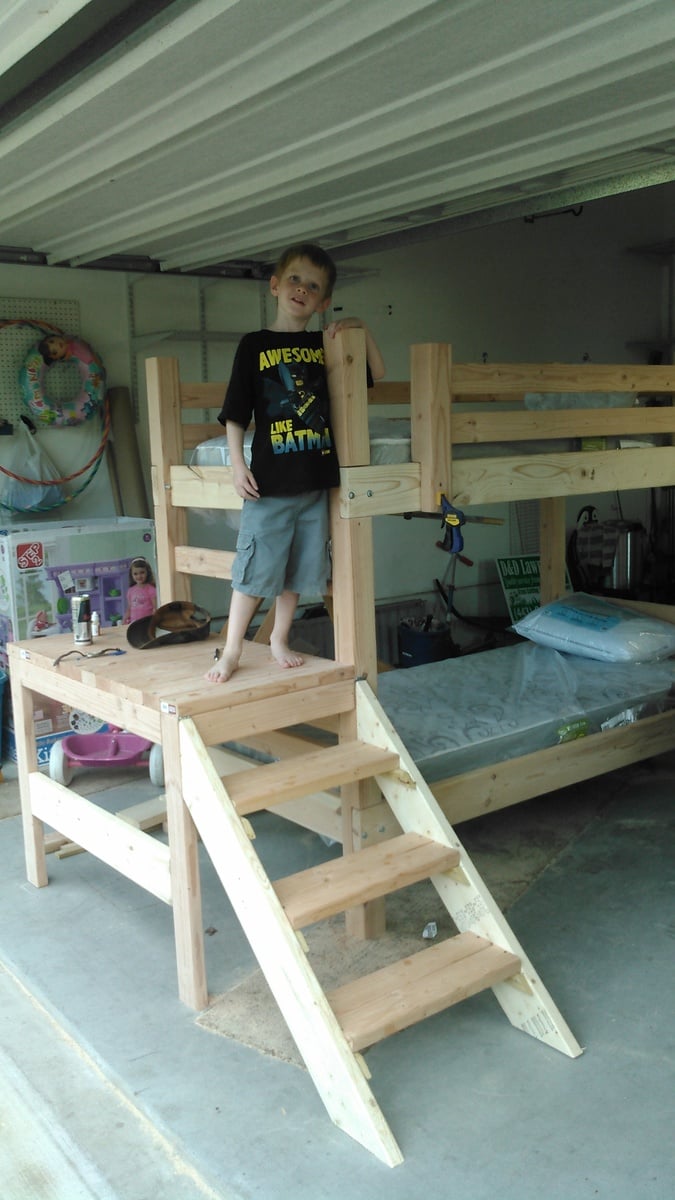
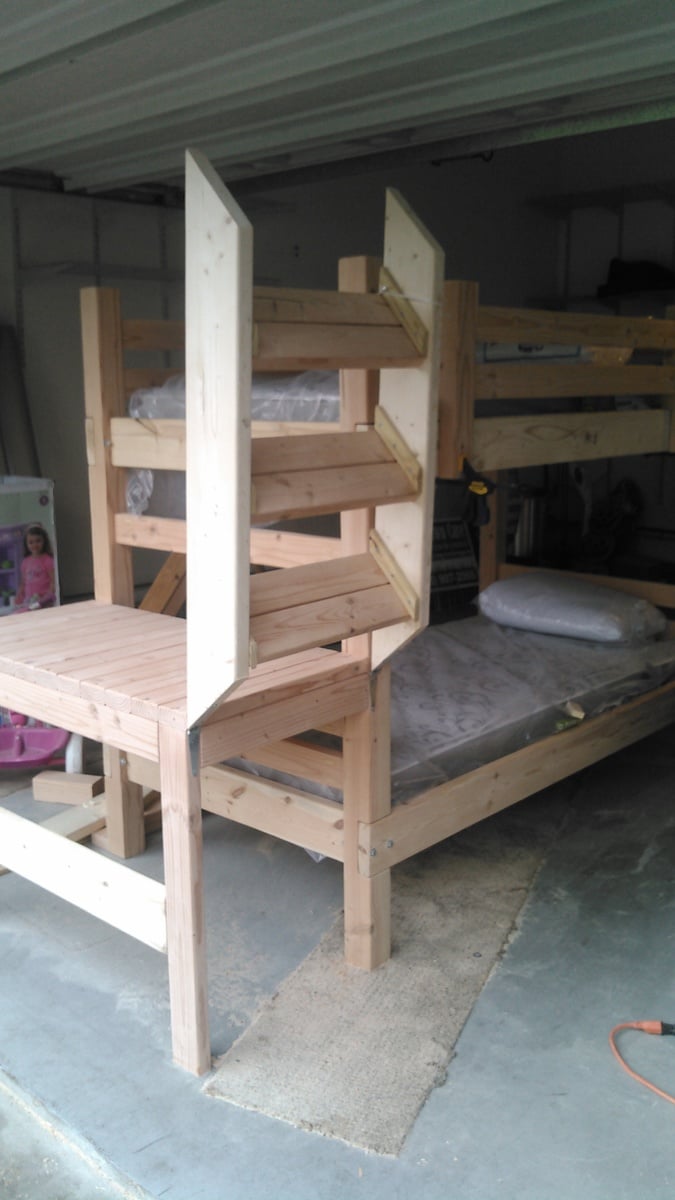
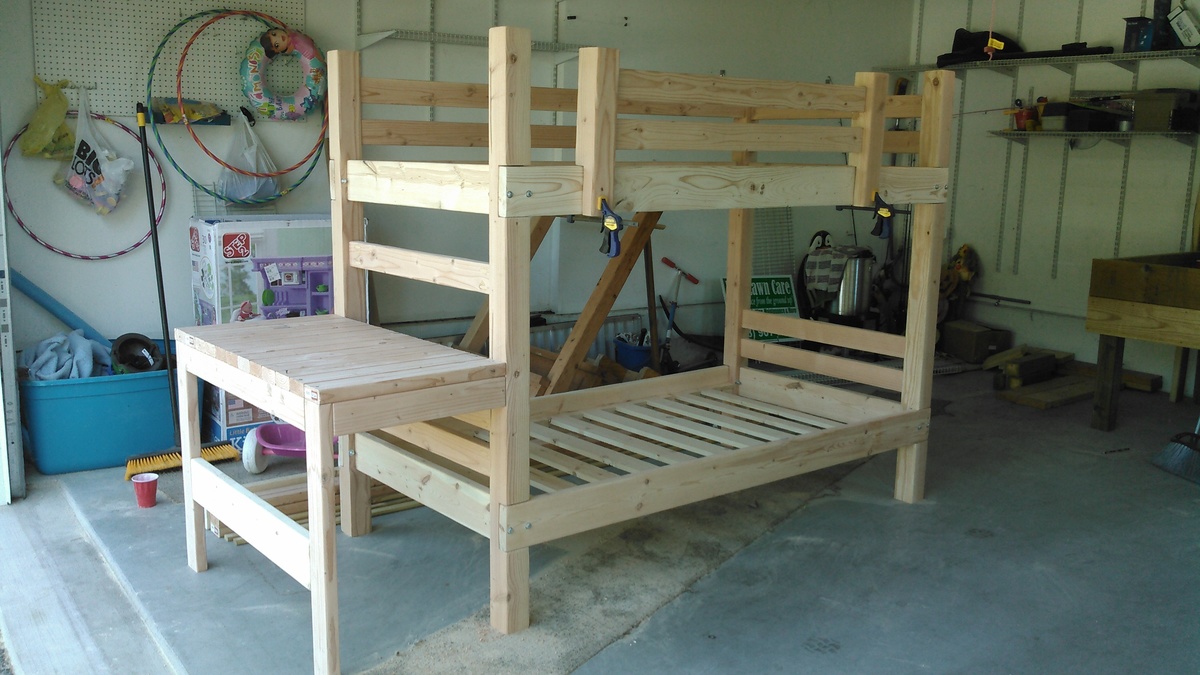
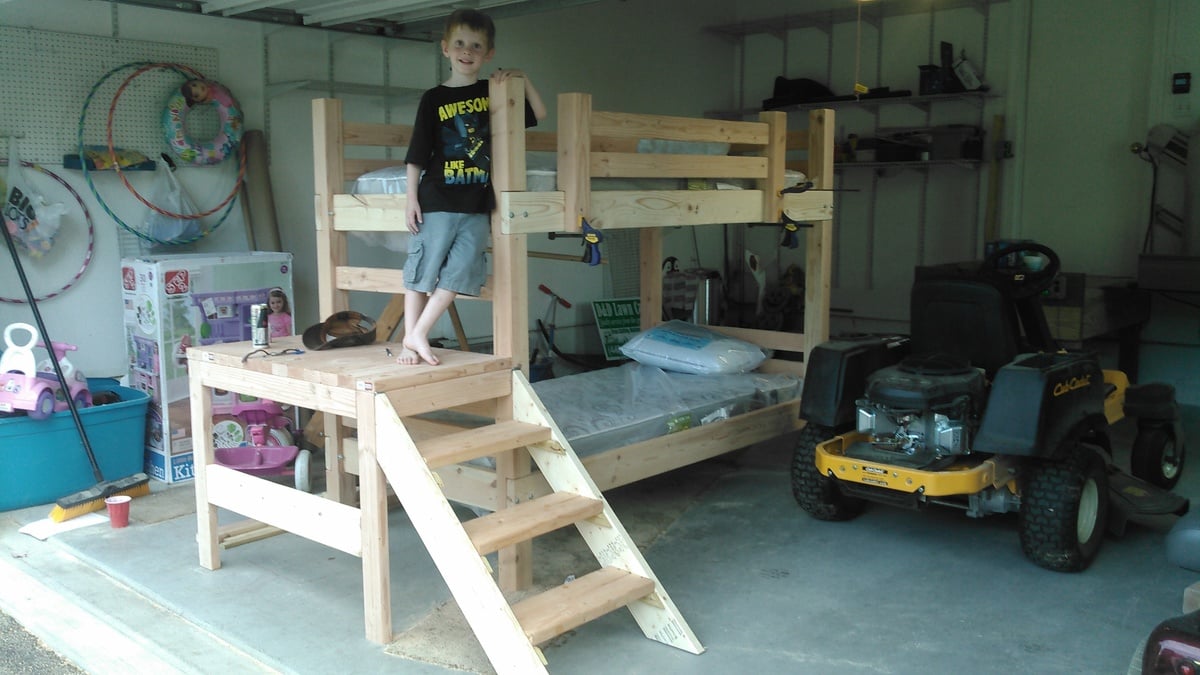
Started with the basic loft plans. Changed out the 2x4 post for some sturdy 4x4's and added a bottom bunk to build this set for my two boys. I also deviated from the plans by using carriage bolts to connect the landing for the steps and the side rails to those post so the bed can easily be disassembled and moved in the future. Finally I placed the steps themselves on a set of hinges so I could easily access the area underneath the landing if needed. This has the added bonus of allowing me to lock the steps in the up position to restrict access to the top bunk during visits with younger family and friends. Now just need to stain it, seal it, and put inside.

Estimated Cost
200.00
Estimated Time Investment
Weekend Project (10-20 Hours)
Recommended Skill Level
Beginner

Comments

Outdoor Farmhouse Table

Outdoor farmhouse table built using Ana's plans. Modified the plan slightly, used 3 2X4s on the top (instead of the 2 1X4's that Ana's plan used) and attached everything from underneath using pocket screws so that no hardware is visible from the top. Used a nailer board under each side of the tabletop to provide a place to attach the top without using huge screws.

Table was built using non-pressure treated lumber (because we wanted the stain to stick well). The finish was done with 2 coats of a chocolate outdoor stain. Took 2 days from start to finish, although much of that time was waiting for the paint and/or glue to dry. Very simple project, only used a few tools. The only "big" tool we used was a 12" sliding compound saw to make the end cuts. Also used the Kreg jig in a few places where we didn't have clamps large enough or, in the case of the table top, we wanted the wood to be able to "float" without warping other boards.

Built from Plan(s)
Estimated Cost
150
Estimated Time Investment
Weekend Project (10-20 Hours)
Finish Used
Chocolate outdoor stain/sealant (2 coats), no rubbing off the stain, applied moderately thick coats and allowed the wood to absorb the stain.
Recommended Skill Level
Intermediate

4 Bright Little Adirondack chairs

These 4 little chairs did not take very long to put together. But they did take me a while to sand, prime and paint. I hate that part of building-haha-so it always seems like it takes forever to get through with that and on to the fun part. They are very easy to make and inexpensive. My grandkids and others who have driven by and seen them out front have loved them!!

Built from Plan(s)
Estimated Cost
About 22.00 per chair(the spray paint was the majority of the cost). I think the chairs without finishing would be only about 10.00 apiece.
Estimated Time Investment
Afternoon Project (3-6 Hours)
Finish Used
I used Valspar indoor/outdoor gloss spray paint. Definitely use a primer and paint or stain before putting together.
Recommended Skill Level
Beginner

Comments

tonjacoy101

Fri, 07/22/2011 - 05:52

What a cute little guy and cute chairs too! I bet the grandkids love them :)

DIY SLIDING BARN DOOR

To date this has been my favorite and fullfilling DIY project!! Skills were learned, $$ was saved and it looks fabulous!!!   It wasnt easy but it wasn't impossible.  April WIlkerson provides a detailed tutorial on her website along with a fantastic youtube video on her channell. I hope this inspires someone else to take on this challenge!!  If you have any any questions please feel free to ask me!!  Enjoy.

Estimated Cost
$100
Estimated Time Investment
Week Long Project (20 Hours or More)
Finish Used
Minwax Special Walnut, Minwax gray, ragged white followed with a satin poly.
Recommended Skill Level
Intermediate

For a co worker...

A co worker reeeeally wanted this and asked me to build it. It is only my second build.

Built from Plan(s)
Estimated Cost
150-200
Finish Used
Varathane Spar Varnish in satin, Varathane Dark Walnut
Recommended Skill Level
Beginner

Just A Bench

Submitted by Jake on Fri, 08/30/2013 - 18:38

I had a request from a friend to build her a bench, preferably one with a back on it. The plans for the Woven Back Bench were perfect. But as you can see in the picture I moved away from the plans a little bit. The woven back is beautiful but I was sure it would become frustrating to get it right so I went with the vertical posts. It worked out well.

It is not visible in the picture but I added a cross-member to the middle of the seat to give it more strength and stability.

I avoided pocket holes to hold the back together by using the Kreg drill and drilling vertically down about 3/4 the way and inserting 2" pocket hole screws and then capping them off. The caps are visible in the picture. I did the same from the bottom of the back.

In a couple of places that called for 2x2s I used re-sawed 2x4s that I think added strength to the bench. I only used pocket holes where they would not be directly visible. Also I used a router to soften many of the edges and to add interest to the arms.

Built from Plan(s)
Estimated Cost
$50 not including primer or paint
Estimated Time Investment
Weekend Project (10-20 Hours)
Finish Used
The finish will be applied by the recipient but I am recommending that she prime and paint. Once a year she should check for any rotting.
Recommended Skill Level
Intermediate

Easy plan

Submitted by Anonymous (not verified) on Sun, 01/06/2019 - 10:58

Easy plan to build. Used scrap 3/4" maple plywood for lower shelf instead of 1x12. Finished top with Minwax Gel Stain in Coffee color and top coat with Minwax matte poly. Painted bottom with primer and 2 coats of SW ProClassic in Soji White. 

Built from Plan(s)
Estimated Time Investment
Weekend Project (10-20 Hours)
Finish Used
Mini wax Gel Stain and SW Proclassic
Recommended Skill Level
Starter Project

Comments

Cabin Bed

Submitted by coskam14 on Fri, 11/18/2022 - 17:29

Cabin Bed for toddler. Alternate take on the Jen Woodhouse bed. Built to fit the space

Built from Plan(s)

Comments

Adirondack Chairs

Submitted by Anonymous (not verified) on Wed, 12/28/2022 - 16:16

Built these for my Father-in-laws birthday

Comments

Dollhouse

Submitted by samueldodd on Mon, 12/21/2015 - 06:04

The house is 48" high and 36" wide and 28" deep. It has 3 floors with a total of 10 rooms. Floors were made to look like hardwood floors and stained. Was fun to build and my granddaughter cried when she saw it. Due to the size of it, I installed wheels on it also. I made it from a picture on Ana White of Kidkraft Chic Dollhouse 2011-12-06 Paint all your pieces before you assemble. It makes it a lot easier than trying to paint afterwards.

Estimated Cost
$100,00
Estimated Time Investment
Week Long Project (20 Hours or More)
Finish Used
Roof was painted with oil based Red( because that is what I had on hand. The frame and walls and ceiling were painted white. The floor was made to look like a hardwood or plank floor and was stained with minwax Special Walnut
Recommended Skill Level
Intermediate

Indoor Playhouse

Submitted by Alaskagirl on Thu, 02/28/2019 - 12:47

Husband and I built this beauty over a rainy weekend. He had cut the wood a few weeks before, then we had to wait for a free weekend to assemble. We switched the placement of the walls around so the bed wouldn’t go over a heat vent and had to trim a few inches off the legs to fit with our lowers ceiling. I painted the back wall with chalkboard paint and we added shelves to the side like shown in the blogpost linked on the build page. We added a light above and Christmas lights below to brighten things up. A book sling and pulley with basket added the perfect finishing touches. All our boys love this magical new addition to our youngest son’s room and gave already spent many hours playing there. 

Built from Plan(s)
Estimated Cost
$200
Estimated Time Investment
Weekend Project (10-20 Hours)
Finish Used
Haven’t finished yet, waiting for drier weather, then will add two coats clear polyurethane to keep the natural look.
Recommended Skill Level
Intermediate

Christmas gift for parents

This bench wowed my parents when they saw me pull up on Christmas Day when I came to visit. Also, this was my first time using the kreg pocket jig. They love sitting outside with their cats and this couldn’t have been easier than I thought. I’m 5’2” and this is a big bench and look forward to building one for myself.

Comments

Husky Farmhouse Table

Submitted by adk_native on Mon, 10/14/2013 - 09:11

I loved the husky farmhouse talbe and after using a small round dining table for years, I figured it was time to get a larger table. What a great build! I definitely appreciate Ana's plans and ideas. I finished it right before Halloween as you can see and my 4 yr old son loves the new table for our sit down meails.

Built from Plan(s)
Estimated Cost
$350
Estimated Time Investment
Week Long Project (20 Hours or More)
Finish Used
Minwax Dark Walnut stain, White primer/paint in one, Minwax fast drying polyurethane
Recommended Skill Level
Beginner

Comments

ariya3

Tue, 07/07/2015 - 00:27

I love this table and i am trying to find a cheap way to get a dining room set( chairs will be bought and stanined). My husband is good a building things, my only concern how do you get all that detail into the legs of the table? Is there anyway you can pre-buy them made? We don't have a wooden lathe to do anything intricate.

Thanks if you can advise

rustic baby crib

Submitted by KL728MX on Tue, 01/05/2016 - 12:32

my wife and I had our first son, Mason, over the summer and I was in love with the idea of building his crib. It was a lot more work than I had anticipated but it was well worth the hard work. it came out beautifully. I made a 2X4 spacer that we can remove as he gets older to lower the mattress height. i used all pine lumber for the crib.

Estimated Cost
$250
Estimated Time Investment
Week Long Project (20 Hours or More)
Finish Used
rustoleum American walnut
Recommended Skill Level
Intermediate

Easy Build wood headboard - King

Submitted by nestbliss on Mon, 11/14/2011 - 19:14

We used this plan for the reclaimed wood look headboard from Ana-White and these dimension mods for a king. We used lots of tips from Create and Delegate who made the same headboard last year. I love how it turned out! I posted more photos and blogged about everything we did for the finish, etc. at - http://nestbliss.blogspot.com/2011/04/we-made-bed.html

Recommended Skill Level
Beginner

Comments

Modern Farm Bench

Submitted by jackkatie on Mon, 11/28/2011 - 11:52

I was looking to make my foyer a bit more kid friendly while still being coze and practical. I came across the modern farm bench plans, and I knew it was the perfect fit!

I have done a few other plans, but all with help. This project I started around 9 pm (after bedtime) one night, and by 11:30, it was completely built and stained. My son was climbing all over it by the next morning :)

I love it - I think it adds the perfect bit of rustic charm to my foyer, while still giving my little guy a sturdy spot to get his shoes/coat on. I have since added baskets underneath for winter storage.

This will definitely not be my last build! Thanks Ana!

Built from Plan(s)
Estimated Time Investment
Afternoon Project (3-6 Hours)
Finish Used
I stained using a mixture of both Kona and Dark Walnut stain from Rustoleum. It definitely wasn't a science - just slopped a little of each on, waited about 3 minutes, and wiped off.

I love the finish - rustic, but not too "country". The dark Kona stain definitely highlights the knots and grooves of the wood!
Recommended Skill Level
Beginner

Double Wide Cedar Fence Picket Storage Shed

Submitted by moosmani on Mon, 11/11/2013 - 03:12

I read and studied every comment and brag post about this shed. I must have read the plans a hundred times before I got up the courage to tackle it. It’s a very attractive and affordable shed design. I thought a double wide version would be perfect for our long, narrow side yard, and it is! I mostly stuck to the plans except for a few things. I made it 10” taller overall so there would be plenty of head clearance under the doorway. That was a very easy modification. I used 2x4s for the walls instead of 2x2s because we have high winds in our area. That modification was a little bit more challenging, but I planned it out and it worked! Also I used 2x6s for the headers instead of 2x4s. I also added 2x4s at the thresholds because I couldn’t image making it stay square without them. I basically made two sheds joined by a common wall in the center. I did not increase the depth, mostly because I was afraid to mess with the angles and how that would change the pitch of the roof. Joining two sheds together meant that I didn’t have to put the exterior pickets on the middle wall. But it also meant that I had to build 4 doors. Yuck. They were difficult to get lined up and level, but I was amazed it actually worked and that all the doors operate properly and smoothly. I was questioning the wisdom of my decision to do 4 doors while I was in the thick of it, but now that all the work is done, I love that I can open all 4 doors and have easy access to absolutely everything in the shed. Very convenient! I told my dad I was building a shed and he recommend that I add cross braces. It seemed sturdy enough without them but it certainly can’t hurt. My dad knows everything about building and I know nothing, so I took his recommendation. If I were to do this again, I would overlap the cedar pickets by 1” instead of ½”. My pickets were not quite wide enough. I could swear they shrunk after I applied the stain/uv protection. I used liquid nails along each lap but it didn’t hold. Where the glue DID hold tight, the wood split lengthwise. Anyway, for whatever reason, gaps appeared and I spent a fortune on clear silicon applied on the interior walls to make it water tight. I had to keep going back for “just one more tube.” So with hind sight I would have been better off just buying a few more pickets and increasing the overlap. Another thing I might do is make it deeper. I decided against it initially because I was worried that increasing the depth would make it flimsy. Now I don’t think that would be a problem. This shed is sturdy. I can’t say thank you enough. Great plans and a great website! I am completely hooked.

Built from Plan(s)
Estimated Time Investment
Week Long Project (20 Hours or More)
Recommended Skill Level
Intermediate

Comments

moosmani

Mon, 11/11/2013 - 14:56

I kept every receipt from caulking gun to stains and brushes. I just now added it up and it came to (cringe) just under $900. But I have lots of left overs for another shed and it's still a huge bargain. Other sheds that are similar to this plan are much smaller and start at $1,999 and up! I think it was well worth it to have a sturdy bargain shed that's also beautiful.

t0mpr1c3

Sat, 01/22/2022 - 23:01

It looks great with the stain. I think your Dad's advice was good. Also I like that the heavier timbers add rigidity to the frame.

Seasonal And Holiday

My first chair

Submitted by Anonymous (not verified) on Mon, 05/15/2023 - 05:16

Thank you Anna for designing such beautiful plans, and making them available for free. My husband likes the chair so much he doesn’t want it outside! I guess I’ll have to make a few more for our deck.

Comments

Kitchen Cabinets

Submitted by Anonymous (not verified) on Wed, 10/02/2019 - 21:30

I followed the kitchen cabinet building plans to build all new upper cabinets up to my ceiling. I built all new drawers with soft close drawer slides also and built the refrigerator enclosure cabinet.I did the entire remodel myself including the new doors out of MdF.

Finish Used
Emerald urethane paint
BIN Shellac Primer

Comments

Ana White

Tue, 11/05/2019 - 10:41

We are so thrilled to let you know your entry WON the Best Brag contest!  There were many amazing entries, and it was tough to choose.

Look out for an email from us shortly!