Community Brag Posts
Outdoor Sectional
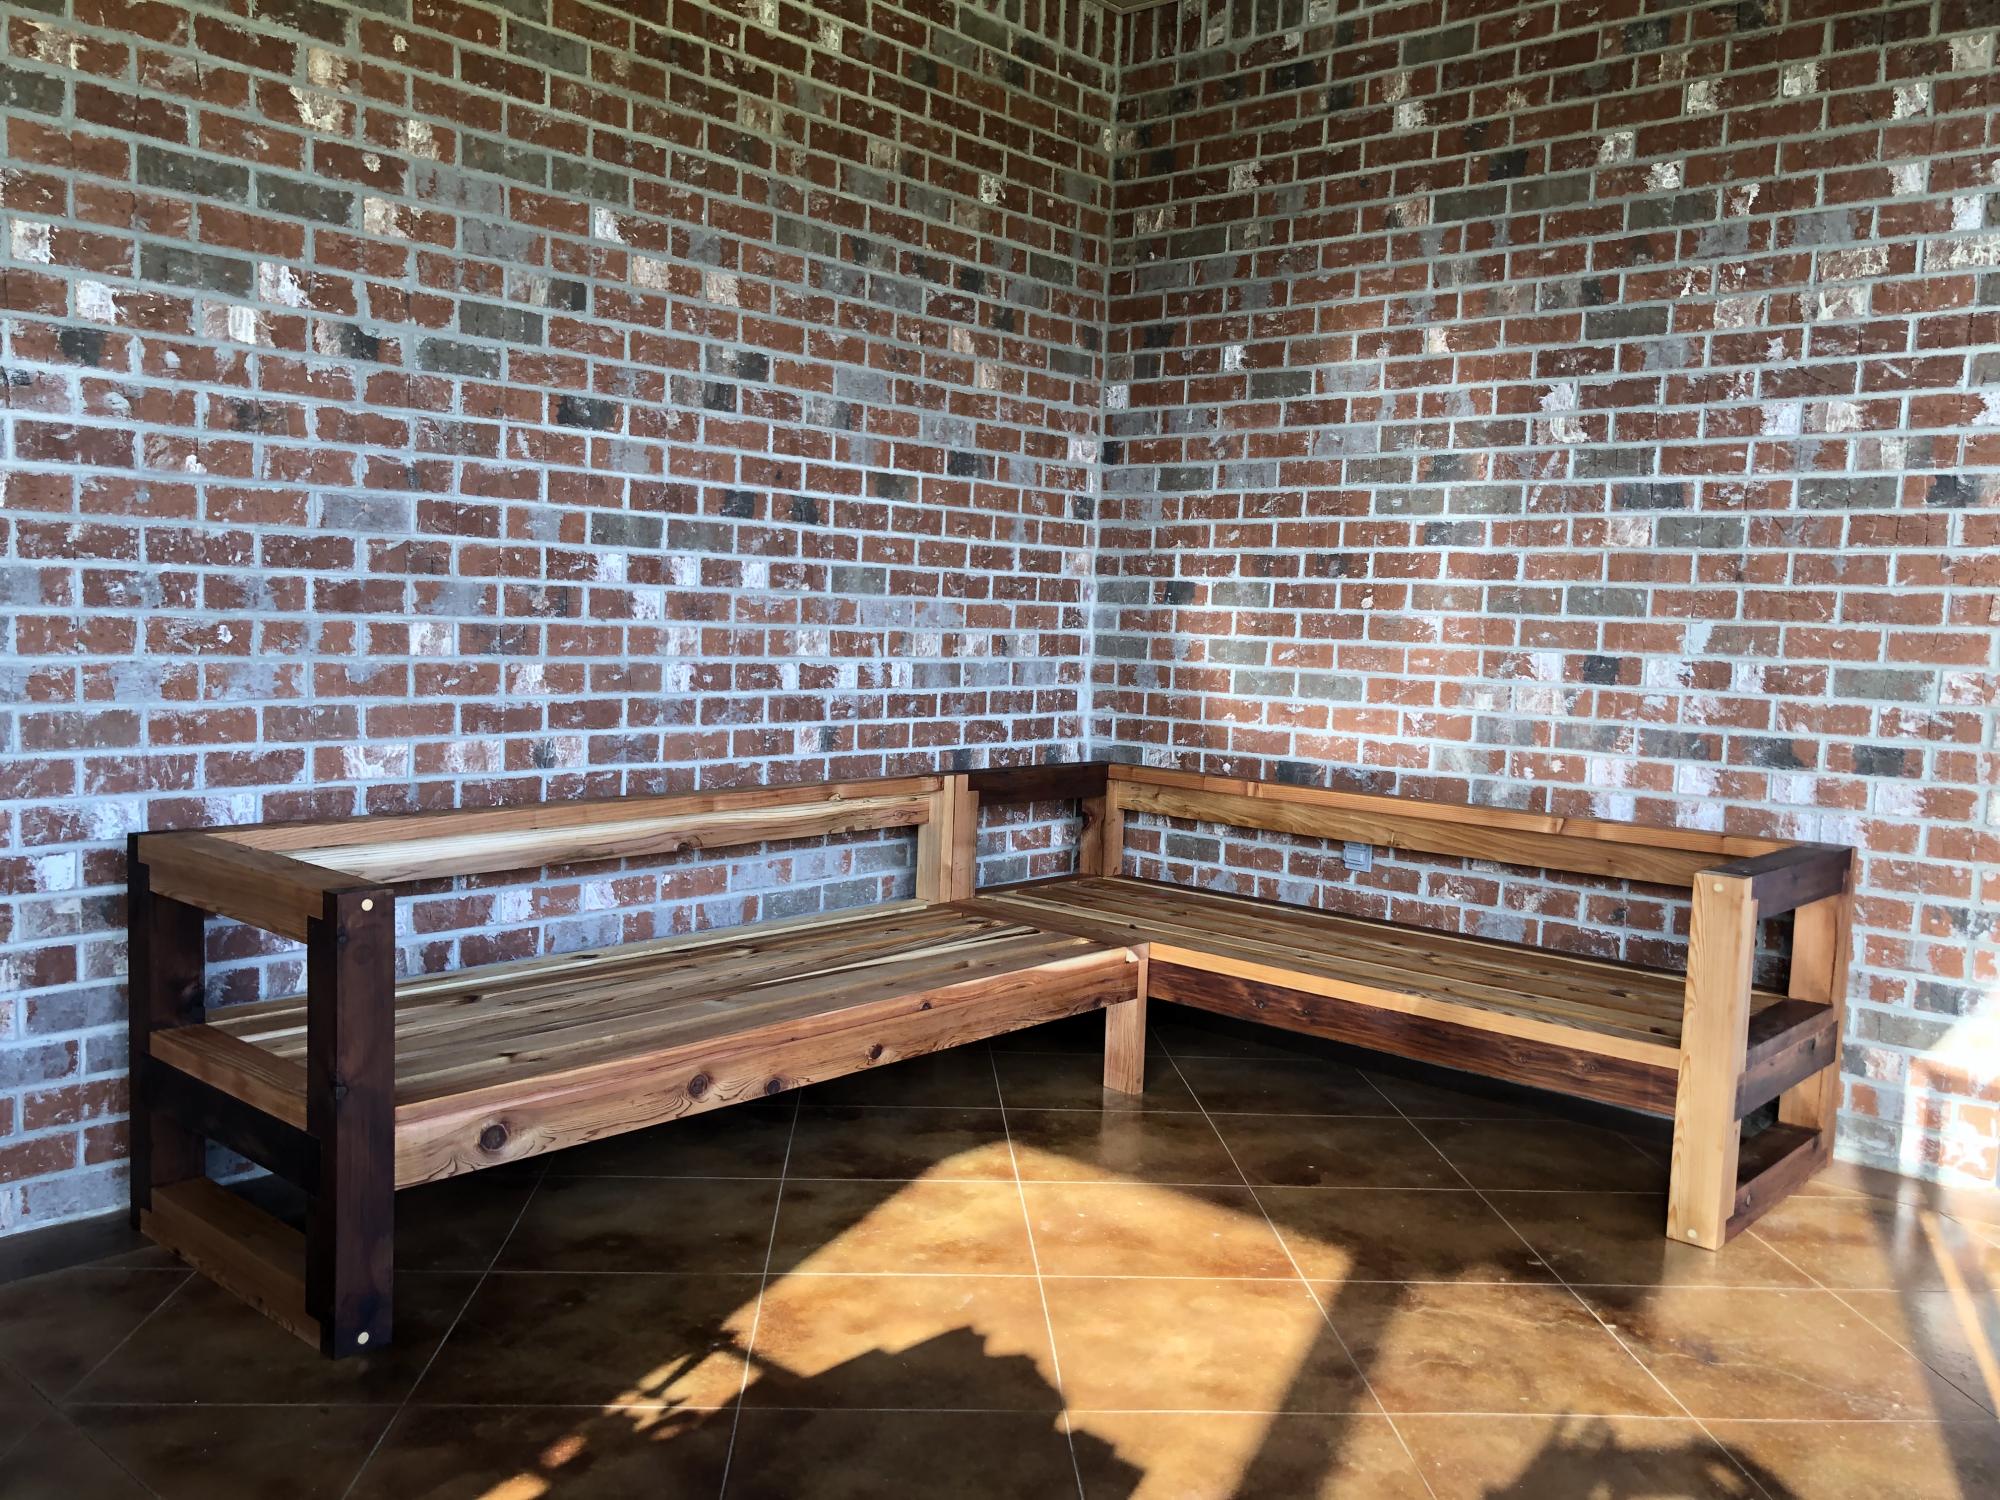
White Cedar outdoor sectional with 4x4 sides. Used rabbit and dado joints for the Arms, with a 3/8 lag screw for extra support. I used a 1/2” countersink for the lag screws and filled the hole with an alder dowel plug to add a design feature.
Estimated Time Investment
Week Long Project (20 Hours or More)
Finish Used
Thompson transparent water and UV seal.
Recommended Skill Level
Advanced
Comments
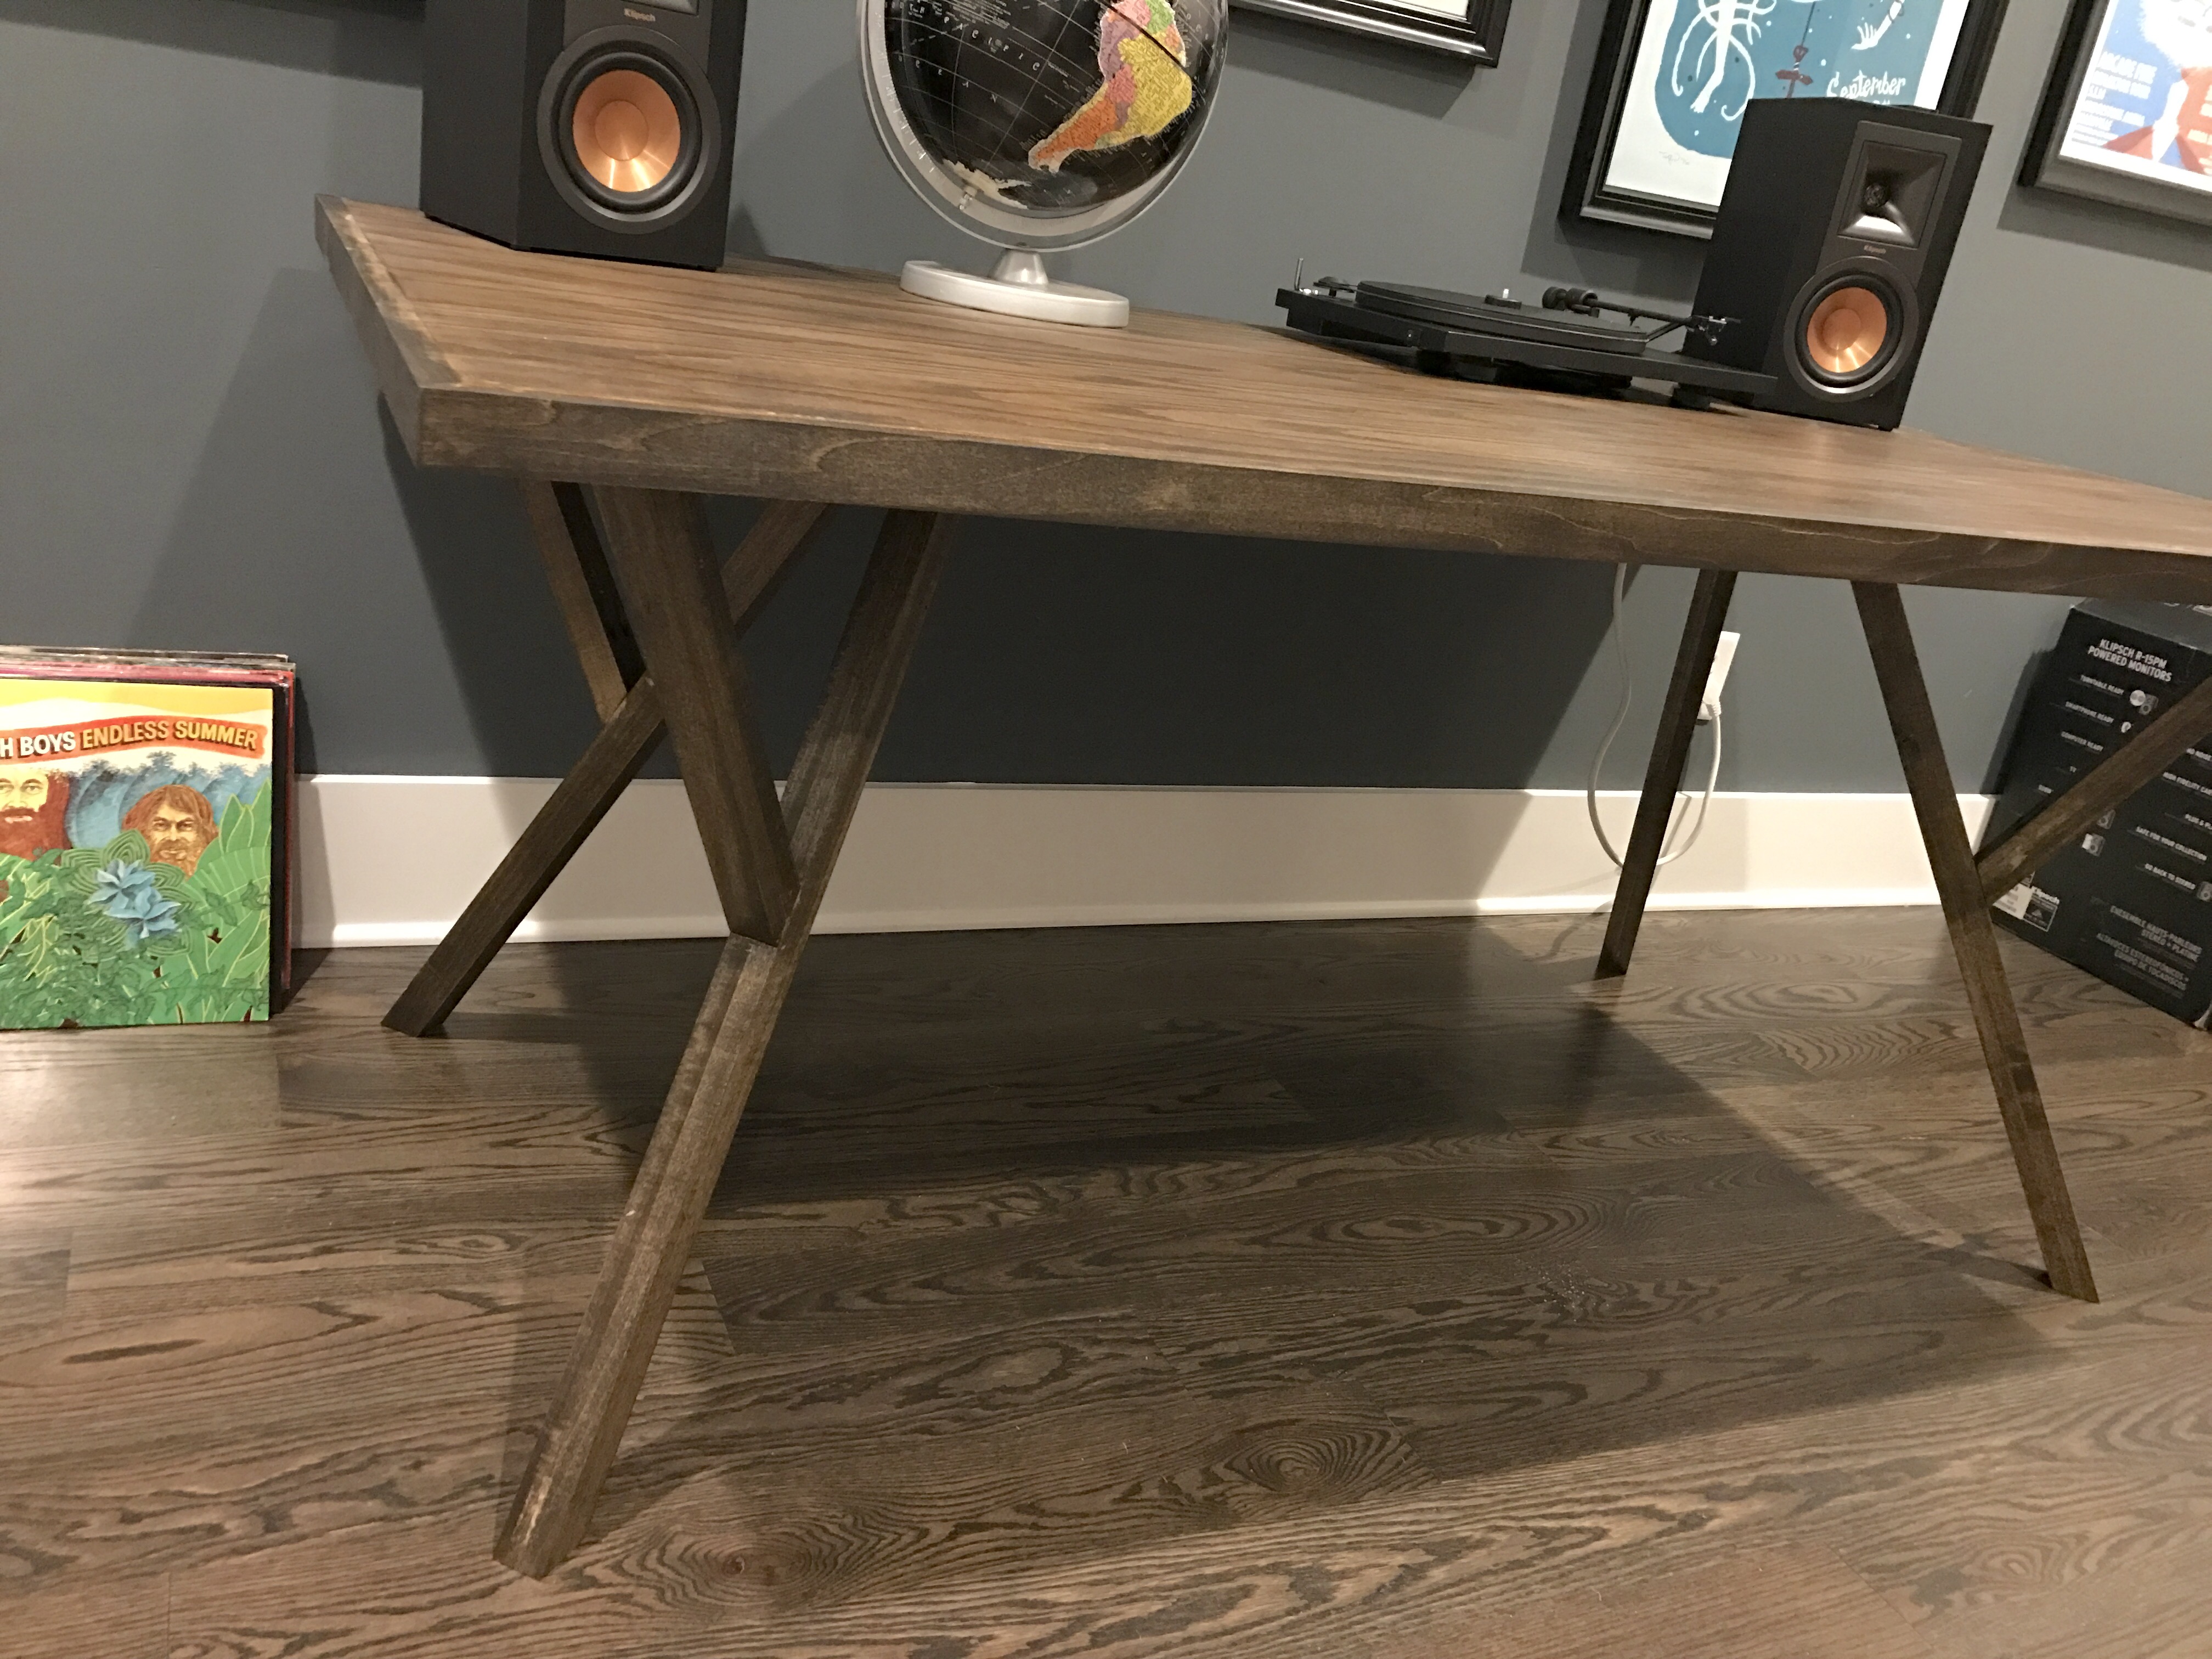
My Y Leg Desk!
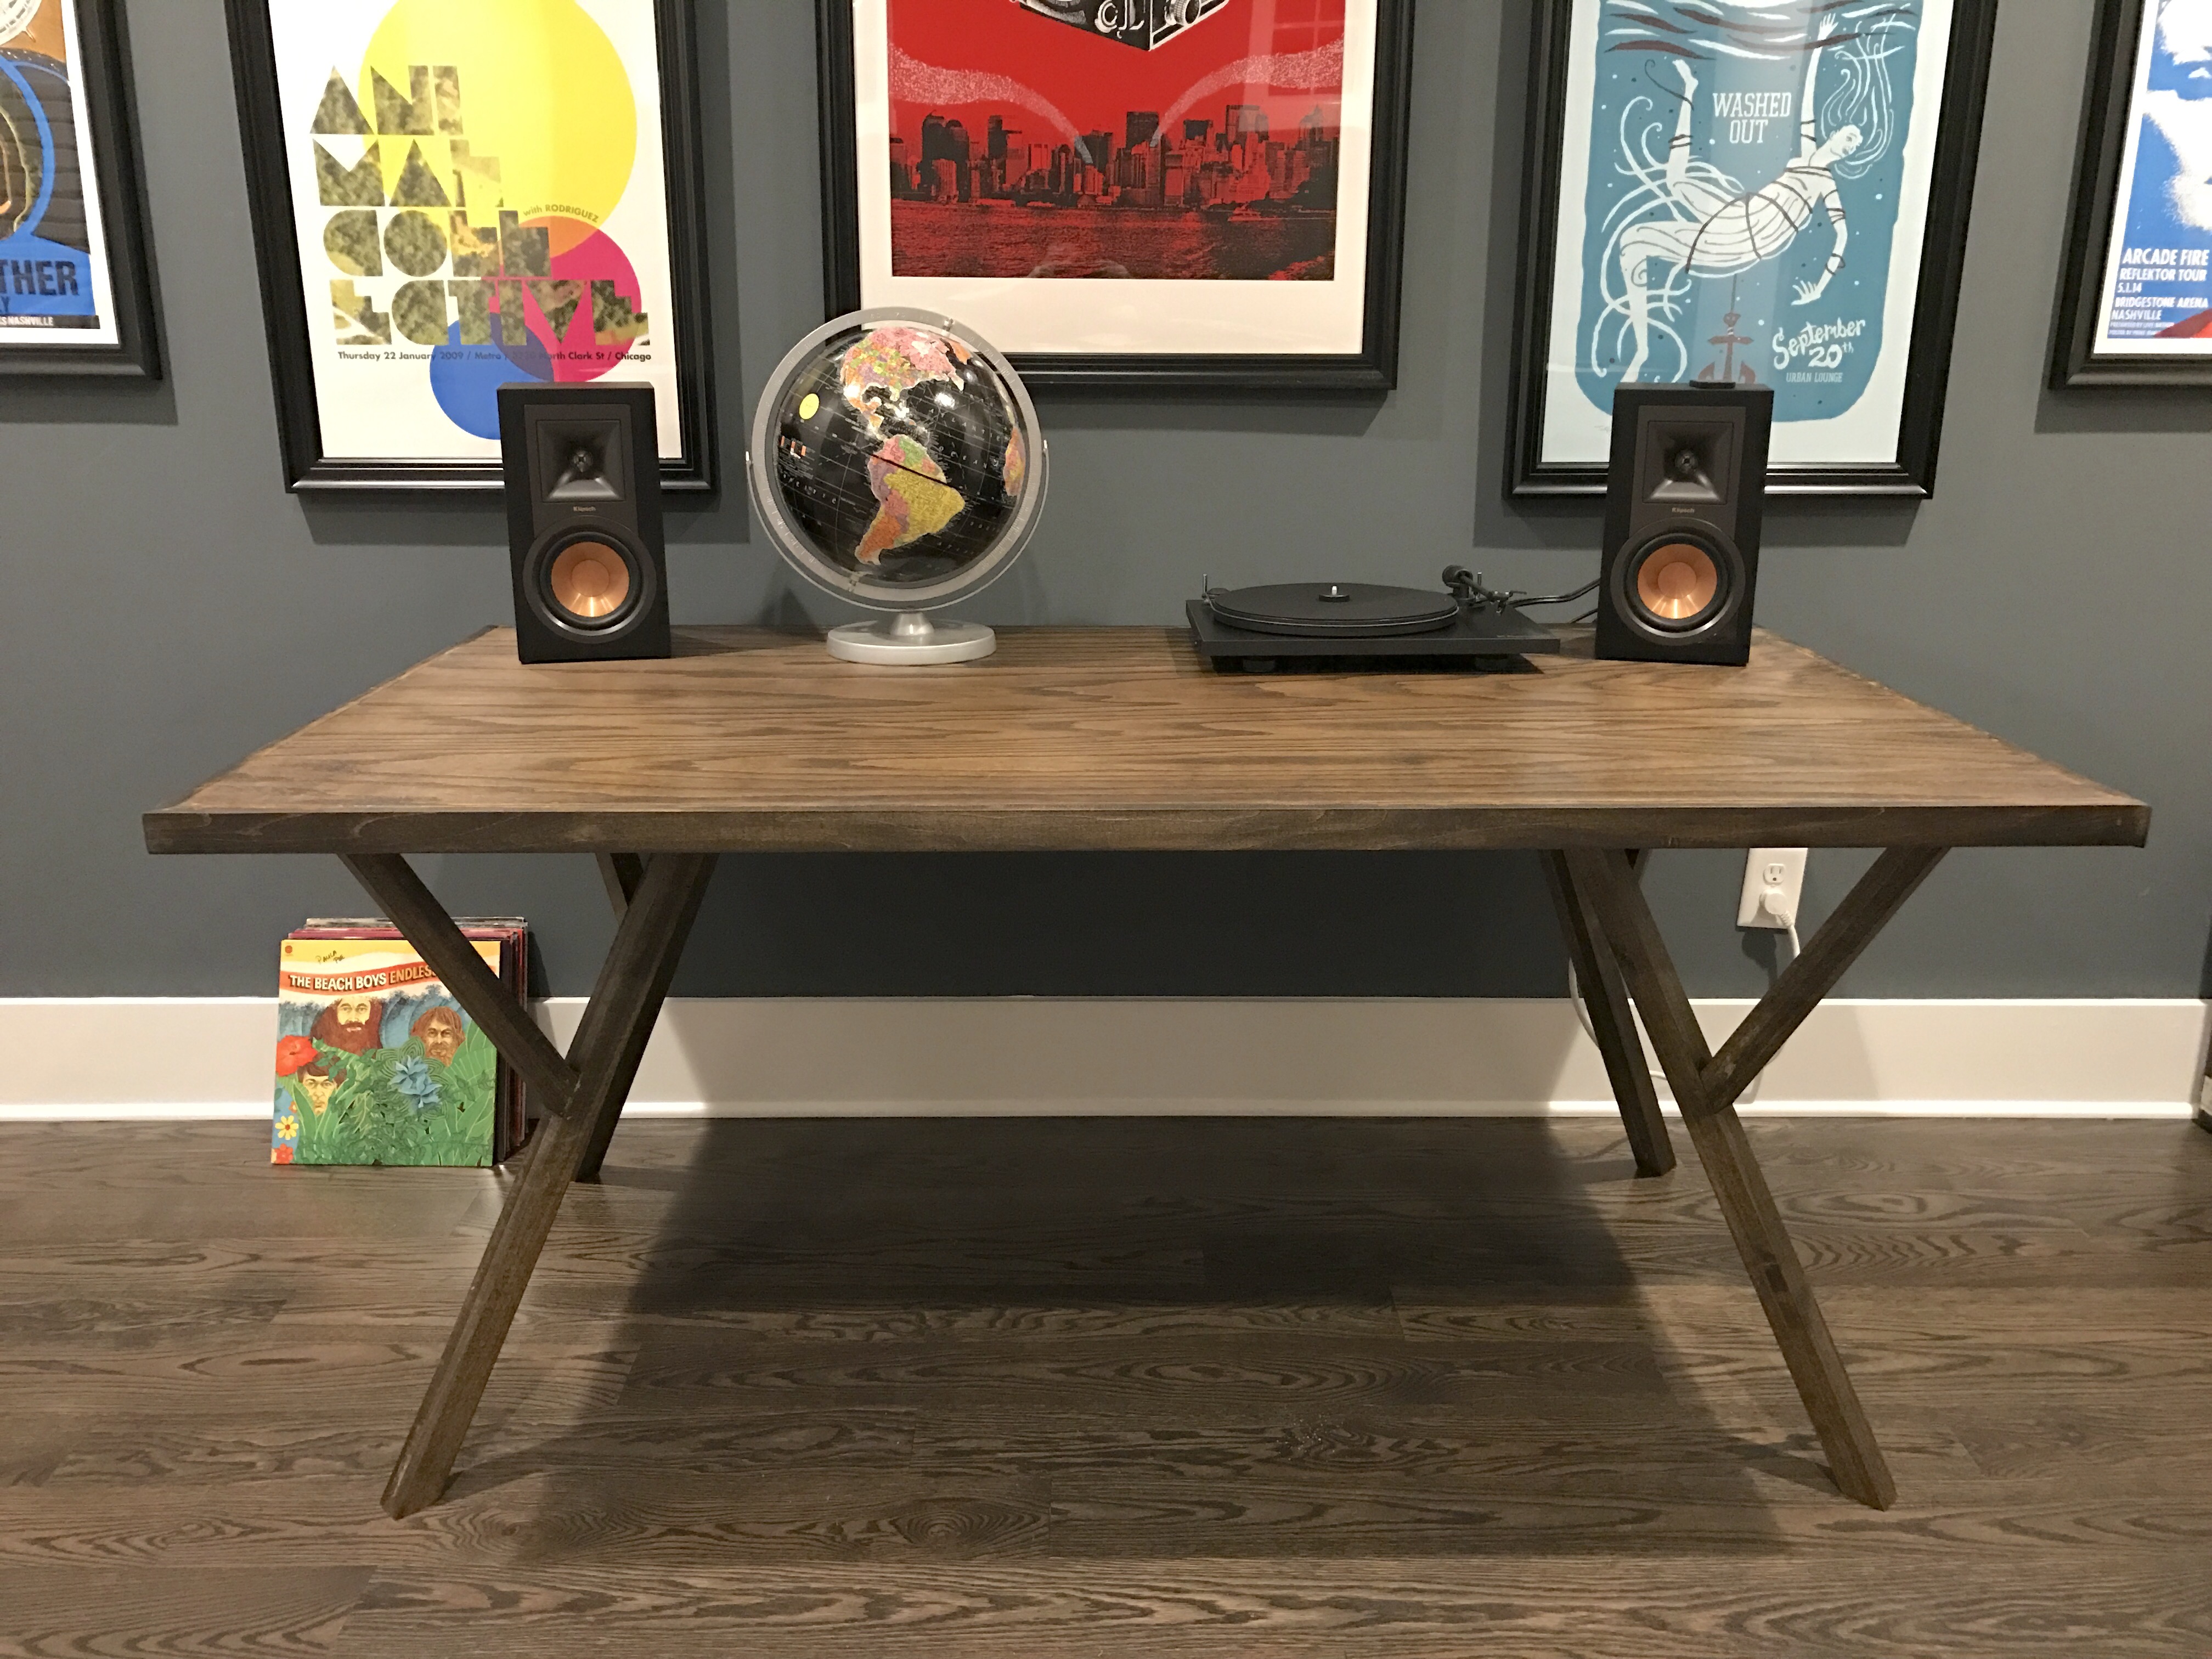
Actually my first build ever. Red oak plywood top and poplar everything else. Added poplar 1x3s around the edges so you don't see the plywood edge. It's surprisingly sturdy!
Estimated Cost
$150 due to nicer wood
Estimated Time Investment
Weekend Project (10-20 Hours)
Finish Used
Minwax Jacobean
Recommended Skill Level
Beginner
Simple Modern Toy Boxes
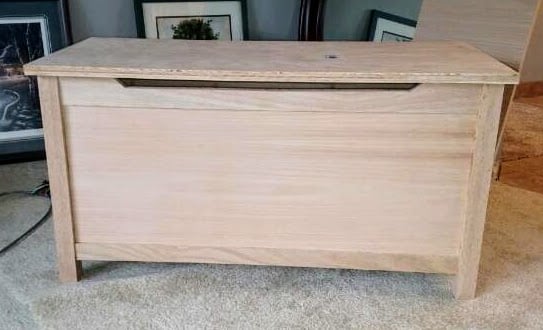
I made two of these. One for each granddaughter at the time. (Since then I have another granddaughter and a grandson.) Made with solid oak everywhere except the top. I made the top with oak plywood for strength. I edged the lid with oak. These were the first projects I ever made where things had to fit tightly together and the beginning of my woodworking hobby.
Built from Plan(s)
Estimated Time Investment
Week Long Project (20 Hours or More)
Finish Used
Each family wanted a different finish, one a more natural oak and the other a weathered gray stain. I used Verathane stain and satin finish polyurethane on both.
Recommended Skill Level
Intermediate
Comments
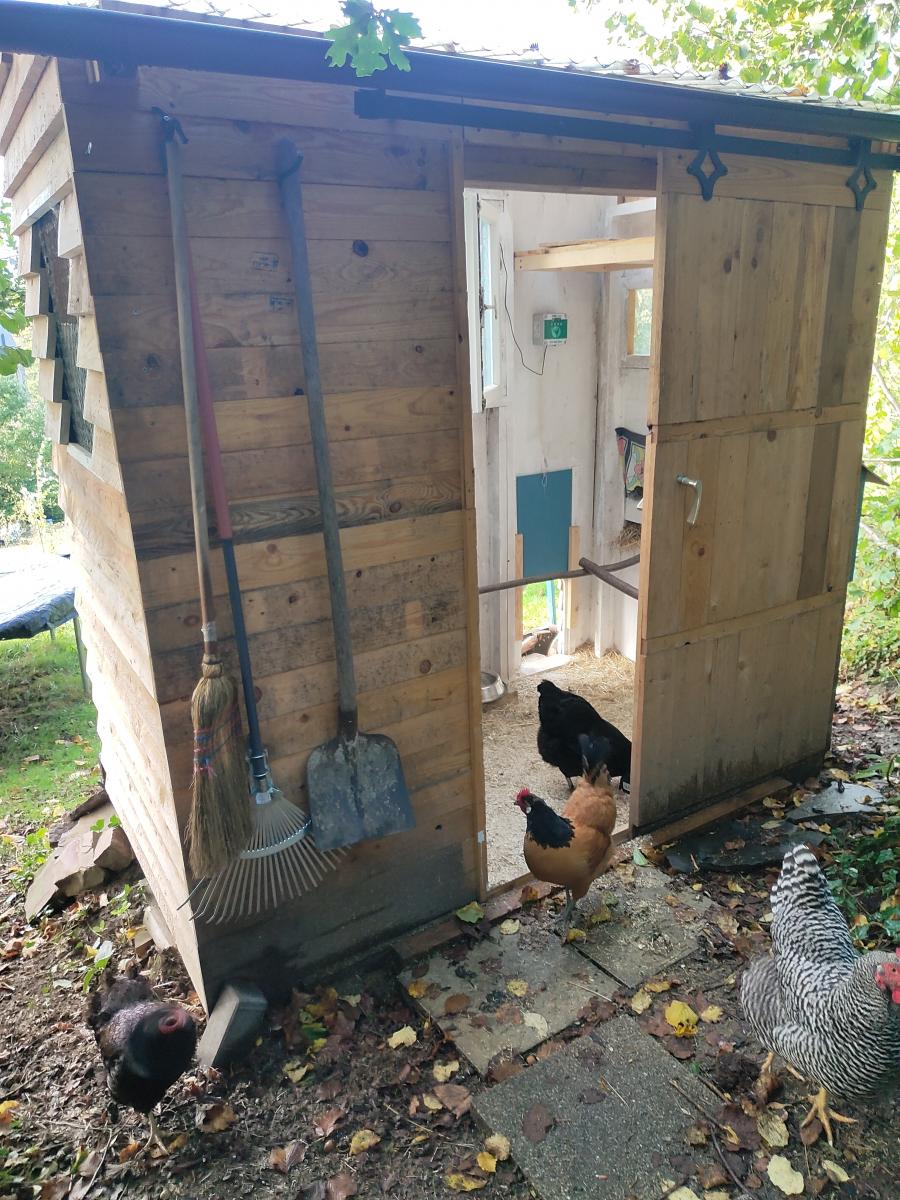
Chicken shed
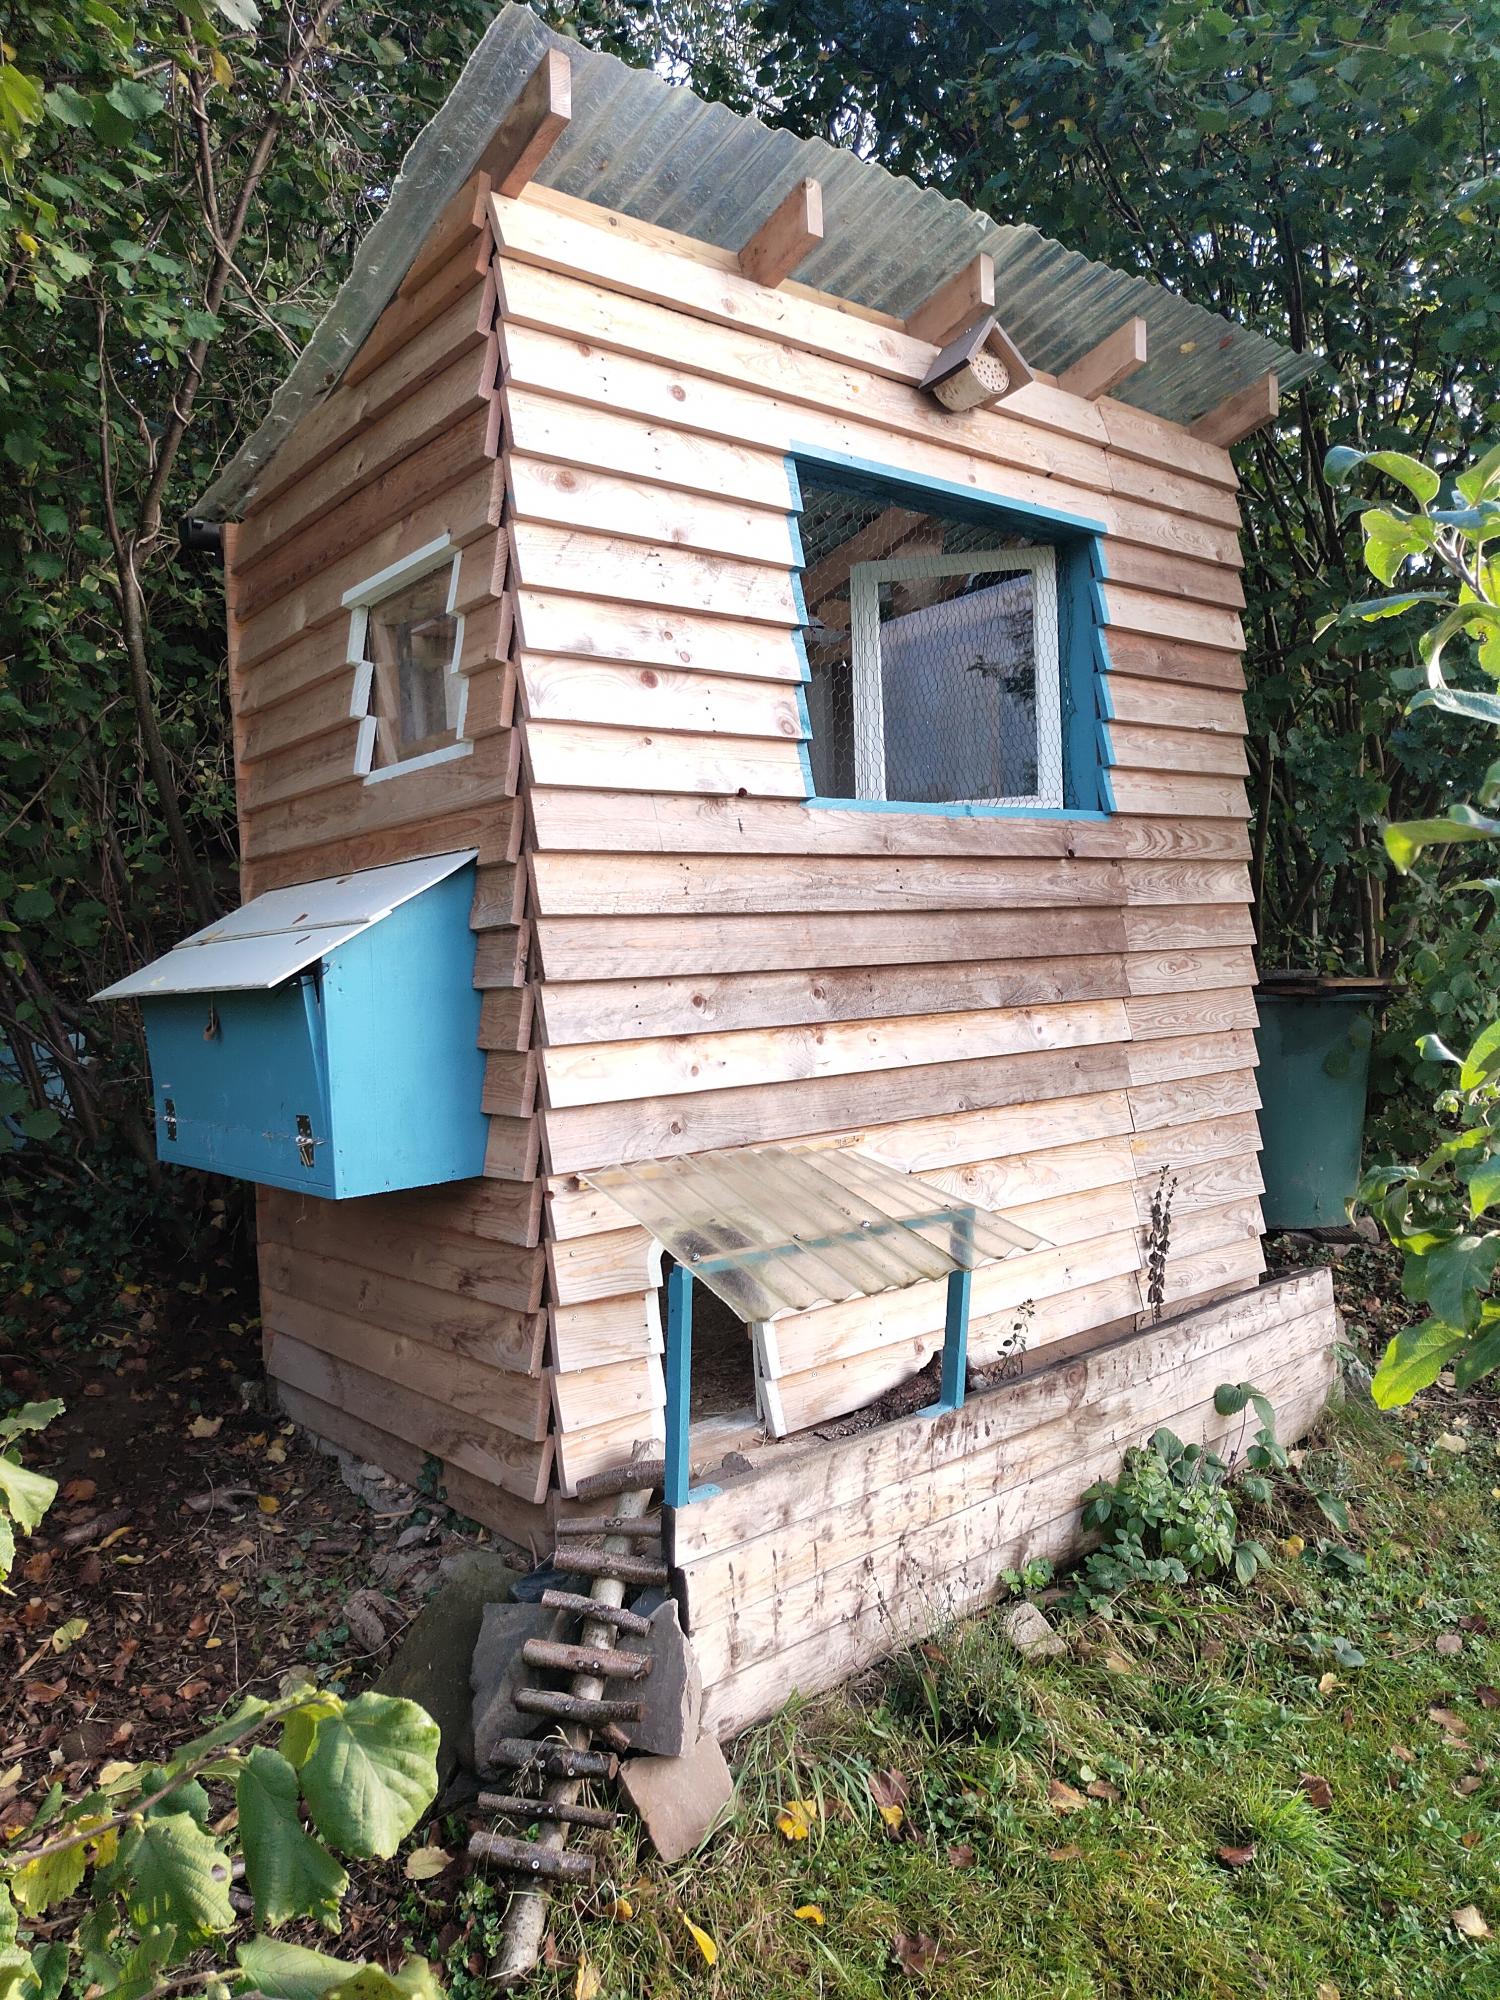
I had started this project last year in September and finished it finally 2020 in March because I get my chicken then.
I did modify the chicken coop a little bit due to the material I got.
The instructions and most of all the cutting list I like best!
Antje
Built from Plan(s)
Estimated Time Investment
Week Long Project (20 Hours or More)
Comments
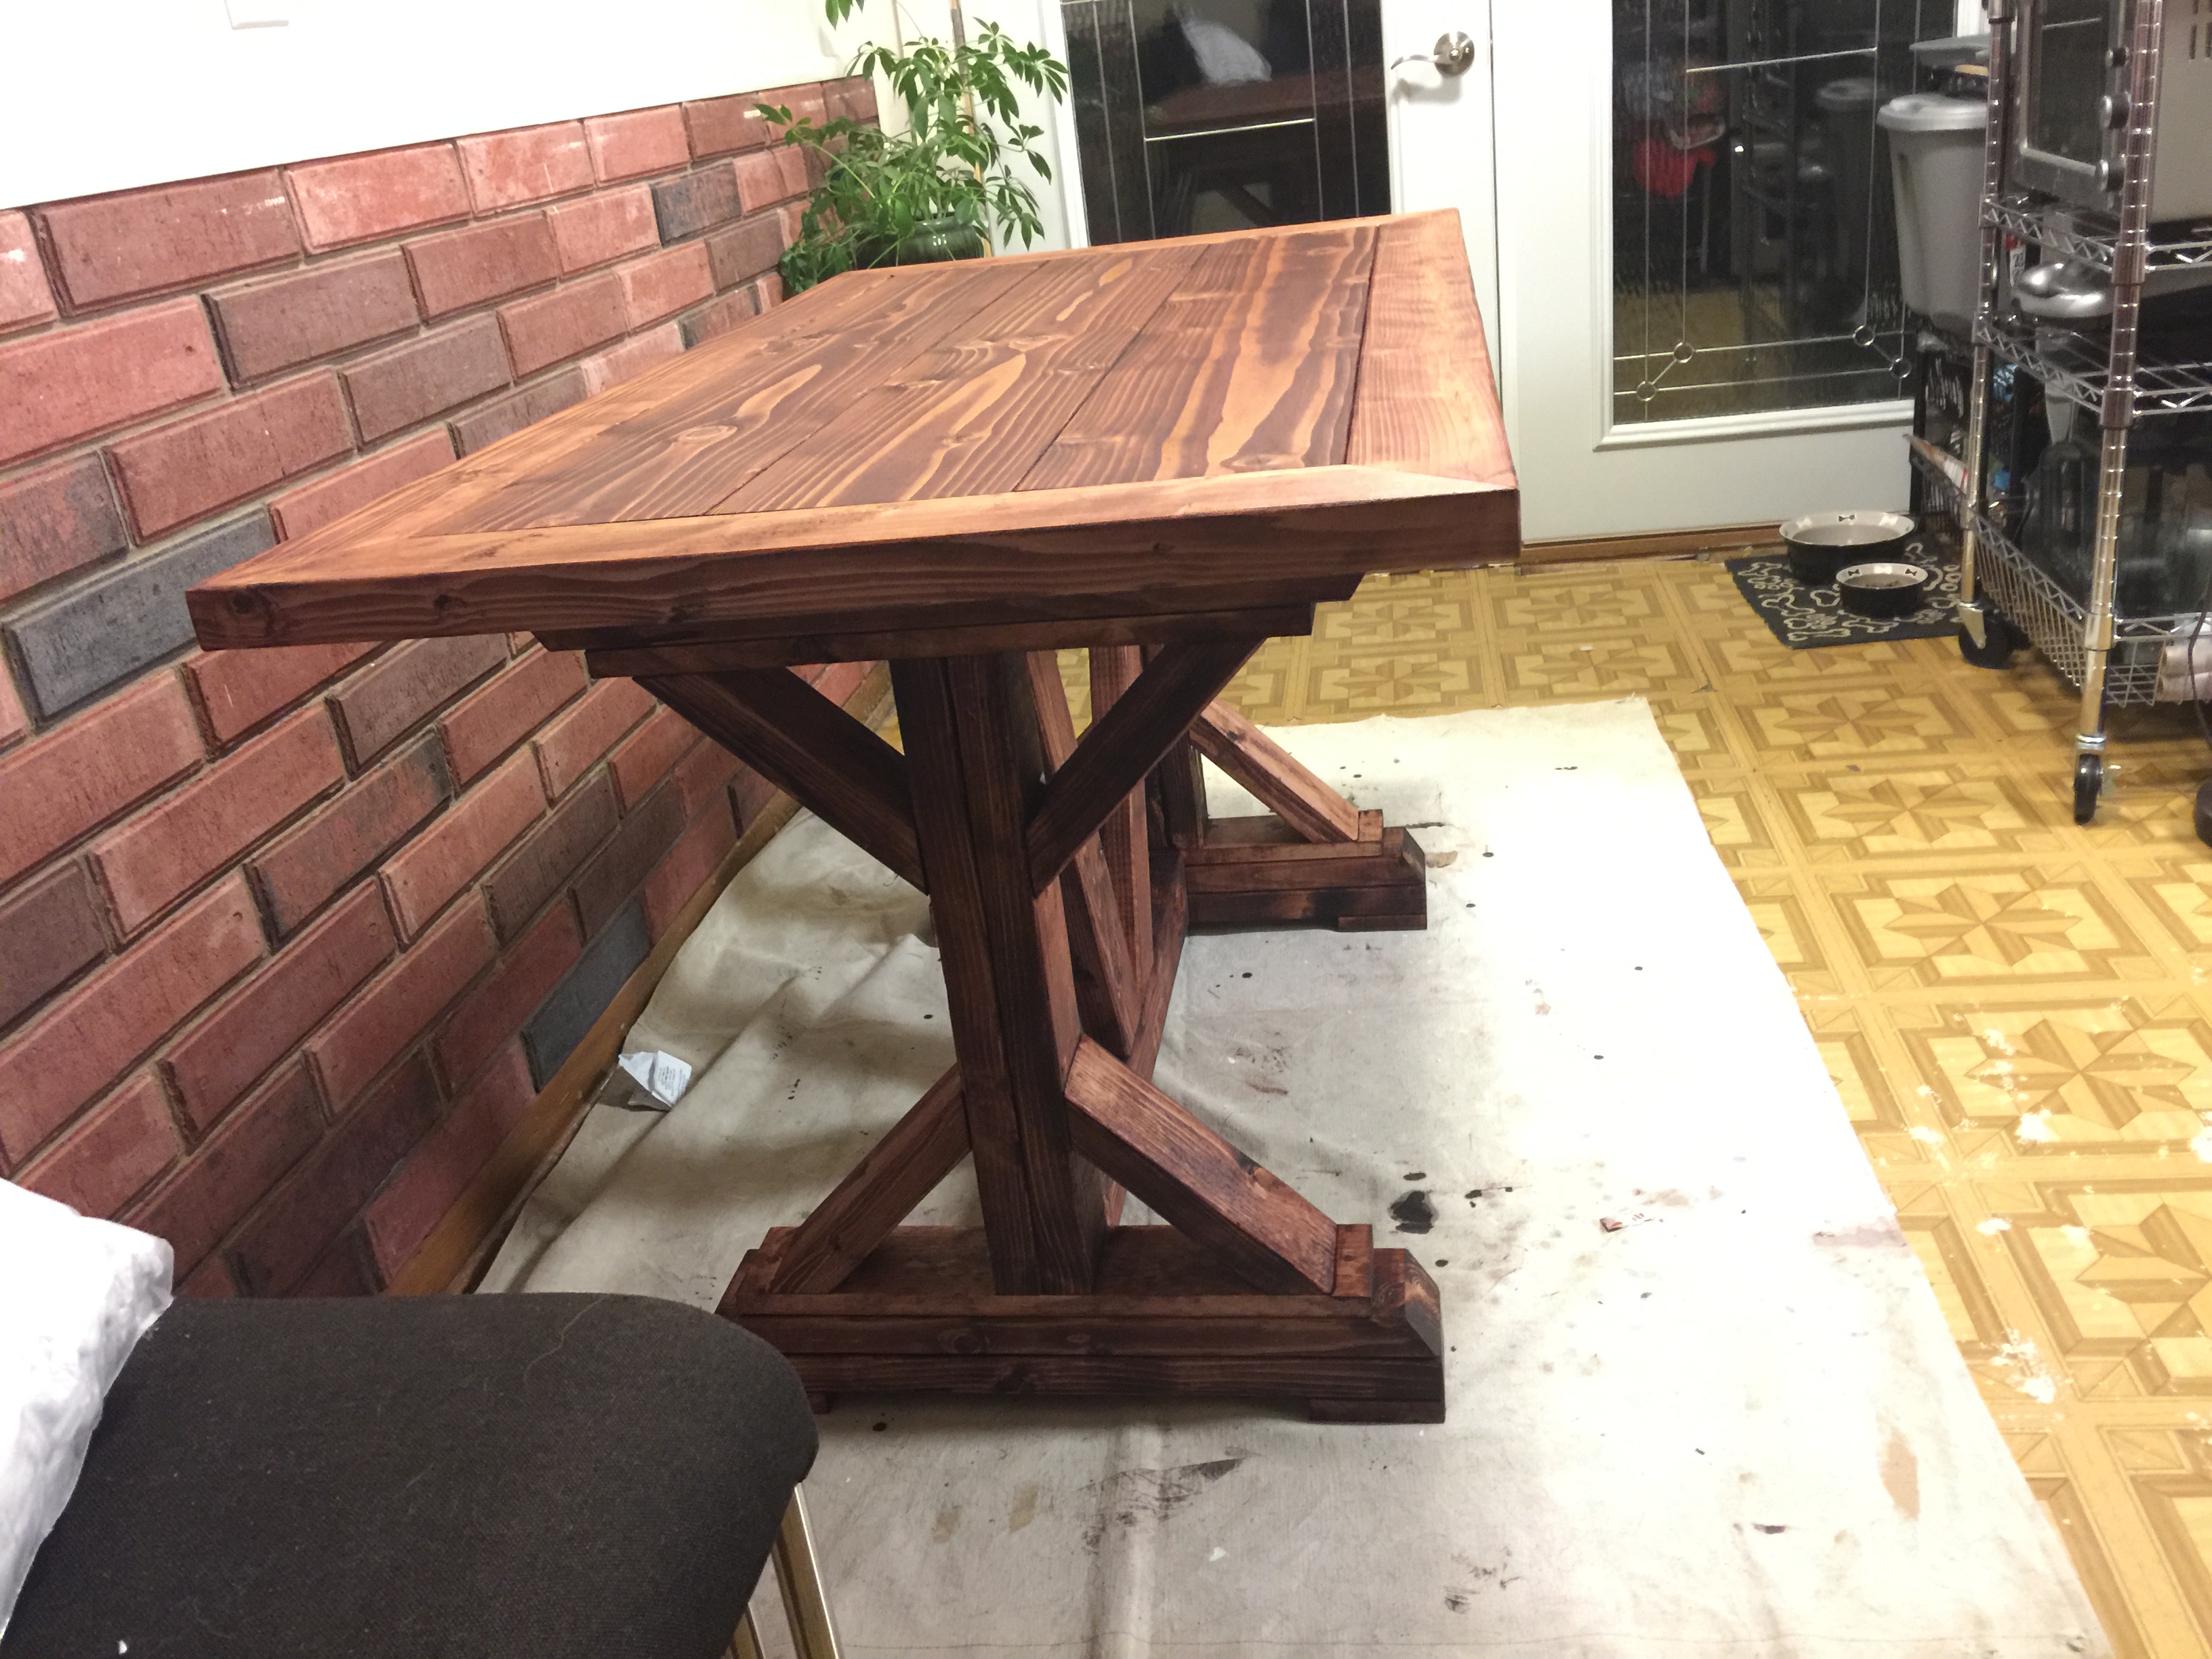
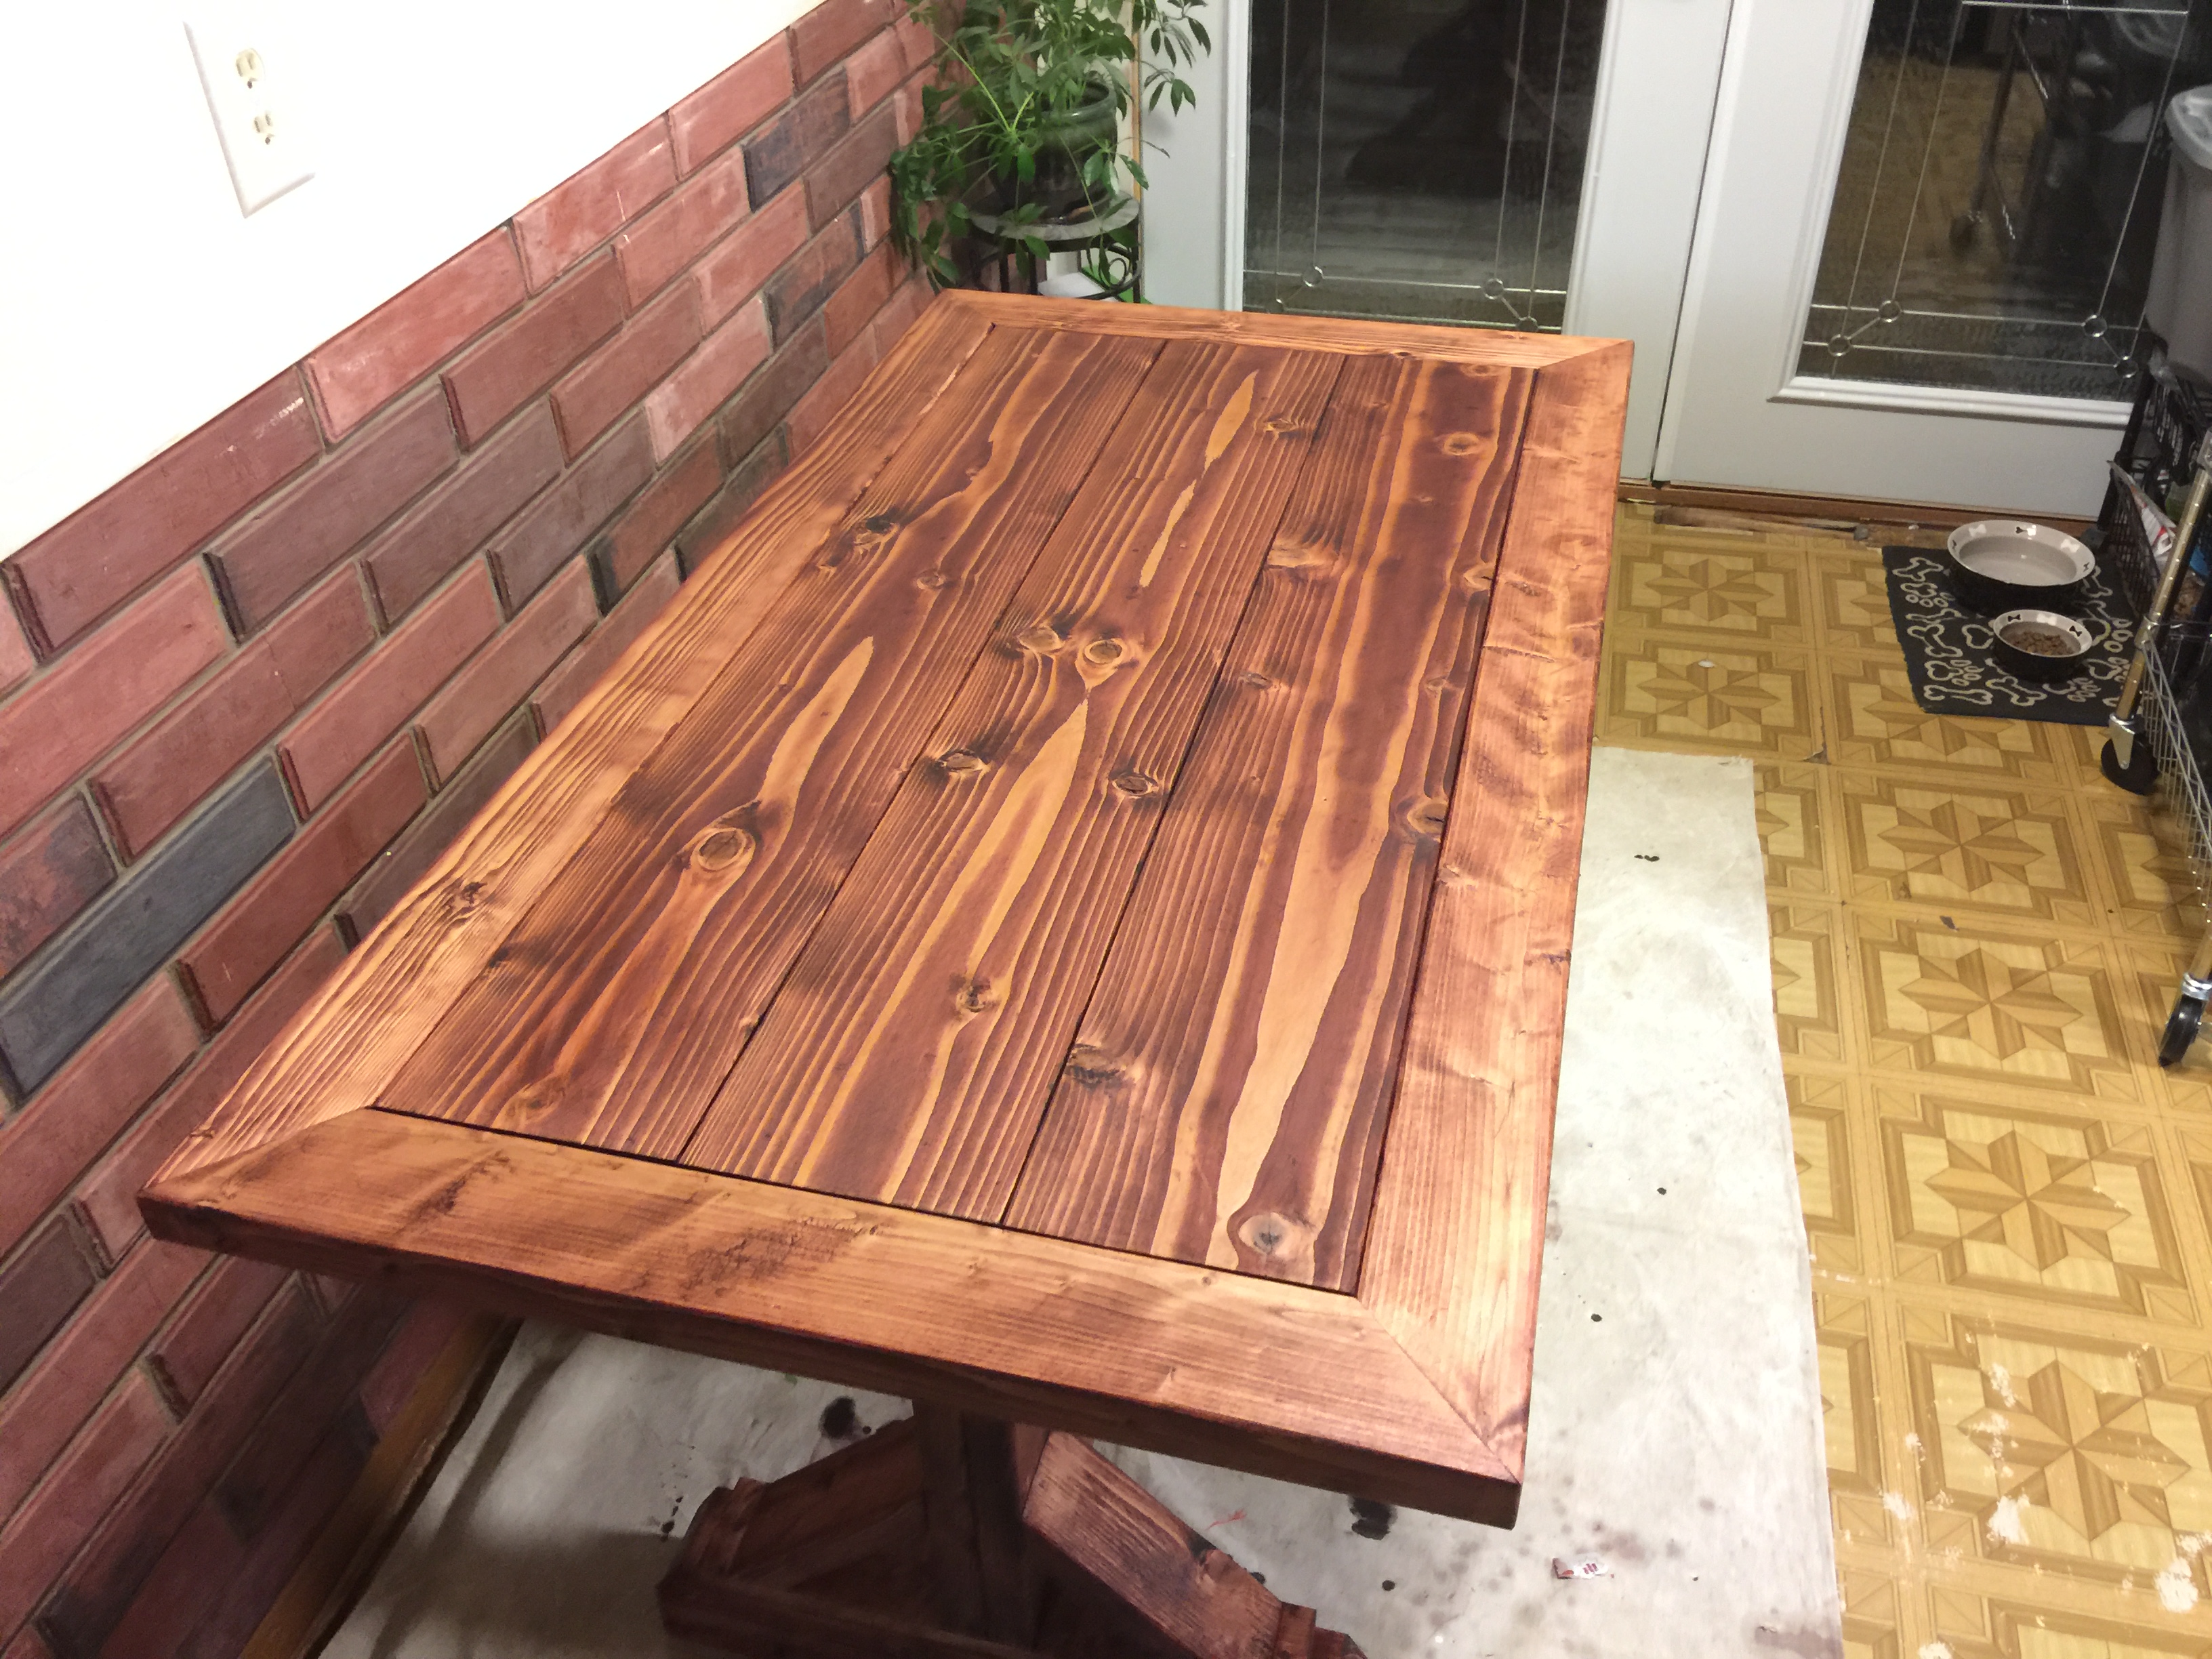
Fancy X farmhouse table
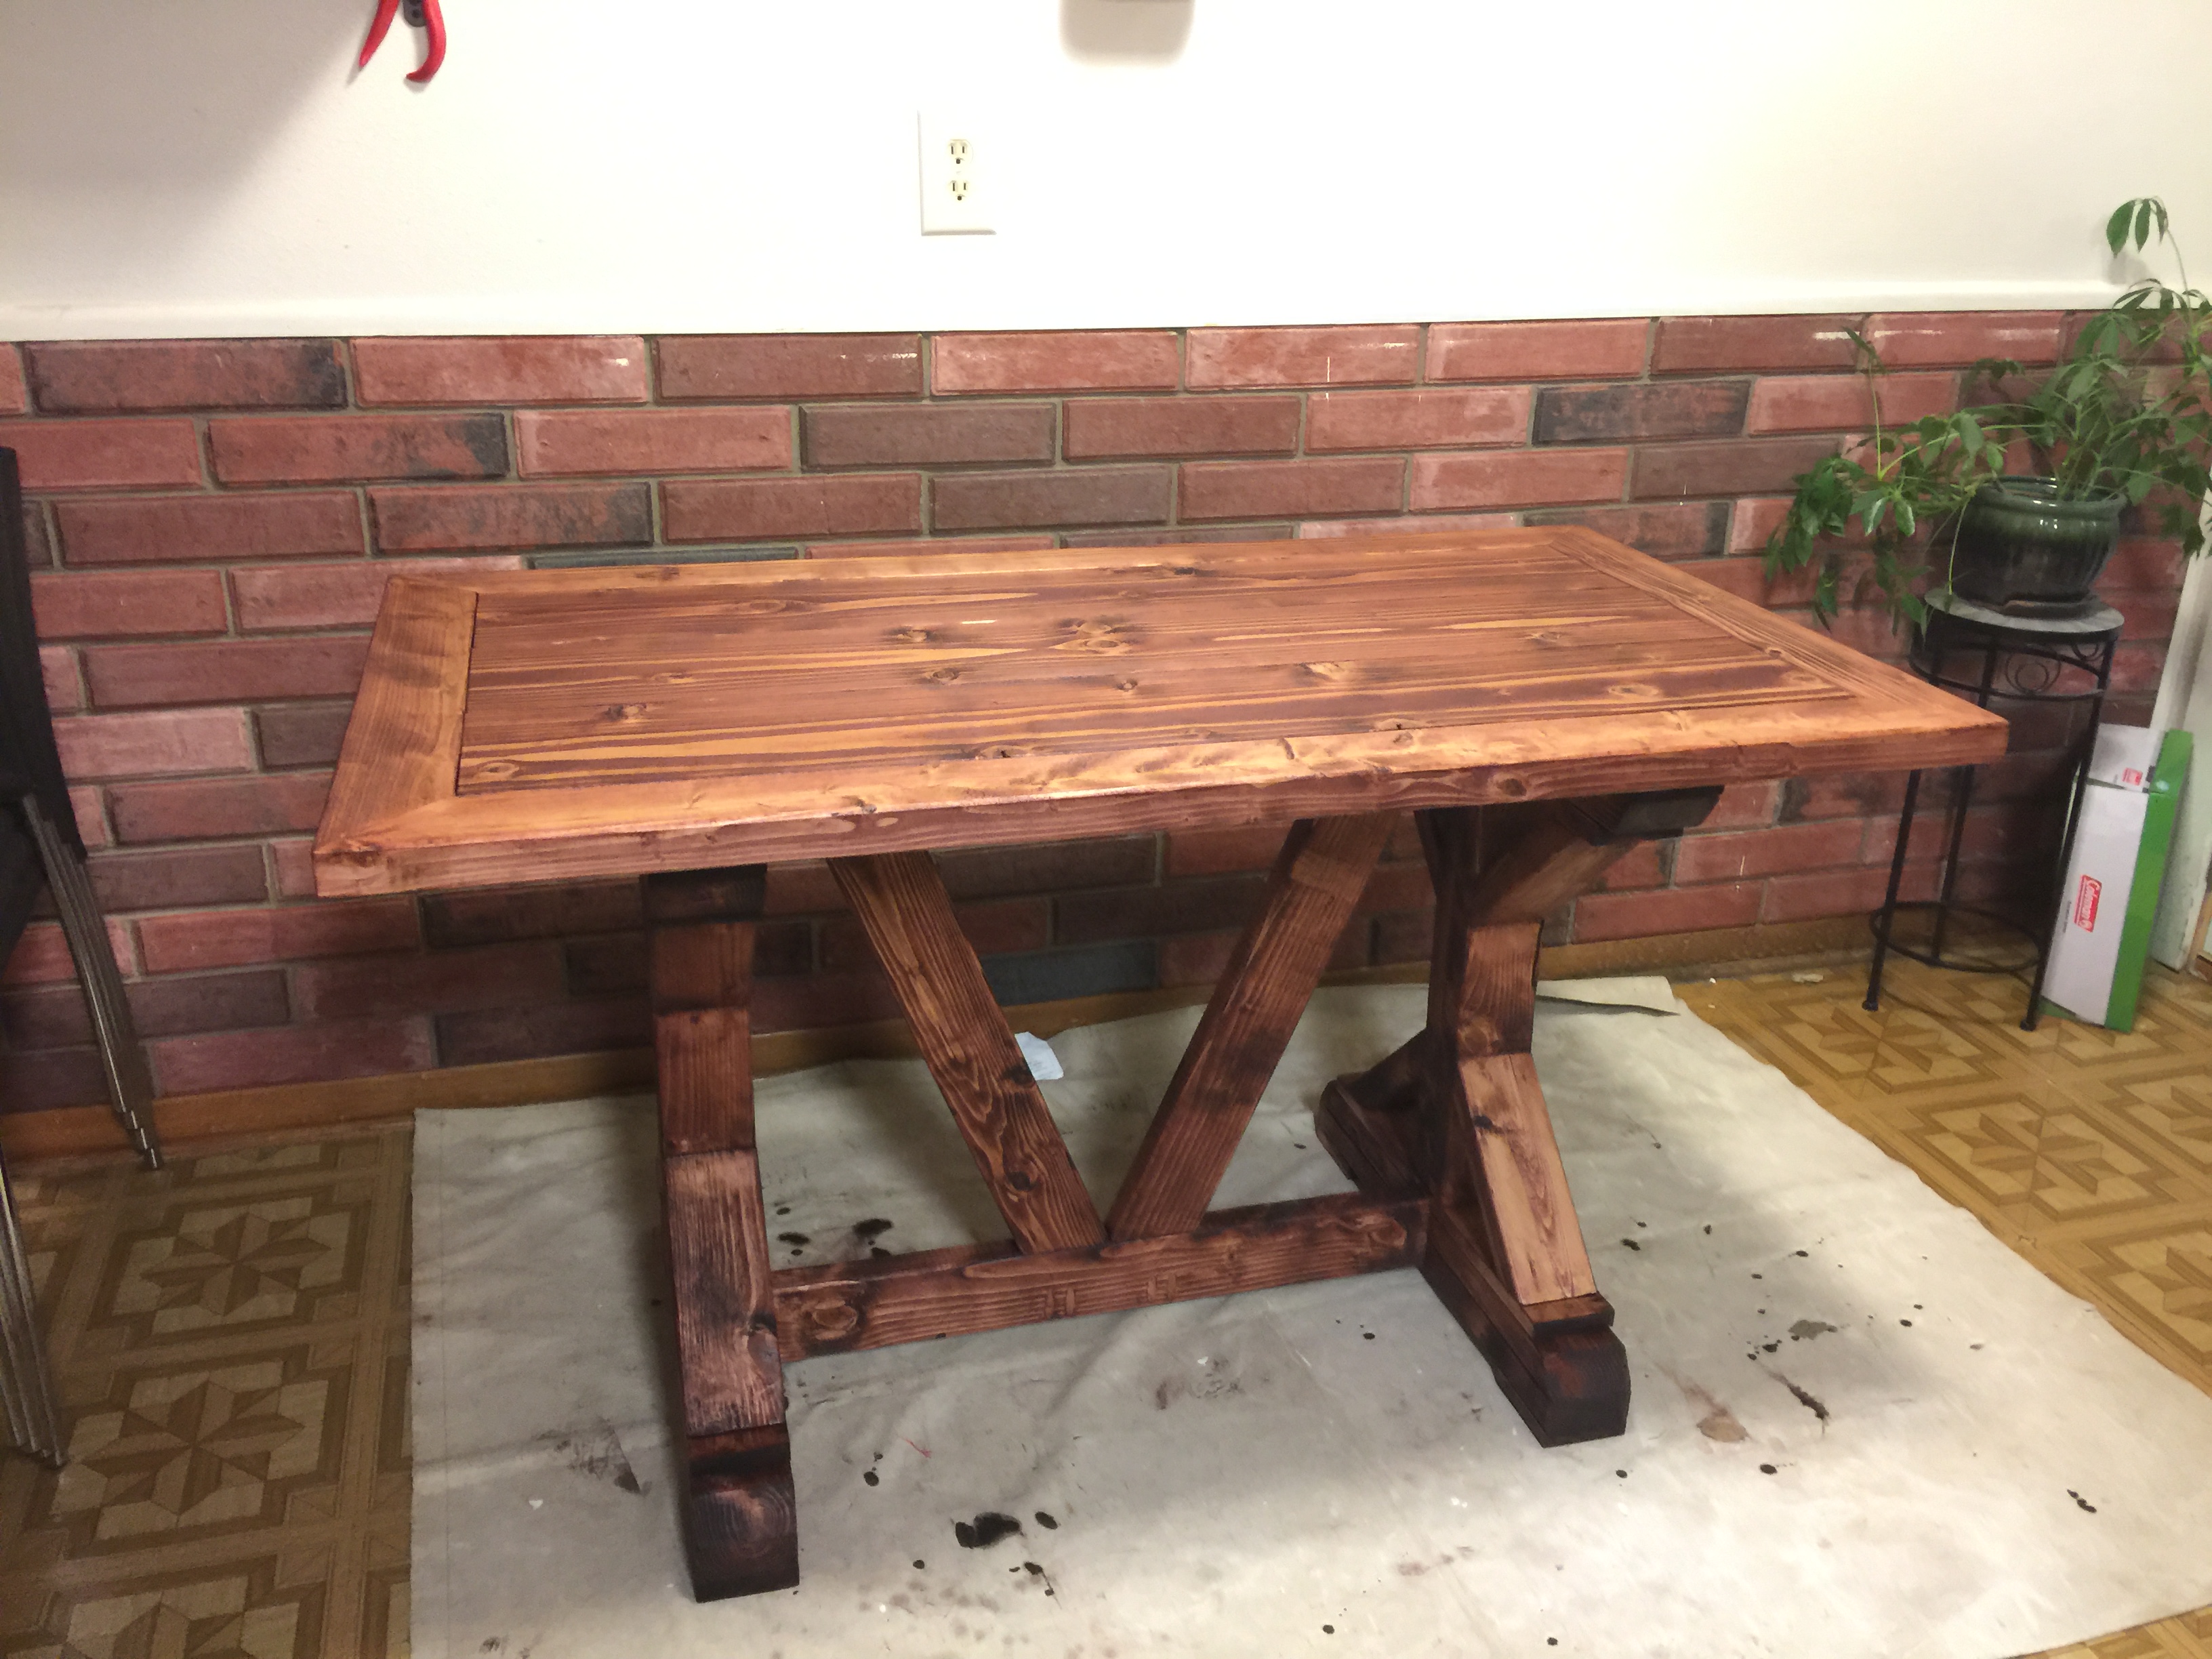
I liked the style of this table and needed something for my kitchen that looked nice but not cheap. I had to shrink it to fit in my kitchen as my space is limited. I changed the top to have a little more finished look and even though I made it smaller than normal, the size I have still fits 6 people. I think it came out fairly well and wanted to say thanks a million for some great ideas and plans.
Built from Plan(s)
Estimated Cost
$75-$80
Estimated Time Investment
Weekend Project (10-20 Hours)
Finish Used
bombay mahogany, no top coat as yet since I finished it when it was to cold to lacquer in the garage.
Recommended Skill Level
Beginner
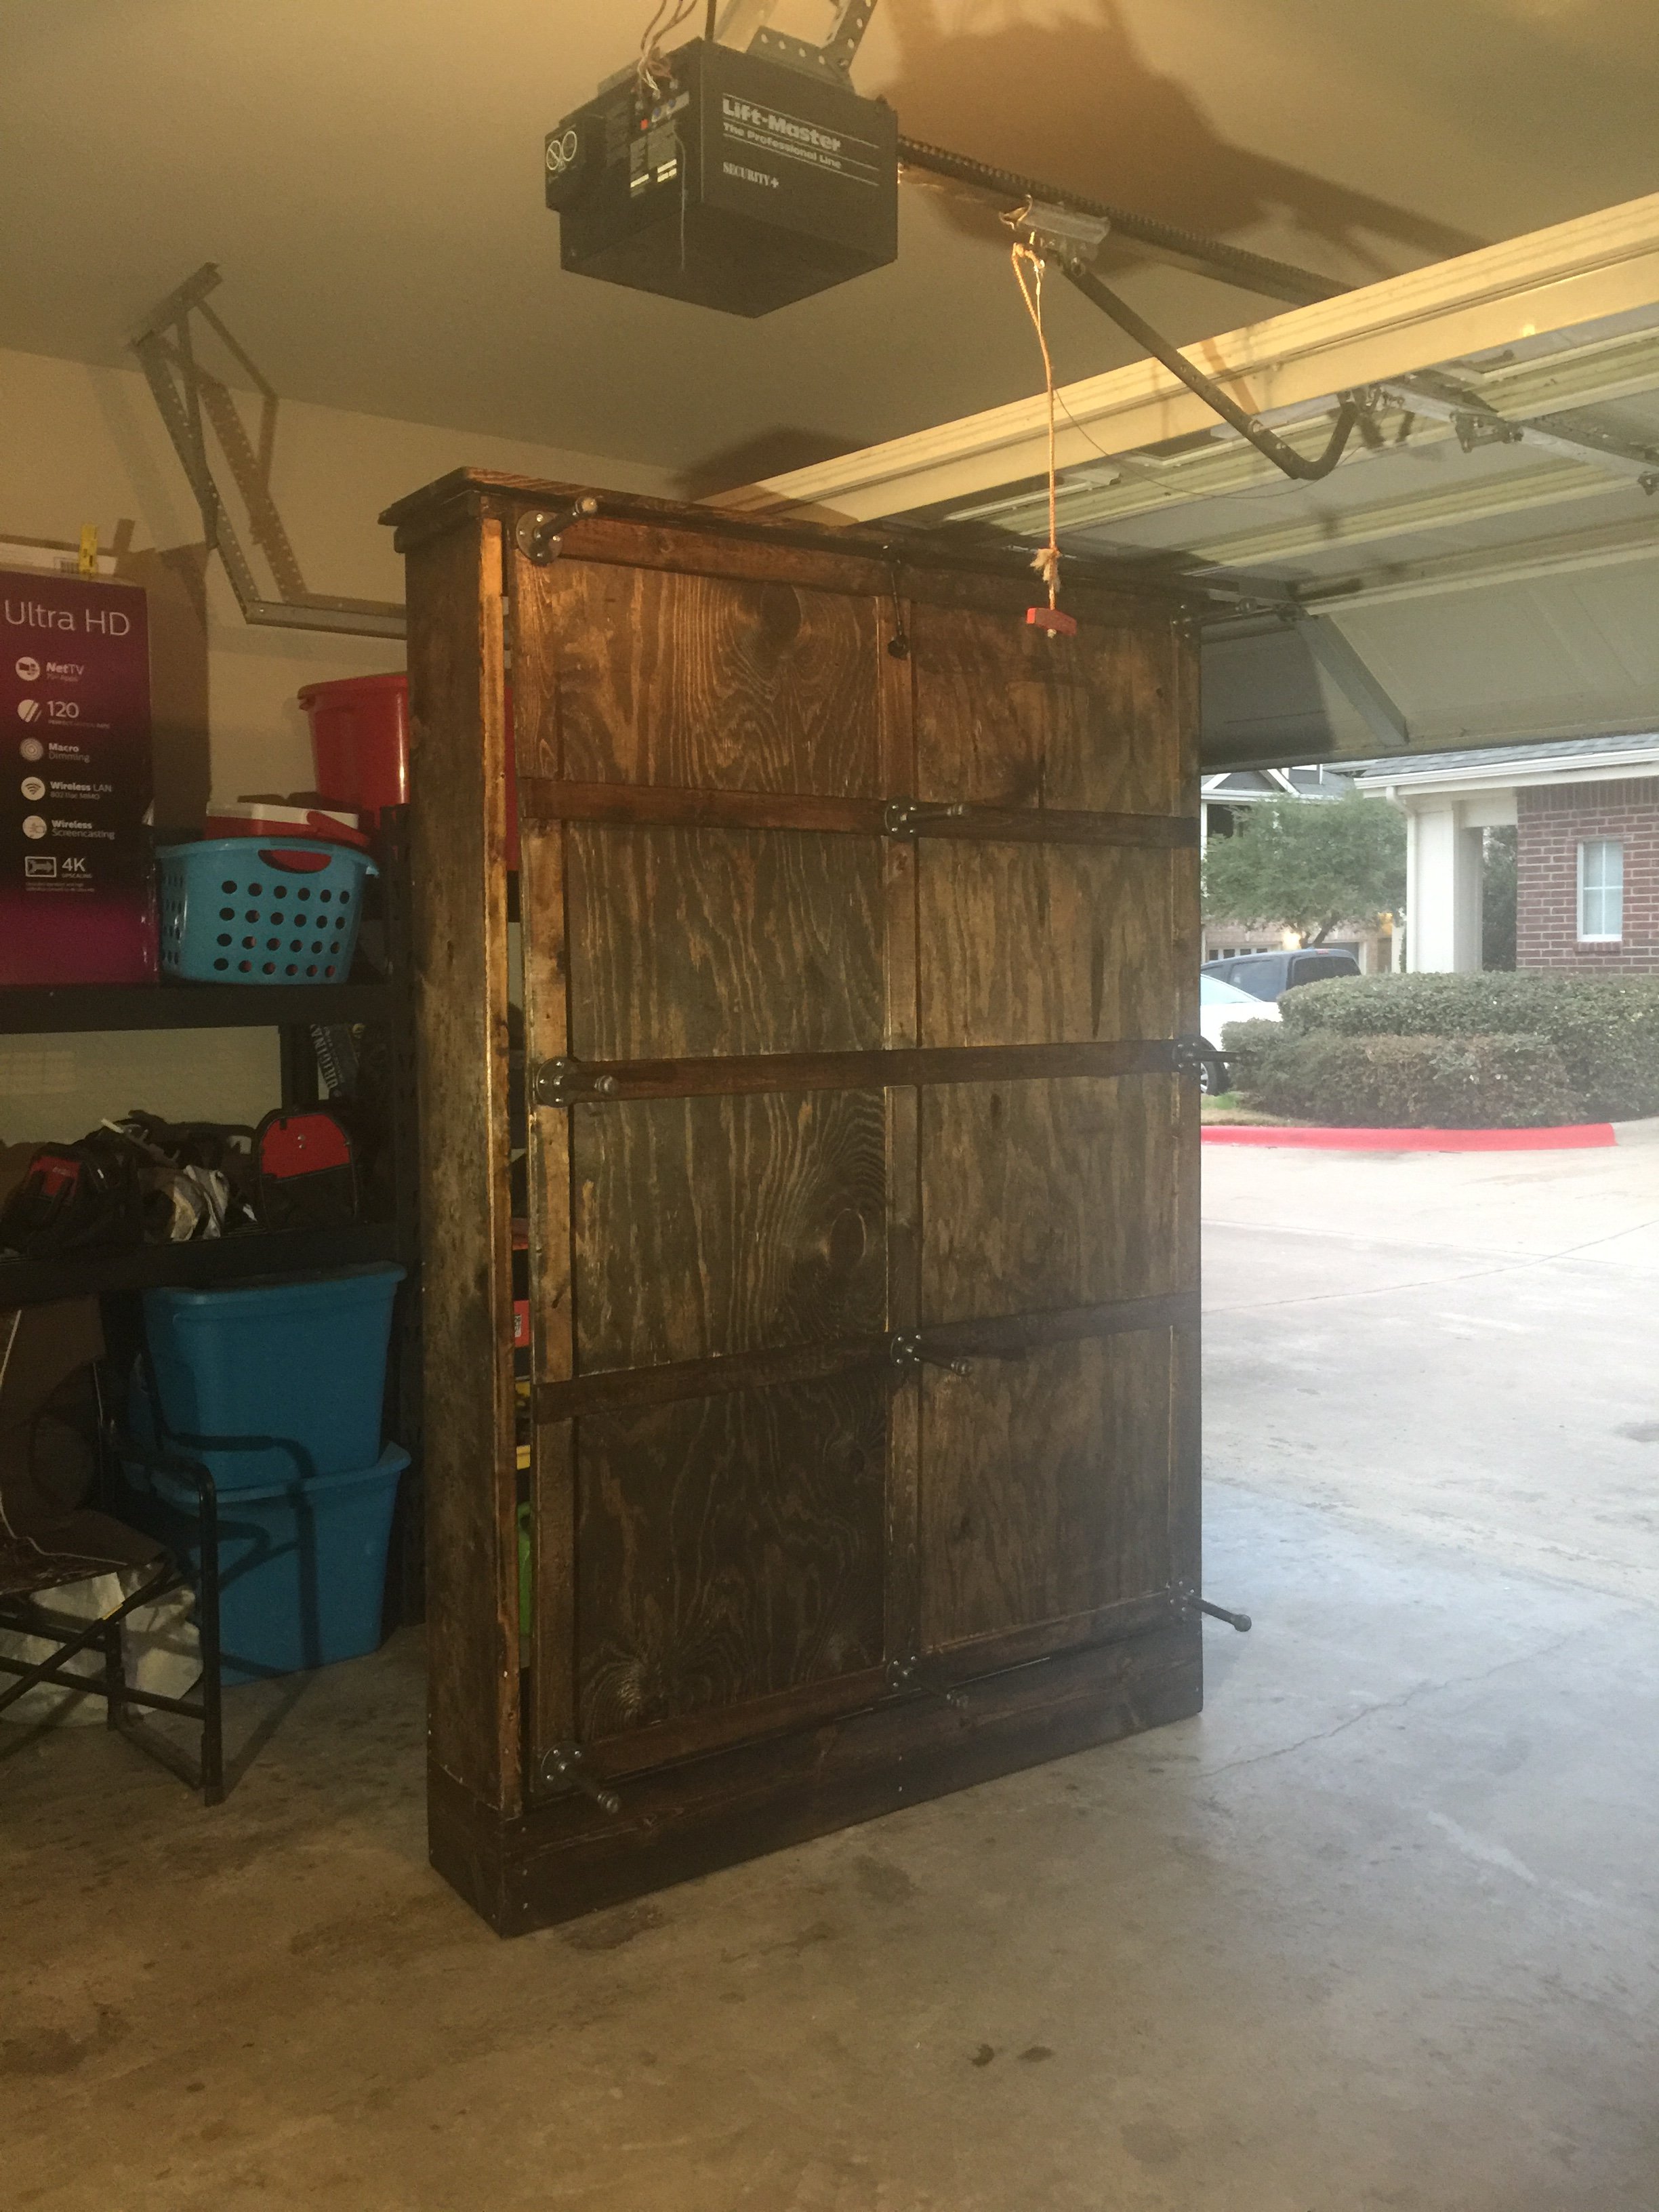
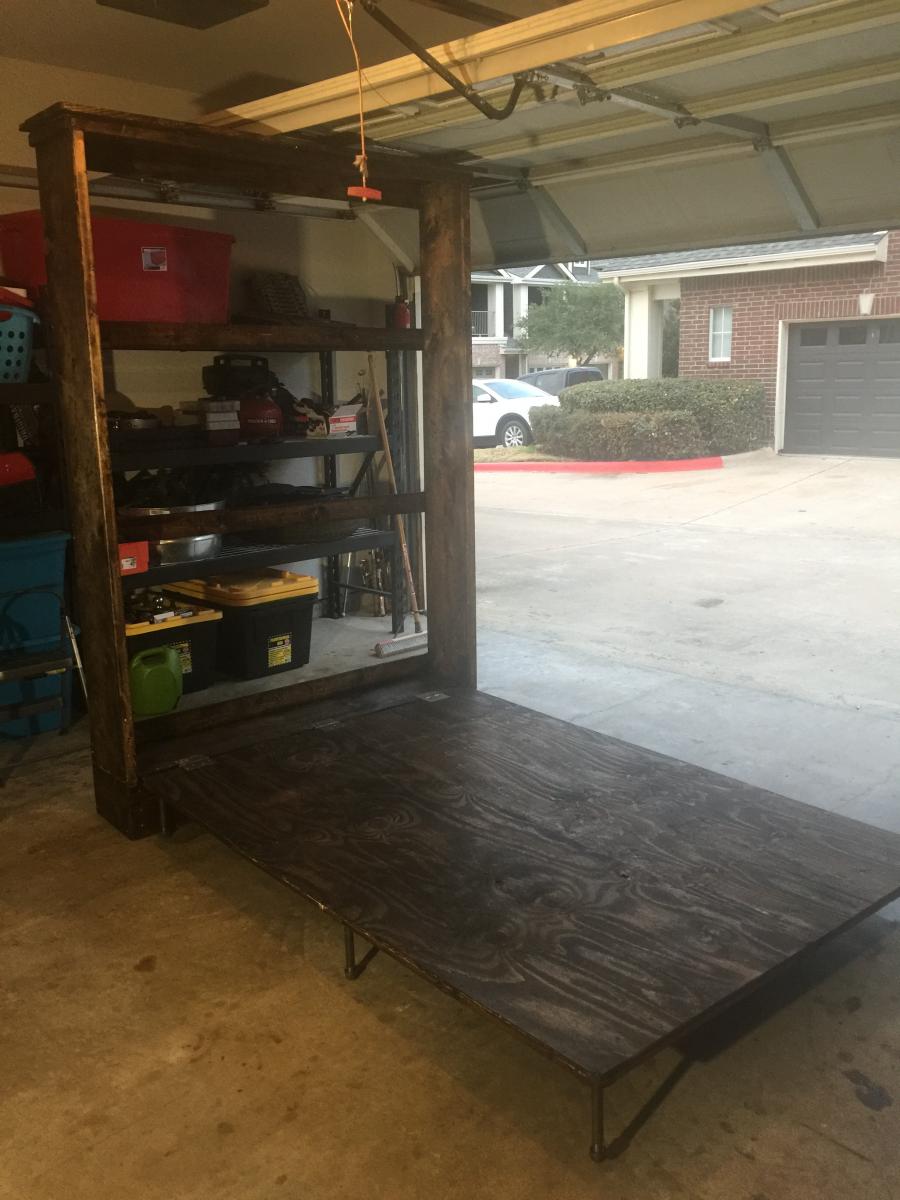
Murphy Bed
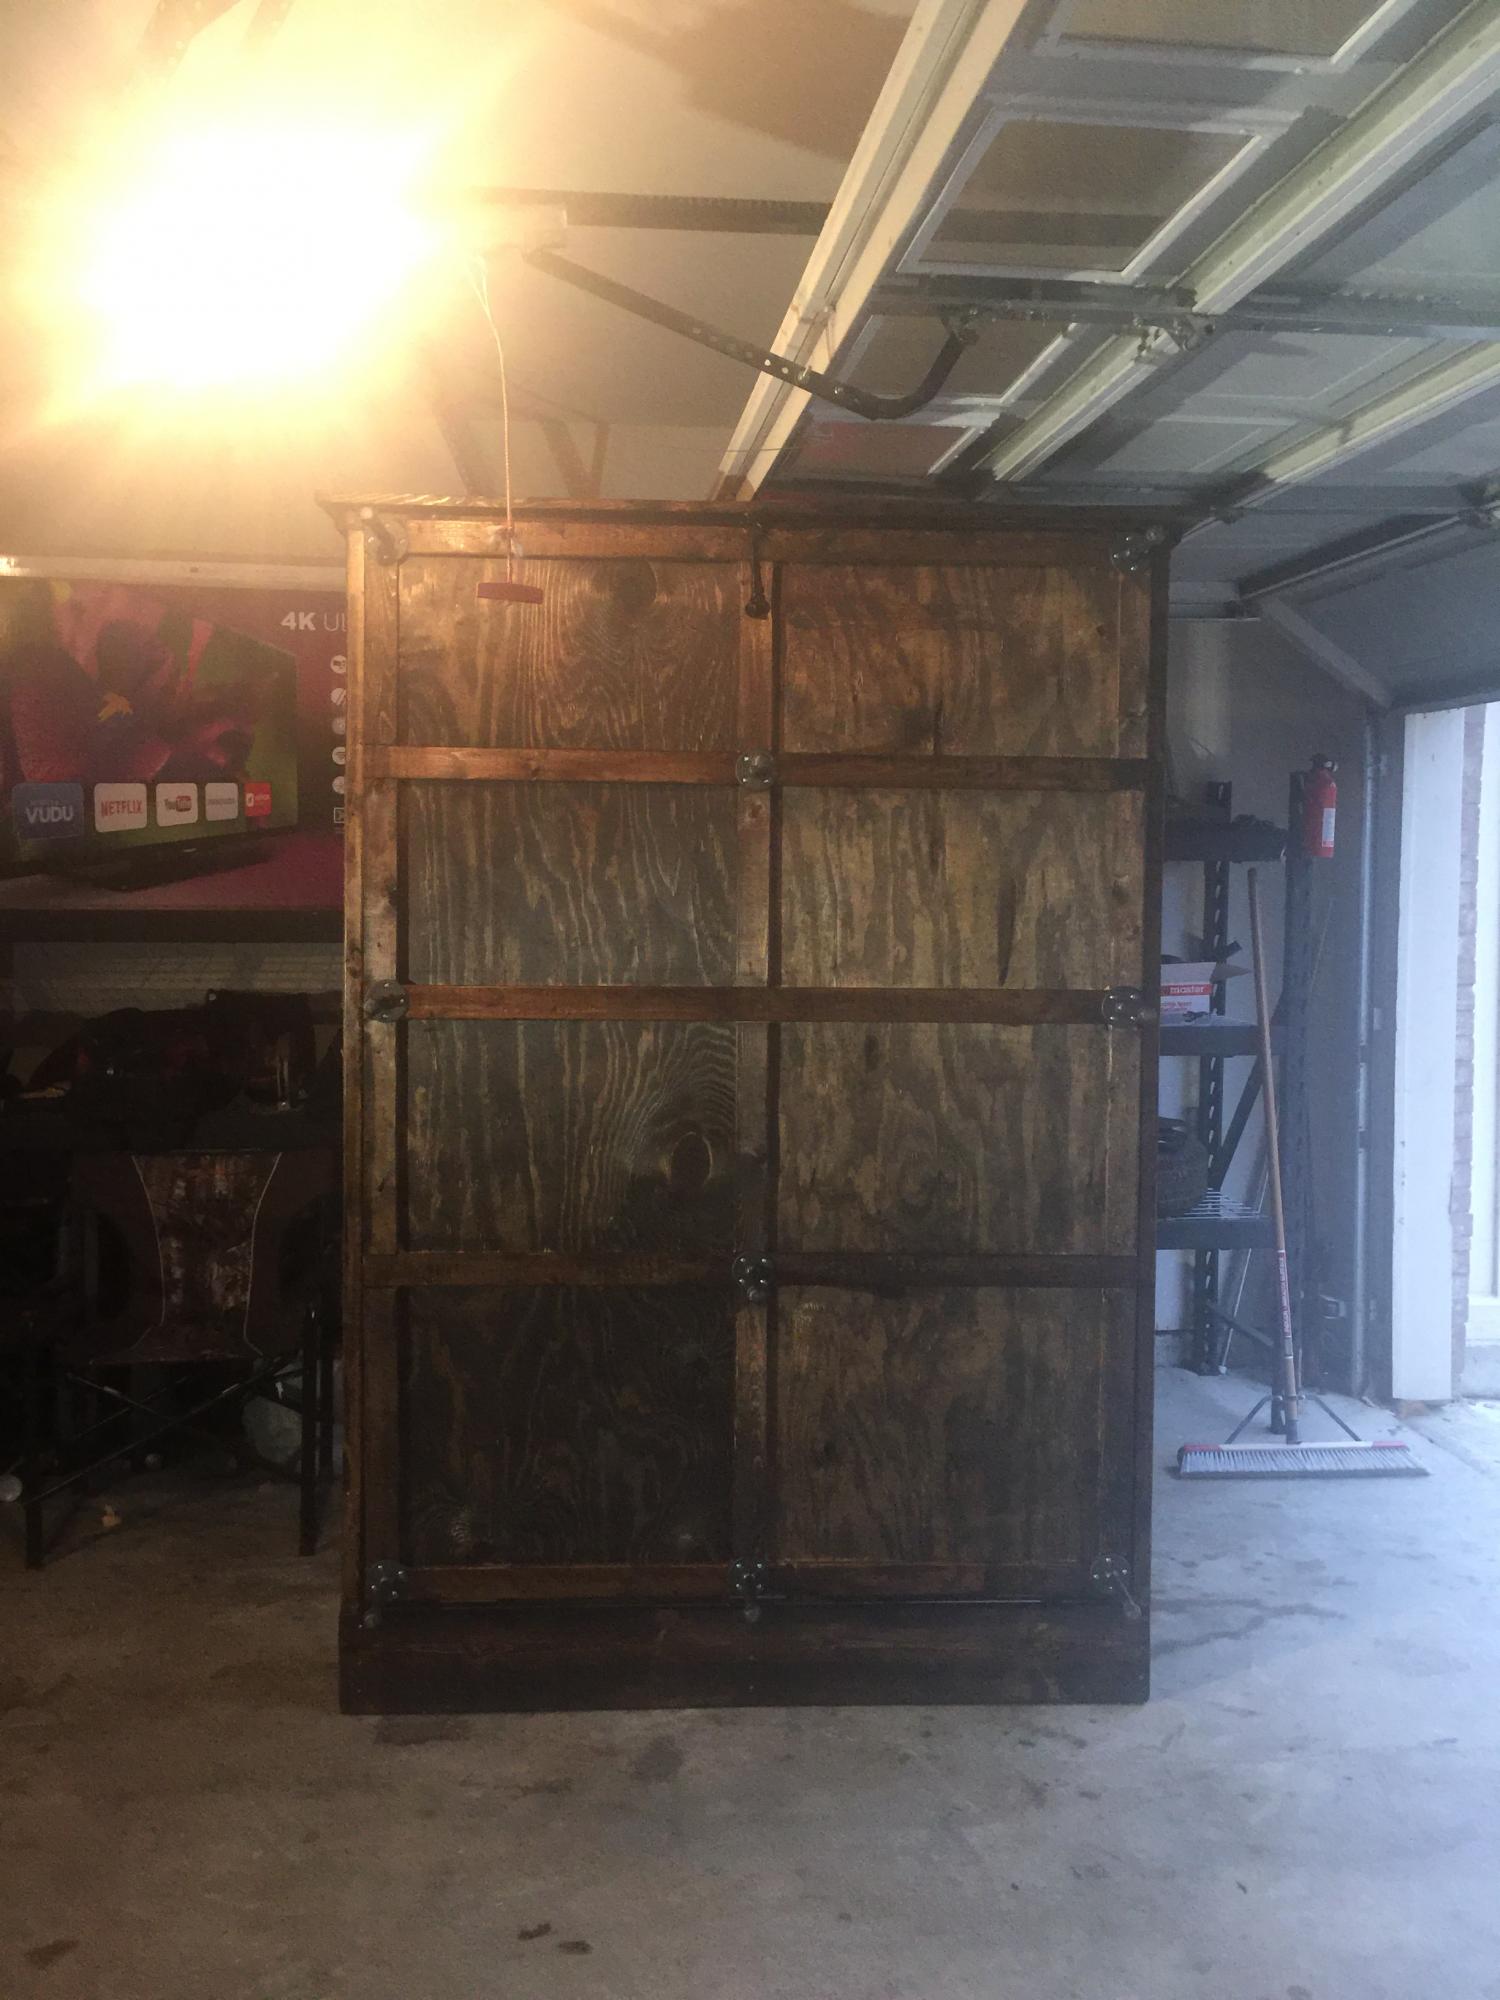
More difficult build then I'm used too. Modified it to fit a full mattress but I think it turned out great! It's a lot cheaper to build than most Murphy beds to purchase out there on the market. Enjoyed these plans. Thank you Ana!
Built from Plan(s)
Estimated Cost
$250
Estimated Time Investment
Weekend Project (10-20 Hours)
Finish Used
Dark walnut
Recommended Skill Level
Intermediate
Garden shed
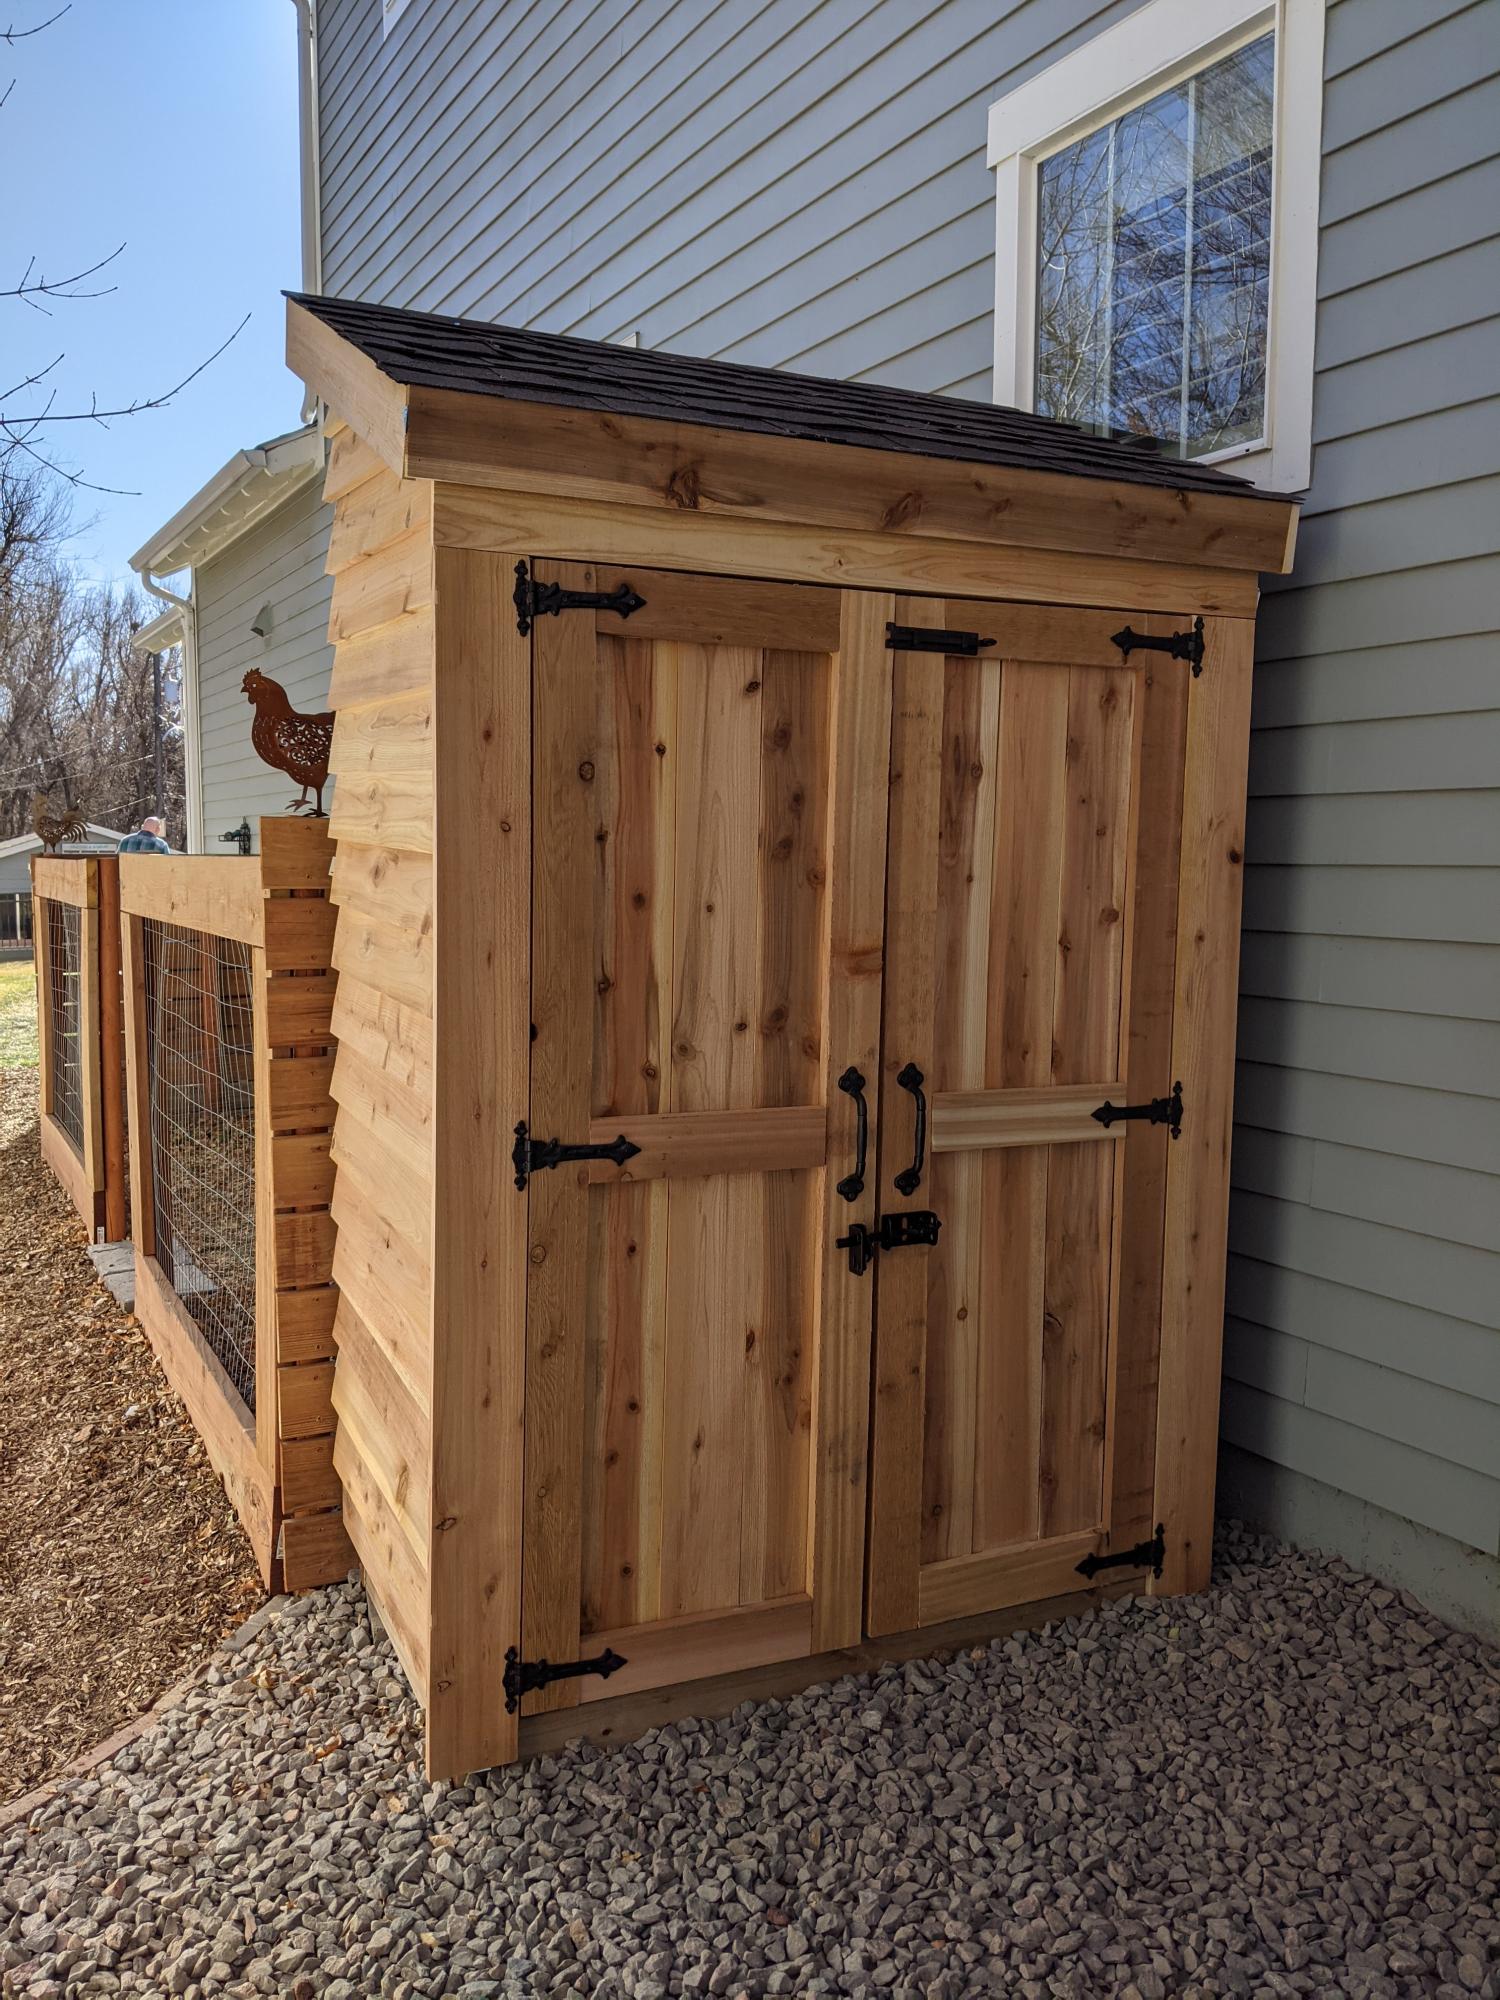
Our take on the small garden shed. Ours is 4 1/2 by 7 feet. We used cedar fence pickets and 2x4 construction. Left over shingles from when our house was built. We are definitely not roofers or framers, also chasing around a 3 year old didn't make things easier. Turned out beautiful for what we want it for. Just rustic enough. Great intermediate project.
Built from Plan(s)
Estimated Cost
$400
Estimated Time Investment
Weekend Project (10-20 Hours)
Finish Used
Thompson's clear water seal will be applied this summer.
Recommended Skill Level
Intermediate
Comments
Mon, 11/30/2020 - 11:14
Beautiful storage!
You did a great job, the 3 year olds add just the perfect amount of challenge to really appreciate a completed project!:)
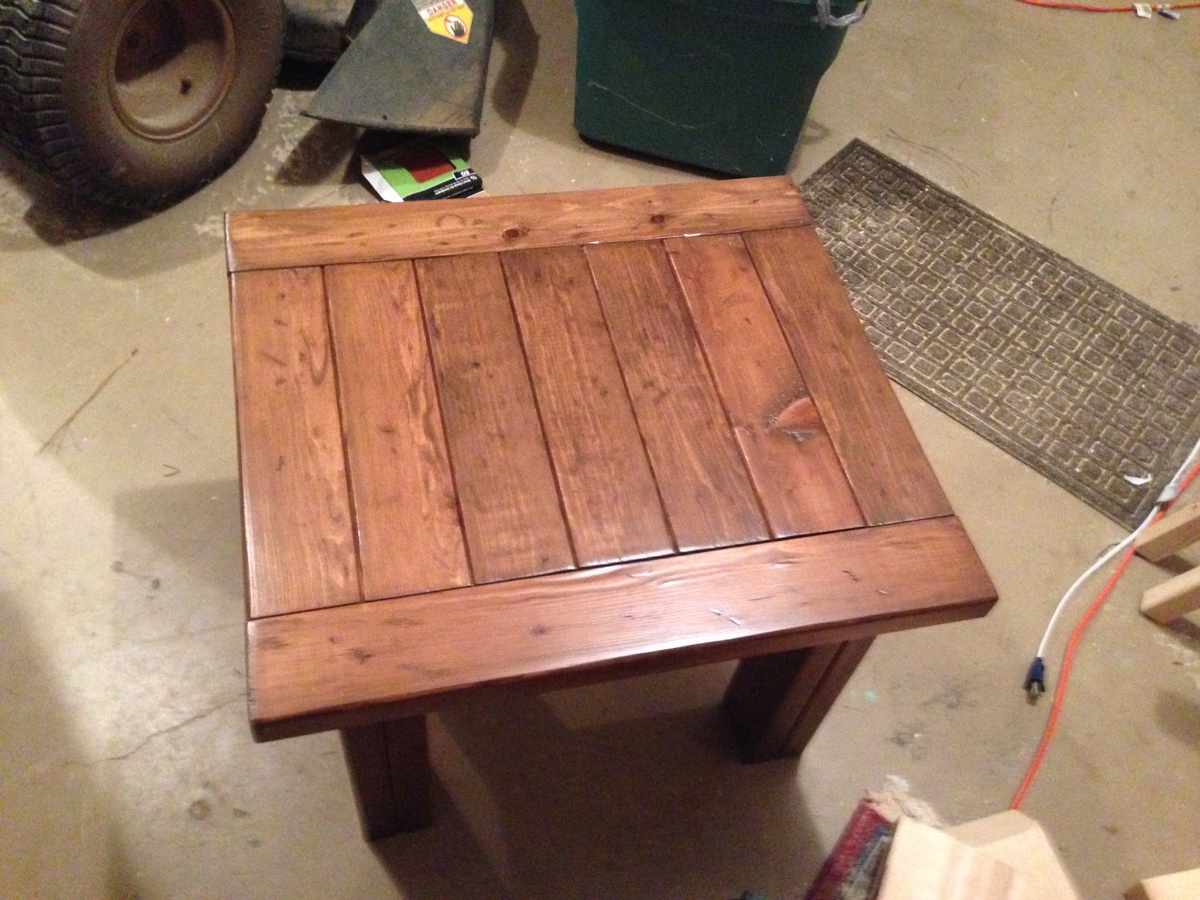
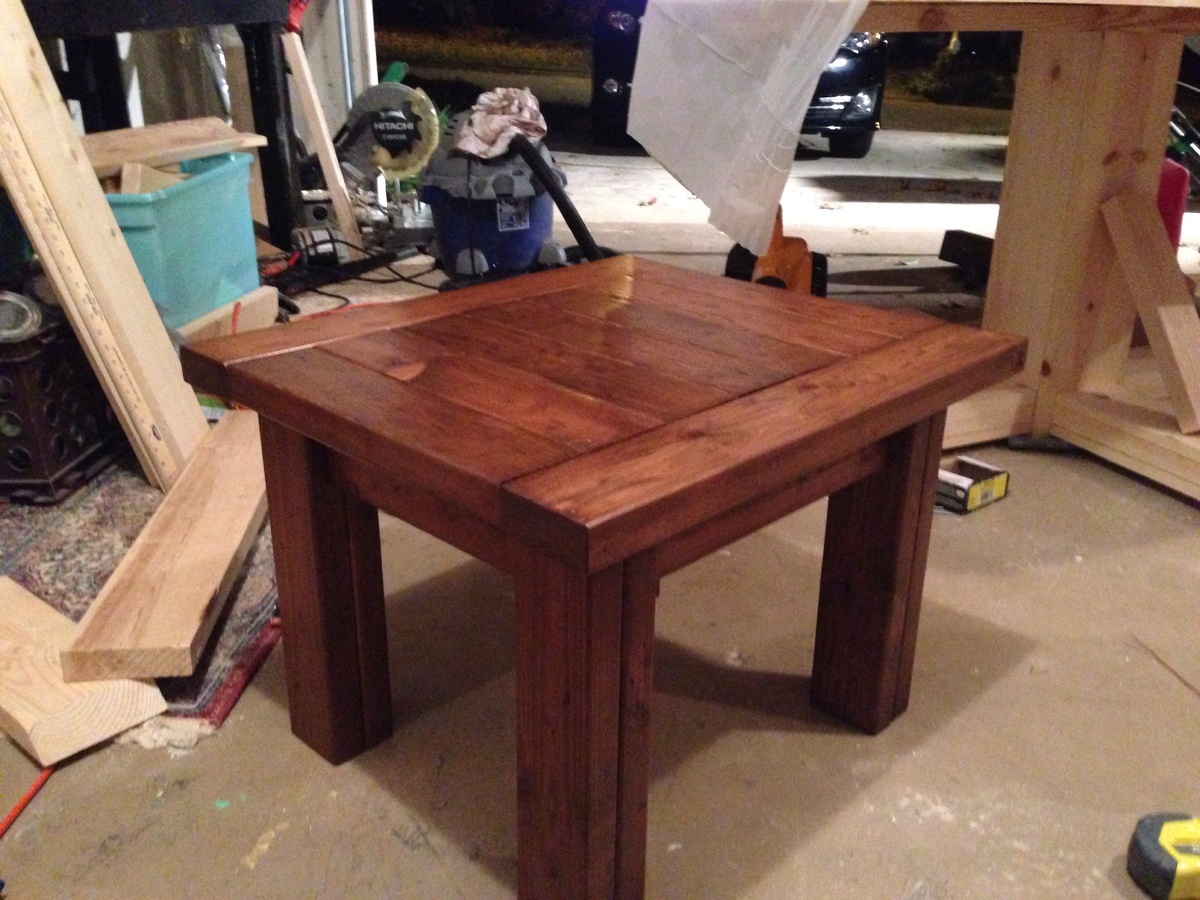
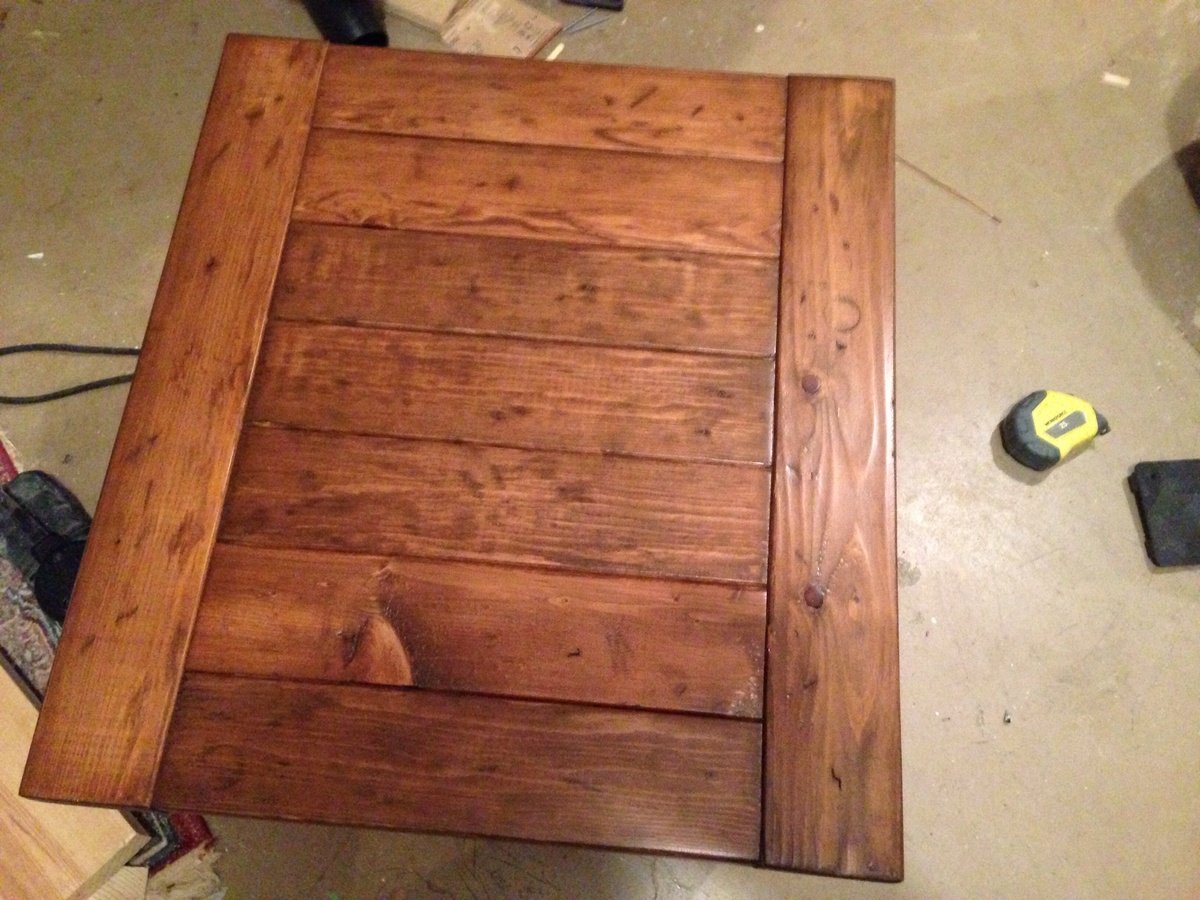
Tryde end tables
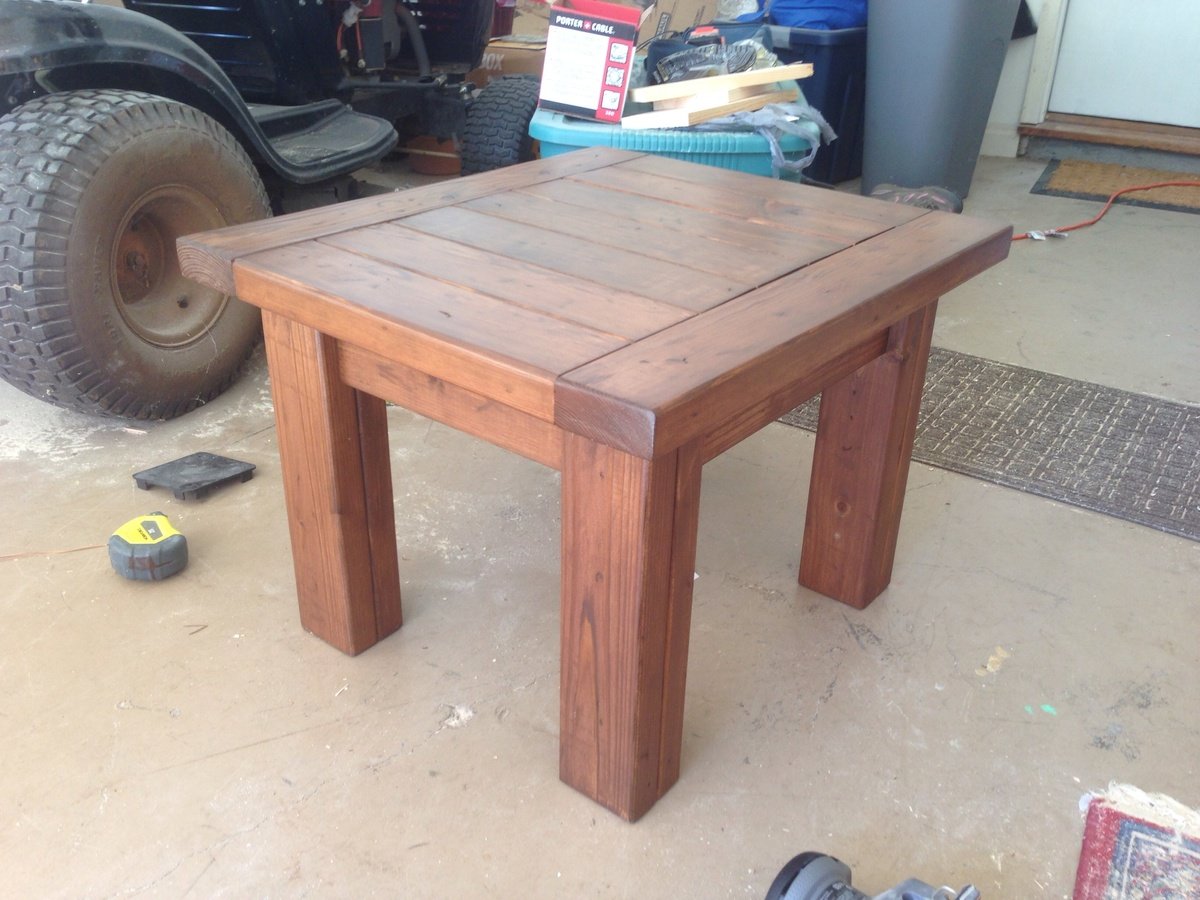
Tryde end tables
Built from Plan(s)
Estimated Cost
$25
Estimated Time Investment
Afternoon Project (3-6 Hours)
Finish Used
I distressed the surface with various tools, also created "worm holes". Finished with vinegar/steel wool oxidizing solution followed by a tea stain. The final finish was a satin poly.
Recommended Skill Level
Beginner
Comments

Fri, 11/21/2014 - 09:32
I really love the rounded
I really love the rounded edges! This is beautiful!
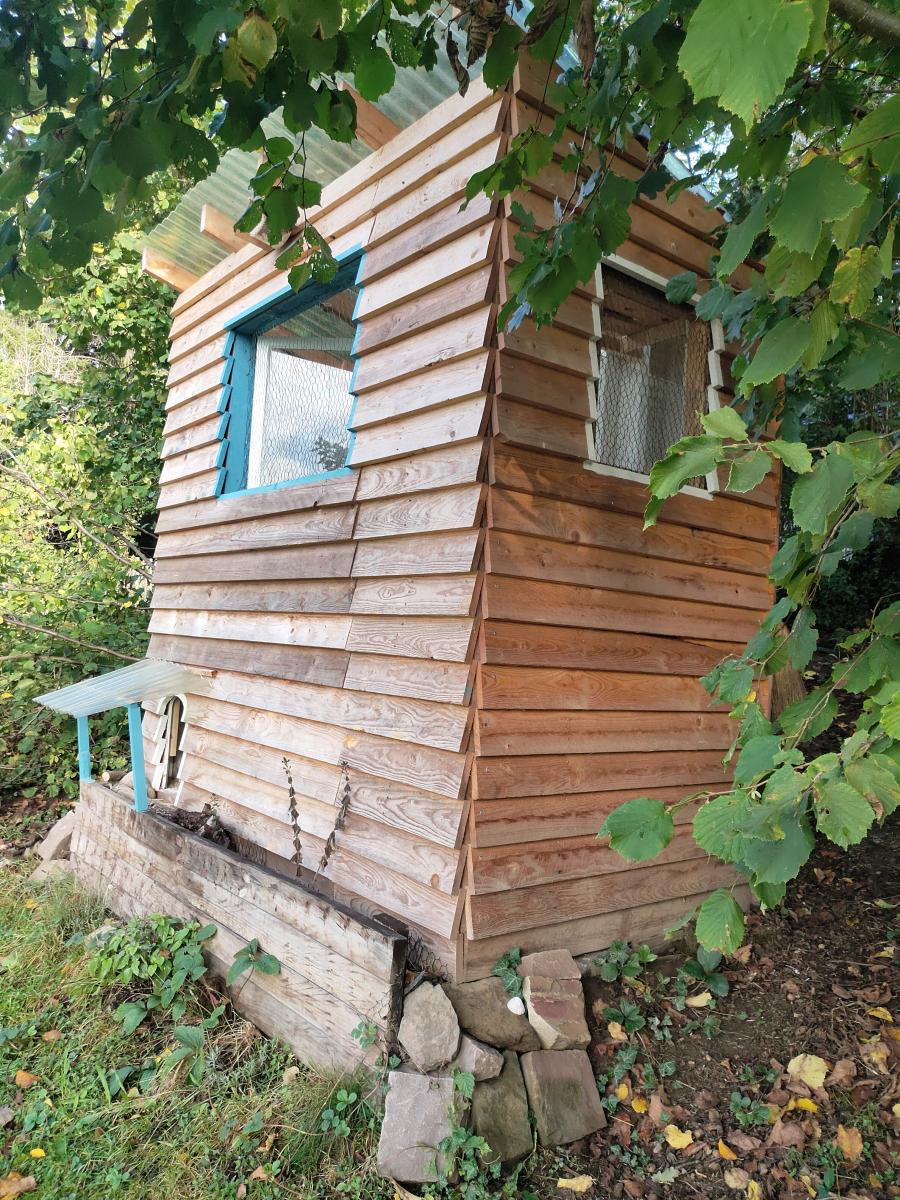
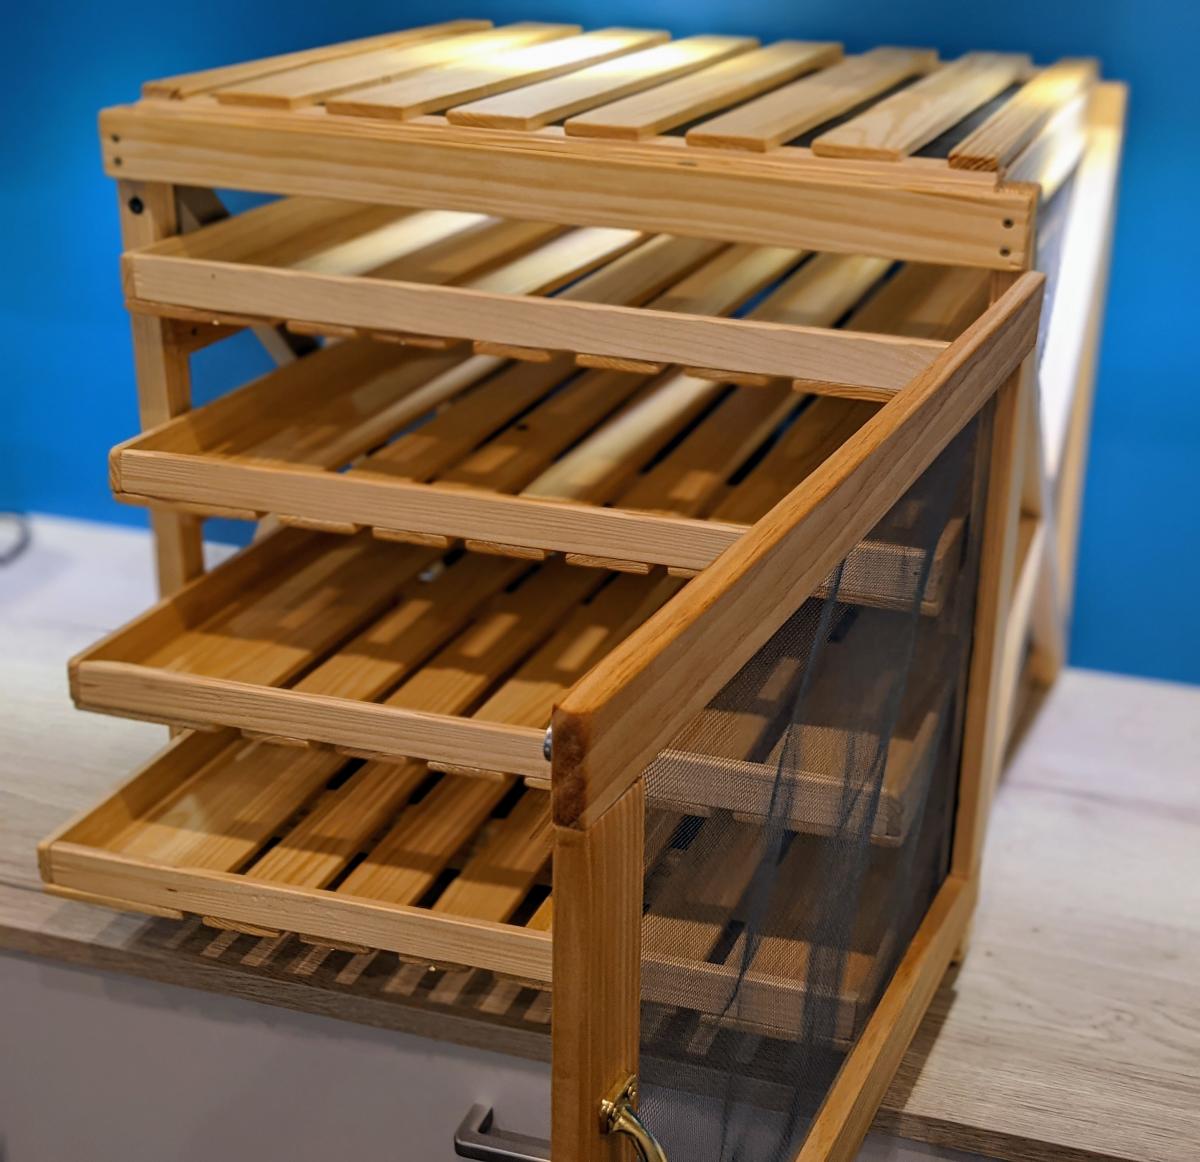
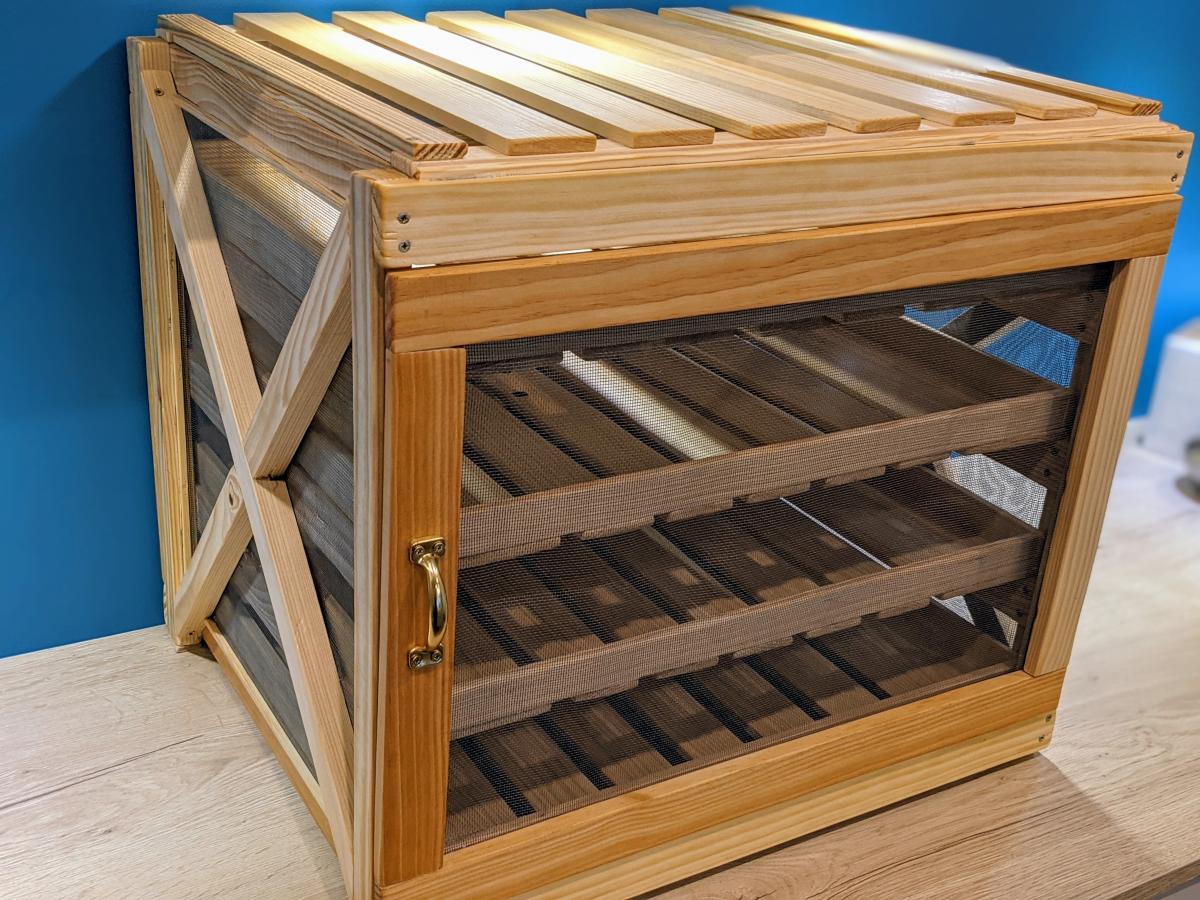
Vegetable Rack with Slide Out Trays
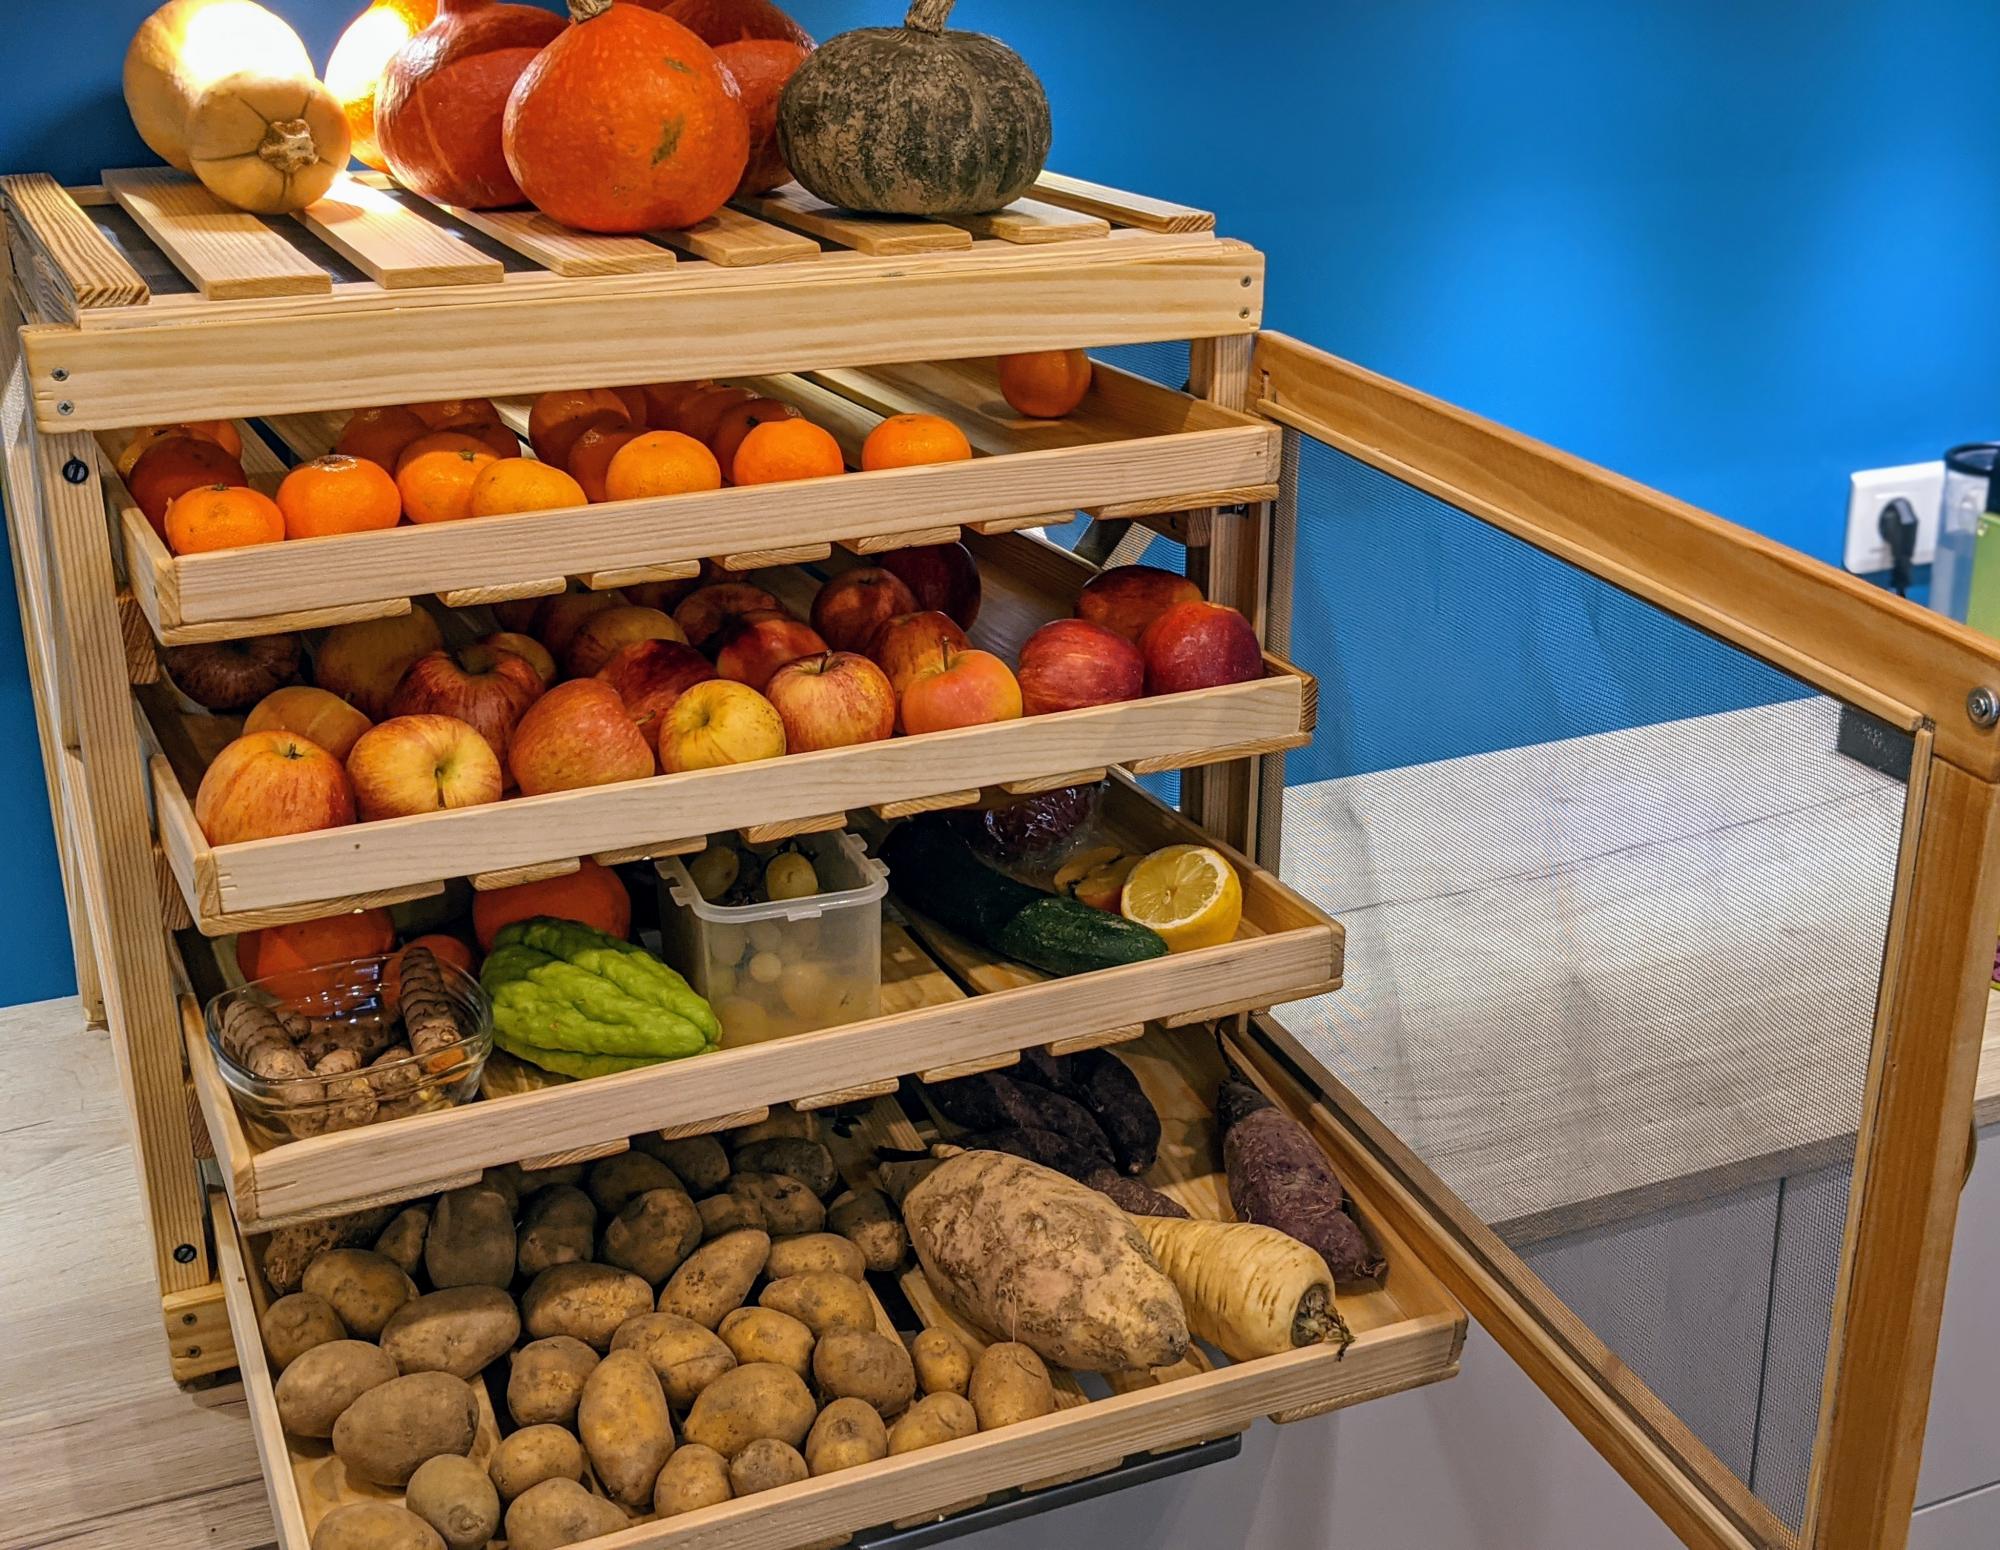
This is the application of the "Vegetable Rack with Slide Out Trays" from Ana White.
I just added a door and some mosquito net, to avoid midges in summer.
Built from Plan(s)
Estimated Cost
100€
Estimated Time Investment
Week Long Project (20 Hours or More)
Finish Used
A mix of coconut oil and wax.
Recommended Skill Level
Beginner
Comments
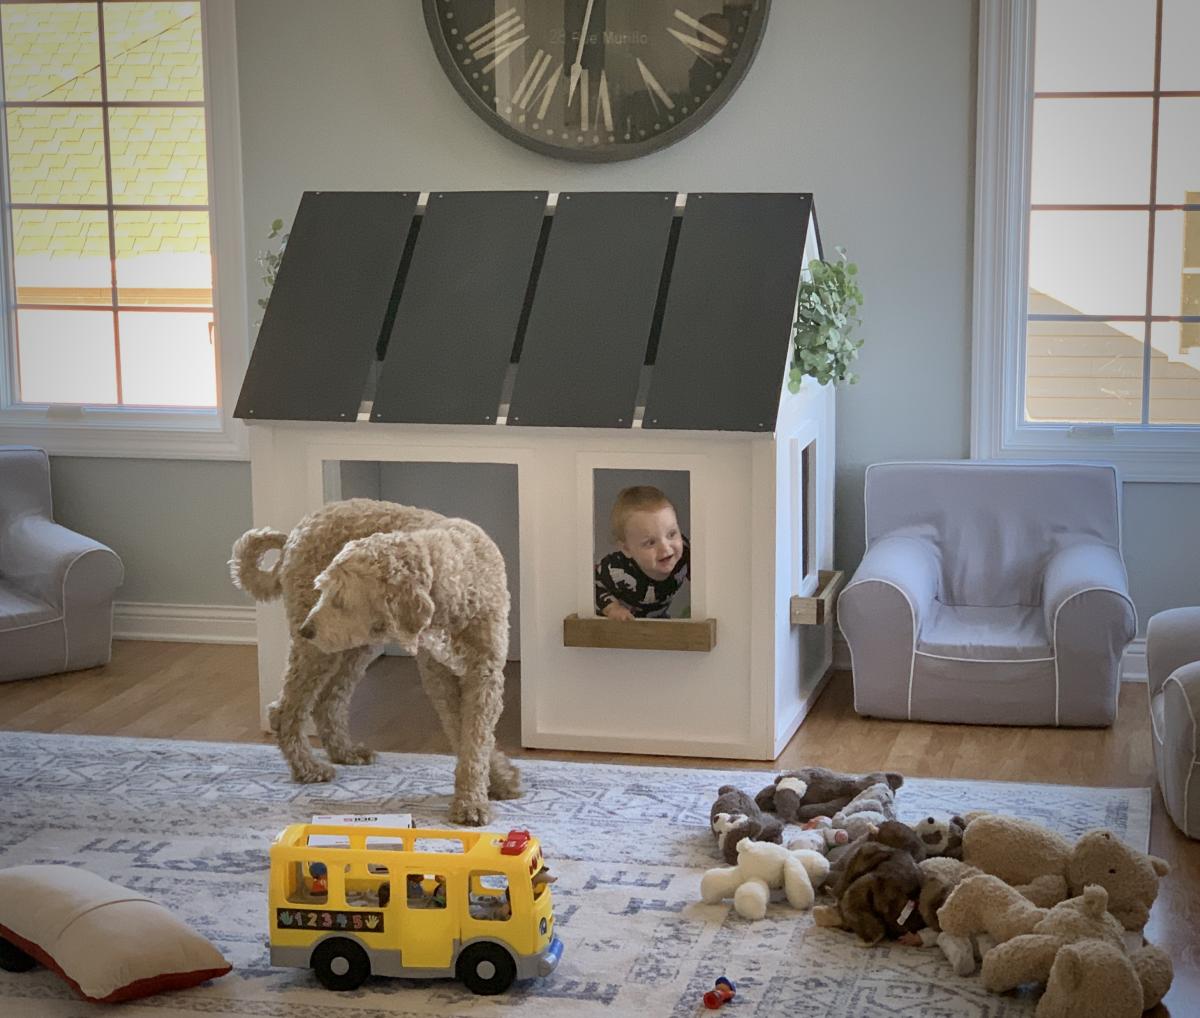
Farmhouse Playhouse for the Grandsons
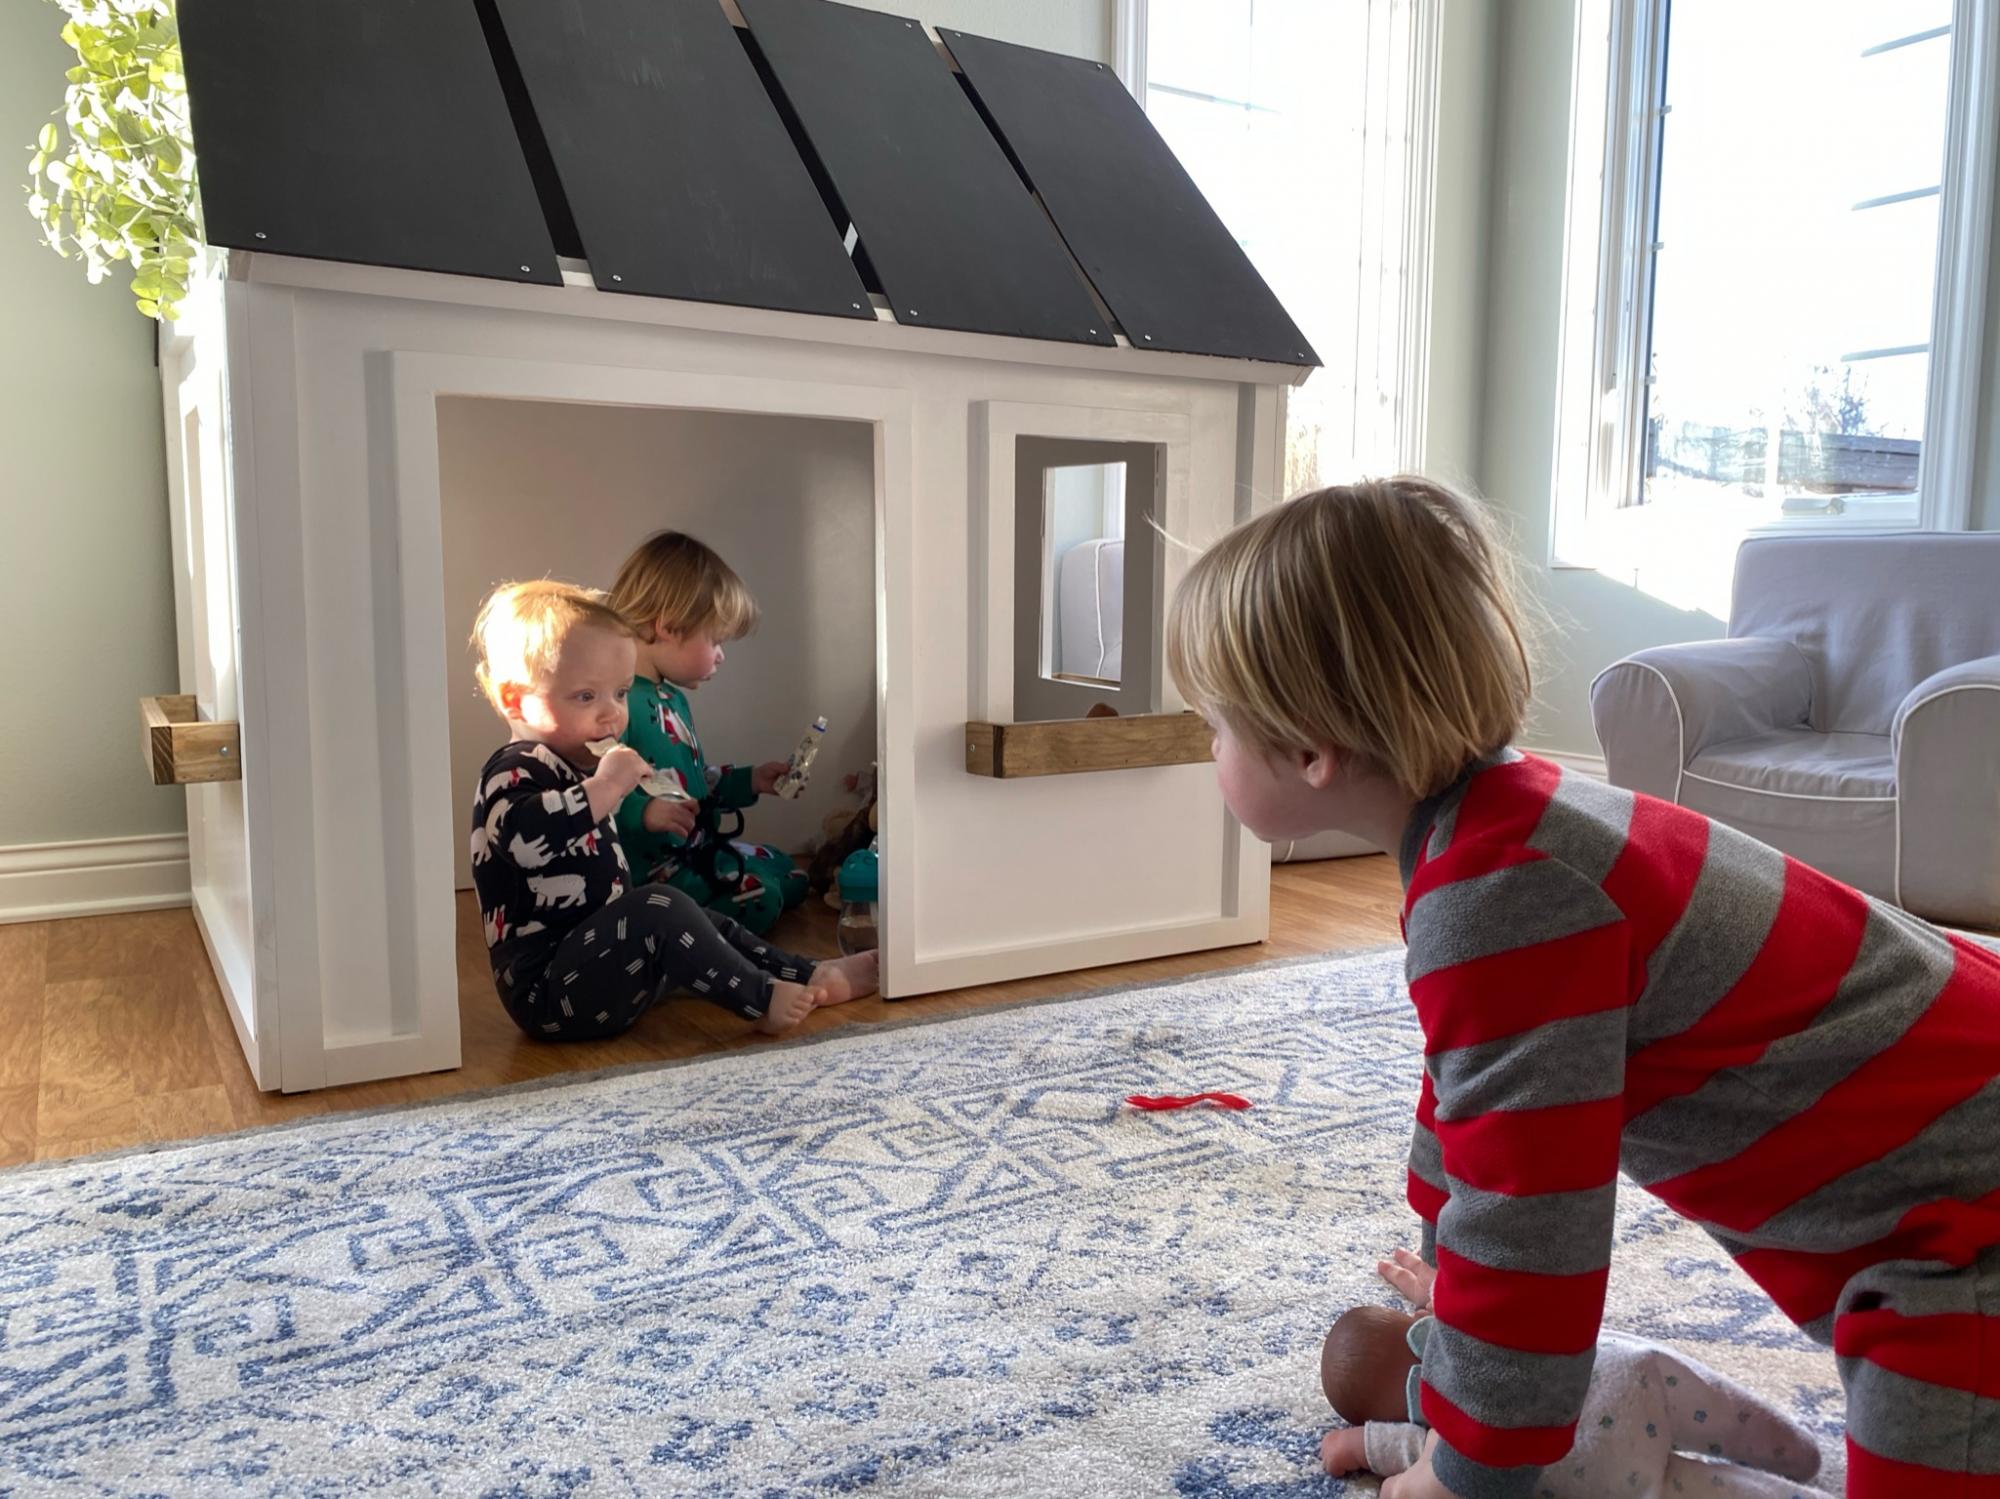
Ana White's plans were amazing and the outcome was perfect! What a fun project for Christmas! Thanks a Zillion, Ana!!
Built from Plan(s)
Estimated Cost
$100.00
Estimated Time Investment
Weekend Project (10-20 Hours)
Finish Used
Sanded, Primed and Painted
Recommended Skill Level
Intermediate
Comments
Fri, 12/25/2020 - 12:41
Heartwarming!
This just makes me smile so big, great job and Merry Christmas!

In reply to Heartwarming! by Ana White Admin
Tue, 12/29/2020 - 11:17
Thanks!
You ARE the Master!! Looking forward to more fun projects!
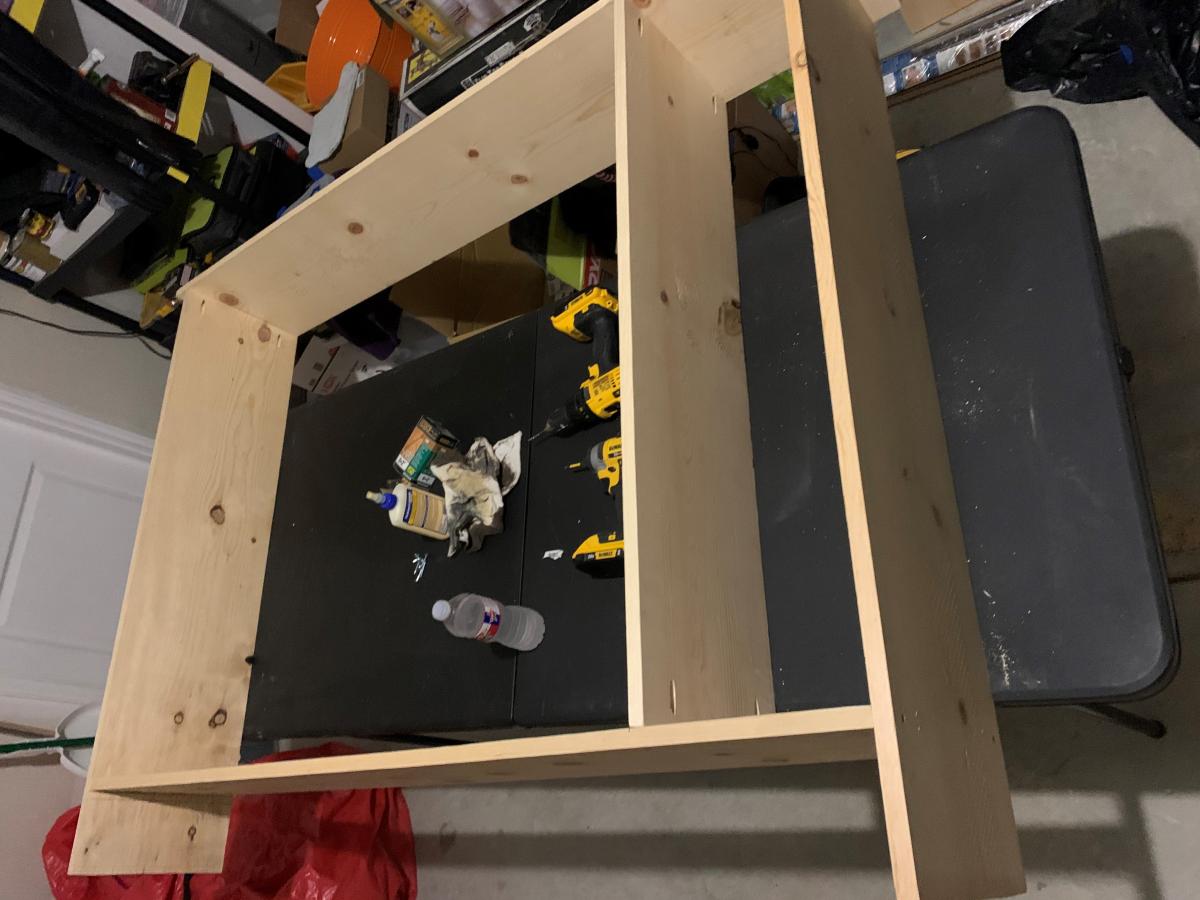
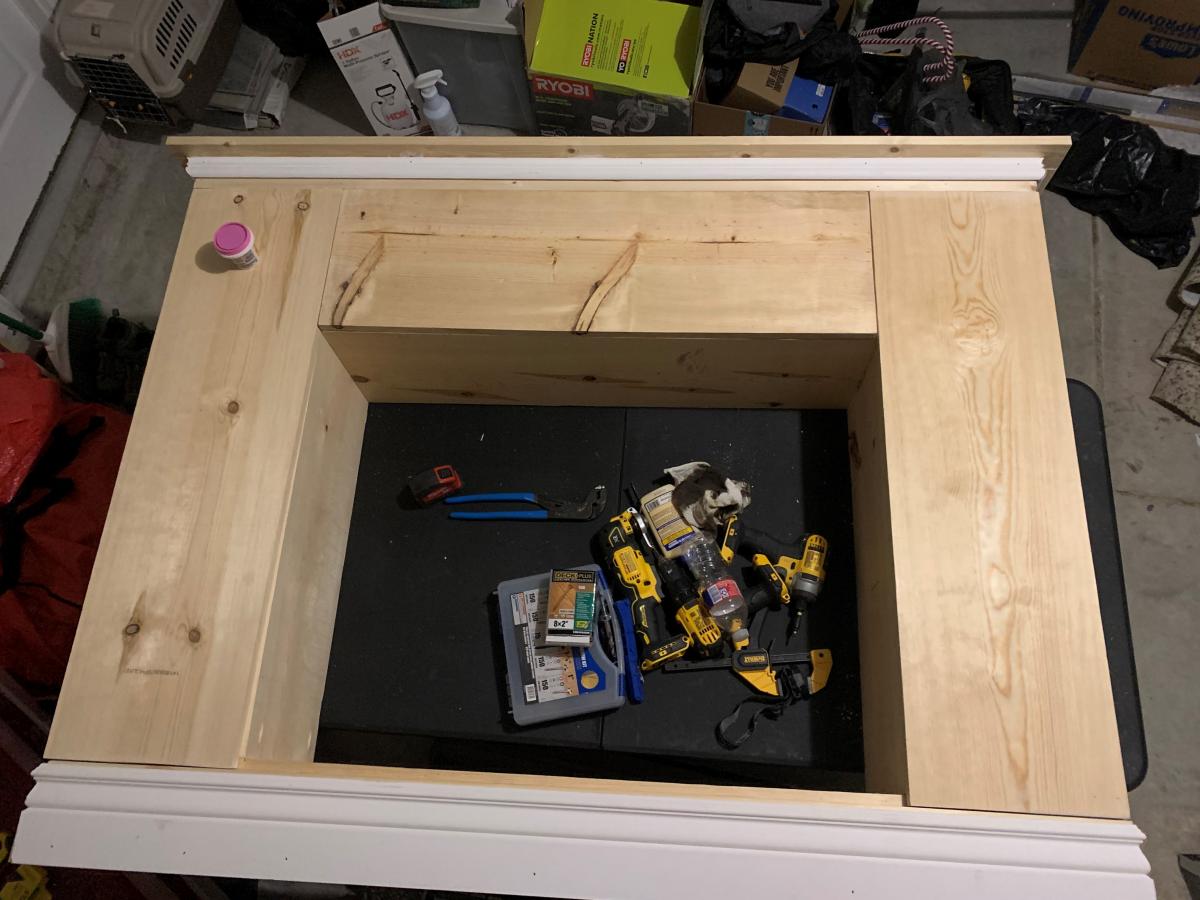
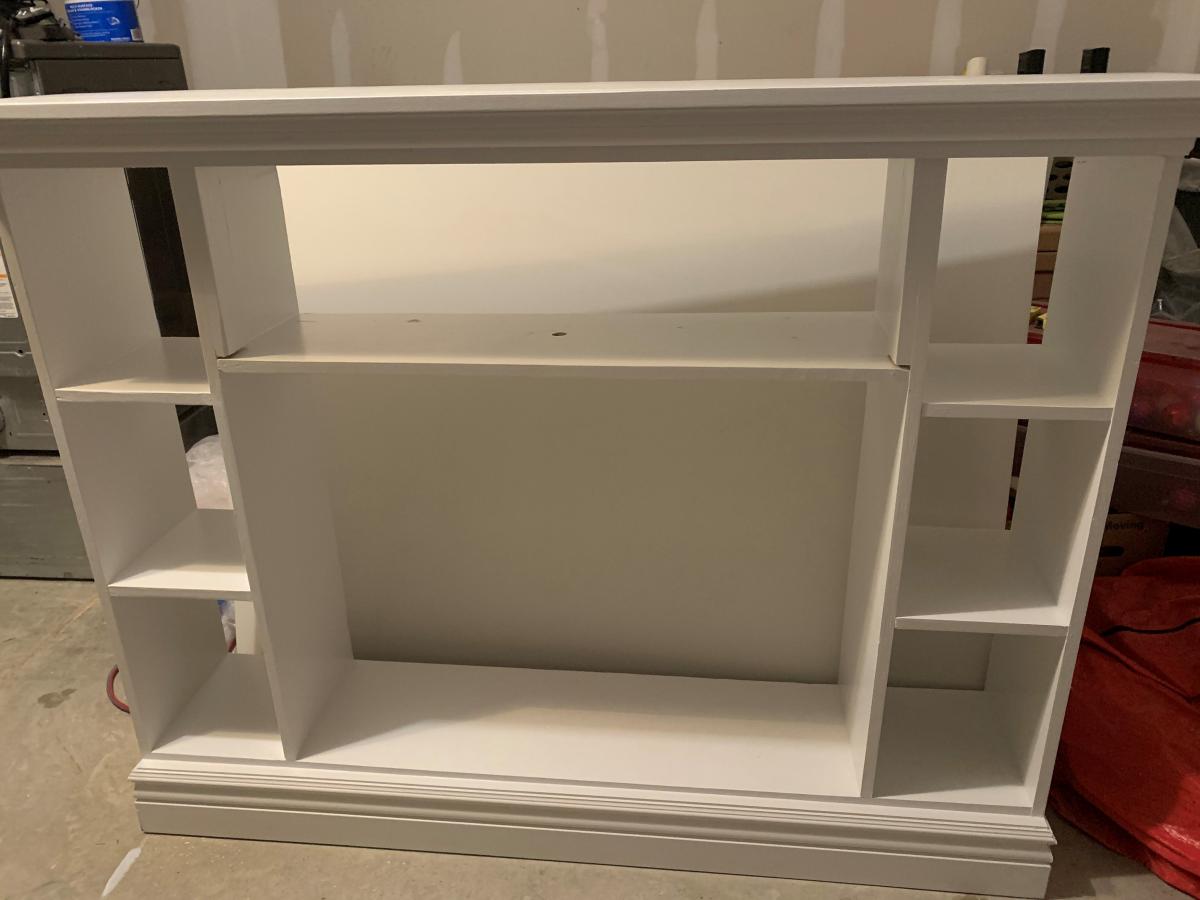
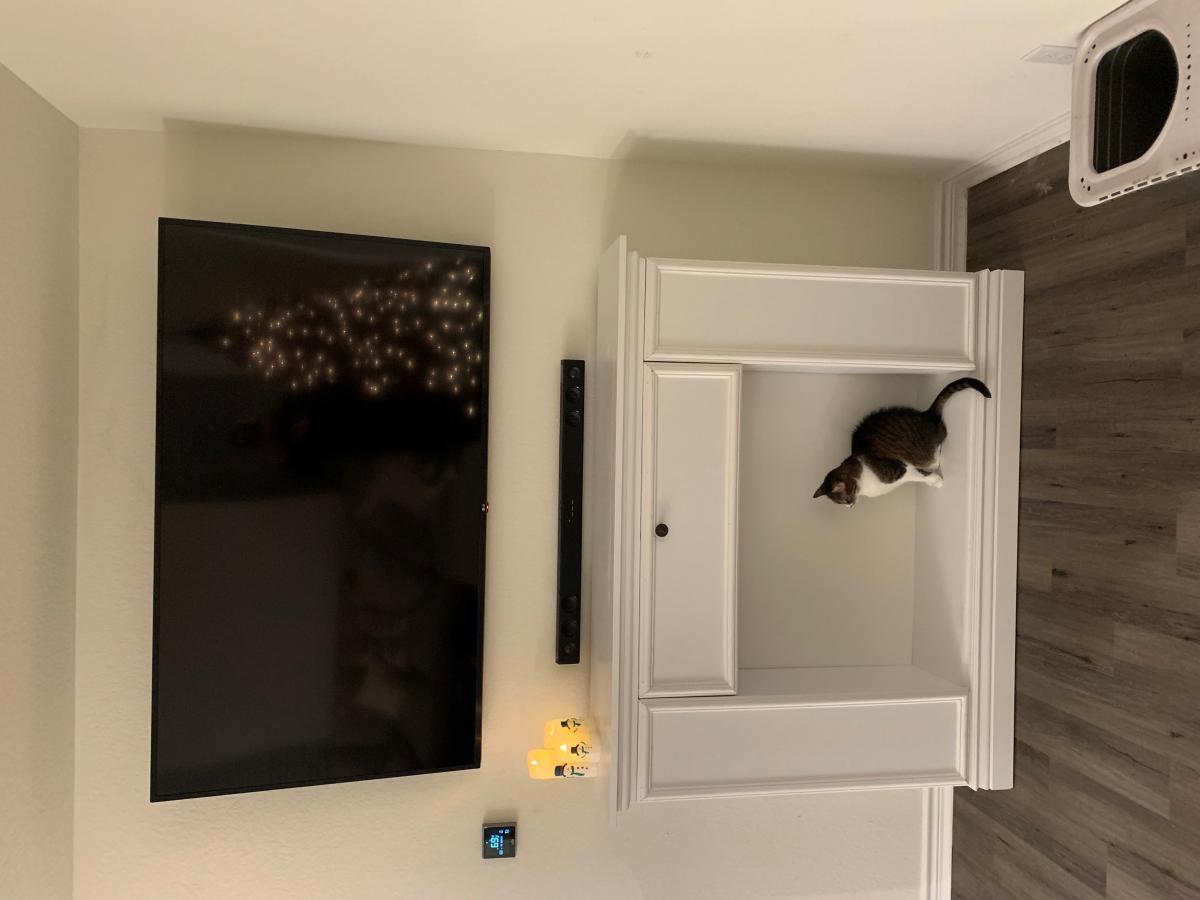
Faux Fireplace
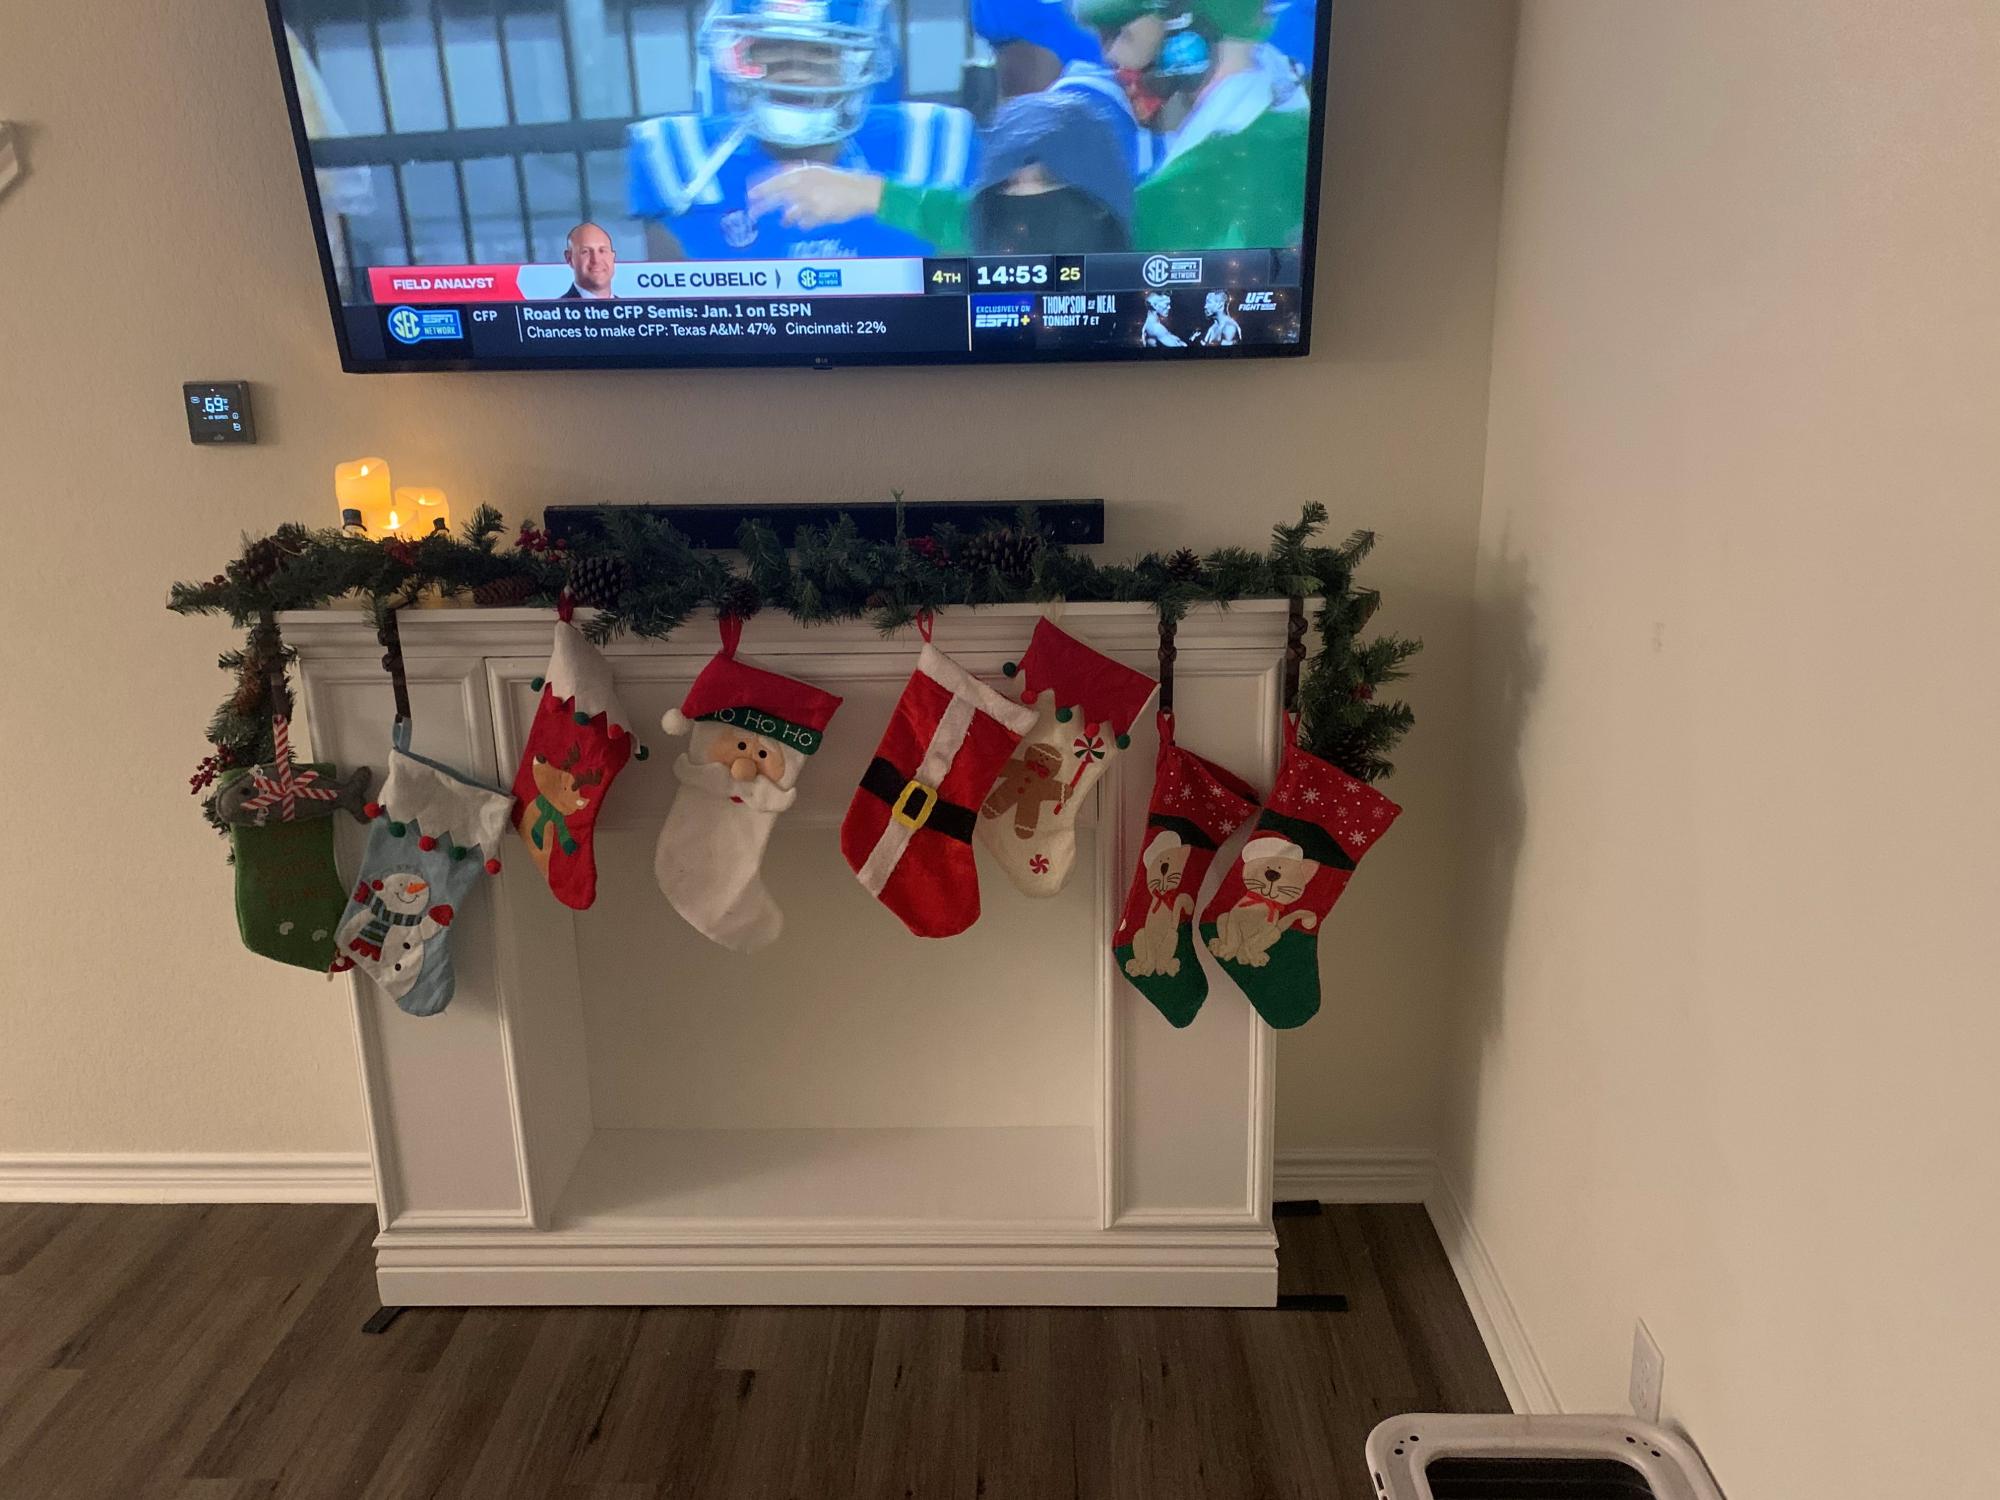
Decided to try my hand at a faux fireplace for our house to be completed and setup before christmas. Used ana white's faux fireplace with hidden storage plans but made a few tweaks to the size and style. Still have to add the electric fireplace logs and will update photos once it is added.

Built from Plan(s)
Estimated Cost
$300
Estimated Time Investment
Weekend Project (10-20 Hours)
Finish Used
Kilz primer, White semi gloss valspar 3000
Recommended Skill Level
Beginner
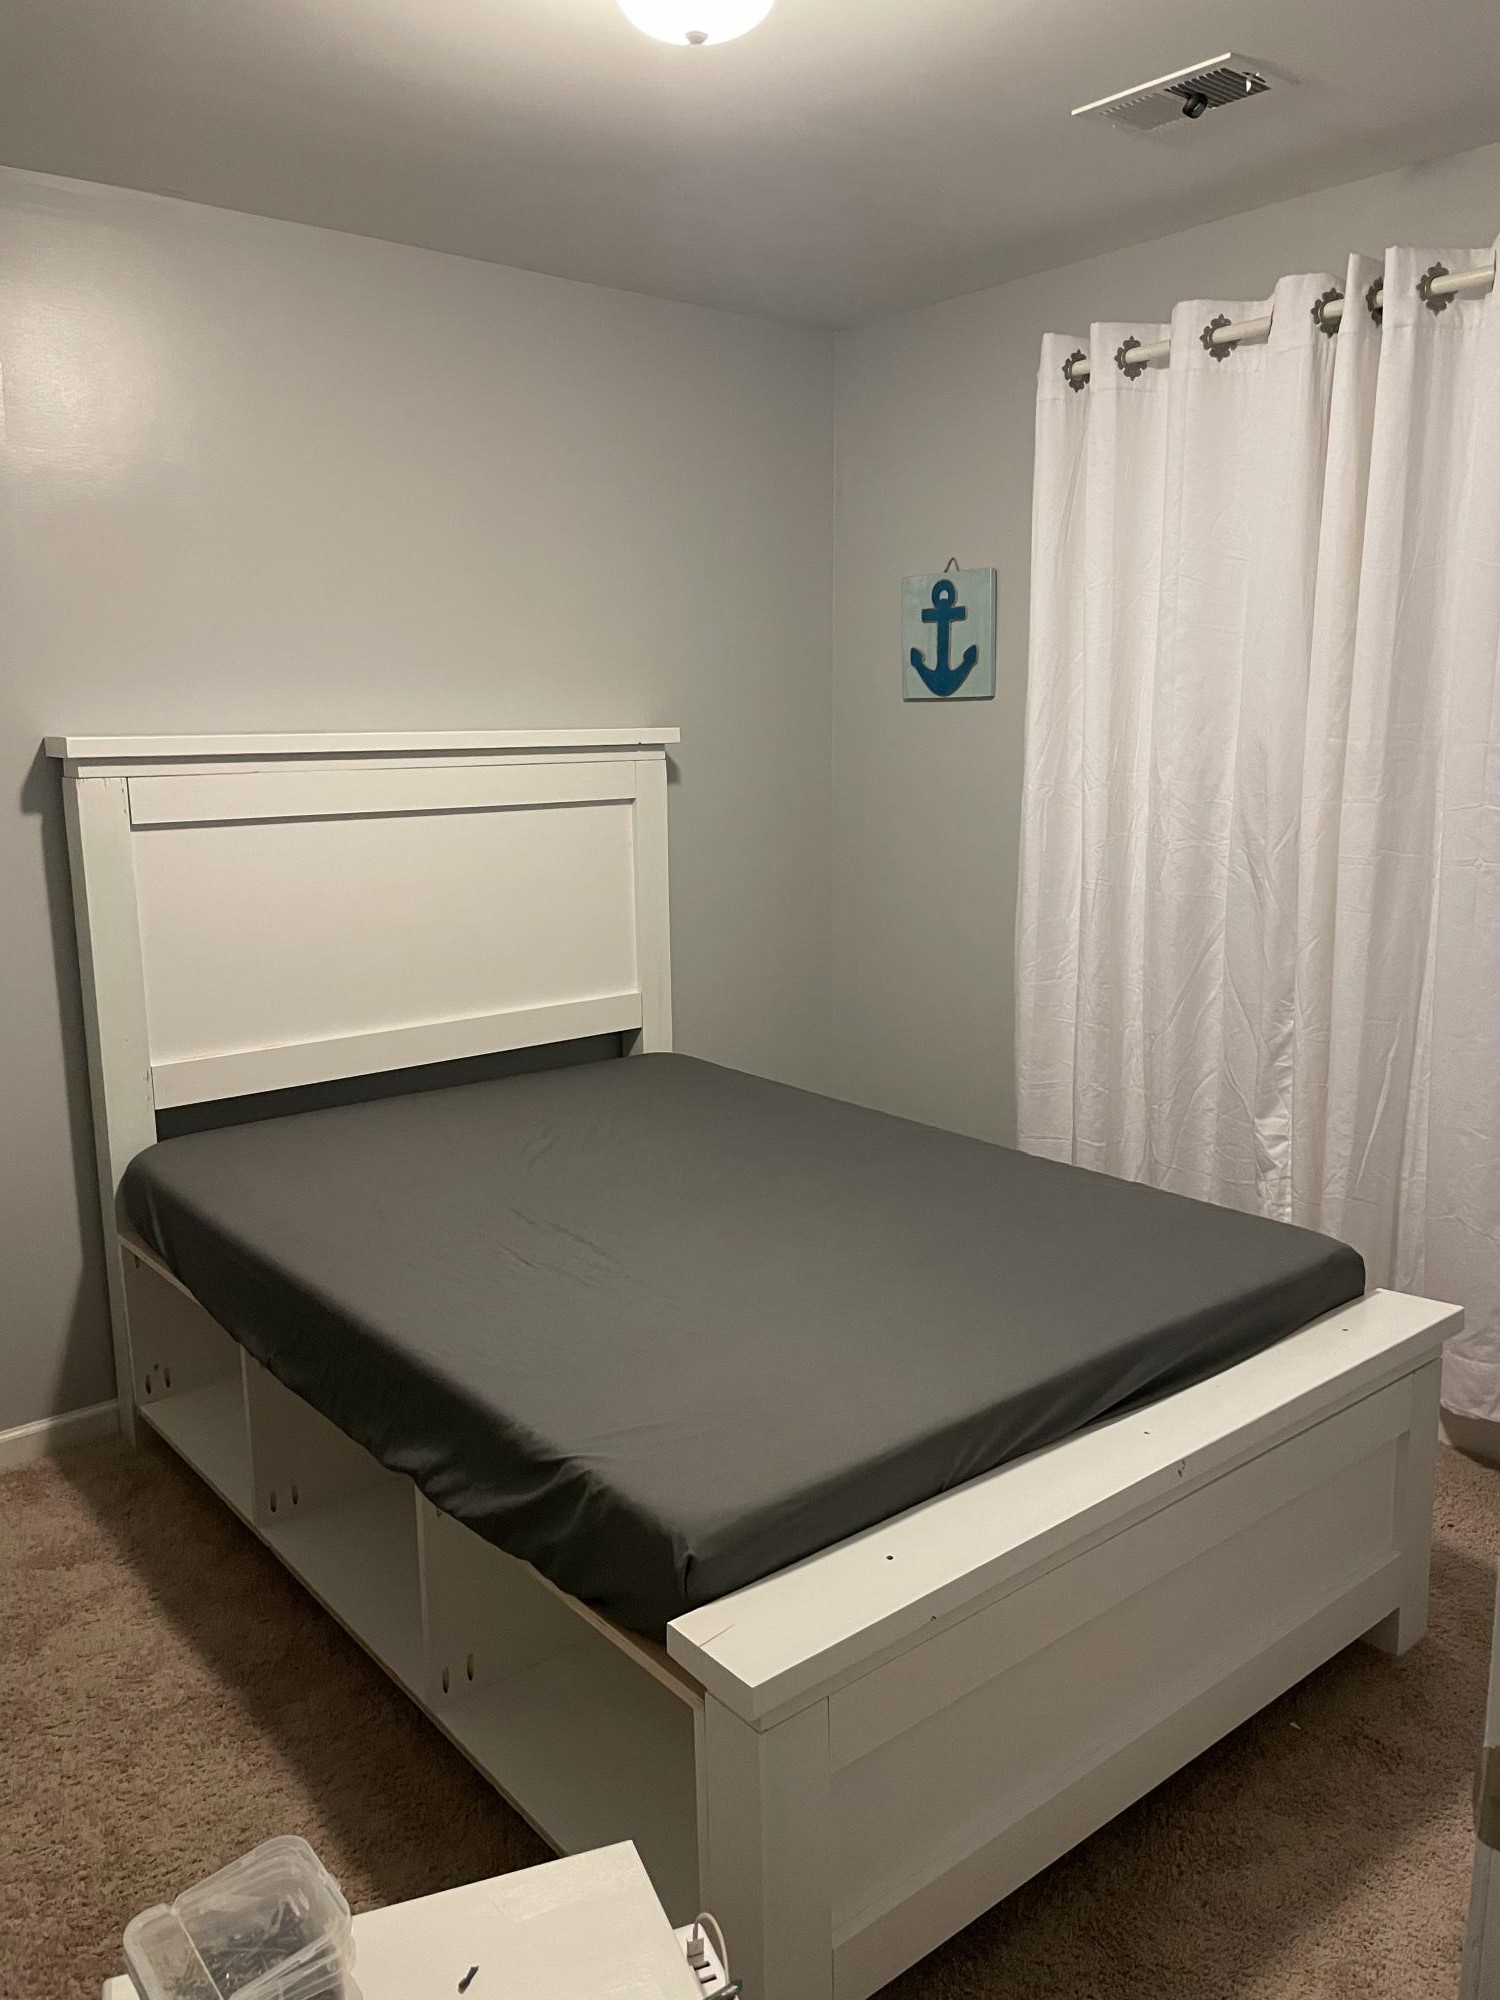
White Washed Queen Headboard
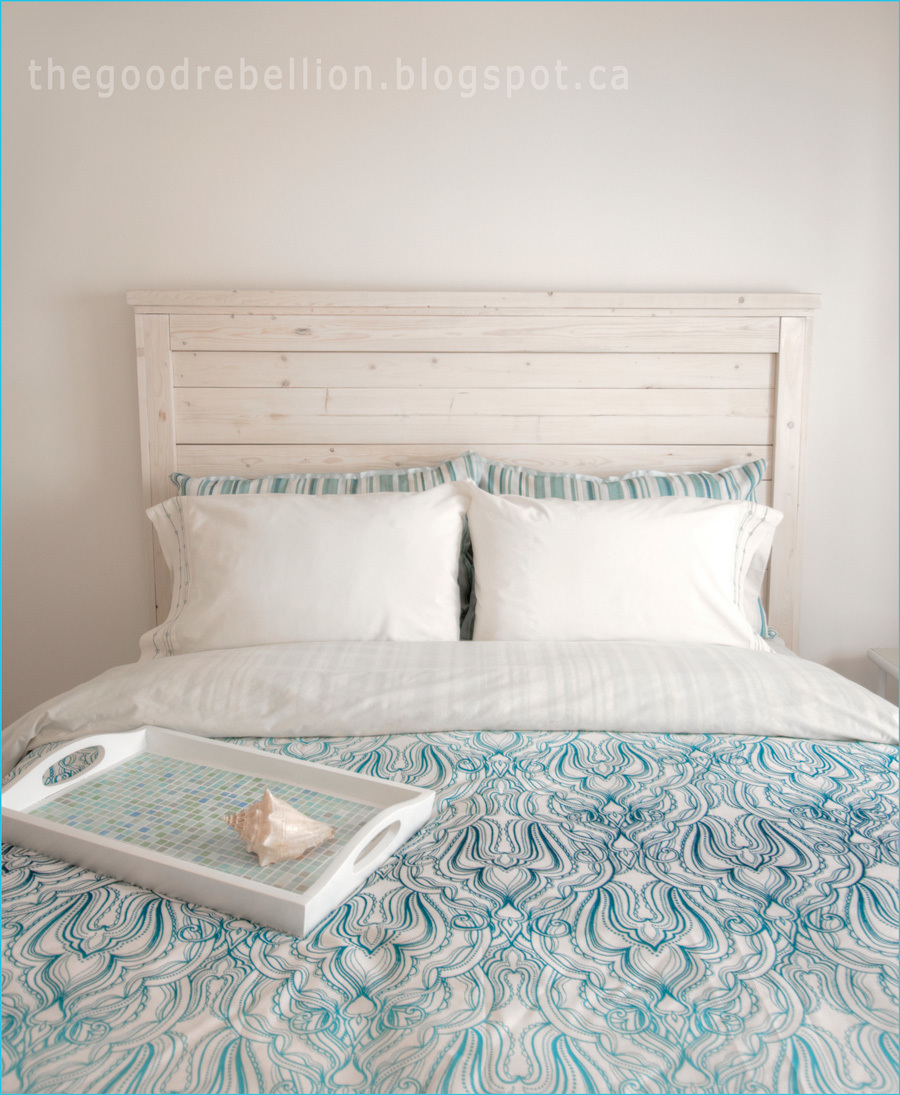
This is my first piece of furniture I've ever made from a plan. I would recommend this for someone who is new to the craft. I also sanded each board before I put it together. I just find this easier to do than sanding it afterwards. Plus, it gives me the chance to look at the grain and see where I might want it. Both the stain and clear coat I used can be washed out of your brush with soap and water.
Built from Plan(s)
Estimated Cost
$90.00
Estimated Time Investment
Weekend Project (10-20 Hours)
Finish Used
Minwax white wash pickling stain - one application with a foam brush.
A very forgiving stain and easy to use.
Minxax Polycrylic clear satin - one coat with a paint brush.
A very forgiving stain and easy to use.
Minxax Polycrylic clear satin - one coat with a paint brush.
Recommended Skill Level
Starter Project
Comments


Wed, 02/13/2013 - 10:54
Thanks!
Hey, thanks so much for your comment, totally made my day (0: The tray was originally brown (no I didn't make it) but I did paint it white and put a paper mosaic on it. You can read about that here if you want to see how I did it: http://thegoodrebellion.blogspot.ca/2013/01/paper-mosaic-tray.html

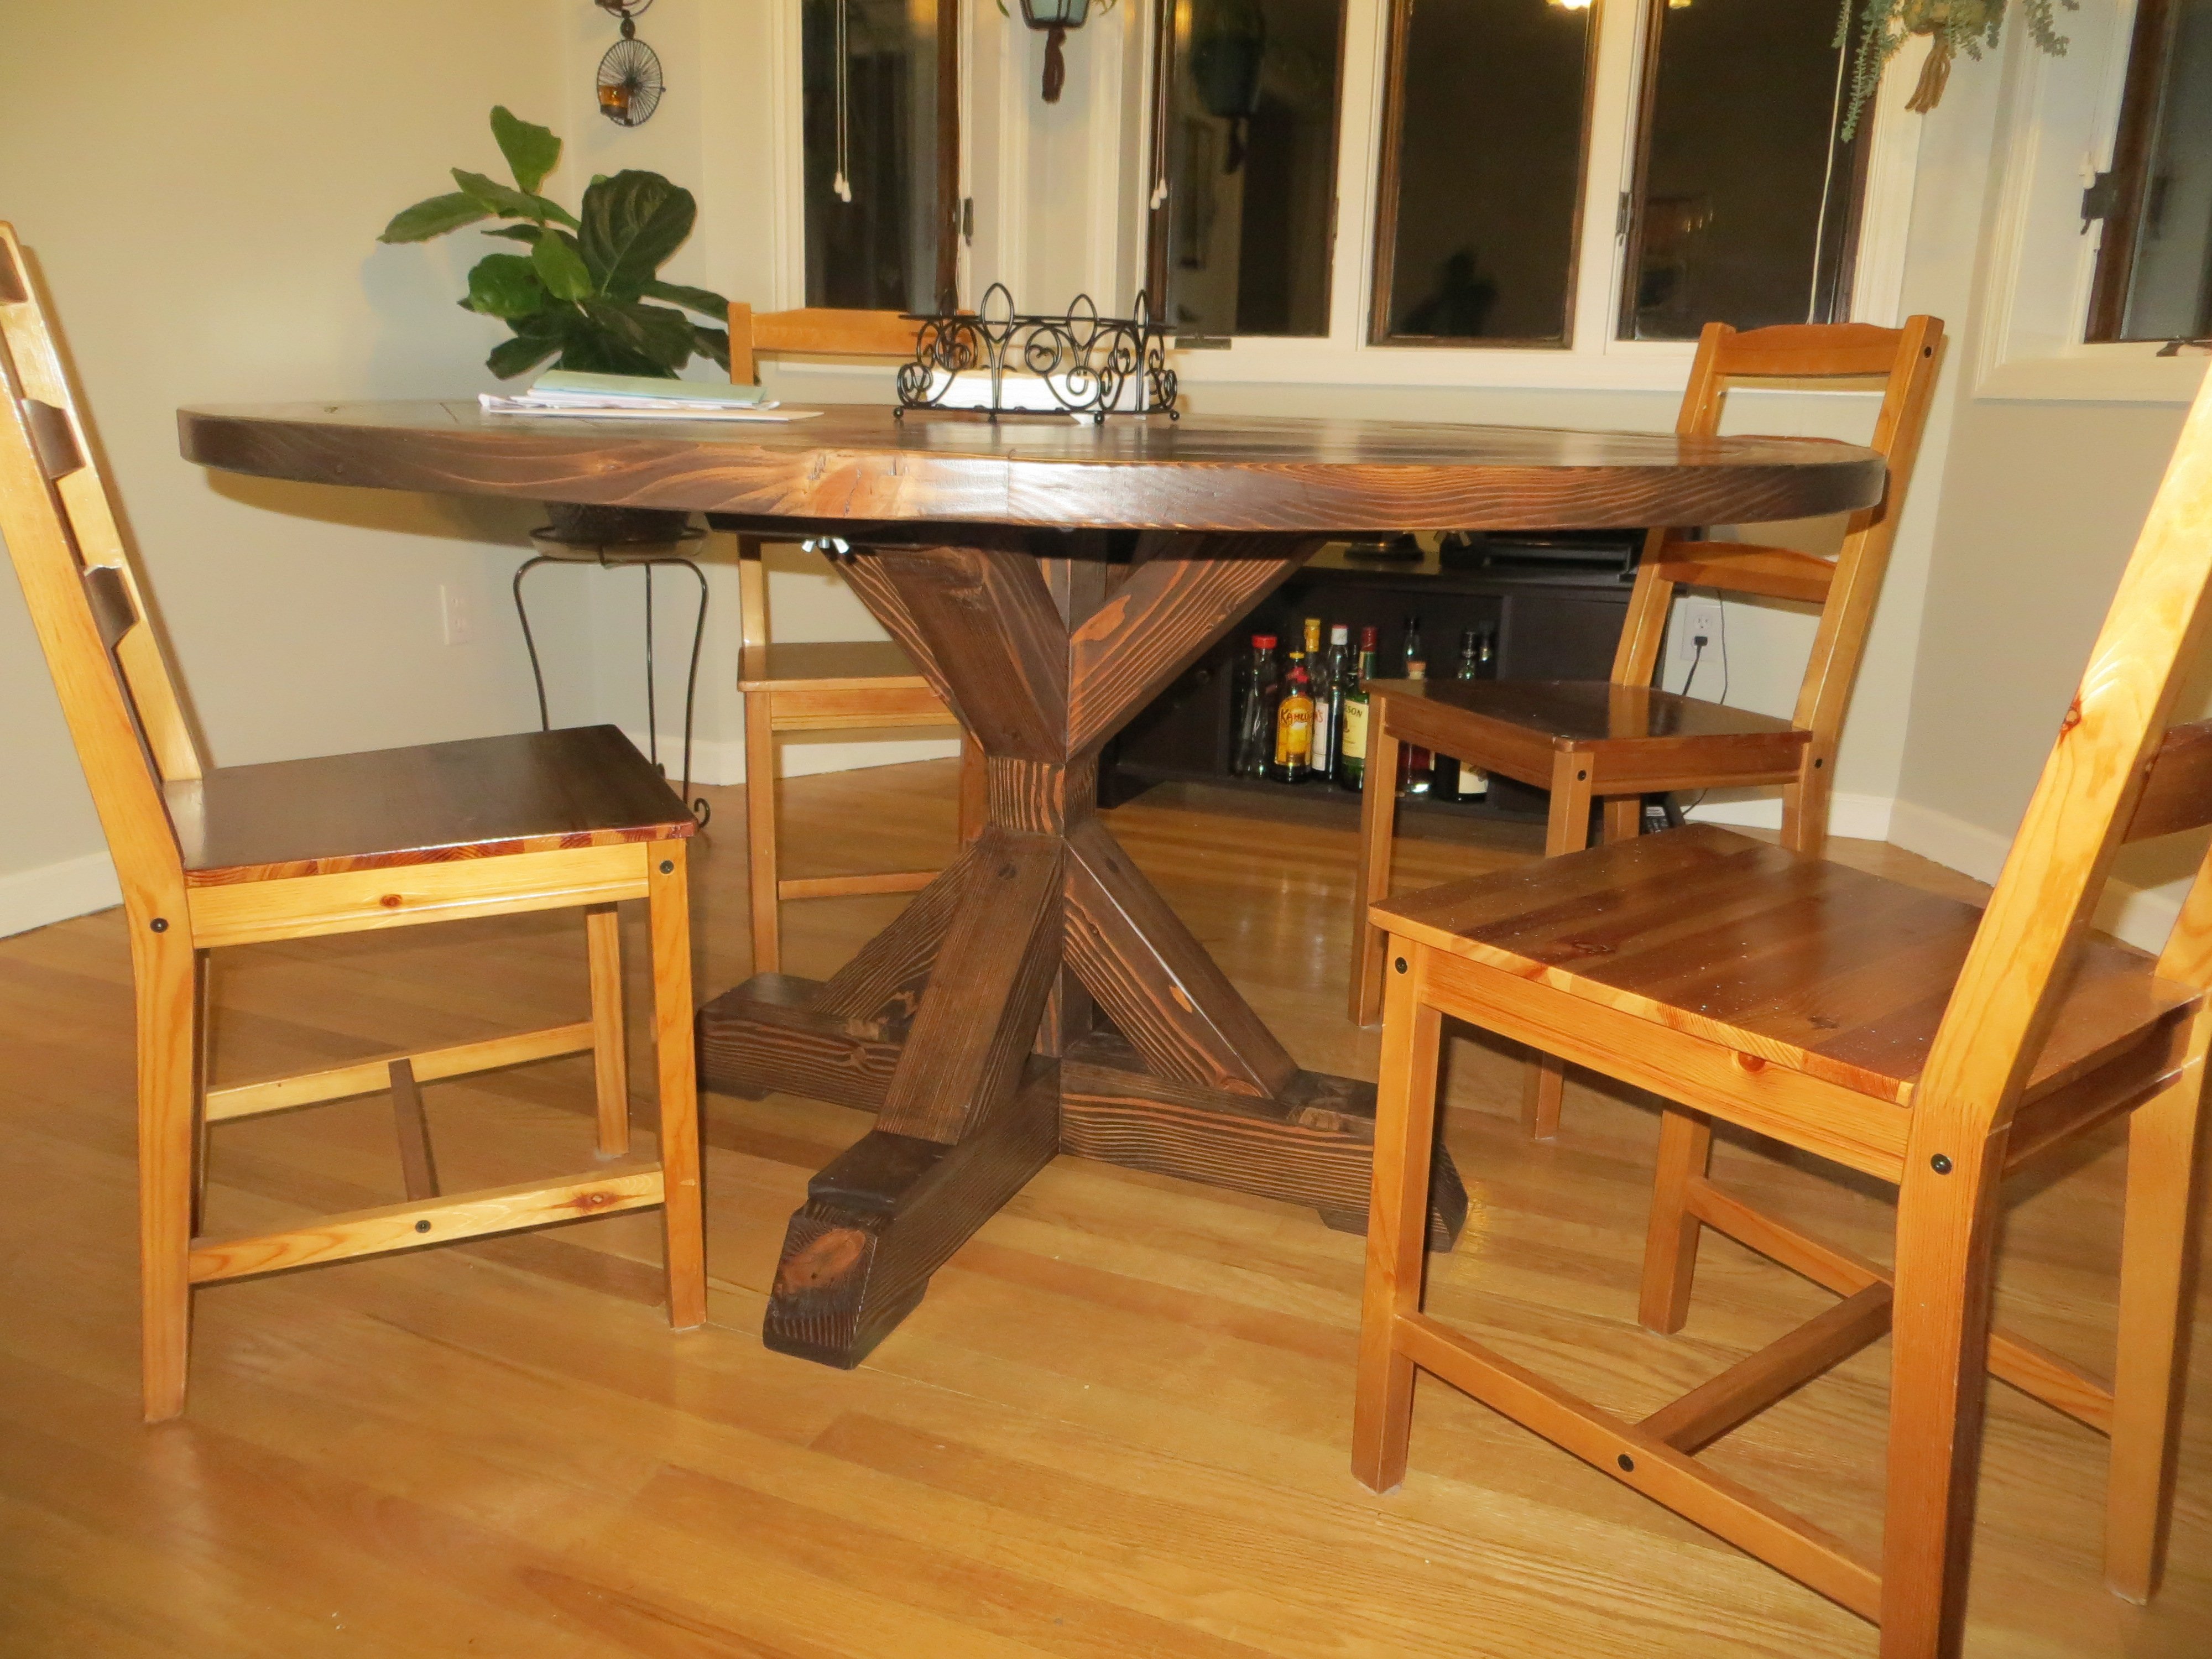
Round X Base Pedestal Dining Table
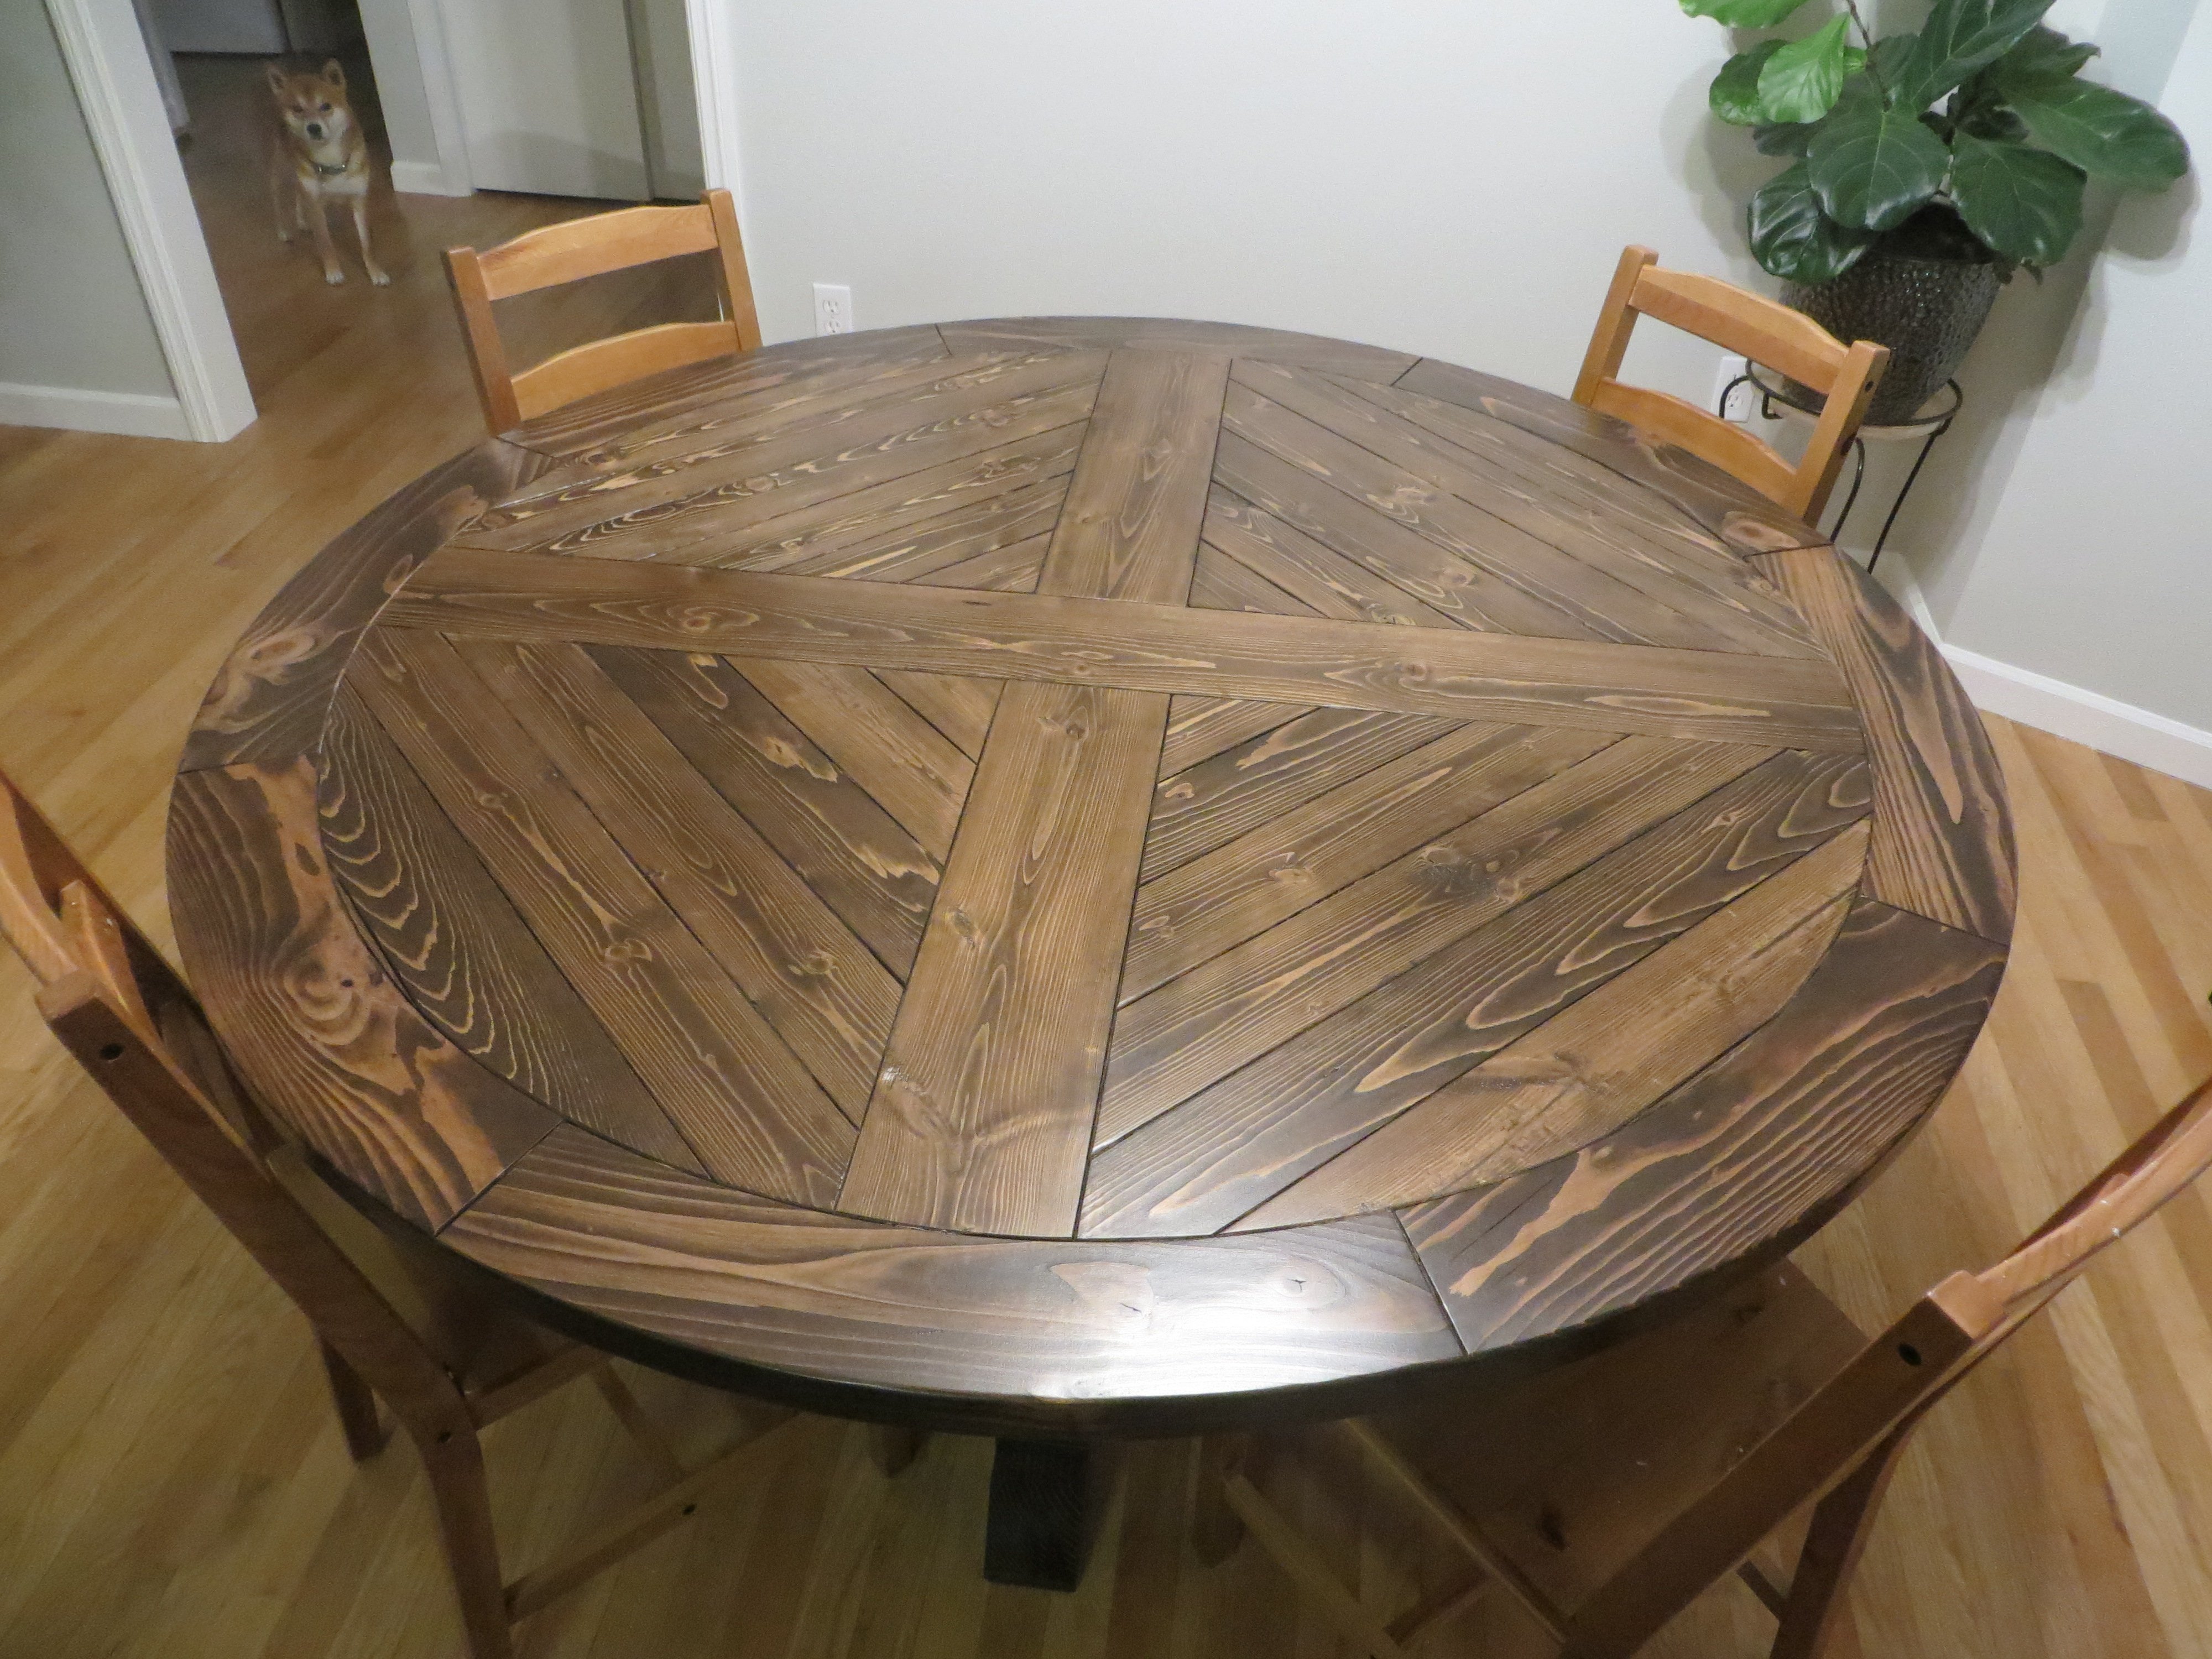
We wanted a round table that would seat a full Monopoly game. To do this we needed about a 5' diameter tabletop. The base was made consistent with the plans.
A few tips on the base:
- Get your angles as close to 45° as you can. Otherwise, there will be much sanding and puttying in your future.
- If you want to hide your lag screw like I did, I used a spade bit to recess an area for the screw head. Then I glued in a plug made from dowel and sanded flush.
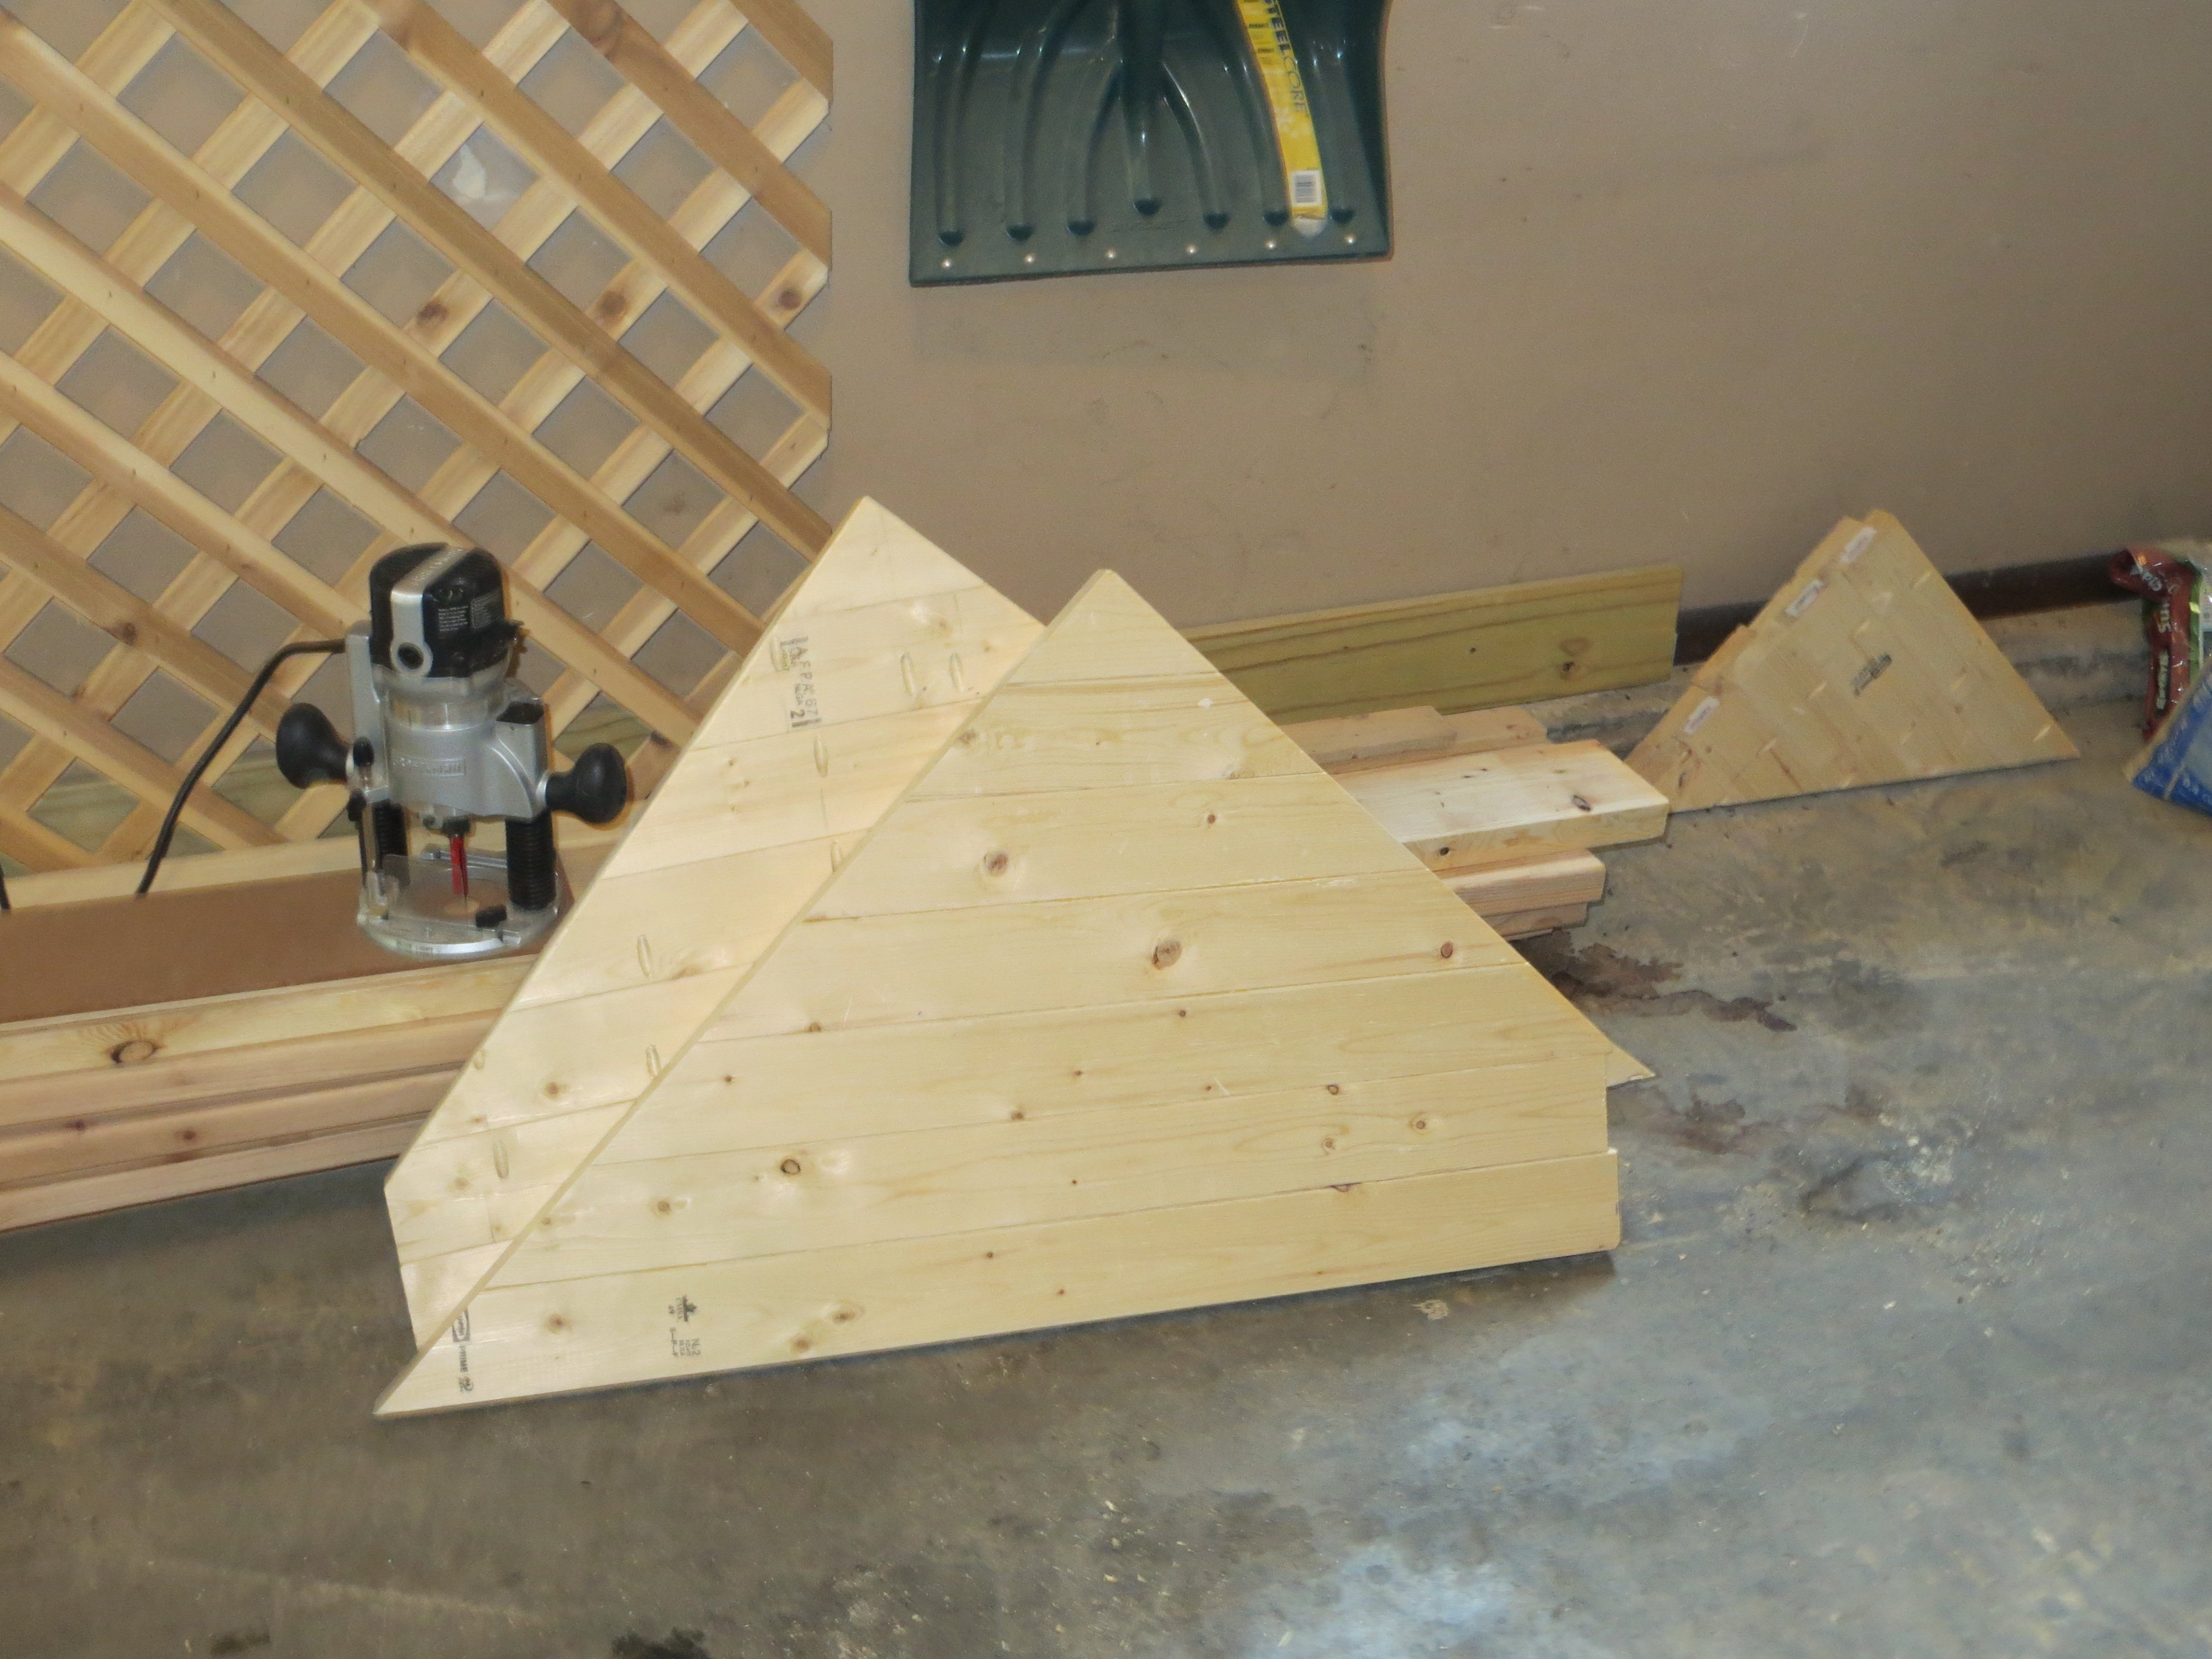
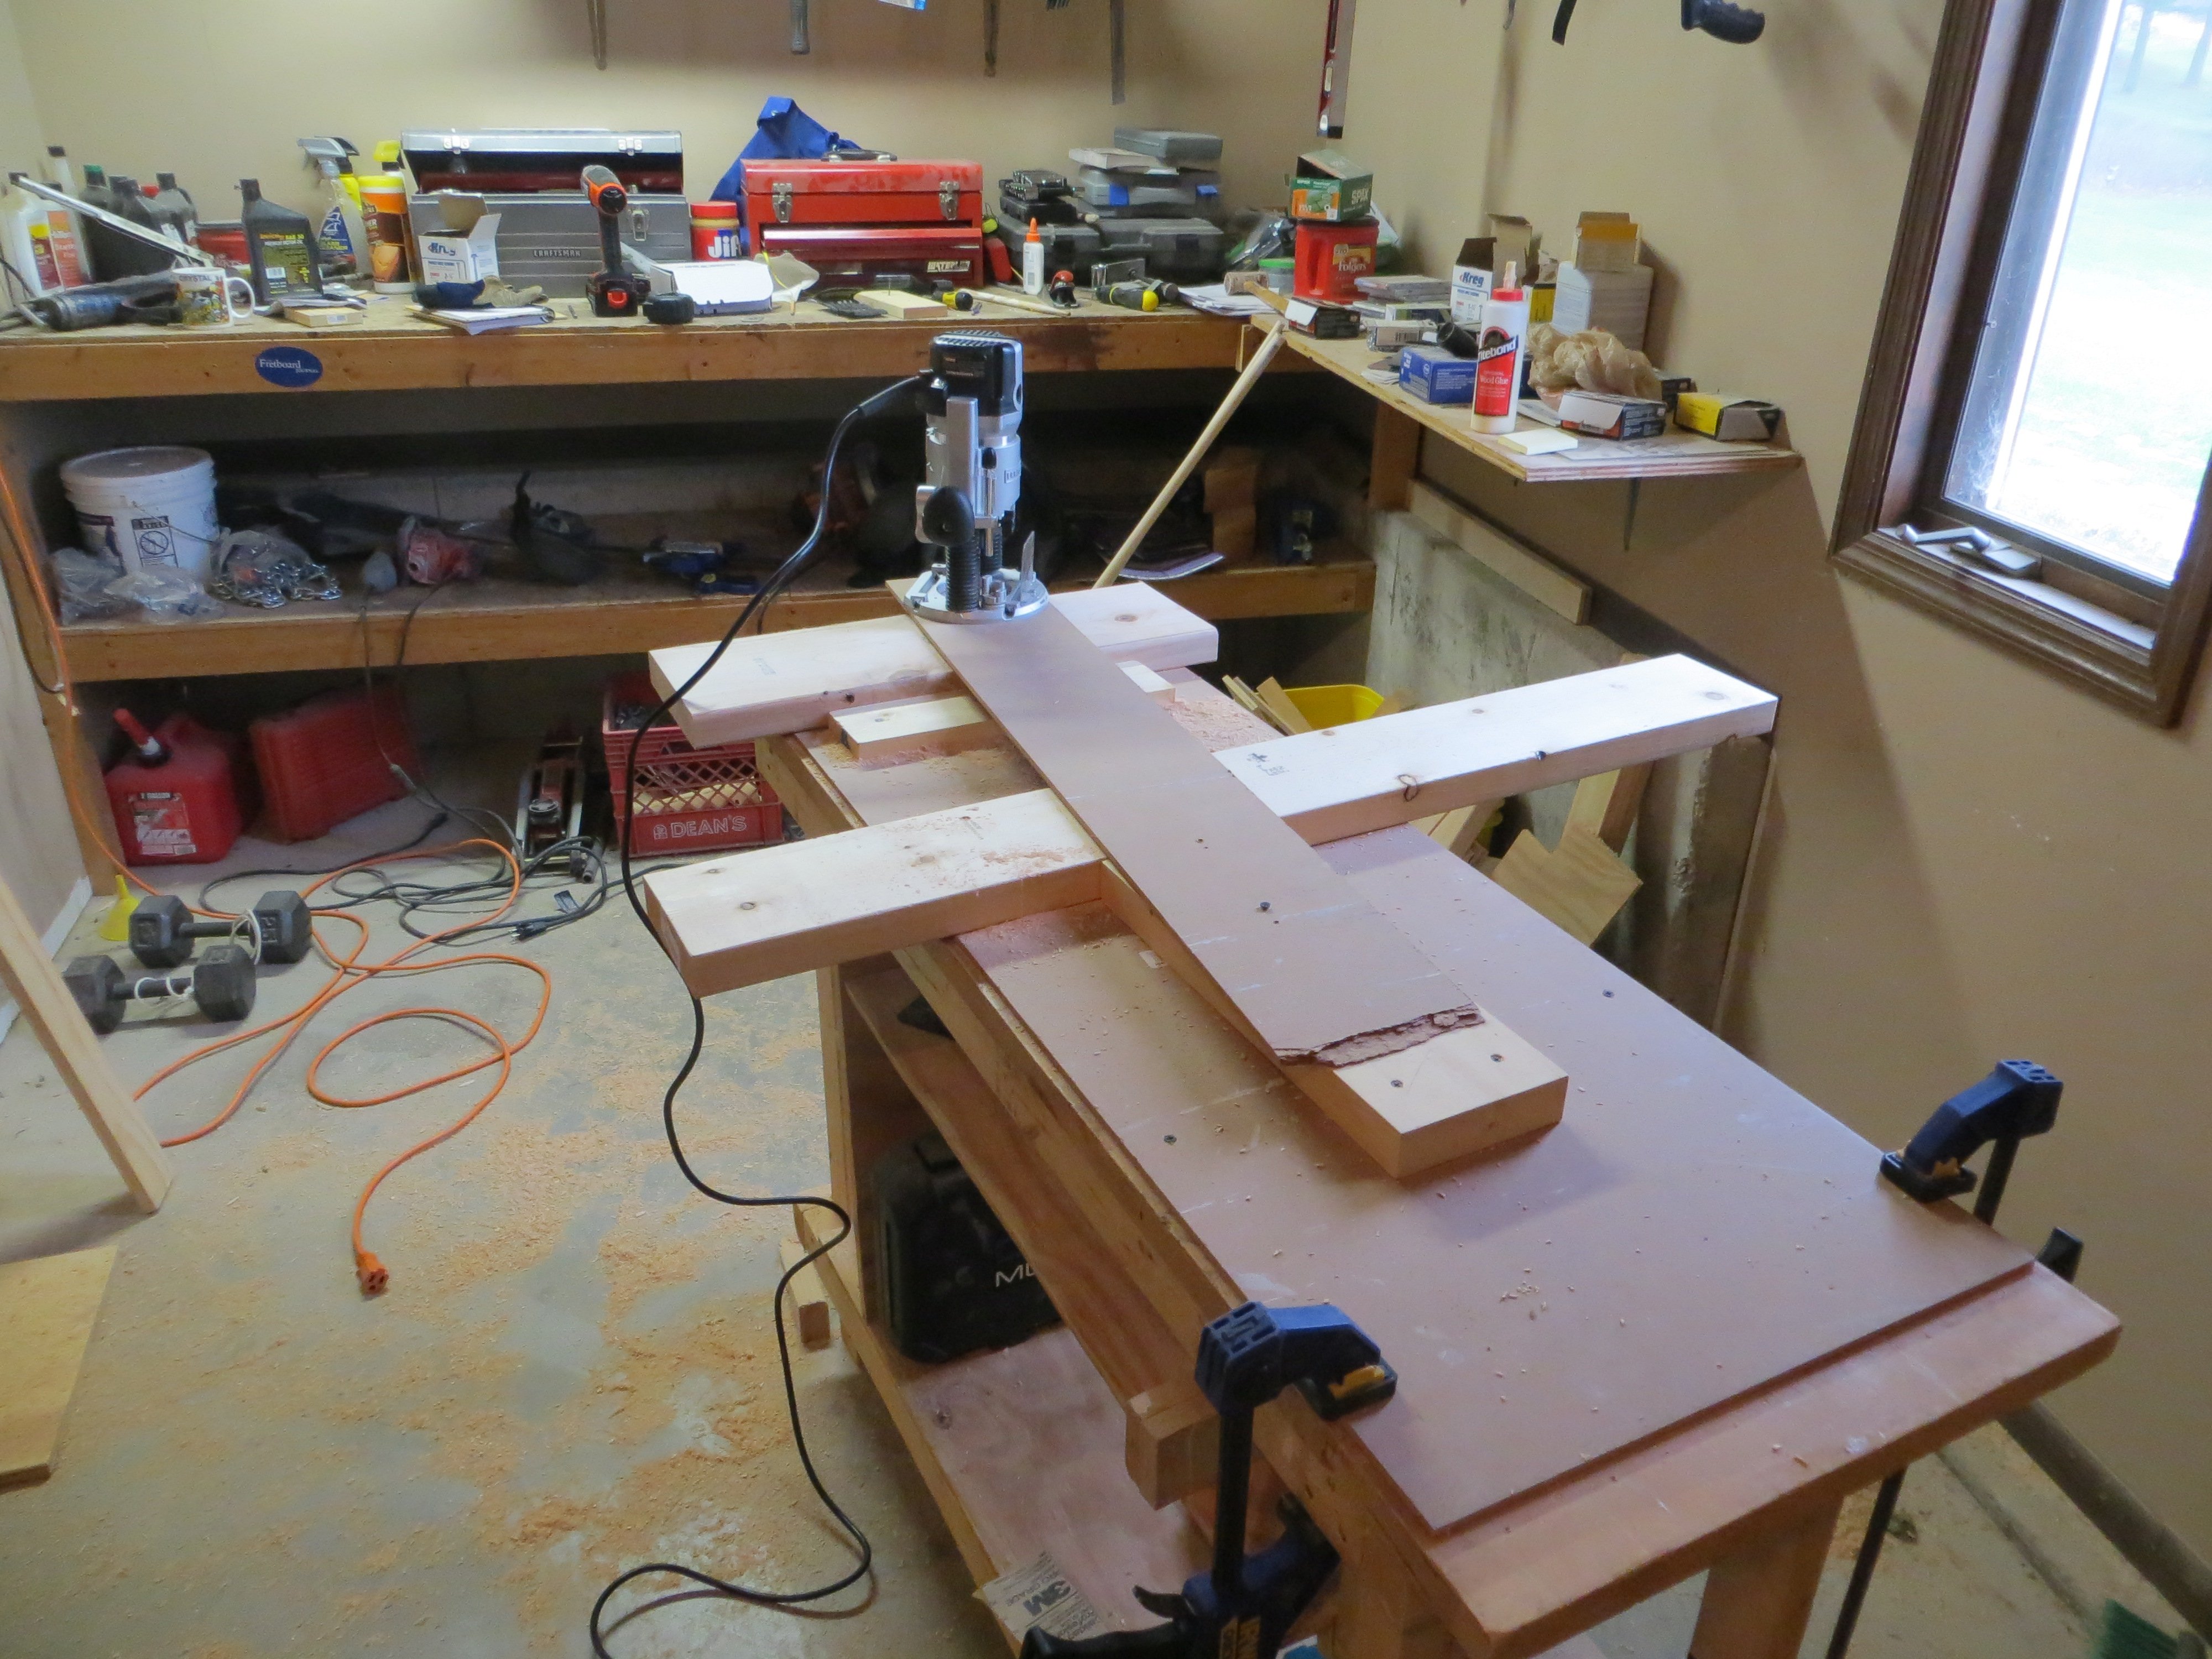
If you want to make a round tabletop, here is what I did (there may be better methods). Keep in mind this was for a ~60" diameter table, I was assuming that the perimeter arc pieces would be about 4.5" wide and that I would cut the inner circle at a 50" diameter.
- Picture 1 - I built two 5' slabs of (7) 2x4s pocket-holed together.
- Picture 2 - Then I cut two pieces from each slab that would later make up the 90° "pie slice" pieces. Make sure to remove the screws that will be in the way your saw blade. Also, you just have to concern yourself with the angle since the radius will be dealt with later. There is a lot of wood waste with this method, but I think it avoided headaches.
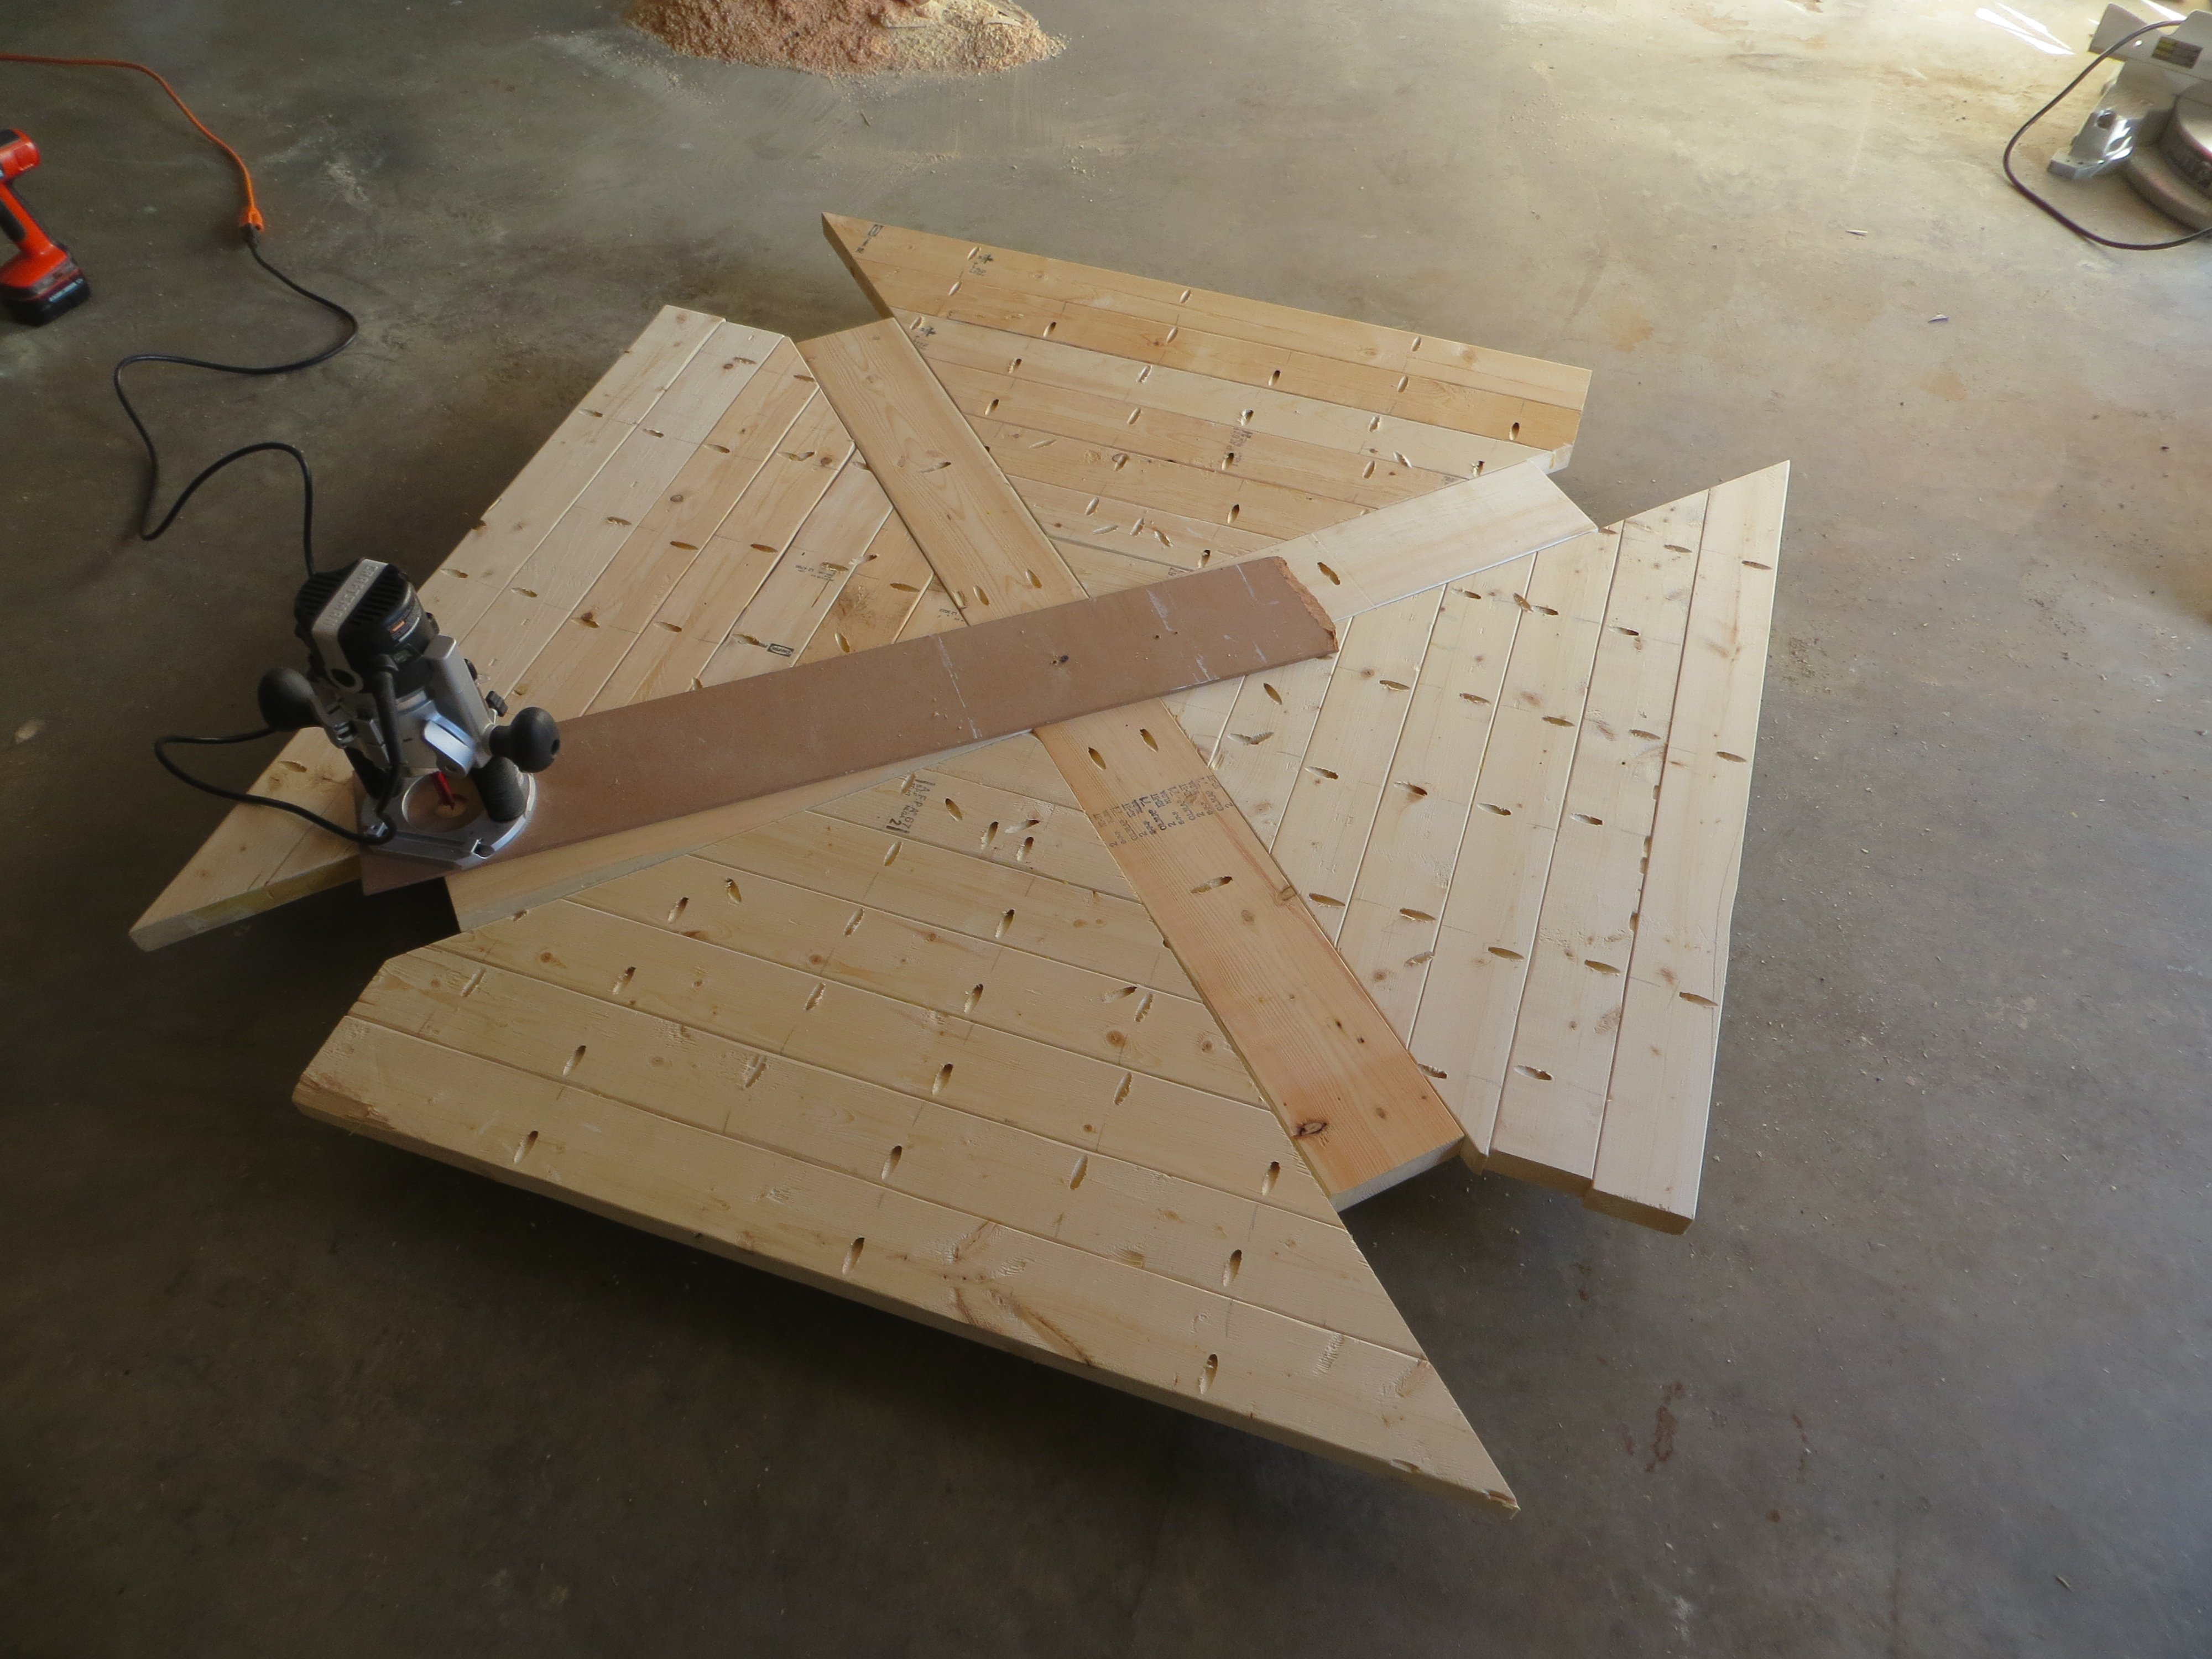
- Picture 3 - I assembled (screwed and glued) the "pie pieces"to the cross pieces. The length of the cross pieces don't matter much since they will also be to cut to a specified radius. Since I would be cutting a 50" diameter circle, the large cross piece had to be at least 50" and the two small pieces had to be at least 22.25" (subtracting the 2x6 width).
- Picture 3 - I mounted my router to a piece of MDF and drilled a hole at the necessary distance to cut a 50" diameter circle. This distance is 25" + half of the bit diameter. Since I used a 1/2" straight bit, my point was 25.25" from the center of the router bit. I screwed this jig to the center of the tabletop assembly so the router could pivot and cut a circle. As for logistics, I rested this assembly on some scrap wood and kneeled on the tabletop as I was cutting it. It took a large number of passes with the router since I was cutting through 1.5" of material.
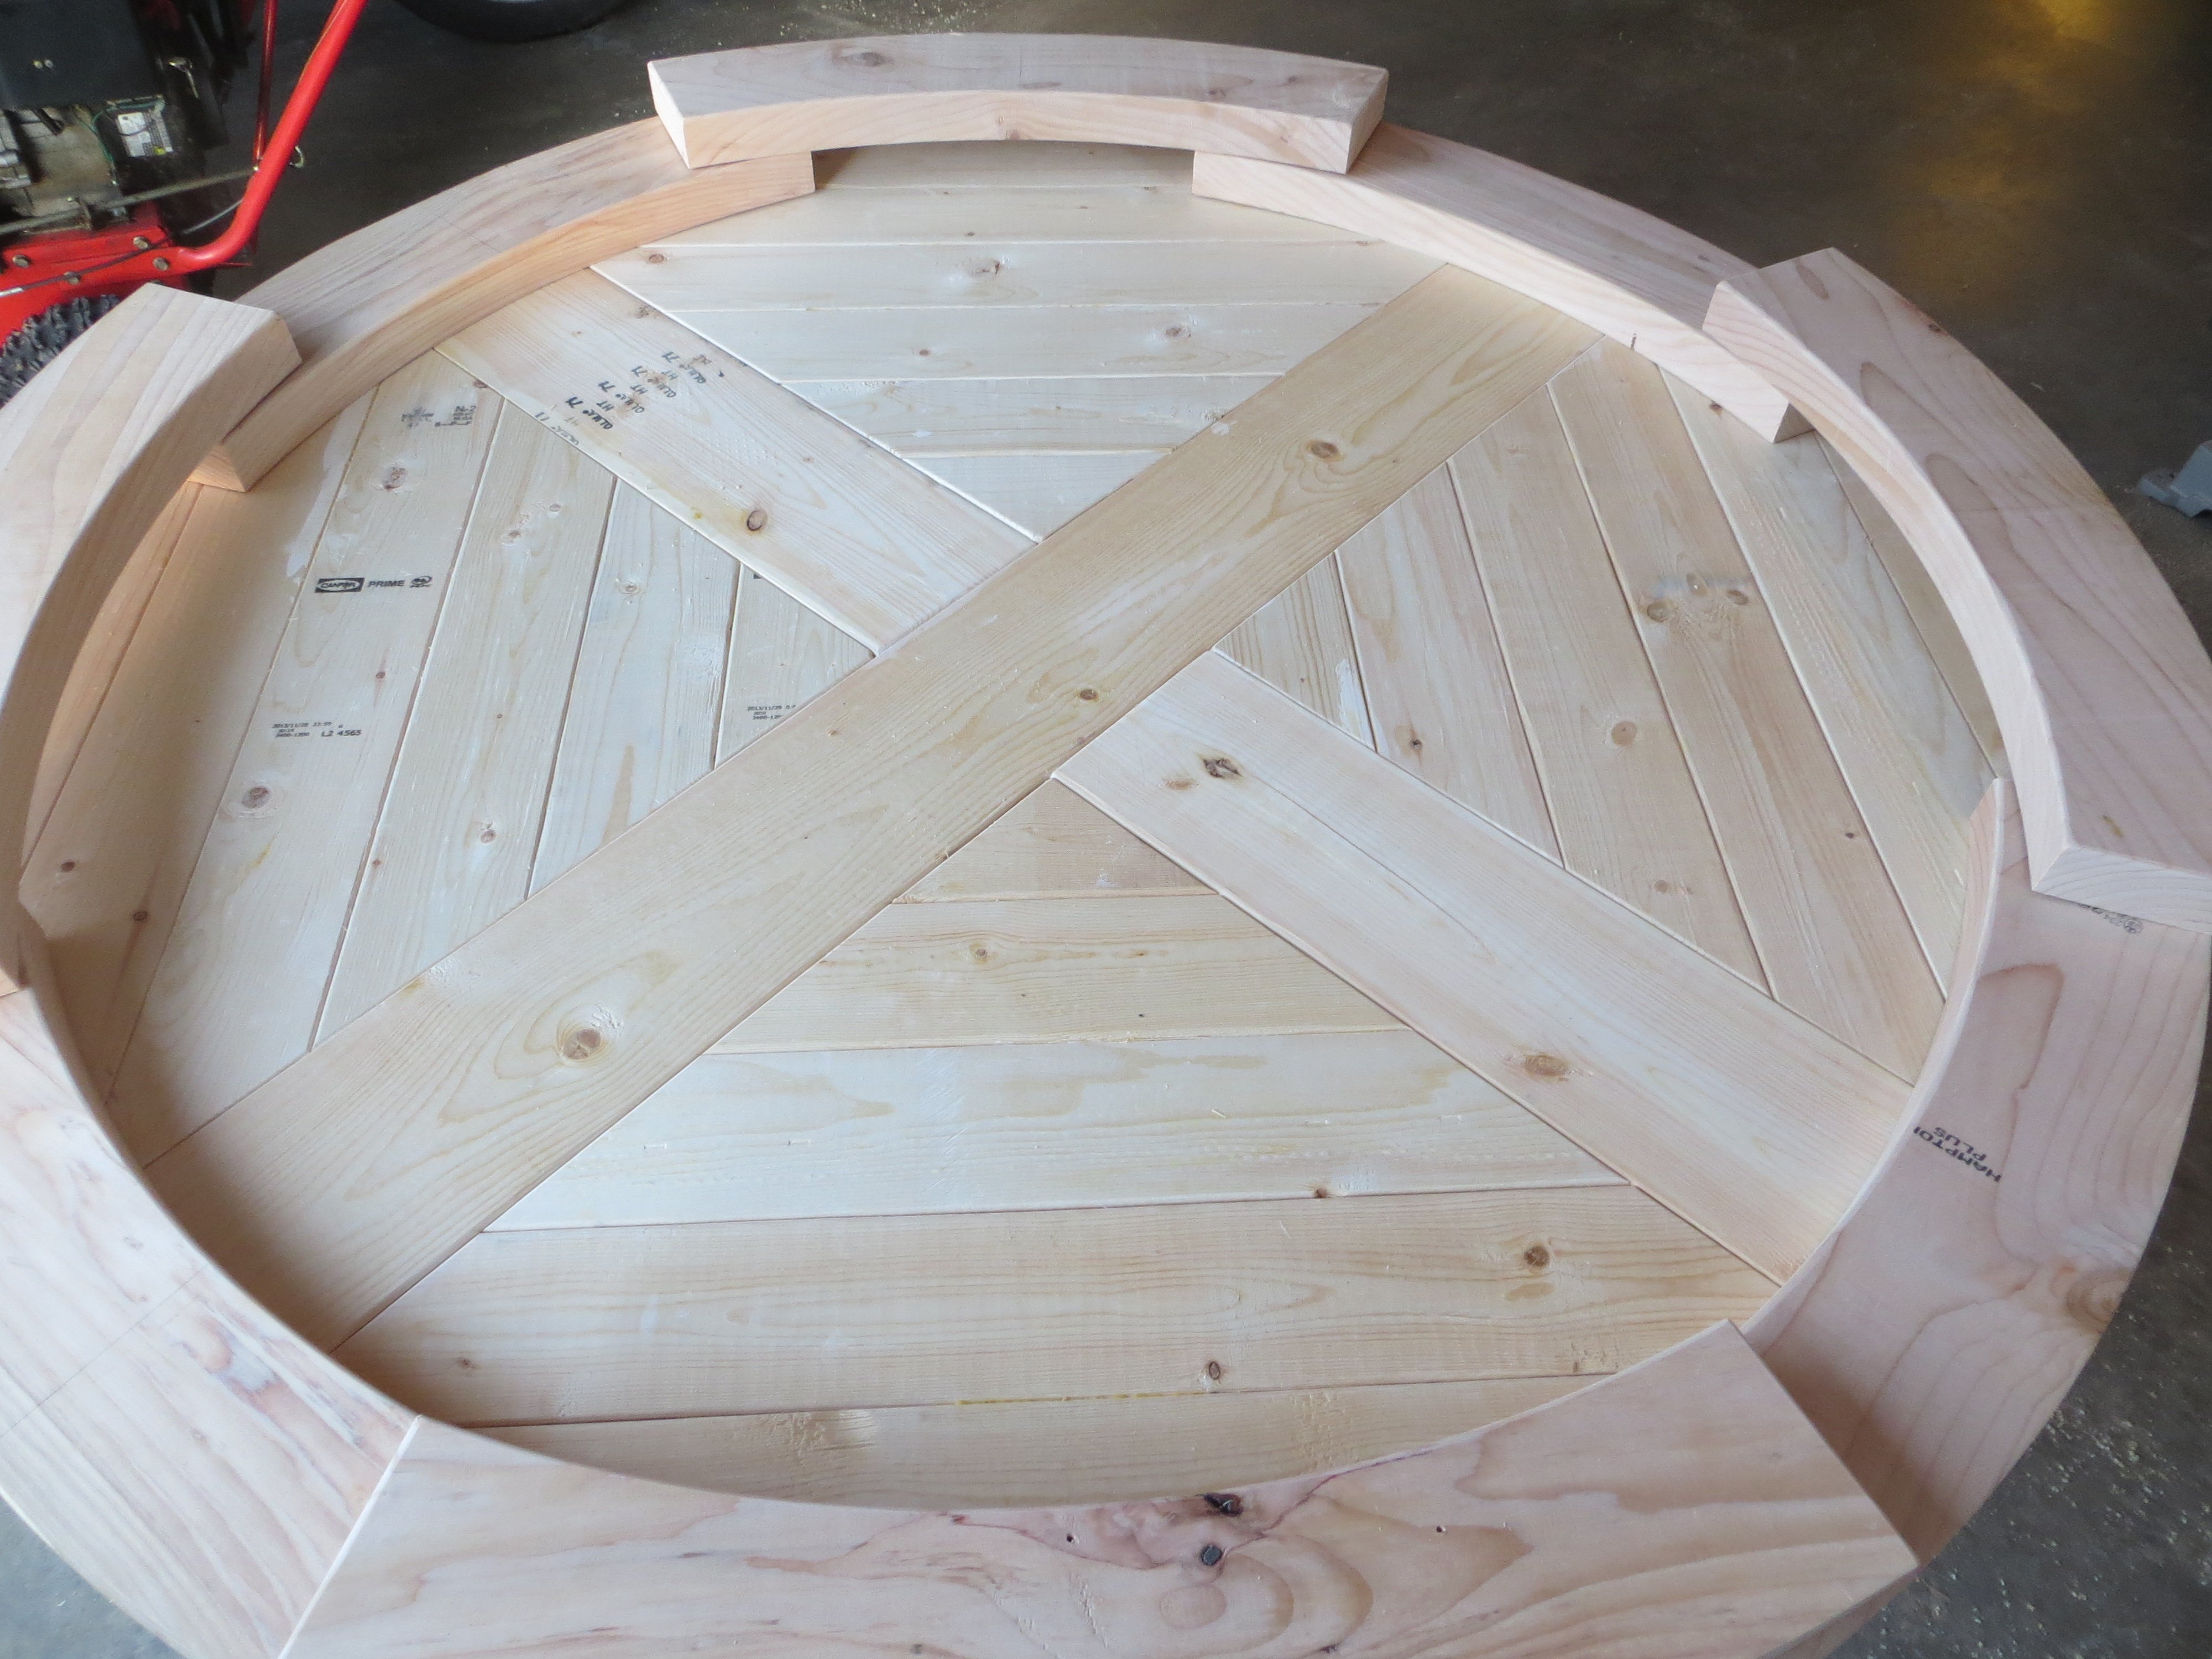
- Picture 4 - The perimeter pieces required some time and geometry. I found that I would need (8) 23" 2x8 pieces (the 23" is approximate because I was a little off for some reason, though I can't recall why). From those pieces, I used the same router jig to cut the perimeter arc pieces. You will need to make two new radius holes in teh jig to accomplish what you need. To cut the inner arc you need a hole set at 25" - half of the bit diameter (24.75" for me). To cut the outer arc, I used a hole that was 29 5/8" from the center of the router bit. You may need to do some fine tuning to these pieces to get them to fit correctly, but for me it pretty minor. I trimmed a couple pieces with a miter saw but that was it.
- The rest is screws and glue.
Built from Plan(s)
Estimated Time Investment
Week Long Project (20 Hours or More)
Finish Used
Sanded using 60, then 120 grit. The stain was Rust-Oleum's Ultimate Wood Stain in Dark Walnut. The top coat was General Finishes water-based polyurethane in flat. One coat of stain, six coats of poly, while sanding with grade #0000 steel wool after every other coat.
Recommended Skill Level
Intermediate
Comments
Fri, 12/19/2014 - 07:13
Simply beautiful. Very
Simply beautiful. Very impressed with this table top.
Tue, 01/13/2015 - 10:05
Better instructions?
Can we get some better details on the instructions for this?
In reply to Better instructions? by odeeodum
Sat, 02/07/2015 - 16:52
Instructions Updated
I updated the instructions. Let me know if you have any more questions.
Sun, 03/08/2015 - 10:23
did you increase the base size
Hi, your table is beautiful! I was wondering if you had to increase the size of your base since your table top is 60". I'm going to be building a round one the same size and wanted to make sure it would be stable at the current size.
In reply to did you increase the base size by ILoveDIYing
Fri, 03/13/2015 - 20:36
Base Size
The only modification I made to the base was the to the lengths of the 2x4 pieces that make up the "X" that sits between the base and the tabletop. In the plans, this "X" is made of (1) 32" piece and (2) 14.5" pieces. I believe I increased these to 36" and 16.5", respectively. Truthfully, I don't think this modification added much value.
I did some calculations and at a 60" diameter, it would've taken over 100 lbs placed at the edge of the table. This was also a function of the weight of the table. The heavier the table, the more stable it will be.
Tue, 03/31/2015 - 07:30
round top boarder pieces.
On your boarder pieces what angle did you cut the ends to and how did you lay the pieces out to route the diameters?
Sun, 04/05/2015 - 19:21
Increased base size?
I want to put a concrete top on this base and increase the diameter to 72". Would I need to increase the size of the base to accommodate the larger and heavier top? Thank you
In reply to Increased base size? by Momma Gladden
Tue, 04/14/2015 - 20:20
Re: Increased Base Size?
It all depends on how much your tabletop weighs. I'm going to take a wild guess that your tabletop will weigh around 500 lbs (~28 sq. ft. at ~18 lbs/sq. ft.). For reference, I think my wood top weighed about 80 lbs. I will also assume the wood base weighs 50 lbs. Using these assumptions, the result is a worst-case scenario (weight placed at edge of table, tipping between two table legs) of tipping at 300 lbs. The lighter the tabletop, the less stable it will be. Since your concrete table is likely to weigh a lot more than my wood top, it will be a lot more stable.
That addresses the design and assumes none of the wood or connections (screws) fail under the increased load (weight of concrete). I can't speak very confident to this aspect. Though I can venture a guess. I will guess that it will be stable under no load, but there will increased loads when under uneven stress (i.e. somebody leaning on one side of the table). Honestly, I don't know how valuable any further speculation would be.
Tue, 09/06/2016 - 08:14
72" version
Can the pedestal hold a 66"- 72" top? I've been searching for a table that seats 6 comfortably with an occasional squeeze for 8. I think a 60" would work but my husband thinks 72". We are struggling to find exactly what we want and are now investigating DIYs . This is a beautiful table!!
In reply to 72" version by X3cougsp
Wed, 10/05/2016 - 17:16
Apologies for the delay
This is a conversation that we had in our house as well. My personal opinion is that 60" is big enough for 6 people and good enough for 8 people. What we did to "dry run" it was I cut a board to 72" and set it up at table height and we sat at oppposite ends of the board. I asked my wife if it was too big and we both agreed that not only would really shrink the room, but it also was too big for regular use. We currently have 6 chairs around this on a regular basis. As for the stability of the table itself, you may want to increase the width of the base. I say this because 74 lbs at the edge of the table (in between legs) will cause the table to tip, which is probably a force that will be exceeded by someone leaning on it.
In reply to curved piece how to cut them by jcatanz740
Sun, 12/25/2016 - 07:11
Updated pic
I've put a new pic up that shows my setup while cutting the perimeter pieces. What's not clear is that I screwed the pieces to my workbench from the bottom.
Thu, 12/22/2016 - 20:58
Similar to cutting the circle
I used the jig that I made the large circle but made a couple new radii. The inner edge was the round piece radius minus half of the bit diameter. The other radius is as wide as you want to make it.
I fixed this jig to my work bench and set it up so that I would be cutting each piece identically. I have a picture that I'll add that shows it better than I can explain it.
Mon, 01/09/2017 - 07:36
Boarder pieces
On your boarder pieces what angle did you cut the ends to make them fit?
In reply to Boarder pieces by Omally83
Sat, 01/21/2017 - 07:46
Border Pieces
I believe my approach was that I cut the 2x8s to the length that would produce the arc length I was looking for. So basically the outer edge was going to (if my jig did its job) be exactly as long as I needed it to be. With that in mind, I used a piece of yarn tied to the pivot point on the jig that I was using and used that to tell me where I needed to make the cut.
Otherwise, I could've used trig to figure it out but I was all angled out by that point. With 8 border pieces they should each cover 45 degrees (360/8) and the other two angles should be equal ((180 - 45))/2=67.5) resulting in a 67.5 degree angle. The trouble in using that method is it doesn't account for all the little screw-ups that may have thrown off certain measurements. Plus, the yarn-thing was pretty easy.
In reply to I love this is this by Mdenton728
Sat, 02/17/2018 - 08:34
Extension
Do you mean extend like adding a leaf?
Sat, 01/23/2021 - 14:17
Twisting round table base
We made the table base for a 60" solid walnut top (used the wider measurements). When people get up from the table, my husband thinks the base twists when they push off. Has anyone else noticed this or have a suggestion on how to make the table not twist? Thanks, Sue
My first big project
I’ve been wanting to build this bed for our guest bedroom for a while. Finally gathered the courage to tackle it over the weekend. This is my first project of this size and difficulty. It’s not perfect, but I love it.
Built from Plan(s)
Estimated Time Investment
Weekend Project (10-20 Hours)
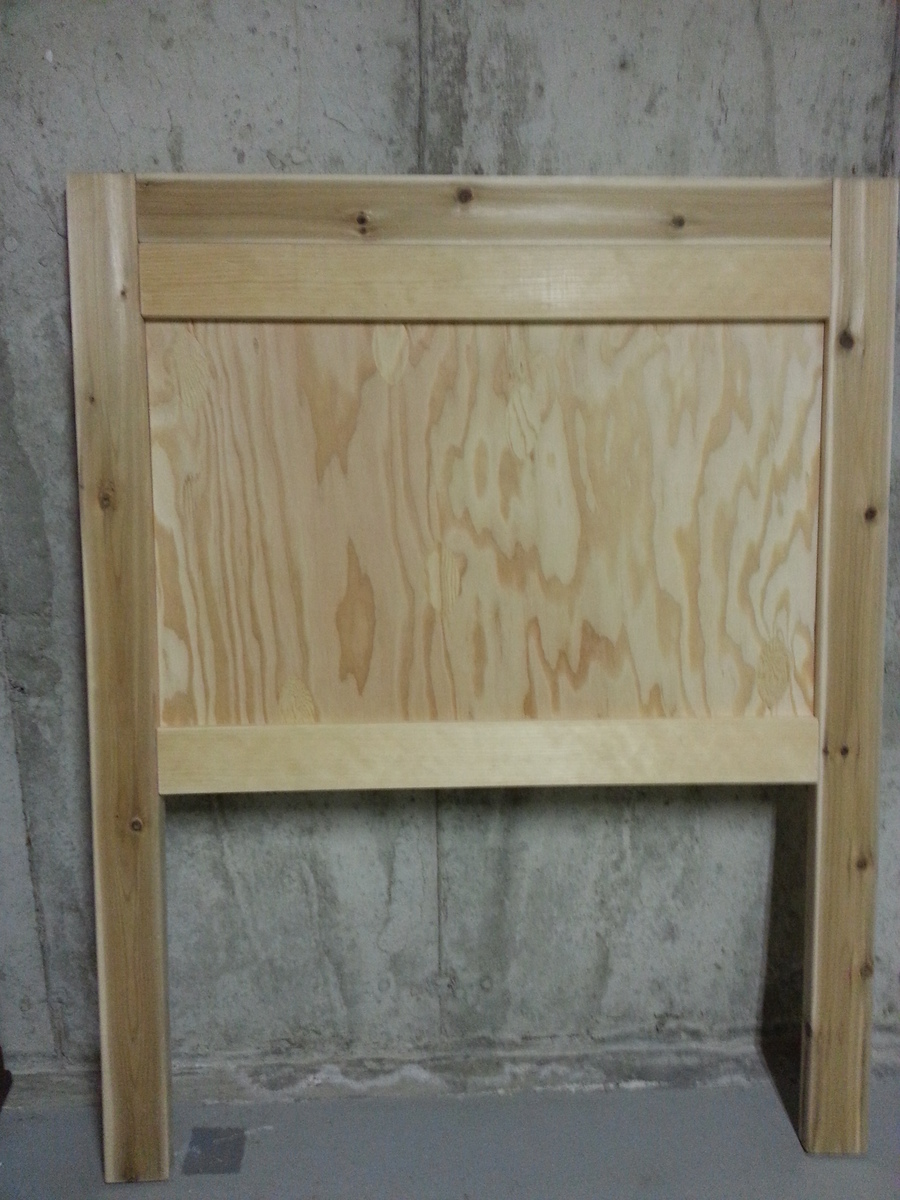
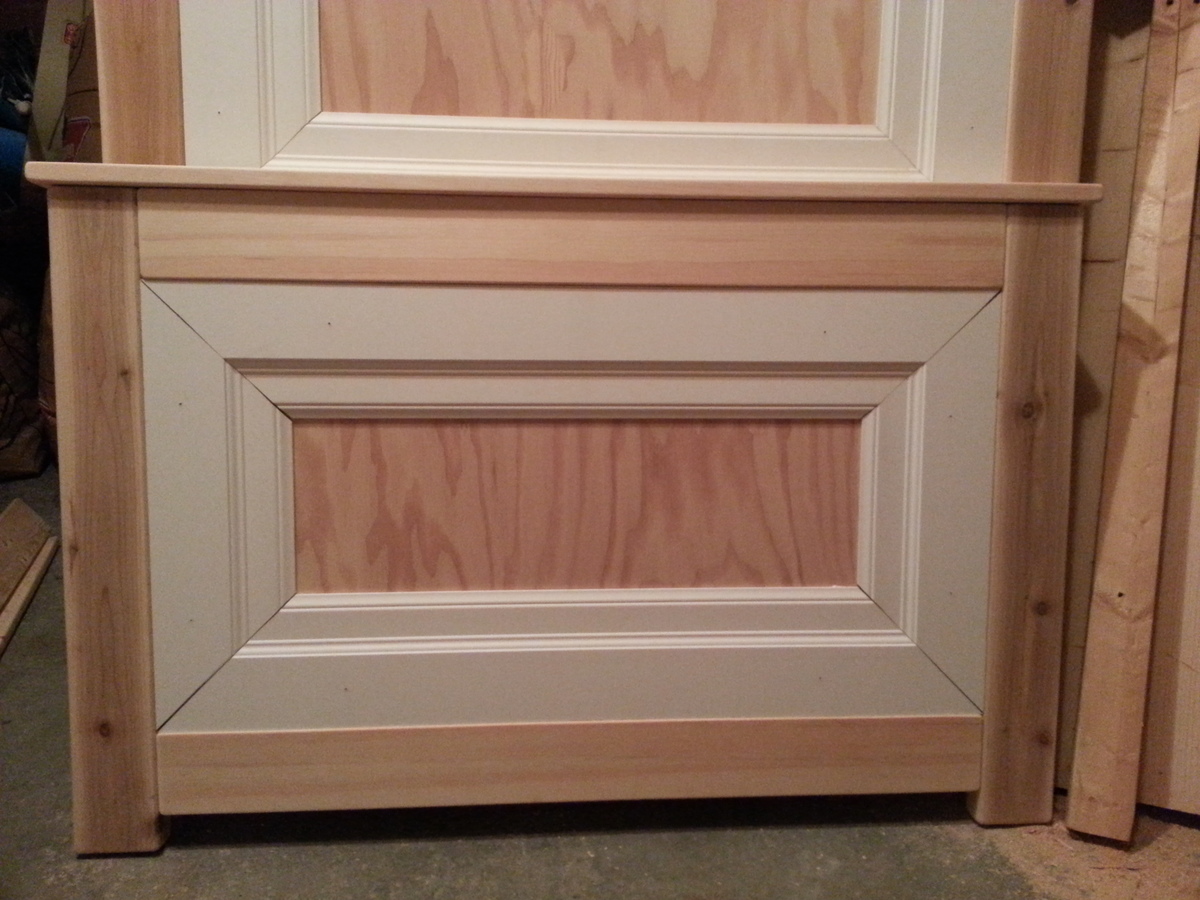
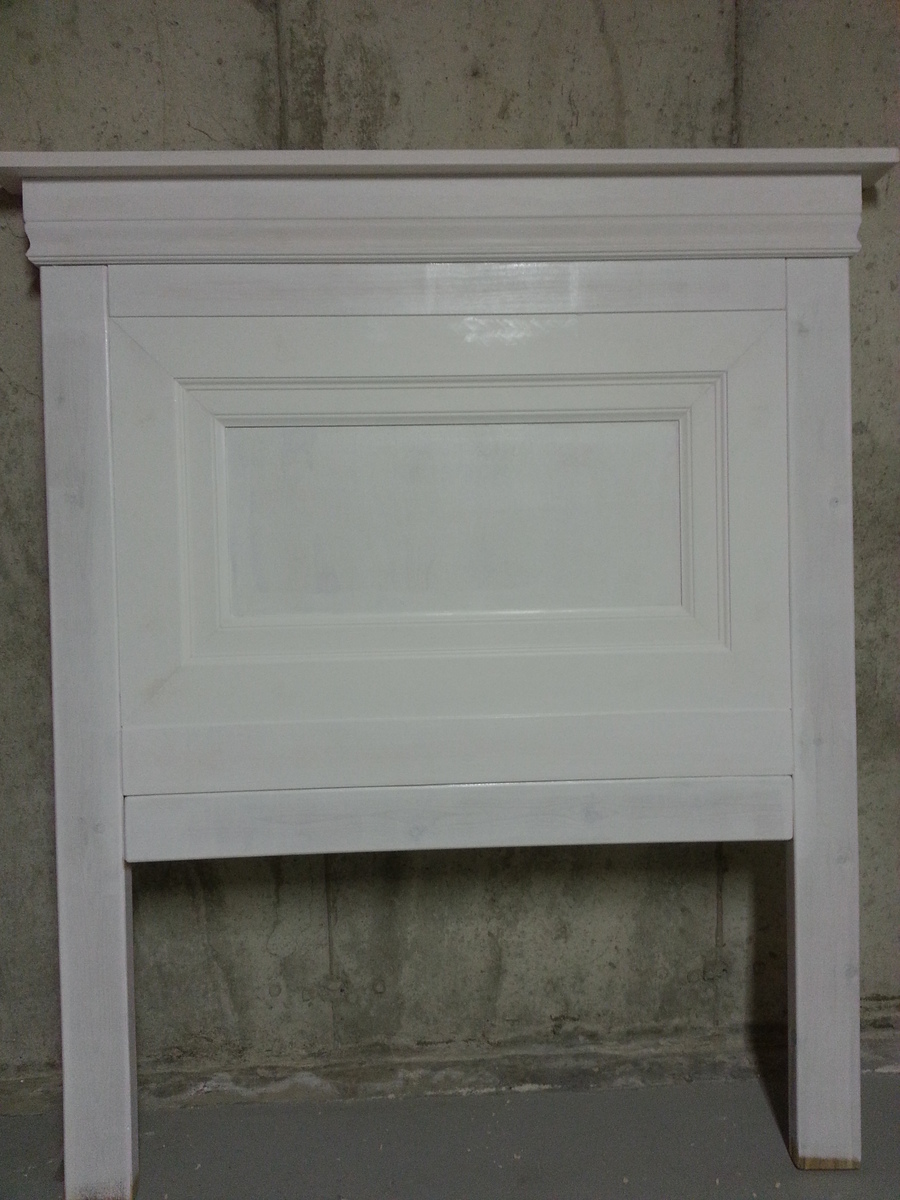
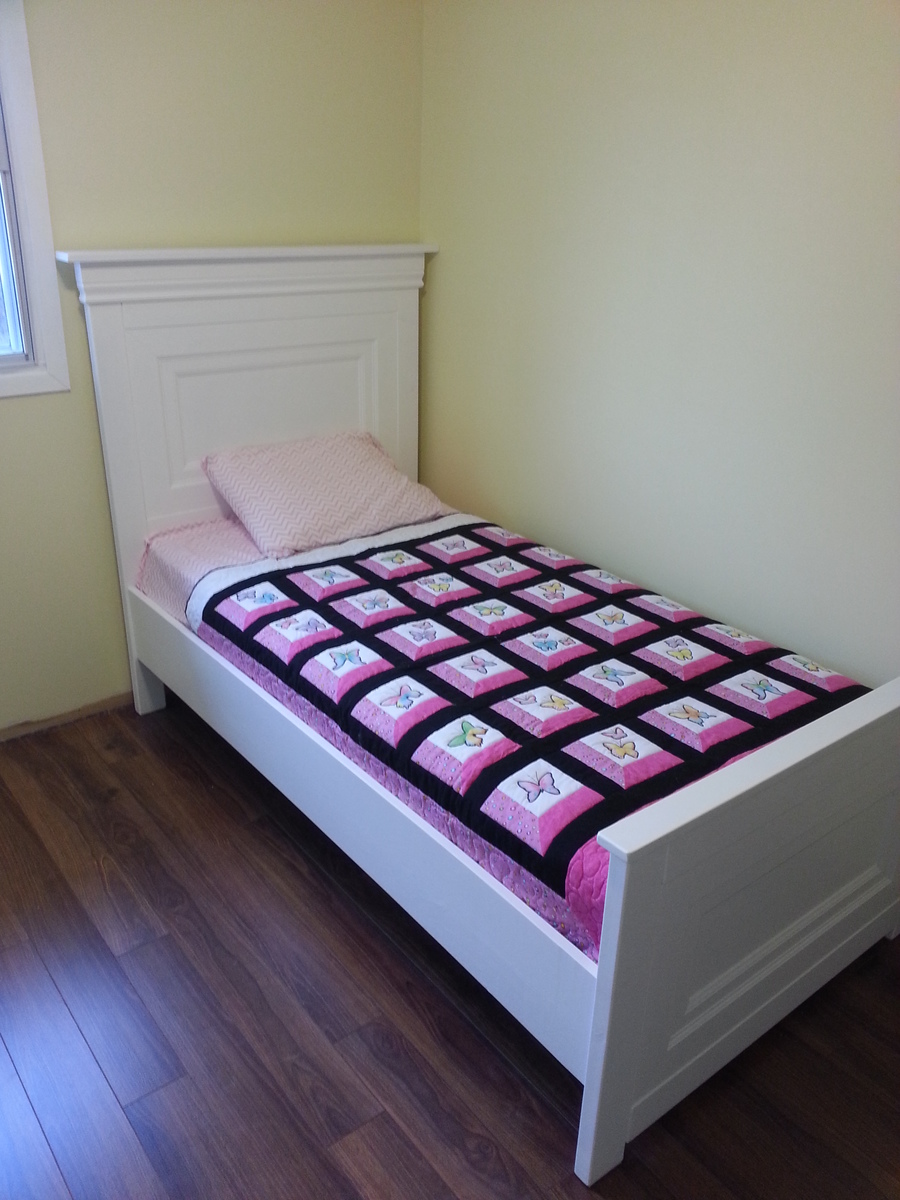
Panel Single Bed
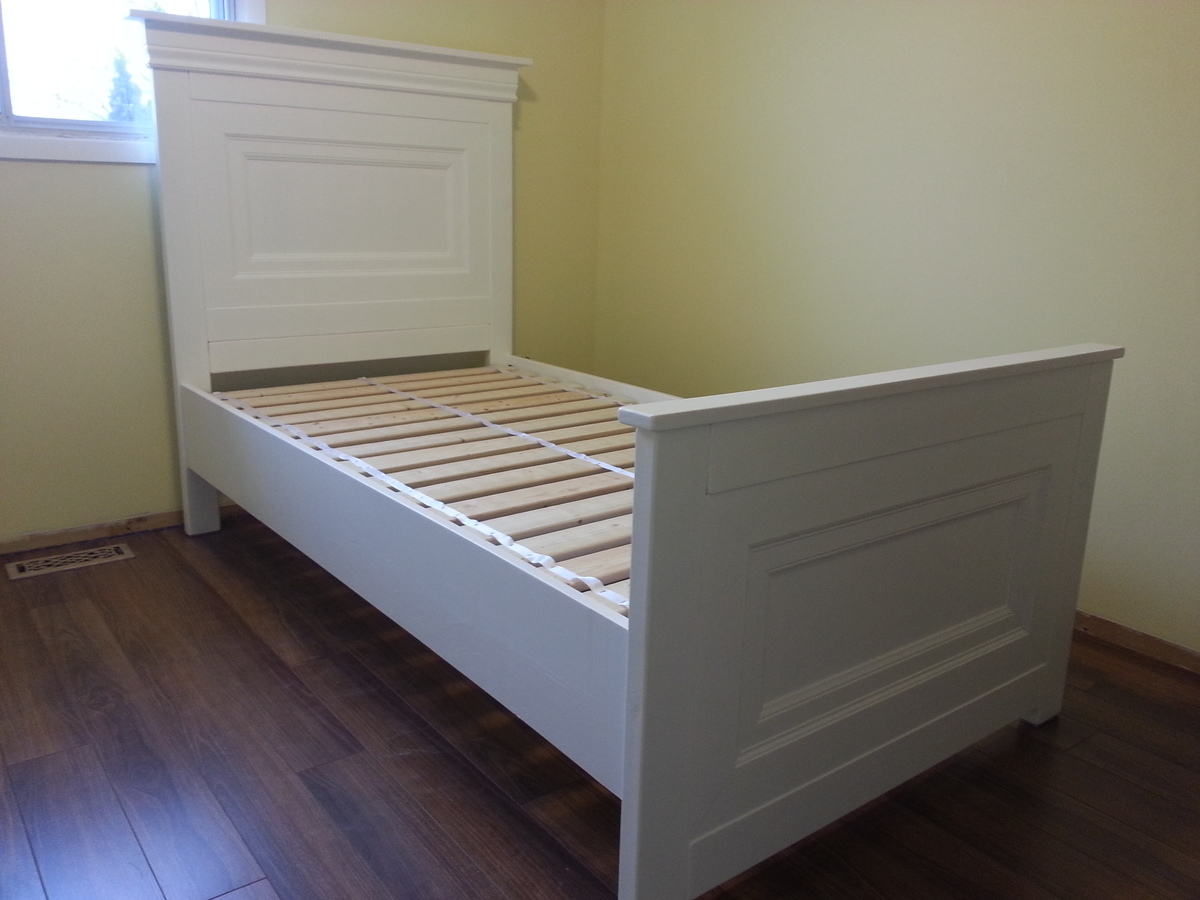
After looking high and low for a solid wood bed that wouldn't break the bank for my daughter's 3rd birthday I discovered this site and the plans for the Twin Panel Bed. The plans were easy to follow and I managed to build this entire bed with nothing but a mitre saw, a 4" electric sander, a power drill, and an R3 Kreg Jig.
I made a few modifications to the original plan, such as dropping the headboard height to 54", using baseboard moulding instead of crown on the top of the headboard, and not using moulding around the feet of the footboard. It was simply finished with 3 coats of a white melamine finish paint I had left over.

Built from Plan(s)
Estimated Cost
$375.00, all wood was bought at a Canadian Lowes. I used cedar 2x4 because of the smoother finish which were about $9 for an 8' length.
Estimated Time Investment
Week Long Project (20 Hours or More)
Finish Used
CIL Realife white melamine paint
Recommended Skill Level
Intermediate
Comments

Mon, 01/05/2015 - 05:10
I love this.
Wow this looks amazing. It's so much better than the original plans. I want to copy cat your build. Are there any additional specifics you can provide to help me or just any tips or tricks. What kind of hardware did you use for the railing?
Mon, 01/05/2015 - 14:22
I pretty much used the
I pretty much used the original directions but subtracted the additional height from the legs of the headboard. I highly recommend getting 2x4 that are semi-sanded like the cedar ones I used, the time you save is more than worth the extra cost. To attach the rails I just used the Kreg Jig and made 3 pocket holes on the 1x10 and 2 on the 2x4 that supports the slats, so there are 10 screws holding up each rail in total. Looking back i probably should have used metal brackets to make it easier to take apart if necessary, but that's a lesson learned I guess.
Sun, 01/11/2015 - 15:36
ok awesome, so you subtracted
ok awesome, so you subtracted from the original 74" length on the headboard feet? so its 20" shorter, did you just subtract those same 20" from the length of the plywood as well?
My first project

This modern farmhouse end table fits my space so well. This was my first project and was completed with glue and nails as I did not have the pocket hole jig initially. I loved this piece so much I made the coordinating coffee table. I would recommend staining/painting prior to assembly.
Built from Plan(s)
Estimated Cost
$40
Estimated Time Investment
Weekend Project (10-20 Hours)
Recommended Skill Level
Beginner
Comments
4x4 truss table with bench
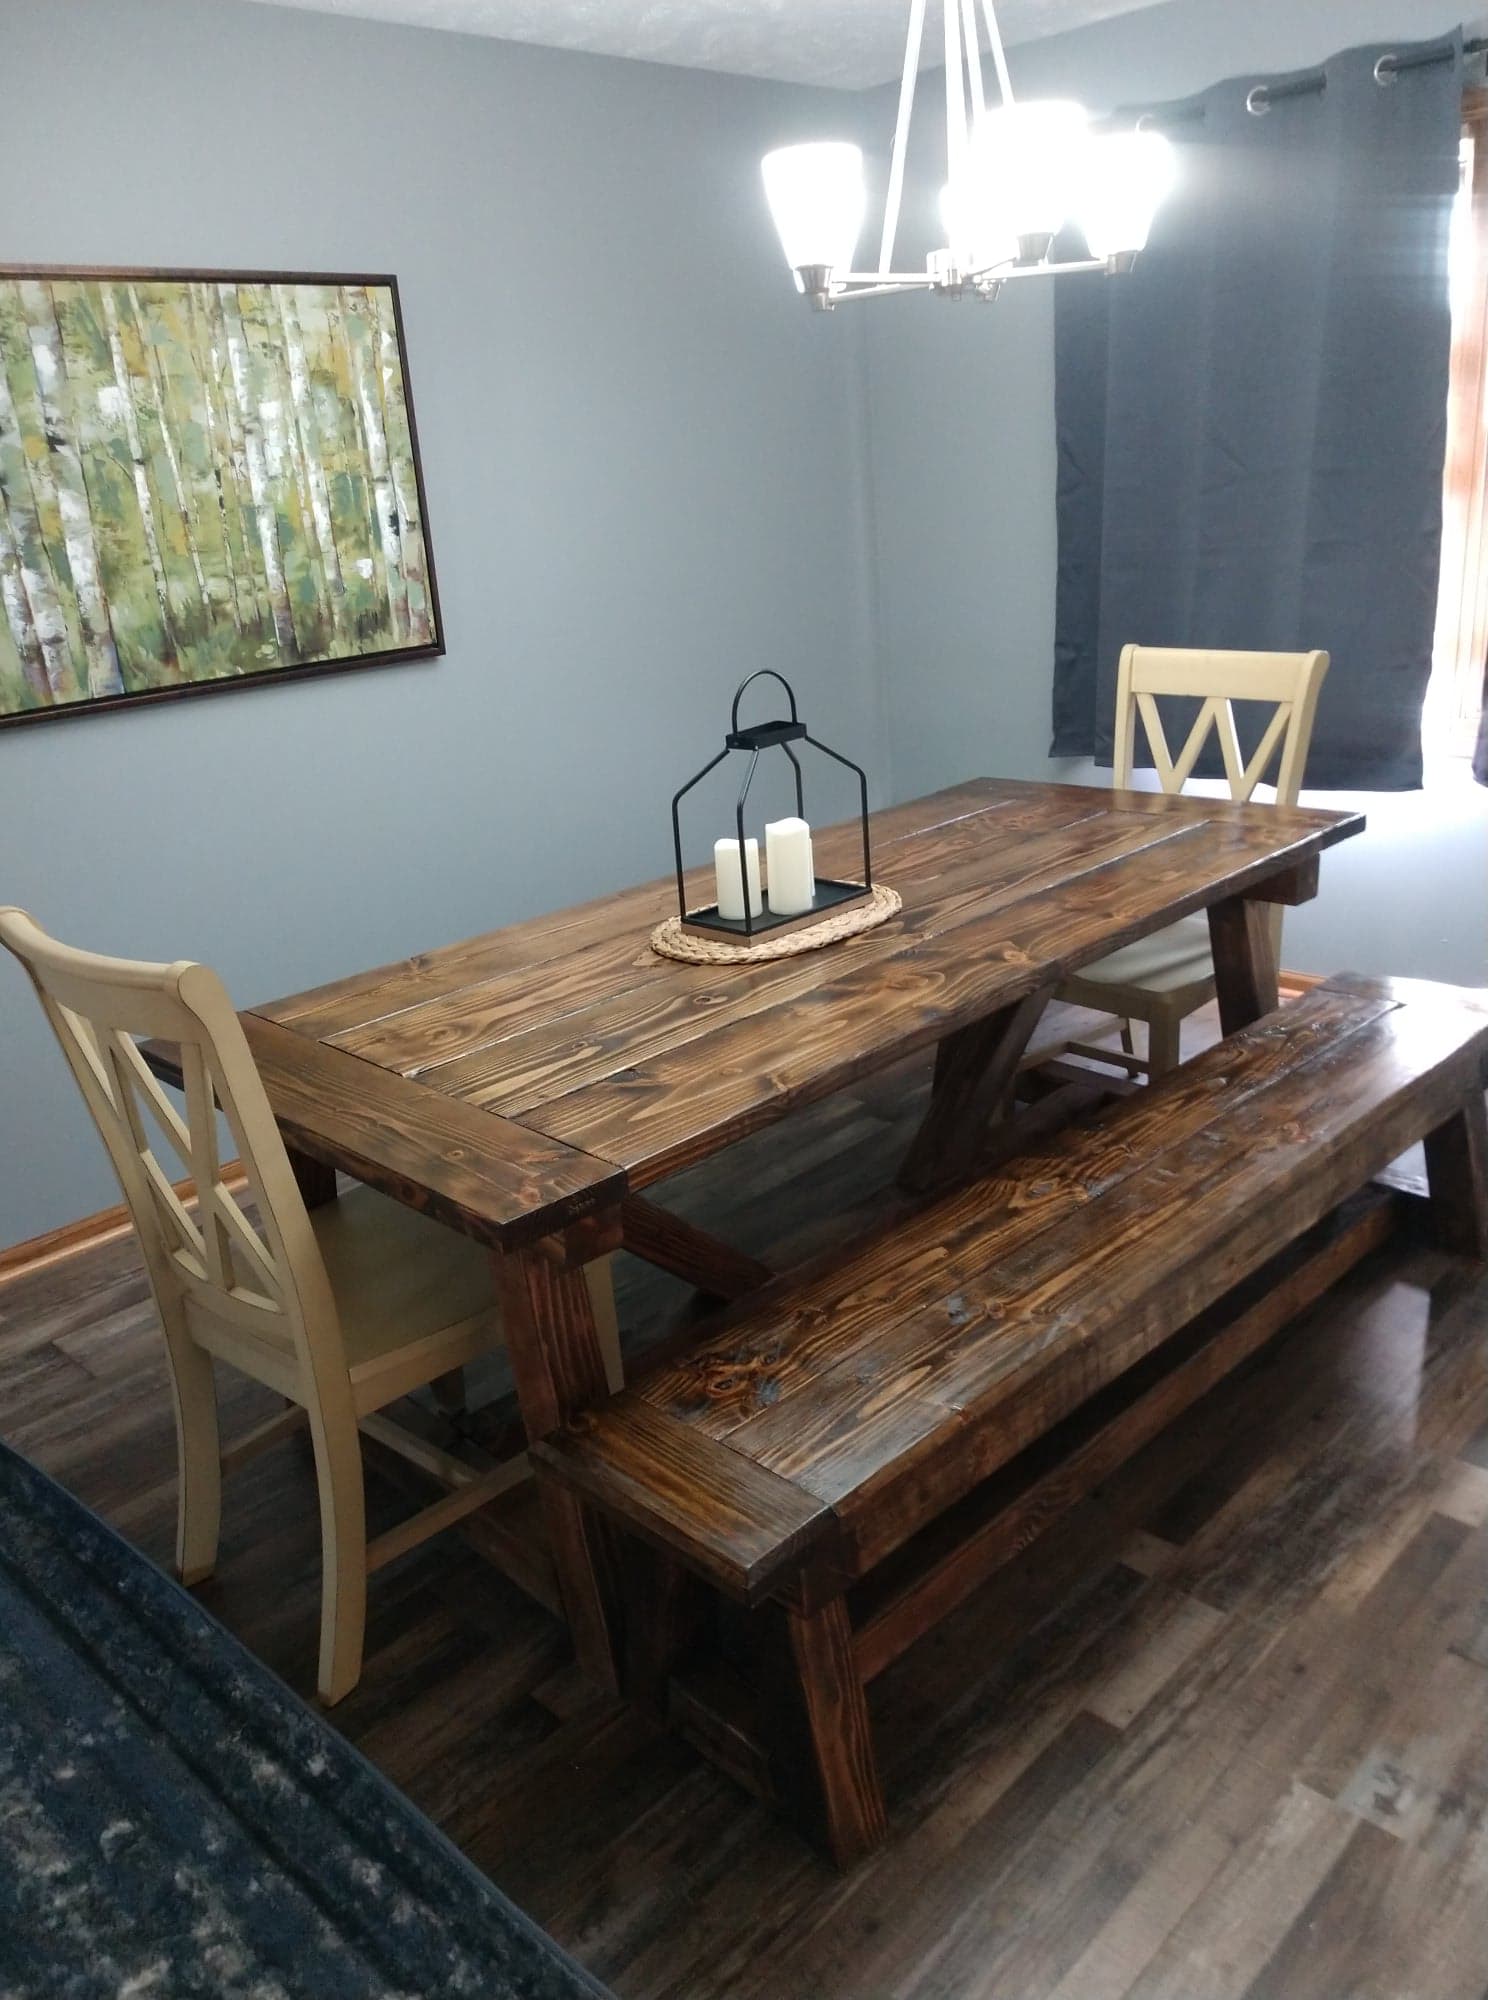
Ana White 4x4 truss table with matching bench.
Built from Plan(s)
Estimated Cost
250
Estimated Time Investment
Day Project (6-9 Hours)
Finish Used
dark walnut stain and 3 coats of lacquer
Recommended Skill Level
Intermediate
Comments
Walk-in Master Closet
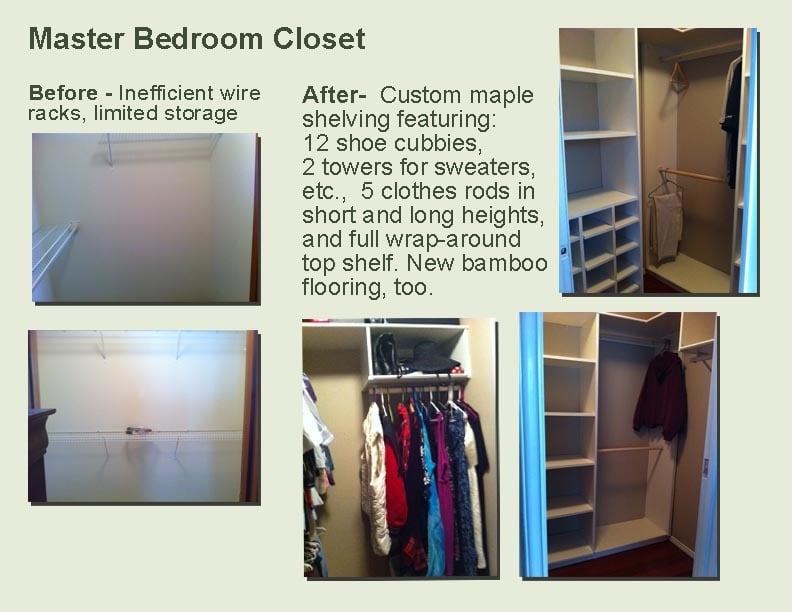
I've been drooling over those custom closet organizers for years, but they were either too expensive, not well made or some combination of not right for us. So seeing Ana's master closet plan really sent my imagination soaring. My challenge. My master closet is a small walk-in 5'x7' so I did have to do some adjusting. I love having a place for shoes and sweaters. One of my favorite parts is the continuous top shelf that connects all the parts together forming a big 'U'. I used my Kreg jig to connect each of those pieces. Anyway, thanks Ana White for the inspiration.
Built from Plan(s)
Estimated Cost
$300
Estimated Time Investment
Weekend Project (10-20 Hours)
Finish Used
Ace Hardware Trim and Cabinet Paint
Recommended Skill Level
Intermediate
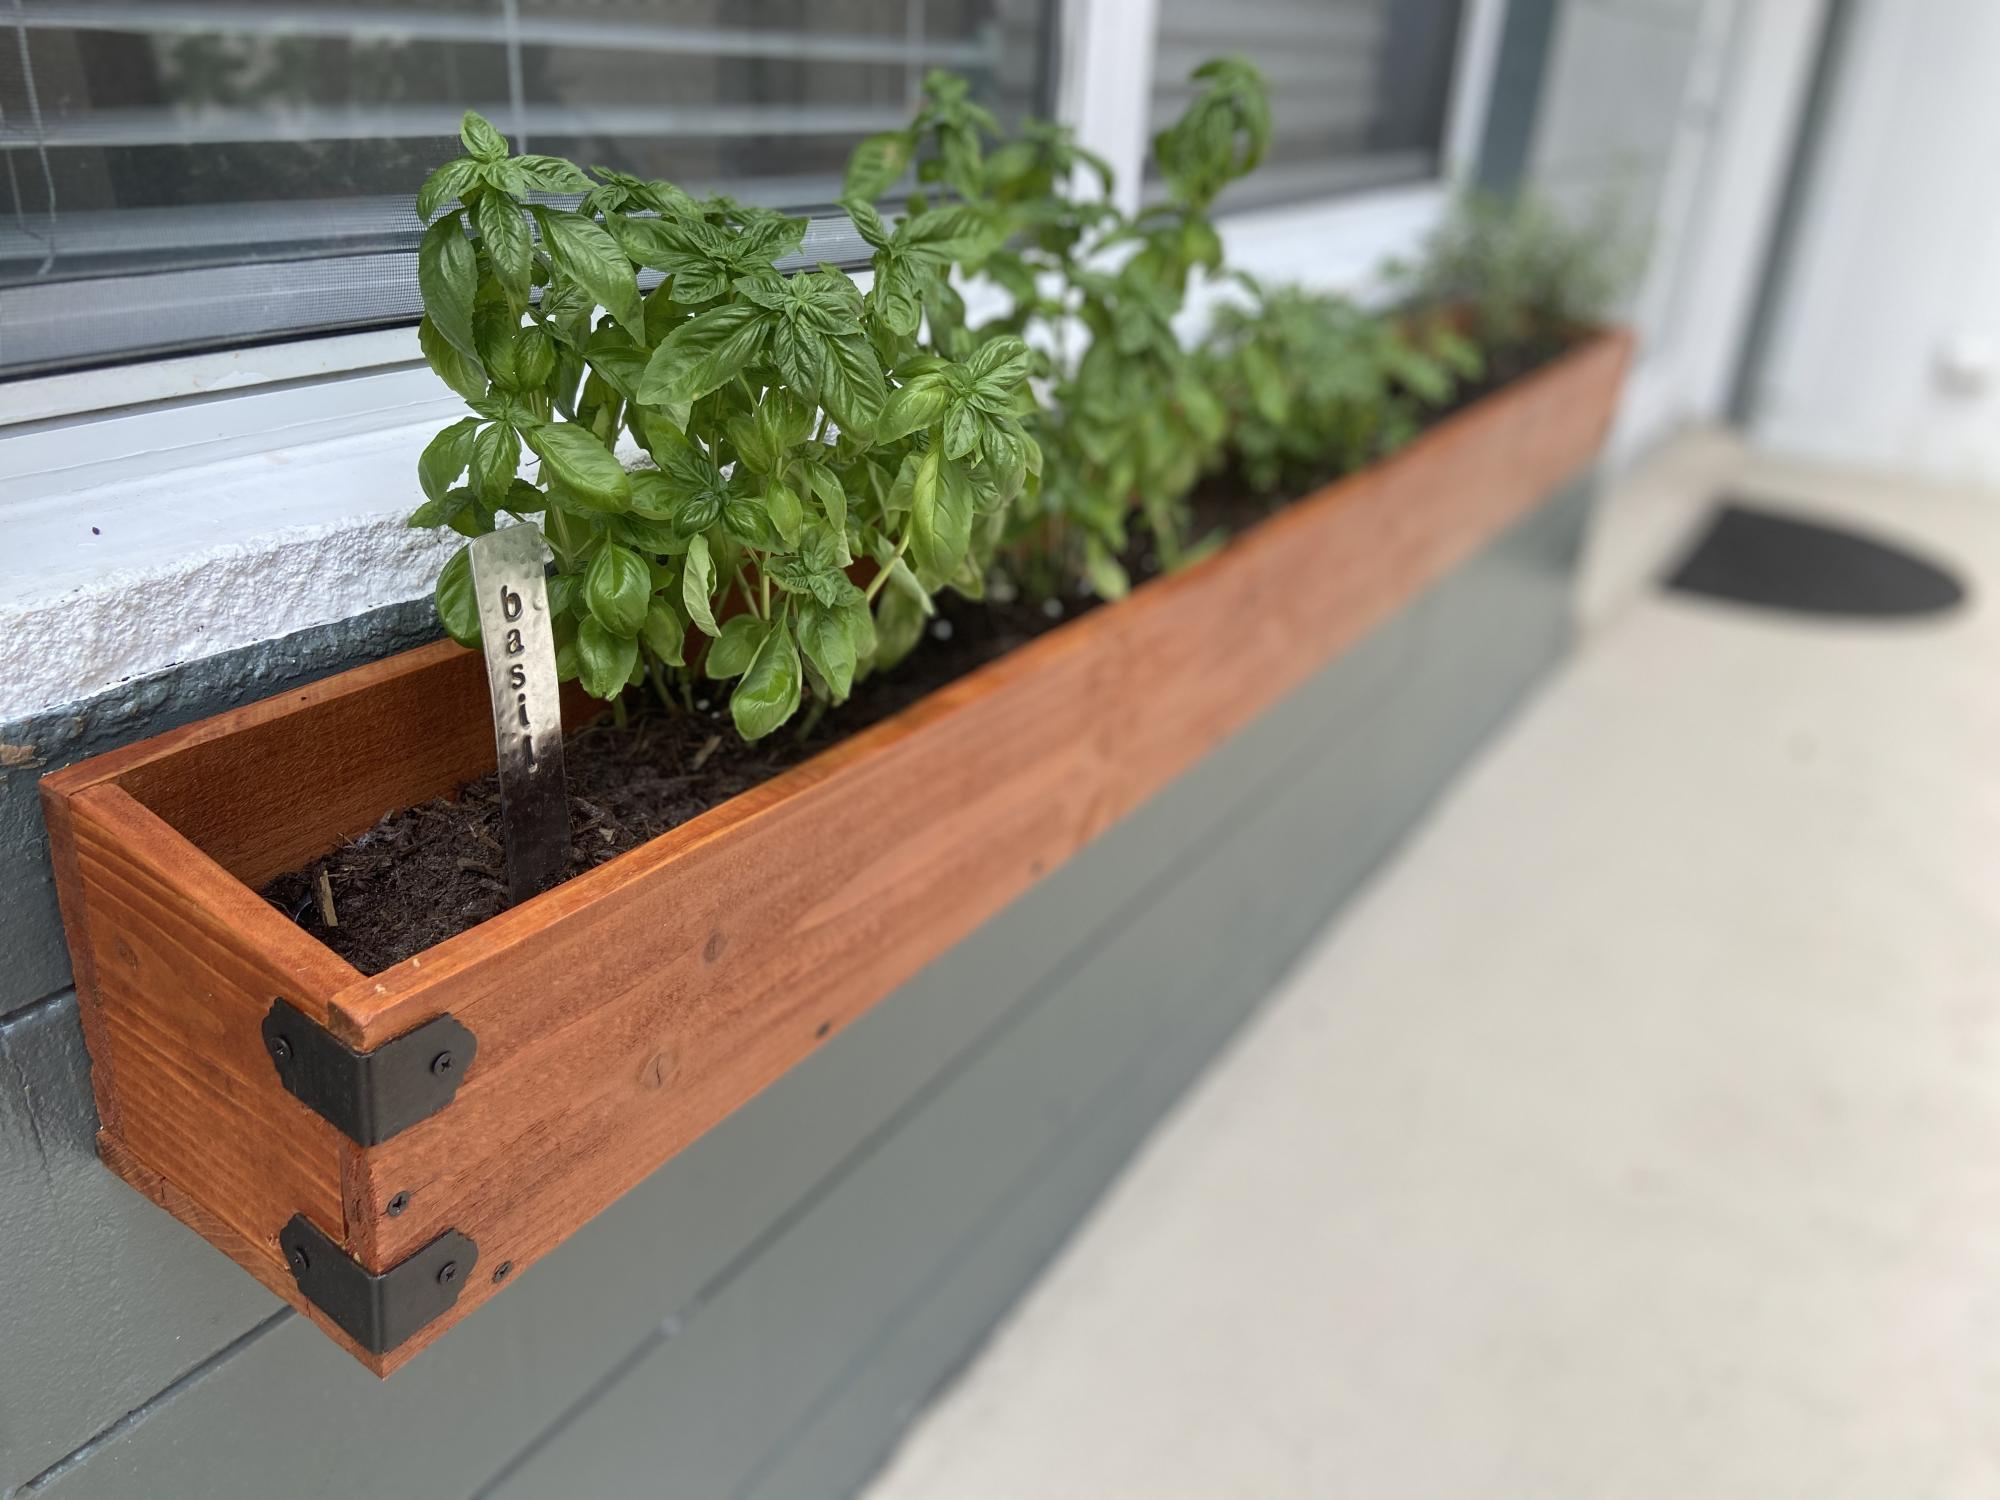
Simple 2x4 Potting Bench modified with inset tote for potting soil or water
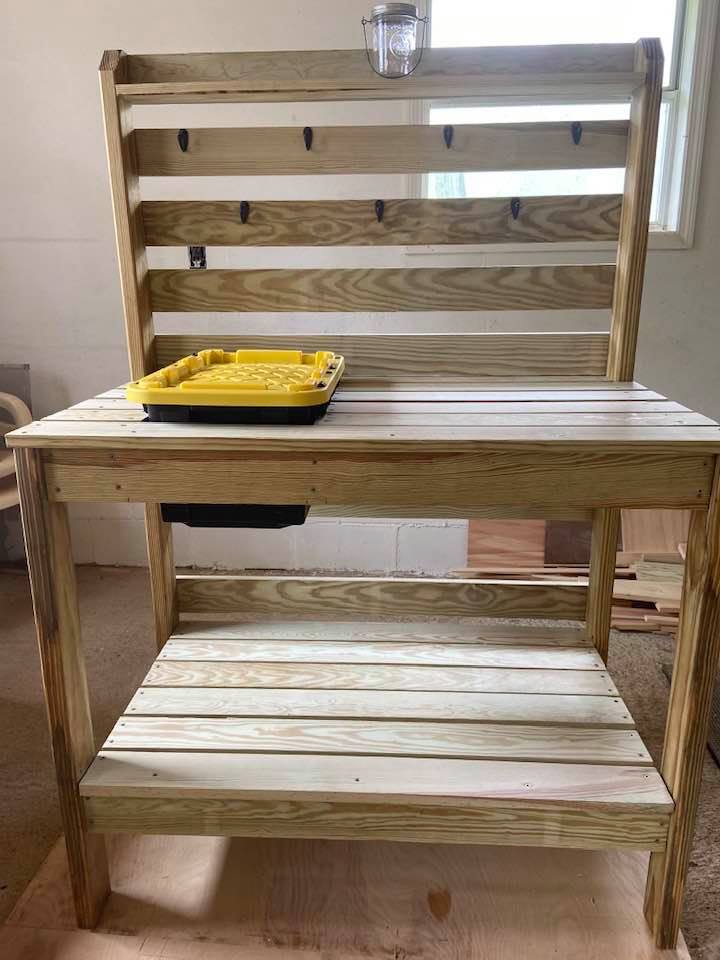
Made this for a friend who does cuttings of her plants for others. I used the Simple 2x4 potting bench plan and modified it to hold an inset 7 gal. Commander tote box with snapping lid with two 2x4 @ 22" braces to support the tote on each side attached to the front and back aprons. She wanted something that would hold a medium size bag of potting soil with a lid to keep snakes and other critters out since she lives in the country. There are plenty of hooks to hang tools and other items.
Built from Plan(s)
Estimated Cost
$224.00
Estimated Time Investment
Afternoon Project (3-6 Hours)
Finish Used
Thompson Water sealer
Recommended Skill Level
Beginner