Community Brag Posts

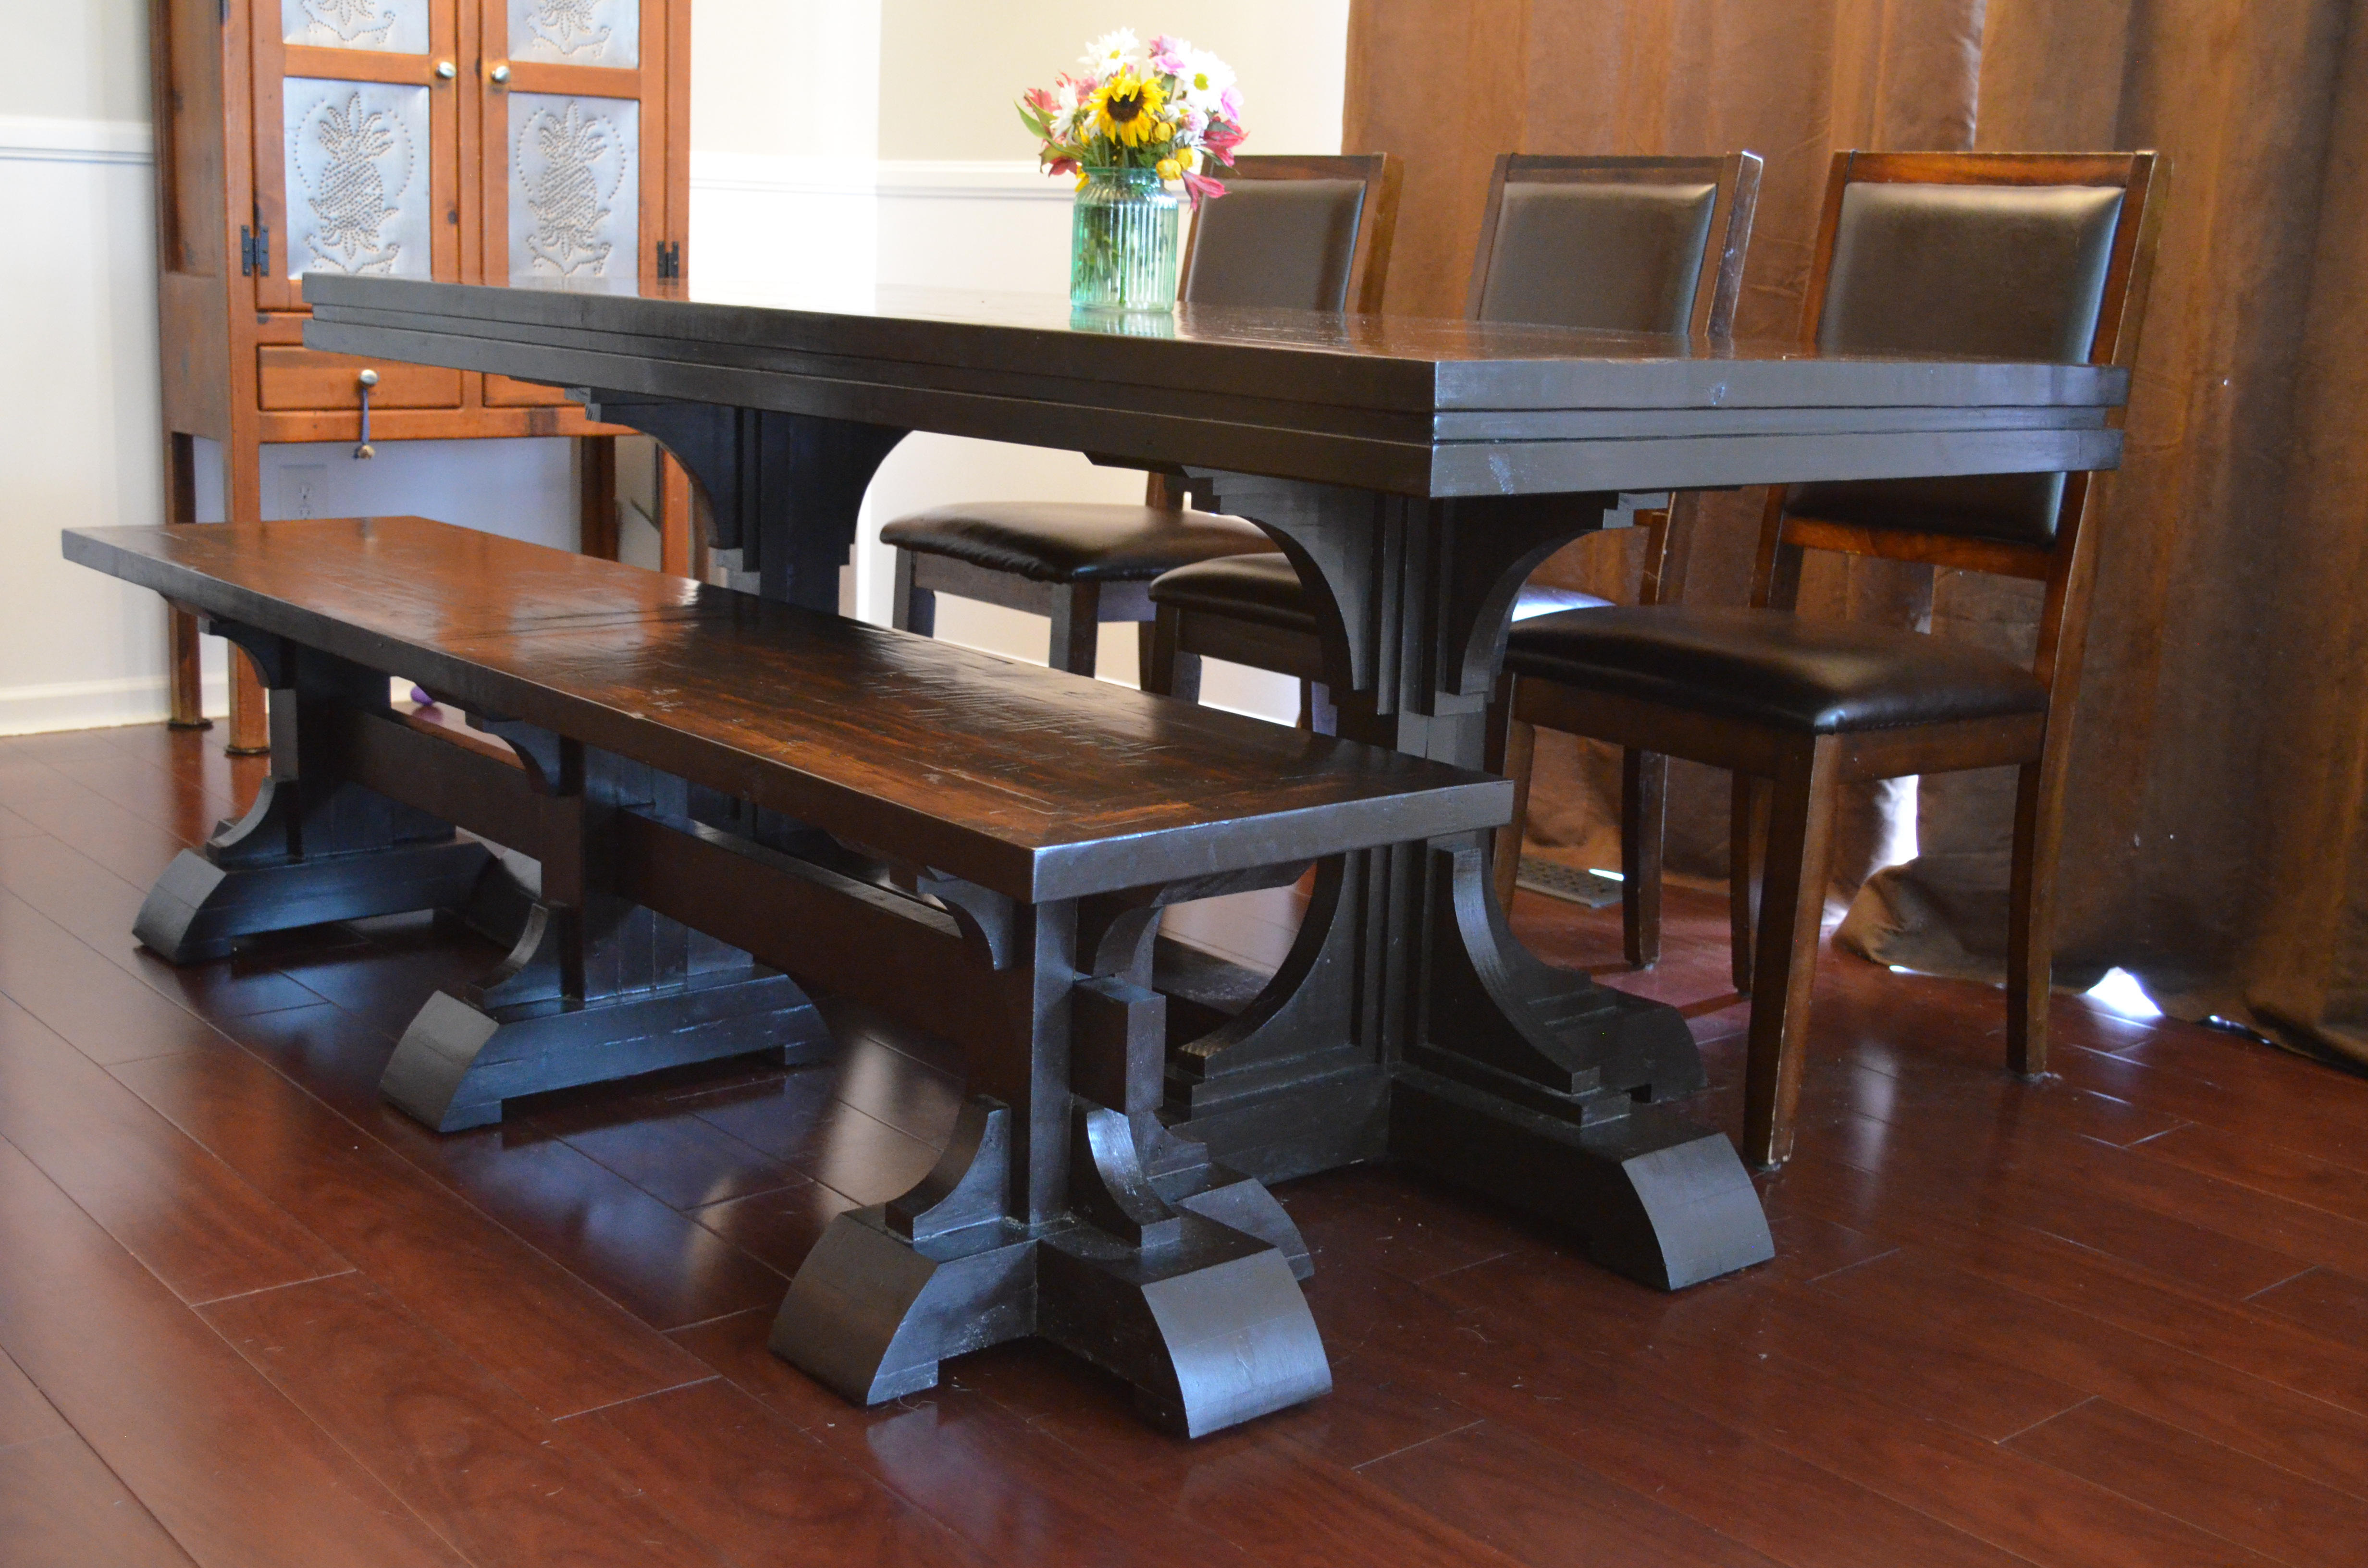
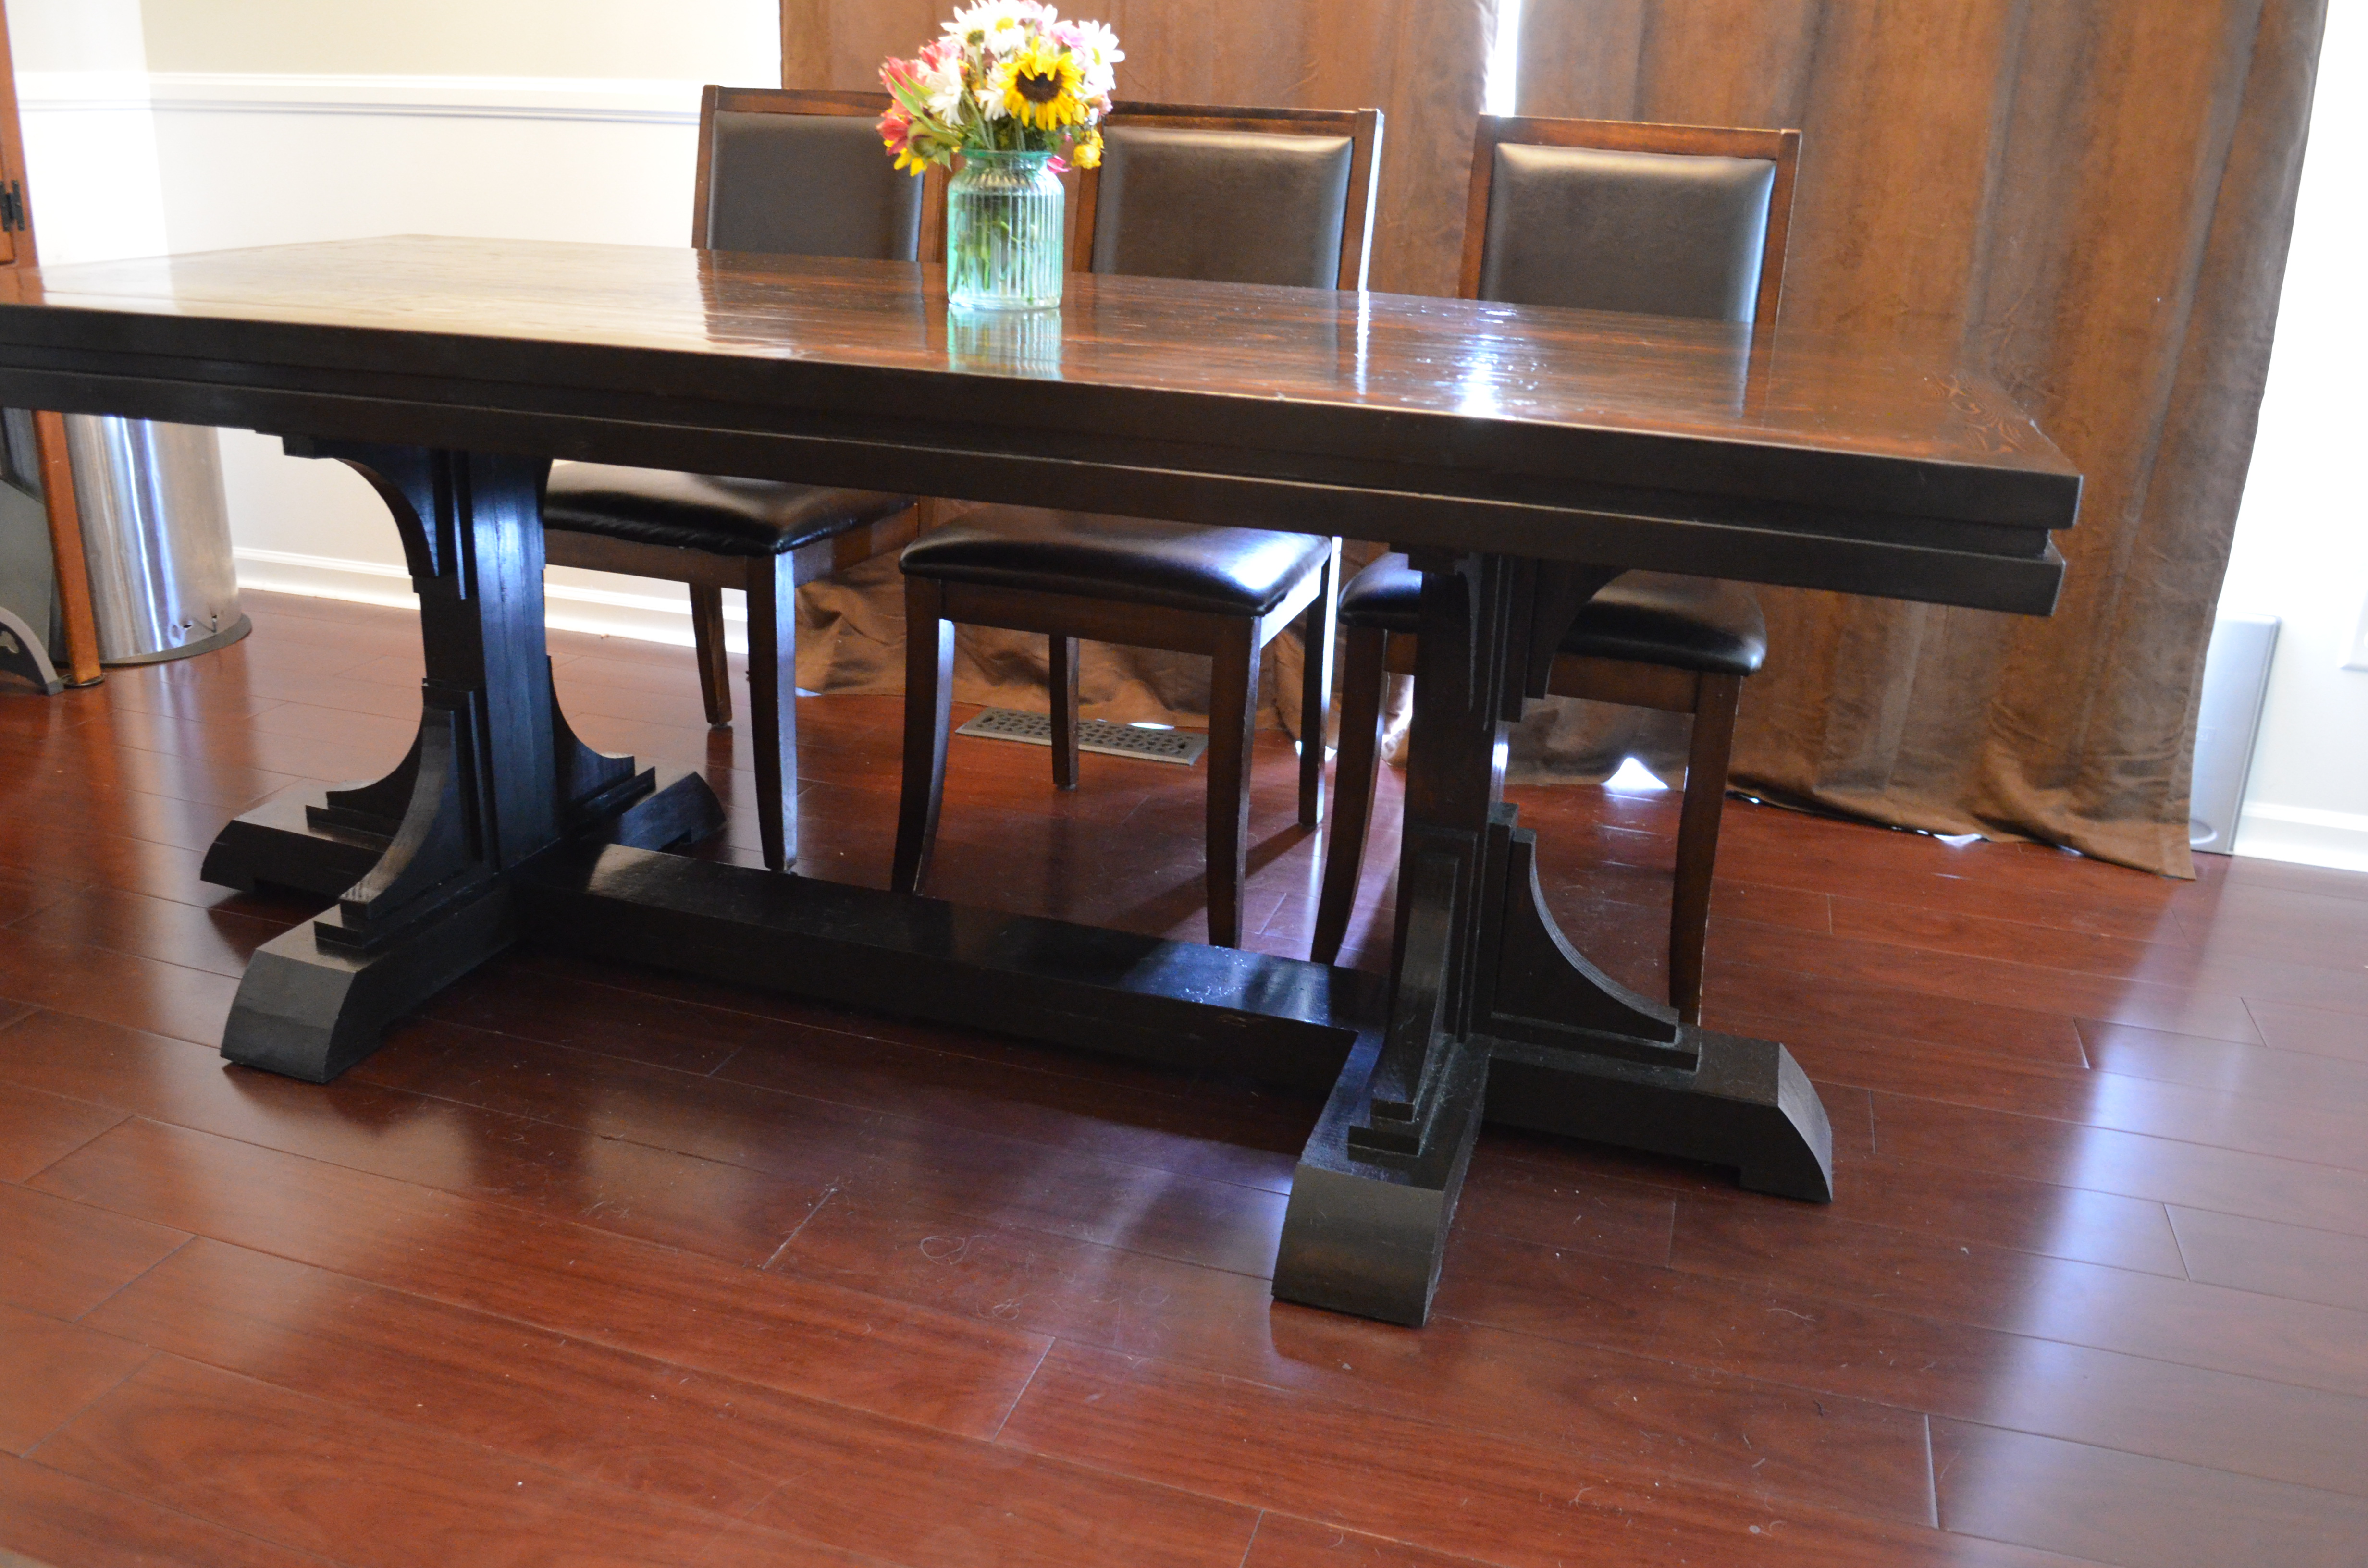
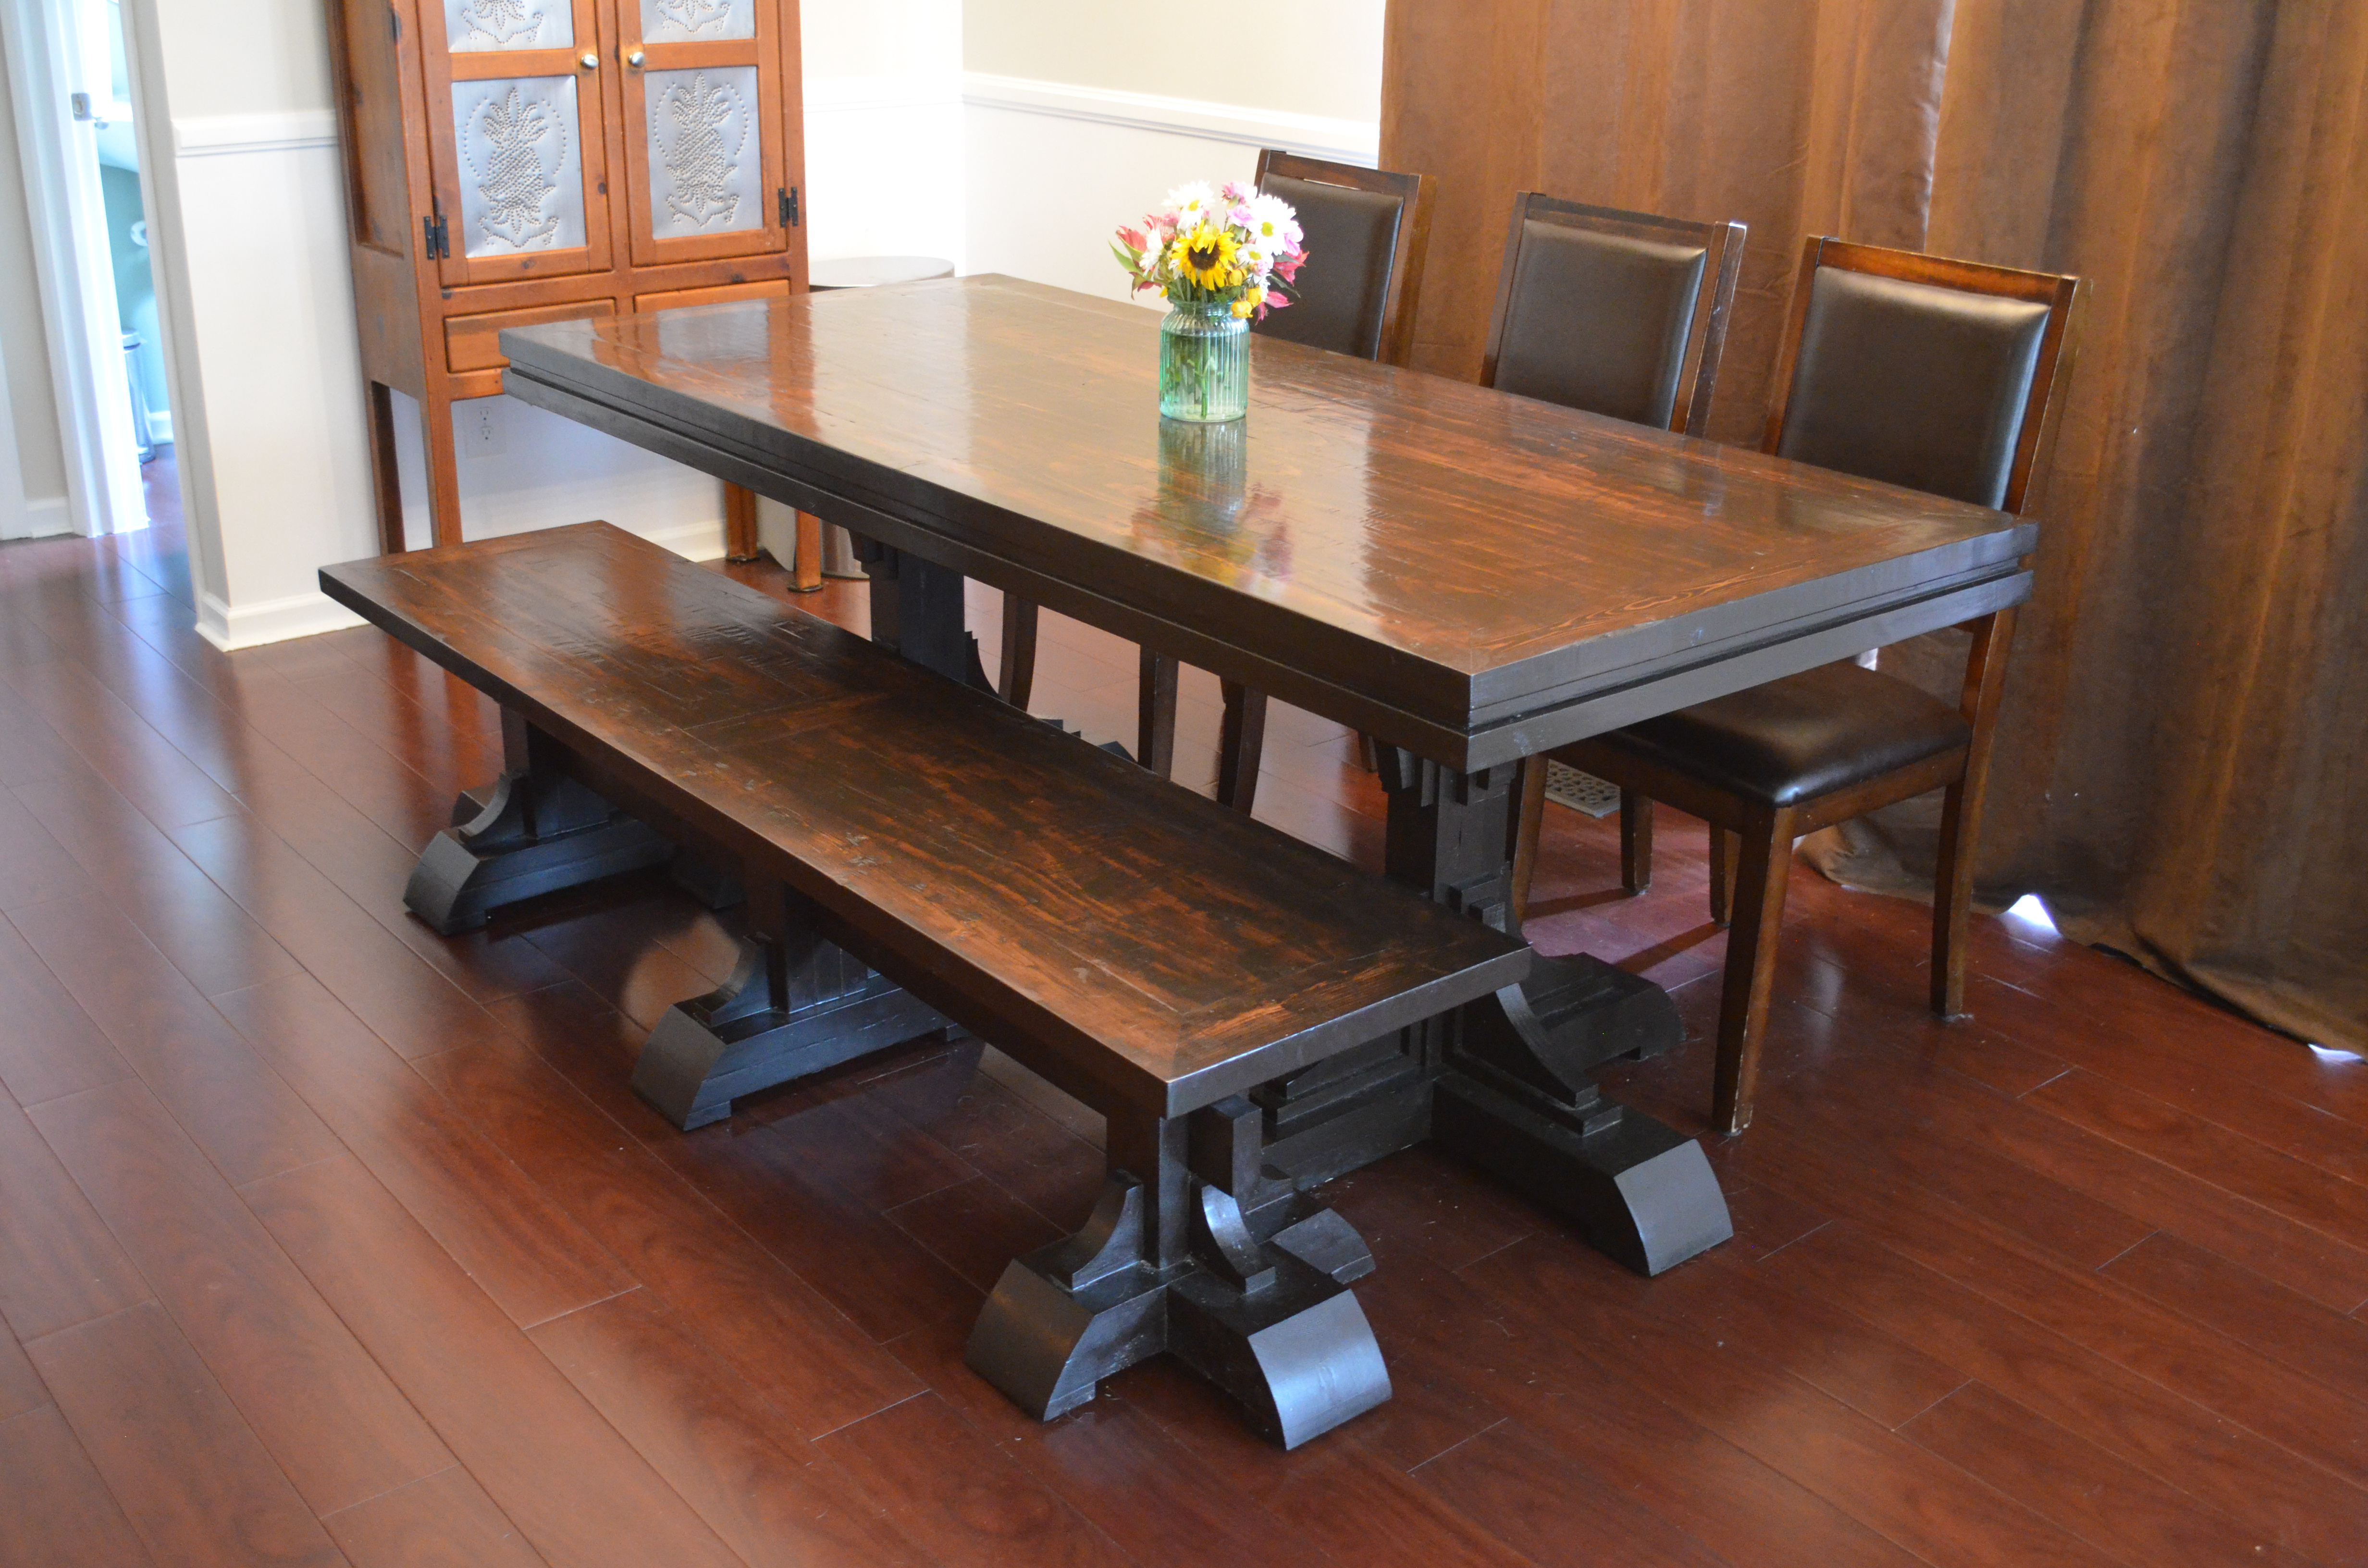
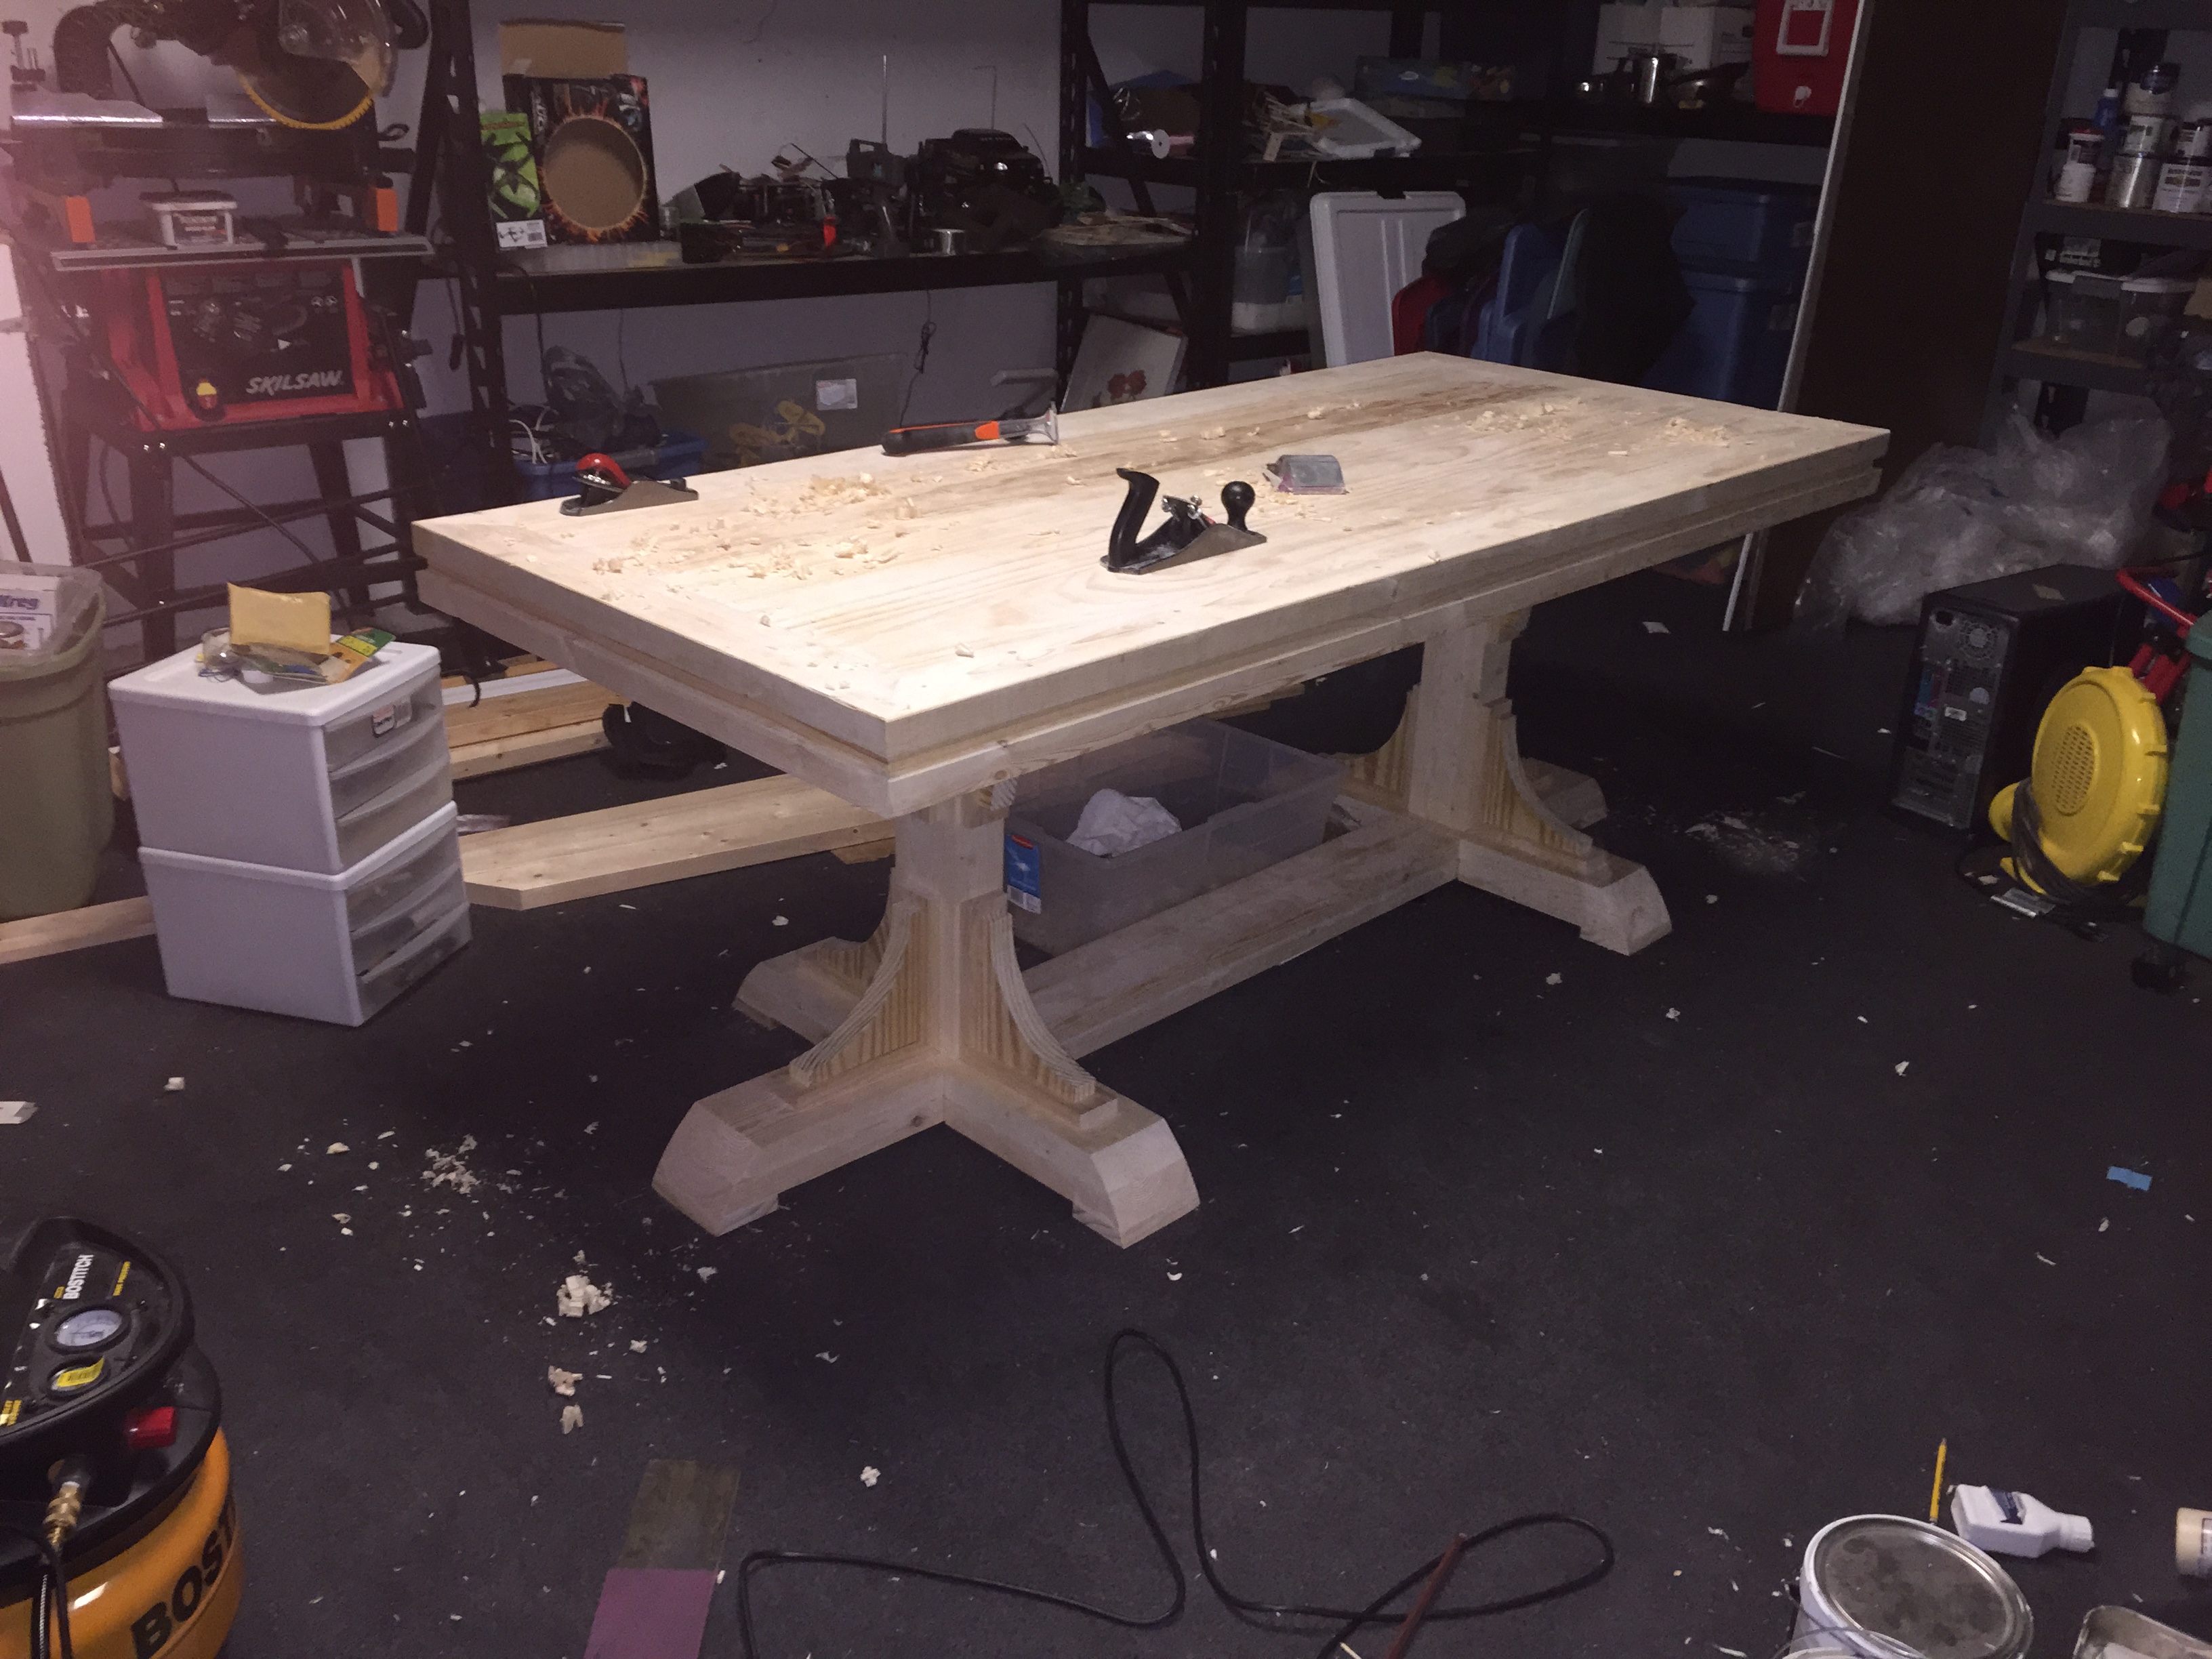
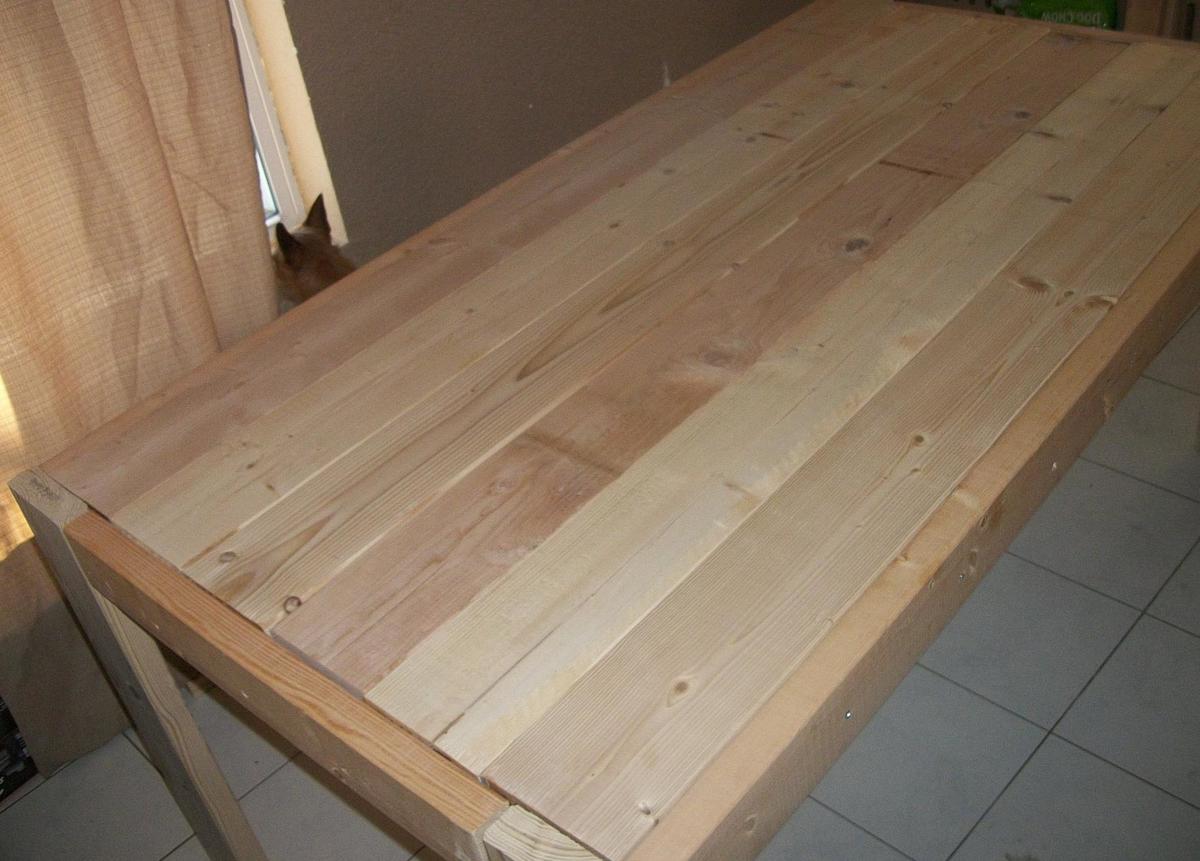
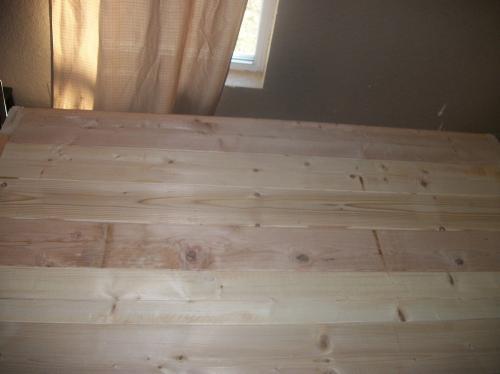
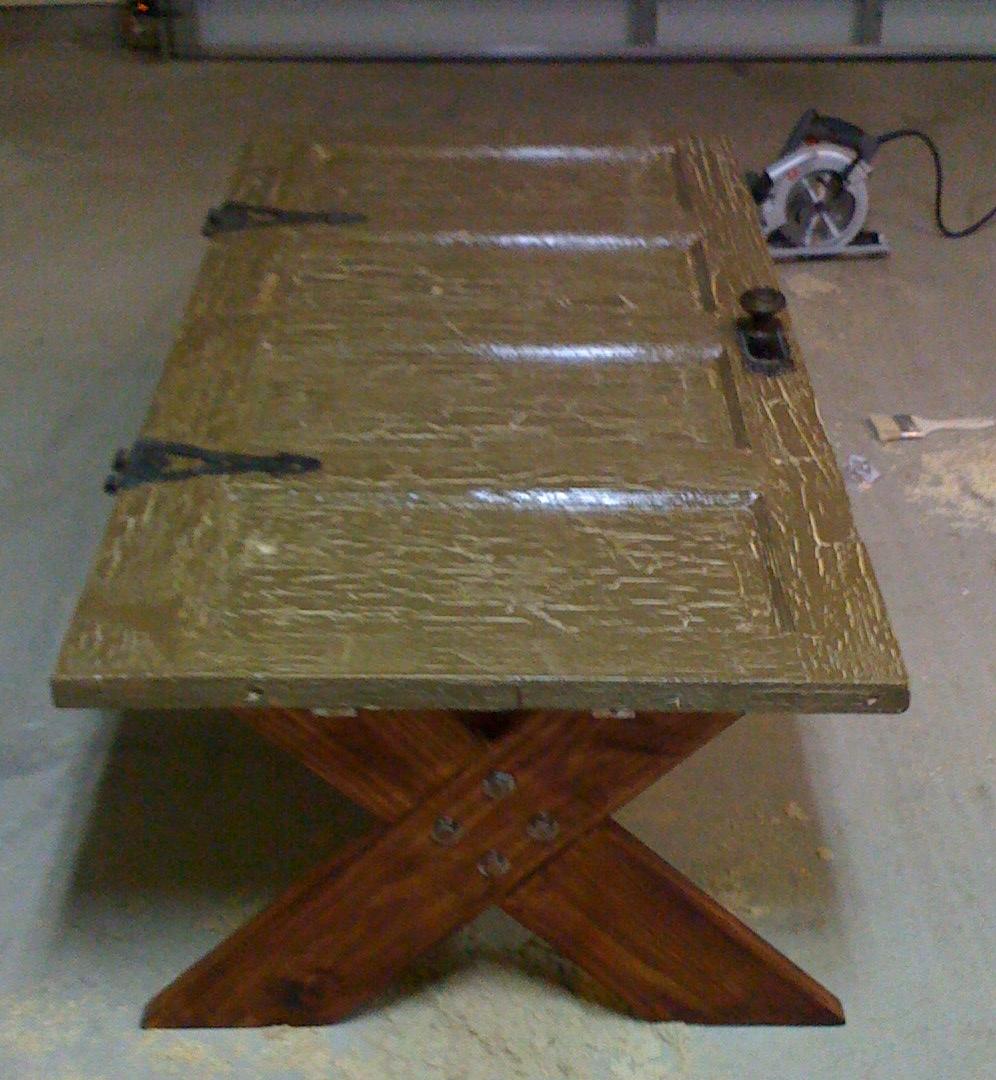
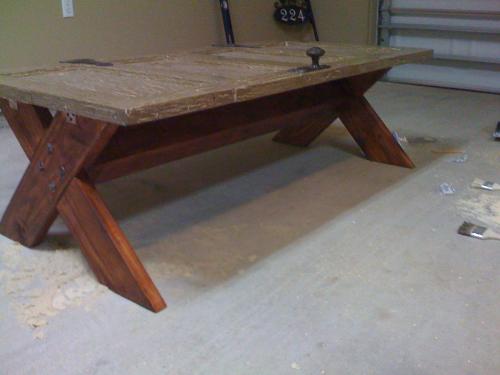
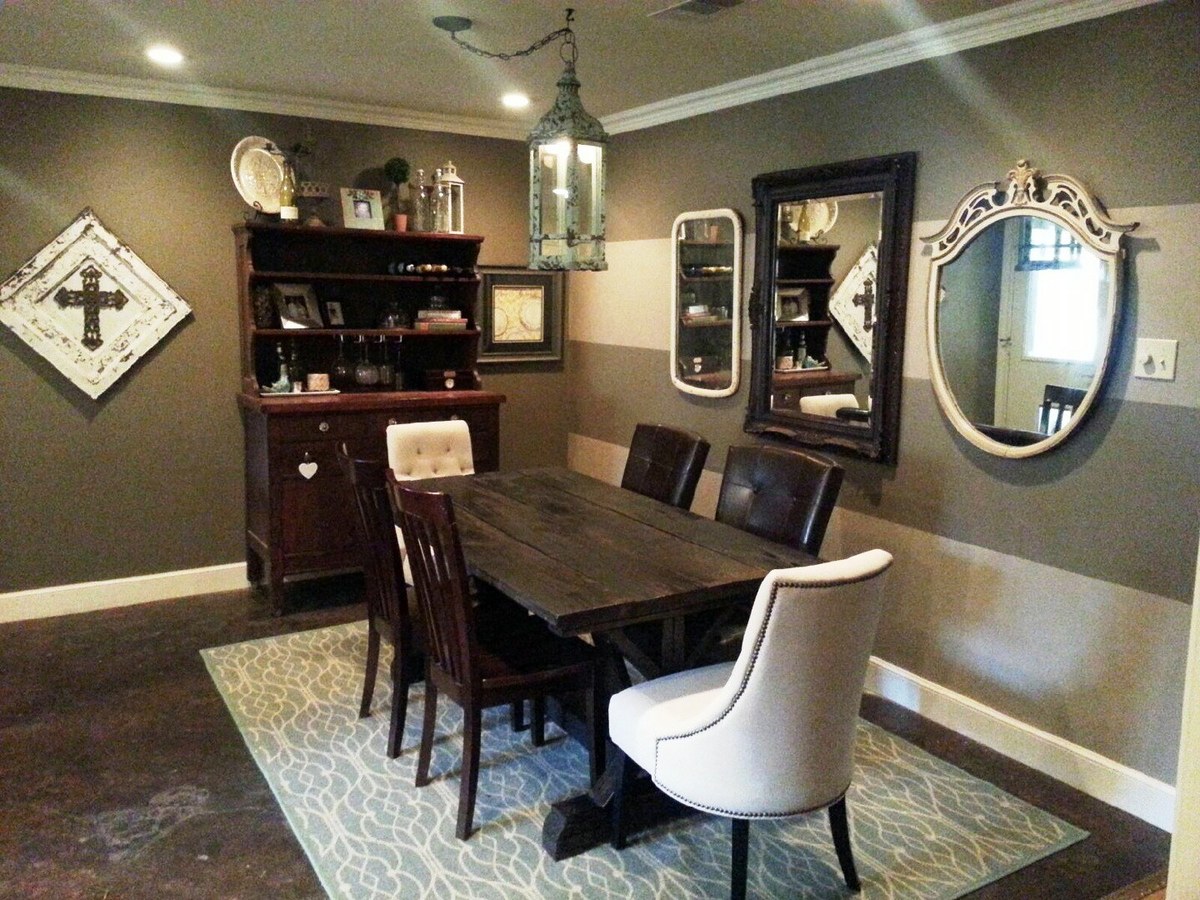
Farmhouse Benchright Table Build

Submitted by tcoche on Tue, 05/28/2013 - 17:59

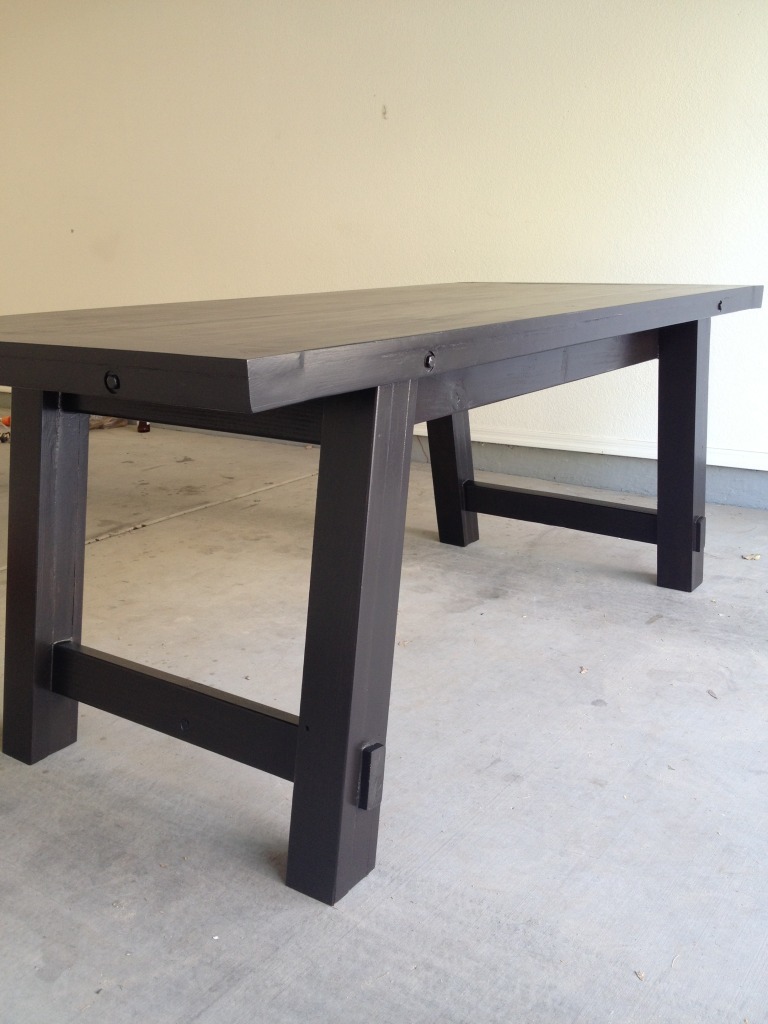
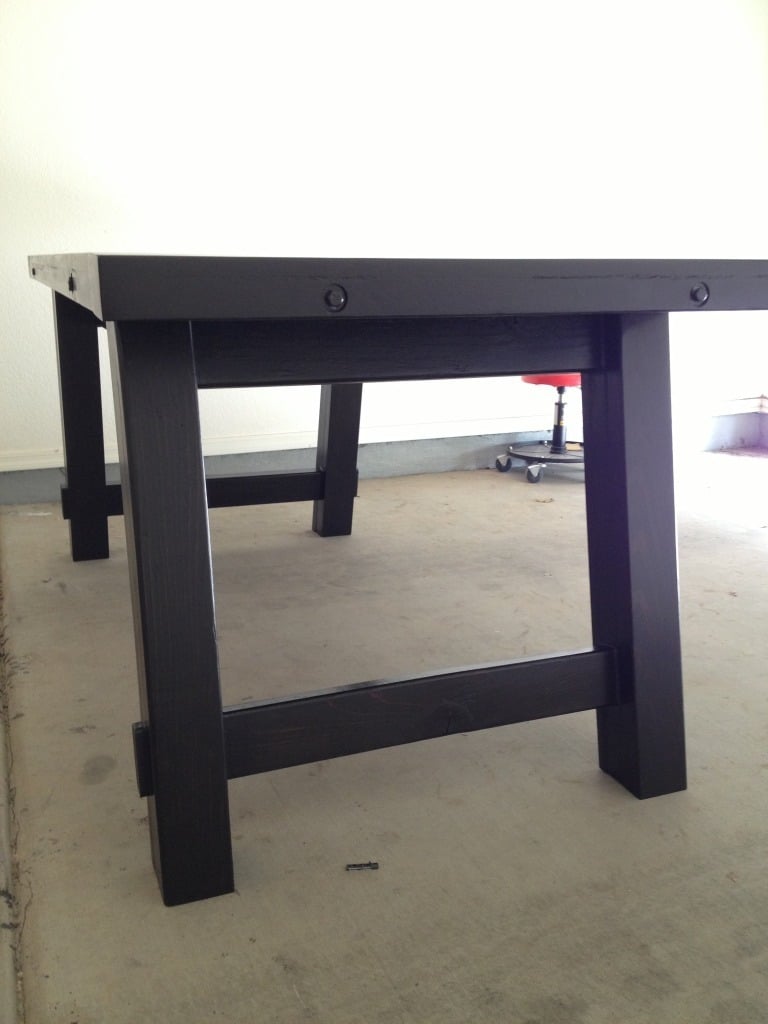
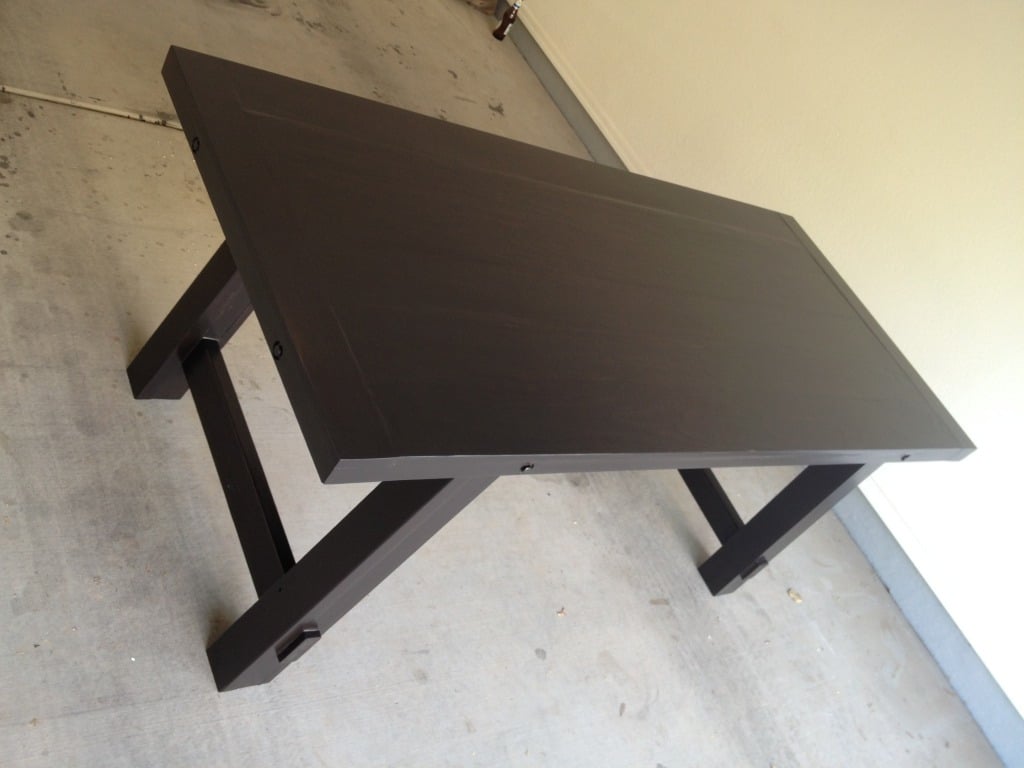
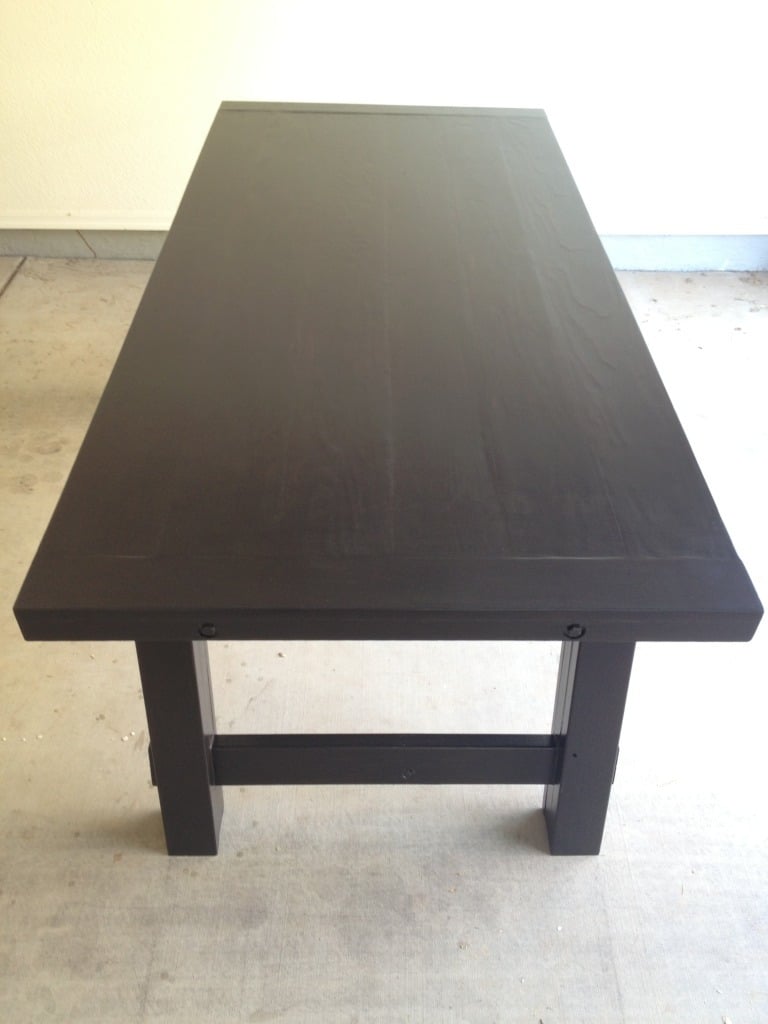
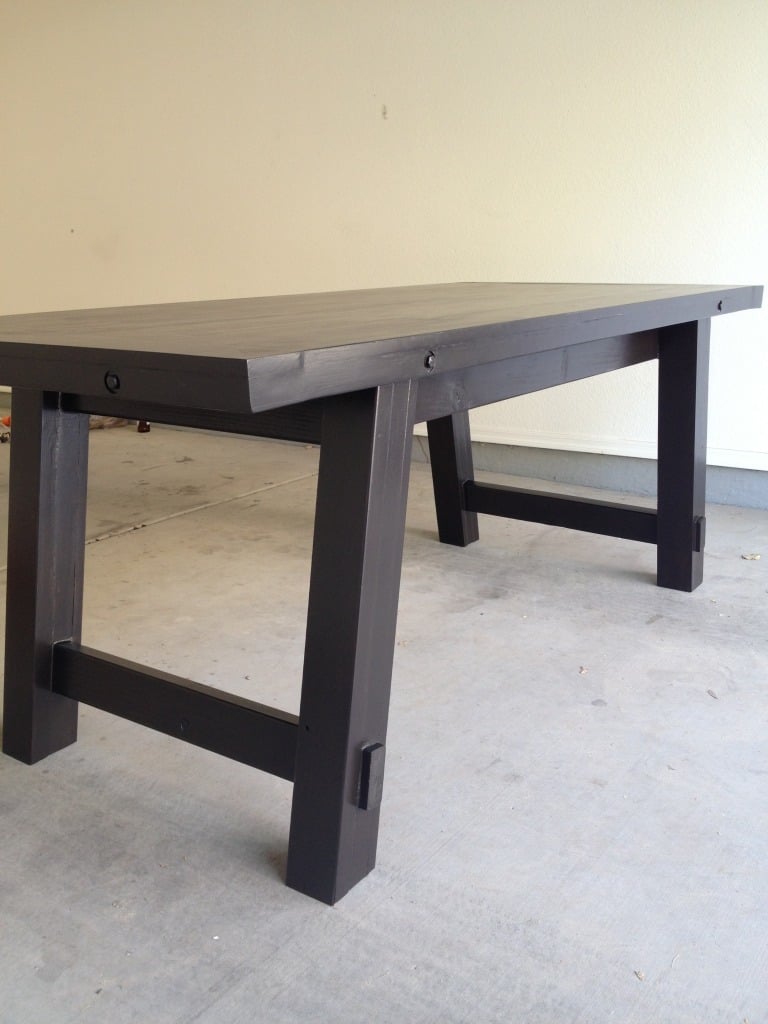
After doing my first build, pallet media center, I was hooked. My family and I desperately needed a dining room table. We wanted a rustic looking table and I was thankful I found the benchright table plan. Thanks Ana!! This build was fairly easy. I did mess up a couple times with the angle/bevel cuts. Totally ruining a couple boards. Which I had to run back to Lowes and purchase a couple more boards. I used 3/8 hardware bolts/washers/nuts in galvanized for the sides (3") and breadboards (6"). The stain basically painted them, which we love. I still need to add the hardware for the bottom (threaded rods, turnbuckle, nuts/bolts/washers, etc). The pics above really dont show the detail with the stain. The pics make the table look black. But you can actually see the wood grain on the table top. The table looks amazing in person, we love it!!! Thanks again Ana!!

Estimated Cost
250
Estimated Time Investment
Weekend Project (10-20 Hours)
Finish Used
Rustoleum Kona stain and Rustoleum Satin Polyurethane. 2 coats of stain and 3 coats of urethane.
Recommended Skill Level
Beginner

Triple foot farmhouse table with runner, triple pedestal bench

My first attempt at a real furniture project, I would have never tried this without all the plans and support here at Ana-White! These are 7' for the kitchen/breakfast area.  Since the table is only 7', it has 2 pedestals.  I modified these a bit from the triple pedestal farmhouse bench and table plans by using a runner along the floor instead of a stringer board on the table and adding triple feet on the outside pedestals.   I also added 1x3 trim under the arches to add some detail and hide the grooves between the three 2x4 leg supports.  The top has mitered 2x4s around the outside with 1x6s on the inside.  One issue I ran into was that the 2x4s shrank a lot as they dried, while the kiln-dried 1x6s did not.  To make an easier to clean surface I planed the top smooth, and then added minimal texture by hand scraping.  My plan is to build a big 12' version of this table for the dining room. 

Estimated Cost
Under $300 for both.
Estimated Time Investment
Week Long Project (20 Hours or More)
Finish Used
2 coats of kona stain, wiped more off the top than the legs. The top shows grain, the legs are almost solid brown. I used hand-rubbed satin poly. 3 coats on the bench turned out great. 6 coats on the table top turned out too shiny and easily scratches. I will refinish the table at some point, possibly with a softer finish.
Recommended Skill Level
Intermediate

Comments

Built-in sliding door console

Submitted by ErinRN on Thu, 09/07/2017 - 07:11

I wanted a sliding barn door concept but as a built-in piece. I had a drywall niche that the builders had made that I've always hated so I ripped that out, and used those measurements to create my version of the sliding door console from Nikki and Ana. This was a big project but so worth it! I ordered the door hardware from Amazon but had to drill my own holes because they did not line up where I needed them to be. 

Built from Plan(s)
Estimated Cost
$200 including hardware
Estimated Time Investment
Weekend Project (10-20 Hours)
Recommended Skill Level
Intermediate

Our New Table...the table of my dreams!!

I have added hundreds of plans on my to do list, and some of them may have been a little easier, but I really wanted this table. Badly.

So, my husband and I, decided one weekend to build the Modern Farmhouse Table. Even though we have a saw, we decided since this was our first project, we would have Lowes cut our wood. Big mistake.

When we got home, we organized the wood as to what is what, and measured. It was while we were measuring, when we noticed that a lot of the wood was cut wrong :(

So let that be a lesson...ALWAYS CUT YOUR OWN WOOD!

We went ahead and put the table together, and even though there are some gaps, which I'm planning on filling, I am proud with it.

It's been 3 weeks since we've built the table, and I still have A LOT of sanding to do, and I still need to finish it, but I am proud of what my hubby and I built together so I have to brag!

Next on our list is to build the benches...

Built from Plan(s)
Estimated Time Investment
Week Long Project (20 Hours or More)
Recommended Skill Level
Starter Project

My Garden box

Submitted by Kabarie on Thu, 05/30/2013 - 13:29

Built this with the help of my Dad! Learned about threads as I've never used them before. Because of all the controversy surrounding having pressure treated wood touch the veggies and because I could not afford or find cedar 4x4's I decided to use the left over cedar to build a little cover around the 4x4's so my soil and veggies will never come into contact with it. Love it and the veggies are growing great!

Estimated Cost
$50/60
Estimated Time Investment
Afternoon Project (3-6 Hours)
Finish Used
I forget the stain I used on the outside of cedar...something natural looking.
Recommended Skill Level
Beginner

Comments

Janettx

Fri, 05/31/2013 - 04:22

I'm glad you were able to follow my plans. I'm not a plan writer so I wasn't sure if I gave good enough instruction. It is a shame you can not get all cedar. Sealing the legs will definitly help them last longer and with all that work you certainly want them to last! Just a hint...you can make 3 for not much more than you spent making one....Great job and thanks for the brag post LOVE LOVE LOVE

a few face grain "catering "boards i made

Submitted by shawns1ton on Mon, 04/27/2015 - 19:10

a few face grain "catering/presentation" boards i made.  16x28


2 for my culinary graduation and 2 for a freinds business

Estimated Time Investment
Week Long Project (20 Hours or More)
Finish Used
Watco butcher block oil
Recommended Skill Level
Beginner

Doll Crib

Built for my daughters 2nd birthday. 

Estimated Time Investment
Day Project (6-9 Hours)
Finish Used
Chalk paint, and white spray paint sprayed over lace. Distressed and dry brushed the blue chalk paint back over for a worn look.
Recommended Skill Level
Beginner

Bathroom Shelf

Submitted by adck9d on Wed, 10/06/2021 - 22:23

Quick little project

Comments

Used 2X2s to support the wings.

I essentially stuck to the main plan - except to support the wings I used 2X2 boards and standard hinges.

I was worried that there may not be enough space for my Ryobi 10" sliding miter saw because of the slide however, it fits nicely and there is plenty of space.

Thank you for the wonderful plan. This was my first project of this size and I am very happy with the results!

Built from Plan(s)
Estimated Cost
More than I expected. $39 for the plywood (sanded), $16 for the 4 hinges, $17 for the 4 caster wheels. The boards I already had.
Finish Used
None
Recommended Skill Level
Intermediate

Comments

jennibee

Fri, 05/01/2015 - 08:10

This is great. I am currently getting my Dad's help to turn an old kitchen cabinet into a miter saw cabinet with wings like this. (it was a 1940's solid wood kitchen cabinet we took out of the house when we remodeled). I really like your 2x2 support struts. Have you considered putting a shelf in the middle of your box? It would add extra support and also more room to store stuff.

richsessums

Sat, 05/02/2015 - 09:09

Good idea. I did consider adding a shelf however I have now decided to use the lower area to store my small router table. I discovered that it would fit in the spot however it leaves not enough room for a shelf.

Top Bunk Organizer

Submitted by Bradnag on Wed, 09/13/2017 - 05:52

Built this to go along with my son's new Chelsea loft bed so he'd have a place to set a glass of water and some books. I was able to use almost entirely scrap wood, except for the 1x4. Cutting and assembly took less than an hour, and the thing is rock solid. Sealed it with polycrylic, because it will probably get spilled on many, many times. Probably the easiest project I've done, and I think it would make a great starter project for anyone looking to try out using pocket holes for the first time.

Built from Plan(s)
Estimated Cost
$5
Estimated Time Investment
An Hour or Two (0-2 Hours)
Finish Used
PPG Speedhide paint, Minwax Polycrylic finish
Recommended Skill Level
Starter Project

Love My Sectional

Submitted by Anonymous (not verified) on Fri, 10/08/2021 - 06:21

Ana did an awesome job explaining everything in the plans. Make sure you buy your cushions first and build your sectional around your cushion size. I added more 2X4's on the back seat and back rest so the cushions would not slide through the opening and to minimize the feeling of the one 2x4 going across your back. I get so many compliments from this beautiful sectional. Thanks Anna!

Comments

Old Door Cofee Table

This table was built out of an old 5 panel door and some scrap would that we had lying around. old hinges and knob came from a local antique store. To finish the door my wife crackled the top and clear coated it. 

Estimated Cost
50.00
Estimated Time Investment
Afternoon Project (3-6 Hours)
Recommended Skill Level
Beginner

Rustic X Farmhouse Table

We were able to finish this table after work one afternoon and stain it the next day. (we have a 16 month old also, so you can do it! :) ) I wanted a similar style I had found at World Market that retailed for $700 we were able to complete this entire table for $100 including all hardware and stain. LOVE it so much and get SO many compliments on it. Thanks so much!

Shelby
The Dandy Lion

Estimated Time Investment
Day Project (6-9 Hours)
Finish Used
A satin poly with espresso stain in one
Recommended Skill Level
Intermediate

Pallet Bench

Submitted by eralben on Mon, 05/04/2015 - 06:30

A friend gave me a pallet that I wanted to make into an outdoor bench.  I found Ana’s plans for a simple outdoor loveseat and they inspired the frame for the bench.  To make the bench I cut the pallet in half and then I adjusted Ana’s plans to make the frame to fit around the pallet. 

The pallet was free and I used scrap wood to build the frame so my only cost for this project was paint.  

Estimated Cost
$25
Estimated Time Investment
Afternoon Project (3-6 Hours)
Recommended Skill Level
Beginner

Thanks for helping me build this shed!

Submitted by cnllusher on Sun, 09/17/2017 - 16:33

Using your shed plans, modified to use the 2x4s I already had on hand, I designed this 4'x8'x7' shed to match my house.  I replaced the ceder fence boards with a hardiboard, but the construction was pretty much the same.  My husband and I are so happy with this shed,which looks very similar to the $4000+ sheds we have seen, and it cost us less than $400 to make and matches our house perfectly.  Your instructions were great, and I know you saved me a lot of time and trouble.  Can't wait to load it up with our snow and gardening equipment!  Thank you!

Built from Plan(s)
Estimated Cost
$400
Estimated Time Investment
Weekend Project (10-20 Hours)
Finish Used
paint
Recommended Skill Level
Intermediate

Modern Farmhouse Bed

My husband and I made this for our son and daughter-in-law. They absolutely love it! The project took about two days to build, and about three days for the finish (stained and weathered). The photos do not show the slats that support the mattress. The only thing we would have done differently, would have been to use 6 “tongue & groove” on the headboard instead of 5. Otherwise it is a solid bed for certain. And they love it!

Built from Plan(s)

Comments

Cubby Bench

Submitted by dhenderson on Sun, 03/20/2011 - 17:57

This was a very fun project to work on.  One of my first ones, I chose this to replace the store bought cubby book shelf in my daughters room with something she can sit on as well as use for storage. 


Built from Plan(s)
Estimated Cost
$25-30
Estimated Time Investment
Afternoon Project (3-6 Hours)
Finish Used
Two coats total - each of a different color stain. Haven't added the poly yet, that is on my to-do!
Recommended Skill Level
Beginner

Castle Bed

A big thanks to FSMumford for drawing this in Sketchup. I had to re-draw it to take into account metric wood dimensions and bed sizes here in NZ, and also to remove a foot or so from the length.

We just gave it to my daughter today, and already I need to make some modifications. I immediately put some vertical grab rails at the top of the steps and slide. The steps are too big for a toddler (she's 3 today) and I didn't take into account how thick a pillow top mattress is! I really needed to make the end guards higher. In fact, were I to make it again, I'd probably make the towers taller and lower the height of the bed by 8-12 inches. While this would lower interior room, it might make the steps a more reasonable height for a littlie. If you're building for a 5 or 6 year old, this may not be an issue. Also, it would make the angle of the slide shallower (it's a bit steep, I reckon). I used 7 sheets of 16mm MDF but if I'd laid them out like FSMumford did in her plans I would have used less. Our (one car) garage is too small and the whole build process, including painting, was a royal pain in the bum. Fun, but a pain. Speaking of painting, next time (riiiiight) I'd try to paint as much as possible before assembling. I built mine in modules but even so it's hard to get a nice coat of paint on the insides of things. Edges of MDF need to be painted and sanded at least twice to look nice. Don't underestimate the time needed to get a good finish - I spent a third of my build time finishing (mostly, again, due to limited space). A narrow foam roller is great for cutting in but doesn't seem to get enough paint on to cover well on larger areas. In places I have three coats and can still see my pencil marks. I used Dulux Aquanamel.

Estimated Cost
Don't get me started....
Estimated Time Investment
Week Long Project (20 Hours or More)
Finish Used
Dulux Aquanamel.
Recommended Skill Level
Intermediate

Comments

Chineselyons

Wed, 06/05/2013 - 10:47

This is gorgeous! I know there are modifications to take into account but it's stunning none-the-less.

Treehouse Adventure Bed (Alternate Beach Hut Bed)

I was looking for something to build for a fundraiser this year and found the Beach Hut Bed plans. I liked the idea of a little house inside a kids room but I wanted to do something a little more rustic. here's what I came up with!!!

The shopping list and cut list is pretty much the same. However, I only used one 1x3 and needed to buy 4 extra 1x4s. I lowered the bed deck about a foot and left half of the walls open for easy parent access. I sorta just winged it as I went. Turened out pretty neat!!!

Built from Plan(s)
Estimated Time Investment
Week Long Project (20 Hours or More)
Finish Used
Roof: Valspar Exterior latex paint+primer. Main structure: burned with torch, wipe on poly, high gloss
Recommended Skill Level
Intermediate

Comments

Woven Back Bench - A little longer

We made our bench 17-1/2 inches longer, just enough for a third panel on the back.  We also added 2 braces under the seat slats to give it additional strength.  A lot of fun to make!  Thanks, Ana!

Estimated Cost
$100
Estimated Time Investment
Weekend Project (10-20 Hours)
Recommended Skill Level
Intermediate

Kitchen Island with Storage

Submitted by Anonymous (not verified) on Sun, 10/17/2021 - 13:09

We built a basic island that will have bar height stools on two sides with storage on the other. The top is a food safe wood that we will use as both a cutting board and breakfast table.