Community Brag Posts

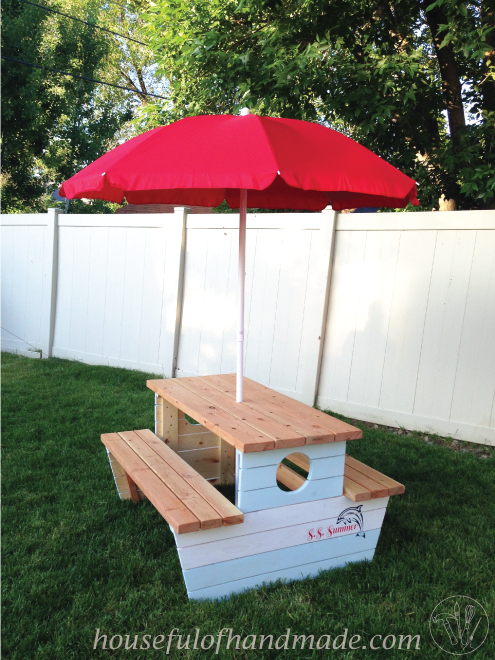
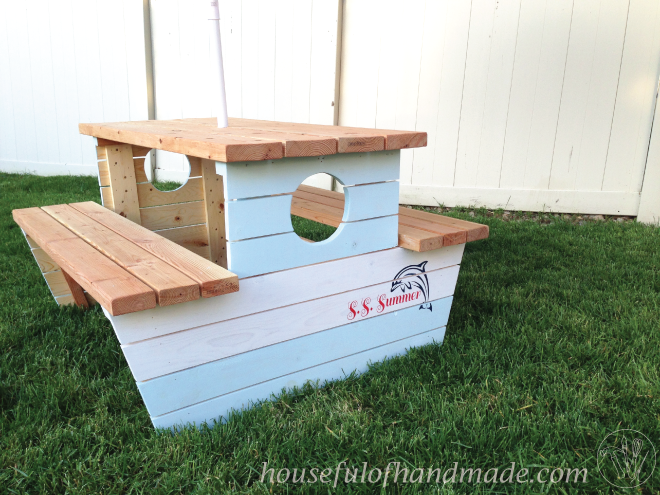
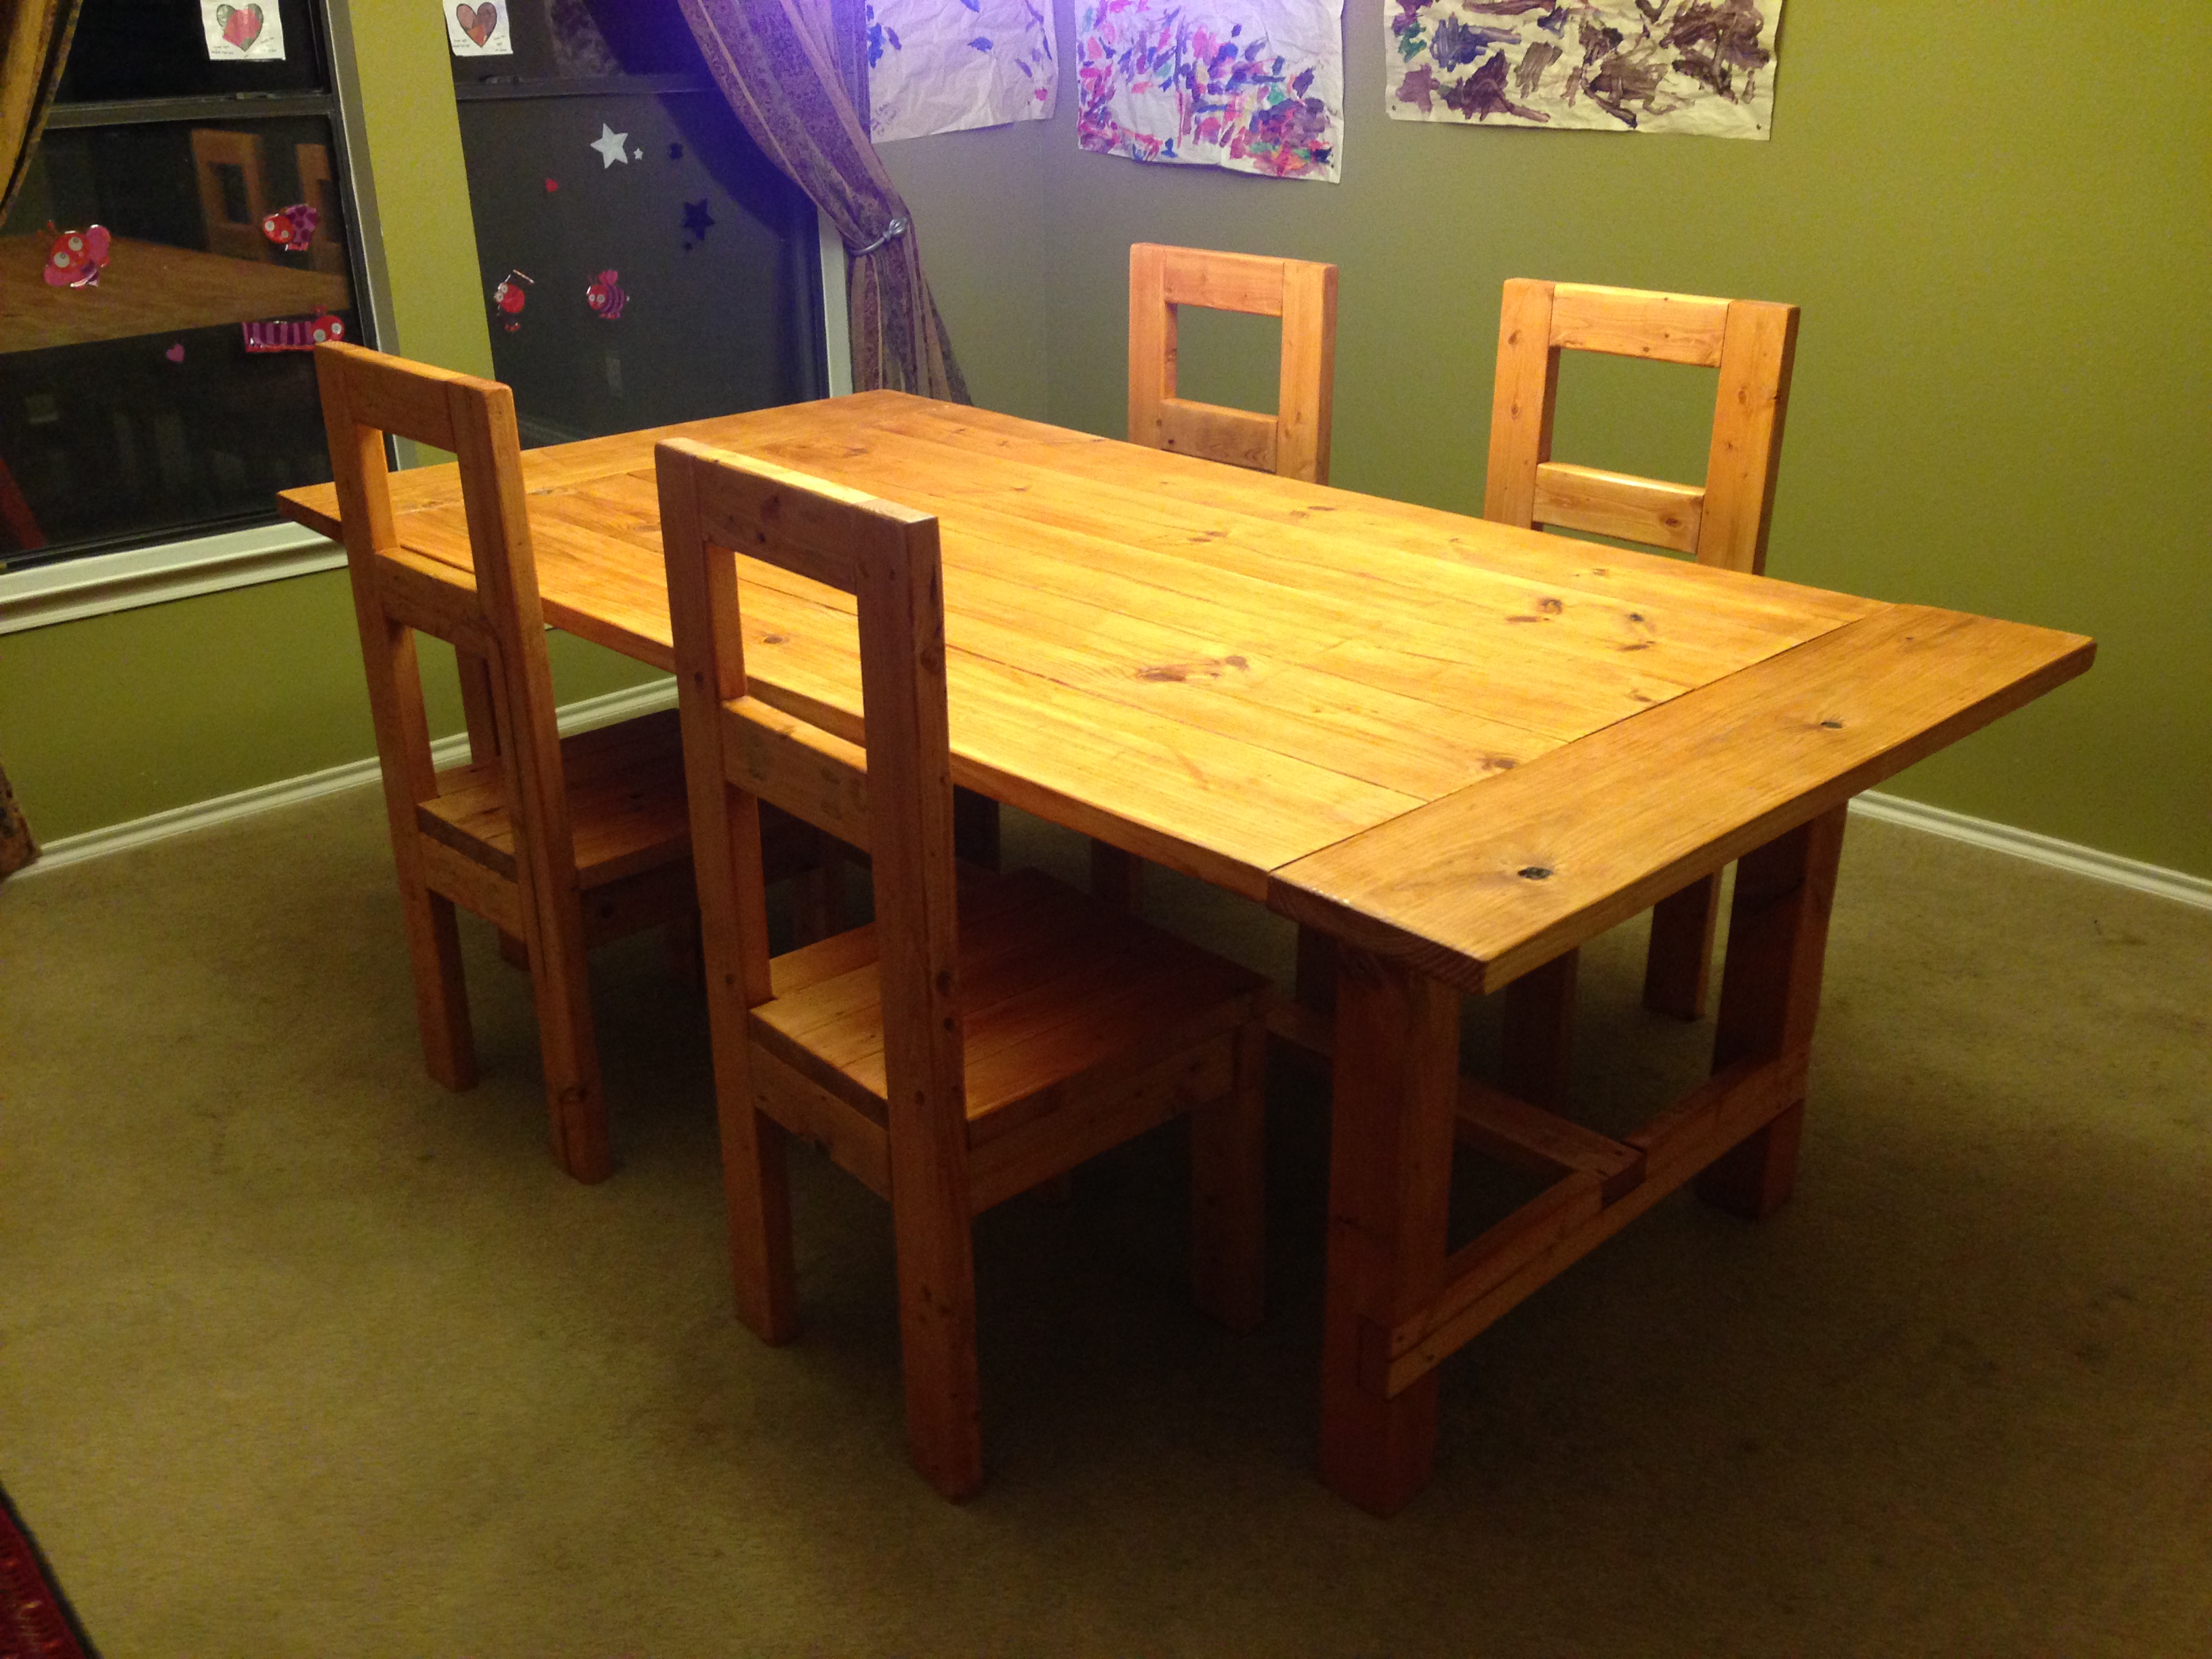
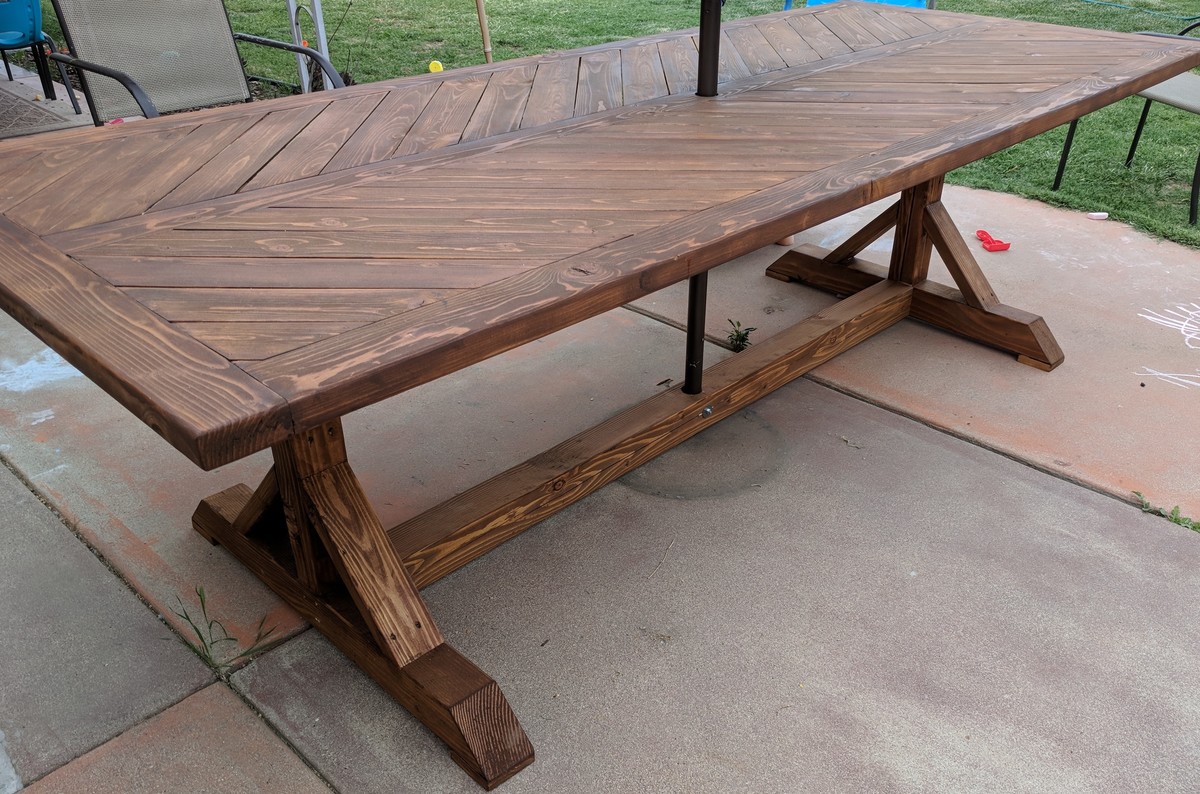
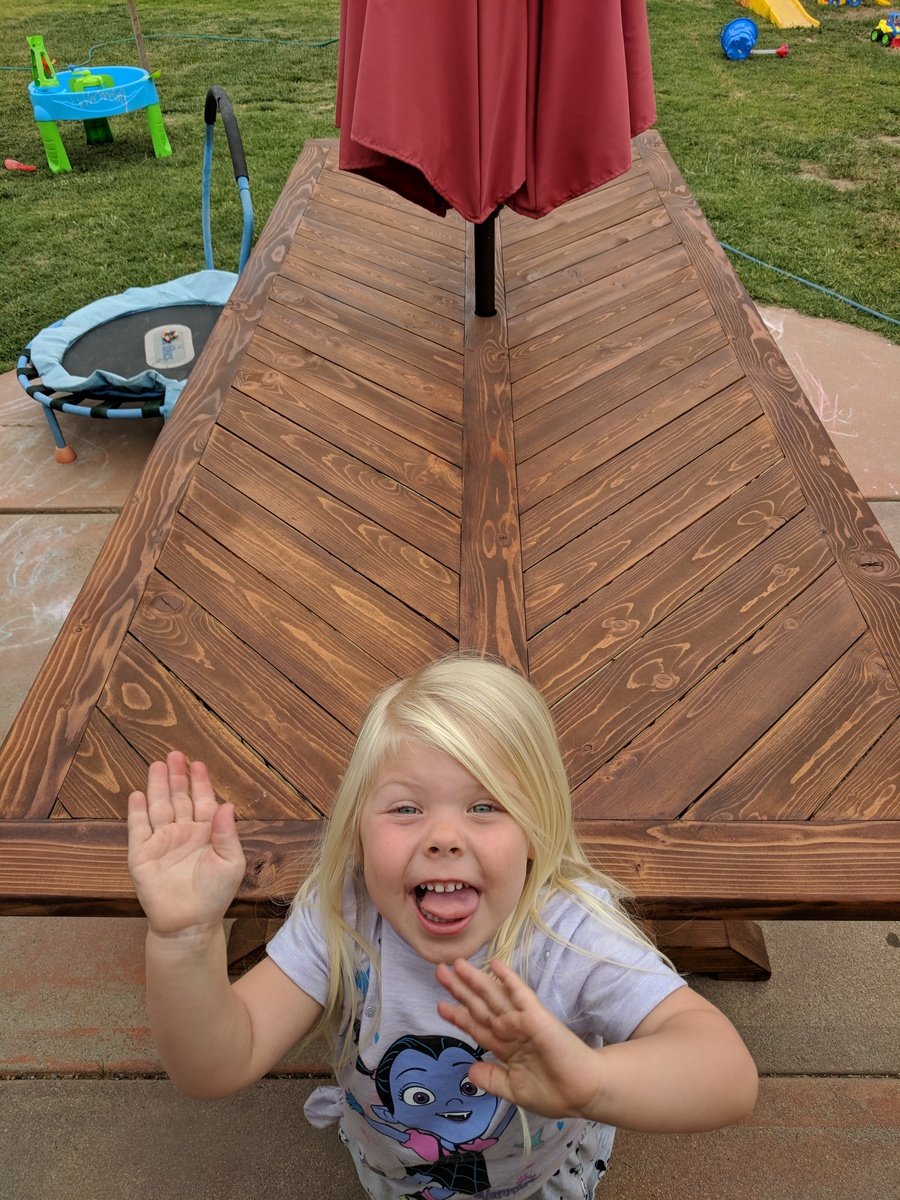
Nautical Picnic Table for Big Kids

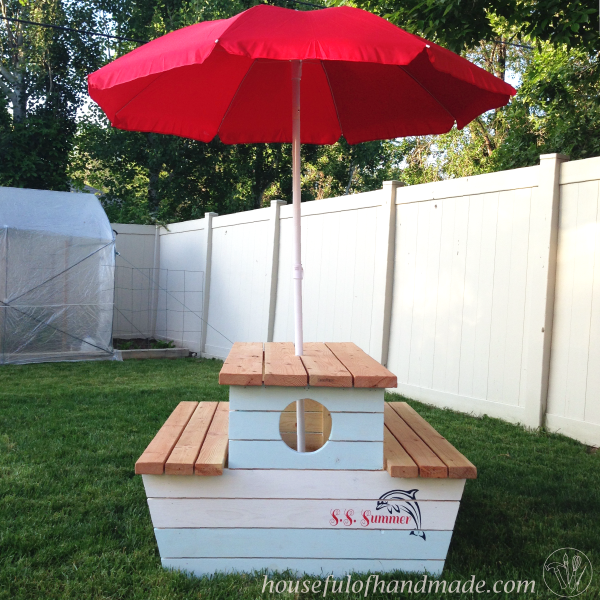
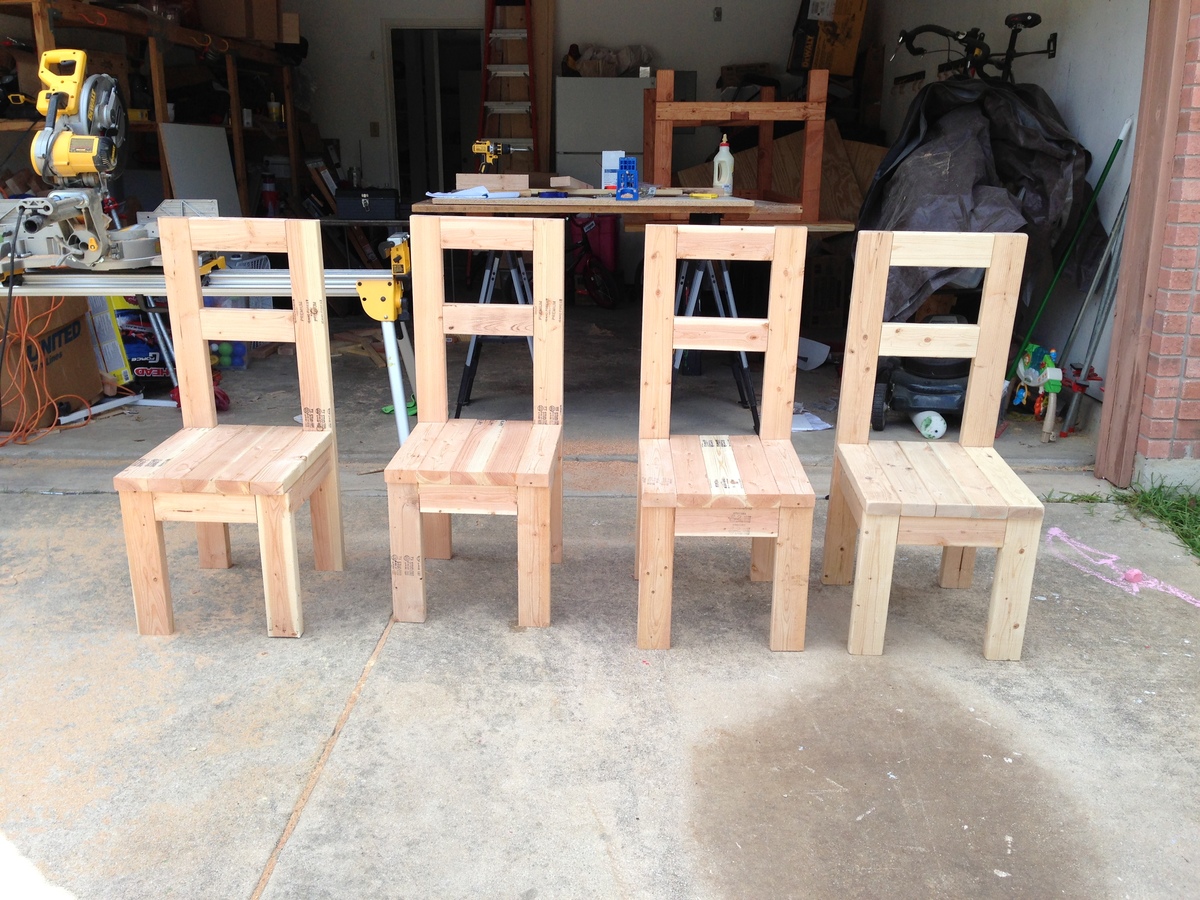
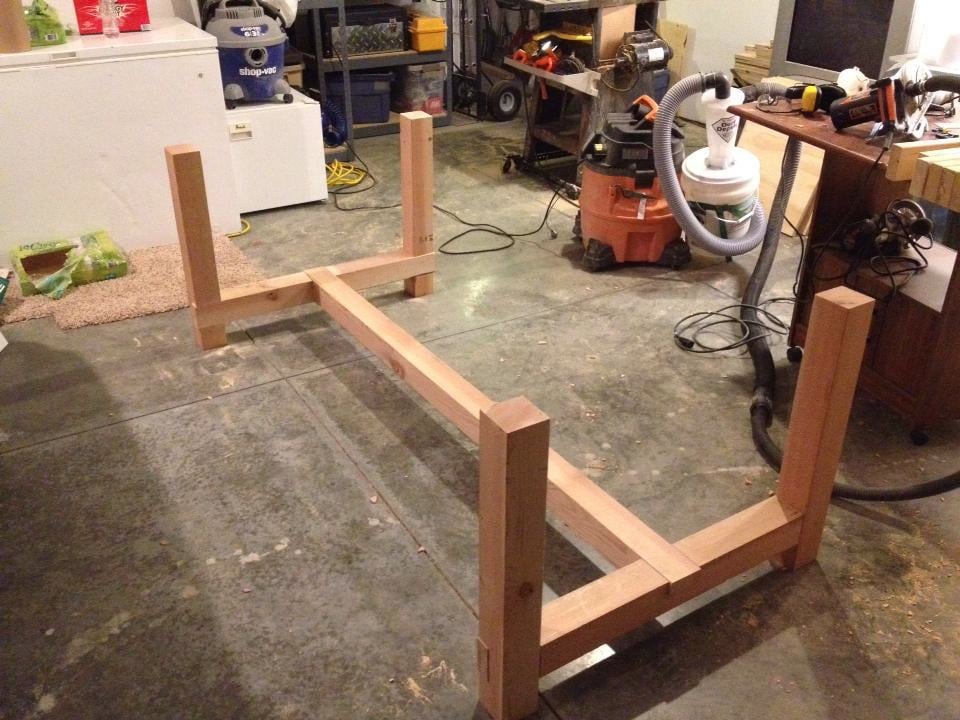
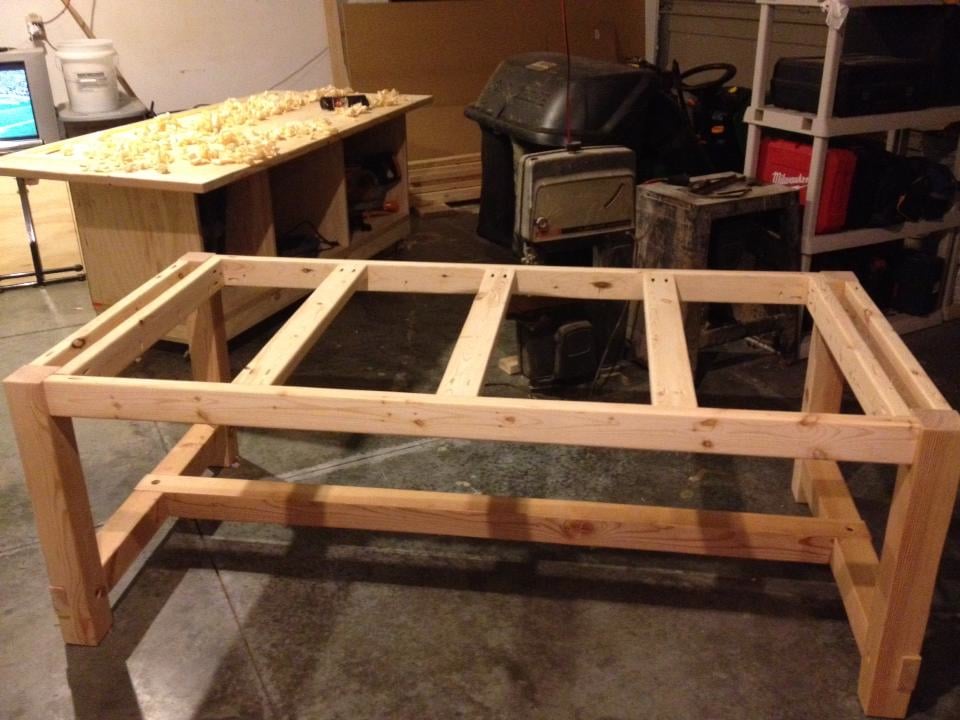
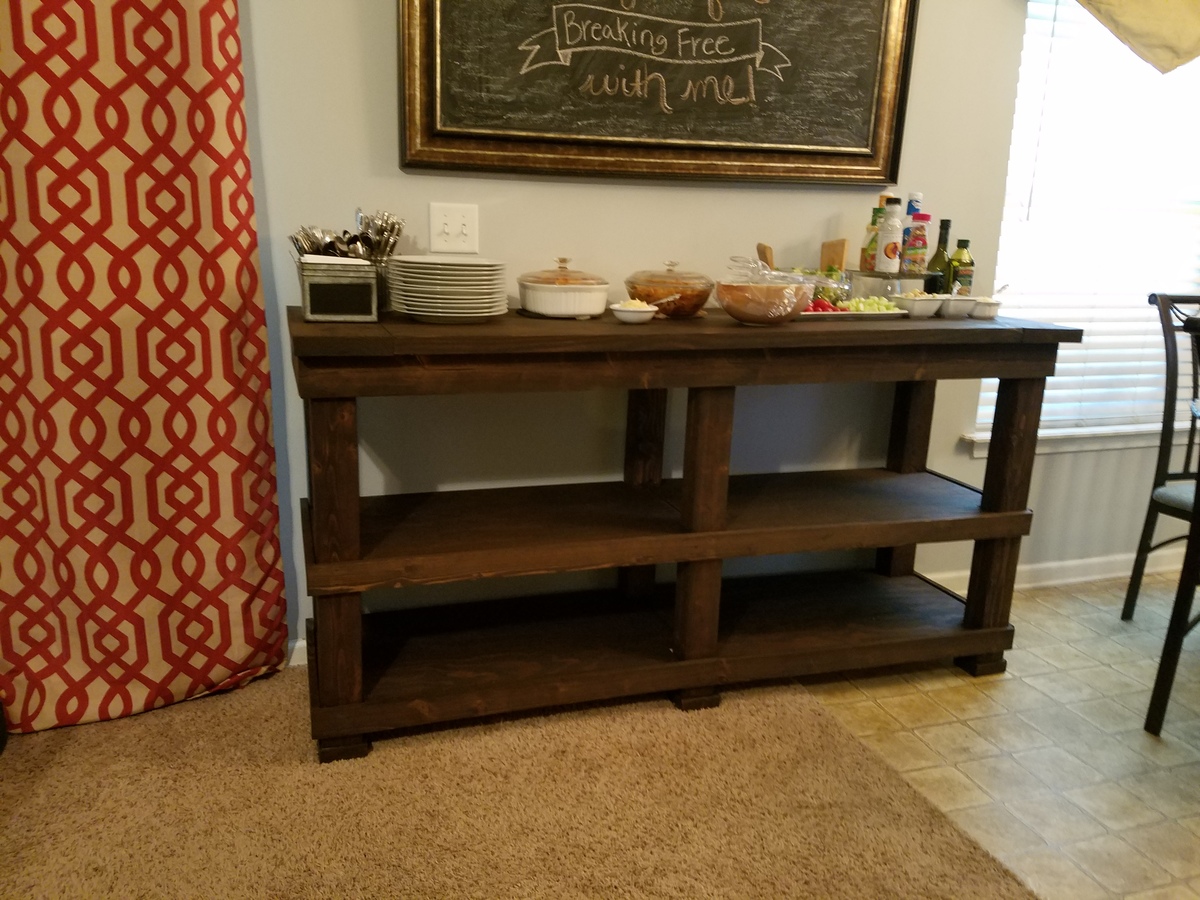
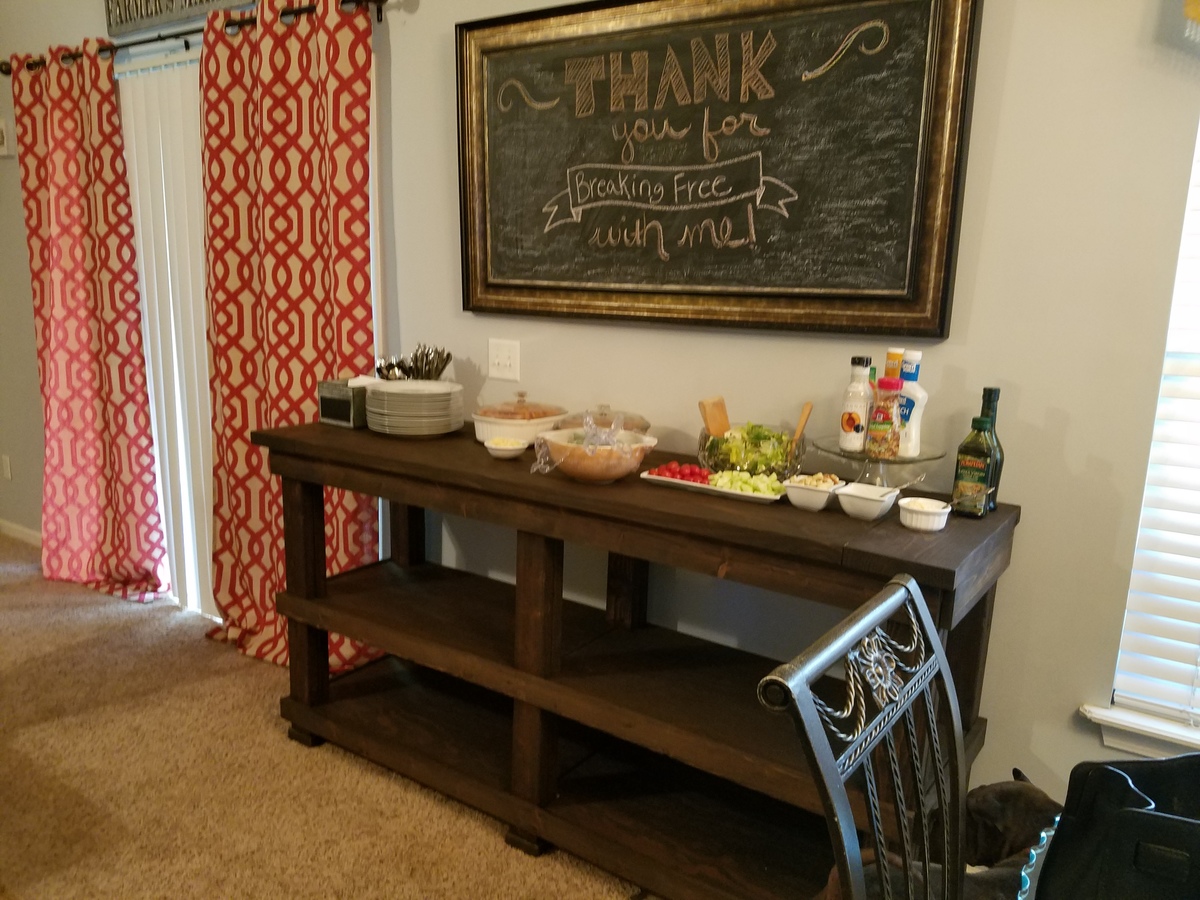
I needed a picnic table for my kids to enjoy summer meals outside and when I saw the plans for the Pirate Picnic Table, I knew we needed it! But it was made for toddlers and my kids are 4 and 6 so it wouldn't work for us for very long. I decided to combine the plans for the Pirate Picnic Table and the Picnic Table for bigger kids. I turned out awesome! And then I finished it off with a nautical paint job to look like a bit of the beach was left in the backyard.

Estimated Cost
$50 (without umbrella)
Estimated Time Investment
Day Project (6-9 Hours)
Recommended Skill Level
Intermediate

Comments

Dining Room Pedestal Table

I've been wanting to build a pedestal dining table for a while, and loved these plans!

Estimated Cost
$120
Estimated Time Investment
Weekend Project (10-20 Hours)
Finish Used
I used a variety of stains but ultimately went with Briarsmoke by Varathane.
Recommended Skill Level
Intermediate

Puzzle table

Submitted by Anonymous (not verified) on Sun, 12/26/2021 - 13:35

This is a table that will fit a large 1000 piece puzzle. The drawers can hold the pieces you believe would fit in that particular corner of the puzzle. When you need the room on your table this puzzle table is easily picked up and moved without disturbing the puzzle

Comments

Zachary's Car and Truck

Submitted by jaime19861 on Wed, 06/17/2015 - 19:28

I made this car and truck for my nephew. They were super easy to make and he loves them!

Check out the blog link for more details.

Estimated Cost
$2
I used wood scraps and only had to buy the wheels. If I would have also needed to buy the board and dowel, it still would be under $5 a vehicle.
Estimated Time Investment
An Hour or Two (0-2 Hours)
Finish Used
Non-toxic acrylic paints sealed with many coats of mineral oil.
Recommended Skill Level
Beginner

Liberty Wall Art

Submitted by karahart on Wed, 05/11/2011 - 09:09

I built this after going dumpster diving for pallets. We went through and broke up all of the pallets and basically made this entire big piece for the cost of the stain, nails, and backing.

Estimated Cost
$30
Estimated Time Investment
Afternoon Project (3-6 Hours)
Finish Used
I used minwax's water based stain in red, white, and blue.
Recommended Skill Level
Starter Project

Narrow Farmhouse Table

Submitted by tfox on Tue, 05/31/2011 - 19:49

This is my take on Ana's Narrow Farmhouse Table project. I plan on adding a bench to one side and random color matched chairs to the other.

Built from Plan(s)
Estimated Cost
$100
Estimated Time Investment
Weekend Project (10-20 Hours)
Finish Used
Minwax Special Walnut stain with six coats of Wipe-On Poly. Finished with steel wool to knock down shine of poly.
Recommended Skill Level
Intermediate

Spices!

We had these spices in a cabinet, which were impossible to see stuff in the back. This was a perfect solution.

Now, we also had more spices then we know what to do with, so we added a second rack at the bottom of the door as well. I just adapted the plans to be 30 inches tall to accommodate the size of the lower portion of the door. This was accomplished by removing the 1st and 3rd measurements for shelves, and using the remaining for an extra tall shelf.

I also only used a finish nailer (and wood glue),to assemble, in combination with a brad nailer to hold the back plywood on.

I also chose not to include the dowel buttons on the end, and did not cut the dowels to length; they were inserted all the way through and trimmed off with a Japanese pull saw (get one, you will LOVE it), then fastened through the front with the finish nailer, then sanded flush.

I also elected not to paint to finish the piece and leave the natural wood.

Built from Plan(s)
Estimated Cost
$33, including the extra shelves.
Estimated Time Investment
An Hour or Two (0-2 Hours)
Recommended Skill Level
Starter Project

Treehouse bed

Submitted by Anonymous (not verified) on Mon, 04/11/2022 - 15:40

Great project. Simple enough to feel like you can do it, big enough to feel accomplished when it’s done. My son loves his new bed!!

Built from Plan(s)

Comments

Planter Box with Trellis

My husband built the Planter Box with Trellis for his mother for her birthday. We planted one of our rose bushes in it. They are pink teacup roses and should look fantastic against this bright white backdrop once the buds blossom.

This was a great project that was easy to cut up beforehand and put together the next afternoon. I think I want one!

Built from Plan(s)
Estimated Cost
$50 with exterior paint
Estimated Time Investment
An Hour or Two (0-2 Hours)
Finish Used
White exterior Valspar paint.
Recommended Skill Level
Beginner

Comments

mmhmakeover

Tue, 07/12/2011 - 03:59

Thank YOU, Tina! The plan was so easy to follow and we were just amazed that this thing came out looking almost exactly like the picture. Often times, we are not so lucky and "modify" the project at the time, or "modify" our expectations when it looks a little different. Not so with this one. It's perfect!

Modern Farmhouse Dining Room table with 2x4 chairs

Submitted by NeekosMac on Thu, 08/01/2013 - 13:28

Modern Farmhouse Dining Room Table (with pocket hole) and 2x4 chairs with plans reposted from morelikehome.net.

Surfed the site for the right plans and dove right in. Thank you for the inspiration all!

Estimated Cost
$200
Estimated Time Investment
Week Long Project (20 Hours or More)
Finish Used
Minwax Golden Pecan and Poly coat.
Recommended Skill Level
Beginner

Comments

Farmhouse Table

I love this table and bench set! Very easy to build and didn't take too much time. We made it a family build. My kids helped put together the benches and table. My wife and kids did all the staining.

Estimated Cost
$150 for lumber and supplies.
Estimated Time Investment
Weekend Project (10-20 Hours)
Finish Used
Minwax Early American used with a staining pad. We applied two coats for a darker finish.
Recommended Skill Level
Beginner

Farmhouse Table

Inspiration for this project came from the original Restoration Hardware table's price, which was way out of our budget. We found the plans on this site, and then the brag post from http://tommyandellie.com/?p=2582, which convinced me to give it a try when we moved to our new house.
I pulled some ideas and techniques from a couple of different areas - one was the idea from American Woodworker to use a straight-edge and a router to joint the edges of adjacent boards so they match perfectly, or as close to perfect as possible (see one of the pictures). After a few false starts it worked out very well.
One other big change was to use 4x4 pieces for the legs and cross-braces - especially on the long cross-brace. With two kids (6 and 3) and a third on the way, I knew they would want to crawl under the table to play, and sit on the beams - and I was afraid a 2x4 wouldn't hold up to their weights. I've VERY happy with the result - that base is not moving or flexing at all.
Finally, I learned a TON about what NOT to do! Apparently after doing the dry fit and having everything fit well, you should not sand the parts of the boards that fit together or suddenly they will be loose! Also, wiping off the stain after the suggested amount of time IS a good idea, after all! Finally, we ended up using pine boards with fir 4x4's, and I wish we had used all fir as I think the grain pattern was nicer.
All in all, though, it was a great experience and I can't wait to tackle another project!

Estimated Cost
$200-$300
Estimated Time Investment
Week Long Project (20 Hours or More)
Finish Used
Minwax wood conditioner followed by 2 coats of Minwax Walnut stain, sanding lightly between coats at 240 grit. After stain dries, one coat of Varathane sanding sealer, sanding again at 240 grit. Then, Varathane water-based poly, 2 or three coats followed by light sanding at 400 grit (or between individual coats if it was past 12 hours from the last application) - followed by one final coat of poly. If I had known then what I know now, I would have used oil-based poly - I didn't realize there was a difference when I purchased the items. I also used foam brushes for each step.
Recommended Skill Level
Beginner

Comments

Rob Dunham

Mon, 08/05/2013 - 07:13

Excellent work. I am purchasing lumber today to build a table for my family as well. Thanks for the tip of routing the joint edges, I will give that a go for sure.
Cheers!

Fred KLauke

Mon, 08/05/2013 - 14:52

Thanks Rob, good luck! Below is the link to the original source for the technique I used (#8 in the list). Just be VERY sure you have the boards (and the straightedge) clamped tightly so there's no wiggling. The first time I did it I didn't have the straightedge tight enough and it wiggled loose at one end, so the router started biting into one board more than the other, making a curve. Once I got the layout figured out, however, it worked very well and I was very pleased with it - I even did it again with the ends of the long boards (after they were glued/screwed together) and the inside edge of the breadboards before attaching them.

http://americanwoodworker.com/blogs/techniques/archive/2009/08/26/10-tr…

AKite

Thu, 08/15/2013 - 19:38

Did you use a planer on your Fir 2x's?
I'm thinking I need a planer to level out some of the 2x10's and 2x12's at my lumber store.

In reply to by AKite

Nathan1342

Fri, 08/16/2013 - 08:05

If your using a hand planer your going to get more of a worn uneven look, it's nearly impossible to get a perfect straight board after using a hand planer. IF you run it through a floor standing planer whatever bend in the board will still be there since it follows the contour of the board. If you want a straight board regardless of size you need to straighten it with a tablesaw. I am sure you can find a million how to's by just googling "how to straighten a board with a tablesaw". When your using building lumber you will always have an issue with things not being straight and looking "rough". It may be easier to just goto a actual lumber store and buy something that isn't Pine. Pine is a soft wood which is likely to dent easily after being used. But regardless, if you want a straight board use a tablesaw. I bought a bosch table saw at lowes and its awesome. folds up against my wall and is probably the best tool i have bought. Decent ones run about 400 bucks but its well worth it with what it allows you to do.

Fred KLauke

Fri, 08/16/2013 - 07:53

Not beforehand... (just to be clear, my 2x's were all white pine, only the 4x4's were Fir - unfortunately, the local Menards only had pine 2x's and fir 4x's) - I spent a lot of time at the store picking out the straightest, least cupped/curved boards I could find, and then spent more time at home arranging them to make sure the boards with the longest straightness (is that a term?) were used for the long pieces. Once the top was put together, I used a straightedge to find the humps and valleys in the top and used a hand plane to level them out a bit (see the background of the picture with the completed base, you can see the shavings on the top). I would suggest, if you do the hand plane route and aren't familiar with the tool or don't own one, to either borrow a well-tuned one from someone who would show you how to use it, or prepare to spend money to get a good one. You probably don't want to do what I did, which was buy a cheapo Stanley from Menards and then spend probably 8-10 hours over the course of a week or so trying to get it setup properly. I finally got it useable, but it was a very frustrating process and it didn't take long before the newly-sharpened edge was dull again. I did finally get it smooth enough so that it was easy to slide a plate or dish from one side of the table to the other without it rocking or hitting an edge/bump, but if I had it to do over again I would have saved the time and spent the money on a good older Stanley or a newer Lie-Nielsen or Lee Valley, etc., and then spent a lot less time getting the plane ready to go.
One thing that helped my mind-set as I went through the process was to remember that the beauty of this style is that it is not supposed to be perfect - a farmhouse table is supposed to look a little rough and worn, and the little defects are part of it's charm. It's an important point to remember especially if you are a bit of a perfectionist as I am!

Buffet, serving table

I made this buffet, serving table to go with a large gathering farmhouse table I made. I loosely used the farmhouse table plans but did some designing of my own based on a picture my friends had of what she wanted.

Estimated Time Investment
Weekend Project (10-20 Hours)
Finish Used
Varathane - Kona stain
Recommended Skill Level
Intermediate

Tryde Side Tables

Submitted by sooz122 on Tue, 06/28/2011 - 11:36

Made these for my guest bedroom!

Built from Plan(s)
Estimated Time Investment
Day Project (6-9 Hours)
Recommended Skill Level
Beginner

Comments

Split Chevron Trestle Table

Submitted by rbgreene04 on Wed, 04/18/2018 - 22:32

I followed the X-table plans for the base and then went a little nutty on the table top. I also beefed up the bottom stretcher on the base as I felt it complemented the 4x4s used for the feet well. I left off the diagonal braces as I liked the contrast of the beefy legs and stretcher and the open airy appearance between the base and tabletop. There were several blogs/ideas on Pinterest about a Chevron style table top. I took pieces from all of them for my design. The table measures 99.75 inches long by 41 inches wide. I thought being a quarter inch under 100 was a bit quirky and did it merely for that reason. Oh and please forgive the photo bomb by my daughters. I could not take a picture without getting at least one of them in the frame. My oldest is being a little silly in the pic trying to show the detail of the Chevron design--or split Chevron as I'm calling it. 

Built from Plan(s)
Estimated Cost
Under $100
Estimated Time Investment
Weekend Project (10-20 Hours)
Finish Used
My last outdoor table failed miserably (it was a beautiful design IMO, of plywood strips layed on edge to create a striated table top). I finished that failure with spar urethane specifically for boats. But plywood, while extremely stable indoors, is a terrible choice for outdoors. Lesson learned. For this table I used a deck stain and sealer. It's Olympic Maximum in Canyon Brown color. Hopefully I'll have better luck!
Recommended Skill Level
Beginner

Comments

Great Shelves - made to measure!

Submitted by tailspin10 on Fri, 09/04/2015 - 08:54

Thanks for the plans Ana!

I stuck to the design but changed the dimensions to suit the space and the boxes we intend to store. This made the shelves 7.5 feet high by 8.5 feet wide. The timber was supplied in 17’ lengths so this also meant very little wastage. The frame is composed of 2x4’s, the shelves are 4.5 x 1.5’s  - as I wanted the shelves slightly shallower this meant I could get away with three boards for each shelf instead of 4 as on the plans. 

For the short cross pieces I used woodglue and screws – to attach the long shelf pieces I just used screws. I predrilled holes in the first piece for each of the screws, but I didn’t drill a pilot hole in the next piece, the screws were self-tapping and didn’t need one.

The back wall is concrete block and I screwed each upright to the wall using wall plugs and screws. I’ve 2 young children and as the shelves are quite high I was afraid they might climb on them and tip them over otherwise. The attachment to the wall definitely makes the whole thing feel much sturdier – the structure is completely rigid.

The only real issue I encountered was that some of the boards were slightly twisted or warped – and I had to apply some force to keep everything square when I was gluing up. Overall I’m very happy with the end product, and found it reasonably easy to put together. Now its time to put the shelves to good use and start tidying up the garage!

Estimated Cost
$180 including screws - I'm in Ireland and unfortunately wood seems to be more expensive here :-(
Estimated Time Investment
Day Project (6-9 Hours)
Finish Used
I gave it a quick wipe of some old danish oil I was going to throw out, I'm not that bothered about finish as the shelves are in the garage.
Recommended Skill Level
Beginner