Community Brag Posts

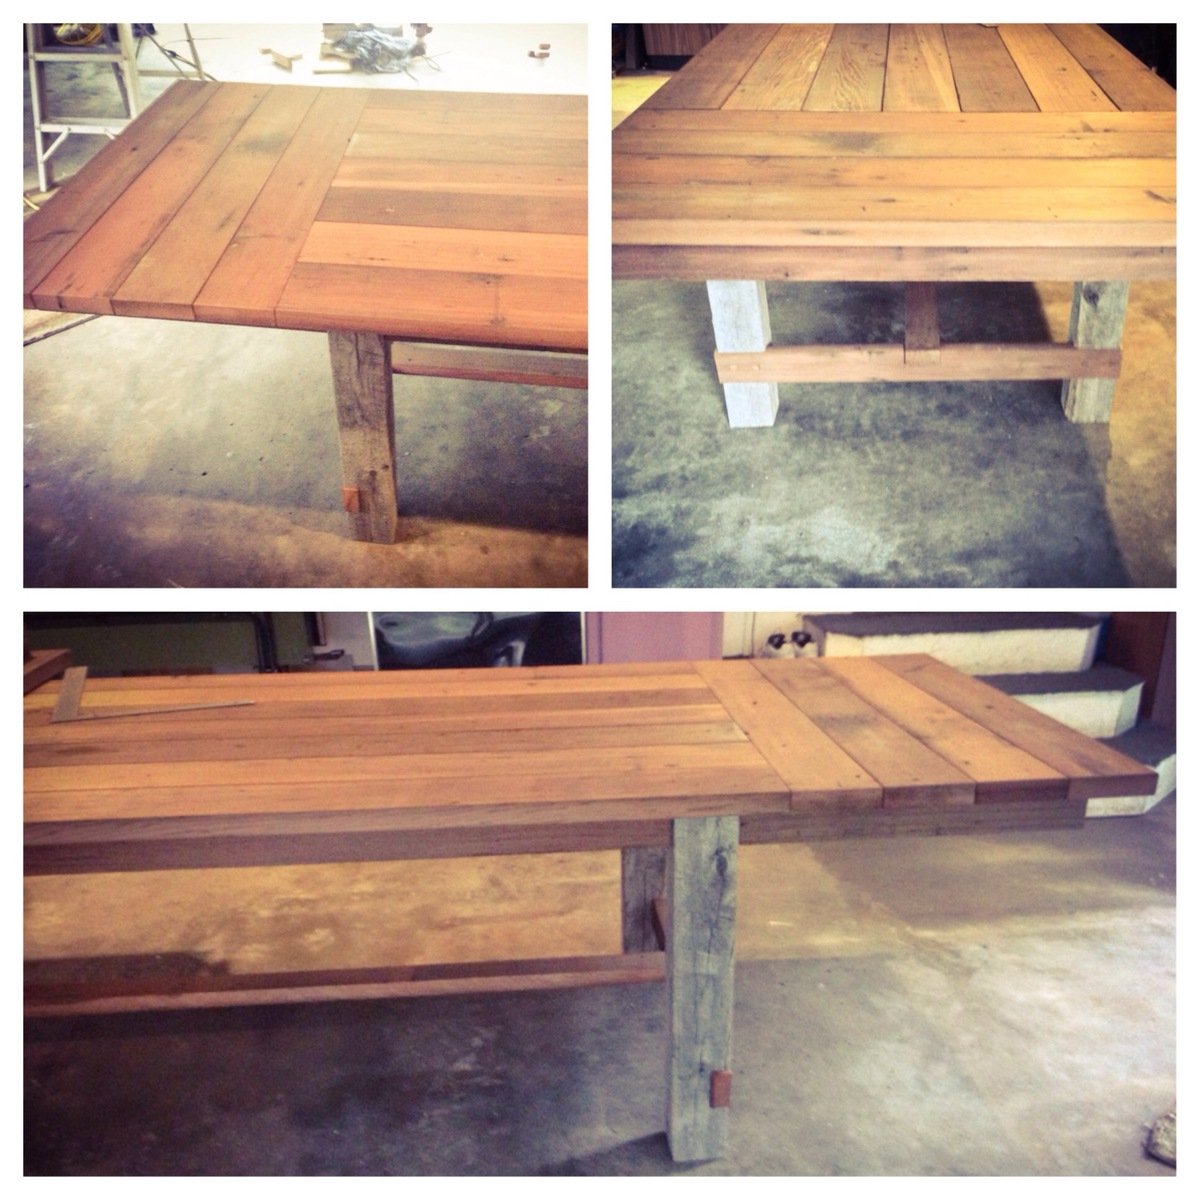
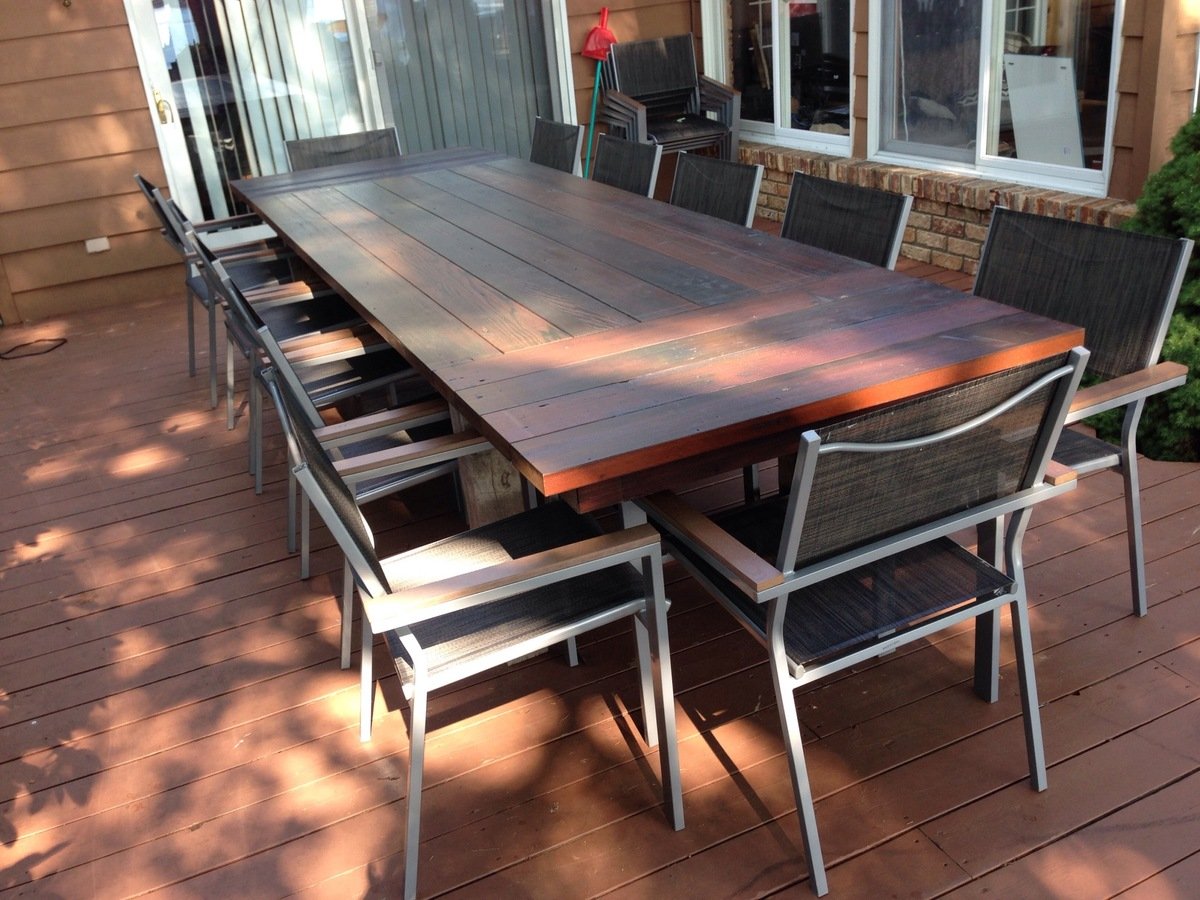
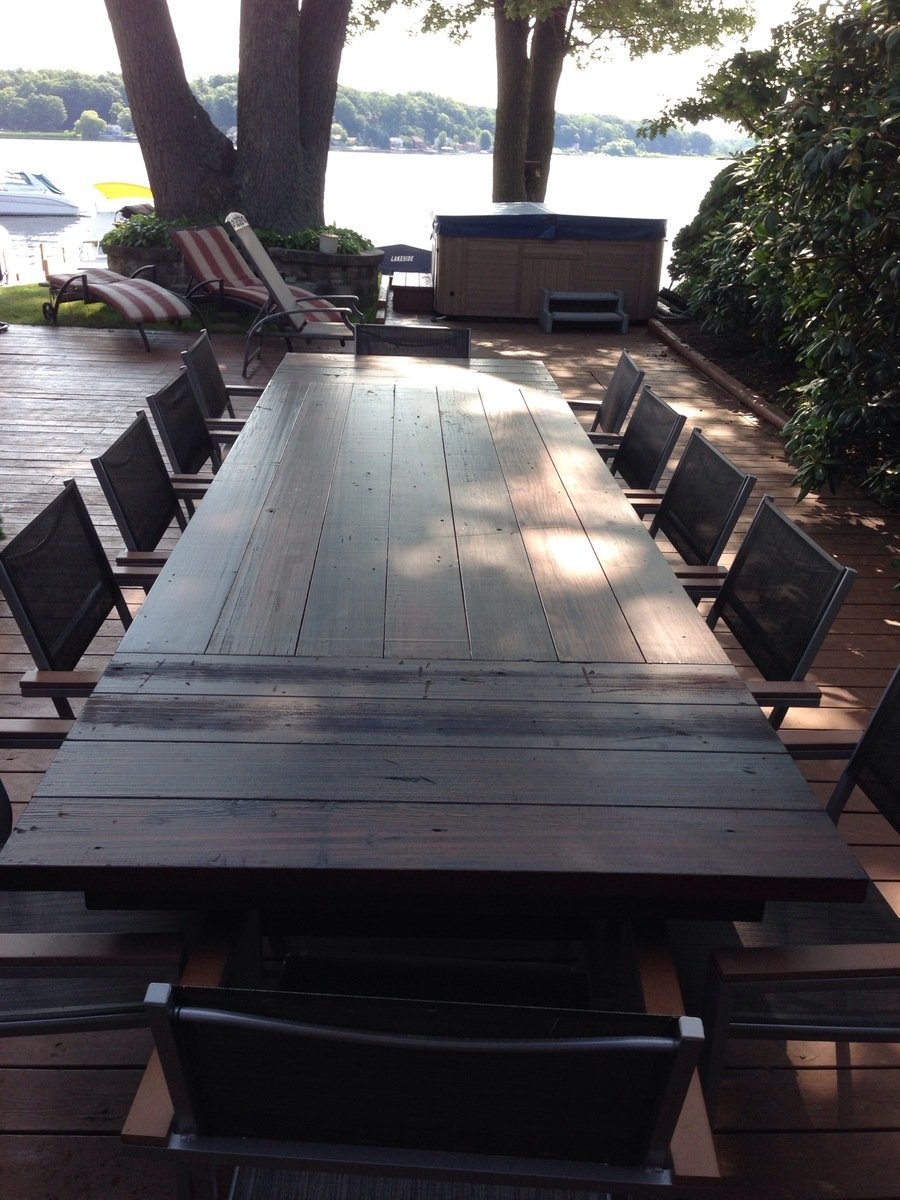
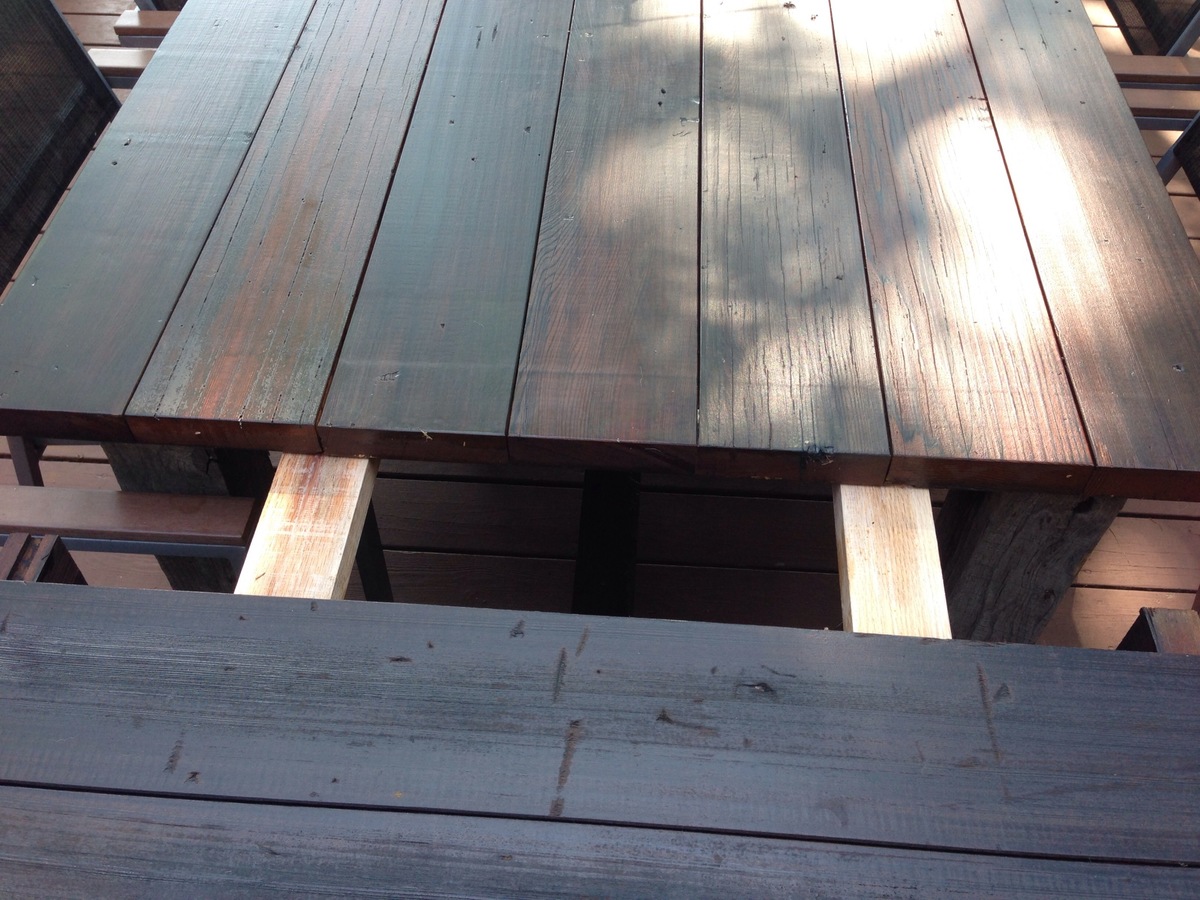
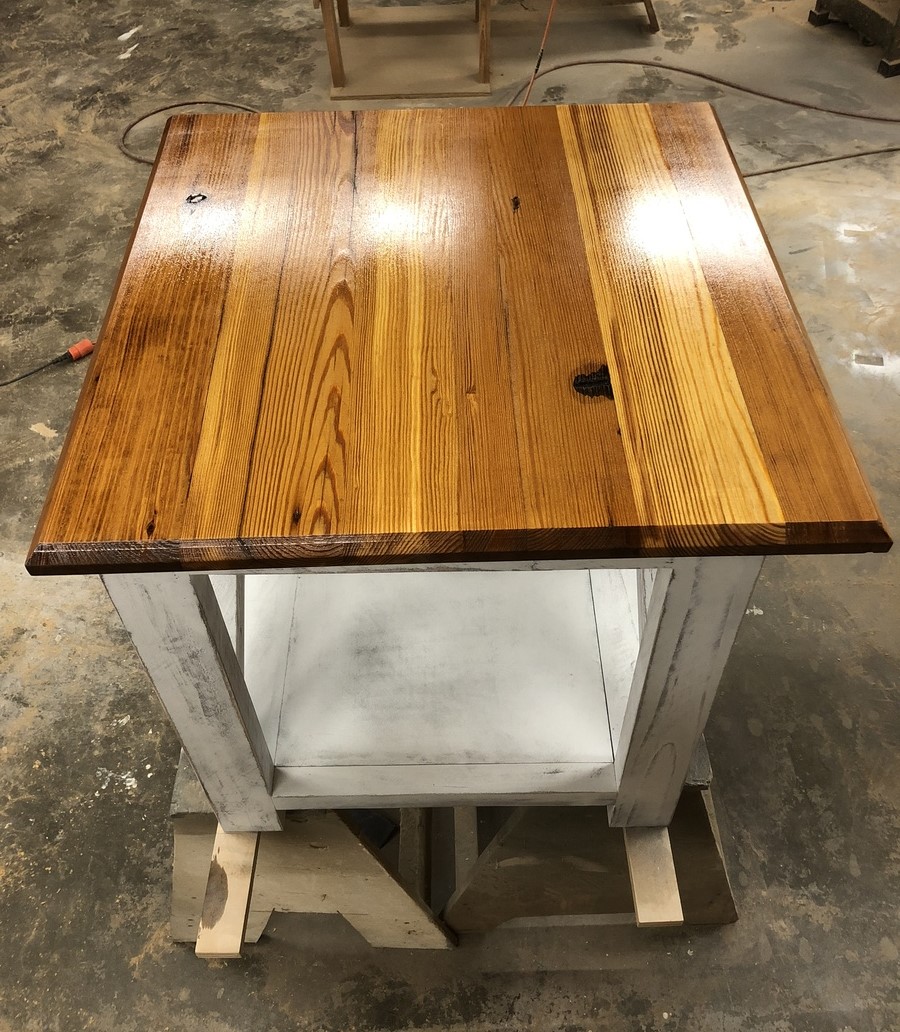
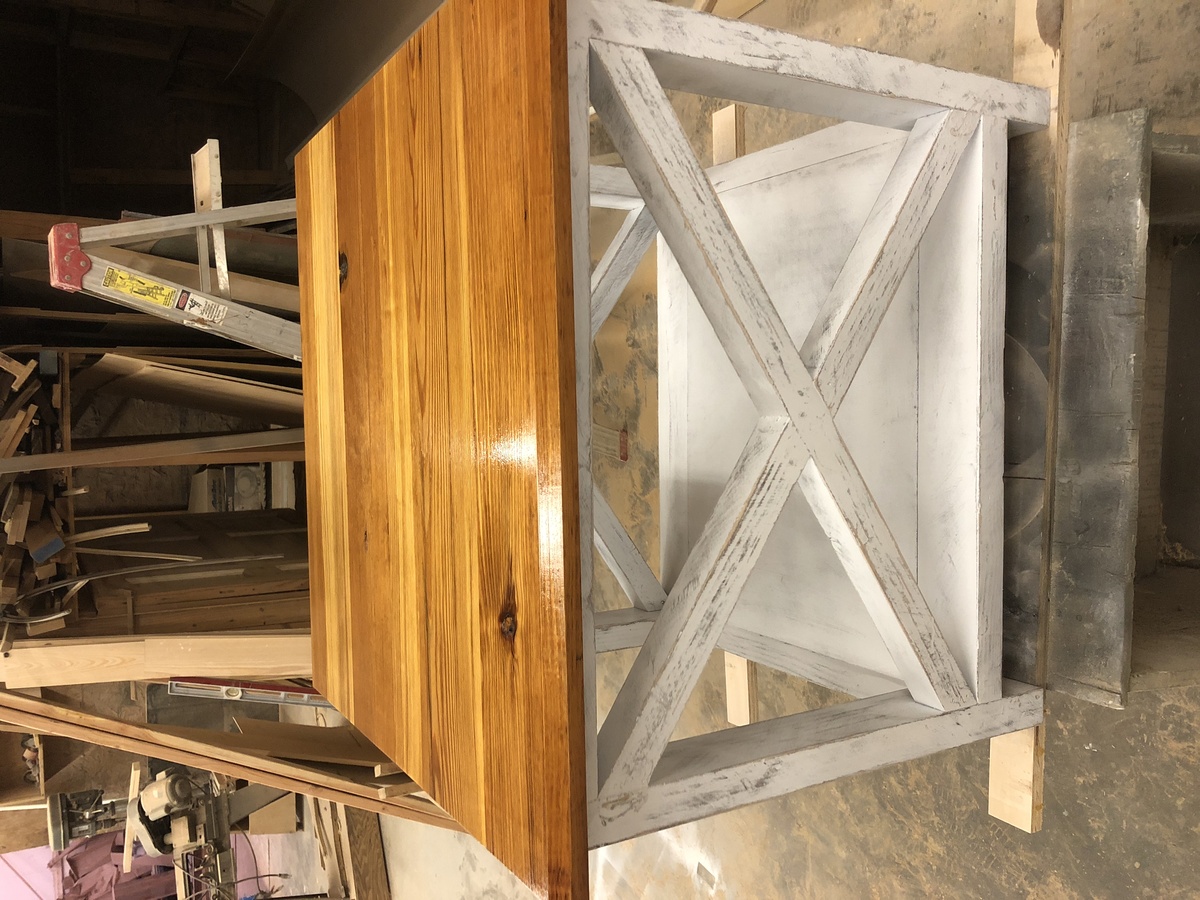
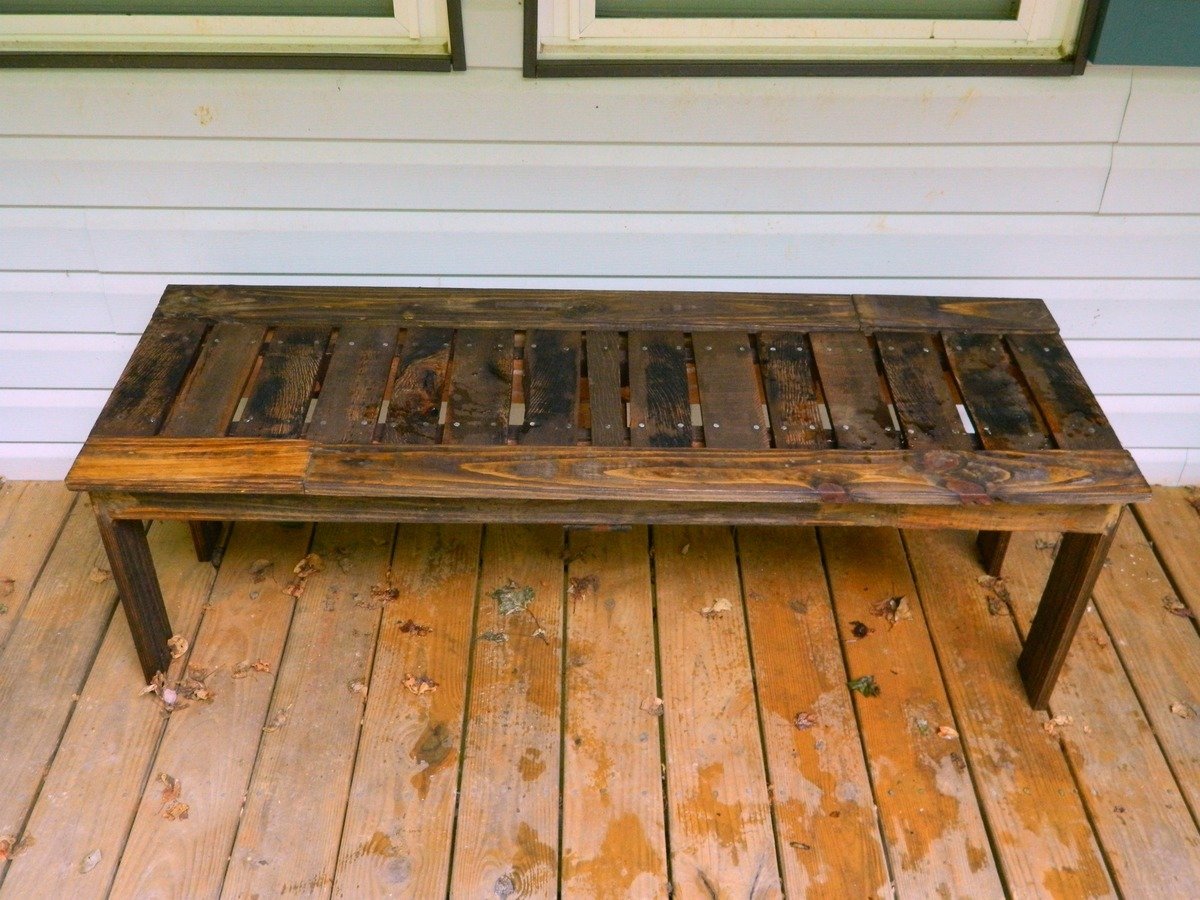
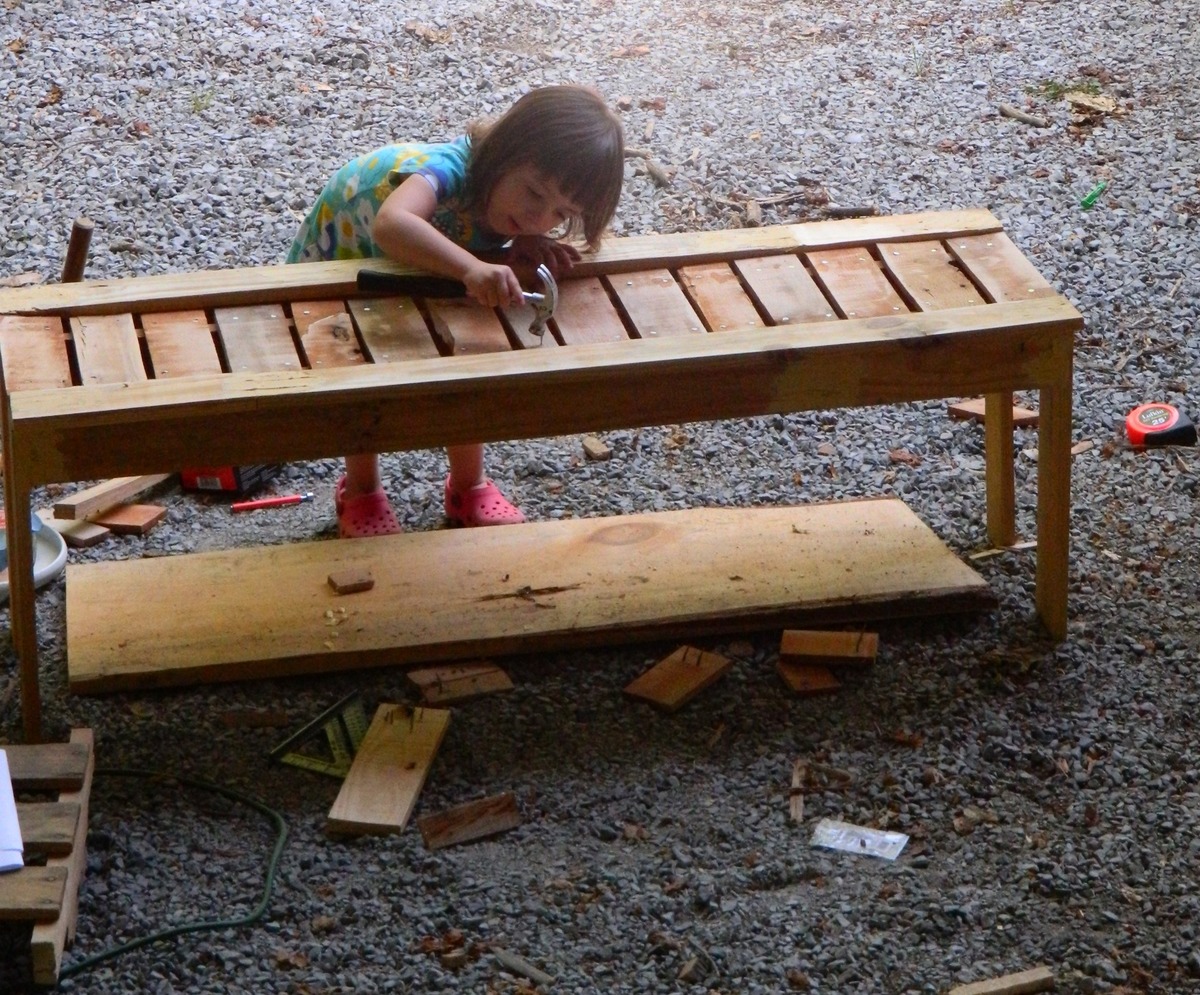
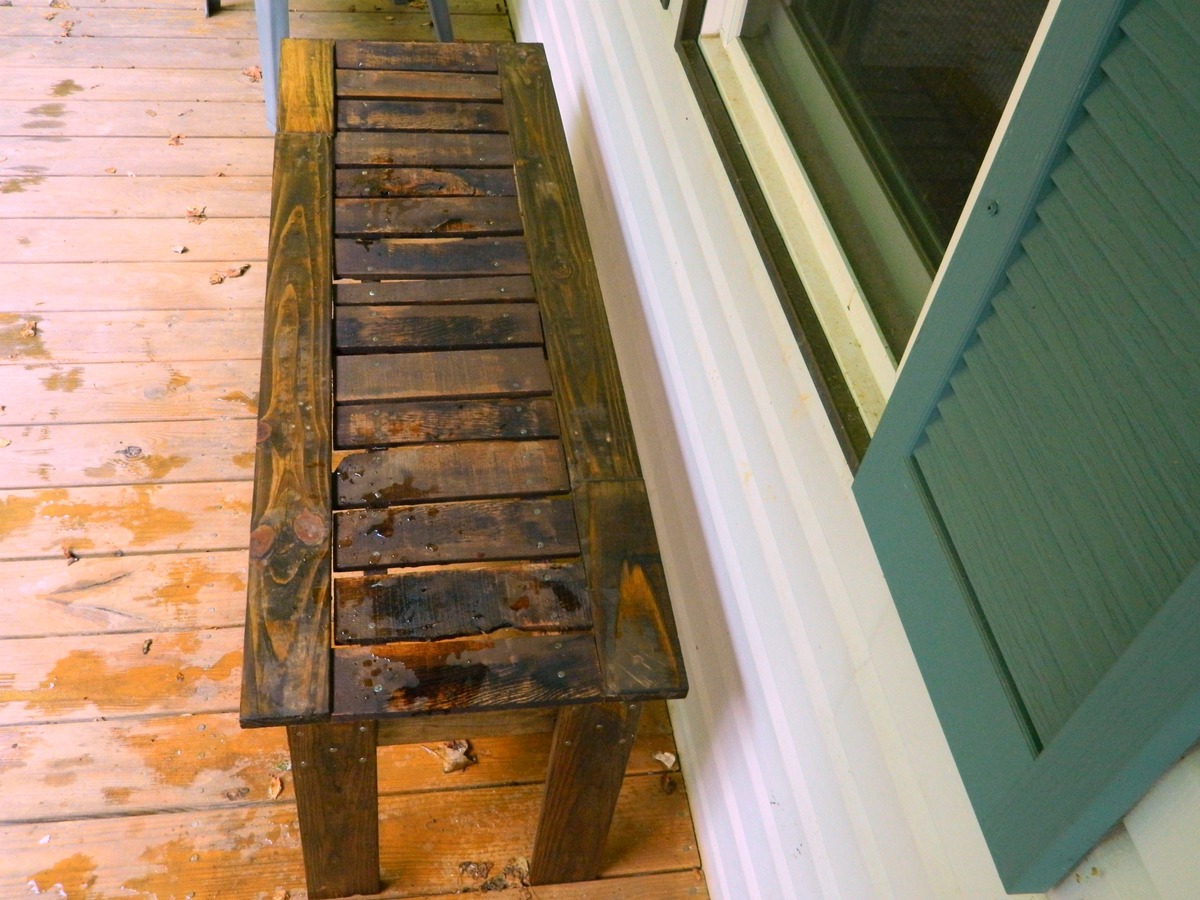
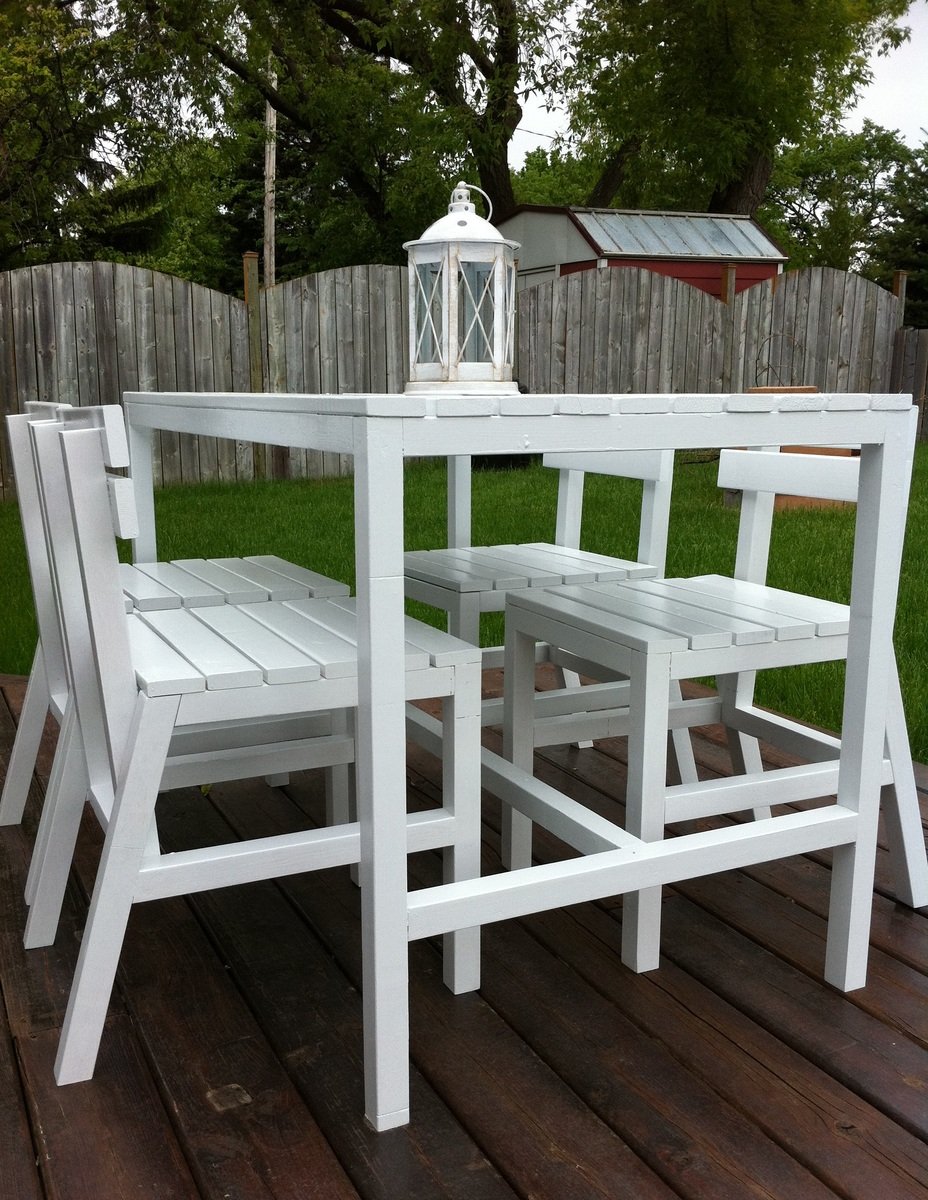
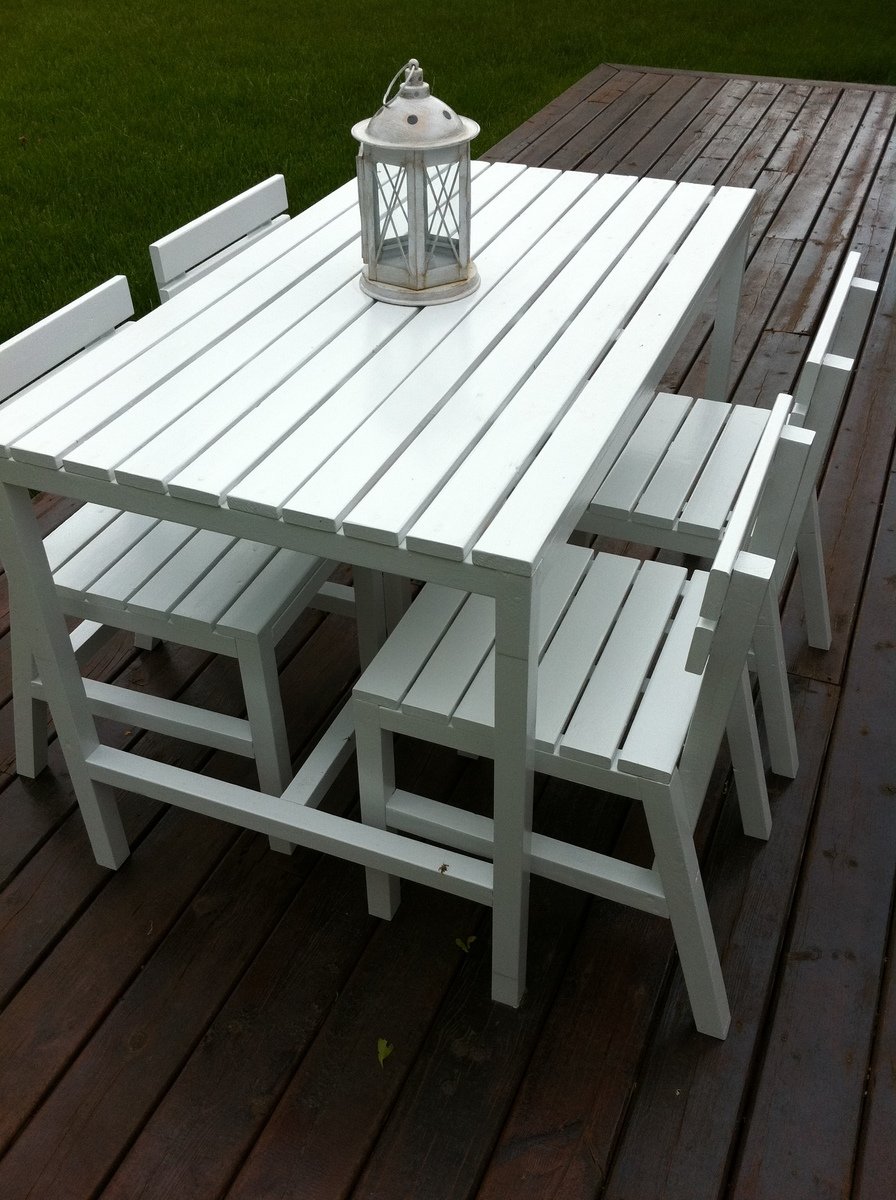
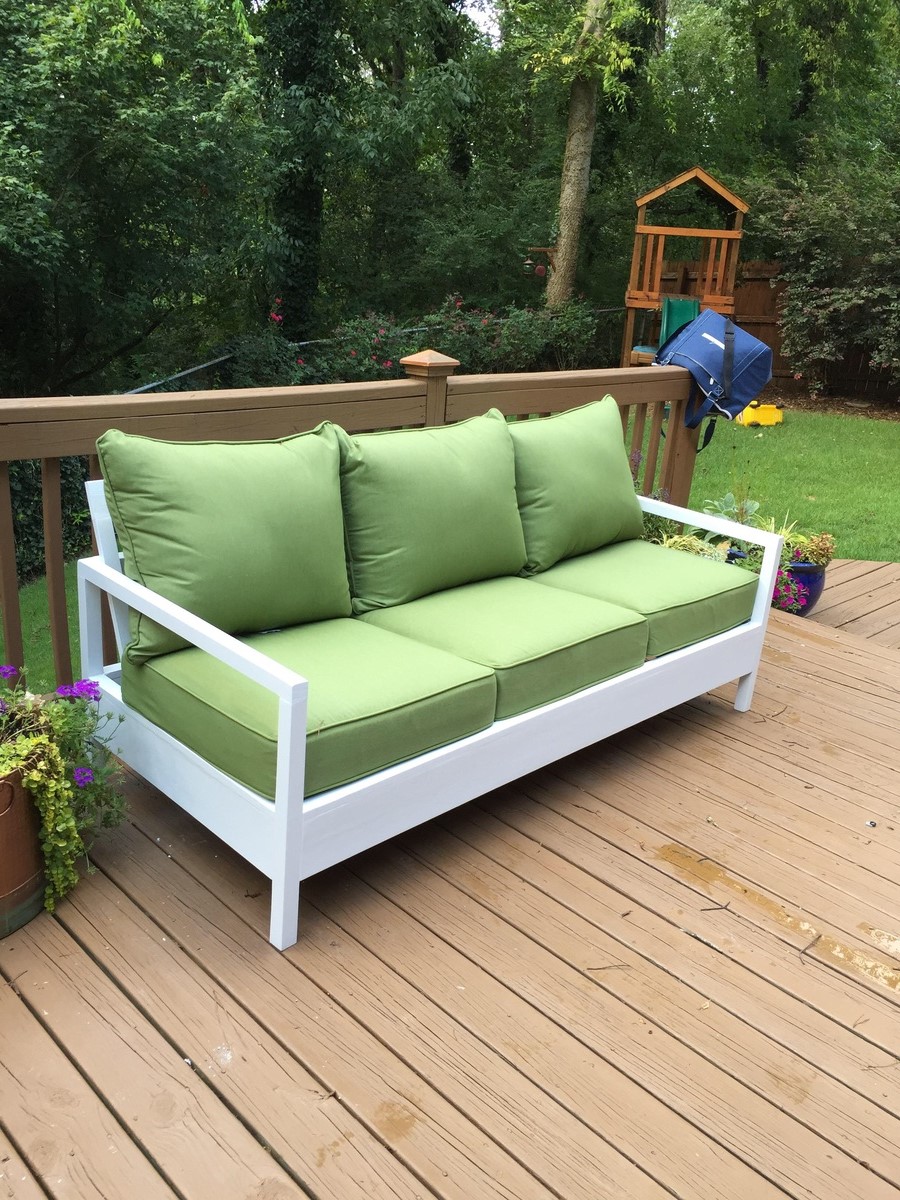
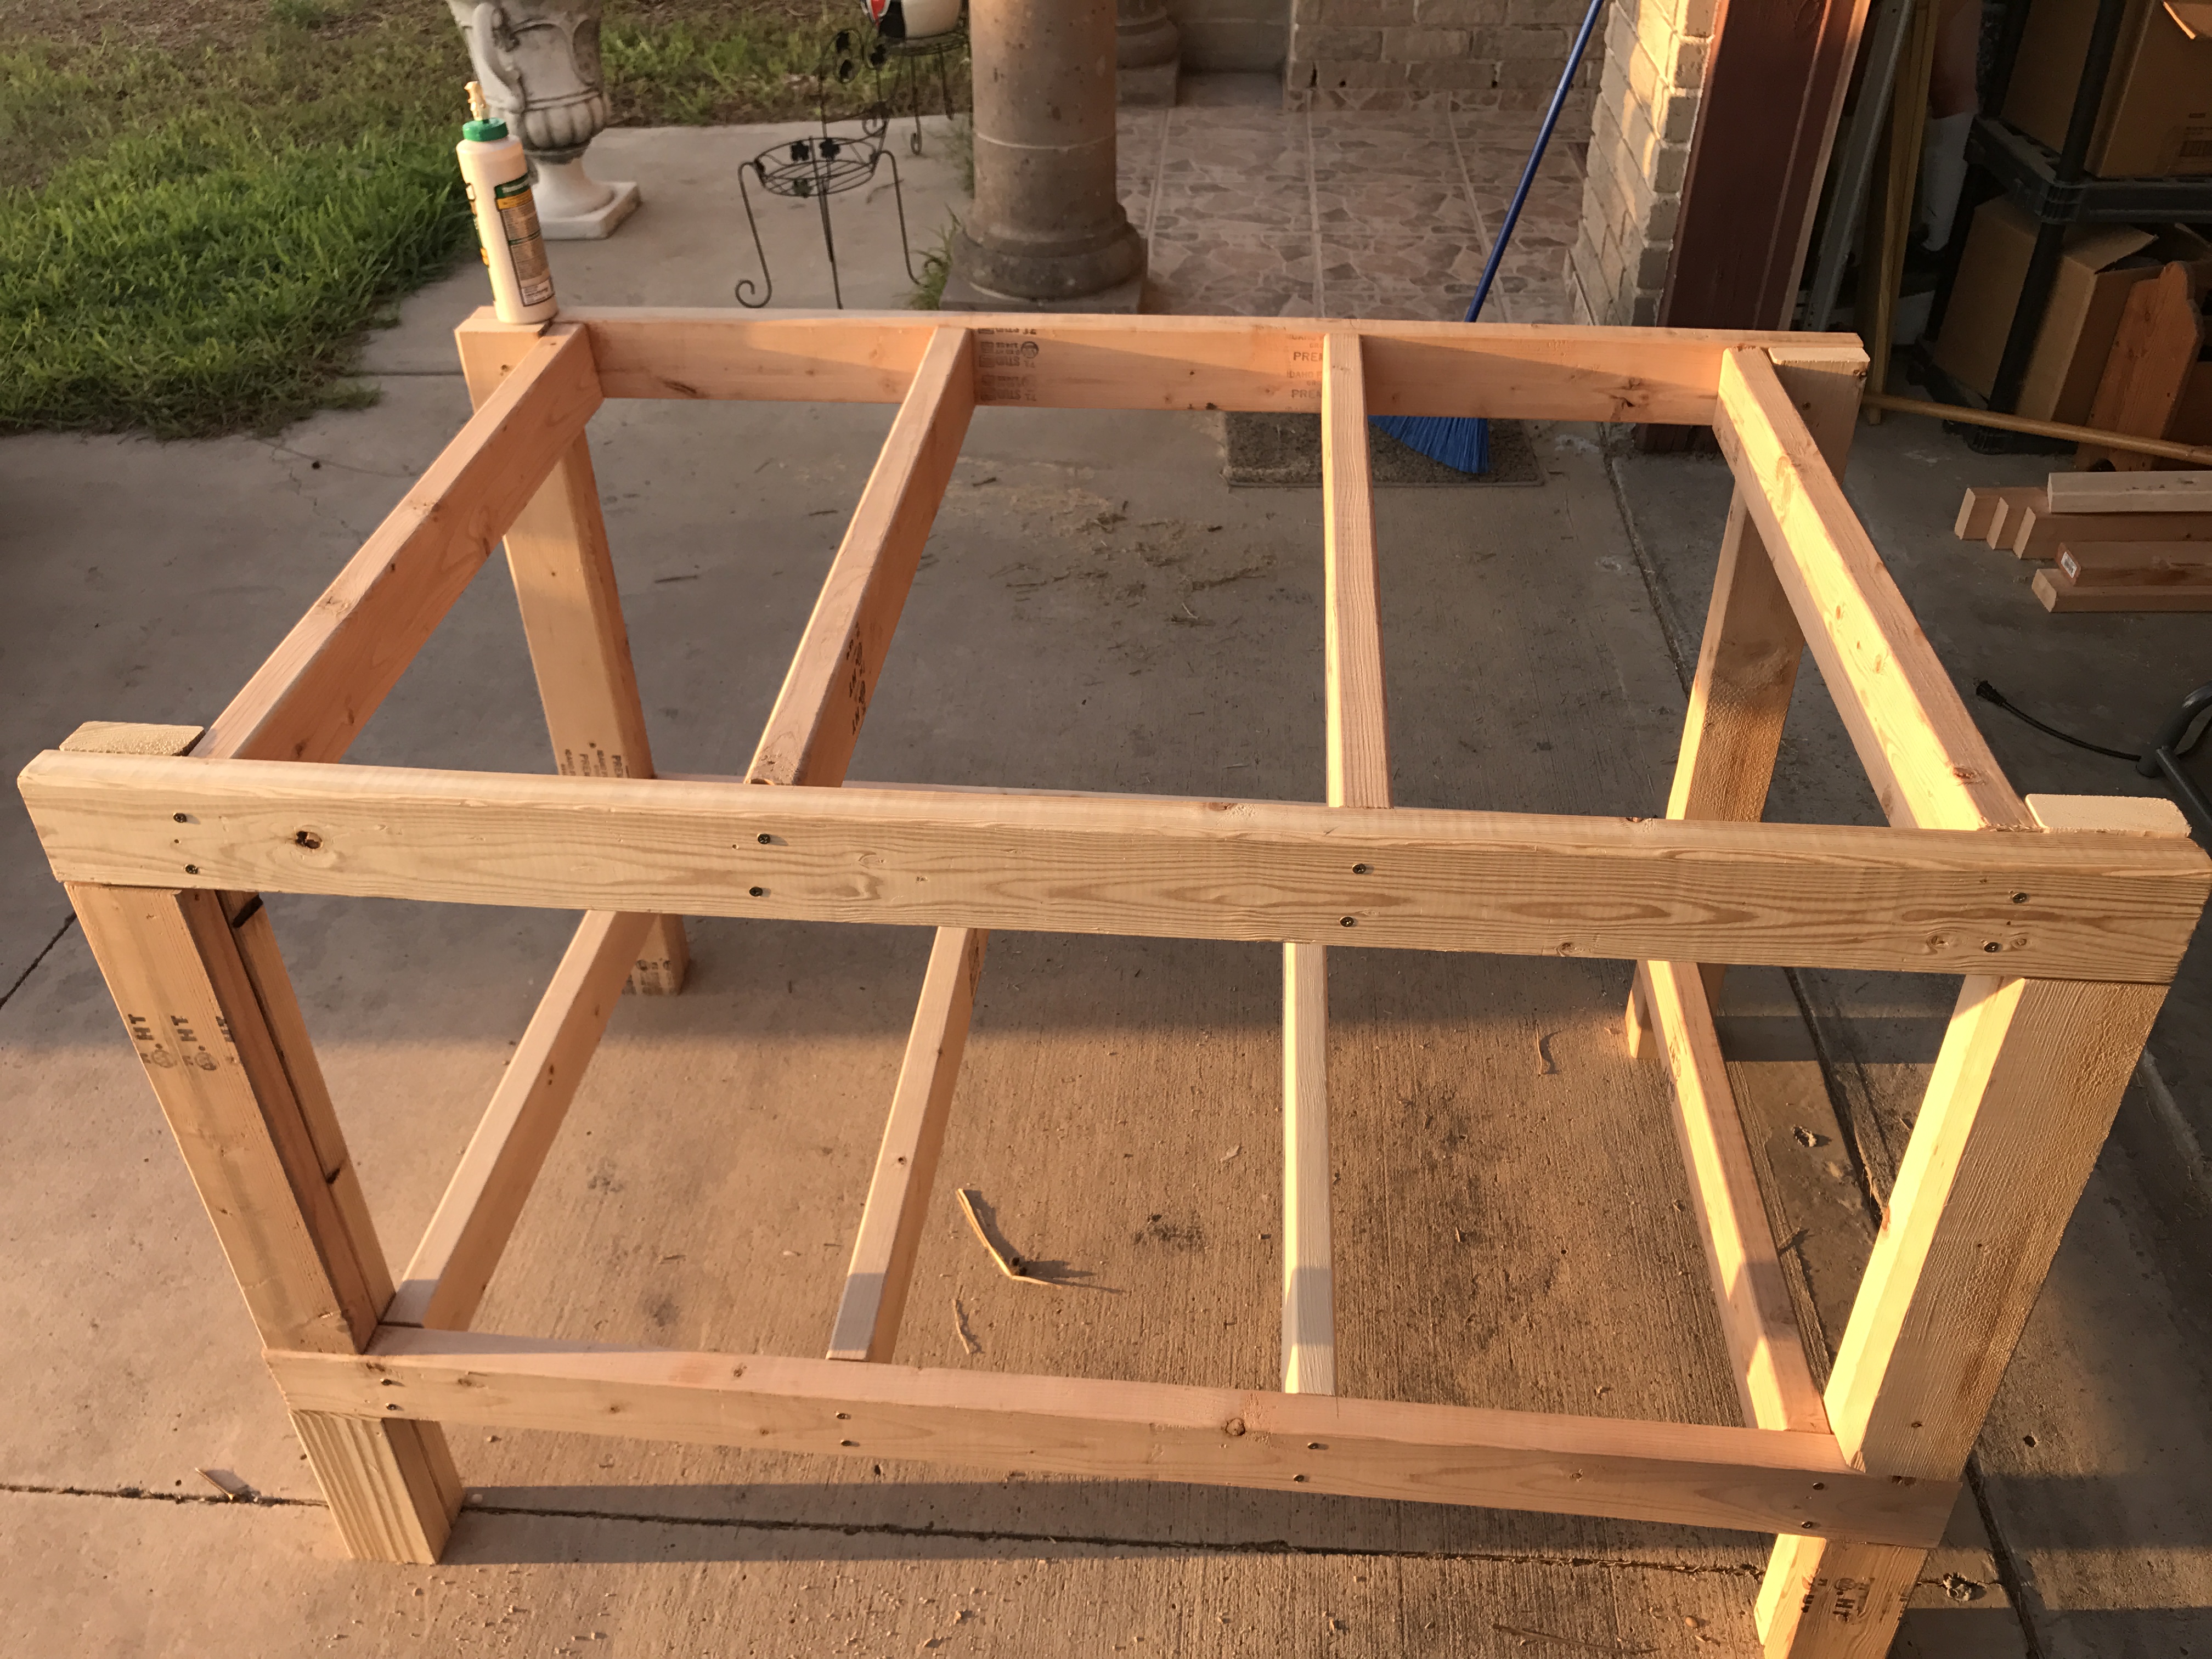
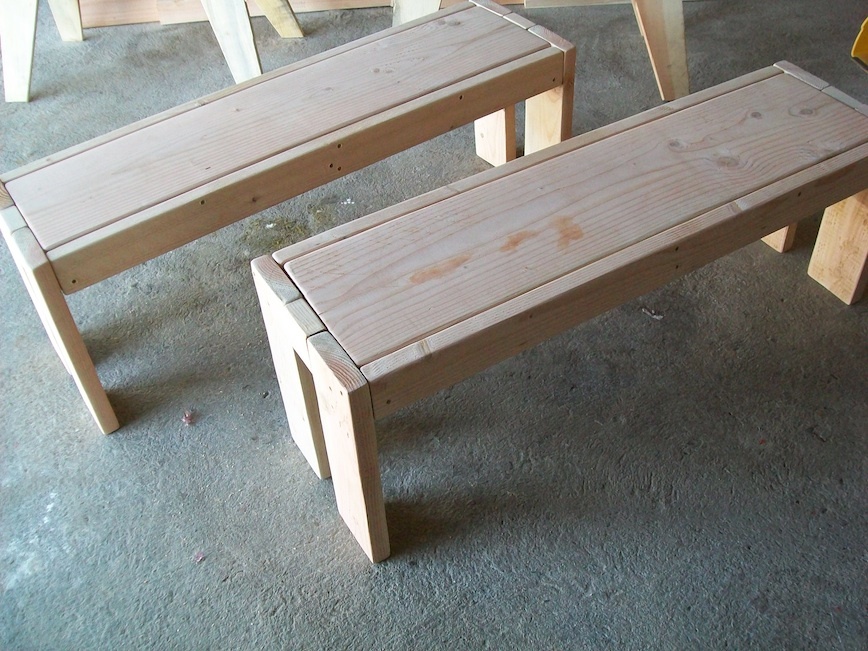
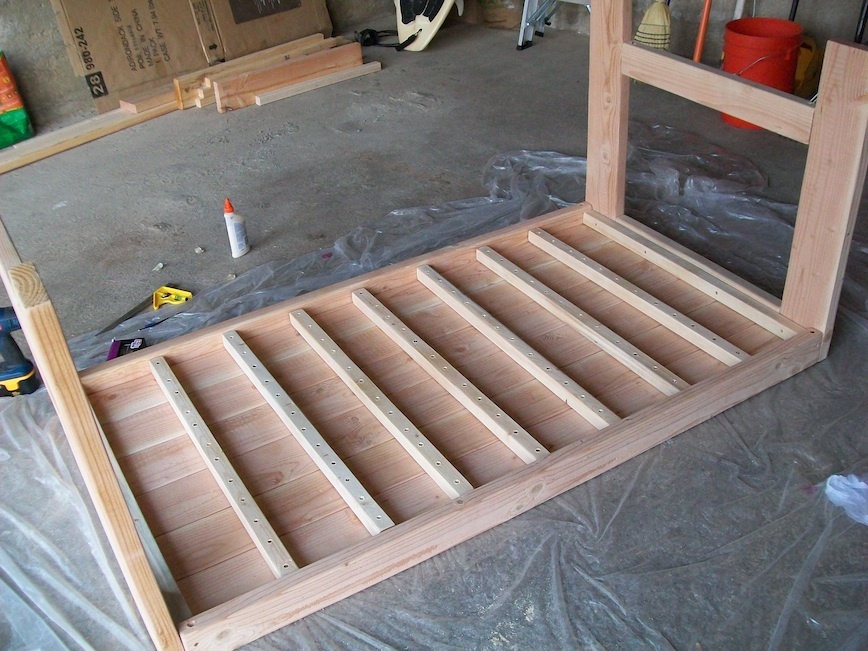
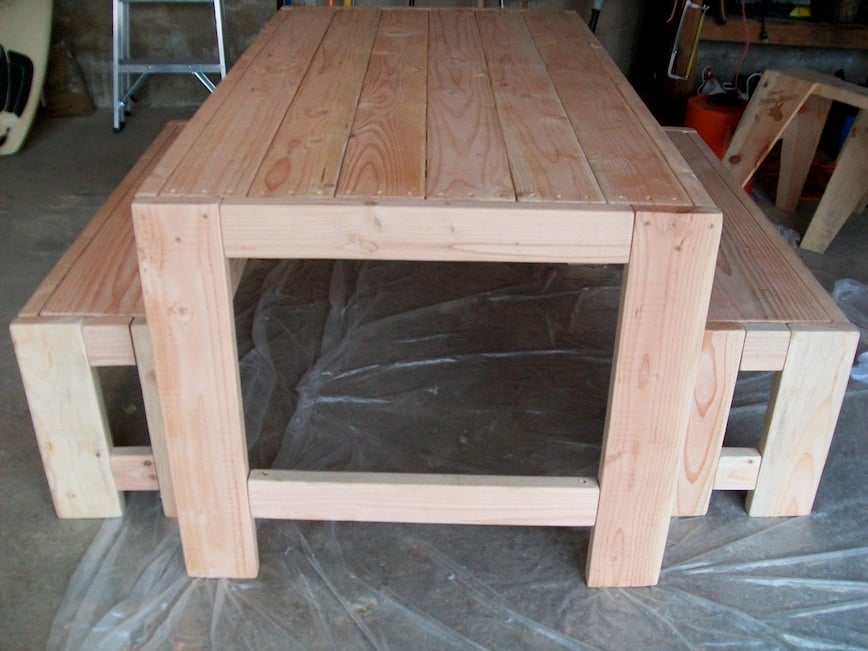
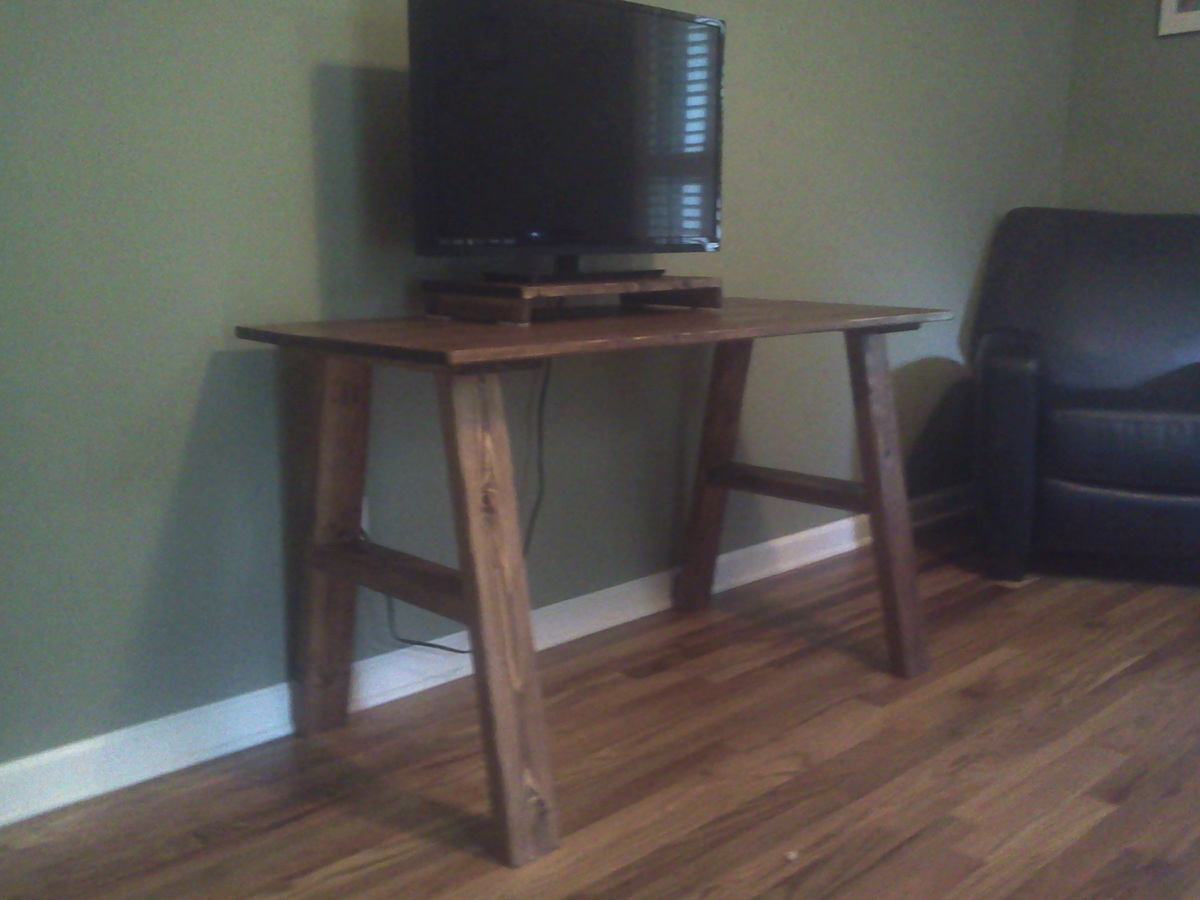
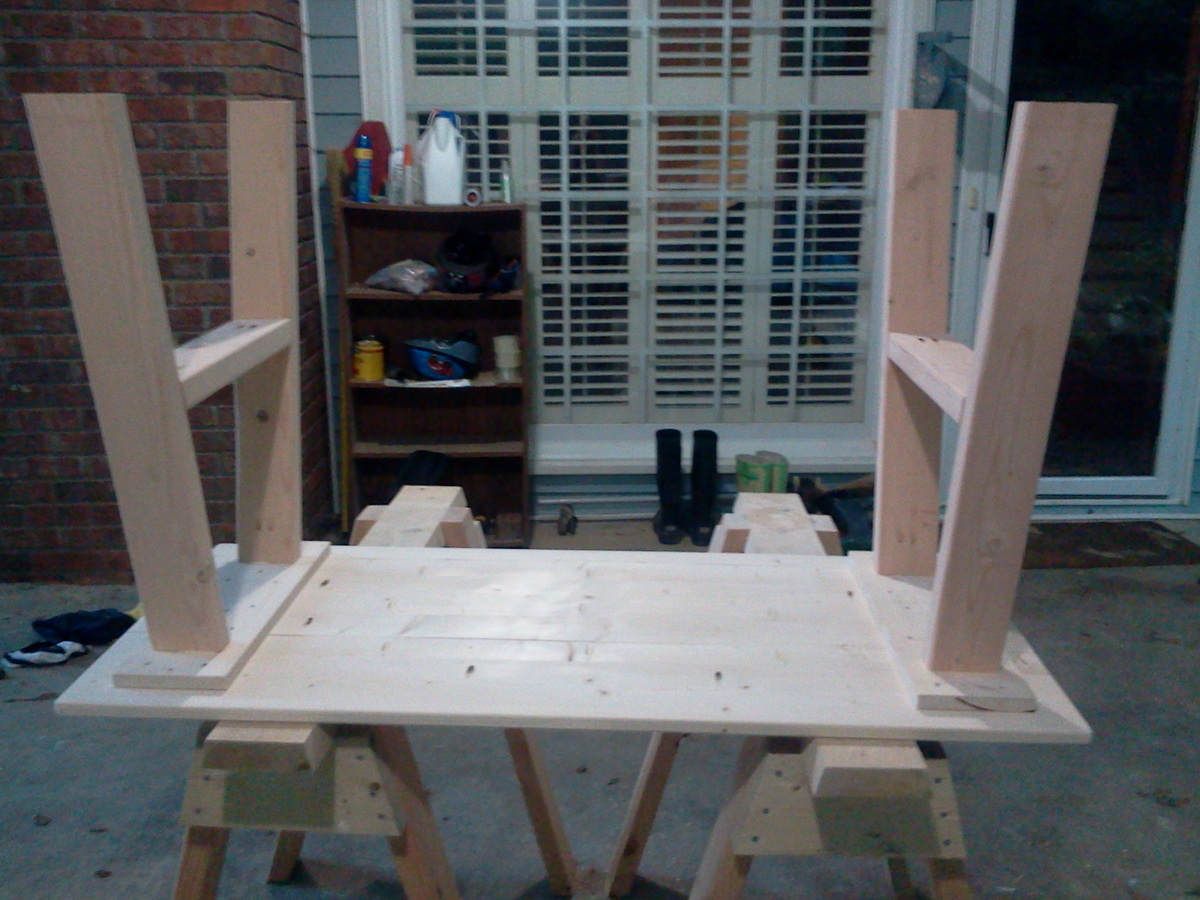
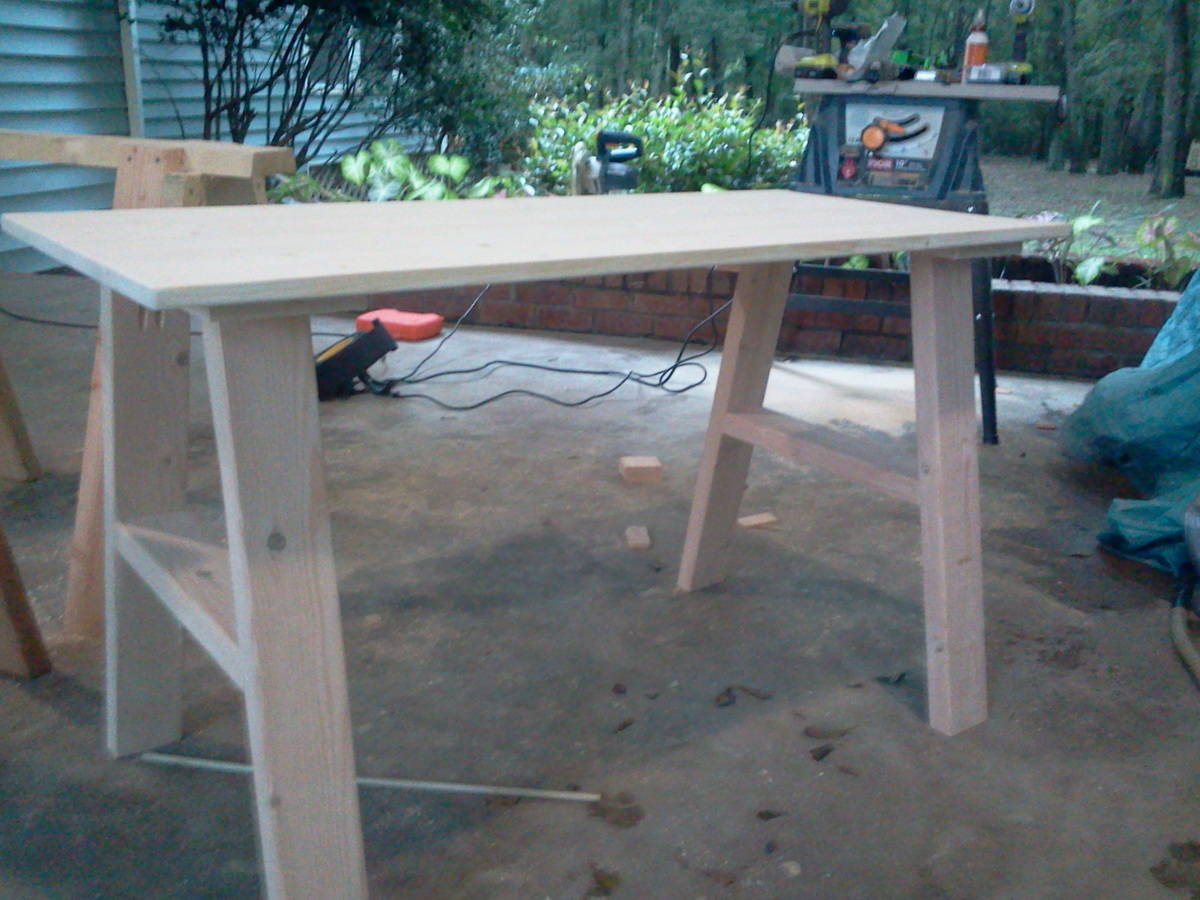
Perfect Trestle Table/Desk

Submitted by c-e-fogus on Thu, 07/18/2013 - 11:16

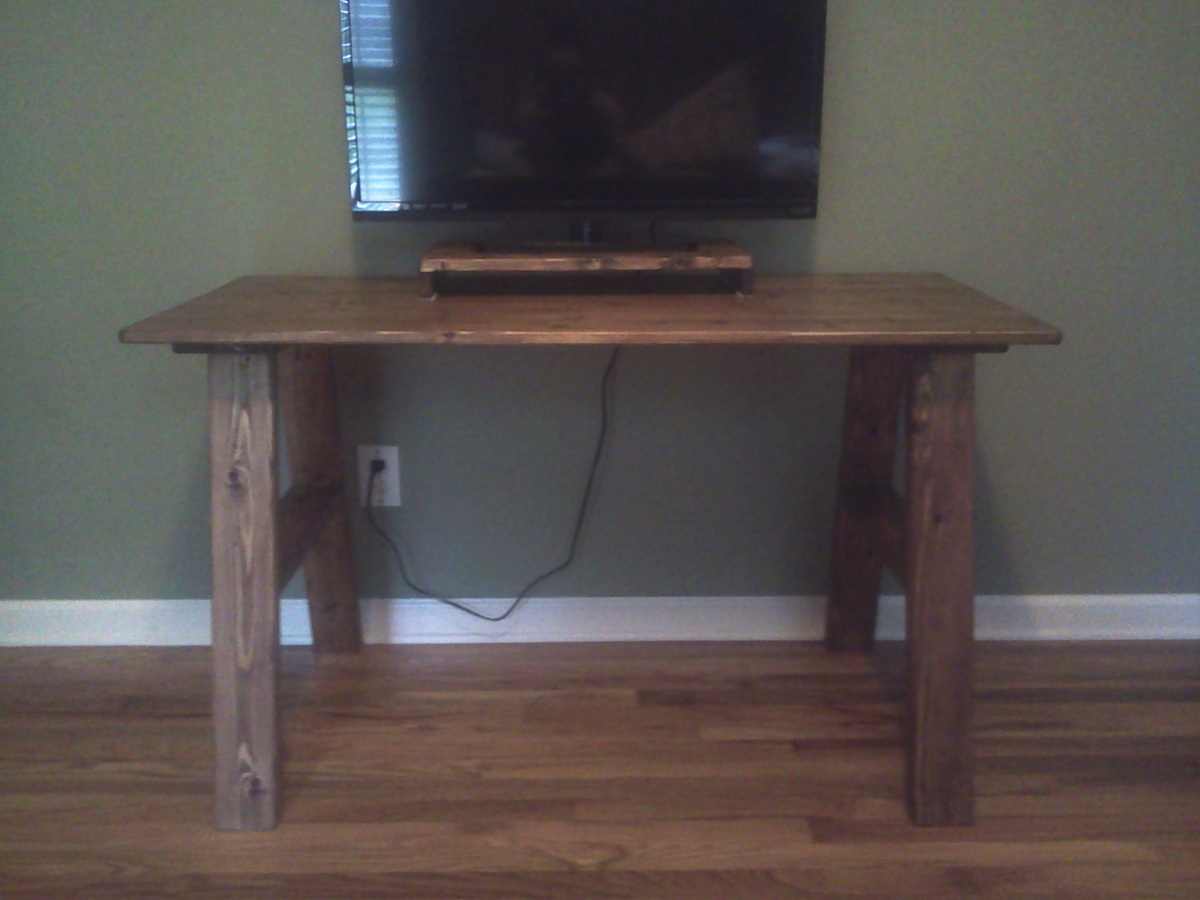
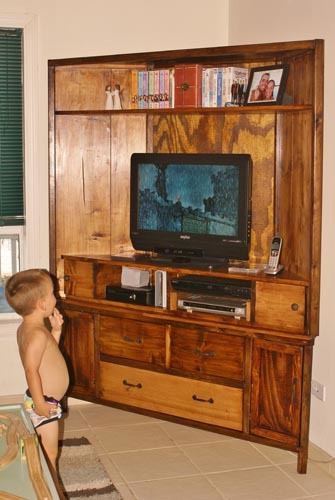
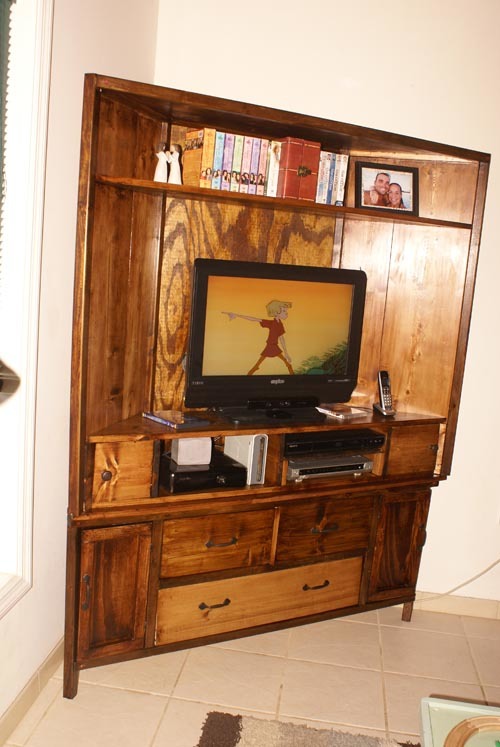
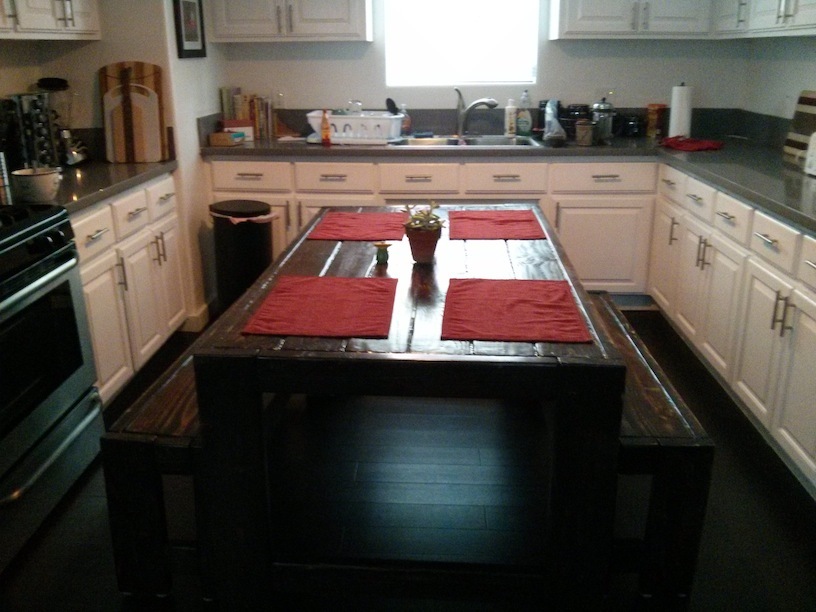
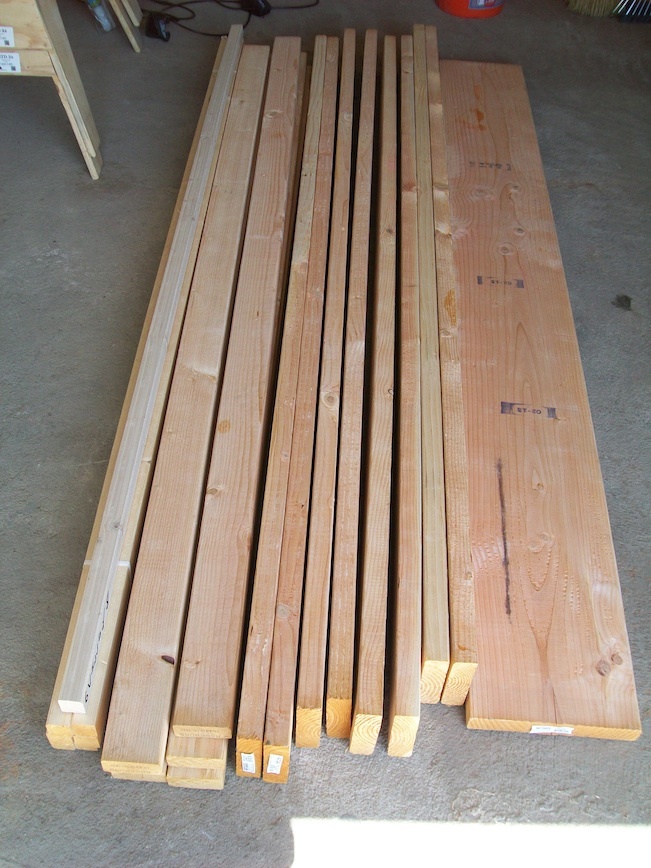
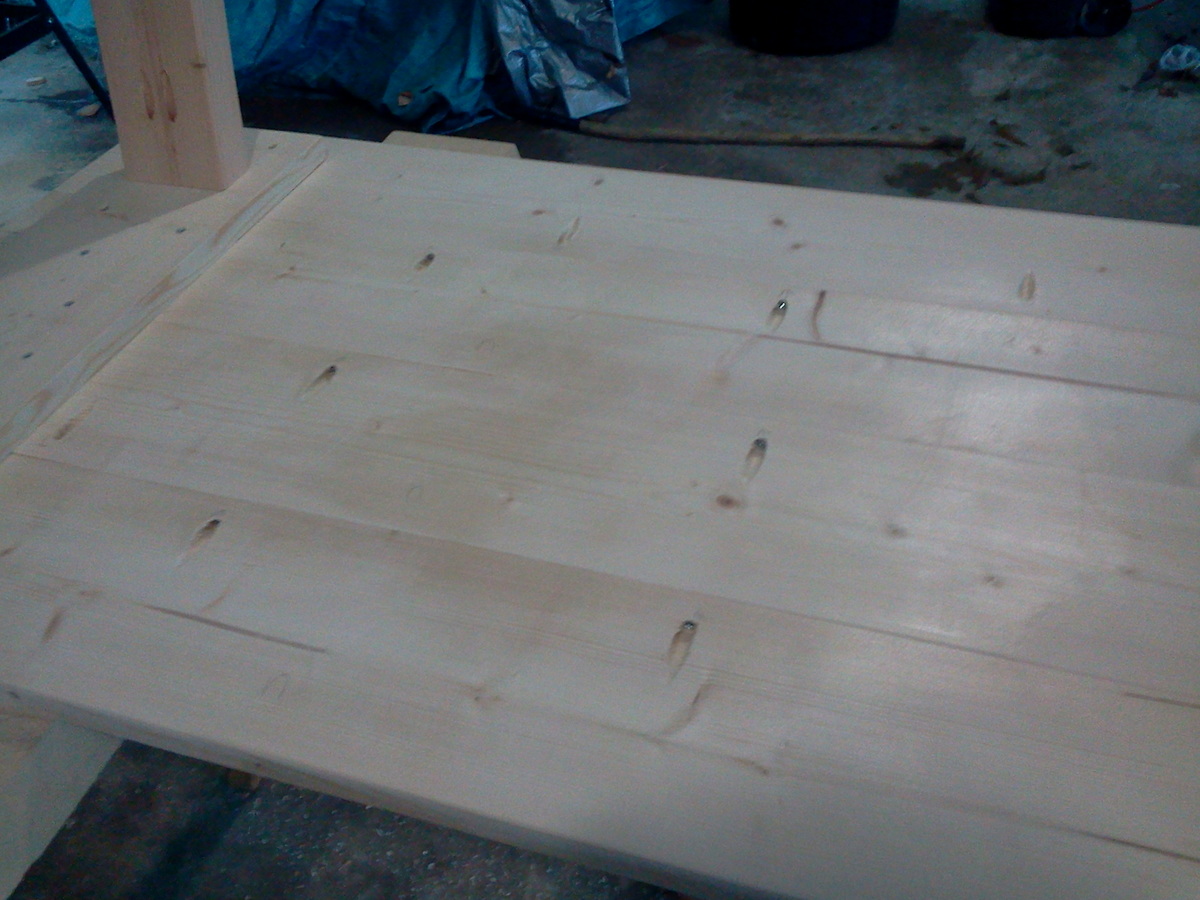
My husband asked me to make a small and inexpensive table for our new TV. I decided to make a desk so it would be able to be used later when we move the TV. Very easy plans. Easy assembly. Great beginner project. I used 1X6 for the top instead of 2X6. It was less expensive and seems to work just fine. I also threw together a small TV stand so the DVD player can go under the TV and not clutter up the table. It's 3 1X4's @ 20 inches. And I made the sides by ripping the leftover 1X4 in half the same width as the top. I spent $30 in wood and have some scraps left over for another project.

Built from Plan(s)
Estimated Time Investment
Afternoon Project (3-6 Hours)
Finish Used
Minwax stain in Early American. Minwax fast drying polyurethane in clear satin.
Recommended Skill Level
Starter Project

12 ft farmhouse table with extensions - reclaimed wood

I had no experience building furniture prior to this project but I wanted a 12 ft outdoor table and could not find one.  This tables center section is 8 ft and was built roughly following the plans for the farmhouse table.  I added two 2 ft extensions at each end making the overall table 12 ft.  The extensions included aprons so when installed they look to be part of the table.  The extensions just plug into the end apron of the center section with 2x4 oak braces which engage in the apron and under the table approximately 2 ft from end.  There is no visual sagging of the extensions. I finished the table with Sikkens DEK finish.


Estimated Cost
The lumber was reclaimed and cost approximately $400 for this project.
Estimated Time Investment
Week Long Project (20 Hours or More)
Finish Used
Sikkens DEK transparent
Recommended Skill Level
Beginner

Bedzilla

Submitted by pmarchino on Sat, 02/17/2018 - 19:28

We had bought a house in New Mexico that was sadly lacking for closet space, as well as square footage for furniture. I was looking at Ana White's website, and saw the plans for the Farmhouse storage bed. It was good, but needed some steroids. I got out the calculator, and started upsizing EVERYTHING. What happened was, BEDZILLA!! King sized bed with 12 giant drawers. I also added lighting to the headboard for reading. It was a blast to build, and I was very pleased with, and proud of the finished product. 

Estimated Cost
Good question!
Estimated Time Investment
Week Long Project (20 Hours or More)
Finish Used
Minwax Polyshades Pecan
Recommended Skill Level
Intermediate

Kitchen Book & Wine Case

I made a small book case that includes a wine shelf.
It is all solid cherry. I used a shiplap paneling design for the back panel.
It is finished with many coats of natural color Danish Oil.
Here's a video of how I built it:
https://www.youtube.com/watch?v=Hxil44OfJ9M

Comments

Modified & Far from Perfect Corner Unit

We were in desperate need of a corner media unit. I just know that Ana will post something incredible for this soon, but we just couldn't wait any longer. SO...I 'TRIED' to modify her lovely Cabin Collection Media Console & Hutch. Her plans were great, and I pretty much followed them step-by-step and just modified corners and things to fit my need. I'll emphasize...it is NOT perfect by any means and is probably not 'done-by-the-book', but it hides all of my hubbies gamer items (rockband guitars and keyboard, wires, controllers, games, etc). AND, I built it with growing room for his biggest wish, a new t.v. :)

Built from Plan(s)
Estimated Cost
$300 (higher prices of lumber on an island)
Estimated Time Investment
Week Long Project (20 Hours or More)
Finish Used
Nuwood poly stain-Walnut. 2 fulls coats of stain, lightly sanded between coats.
Recommended Skill Level
Intermediate

Teddy Bear Bunk Beds

I made these bunk beds for my daughter and her best friend for her best friends birthday. My 4 year old daughter helped putting them together and painting so she got one too:) We used the paint sparkle add-ins from lowes with sample paint colors in each girls' favorite color. I haven't finished the bedding for my daughter's yet, but as you can see, it is working just fine without bedding:)

Estimated Cost
$25 for both with bedding
Estimated Time Investment
Day Project (6-9 Hours)
Finish Used
Valspar sparkle add-in and Valspar yellow and purple samples (don't remember exact color, actually I don't think I ever looked, my child selected them:) I just sanded with a sanding sponge and then painted when done.
Recommended Skill Level
Starter Project

Antique reclaimed heart pine rustic x

Submitted by jchriceol on Wed, 02/21/2018 - 05:29

Got this wood from some thick old flooring we laid in a house and brought them to my shop. Cost me about 20-25 dollars for lumber and paint. Everything else I pretty much had on hand. But man I think it turned out really well 

Estimated Cost
20-25 dollars that’s for paint and 2x lumber everything else I had
Finish Used
Minnwax early American
Minnwax semi gloss polyurethane
Recommended Skill Level
Intermediate

Potting Bench

Submitted by Anonymous (not verified) on Wed, 04/06/2022 - 10:30

This was my very first project last year!  

I couldn’t get the 2x4s so I used a different size and it worked out great. Love it so much. So much better than what you can buy for same price as most potting tables are very small. 

Thank you as I couldn’t have done this without your plans.

Karen Martin 

Age 51

Simple bench from pallets

I had some left over wood from pallets and I really liked the look of the simple outdoor bench. One pallet was made out of some type of red colored wood and I decided the slats for the seat would look good in the red colored wood. The rest of the bench was from a lighter colored pallet. I used nails and glue to attach the seat slats so that my daughter could help. She loves to help, but does not like my drill even if she has hearing protection. See more at http://www.makeitlovely.com

Estimated Cost
Free
Estimated Time Investment
Afternoon Project (3-6 Hours)
Finish Used
Minwax Early American wood stain (1 coat)
Recommended Skill Level
Beginner

Barnwood Frame

Submitted by CGruff on Sun, 07/21/2013 - 18:45

My first DIY project EVER. Not really a brag....but I'm pretty proud of it. Amazing what you can do with a $1 piece of wood and some stain. Some sides are slightly uneven, some nails might be crooked. It has character and I will always remember it as my first! It's liberating to create something beautiful with your own two hands :)

Estimated Cost
Maybe $2? Cheap, easy, and gorgeous.
Estimated Time Investment
An Hour or Two (0-2 Hours)
Finish Used
Minwax stain in blue and dark walnut.
Recommended Skill Level
Starter Project

Comments

6 Cube Bookshelf - Poplar

Submitted by kev117s on Tue, 07/28/2015 - 18:29

I built this set of cube shelves for my 3 yr old son's room. THANK YOU, ANA! I used poplar as I did not want to paint the wood and I love the irregular pattern of the wood grain. To save money, I used pine for the inner shelves and dividers. I stained it using the oxidized solution (http://www.friendly-home.net/2012/05/oxidized-x-console.html) that Ana recommended from the instructions of the Rustic Console. I added a cup of coffee to the solution to get a darker browner shade and unevenly sanded the wood for the distressed look. It matches the poplar wood more so than keeping the pine wood as is.

I also created a 5-tier version to match the 6 cube shelves but did not include the legs. I thought it would be more stable to keep the lower frame on the ground.

I purchased the storage boxes from Amazon It was around $20 for 6 boxes!


I am ready for the next project!

Built from Plan(s)
Estimated Time Investment
Week Long Project (20 Hours or More)
Finish Used
Oxidized solution for the shelves and dividers.
Recommended Skill Level
Beginner

Rolling Wood Dresser

Submitted by ABE750 on Sun, 02/25/2018 - 11:47

Good project. Learned a lot of new things. Installing the drawer slide is the most challenging 

Estimated Cost
$350.00
Estimated Time Investment
Week Long Project (20 Hours or More)
Finish Used
Watch Danish oil dark walnut and minwax wipe on clear satin poly 4 coats
Recommended Skill Level
Intermediate

Golf Club Locker

Utilized the plan for the Locker Book Shelf-Full Size and modified it a bit to convert to a golf club locker. Definitely keeps all the clubs, shoes, and accessories organized and eliminates the clutter. My wife loves it, course she added the baskets, which makes it look awesome! Actually this is how I stumbled upon Ana White's website. I was looking high and low for a plan for golf club lockers, and found Ana's website as part of the process. Best google search I've ever done!

Built from Plan(s)

Comments

Harriet Outdoor Table & Chairs

Submitted by LinzFritz on Sun, 06/05/2011 - 20:02

When I saw these plans I couldn't wait to build them for my deck. I'm so happy to finally have some outdoor furniture, especially solid wood pieces that I built myself. Thanks Ana!

Estimated Cost
$80
Estimated Time Investment
Week Long Project (20 Hours or More)
Finish Used
Rust-Oleum High Gloss White Outdoor Paint
Recommended Skill Level
Beginner

Comments

brookifer86

Mon, 06/06/2011 - 13:46

Everything looks so sharp and chic, love the white color. Only $80 for a full table and chairs too, can't beat that!

Recycle/garbage center

Submitted by YeenYus on Wed, 07/24/2013 - 08:50

We just moved in to a newly built house, so it was important for everything to have a place. I don't like the garbage can to be under the sink, and my wife doesn't like the can just out on the floor...too many missed hook shots with the coffee filters I guess! This cabinet solves many kitchen problems all at once. An attractive cabinet that hides garbage and recycle, yet is easy to get in and out of. The railroad spike handles are something we sell on Etsy, as well as knobs and shelves. The shop name is YeenYus.

Estimated Time Investment
Weekend Project (10-20 Hours)
Finish Used
Stain, paint
Recommended Skill Level
Intermediate

Comments

Ecspronk

Wed, 07/24/2013 - 20:44

I was wondering if you had a price estimate on how much the supplies cost you along with some measurements. I am looking to build a double one like this. More details would be awesome. Thank you

In reply to by Ecspronk

YeenYus

Wed, 07/24/2013 - 21:15

Yeah, I kind of built this on the run with nothing but the space it had to fit into. But it is 34" wide 32" deep and 24" high. I needed it to fit under the window and used the Home Depot garbage bins as the starting point.

I build a lot of stuff...and this was a tough one. The frame is 2x4's with pine facing and bead board. 4 hinges, stain and paint...less than $100.

I'd love to work with you on this if you want. The hard part was engineering the bins falling forward equally and not binding up. The back of the bin actually hits the counter top perfectly now. But you can see that I had to put an extra 1" under the top for it to hit something.

It' gonna take some work but this thing looks and works so smoothly. You can do it...I can help!

momaimp

Thu, 05/08/2014 - 06:07

Would you be able to post a sketch of this project? I assume there are three boxes - the main cabinet and the two tilt-out boxes, but I would appreciate seeing a breakdown of the parts. Thanks!

momaimp

Thu, 05/08/2014 - 06:07

Would you be able to post a sketch of this project? I assume there are three boxes - the main cabinet and the two tilt-out boxes, but I would appreciate seeing a breakdown of the parts. Thanks!

Jsanderson

Wed, 09/23/2015 - 06:32

Is there a way I can get plans for this? I tried to sign up on site but can't locate

Simple outdoor sofa and chairs

Submitted by Bamafan50 on Sun, 08/02/2015 - 17:50

The sofa was my first large DIY project that required a fair amount of construction. It took me about a week working a few hours a day. I followed the plans as they were listed but made a few adjustments to accommodate for the size of the cushions. I used regular pine and then cheap lumber for the slats, lesson learned. Way too much sanding and it still didn't have the finish I was hoping for.  

For the chairs: I used a mix of plans from the Bristol outdoor lounge chair (Ana's) and the simple outdoor sofa. I chose to use all sect pine for the chairs, after the hard time I had with the cheaper wood I chose to use on the sofa.  I was much happier with the end result.  I used 1x3's mostly and then added 1x1 composite molding as an accent around the base.

I looked long and hard for cushions before I started the project based on the recommendations from others. I took me a while but I finally found Somewhat affordable outdoor sunbrella cushions at Lowes. These are the Allen + Roth deep seating sunbrella cushions, which I highly recommend. They are very comfortable and dry quickly after it rains.

Estimated Cost
The cost for both the sofa and chairs was close to $800 dollars. However, the majority of the money was spent on the cushions. At about $98 dollars a set, the sunbrella cushions cost me about $530
Estimated Time Investment
Week Long Project (20 Hours or More)
Finish Used
Rustoliium oil based glossy white with two heavy coats. If I had it to do over again, it would be latex followed by poly
Recommended Skill Level
Beginner

My work bench

Submitted by jsmithfoto on Sun, 03/04/2018 - 12:11

Awsome work bench. After I fininished with the table, I decided to add to it. I put on a pegboard with 2x4's on the back. Then a dowel rod on the side for clamps. Santa hooked me up with a shop light so I used scrap 2x4's to add a support arm for it, That called for a power stip on the back. I now have 3 power stips mounted and two bottle openers on the front. Next up is led lights for the bottom shelf.

Estimated Cost
$100.
Estimated Time Investment
Afternoon Project (3-6 Hours)
Finish Used
I didn't paint it.
Recommended Skill Level
Beginner

My Adirondack chairs and table. Ready for the summer.

Submitted by Anonymous (not verified) on Thu, 04/21/2022 - 12:11

Thanks for the plans Ana.

Comments

Farmhouse King Bed

Submitted by nguim21 on Thu, 06/09/2011 - 20:19

I have been dreaming of building a bed since I found Ana's website over a year ago. I bought the wood in January and slowly worked on it over 3 months, mainly because I was uncertain that I could actually do it myself! After spending about 3 hours in a row to finish it, it is finally complete! I am so happy with how it turned out and friends of mine cannot believe that I did this BY MYSELF! View more on my project at http://thevpfamily.blogspot.com/2011/05/lumber.html or http://thevpfamily.blogspot.com/2011/06/did-you-guess-bed.html

Built from Plan(s)
Estimated Cost
$75
Estimated Time Investment
Day Project (6-9 Hours)
Finish Used
Minnwax stain. I mixed dark walnut and early american. I applied a coat of one, then a coat of the other until I got the honey/brown color I wanted. I then used a poly to give it some sheen at the end!
Recommended Skill Level
Starter Project

Comments

saracrow

Tue, 02/21/2012 - 08:39

When you say "poly", did you use a polyurethane or a polyacrylic? I am having trouble deciding what to do on the farmhouse headboard we just made!

Modern Farm Table - Dark Stain

Submitted by nittle on Thu, 07/25/2013 - 22:27

This was my first project. I learned a ton through the process. Ana's directions were very easy and straightforward.

I purchased the wood (Doug-Fir) from Lowe's and cut it at home with a circular saw. I filled the gaps in the table/benches with a crystal clear silicon caulk - I have mixed feelings about this, since it dried kind of shiny. The coats of polyurethane helped to dull the finish a bit. For the stain, I used Rustoleum Kona, and Minwax Helmsman Spar Urethane Semi-Gloss for the finish.

Like others have suggested, I built the benches first, then the table. This was a great tip, since you can learn the design on a smaller model before tackling the beast of table (it's heavy). I also added some horizontal supports on the ends of the tables/benches, not in the original plans. I just duplicated the end aprons of the table and countersinked/screwed them in at an angle.

Cutting and building the project didn't take nearly as much time as the sanding, staining and finishing. The back-end part of the project was very detail-oriented and stretched out over several days.

Overall, very pleased with the finished project. It was very empowering to know that I can build something like this. Thanks Ana and all of the others with their tips and suggestions! My wife and I know have a long list of other projects to tackle :)

Built from Plan(s)
Estimated Time Investment
Weekend Project (10-20 Hours)
Finish Used
Rustoleum Kona Wood Stain and Minwax Helmsman Spar Urethane Semi-Gloss for the finish
Recommended Skill Level
Beginner

Weatherly Sectional (L-shaped)

Submitted by OUKerri on Fri, 08/07/2015 - 21:50

When I first saw the outdoor sectional plans from Ana I had to build this! The sectionals at potterybarn cost at least $1500 and that is without the cushions. I chose cedar for the lumber because I wanted a high end stained wood look that would stand up to the pacific northwest weather. I purchased most of the lumber from Orange and some of the smaller boards from a local lumber yard. Every board was cut first then sanded and stained before assembly. This made it look a lot more professional and no drips! There are just too many tight areas to do this after it is assembled. I made 2 Weatherly outdoor sofas and used the plans from the Weatherly loveseat to leave the end off of one of the sofas to make an L-shaped sectional. This fit perfectly for my narrow deck which is the beauty of DIY and Ana's easy to modify plans. I  followed the suggestion of another brag post to attach the 2 sofas together with carriage bolts and nuts. It is important to be very accurate with all of the cuts because they have to fit together perfectly for the final product to look straight and measure correctly. Because there a about a million repetitive cuts in these plans I took the idea of another brag post and youtube and created a stop out of leftover lumber which really helped me keep my cuts accurate and saved me a lot of time. I really enjoyed using my new Kreg K5 pocket hole jig on this project which saved me time and my new Ryobi brad nailer that I convinced my husband I needed. I plan on using it on several projects which "require" a brad nailer! I bought six 25" cushions in turquoise from Pier 1 in mid-July which were on major sale and several pillows to match the color. I am somewhat of a beginner so I didn't adjust te plans to fit six 25" cushions so I had to have one cut down to 22" by a local upholstery shop (I could have purchased a 22" cushion but of course they were all sold out). I suggest at least a 3-4" depth cushion that is fairly firm, which Pier 1 cushion were.

I love the outdoor coffee table with built in beer cooler idea that another brag post had suggested.It uses a planter box as the cooler.  I used the same stain which worked well and adequately waterproofed the table. It also has a cover for the cooler when it is not in use. I thought it was a nice addition.


I loved this project and how it turned out! Thanks for the plans and inspiration!!!


Estimated Cost
$300 for the lumber, sand paper, screws and stain. $300 for 6 cushions and pillows from Pier 1.
Estimated Time Investment
Week Long Project (20 Hours or More)
Finish Used
Behr Transparent Weatherproof Wood Finish in Cedar Naturaltone
Recommended Skill Level
Intermediate