Simple, Strong Workbench
Built this for my garage shop in a day. Added a cutout for my Kreg Pocket Hole Jig, a power strip and casters for ease of movement.
I built this dresser for my wife. When we moved in, we got new furniture for my 2 boys. But didnt have much for ourselves in our room. She deserves a nice peice like this to put her clothes in. Its built from 1" solid cherry boards. Finished is a simple boiled linseed oil with shellac.
I built these planter boxes to hold my raspberry and blueberry plants. Also by connecting them with 2x2s, it keeps my dogs out of the garden
I made two of these side tables for my niece and her new husband as a house warming gift. I dropped the top down 1.25 inch and added a glass top so she could display items. They are going to be a surprise, so I left them bare. She can stain or paint them whatever color she wishes.
Donna Cox
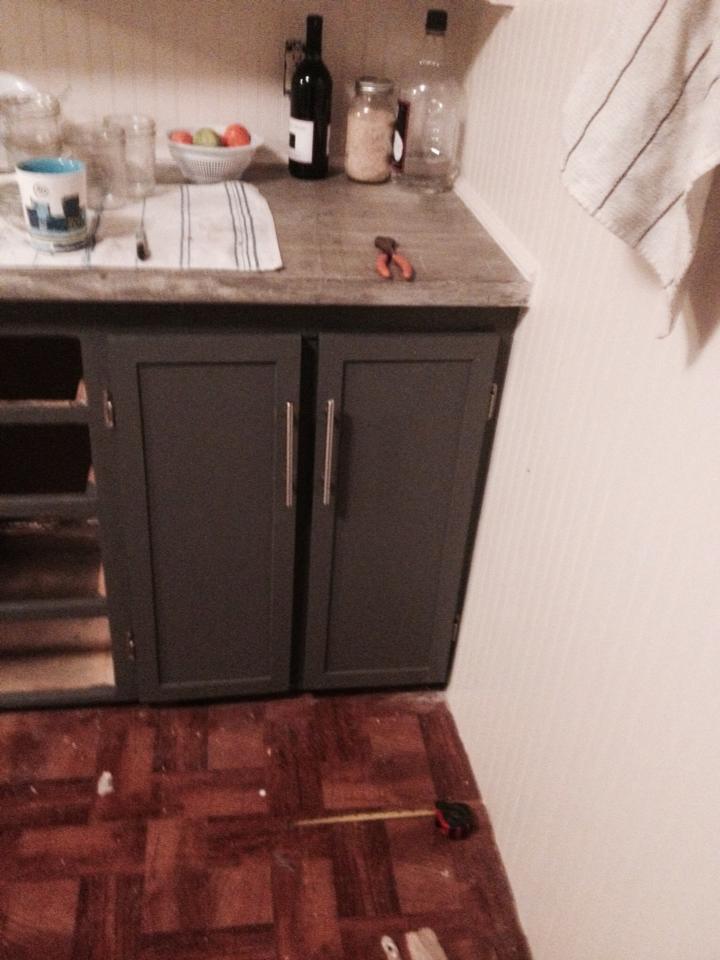
Pleas excuse the mess in the pictures. It is too cold to work in the garage up here in the northwest, so this project took over our entire kitchen and dining room. We built these frame and panel-style doors using Ana's plans from the mom-plex bathroom vanity! We are so excited because we spent about $100 including paint and have plenty of leftover materials for the drawers next week!
These are the original cabinets in our 75 year old house and they were in serious need of rehab. We even contemplated ripping them out and using Ana's cabinet plans to build new ones but after we removed the shelves, the carcass of the cabinets were still in good shape. We filled, sanded, painted and built these new amazing doors that I'm seriously losing my mind over. They are so beautiful and I don't think I could have ordered something better. Maybe better made but how sweet is it to save all that money by building them yourselves?
We'll post drawer pictures after we get those finished up and hopefully have a clean kitchen at that point. :)
Thanks Ana! Our home is becoming truly special with the skills we learned from you!
Easy 3 tier planter. Made from Ana White's plan Made for free from scrap wood that I pulled out of the trash and portions from a pallet, ripped 2x4 and shipping container. #ForMereMortals #planter
This box is 3 boards high (cedar dog-eared fence pickets), using the full length of the pickets for the sides and 1/2 the length of the boards for the ends. The dog ears were removed with a pull saw before painting and construction.
A 12ft, 8 inch wide, pressure treated pine plank was used to create a bench shelf along the sides. The plank was halved to create 2 benches. Small, 1 x 2s hold all three boards flush to form the sides. Segments of 2 x 4's were secured to create braces that hold the benches. The upper level of the end boards are longer than the bottom two and serve as additional support for the ends of the pine bench boards.
Wood screws were used for assembly. Corner brackets reinforce the interior corners for added stability. All exterior boards were painted before assembly.
The bed interior is 17" deep 33" wide x 71" long.
Mon, 06/04/2012 - 12:10
Love it! As I get older I am looking more and more at switching my garden space over to raised beds. The added bench is a great idea.
In reply to Love it! As I get older I am by Pam the Goatherd
Mon, 06/04/2012 - 16:14
This one is a gift, but left me wishing it were mine. It looks so inviting that one of my sons asked for his own gardening space and started drawing up plans.
Thankfully, it's easy enough to put together with interruptions. I have lots of interruptions. I did the cutting in one session, the painting in another, the assembly third and then some final touch ups with the paint.
The cedar smells WONDERFUL. The benches are narrow but sturdy enough to handle my dangerous curves *cough* *smile*
I based my bed off of the Fillman Platform Bed plans. Just bumped the dimensions up to fit my mattress and added the mid supports. The frame was built using 2x6 boards taken from a fallen barn. I ripped 2 2x6 boards down the center to make the the supports for the slats. My feet are 3 2x6's screwed together and then attached to the frame. Next time I will cut a notch out of the feet so that I can rest the bed on them and then try to find some old lag bolts to attach them to the bed. The frame was put together using a Kreg Jig. I put the Cedar boards on to dress the front and sides up some and to help keep the slats from showing when the sheets were tucked in. My finish is 1 coat of Linseed Oil and 2 coats of Teak Oil.
Let me know if you have any further questions on this build. As soon as I find some doors I will be building a head board for this bed.
This was so much fun to build and it turned out really great. It was the perfect gift for my son on his fourth birthday.
I apologize for not having before and after shots from the same perspective, but this is the bookcase I built to replace the very poorly sized and very poor quality bookcase that was in this room before. The room has a slanted ceiling that goes from 8' to 16,' and has baseboard heaters that got in the way of cabinetry. I worked around it. These were my first cabinets, and they didn't come out exactly has I had envisioned, but they're pretty darn close! The shelves are all on brackets that are screwed into studs in the wall, and the boards that make the sides of the bookcase aren't even screwed down. I wanted something that would be sturdy and yet easy to take down or change. I left space in the middle because we'd like to put in a fireplace one day...
MelissaLeigh144
Just built this today, very easy build. I used cedar tone treated lumber for the frame and the cedar pickets. I modified the size some, little smaller than the plans. Total material cost about $70.
When we moved into our new house, we quickly realized the boxsprings for our queen-sized bed were not going to fit up the stairs. So while hubby was busy with his own projects, I made a 2x4 bed frame at 16-1/2" off the ground and built the farmhouse headboard. We like to use the end of the bed for sitting and putting on socks and shoes, so I did not build the coordinating footboard.
I absolutely love the way it turned out and have received so many wonderful compliments. Take about an ego boost!
Cutting took about 1 hour (first use of a radial saw) and assembly took another hour. I applied 1 coat of Minwax Red Oak stain and 2 coats of Minwax semi-gloss polyeurethane sealer.
In reply to NICE! by Rusty Cottage
Thu, 08/23/2012 - 12:49
Good eye, I forgot those were in the picture. Thank God for scraps!
This was my second project (first was a work bench) and it came out great.
W. Knight
This was my first build from your site! Farmhouse bench.
I was a little confused with the miter saw instructions "bevel cut at a 10 degree angle off center". I had to google to figure out what you meant. In the end the bench looks awsome and I feel very empowered with my tools.
(still need to stain the finished project, bought all the wood and built in 1 day)
Thank you Ana for sharing your plans!! I love your site and I love my Kreg Jig!
Vicki
(Canada)
Wed, 04/15/2020 - 11:38
It looks great and rock solid. I can't find a plan for it. Could you please help me?
My first Ana White project! I'm getting so many compliments on these! My shop is my driveway so due to the weather, it took me about a week to get these built and painted. And I can only fit enough wood in my car to make one at a time! But they were so fun and easy to make!
The design plan from the https://www.ana-white.com/woodworking-projects/2x4-modern-adirondack-ch… worked out really well and with tiny modifications to the dimensions i was able to build this in a couple of days. All the wood used was discards on a construction site plus a neighbor discarding a dismantled old fence. Added my footstool which was fairly straight-froward as well. My wife made a few cushions at home for it and its super comfy Really happy with the way the whole thing worked out. Thanks Ana
First project made from scratch....took me a while but glad it is finished! Will try to do one more of a larger size for my other dog.
This was my first time DIYing furniture, so I definitely came up with a very easy design!
The dimensions for this sofa are modern as it sits low to the ground and has a squarish appearance.
Free detailed plan on Blog: www.MinimalistFarmStyle.com
Love your site. The 8’ pony wall I recently made was a great plan. I’m also going to build the outdoor storage plan you have. Thanks for your creativity!
When I got Ana's book The Handbuilt Home, I was super excited to tackle a project. It just so happened that her mirror plan on page 37 also makes a perfect trophy display. I just replaced the mirror with stenciled cork board so my daughter could display keepsakes along with her trophies and medals.
I followed the plan pretty closely, but I added some cove molding to the center to hold the cork board in place. You can find more details on my blog.