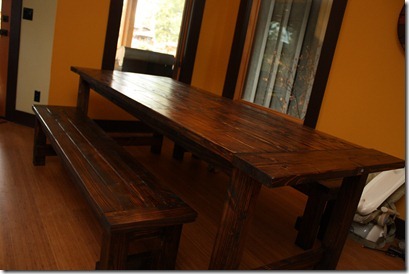
Truss and Beam 4x4 Table
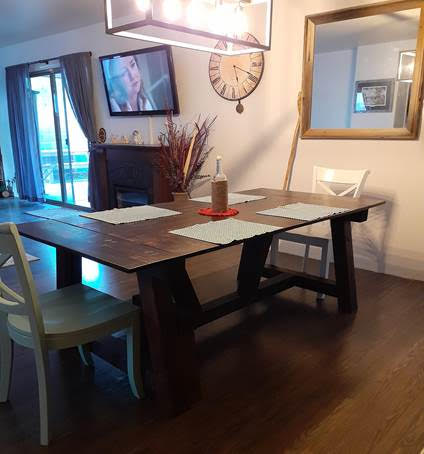
Love my table, I’m still working on the benches.
by Melonie
Built from Plan(s)
Love my table, I’m still working on the benches.
by Melonie
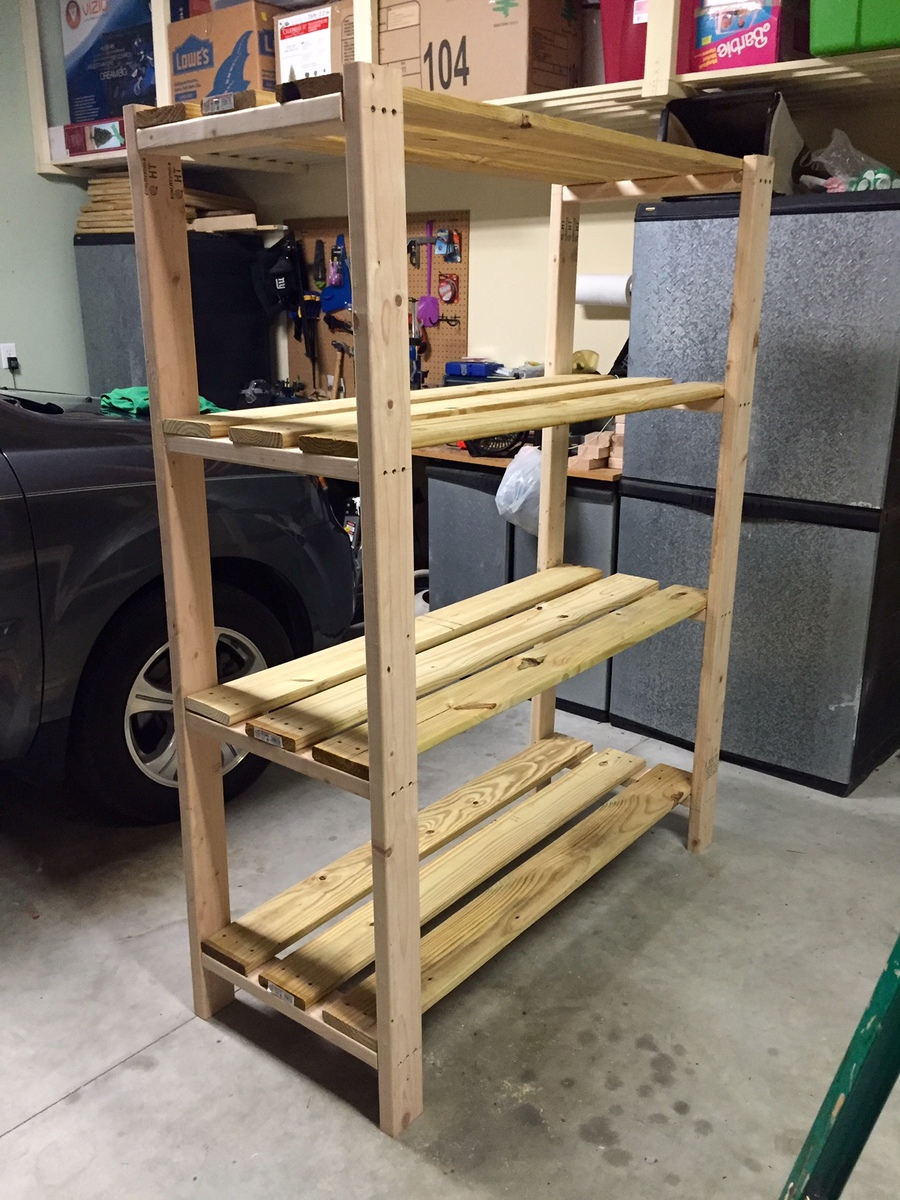
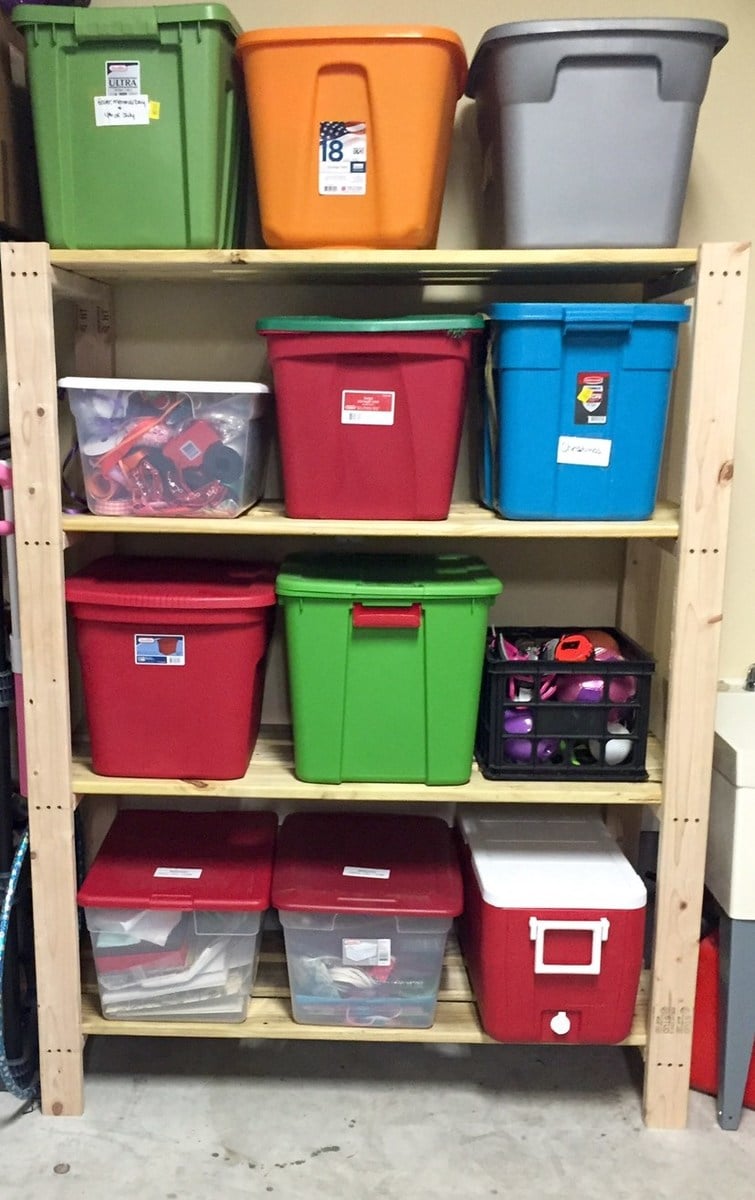
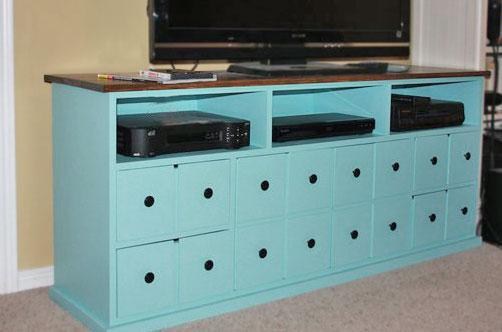
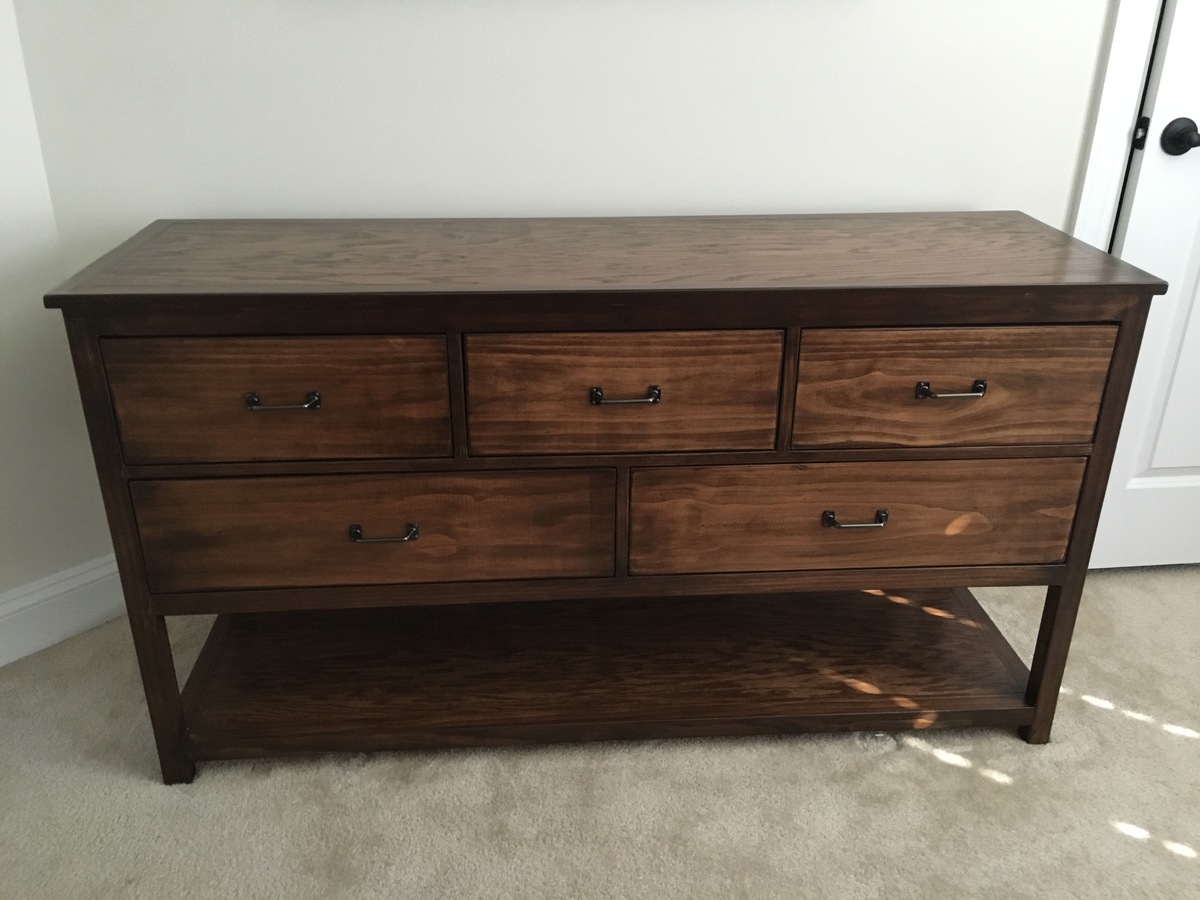
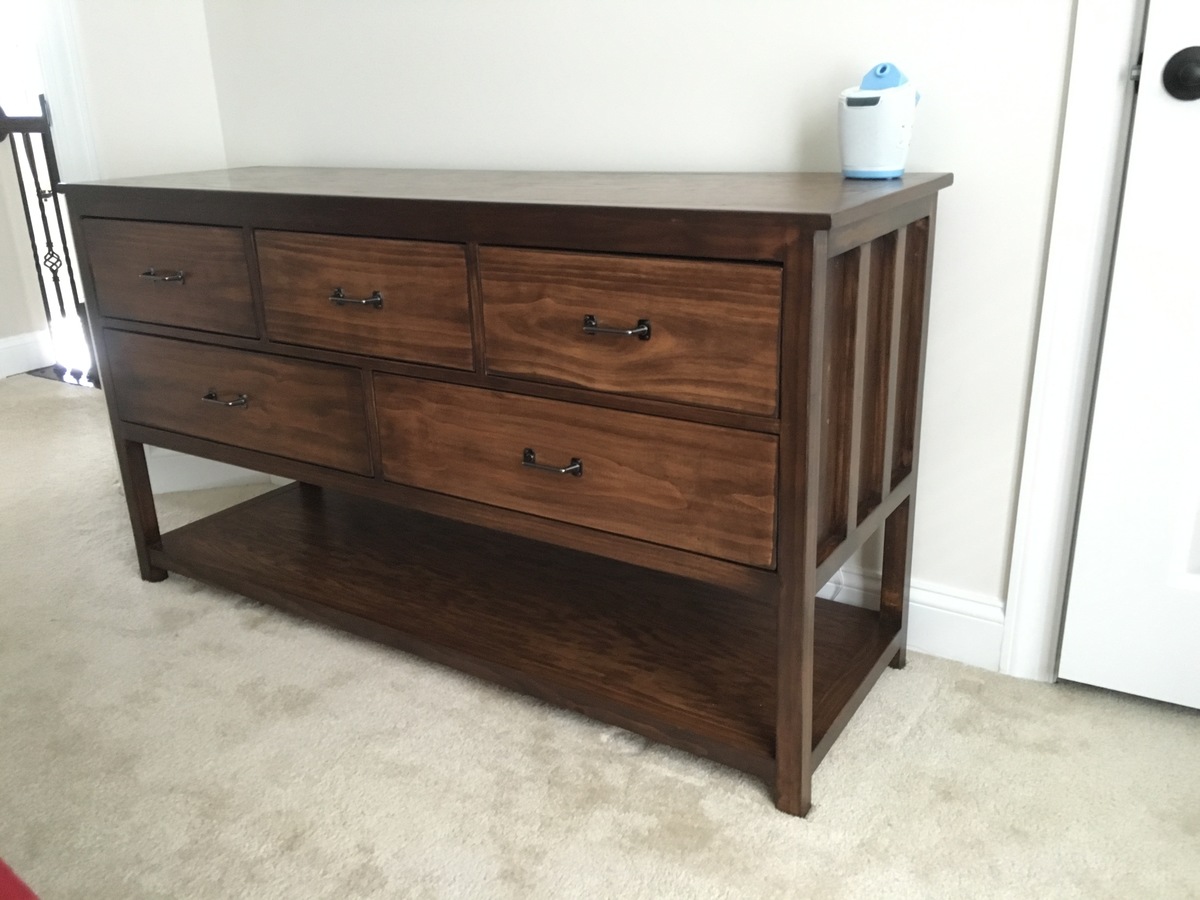
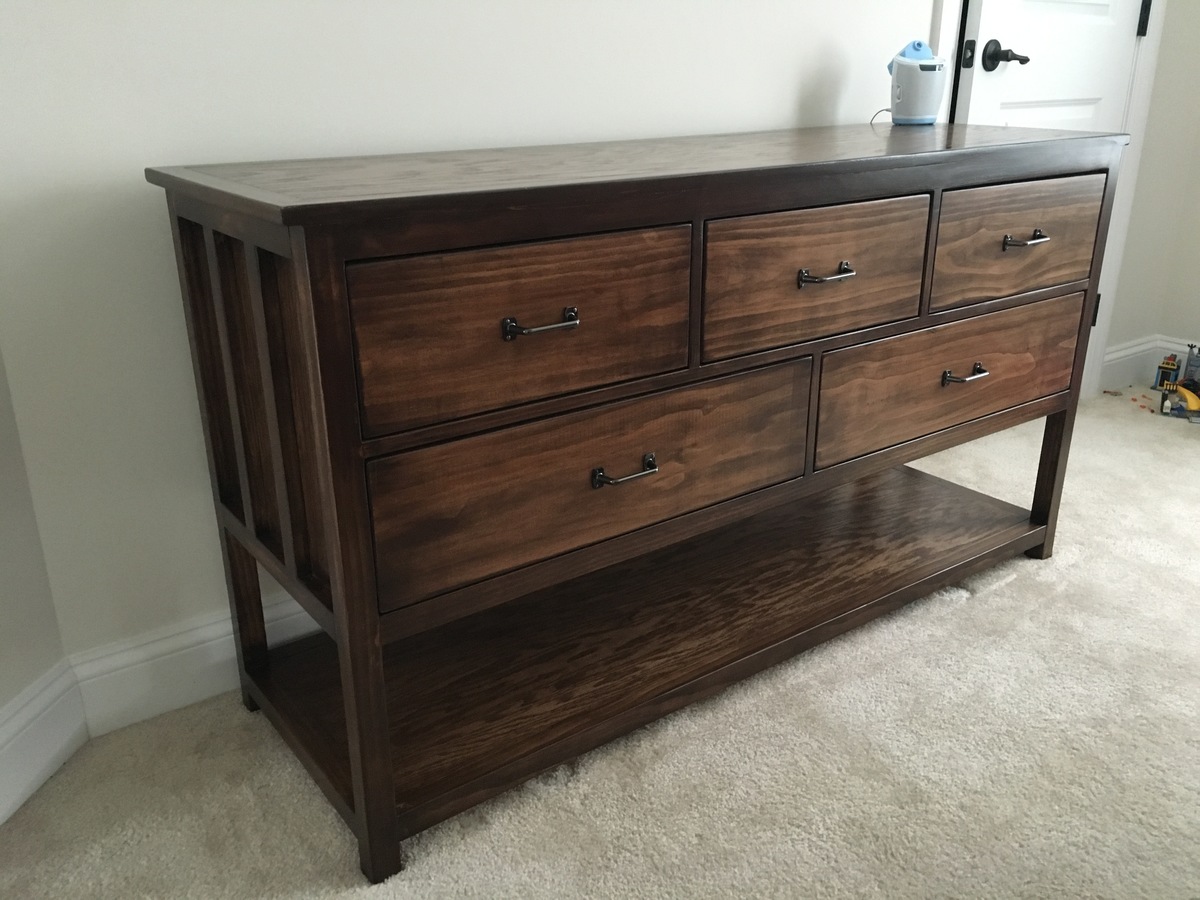
My wife was needing some extra storage in the garage for seasonal decor totes.
So, of course, I first go to Ana White's website. Voila, I found the perfect plans for the space I had to work with.
- The final product ended up being 72"Hx54"Lx21"W
- I used a counter sink bit to pre-drill screw holes so the heads would be slightly below the surface of the boards. This way the totes would not get caught on or damaged by the screws.
I love the plans for this bench! Very well thought out plans, easy to cut the wood and easy to put together. Thank you for all the hard work in coming up with all of these great plans!
Reanna Tovar
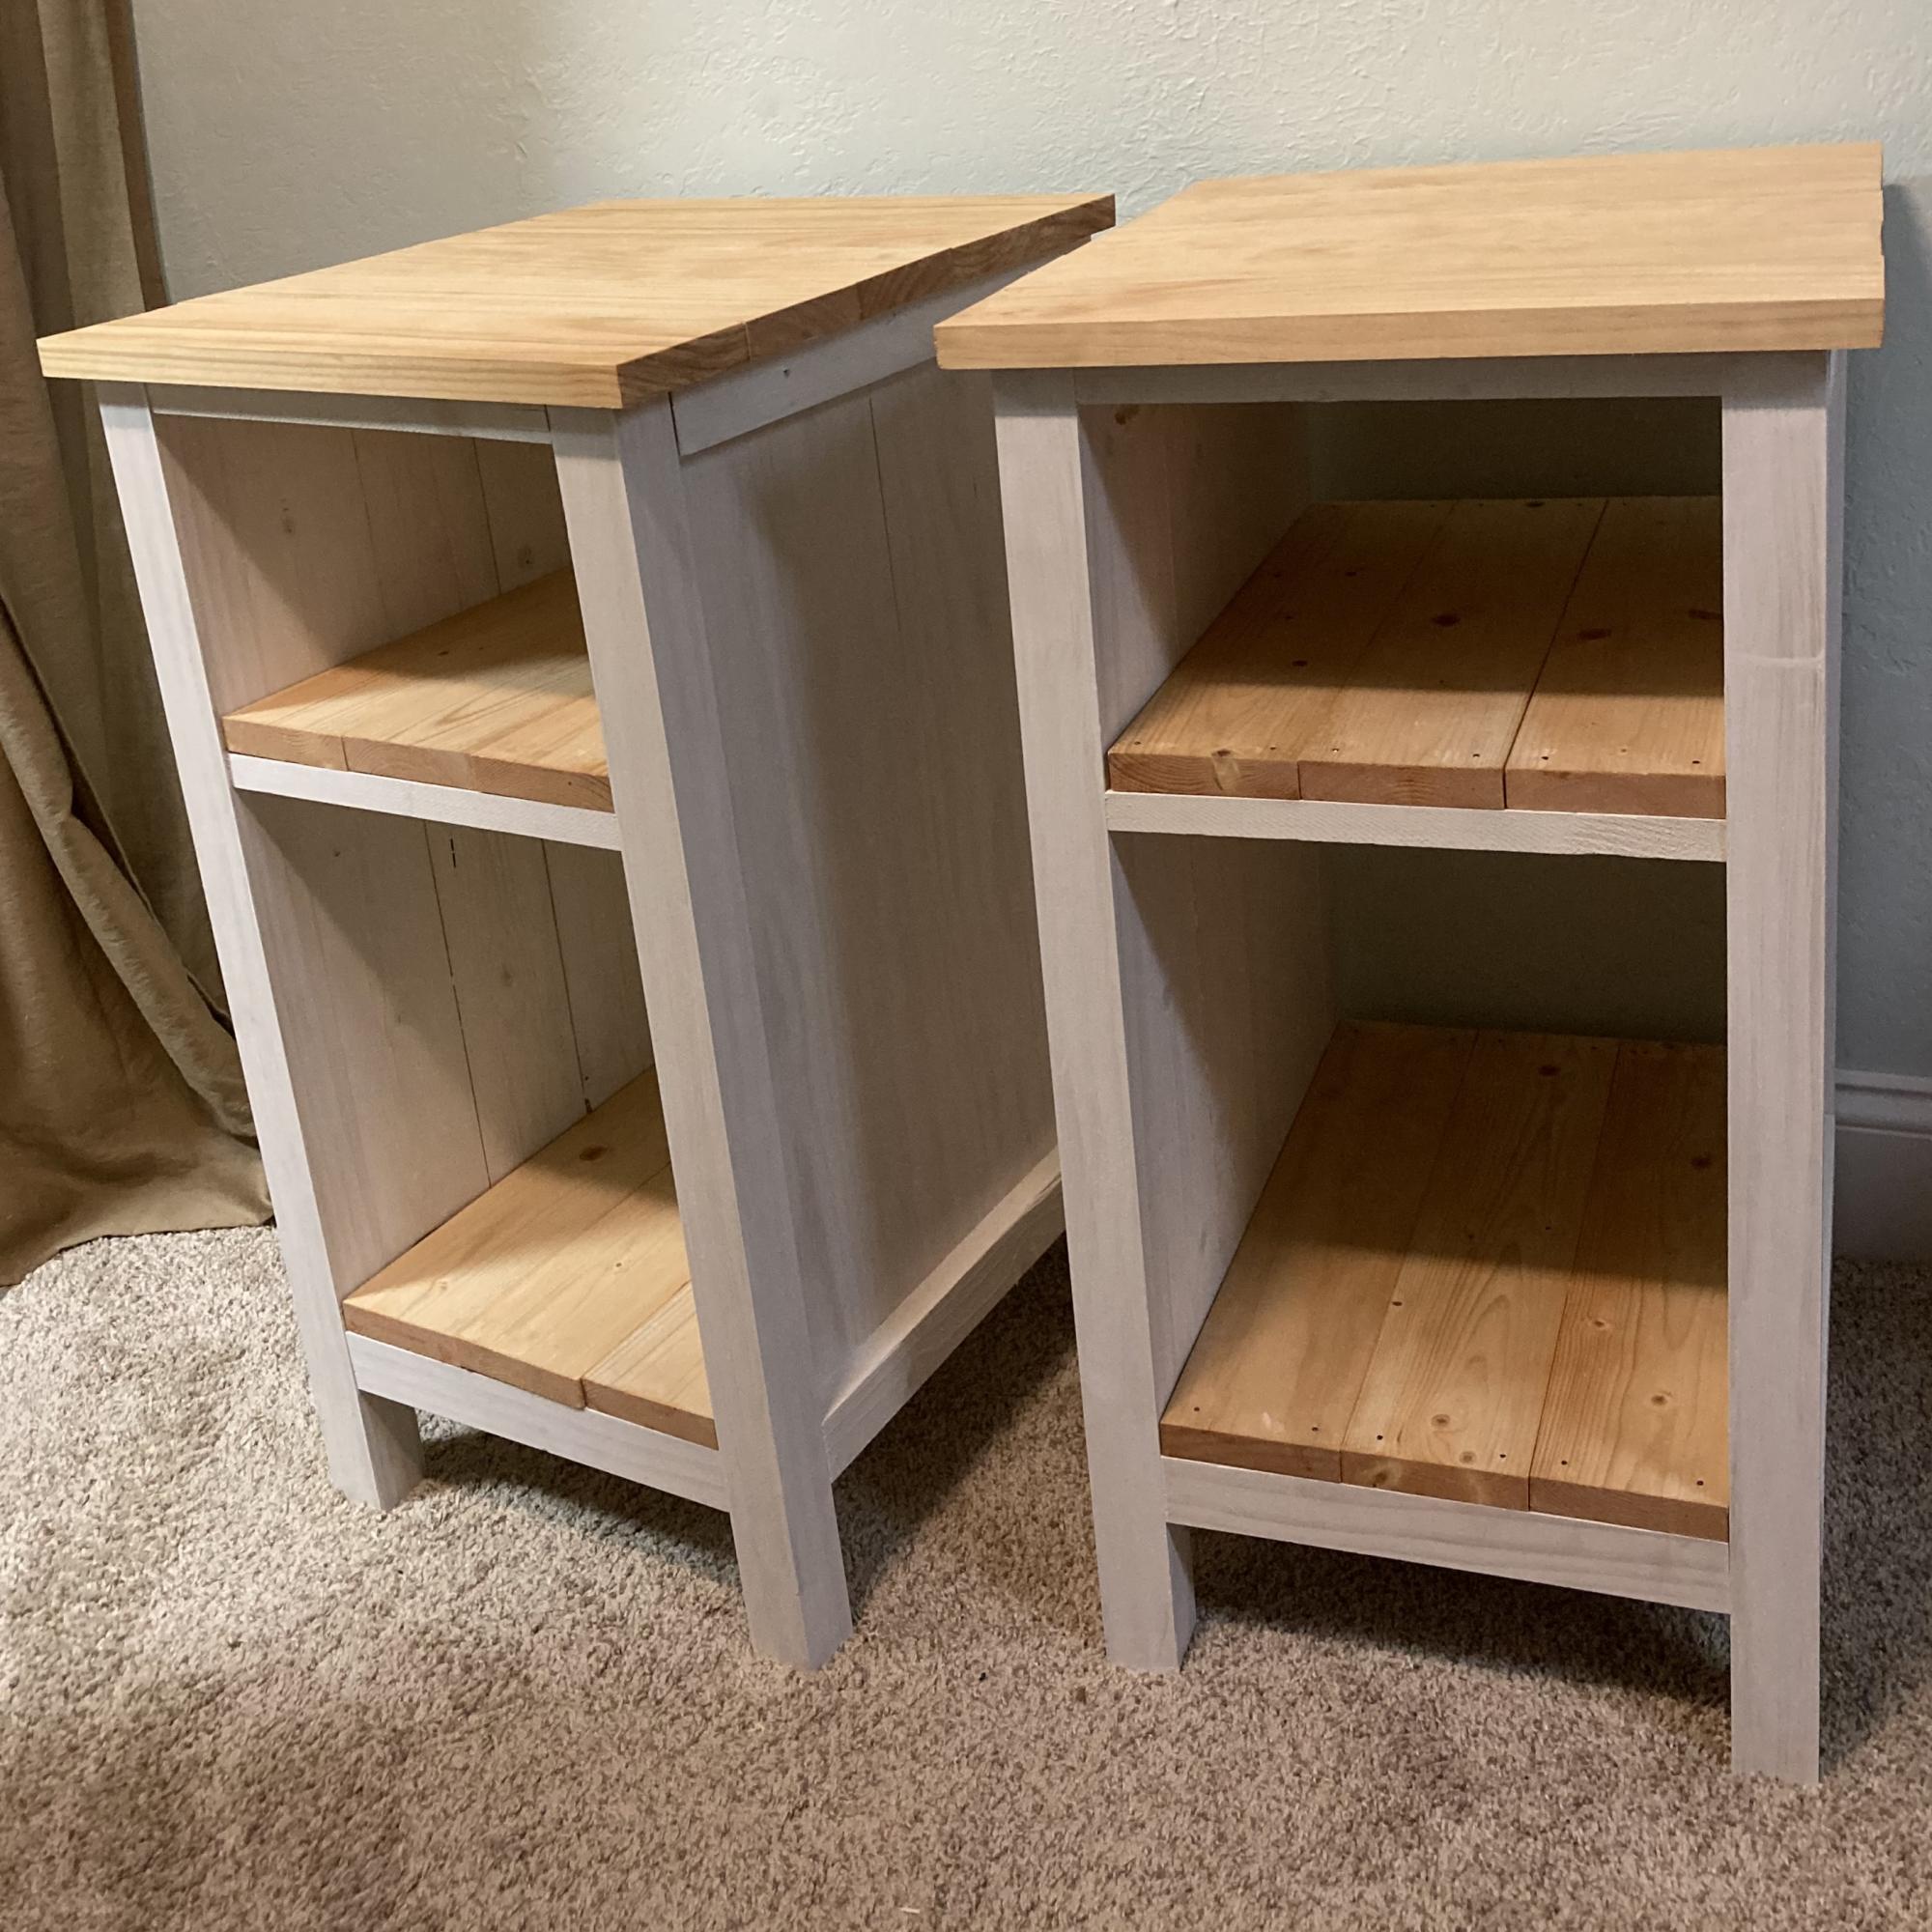
I made these, then had to re-make them once I realized they were just too wide for our narrow bedroom. Each shelf is now three slats wide, not four. Modifications were easy: cut cross supports to 10 1/2” (not 14) and tabletop planks to 15”.
Thanks for the plans! Simple enough and stylish. -Katie
Sun, 09/11/2022 - 12:50
Thank you for sharing, so happy you could modify them for your space!
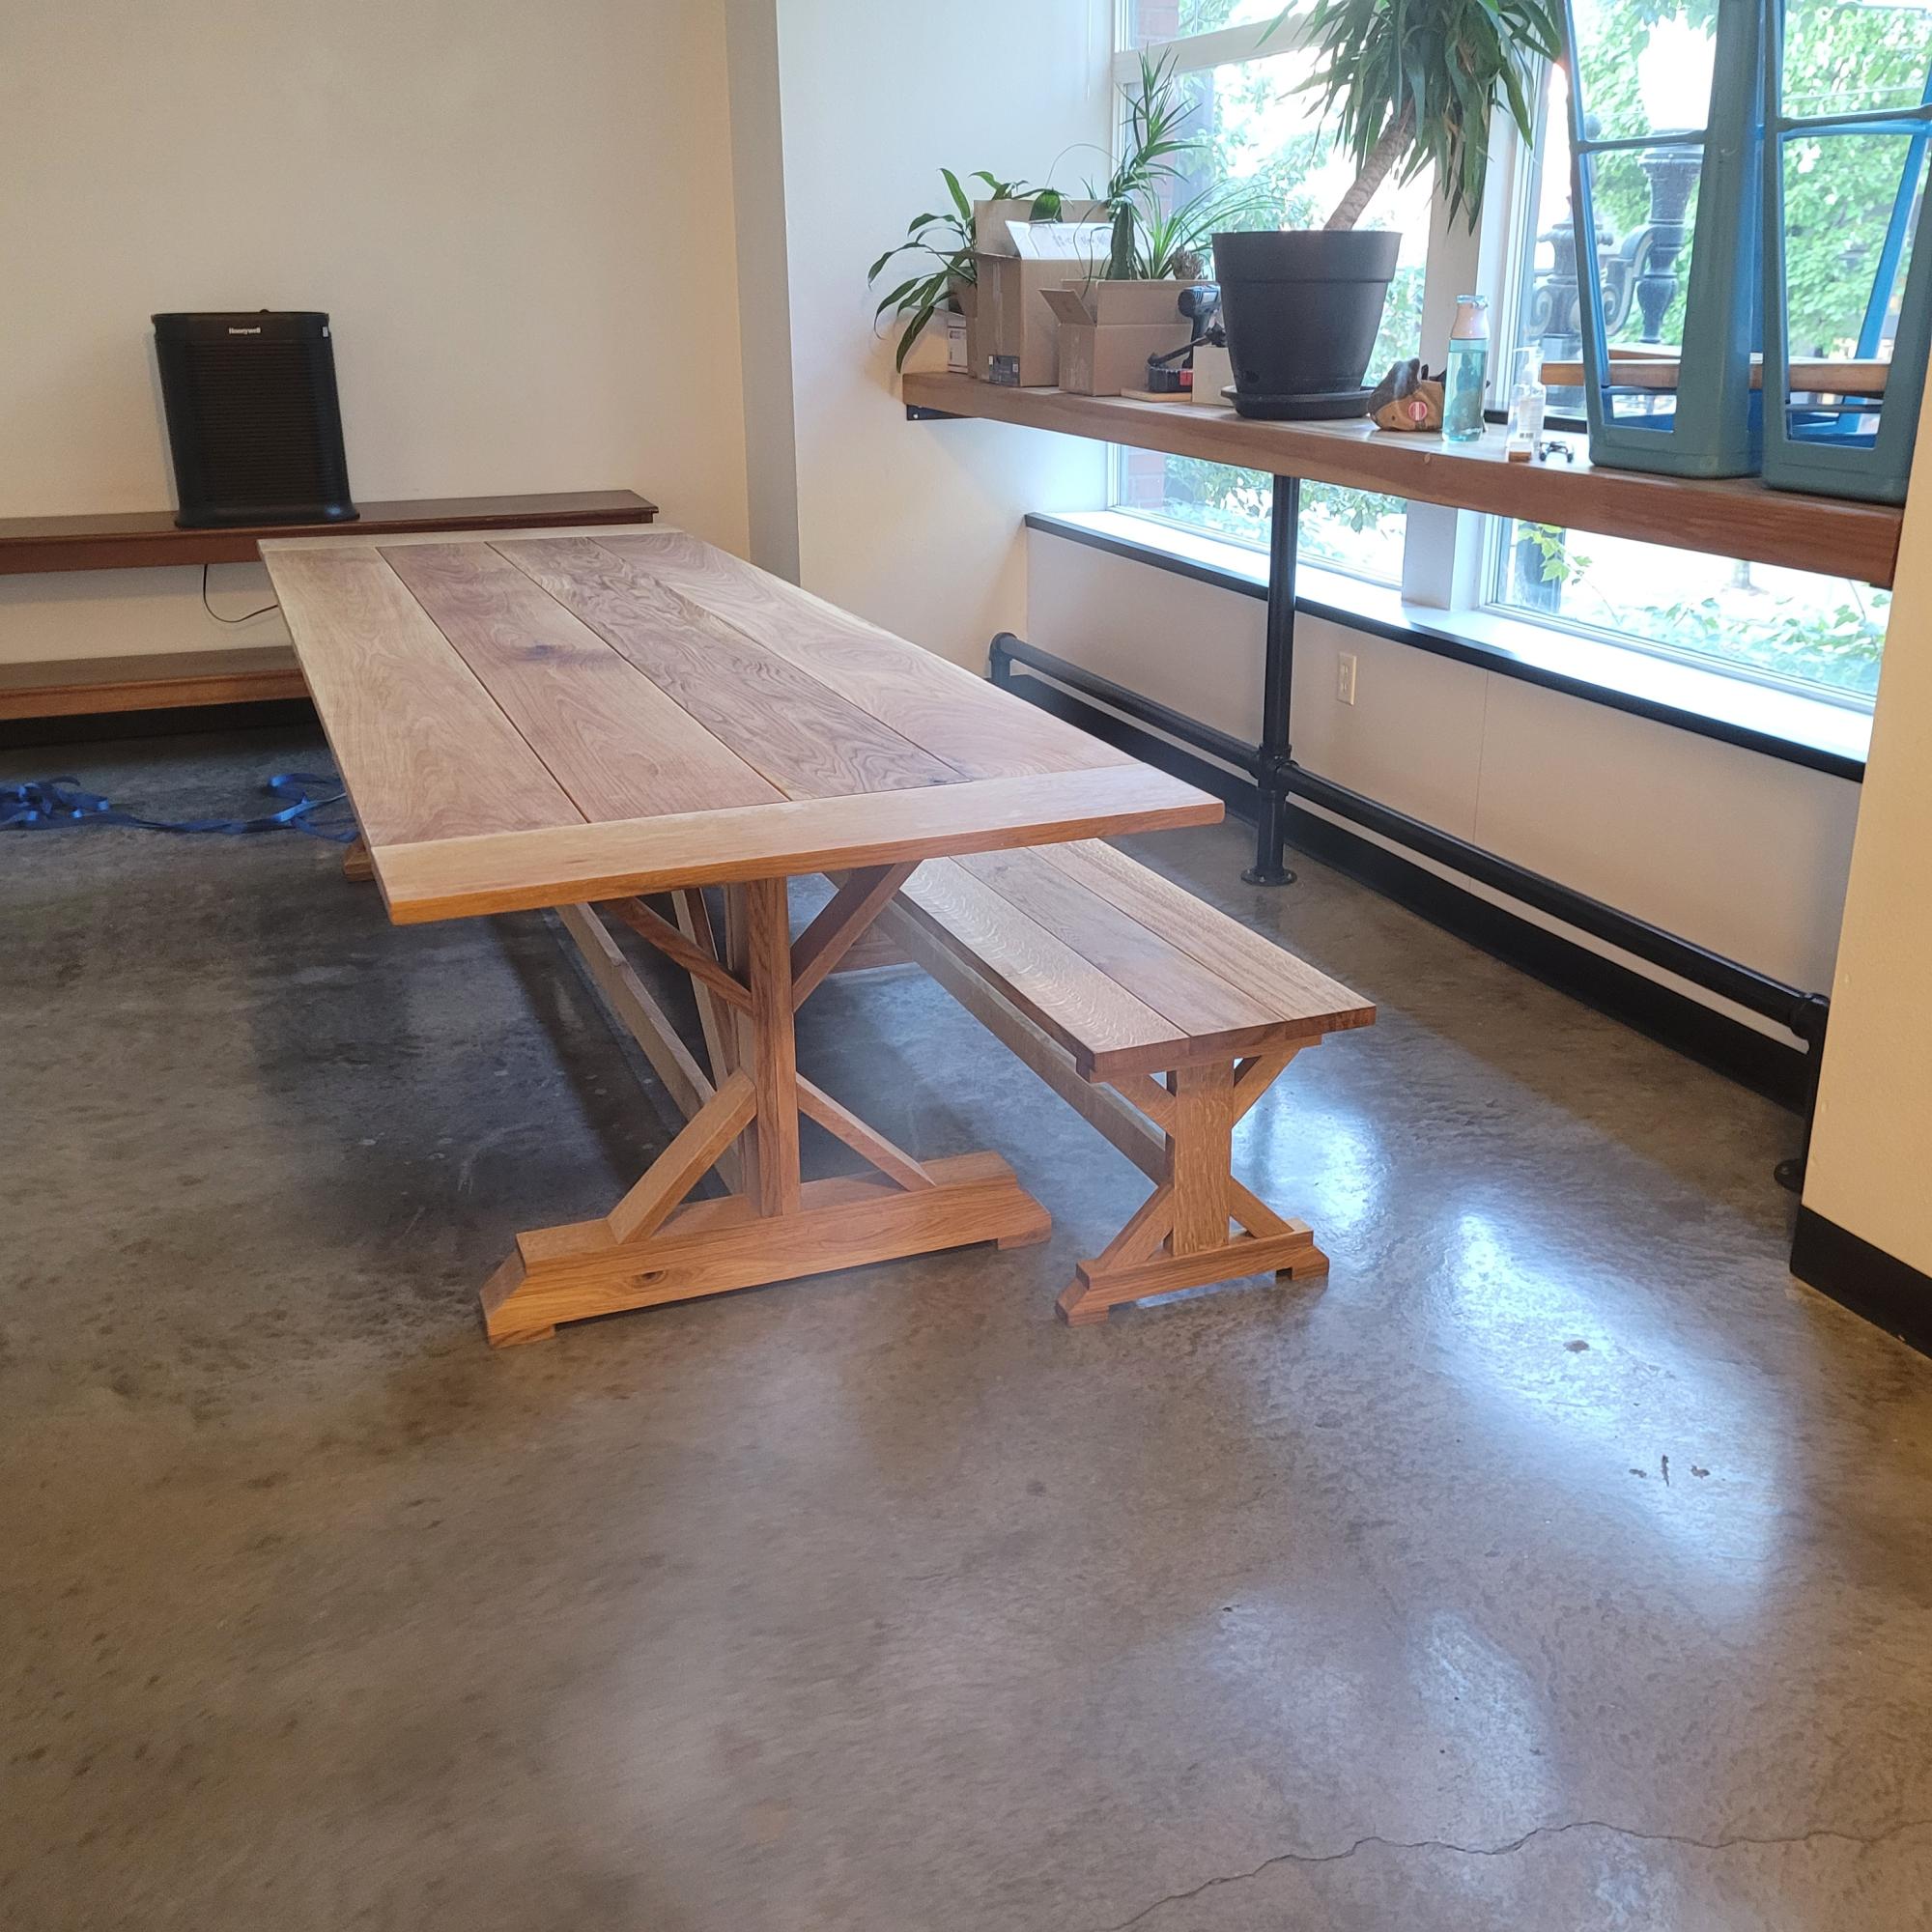
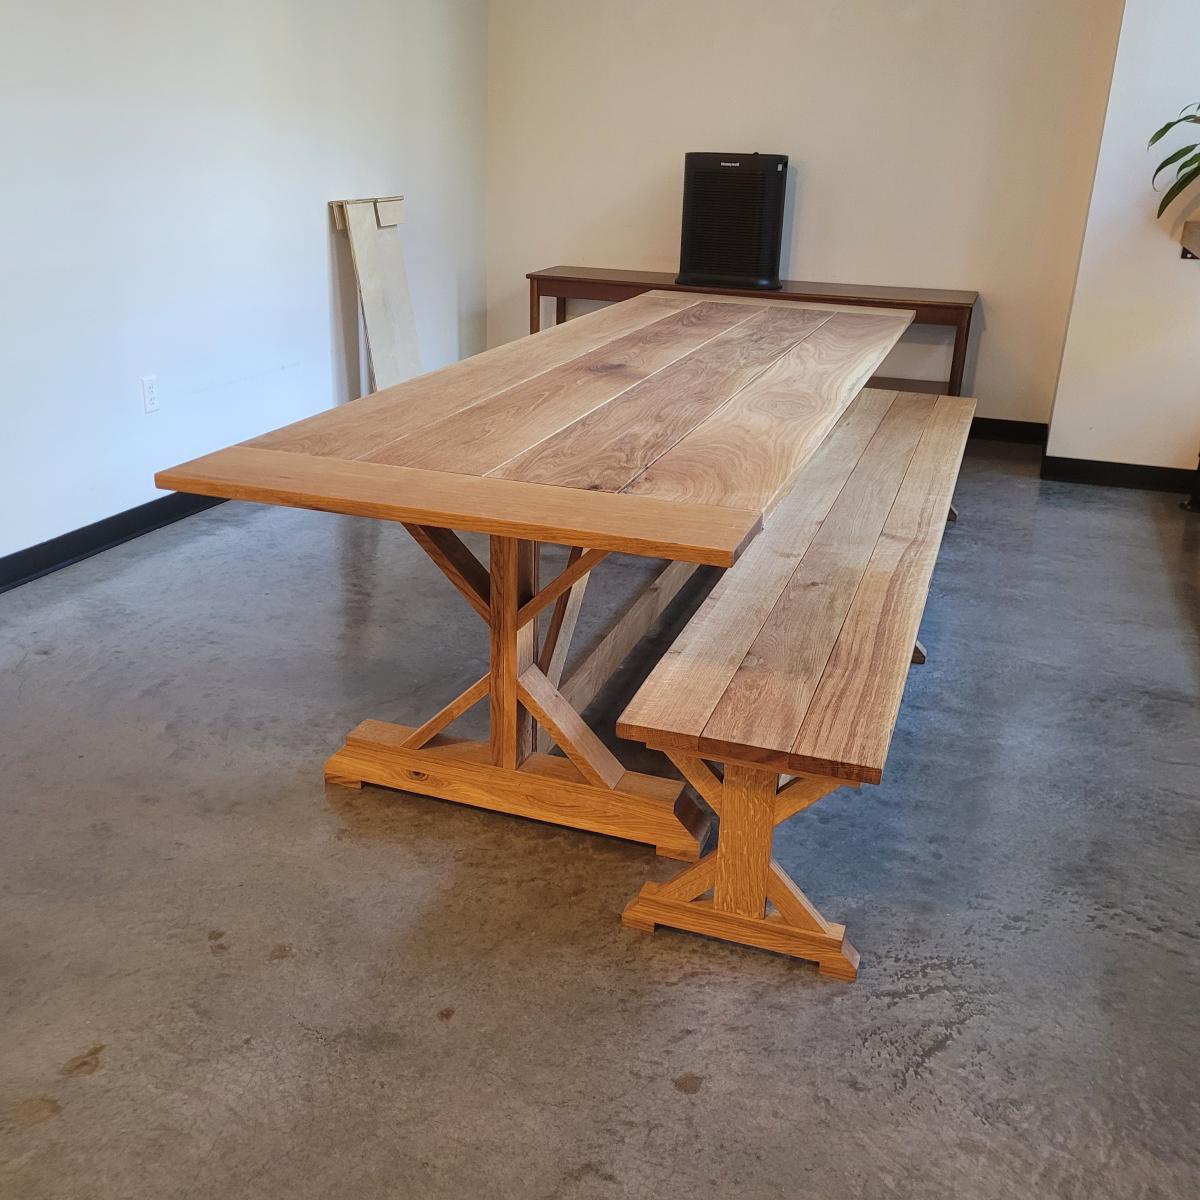
My employer asked for an "upscale farmhouse table" to act as a feature in our new training facility. After perusing designs online, I found this one and decided to upgrade it just a bit for the stated purpose.
Made entirely of white oak (over $1600 worth!) purchased as 4/4 and 5/4 stock, I milled all the lumber to spec in our shop. As it was to be 10' in length, and I was unable to acquire acceptable wide stock for the tabletop in that length, I went with breadboard ends, which also seems to have served to upgrade the appearance over "picnic table" to elegant showpiece. All joinery is invisible, using mostly dowels and glue where joints had to be hidden.
Final treatment was with tung oil, and it took up residence in its permanent home last week. I had to assemble it on-site, as there is NO way to move a table of this size in and out of the building. It's there to stay.
As my lumber wasn't exactly spec-size (1X4, 2X10, etc), I had to do the math and make some adjustments to achieve spec height, but the final product is a rousing success.
Thank you for the inspiration.
Mon, 09/26/2022 - 17:59
This is gorgeous and very well built! Thank you so much for sharing.
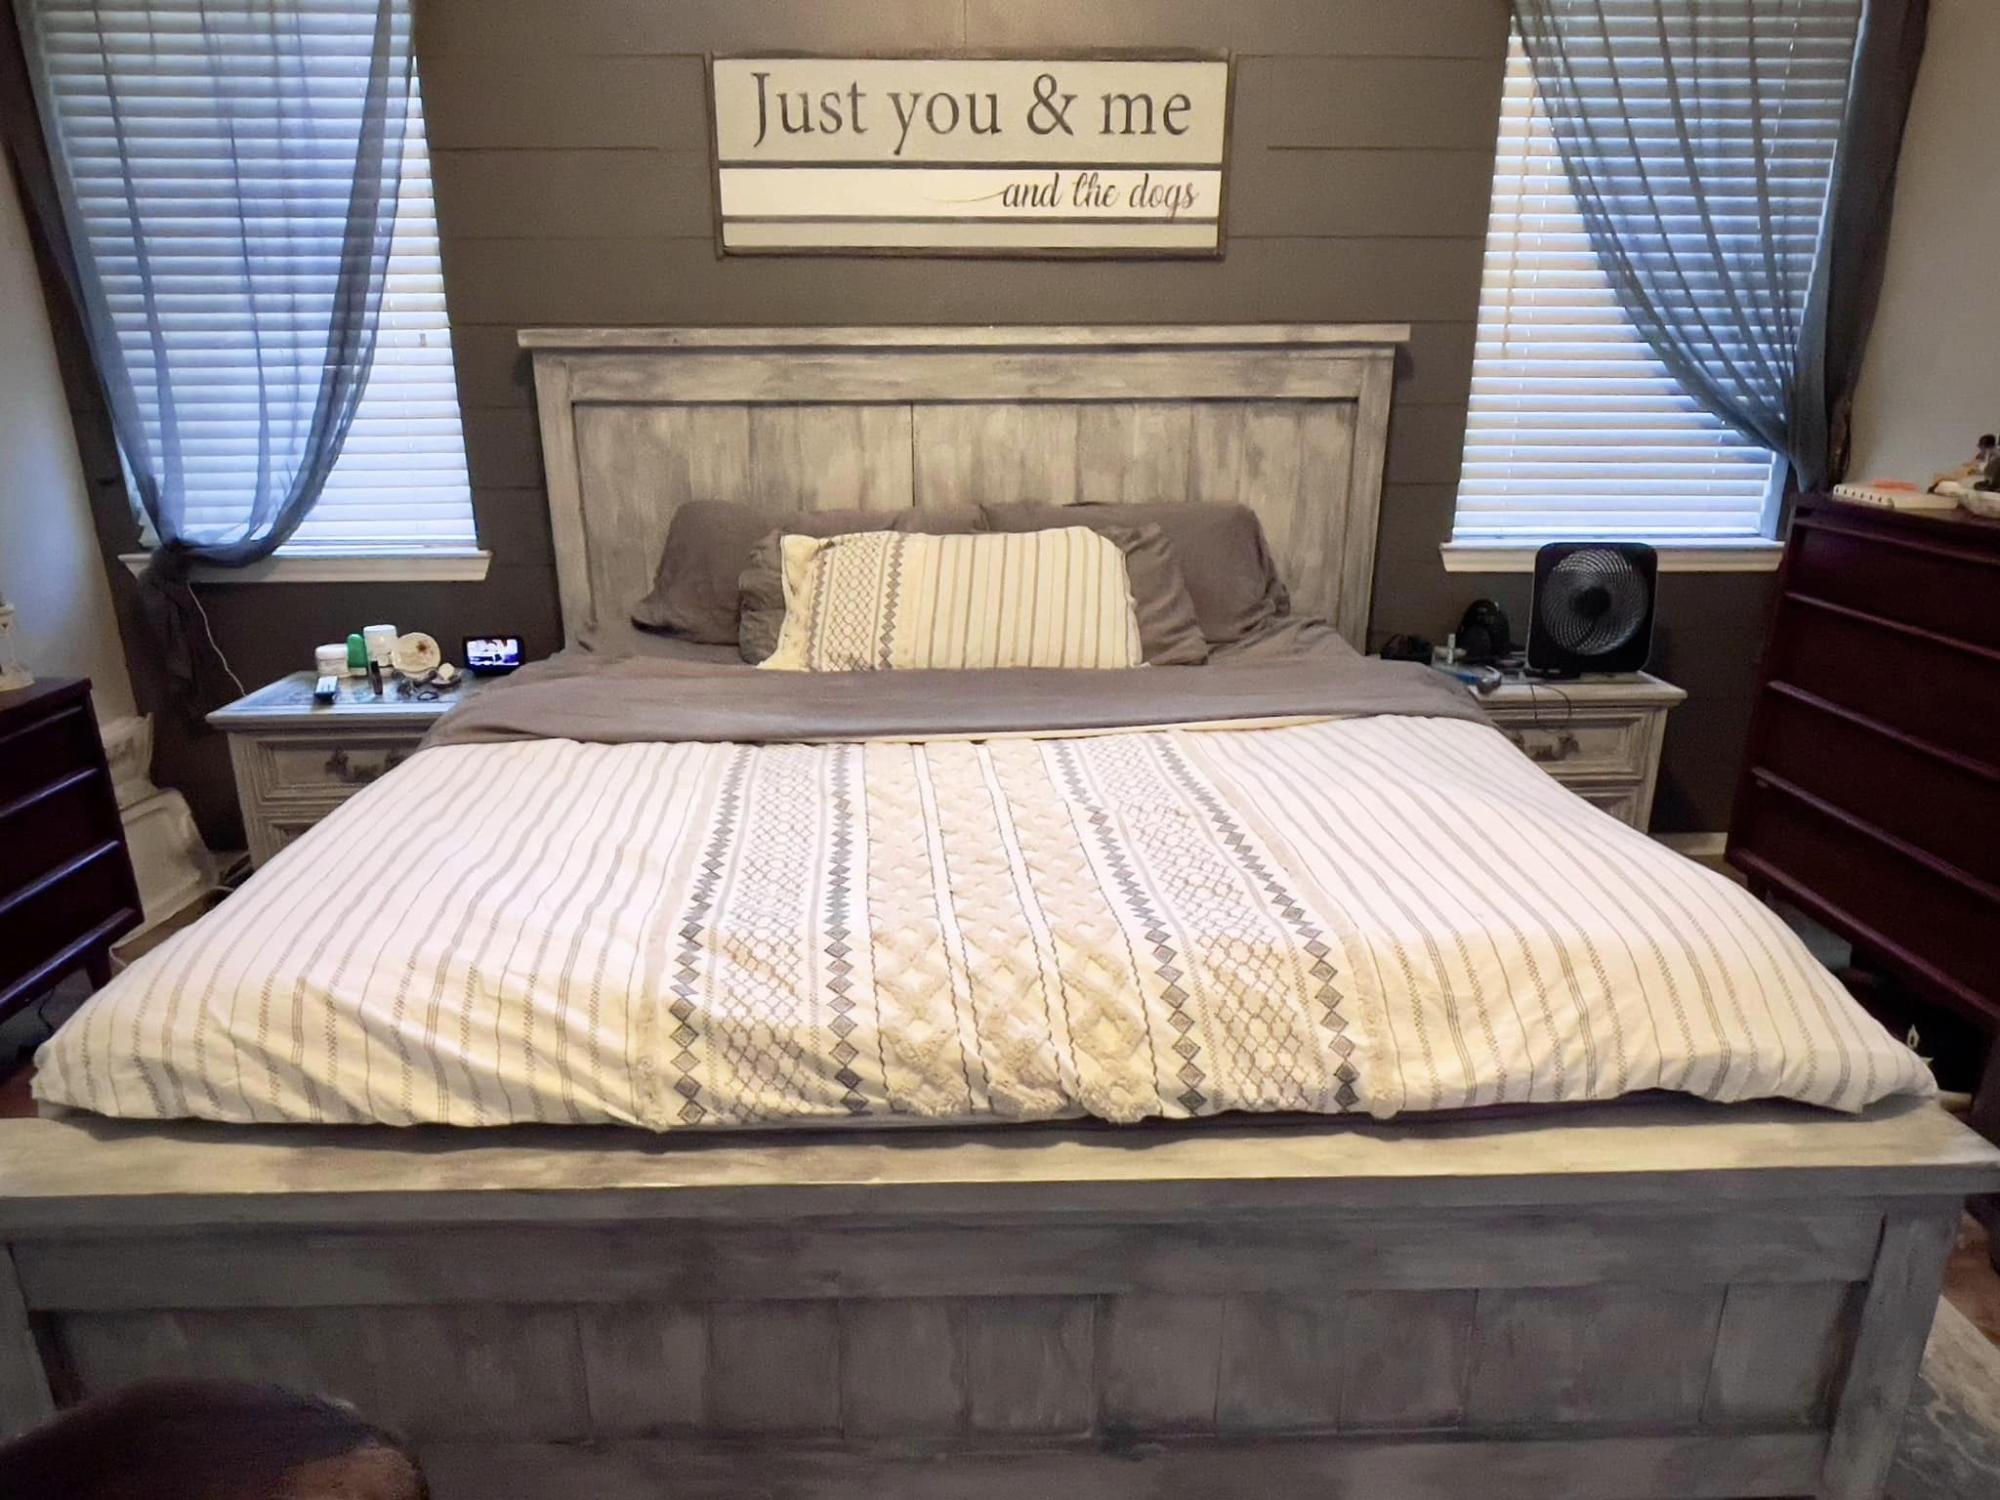
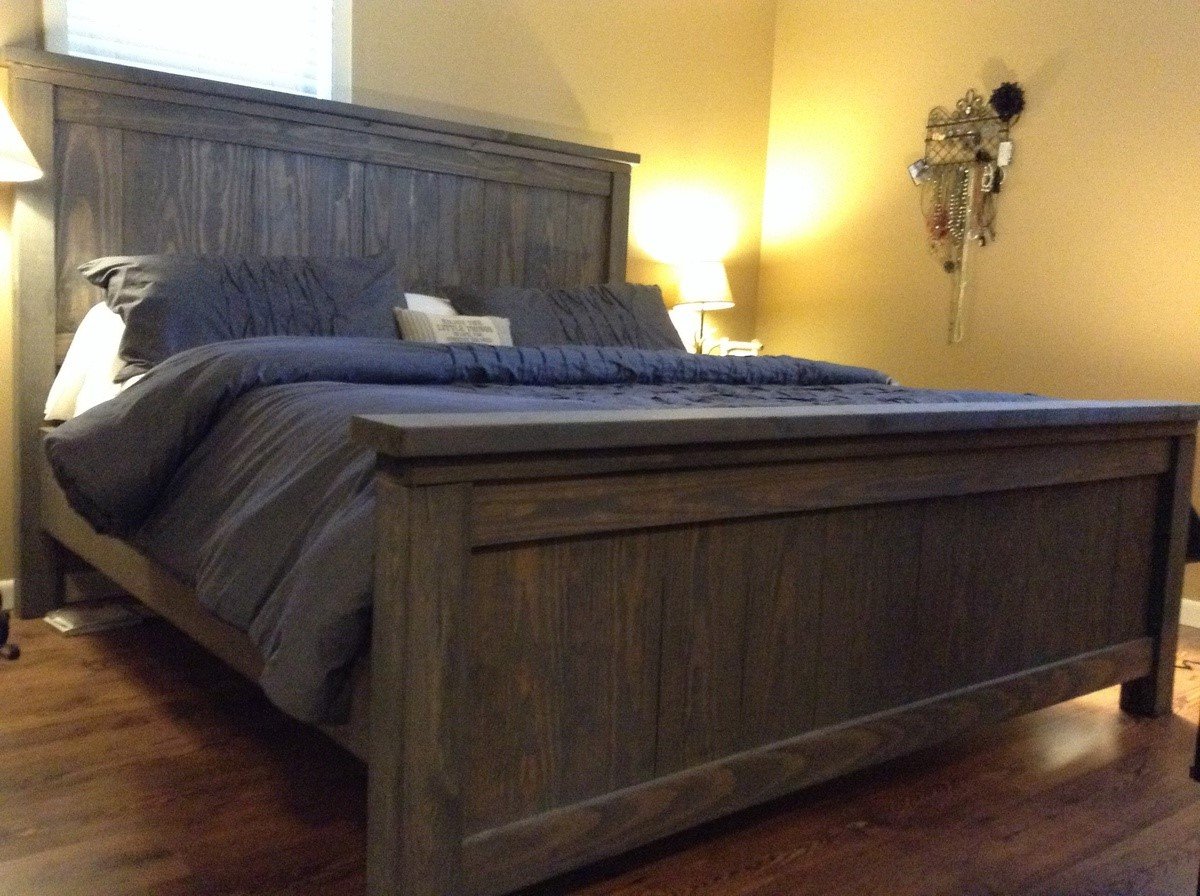
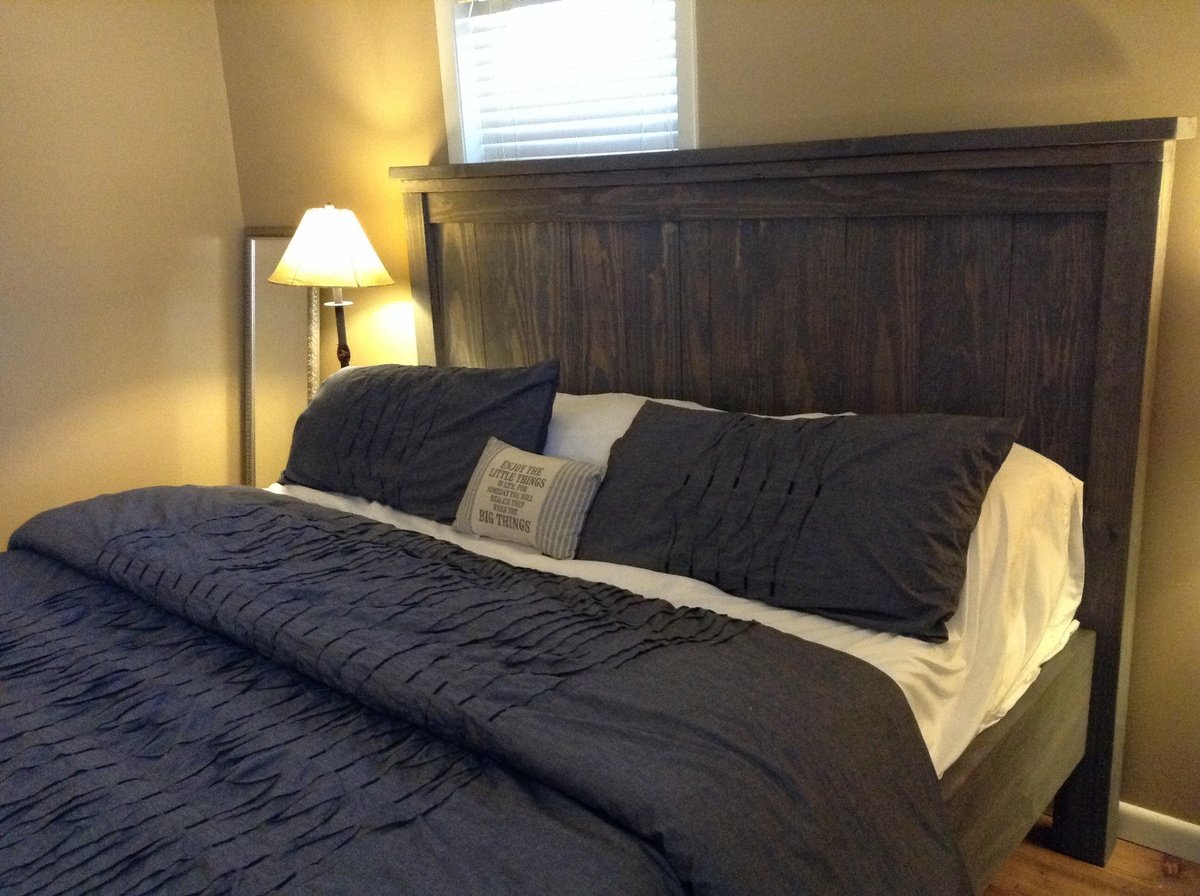
This is a King size farmhouse bed that I made based off of Ana's plans. I love it! I painted it a light gray and then glazed over it with a darker gray. Thanks for looking! - Wendy
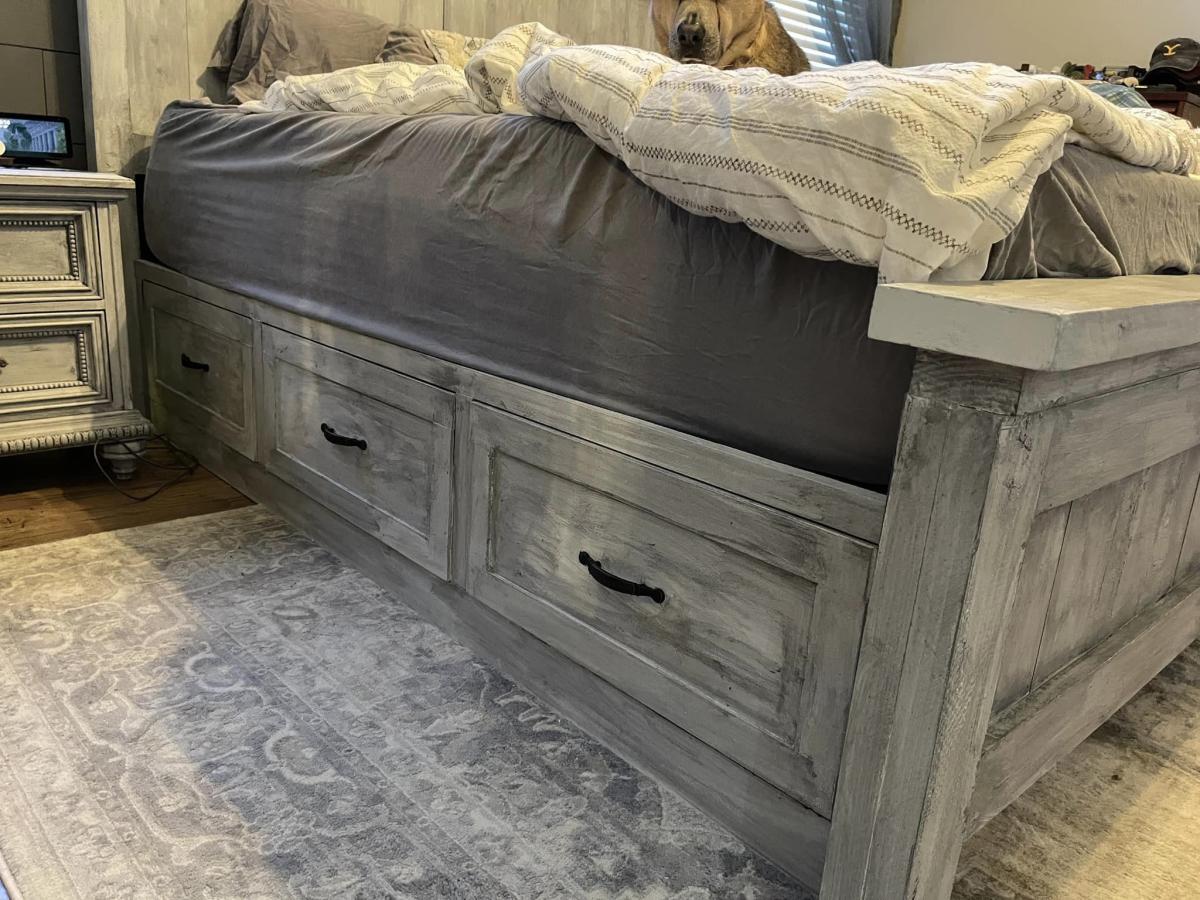
Tue, 10/04/2022 - 08:13
WOW, this is amazing, job well done! Thank you so much for sharing!
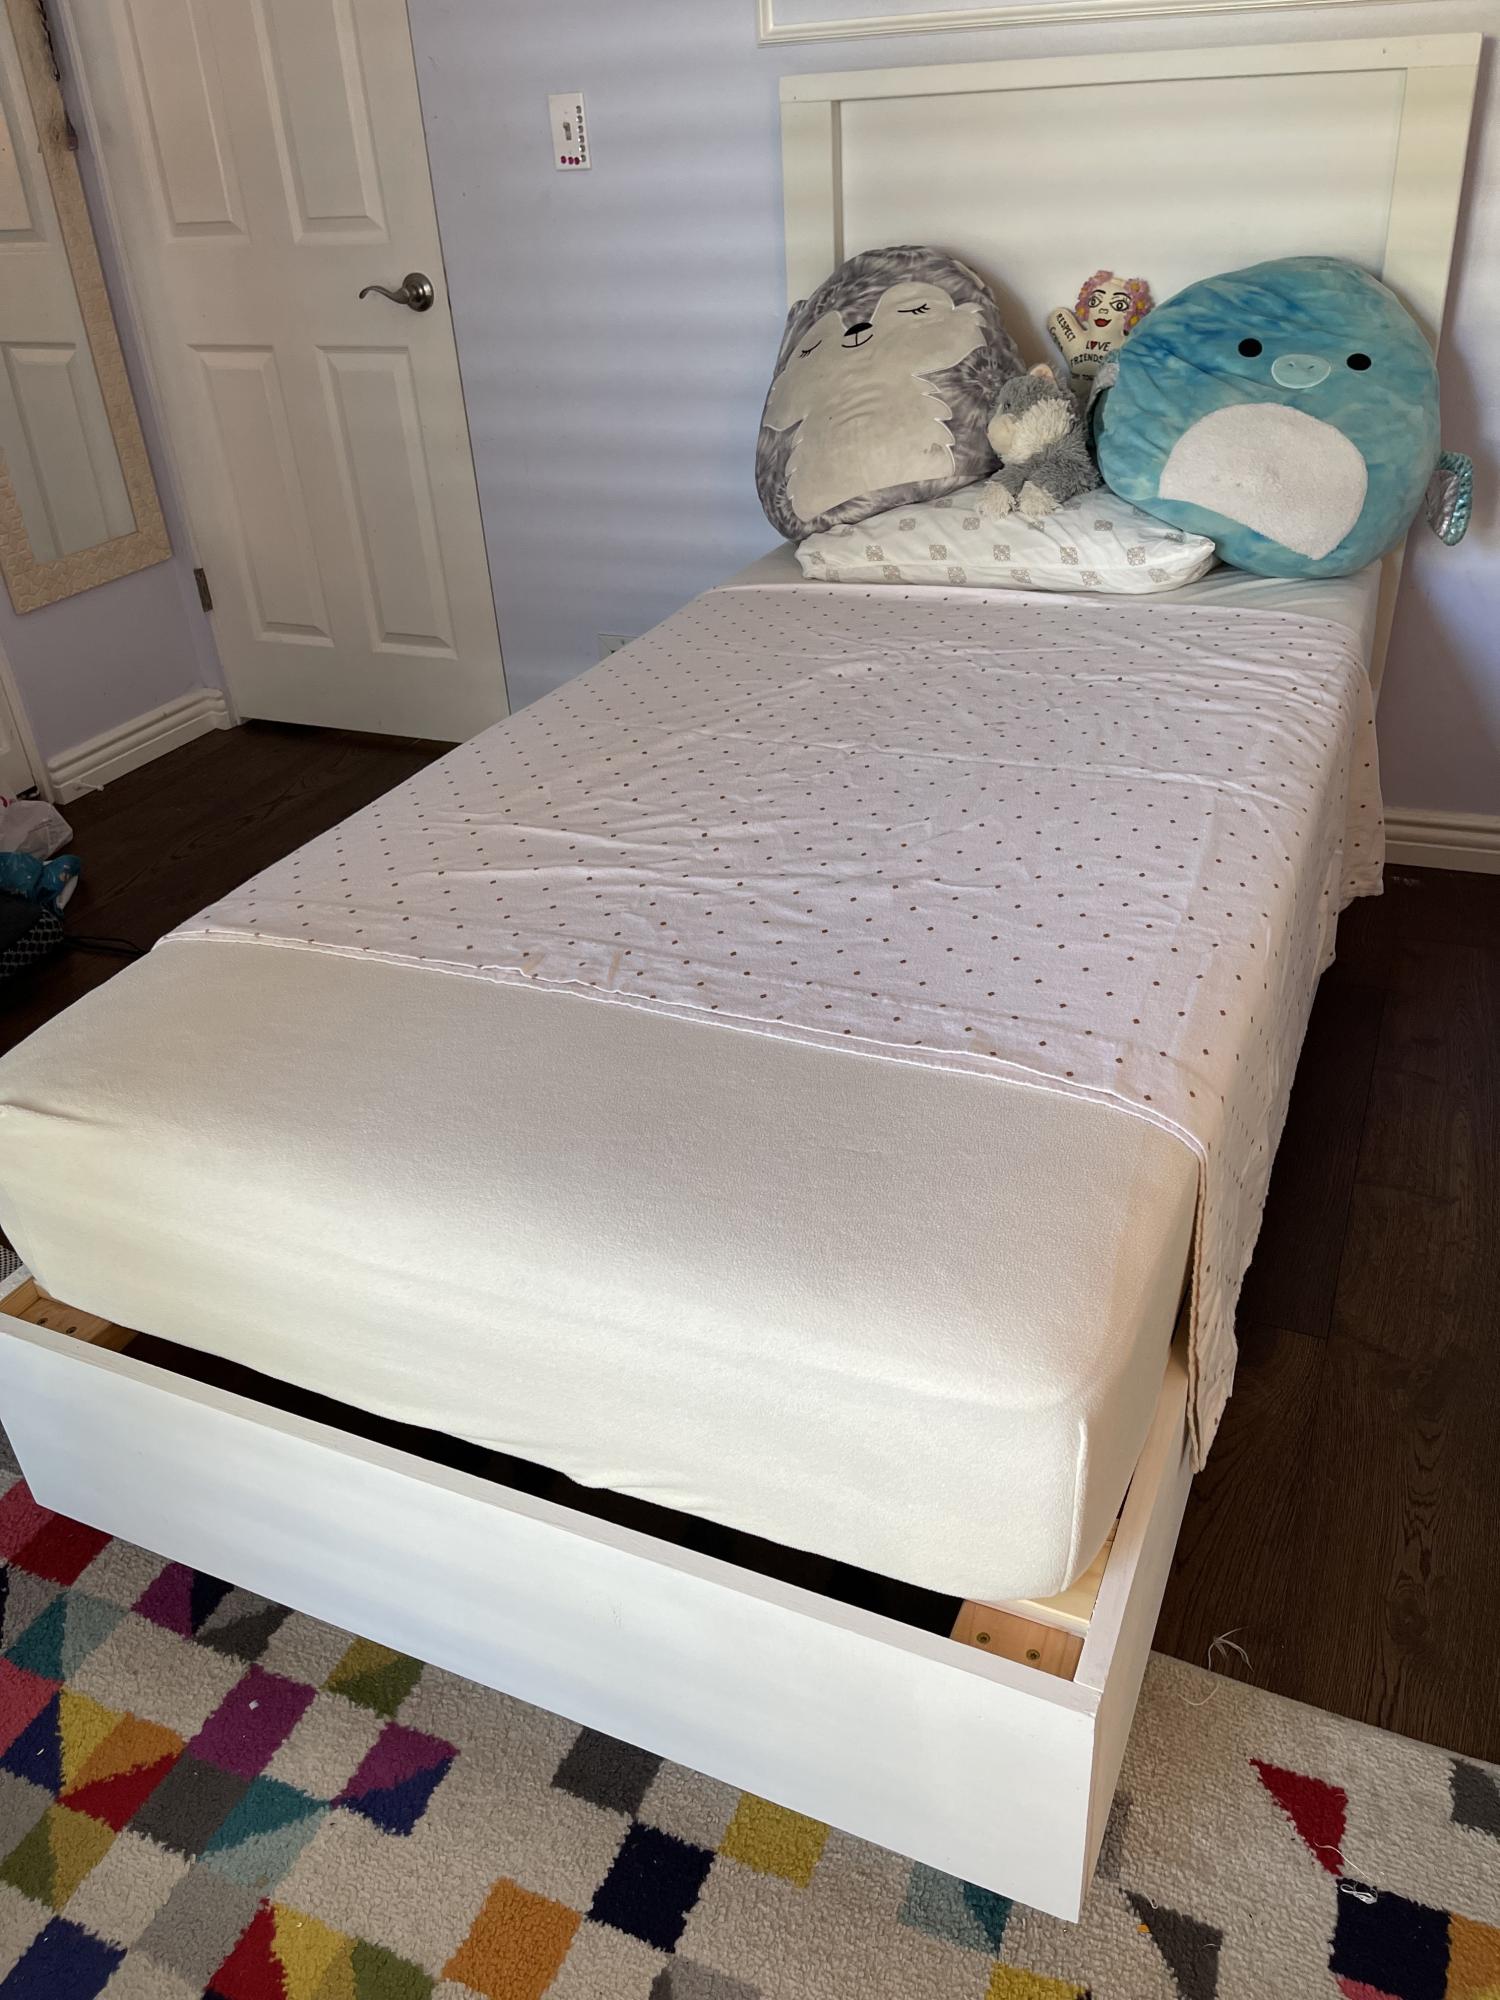
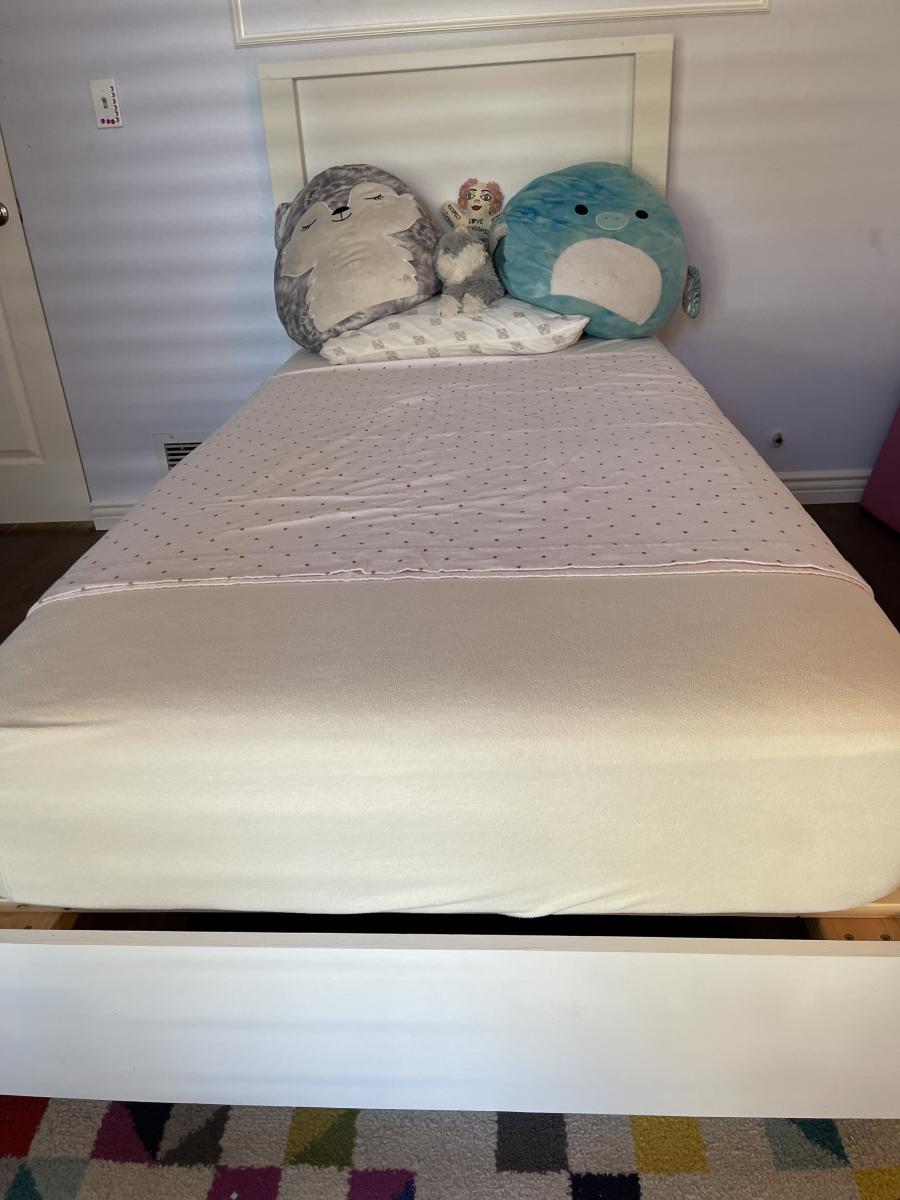
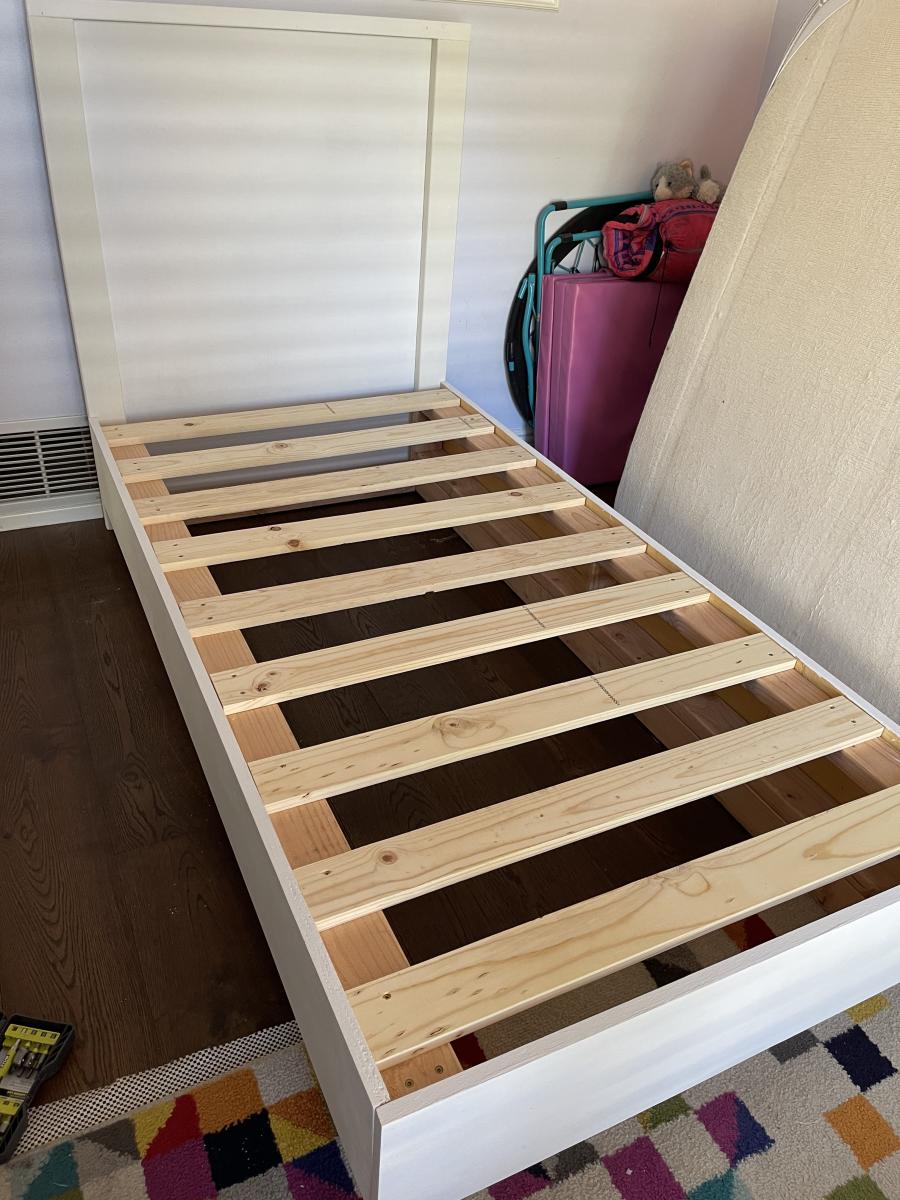
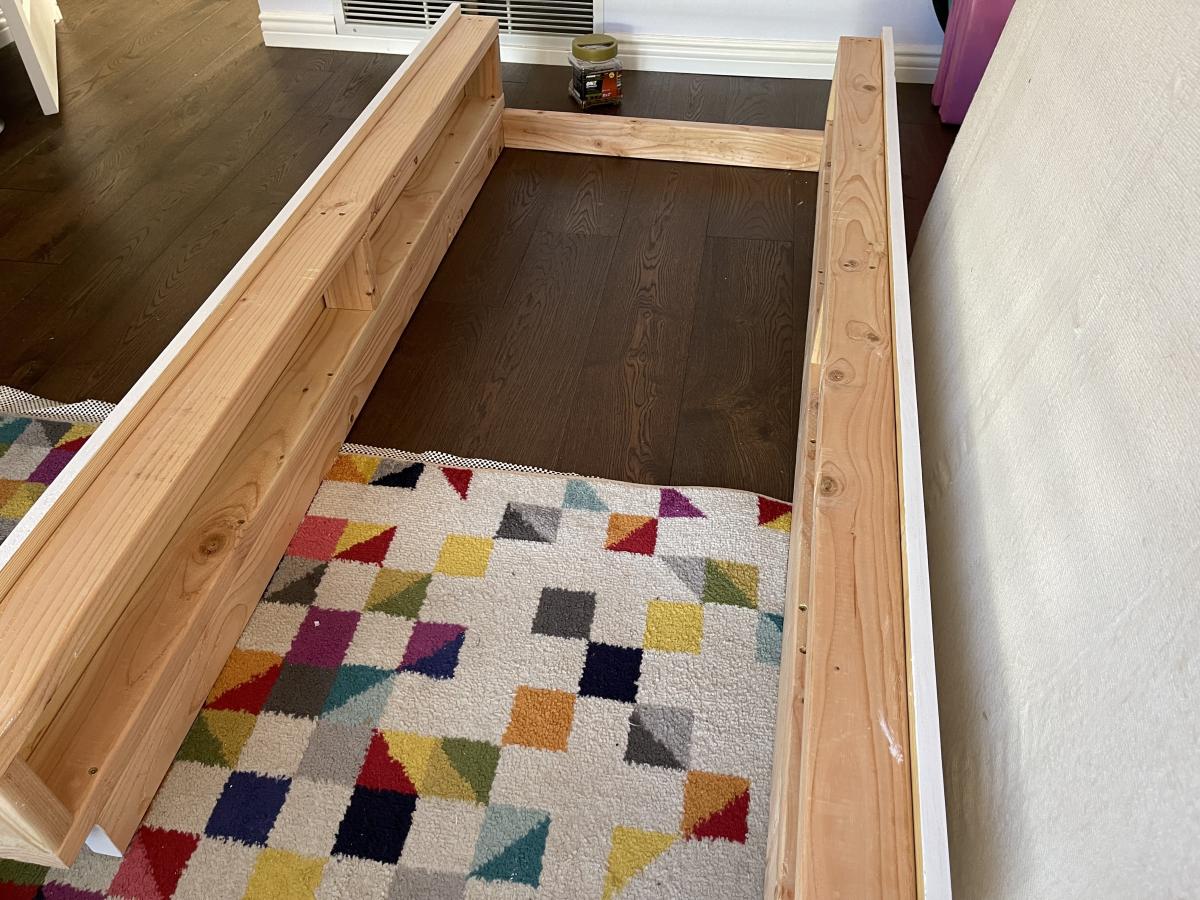
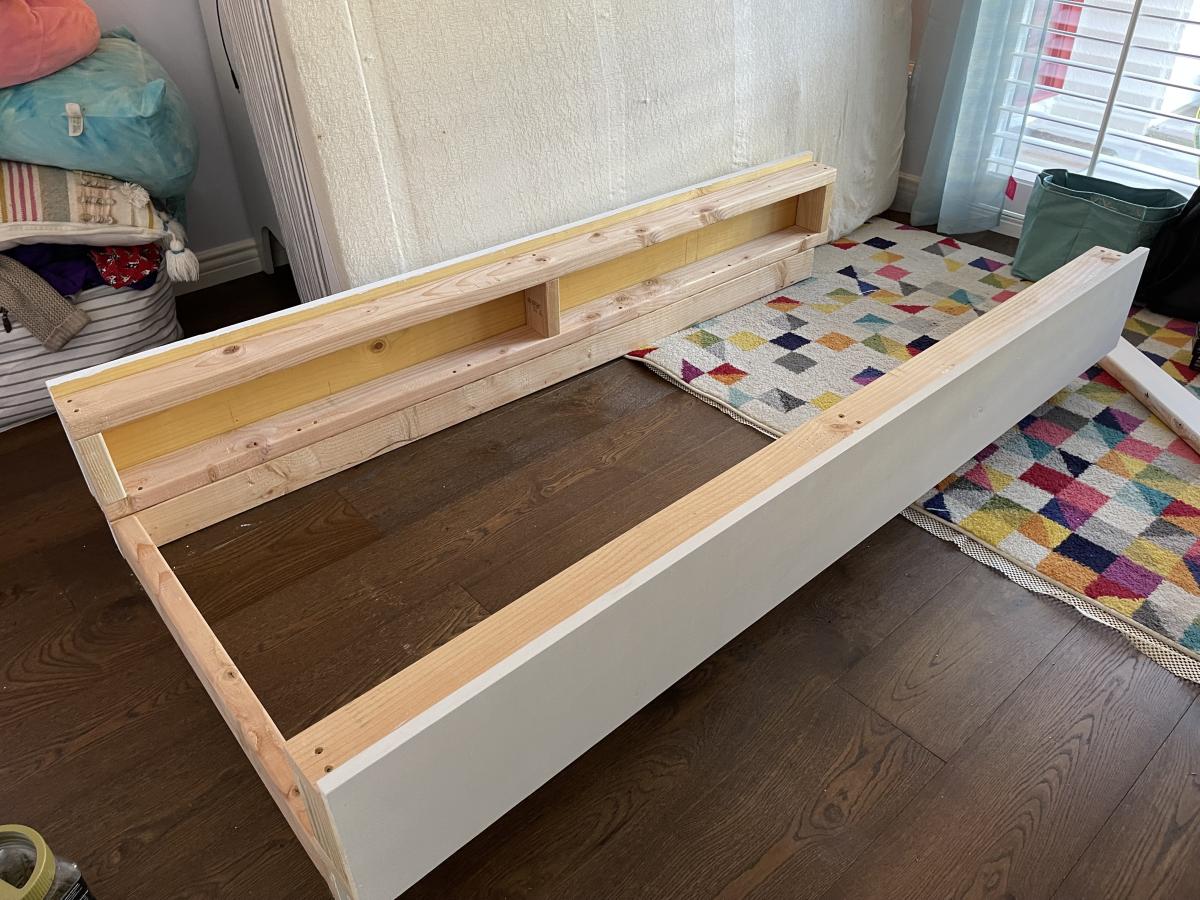
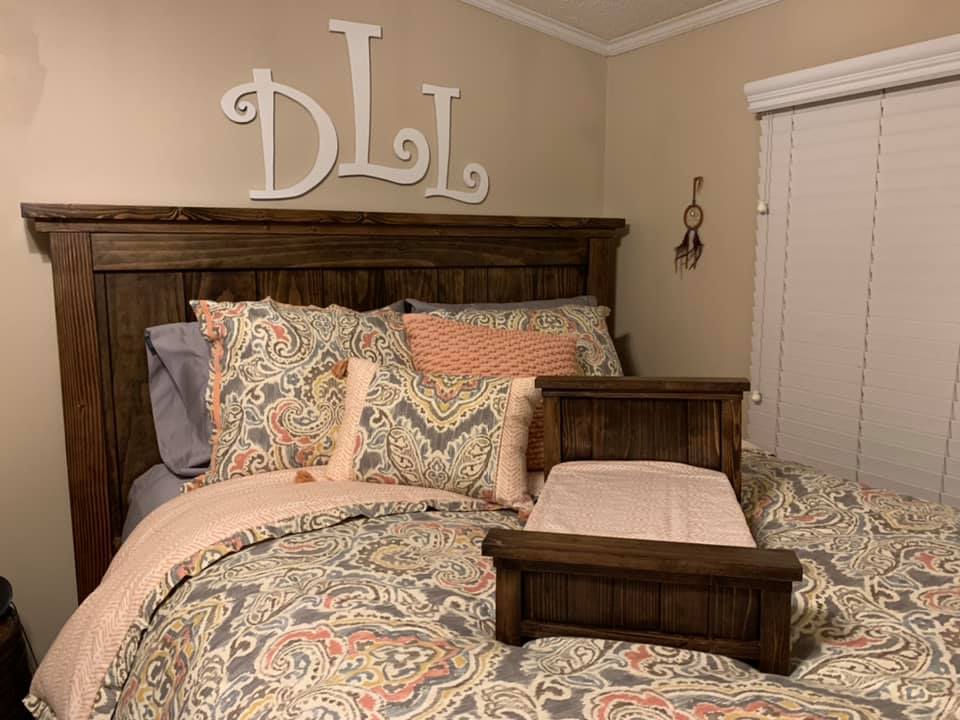
I built a floating bed using Ana's plans. In my case, I built a twin size bed which now my daughter enjoys every night. The bed turned out beautiful and very sturdy.
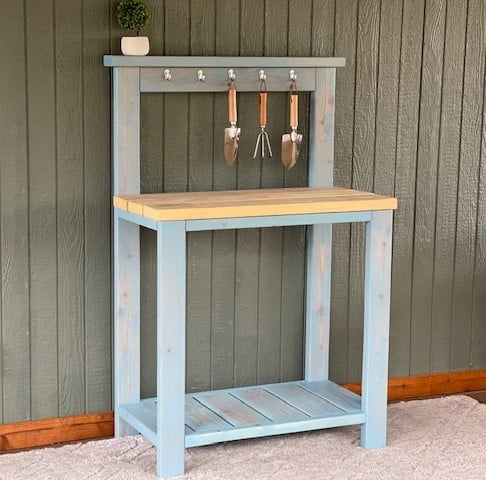
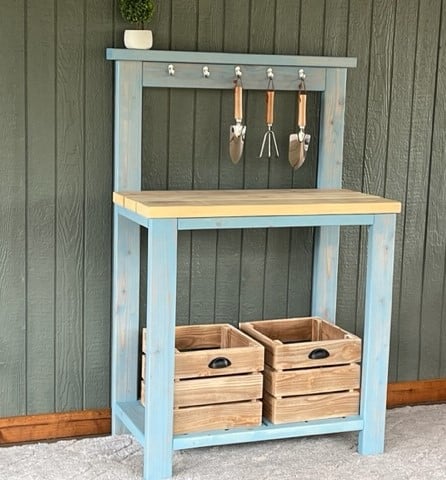
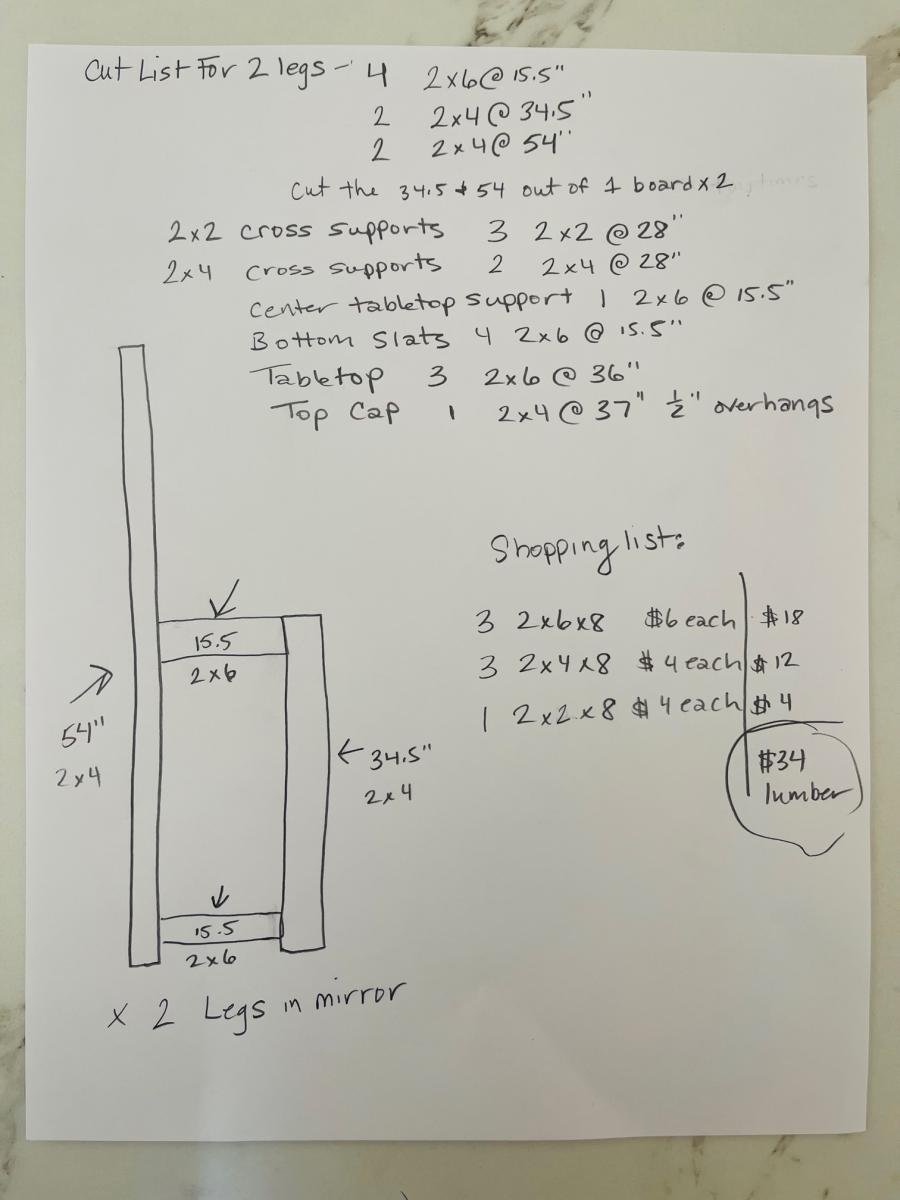
I used Ana's Farmhouse Potting Bench plans and modified it to be more compact and left out the x detail. I built it for under $40 in material.
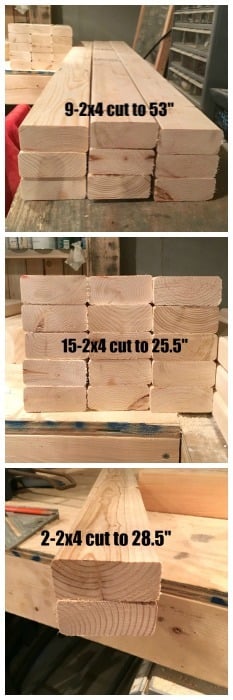
Modifications for Shopping and Cut List - Construction and placement is same as Ana's original plan, so make sure you look that over.
3 - 2x6x8
3 - 2x4x8
1 - 2x2x8
FOR 2 Legs
4 2x6 @15.5"
2 2x4 @34.5"
2 2x4 @54"
(cut the 34.5 and 54 out of 1 board and repeat)
2x2 Cross Supports
3 2x2@28"
2x4 Cross Supports
2 2x4@28"
Center Tabletop Support
1 [email protected]"
Bottom Slats
4 [email protected]"
Tabletop Boards
3 2x6@36"
Top Cap Board
1 2x4@37" leaving 1/2" overhangs
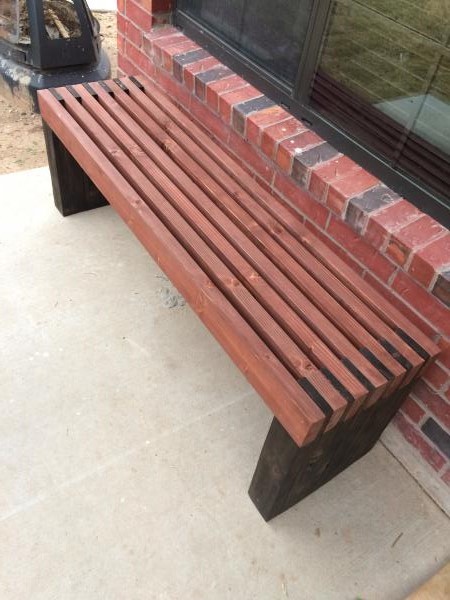
I followed Ana's instructions except for my bench was 56" in length and stained the top red bottom brown.
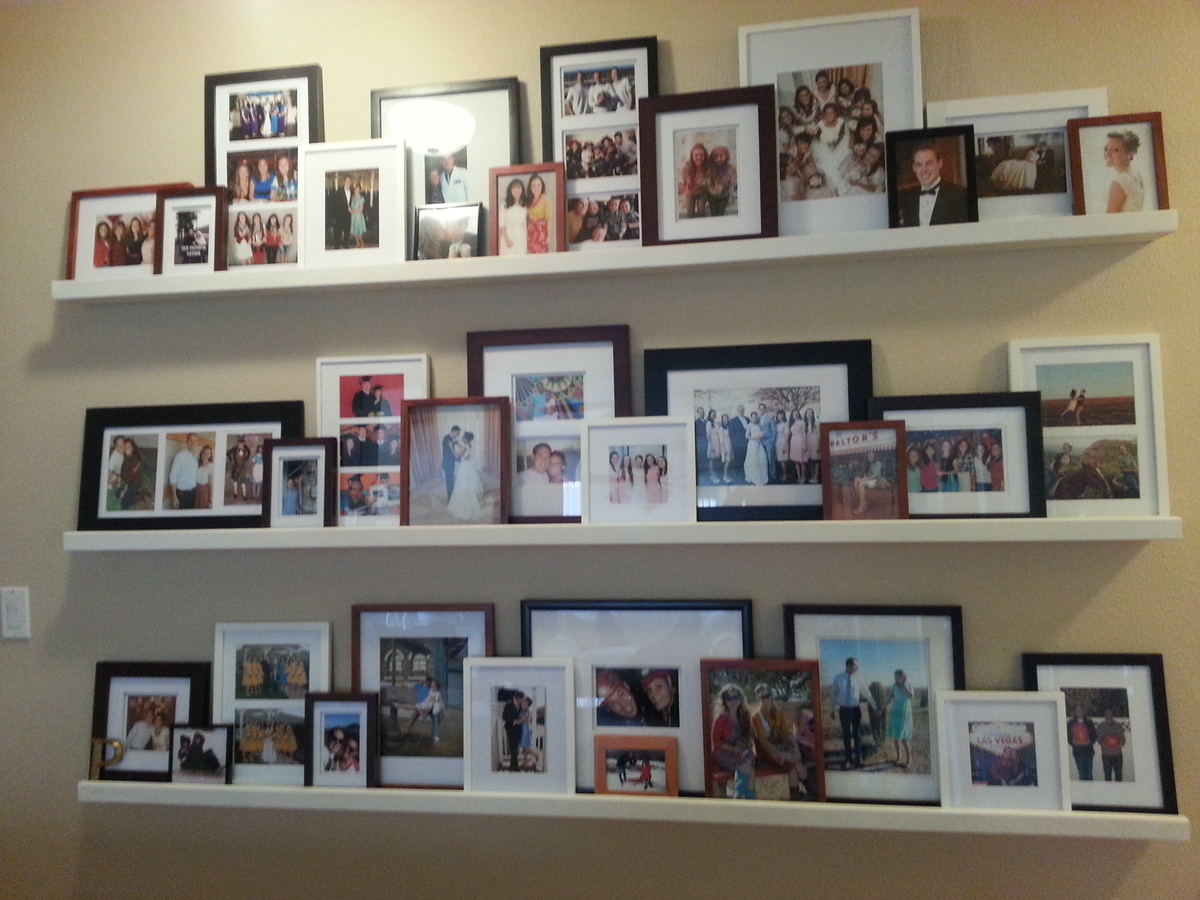
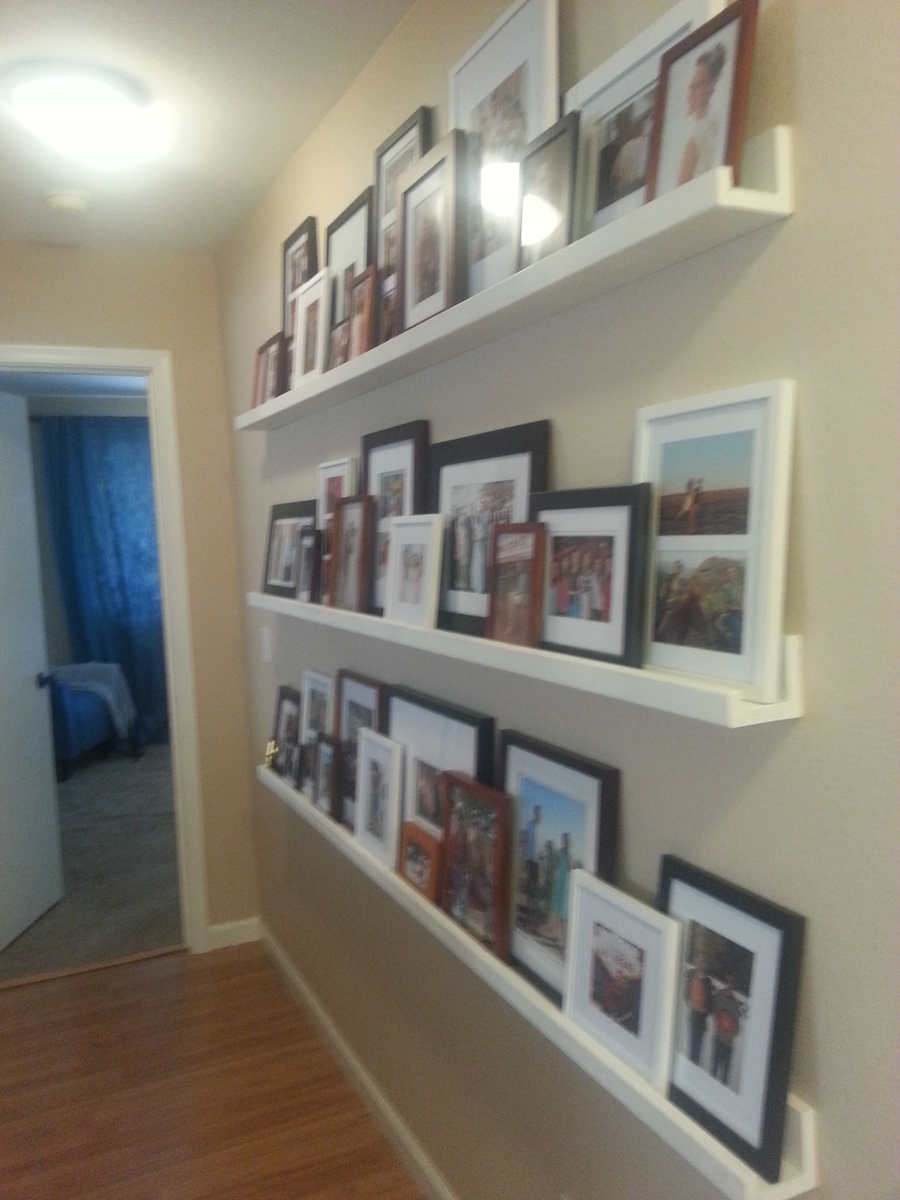
I love my new photo ledges. I had a huge space on my wall and these ledges are perfect. The ledges were so easy to make. I got a kreg jig for my birthday (I never thought I would ask for a tool for a birthday present) and I have gotten so much use out of it. I saw similar ledges at pottery barn for 10 times the cost of this DIY project. I saved so much with these ledges. The kreg jig has already paid for itself. The ledges make it super easy to switch out photos and I love being able to display so many fun photos. Everyone who sees these ledges loves them!! This was my first project. Thanks Ana for the great plans!
Mon, 10/21/2013 - 12:51
I might spray paint all the picture frames white or an oil rubbed bronze in the future...I'm not sure yet. Opinions?

Mon, 10/21/2013 - 18:27
Your gallery looks beautiful! Great job on your first project, congratulations!
(ps- I think the oil rubbed bronze would look super on the picture frames.)
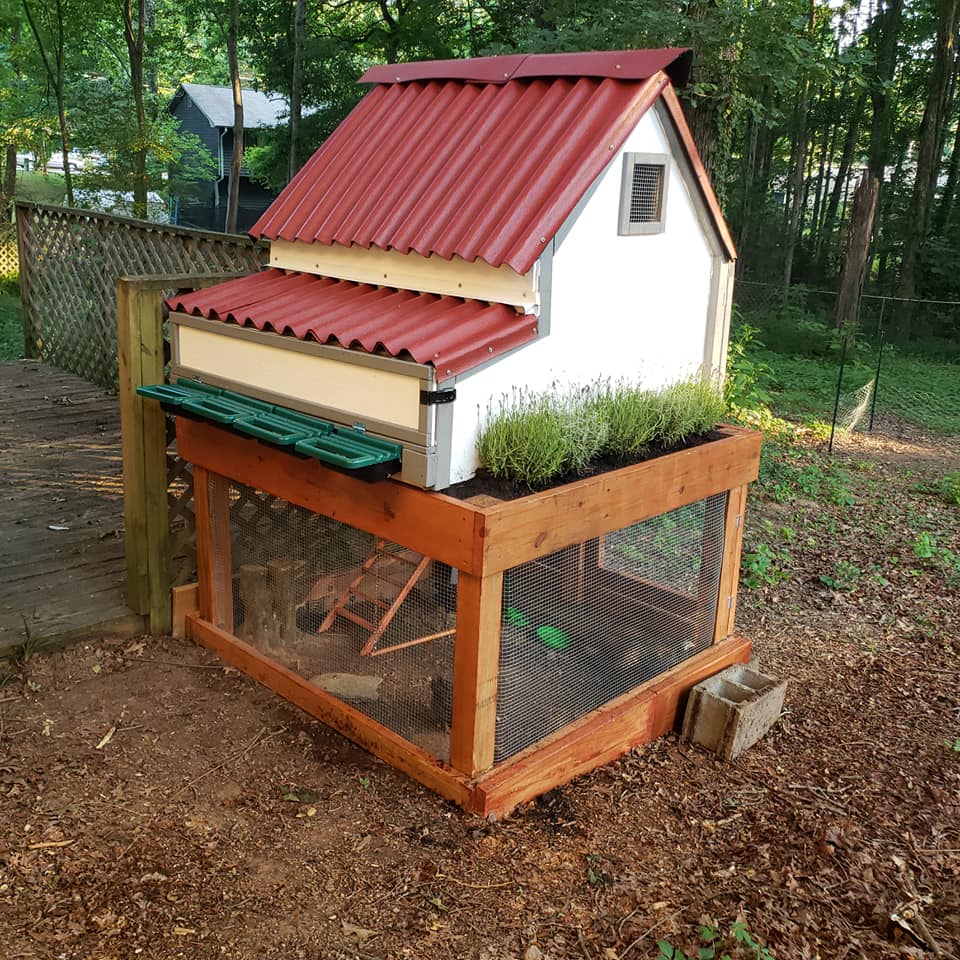
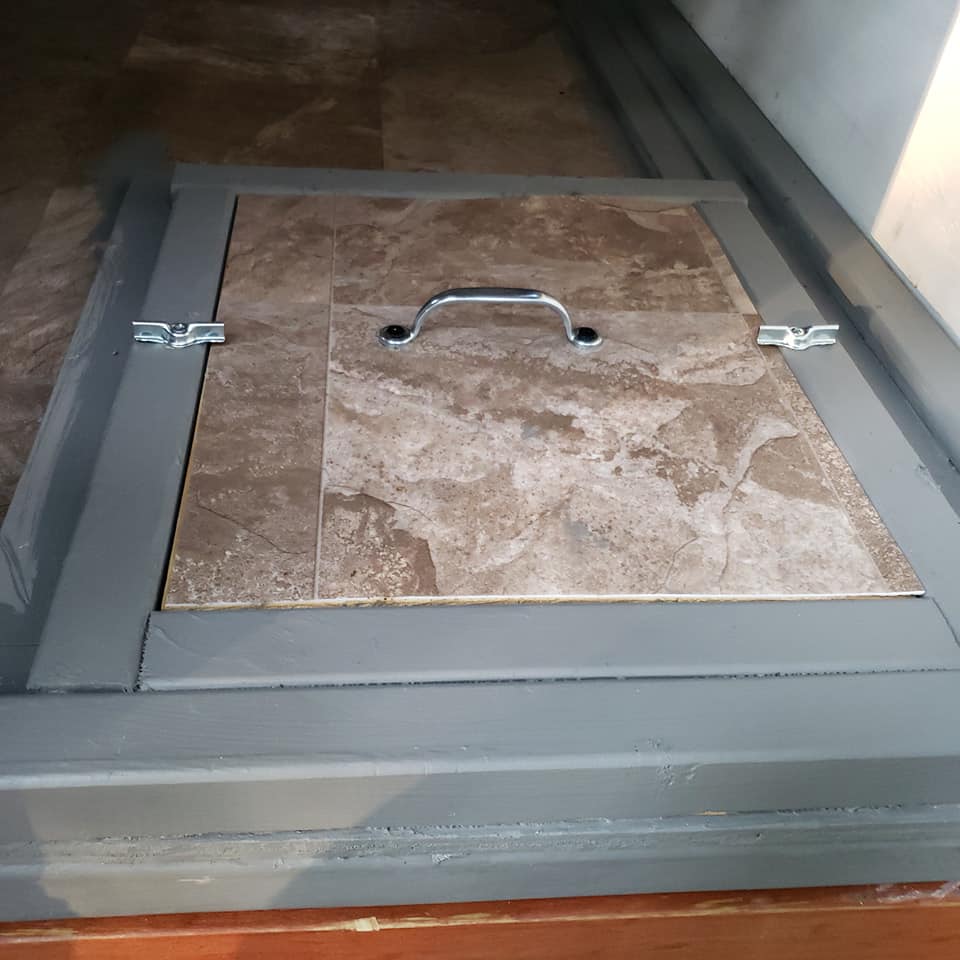
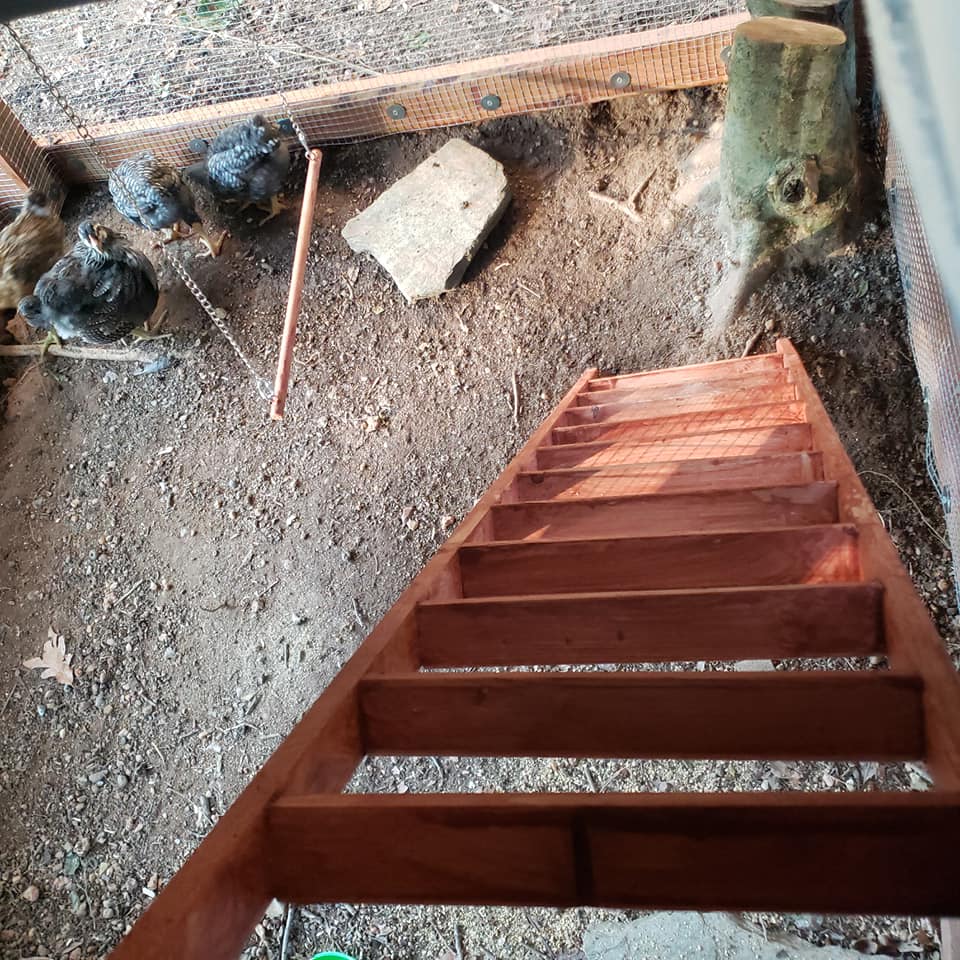
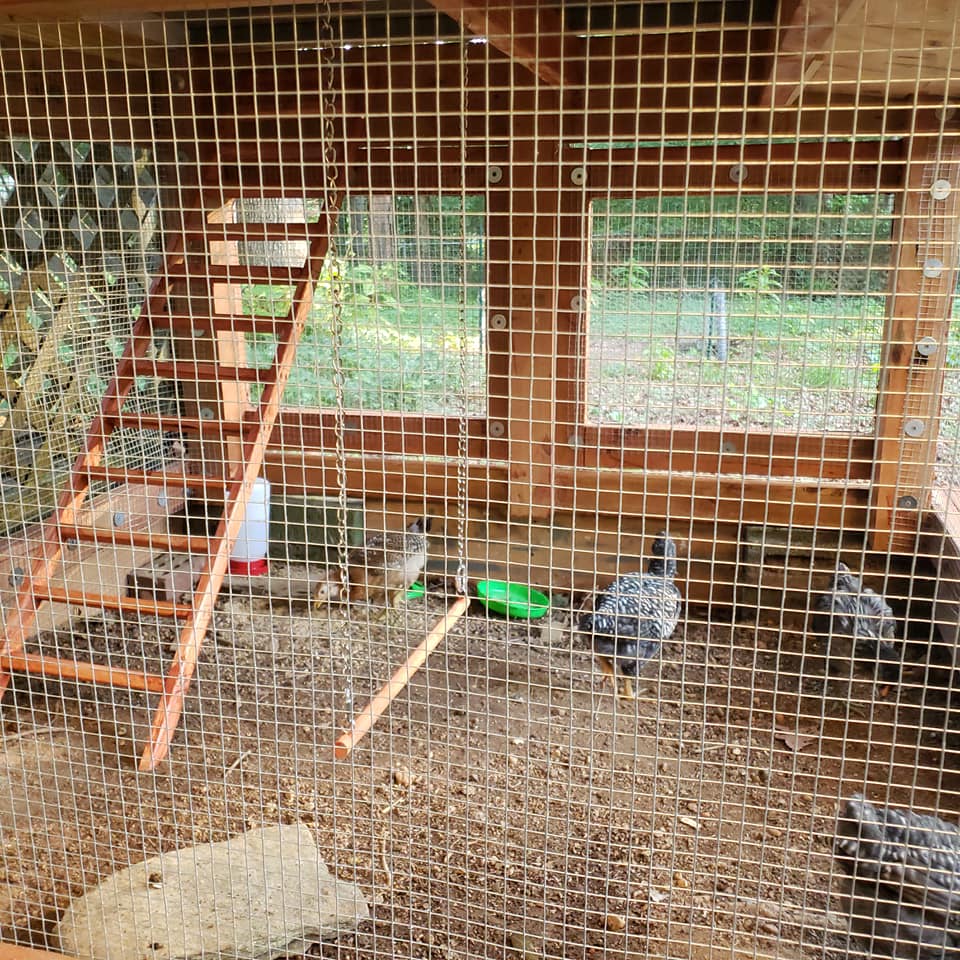
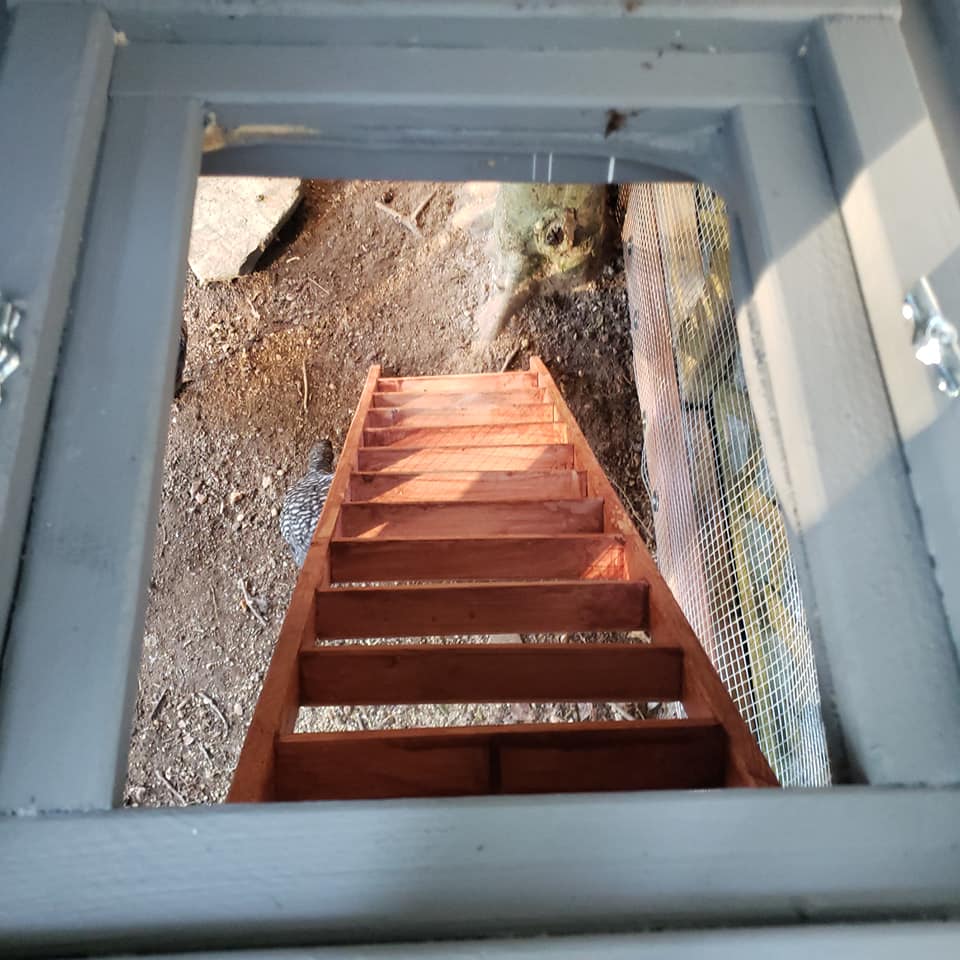
I Modified the plans to make the coop 4Ft wide to accommodate 4 nesting boxes. I Used roll away egg nesting trays in my coop. I keep the base pretty much the same dimension but made the planter smaller. I also replaced the 2"x 4" that framed out the house with 2" X 3". My chicken ladder is made from three 1" x 2". Because my chickens are so young I have the nest box blocked off until they are bigger. I will then use a hole saw to cut holes to each individual nesting box. I also added a Chicken Swing!
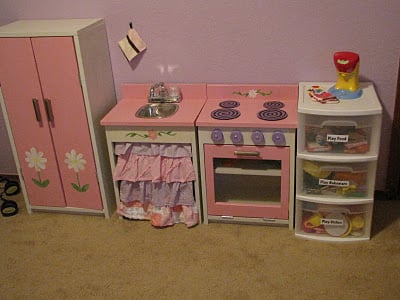
Christmas 2010 my husband and I made our little girls a kitchen using Ana's plans. We used the materials on her cut list, and used paint for the finish. Used fabric scraps to sew the sink skirt, found the knobs at hobby lobby and habitat for humanity, and small bar faucet at Home Depot. It turned out amazing!

Thu, 12/15/2011 - 19:04
Julie, this kitchen set is gorgeous!!! Thanks for sharing!
In reply to Julie, this kitchen set is by Ana White
Tue, 12/20/2011 - 16:04
Thanks so much for the compliment! Means SO much coming from you! I love your site and your plans, Ana you are amazing! Thank you for making me your featured builder this month, I had no clue until someone saw my face on your blog! I feel like a rock star now ;)
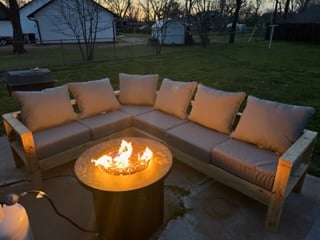
First build ever. Took about 2 days and the most expensive part was the cushions, but Lowe's had a good deal. I did not sanding, painting, or staining. I'm sure I'll do that eventually, or make another sectional later, but I'm in North Texas and loving this set right now.
Tue, 04/18/2023 - 15:35
This looks so great! Thank you for sharing your first ever build, can't wait to see what's next.:)
My husband built the dresser for our three-year-old son. He built and stained the dresser over the course of a week.
My husband and I built this for our first furniture project. I have the bug! Now I must make night stands . I got the look by staining first with min wax dark walnut, followed by rustoleum weathered gray. This was my first time to ever stain anything, so this does not take much experience to do. Love it! We followed the advice to measure our mattress first, which was good because it turned out to be narrower than many kings. We built the bed custom to our mattress . We also made the height a few inches taller to have a nice tall bed. The footboard is lengthened also. I wanted it to come up above the end of our mattress. This project is easy once you get going. It is also addictive!
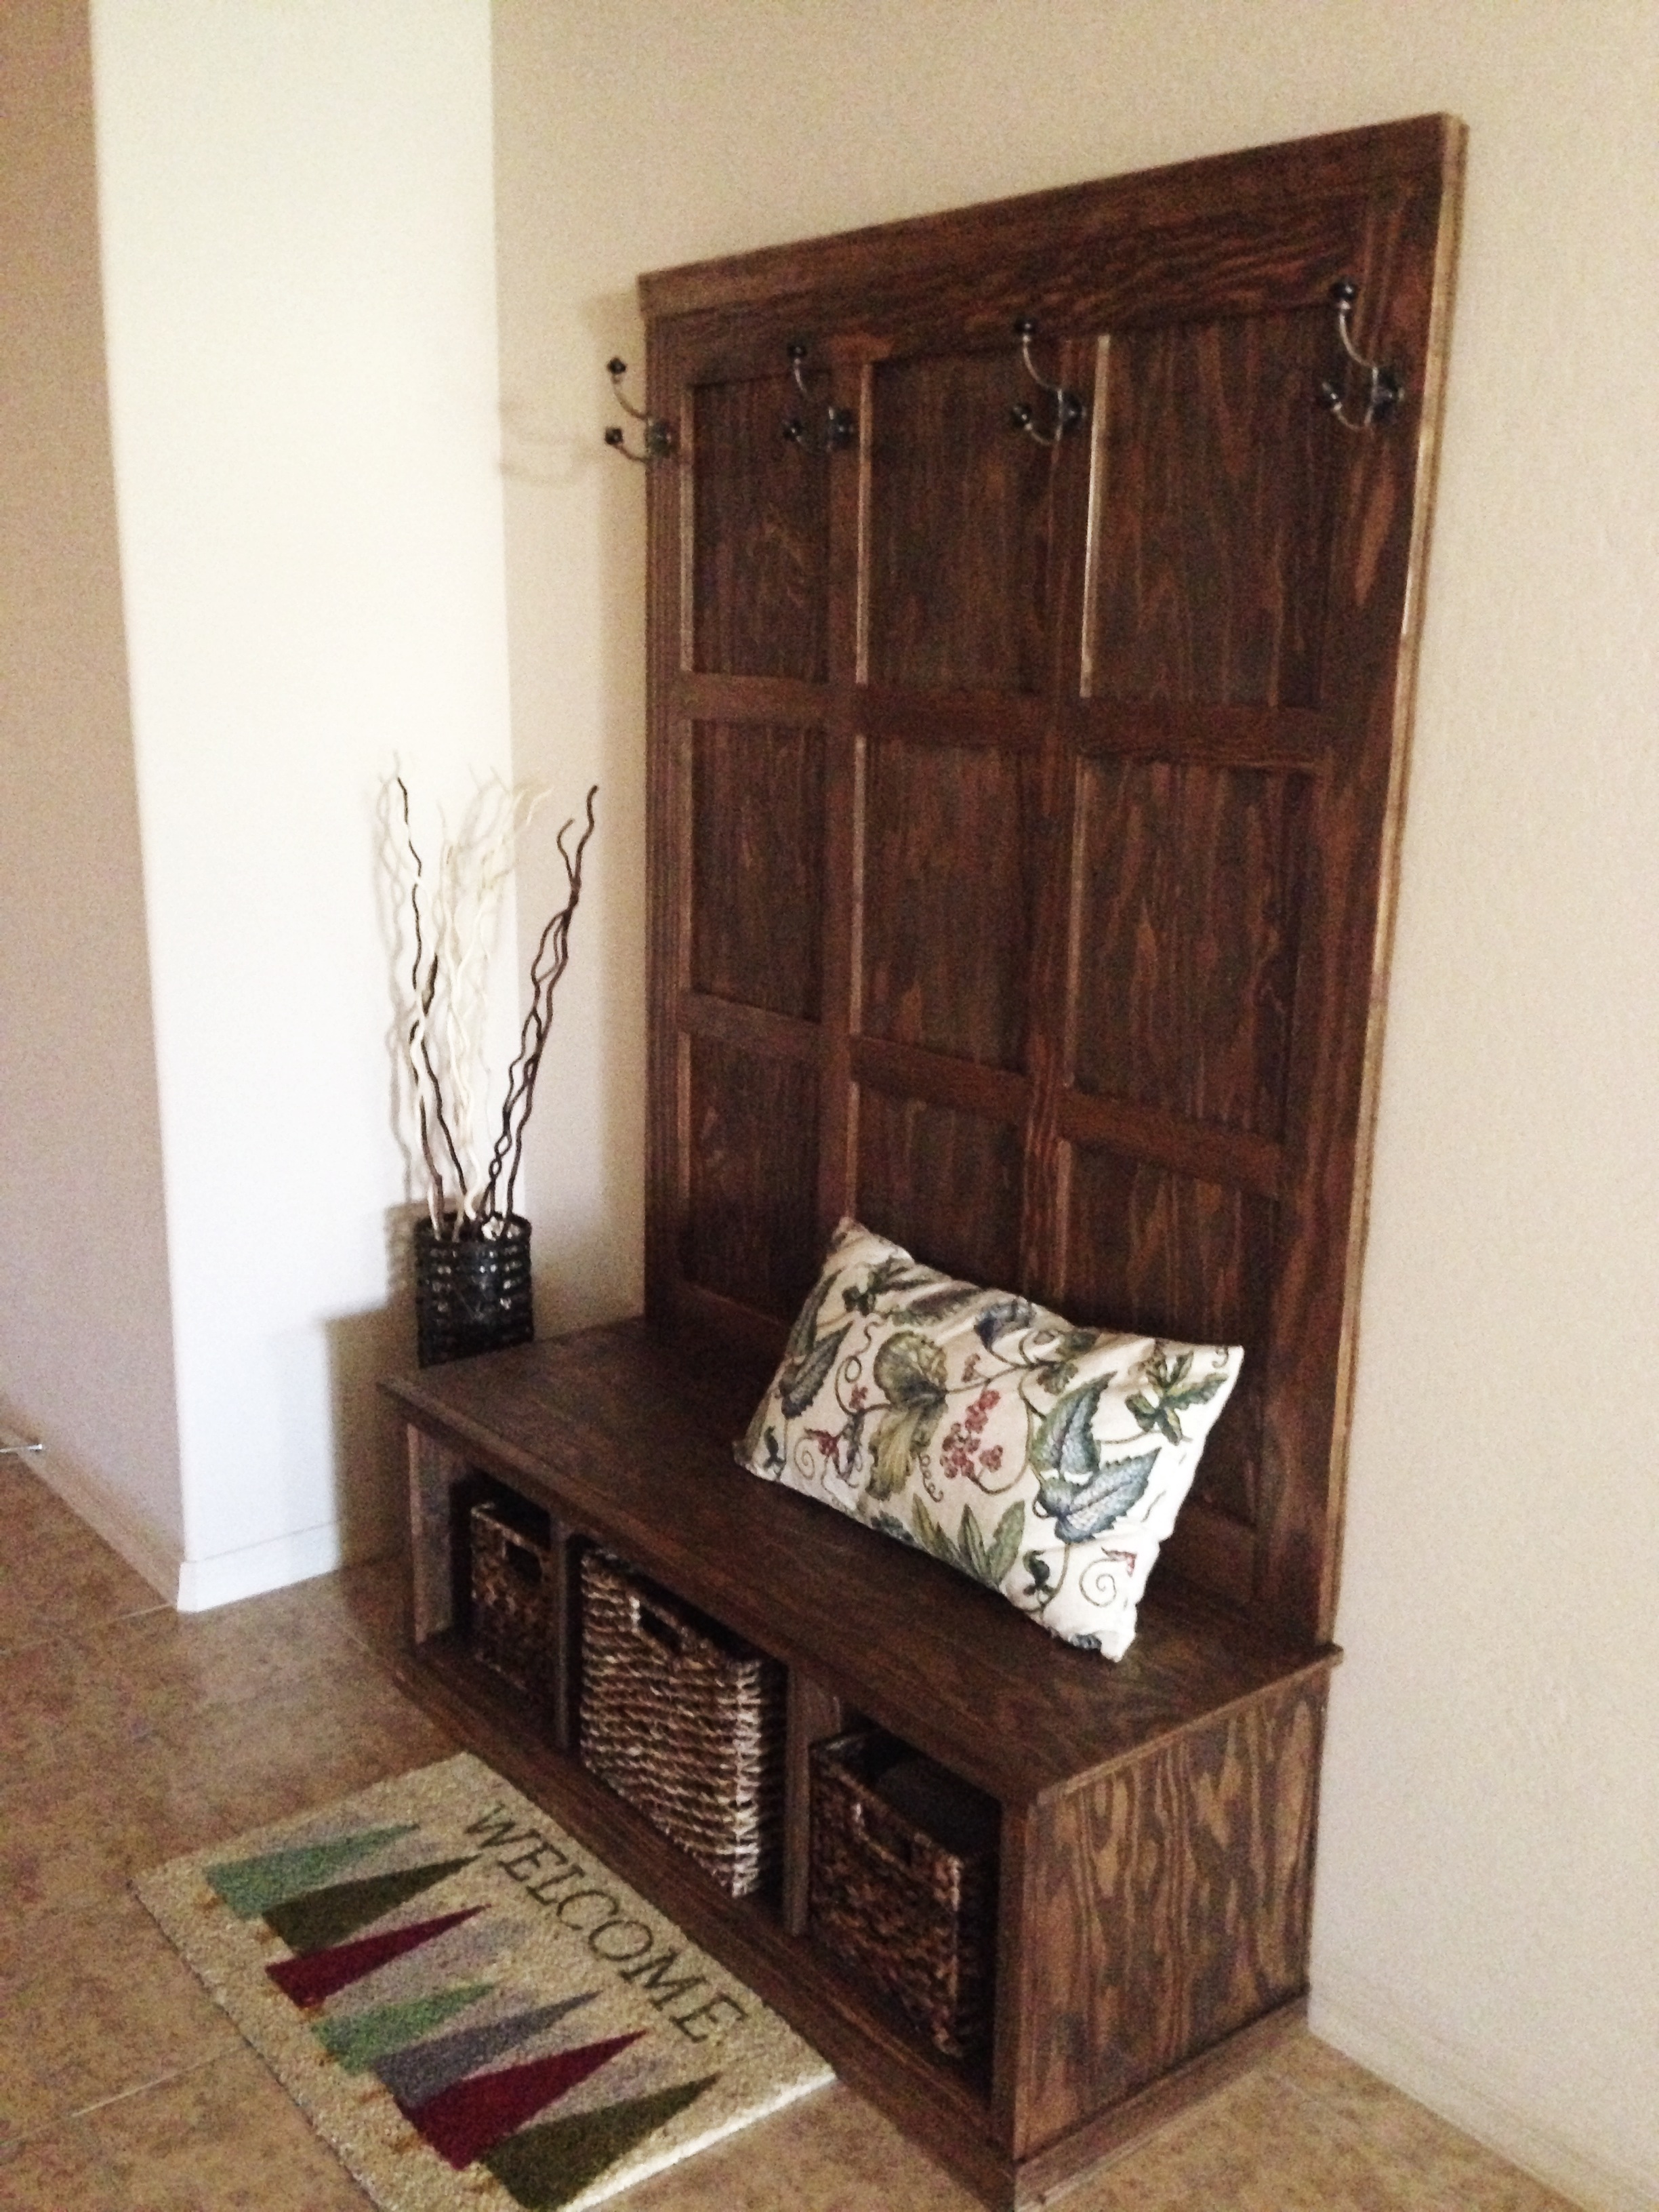
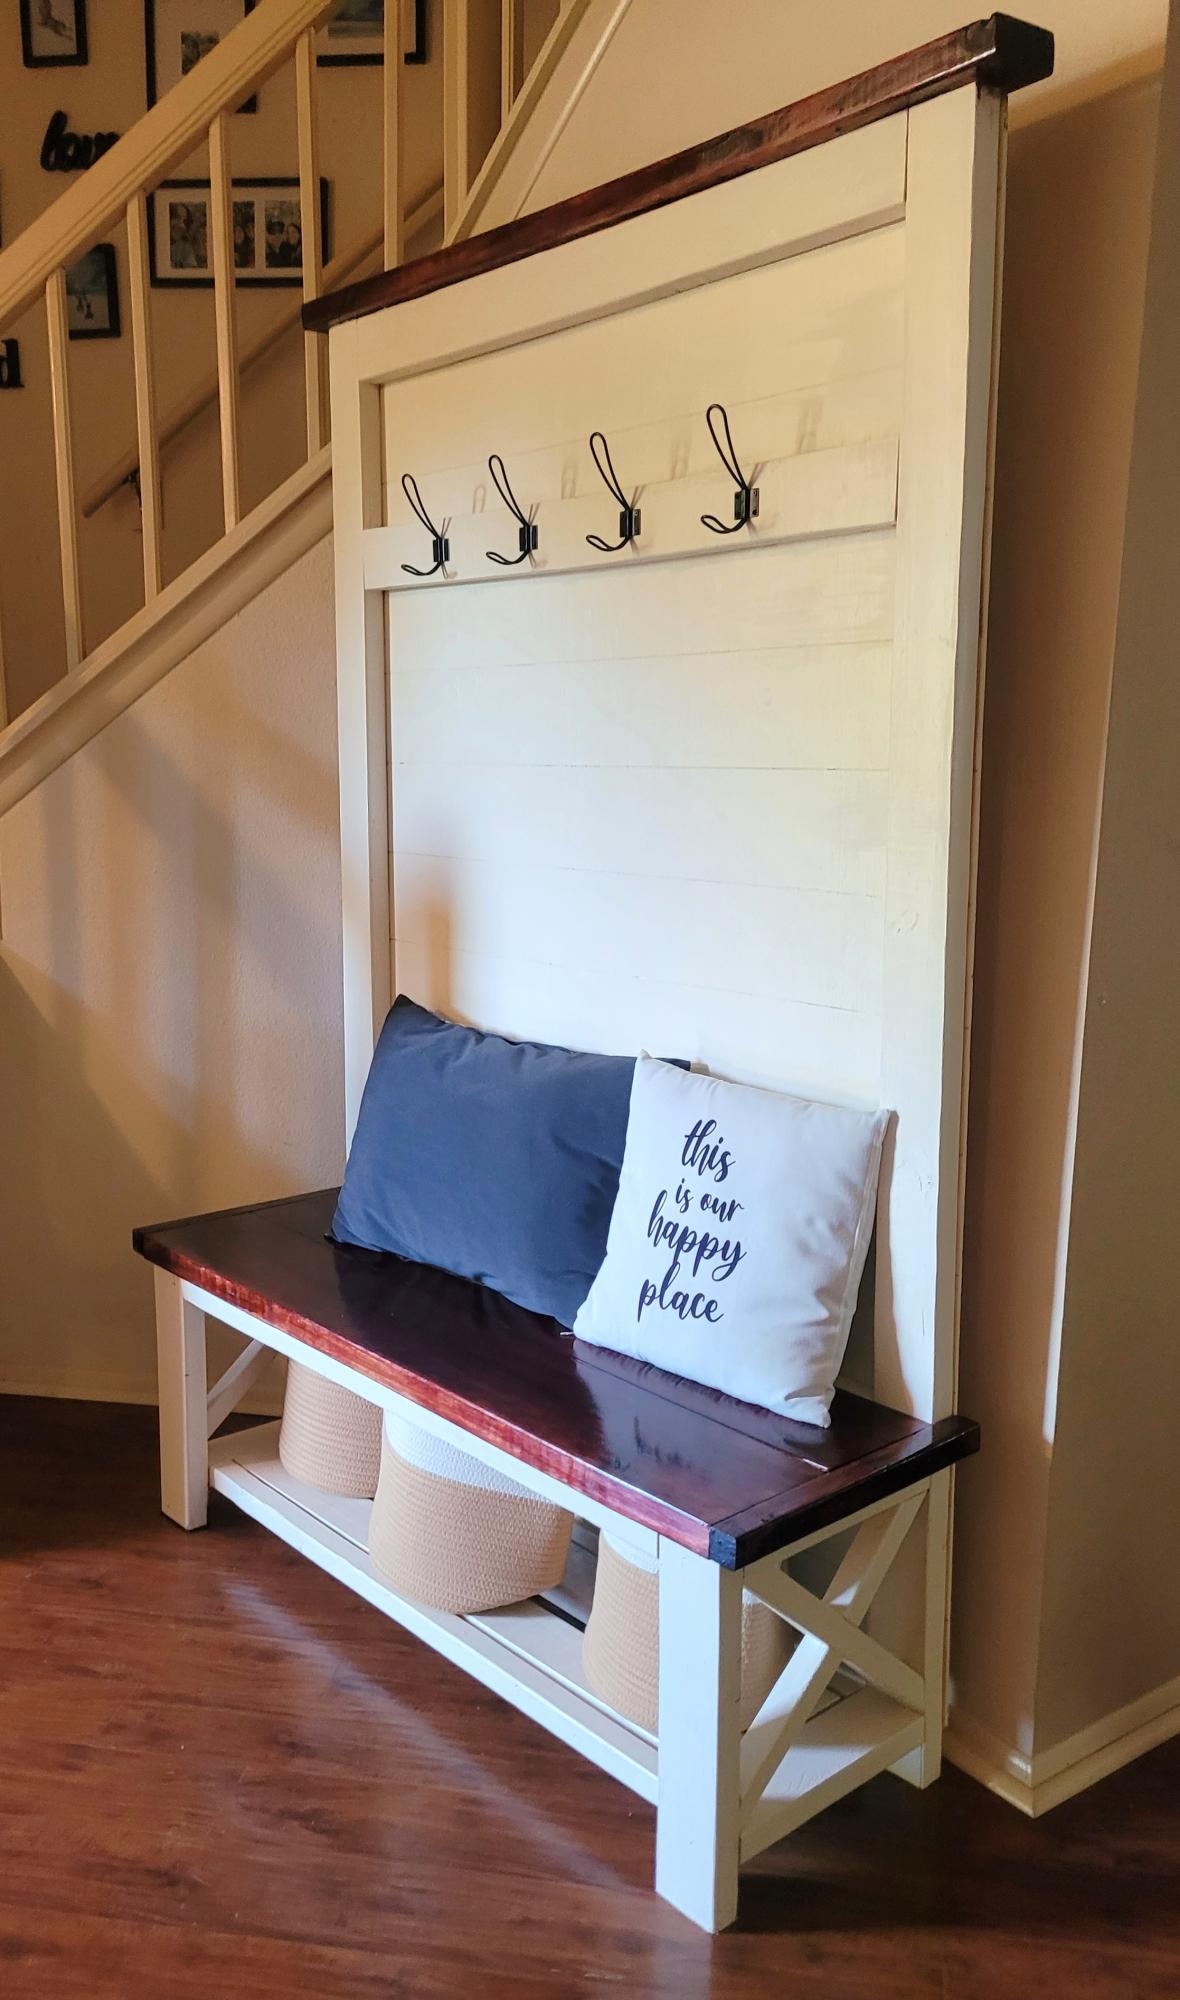
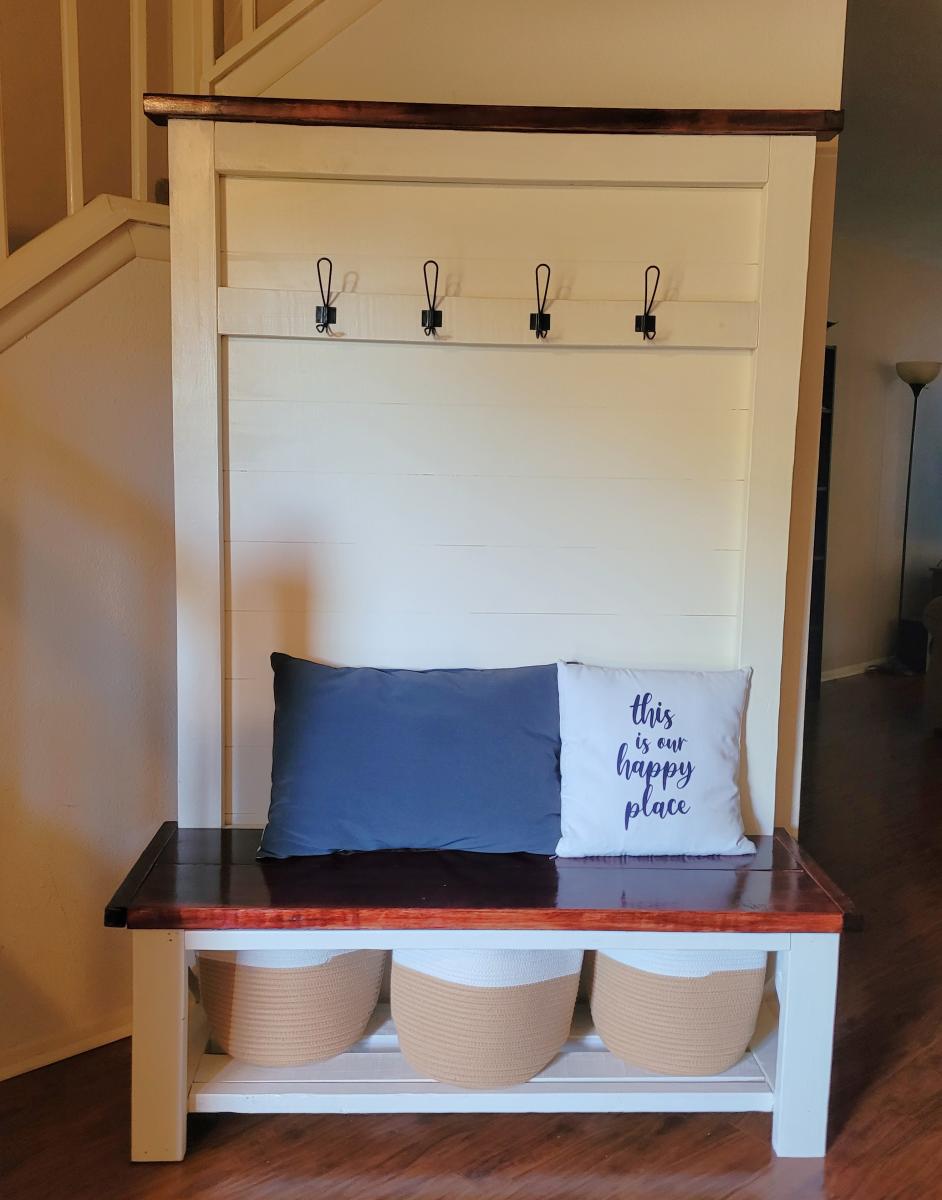
I saw the plans for this and had to have it! My husband had it assembled pretty easily (we've built several dining tables/benches, but this was our first piece that went out of that box, lol) and the whole project took maybe a day or two including staining. We left of the end pieces just because we were trying to get it done quickly for Thanksgiving; we intended to add them on later, but I kind of like it open. Everyone who has seen it loves it!

Sat, 12/07/2013 - 21:46
Your hall tree looks really good! (Early American is my favorite stain color!)
Val @ artsybuildinglady.blogspot.ca
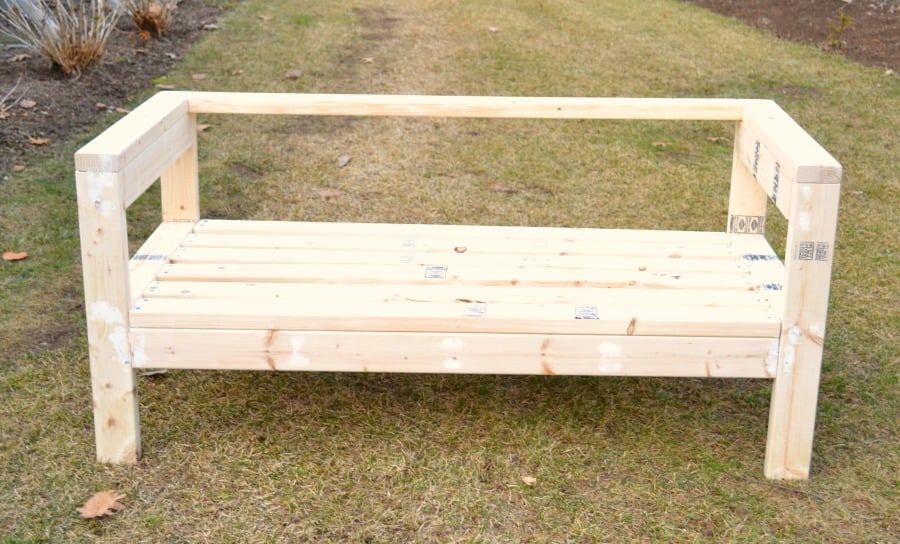
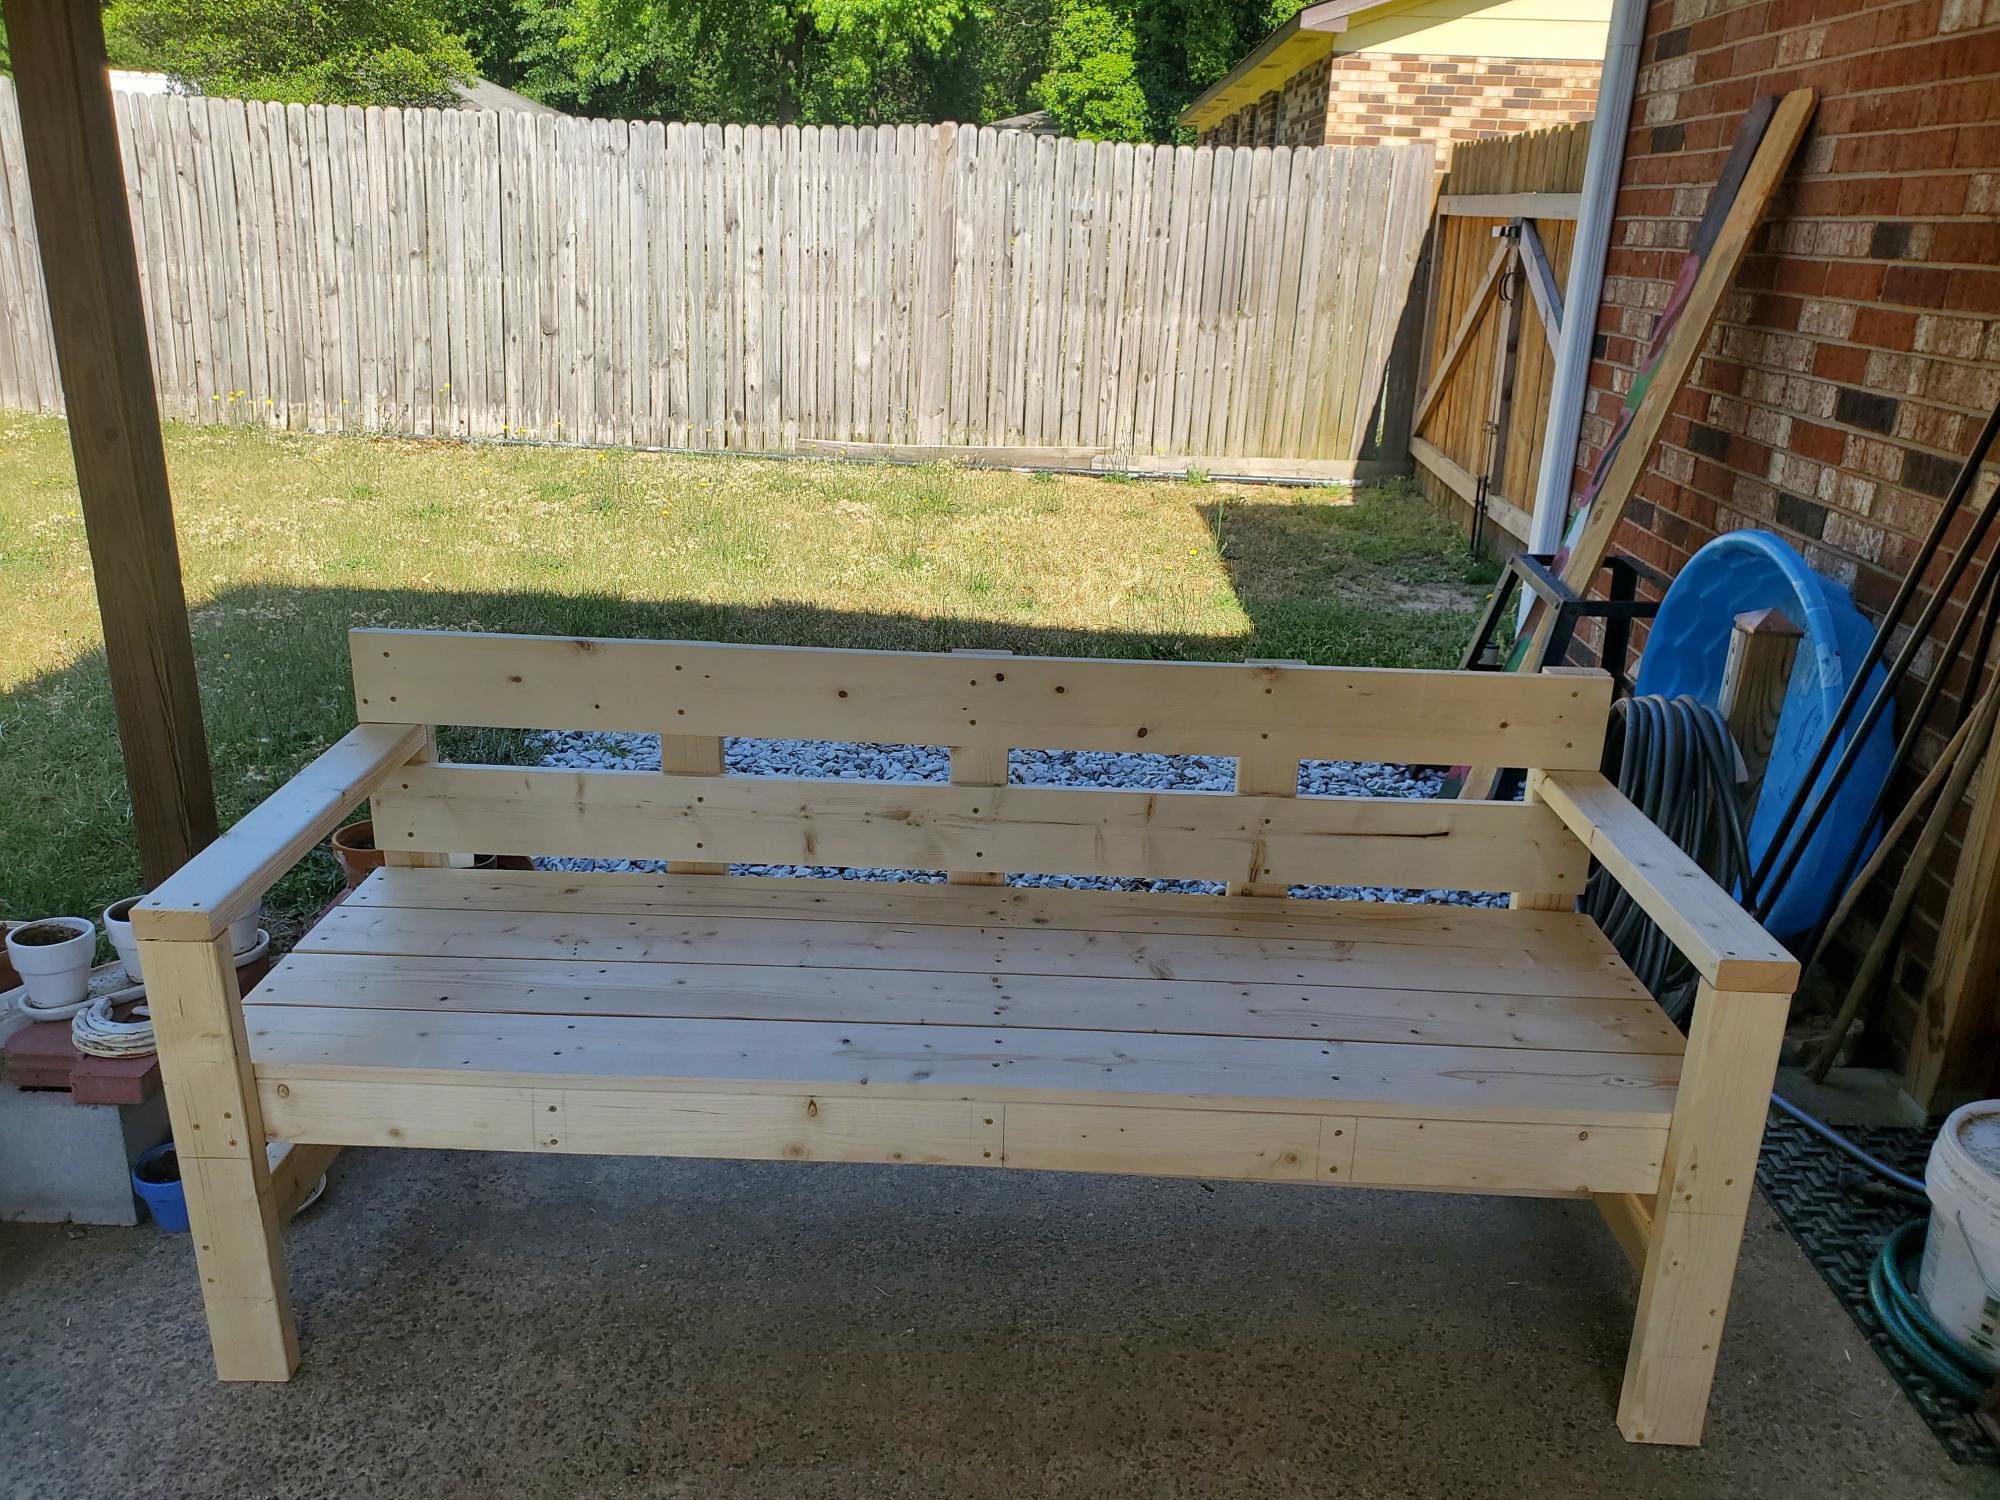
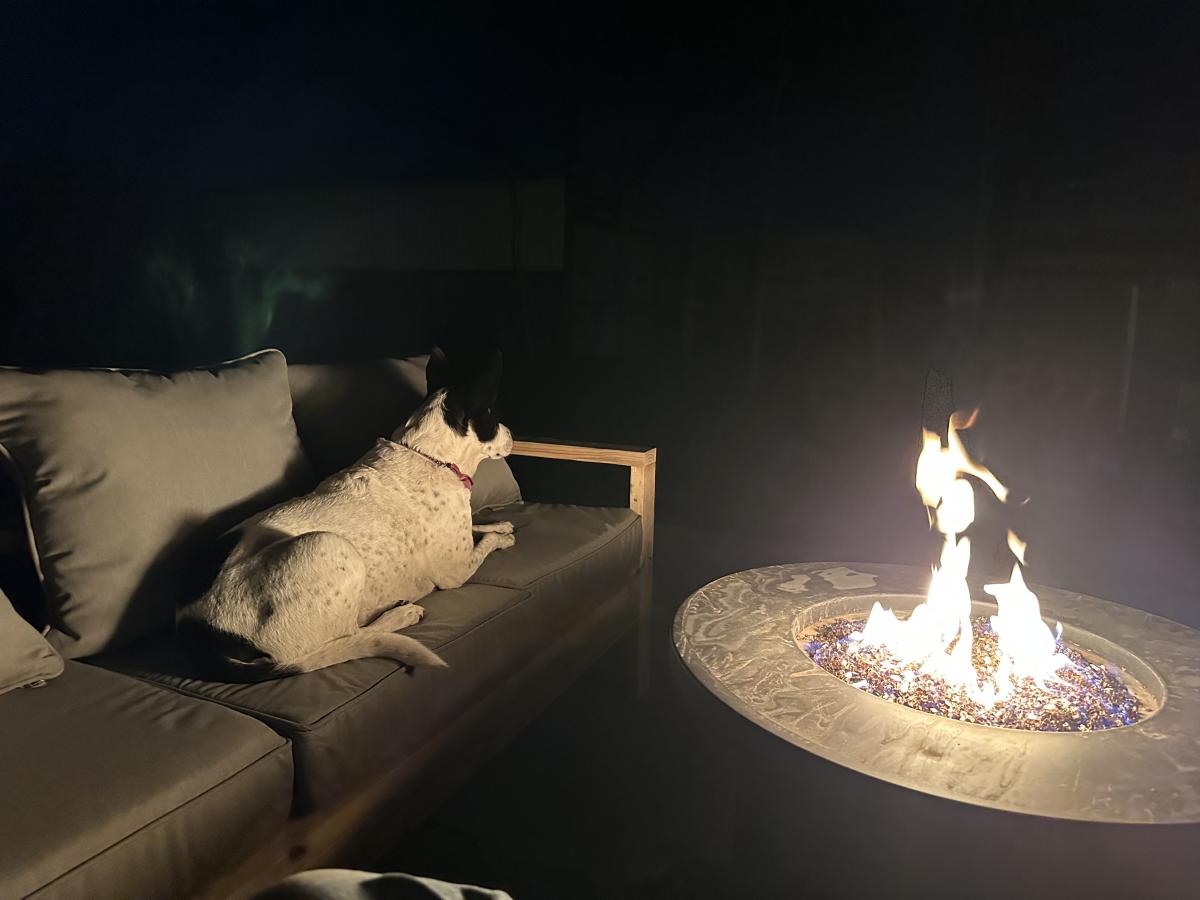
I have been looking for something to add extra seating to my deck while also filling an awkward corner that I have never been able to find prefab furniture to fit. This build reminded me a lot of the large X bench that Ana made for her cabin (that I also built for my front porch.) It is super simple and so sturdy. I can't wait to sew cushions for it and build the second half.
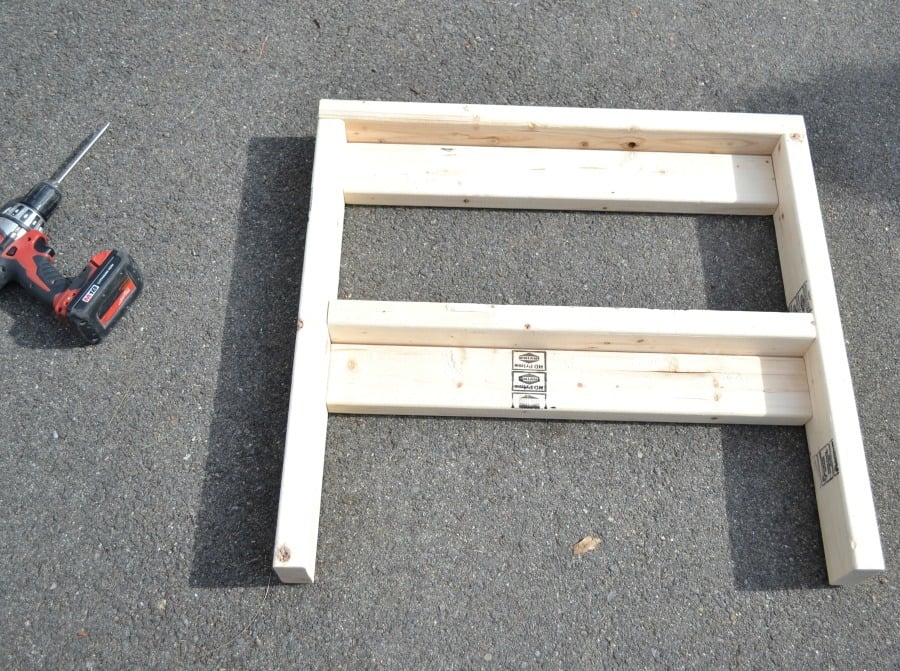
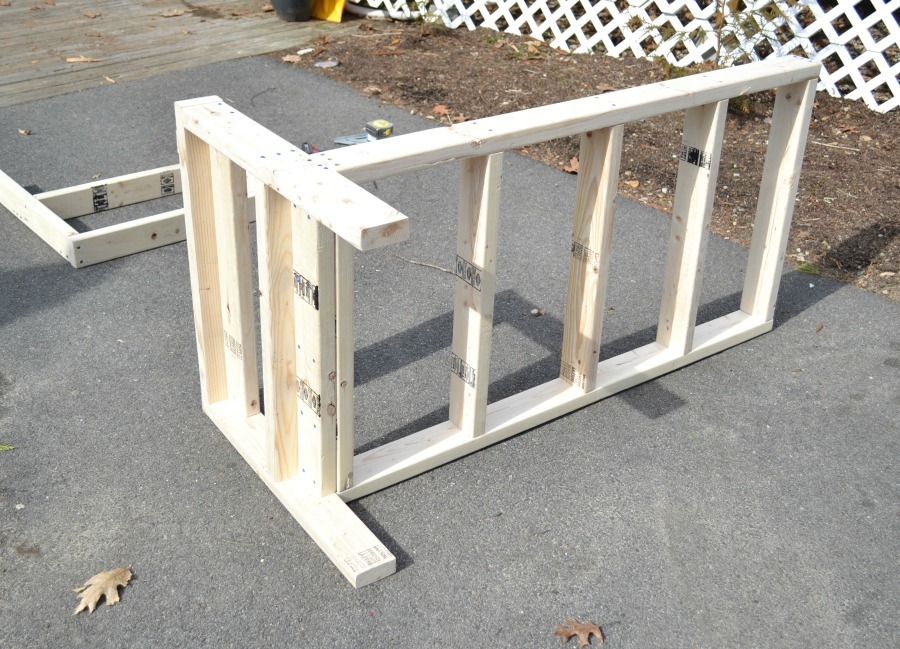
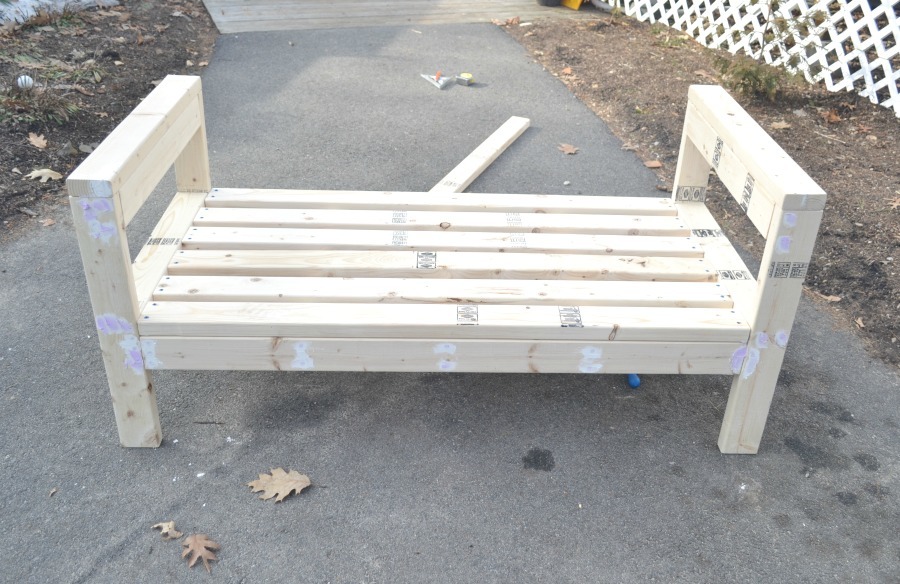
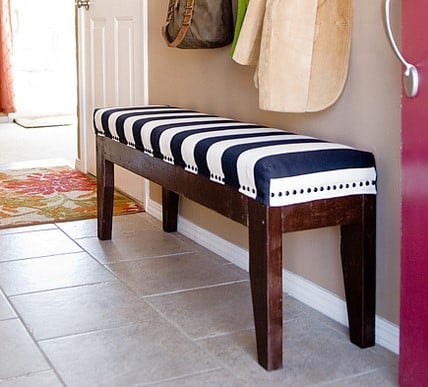
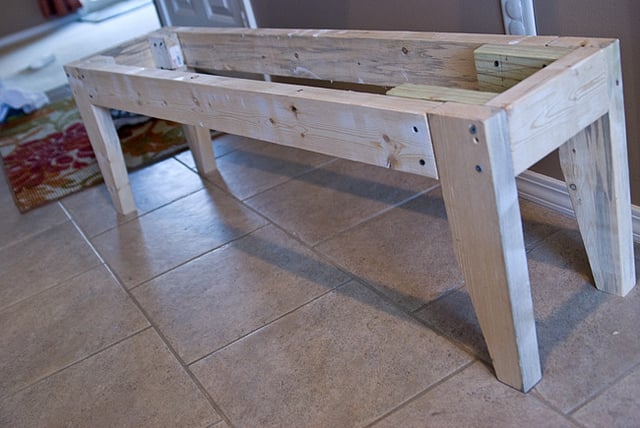
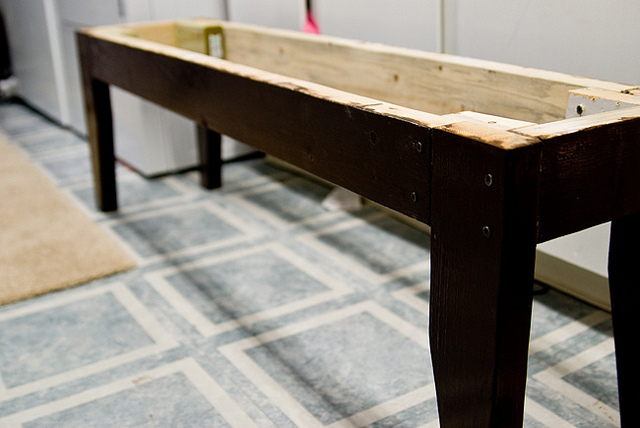
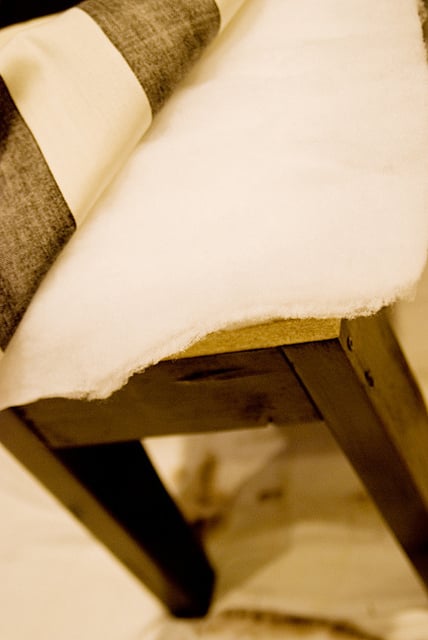
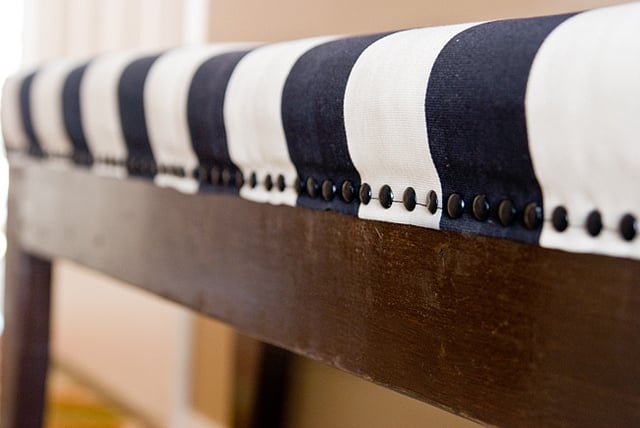
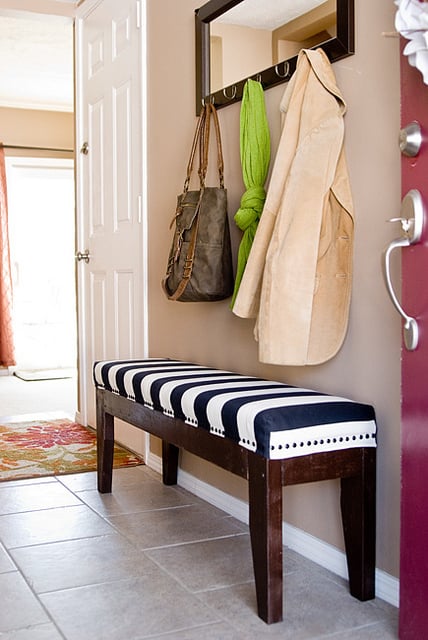
Wonderful project! Very fun. Built a bench from scrap 2x4s (left in the garage by our home's previous owner, so they were free!) and a piece of MDF shelving. Perfect for our entryway. The bench itself was incredibly easy to build. The hard part, in my opinion, was finishing it. So many pretty things to choose from! I used a piece of 2-inch foam plus a double layer of batting for the top, some striped upholstery fabric, and 160 nailheads to finish it off. Love it.

Tue, 02/14/2012 - 12:45
This really came out nice, and lovely selection of fabric.
Sun, 02/19/2012 - 12:54
Love it! Wondering if I could build it and have some type of slipcover on it. (house with three kids under 5 years old does not go well with permanent upholstery! haha)
Fri, 03/09/2012 - 09:06
If you check out Ana's original plans for the Easiest Upholstered Bench, you'll see that she DID use slipcovers! You could make different ones for each season, or for holidays like Christmas or birthdays...
Wed, 10/30/2013 - 08:36
Hi Katie, I am having a difficult time finding fabric (hard to believe)! did you get yours online? How wide are the stripes? most fabric I am finding is not wide enough to cover the top and sides. Thanks for the help! Great build!
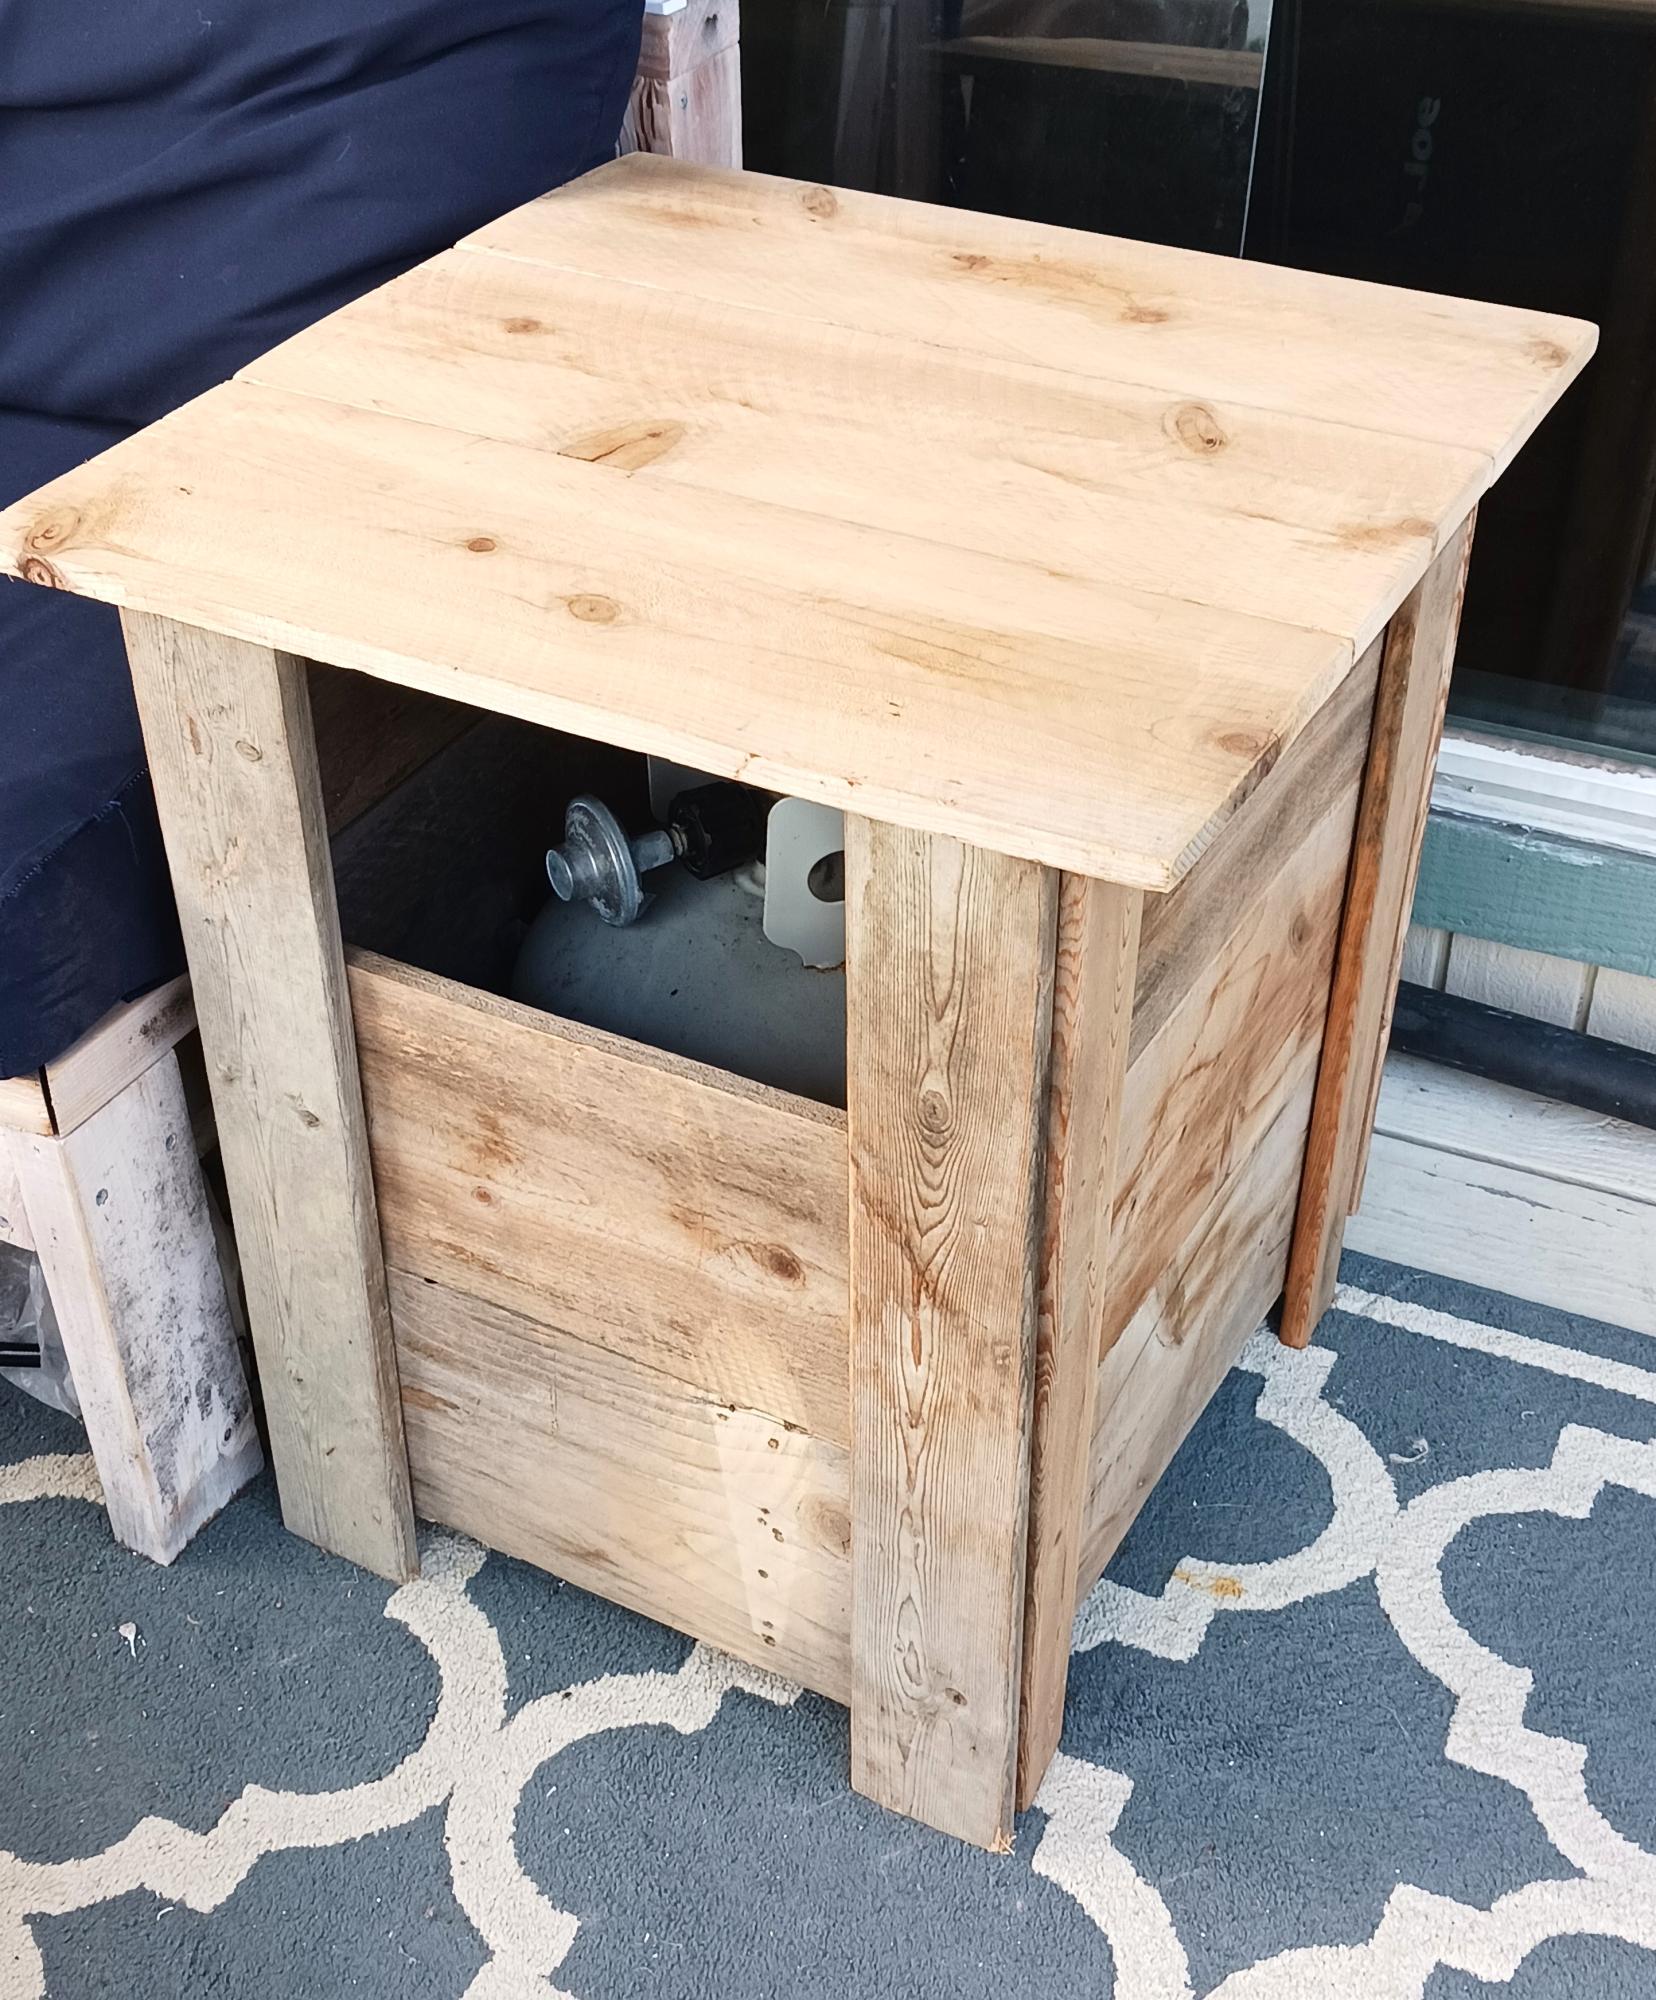
I had inquire on your Facebook about you making a new plan... i had wanted a side table to hide my propane tank. I used the planter plans as an inspiration for this table. It is regiment rough looking as I managed to build it using only scrap on hand. I did have one cedar board in my pile that was leftover from another project that I used for the top... pretty happy but know it would have been better with new wood that was the right size and not warped! The space at the top is on purpose to be able to teach in and turn the gas on and off.
Debbie Hertz
Such a fun build! Can't wait to start my new project 🤗
Jenuri
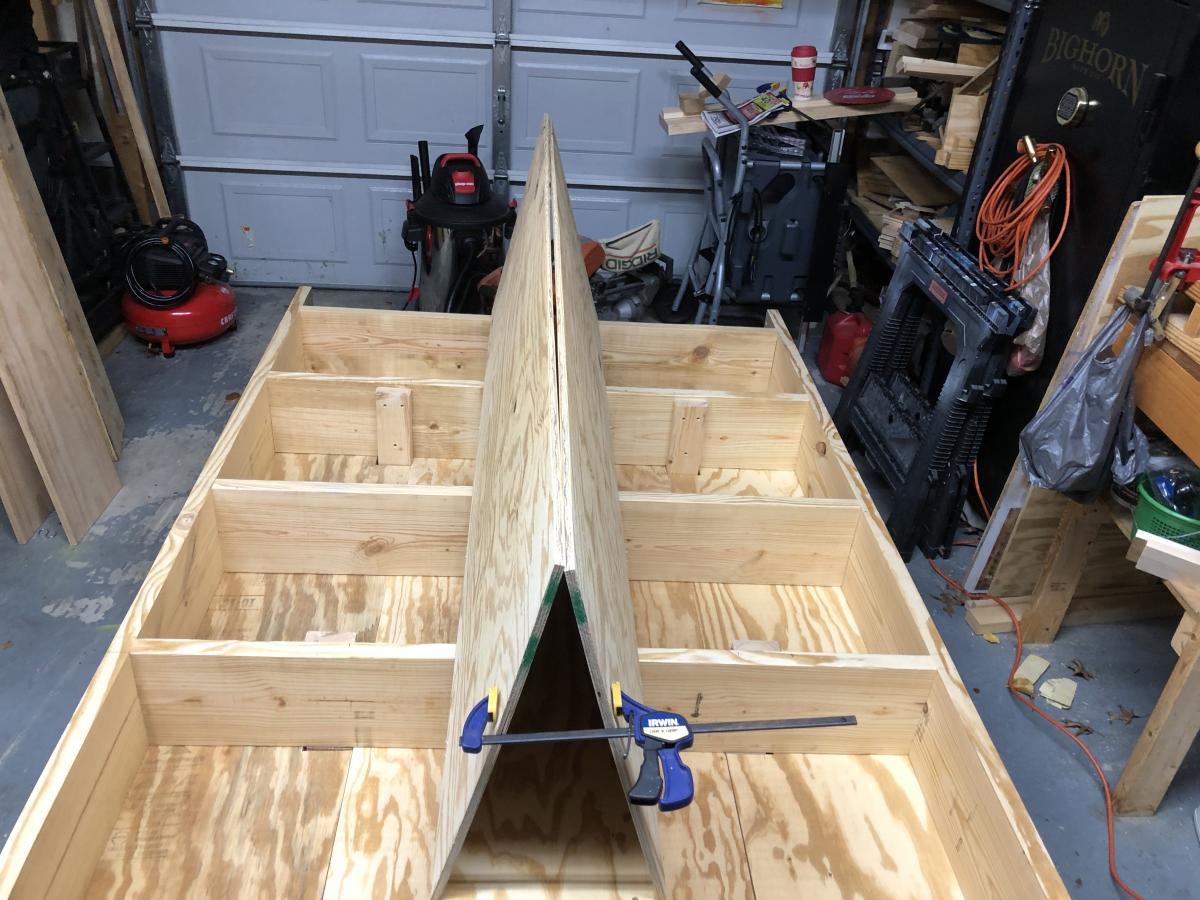
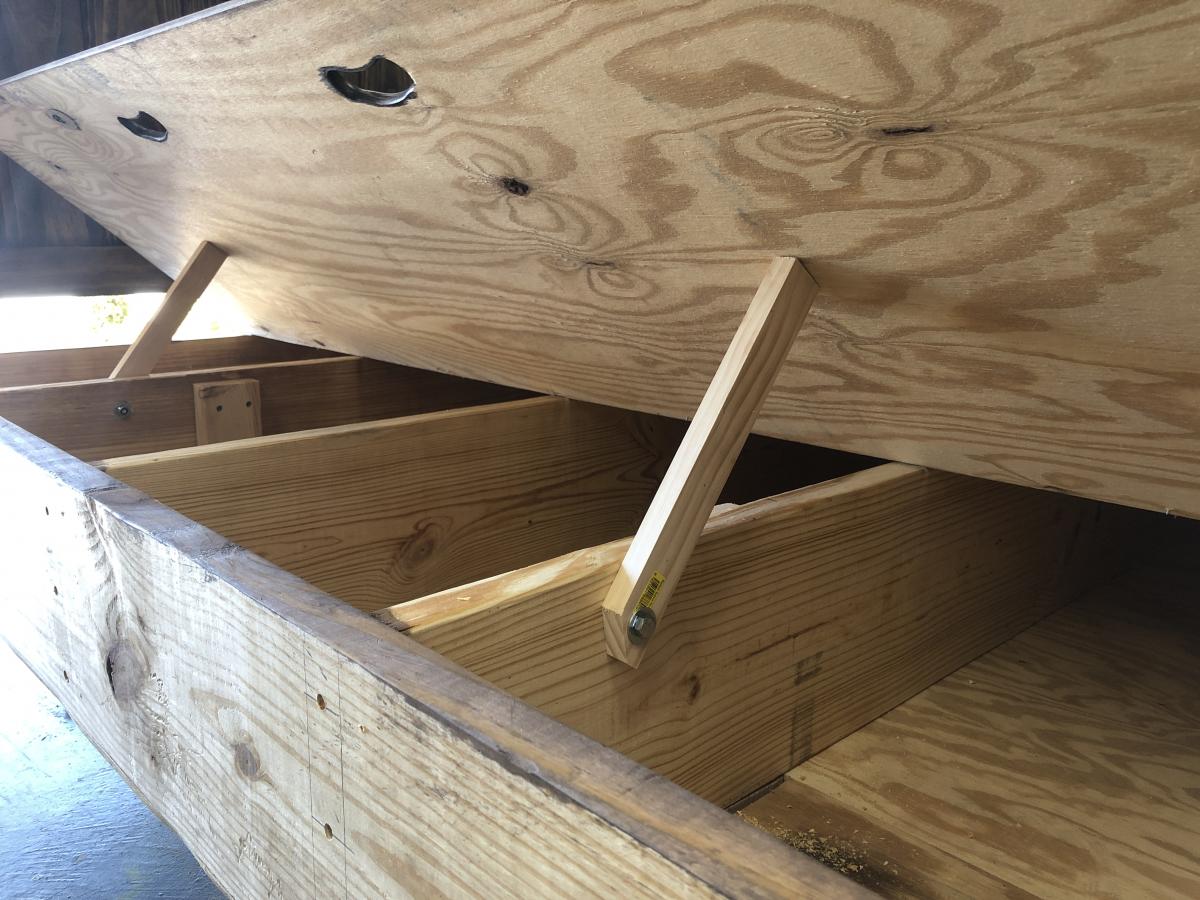
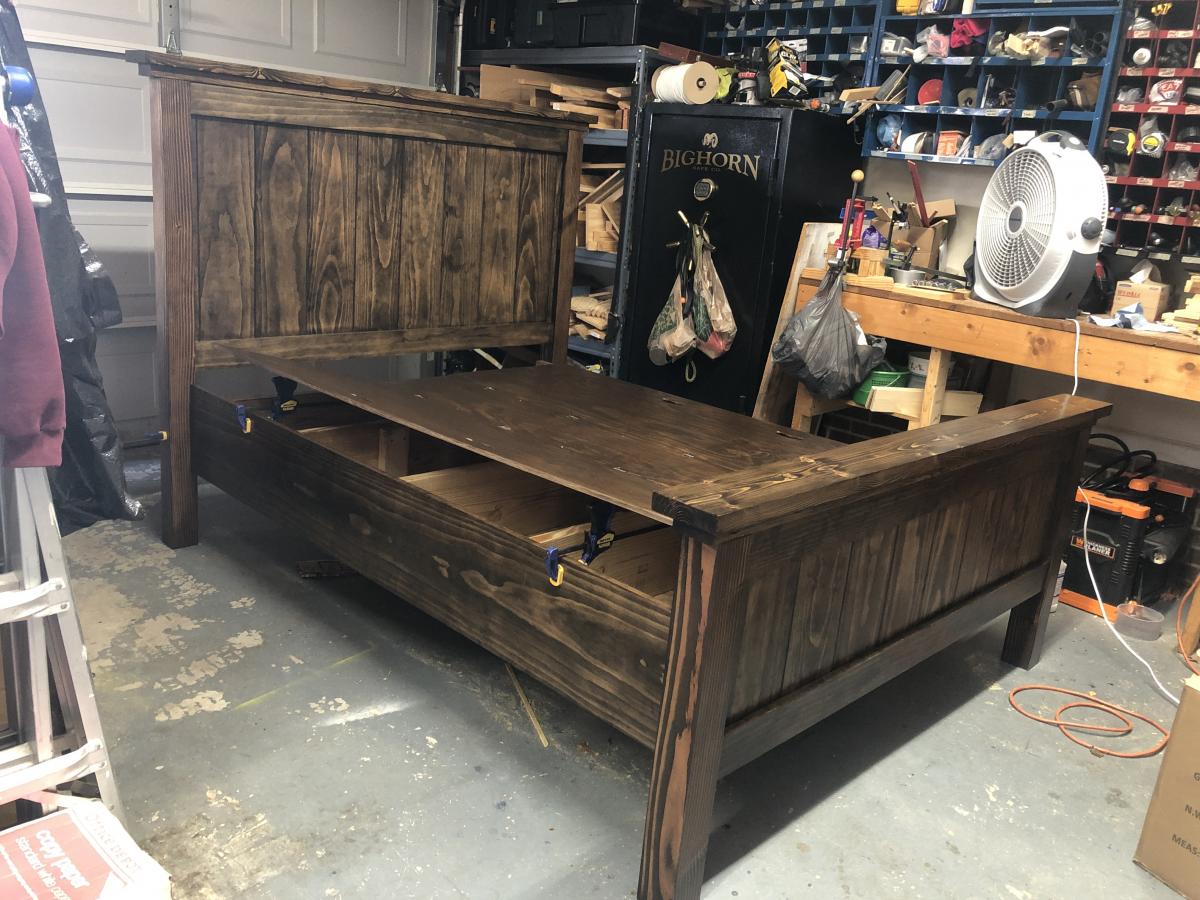
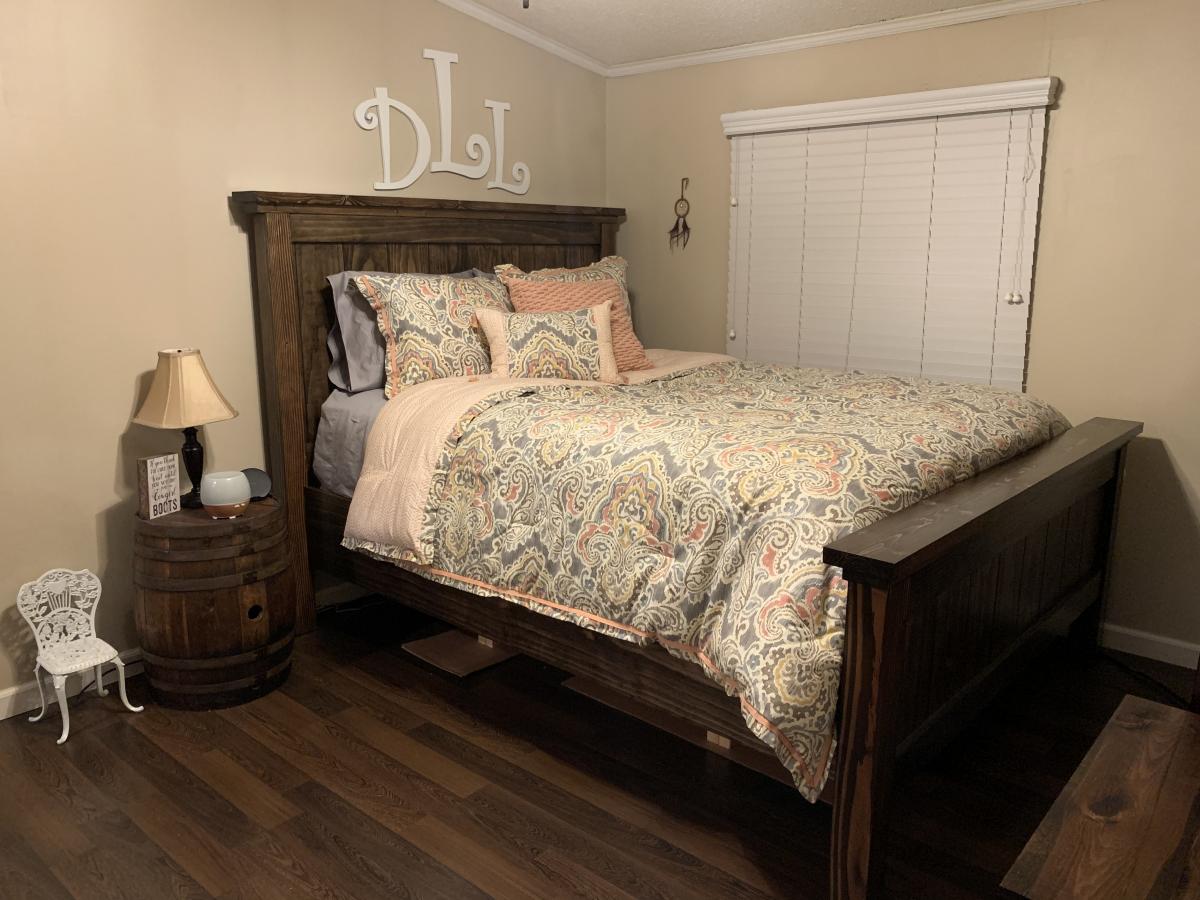
I built this queen size farmhouse bed using Ana's Plan. I wanted hidden under bed storage so I did alter that part of the plans. The box is pretty heavy so i added foot supports to carry the weight. I have access to the storage on both sides of the bed. I have built another version of this bed where i added gas springs to help lift the bed for access but i chose not to do it on this one. As an added feature, i also built a matching doll house bed. I love this bed, and it turned out beautiful.