Community Brag Posts

Children's Zoo

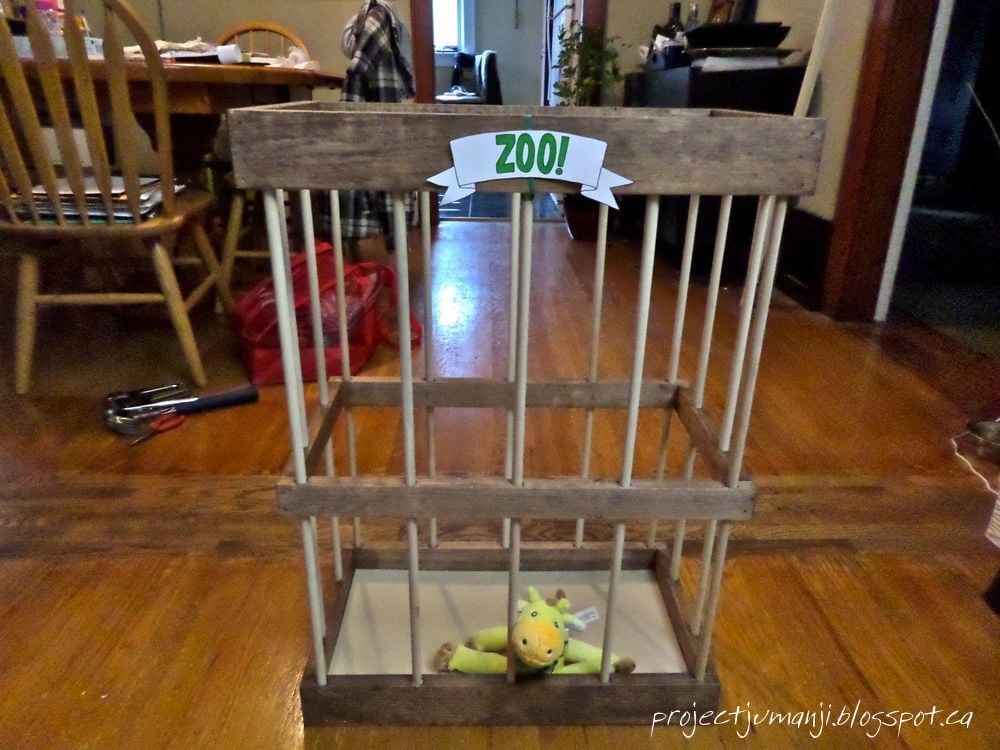
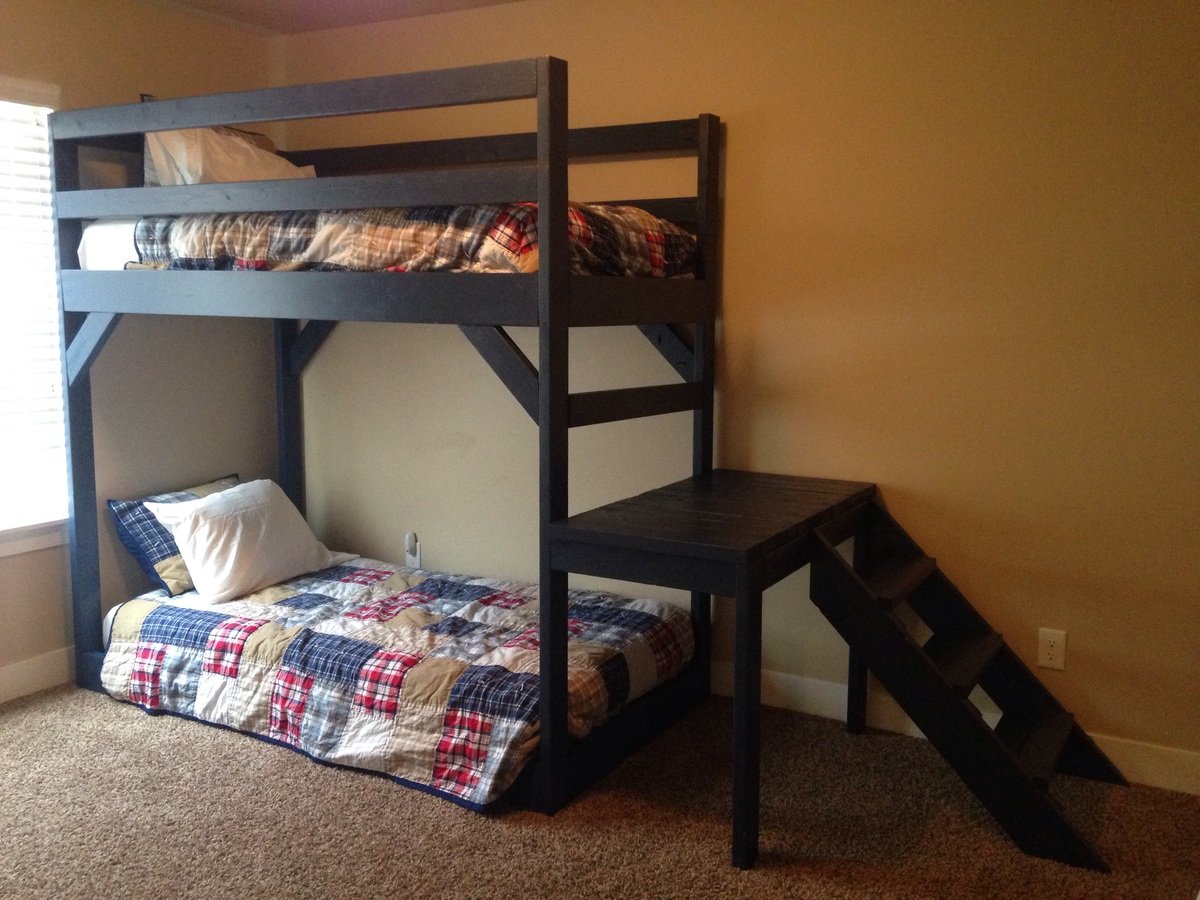
I made this as a gift for a friends Baby Shower. It's meant to mount on the wall and hold Baby's stuffed animals. After the Shower yesterday, it's half full of animals already!

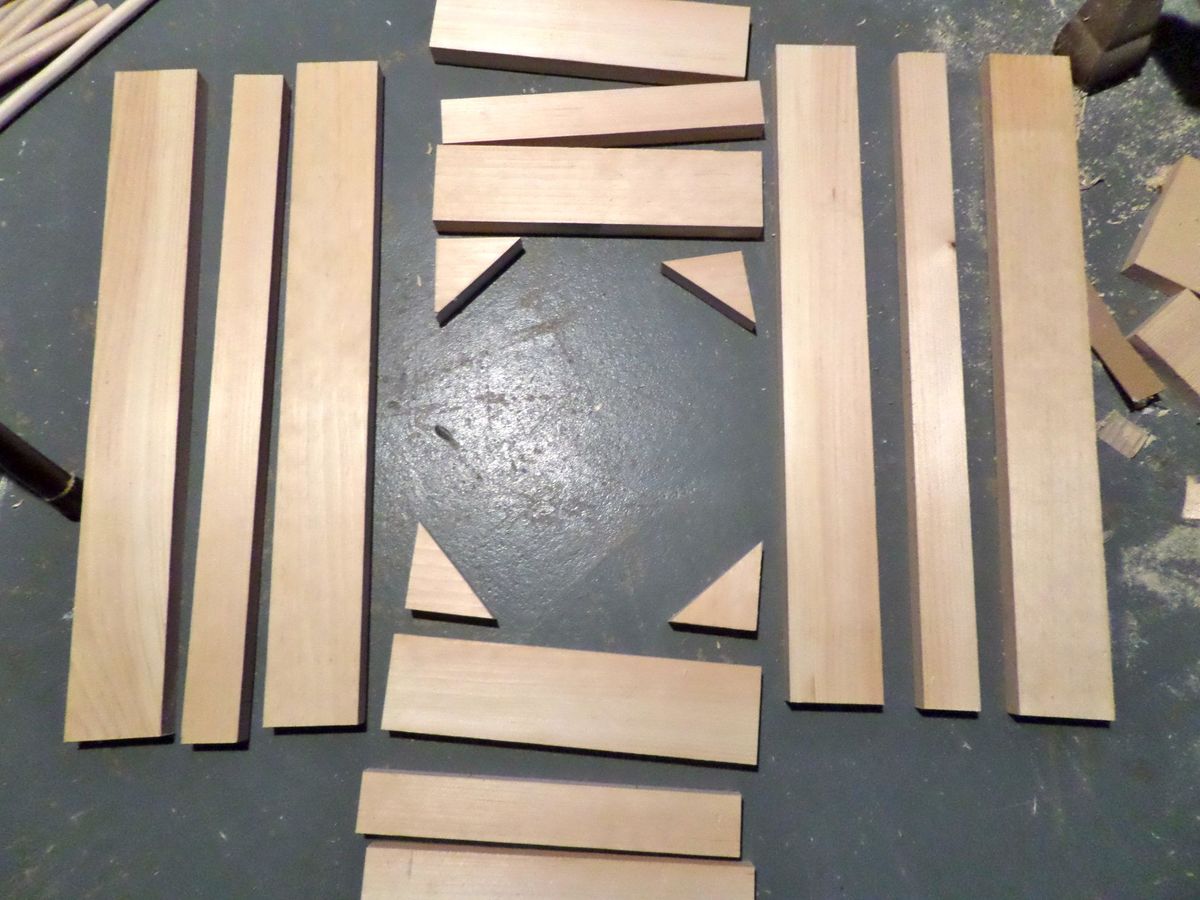
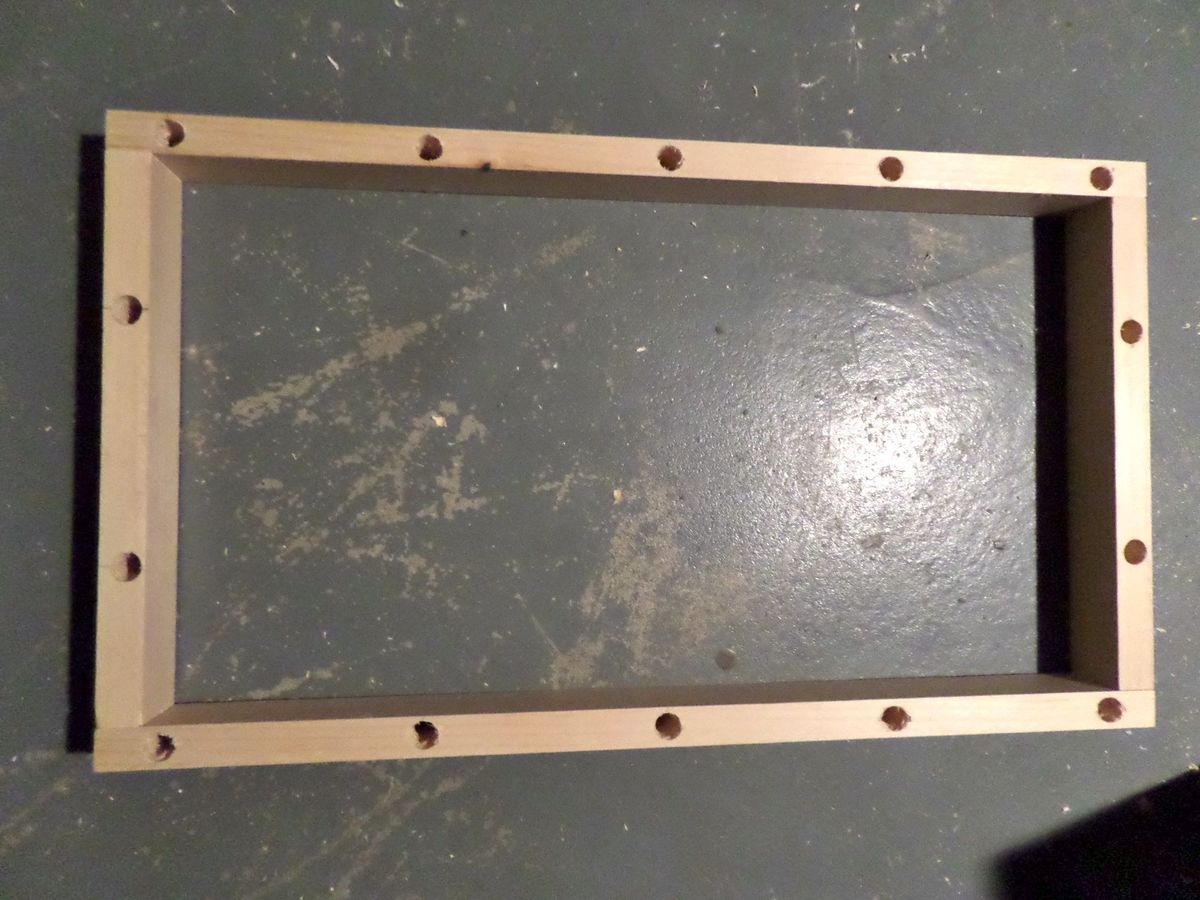
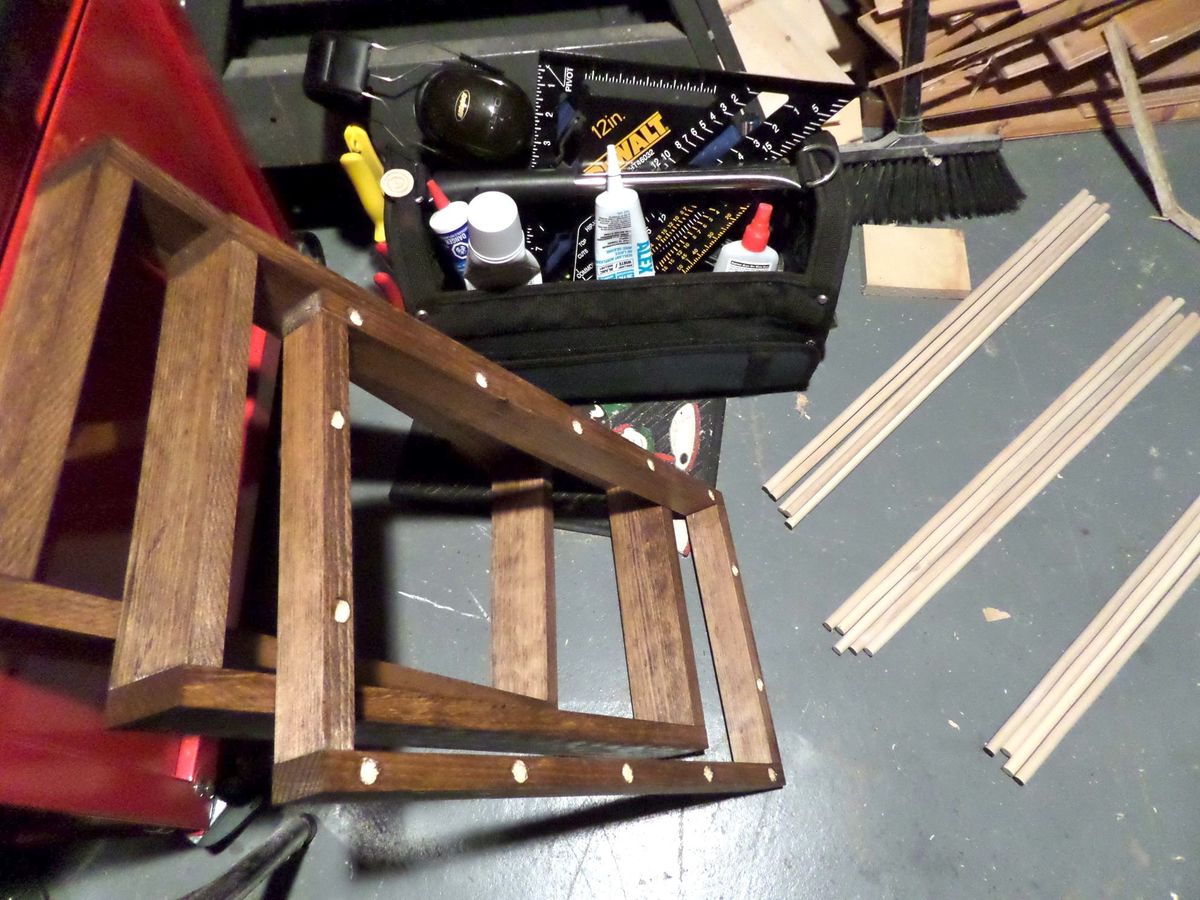
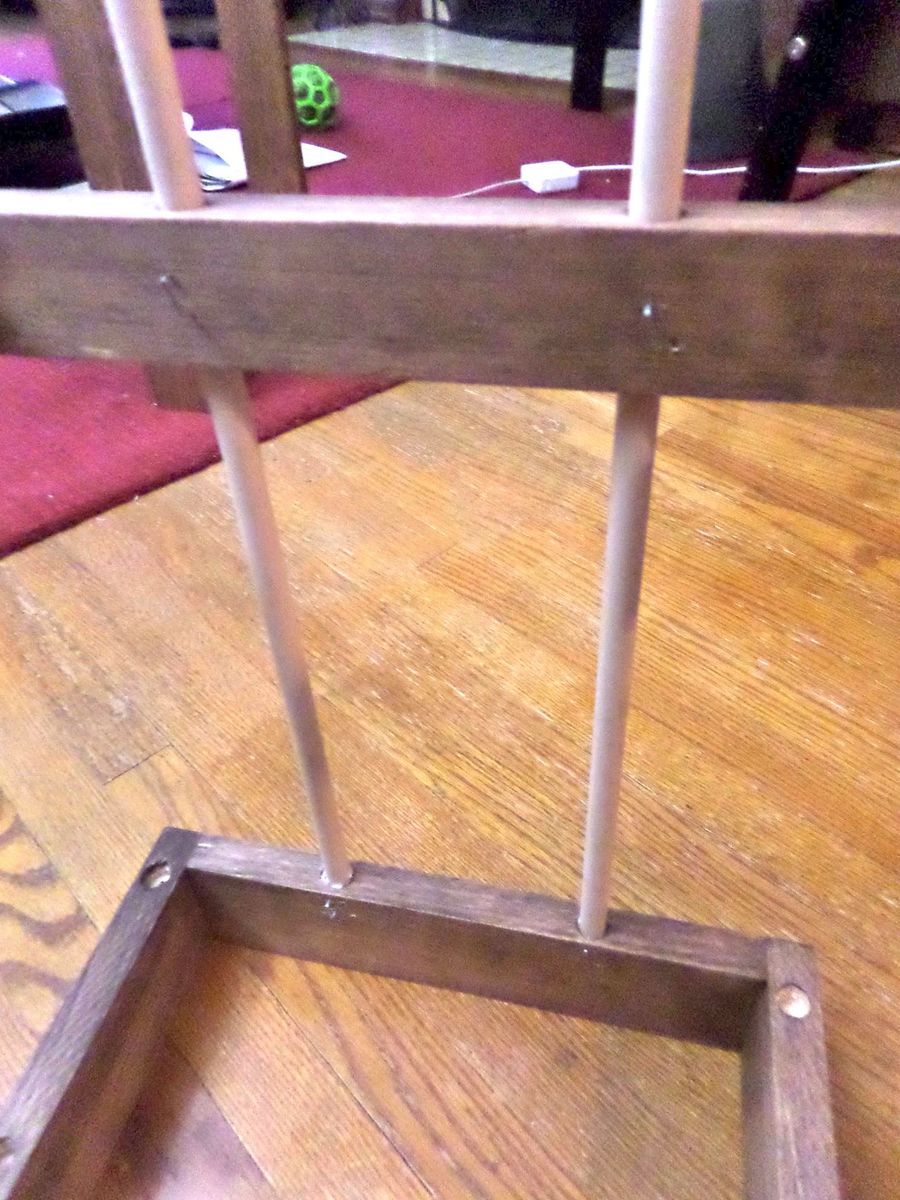
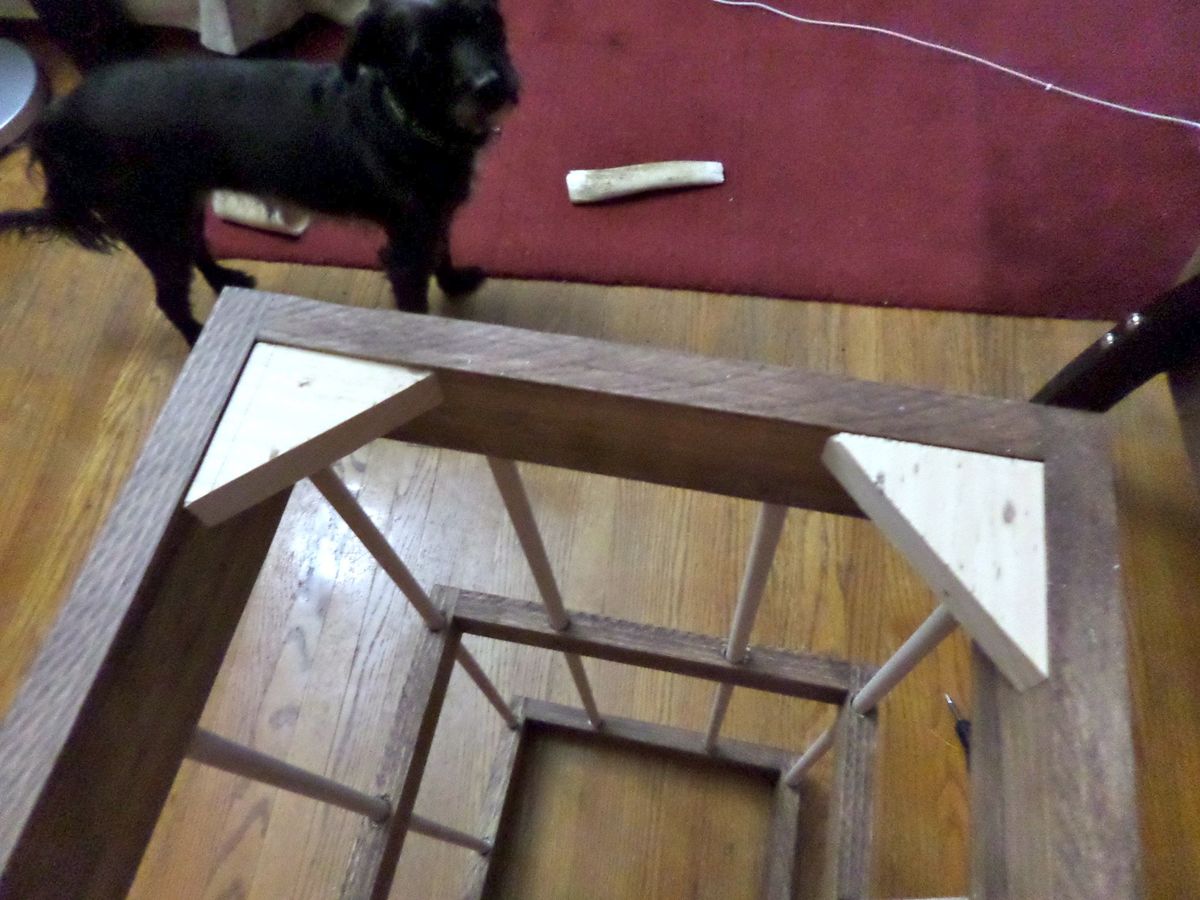
I used pine, and a "walnut" stain by minwax. We only stained the structure part so the bars would look like they were a different material. I also used glue, a staple gun and my Ryobi Airstrike automatic nailer - it's a new toy for me, but one I'm in love with already :)

Please feel free to click over to my blog for details on how to help build yours! ---> http://projectjumanji.blogspot.ca/2013/10/what-ive-been-up-to.html

Estimated Cost
$50
Estimated Time Investment
Afternoon Project (3-6 Hours)
Finish Used
minwax stain - "walnut"
Recommended Skill Level
Starter Project

Small Flower Planter

Submitted by JamieLynn on Sun, 05/19/2019 - 04:45

This is my first project in years. It turned out exactly as I wanted. I decided to paint it after with some white paint That I had laying around. This whole project cost about $15 and 2 hours.

Estimated Cost
$15
Estimated Time Investment
An Hour or Two (0-2 Hours)
Recommended Skill Level
Starter Project

Bar stool

Submitted by Anonymous (not verified) on Fri, 03/10/2023 - 13:10

Hi Ana,

Using the bar stool plan and I built two bar stools for my man cave in Australia. Thank you so much. Cheers
Ricky

Built from Plan(s)

Comments

Ariel's Coffee Table

I built that table for a friend using primarily hand tools. The only power tools were a table saw to rip the legs from a scrap 2x12 from another project, and a drill for draw-bore holes.

The table is made from pine, so that it is light enough for a woman of small stature to carry it up to a third-floor apartment. The frame is made with mortise and tenon joinery for strength, and the joints are draw-bored to make sure it doesn't fall apart in our lifetime.

The top is a glued-up panel from five other boards. This was my first panel glue up, so it was a little bit exciting in the same way that a kitchen fire is exciting. The surface has a rustic texture, made by planing it smooth with a cambered jack plane. The texture isn't visible under normal lighting, but with a raking light you can see it. It's very interesting to run your fingers over this table because of the texture from the plane, and the strong grain of the white pine.

Estimated Time Investment
Week Long Project (20 Hours or More)
Finish Used
The finish is amber shellac, with four coats of gloss polyurethane, thinned 1:1 with mineral spirits to improve the flow and help the finish self-level.
Recommended Skill Level
Intermediate

Wood Trug - Kit Form

Submitted by rosiejane on Tue, 10/29/2013 - 01:25

I made these back in February. I came across this project on Jamie's site (http://thatsmyletter.blogspot.com.au/2012/10/t-is-for-trug-naked-versio…) earlier in the year and thought that it would make a fantastic birthday gift for my 6 year old nephew. I gave it to him in kit form complete with nails and glue so that he could assemble it himself. I predrilled the nail holes. Of course I then had to make one for my own 6 year old so that they could build them together. I adjusted the size to accommodate some tools my dad had given them for Christmas. Time indicated includes personalisation time.
I've had a bit of practice painting names since this project. Each time I get better at it.

Built from Plan(s)
Estimated Cost
under $5
Estimated Time Investment
Afternoon Project (3-6 Hours)
Finish Used
Used cheap craft acrylics for the stripe and the name. Due to time constraints I skipped the protective poly coat. I did go back later and add poly to my son's one.
Recommended Skill Level
Starter Project

2x4 patio couches

Submitted by Sner77 on Mon, 05/27/2019 - 10:49

I built 2 of the 2x4 couches with slight modifications.  I didn’t like the straight bar across the back so changed it to a leaning high back.

I also added a square box that can be used for a dividing table on the couch or side table when additional seating is needed.  

Plan on scaling down for a love-seat and chair.

Kreg jig for pocket holes was time consuming but well worth it! 

Built from Plan(s)
Estimated Time Investment
Weekend Project (10-20 Hours)
Finish Used
Urathane.
Not pleased with the urathane finish after 2 years. I have begun sanding them down to try a linseed oil finish instead.
Recommended Skill Level
Beginner

High Patio Chairs

Submitted by Anonymous (not verified) on Sat, 03/18/2023 - 12:12

Made from reclaimed materials. Made it easier to standup with my bad knees

Comments

Seth's first work bench

I am so excited to have my son see this on Christmas morning. I decided to build in the bottom shelf for more tool storage and I am considering drilling some holes in the sides of the top shelf or the back for hammering in "nails" (or clothespins painted grey). This was my first project without any man-help and I can't wait to get started on the next one! Thank you so much Ana for your designs and more importantly, your inspiration.

Built from Plan(s)
Estimated Cost
$21.00
Estimated Time Investment
An Hour or Two (0-2 Hours)
Finish Used
Clear coat and laytex paint (benjamin moore admiral blue)
Recommended Skill Level
Beginner

Comments

rhonit

Sun, 12/04/2011 - 13:44

you're little guy should love this. my grandson is 4 months old but next year this is on my list to build for him. love the idea about the wooden clothes pins. good job!

Rustic X Console Table

Submitted by hmctagg on Sat, 11/02/2013 - 13:05

We followed the plans closely, and it turned out well for the first project. It was the perfect size for what we needed! My husband had never built anything like this before and after a little research on how to use the kreg jig, he was able to finish it in a weekend.

Estimated Cost
$120 including finishing supplies
Estimated Time Investment
Weekend Project (10-20 Hours)
Finish Used
I used one coat of Minwax Provincial. I originally bought a sample can to practice on some scraps and then planned to go buy the bigger can, but I was able to stain the entire table with the sample size using an old T-shirt instead of a brush (I didn't want to risk brush marks). I liked the look after one coat, so I stopped there. I also decided against adding the hardware since I liked the look without it.
Recommended Skill Level
Beginner

Outdoor Sectional

Submitted by KristenP on Thu, 06/06/2019 - 18:00

We built Ana’s outdoor sectional in a few hours and it’s made a huge impact on our deck! It saved us so much money but looks like a high end piece! Thank you for the simple and structured plans!

Estimated Cost
$200
Estimated Time Investment
Afternoon Project (3-6 Hours)
Finish Used
Cedar Stain
Recommended Skill Level
Beginner

Comments

Entry Cosole/Media Stand

Submitted by Anonymous (not verified) on Fri, 03/24/2023 - 14:09

Thank you for this plan! We did a few alterations like the soft close shaker doors. We painted with Navy Blue paint mixed with BBFrosch chalk mix. Love this so much! John + Jina
Colorado

Comments

Rustic X Bench

Submitted by jont on Fri, 12/09/2011 - 18:51

Simple x bench followed the plans posted below except I shortened it to fit our old table.

Estimated Cost
$35
Estimated Time Investment
Weekend Project (10-20 Hours)
Finish Used
English Chestnut Minwax stain with 2 coats minwax polyurethane
Recommended Skill Level
Intermediate

Comments

Handmade pedestal farmhouse table

Submitted by Anonymous (not verified) on Wed, 01/20/2016 - 09:42

Modified slightly to include just two legs and excluded the decorative pieces for a more streamined look.

Built from Plan(s)
Estimated Cost
$400
Estimated Time Investment
Weekend Project (10-20 Hours)
Finish Used
English chestnut stain with a flat poly
Recommended Skill Level
Beginner

Herringbone Side Board

Submitted by abarkman on Tue, 06/18/2019 - 14:18

I started this project by using the mini Farmhouse side tables plan.   I added my own herringbone detail on the top that turned out pretty cool.    I finished with Italian brass hardware and put a sleek satin Old Masters finish over the whole thing.  It's a lovely piece that I really enjoy.  

Built from Plan(s)
Estimated Cost
Made mostly out of scrap that I had kicking around. The top has a 1/2" plywood base that would probably cost the most out of all the lumber.
Estimated Time Investment
Weekend Project (10-20 Hours)
Finish Used
Ben Moore Paint (sanded back a bit) and Old Masters Polyurethane
Recommended Skill Level
Intermediate

COVID Projects

Submitted by Anonymous (not verified) on Fri, 03/31/2023 - 07:31

A few alterations to plans….thanks for the inspiration!

Built from Plan(s)

Comments

Simple Chair

Submitted by Medickep on Wed, 11/06/2013 - 21:11

I needed some new chairs for my kids play room as the ones that came with a table they received as a gift were cheap and I had reinforced them three different times.

I liked the simple design of them and the cost is right! Mine were a little more as I used 2x2's for the legs and made the body of the chair double-braced as my boys are hard on things!!

My boys picked the colors, which the blue was left over from a room and the red from my older son's desk!

Estimated Cost
15 per chair
Estimated Time Investment
Weekend Project (10-20 Hours)
Finish Used
I primed and painted the chairs with left over paint. On one of the chairs I used a spray polyurethane. On the other one, I used a foam brush with expensive (30.00 quart) polyacrylic as I wanted to see if there was a huge difference. I didn't care for the sprayed technique!
Recommended Skill Level
Beginner

Outdoor Loveseat

Still need to stain but this was my very first project and it turned out well!  The directions are very easy to follow and I am very happy with it!

Estimated Cost
$25
Estimated Time Investment
Afternoon Project (3-6 Hours)
Finish Used
Will be using Minwax oil-based stain over a wood conitioner, and a clear flat oil-based top-coat.
Recommended Skill Level
Beginner