Potting Bench
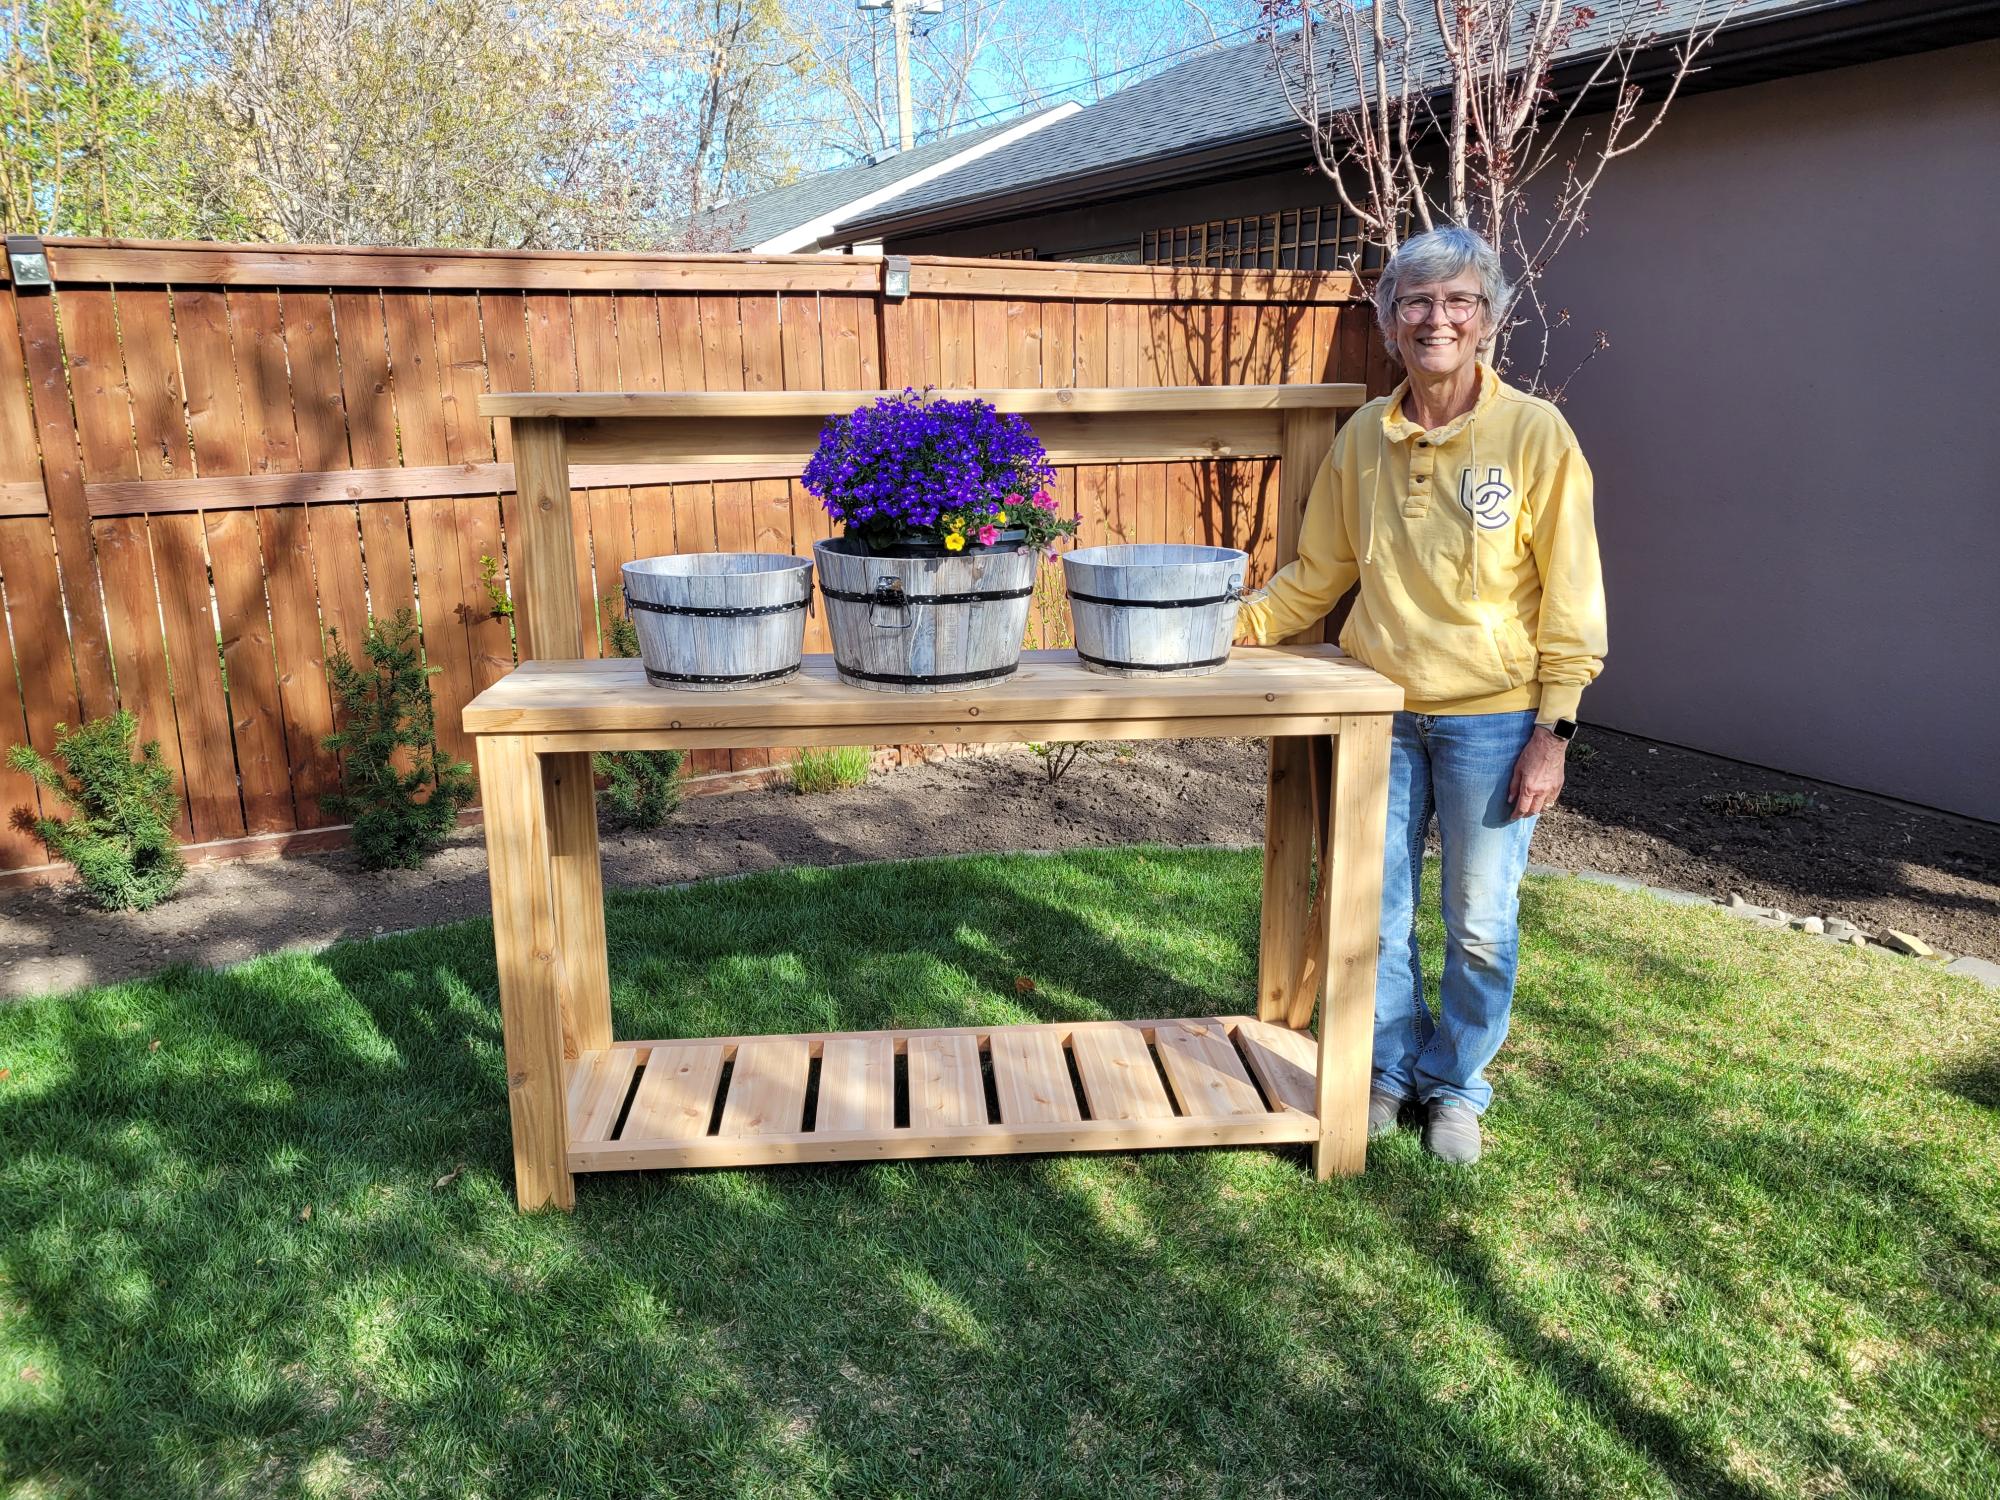
Used a light stain to feature the cedar.
by Lawrence and Pat!
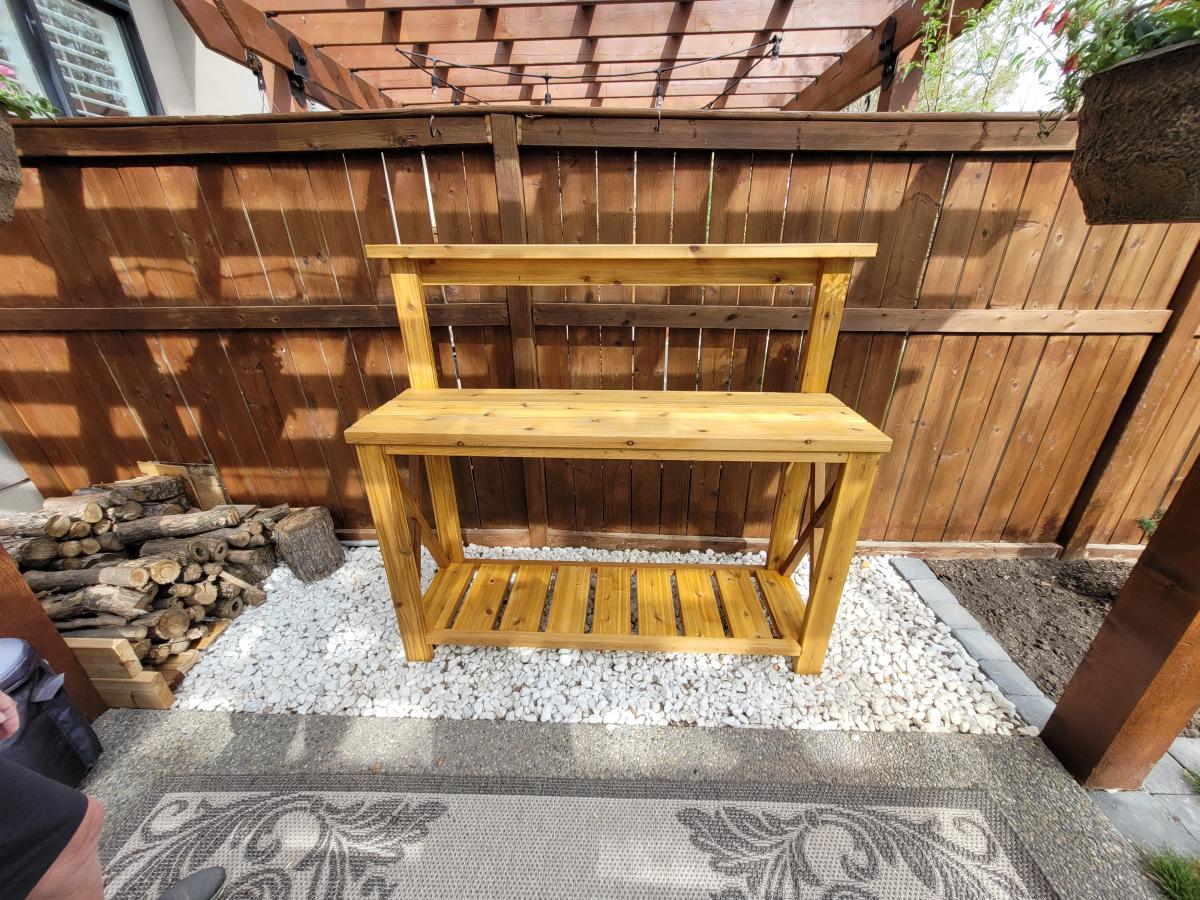
Built from Plan(s)
Used a light stain to feature the cedar.
by Lawrence and Pat!
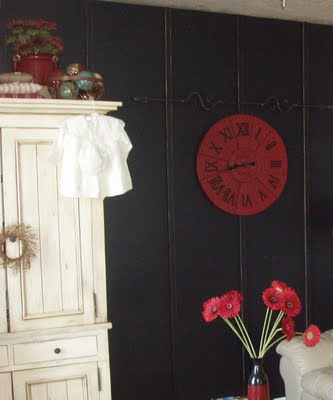
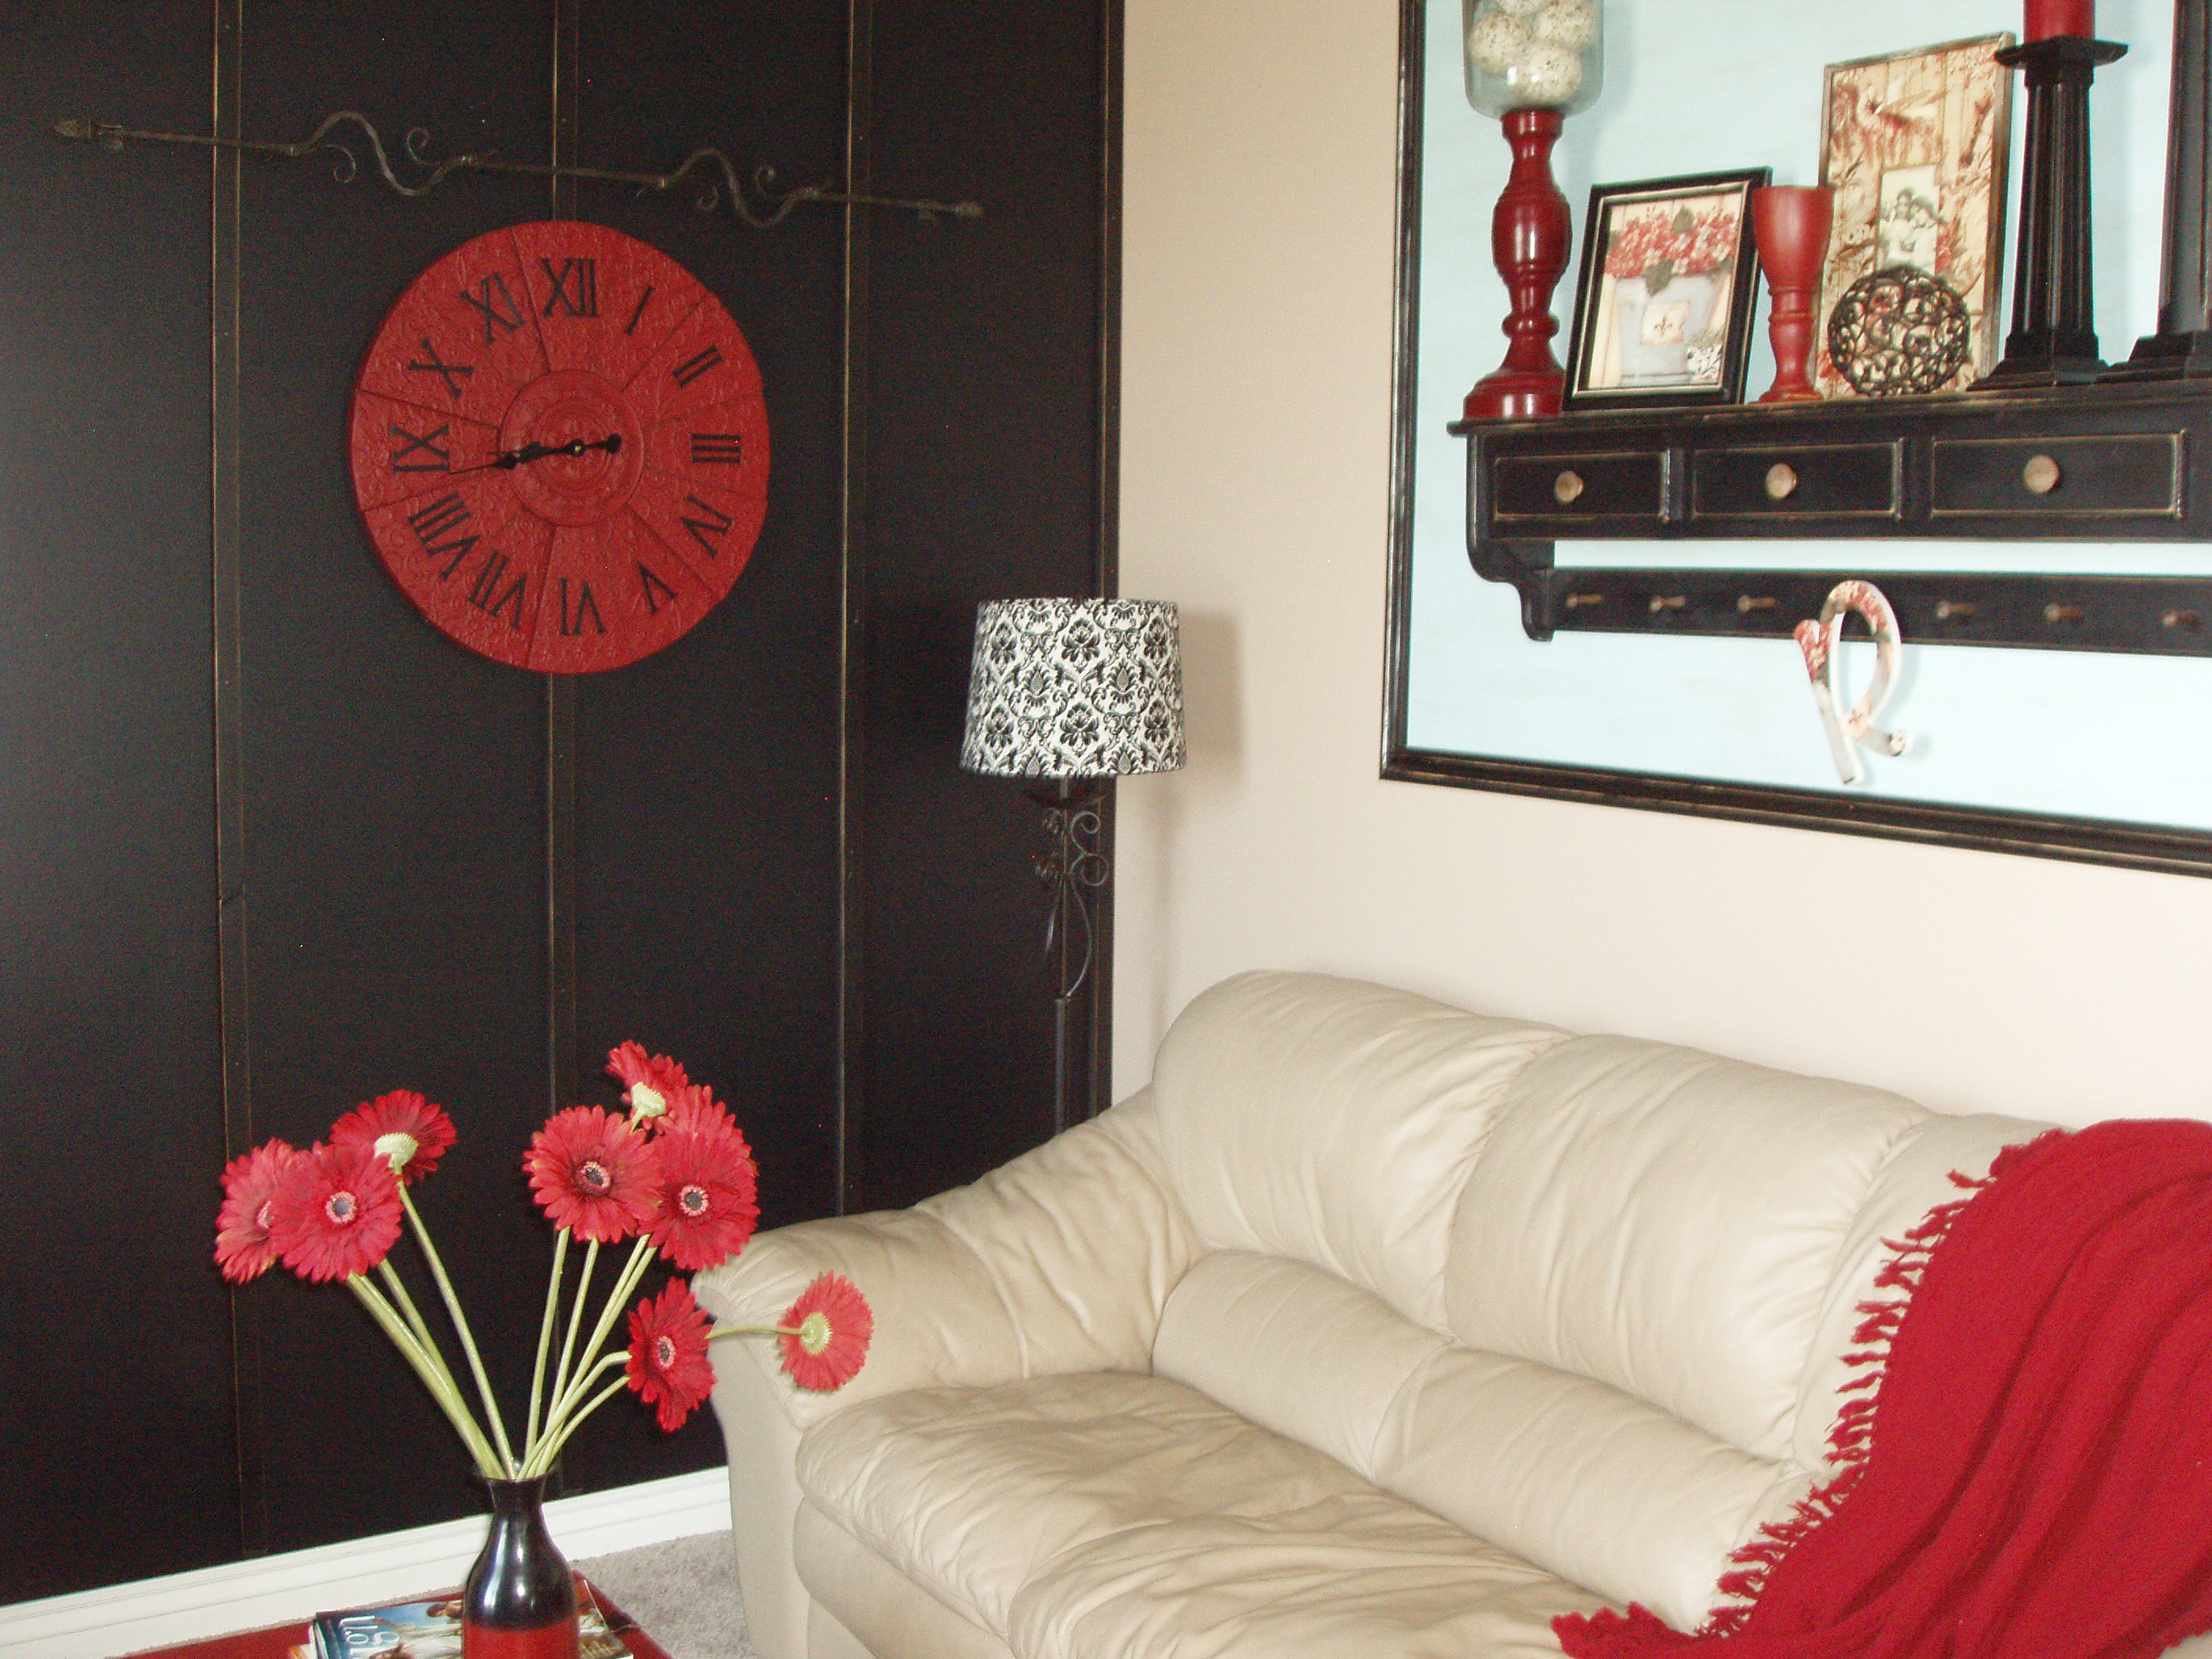
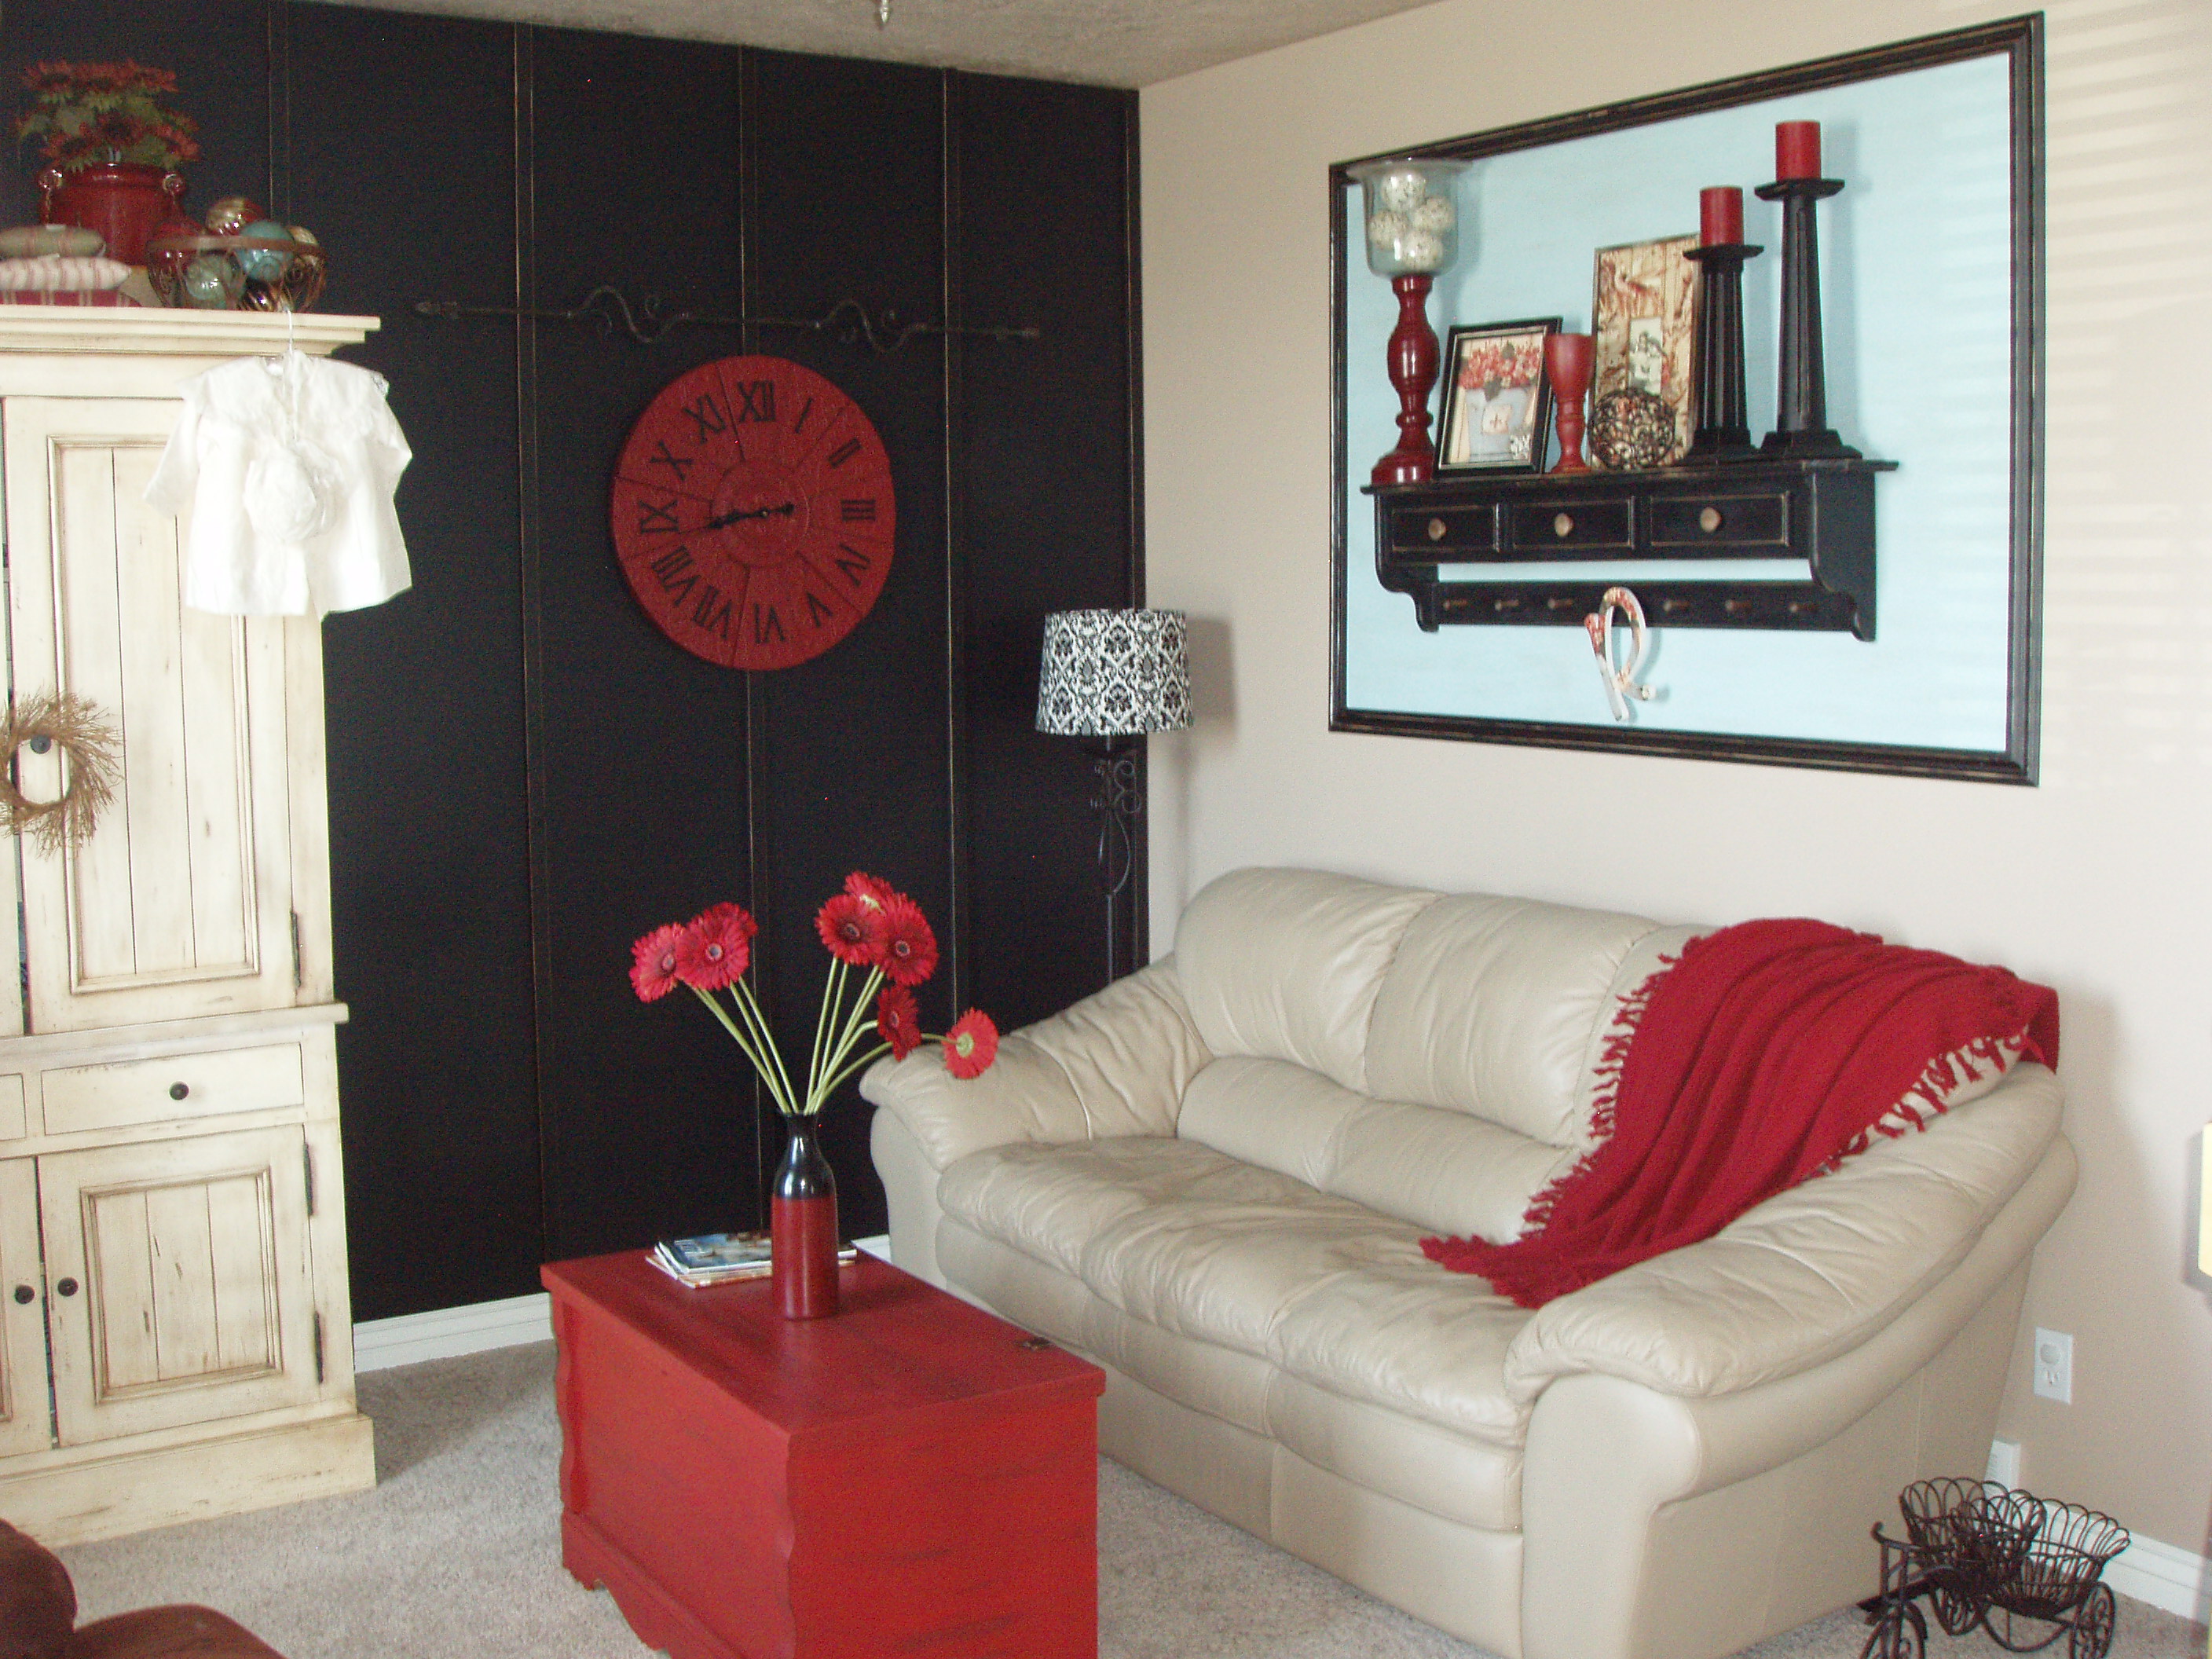
Hanging the board and batten wall is incredibly easy and fast! It's when you decide to paint it black that complicates things!
You can check out the whole tearful/funny experience here http://isteppedoutofmycomfortzone.blogspot.com/2011/04/and-opened-can-o…
Sat, 08/06/2011 - 16:26
This looks great!!! I love your board and batten. I also love the shelf within the frame.
This was my first "real" project other than making a small bench to hold my miter saw in order to make this project! :)
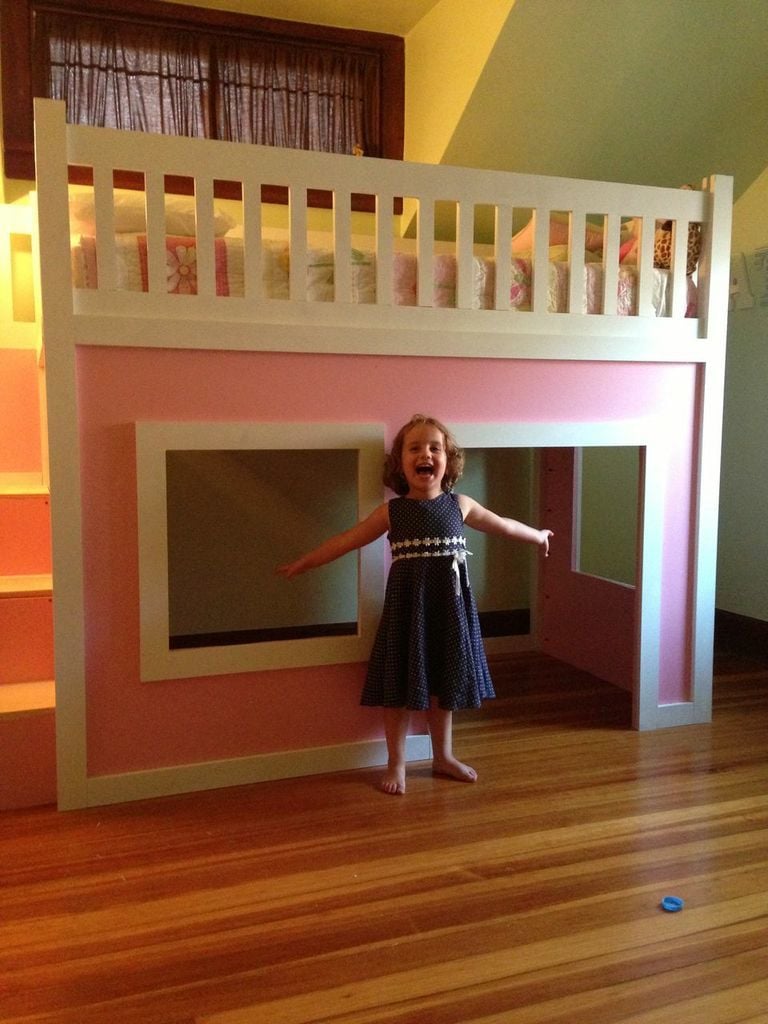
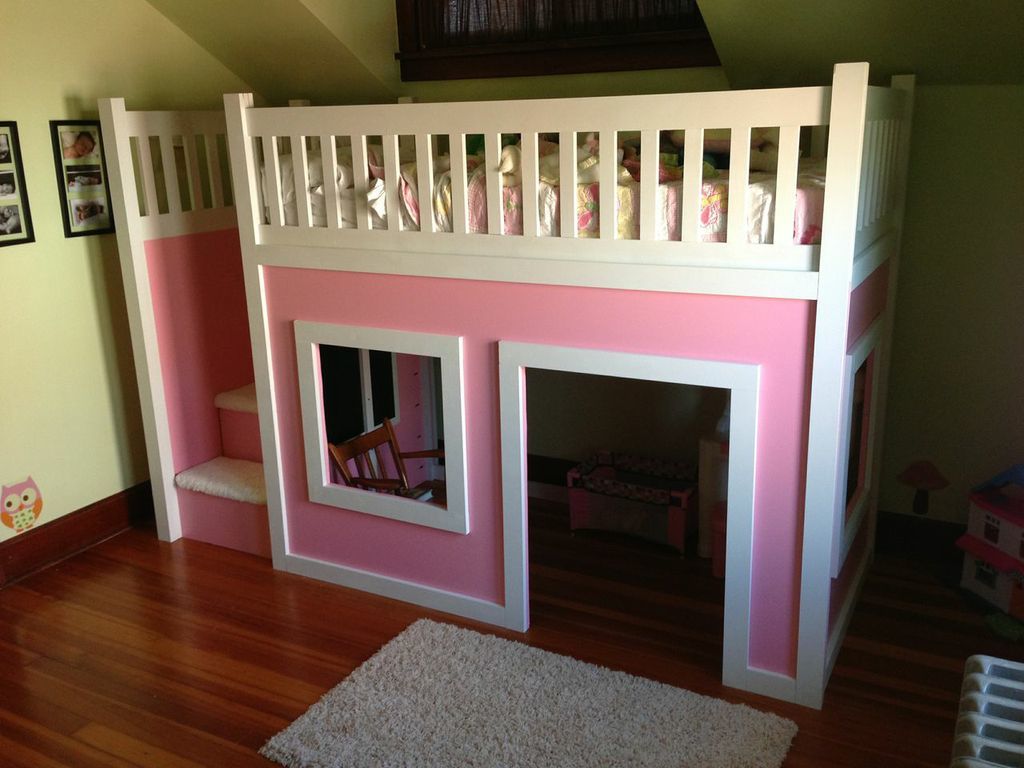
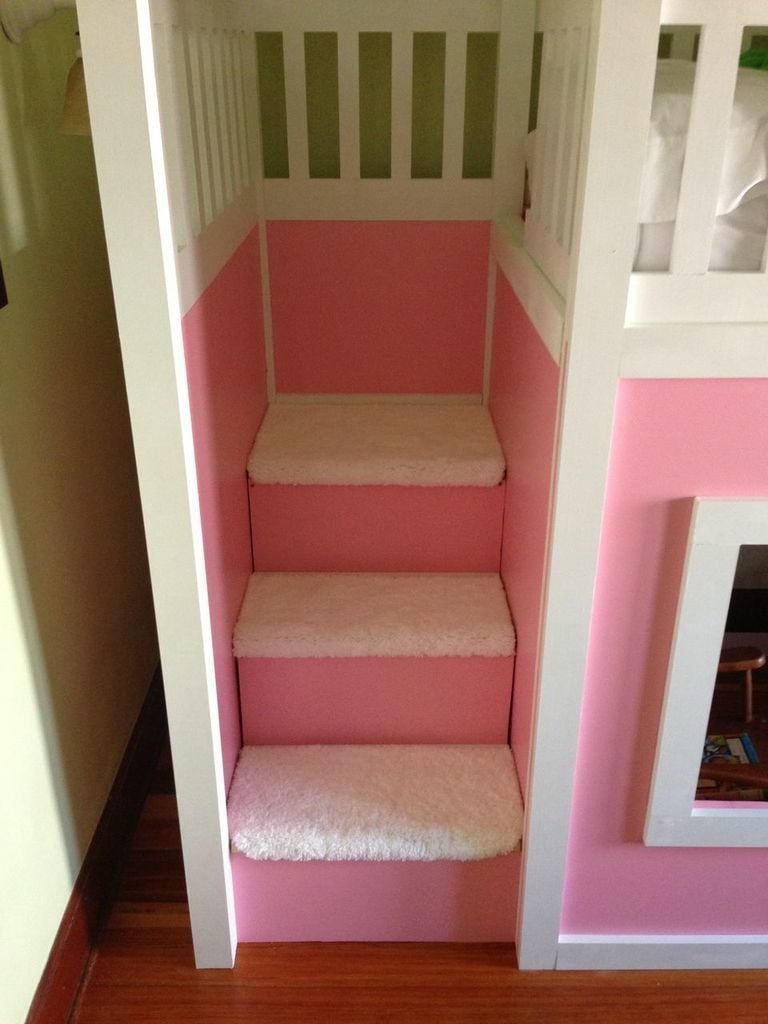
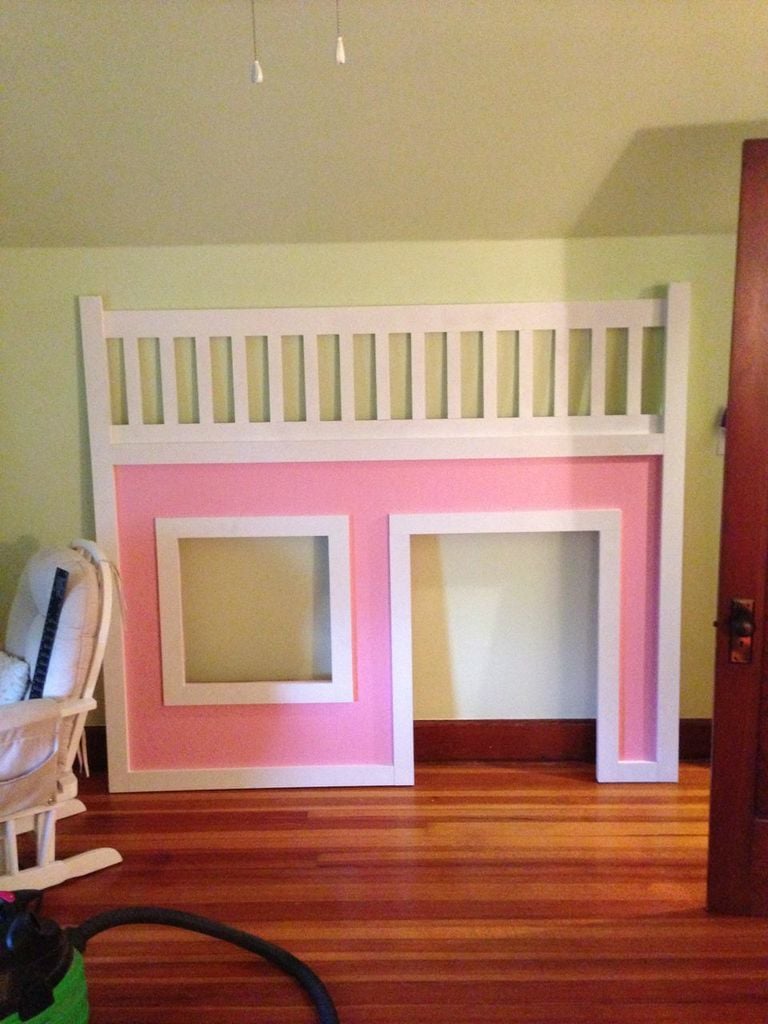
Saw these plans and instantly fell in love. I knew my daughter's birthday was coming up soon (she turned 4) so I got to work!
I used Poplar wood that had different nominal dimensions than the standard making this project not nearly as easy as what it should be. A lot of headaches, but seeing Tatum's smile on her face when we revealed her surprise made it ALL worth it!
I mostly used my Kreg Jig and Kreg screws. Used my nailer to tack up all trim. used wood screws to secure all of the walls together through the legs.
For the stairs, I purchased a large bathmat from Walmart and cut it to fit each step. I tacked it down with some staples and adhesive. I used 12" continuous hinges for the stairs and they worked perfectly.
Keep in mind other expenses, as the bill can increase rather rapidly!
My total wood bill was $398...but I used Poplar. If you go with pine, it will cost you less. $40 for primer and paint. $100 for new twin mattress. $30 for protective mattress cover. $75 for pottery barn quilt set (eBay). $13 for carpet on stairs. $24 for hinges ($8 each)!! $28 for 2 sets of sheets...bringing the grand total to a whopping: $708!
Very finicky to assemble, but love the finished product!
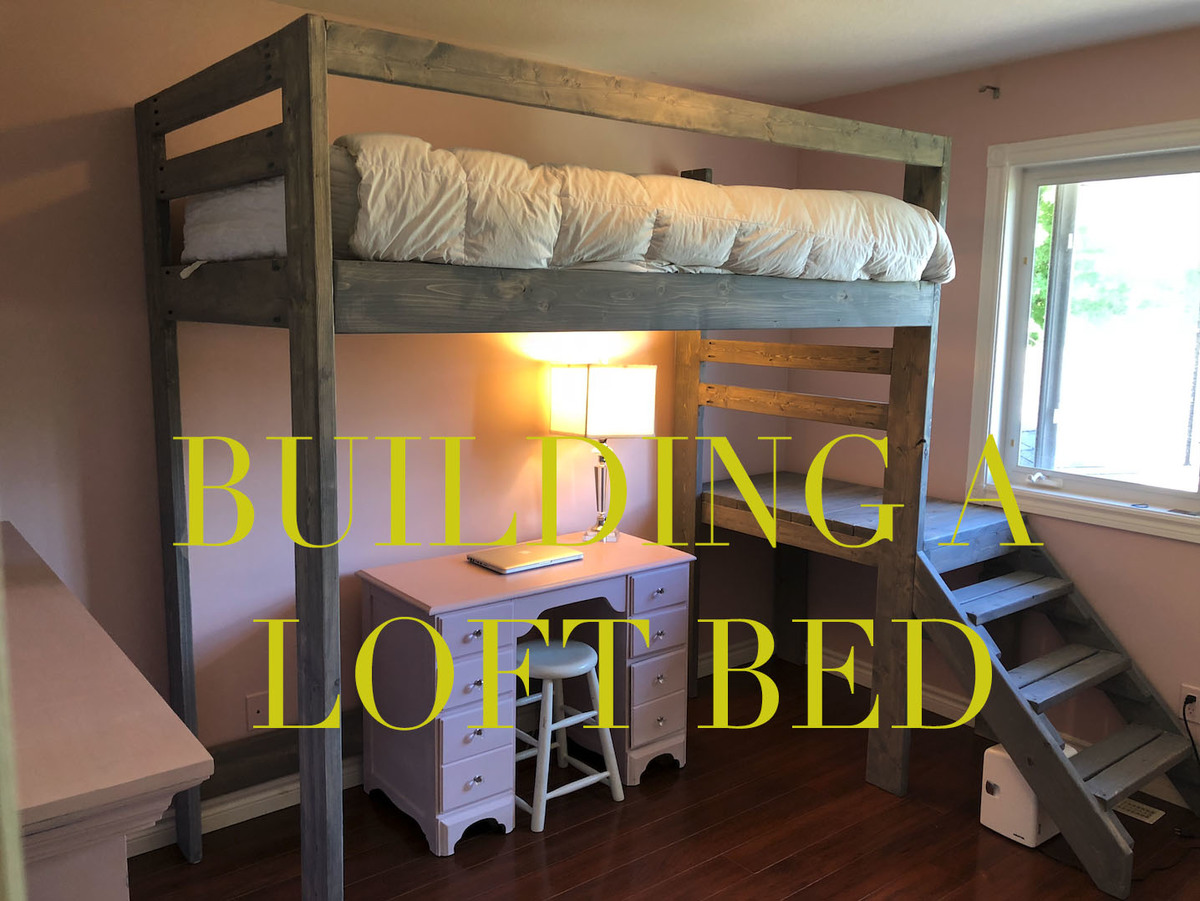
This is my youtube video of me building the loft bed.
Instagram: @gardners_garage
Thanks Ana for your plans. I used them but made just minor adjustments to the height to suit my daughter.
Having your website defenitly made things easier, from picking up the wood to the cuts!
Thanks!

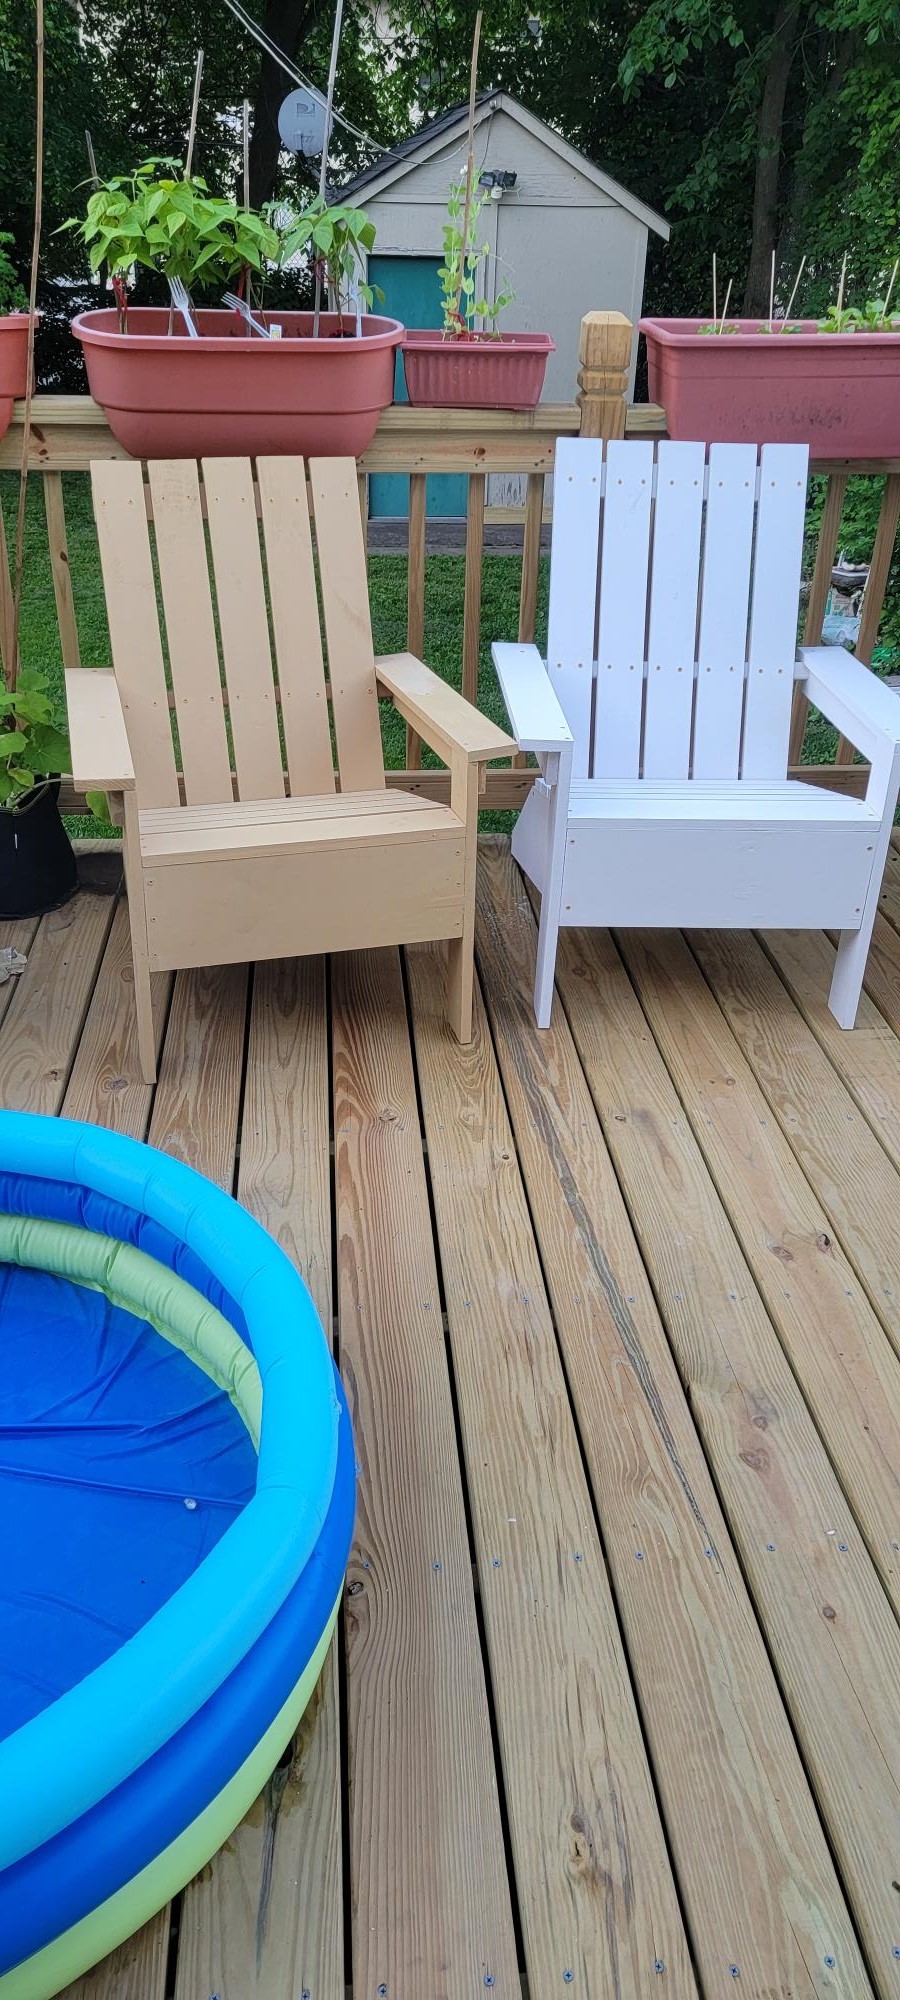
Loved building these chairs. Last year I built 5 of the smaller ones for my grandchildren.
Carol Schiffman from West Orange. NJ
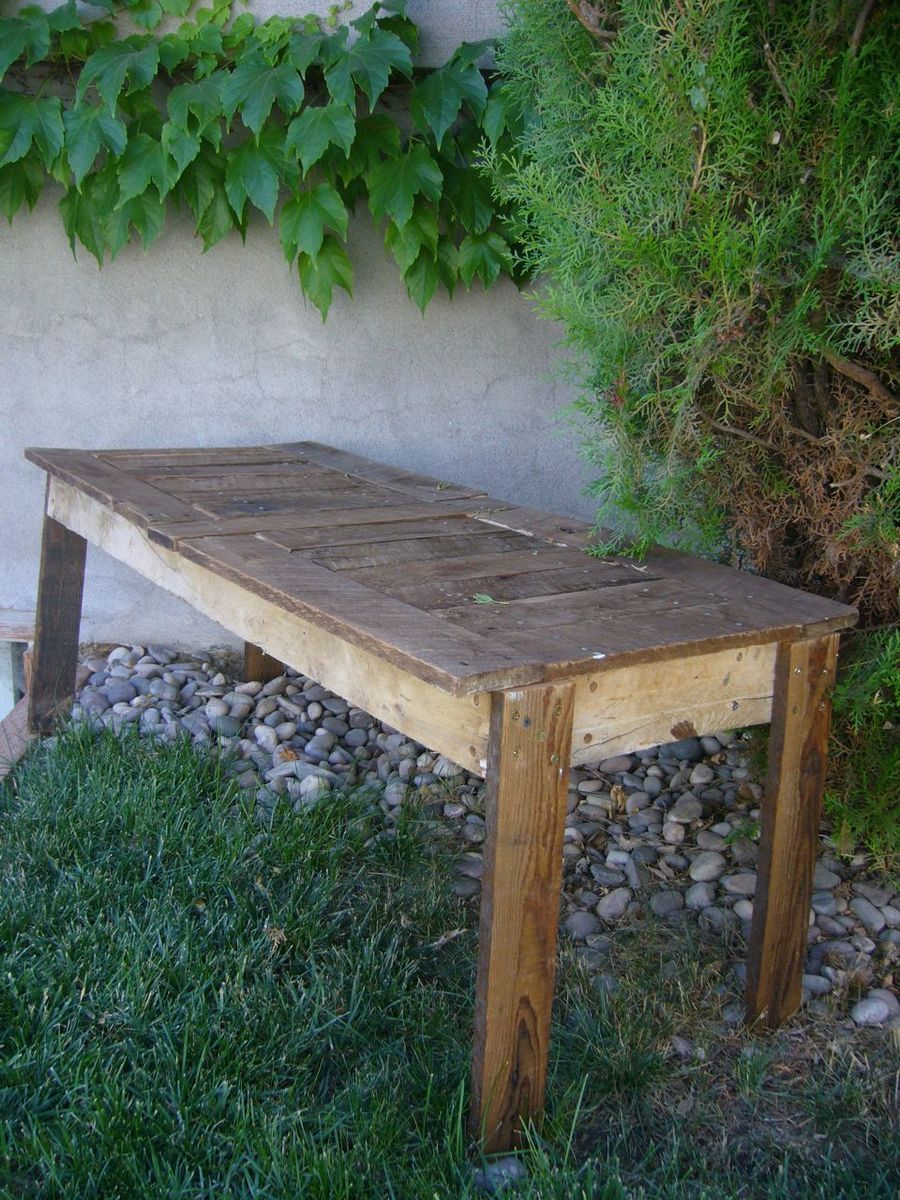
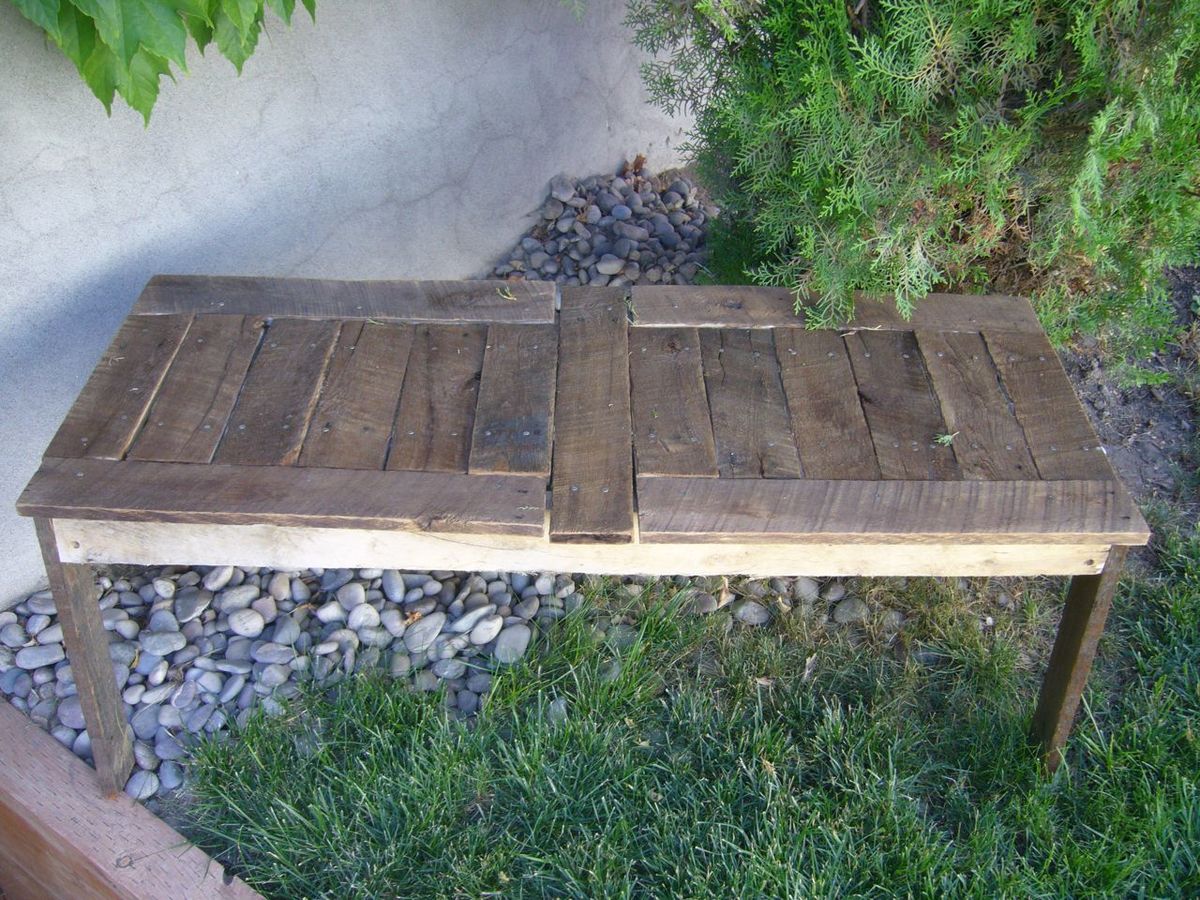
The side of our house needed some character, and this pallet wood bench was the perfect solution. Very rustic, very worn, very out of square and poorly measured, yet cute, sturdy, rich and perfect. The weathered rough sawn oak pallet that we made this out of was so heavy it took two to carry out of the weeds it was found in. The bench probably weighs 100 pounds. The hardest part? Getting the 100 year old pallet apart. Bring all your muscles (or a saws all!). Perfect for decoration and if need be a quiet spot to sit and think.
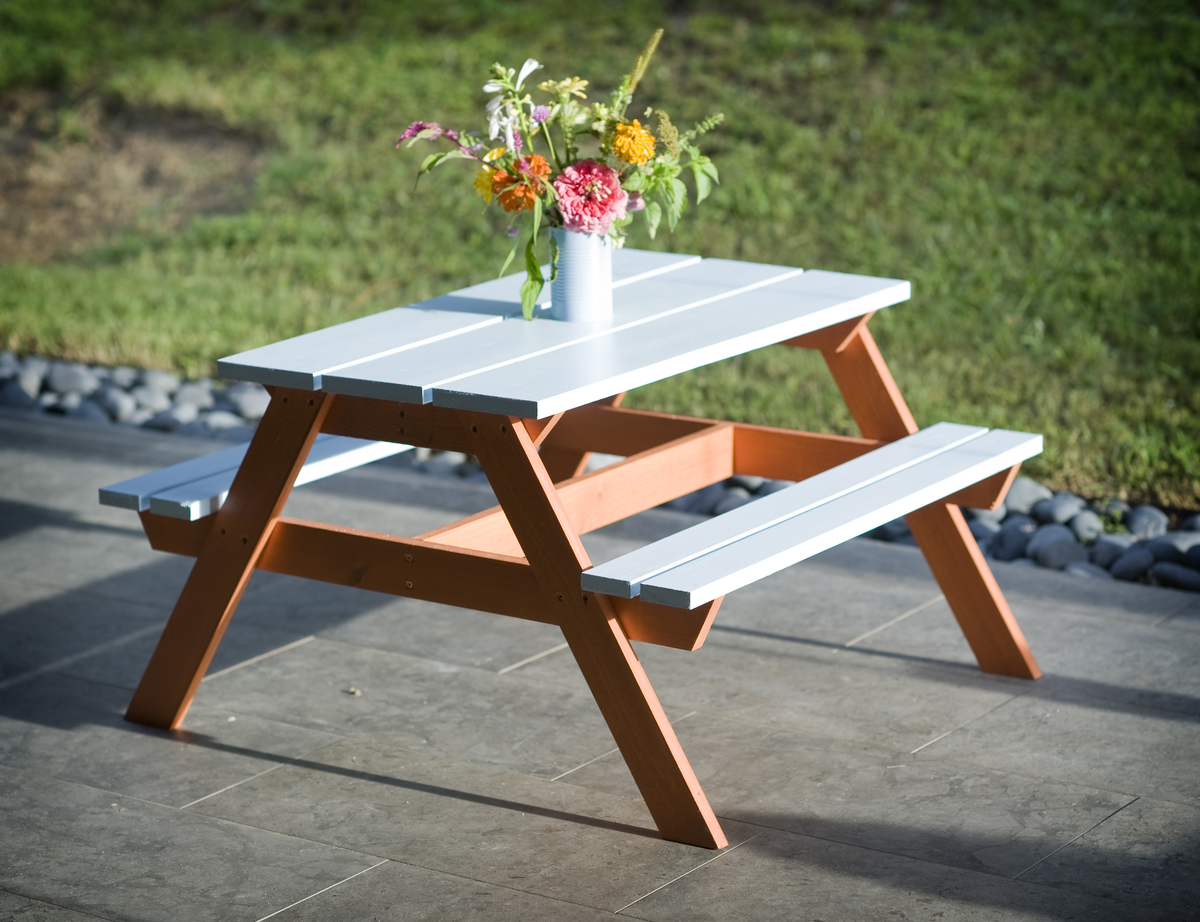
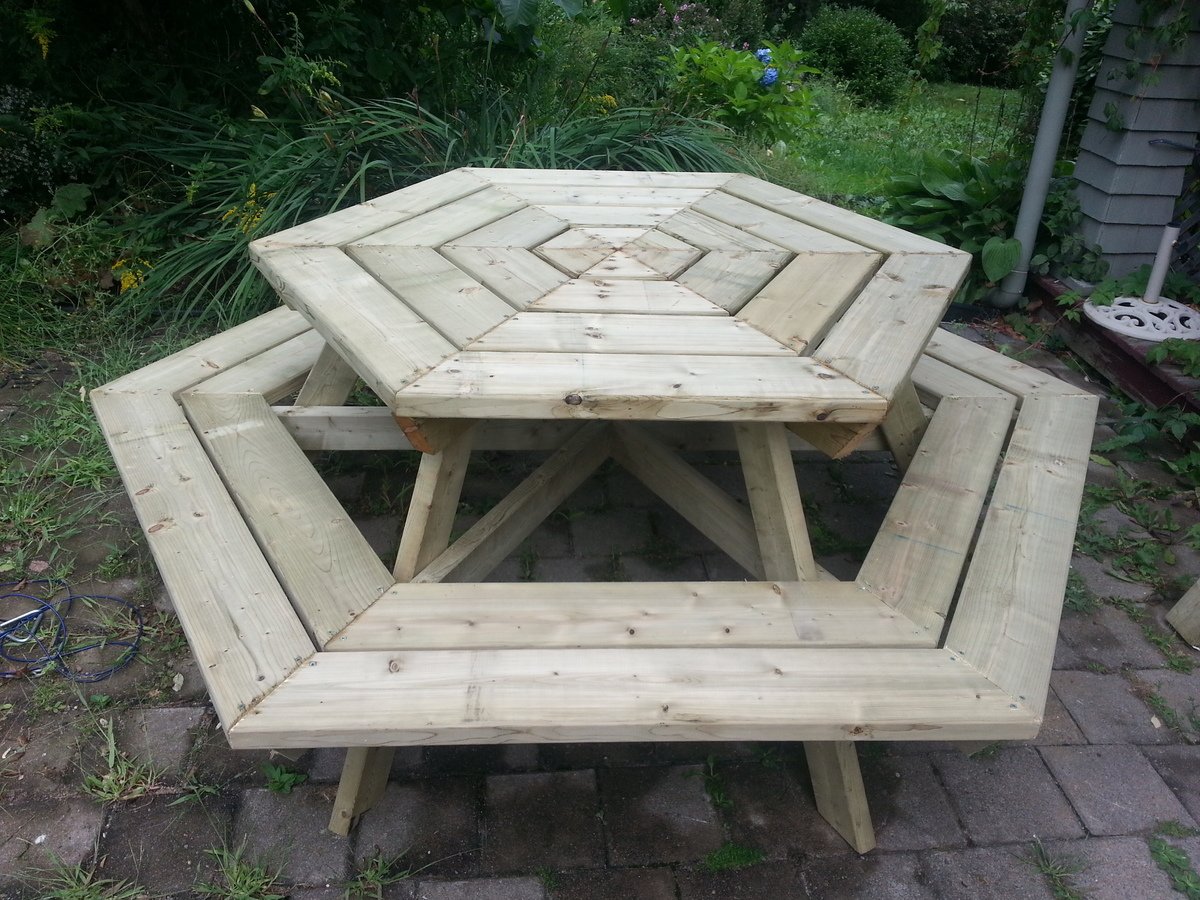
My husband and I made 2 of these for my 3 year olds "Picnic Birthday Party", and they worked out great! We will definitely be using them for a while! They took about a week off and on since I just had a little time each day to do them, but I could have gotten them done in a couple easily. Very fun, easy project! We ended up staining the bottom support pieces and painting the top pieces a light blue, I love how it turned out!


Mon, 08/19/2013 - 19:13
This little table is just darling! The picture of your girls at the table is just the cutest thing! Thank you for posting this!
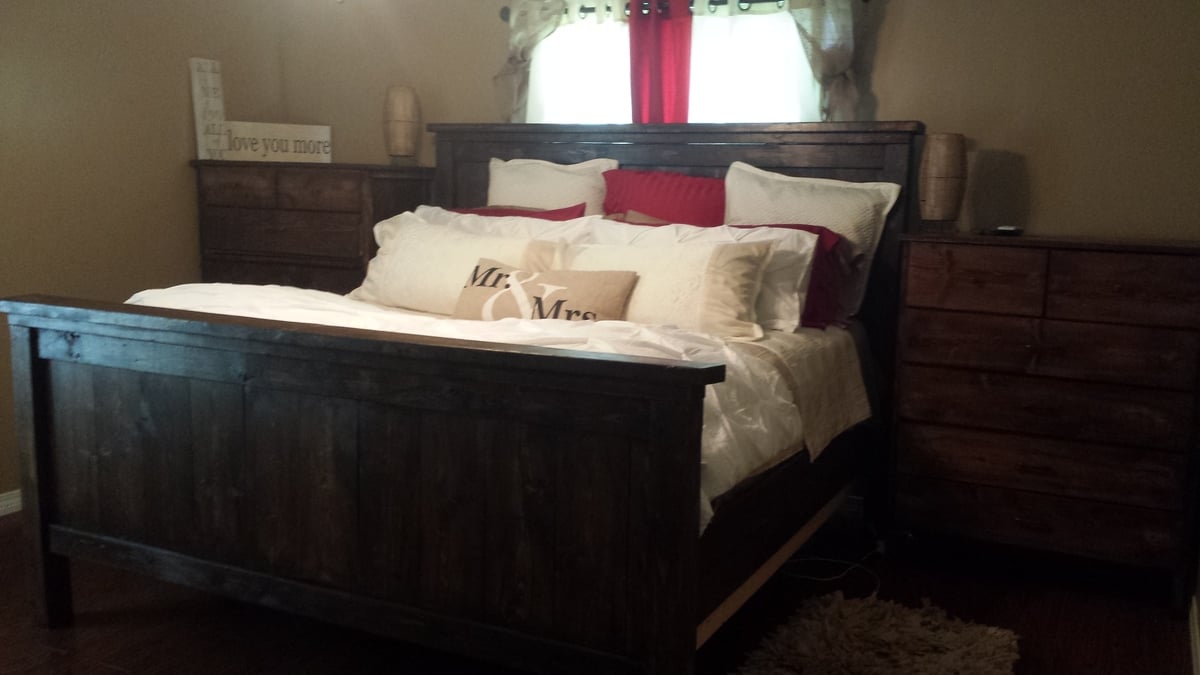
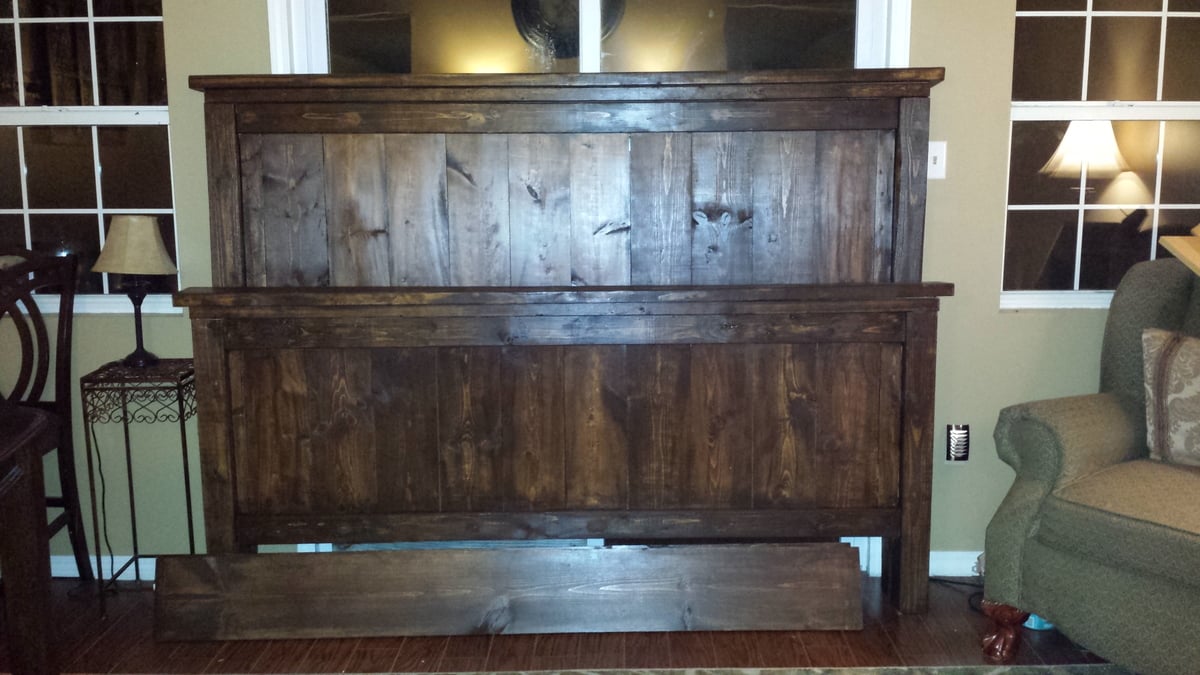
This was our first big DIY project and I absolutely LOVE the finished product. We now have a solid, sturdy king size bed that everyone loves. The plans were pretty easy to follow although I chose to make the headboard and footboard taller than mentioned on the original plans. The measurements came from another Ana White DIY-er http://diystinctlymade.com/2014/02/05/diy-pottery-barn-farmhouse-bed/ . For the bed frame, brackets and 2x4s were used. The stain use was dark walnut by Rust-o-leum and finished with minwax polyurethane semigloss. Working on and off, it took us approximately 2 weeks to finish the project; although, I'm pretty sure it could've been completed in a weekend.
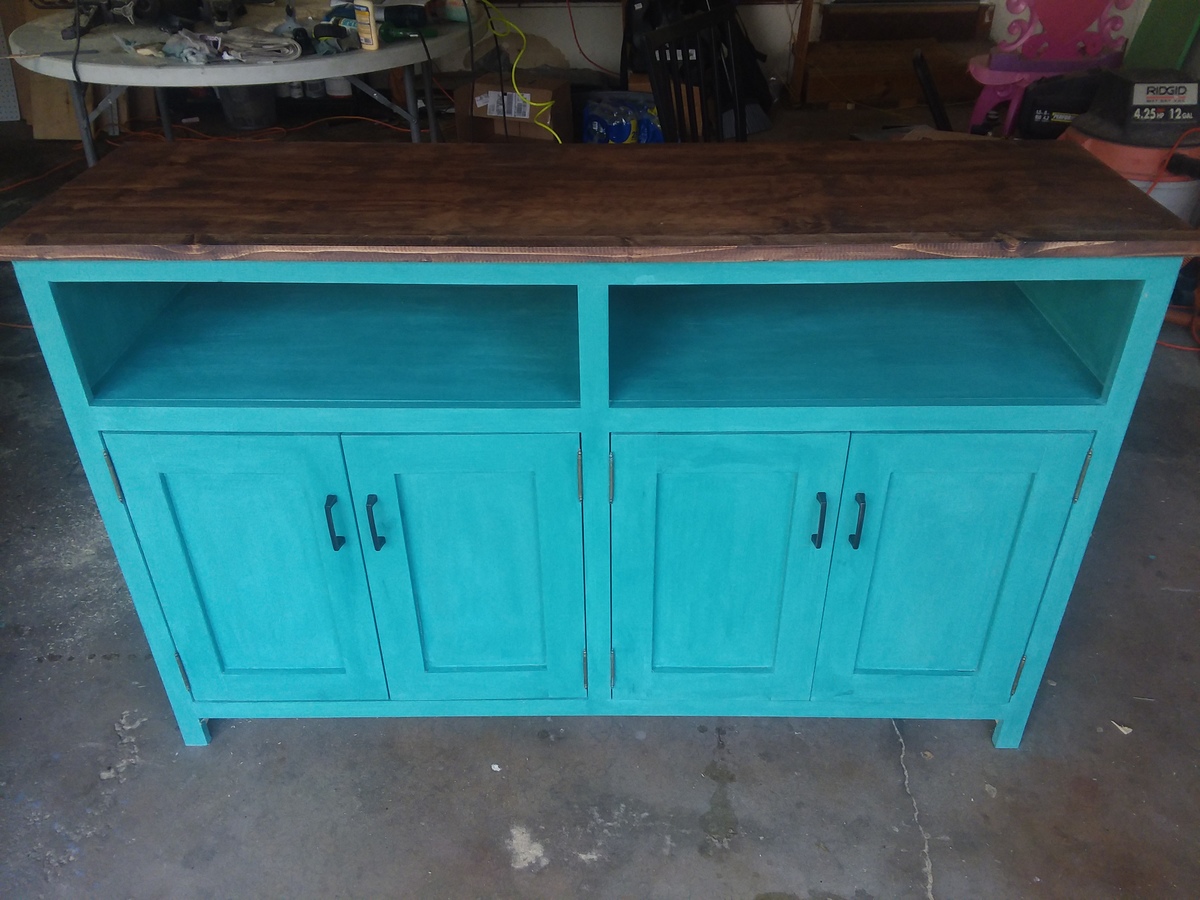
Entryway console without base pieces to more closely match my other furniture.
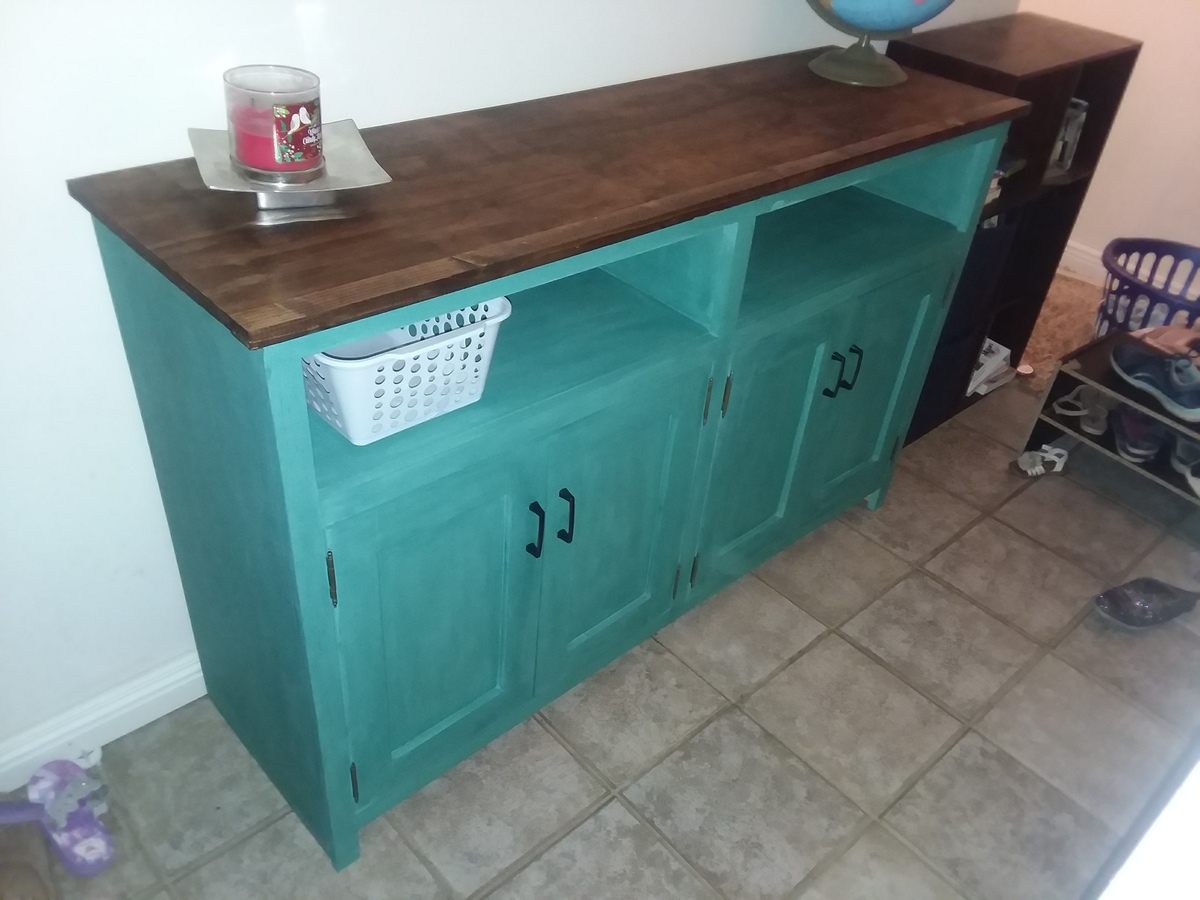
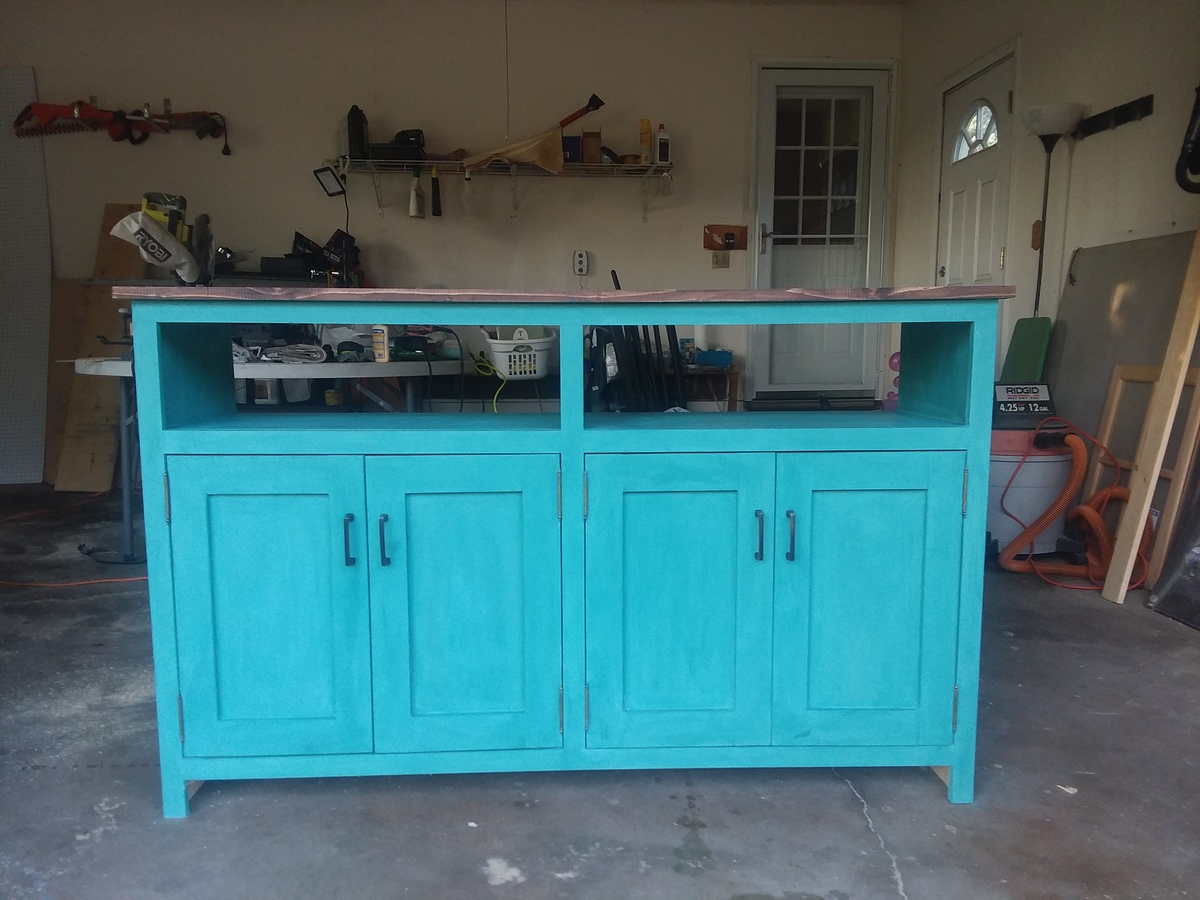
Love how this turned out! Thanks Ana!
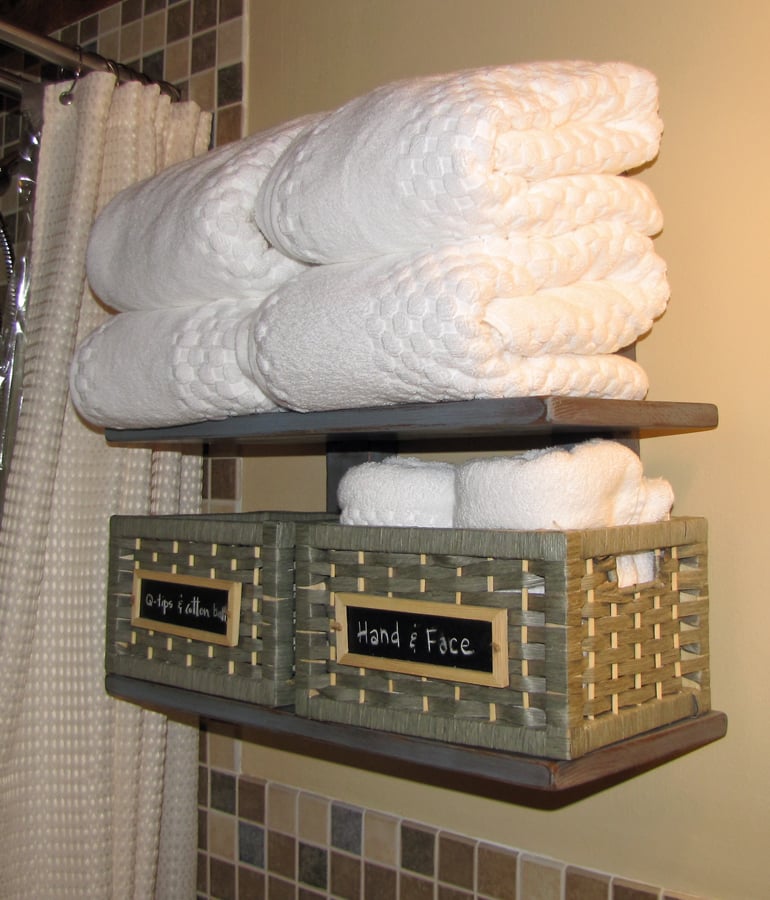
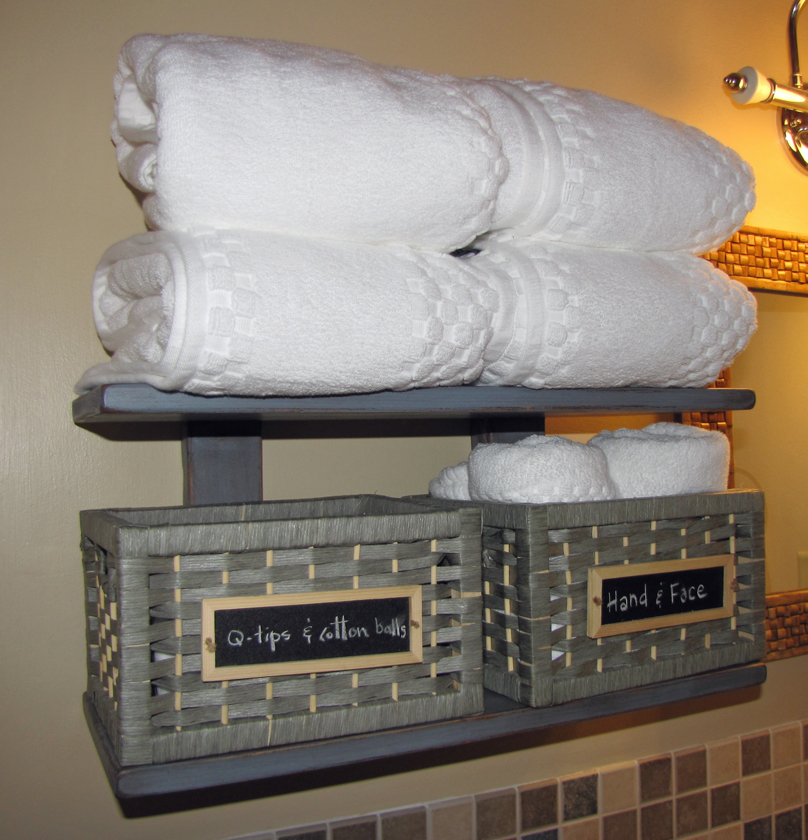
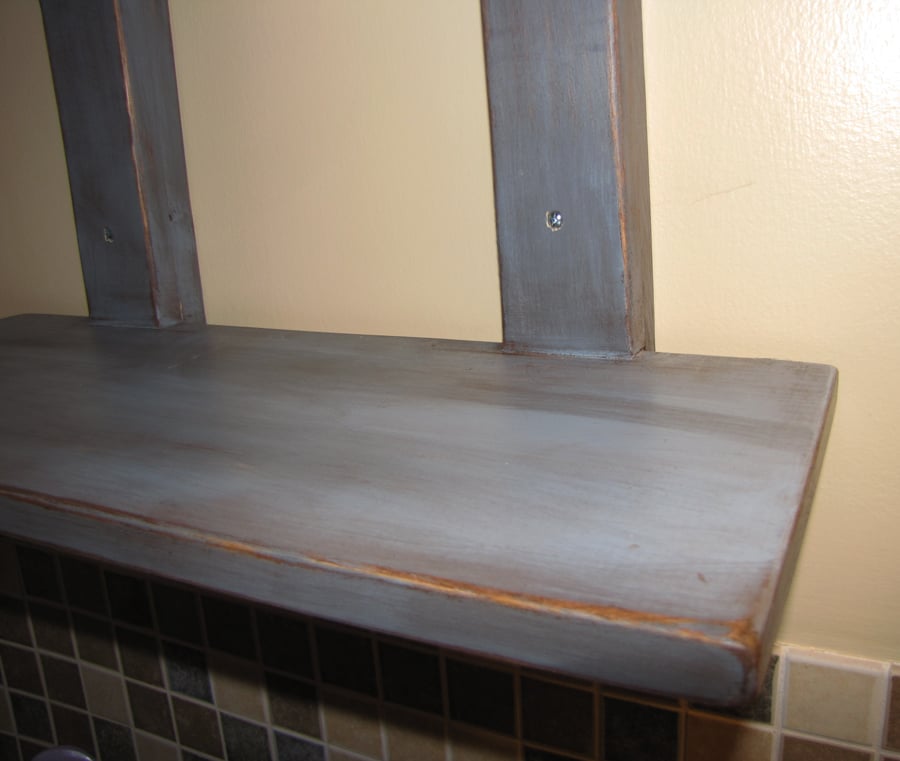
I needed a little shelf on our bathroom wall and I had lots of scraps hanging around. I made this loosely based on one of Ana's plans. I built it around the size of the baskets I purchased at Homegoods and the size of the four towels.
Wed, 07/20/2011 - 19:31
This would be perfect for a small bathroom with very little floor space and it looks great!
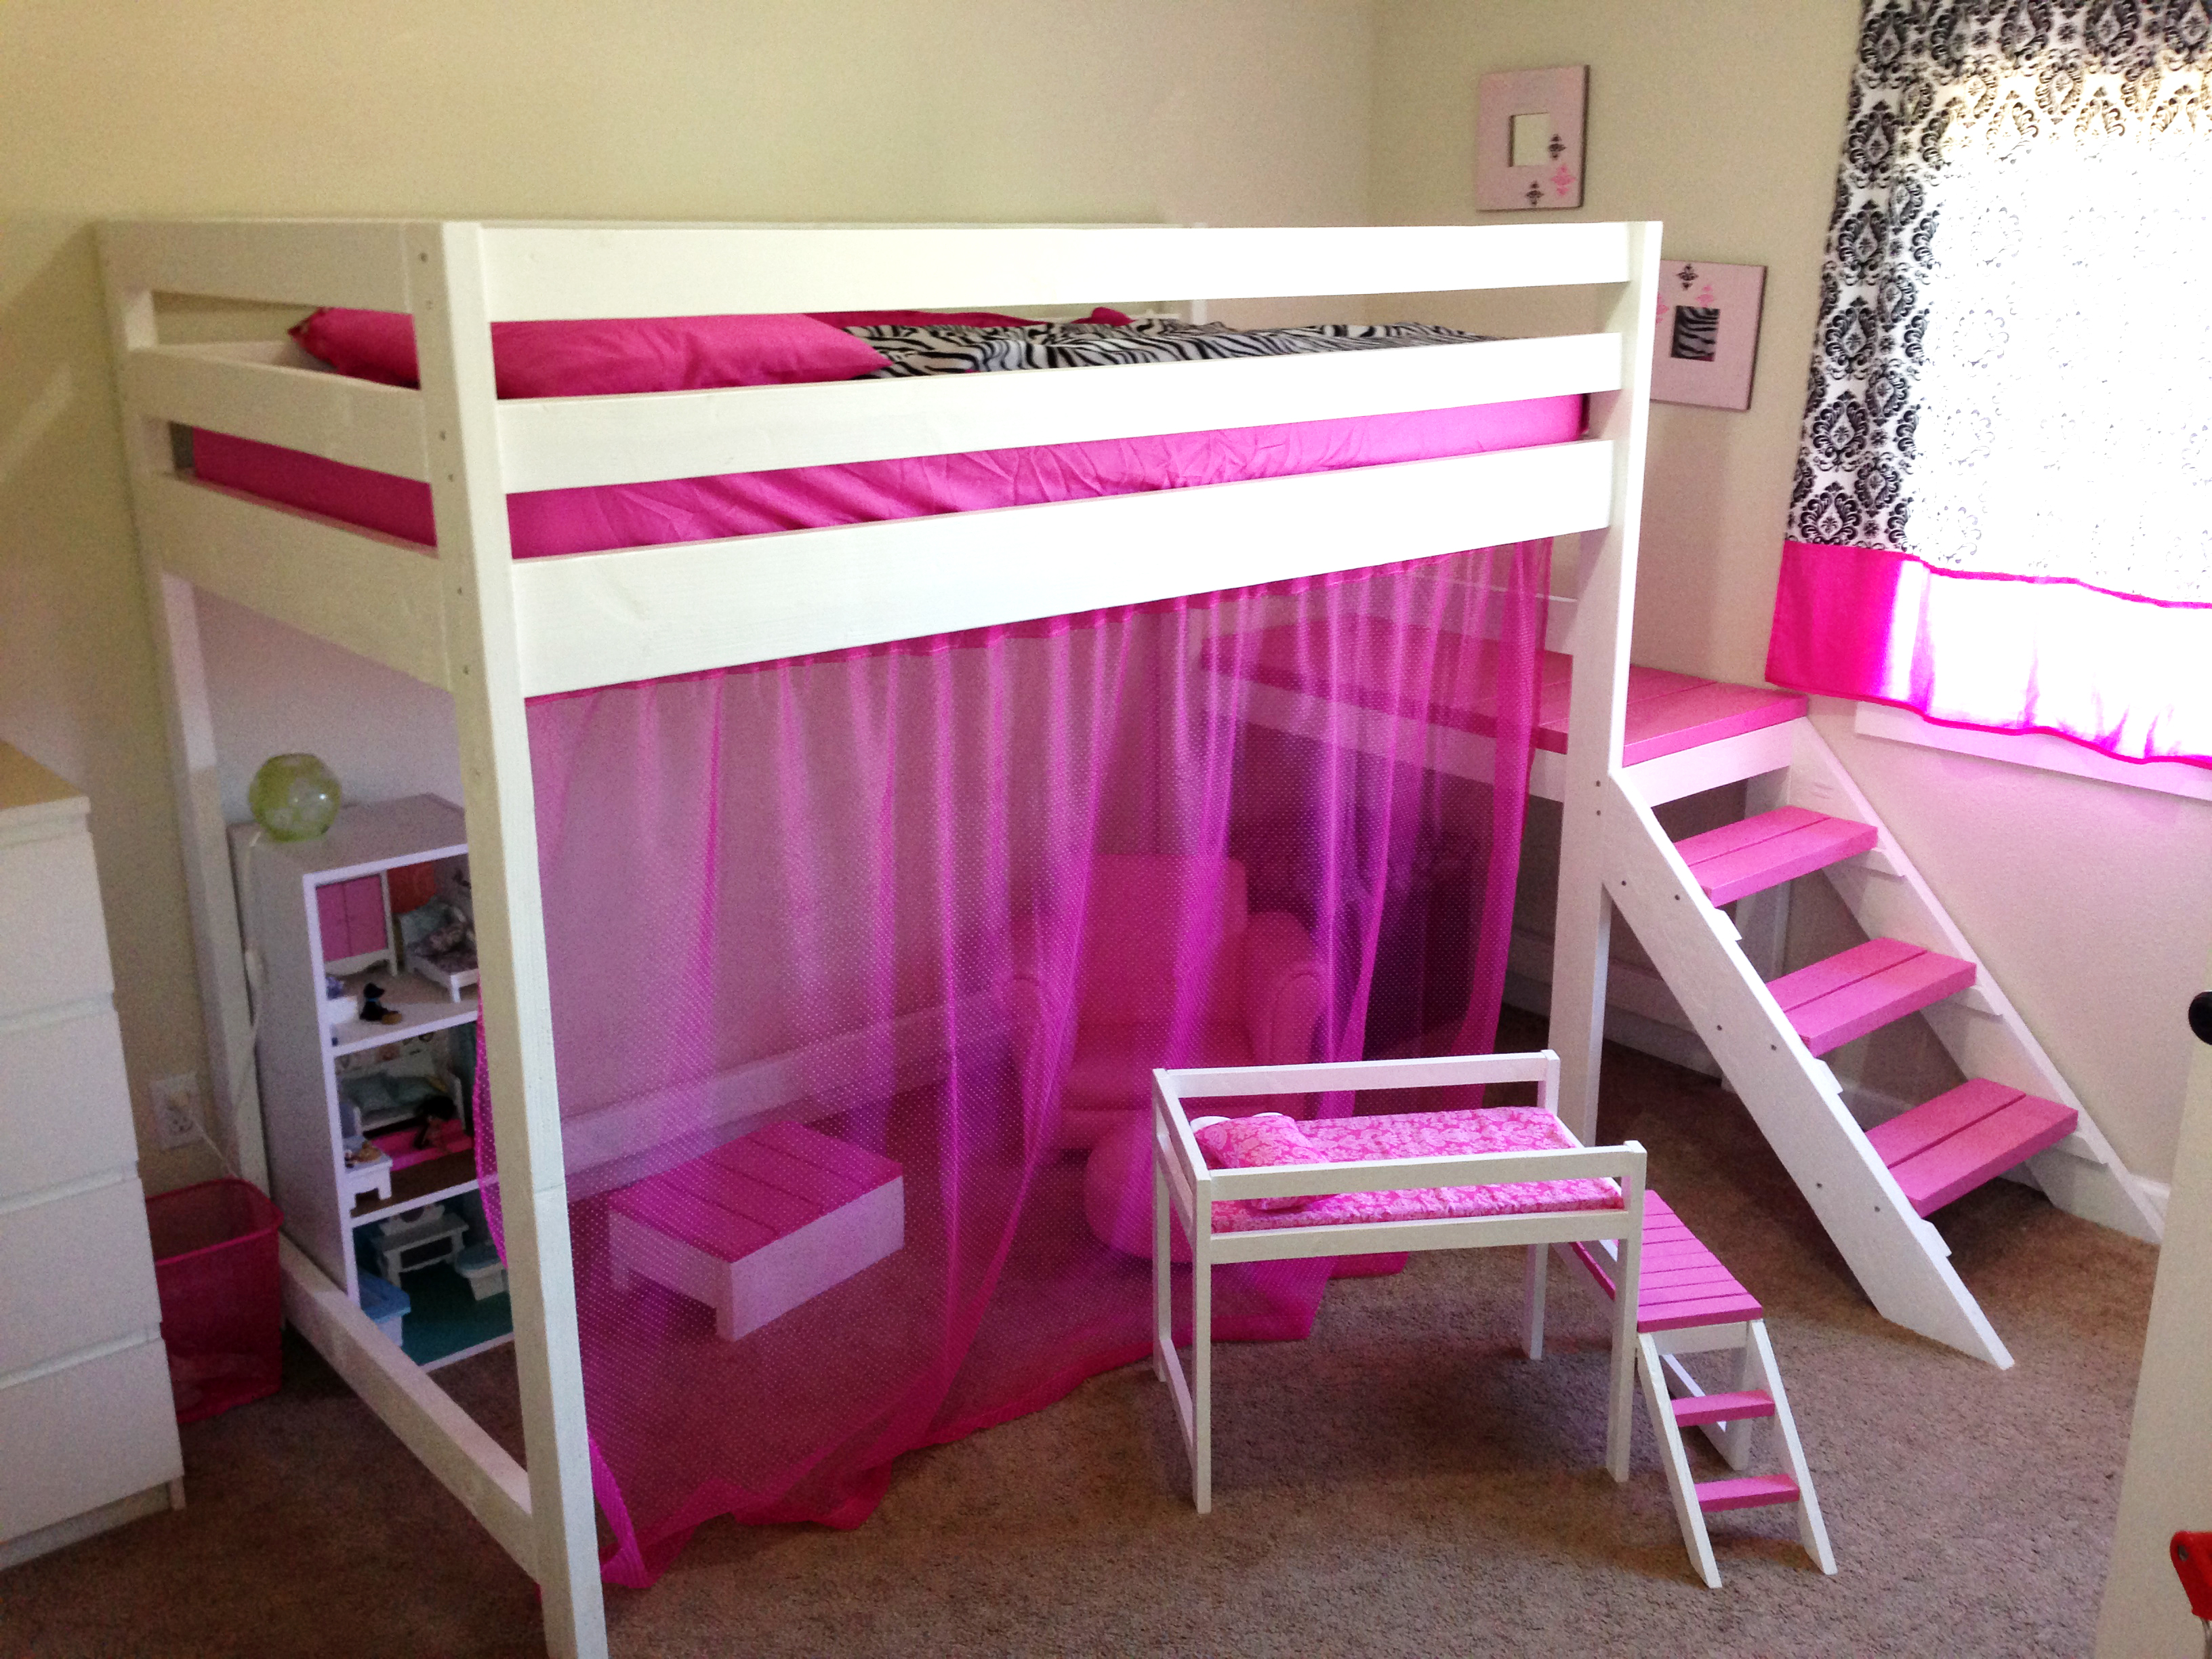
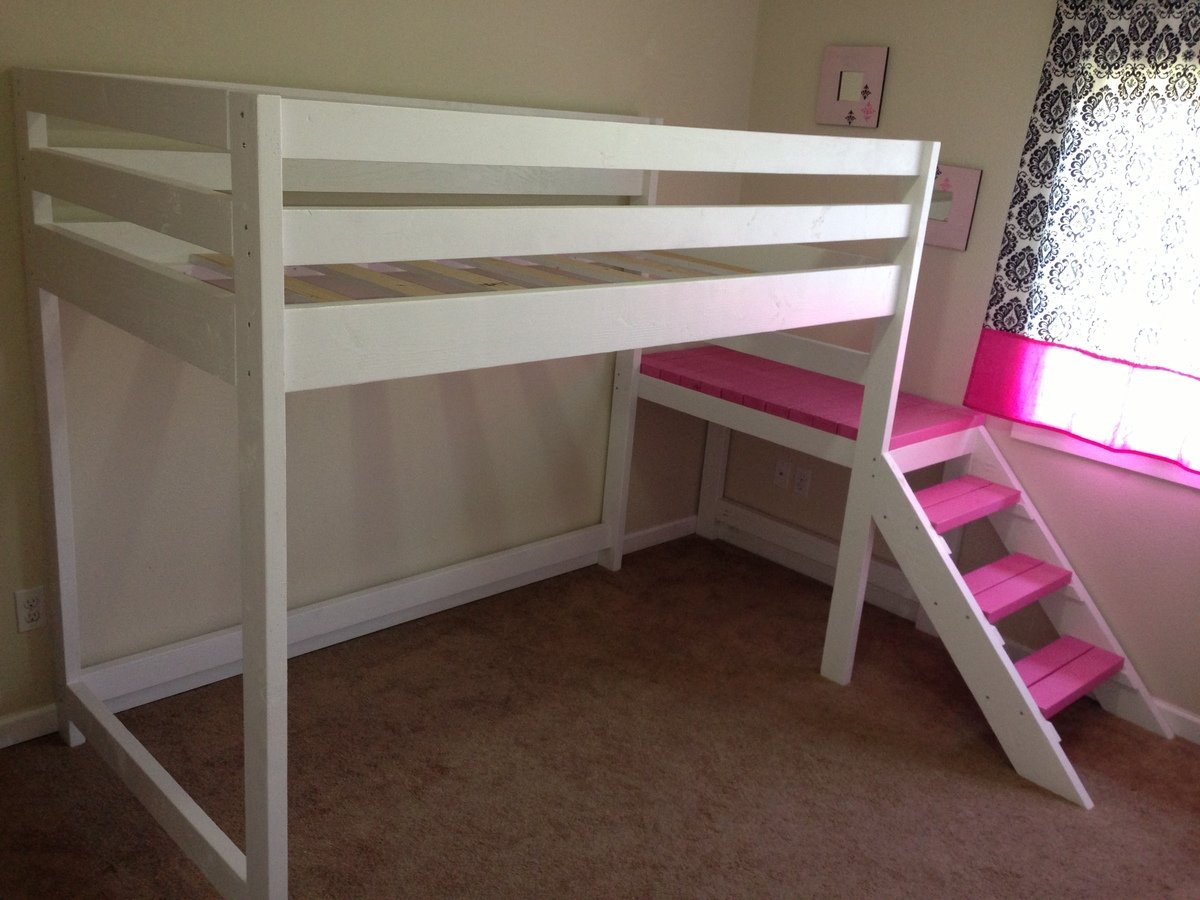
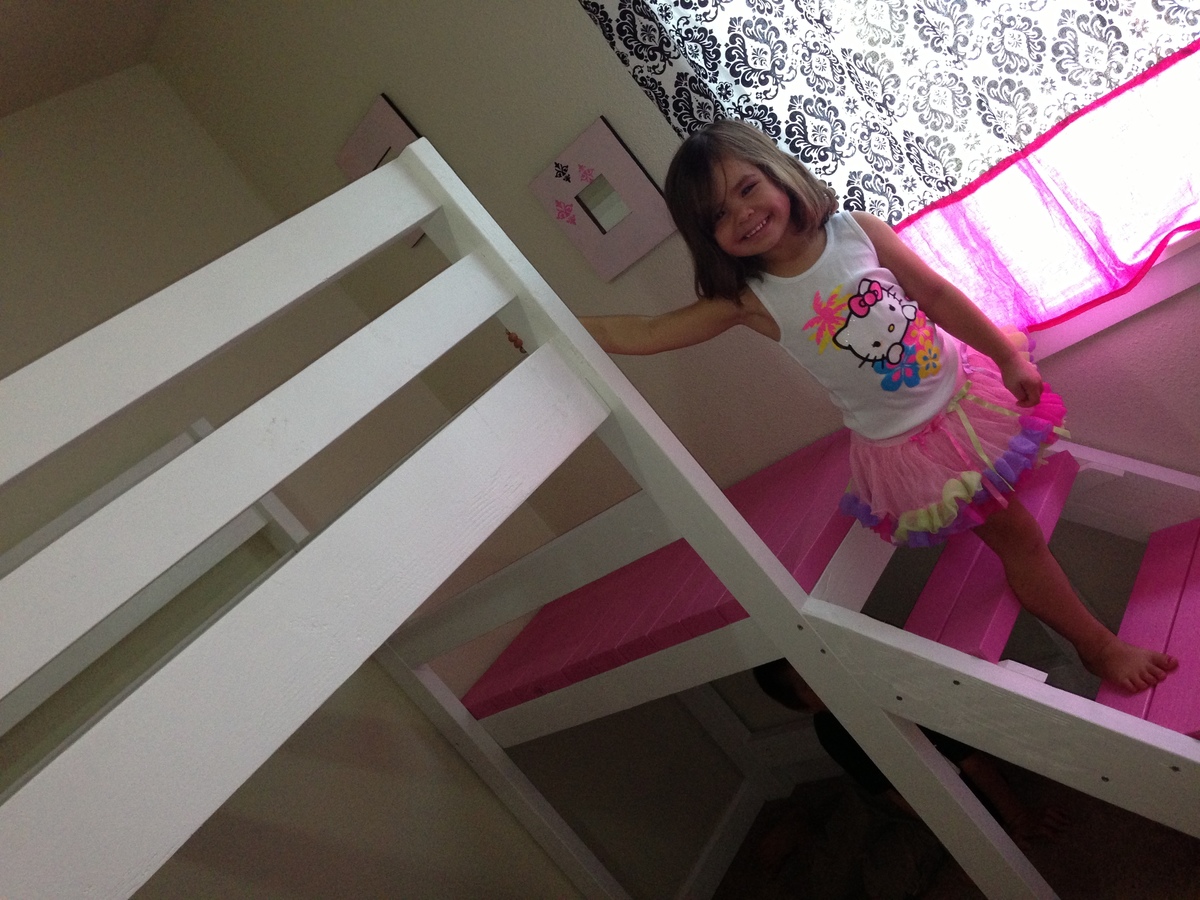
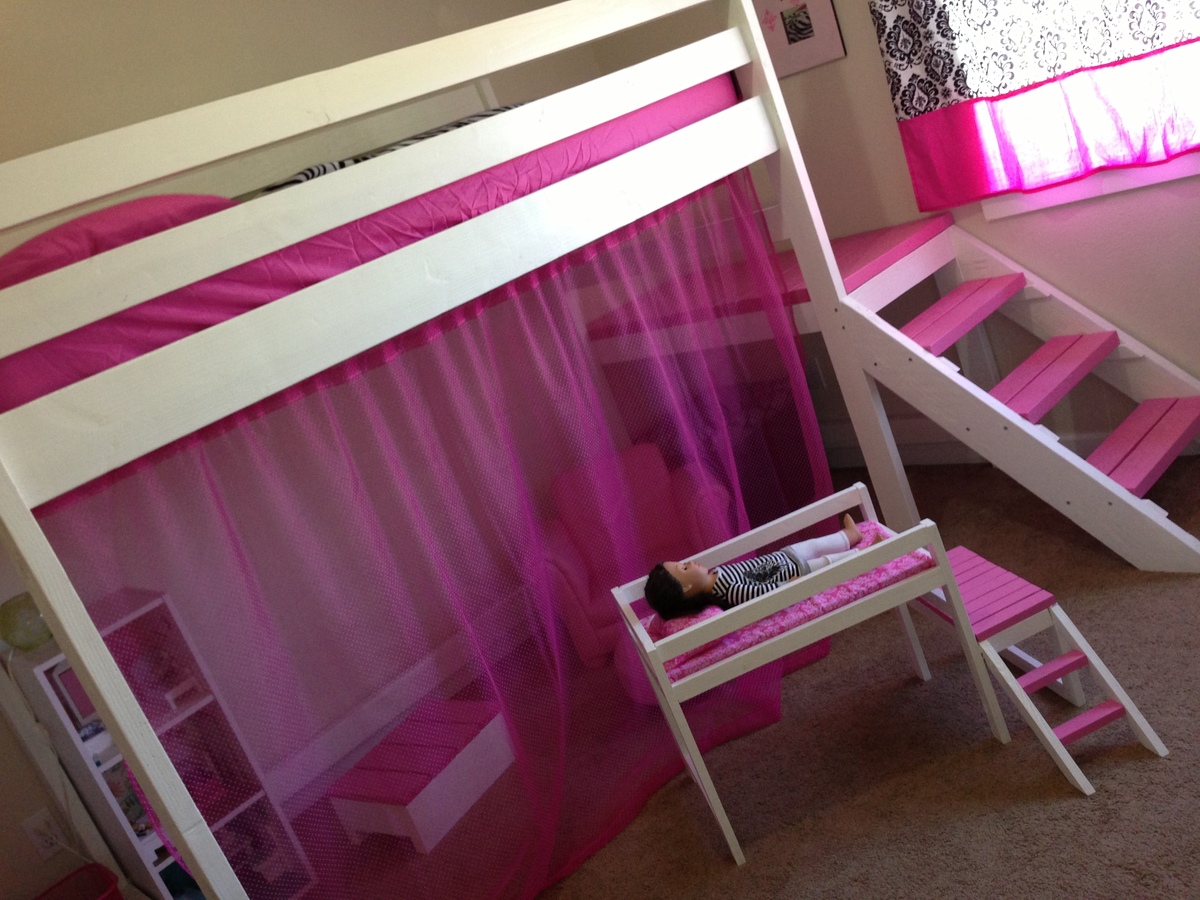
We made this loft bed for my daughter's 4th birthday. I did all of the cuts, sanding, and painting on my own, and had my husband help me with the assembly of the bed. It took us 2 full days to complete this build. The sanding and painting was the most tedious part of the project. I think it cost us about $150 for all of the lumber, paint, screws, etc.
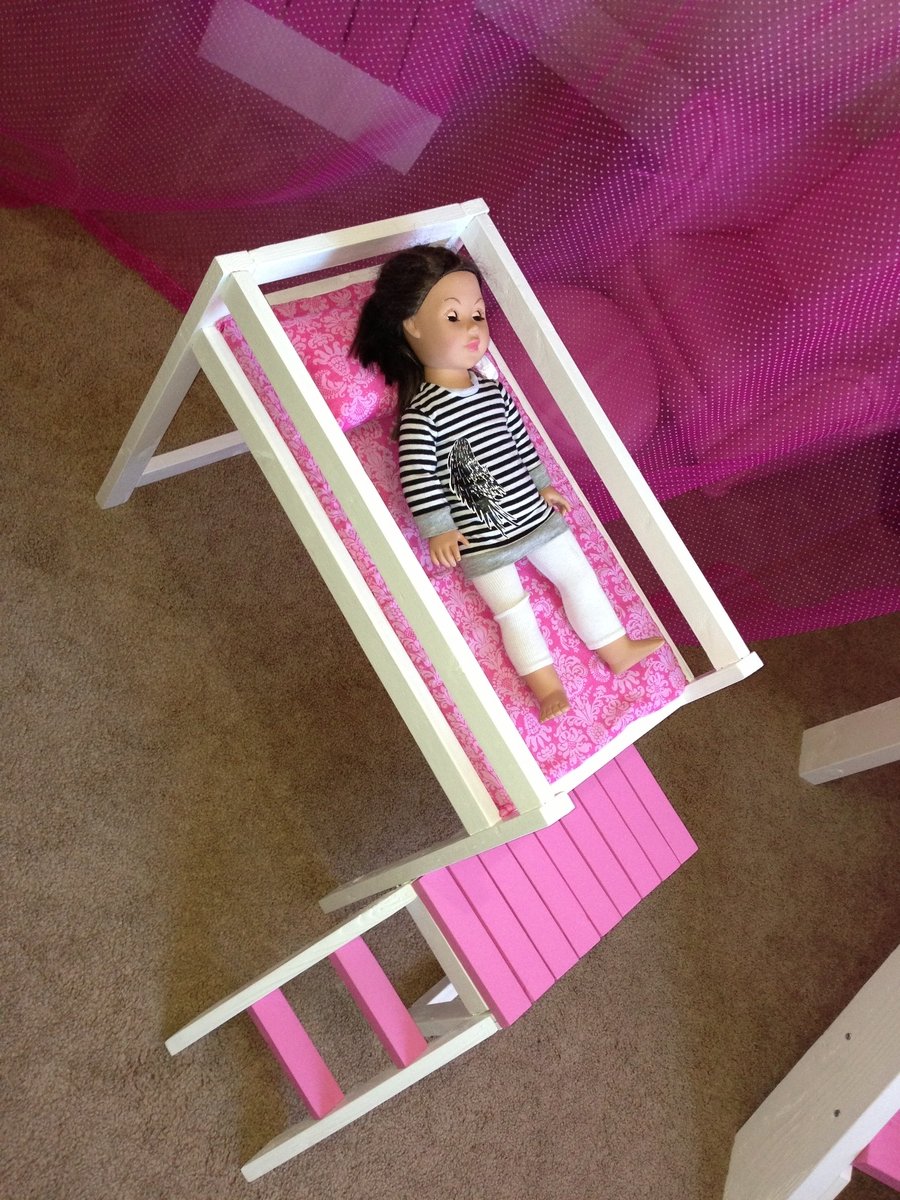
My daughter's really into playing with 18" dolls right now, so I decided to make a mini version of her loft bed for her dolls. I think it turned out really well and she absolutely loves it! The doll sized loft bed only cost about $15 to make (including wood, foam for the mattress and fabric). You can't beat that price for a wooden doll bed...and what little girl wouldn't love a matching bed for her dolls?!?!
I'm so happy with how both beds turned out!
Love how it turned out cost a little more if you count stain,wood conditioner..etc wasn't bad still.wood probably cost around 60-70 cheap and better then most anything you can buy.. Lots more to come
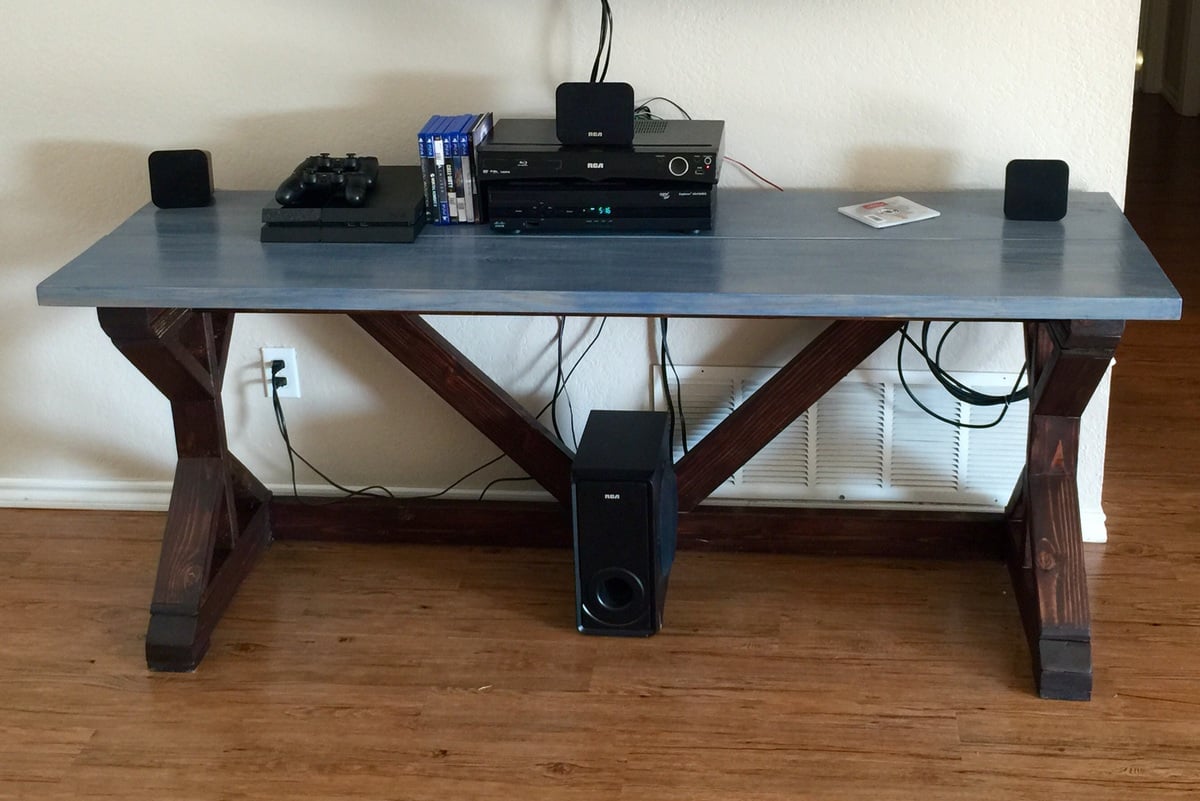
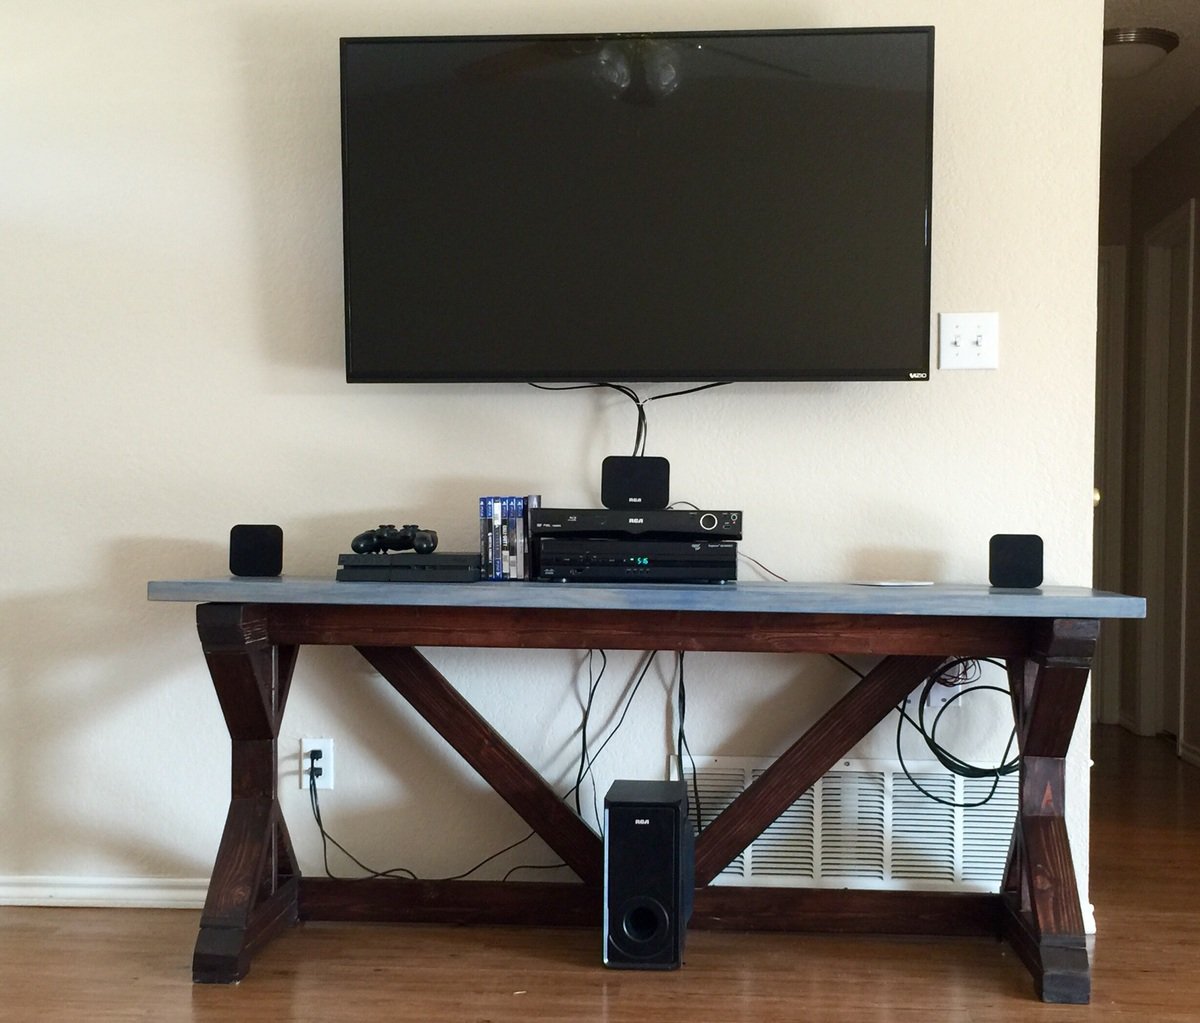
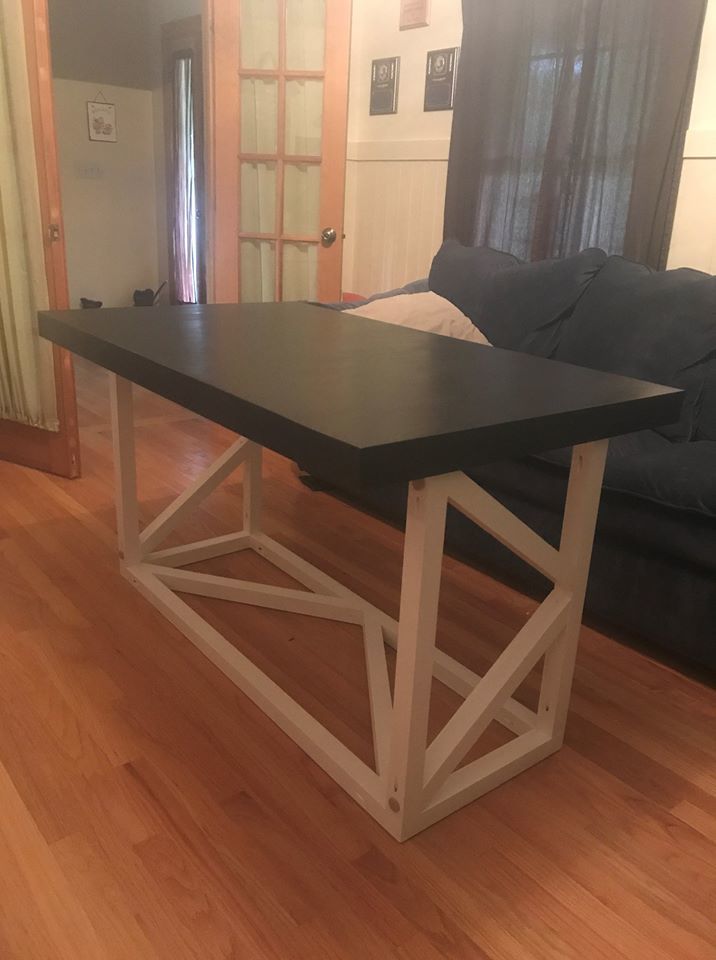
My wife was interested in a coffee table that we could also use for playing games or company for meals, and naturally we found just the thing on Ana White's website. I got some 2x2 pine from a lumberyard after not being happy with box store lumber. The table top is made of pine glued together. I decided to put the 2x4s underneath which gave some heft to the top so it does not wobble. It fits tighter than I would want, so lesson learned for me I should have paid more attention there. Since we wanted to paint the piece I went with the pine top. If it were going to be displayed somewhere else in the house, or stained, I would have chosen a harder wood for the top. The nice part of this plan, I could easily build another nicer top to go with the base if I wanted too.
Sun, 10/14/2018 - 15:15
Thanks Ana! What a great surprise hearing from you directly. I appreciate it. :-)
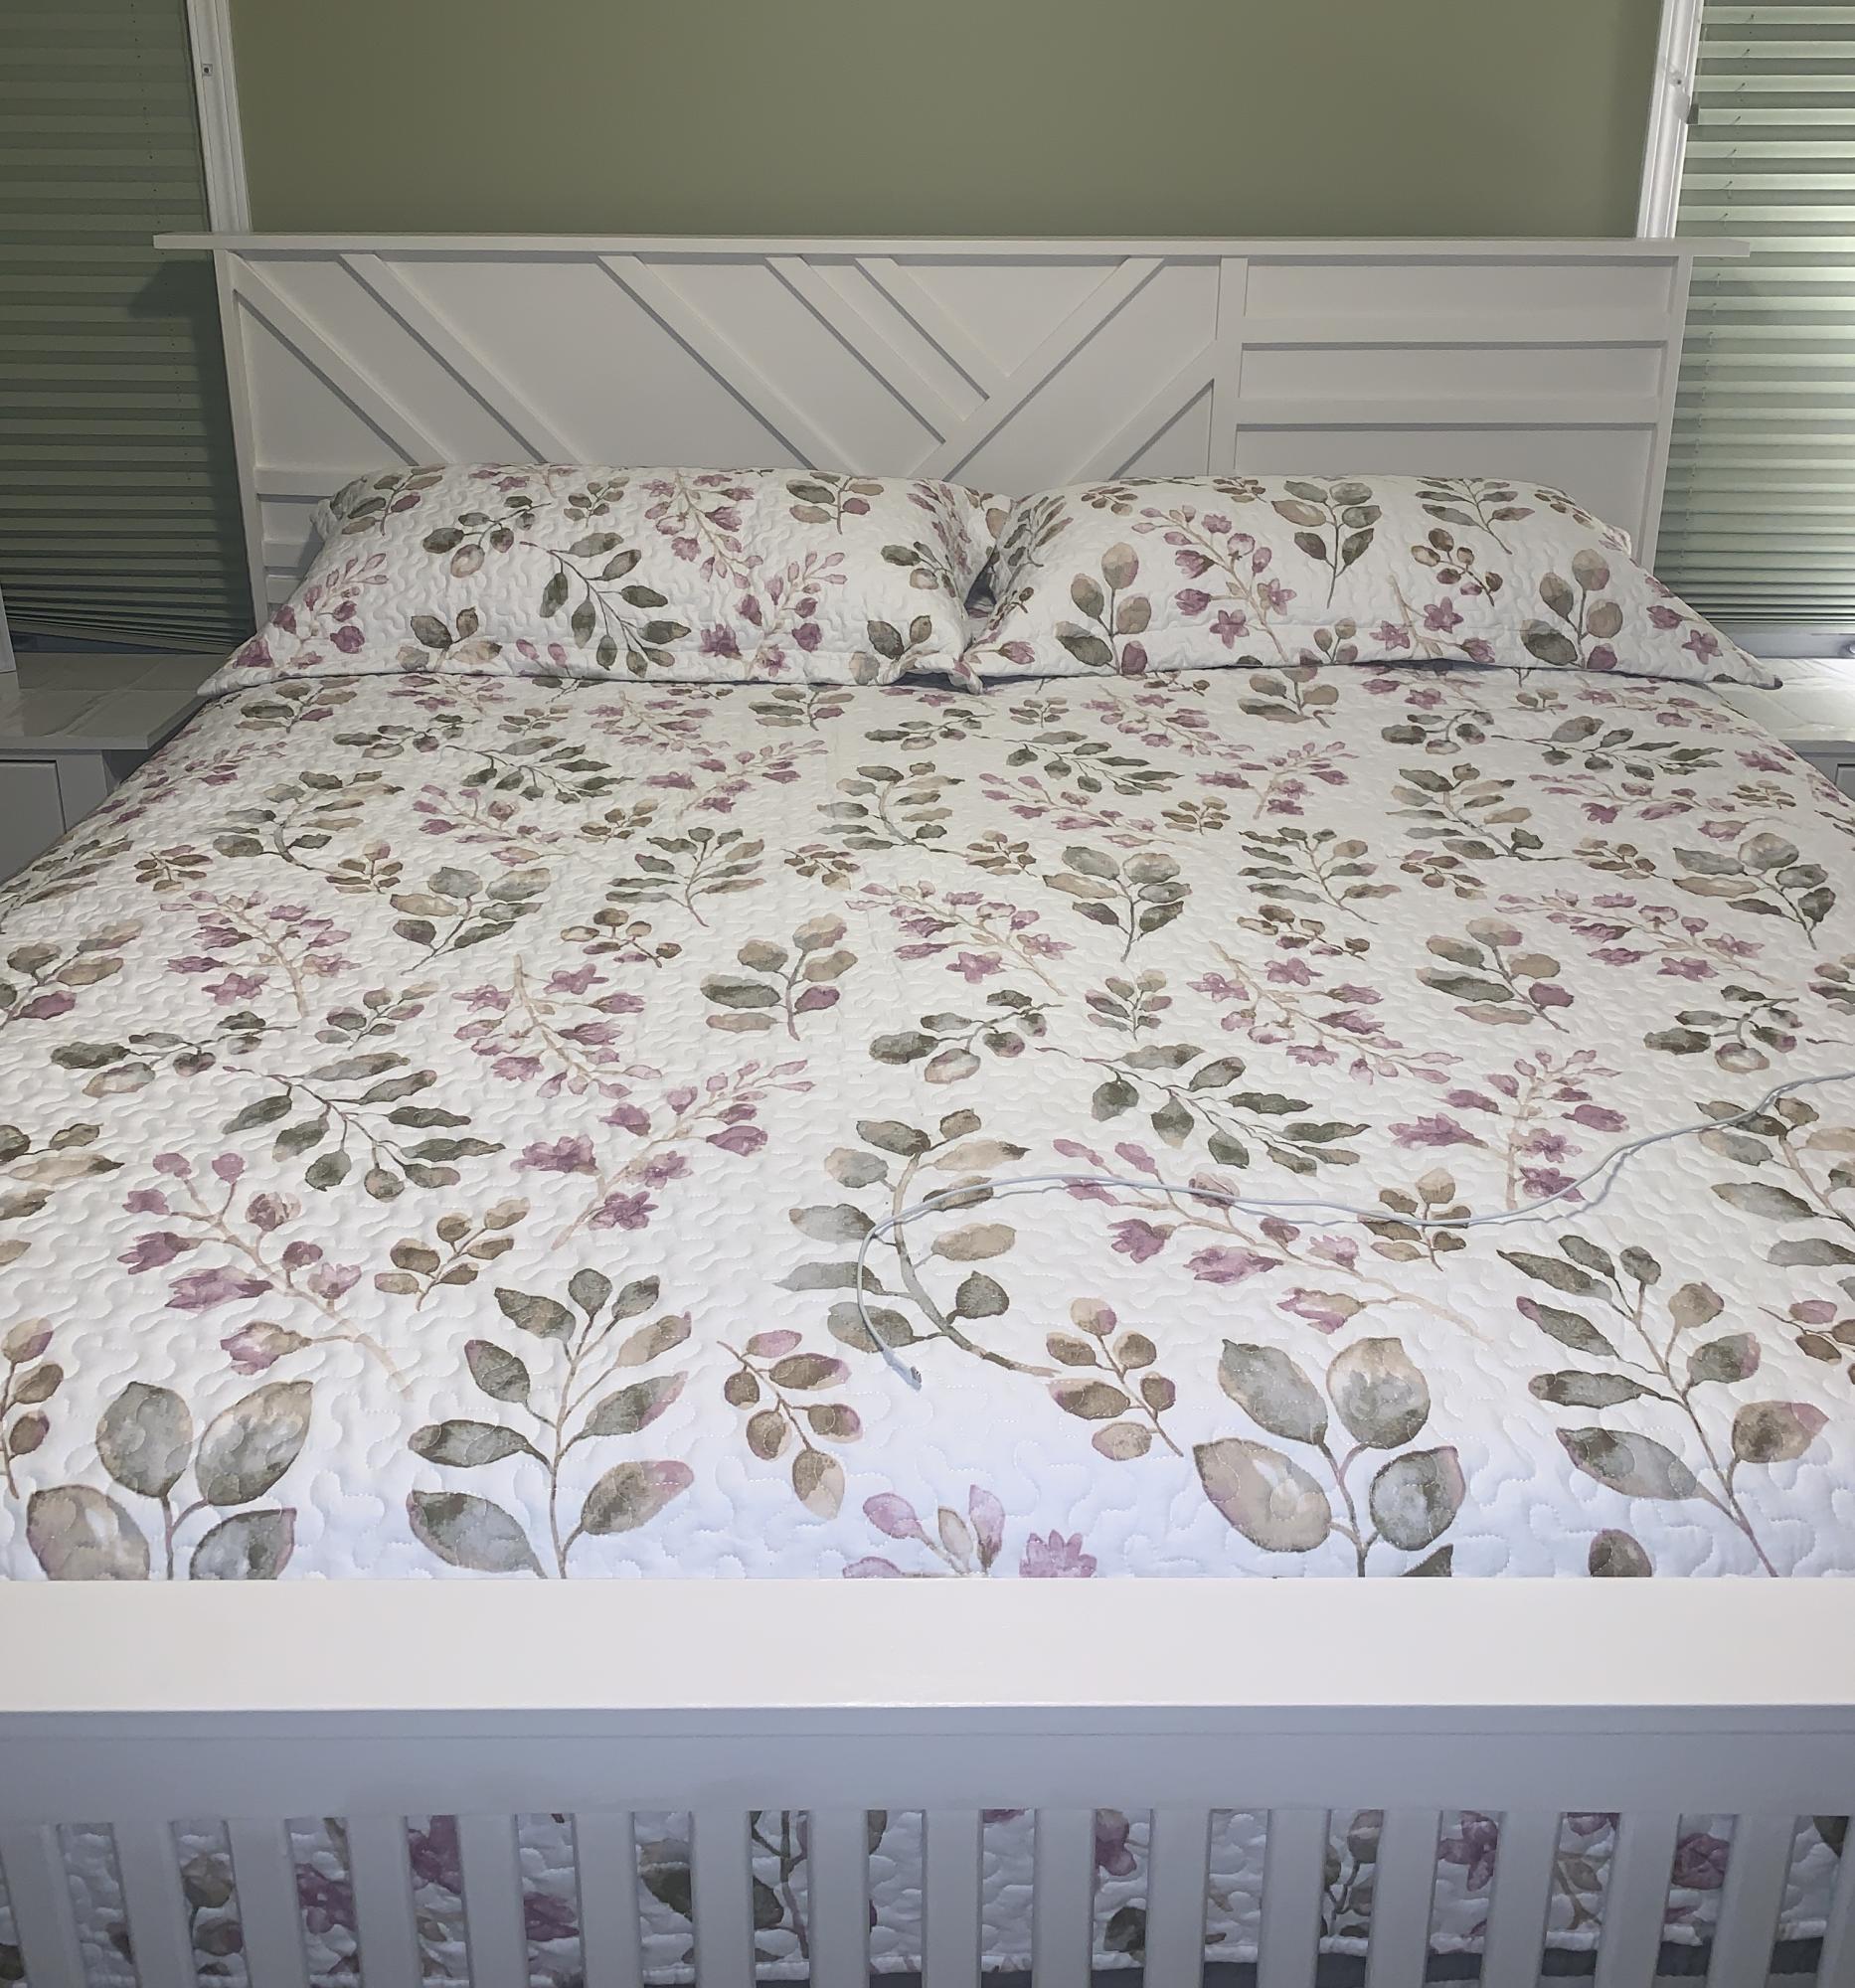
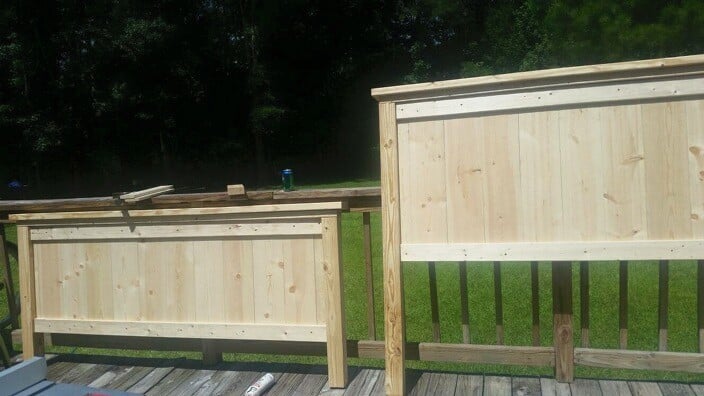
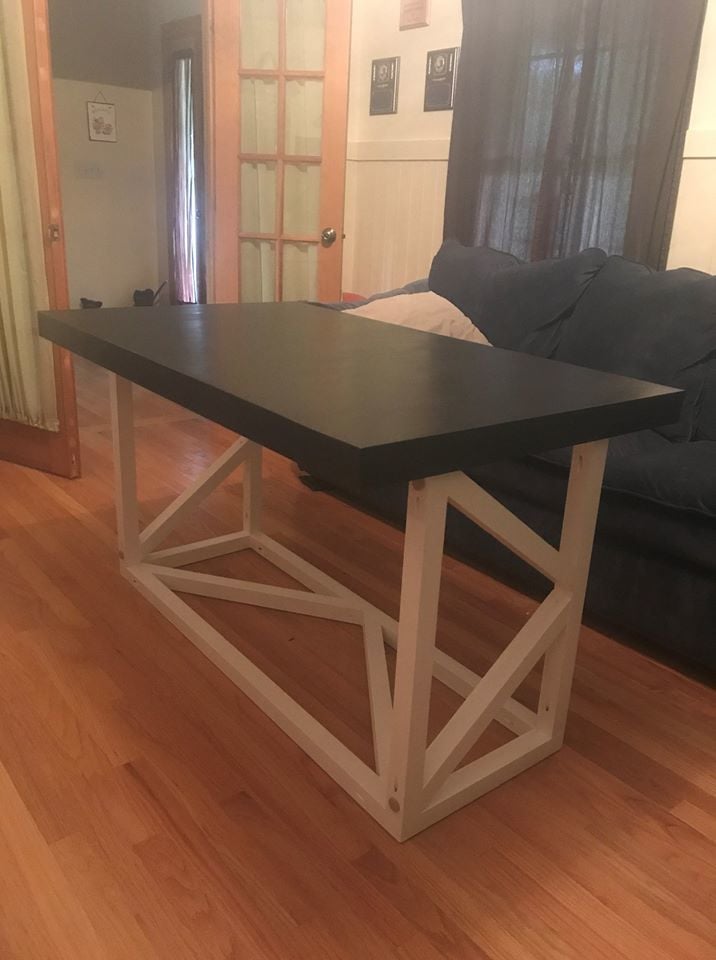
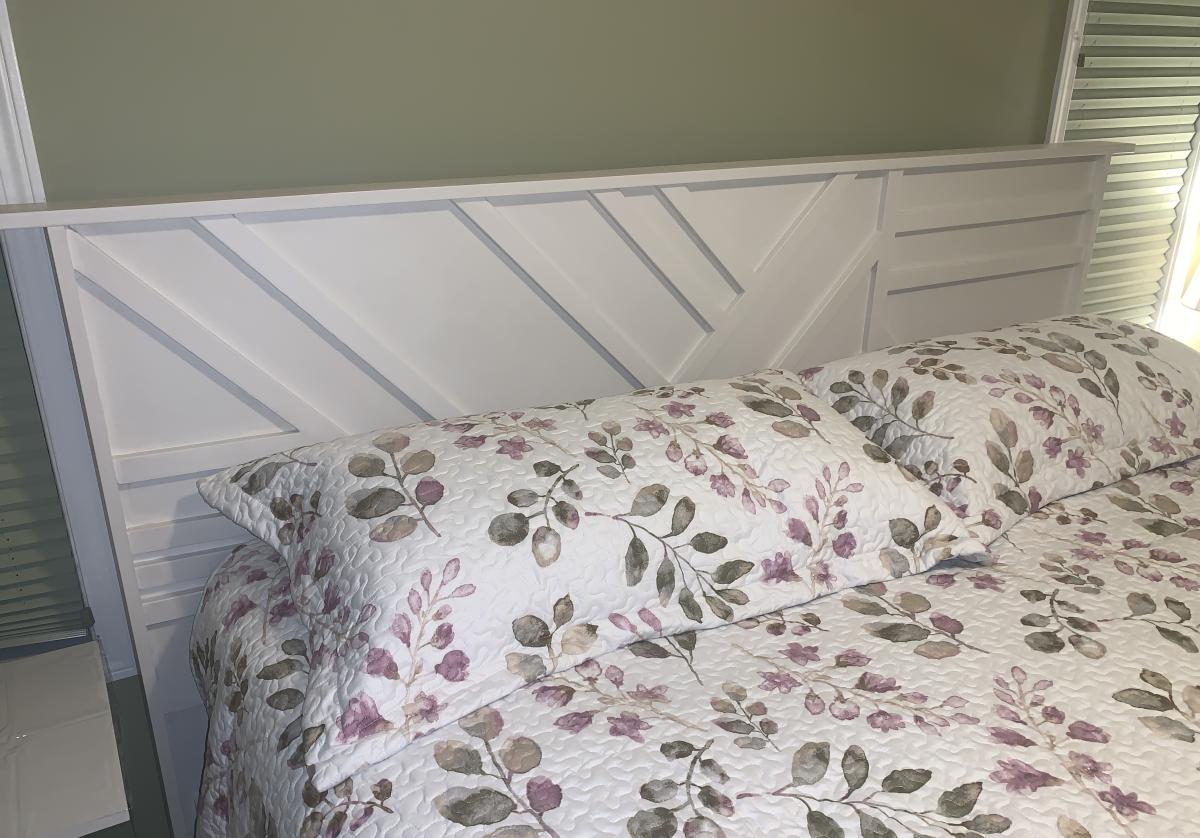
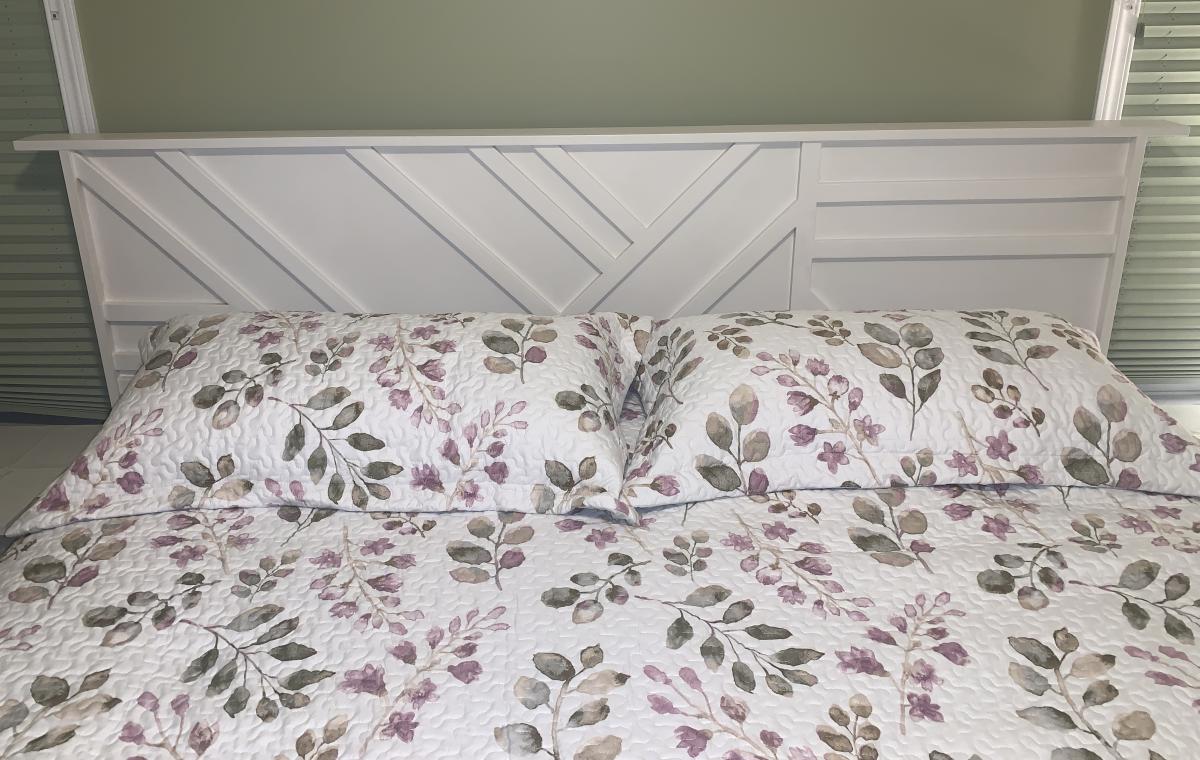
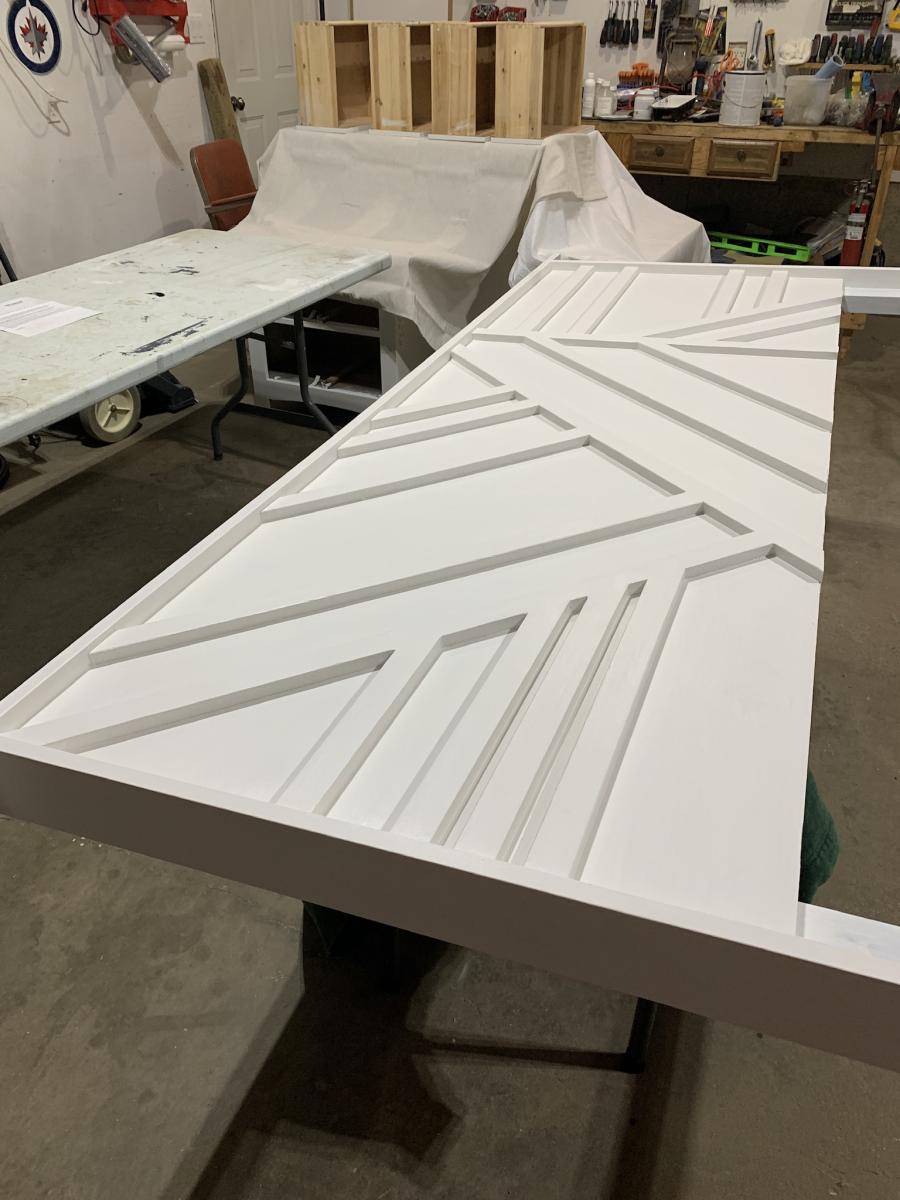
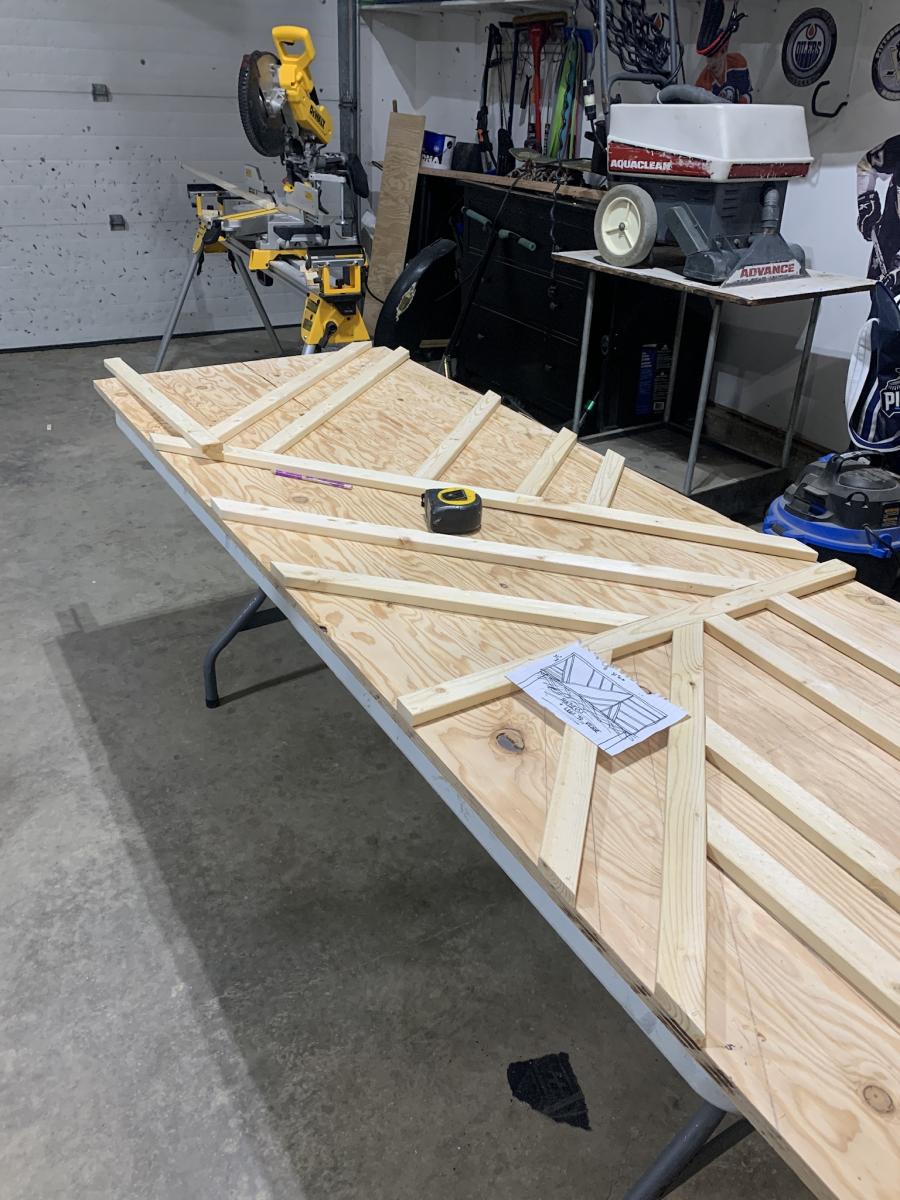
I followed the instructions for the Modern Geo Headboard but adjusted them to fit my bed frame because I don’t have a platform bed. I’ve refurbished pieces before but this is the first one I have actually built from scratch. It’s certainly not perfect but I’m so happy with how it turned out. Lots of satisfaction in knowing I built this and it cost a fraction of the similar one I wanted to buy in store. Thank you for the inspiration.
-Teena
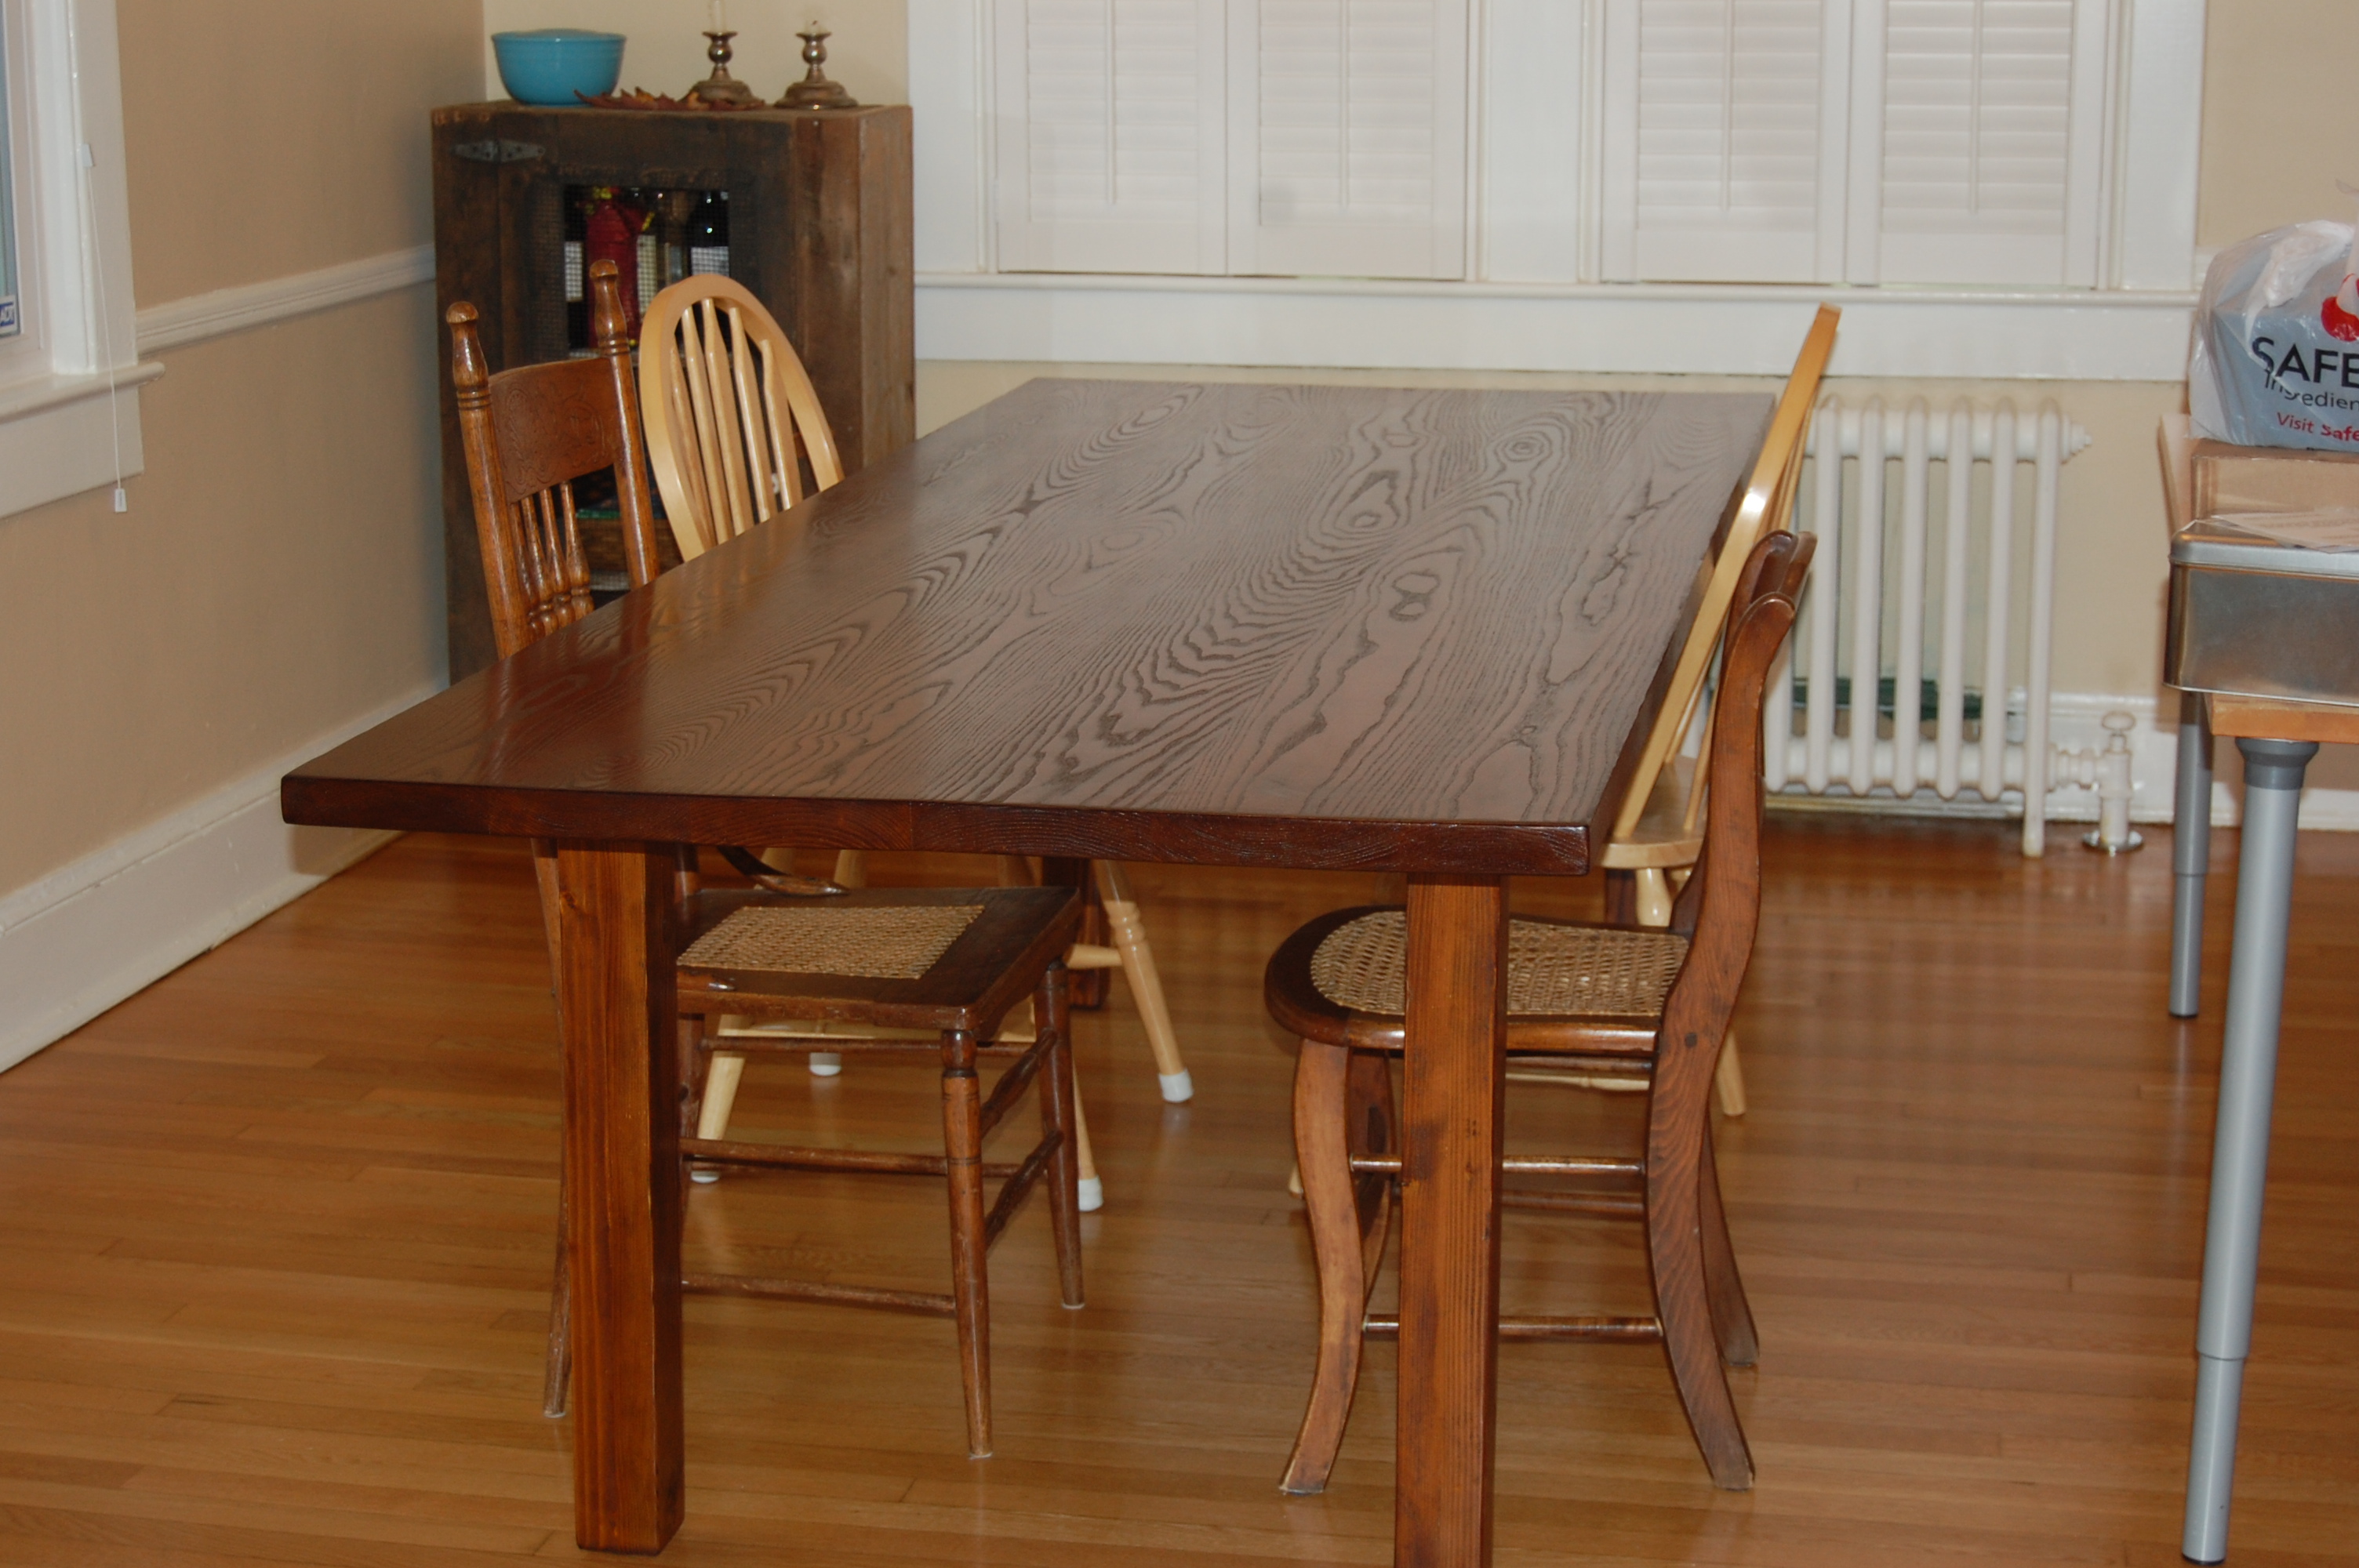
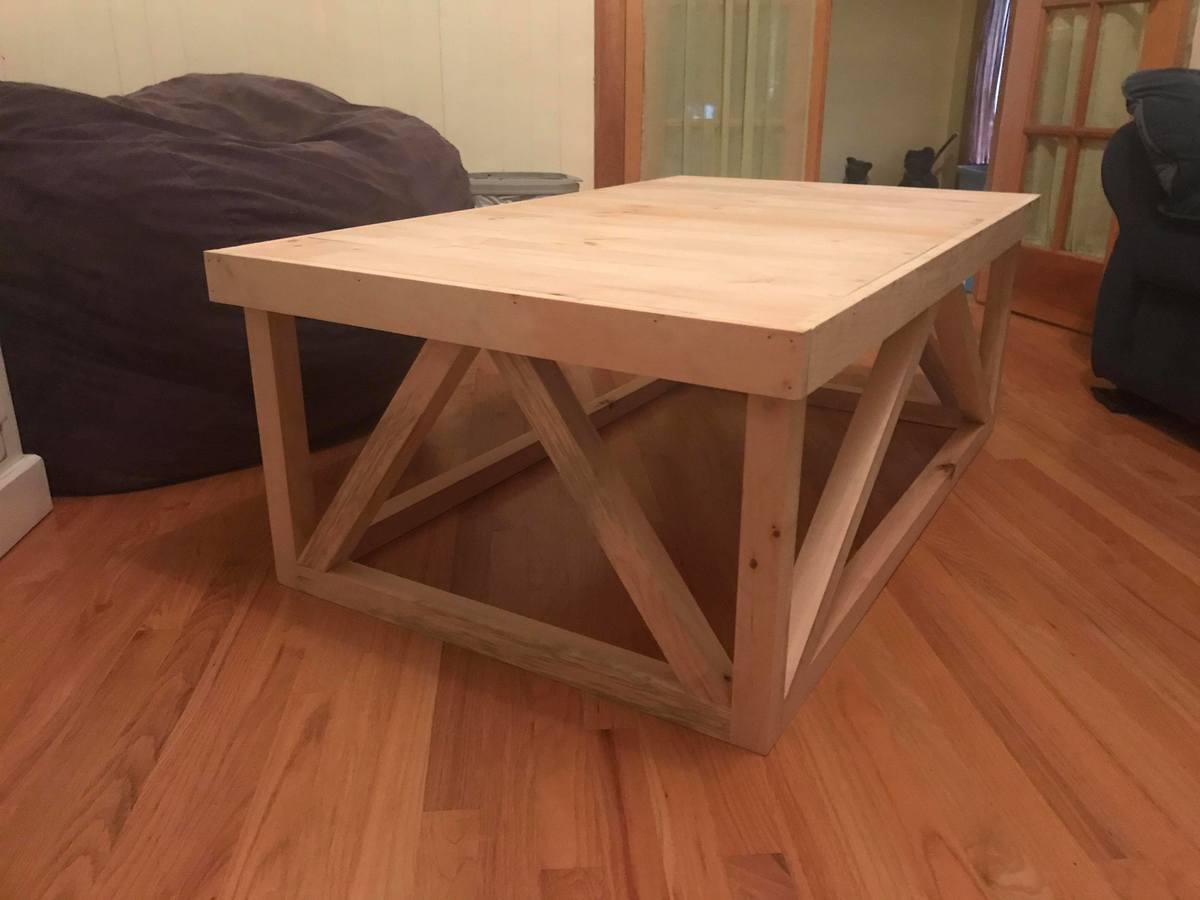
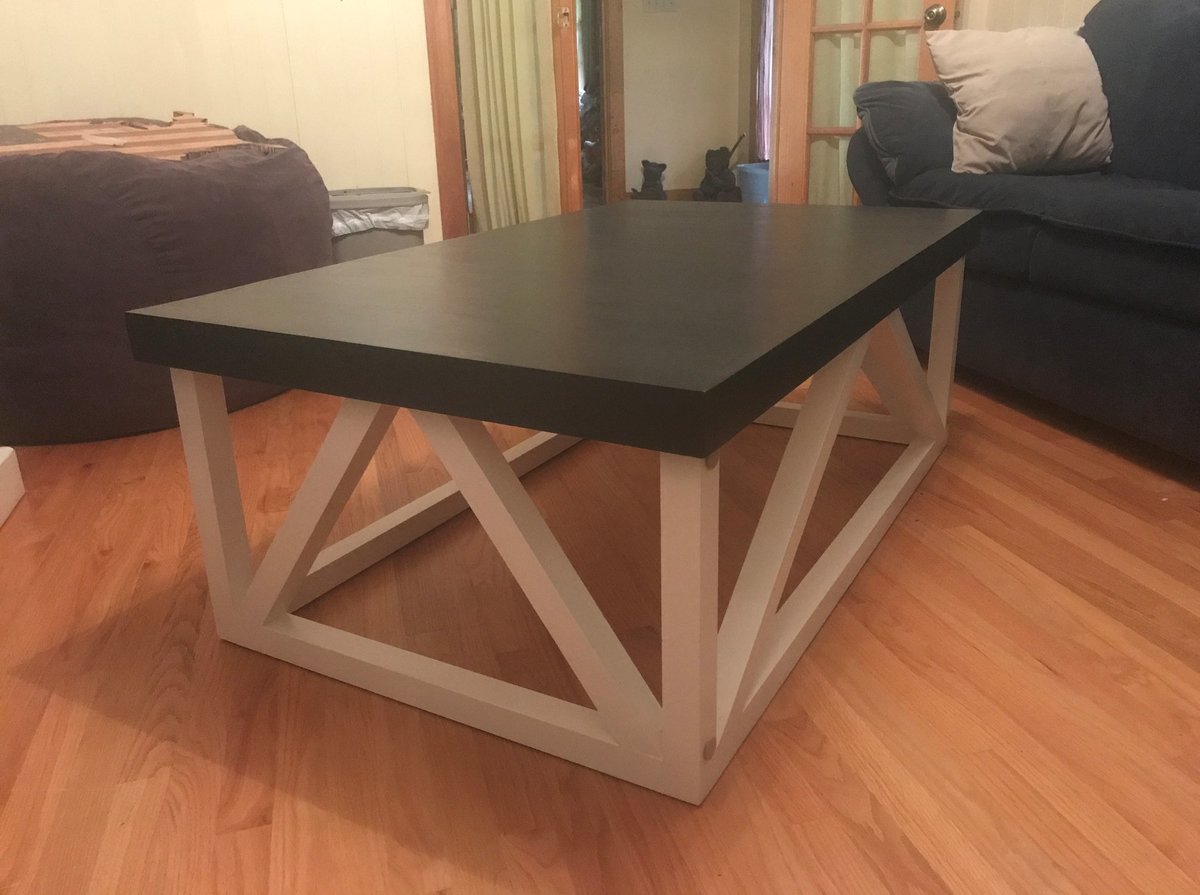
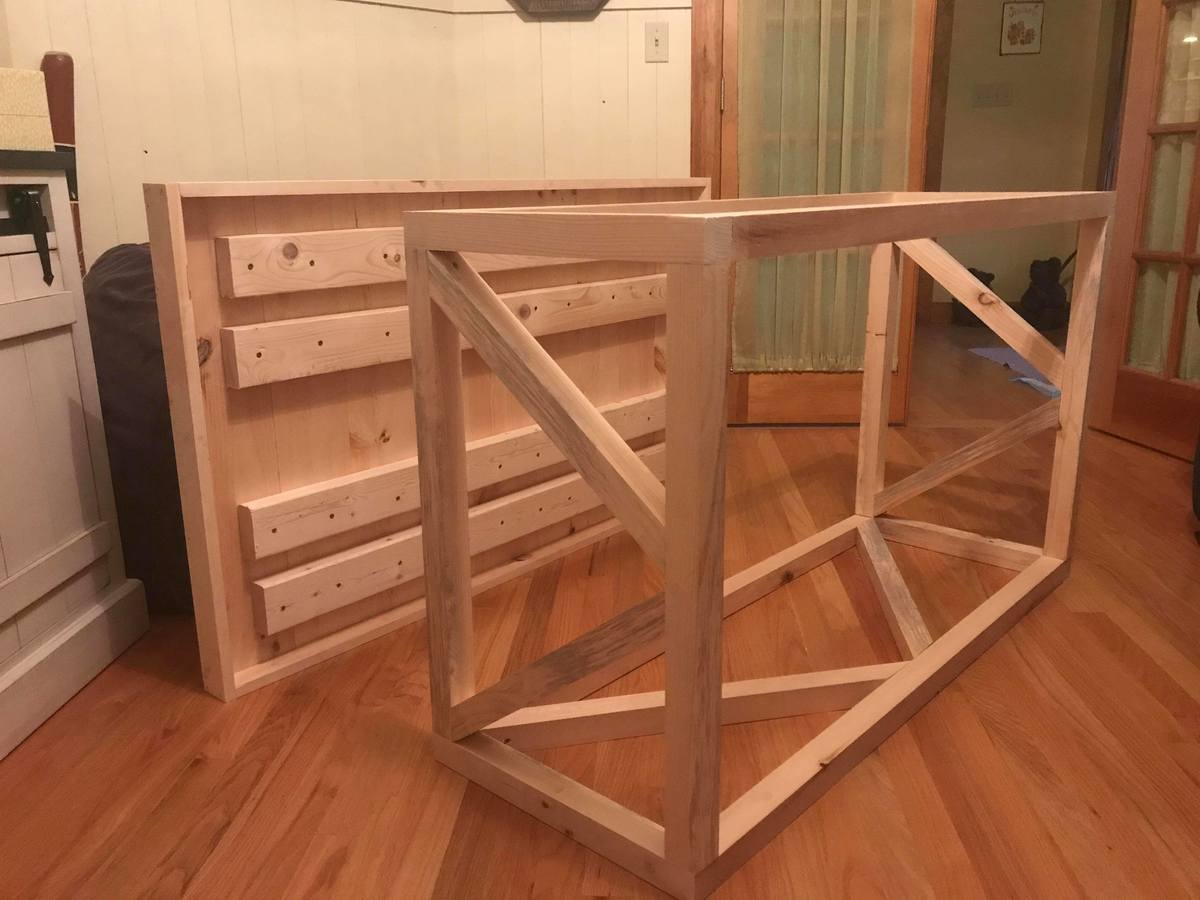
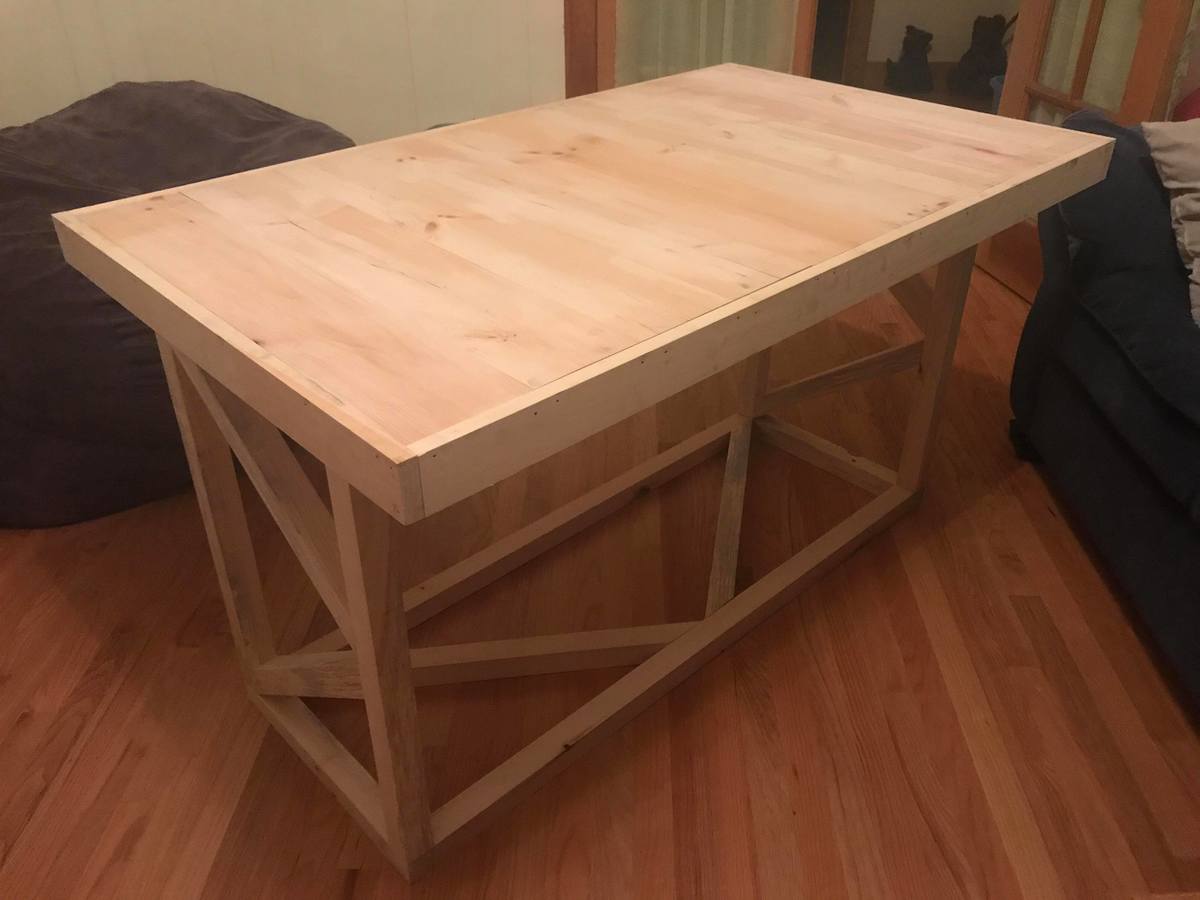
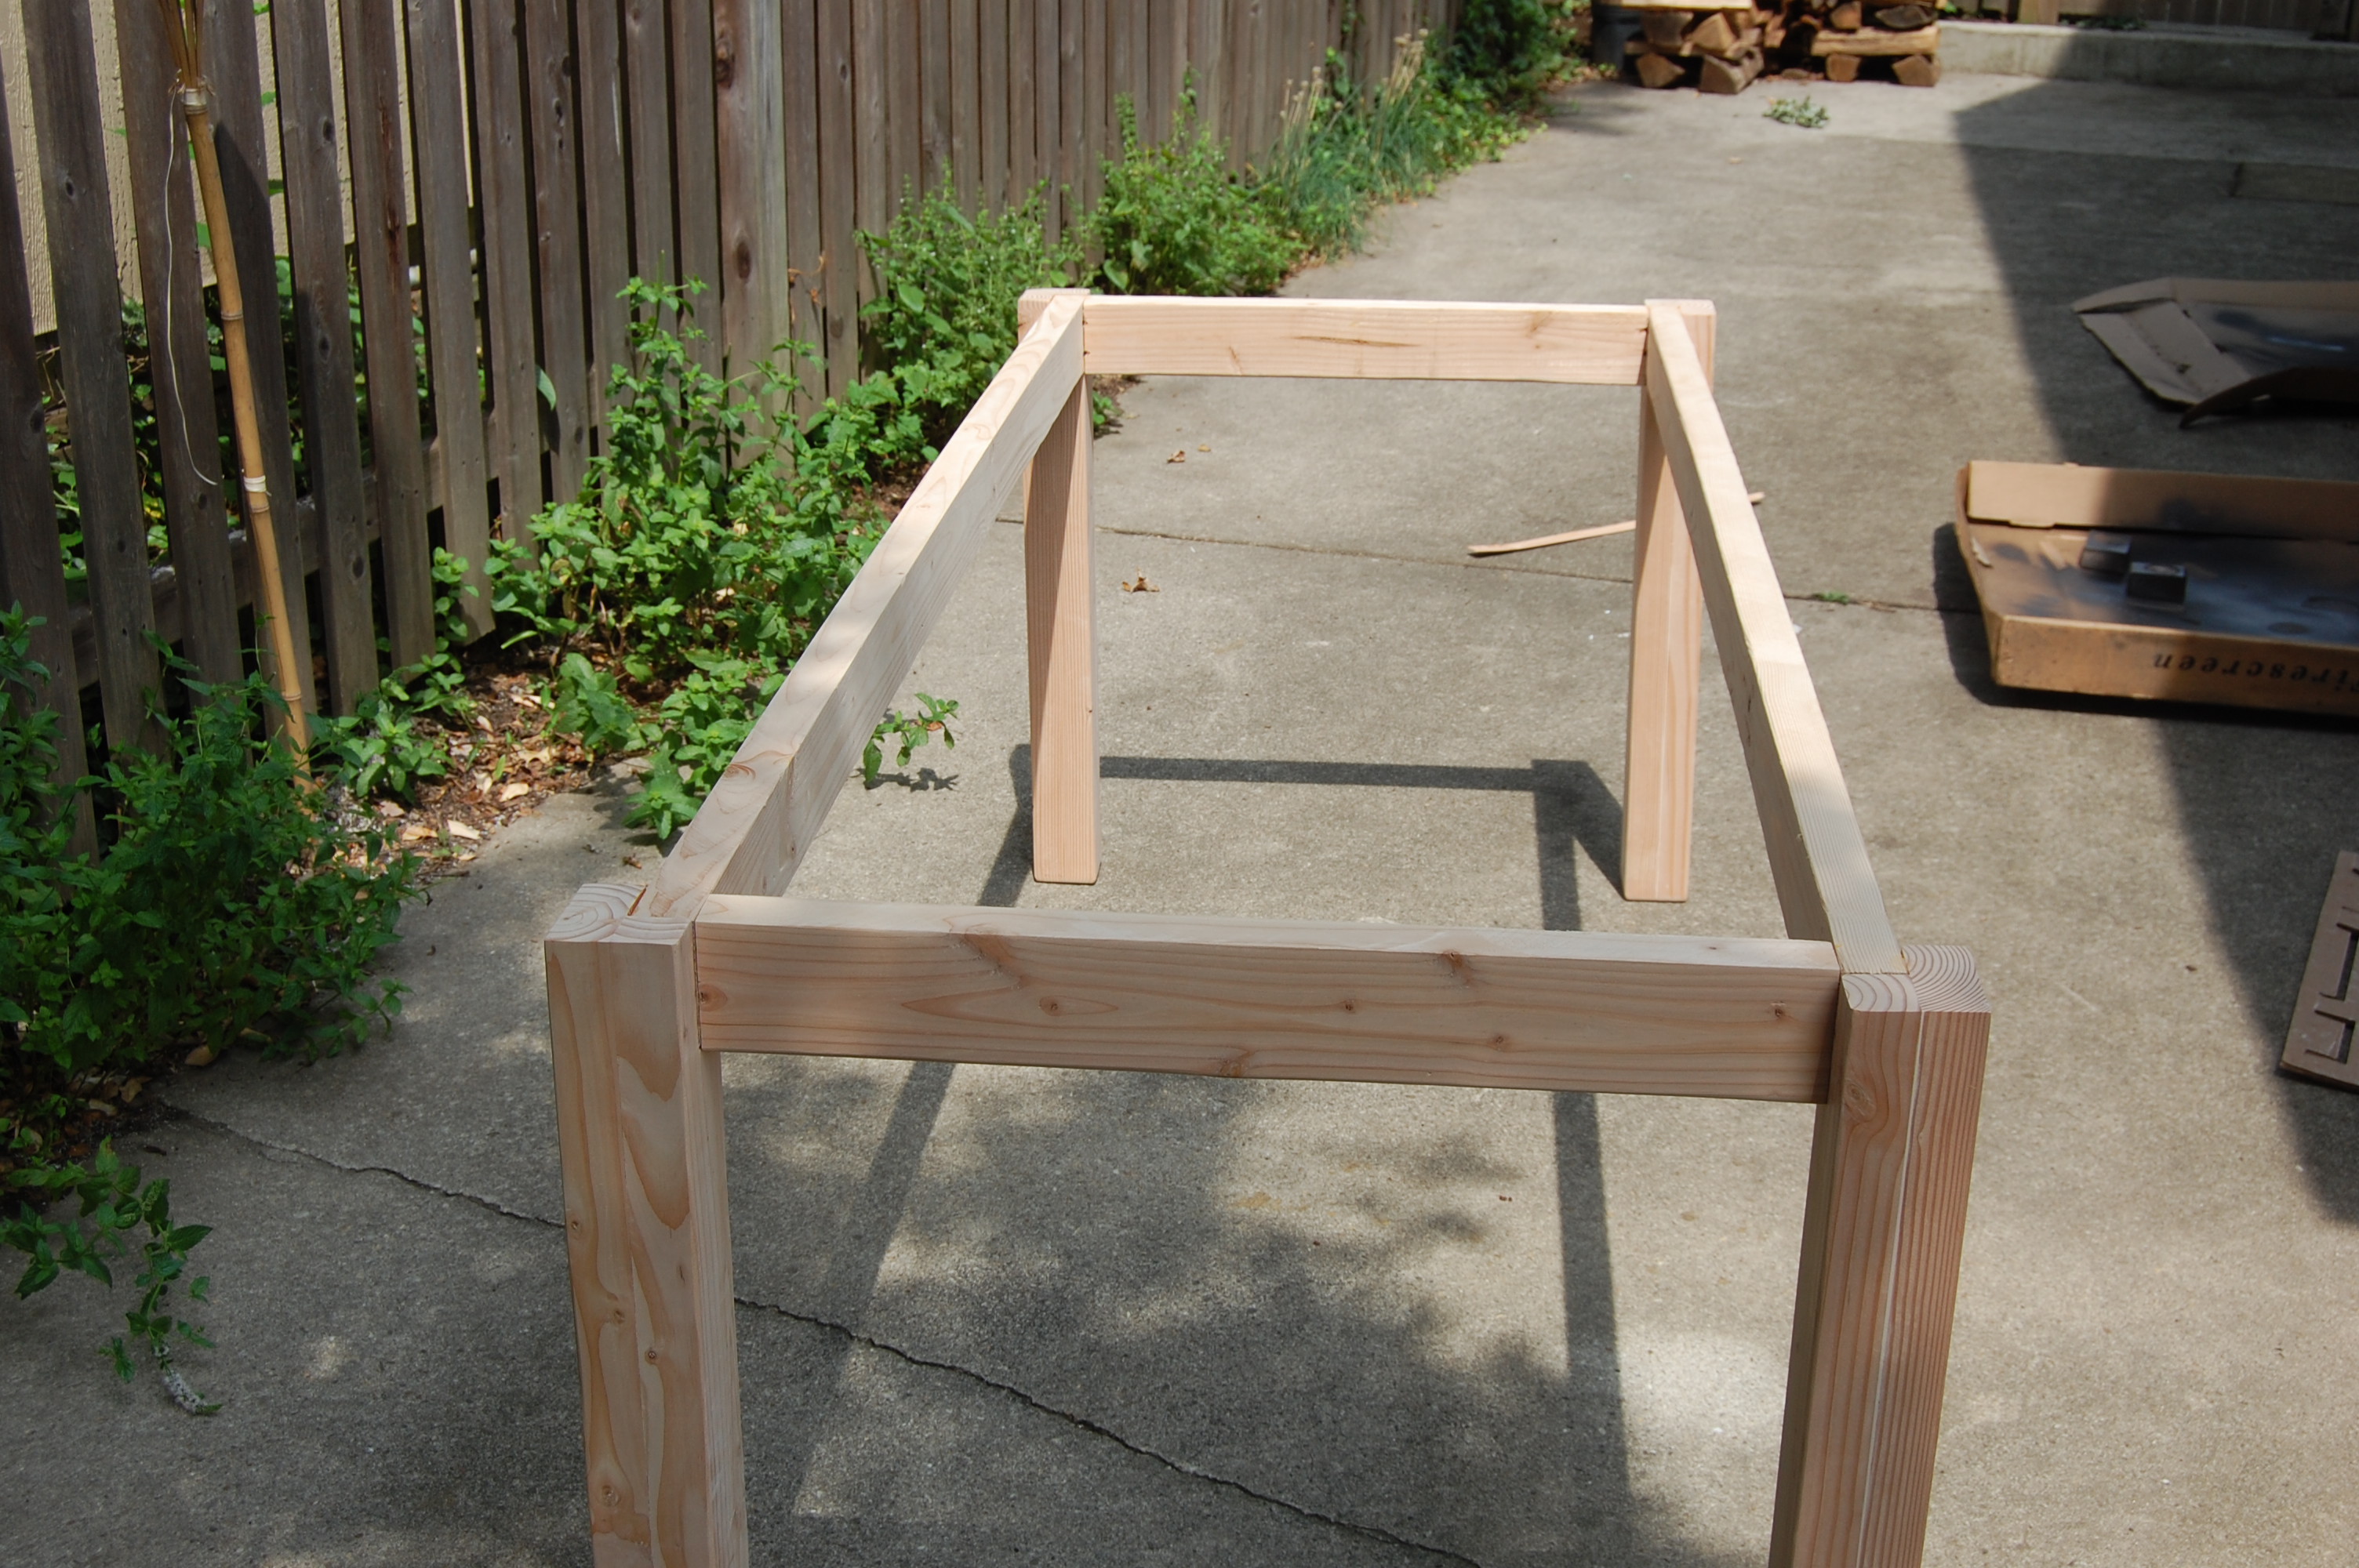
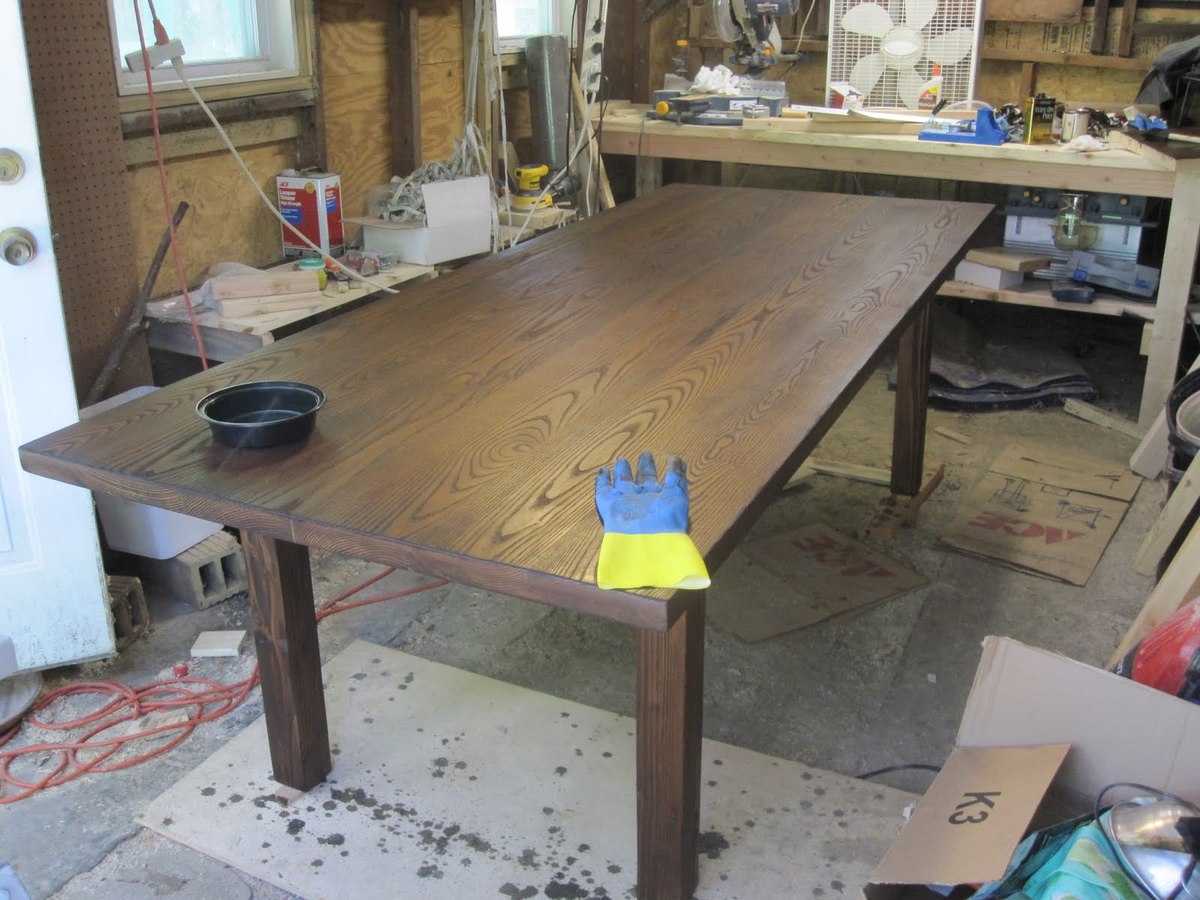
My first furniture project was Ana's Tryde Coffee Table. All along though, the goal was to learn enough to be able to make a dining room table. I love the coffee table, and I love Ana's Farmhouse table plans, but I was worried about getting food and stuff stuck in between the table top boards.
So I decided to embark on the adventure of learning how to make a solid table top that I could rest on top of Ana's base design. The result is below, and although it took about 6 months of learning, practicing, and prototyping, I am finally done!
Because I made a solid top, I was able to skip the support beams on the base, which hopefully reduced the weight a little bit.
I don't have a blog, but I added some additional comments in my Picasa Album.

Thu, 12/22/2011 - 13:53
He did was is known as a panel glue-up. They aren't terribly difficult once you've done one. The first one is exciting though. My technique is a bit simpler than what he used, but everyone needs to adapt a method suited to their available tools and knowledge.
If you want to try something like this, check local sawmills and timber suppliers first. adidas30, around here (Ann Arbor, MI), I can lay hands on a single slab of oak or walnut big enough for that table for half to a third that price. The bigger challenge is finding a friend with a big enough truck who is also strong enough to help me shift that beast. Still, what you paid is way less than what you'd pay to buy a table like that.
Wed, 01/04/2012 - 10:46
Crystal: Take a look at the blog link in my post. It links to a picasa photo album that shows a few of the steps along the way. Clay is exactly right. Now that I have done one, the next will not be so bad. It took a long time to learn how to do it right the first time, but it was really fun and extremely satisfying.
Clay -- I'm jealous. I felt silly spending so much on the Ash, but it was half the price of the oak. I think the ash was around 4 dollars per board foot, and the white oak was 7.80 per board foot. Good lumber yards are hard to find in DC. I had to venture over to MD.
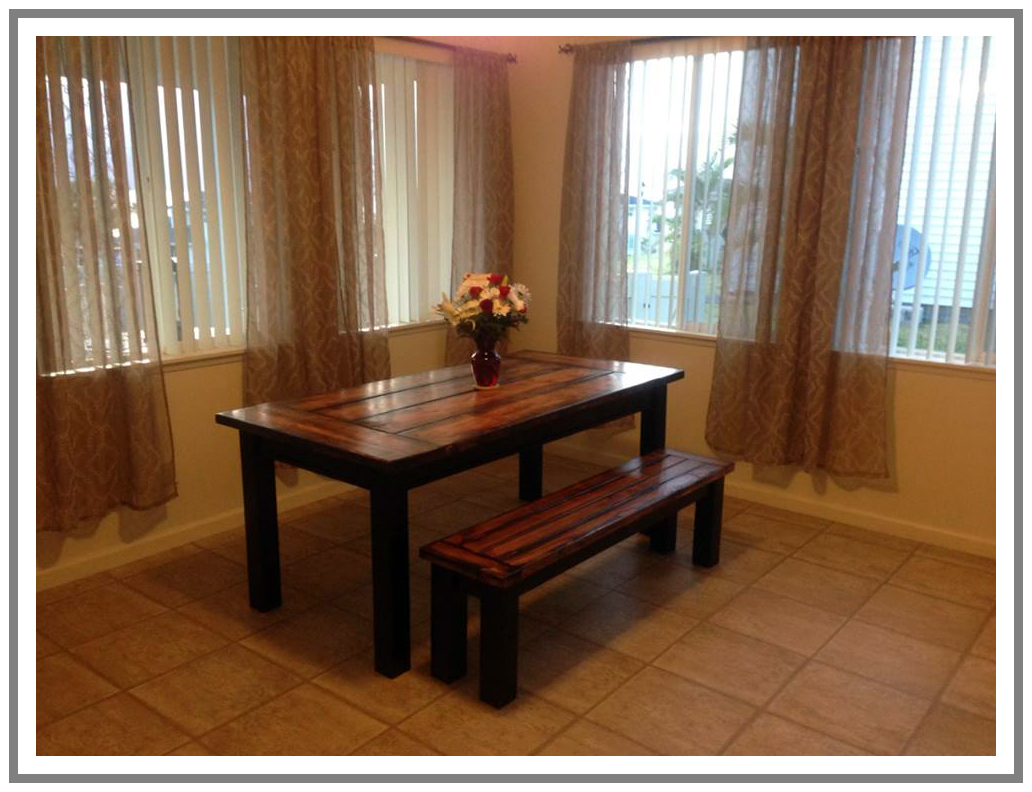
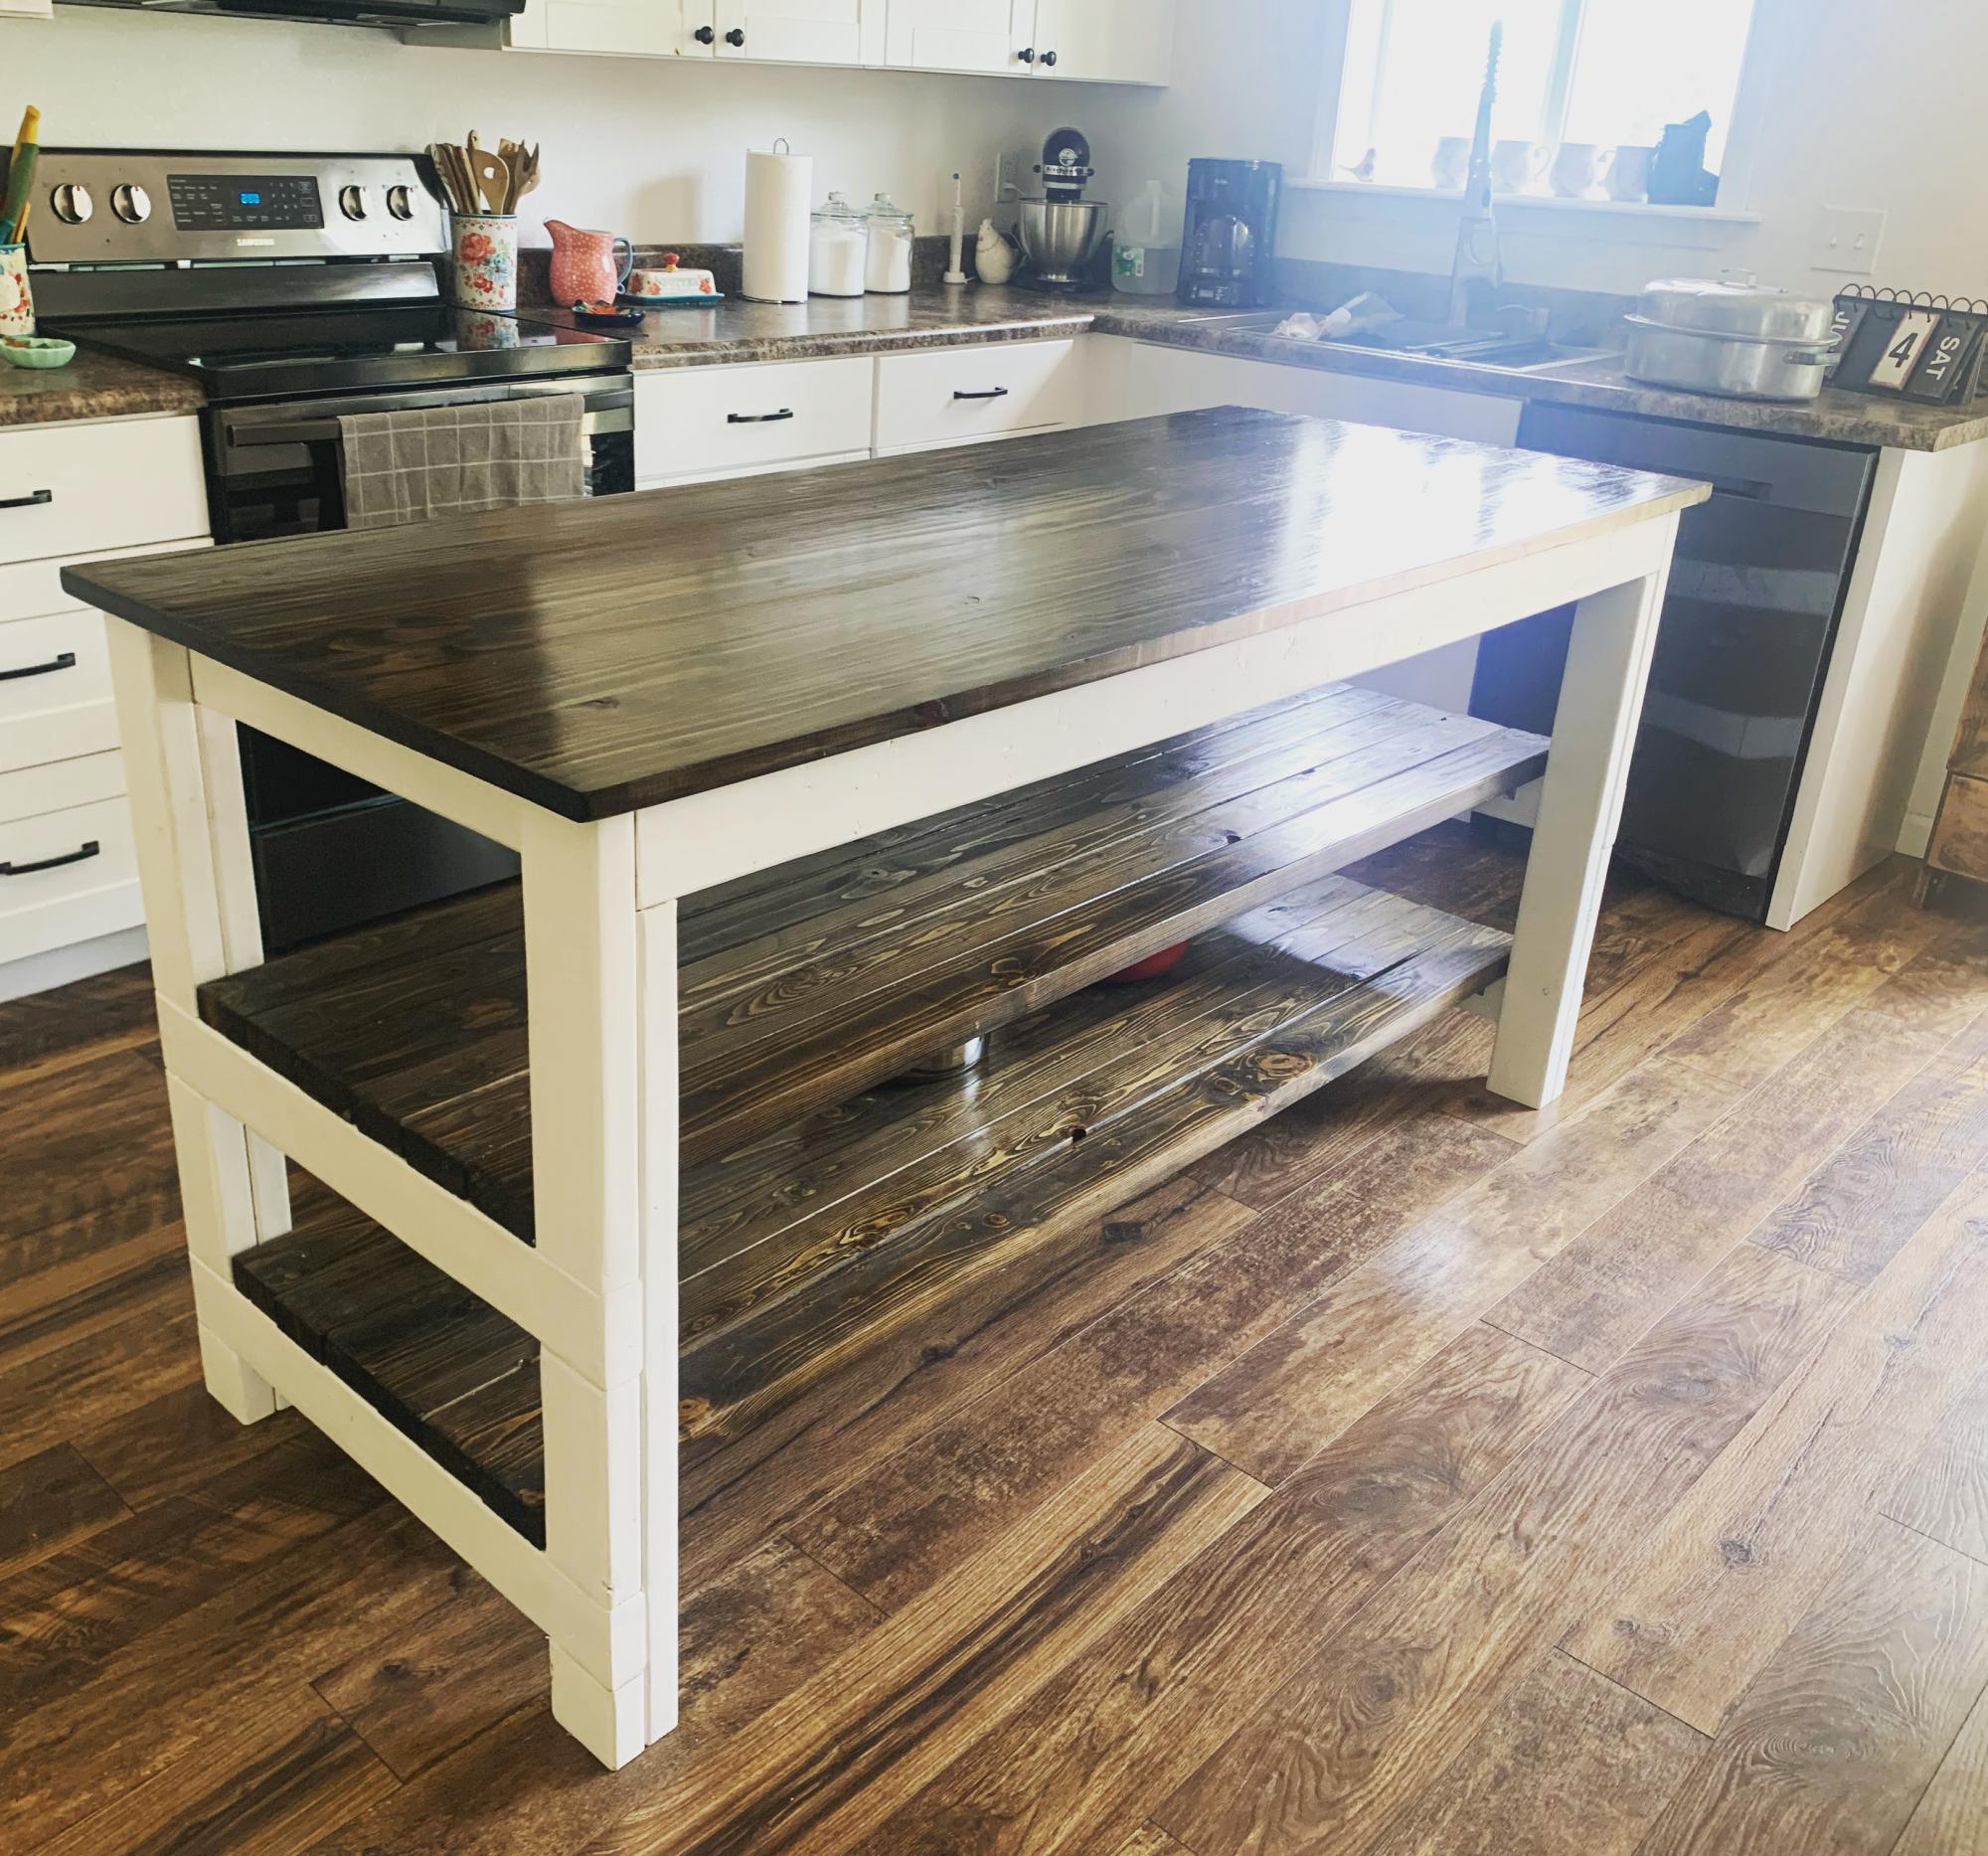
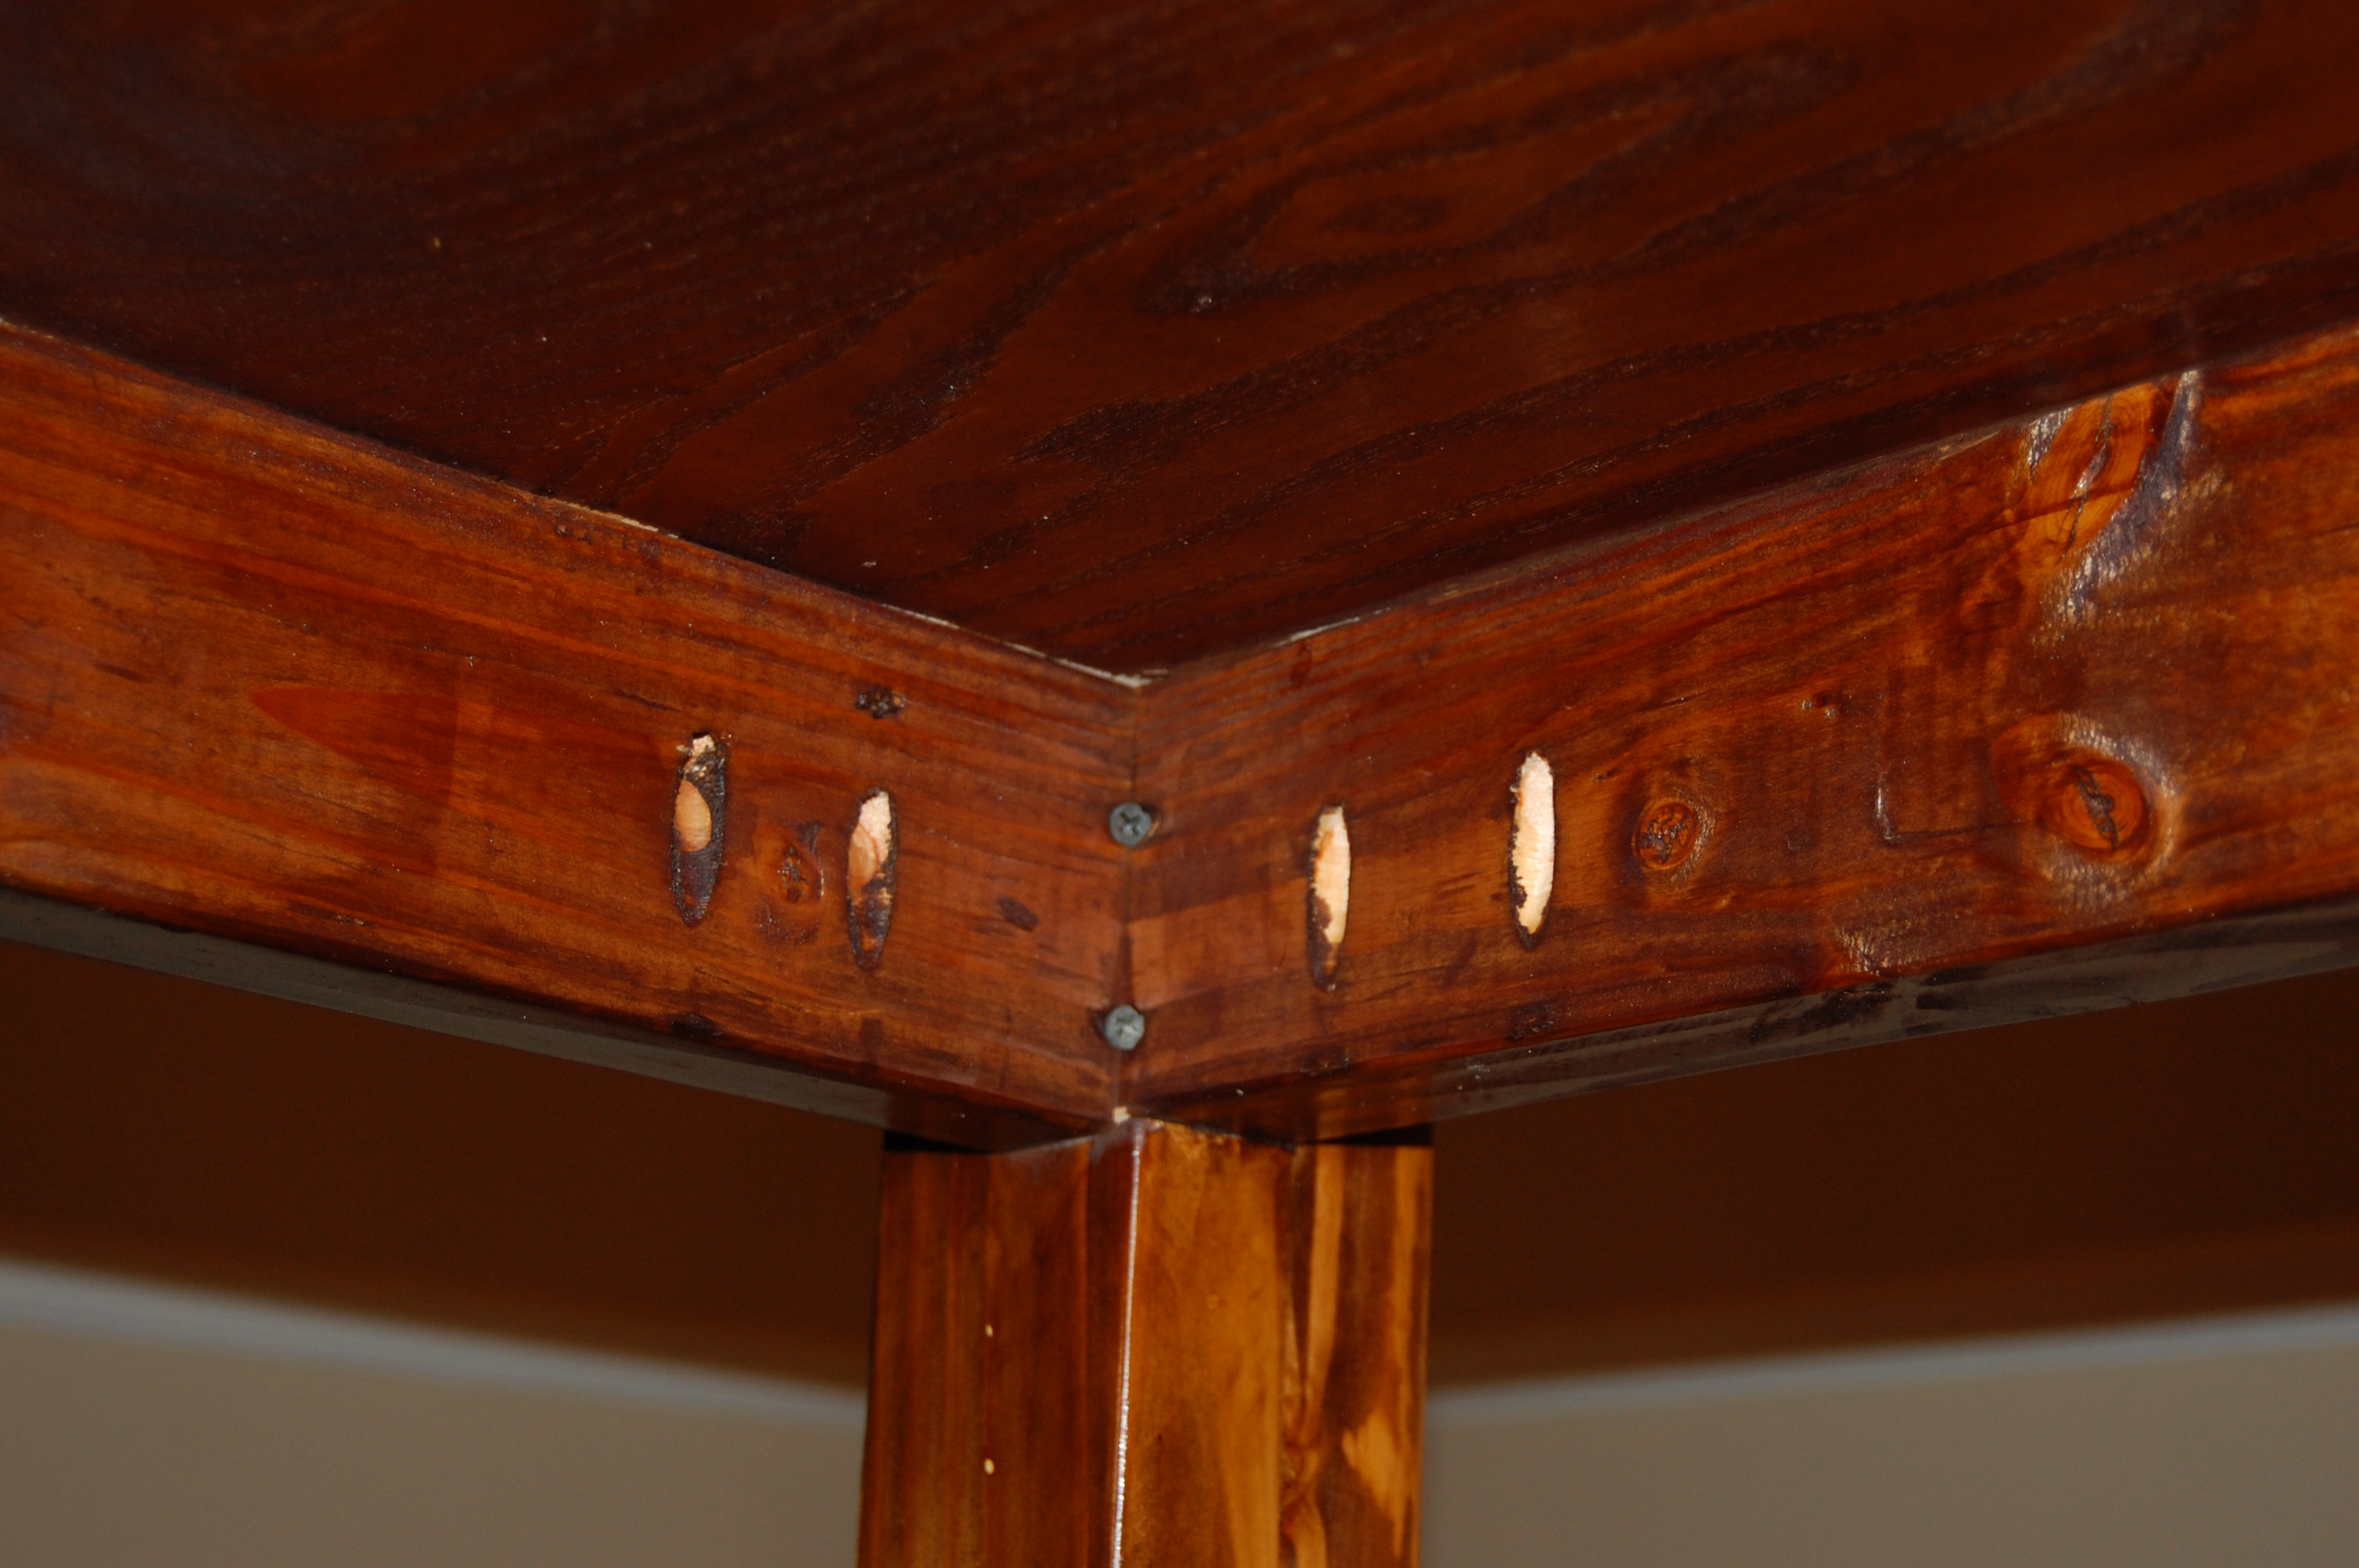
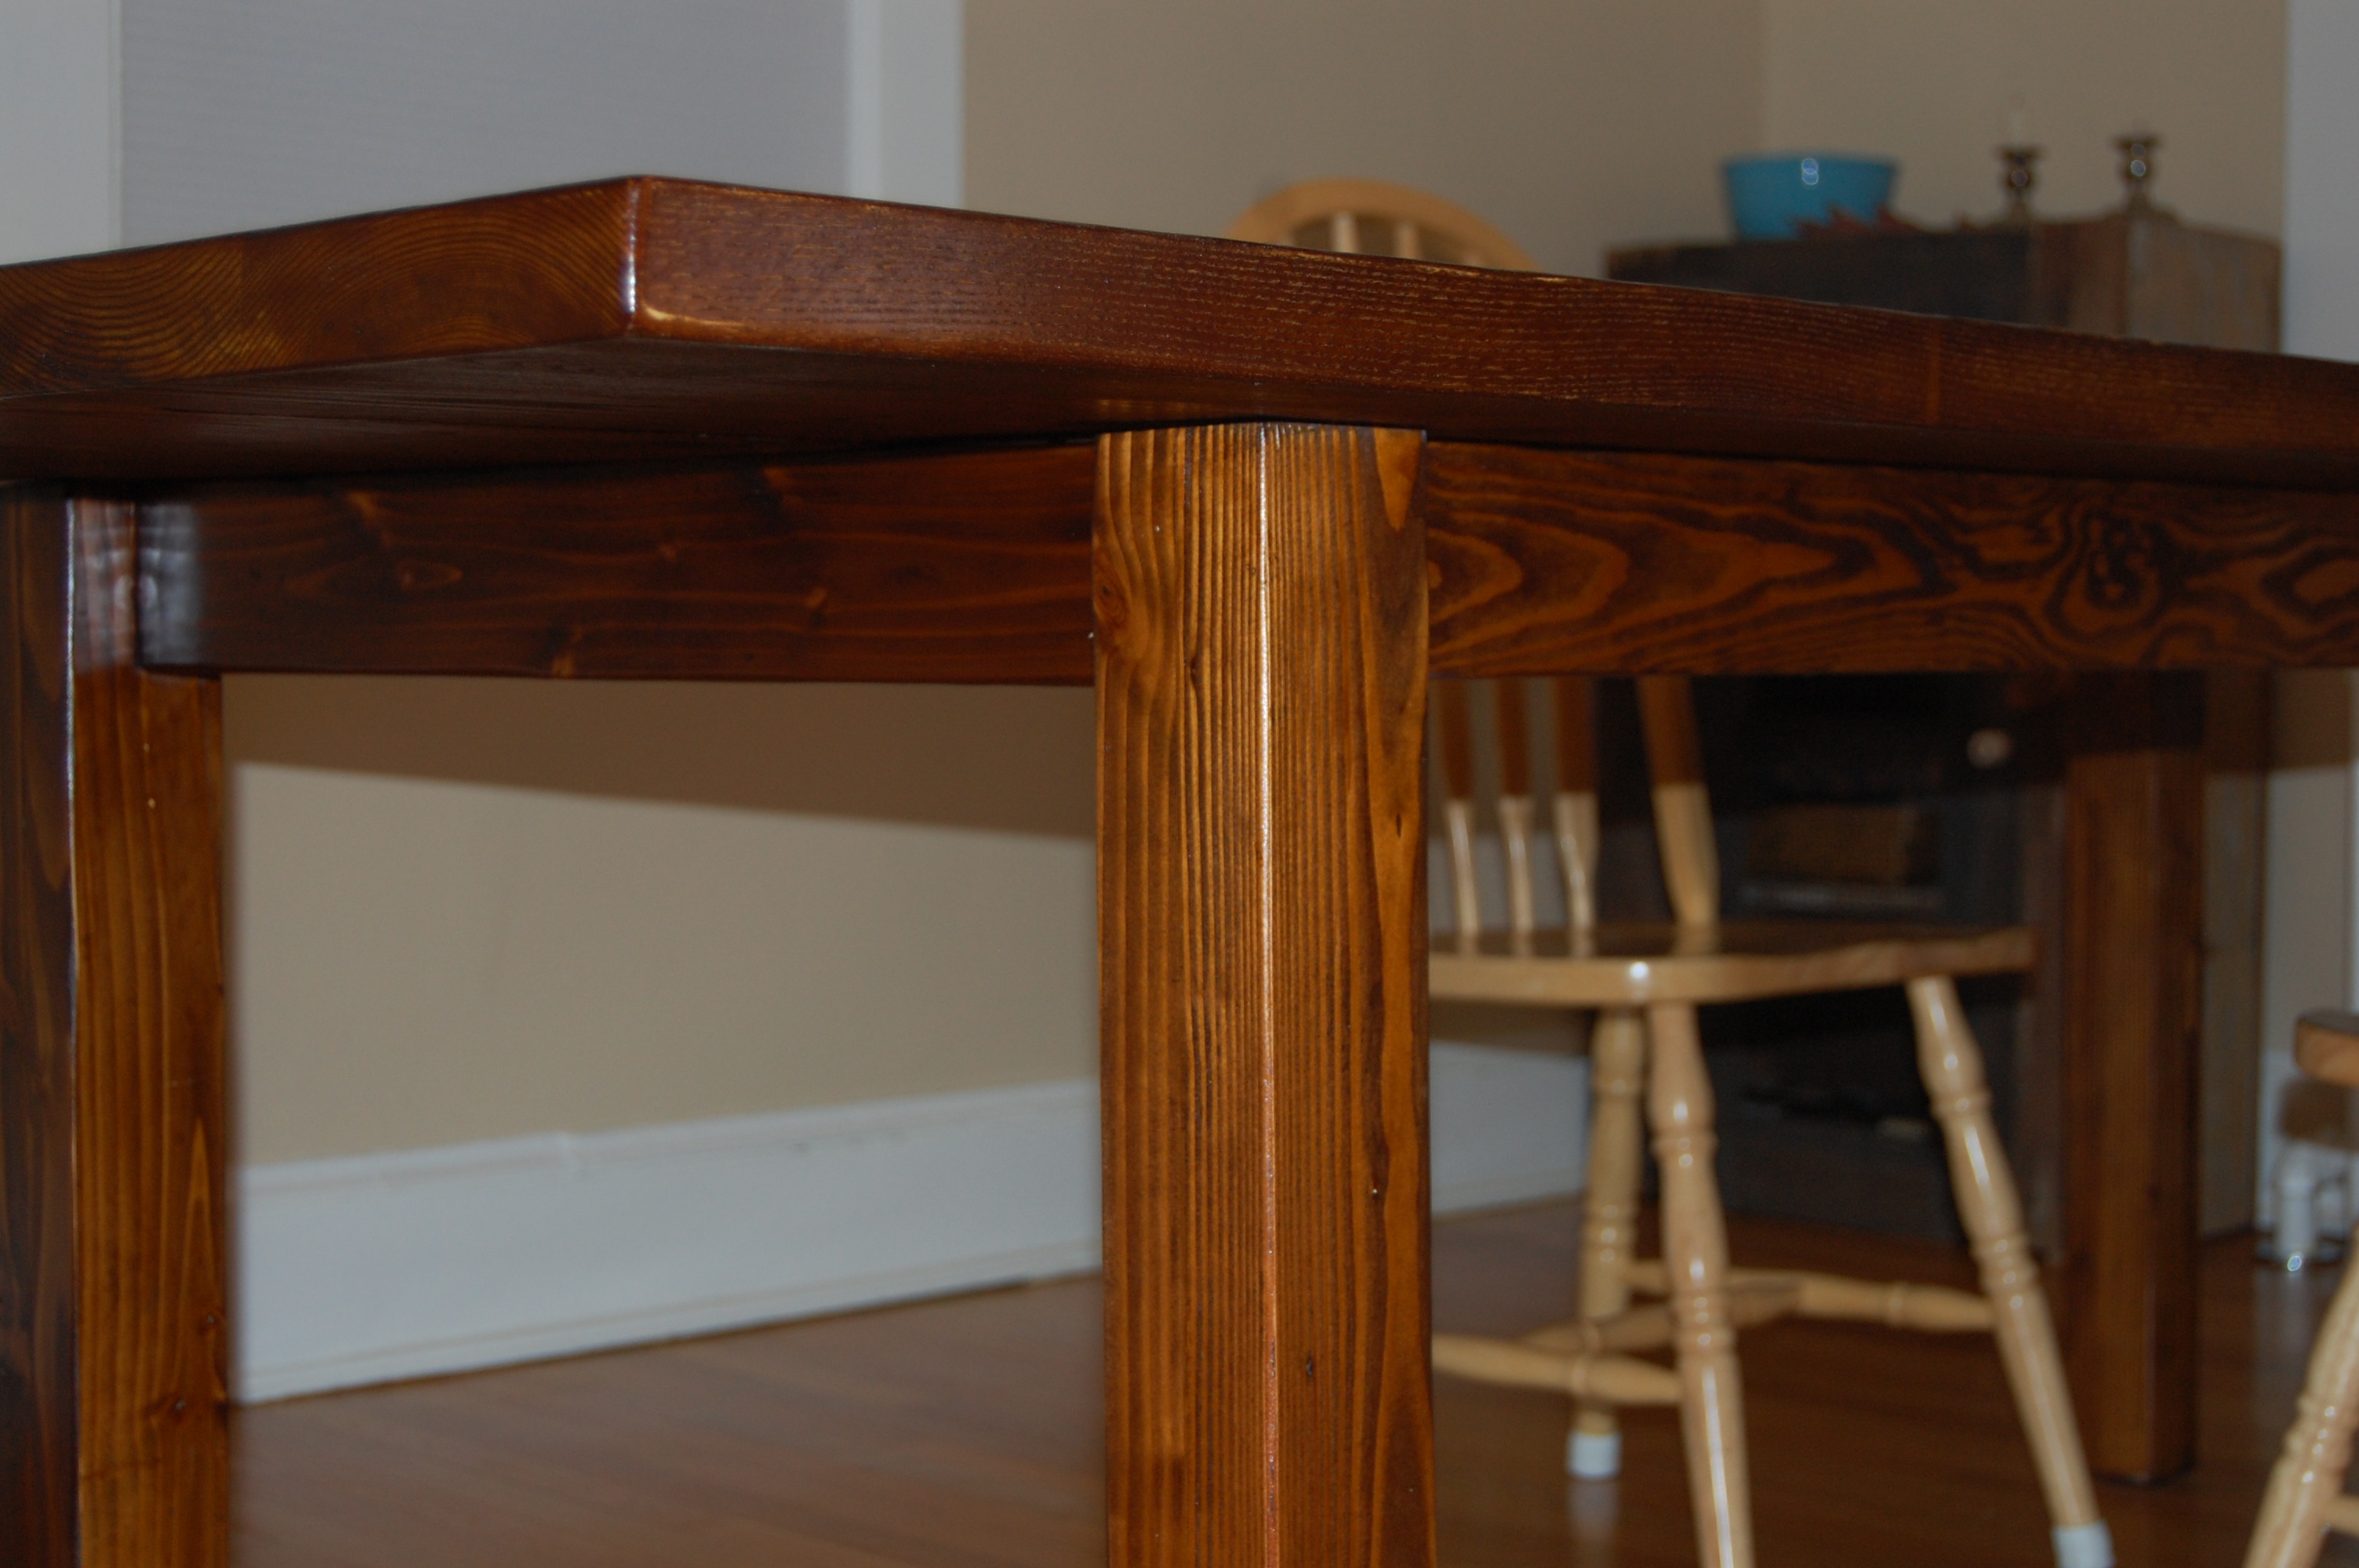
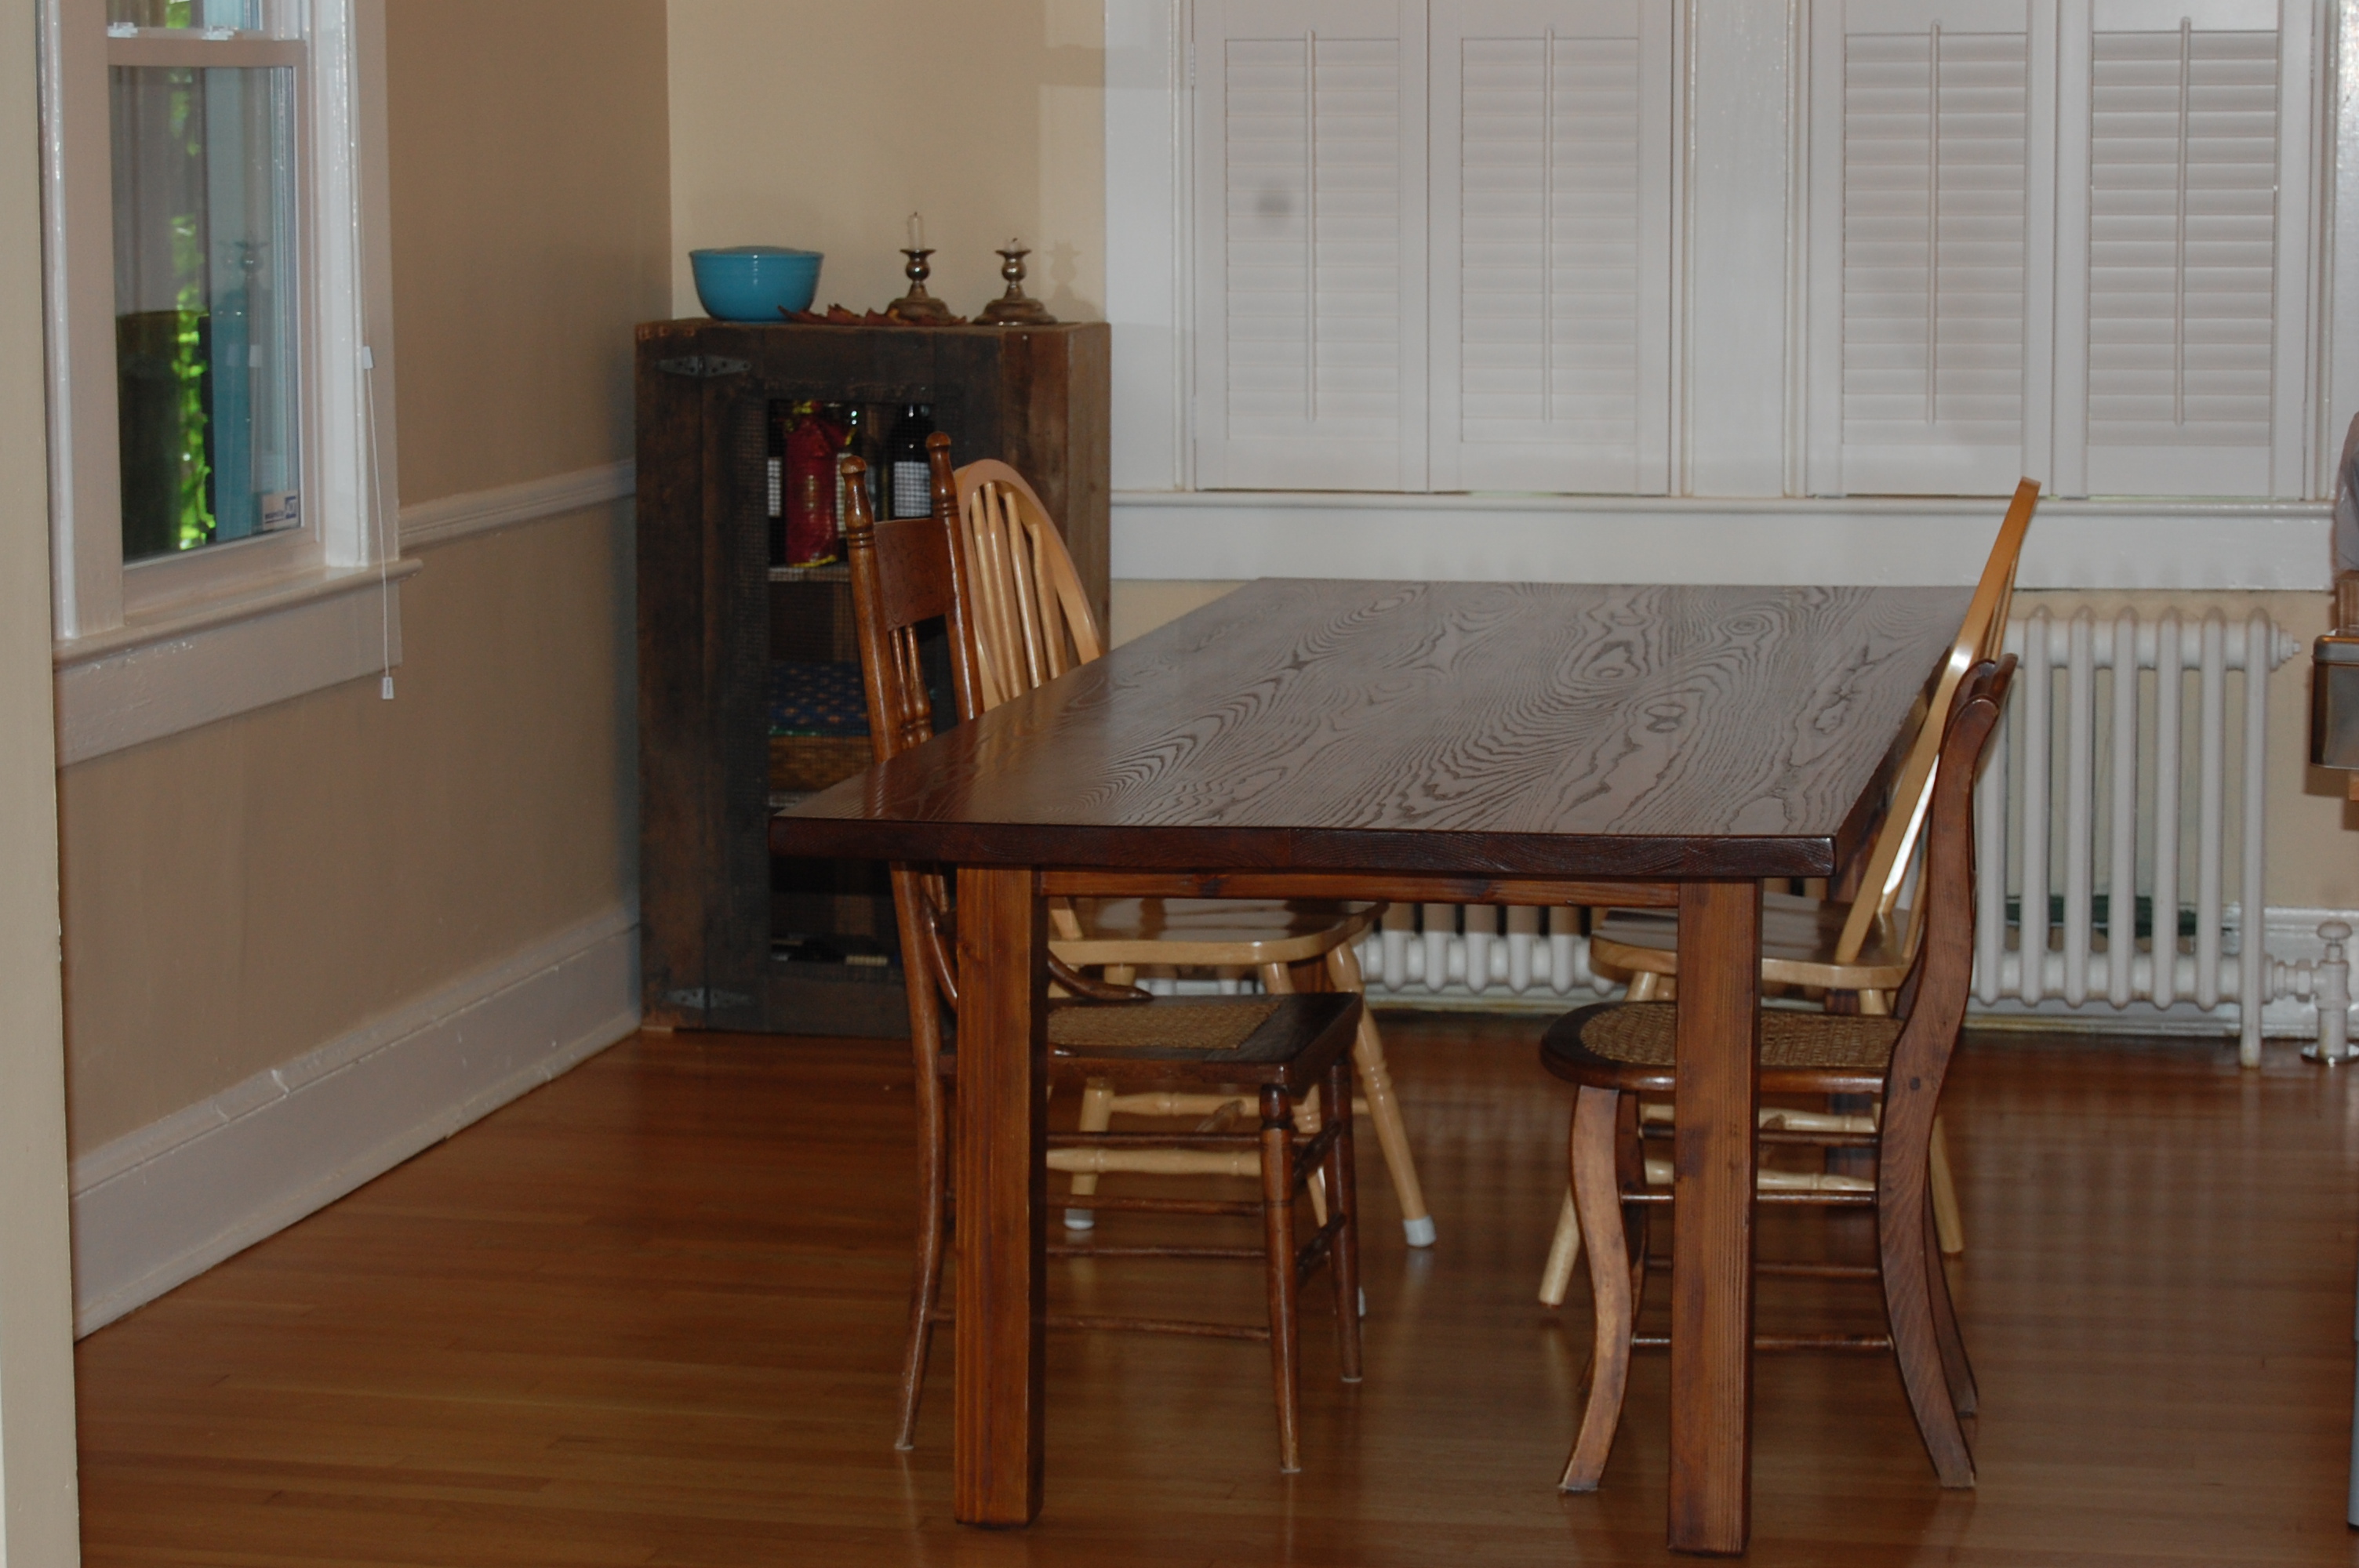
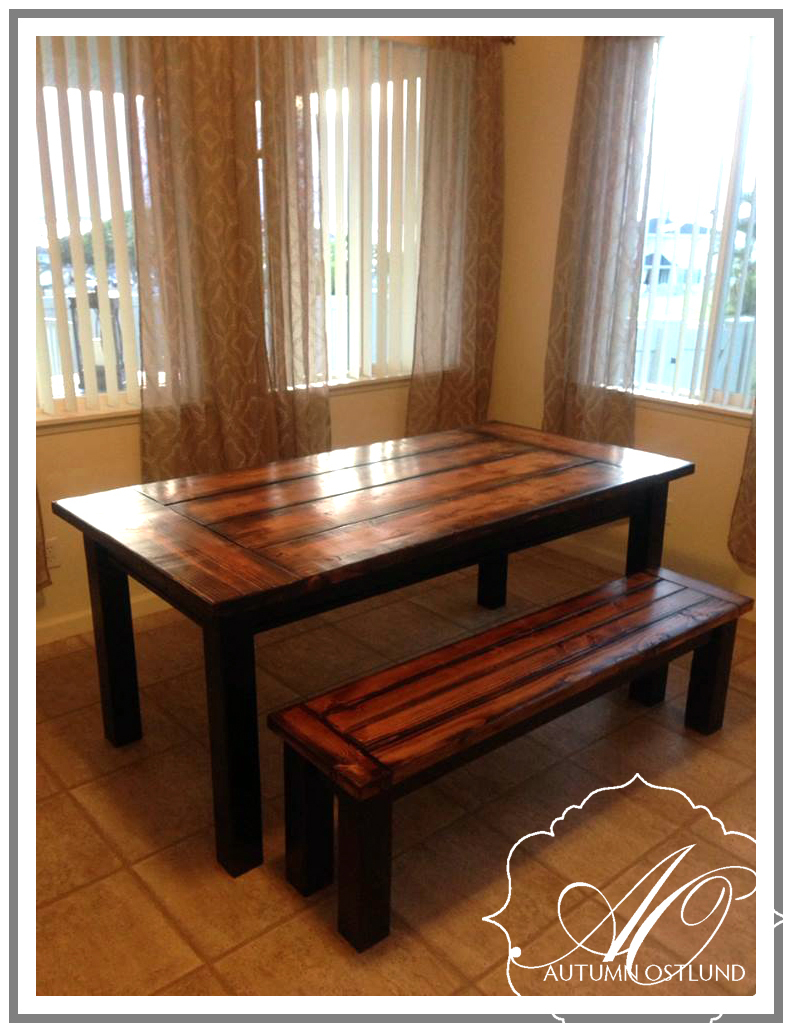
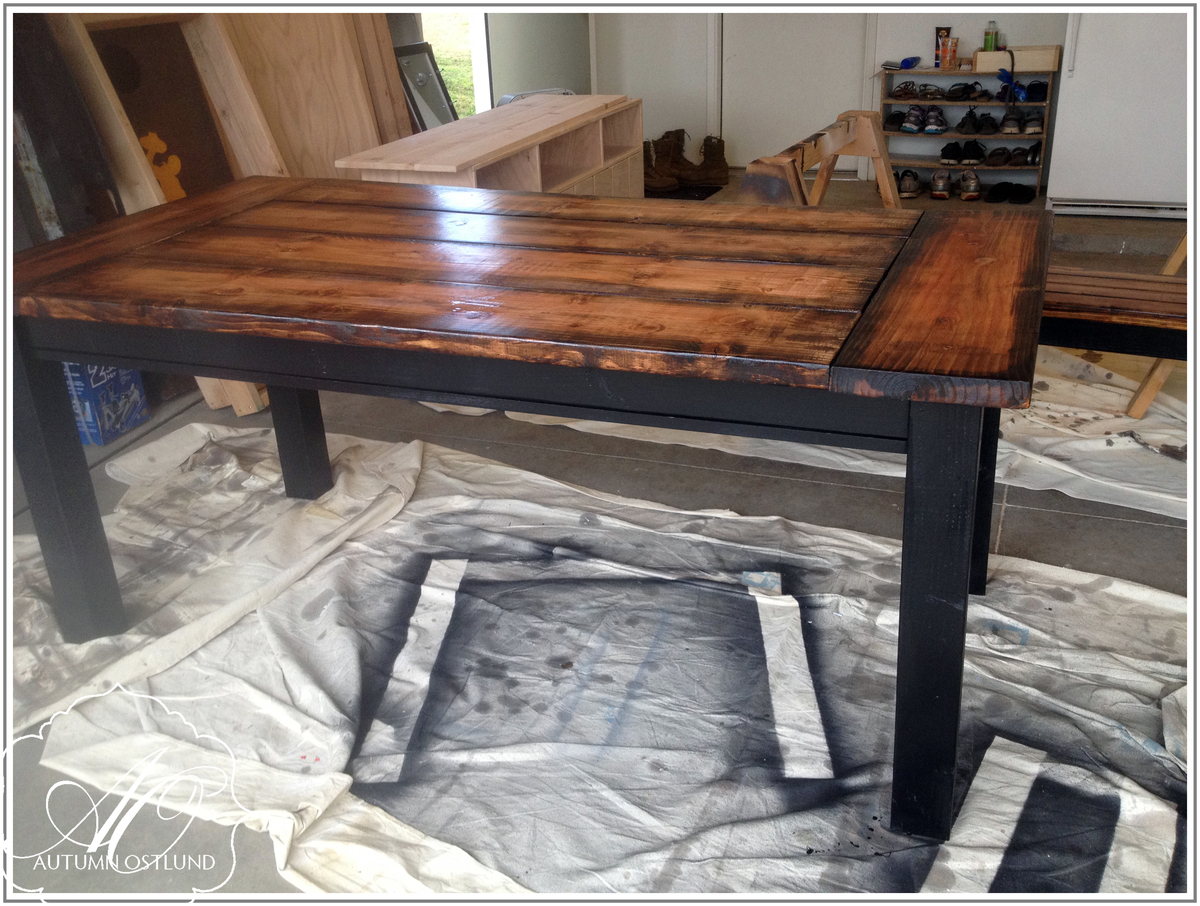
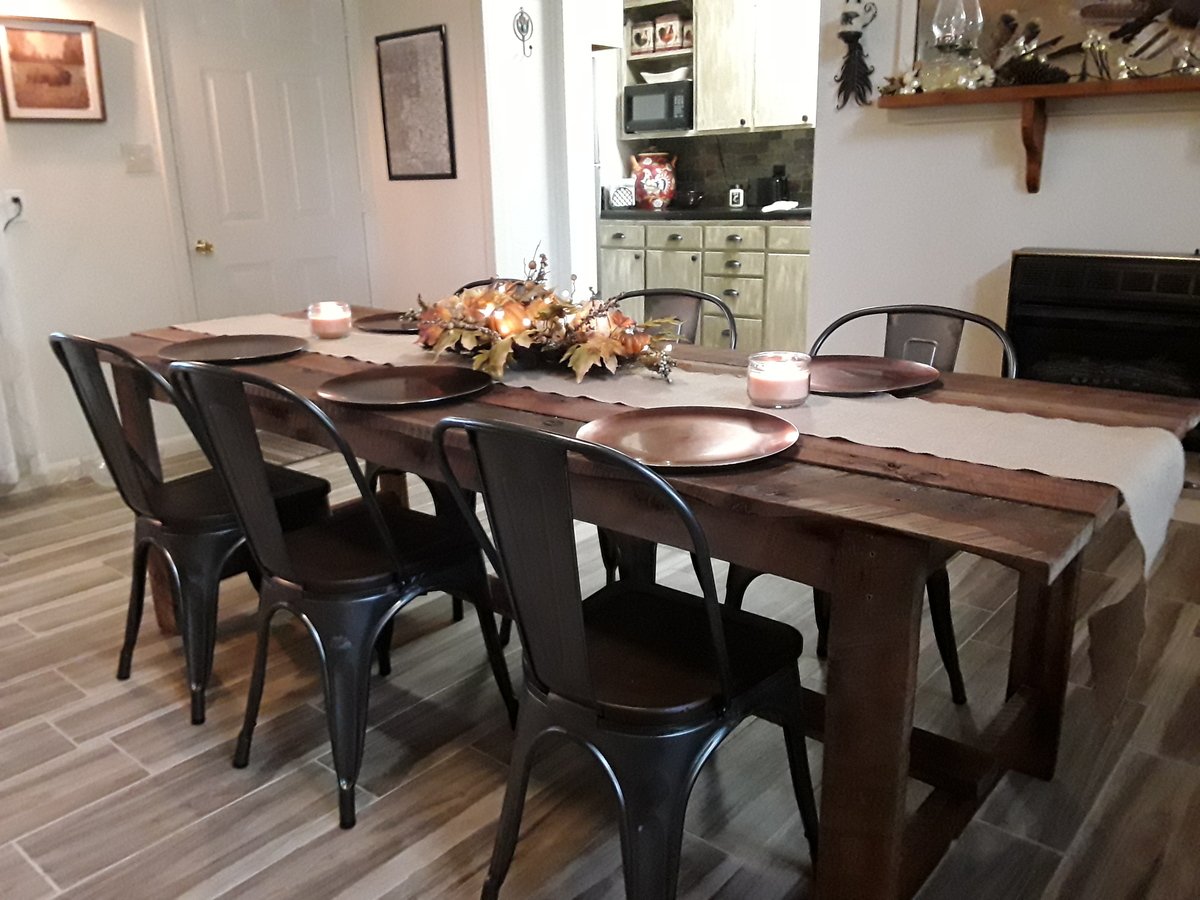
Slightly based on Ana White's husky farmhouse table, this table has 4x4s as legs and a nice, thick planked top with breadboard ends. It will easily seat 6 and will seat 8 in a pinch! I also build a bench to match, using the same concept, just smaller dimensions.
Fri, 08/23/2013 - 02:49
Love the stain you did on the top, looks awesome! It's a very beautiful set!
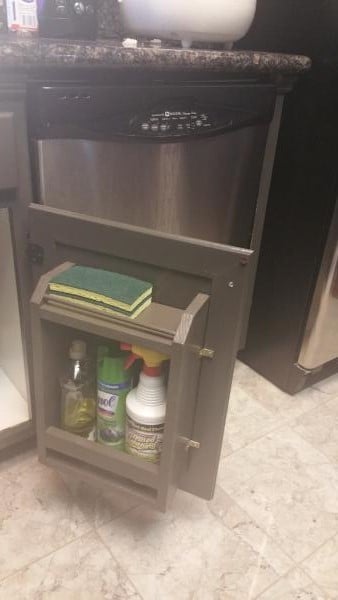
My under the sink door cabinet is smaller than what's on the plan so i had to improvise. A paper towel dispenser won't fit anymore so I just made another shelf. I love it. No clutter and everything is so organized. :)
I made the table from rough-cut cedar that was harvested on my father's land. All I spent was $16 on Danish oil and $5 on sand paper but its priceless to me. Thanks Ana!!!
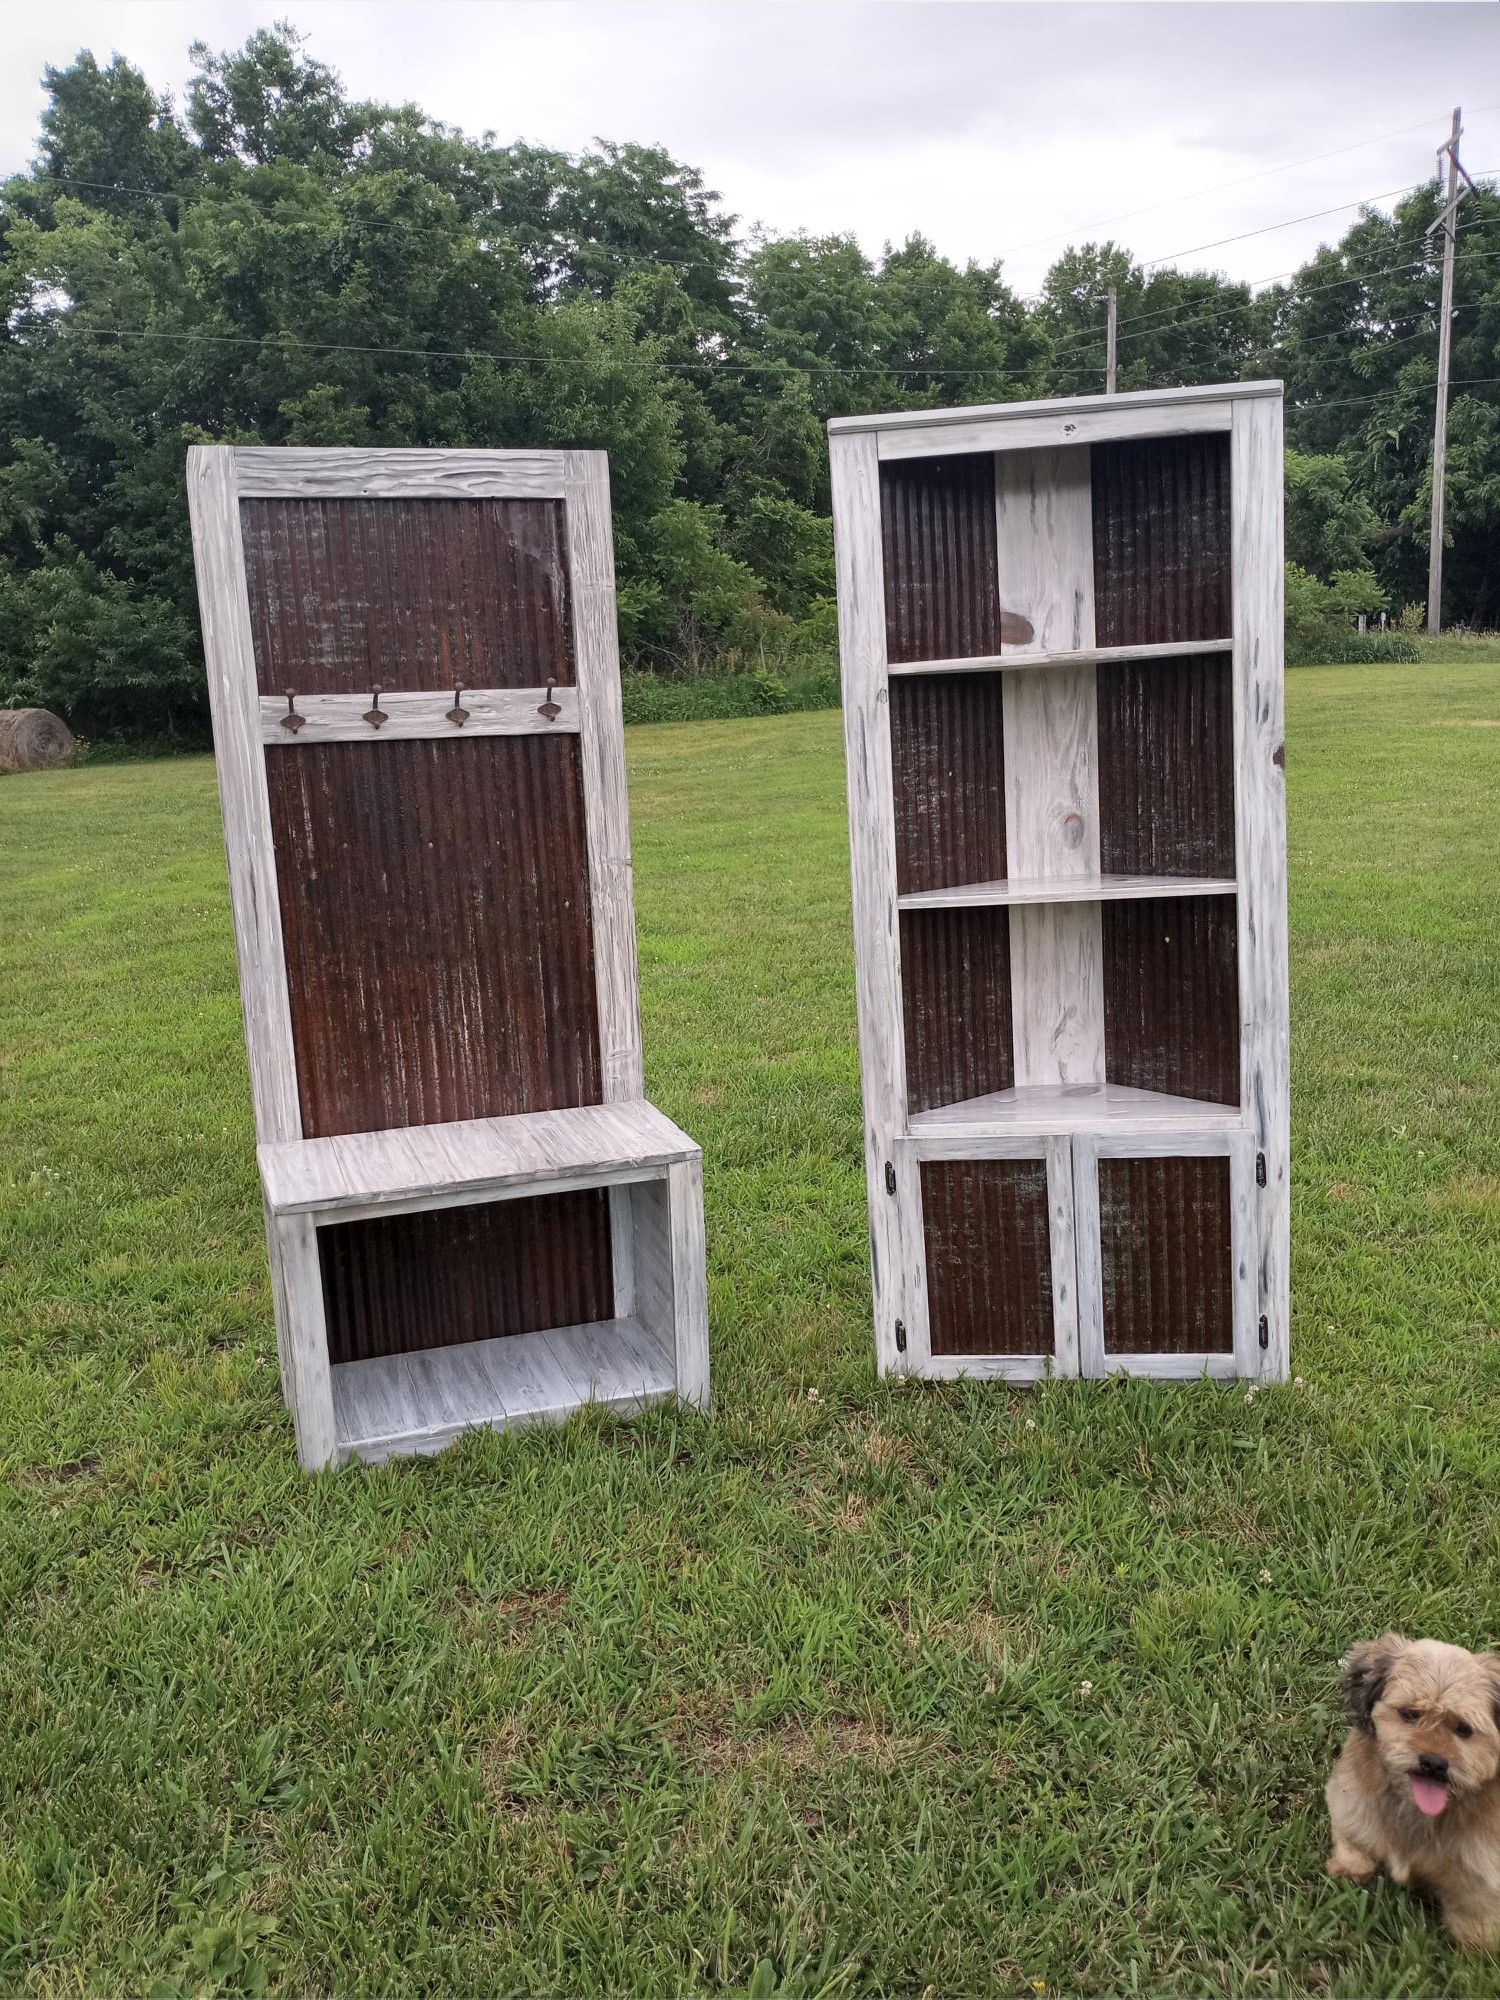
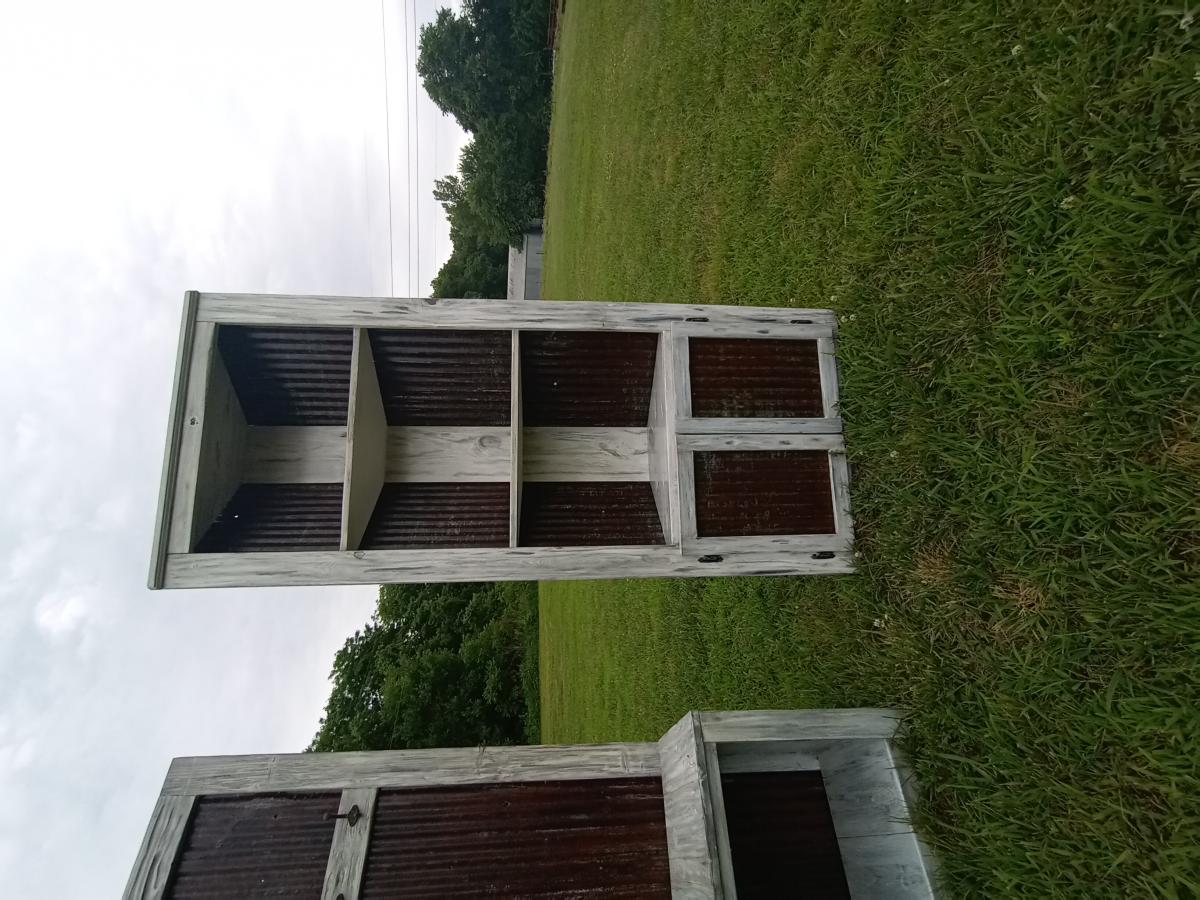
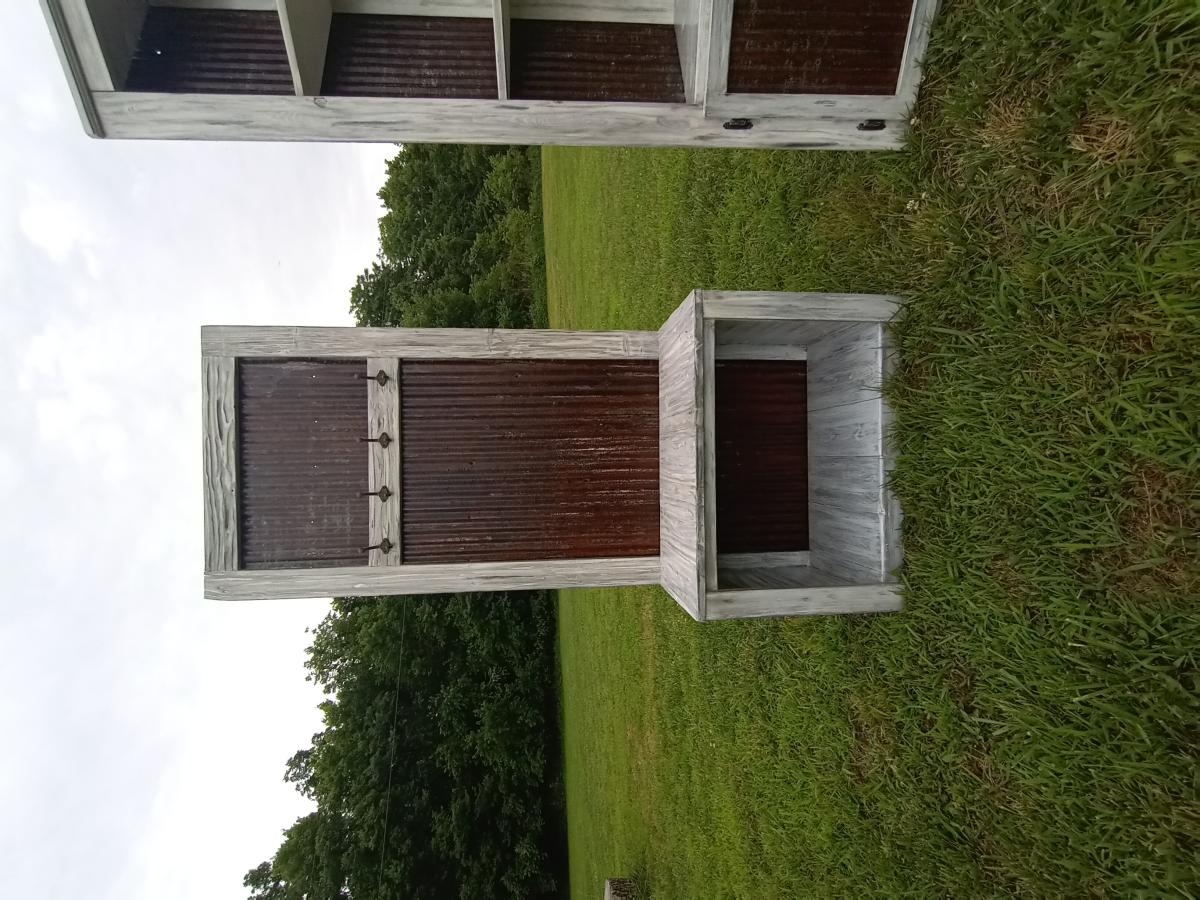
My take on a corner cupboard. I used old barn tim form backing and somewhat modified the plans. I actually made the hall tree first and then the matching cupboard. I finished it off with a custom distressed finish.