Community Brag Posts

Deck Gate

Submitted by mweir on Tue, 06/26/2012 - 19:37

With grandchildren and pets we decided to put a gate on the deck.

The gate is made from 2 X 4's and 2 x 2's. I used brass hinges to prevent rust and smooth operation

Estimated Cost
$15.00
Estimated Time Investment
An Hour or Two (0-2 Hours)
Finish Used
we will finish the gate when the deck is stained
Recommended Skill Level
Beginner

Cedar Planter with X Trellis

I made this project to add a little life to the front a flip house I just finished.  I had an awkward spot, and I was able to easily modify this plan to fit the space.  Thank you for the inspiration!

Built from Plan(s)
Estimated Cost
$30
Estimated Time Investment
Afternoon Project (3-6 Hours)
Finish Used
Minwax Special Walnut
Recommended Skill Level
Beginner

Cedar Street Number Planter

I was looking for a way to give our house some better curb appeal and decided our stree numbers could use a facelift.  The majority of money spent on this project was for the numbers since I had enough spare cedar laying around.

house number planter

Estimated Time Investment
An Hour or Two (0-2 Hours)
Finish Used
Sedona Red
Recommended Skill Level
Starter Project

Comments

Shiplap Bathroom - DIY Vanity

Submitted by Anonymous (not verified) on Tue, 10/11/2016 - 13:52

It had come time to renovate our powder room bathroom. We were on a tight budget so we decided to build our own vanity & add a little twist to it! We splurged on the granite countertop, vessel sink  and faucet. Thanks to Ana White we built our vanity for less than $10! The plans were easy to follow . . . .we are so proud of our wood vanity!  link to our blog: http://www.houseofrumours.com/shiplap-powder-room-diy-vanity/


Estimated Cost
$10
Estimated Time Investment
Afternoon Project (3-6 Hours)
Finish Used
none. slightly sanded and used wood oil.
Recommended Skill Level
Beginner

Headboard based on PB Oxford Storage Bed

Although I didn't build this from a plan I wanted to be sure and share it as it is because of my experience building from Ana's plans that I felt comfortable giving this a shot.

My in-laws were just updated their lake cabin and wanted a storage headboard as space is a premium and it will be the only furniture in the guest rooms. It is unique as it has shelves on either side which can pull out to function as a small night stand, perfect for cell phones, books etc. The back of the piece is tongue and groove knotty pine which for the more rustic look they wanted.

I will probably do things a little different when I build the next headboard but overall I am satisfied with the end result. I chose not to do a lower storage area, mainly to keep the cost down. It could be done very easily but this piece is already very heavy and that there is plenty of storage.

Estimated Time Investment
Weekend Project (10-20 Hours)
Finish Used
Special Walnut stain with semi-gloss Polycrylic. All of the wood was sanded and then I applied wood conditioner. One coat of the stain and three coats of the semi-gloss. I live in Minnesota and build it in my garage so I had to wait until this week when temperatures finally were warm enough to apply the finish.
Recommended Skill Level
Beginner

Comments

Ten Dollar Cedar Raised Garden Beds

Submitted by kelli224 on Wed, 06/29/2011 - 19:19

Since moving and finding Knock Off Wood, we decided now would be a good idea to try some gardening (again...after failed attempts!) These beds are so simple but beautiful out in the yard and for the first time I actually have vegetables growing. We used the cedar fence posts just as Ana suggested.

Estimated Cost
$40
Estimated Time Investment
An Hour or Two (0-2 Hours)
Finish Used
None
Recommended Skill Level
Beginner

Comments

Seasonal And Holiday

chicken coop

Submitted by namaste7 on Mon, 05/11/2020 - 22:10

Modified to make the coop bigger and the planter smaller. Added 1" foam insulation on the inside and changed the design to use the "deep litter" method. This means the coop bottom goes all the way to the bottom of the support beam rather than using a removable tray. Added a steel roof with a ridge vent at the top. The chicken run under the coop is lined with buried hardware cloth so no animals can dig under the coop. All hinges are mortised and doors flush mounted. The coop is wired for power for a heat lamp. The planter is lined with a metal tray. The coop can be separated into two pieces so you can move it or rotate the top 180 deg if needed (so you can get to the eggs from the left or right side). Great plans, thanks Ana!

Estimated Time Investment
Week Long Project (20 Hours or More)
Finish Used
cedar deck stain. Olympic. brand
Recommended Skill Level
Advanced

Comments

Seasonal And Holiday

Modern Outdoor Patio Set

Submitted by dlangford on Sat, 09/05/2020 - 16:08

Built this over the weekend for my girlfriends sister. It was a great project and the whole family was able to work together on it, sanding and waterproofing it before assembling. The loveseat plans need a little tweaking. We ran ran the slats the same direction as the chair plans call for so we added a middle support for extra stability. We also pitched the seating down towards the back by 5* to make a more natural sitting position.

Estimated Cost
$300
Estimated Time Investment
Weekend Project (10-20 Hours)
Finish Used
Behr Cedar Natural Tone Waterproofing Stain and Sealer
Recommended Skill Level
Beginner
Seasonal And Holiday

Drop Leaf Mobile Kitchen Island

Submitted by jkjackson on Sun, 03/14/2021 - 11:19

This was born out of the need for more counter space in our galley kitchen. We don't have the space to add an island. Especially around the holidays, it would be great to have extra space for making cookies, serving big meals, etc. I used Ana's Small Kitchen Island Prep Cart plans for inspiration. I adapted the dimensions to fit at the end of our counters when not in use and added a drop leaf to give us almost 4 additional feet of butcher block counter top when we need it. I used scrap lumber that I had for the cabinet and had an extra drawer handle that matches our kitchen cabinets but bought the butcher block, locking casters, drawer slide and hardware for the legs. Also, the weight of the butcher block makes it want to tip when it's away from the cabinet with the drop leaf down so I added a lead counter weight inside the drawer.

Estimated Cost
$150-200
Estimated Time Investment
Weekend Project (10-20 Hours)
Finish Used
Behr paint for the cabinet, food grade mineral oil and cutting board wax for the butcher block
Recommended Skill Level
Advanced

Comments

jkjackson

Sat, 07/24/2021 - 16:59

Sure! I used a 4 foot butcher block and cut it down. The horizontal part is 13 1/2" and the drop leaf part is 32 1/8" attached with a piano hinge. The legs need to be cut and hinged to fit when folded up. This one is made so that the drop leaf fits right under the overhang of the kitchen countertop that it is next to so it's snug against the cabinet and not an issue but, if you want it to be freestanding, the weight of the butcher block will pull it over if you don't weight the cabinet down with something as well. I got a 5 pound lead bar from Amazon in case we need to use it somewhere else. I hope that helps! Let me know if you have any other questions.

DIY outdoor chairs for our firepit

Here is one of the new chairs I'm building for our new fire pit.  They are made out of four pressure treated 2x6s (and one 2x4), and have a comfortable 18" seat depth, 19" seat width, and 110 degree angle for the backrest.  

More information, and a link to our plans are located on our blog, FamousArtisan.com

Estimated Cost
$50
Estimated Time Investment
Day Project (6-9 Hours)
Finish Used
None yet.
Recommended Skill Level
Intermediate

Comments

Barn Door Console with Drawers

Submitted by Anonymous (not verified) on Mon, 05/06/2024 - 13:27

Being a newby to woodworking, I wasn't sure if I could tackle this build. I saw pictures on your website and decided to give it a try. However, my wife wanted drawers so I made the doors a little shorter in order to add the 4 drawers but keep the height at 36". Thanks for your inspiration. I'm getting more comfortable everyday.
 

Louis Villarrubia


Three Bin Laundry Sorter

Submitted by Meyer1120 on Mon, 01/21/2013 - 21:10

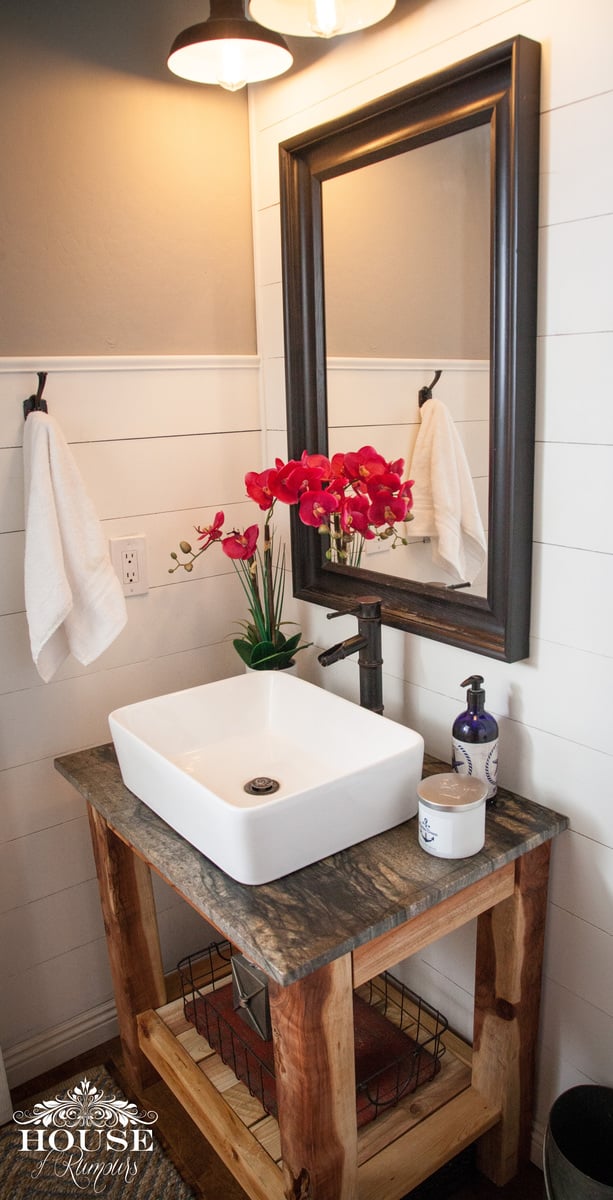
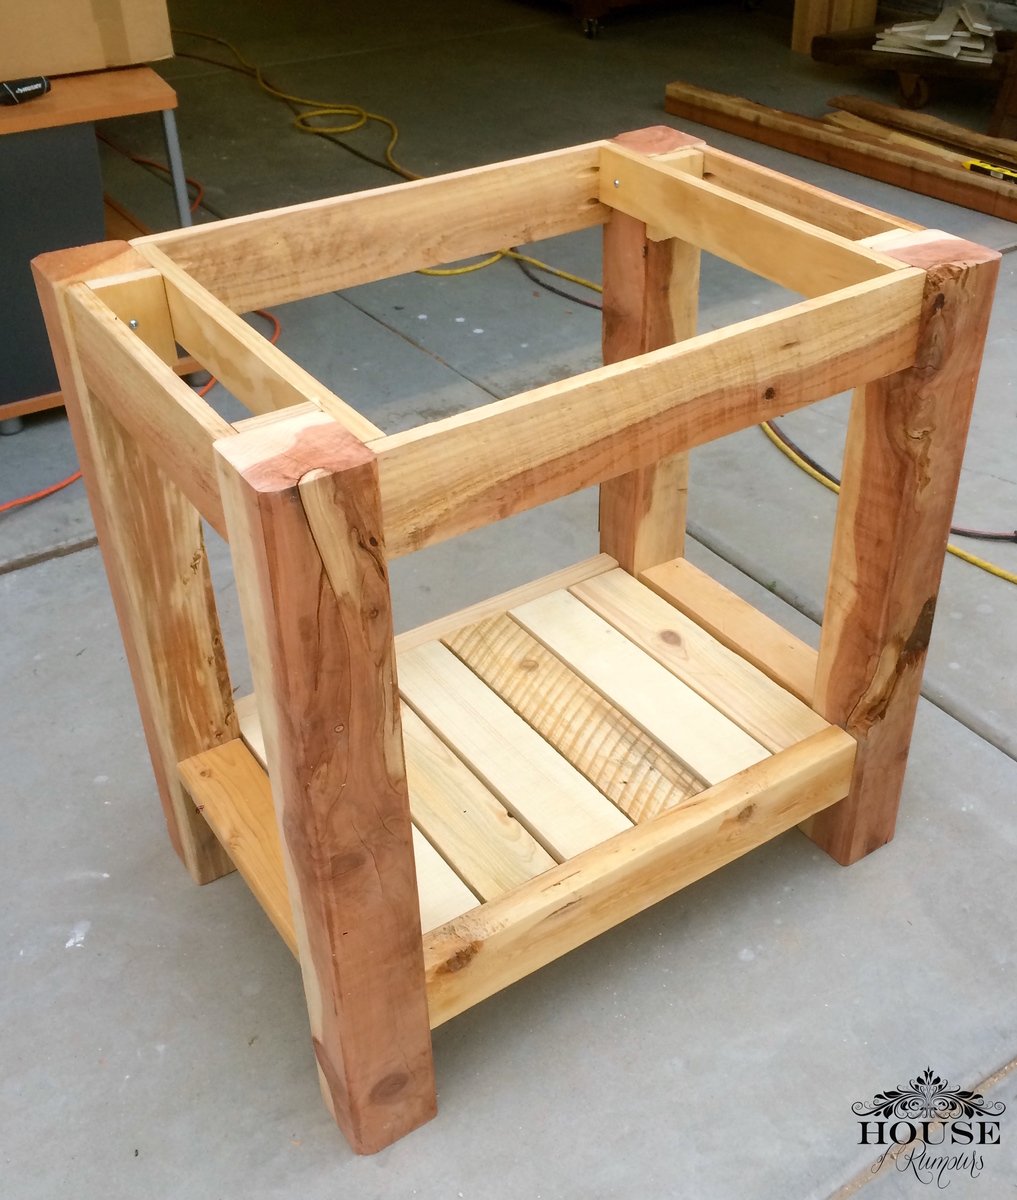
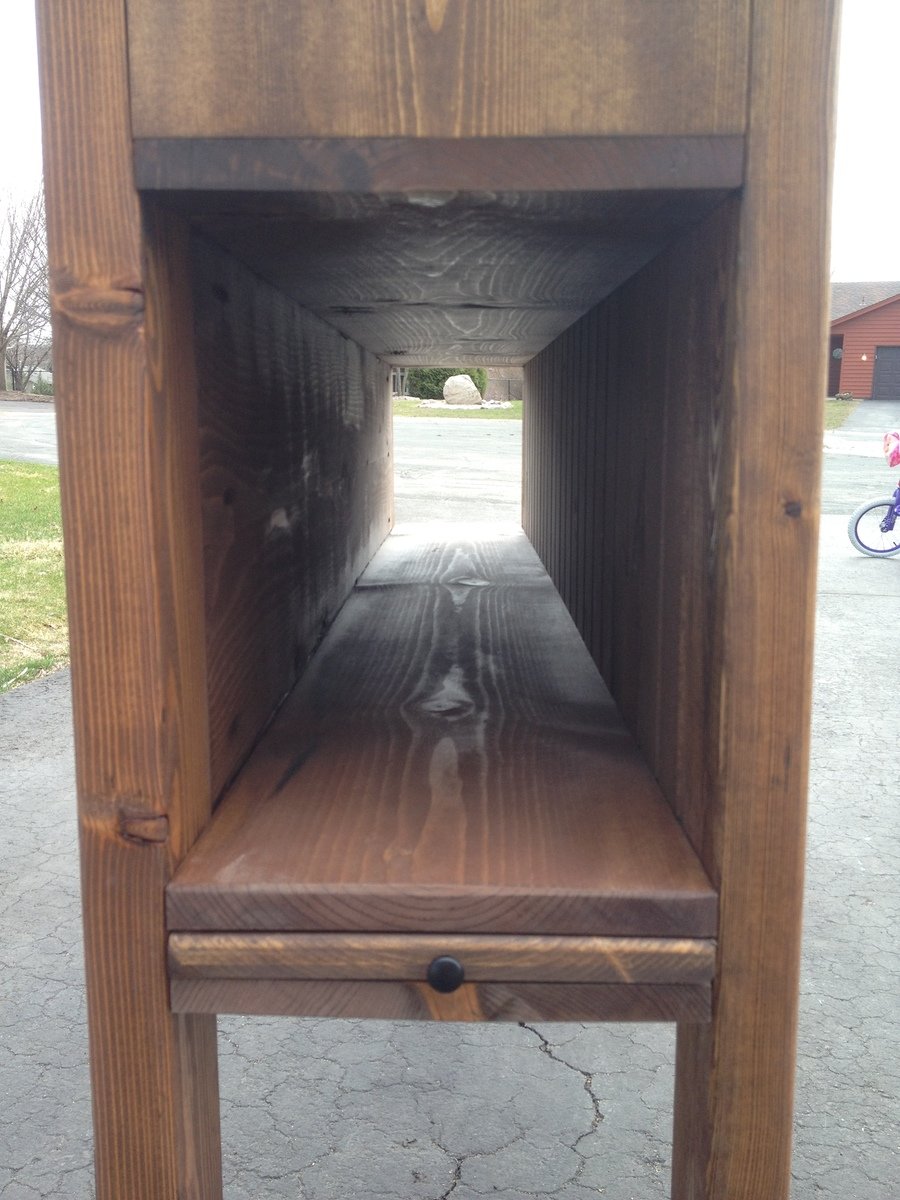
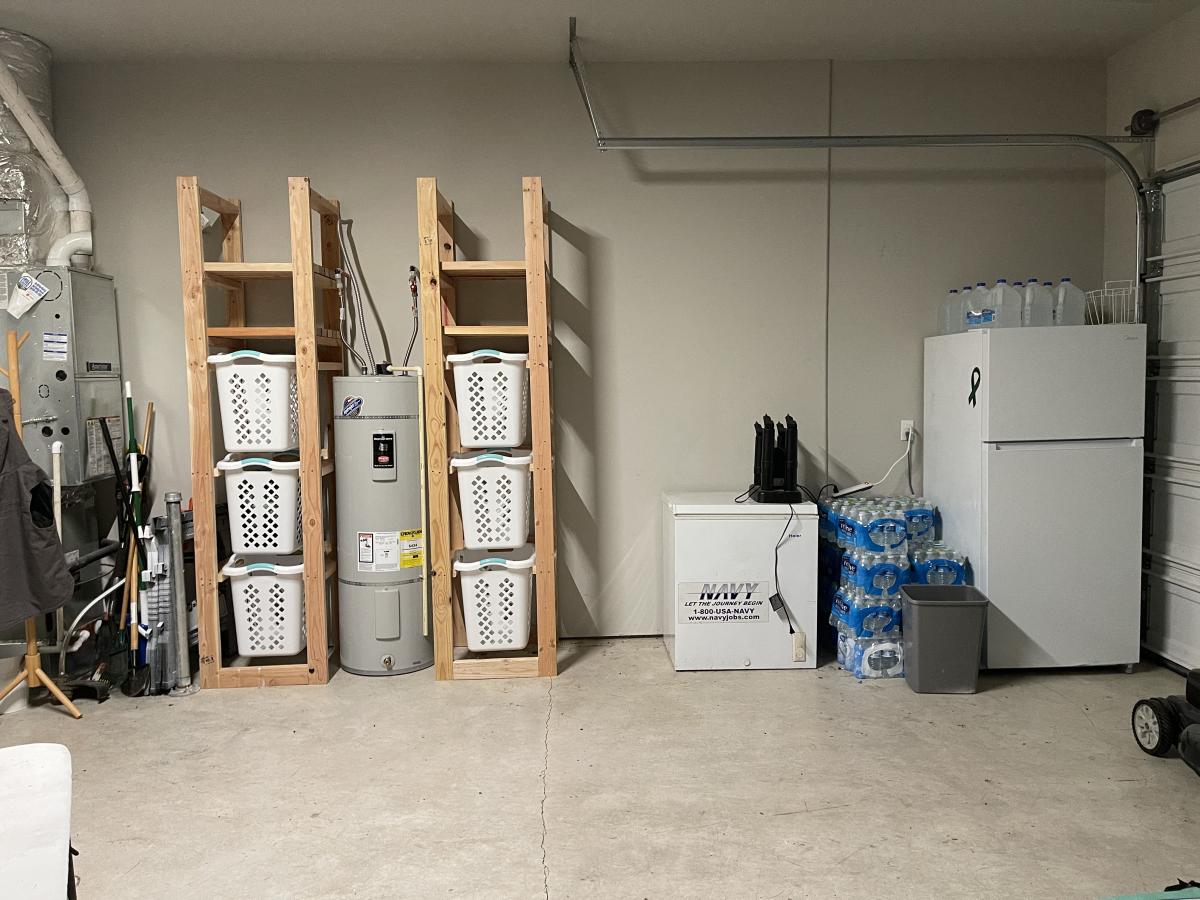
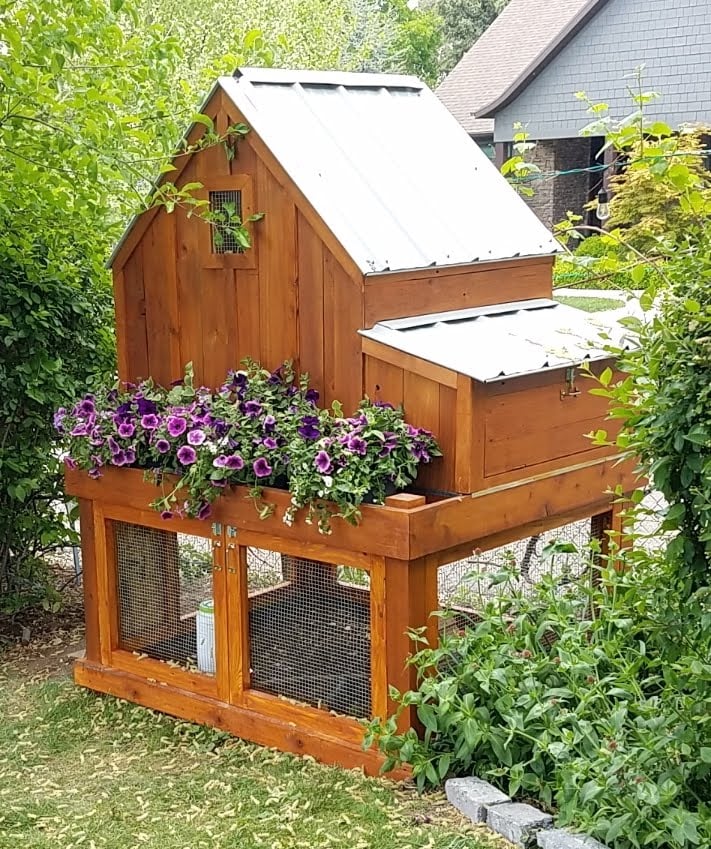
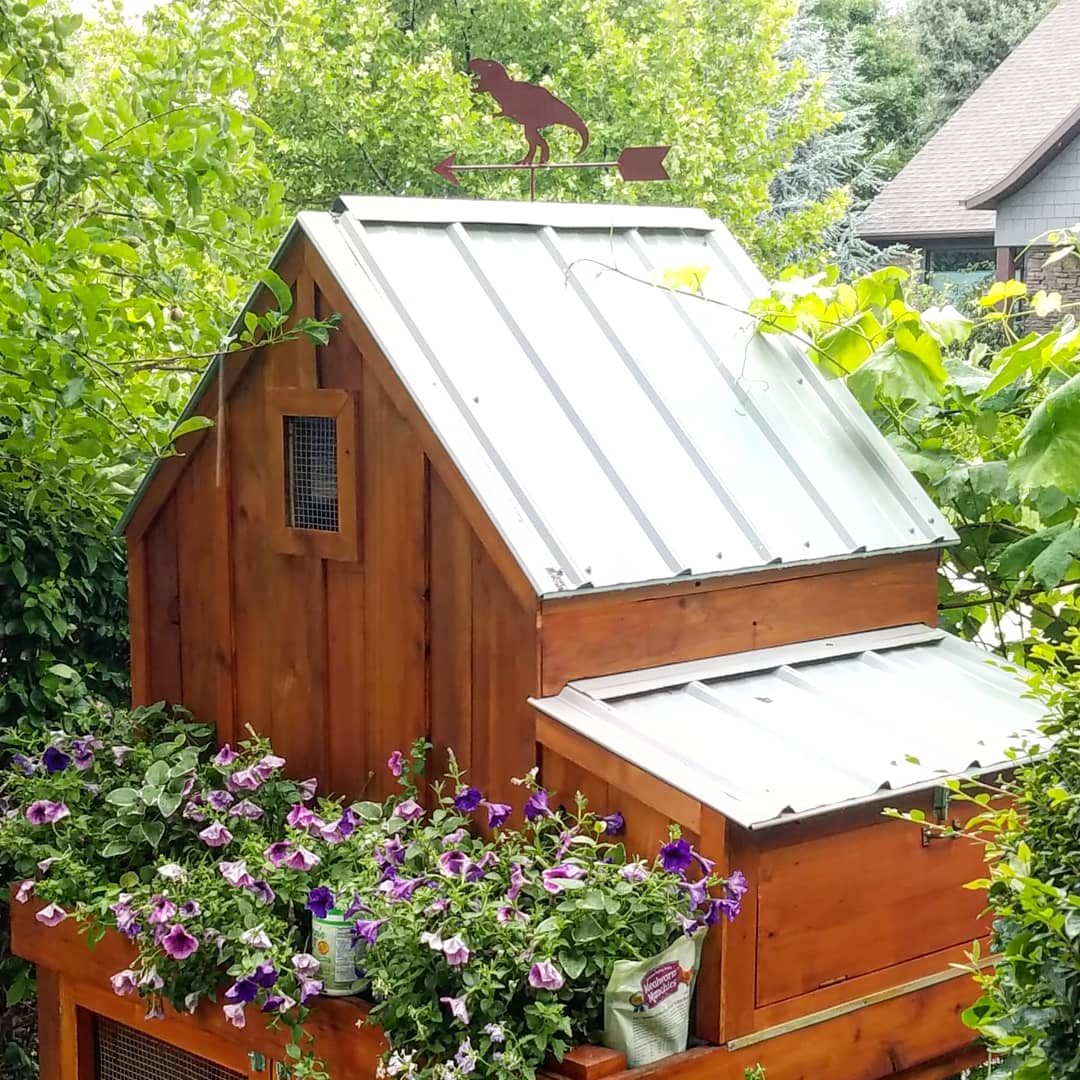
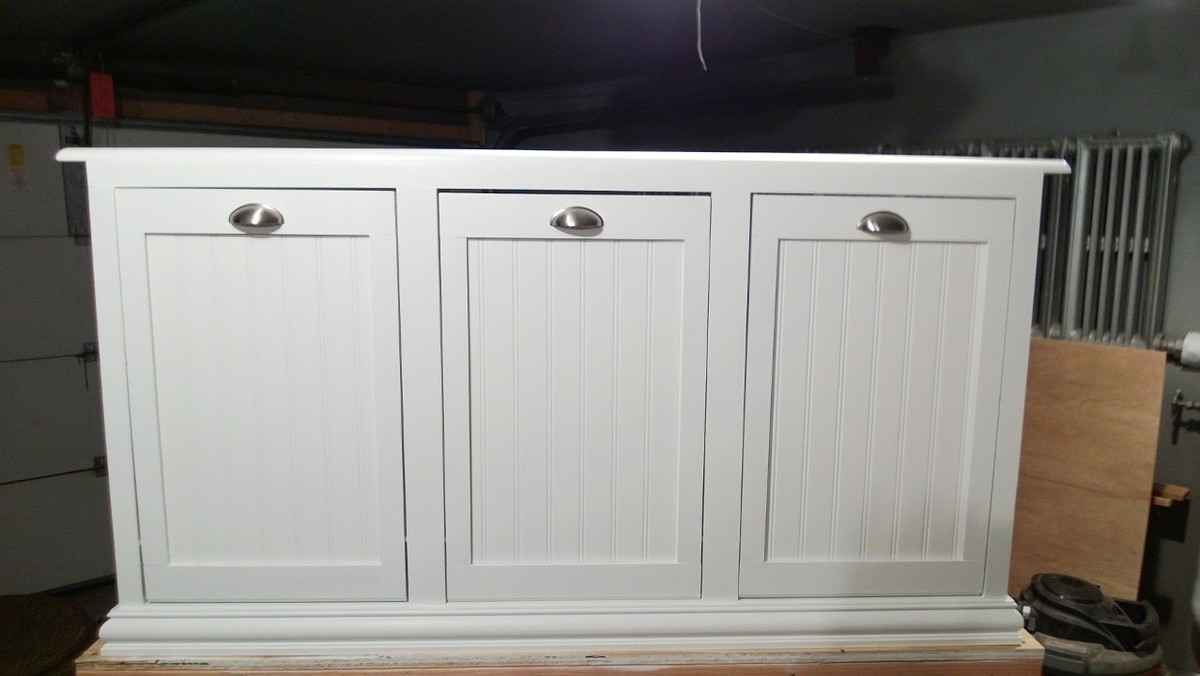
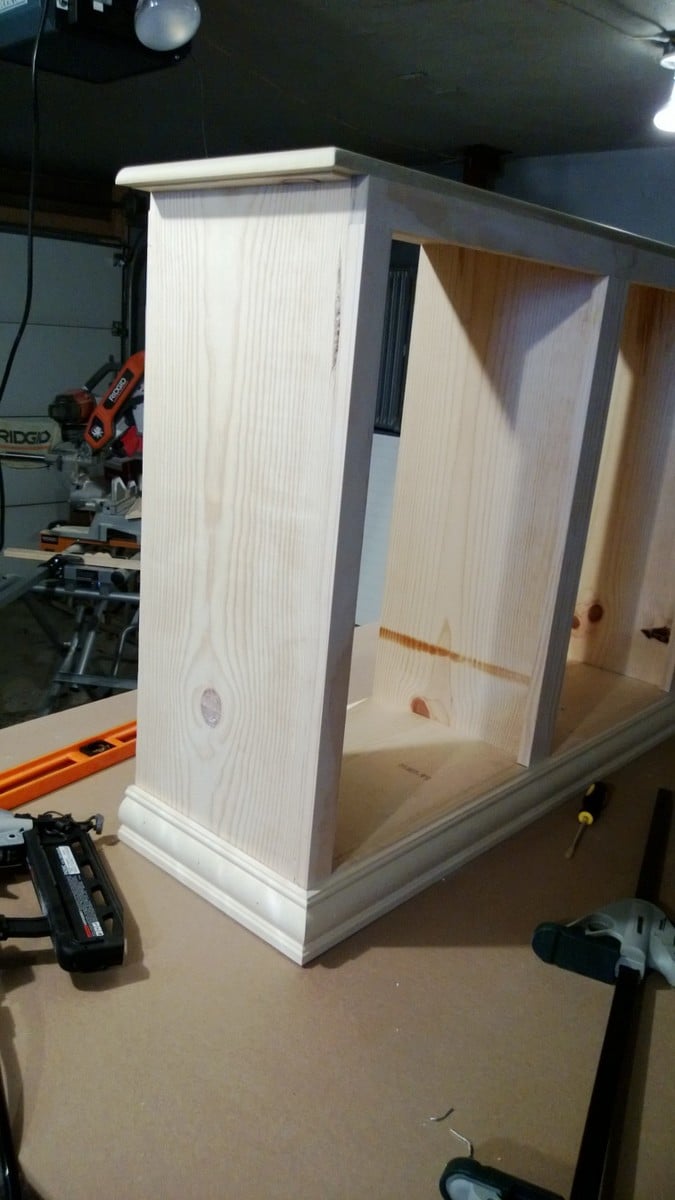
Modified the original plan to meet our needs of a laundry sorter. Had problems with the hinges so ditched them. I used dowels with a combination of a chamfer cut on the bottom of the door. Dado-ed the trim on the doors and slide the bead board panels in. The face frame is all held together with pocket hole screws, which I highly recommend because it eliminates nail holes and keeps the face frame square. This was my first wood working project, took me a little long to get it done. Thanks for looking.

Modified January 28

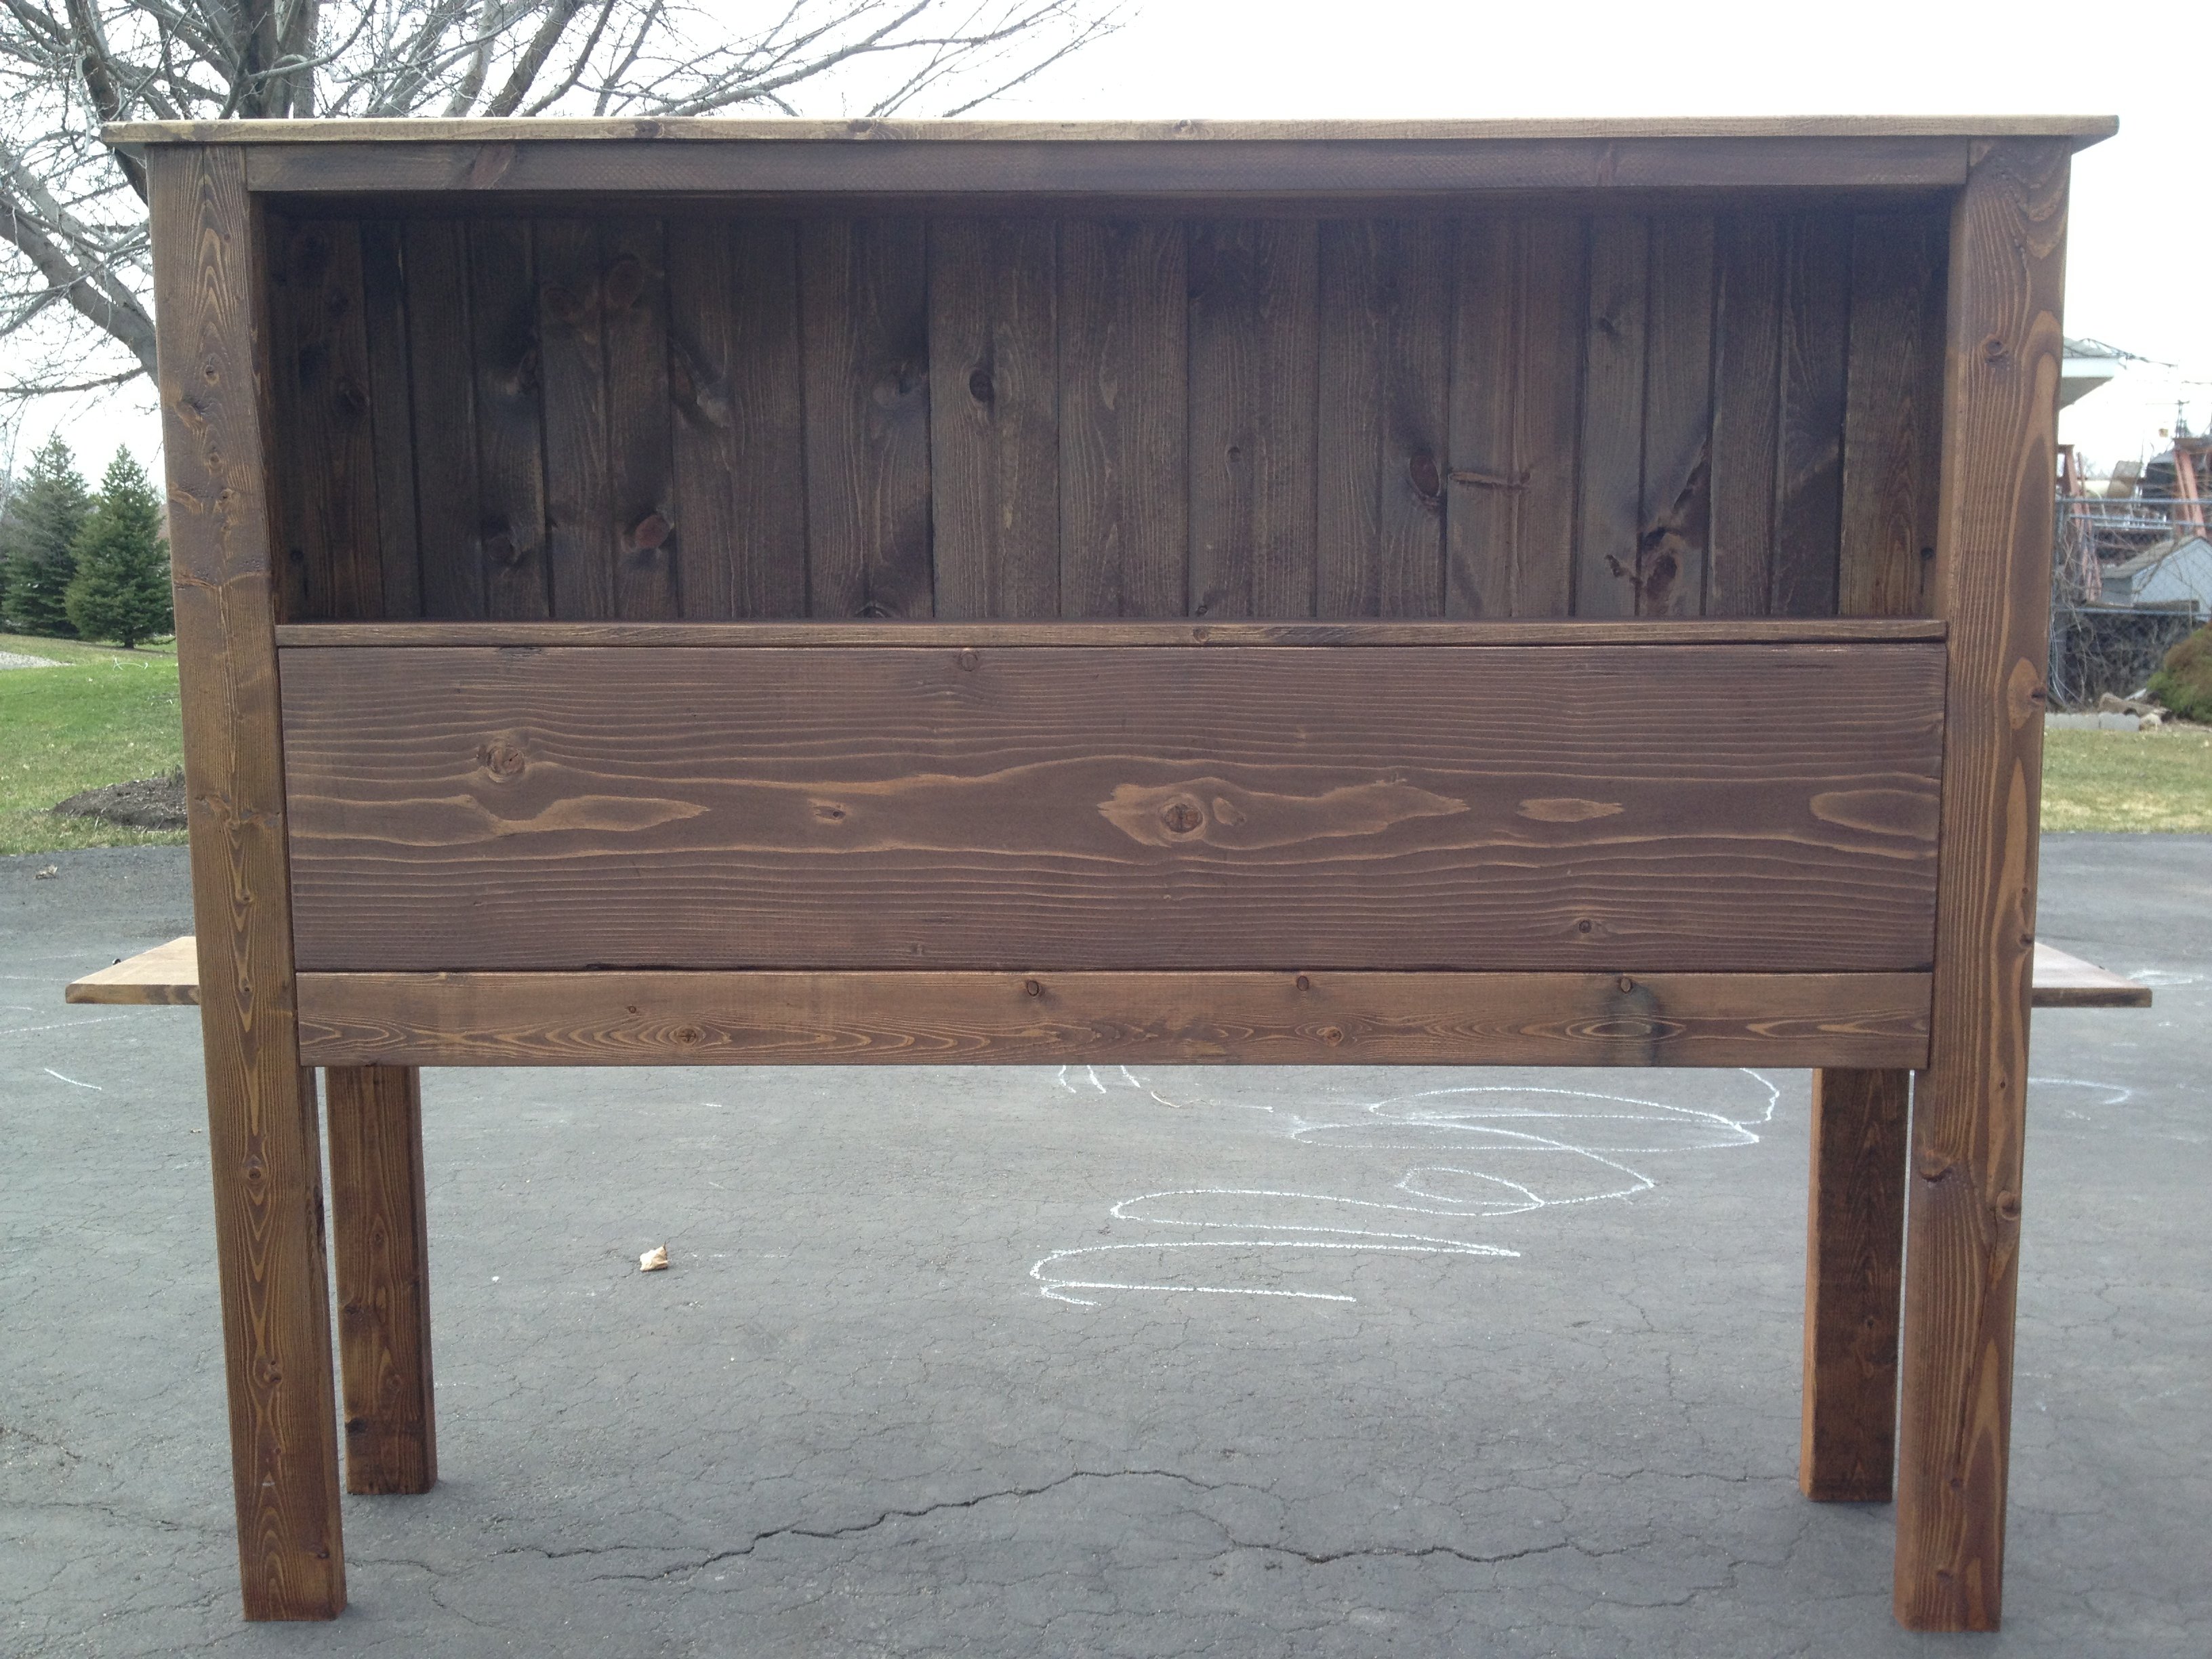
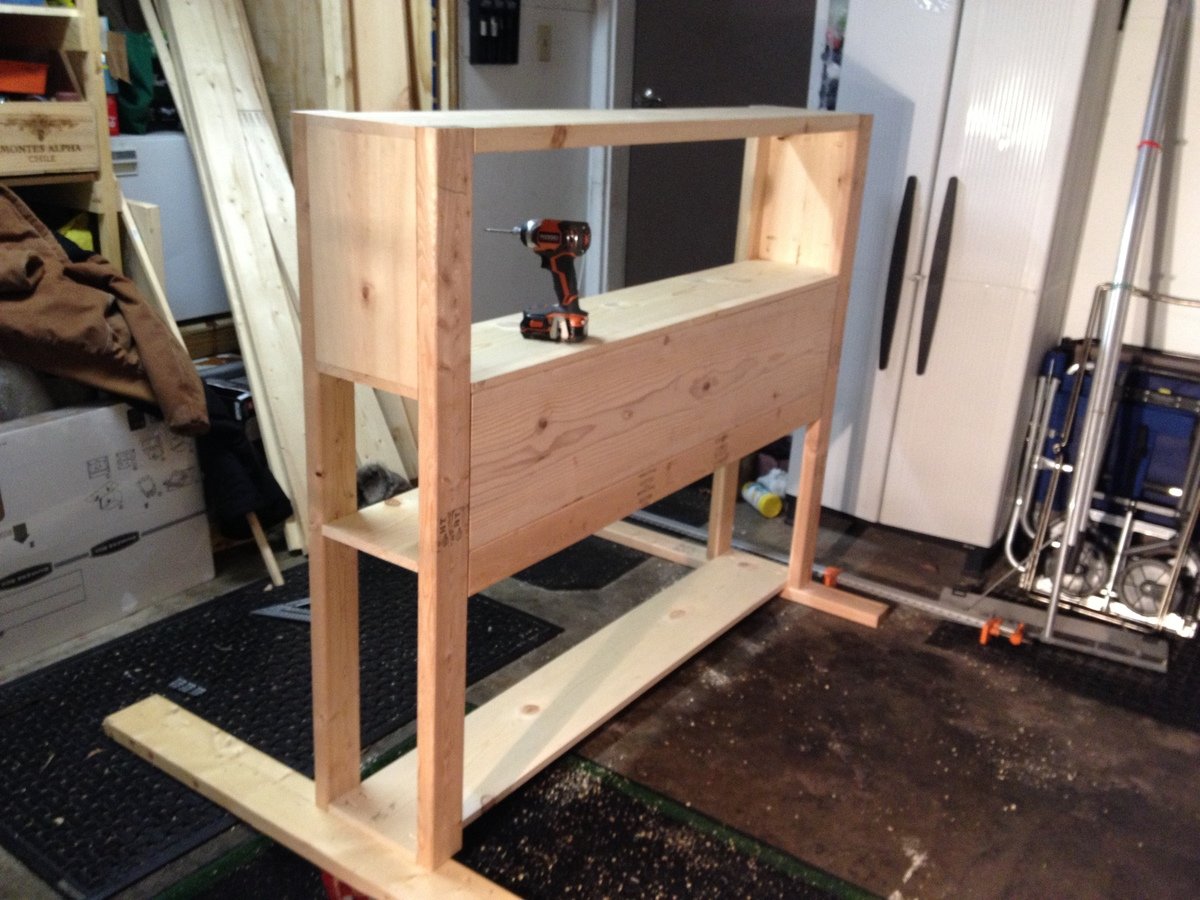
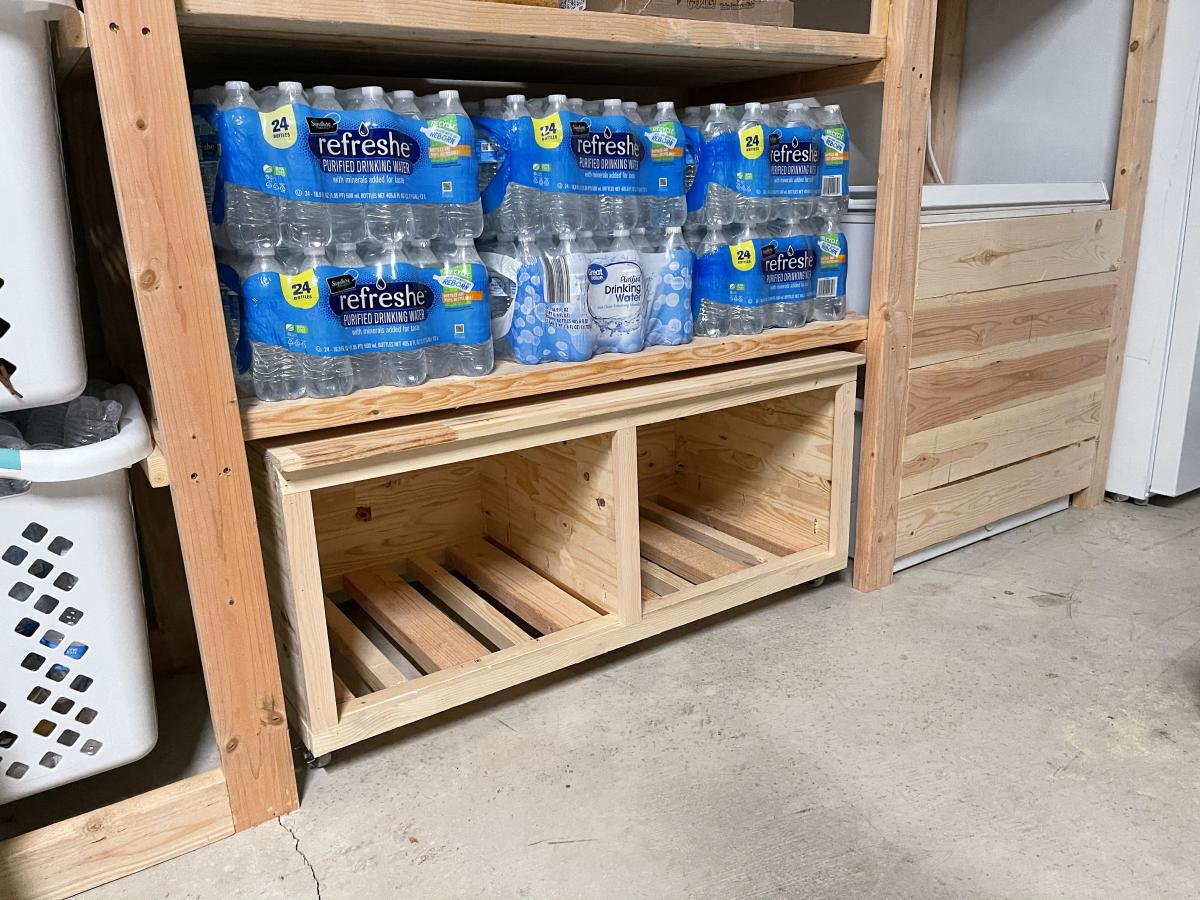
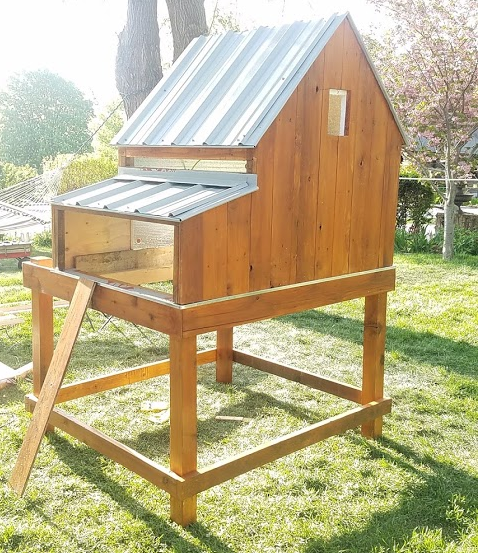
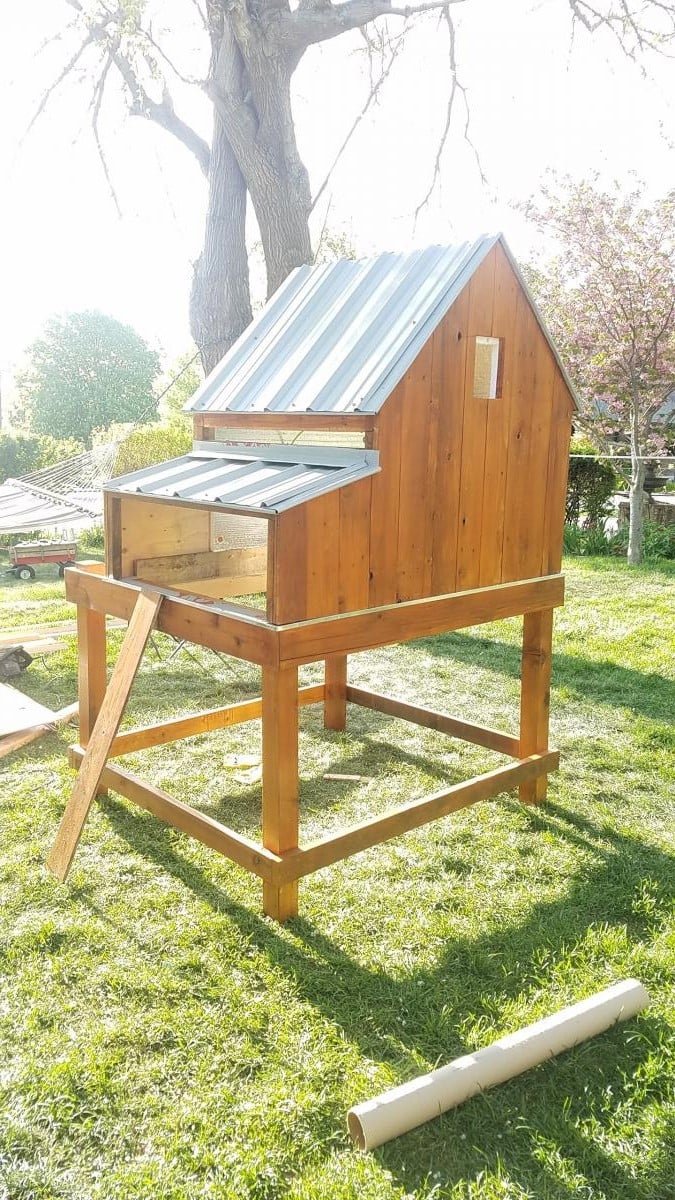
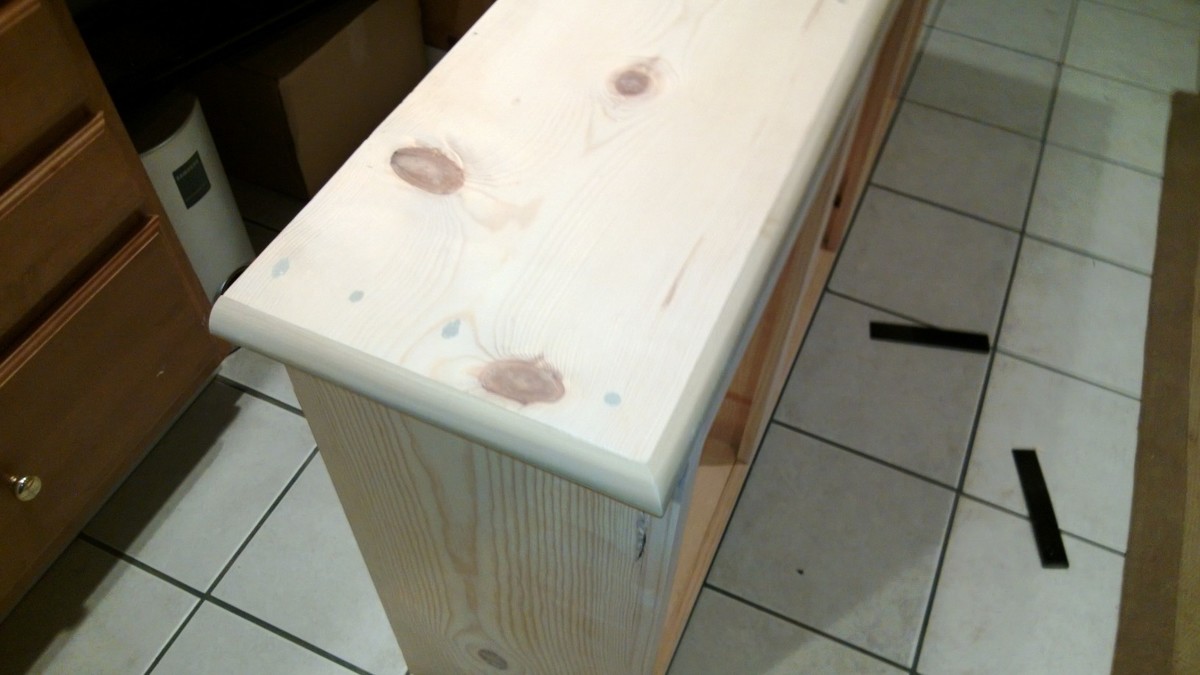
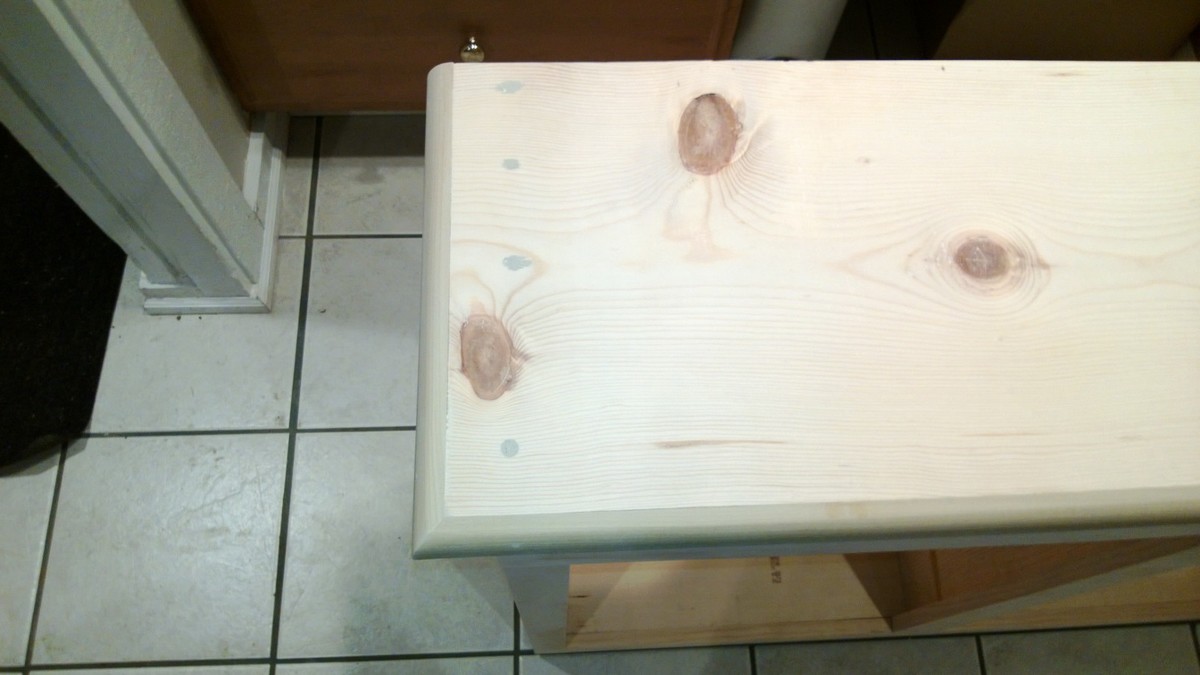
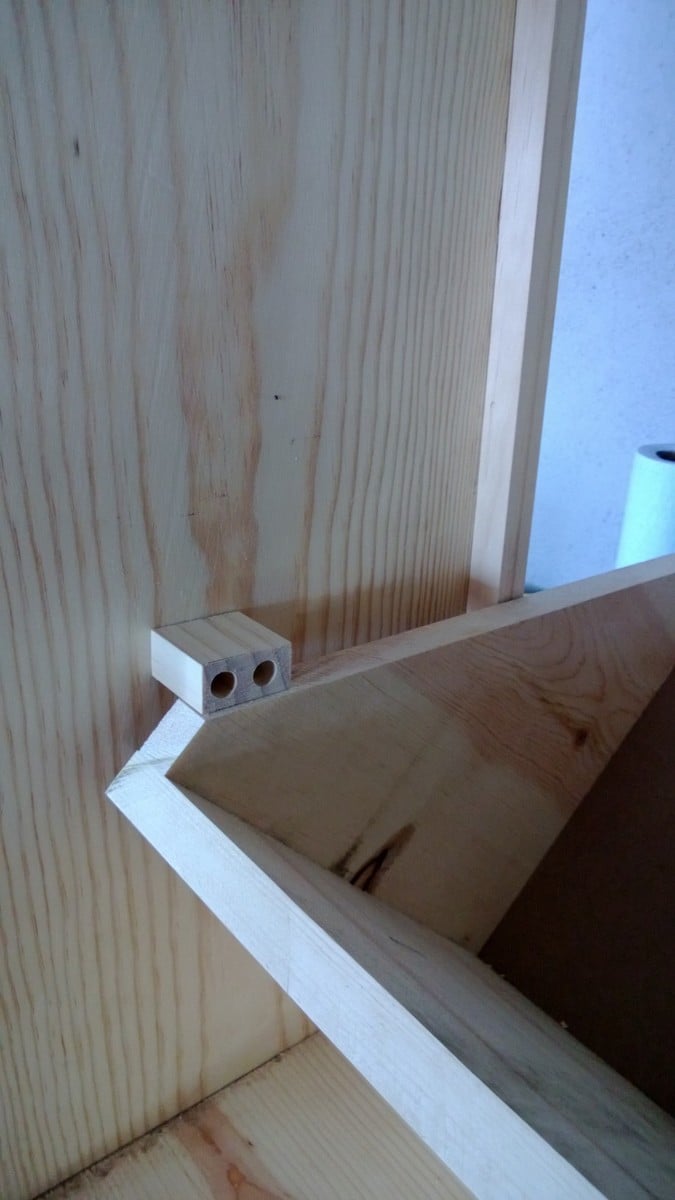
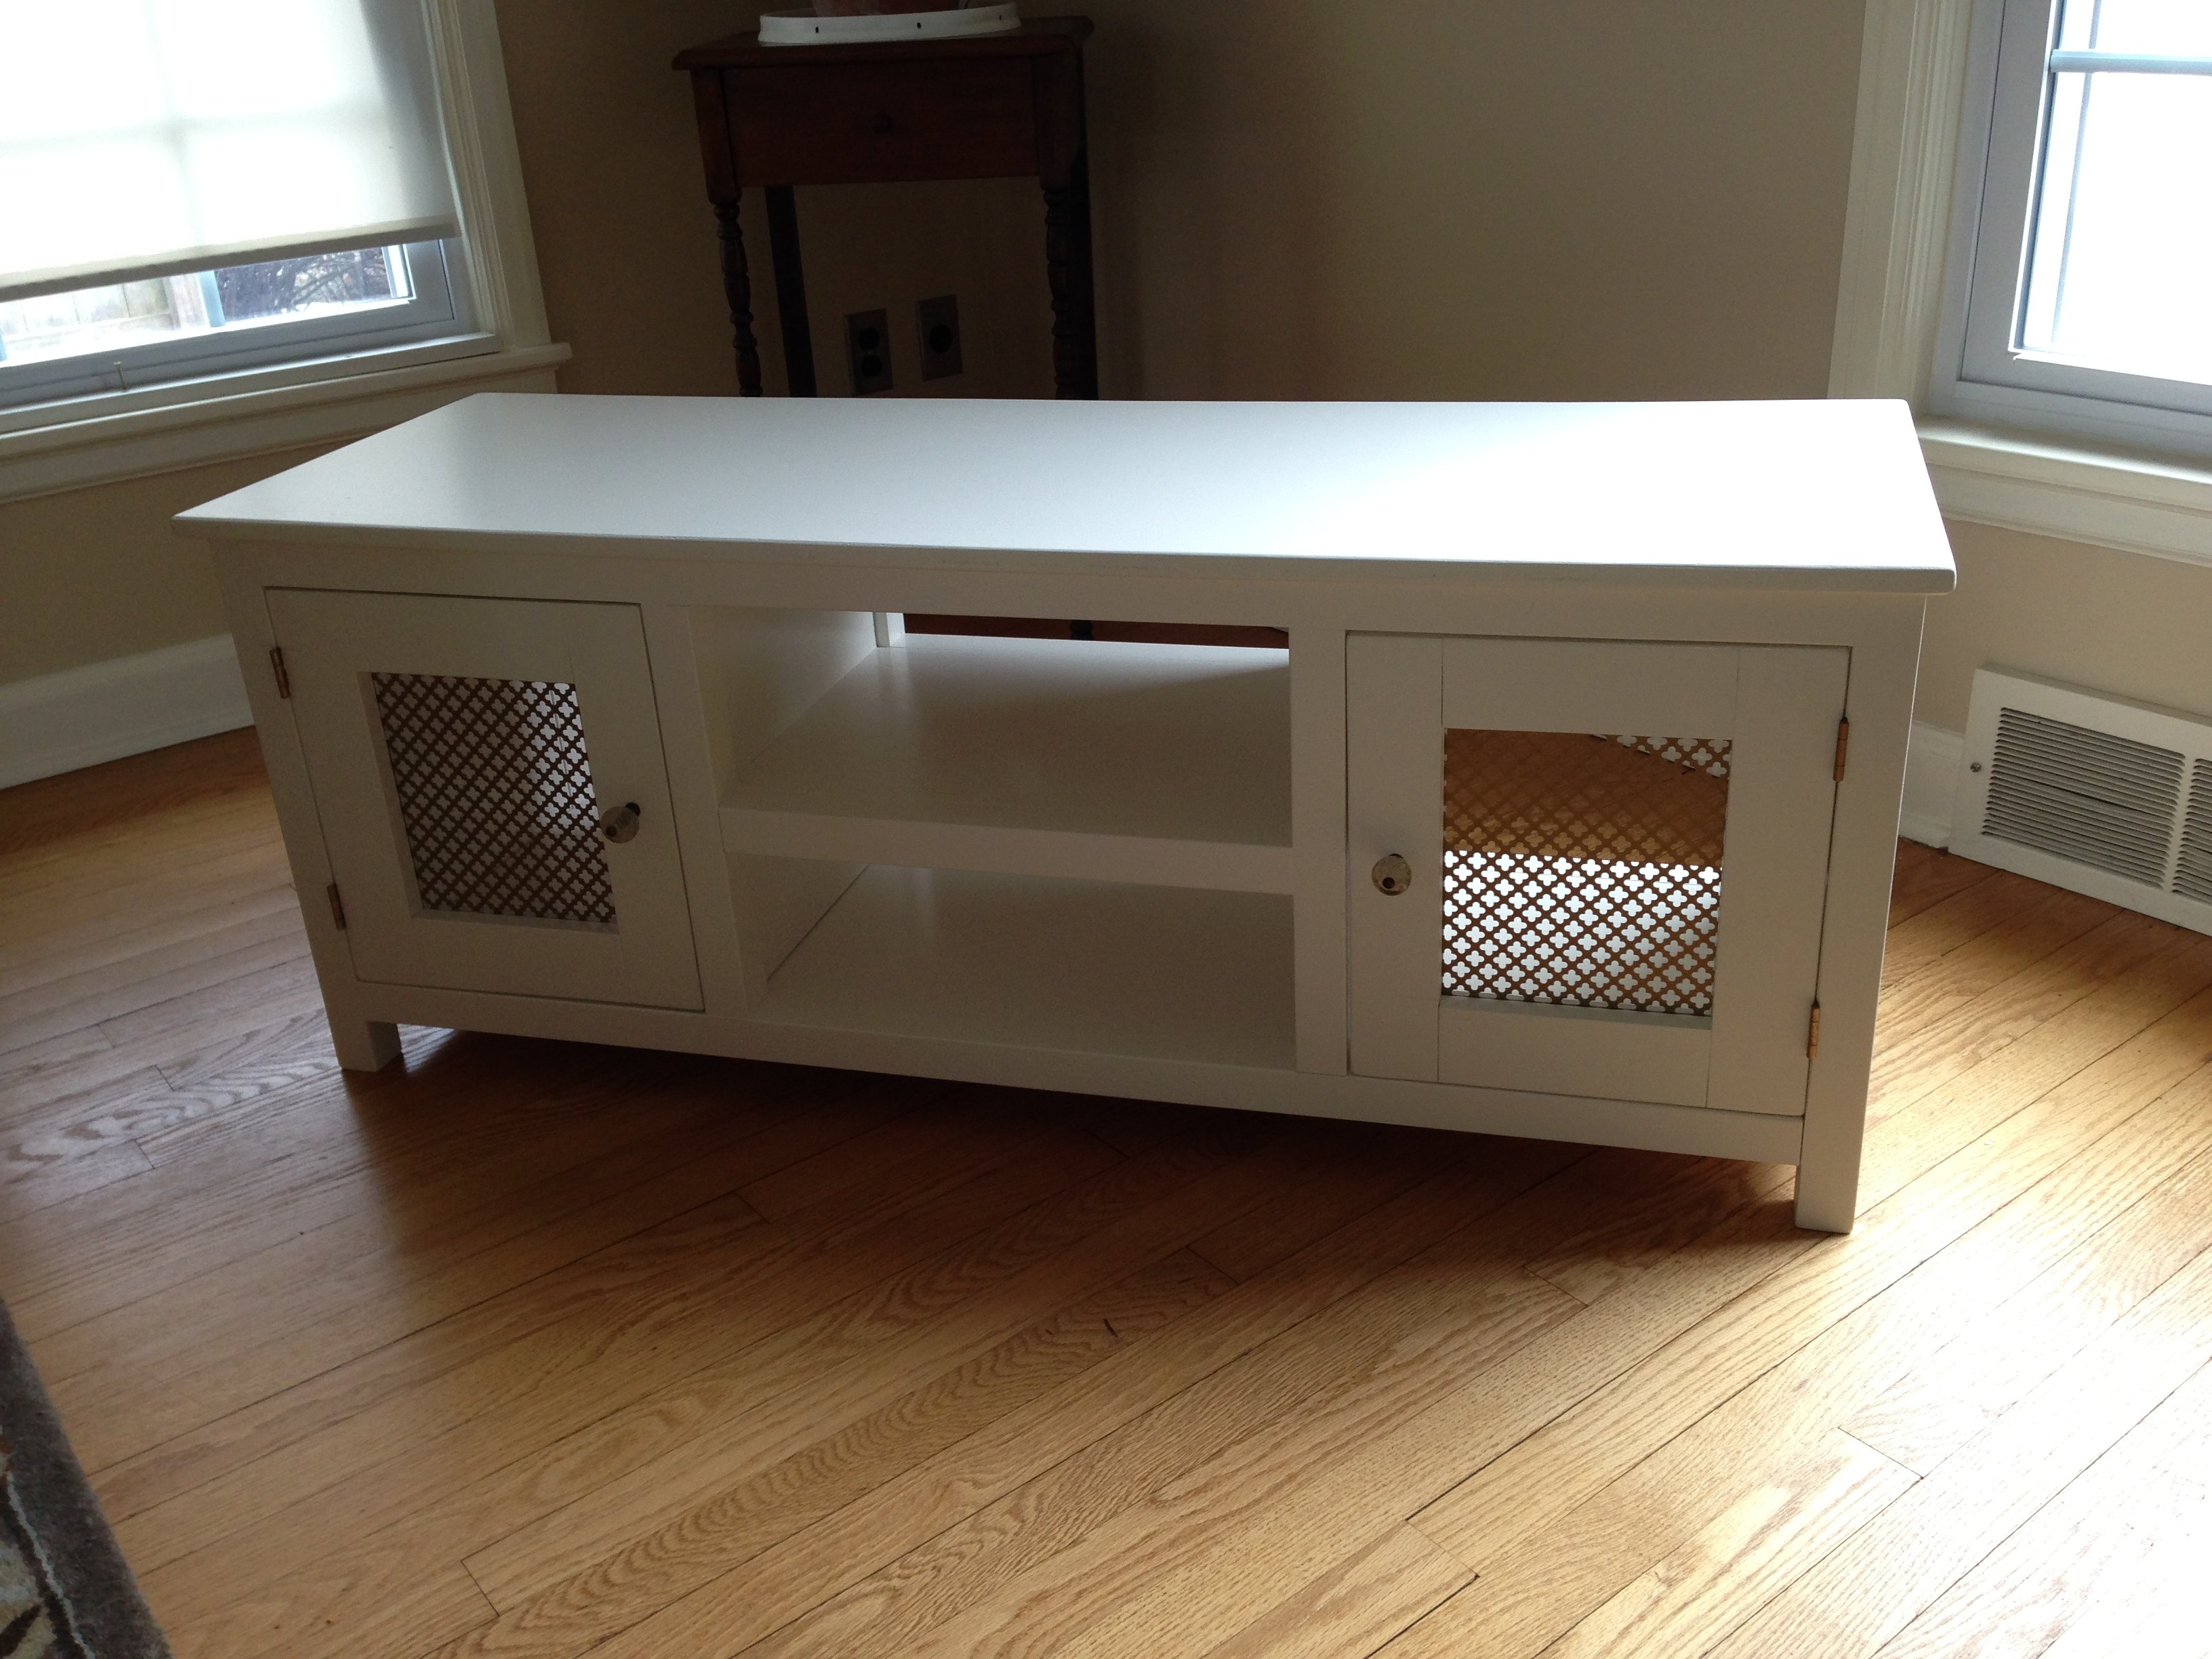
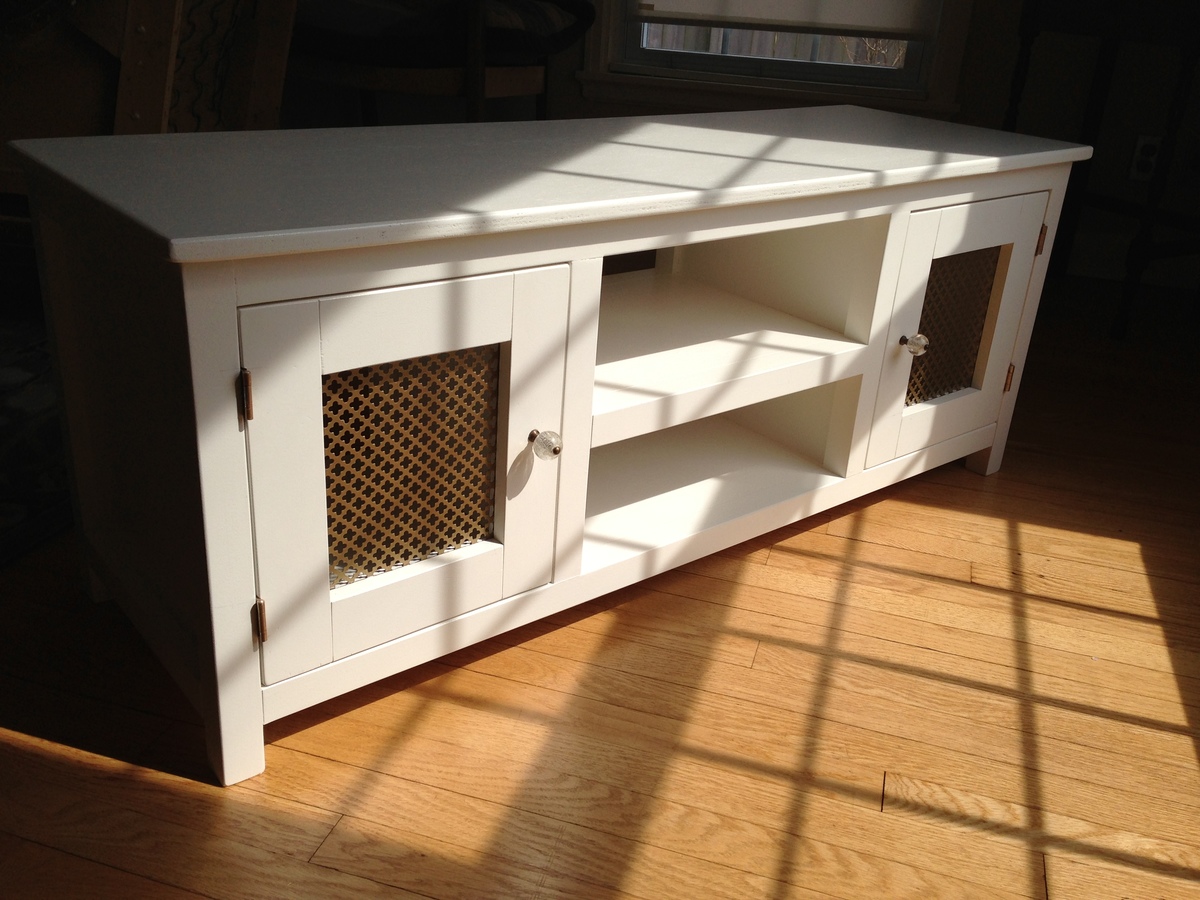
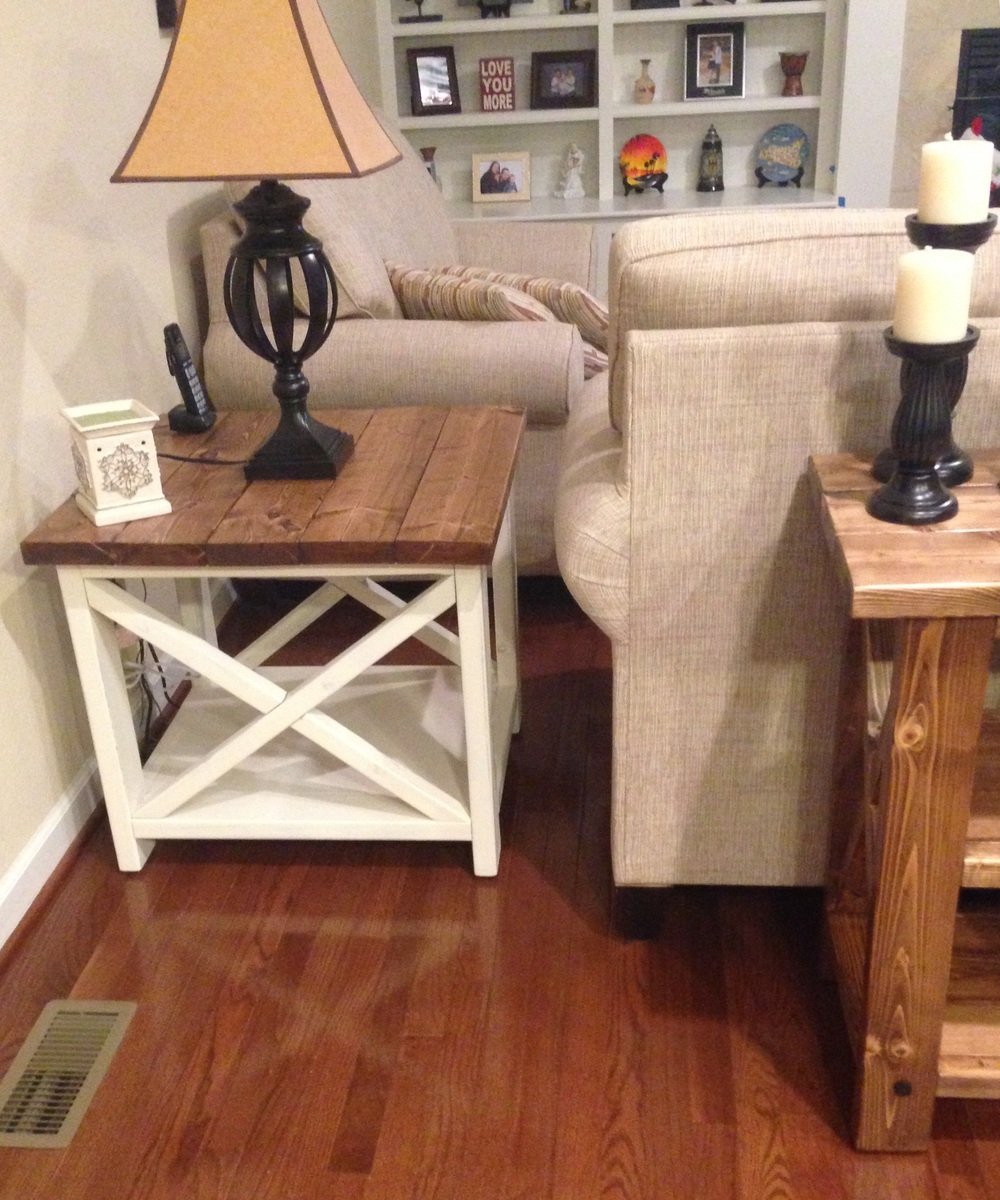
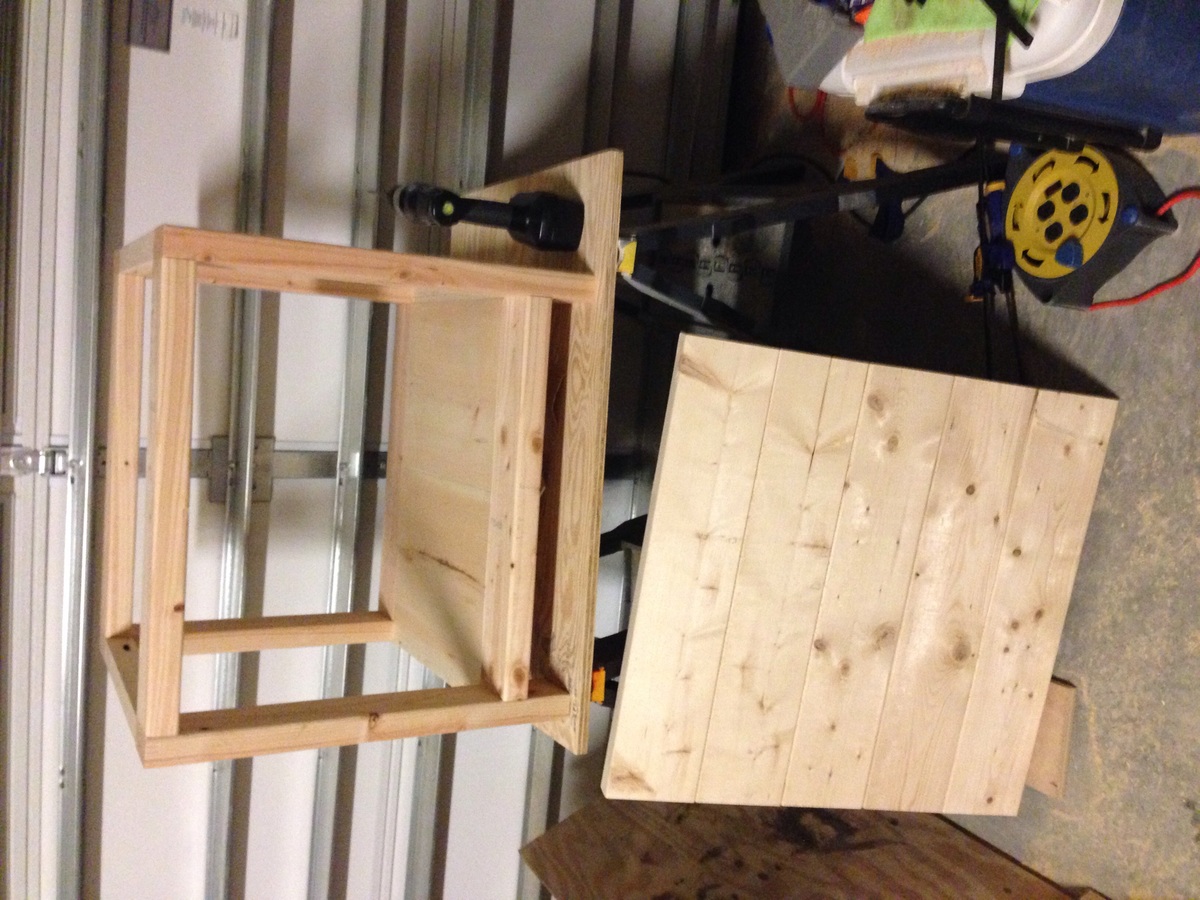
So here are some more pictures of my project. I don't really have any good pictures of the dowels. But what I can tell you is, I drilled holes through the sides of the face frame and the trim pieces and then measured where the holes would be in relation to the "drawer". I then drilled holes in the drawers at those measurements, I was careful to not go to deep. I think I went in half an inch. After that I started at one end and placed the dowels in, then put each drawer in. It wasn't easy but with a little patience it worked. The key is to wax the dowels so they will last longer as well. I also am including pictures of the top and bottom trim. On the top the original plans called for an overhang piece and I didn't like the way that looked. I ran the top board an inch long on each side and then wrapped it in quarter round trim. I did this because I plan on adding the Mimi Hutch Top. The bottom was built per the plan, but I ran into a problem with my bottom trim not being level and you could tell. So I raised the whole unit on 1 1/2 legs then placed it on a level surface and again wrapped it in a decorative trim. The key on both trims was a nice miter joint. Last picture I added was of my stoppers. I took scrap from the 1x2 trim and cut them to an inch and a half or two (can't really remember), then using the Kreg Jig drill bit drilled recessed holes. I then opened the doors until the side 45s were level then mounted the blocks on each side. I feel that it is better than a chain or string catch. Again thanks for looking and I hope I answered all of your questions.

Estimated Time Investment
Week Long Project (20 Hours or More)
Finish Used
Primmer and paint
Recommended Skill Level
Intermediate

Comments

moosmani

Tue, 01/22/2013 - 11:29

Dowels! What a great idea! Would you mind sharing how you did it? Could you possibly add some pictures showing the dowels? You did a great job. It looks beautiful.

mullid1

Thu, 01/24/2013 - 09:27

I love what you have made! Could you post pictures of the top and the bottom trim? I'm very impressed that this is your first project!

mullid1

Tue, 01/29/2013 - 09:12

Thank you for the photos and new instructions! You're awesome!!!

VLT

Fri, 03/15/2013 - 12:05

This is lovely; I like the trim job you did. Is there a way to post the plans so we can all get to them. I cannot believe this was your first project!

Liz82

Sat, 11/16/2013 - 18:23

I am a little confused. I love the three bin laundry sorter, but everyone is mentioning plans. I am not finding plans for it on the site. Also, what goes in to hold the clothes? There may be obvious answers, but I am not seeing them. I'd appreciate any help you could give.

towering inferno

Tue, 12/02/2014 - 02:58

I've been thinking of working up one very similar to this, also with 3 bins, but I didn't want to use chain either.  Those stoppers will be ideal - do you put them on both sides or is one enough?  Thanks for the share!

Karahd

Sat, 01/24/2015 - 11:29

Hi-

Im not sure if you still have the plans to this awesome project, but if you do, would you be able to share them with me? Ive been looking to make something like this forever, but just couldnt find any help!

thanks,
karah
[email protected]

petemoore

Mon, 02/08/2016 - 07:46

hi im the same as everyone can you send me the build plans with dimensions etc

many thanks

virginie D.

Wed, 03/02/2016 - 14:49

Hi

It's exactely what i need. so amazing. Someone can send me the plan please? I'm so newbie to do tat all by myself without plans. Thanks you.

virginie D.

Wed, 03/02/2016 - 14:49

Hi

It's exactely what i need. so amazing. Someone can send me the plan please? I'm so newbie to do tat all by myself without plans. Thanks you.

ajbreaux

Mon, 05/02/2016 - 14:22

My wife loves this . if its possible could i get the plans and hopefully have time to build it to give to her for mothers day ? thanks 

Kimhubbell

Fri, 12/02/2016 - 11:01

I would also love to have the plans for the 3 bin sorter. I am barely an intermediate so more specifics would be a huge help! Thanks to anyone who could help.

lworthy

Mon, 07/10/2017 - 04:19

 I absolutely LOVE your laundry sorter!!!! You did a fabulous job and the TRIM, WOW amazing!!!! I've searched Ana's website and cant find the plans' could you please email me the plans to [email protected].  I started building my own furinture back in October 2016 and the reward is amazing... Keep up the good work.

Happy Building,

Lisa

woodmama

Tue, 01/16/2018 - 22:18

I'm too new at woodworking to be able to tackle this right now, but would love to download the plans for future. My most successful project so far is a pretty standard bookshelf. I got a free plan, with lots of guidelines and explanations, at https://tinyurl.com/ydeup8lo -- it came with a 440 page guide, "The Art of Woodworking" that has tips and techniques, and am plowing through that right now.

momto3

Wed, 02/28/2018 - 12:53

This is amazing.  I am very new to woodworking.  Could you send me the plans please?  I would be most appreciatative 

Ljohns

Wed, 03/11/2020 - 23:27

I would love to have the plans for the three bin laundry sorter to build for my laundry room. Are the plans available? Awesome work!

Media Cabinet

Submitted by scidster on Sun, 04/14/2013 - 10:35

Modified the size to be 42" (w) x 16" (d) x 19" (h). Used radiator covering grate for door inserts and left shelves open for horizontal component storage.

Built from Plan(s)
Estimated Cost
130
Estimated Time Investment
Week Long Project (20 Hours or More)
Finish Used
Behr Swiss Coffee and minwax polycrylic top coat. Applied using Wagner HVLP sprayer (#518080). Pulls from Hobby Lobby.
Recommended Skill Level
Beginner

Closet shelving for sloped ceiling.

Submitted by kellystern on Mon, 01/09/2023 - 16:22

I used Ana’s Shelf Help Configurator to build these shelves for a deeply sloped ceiling. None of those well known Closet Organizer Companies could come up with a decent plan for this closet and they charge a small fortune.

Comments

Industrial Bookshelves

Submitted by Jodiah on Thu, 10/31/2013 - 14:20

It took a long time to compile all if the parts for these shelves. I searched the Internet for affordable cast iron castors. I ordered all of the black plumbing fixtures from a local hardware store. I bought 2, 16 foot 2x12's and cut them up, sanded them and stained them.

Estimated Cost
$250./ shelf
Estimated Time Investment
Weekend Project (10-20 Hours)
Finish Used
Min wax Early American stain, min wax Polycrylic protective finish.
Recommended Skill Level
Intermediate

Comments

Rustic X end table

This project was similar to the Rustic X Console.  Recommend building the lower shelf halves before installing so that it's easier to make the bottom flush.  The X's were somewhat tricky....just take your time.  It's easier to cut the piece too big and trim than to add wood to a piece too short.  I stained the top with miniwax special walnut and used a satin poly.  For the bottom, I used the same stain and then painted over it with rustoleum heirloom white.  I lightly distressed it with 150 grit sandpaper so some of the stain would show through.  All in all I am very happy with it!

Built from Plan(s)
Estimated Cost
Approximately $50
Estimated Time Investment
Afternoon Project (3-6 Hours)
Finish Used
Top: special walnut stain and satin polyurethane. Bottom: same stain and painted over it with rustoleum heirloom white. Lightly distressed.
Recommended Skill Level
Beginner

Comments

Sandbox with Benches

Submitted by cscottrun on Mon, 04/13/2015 - 10:33

We altered the original plan by enlarging the sandbox (approx 5' x 6') which made for wider benches that can comfortably seat an adult.  The benches and back rests are three boards deep instead of two.  We added 2x12 supports under the benches for additional support, as well as another 2x4 support in the middle of the backrest.

Built from Plan(s)
Estimated Time Investment
Day Project (6-9 Hours)
Finish Used
None
Recommended Skill Level
Beginner

Comments

Seasonal And Holiday

Swing Slide Playset for Grandson

Submitted by shellyward on Wed, 05/20/2020 - 09:22

We are used to seeing our grandson every weekend but during the 2020 COVID quarantine we were unable to do so. Instead, we filled our time building him a swing set for our backyard. He loved it!! We are going to add more to the swing side but the hardware I want isn't available right now (apparently there is a lot of swing set building going on during this time). I look forward to many years of playing on this with our grandson and hopefully additional grandkids in the future... Our cost was pretty high mainly because our first round of lumber came from a local lumberyard that was willing to deliver within a few days (big box was going to take several weeks) and they had what is supposed to be higher end lumber (not sure I am convinced of that)....also, i chose some pretty expensive hardware (brackets) just for the added security.....

Estimated Cost
1800-2000
Estimated Time Investment
Week Long Project (20 Hours or More)
Finish Used
not done yet but will be staining/sealing when the wood is ready
Recommended Skill Level
Intermediate

Comments

Seasonal And Holiday

Great Plan for Garage Shelf!

Submitted by edapina on Wed, 11/26/2014 - 07:35

This was an easy project to complete in an afternoon that does not require any advance woodworking skills

Estimated Cost
About a $120 bucks considering that I had to buy all the wood and a box of 2 1/2 In screws!
Estimated Time Investment
Afternoon Project (3-6 Hours)
Finish Used
No finish used.
Recommended Skill Level
Beginner

Comments

edapina

Wed, 12/10/2014 - 09:41

This is my second completed project with plans and ideas from your website. Thanks for your good work!

Back