Community Brag Posts

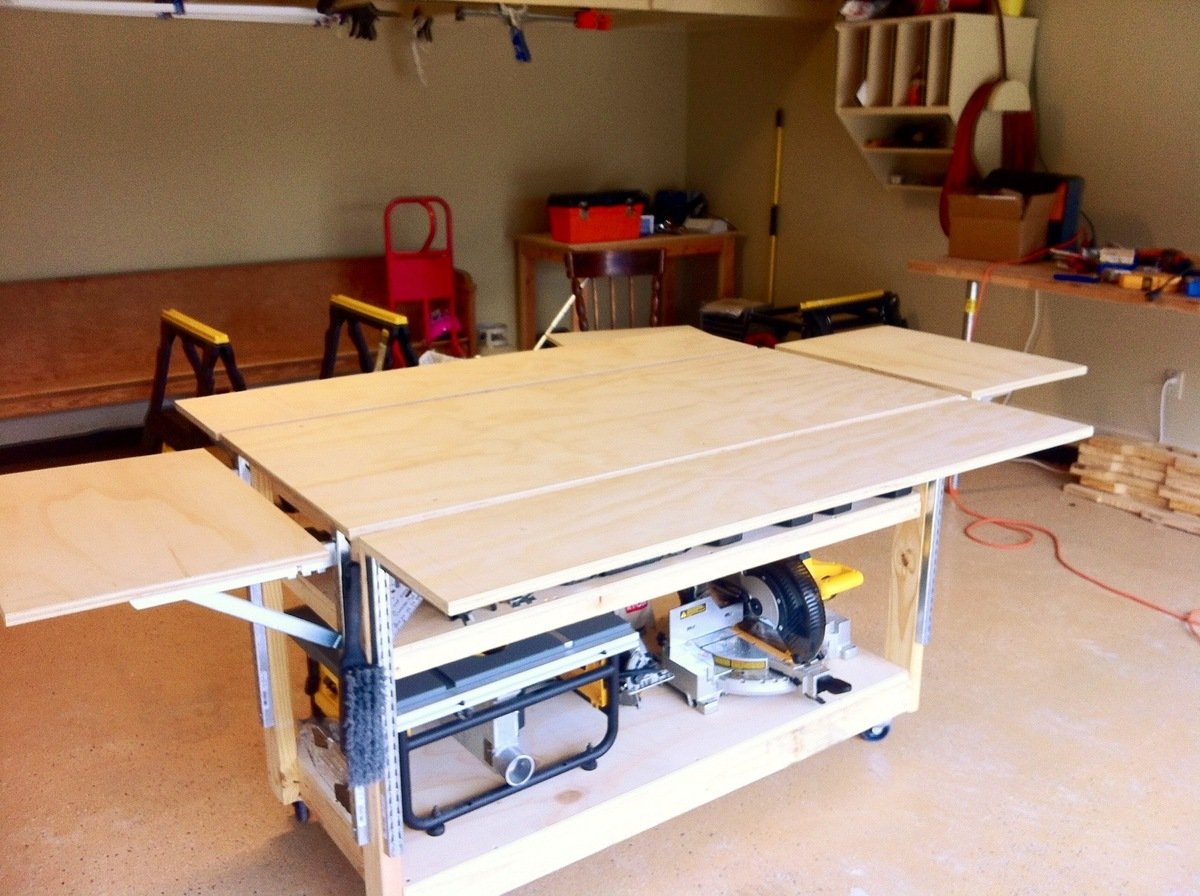
Do-It-All Mobile Workbench

Submitted by JL Hurst on Wed, 11/28/2012 - 11:02

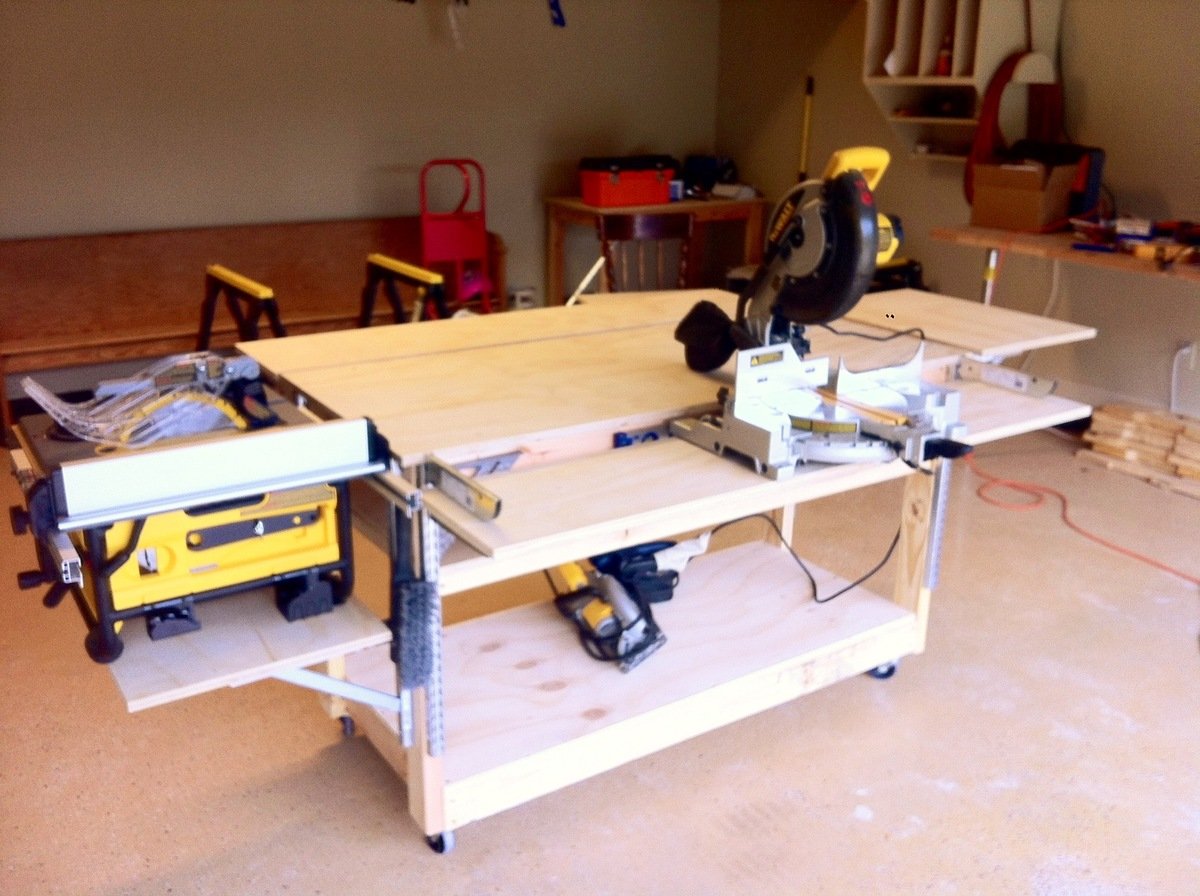
The need for a proper workbench in my garage/shop is a must, but. So is space! I already have a fold down workbench I’ve made with ¾ inch pipe & a door, but. I just need something that can handle all my tools. So, I stumbled upon these plans from the Family Handyman & couldn’t find a reason why this wouldn’t work in my shop. It has room for storage, can easily accommodate my tools & most importantly fold up to store. Easy to build too! Make sure you read all the plans first as some of the materials could be pricey, but well worth it. Technically it’s taken 2 months to build this bench, as I operate on a firefighter/teacher’s budget & during the holiday season no doubt. I ordered all the shelf standards & brackets through Amazon, $210.00 for those alone, but they hold so much weight to support your tools I figure it’s worth it. The rest materials (wood, screws) were purchased at Home Depot for around $150.00. The plans called for ¾ inch ply & it was $45.00 per sheet. However they did have a smaller thickness for $22.00 per sheet & was only a 1/32 inch thinner. I plan on topping all my surfaces with some ¼ inch tempered hardboard later on so I knew it would work. That also left me adjusting my screw size to mount my brackets. Due to the reduction in thickness of the plywood all my #8-1 inch screws needed to be adjusted to ¾ inch so to not screw through the ply. I also hit the molding isle to nab some pieces to use as furring strips to use under the shelves before attaching the brackets. This way I can sand each strip to match before mounting to make sure it lined up flat with the center top. One more thing; where it says “drill 1/8 inch hole in brackets make sure you use 1/8 inch pop rivets. I barrowed a pop rivet gun & was handed some rivets as well. Popped two & they had to be trashed because the rivet size turned out to be 5/32. So I stepped up in drill bit size & it all worked out. As I said, I’ll be topping it with some ¼ inch hardboard. I also plan to run it’s own electrical with an outlet on each post. I hope you all enjoy & this can help!

Estimated Cost
$350.00
Estimated Time Investment
Weekend Project (10-20 Hours)
Recommended Skill Level
Beginner

Comments

Rusty Cottage

Thu, 11/29/2012 - 07:03

This is by far the best workbench I have ever seen!!! Thanks for sharing. And excellent choice of table saw and miter saw.

JL Hurst

Thu, 11/29/2012 - 14:59

If I had it to do over I'd had gotten the contractor grade portable saw from Dewalt. The smaller version I have is the same 10" saw, but. It's maximum rip capasity is only 16. The other will at least rip a sheet of ply in 1/2.

Thanks for the kind words on the bench! I hope everyone that may find this valuable will. The plans came out of a 2005 issue & were hard to find on the internet.

uniquetrio2000

Thu, 07/04/2013 - 18:28

I love this work bench and would love to build it but i cant find them. Could you post them or email them to me please. uniquetrio2000 [at] gmail [dot] com

phantom1

Tue, 06/02/2015 - 05:39

I built this bench 3 years ago and I couldn't be happier. The portability, space savings and functionality make it wonderful!

StepFar

Mon, 01/08/2018 - 14:44

Am I missing the actual plans for this. I downloaded the pdf but it doesn't have the build plans apart of it.

Clubhouse based on Ana's Plan

Submitted by MattSl on Tue, 05/03/2011 - 09:18

I used Ana's plan as a base.

I changed it from 8x8 to 8x12, made the 4x4x8's to 4x4x10' for a higher main platform and swing platform, and added a 12' long monkey bar set to the other side. Also, an 8' climbing wall and a plank walkway to accompany the two slides.

For the clubhouse, I used Hardiplank 4x8 sheets for the siding and an EZ-Framer kit for the structure itself.

The slides I purchased from Lowes, monkey bars from Amazon, and the swing frame braces from Amazon as well. The swing kits I got from ebay.

Estimated Cost
1500
Estimated Time Investment
Week Long Project (20 Hours or More)
Recommended Skill Level
Intermediate
Seasonal And Holiday

Double Inset Bookshelf Doors

Submitted by dholubar on Wed, 08/21/2013 - 07:08

You made this project look so simple that I just had to try it. However, to suit my needs I had to make a few alterations to the plans. I had a set of bi-fold doors that were in need of replacement and I thought inset bookshelf doors would be the perfect way to replace them. This project was easy enough for me to do it myself and I am really new to the DIY game but I did have some help. I really love the way they turned out. You can read all about my my adventure at http://heresalittletmi.blogspot.com/2013/08/bookshelf-doors.html

Built from Plan(s)
Estimated Cost
$120.00
Recommended Skill Level
Beginner

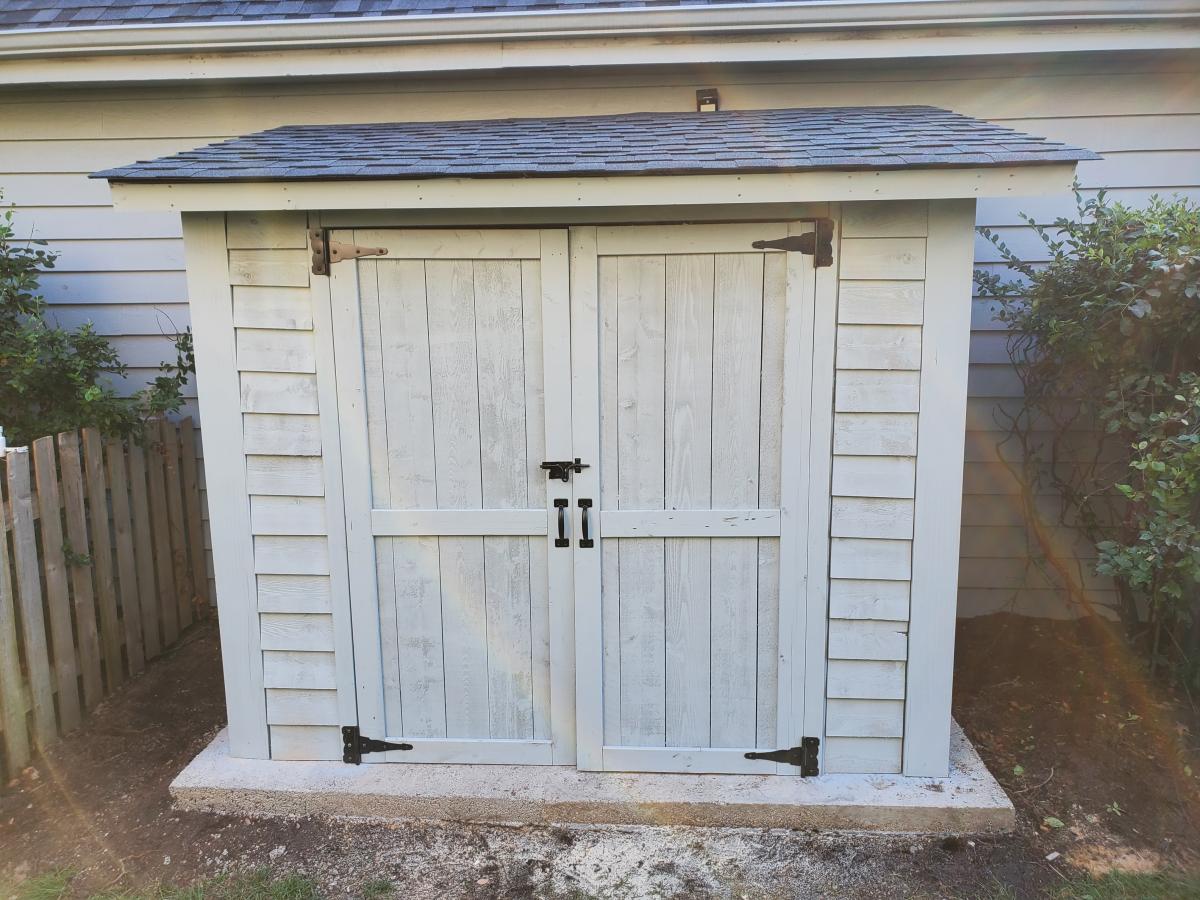
Eric's Cedar Shed!!

Submitted by Anonymous (not verified) on Mon, 07/06/2020 - 21:35

Thank you for the plans, shed turned out great! My association required me to match the siding color, roof color, and anchor to a concrete slab. So I poured 25 bags of 80lbs concrete to make a 9x5 slab. Redid the plans for an 8x4 shed, built the frame with 2x4s and not 2x2's, installed flashing, ice/water shield + felt + matching shingles since I'm near Chicago, and used a flexio finishing sprayer to paint the shed. Saved some $ by using 2 Redwood Grain Fiber siding panels for $22 each at HD.

All in all very happy with my shed and all my dangerous yard tools and woodworking tools can be put away from my toddler.

Built from Plan(s)
Estimated Cost
400
Estimated Time Investment
Weekend Project (10-20 Hours)
Finish Used
Behr Premium Plus exterior paint
Recommended Skill Level
Intermediate

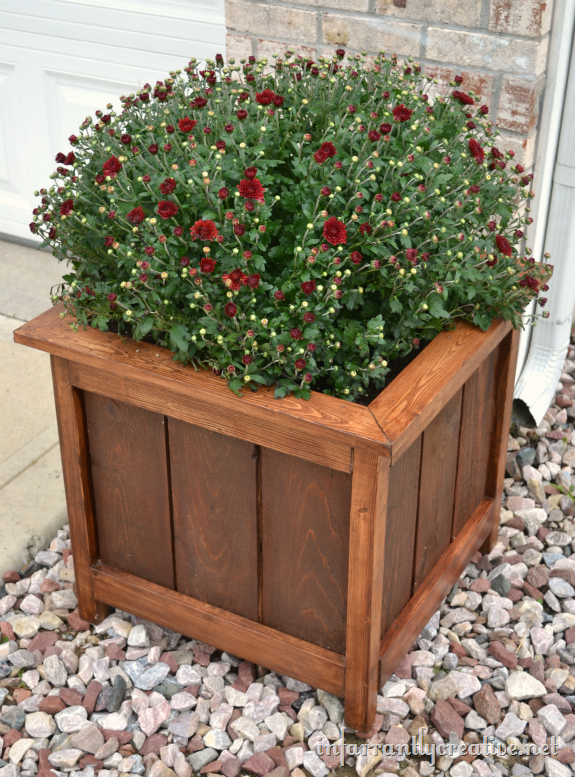
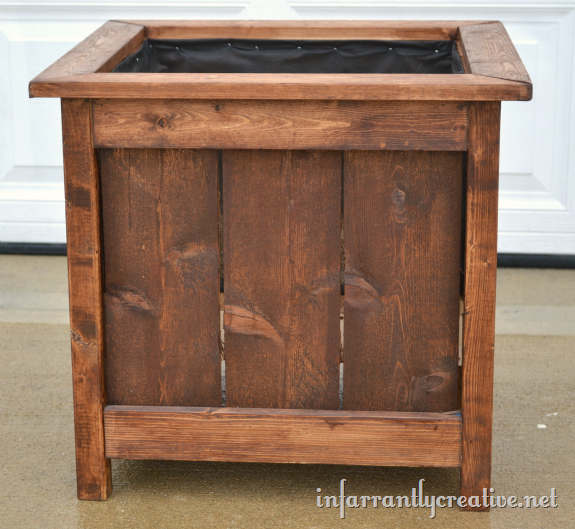
Cedar Planter with Mitered Top

This was by far the easiest project. This planter is HUGE as well and makes a great focal point for your curb appeal. I didn't extend the sides but rather created a mitered edge for the top creating a nice clean finish.

Built from Plan(s)
Estimated Cost
$20
Estimated Time Investment
An Hour or Two (0-2 Hours)
Finish Used
Minwax English Chestnut with a Spar Varathane protective coat
Recommended Skill Level
Beginner

Comments

adkgirl

Sun, 09/22/2013 - 20:25

how exactly did you attach the mitered top?? Finish nails or is there a way to use the kreg jig to hide joinery? These are beautiful, BTW. Thanks :)

Swing and arbor

Weekend swing project

Recommended Skill Level
Beginner

Comments

Ana White

Tue, 05/07/2019 - 10:42

We don't currently have this plan available, although I'd be happy to draw it with the author's permission.

I have linked a few plans above that could be used to create this plan.  Just make sure you bury the arbor uprights underground on concrete pier posts or similar (like building a fence)

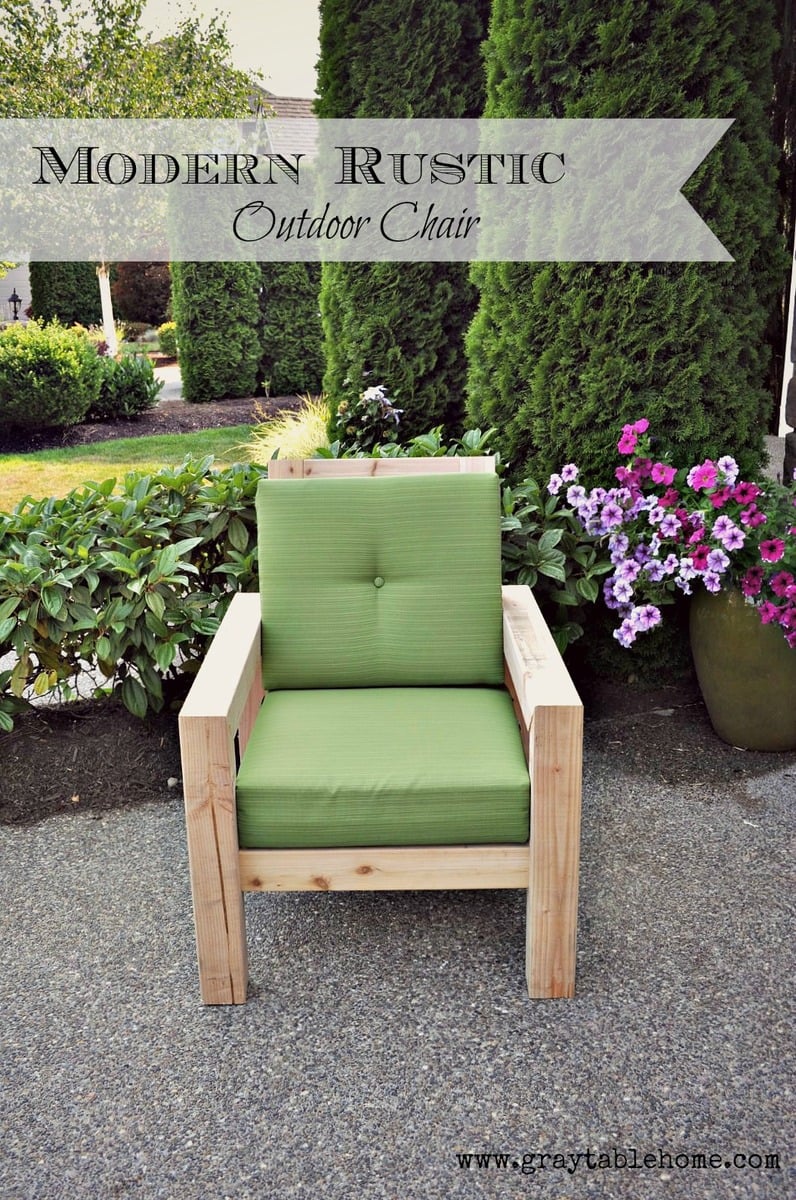
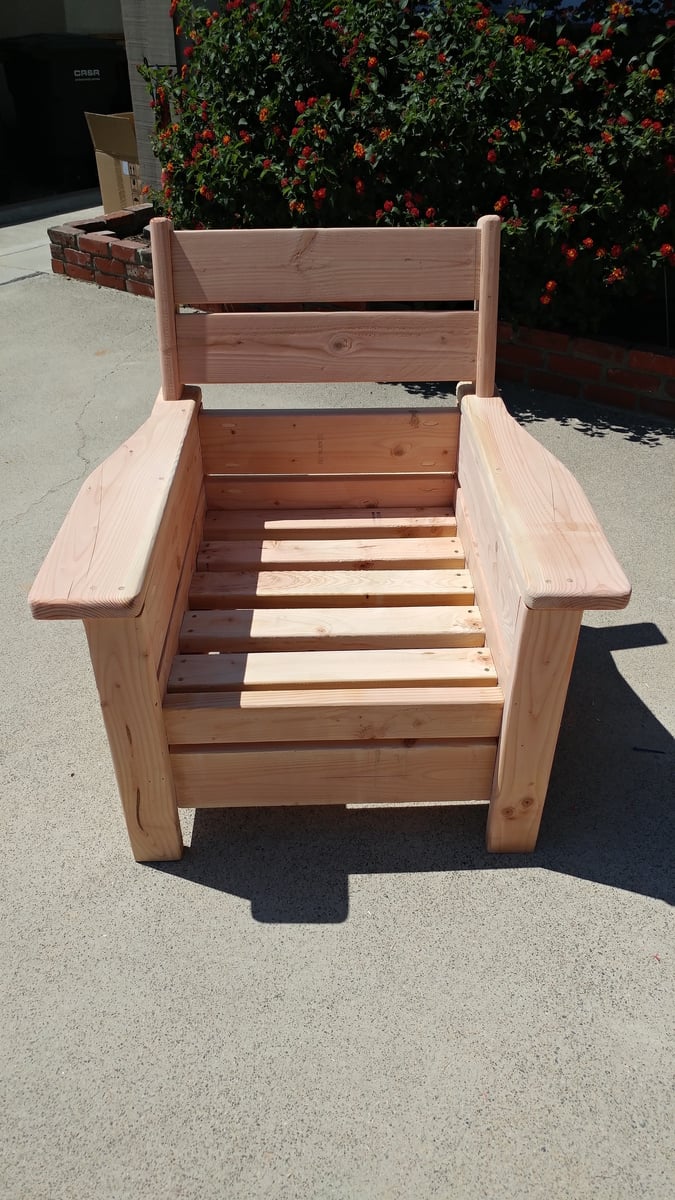
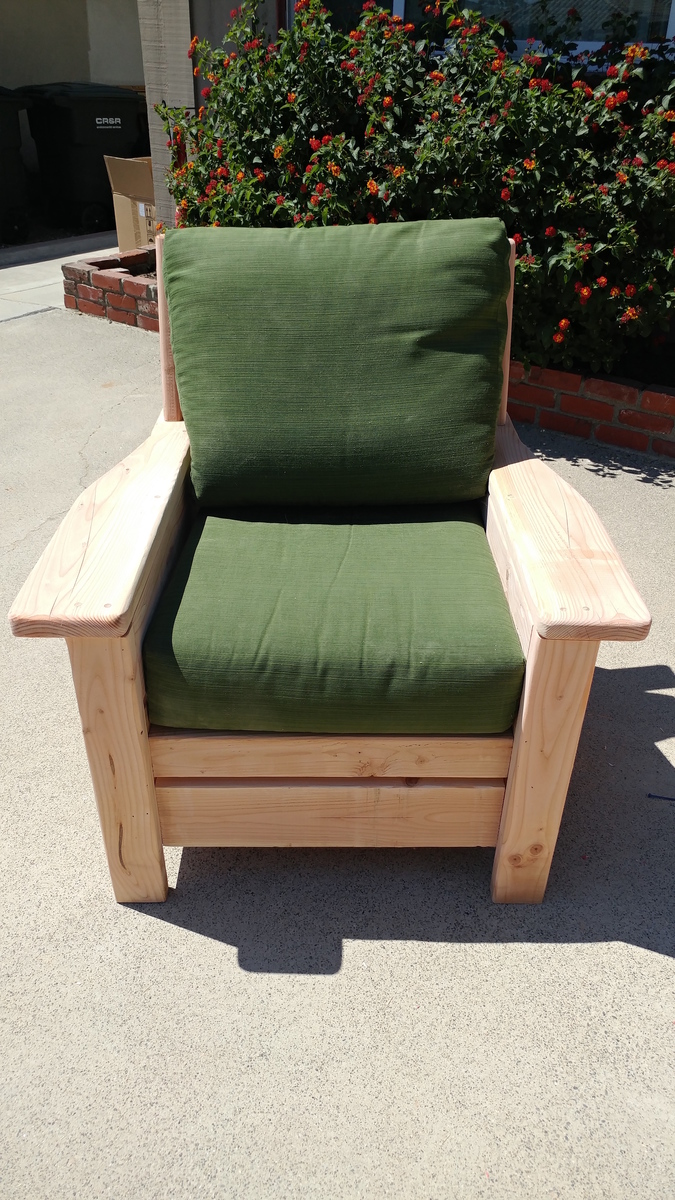
DIY Modern Rustic Outdoor Chair

Submitted by susanshamp on Fri, 07/10/2015 - 15:07

I made this outdoor chair by looking at a variety of plans and designs from Restoration Hardware and other stores. Check out more info on the project on my blog link. Thanks for looking!

Estimated Time Investment
Afternoon Project (3-6 Hours)
Recommended Skill Level
Beginner

Comments

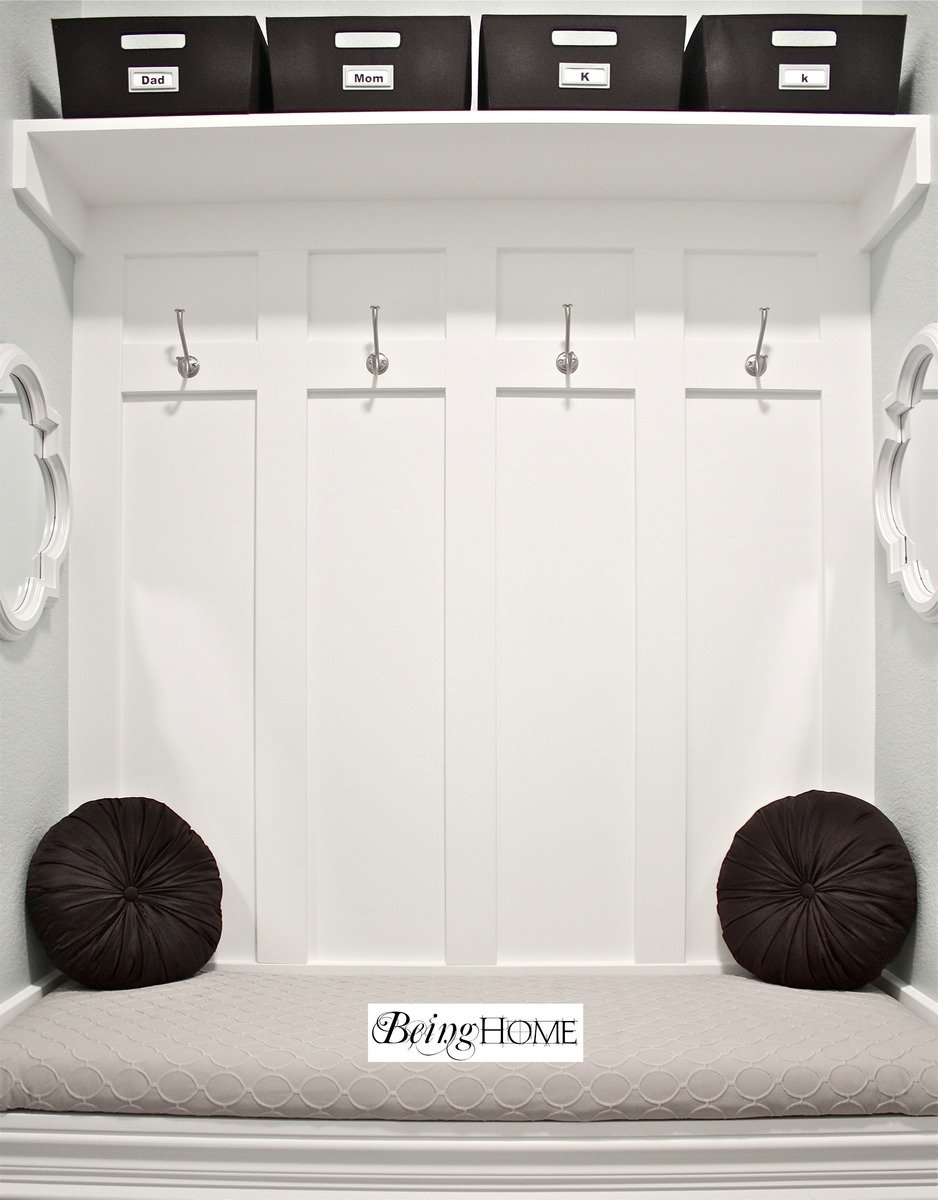
Mudroom Bench

Submitted by BeingHome on Sat, 02/23/2013 - 22:26

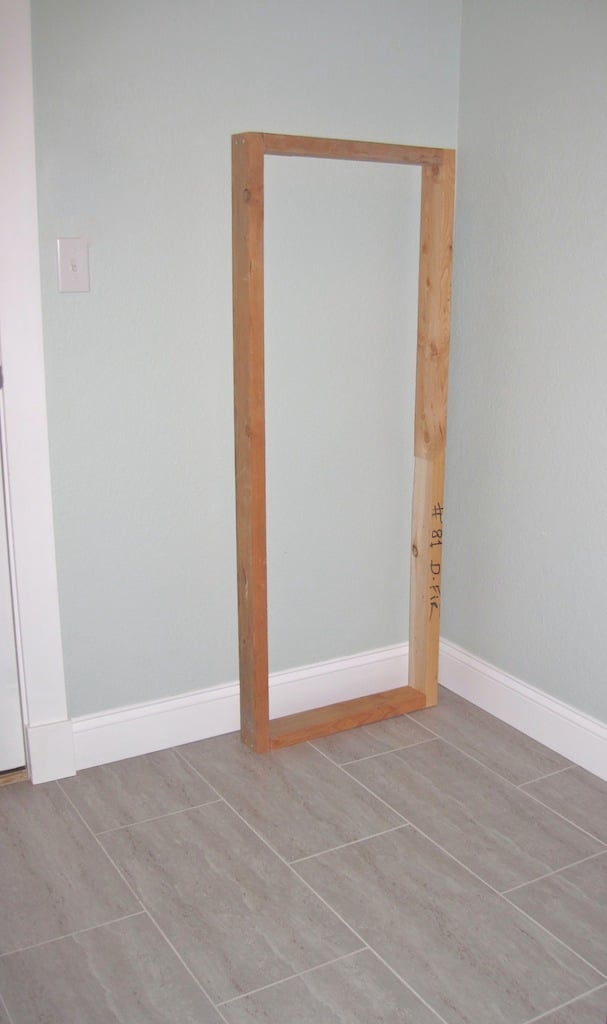
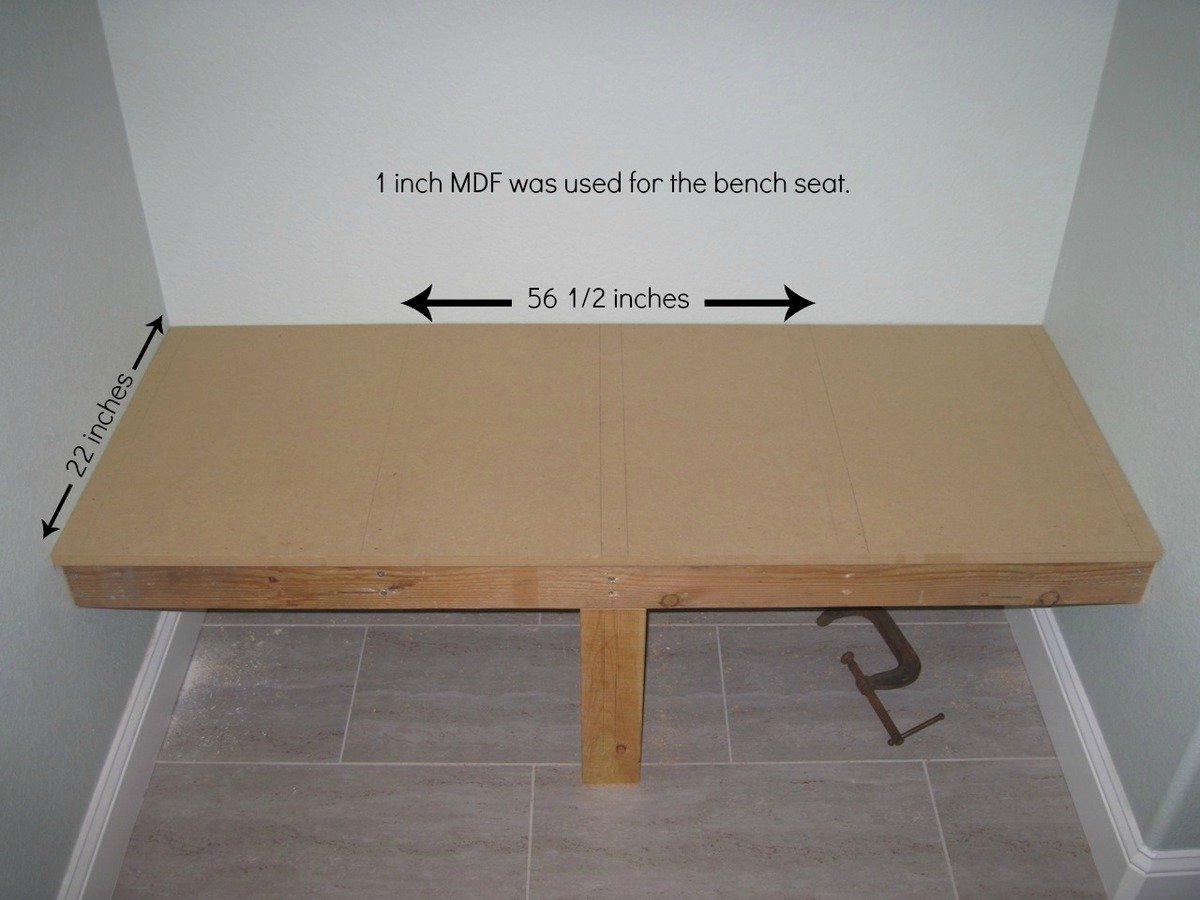
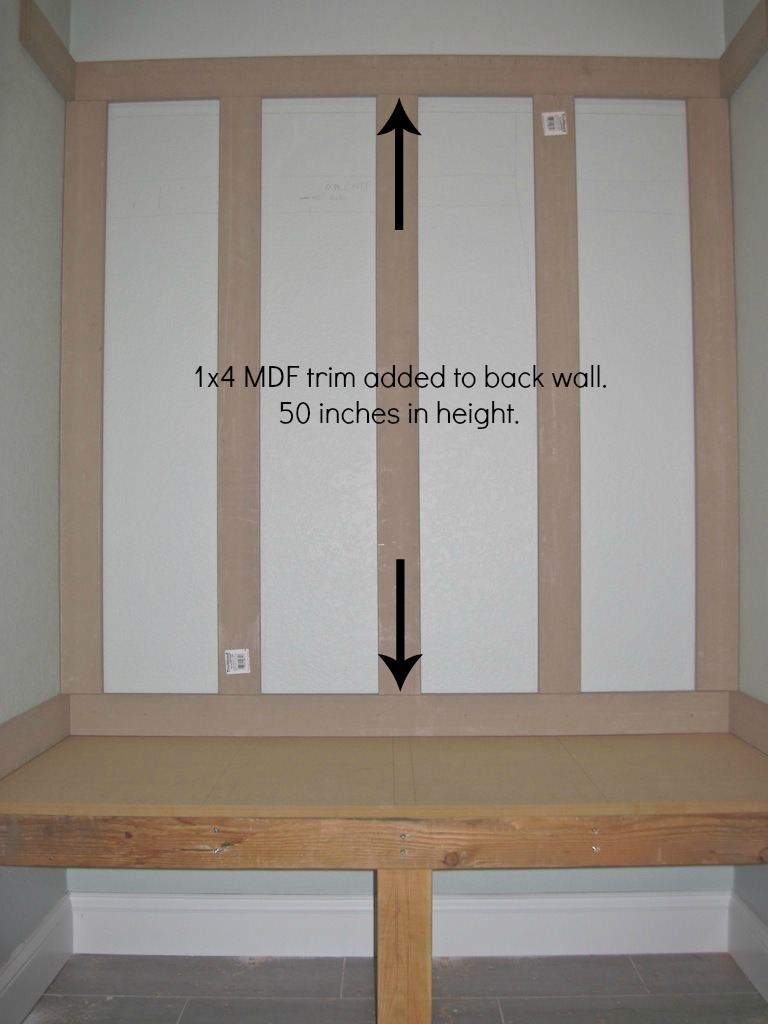
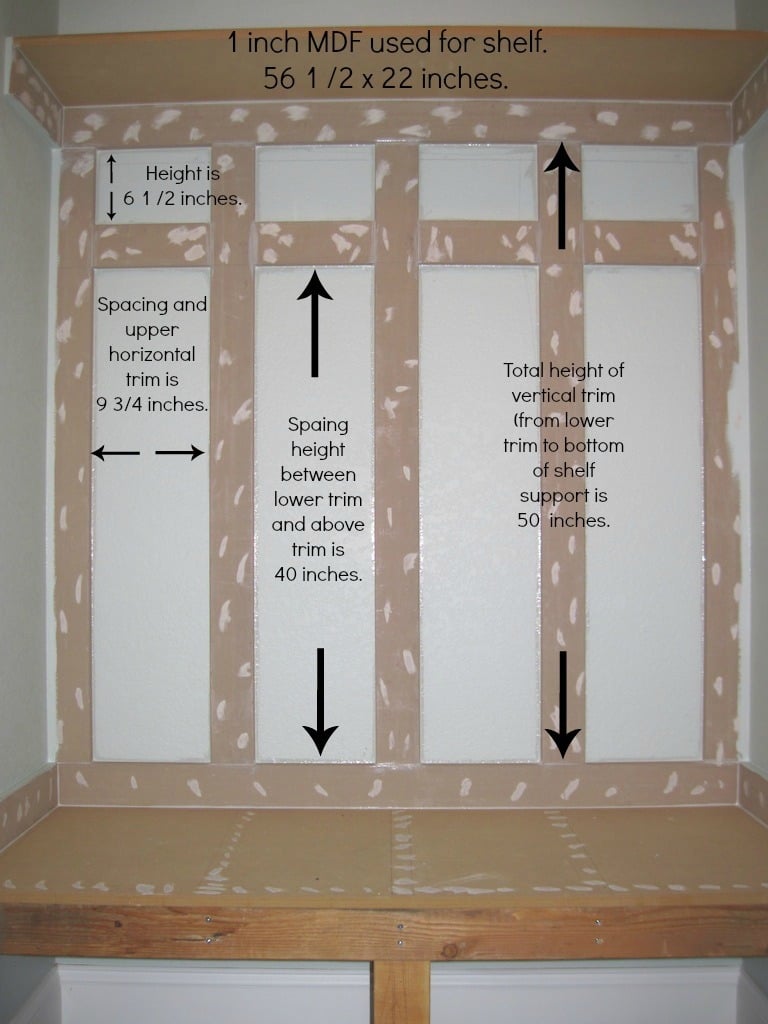
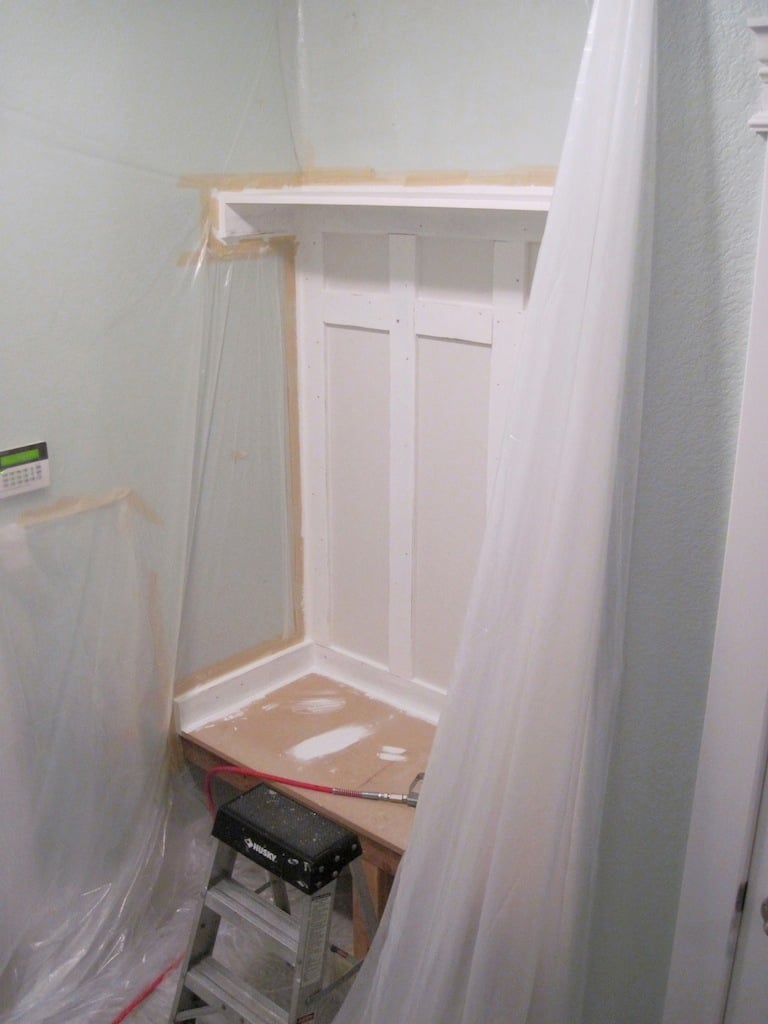
With much needed seating in the mudroom, an unused space (nook) was used to build a mudroom bench and shelf. No plans were used. I basically looked on-line and mentally drew up an idea of how I wanted the final product to look.  


There were some setbacks such as not like the knock down textured walls (after partially painting the bench). I ended up covering the textured walls with hardboard and repainted.


A bench cushion was made for added comfort and style.


Complete tutorial for the bench is here and the bench cushion tutorial is here.


Thank you.


Julie

Estimated Time Investment
Weekend Project (10-20 Hours)
Finish Used
Behr Ultra (paint and primer in one) in ultra white finish.
Recommended Skill Level
Beginner

Comments

Cleverly6

Thu, 05/16/2013 - 13:48

Thank you so much for the idea and plan. I used it to turn an extra laundry room that we have off of our garage into a much needed mudroom. The most challenging project I have ever done before is hanging blinds. But with your help and some from the Home Depot employees, I did it! Our family is more than happy with it. Thanks!!!

BeingHome

Sun, 08/25/2013 - 22:28

Thank YOU so much! I would love to see a picture of your new mudroom area. :) I am happy the plans helped and of course Home Depot. ;)

Sorry for my delayed response. :(

BeingHome

Sun, 08/25/2013 - 22:28

Thank YOU so much! I would love to see a picture of your new mudroom area. :) I am happy the plans helped and of course Home Depot. ;)

Sorry for my delayed response. :(

Porch swing bed

Submitted by Beaulook on Tue, 01/28/2014 - 16:29

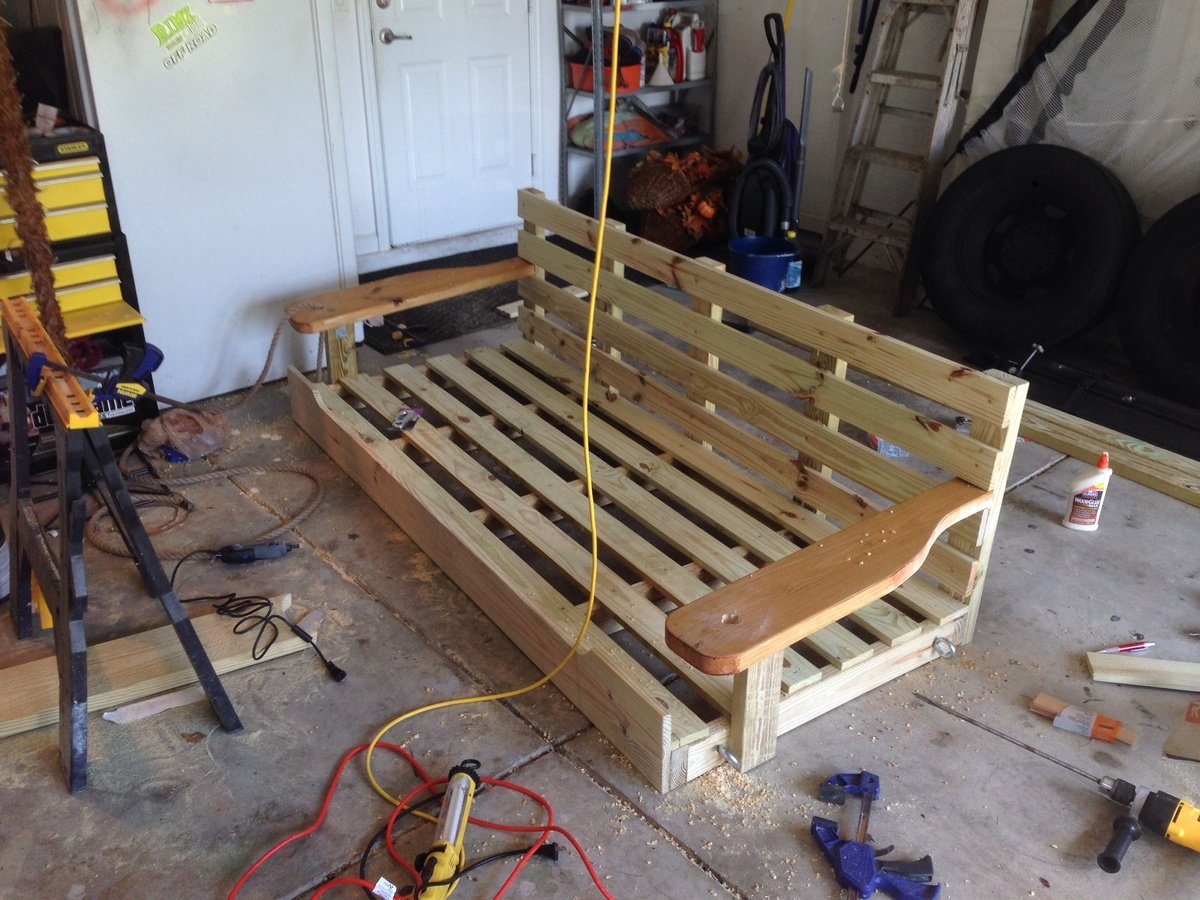
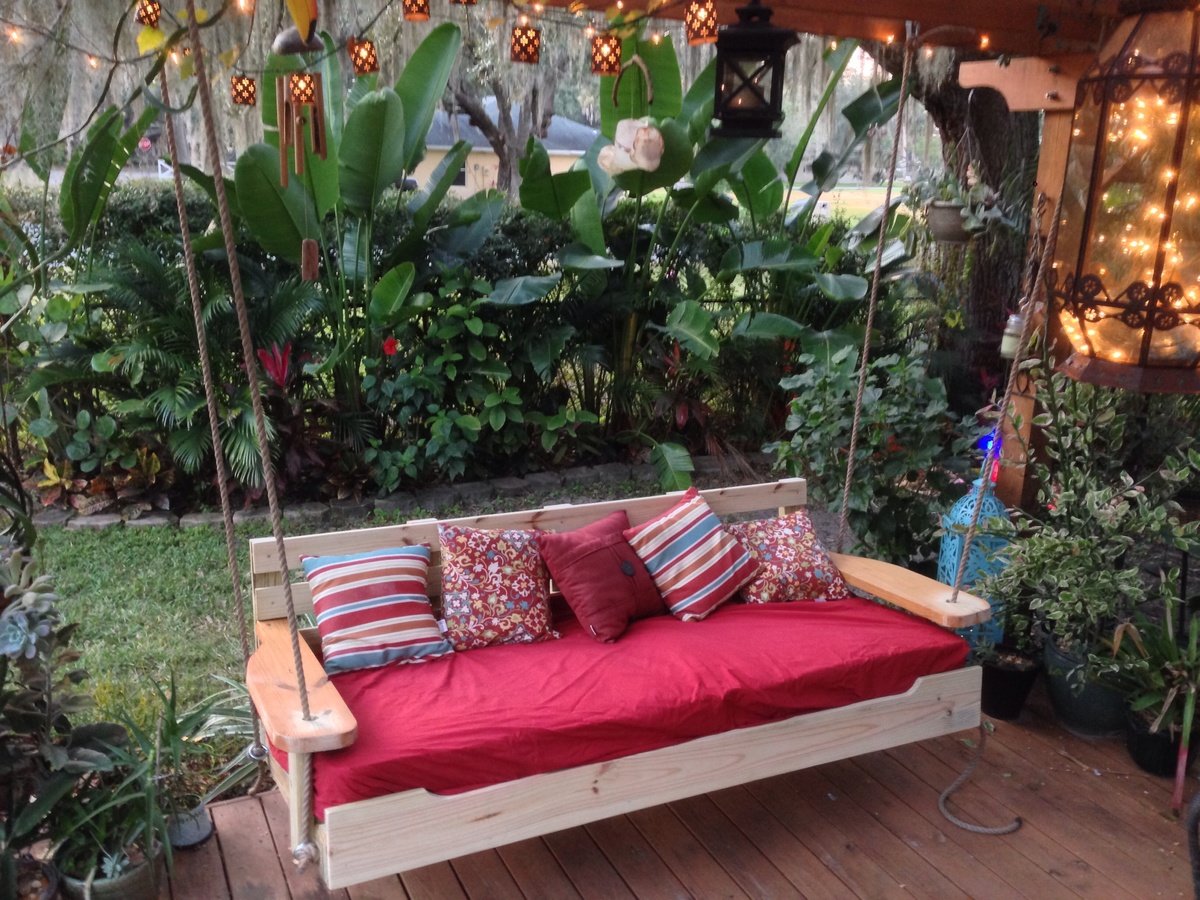
Started off with the original design but enlarged it to fit an oversize single mattress. The mattress cost me $35 from a local faith farm, while the materials came in around $200. I decided to hang under my backyard pergola. Fun and easy project.

Built from Plan(s)
Estimated Cost
$250
Estimated Time Investment
Day Project (6-9 Hours)
Finish Used
Cedar stain
Recommended Skill Level
Beginner

Comments

bhammond

Tue, 01/28/2014 - 21:10

Wow this looks so inviting I might just have to make one too! Nice work-- it looks great!

Shorty

Tue, 01/28/2014 - 21:26

Really great job on your porch swing bed AND an awesome looking patio/yard. Looks amazing all around!

Debbie Perkins

Mon, 07/27/2015 - 22:45

I want this!  I just made a couple of plant stands for my front porch.  My husband asked me what my next project was, why, a swing bed.  (This was only my second project!)  I want to put cup holders in those big ole arms!  We have a house at the beach in South Alabama, so, you gotta "hydrate."  This is an awesome swing.  I can't wait to do mine...pillows to rest on, one foot on the concrete pushing me in a slow swing. Cold beverage in my hand or in my cup holder. Yep, southern girl has a new project.  Love it!

Garden Tool Storage Rack

Submitted by kwildman on Tue, 04/28/2020 - 20:45

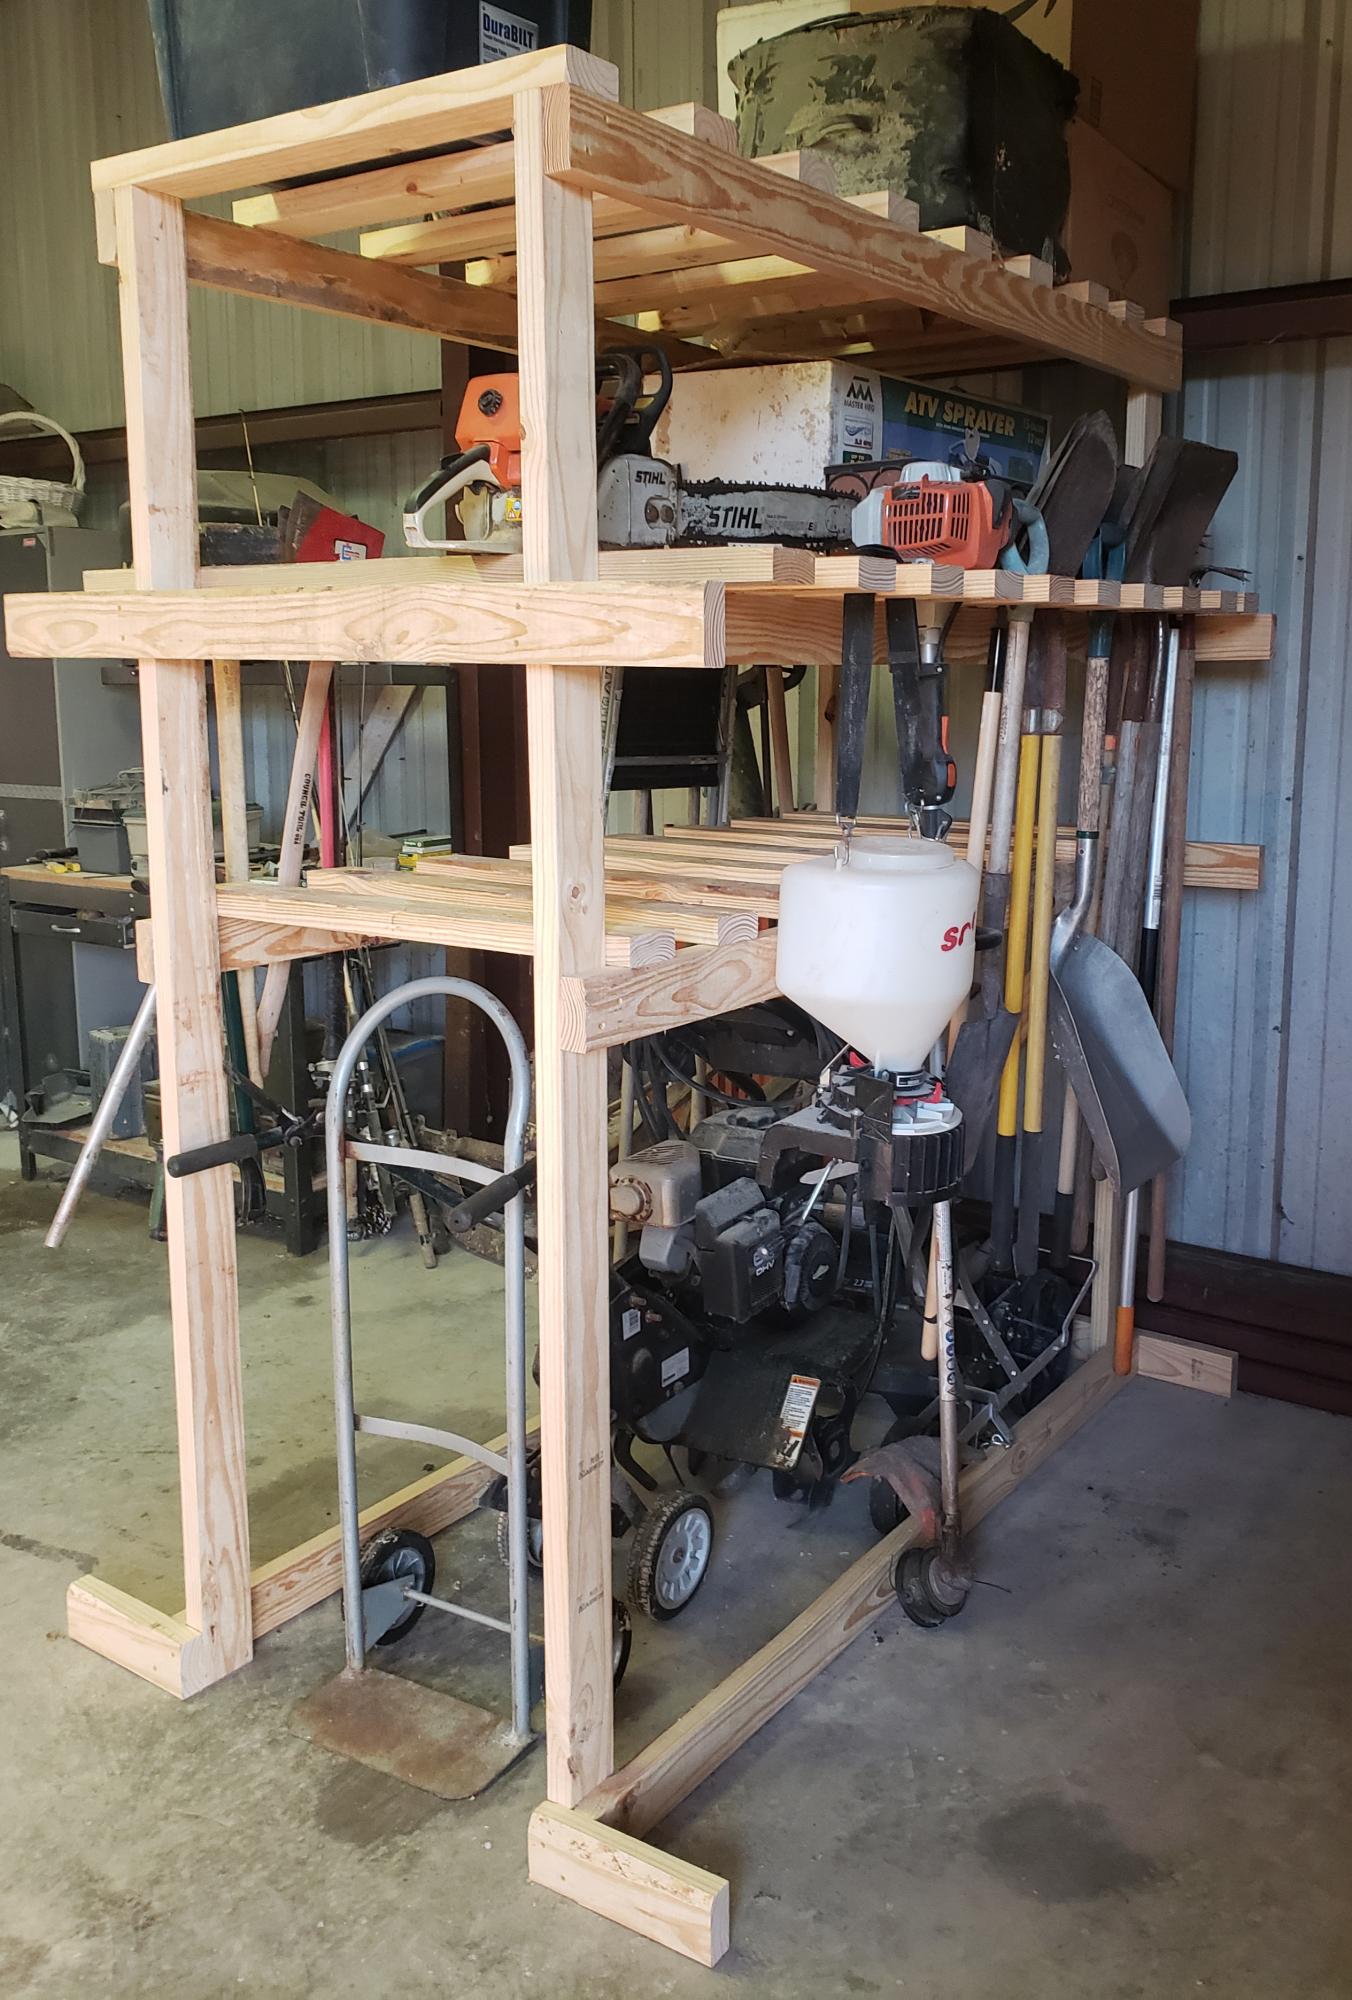
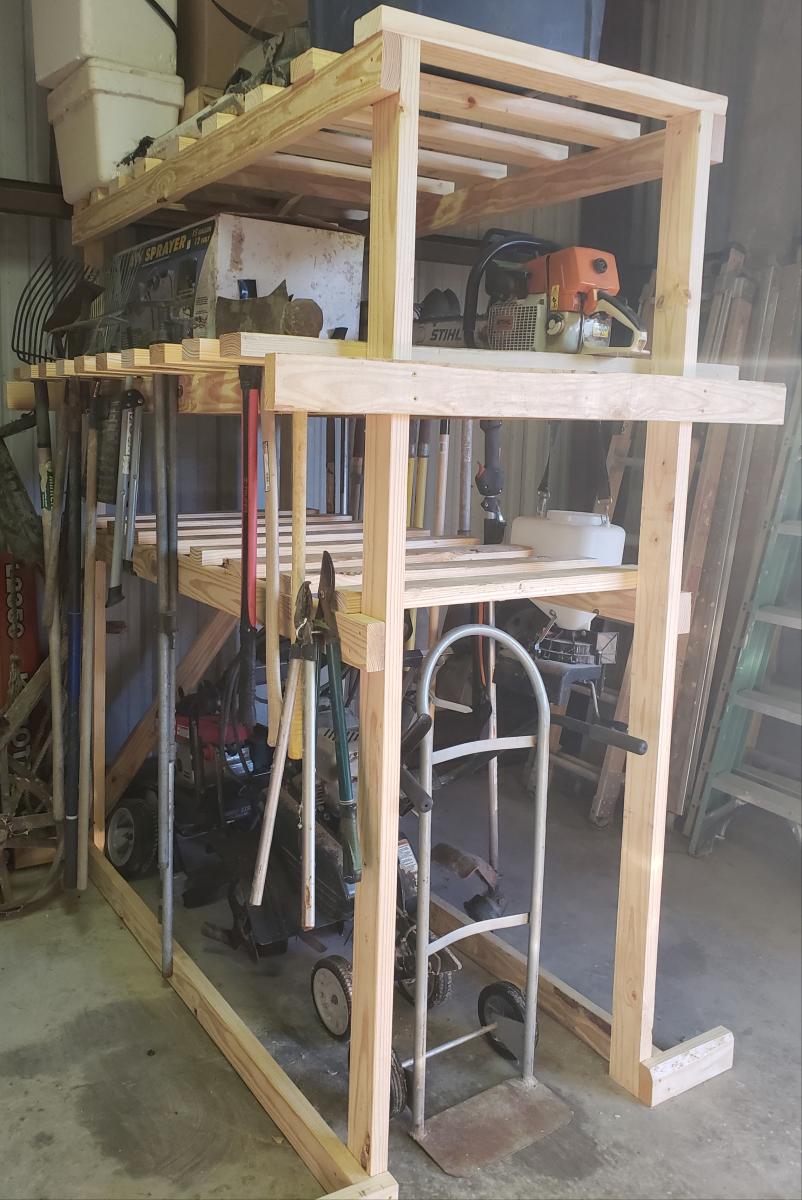
This isn't an Ana White plan but I've learned so much from this site that I designed and built this garden tool rack. Its pine 2x4 construction. I love it!

It is 84" tall x 72" long x 26 wide (opening) and 48"wide for garden tool hangers.

Estimated Cost
100
Estimated Time Investment
Afternoon Project (3-6 Hours)
Finish Used
No finish
Recommended Skill Level
Beginner

Comments

Washer and Dryer Pedestal

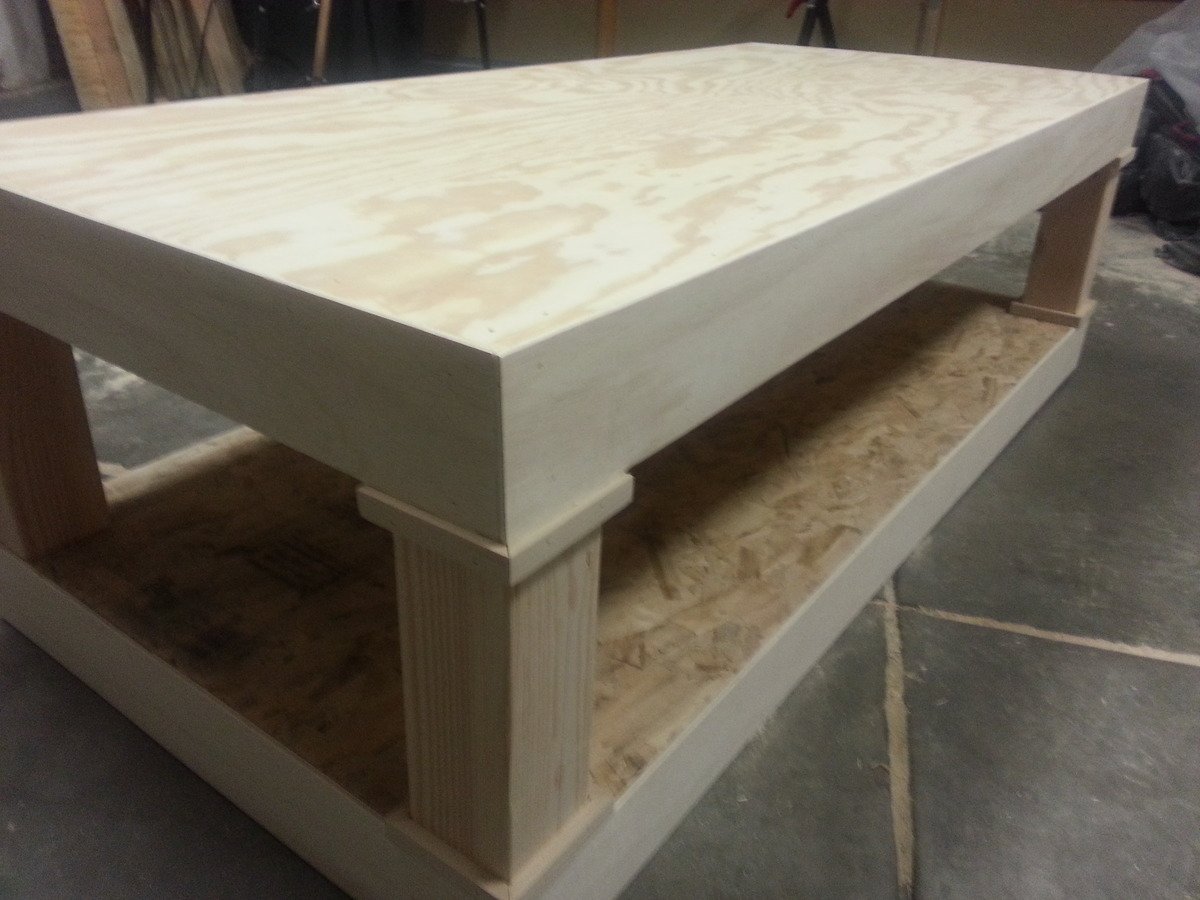
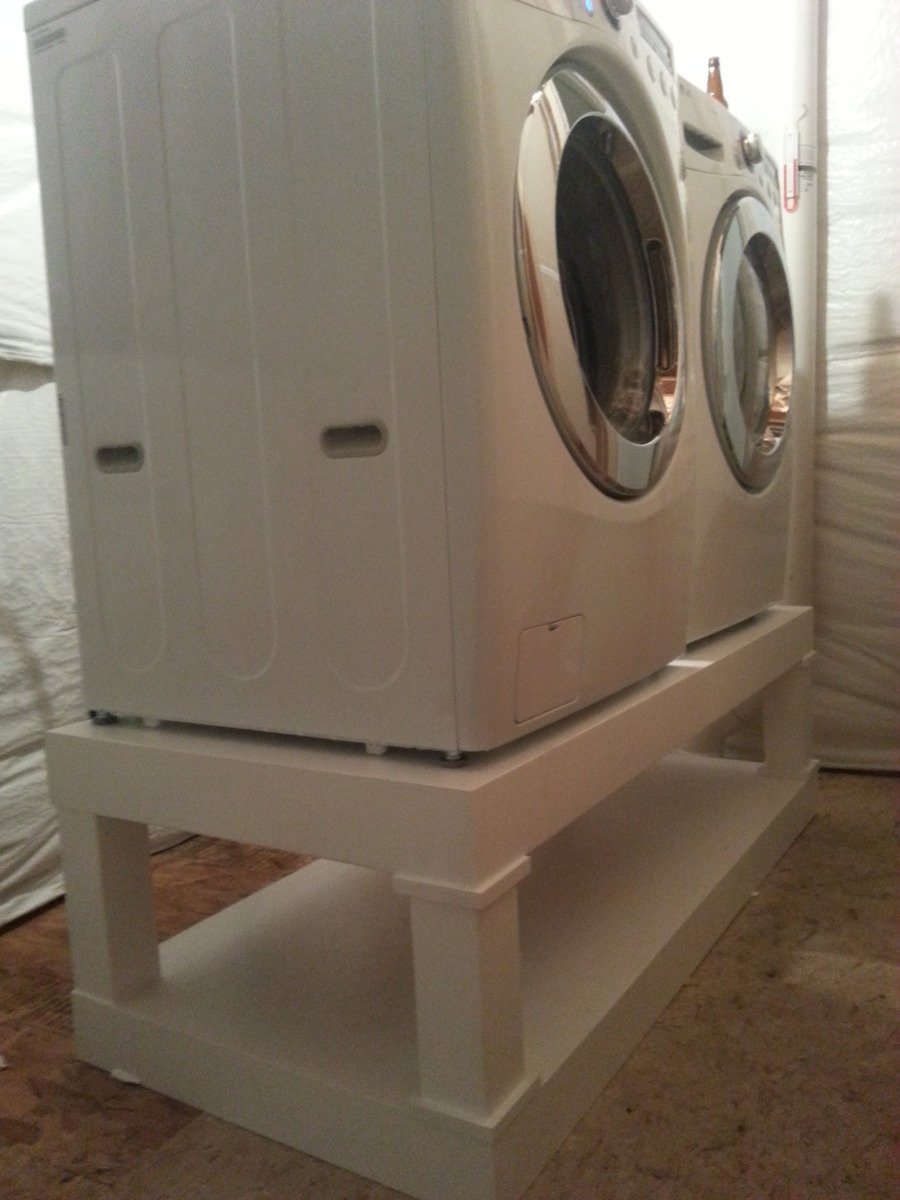
This thing is awesome! The access to my crawlspace was conveniently put under the dryer, but with both the washer and dryer on the pedestal I can slide it forward by myself if I need to get into the crawlspace. Bonus! I couldn't find any basecap so I used a plain old piece of trim. I also had some 1/8 inch plywood that I ripped to trim the front and sides. Very happy with how it turned out.

Estimated Cost
50 (but I had spare OSB for the bottom, so I only bought 1 4x8)
Estimated Time Investment
An Hour or Two (0-2 Hours)
Finish Used
Sealed with Kilz and then Painted with Valspar white.
Recommended Skill Level
Beginner

Full size loft

Submitted by Anonymous (not verified) on Tue, 10/01/2019 - 18:46

Built a full size loft bed for my kids but wanted something safer than having them climb up and down a ladder so used the Camp Loft Bed plans to add the platform and stairs. It is much easier for the kids. Going to finish by covering the platform and stairs with carpet.

Estimated Cost
180
Estimated Time Investment
Day Project (6-9 Hours)

Comments

Bathroom Vanities

Submitted by kdins31 on Sat, 01/04/2014 - 13:09

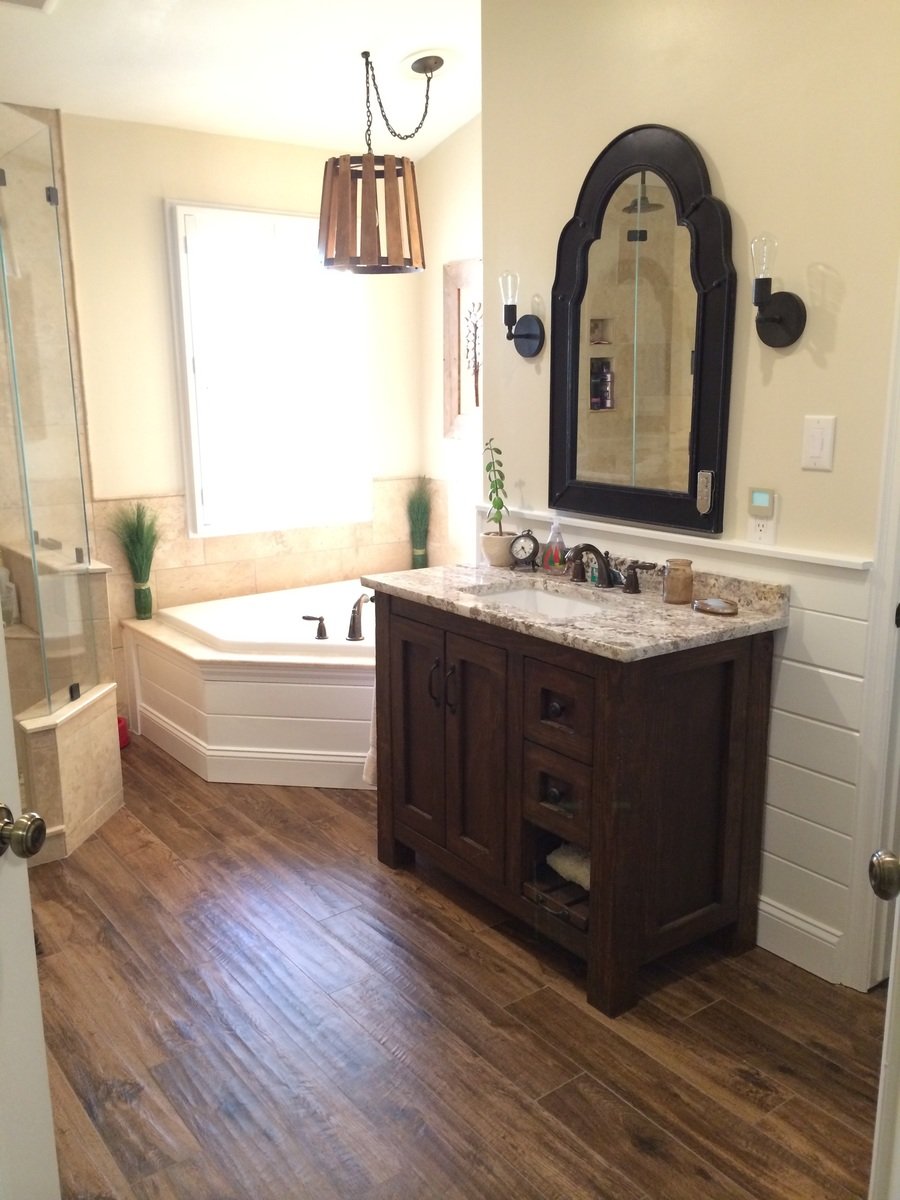
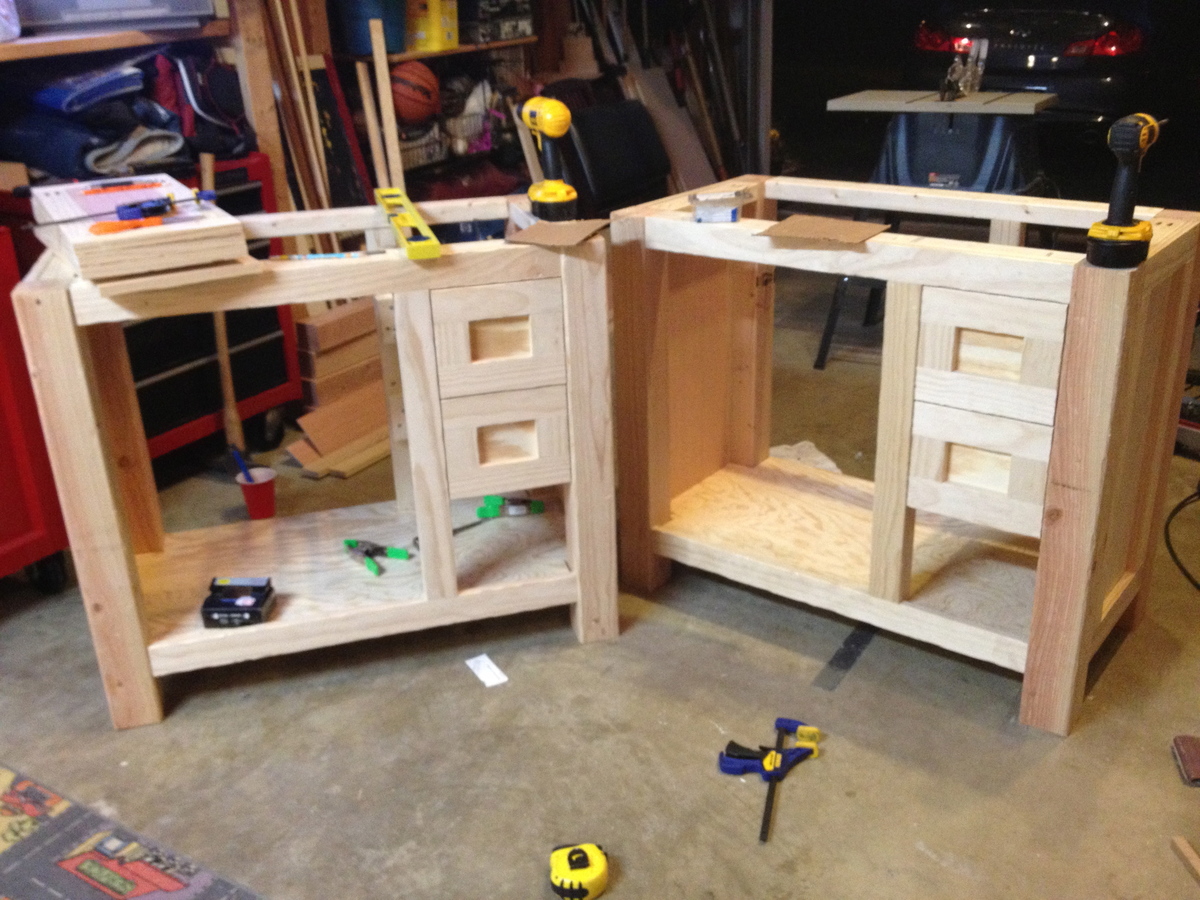
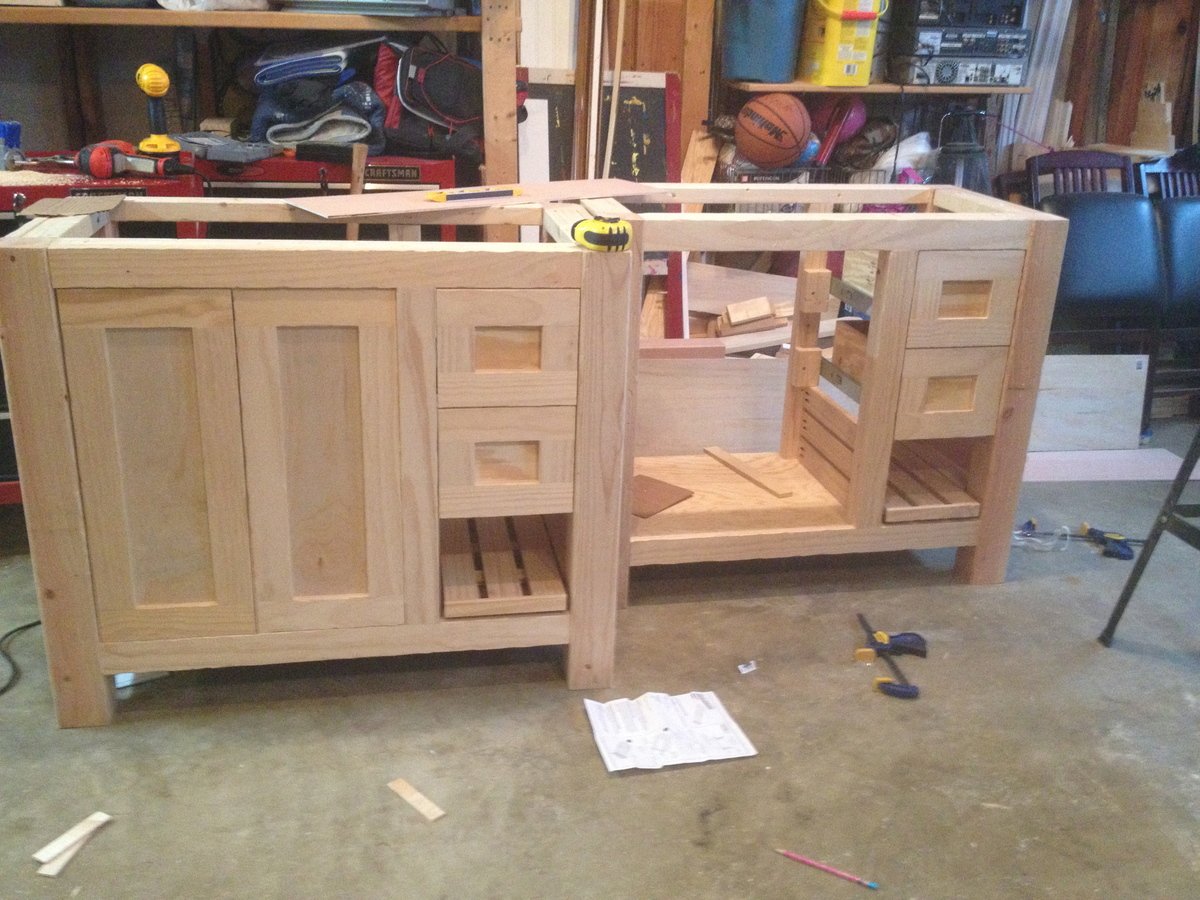
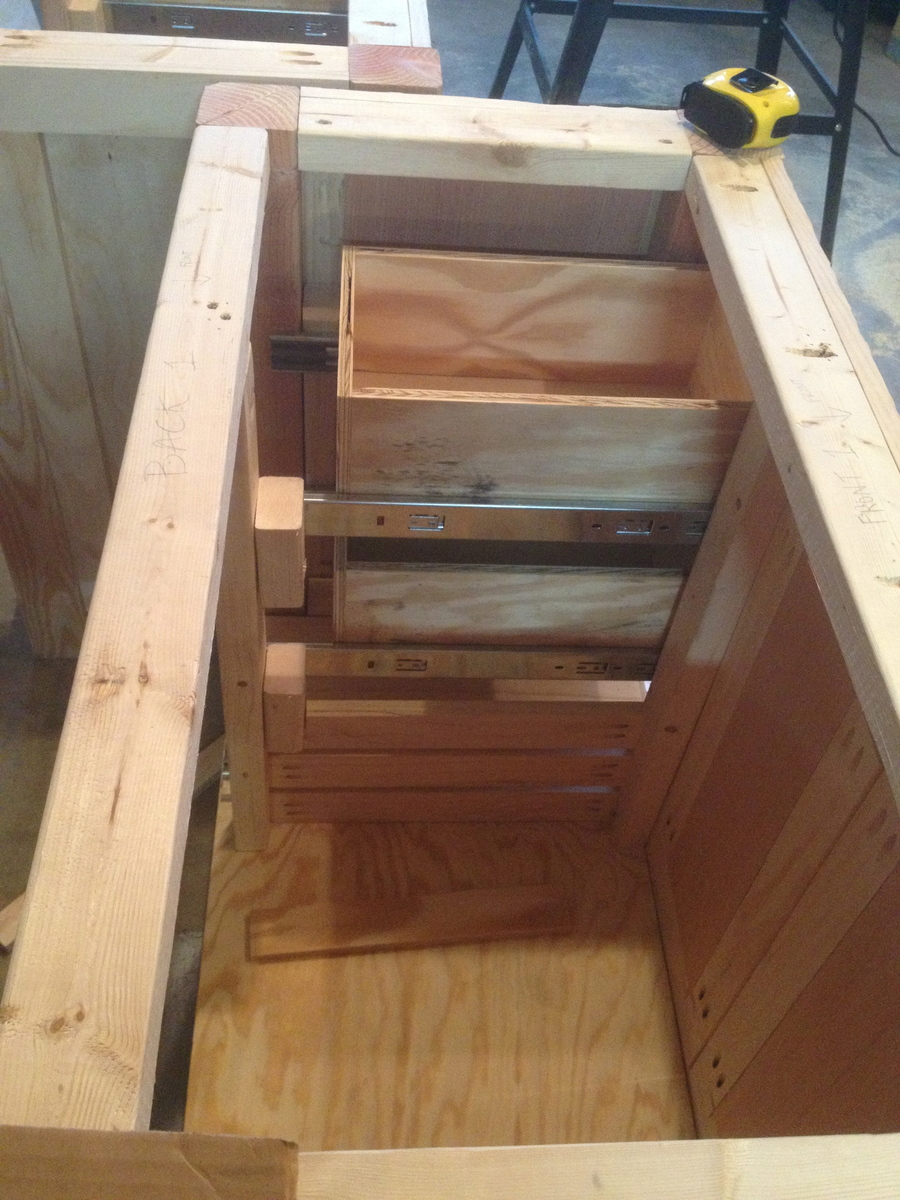
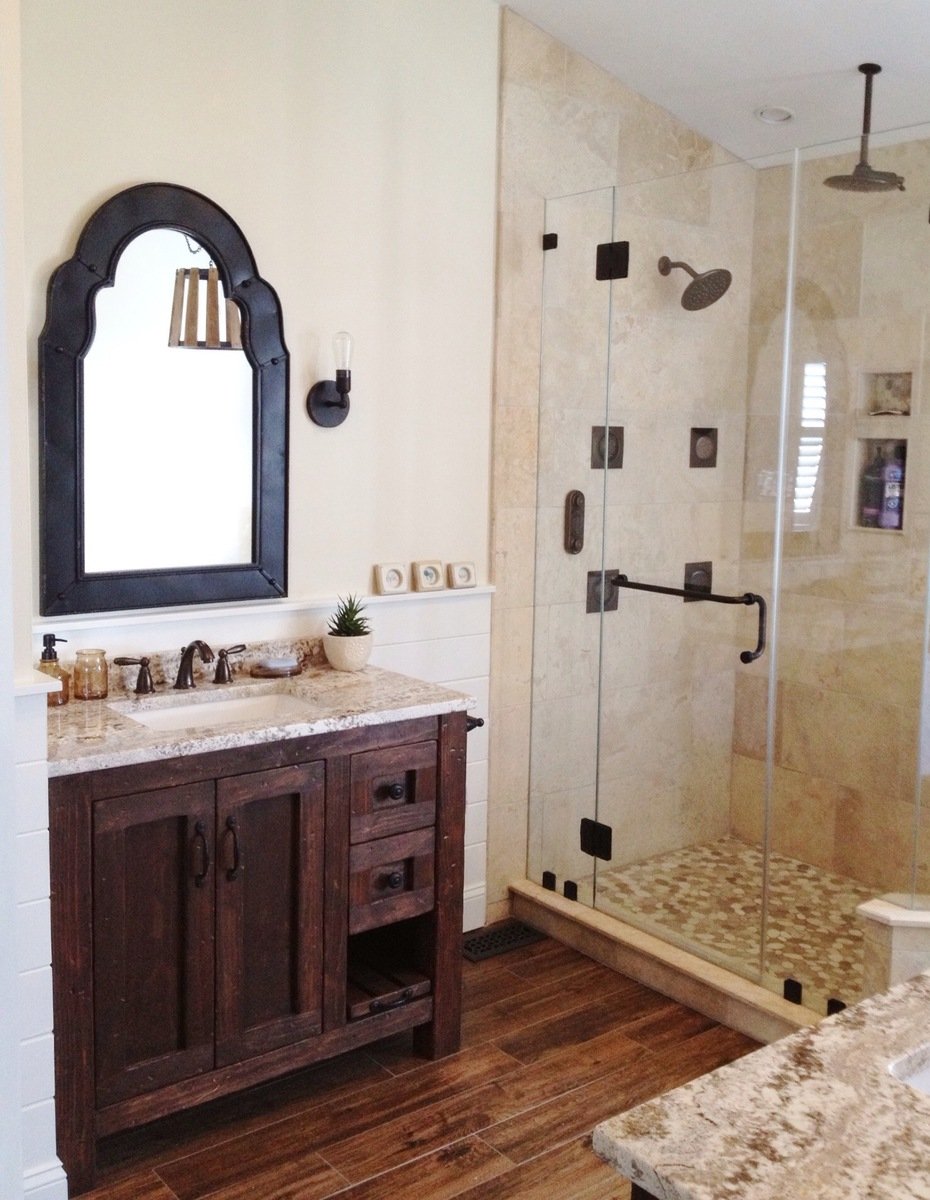
Rather than burning a few thousand on vanities for my bathroom remodel I decided to build them instead. The bottom shelf on the right slides out for a footstool so the kids can reach the sink.

Estimated Cost
Wood was cheap, the granite and sink were not, though I was able to save by getting remnant slab from granite shop.
Estimated Time Investment
Weekend Project (10-20 Hours)
Recommended Skill Level
Intermediate

Comments

Joni

Sun, 01/05/2014 - 20:55

These are so beautiful -- they really look like high-end rustic pieces. The slide-out footstool is genius. The distressing is fantastic. I really love your pebble art as well.
Would you mind sharing the stain color?

Podium for My Wife's Classroom

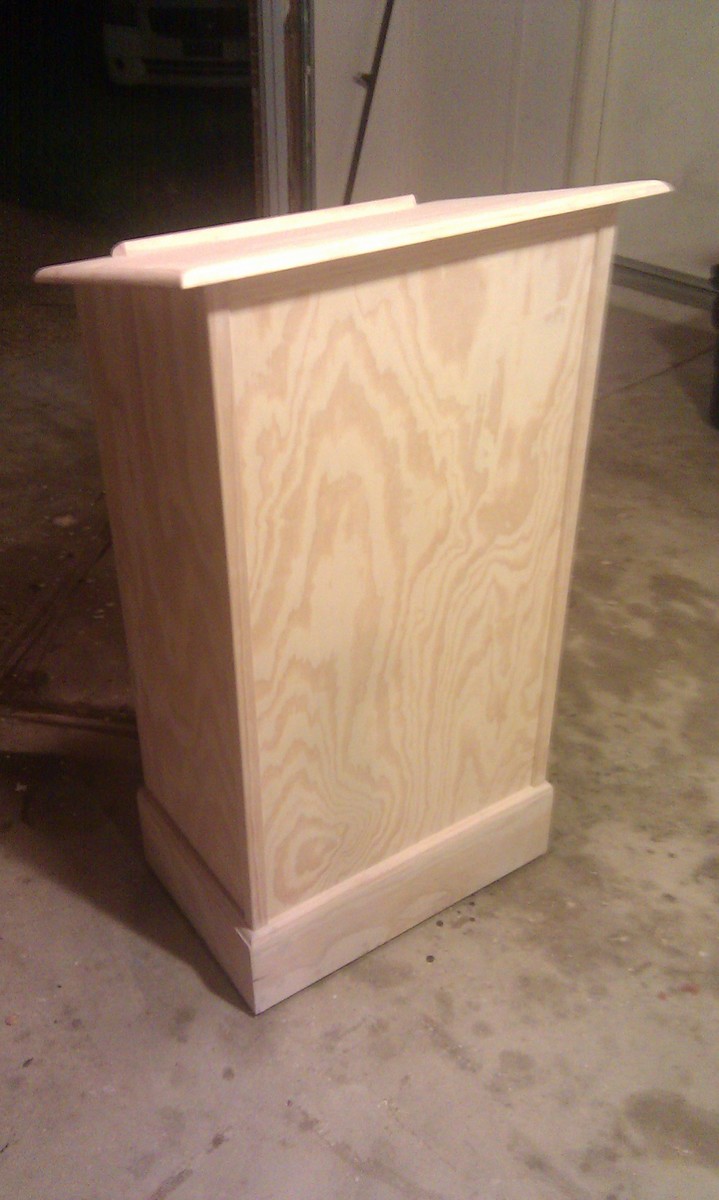
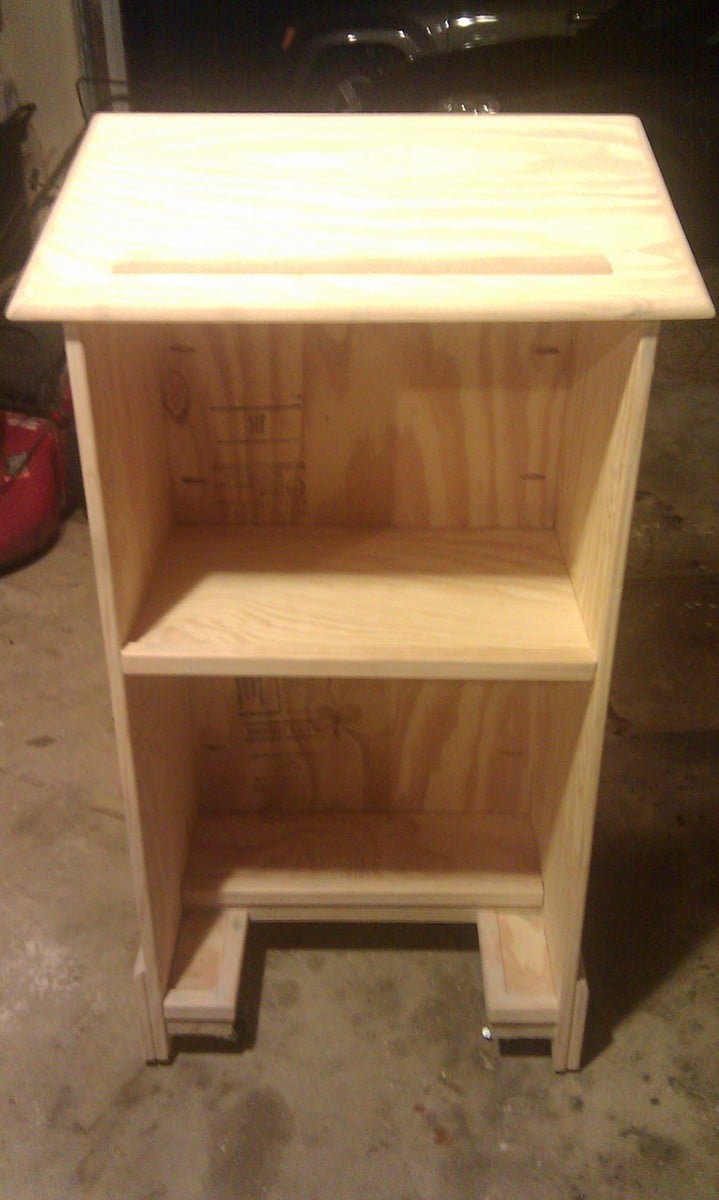
This is my first try at building furniture. I've built larger things in the past like decks and a fort for my nephews, but never furniture. Even though I used the plans to build the main box, I did change up the bottom and added some new stuff. I added wheels to the bottom my wife could easily move it around her classroom. I didn't want to put a square base on it because I thought it might hit her ankles when she was standing close to it. So I sort-of notched it out to give an opening for her feet and I used some scraps to create a short shelf at the bottom. I also added more trim that the plans call for. I cut strips of the pine plywood for the base molding and topped it with quarter round. I used corner trim for the front corners, the self inside and the bottom notched shelf. I also used screen trim for the back of it. I think it came out nice and I've very pleased with it. I used 2 coats of Minwax PolyShades American Chestnut on it.

Built from Plan(s)
Estimated Time Investment
Weekend Project (10-20 Hours)
Finish Used
Minwax PolyShades American Chestnut
Recommended Skill Level
Beginner

Bike Storage

Submitted by vendo on Wed, 10/13/2021 - 10:10

I live in a smaller rental with limited garage space, so I needed a place for my kids bikes. This is what I came up with. It required minimal screw holes in the treated fence posts and I attached a rail system(rubbermaid fasttrak) for the bikes to hang from. I used Ana's easy shelves plan for the upright supports and then just added some corrugated roofing and cedar fence pickets (which I had on hand) to finish off the top.

Daybed with Storage Trundle

Submitted by Crafty-Mom on Sat, 01/27/2018 - 10:38

This was my first project from Ana's website and I'm hooked! I'm a beginner, but thank goodness for my Dad's help because I have a lot of learning to do!

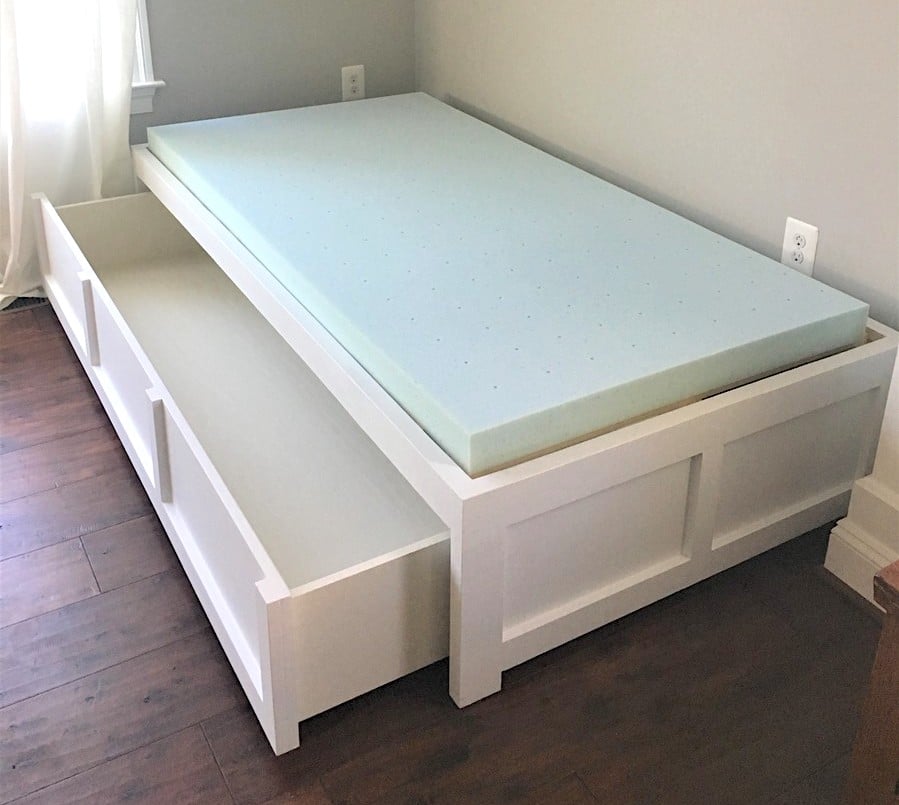
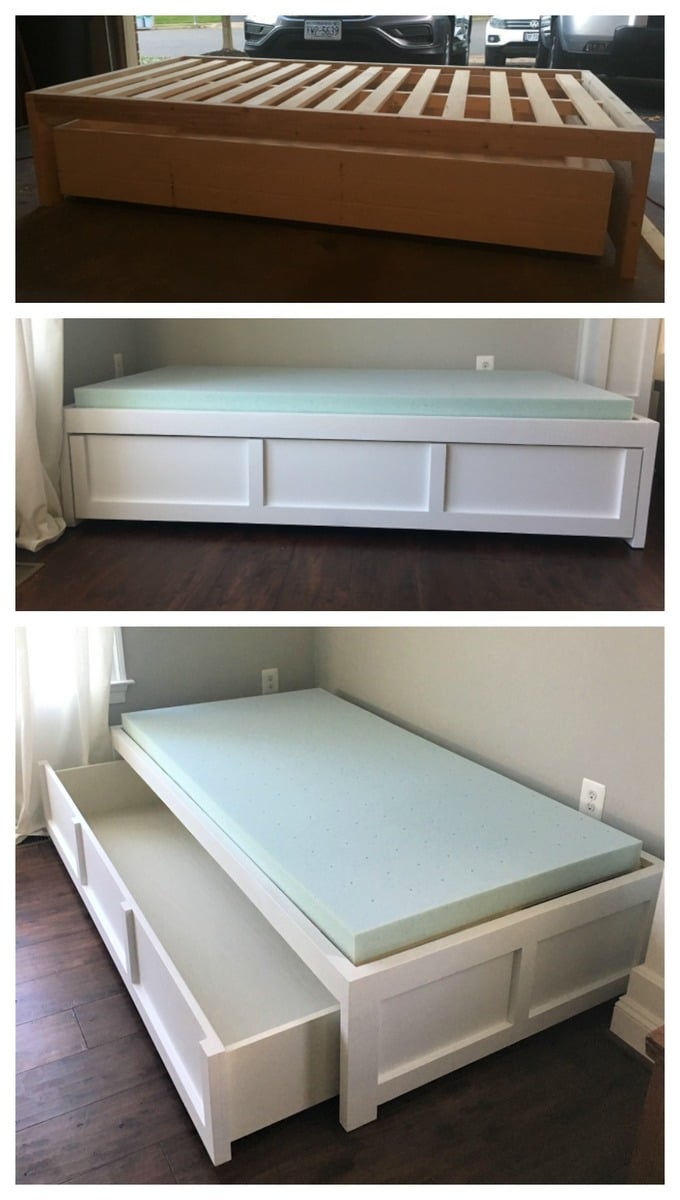
I wanted the drawer to be 1 drawer instead of 3. I feel like it looks cleaner (without having to adjust 3 drawers constantly to make it look good when you push them in). I was thinking the bed could actually be used as a trundle bed in the future too! I use this to store toys right now and it is Awesome!

I increased the bed size to fit a twin mattress and increased the height of the bed slightly so that the drawer would be a little bit deeper. We also added a back to the bed and carried around the trim to make all sides look the same. We added a bumper to the back and sides of the inside of the bed so the drawer is easy to push in and fits in snug. Finally we reinforced the bottom of the drawer with more 1x4 boards so that if a child does sleep in it, it would be more sturdy. I now have kids come over and jump into the drawer (literally) and I'm glad we reinforced it.

The changes we made did add to the cost and our time (as well as being newbies), but I think it's worth it and the bed turned out beautiful!

Estimated Cost
$180
Estimated Time Investment
Weekend Project (10-20 Hours)
Finish Used
Behr Marquee (I'll have to find the name of the white color we used). We almost went with chalk paint, but after talking to the HD guy, he talked me into this paint and I'm glad we used it! So much cheaper and turned out beautiful.
Recommended Skill Level
Beginner

Comments

Nisssc

Mon, 10/12/2020 - 07:51

This looks great! Any suggestion if I want cubbies instead of a trundle? Also, cubbies only on side as bed would be against the wall. Thanks for the inspiration!
Sandy

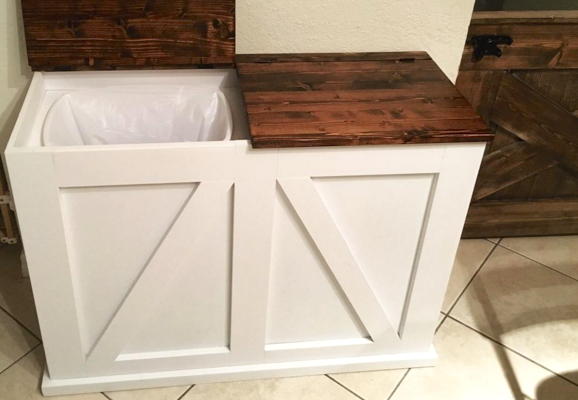
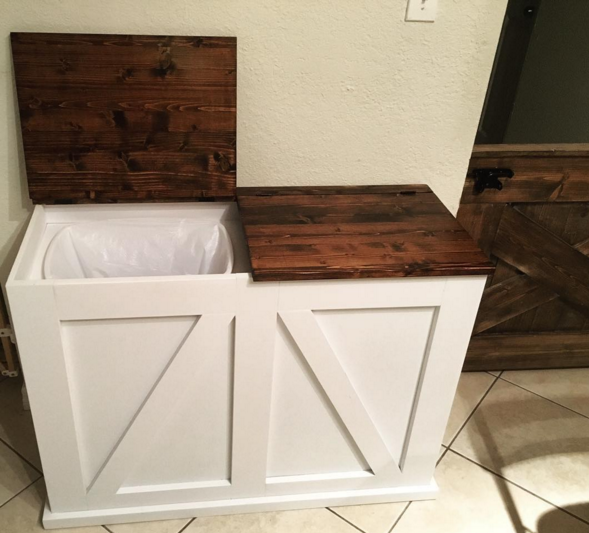
Double Bin Trash and Recycling Bin

Submitted by Anonymous (not verified) on Tue, 02/02/2016 - 12:54

Modified the design a bit to be lift up lids instead of tilt out.

Estimated Cost
125
Estimated Time Investment
Weekend Project (10-20 Hours)
Finish Used
White Painted Base, Dark Walnut stained top
Recommended Skill Level
Intermediate

Comments

Matt712

Sat, 03/07/2020 - 02:29

I’d be grateful for details, plans, measurements for this project. This is an amazing build, nicely done.With green top looks fantastic and complements the white very well.

smbanks75

Thu, 01/11/2024 - 20:31

To everyone asking for the plans, it's a modified tilt out. It states right there under the pics that it was modified and the original plans are there in red, under "Built from plans"

Outdoor Sofa and Chair with Slanted Back

Submitted by Anonymous (not verified) on Sun, 07/16/2023 - 10:22

OK, I think this build may be my biggest project yet! It is definitely the heaviest. With the strong winds we can get here in Florida we needed substantial outdoor furniture.
I did make some modifications along the way measurement-wise so the sofa would fit my front porch better. All in all, this took 2 full days. I built the sofa first, stained it the next day and then decided (due to trying to get stain in all the nooks and crannies) to stain the chair pieces first before putting it together.
I am so happy with the results and so far, almost a year later, this furniture looks great and hasn't moved an inch in any of the thunderstorms we've had! Thank you Ana!!

Master Bath Barn Door

Submitted by Anonymous (not verified) on Fri, 03/17/2017 - 16:34

Created this door with pine wood tongue and groove lumber and pine wood planks. Purchase barn door hardware / track from Jet.com and door handles from Hobby Lobby. 


This replaced my Master bath door and I think came out pretty good. Thank you for the ideas!!!  Jeff M.   Brownstown, Mi

Estimated Cost
Wood 55.00
Handles 2 for 8.00
Stain ( left overs)
Barn door track 54.00

Total $117.00 and 10 % Military discount at lowes
Estimated Time Investment
Weekend Project (10-20 Hours)
Finish Used
Minwax. Mix of Kona and Driftwood Grey
Recommended Skill Level
Intermediate

Modern Outdoor Chair with a twist

Submitted by Anonymous (not verified) on Wed, 07/05/2017 - 16:05

Taken from the Modern Outdoor chair project and added a back. Then decided that I love the andorak style chair arms and thus the Andrmodern chair was born.. 

Estimated Cost
$35.00
Estimated Time Investment
Afternoon Project (3-6 Hours)
Finish Used
Will use the Behr two in one
Recommended Skill Level
Beginner

Comments

jkess44

Tue, 06/09/2020 - 13:36

Wow! I really like this look, Im sure its very comfortable. Do you have plans to share? I am very much a beginner and need guidance, lol.

Glider

Submitted by Seansg5 on Sun, 08/09/2015 - 20:24

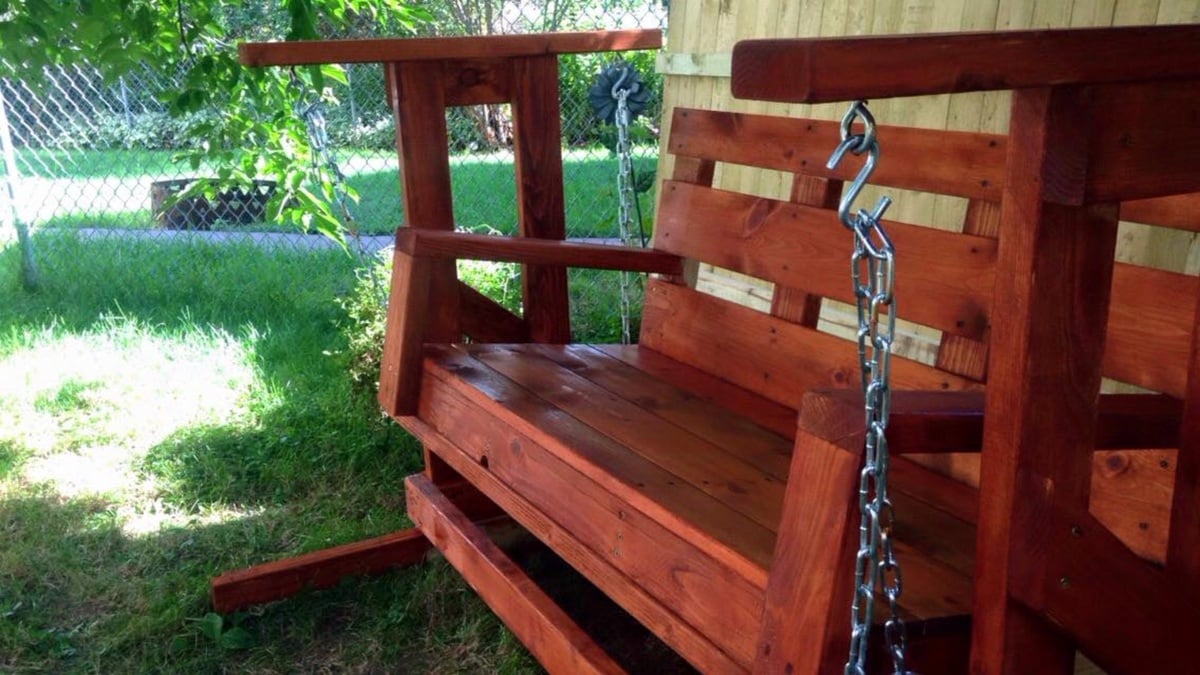
The bench was easy to build with great instructions. I had Home Depot make my cuts for this first project and then I went and bought a miter saw and other power tools for future ones. So much fun. 

Built from Plan(s)
Estimated Cost
$100
Estimated Time Investment
Afternoon Project (3-6 Hours)
Recommended Skill Level
Beginner

Comments

Cross35

Mon, 03/14/2016 - 08:35

Great work.  DId you do anything different to the swing itself?  How did you build the frame.  I'm looking to do this exact thing for my patio.  I don't have anywhere to hang the swing.


Thanks for sharing any info.

mbarland

Sat, 06/13/2020 - 16:54

Made the chair and then built the glider frame for it just eyeballing the picture. I can't figure out how to upload a photo of my design, but can try to describe it.

I made mine with a 4x4 on the base of each leg, but a 2x4 would work as well, it was just what I had on hand. The base board on each leg I made 48". From there I put two 48" vertical boards. The vertical boards were centered and from the front edge of the first board to the back edge of the second board. Two 16" boards were then used at the top and bottom of the vertical boards to hold them in place. Cap it off with a 30" board on top of the verticals. This is where you'll attach your eye bolts. I put both eye bolts 3 1/2" back from the front (a scrap of 2x4 works well as a guide). To join the two legs, I used two 52" boards on top of the base 4X4 of the verticals (one in front of the legs and one behind).