Planked Wood Sideboard
Great plans; thanks Ana . . .
Built from Plan(s)
Estimated Time Investment
Week Long Project (20 Hours or More)
Recommended Skill Level
Intermediate
Great plans; thanks Ana . . .
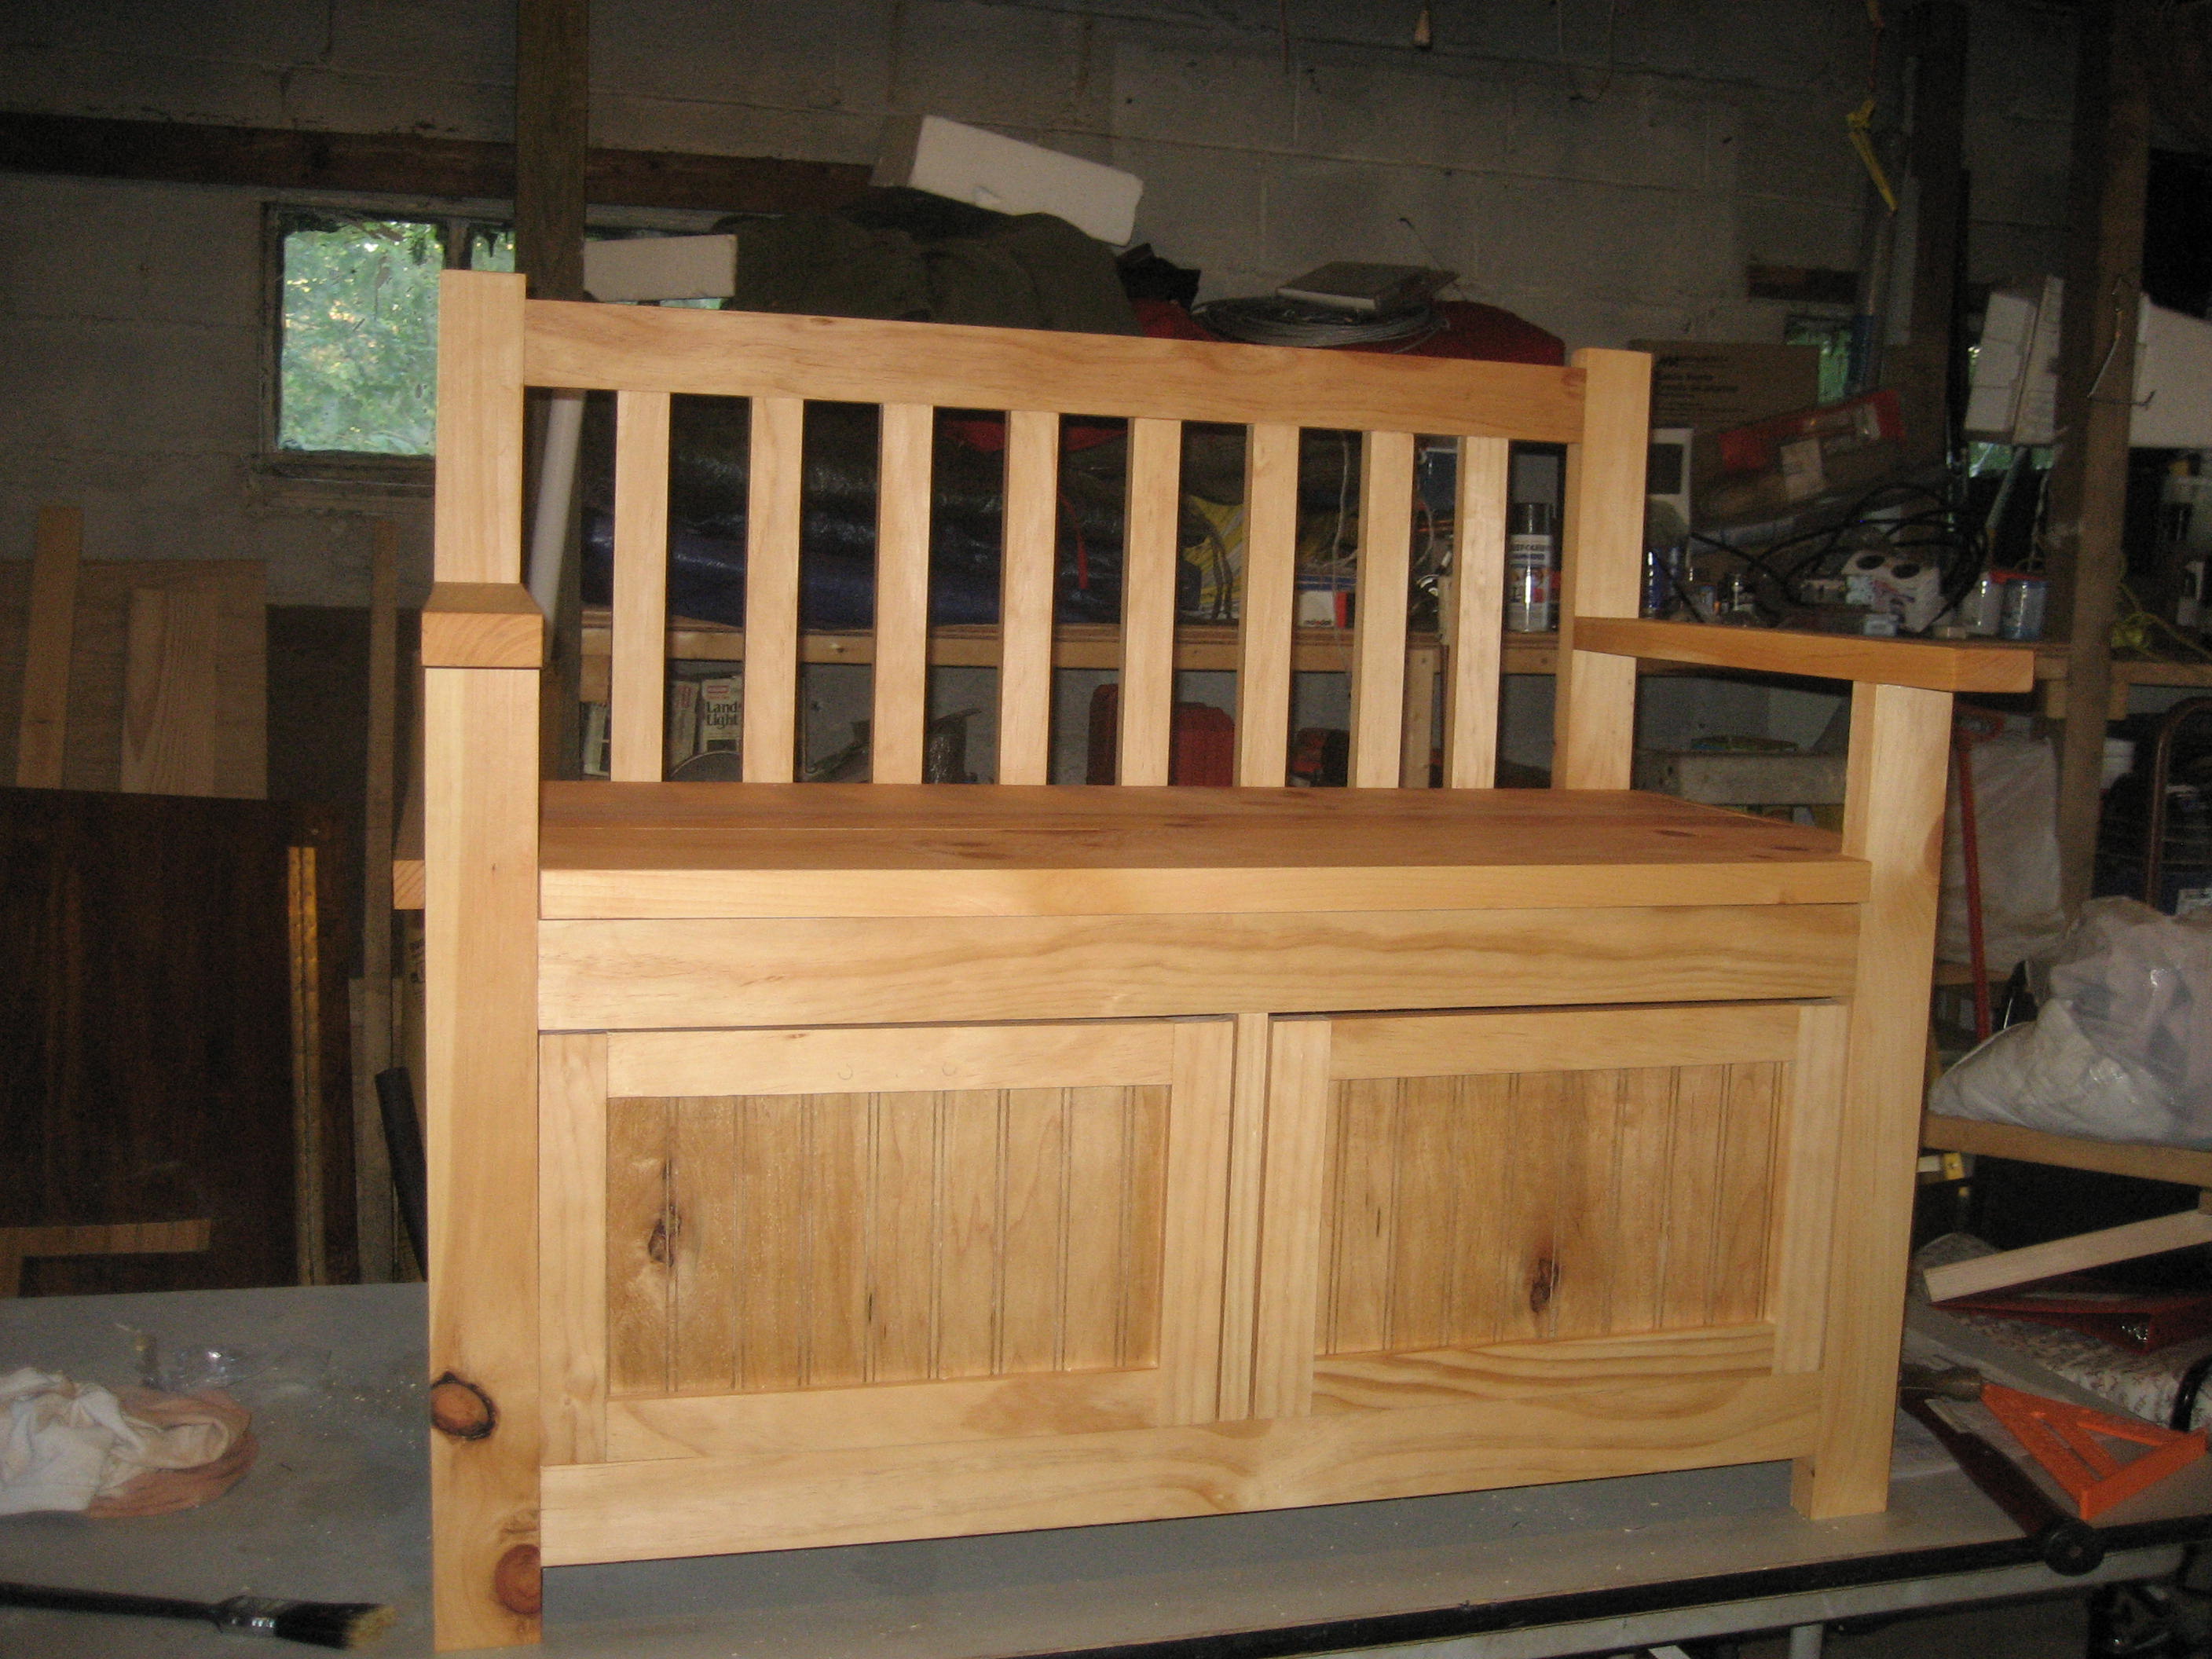
Pretty basic but fun to build


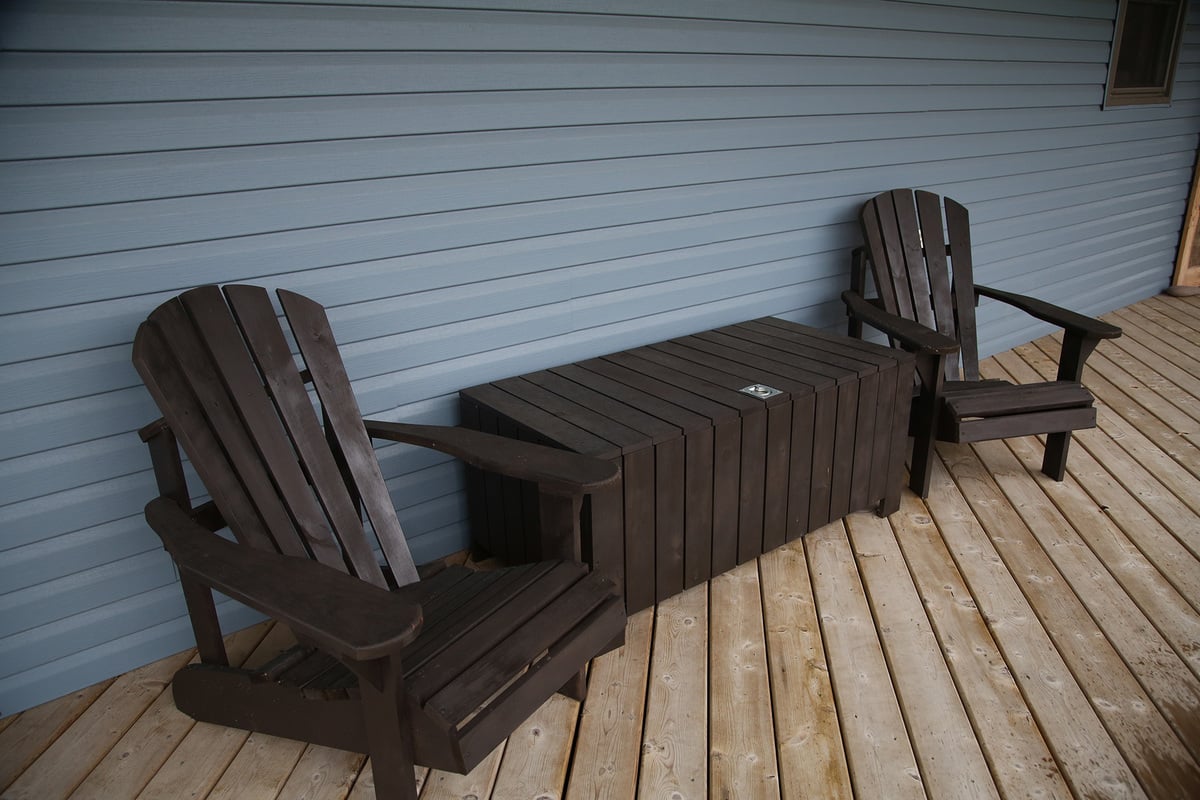
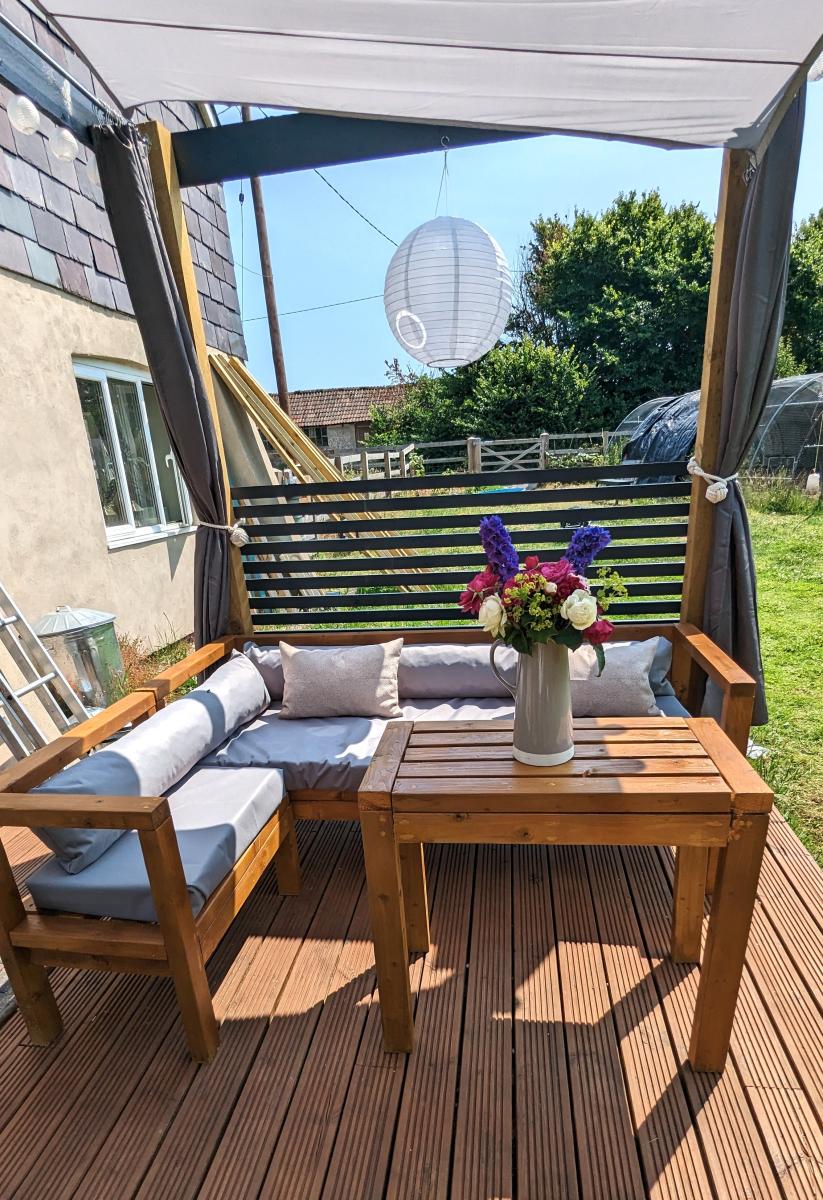
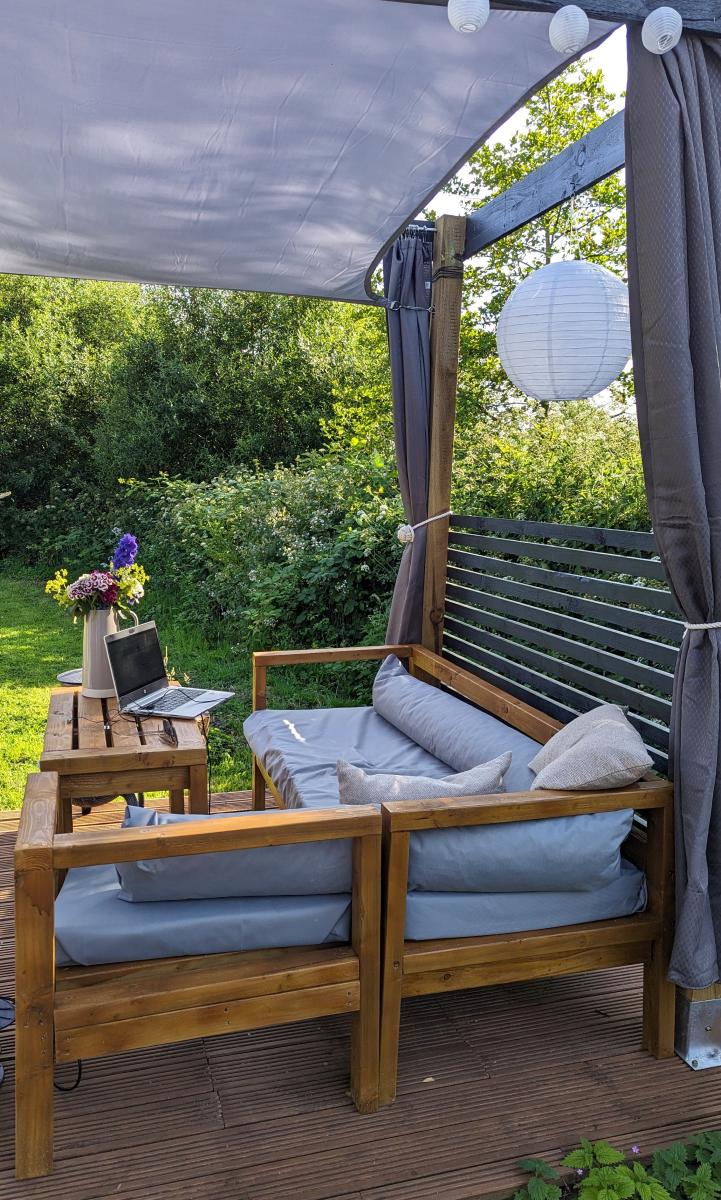
I built this to go with my outdoor sectional. It's perfect for storing the cushions and the gardening tools that I like to keep on the porch. It doubles as a table and extra seating in a pinch, so it's a great addition to the space.
I'd recommend either spray painting it or pre-painting the pieces- I wouldn't want to try and brush between all the slats.
Just wanted to do something a little more original.

Sat, 12/10/2016 - 17:57
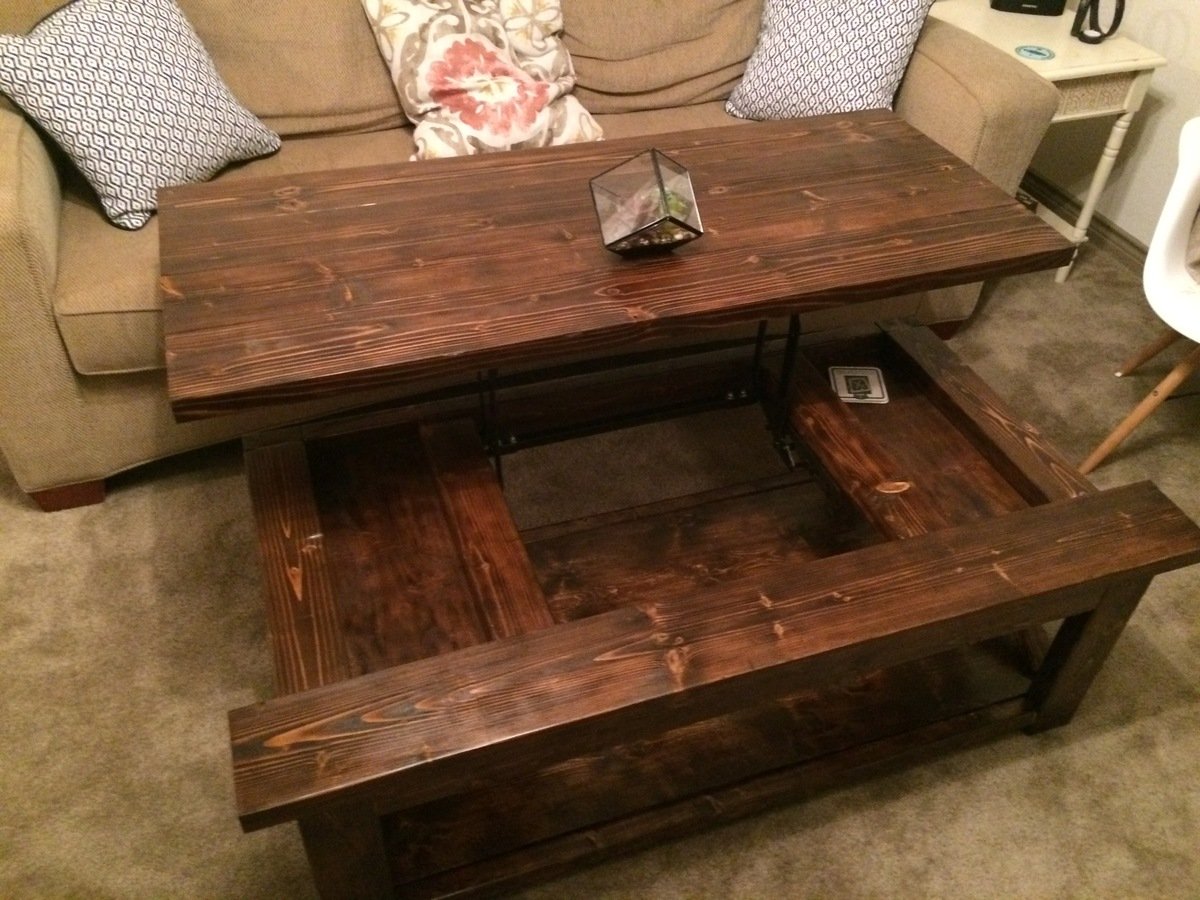
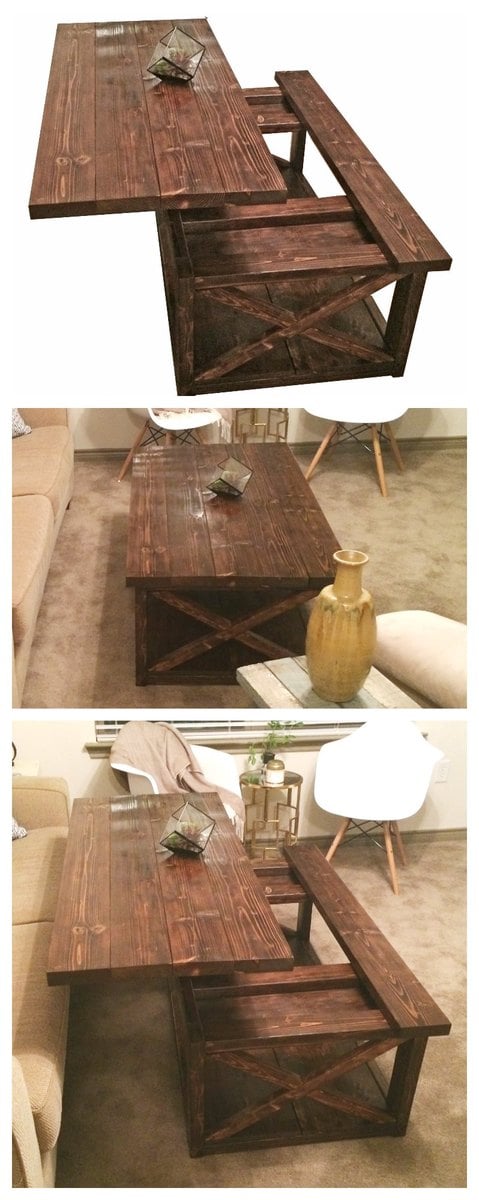
Hi. Are there any plans for this piece using the lift top hardware?
Wed, 12/21/2016 - 20:46
Just curious about the hardware and design if there are any actual plans for this coffee table
Wed, 04/08/2020 - 05:01
Where can plans for this lift top version be found?
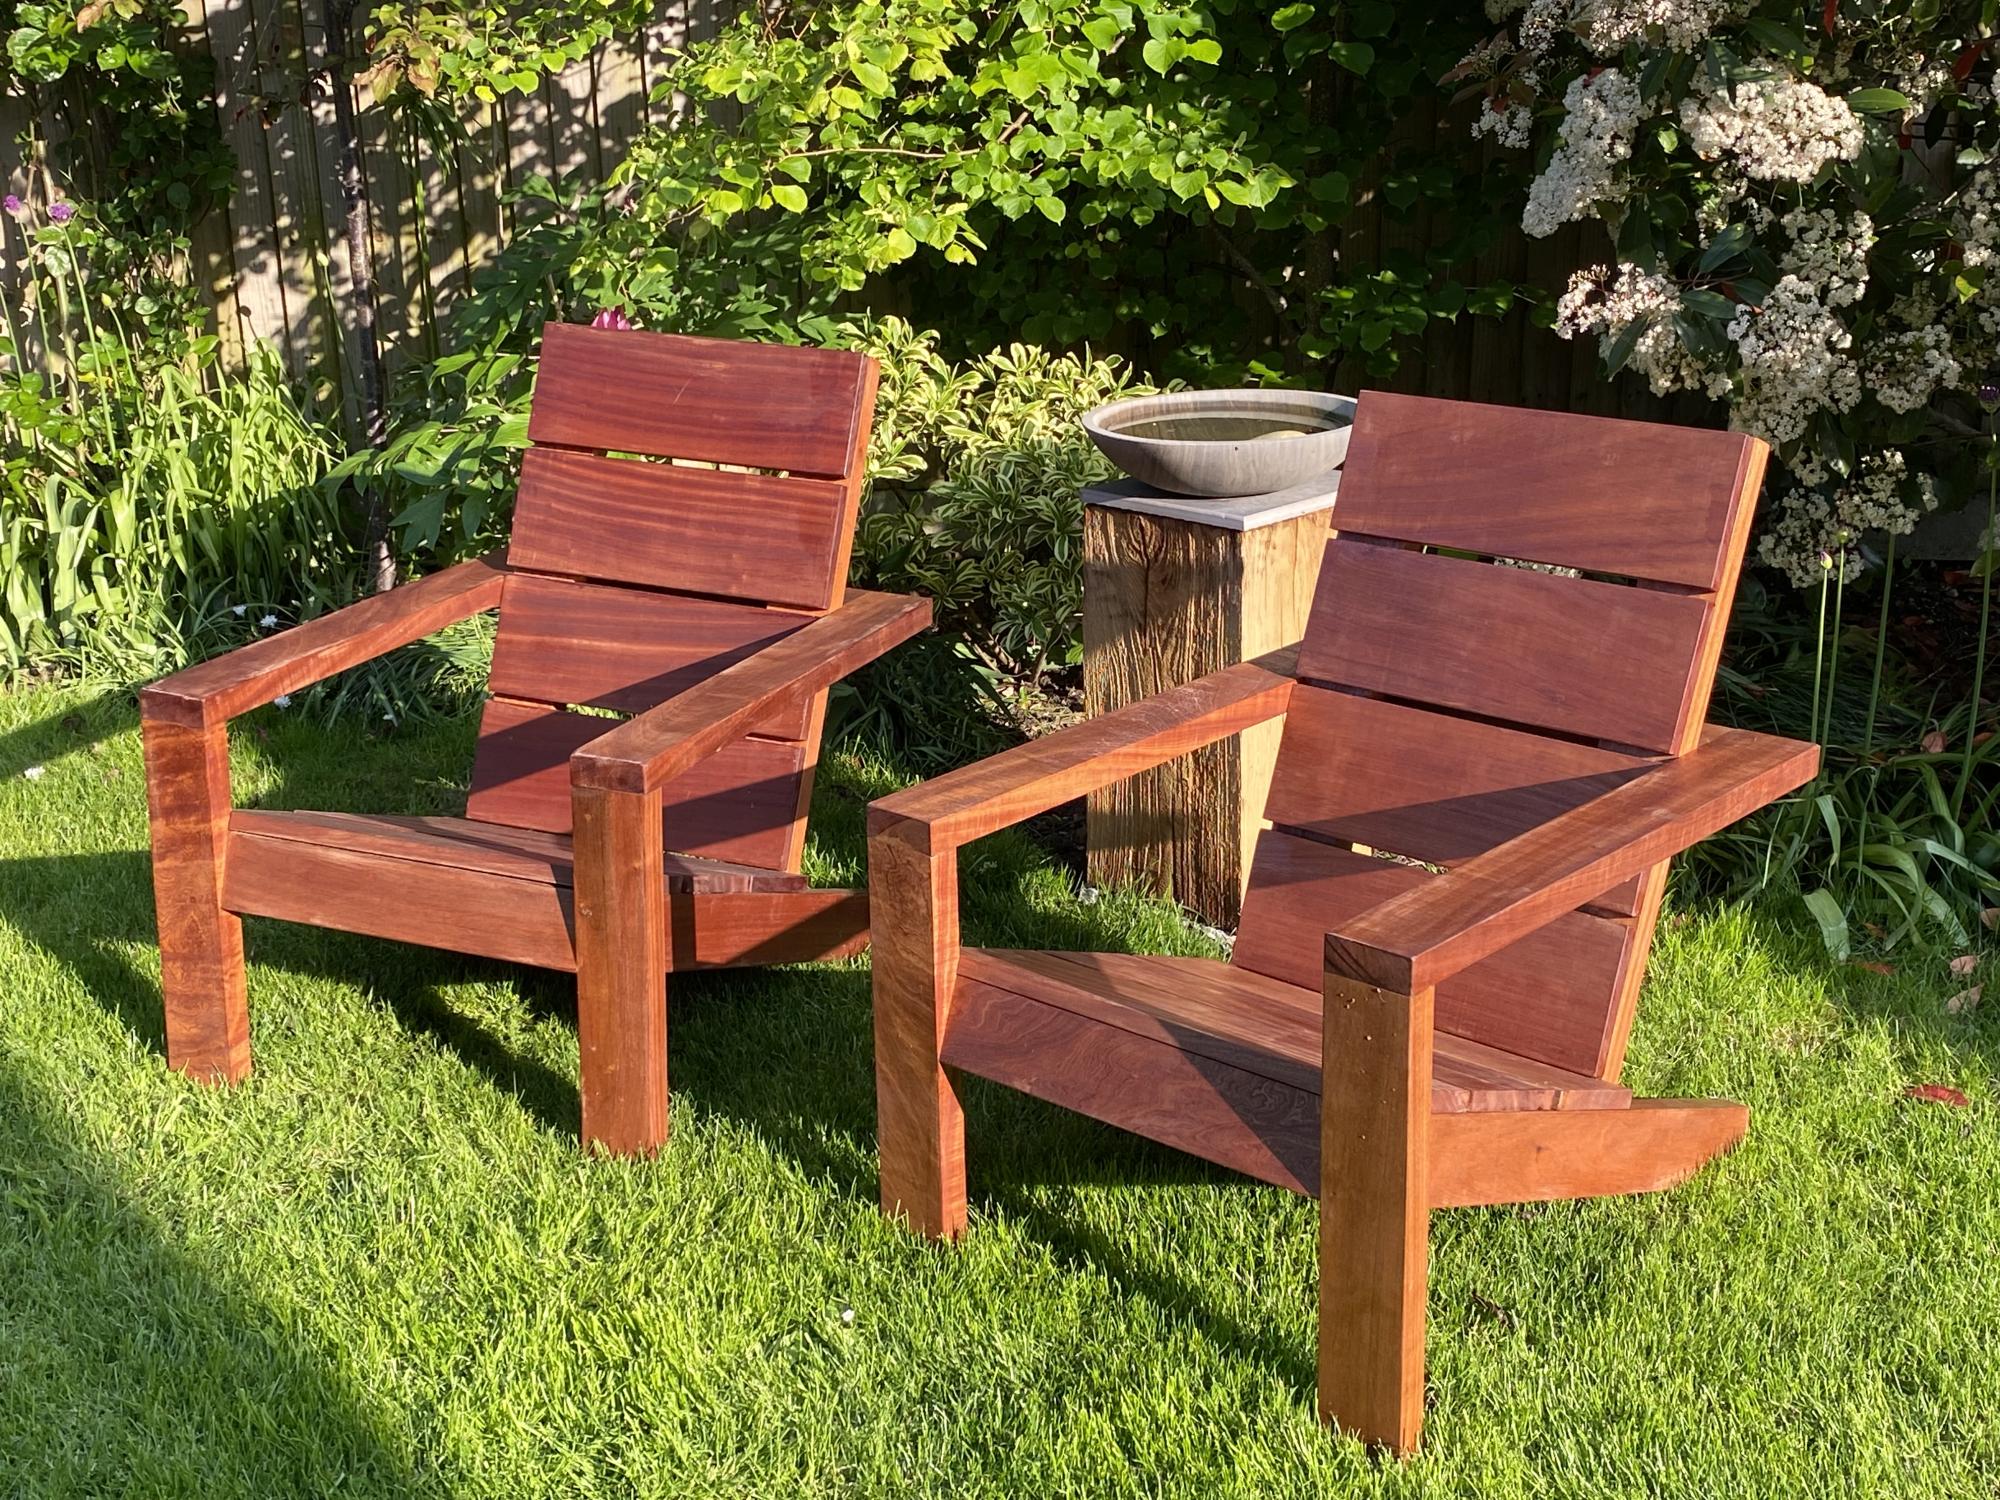
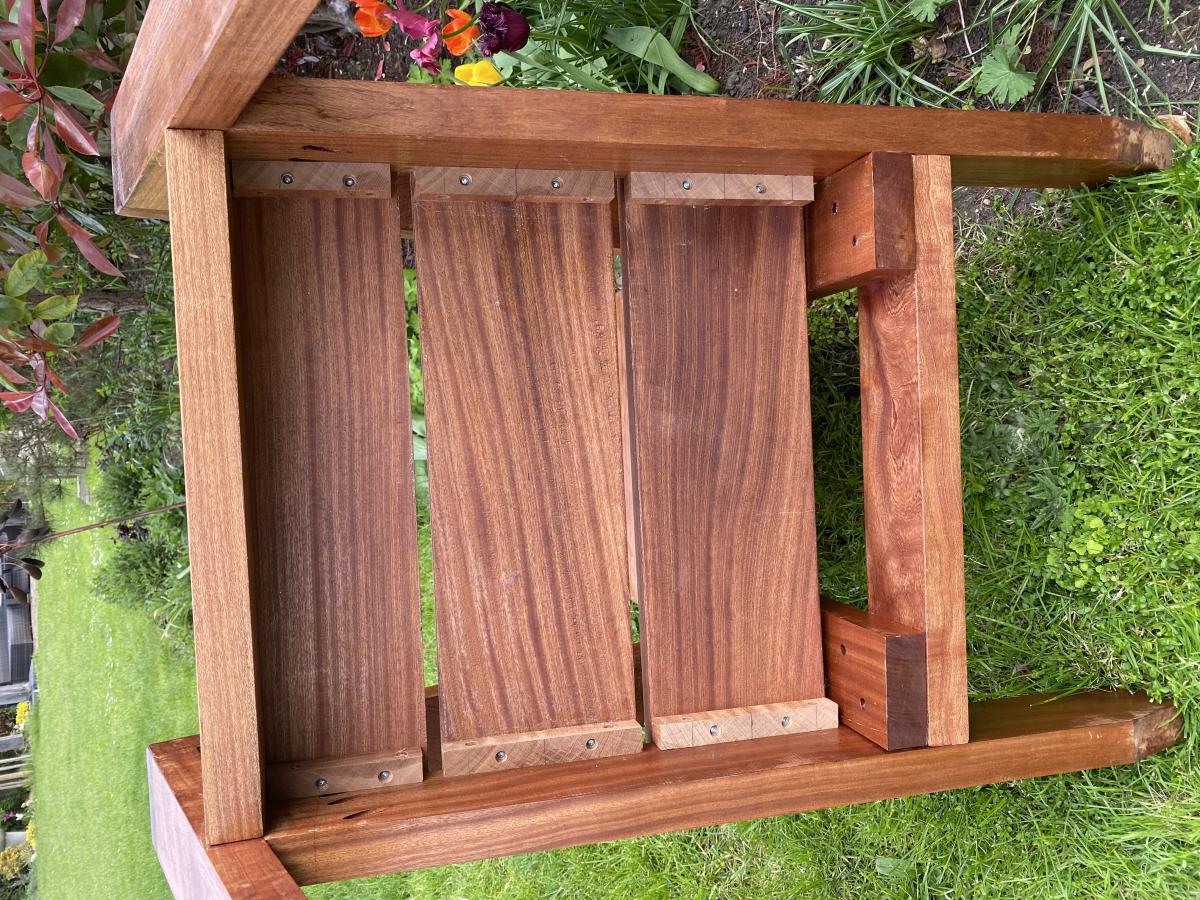
Loved design so decided on hardwood and no visible screw heads….. took a while but loved the result

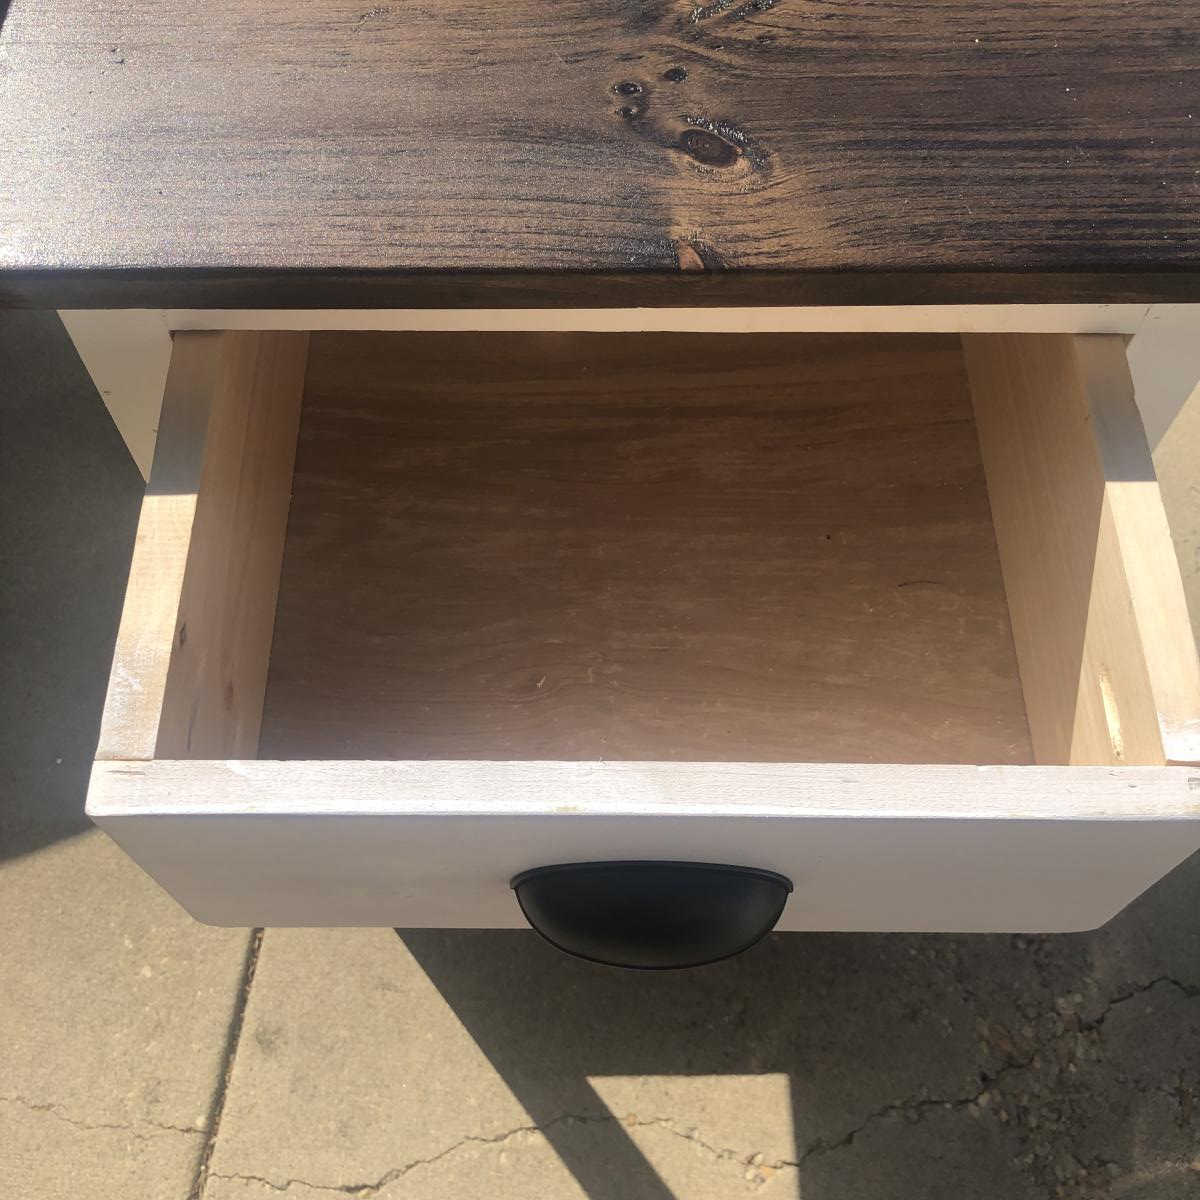
Nightstands are expensive. I don't have money. So, I thought I would build one. I kept this one rustic looking by not filling the holes but I did sand quite a bit. Just not enough to remove the printing on the boards, I think it looks good when it's got finish on it.

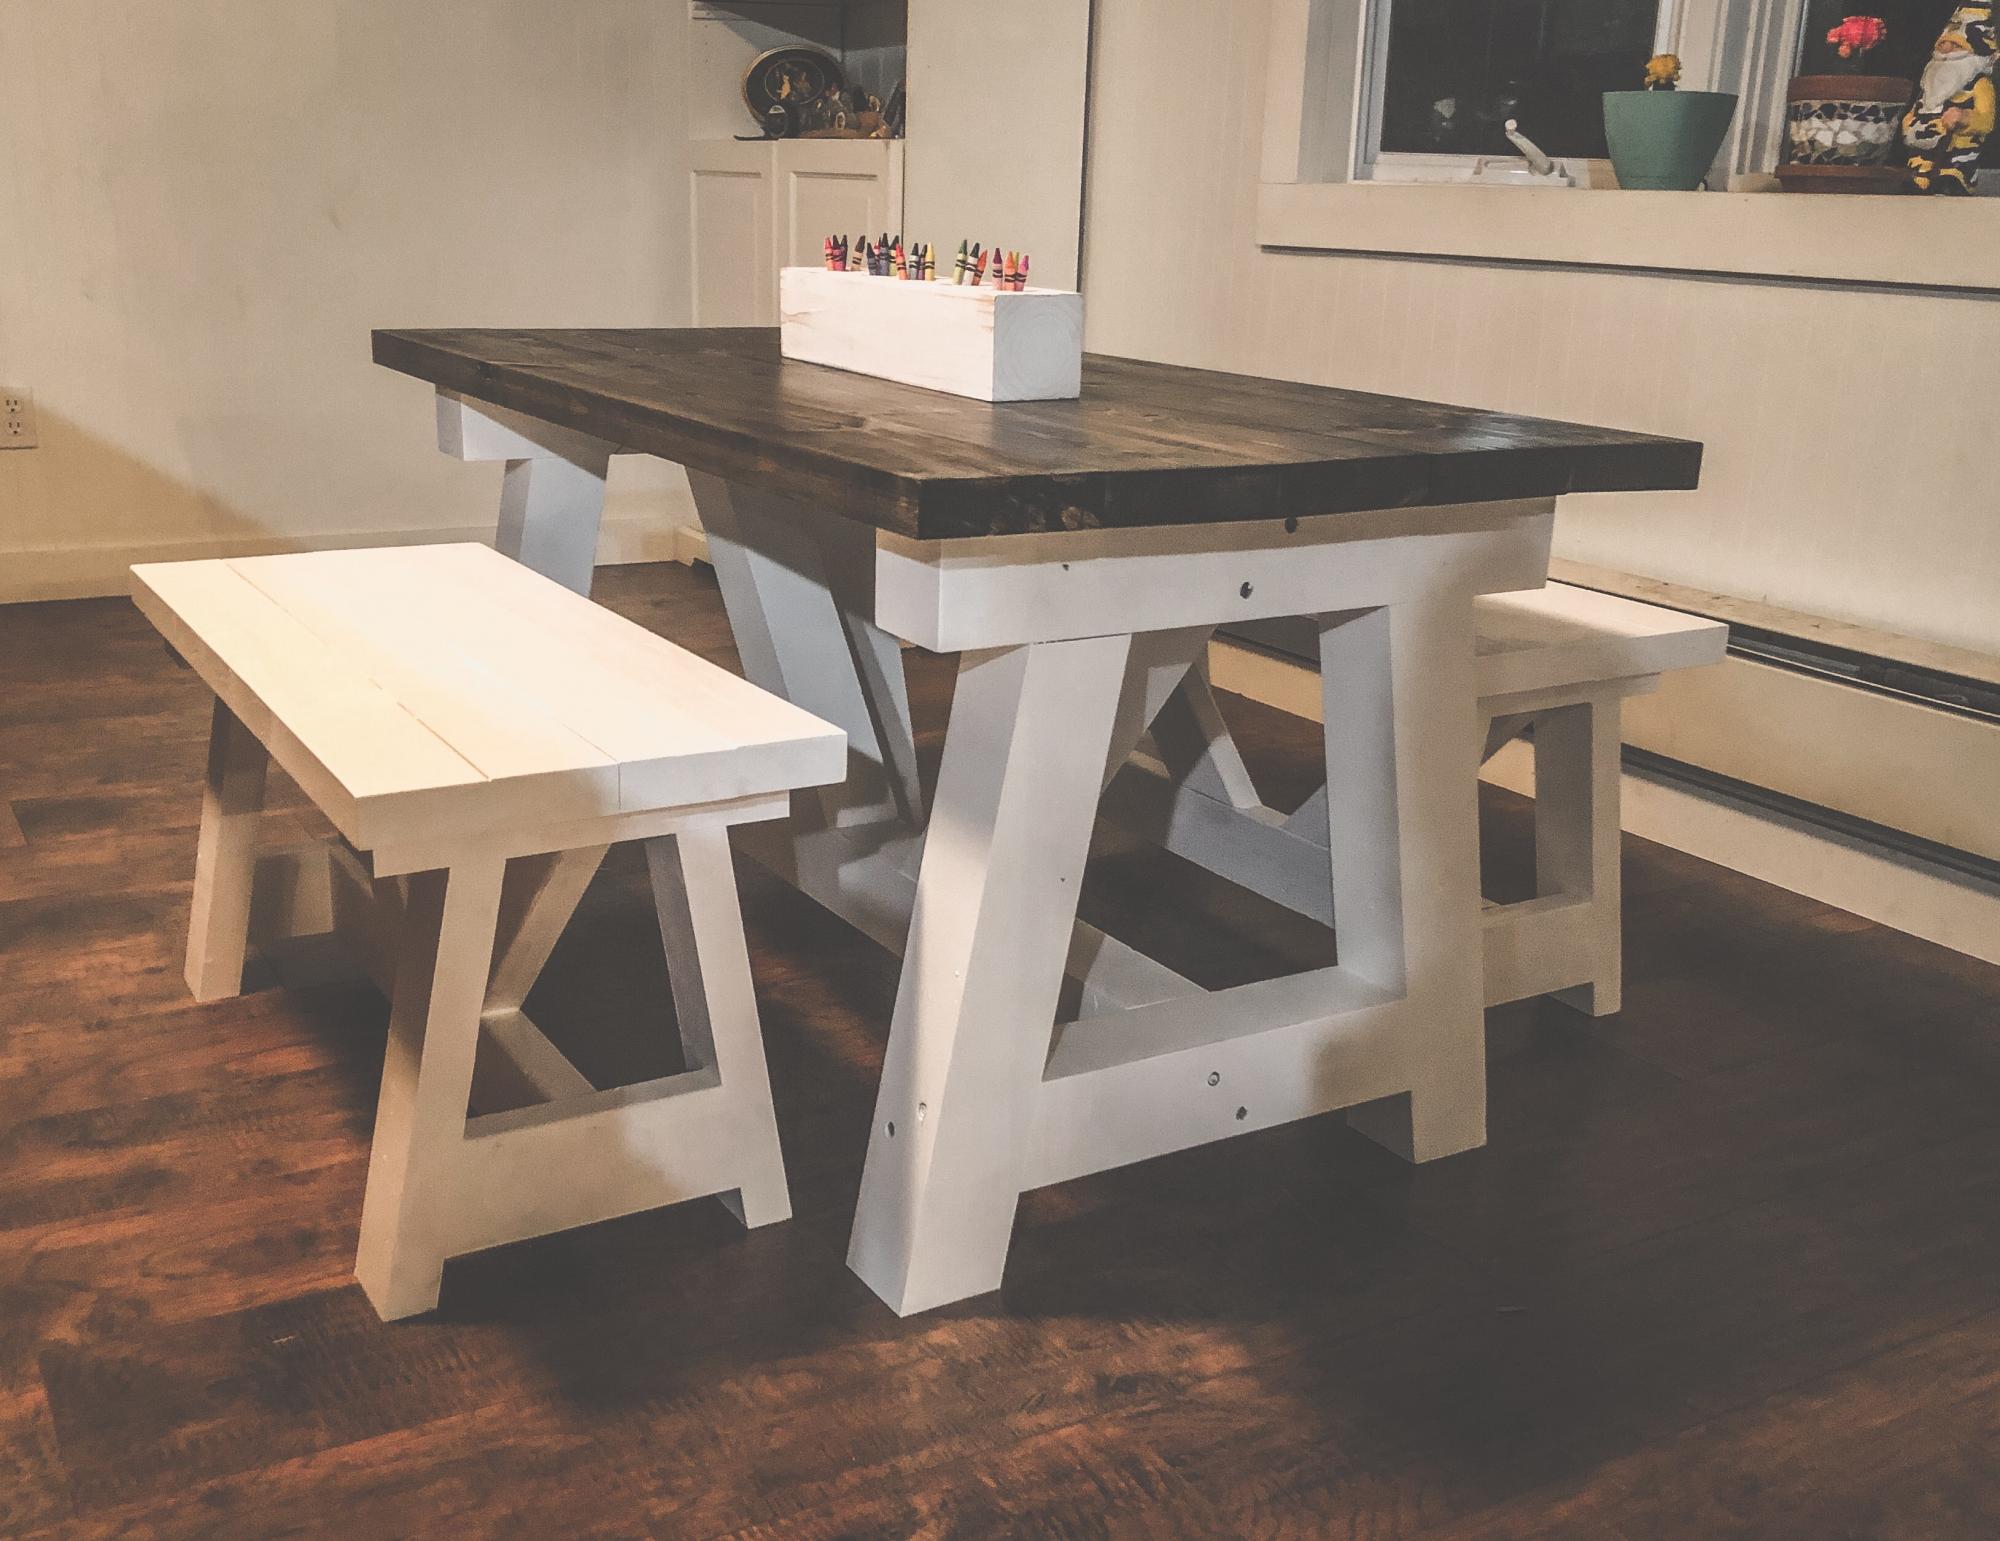
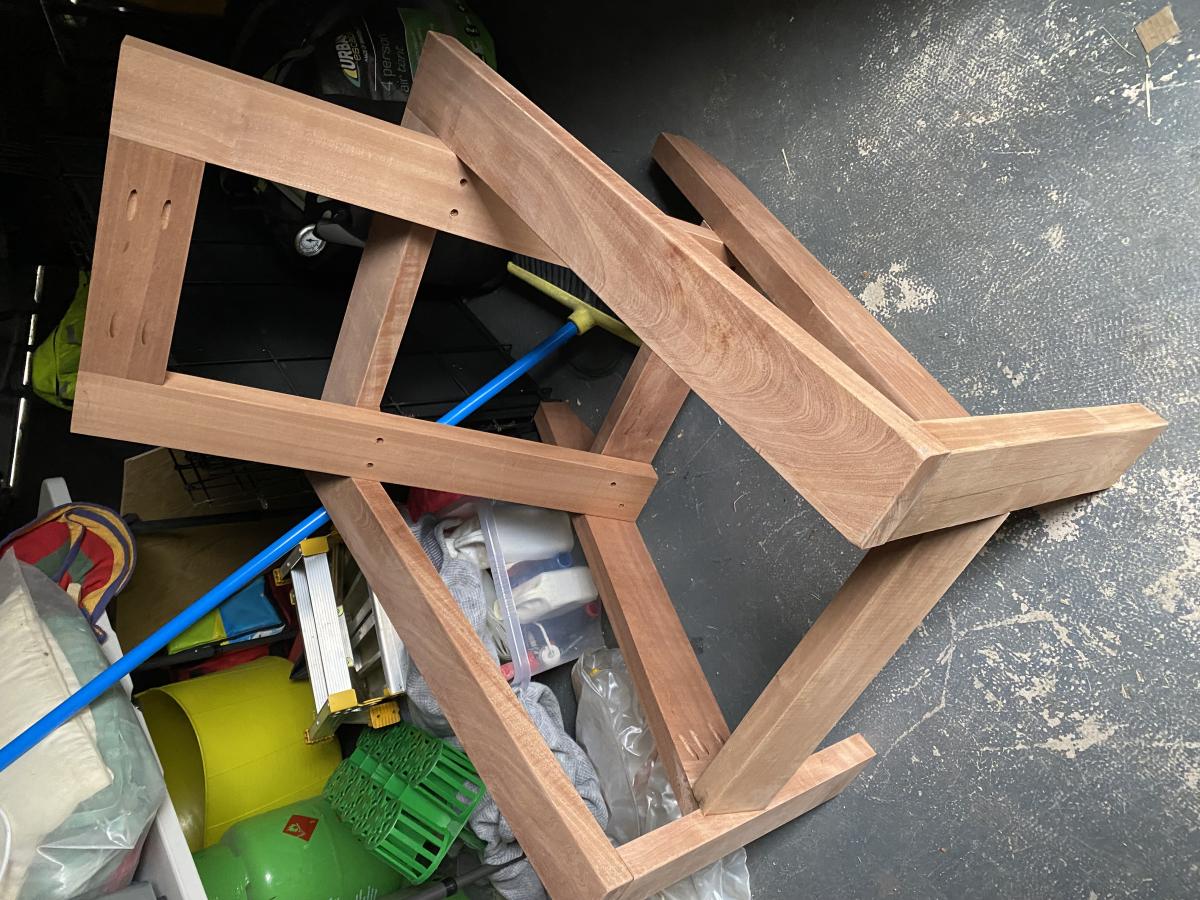
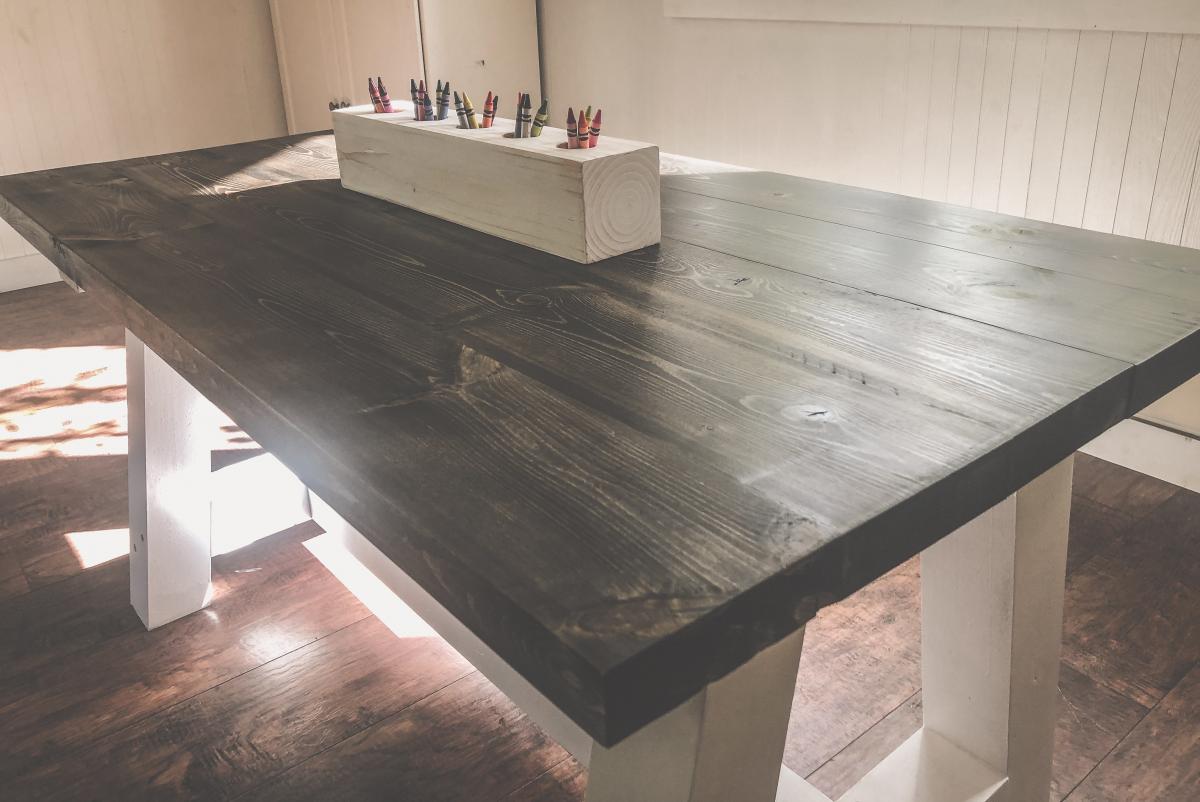
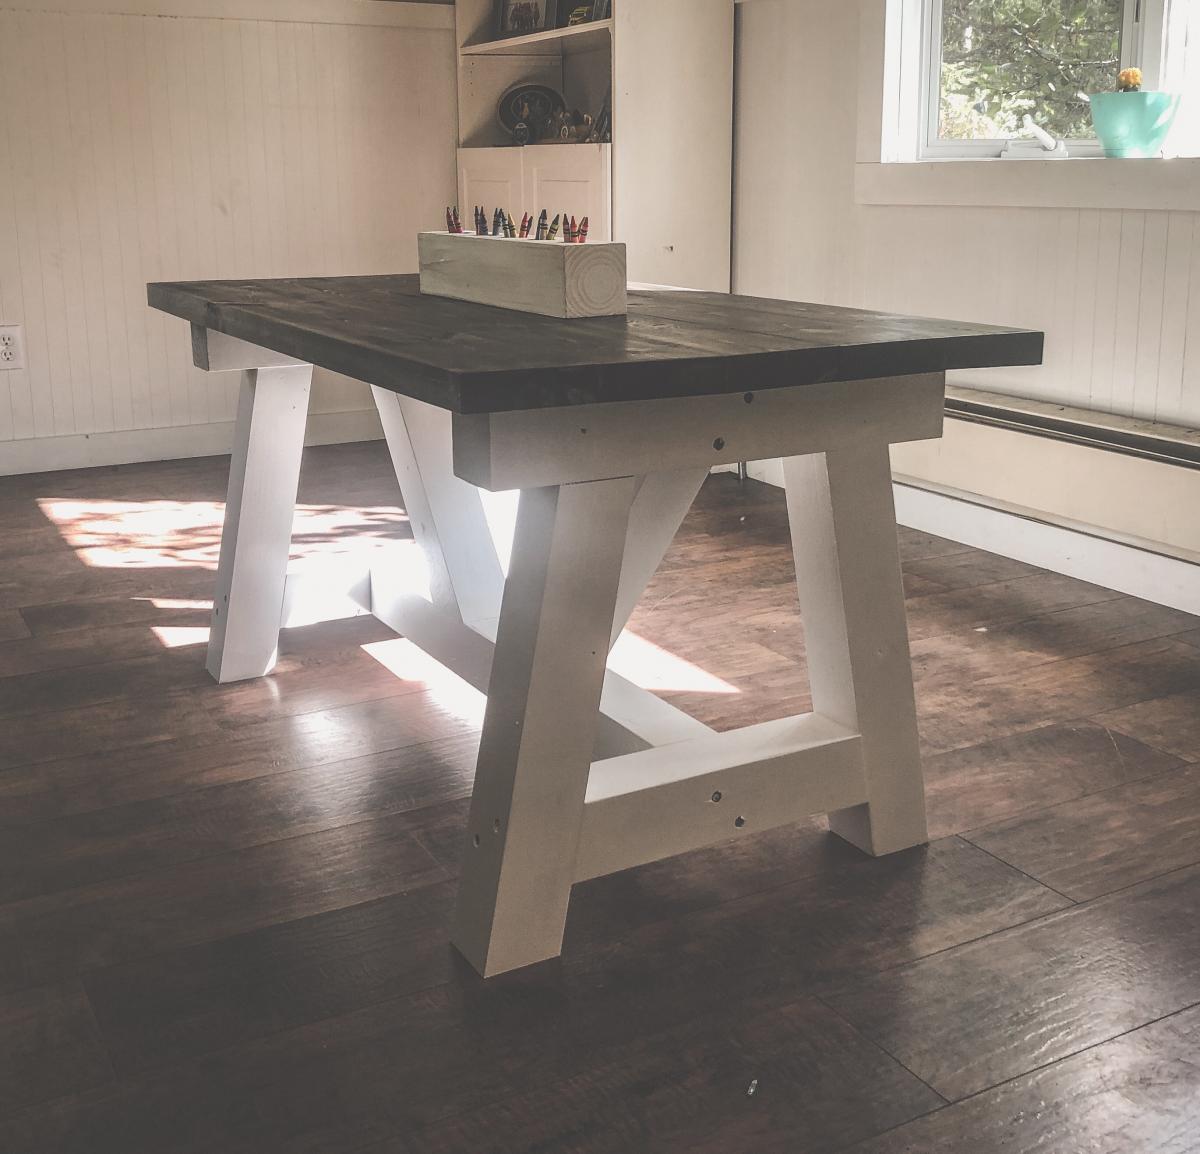
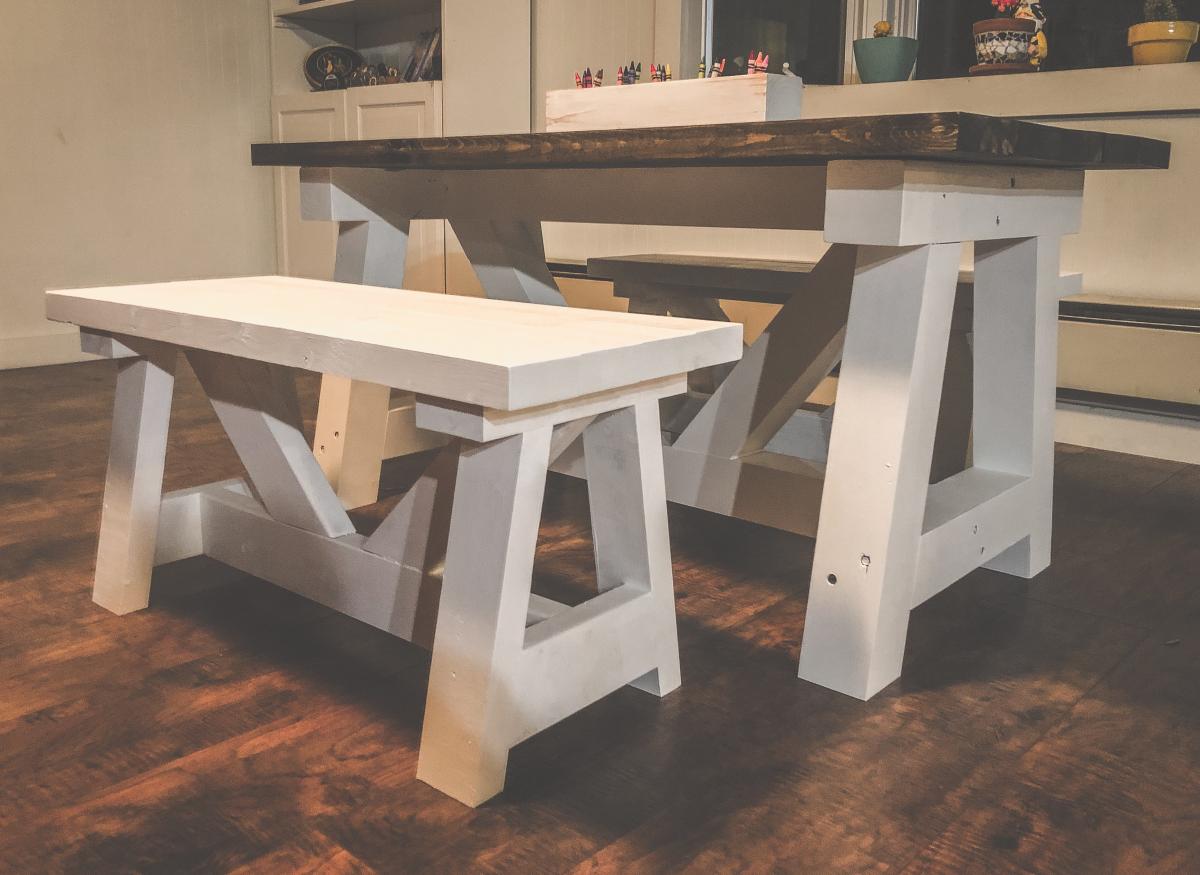
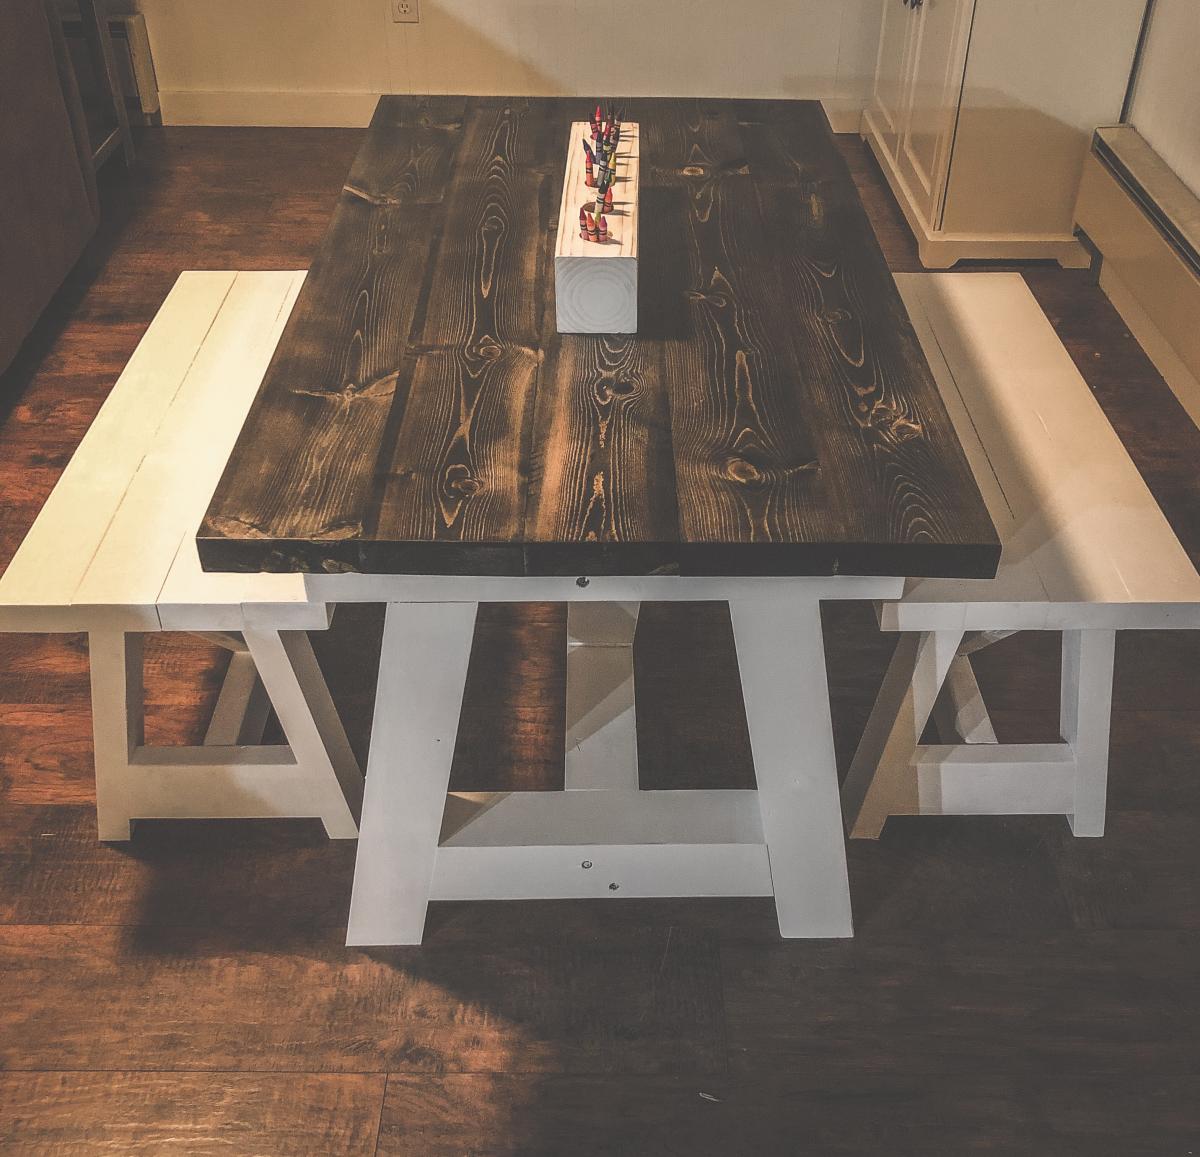
A friend asked for a kid sized farmhouse table and I knew immediately what plans I wanted to modify! The 4x4 truss table is my favorite go to table because it is extremely solid, easy to build and looks so nice! I know this table will hold up to the wear and tear of 4 kids for years! I also modified the 2x4 truss benches to match. They are the same style but not as chunky as the 4x4 truss bench plans.
Dimensions for table are 24”h x 24”w x 48”L
benches 16”h x 13.5”w x 33”L

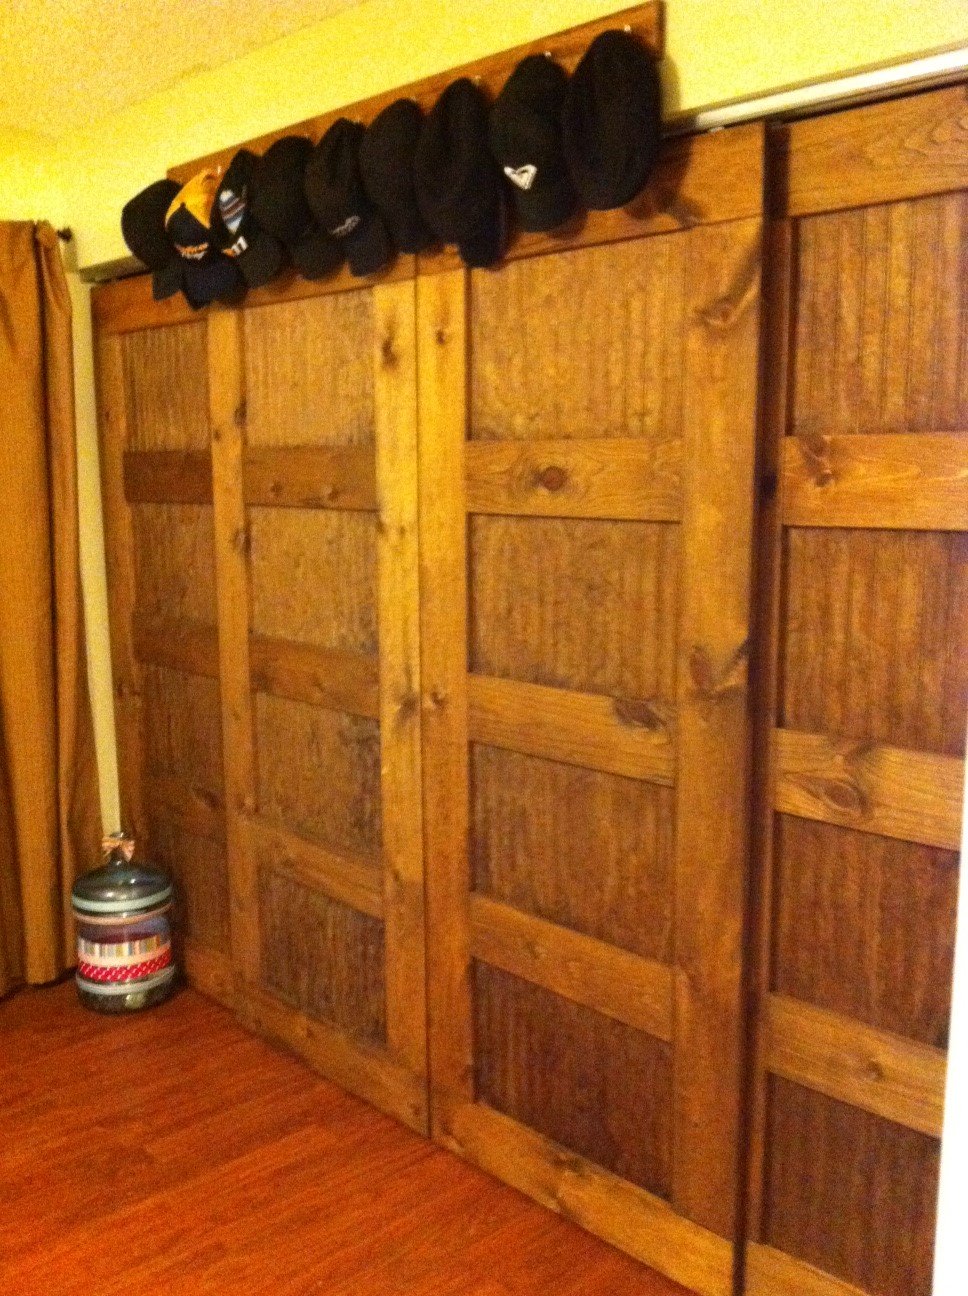
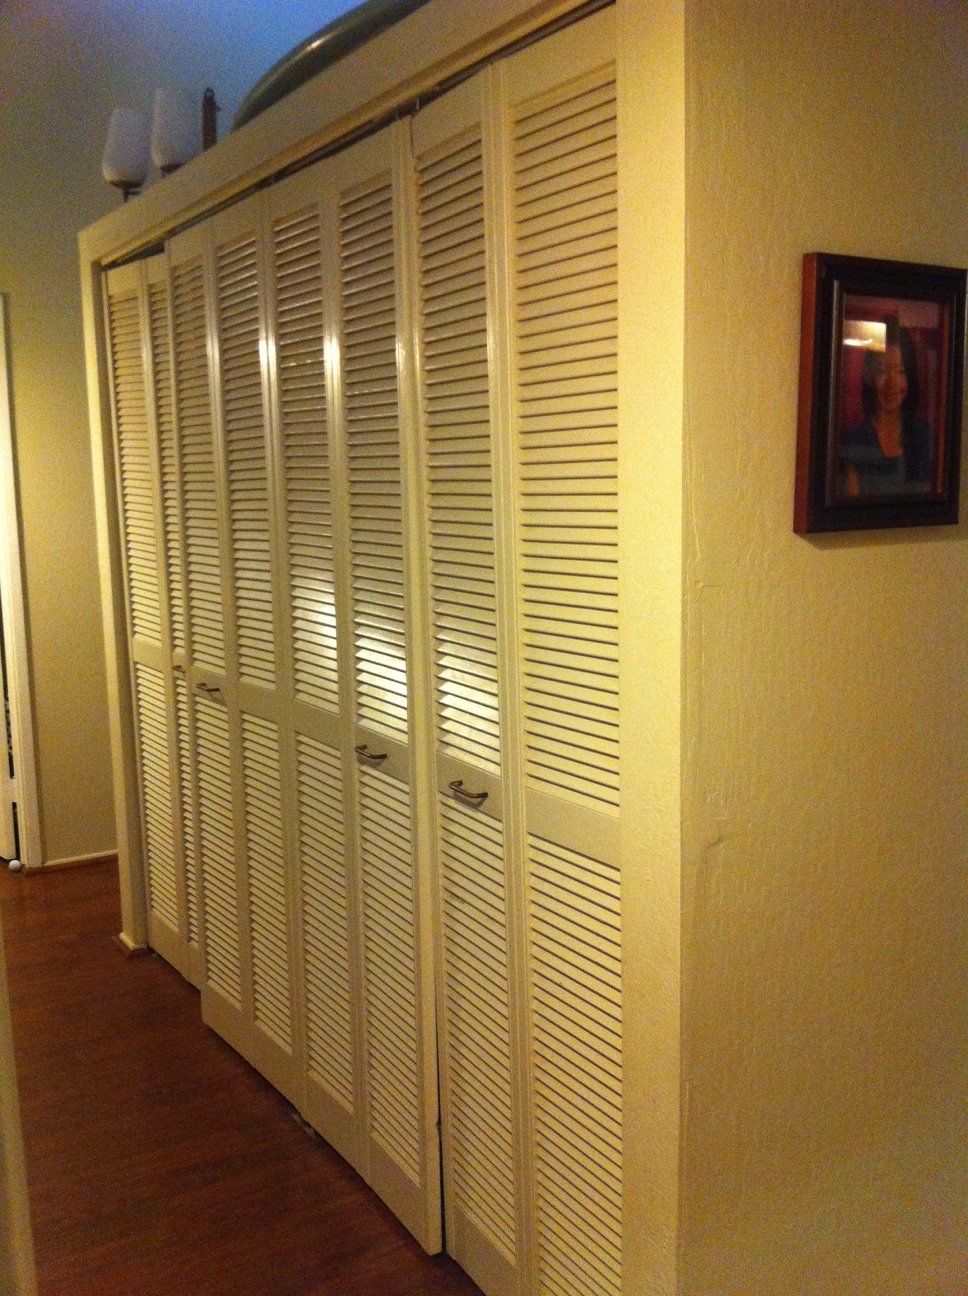
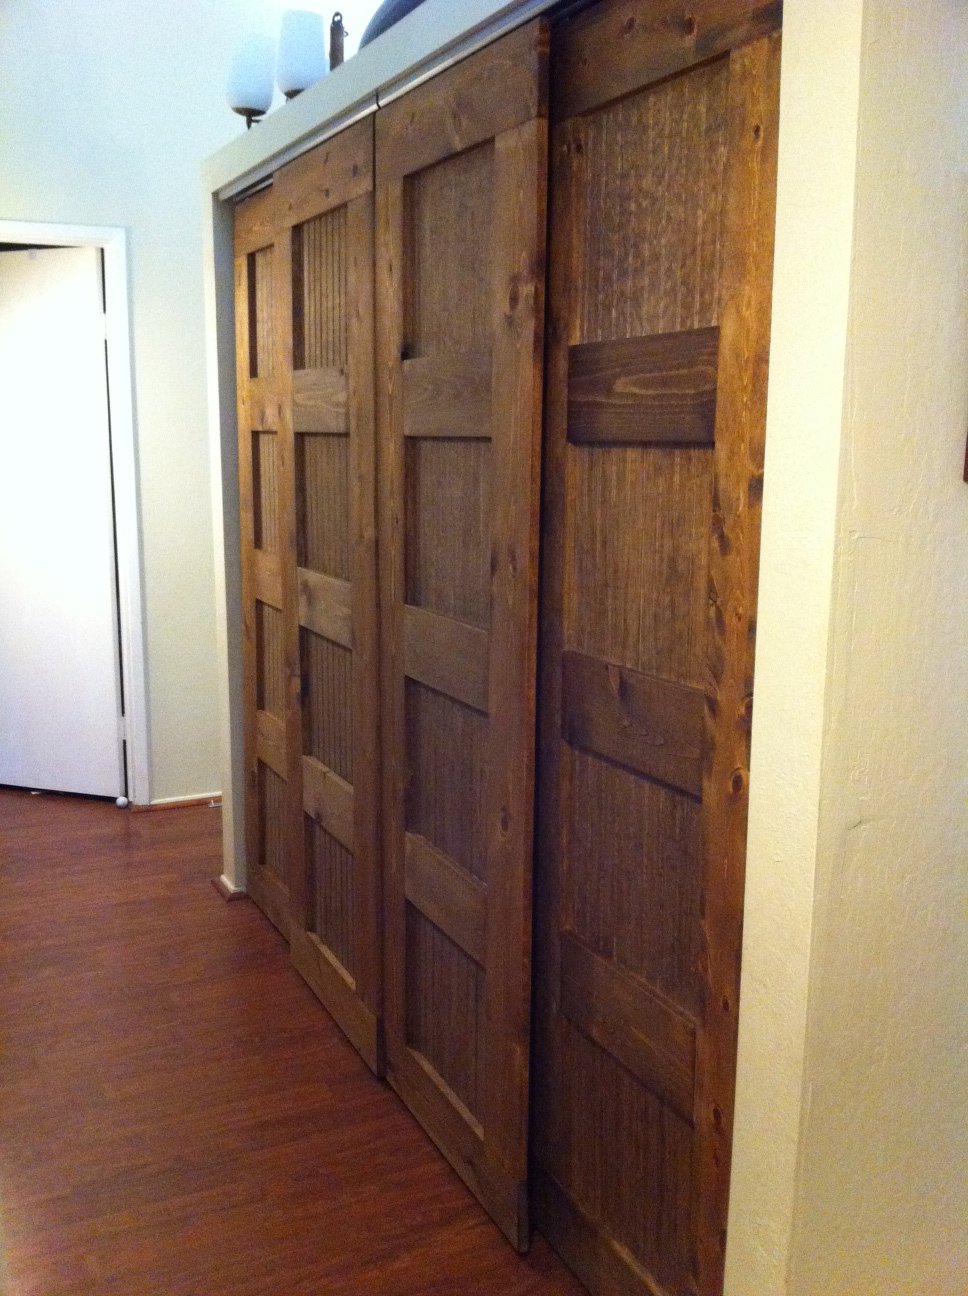
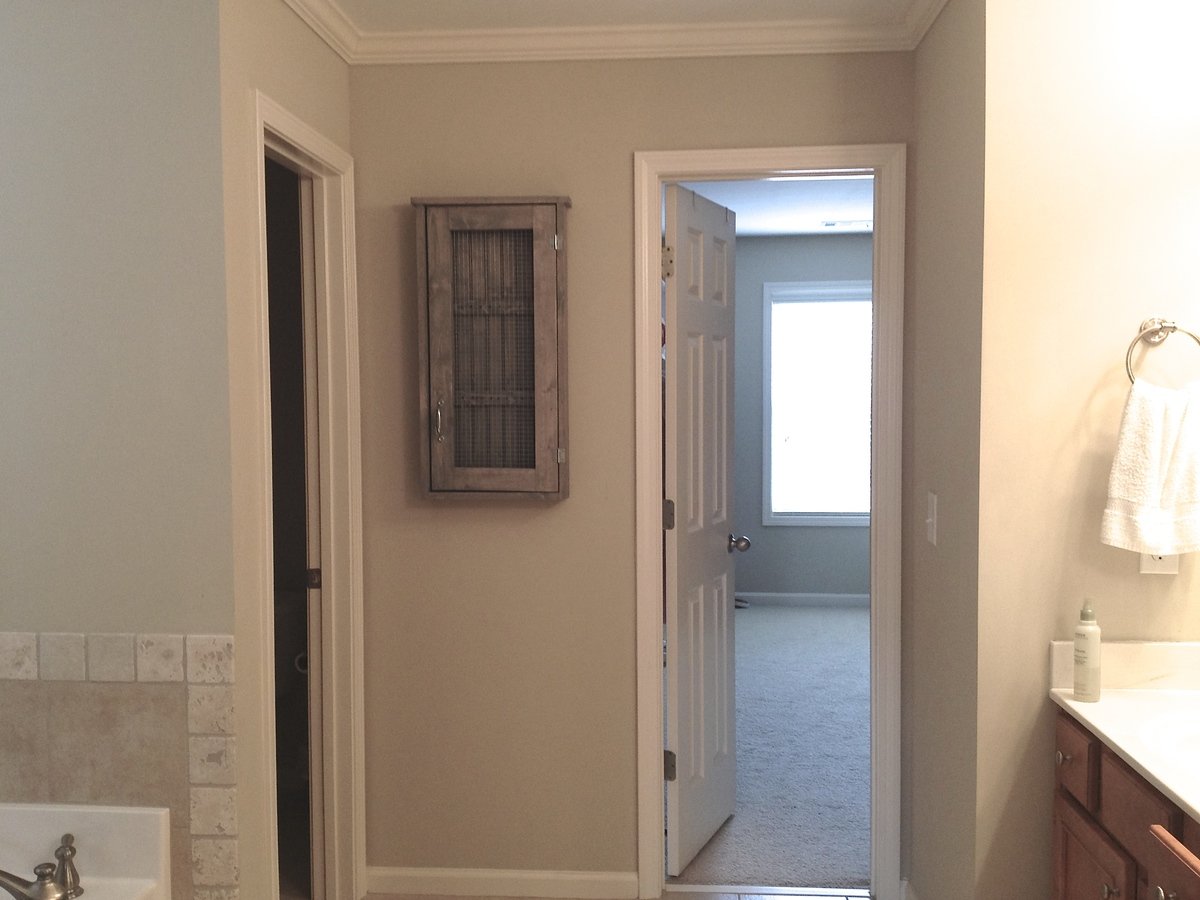
I loved the Idea of new closet doors and hated the idea of bi-folds. My house is crooked it seems. The doors don't sit straight and bi-folds always fall off their tracks. When I came upon the plans for Bypass Doors from Old Paint Designs I was hooked! I made 4 doors for the hallway in 1 day, oiled it with Danish Oil in Dark Walnut, hung it the next day and what a difference!! Glass is rather expensive in Hawaii and so is plexi-glass so I opted for Bead Board which gave it a more "country" feel instead of a more modern feel. I wish I could have used glass but the $150 price tag just wasn't fitting into my budget very well. My hubby loved the bypass doors so much he asked me to build them for our open closet. 2 days of work, 8 doors, 2 closets done!

Thu, 01/26/2012 - 13:48
Those turned out great. Love the bead-board and color.
Thu, 01/26/2012 - 23:24
Wow! Those turned out great! I love the idea of using beadboard - so creative!
In reply to Wow! Those turned out great! by oldpaintdesign
Fri, 02/17/2012 - 17:13
Thank you for your plans...love them. I've been asked to help a friend of mine build some doors for his house!
Tue, 08/28/2012 - 15:27
Great job on the doors! I am interested in doing this myself. I will have to make 4 doors for my closet as well since I have such a large opening. Can you tell me what the measurments of your closets are? Also what are the dimensions of the pine that you used? Thanks a bunch!
In reply to Bypass Closet Doors by Jilley27 (not verified)
Tue, 08/28/2012 - 18:44
My closet opening is about 8' across. Each door is 26" wide and 79" tall. I made them so the would have a 1" overlap on each side...
I used 1x6 @ 8' lengths of pine. I like the really knotty pine with lots of character! Have fun building! These were pretty simple to make once you get all the boards cut.

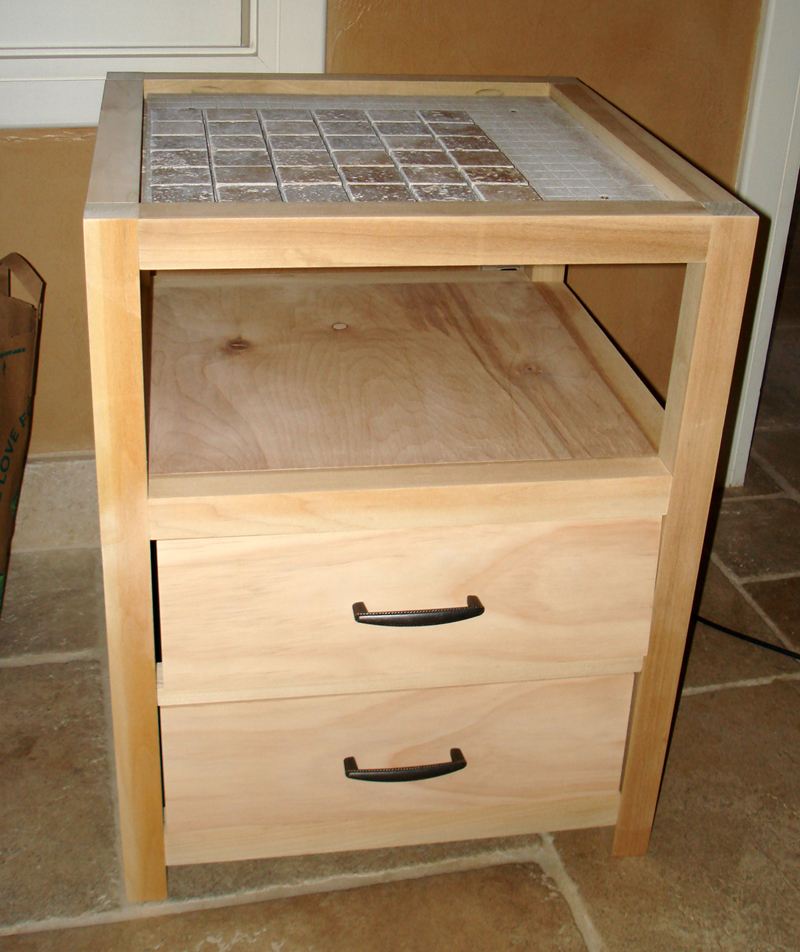
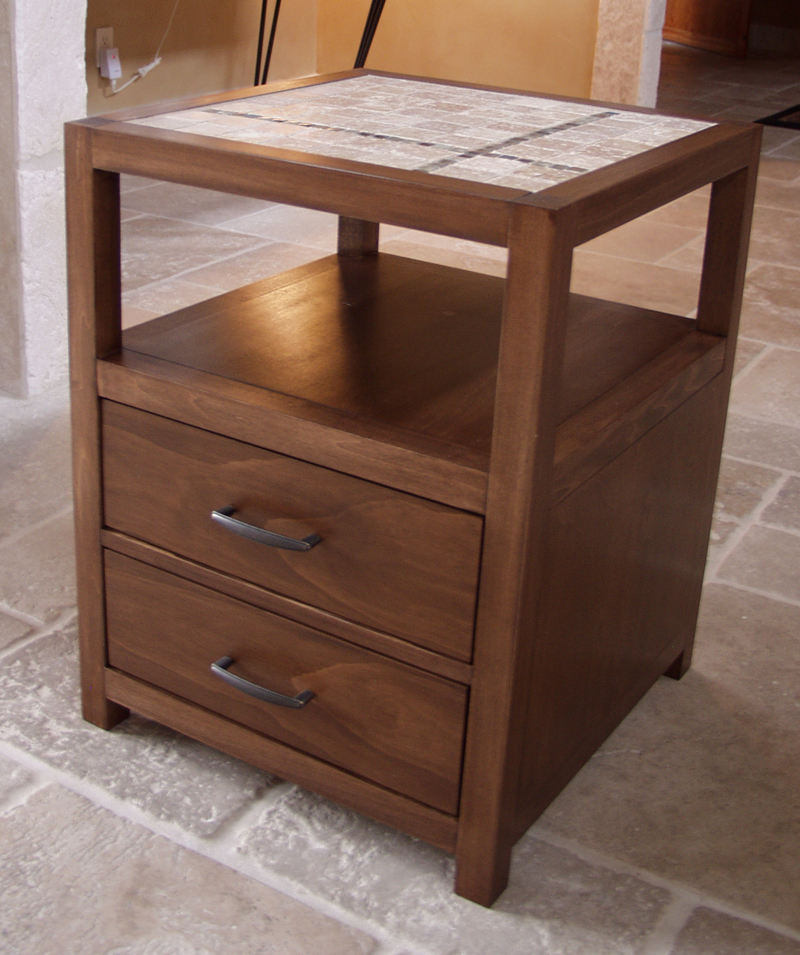
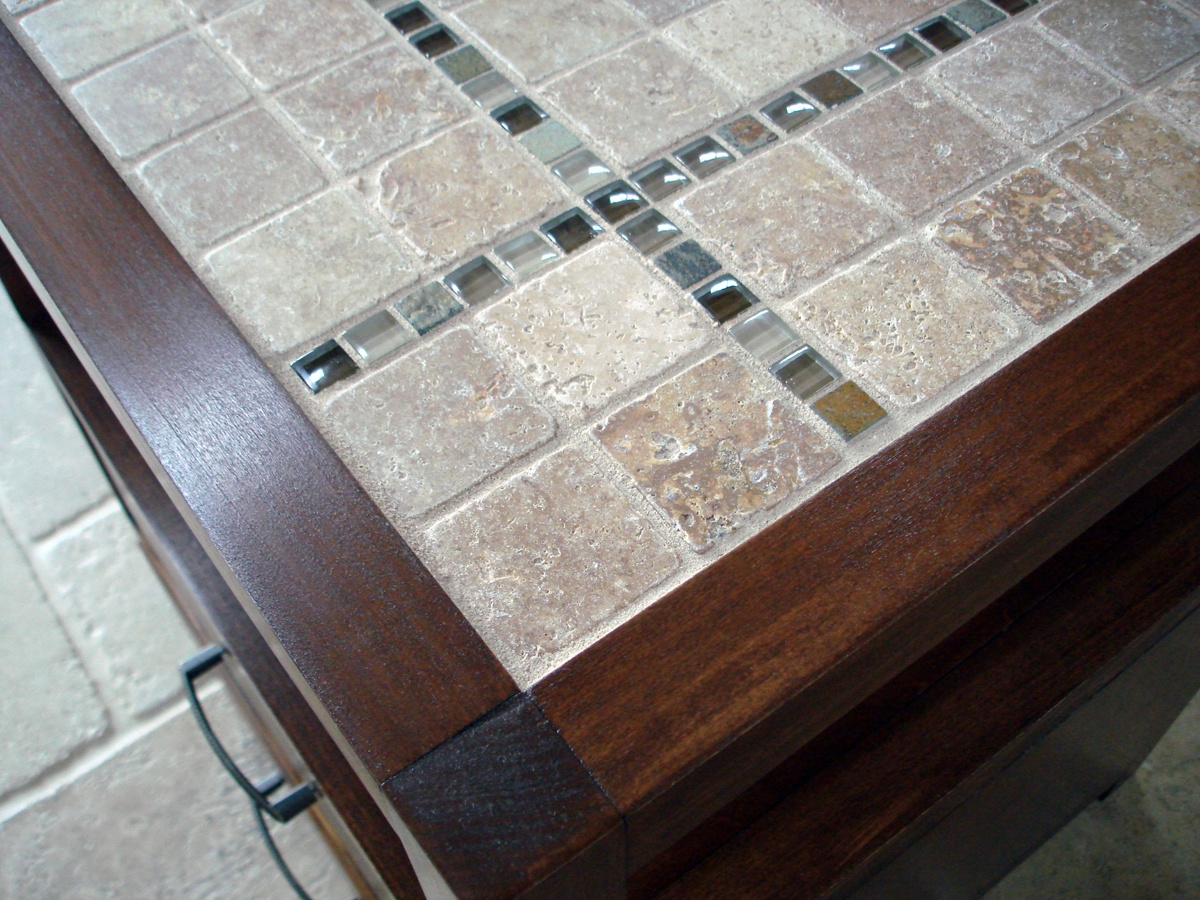
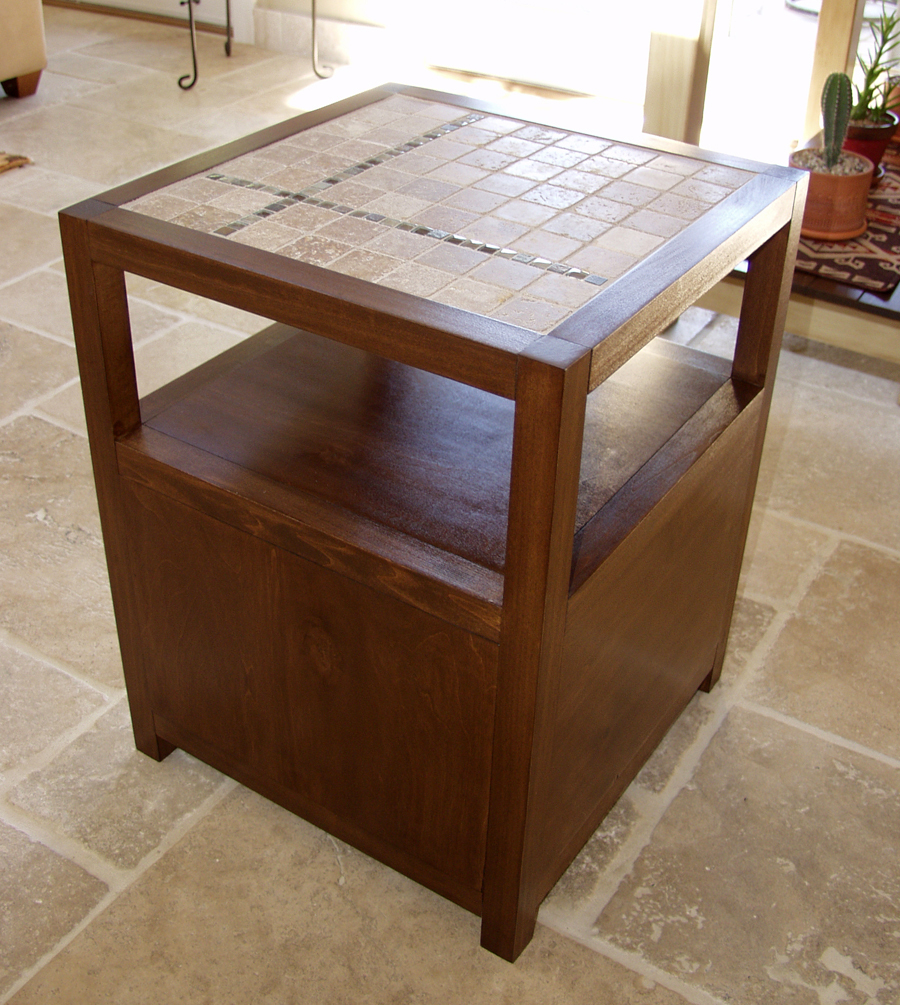
I used Ana's plan, but modified it to incorporate a tiled top. If you want to do the same, you simply align the upper shelf with the bottom of the 2x2 frame, fill it in with hardibacker cement board, and tile over that. My stone was thicker than the border used, so I made a narrow shim in order to accommodate and bring them all to the same level.

Thu, 02/02/2012 - 11:03
Simply stunning! Love the tile top, but the wood construction is breathtaking! Thank you so much for sharing, absolutely love!
Fri, 02/03/2012 - 07:34
I love the tile top and am blown away by the finish. Who knew poplar could look so rich!
Fri, 02/03/2012 - 10:18
Wow! The stain is amazing! It's so perfect! That takes a lot of time and patience, but clearly it was so worth it. Great job!

Sat, 02/04/2012 - 00:54
Love, love, love the stain on this. Your construction is perfect and looks like a high end piece! Congrats!
Sat, 06/30/2012 - 11:24
This table is obviously put together like a pro, the tile top is beyond beautiful and creative but what really gets me is your GORGEOUS staining work. I struggle with staining on every project! Any advice or tips on how to get a beautiful finish like yours? You should give a tutorial!

In reply to AMAZING STAIN JOB! by Julie D. (not verified)
Thu, 07/19/2012 - 08:05
Julie, Thanks so much for the feedback. I hate to admit it, but I am unable to get anything to look decent with an oil-based stain; all I get is blotch. I see others on the site with gorgeous colors and finishes that I want, but I can't use them. I can only get consistent results with the water-based stain, and I have to use the pre-stain wood conditioner. With 2 coats of stain, I have fairly consistent results (applying with foam brushes and wiping off with paper towels). On this particular project, I had to mix several colors and layers to get exactly the tone that I wanted.
I'm on my last can of Bartley's gel polyurethane, and they no longer make the product. It allows such control in getting a perfect finish. I don't know what I'm going to use when my can runs out!!
Thu, 11/08/2012 - 10:26
This end table is amazing; looks like an end table you'd buy in a high-end furniture store. The finished looks perfect and the tile top is really creative.
Question: where did you find the 2x2 poplar? I'm looking for some to use for the Rhyan Coffee Table and can't find anything longer than 3 feet.
In reply to Awesome by Newbie07 (not verified)
Thu, 11/08/2012 - 11:57
Thanks for the feedback!! I had to go to a bigger lumber yard to get the poplar 2x2s (Austin Fine Lumber in Austin, TX). The poplar was the cheapest (by far) of the better 2x2s, and the guys told me it wouldn't take a stain very well. They were wrong; it took the stain beautifully. The 2x2s were perfectly straight and had straight edges...much different than the ones from Home Depot or Lowe's.

Mon, 01/20/2014 - 15:45
How did you do the tile to the wood ? We are building a coffee table and two end tables just like them, we just don't know which way is best to attach the tile

My daughter wanted a table to fit a specific location .... your plan for a side table fit the bill - with some dimensional adjustments
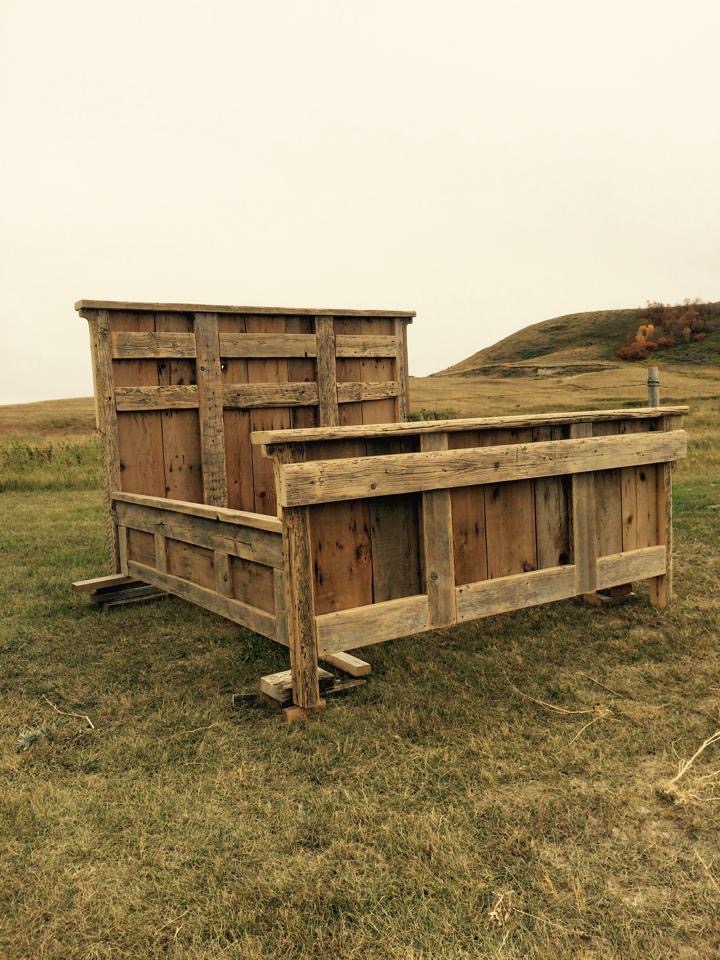
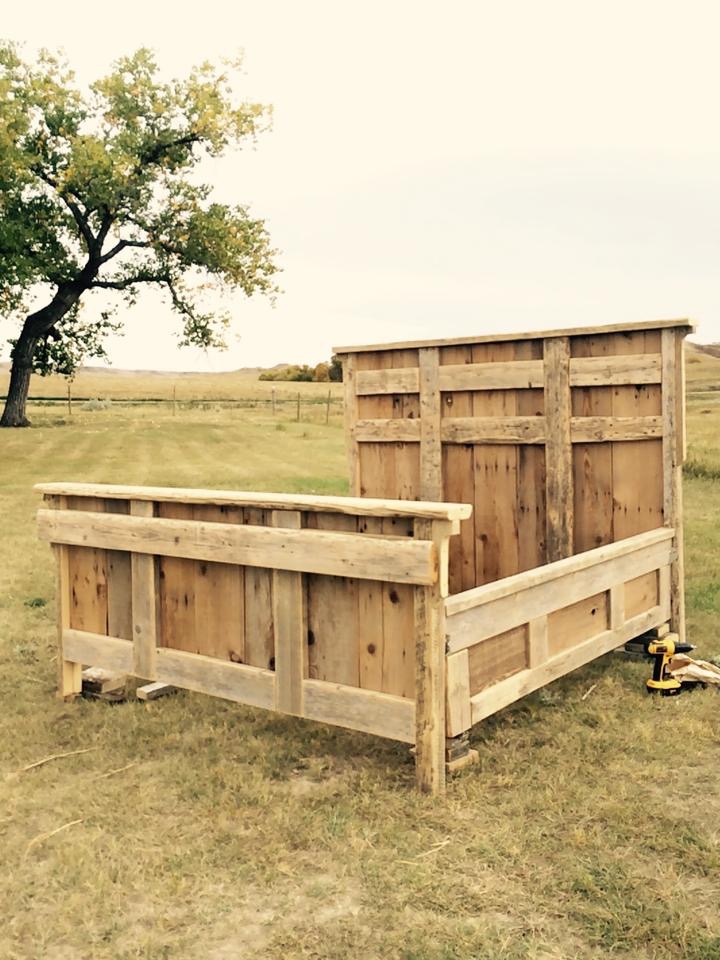
Built for a customer out of reclaimed 2x6 spruce corrral boards. There was a lot of sanding involved in prepping this wood, but I couldn’t be happier with how it turned out!
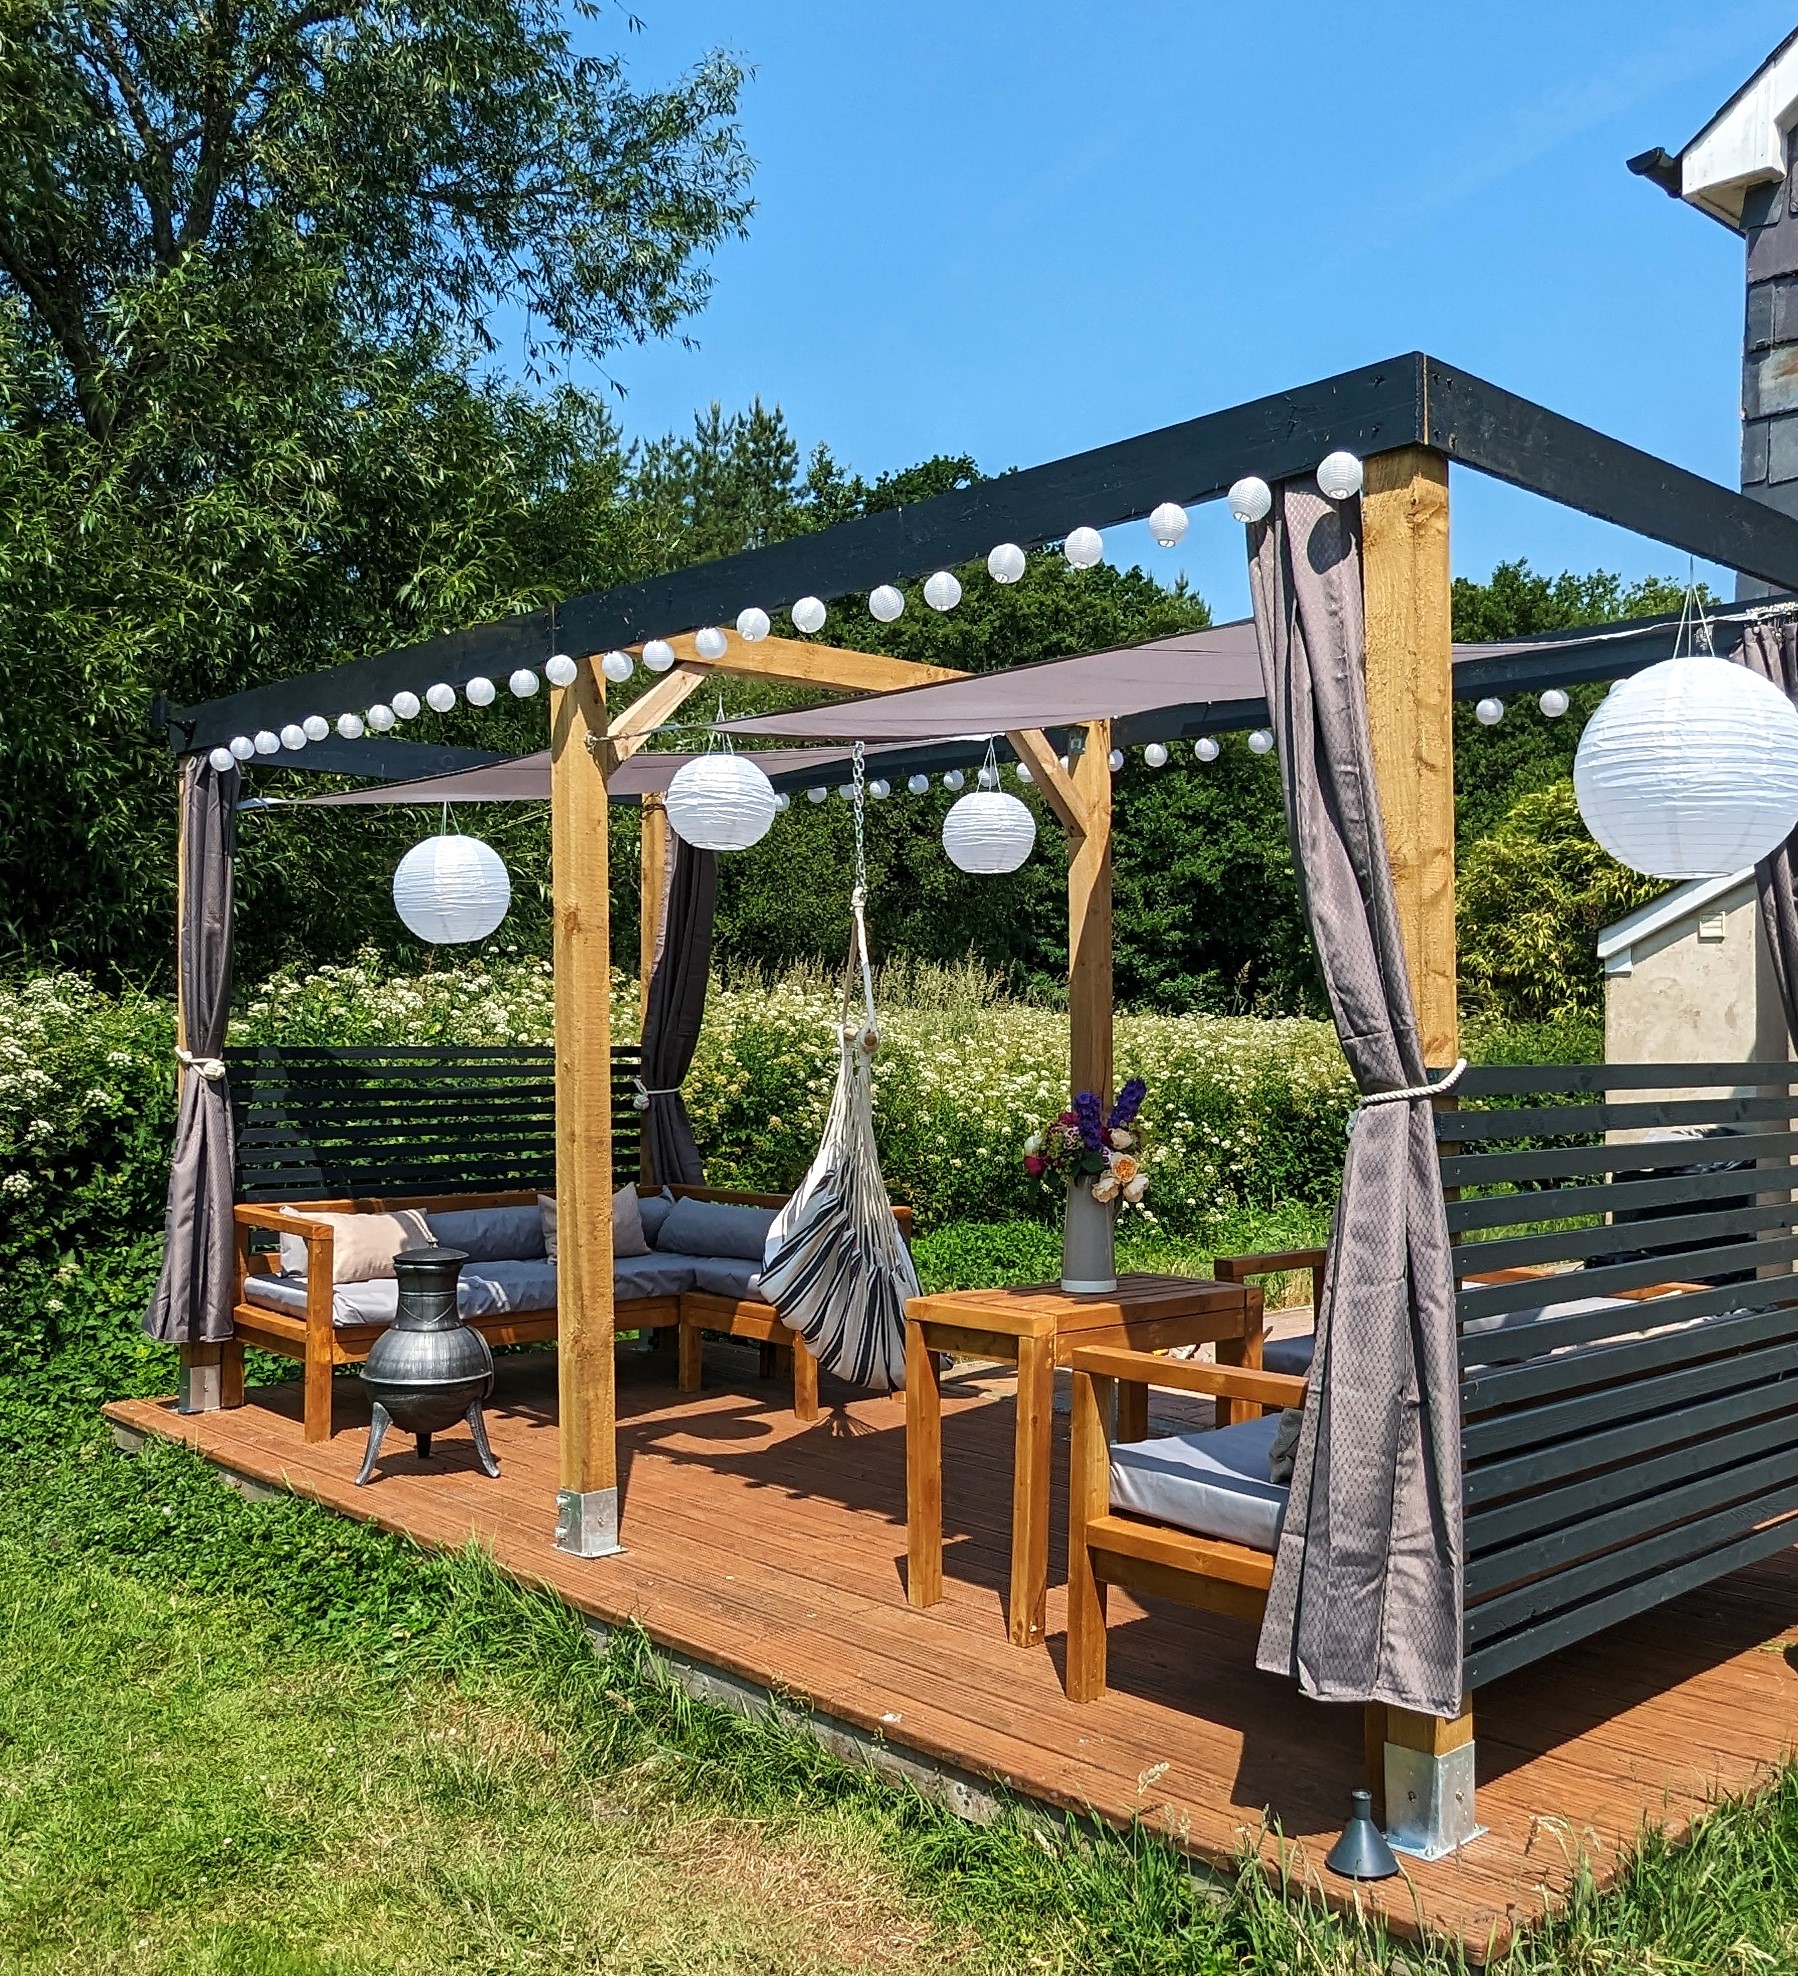
My first ever attempt at woodworking, after I built the pergola I used the 2x4 outdoor sectional plans and modified slightly to fit the space I had. So easy to follow and delighted with the result. The hardest part of the whole project was making the cushions, that's how easy the woodworking plans were to follow!
@louspoutsstuff tiktok - Lou brown
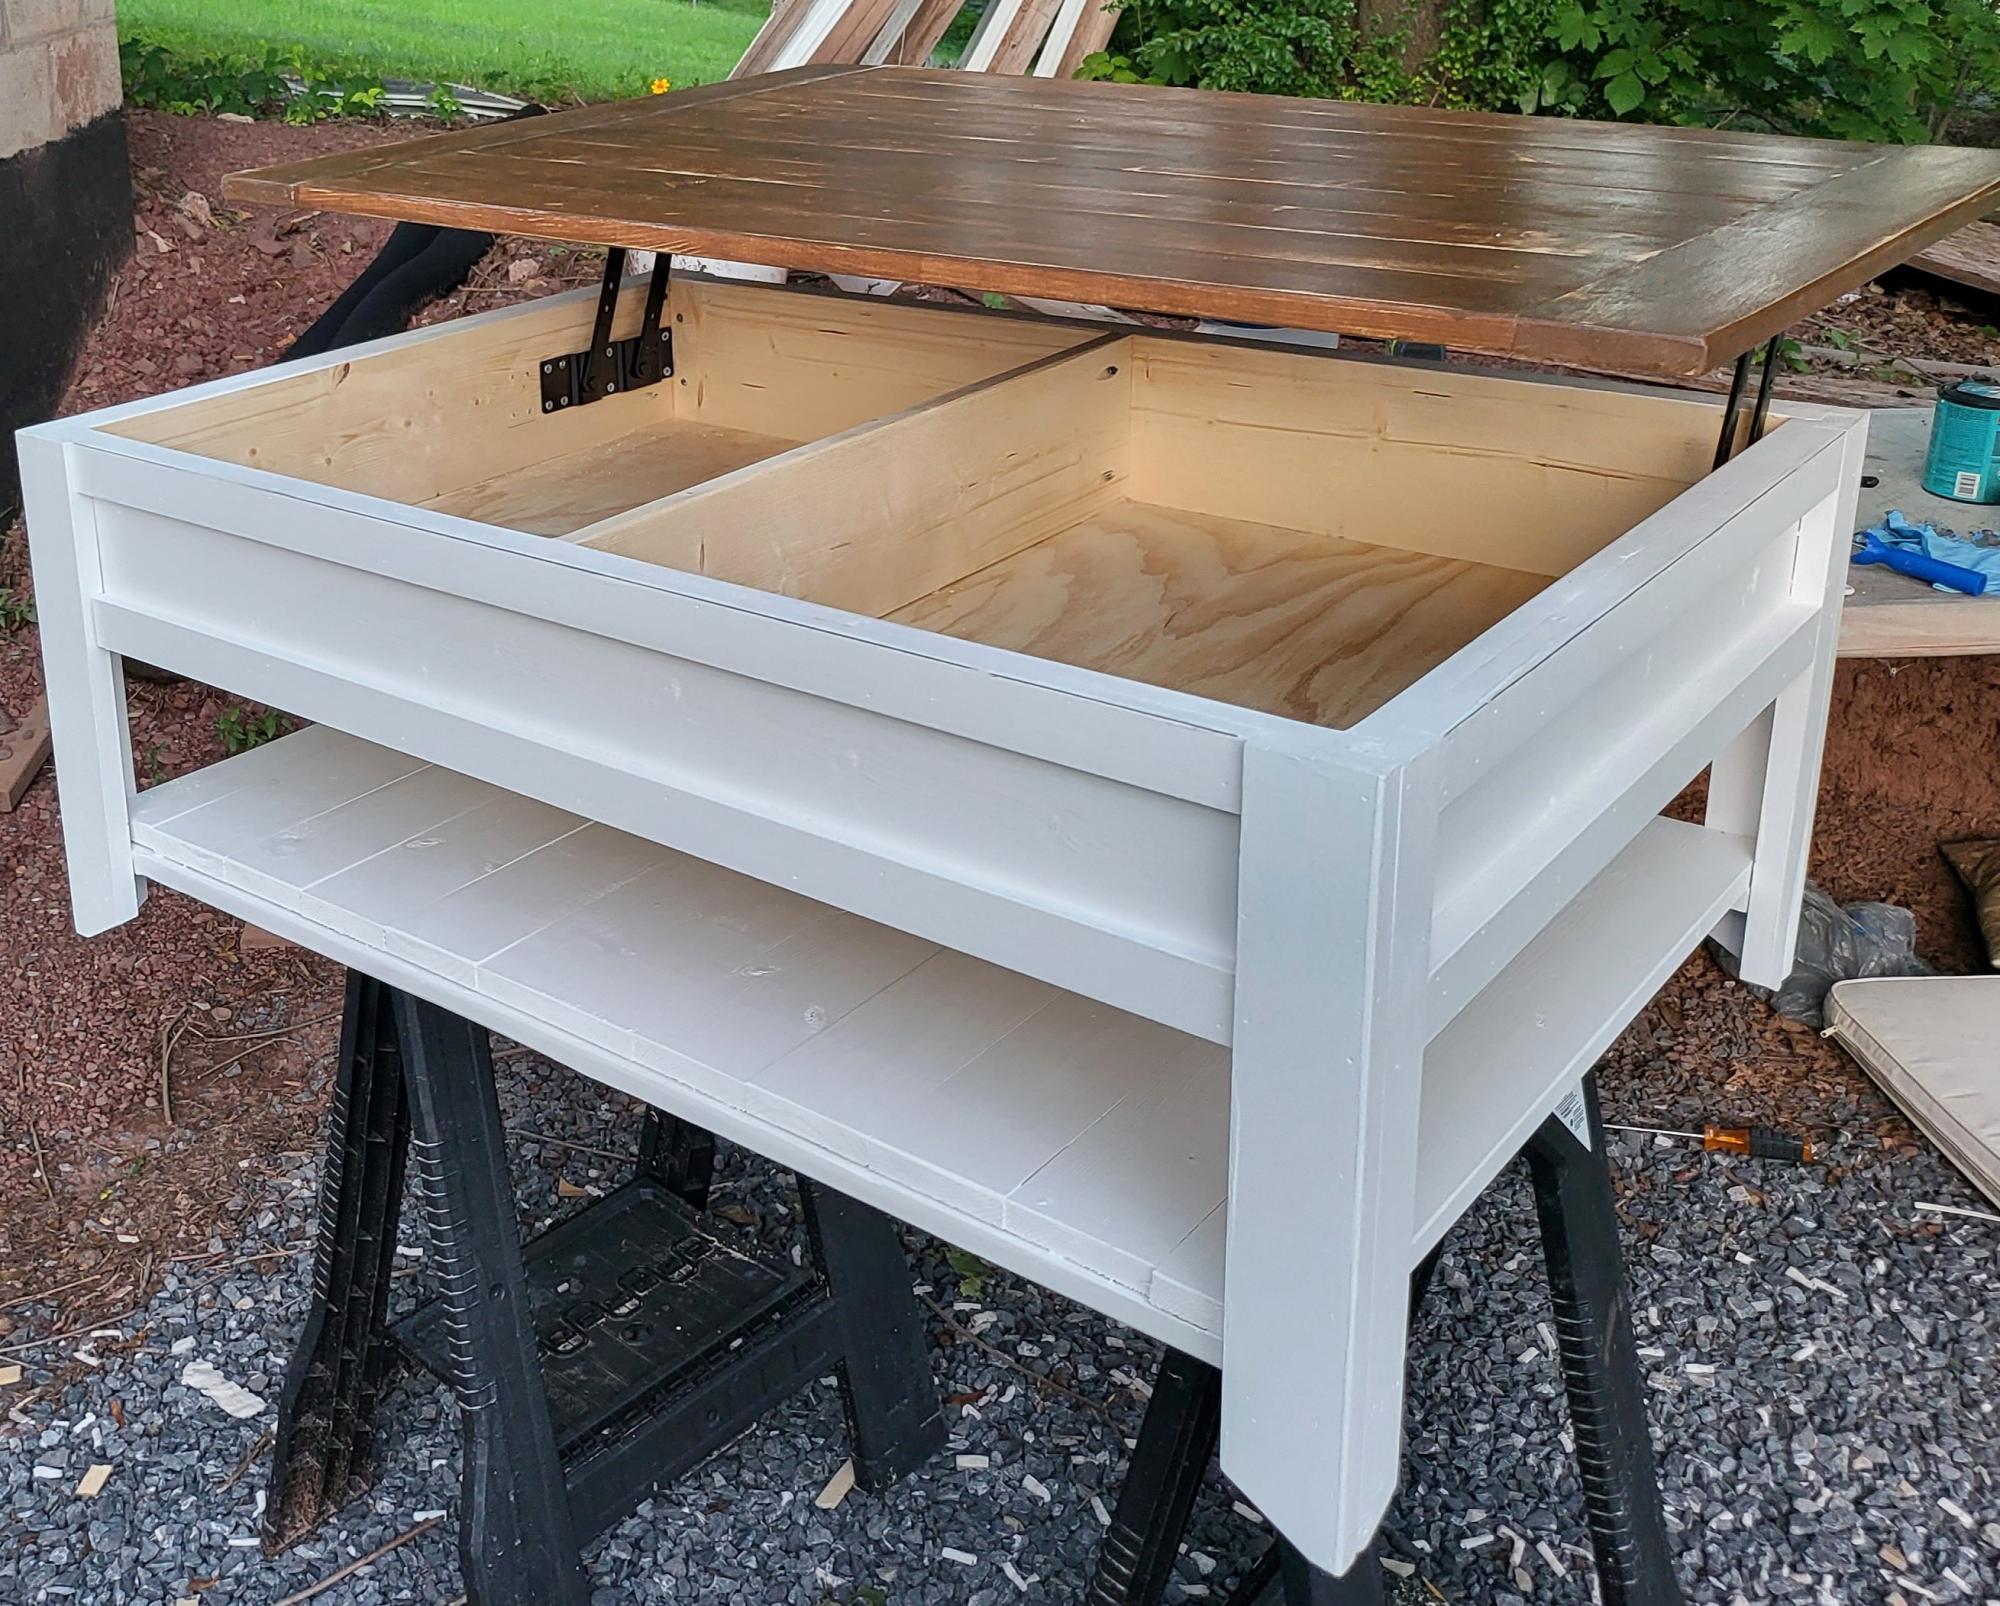
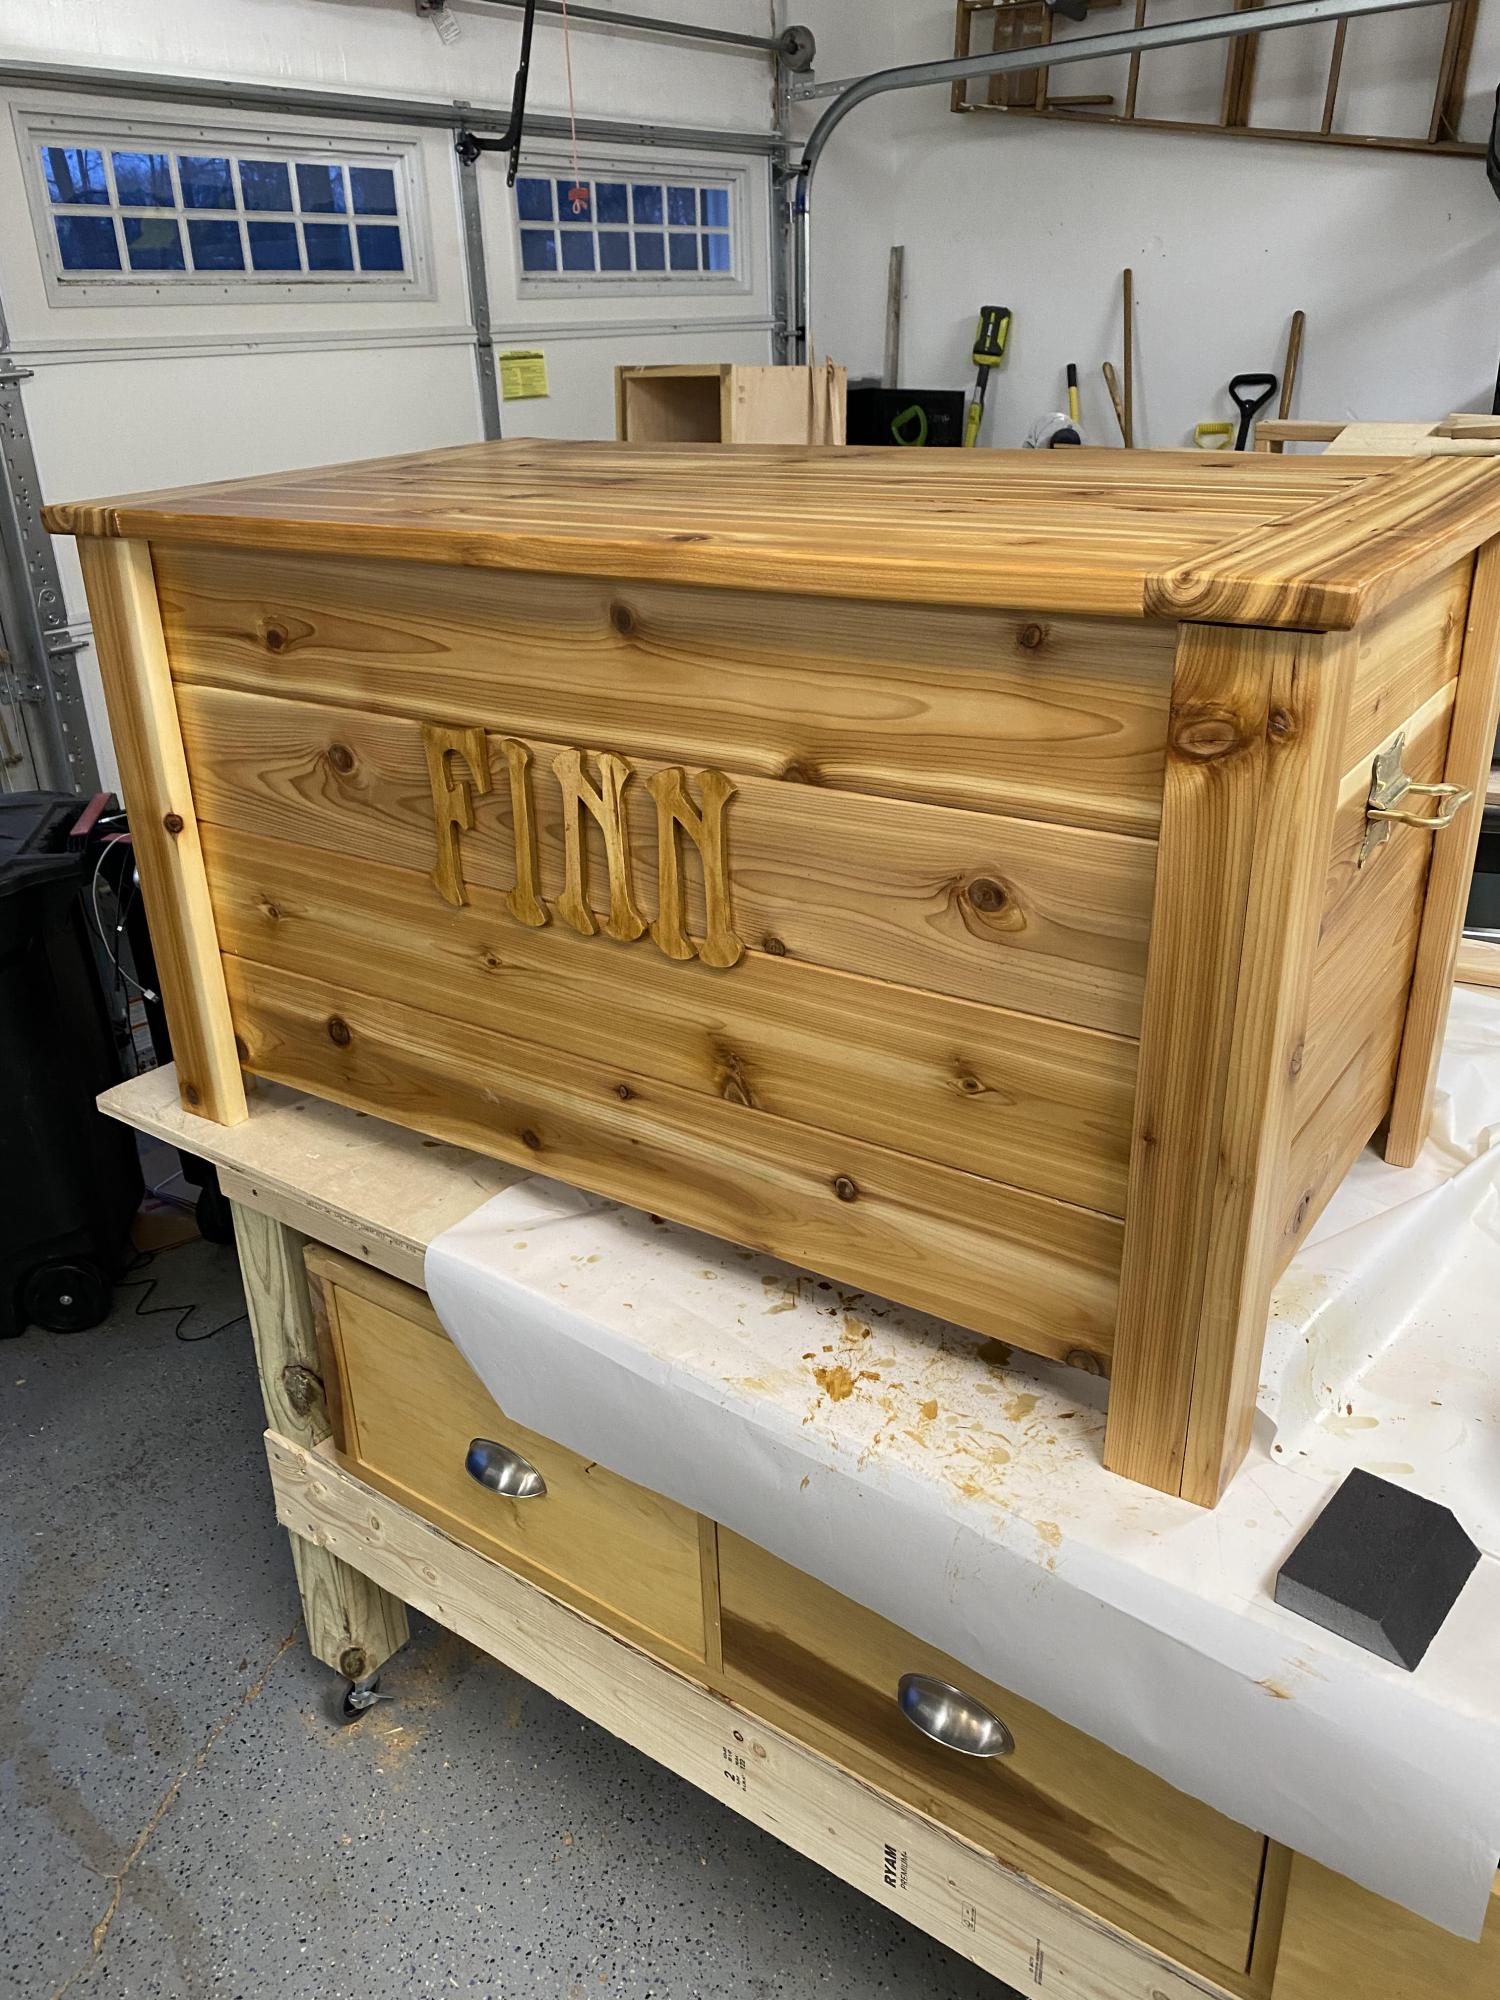
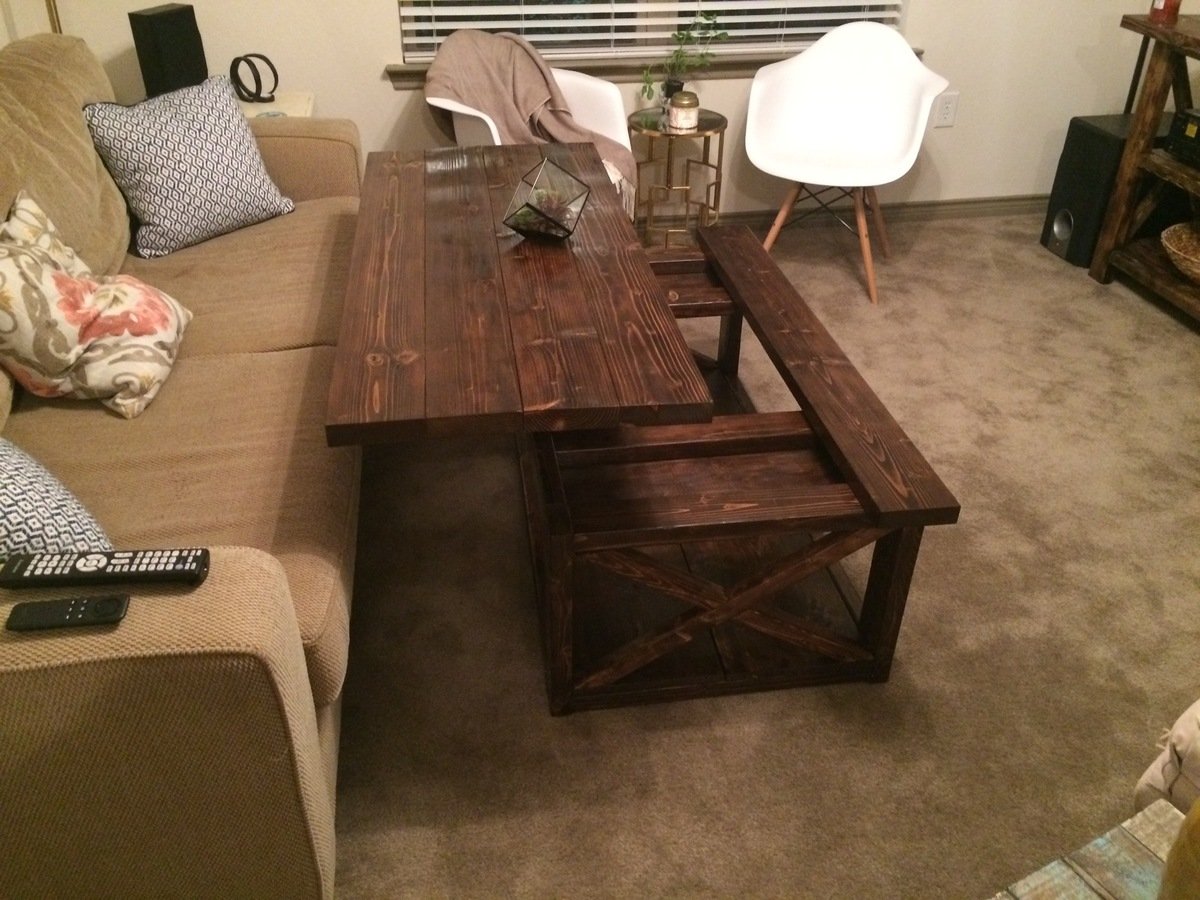
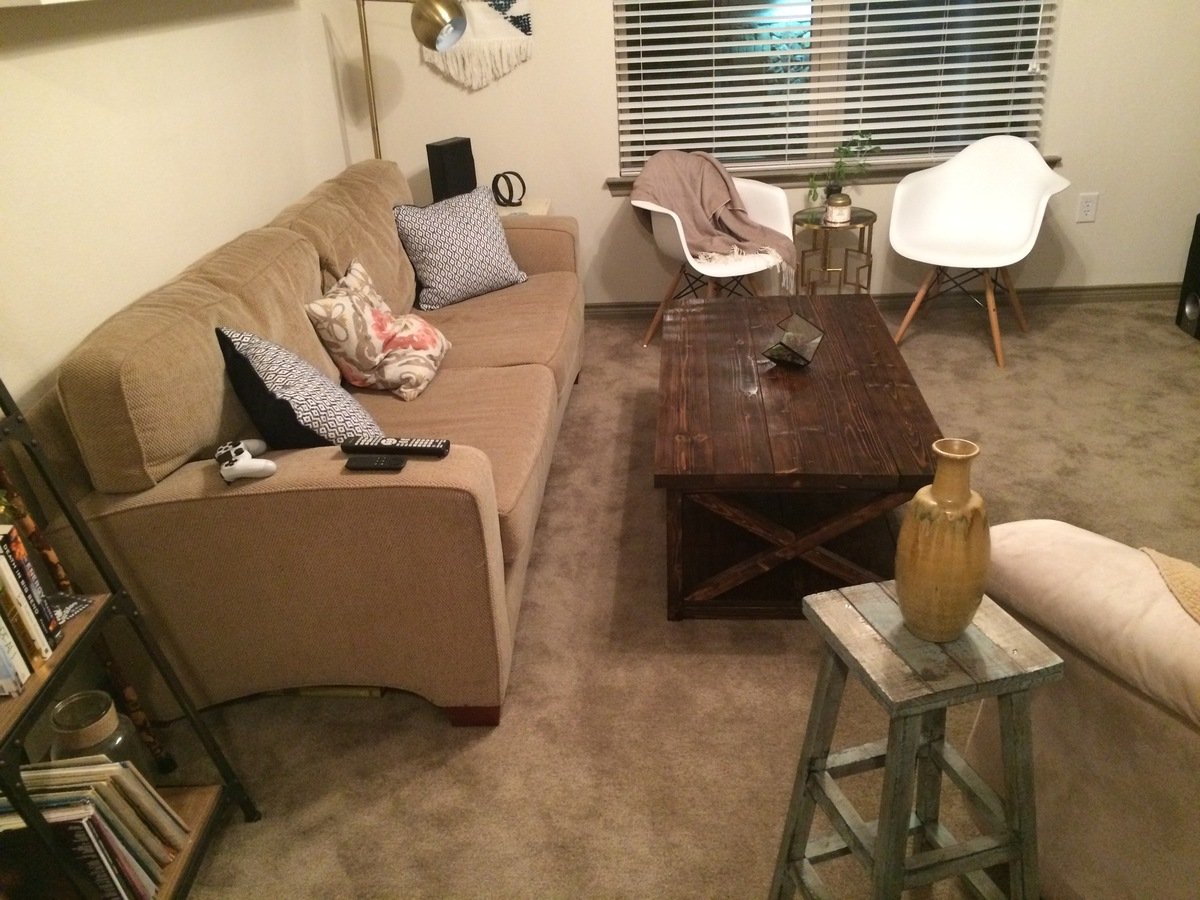
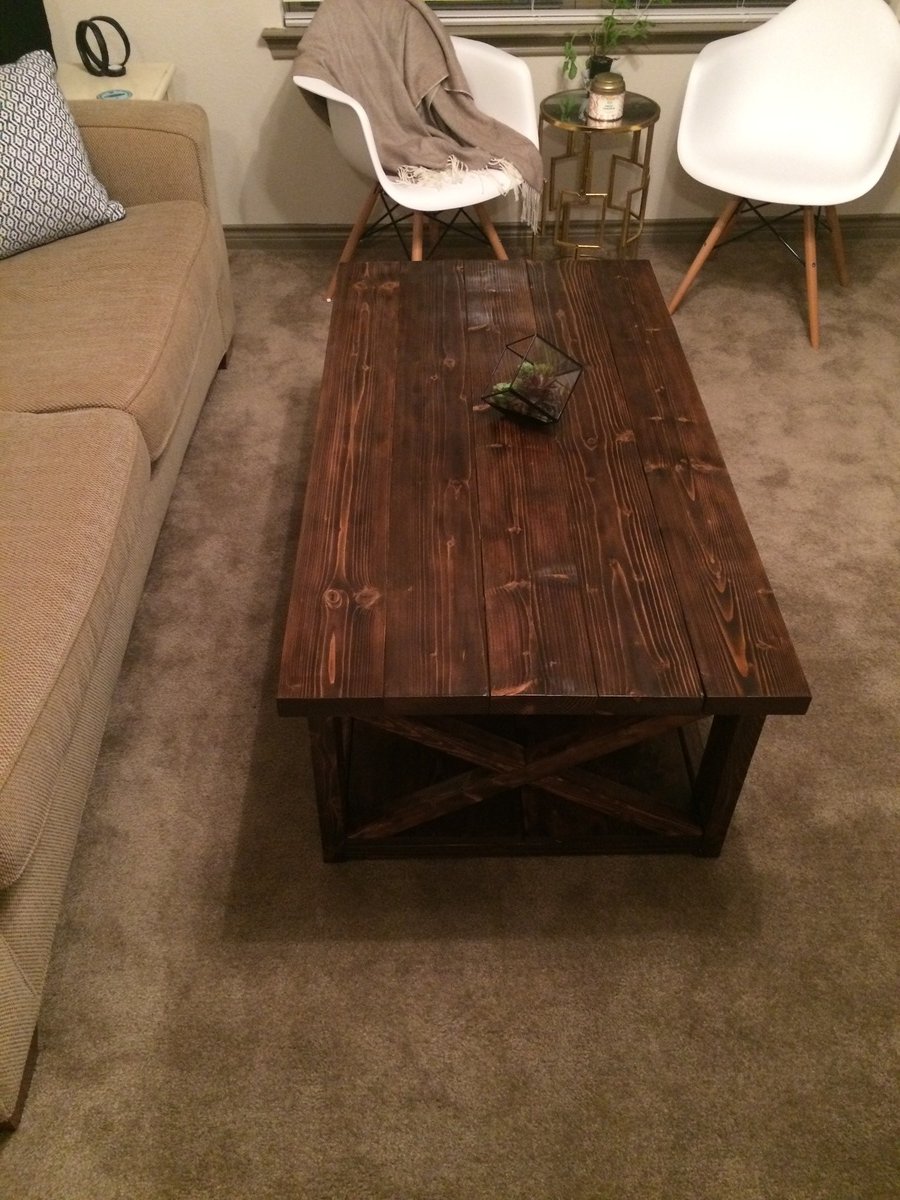
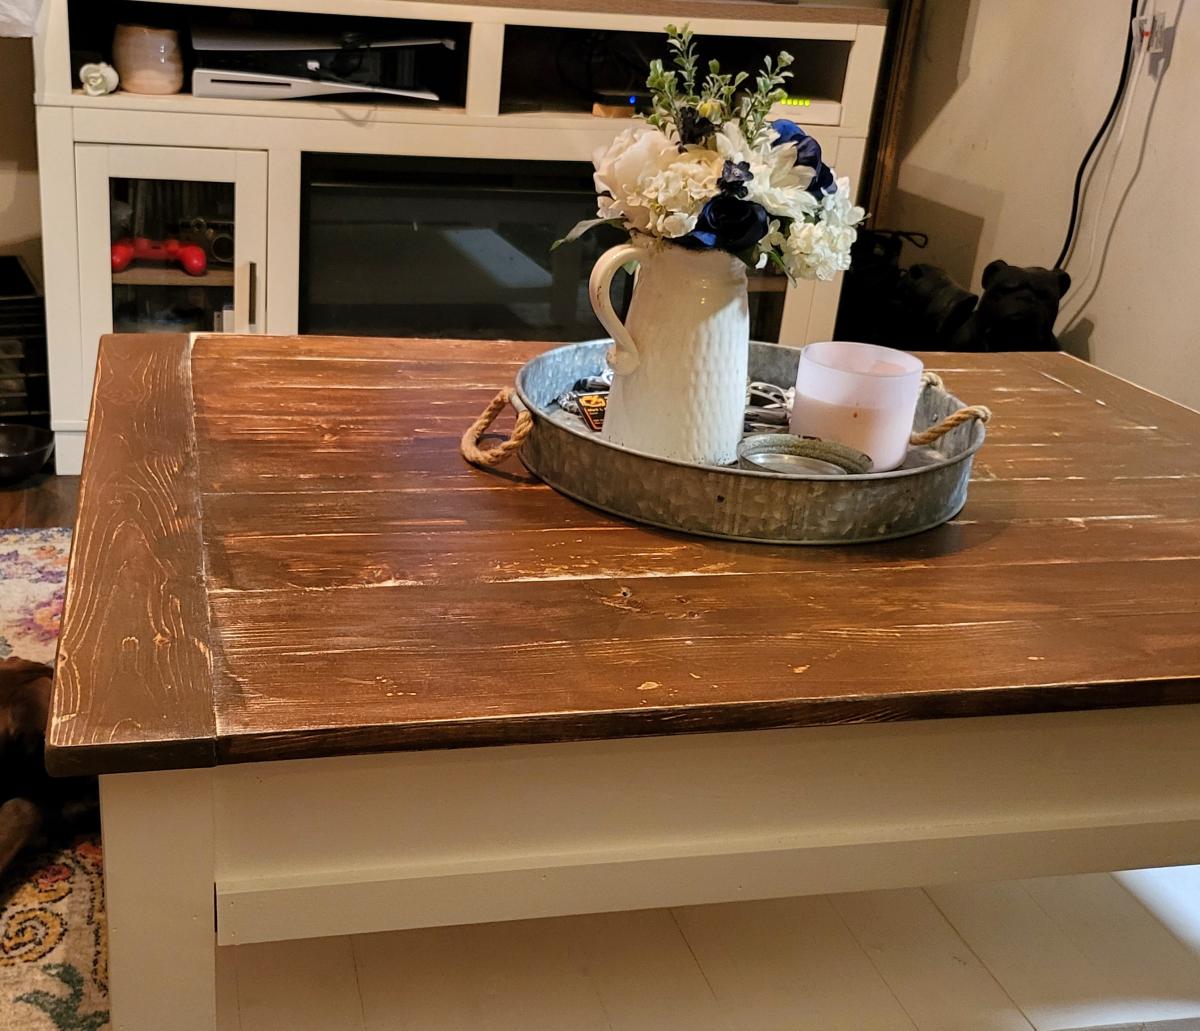
I wanted my top to be a lift top, so I used 1x3's adding breadboard ends. I ordered the lifts from Amazon. I applied a single coat of stain and then sanded it down to give it a more rustic look before applying a satin poly coat.
A. Henry
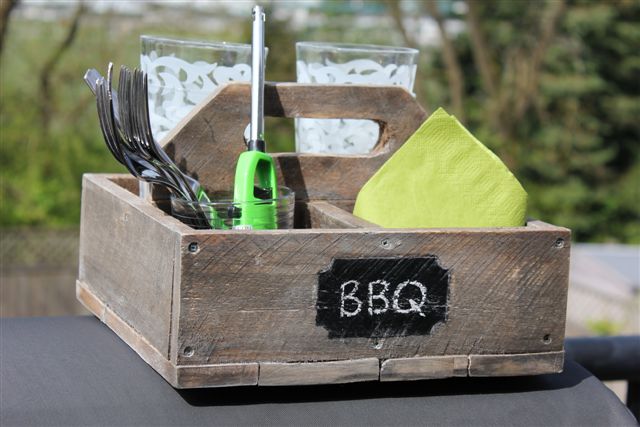
I had some pallet wood laying around and felt like taking on a small project. The boards were warped, but after fighting with them a bit, it turned out well. I was going for the reclaimed, rustic look anyhow :) I find it a little heavy to actually use as a caddy, so it's more for decoration. I think I might plant a few herbs in it, for a little portable herb garden.
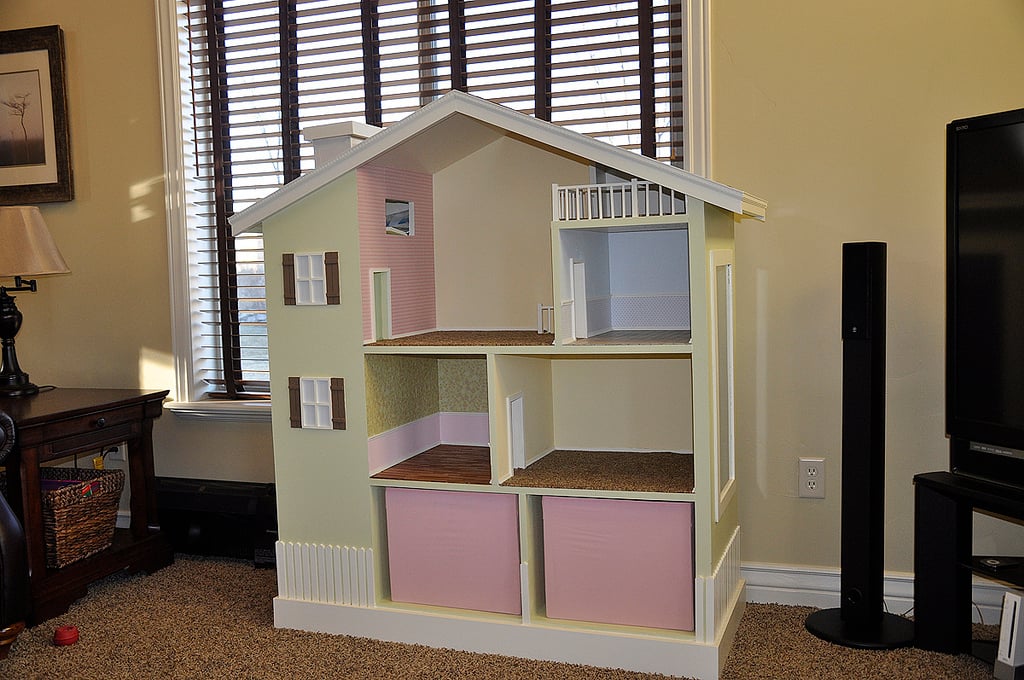
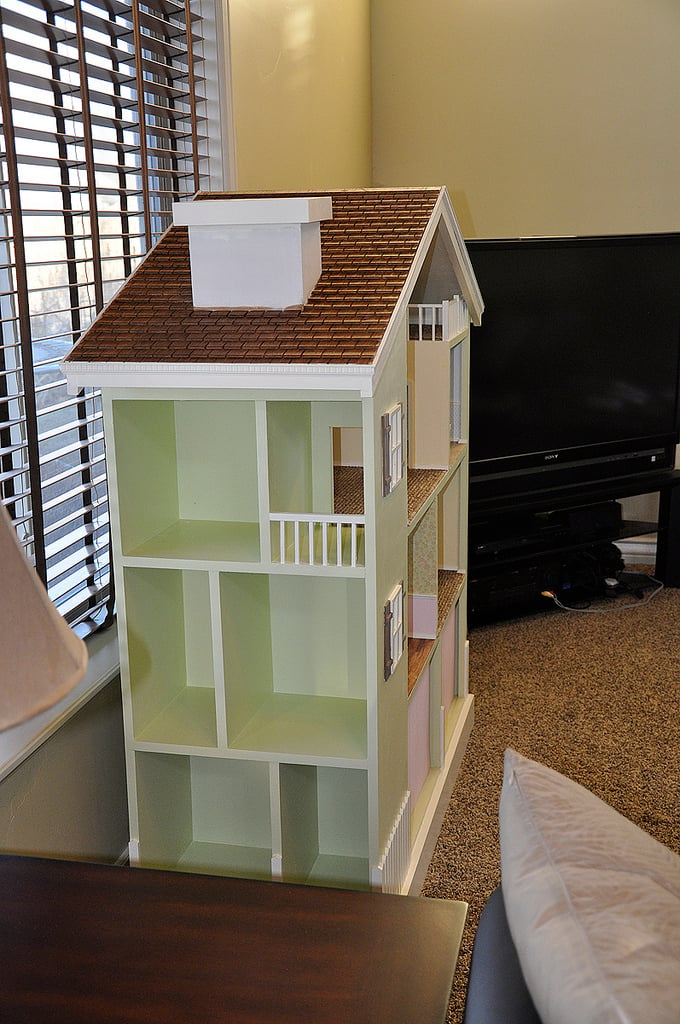
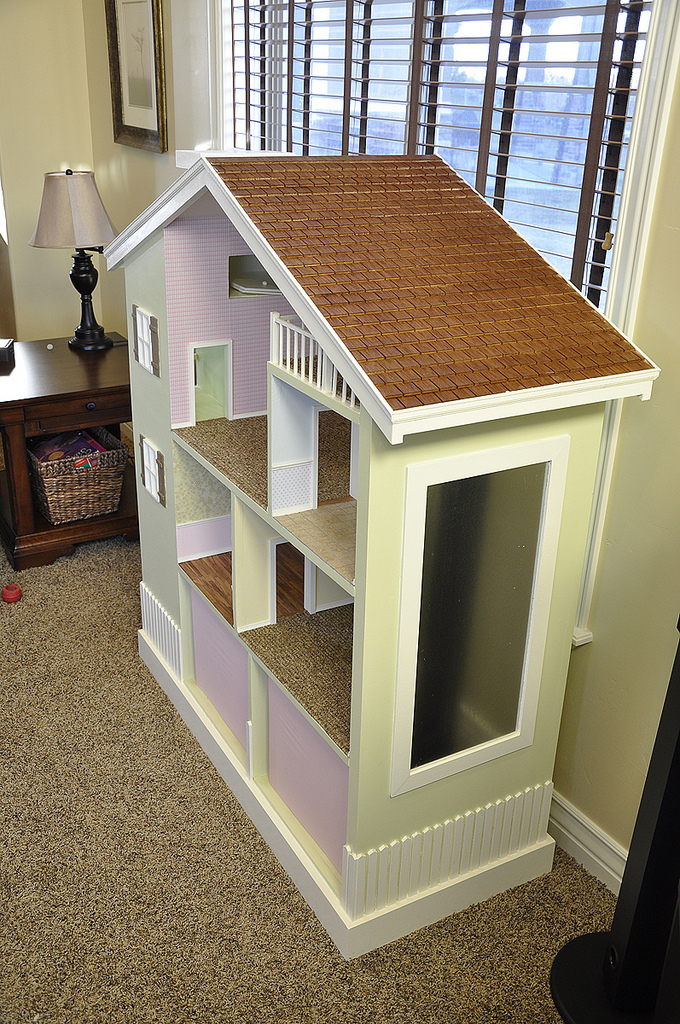
After much deliberation, I decided to make a dollhouse for my daughters Christmas gift. The aesthetics of the bookshelf-style dollhouse appealed to me over the more intricate and fancy designs. I took the literal meaning of the style and incorporated an actual bookshelf/DVD rack into the dollhouse. On the apposing side I built a magnet board for my daughters given that my refrigerator is not magnetic. About the project: I knew my design would end up being heavy so I started by building a basic frame out of construction grade 2x4's. The frame is placed on four casters and is concealed by the baseboard. When on carpet, the casters are not visible and have come in handy. Working upward, the majority of the construction consists of 3/4" cabinet grade plywood which you can find at Home Depot. The "carpet" I chose was an inexpensive bathroom rug that I purchased at Walmart. The scale & thickness of the berber seemed appropriate for the dollhouse and I attached it using carpet glue. For added security I tacked the perimeter with some staples. For the bathroom tiles, I cut some groutable adhesive tiles into squares on the table saw (use a cross cut sled if you have one) and attached them to the bathroom floor. Make sure your surface is free of dust, and a heat gun or a propane heater will accelerate the drying process and create a better bond. Make sure to use unsanded grout for the joints. To make the shingles, I cut a 4'x8' (used about 2/3 of the sheet) piece of 1/4" mahogany veneer into 2.5"x4' strips. The cuts were made perpendicular to the wood grain to give the desired aesthetic. This gave me a robust shingle construction with the look of shake shingles. I then cut about 3/4 of the way through the strips with approximately 1 1/4" separation between each shingle. Attaching the shingles was easy. I didn't want to wait for glue to dry so in addition to some wood glue, I also tacked the row of shingles in place with 3/8" brad nails. When placing the shingles, make sure to start at the bottom and work your way up to the pitch of the roof. This will allow you to overlap the shingles about 3/4" to cover the uncut portion to give it the appearance of individual shingles. You will also want to offset your rows to change the vertical alignment of the shingle spaces. I marked each row with a pencil prior to cutting the final width. You may also consider which side of the shingles you want facing up. I opted for the rough side to give it a more weathered look. With some of the extra shingle material I made hardwood floors for the kitchen.The veneer I purchased was mahogany on one side, and oak on the other which allowed me to alternated sides and give it a unique look. Attach the floor using wood glue and allow 24hrs before sanding. Place weights on the floor to secure it while drying. I applied both a stain (Minwax Golden Oak) and some wipe-op polyurethane for the finish. The storage bins are Ikea boxes that can be easily removed to allow for additional play areas. The piece of sheet metal I used for the magnet board was already cut to the desired size at Home Depot. I attached it using some 3M spray adhesive, then secured it with some poplar strips. I also used the 3M construction adhesive to attach the craft paper/wallpaper. With all of the chaos surrounding Christmas I wasn't able to quite finish it. Here is still what's in progress: - Painted white ladder to loft - Stained mahogany stairs to family room - Kitchen cabinets - Cobblestone chimney - Closet doors

Thu, 04/12/2012 - 02:56
Your attention to detail is amazing! What a beautiful build! Blessed daughters!
Fri, 04/13/2012 - 15:18
How did you make the railing? It looks great, but wouldn't it be fragile? What did you use for trim and molding throughout the house? Did you use a dremel to work with the small details? This is an amazing looking doll house that my daughter would love. I just may need to do this sometime before Christmas.
Mon, 04/16/2012 - 17:32
It gives the appearance of individual shingles, but I actually just cut strips with grooves in them. I have seen several dollhouses with shingles that have fallen off so I wanted to avoid that :)

Sat, 04/14/2012 - 04:00
Those are the coolest bookshelves I've seen in a while. Love it.
Fri, 06/08/2012 - 20:32
Super duper good job on it :) Wish I had time to make one like that for my 4 yo. She's so particular, can't let her see the pictures ah ah. Lucky girls! Talented mama!
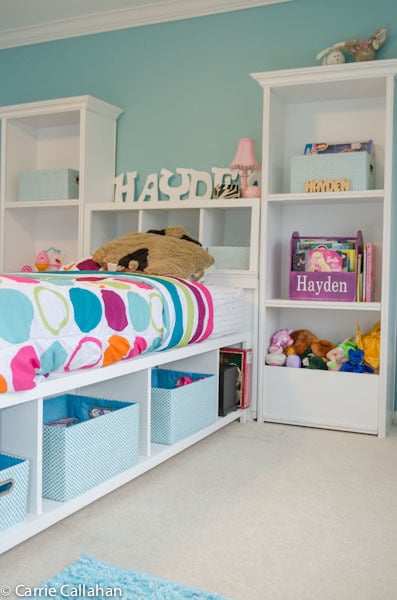
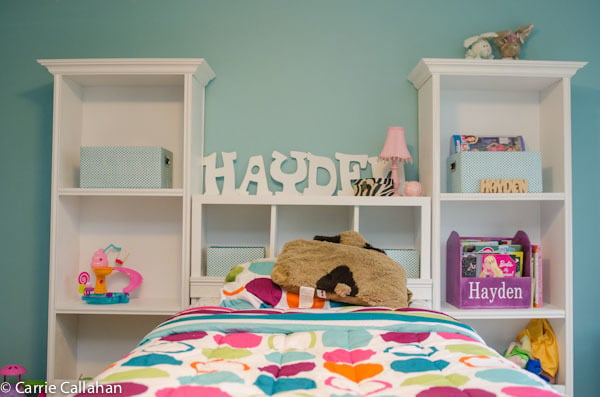
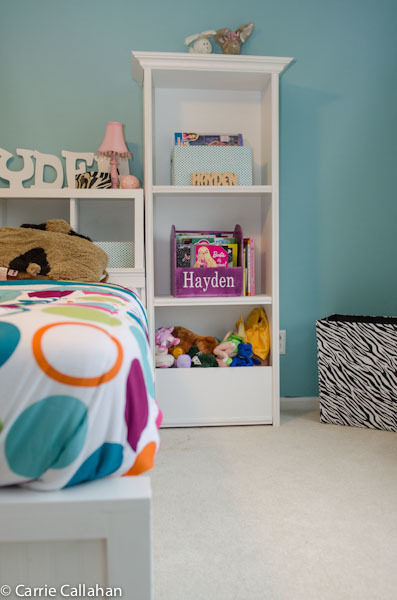
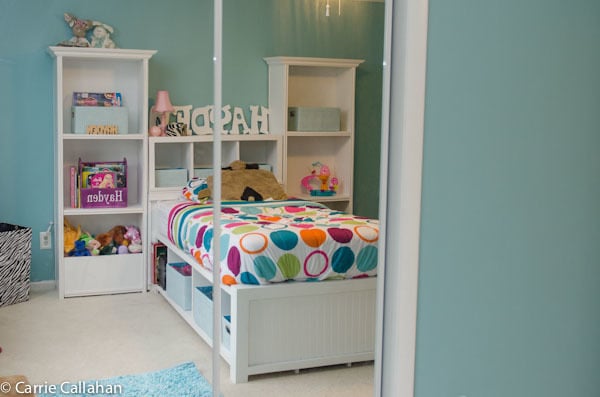
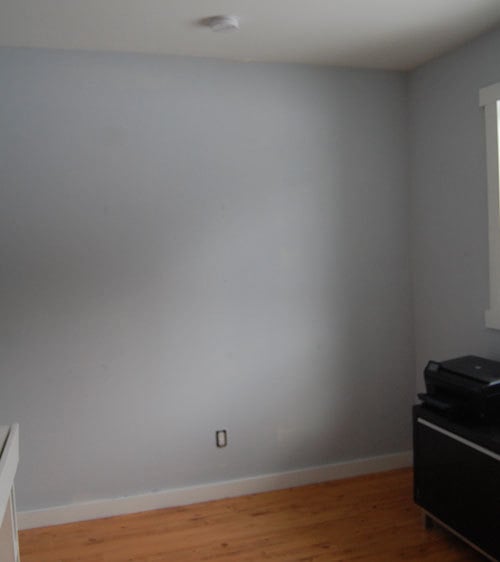
I promised my daughter that I would build her a new room for her birthday (in February). I finally got around to it in late March and I couldn't be more excited! She picked out the paint color (blue) for her room. And I got to work! Every time I go in her room I smile and feel so incredibly accomplished! I did the whole project myself! The only exception was carrying it up to her room. I overcame my fear of the circular saw which was awesome. The only problem was my oldest took one look at the room, fell to the ground in tears and wanted to know why her little sister had a "better" room than she did. And where her bed was! So I told her we'd get her a desk - she looked at me and said "No Mommy - I want you to build it!" I love that!

Sat, 04/21/2012 - 09:11
You have every reason to feel accomplished! The room looks stunning. And you've already inspired your daughters to DIY. Time to build some memories ;-)
Sun, 07/12/2015 - 19:31
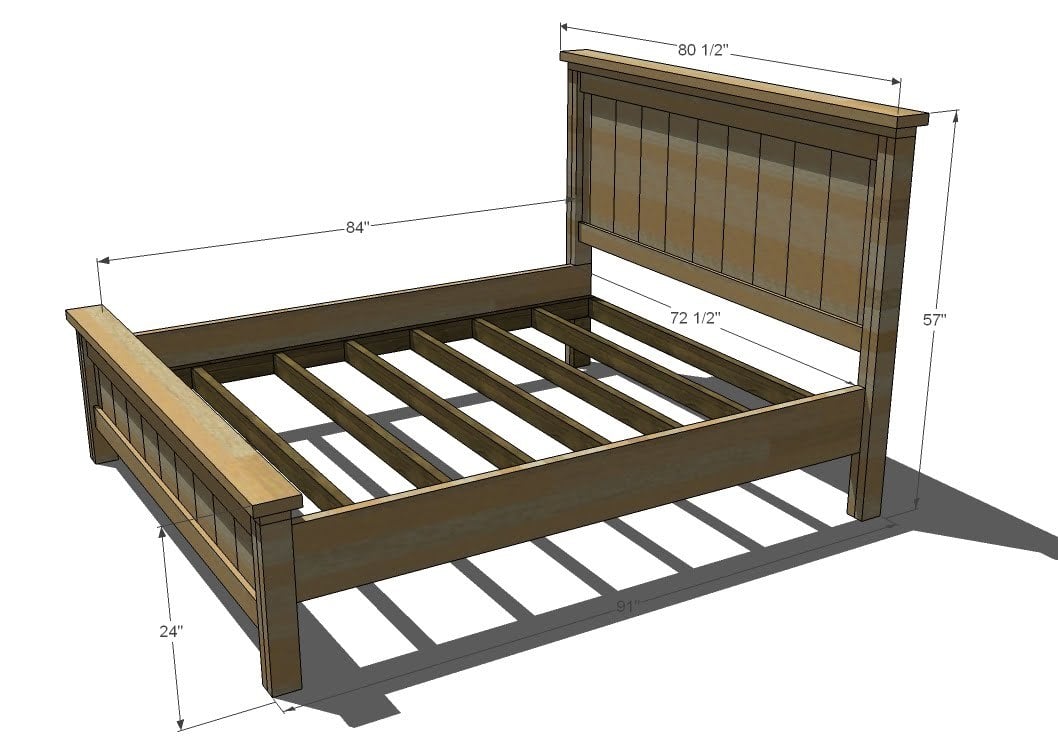
Okay I have found the plans for the bed, the towers and the hutch on top but i cannot find plans for what the hutch is sitting on. I know its non on the bed or that would shorten it. Where can i find plans to build the headboard that the hutch is on?
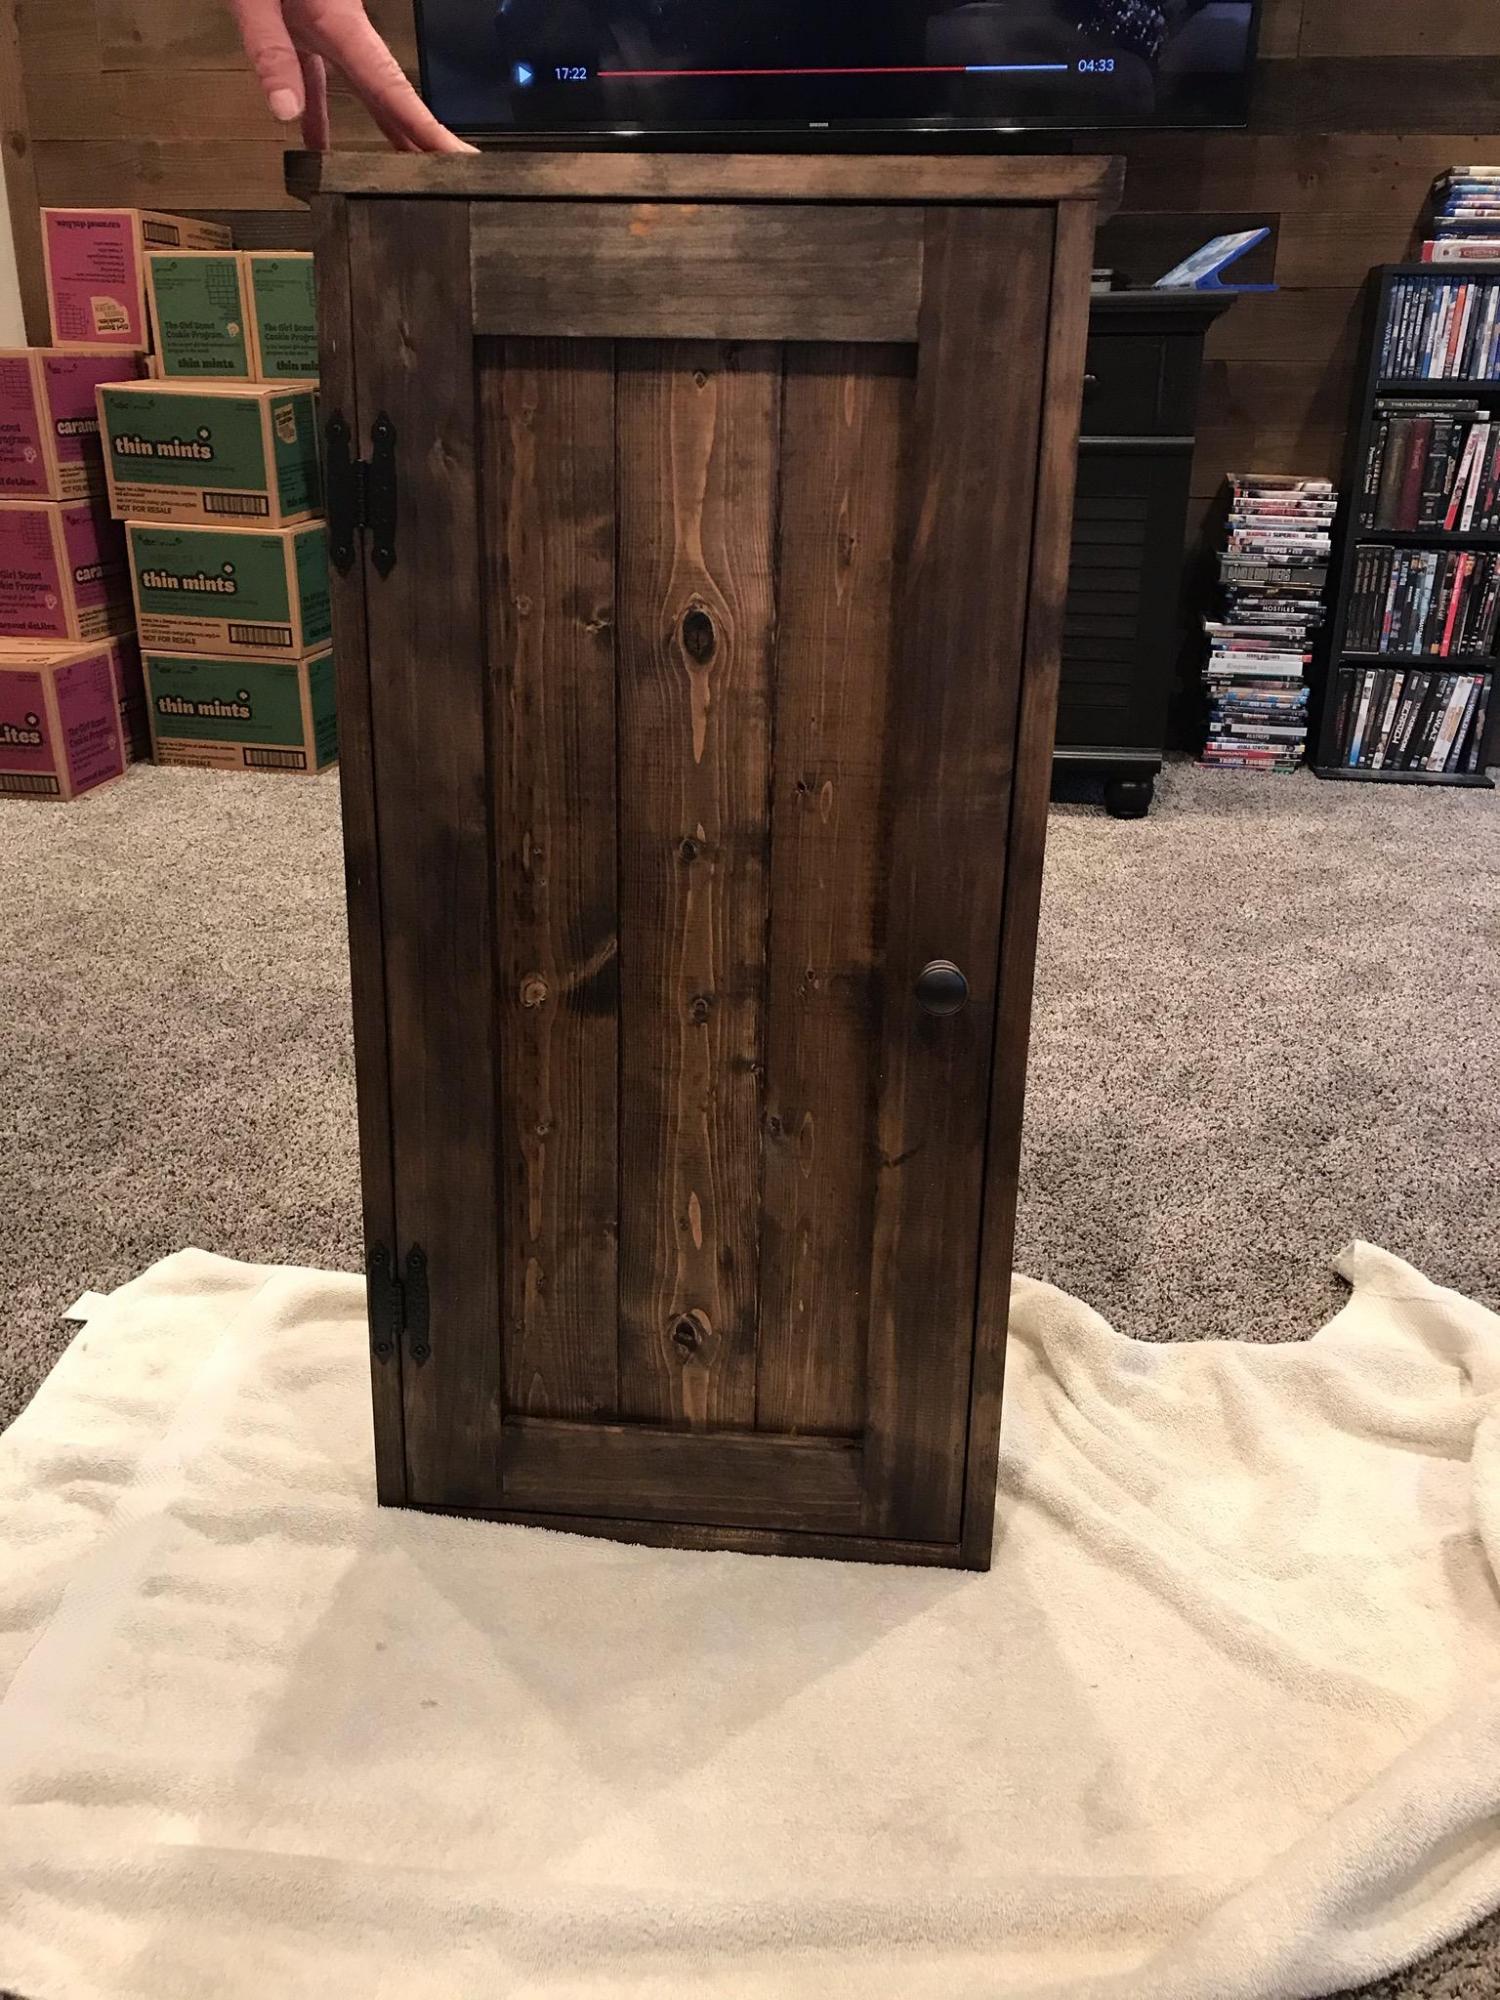
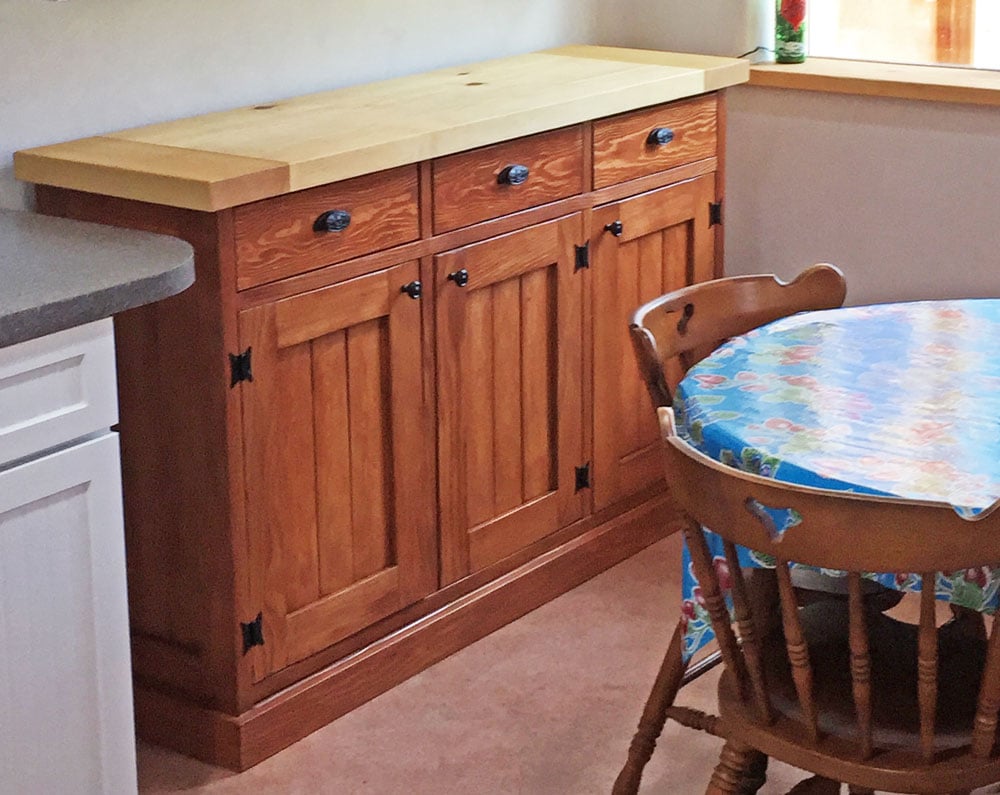
The plans were simple to follow. Made some small changes, used some pine wood wall paneling from Lowes. The pine paneling was used on the back and door. Both were inset with a routed step the same thickness as the panels.
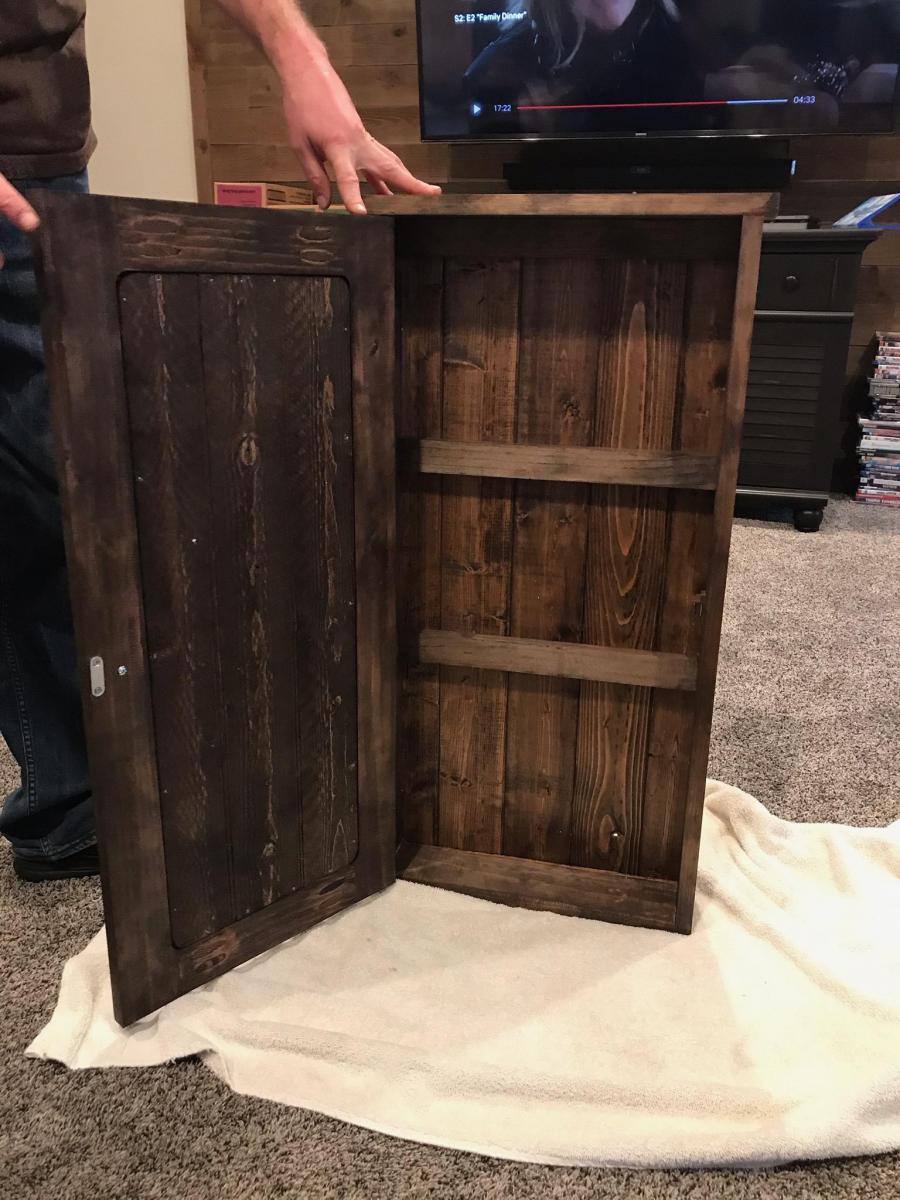
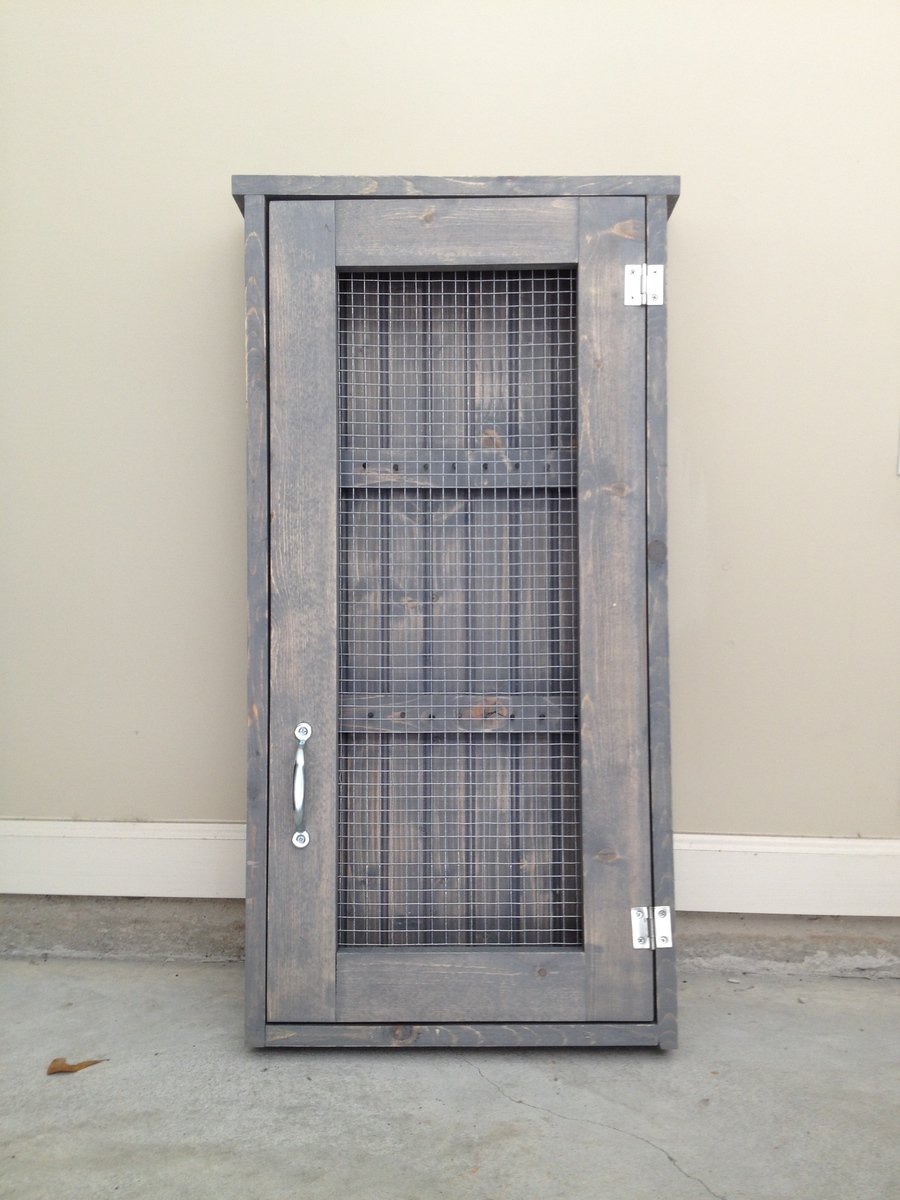
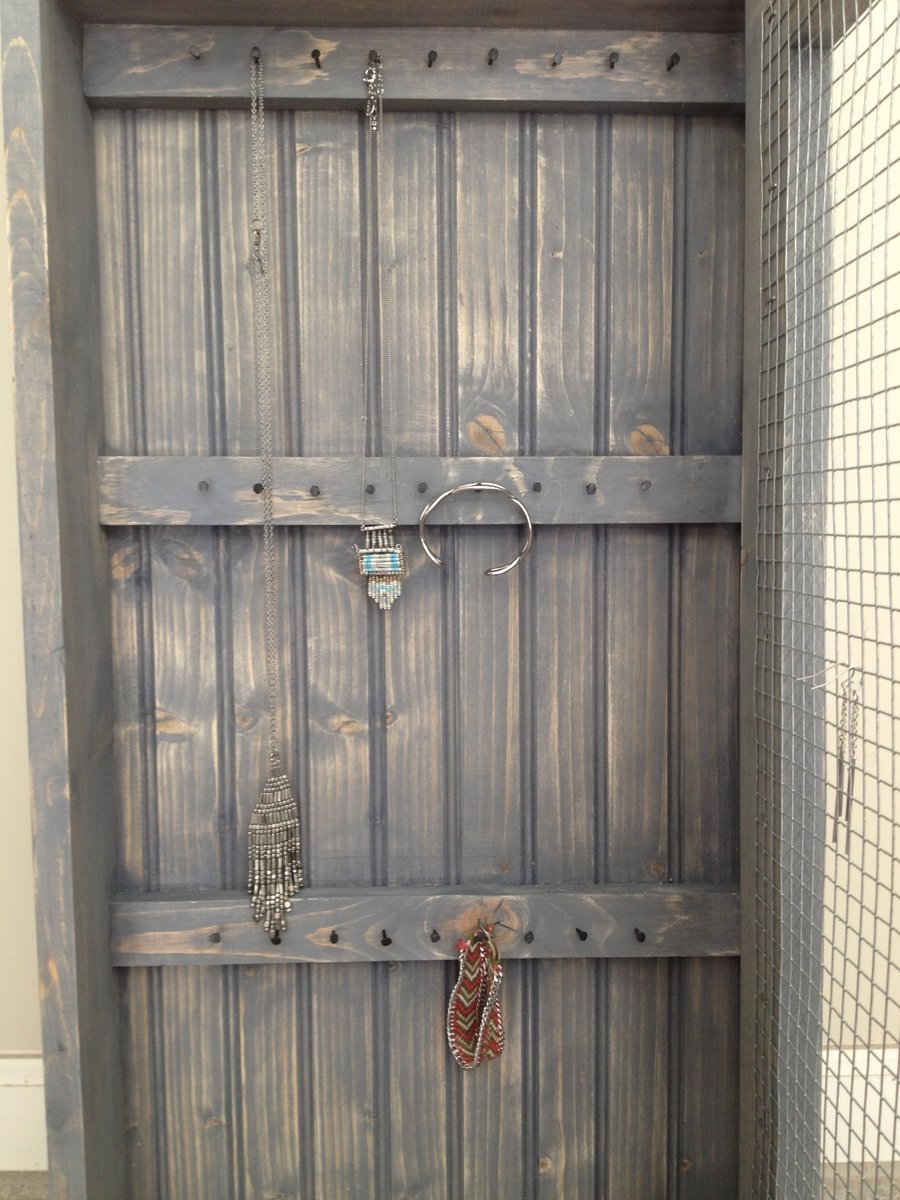
Building this Jewelry Cabinet was really fun and easier than I expected. I made one to give away as a birthday gift, could not resist making another to keep. I don't really have that much jewelry, I just think its gorgeous! I loved the look of the original posted project, that I wanted to duplicate it just as it was.
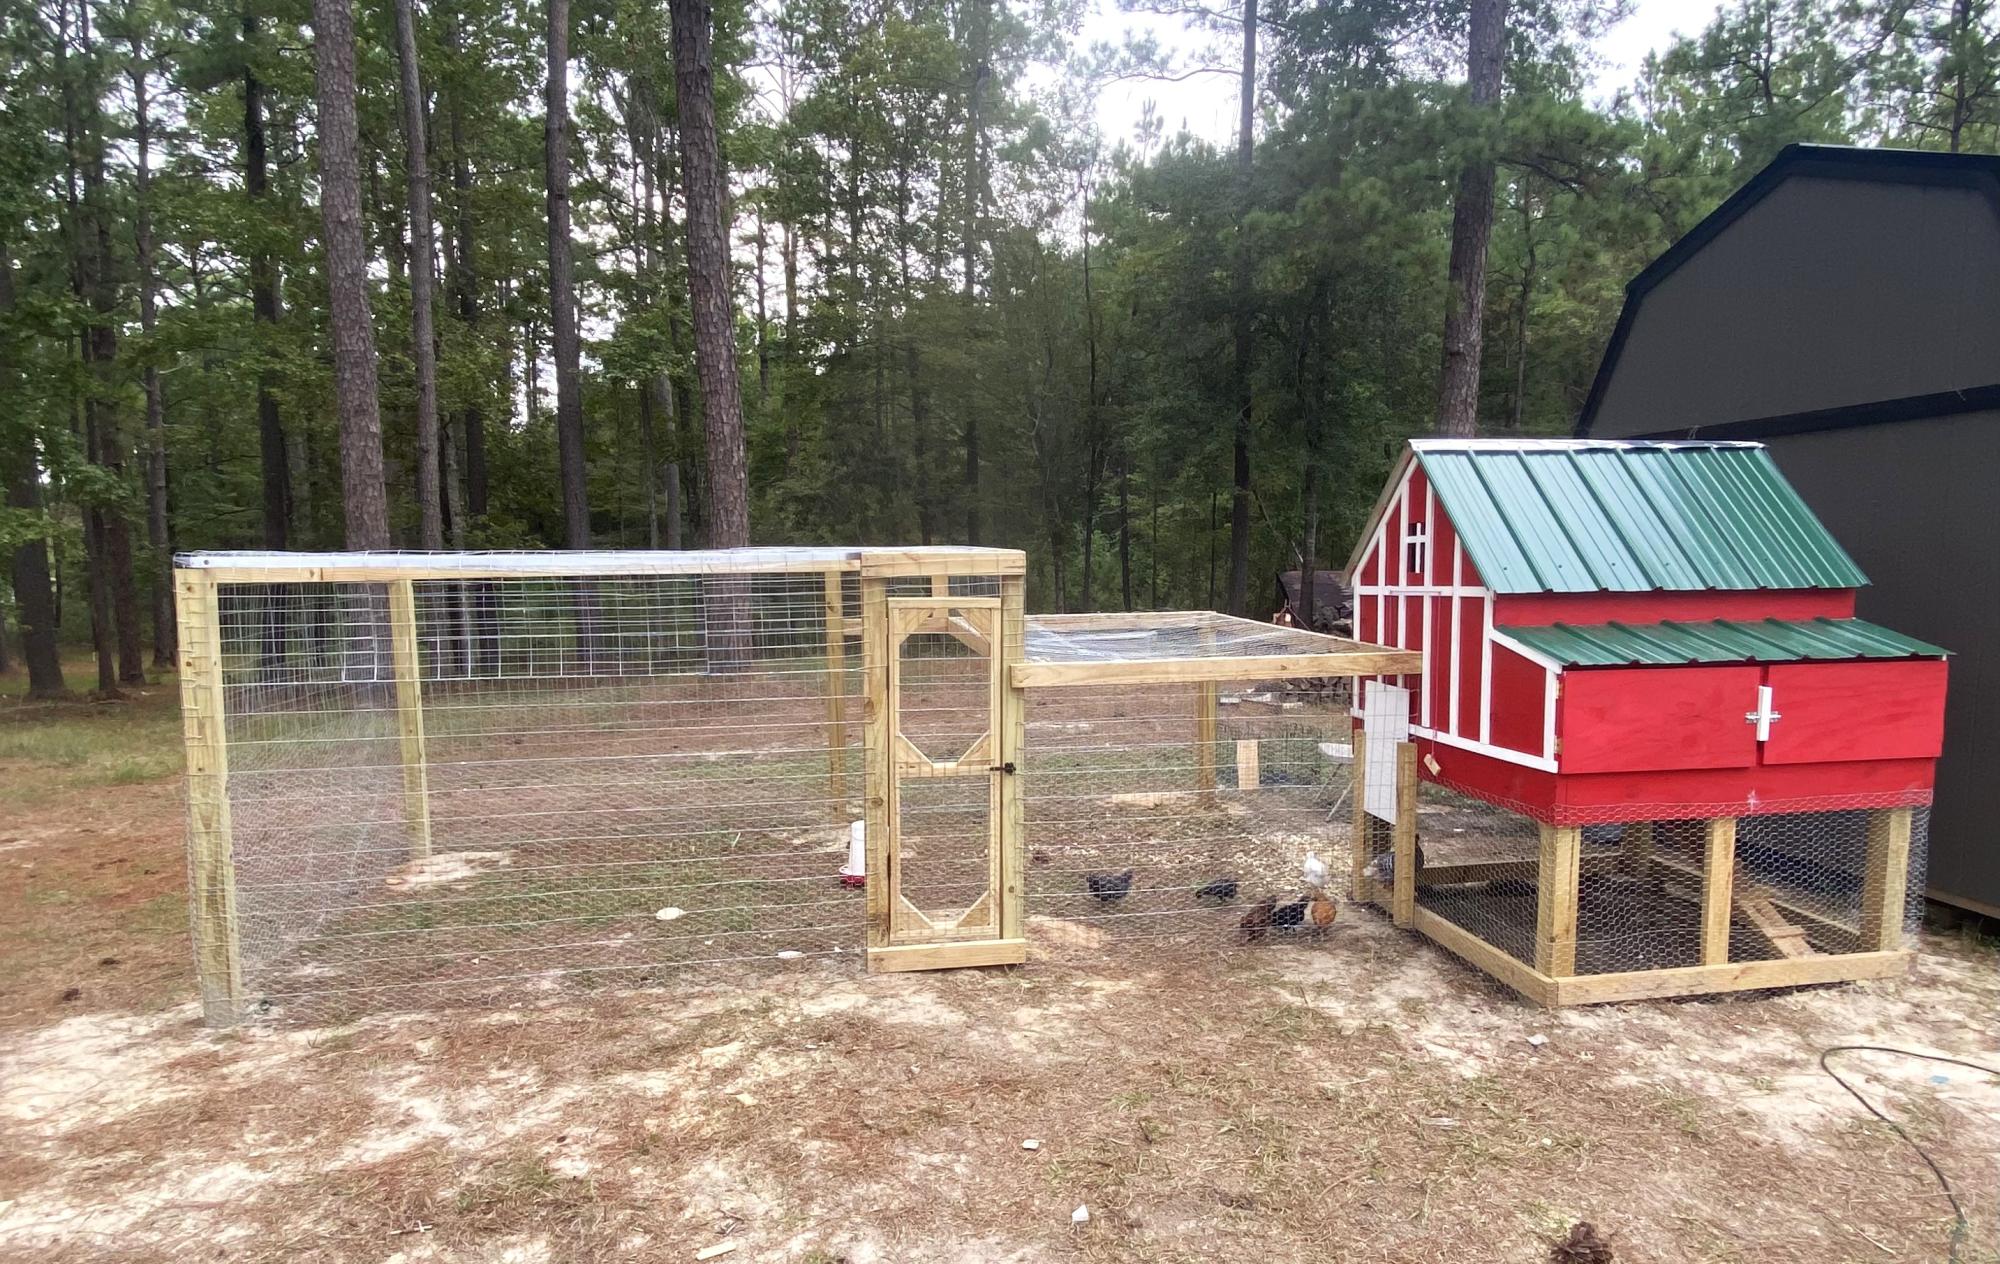
Small coop with run. Awesome plan.
Jinks hill farms
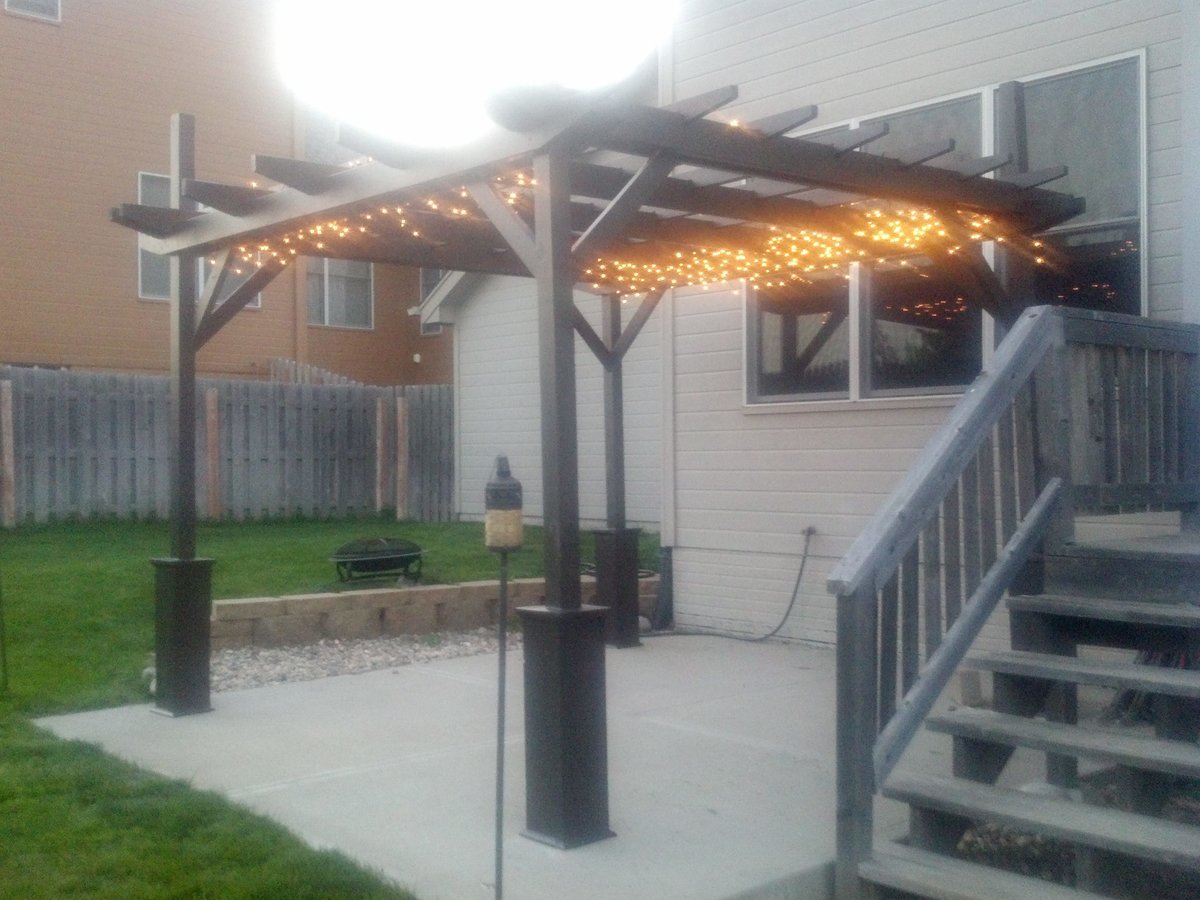
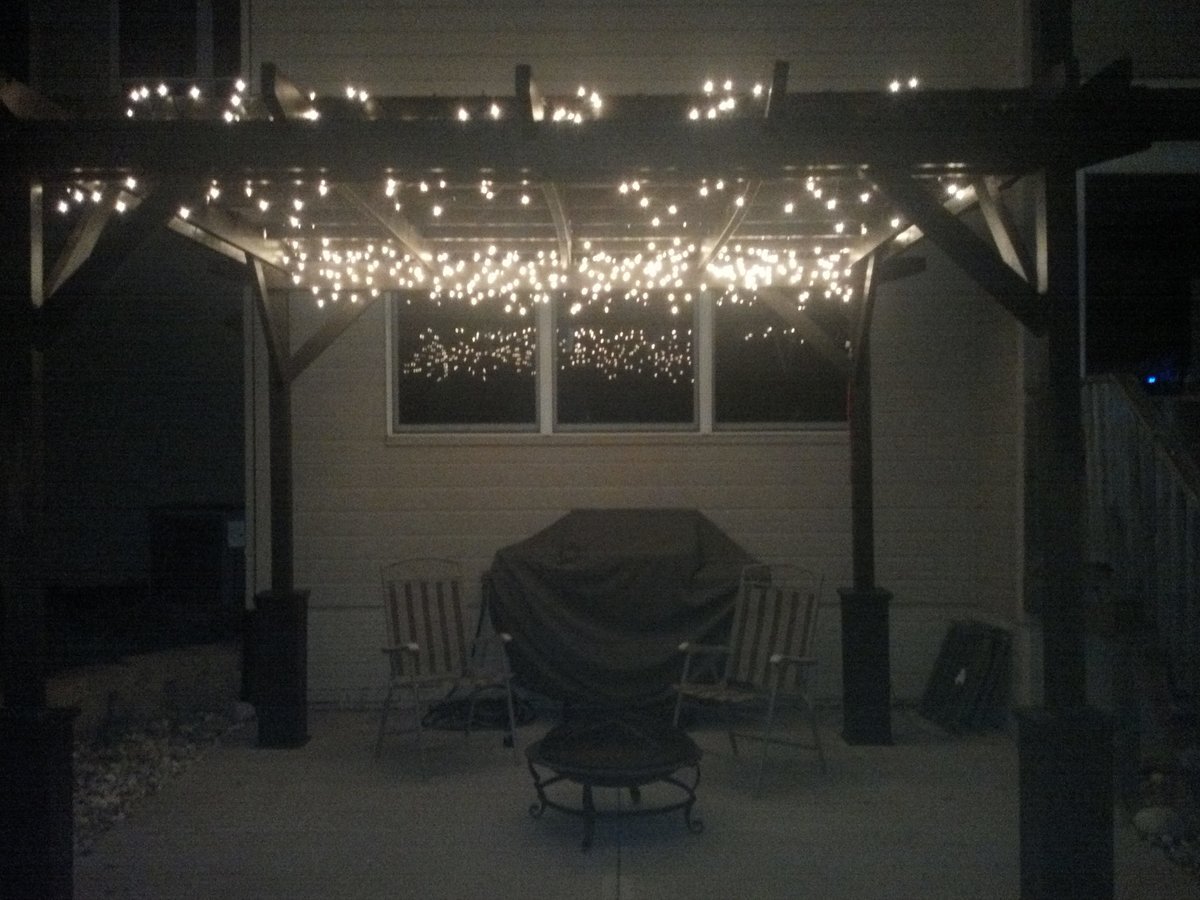
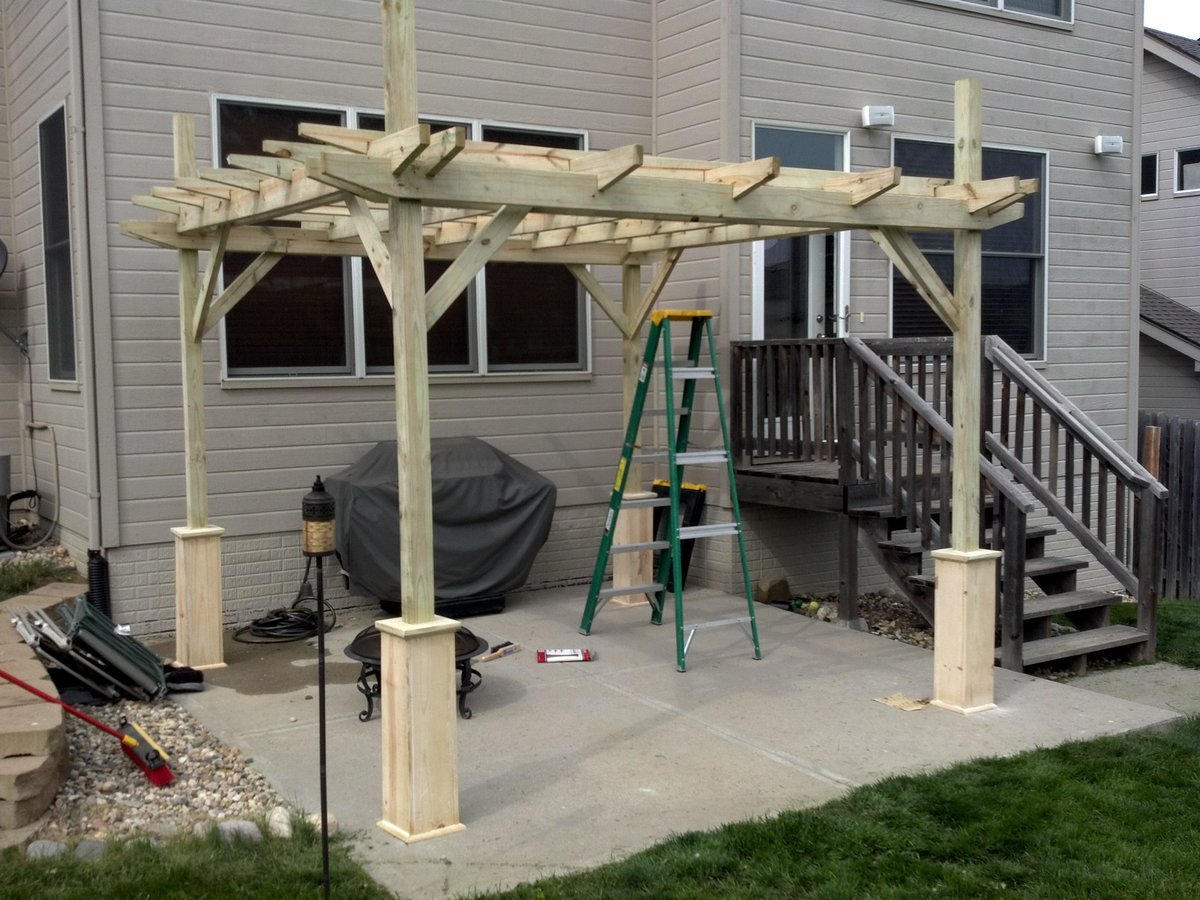
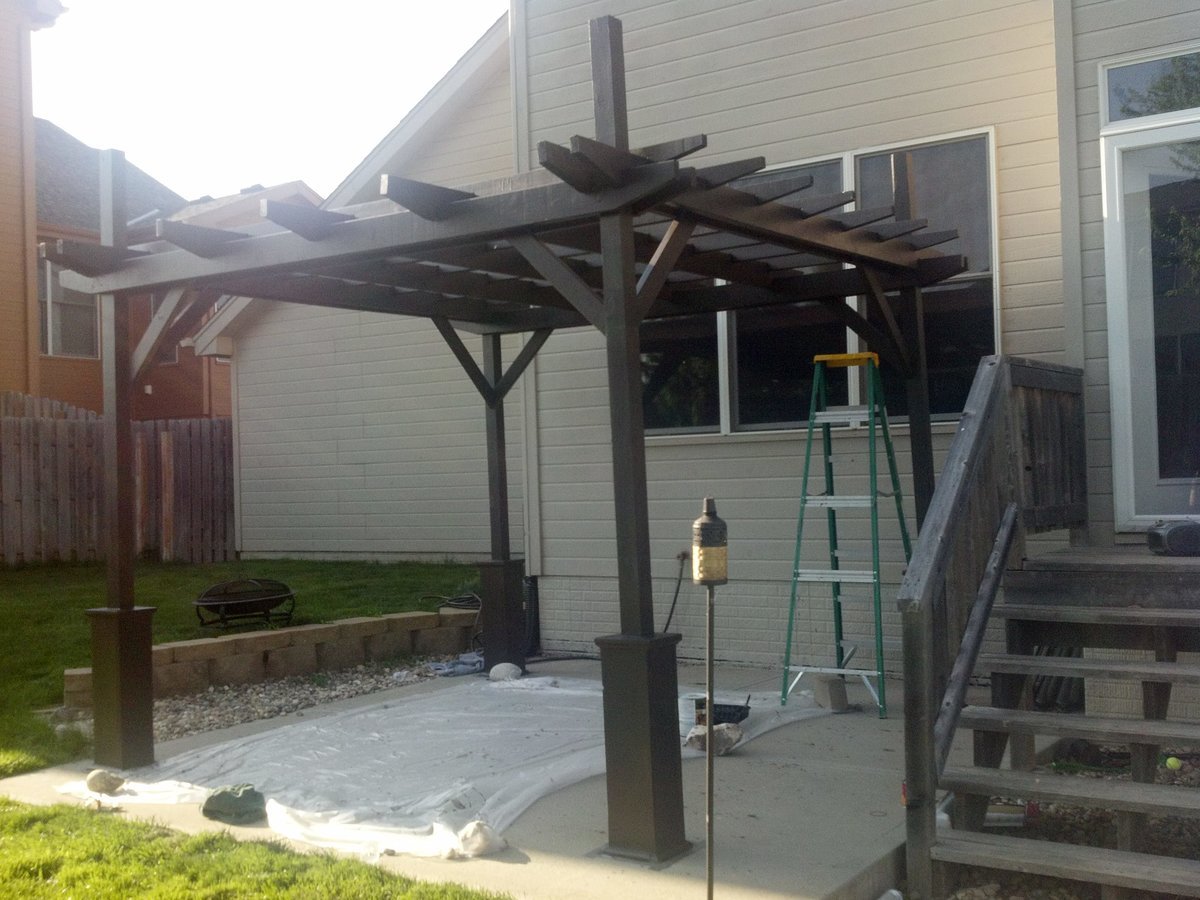
Thank you for the plans! They were easy to follow and my girlfriend and I are very happy how the pergola turned out. I used the 2x6's and 2x4's due to being in Nebraska with heavy snow and high winds often to give it more durability. I can't wait to start on the sectional. Total cost was about 350 dollars...so cheap in comparison to what they sell for.
Fri, 05/11/2012 - 10:16
Beautiful, I love the color you choose too!
PS - for a second, I thought the pergola was on fire! haha! Glad it's just beautiful lights!
Sat, 05/12/2012 - 05:22
Thank you Ana, I have had multiple people say it looks like it is on fire...hilarious :) We will be adding outdoor fabric over the top for shade and gathering outdoor curtains on the posts. Will take another pic when that is complete. This site is awesome and I will continue to support you as much as I am able.
Thanks for the comment Jade!
Thu, 05/17/2012 - 11:45
My husband is DYING to have a pergola. I showed him the plans and he is down to build and is really excited for it! That's our next project as soon as I finish our bed (haha!). Did you paint or stain this?

Fri, 05/25/2012 - 18:54
Great job! I want to build one too! The original plans say advanced, but on this post it says beginner.....watcha think? Can I do it? (so far I've made a picture frame and framed out some trimwork). Thanks for posting....btw, I love the twinkle lights!
Wed, 06/27/2012 - 17:00
You did an awesome job! I'll be showing my husband these pics and hopefully they will inspire him to make us one too! I'd love your modifications to the plans also since we have heavy snow etc.. up here in Quebec too. Thanks for sharing!
Thu, 09/20/2012 - 06:47
Im trying to build a 10x10 just like this but im trying to figure out exactly what wood dimensions I should order before i do. Im going to use cedar and I know i want to use 6x6 posts and I want to use 2x6 on top like yours but i cant figure out what exactgly I need to order. My wife wants me to do the decorative around the posts as well.
Please help!
Sun, 04/28/2013 - 11:27
Hi I was hoping you would share your plans with me I live in oregon I wanna make one of these but I plan on using 12 ft 4x4 posts putting them 3 ft in the ground and I like the way you used 2x4's and 2x6's id like to know the dimensions you used if you modified anas plan what was your spacing and what degree did you cut the outside piece's on the 2x4's and 2x6's I love the design you created from anas plan
Sun, 04/28/2013 - 11:29
oh I would also like to know how you did the cut out notches if you dont mind
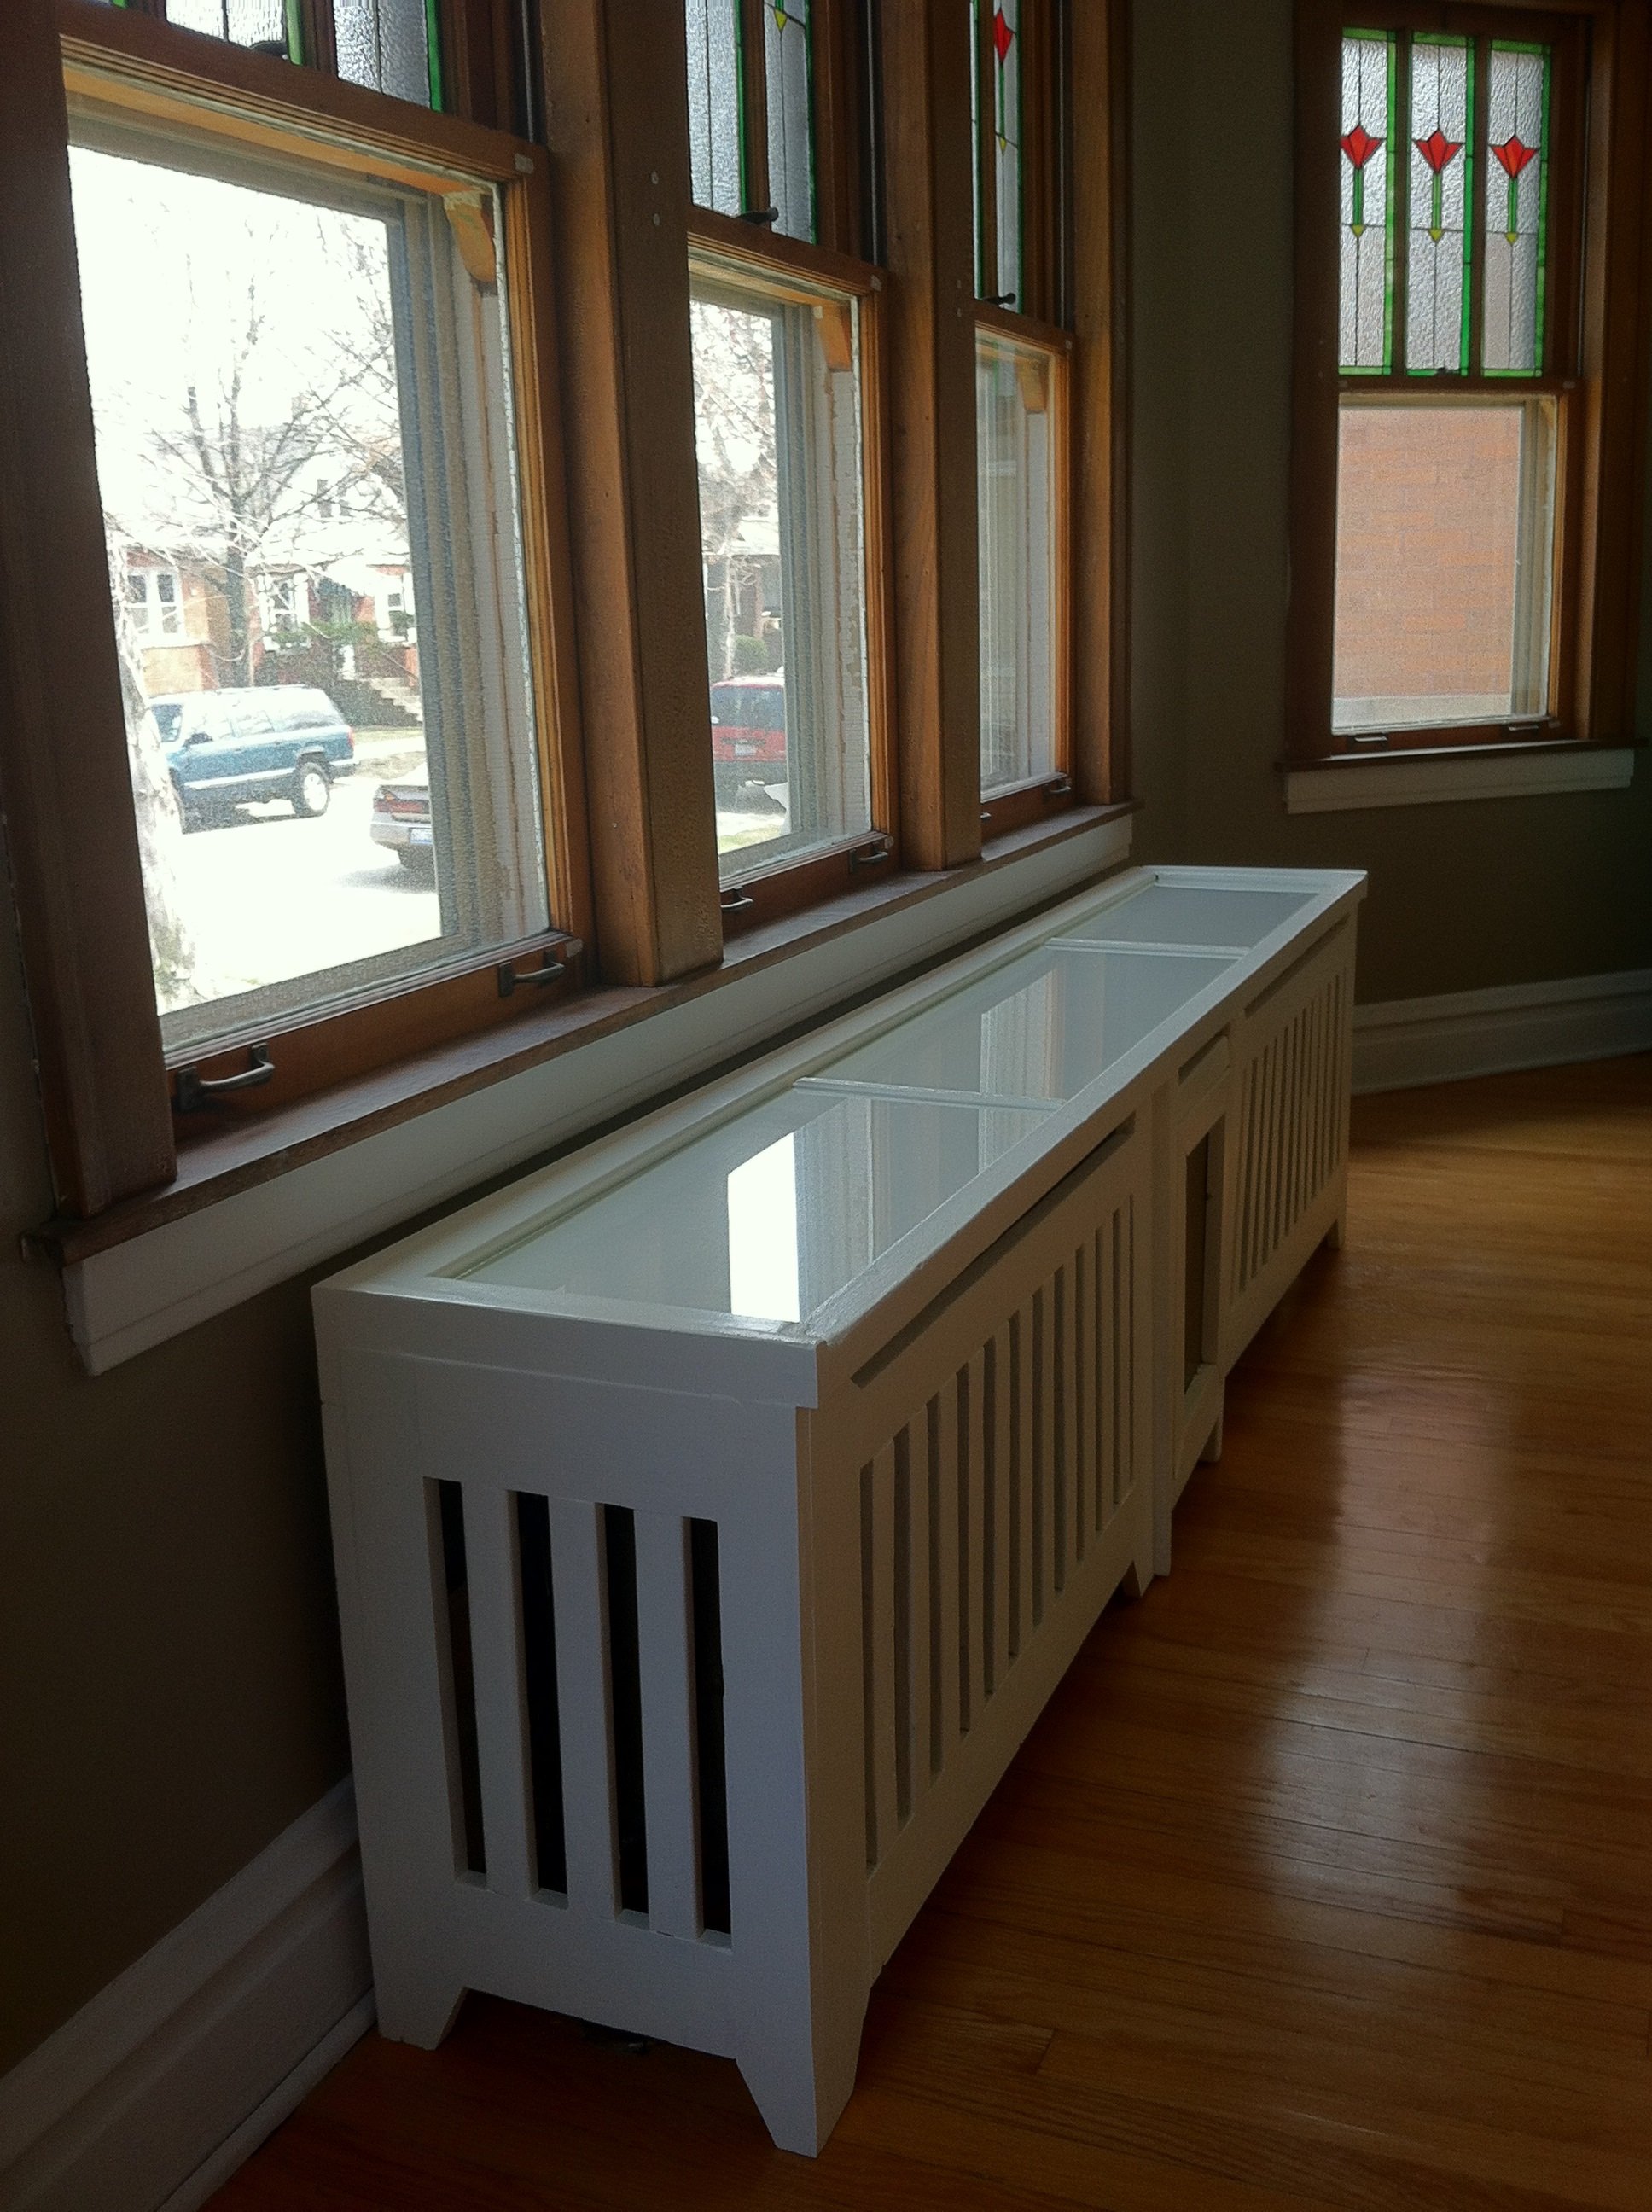
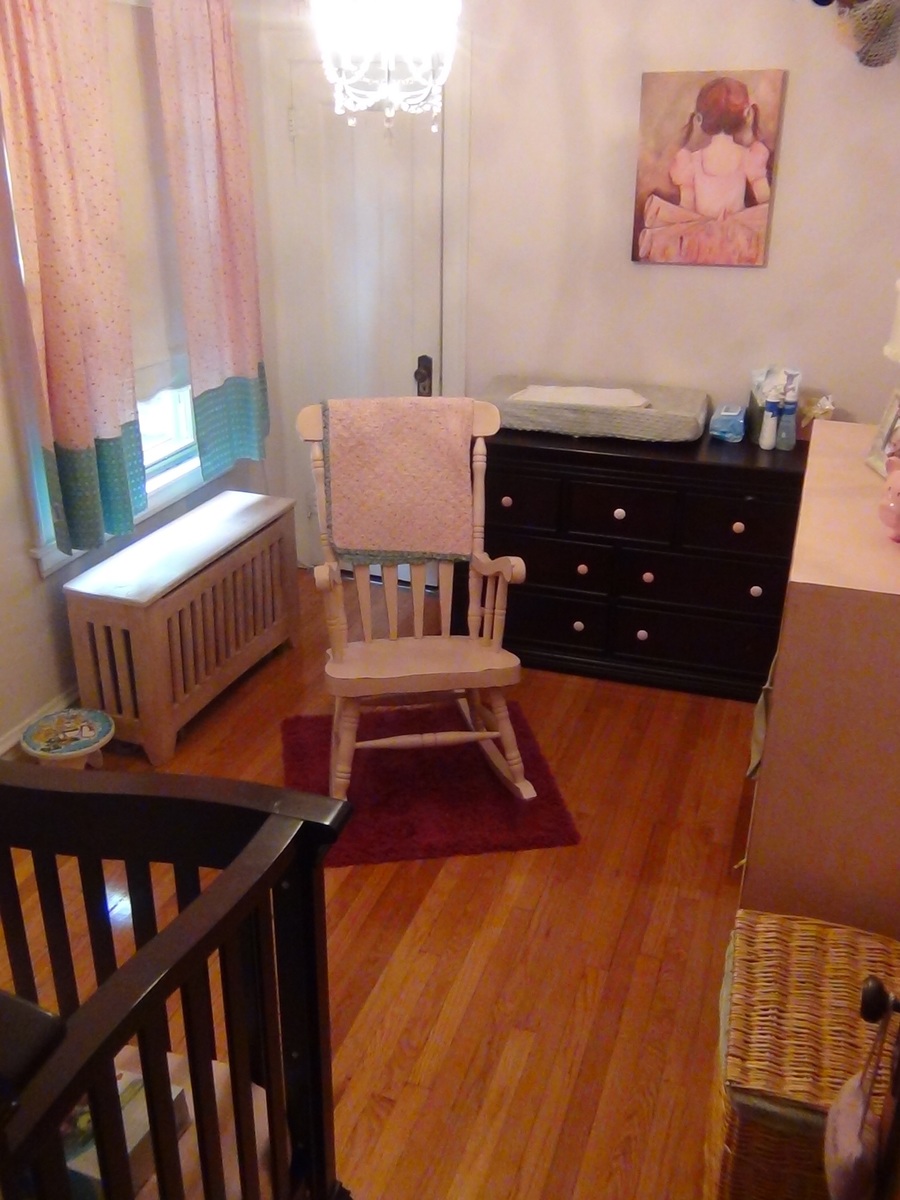
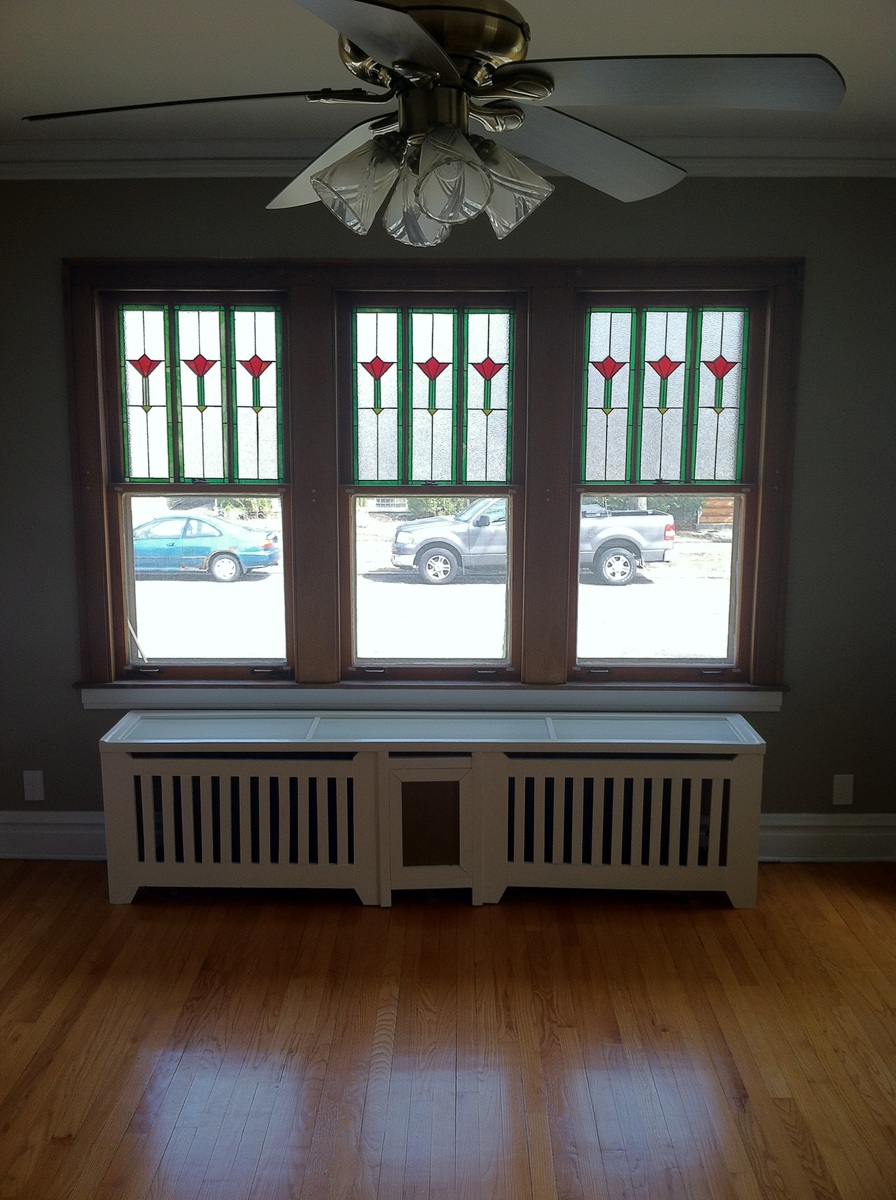
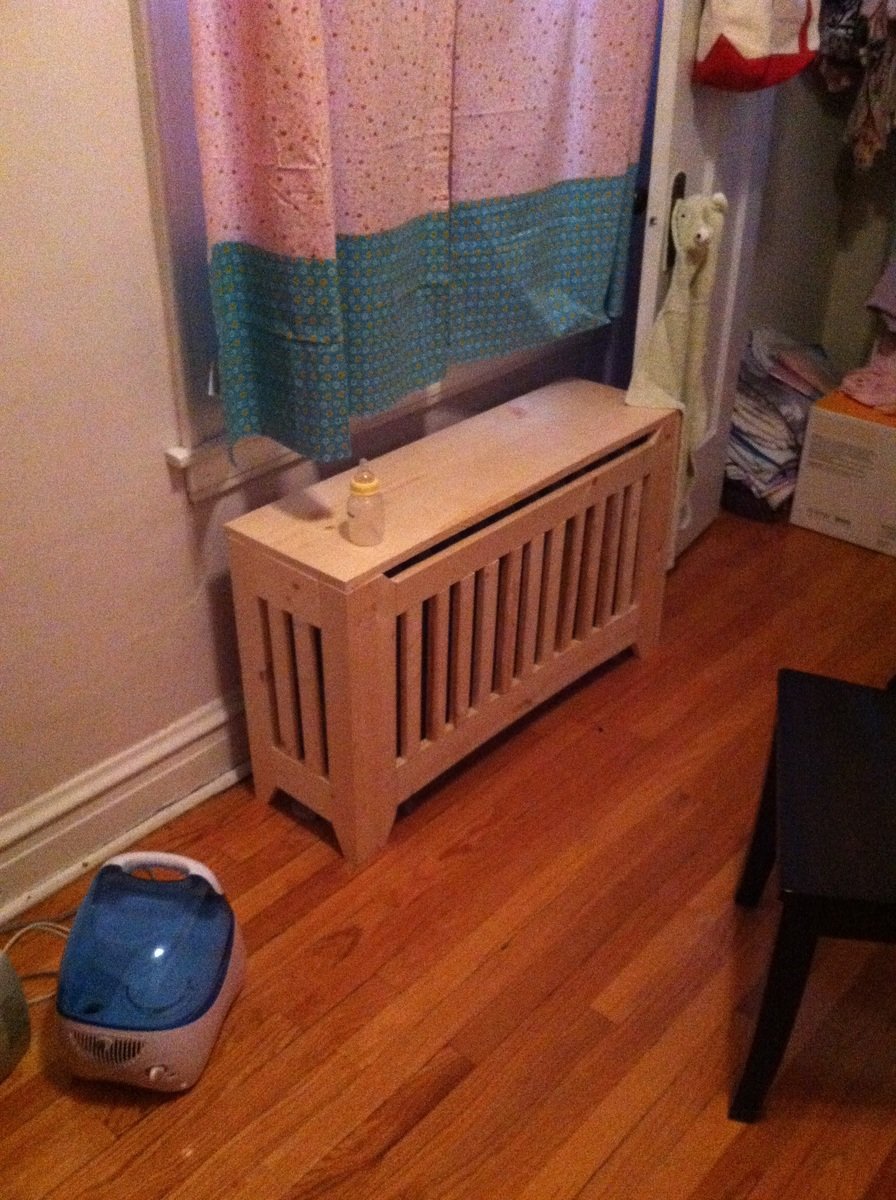
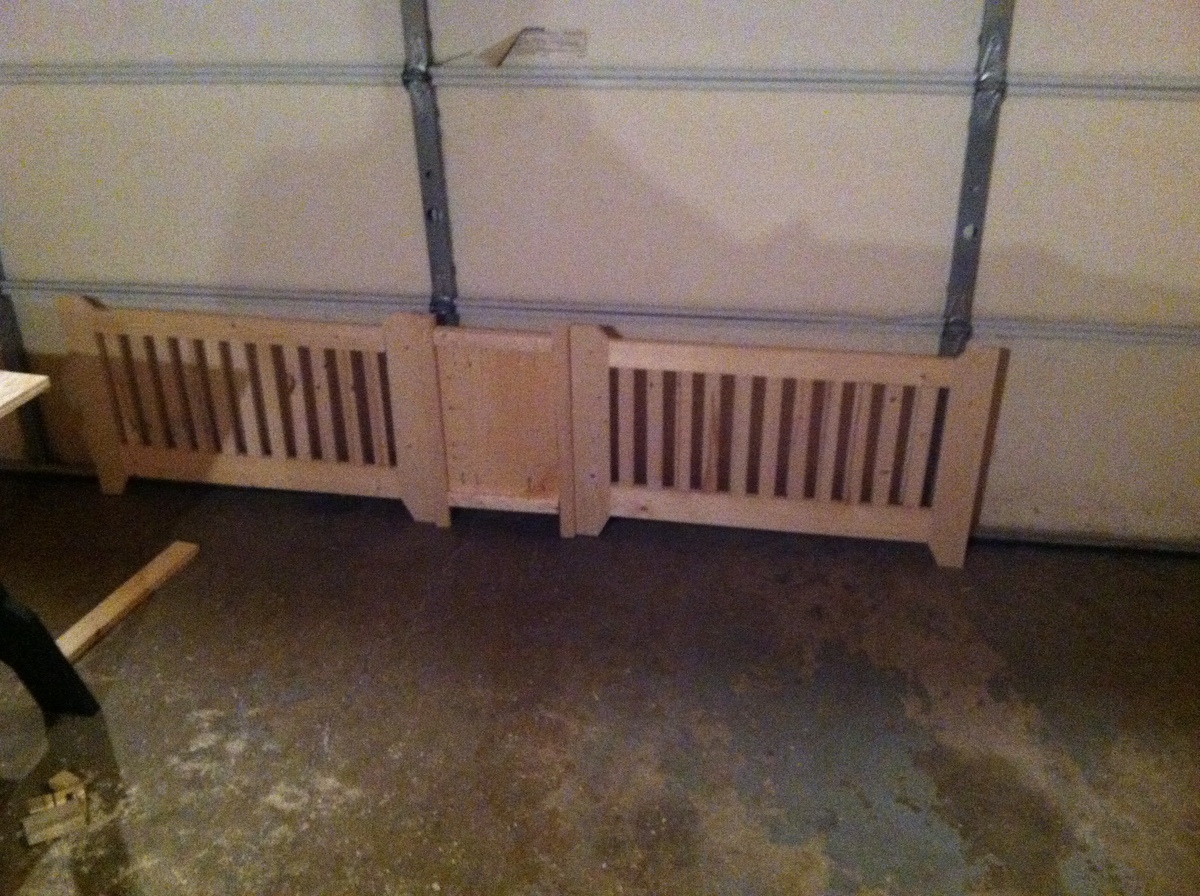
We loved the radiant air in our new early 20th century house, but as our daughter learned to crawl, we needed to prevent her little fingers from touching the two radiators that were still uncovered. After I finished my first few builds, I custom designed these radiator covers with 1x2s, 1x3s 2x2s and 1x12s. Needless to say, I got a ton of use out of my Kreg Jig. On the middle panel of the larger cover, I used a bit of decorative metal that they sell at the Big Box stores (of course, it would have been easier to use more of it, but I am a bit paranoid about little fingers touching a metal cover). For a final touch, I covered the top of the larger cover with decorative glass. For the smaller cover, I matched the distressed pink throughout the rest of my daughter's nursery.