Community Brag Posts

Modern Outdoor Sectional

Submitted by jtcalypso on Wed, 07/25/2012 - 10:02

Loved doing this as my first ever building project. Ana's plans made it easy and I found a tutorial for making the cushions at Sew Mama Sew. It's not perfect but we love it because it seats so many people comfortably and is exactly the right size for our patio. (All of our friends have complimented it like crazy, too!)

Estimated Time Investment
Week Long Project (20 Hours or More)
Finish Used
Opaque stain
Recommended Skill Level
Starter Project

Comments

spiceylg

Wed, 07/25/2012 - 10:34

You did a great job and those cushions are fab. I am a sewing novice and was too afraid to take them on.

JoanneS

Thu, 07/26/2012 - 16:32

You did such an awesome job on this. And it's your first project -- wow, it looks like it came right out of a furniture store and cost thousands! The piping on your cushions is a wonderful touch and it looks so flawless. Just beautiful!

Michelle212 (not verified)

Mon, 10/22/2012 - 08:15

Wow, this is really great. I love that color - How did you do the stain/paint? Is it meant for outdoor use?

Husky Farmhouse Dining Table

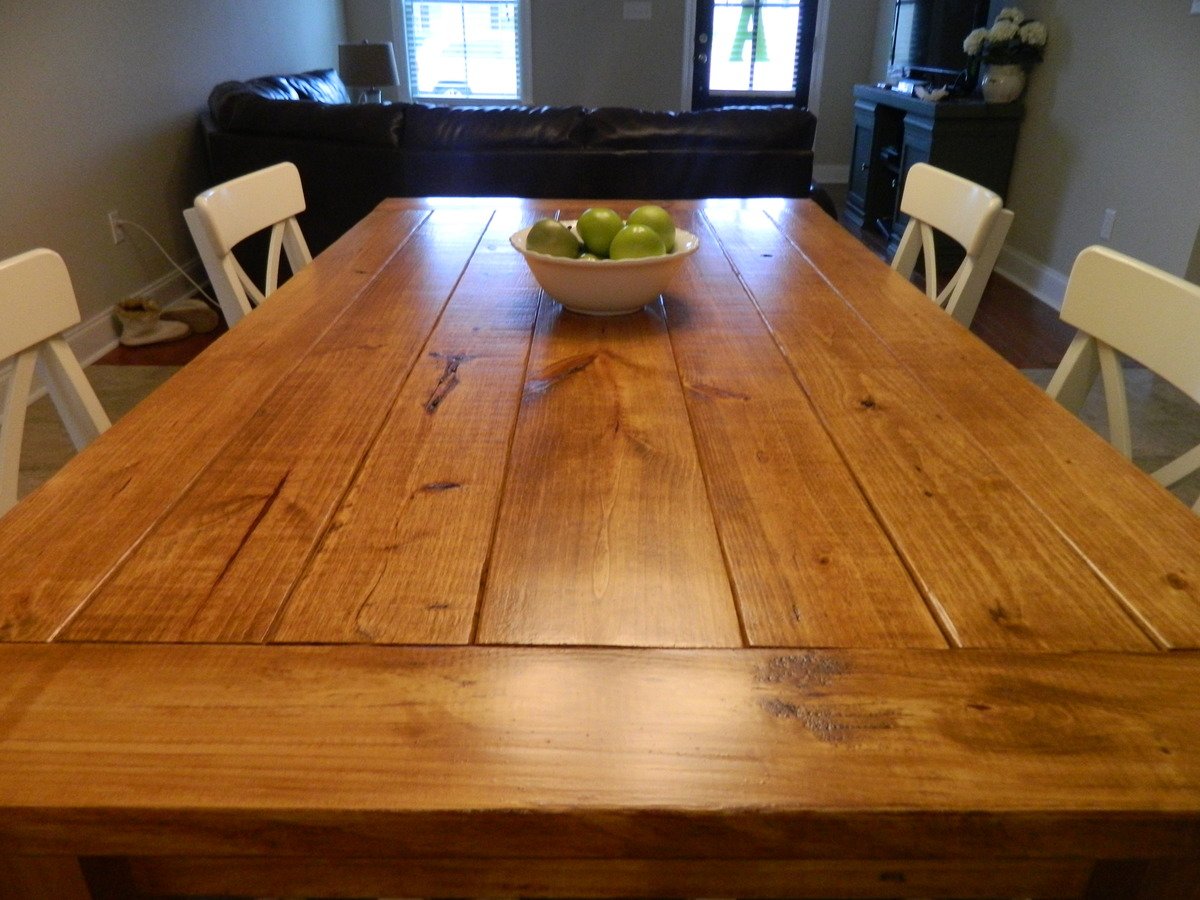
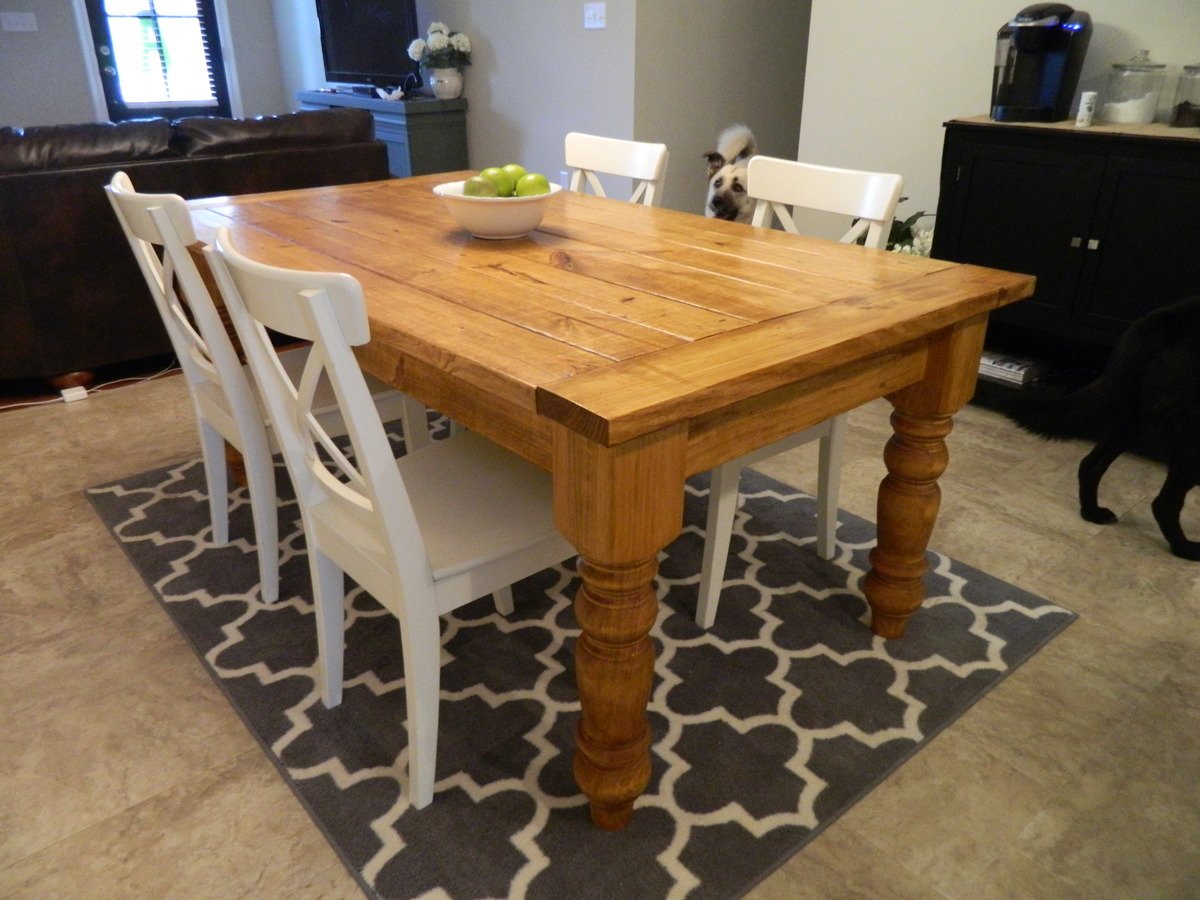
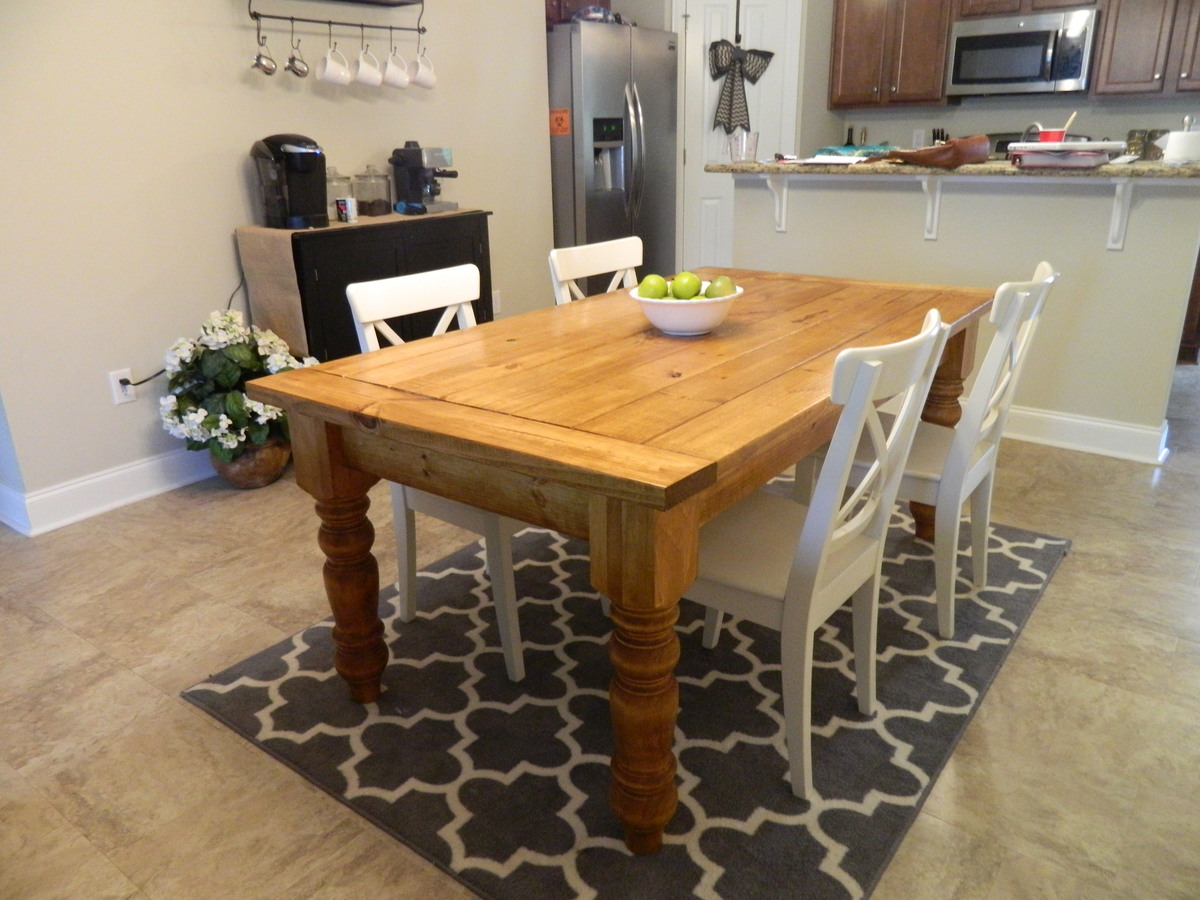
I love building my own wood furniture so that I can have beautiful pieces of furniture in my home while saving money! And while this project definitely cost more than the others I have done, I am so glad I splurged on the table legs. They ran me about $260 after tax and shipping costs, but I really think they give the table that extra OOMF! So a total of about $300 is nothing compared to a price tag at Pottery Barn or Restoration Hardware!

I chose this stain because I really wanted something to contrast with our dark leather couch and white dining chairs and this stain was even more perfect than what I expected it to be.

Built from Plan(s)
Estimated Cost
$300
Estimated Time Investment
Weekend Project (10-20 Hours)
Finish Used
Varathane Early American with Helmsman protective coating
Recommended Skill Level
Beginner

Modern Oversized Outdoor Chair

Submitted by zpbrown84 on Tue, 06/02/2020 - 10:41

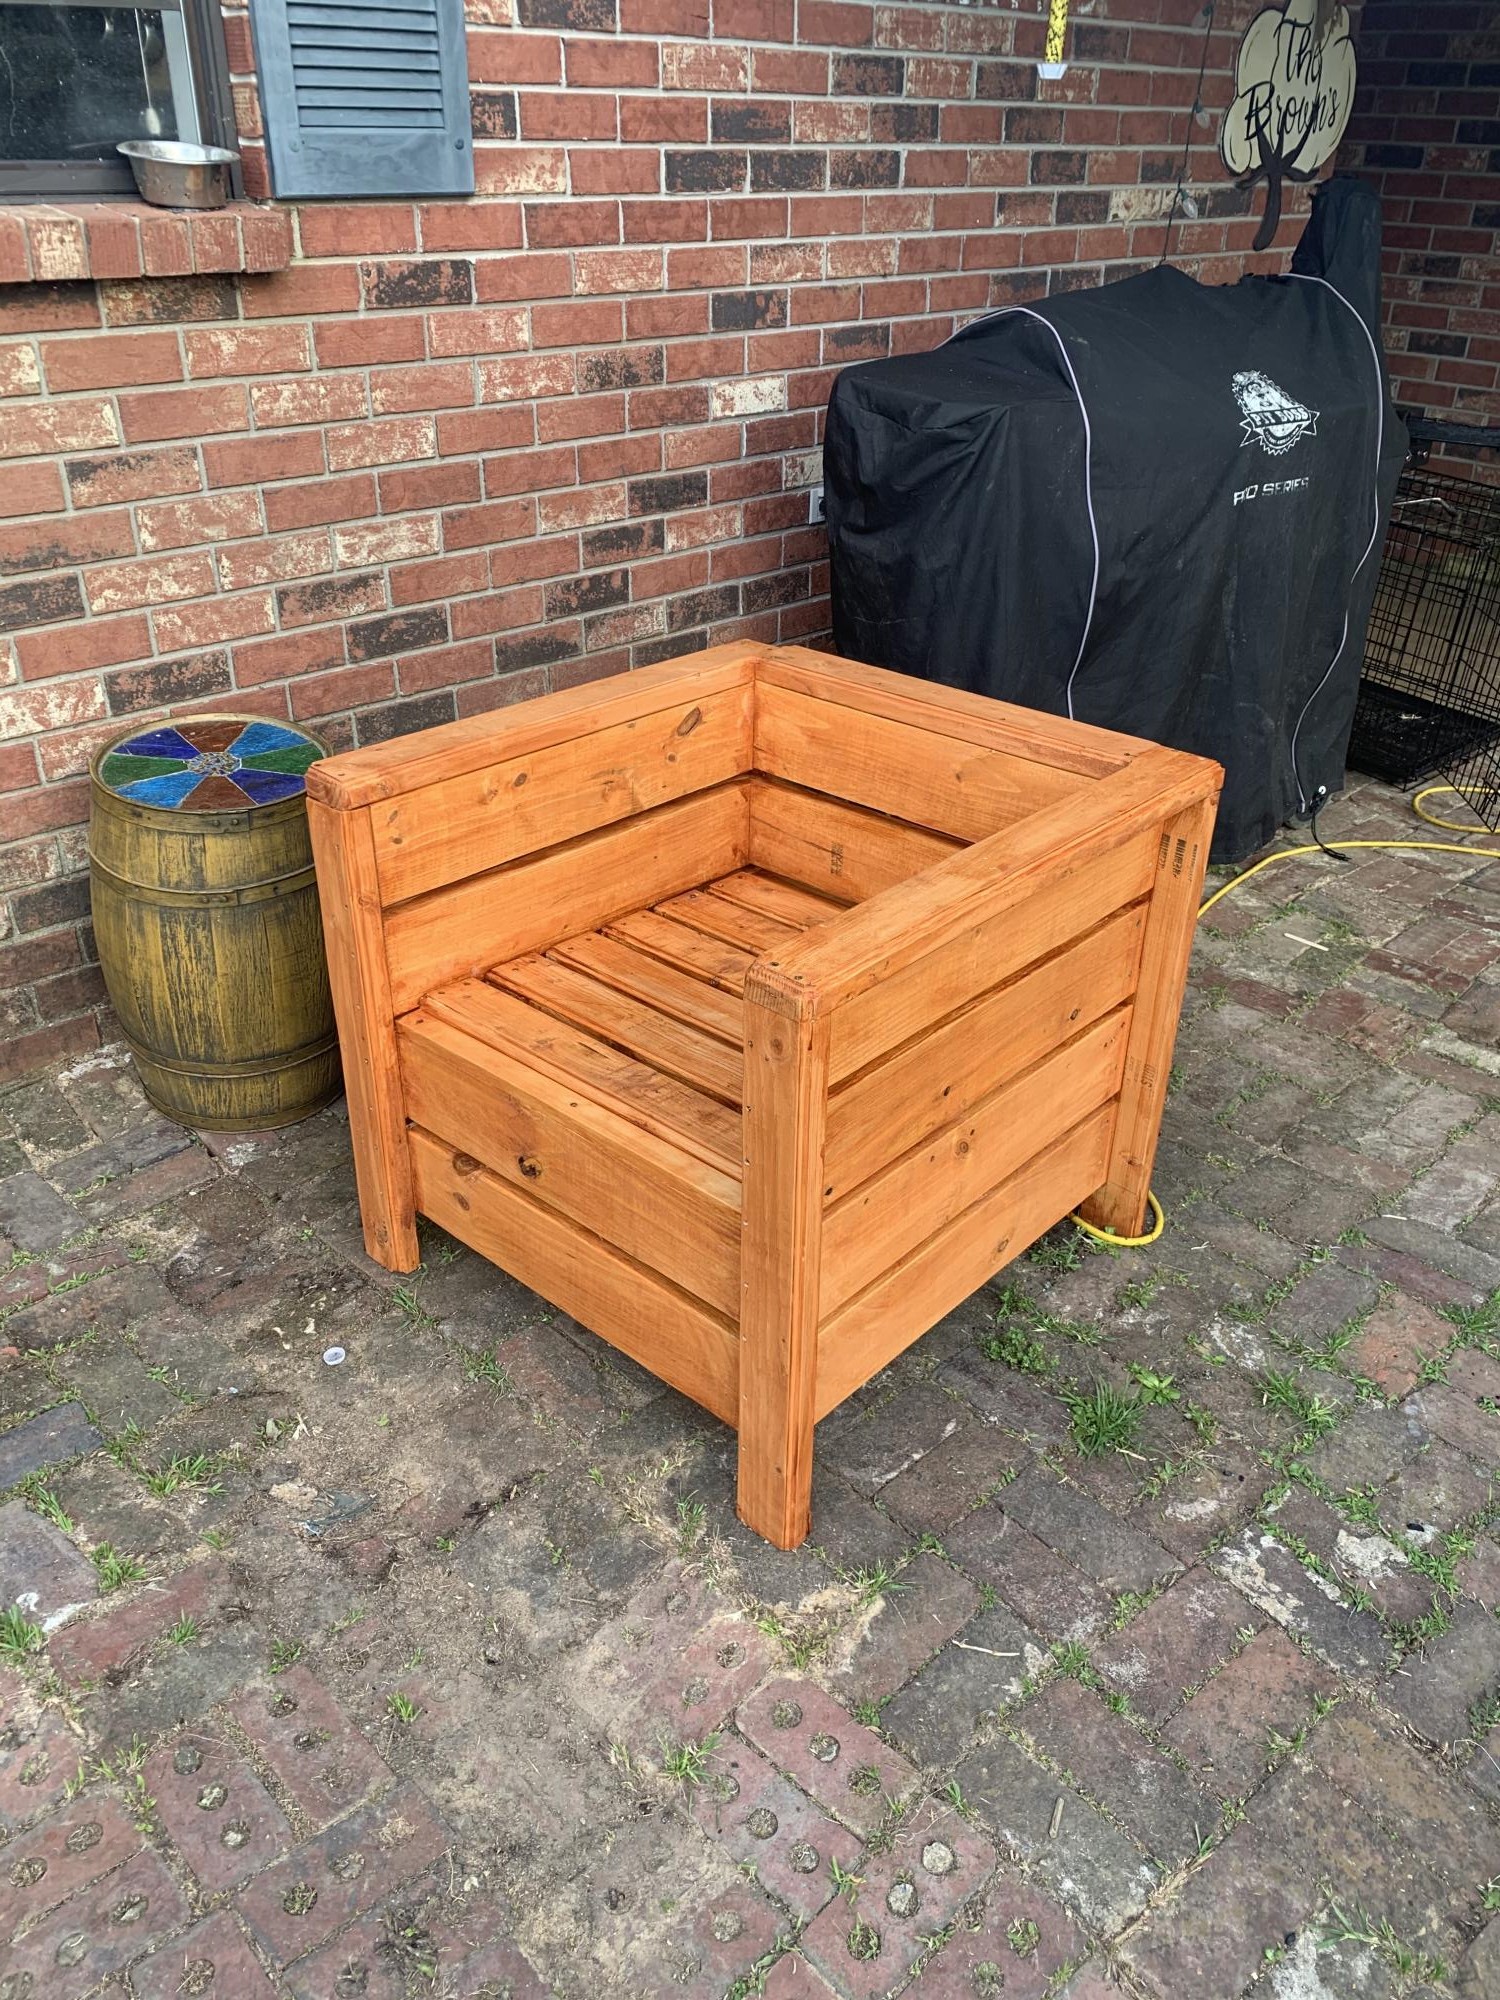
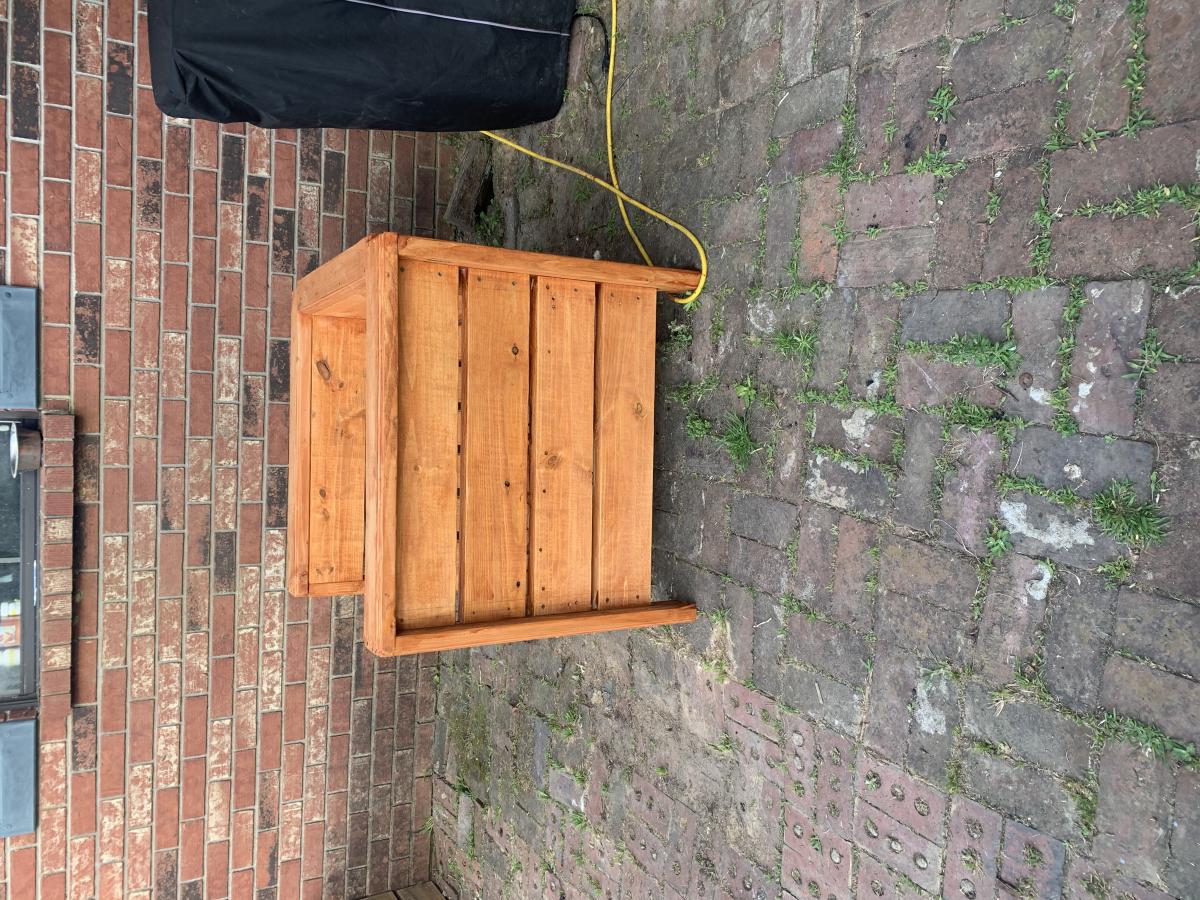
I made one of these chairs the the back hit me to low and was uncomfortable so this one I the legs 5 1/2” longer. This is my second project and took half a day but I am very happy with the outcome and started a second chair to match.

Built from Plan(s)
Estimated Cost
$50
Estimated Time Investment
Afternoon Project (3-6 Hours)
Finish Used
Valspar Transparent Redwood and I used a 1/4 Roman Ogee router bit on the arms and legs
Recommended Skill Level
Beginner

Cottage Hall Tree

Submitted by Anonymous (not verified) on Mon, 02/26/2024 - 10:45

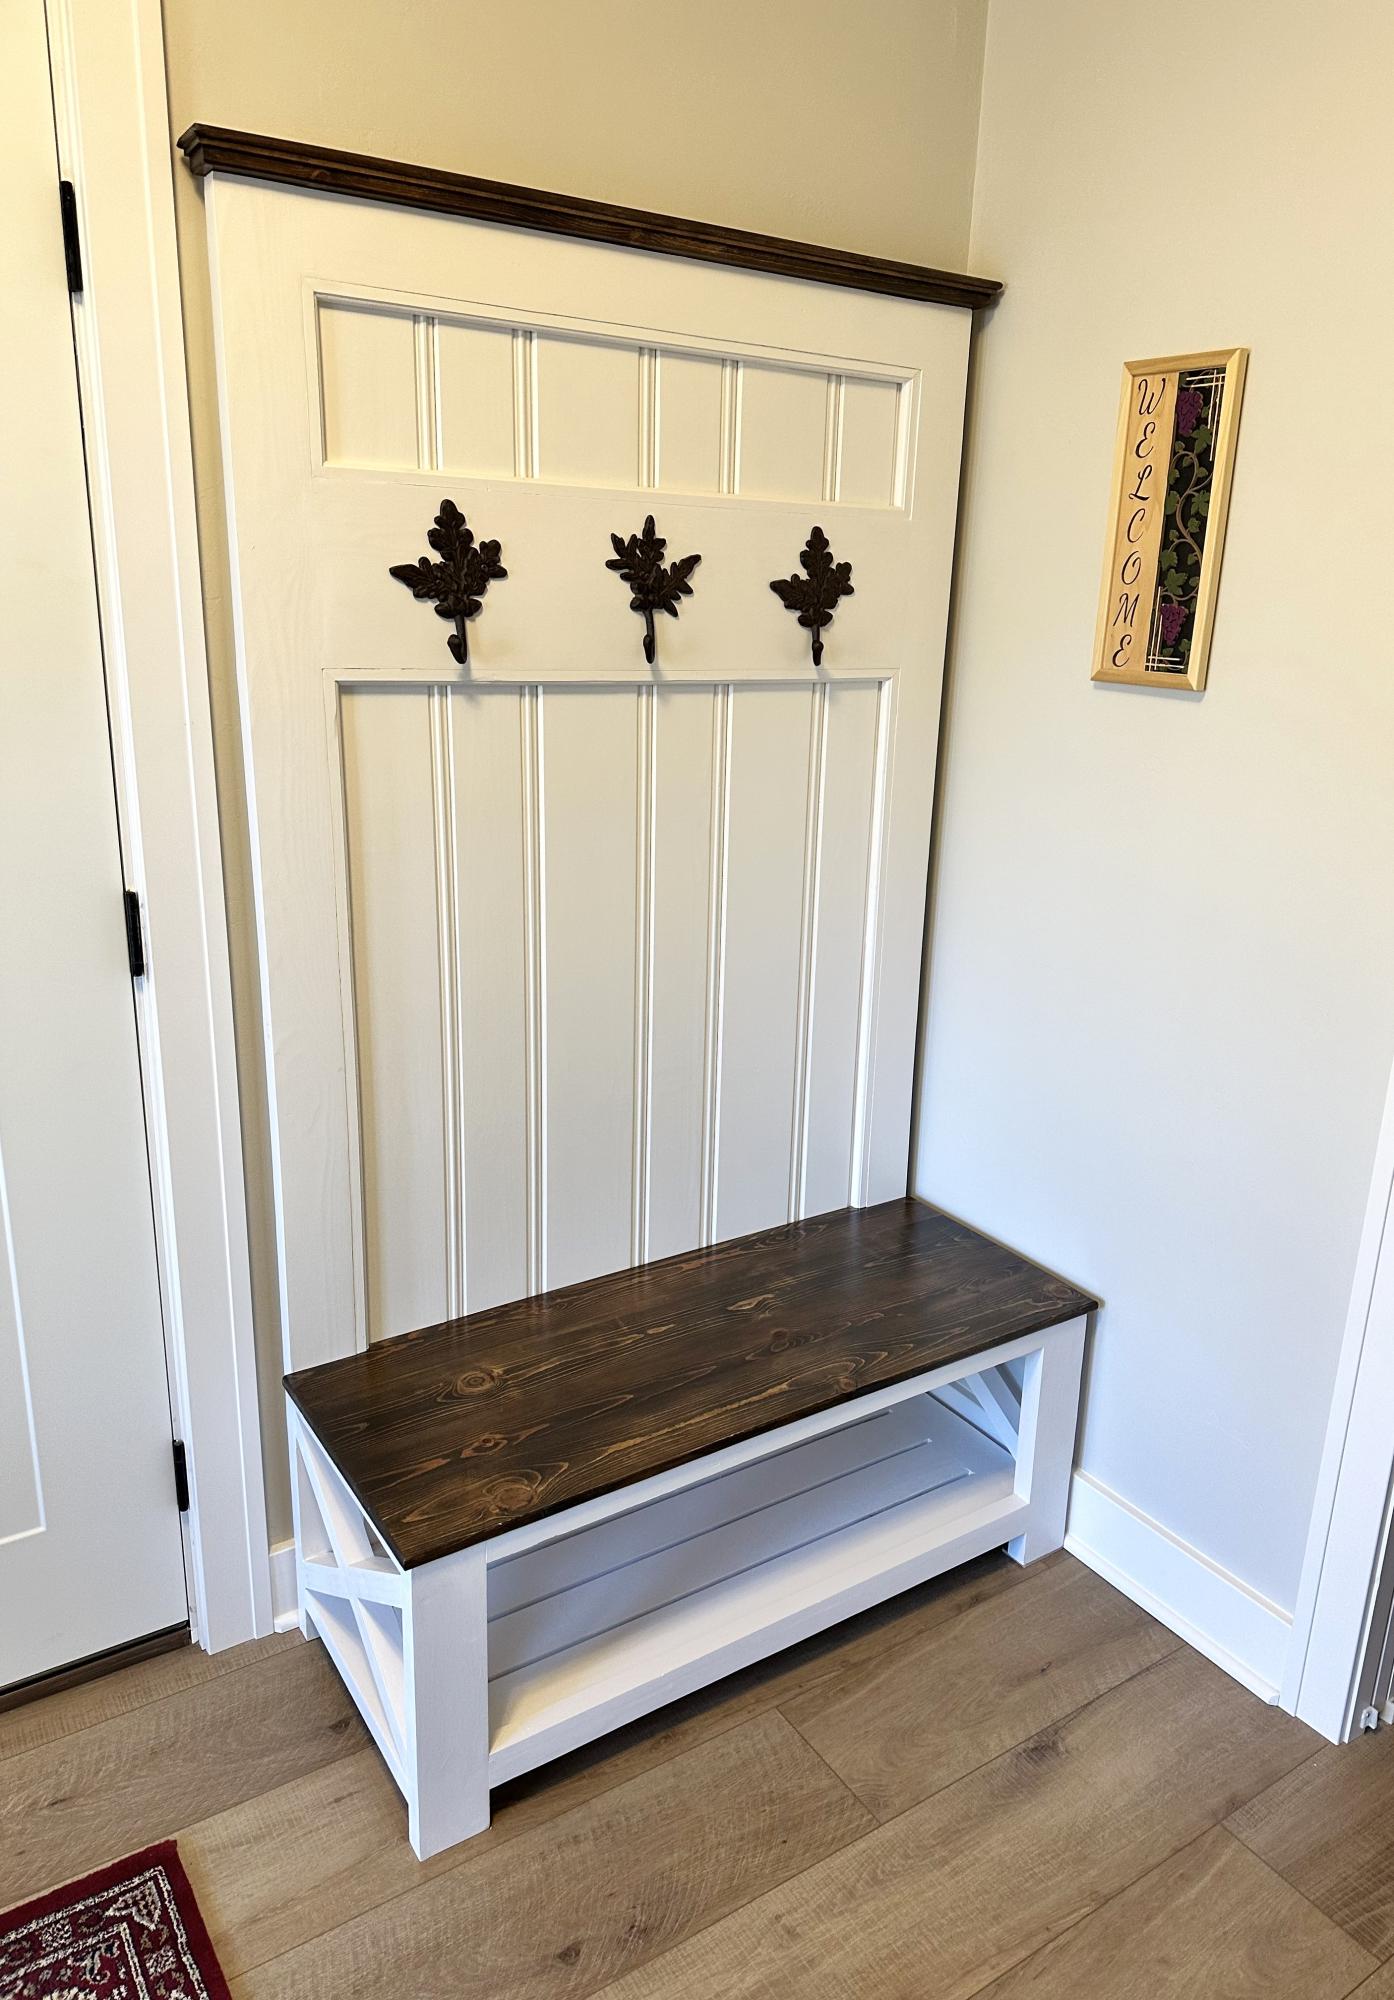
Great plan, I used knotty pine boards for the entire build, including glue up for 2x4 pieces. And the hooks came from a recent visit to England. The wood was reclaimed from a tear down of our family cottage. Using the material gives our new home a sense of history.

Built from Plan(s)

Modified Trestle Table

Submitted by Ryan on Fri, 07/27/2012 - 06:24

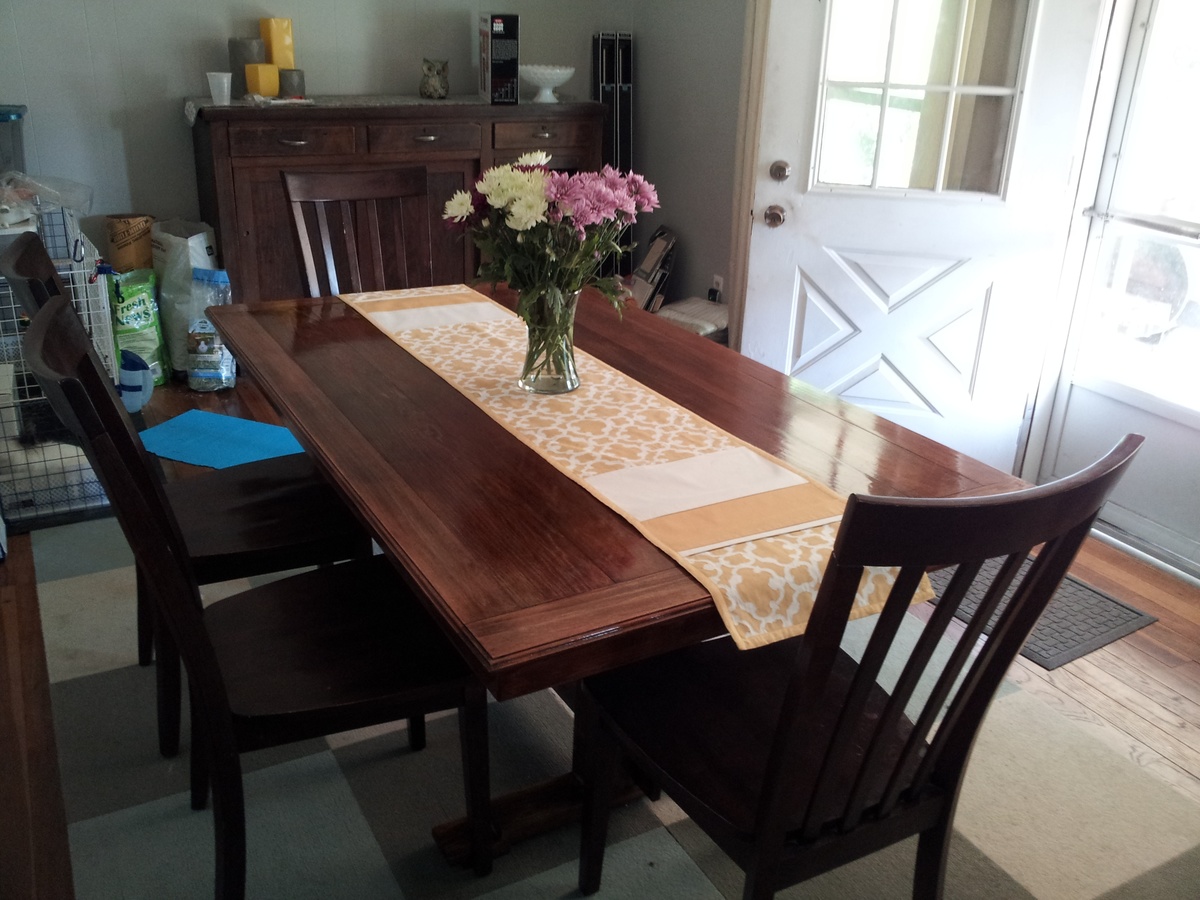
This is the kitchen table that I made when my wife said I "wasn't handy", I'm pretty sure she meant she wanted me to replace the ceiling in the dining room...

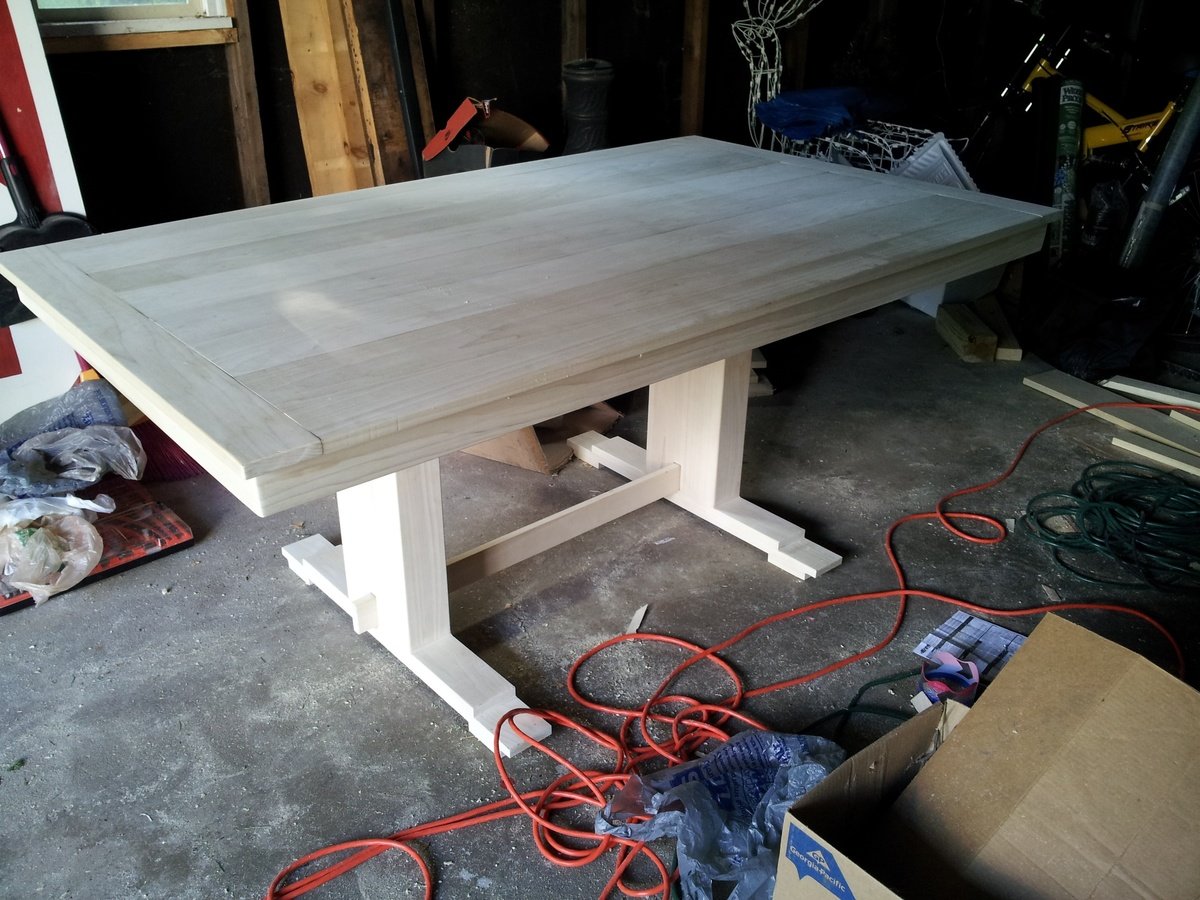
I took the Farmhouse Table plans and changed them a bit to create a true trestle table. I'm pretty happy with the results.

Unfortunately there isn't anywhere to put the Google SketchUp of this project.

Estimated Cost
$250
Estimated Time Investment
Week Long Project (20 Hours or More)
Finish Used
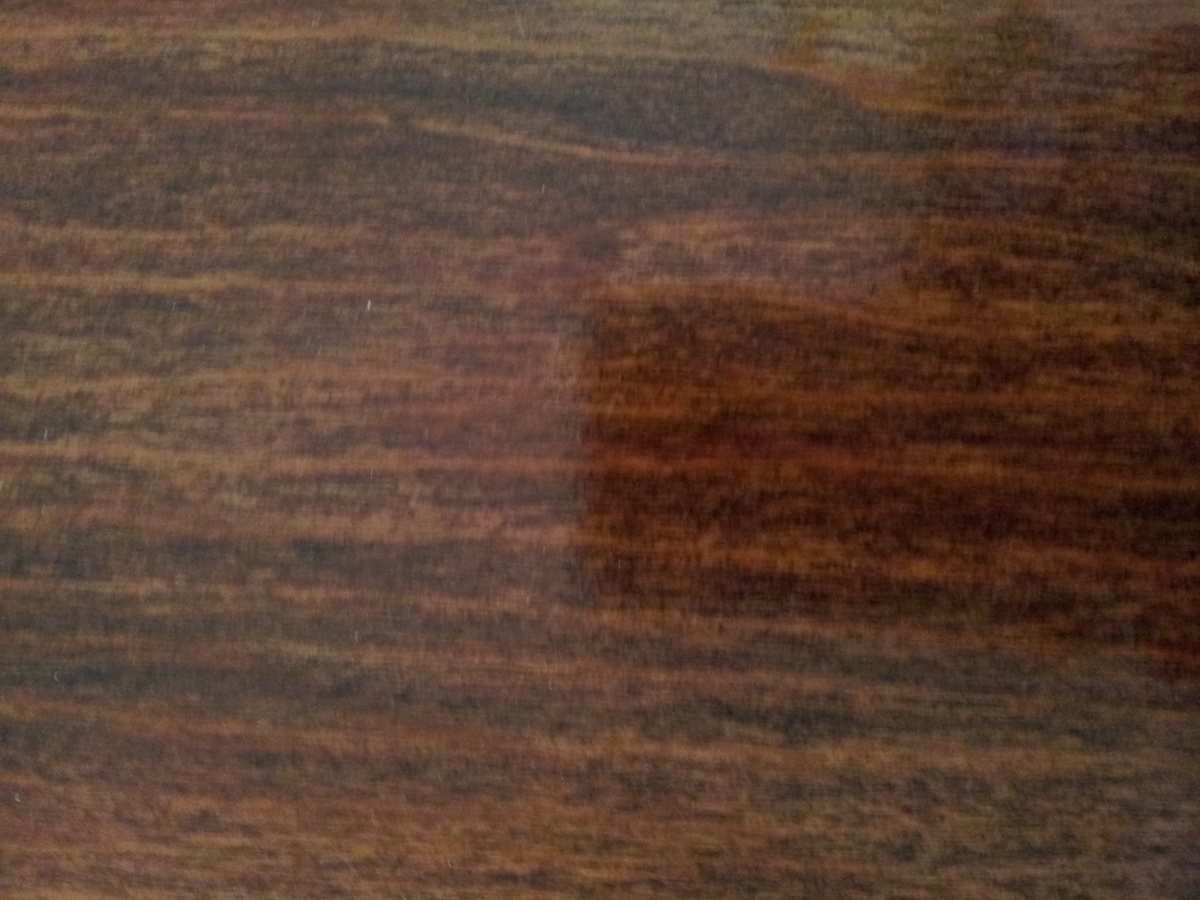
I used a cherry gel stain and a jacobean traditional stain, finished with poly. Two coats of cherry followed by the jacobean and three coats of the poly.
Recommended Skill Level
Intermediate

Comments

Ryan

Wed, 09/05/2012 - 11:57

Basically I combined the farmhouse and trestle table plans that Ana has up here... I didn't want to use a metal bar to fasten the legs, so I used a wood cross brace. Though honestly with the large box legs, the table is very sturdy even without a cross brace. I have a Google SketchUp of this project if you want it.

MaryMurray

Sun, 12/01/2013 - 20:05

I love the color of the finish. I am just about ready to start building my farmhouse table and was looking for a nice color for the finish. Thanks for sharing!

King Farmhouse Bed

Submitted by jhavinga on Thu, 05/22/2014 - 16:31

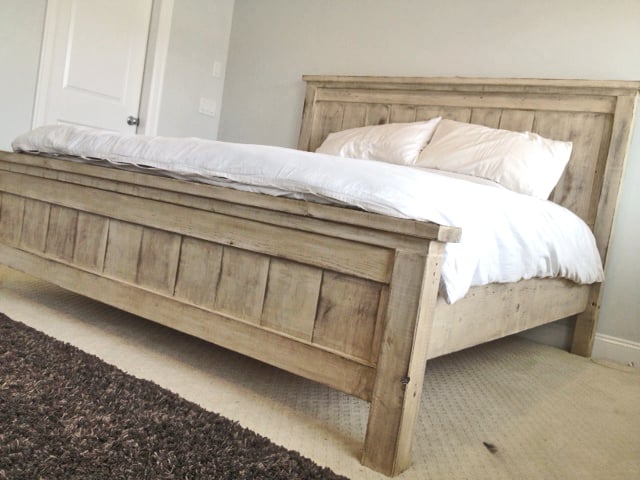
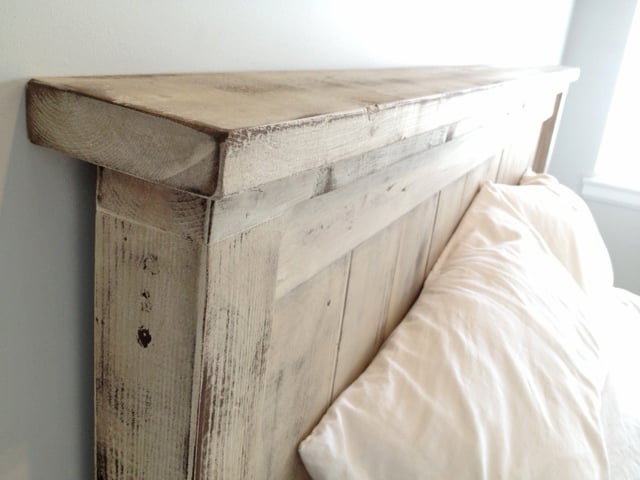
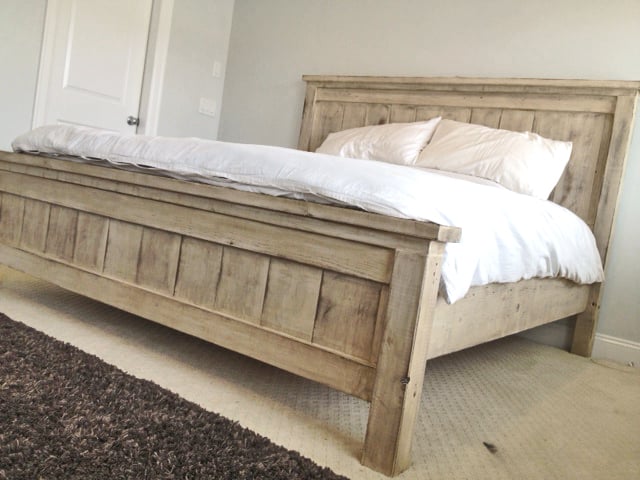
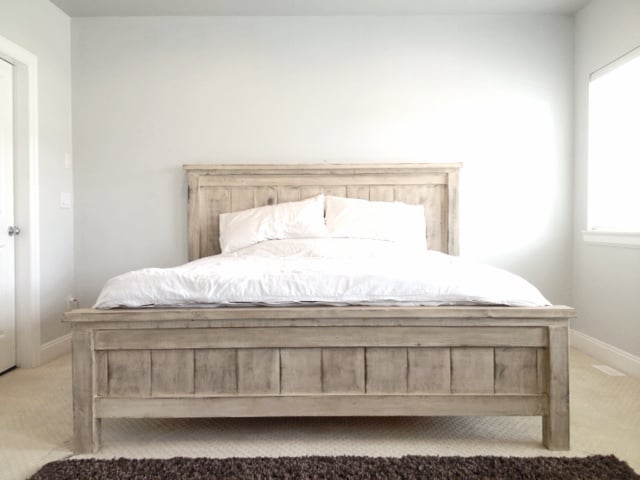
Second project ive completed from Ana White, and I am very happy with how this bed turned out! The only thing I would fix would be the finish, I wanted it a bit whiter. not so creamy. Otherwise very quick and easy fun project to do. =)

Estimated Cost
$300
Estimated Time Investment
Day Project (6-9 Hours)
Finish Used
1 coat of a basic latex white paint.
Then I sanded down just so raised grains would become exposed.
1 coat of dark walnut stain (wipe on with cloth)
Done.
Recommended Skill Level
Starter Project

Comments

jhavinga

Thu, 05/22/2014 - 16:34

Thank you for sharing all of these awesome projects. I was always hesitant when it came to wood, but now I cant seem to stop!

jhavinga

Wed, 06/11/2014 - 13:43

(You can do all this before or after your project is put together or not.)
Be sure to do a test piece before hand so you can see exactly what your getting :)

The first step I did once the head board and foot board were put together, was to sand any sharp edges or corners. I liked mine rounded and worn looking. I did not sand anything else.

Second step is to paint 1 even coat of a basic white latex paint.

Third step is to sand away some white paint. because we didnt sand it before hand the grains in the wood will be very bumpy. so the paint on the grains will sand off while the paint lower than the grain will remain. makes sense? hopefully i explained that right!

Fourth step is to now wipe on the stain of your choice. I went with Dark walnut. It stains the paint a bit bringing the white to a gray/brown tone. and stains the wood dark walnut so the grain patterns show up dark.

Let me know if you have any other questions and good luck!

jbogan15

Thu, 01/29/2015 - 07:49

What grit of sand paper did you use to sand off the white paint? and did you sand it by hand? Also, for the dark walnut stain, did you wipe off immediately or leave it on for a bit before wiping? Beautiful bed, I want to achieve this look!

In reply to by jbogan15

jhavinga

Fri, 02/06/2015 - 09:15

Hi jbogan15, thank you!
For sanding I used a palm sander with 120 grit to get the job done a bit quicker, than went over lightly with 220. When staining I actually just dipped a rag in the stain and would wipe the stain on. =)

Good luck!
Justin

kosborn

Fri, 01/27/2017 - 11:05

Love this look! Exactly what I am trying to achieve...A few questions about the side rails. How high did you connect them to the 4x4 posts and exactly how did you connect them? Did you use brackets or screw right into the posts? Thank You!

barkleyl

Thu, 09/05/2019 - 15:07

I have seen several beds from Anna White. I was wondering if the frame require a box spring mattress or not. If not, are the beds lower than what a traditional mattress and box springs are. Thanks ! 

Emily's playroom chairs

Submitted by Anonymous (not verified) on Mon, 08/22/2016 - 12:20

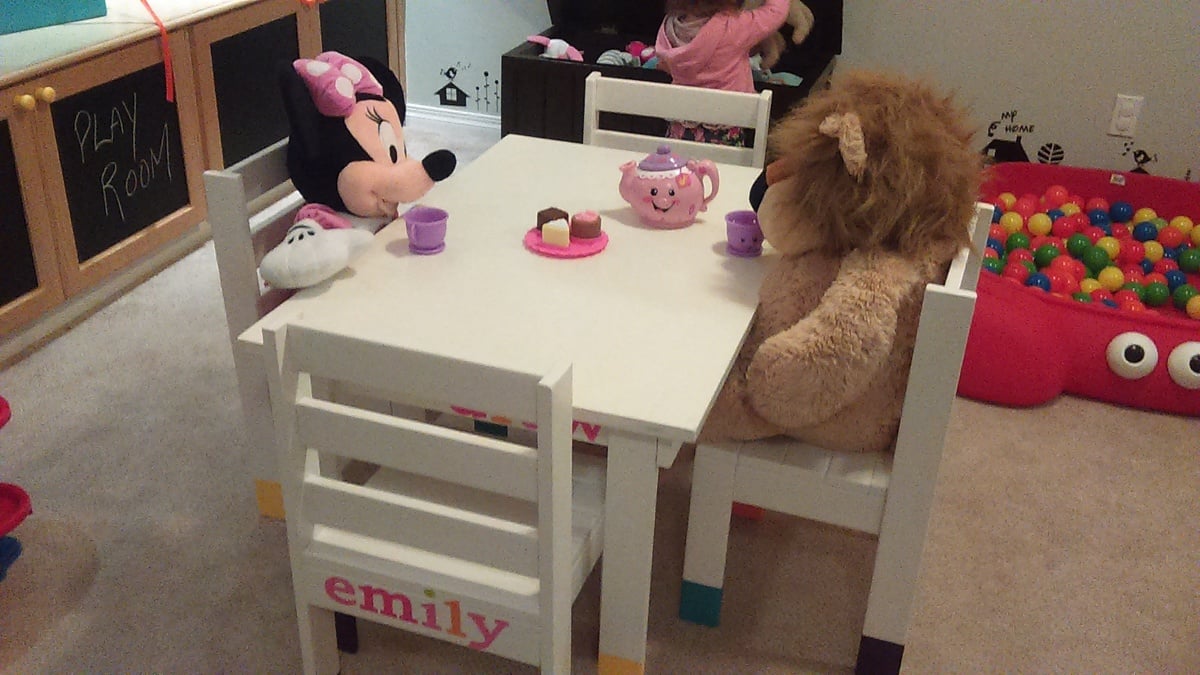
So we had our grandchild Emily needing a play table and chairs, a limited budget, an old play table but no chairs! Ana White to the rescue! We made 4 chairs and painted them and the table to match. As you can see Emily has made lots of new friends over tea! 

Estimated Cost
$30
Estimated Time Investment
Weekend Project (10-20 Hours)
Finish Used
Enamel paint and clearcoat
Recommended Skill Level
Beginner

Modern Adirondacks UK

Submitted by Anonymous (not verified) on Thu, 06/04/2020 - 11:16

Hi Ana

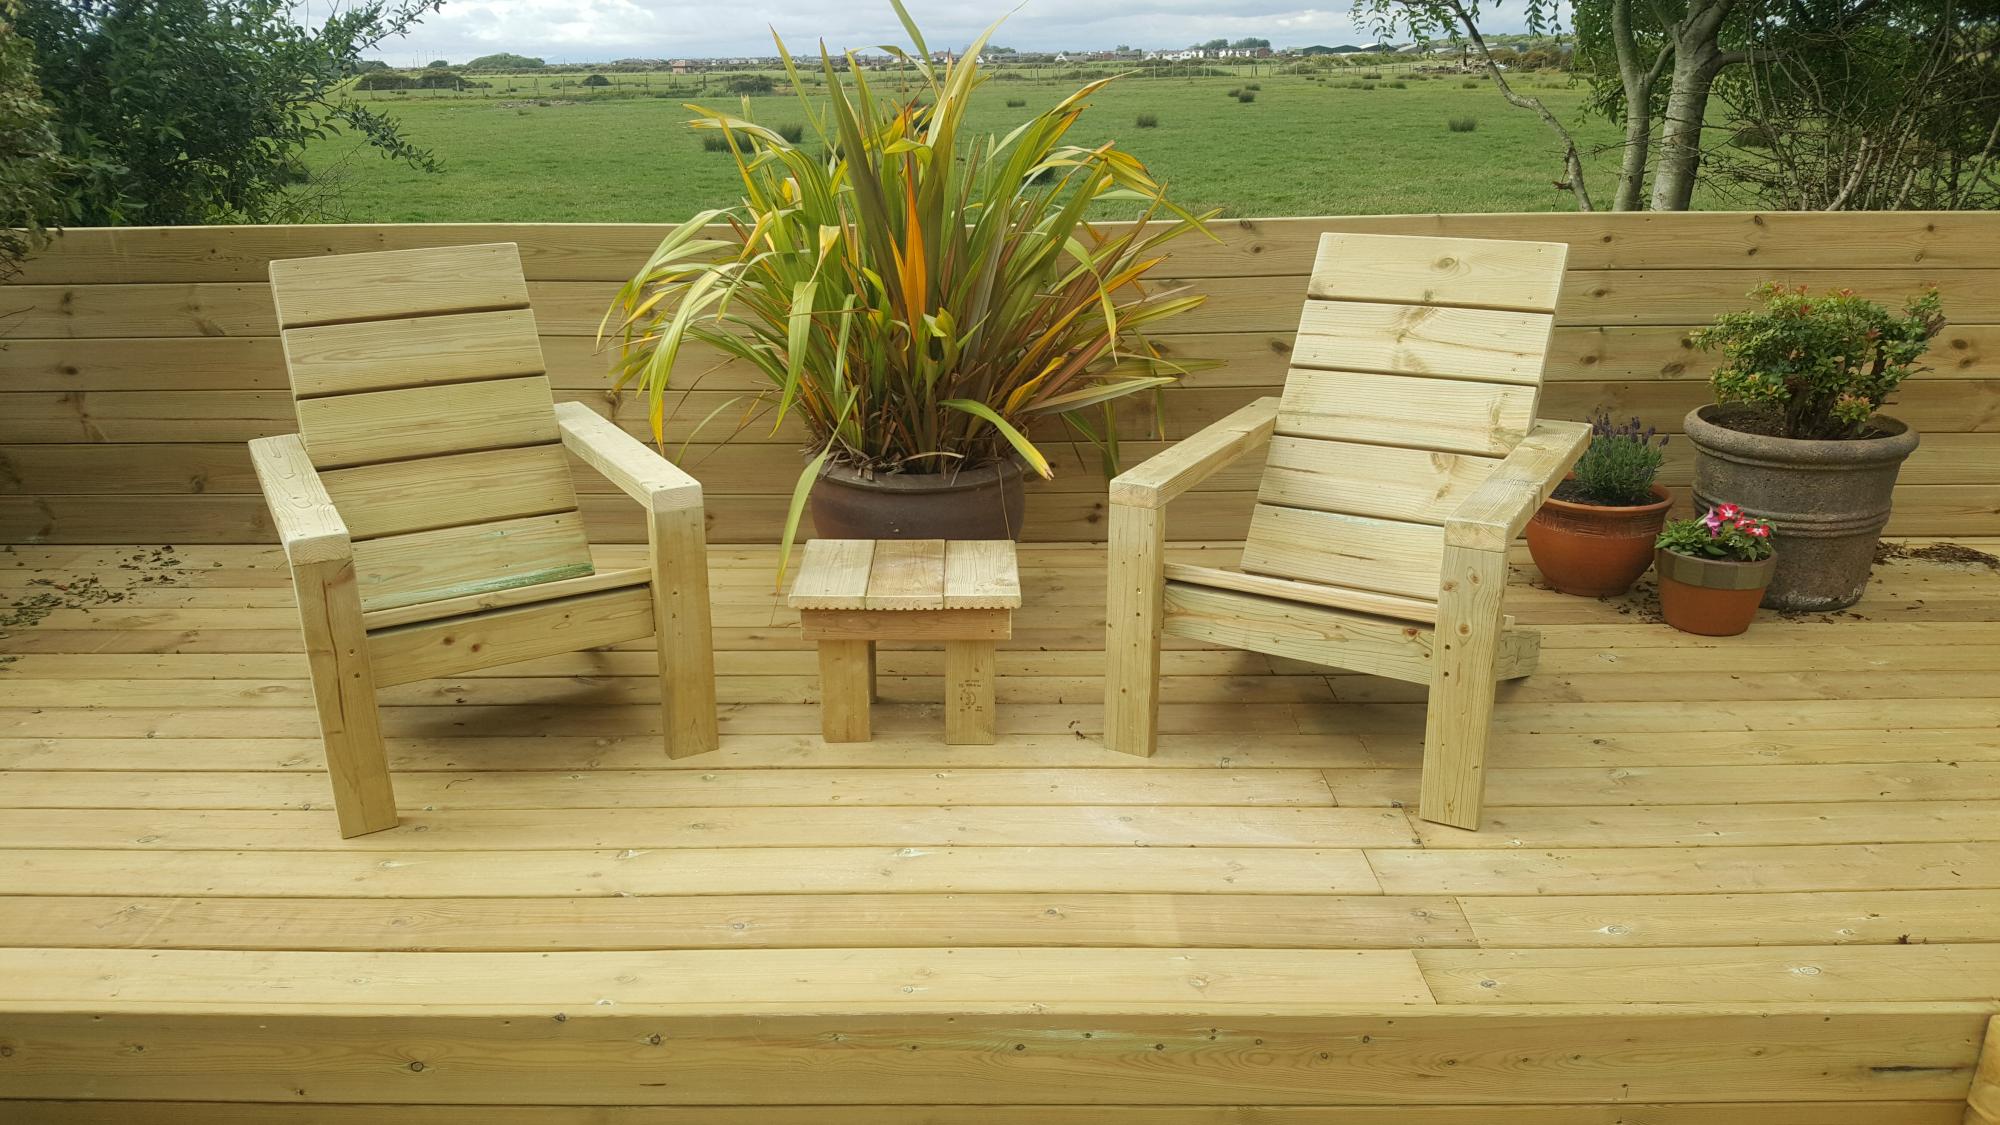
Just wanted to say thanks for the plans. Here's how ours came out!

Ben.

Estimated Cost
£50
Estimated Time Investment
An Hour or Two (0-2 Hours)
Finish Used
Tanalised pressure treated timber.
Recommended Skill Level
Intermediate

Small Upholstered Stool

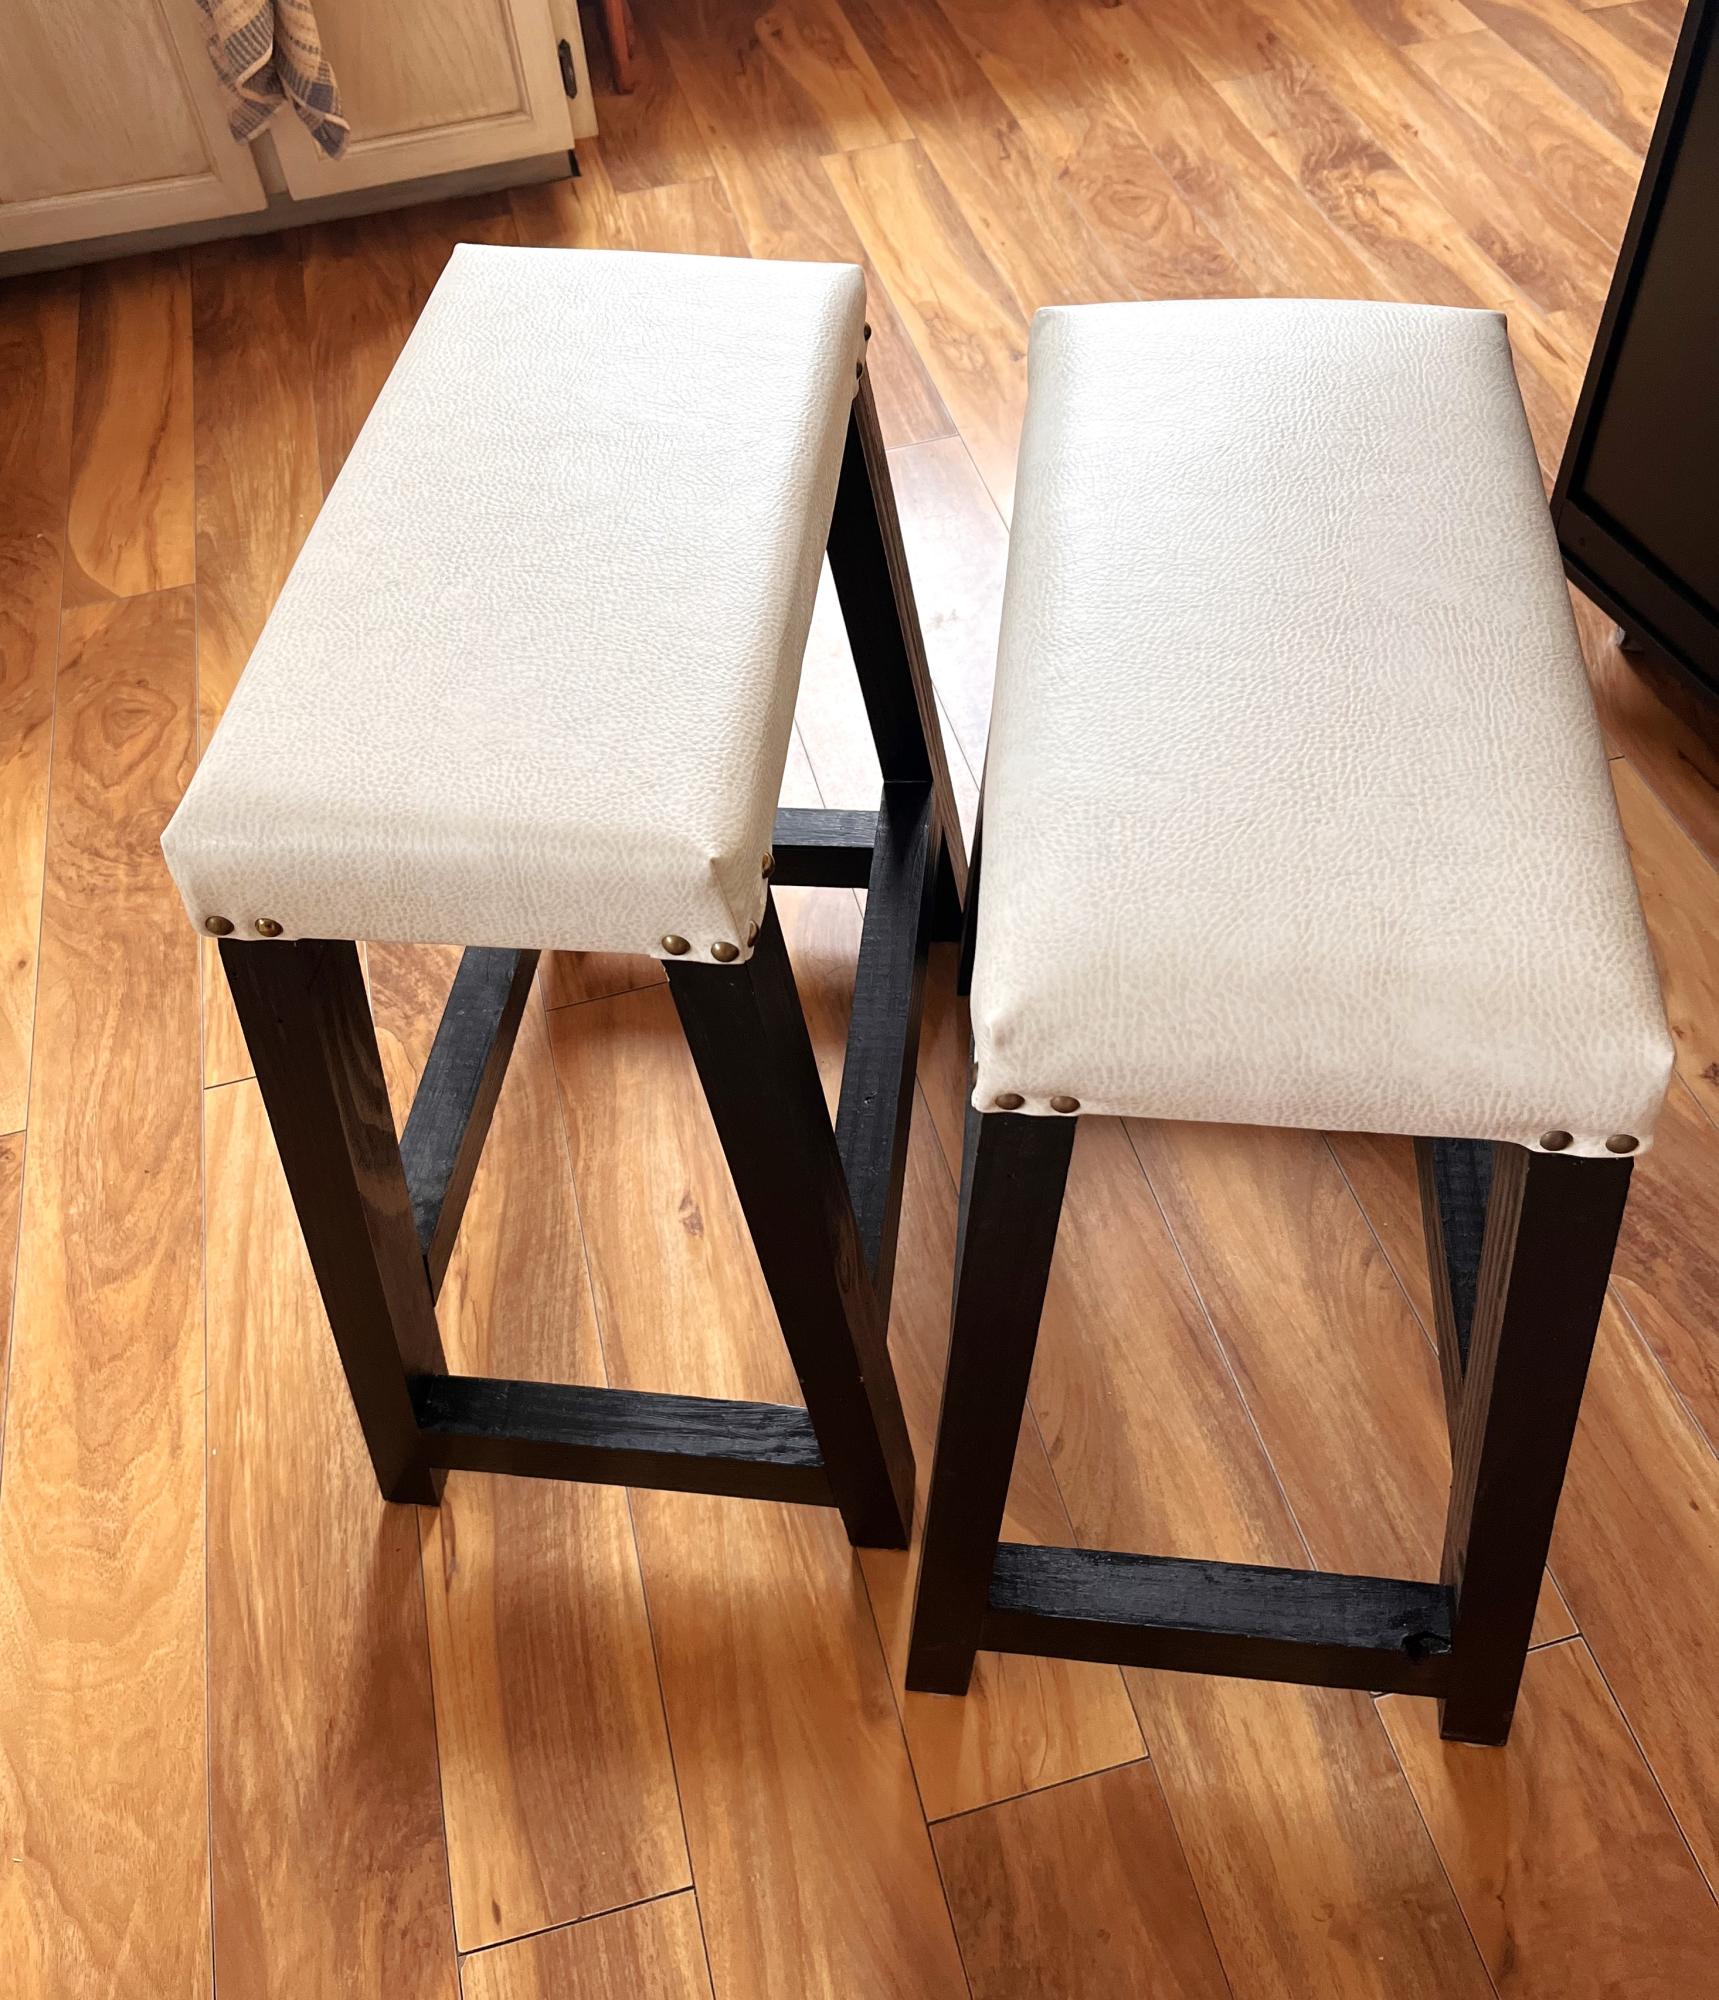
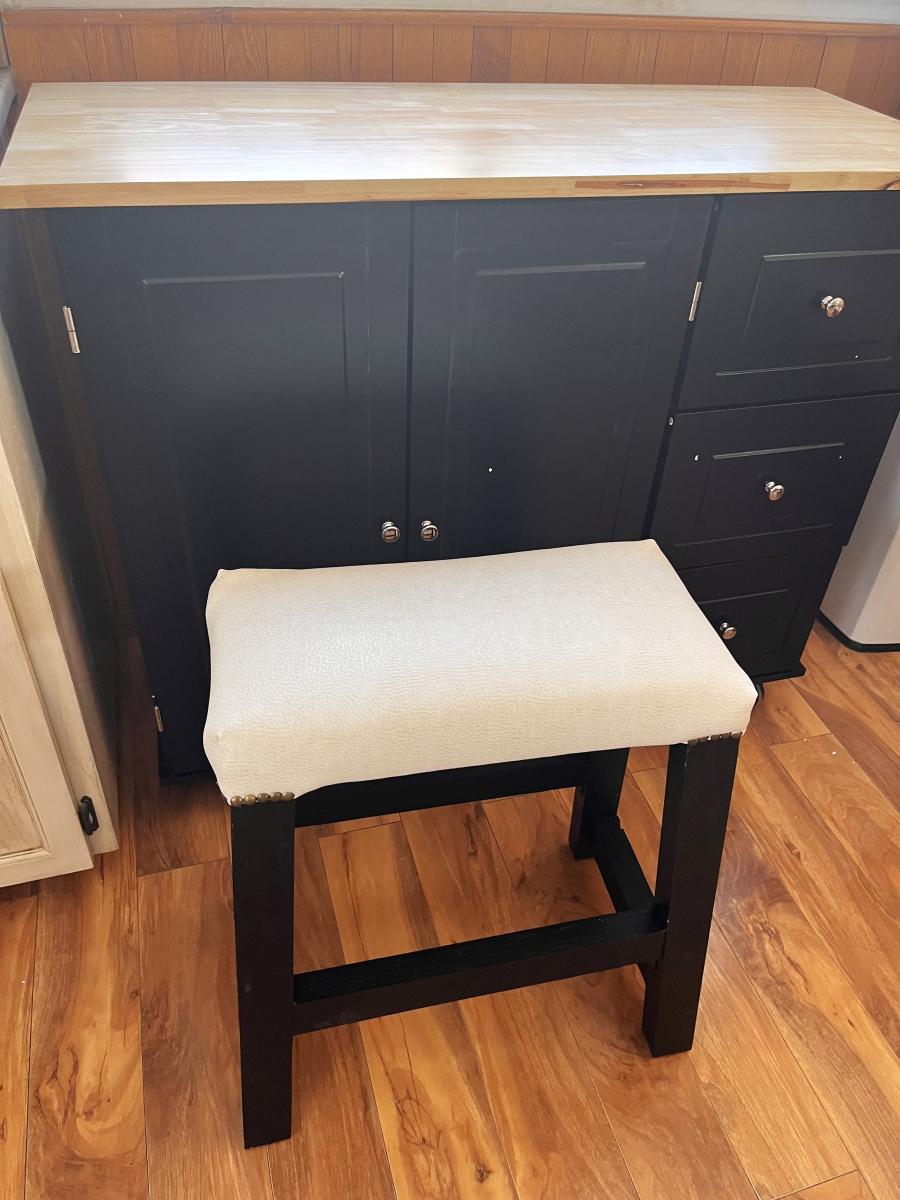
We just purchased a rolling island to replace our old kitchen table. We wanted to make stools to fit under it properly at the right height. We used all recycled wood and it’s painted with and exterior black semi-gloss paint that I had on hand that I use for my outdoor barn quilts. I covered it with 1” foam, a layer of Dacron and some off white(to match our kitchen cupboards) heavy vinyl. We really like our new look❤️Thank you Ana for sharing all of your plans. We are going to be using more in the future. I just know it.

Mississippi Lakeside Creations.


Built from Plan(s)

workbench

Submitted by vic b on Mon, 07/30/2012 - 13:43

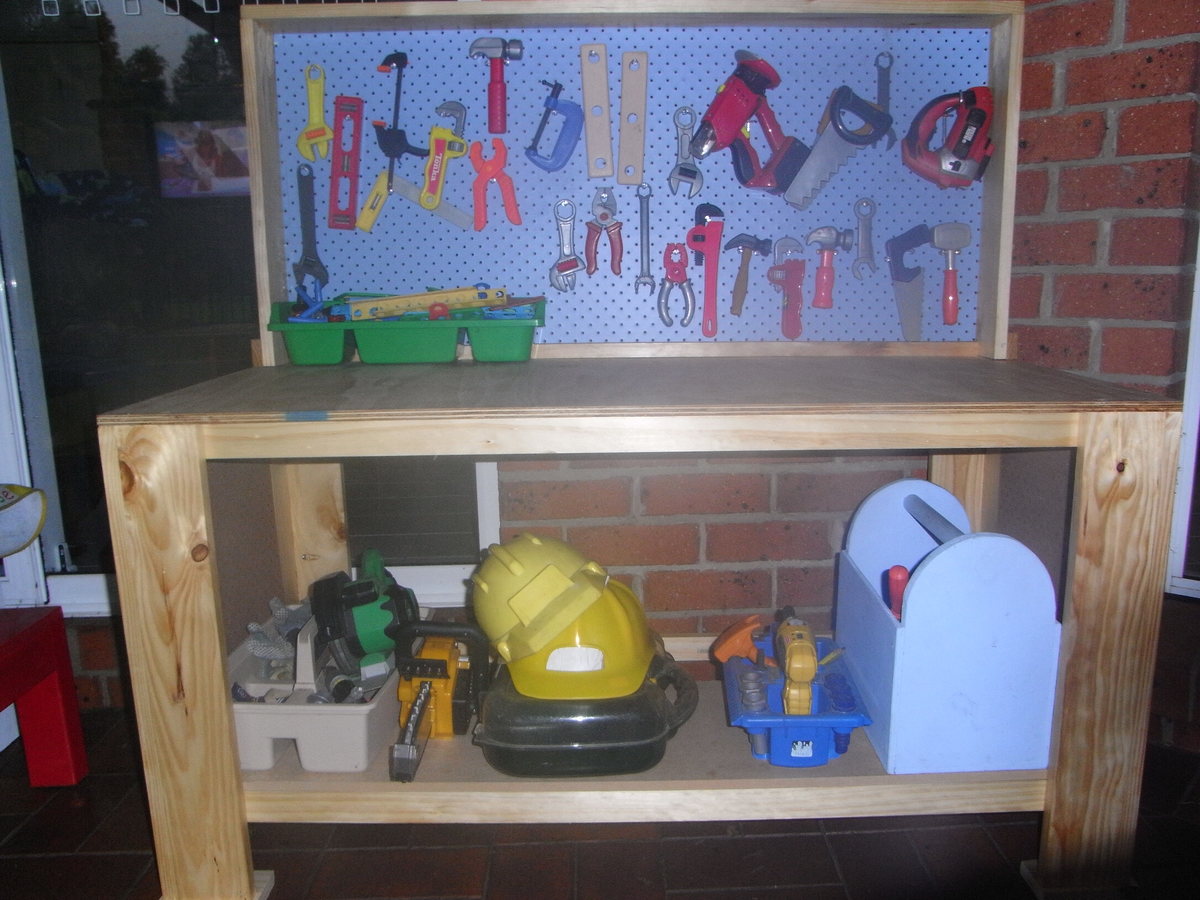
kids workbench

Estimated Cost
$60
Estimated Time Investment
Afternoon Project (3-6 Hours)
Finish Used
clear finsih
Recommended Skill Level
Beginner

School Library Cart

Submitted by dmfinet on Sun, 05/25/2014 - 19:11

My 11 year old son made this library cart for our homeschool books. He followed Ana's plans with a few changes on dimensions. I love how it turned out, and it is a perfect addition to our school room. We kept the cost low by using some wood and paint that we already had.

Built from Plan(s)
Estimated Cost
$23.00
Estimated Time Investment
Day Project (6-9 Hours)
Recommended Skill Level
Beginner

Shared room

Submitted by kile529 on Fri, 08/26/2016 - 05:38

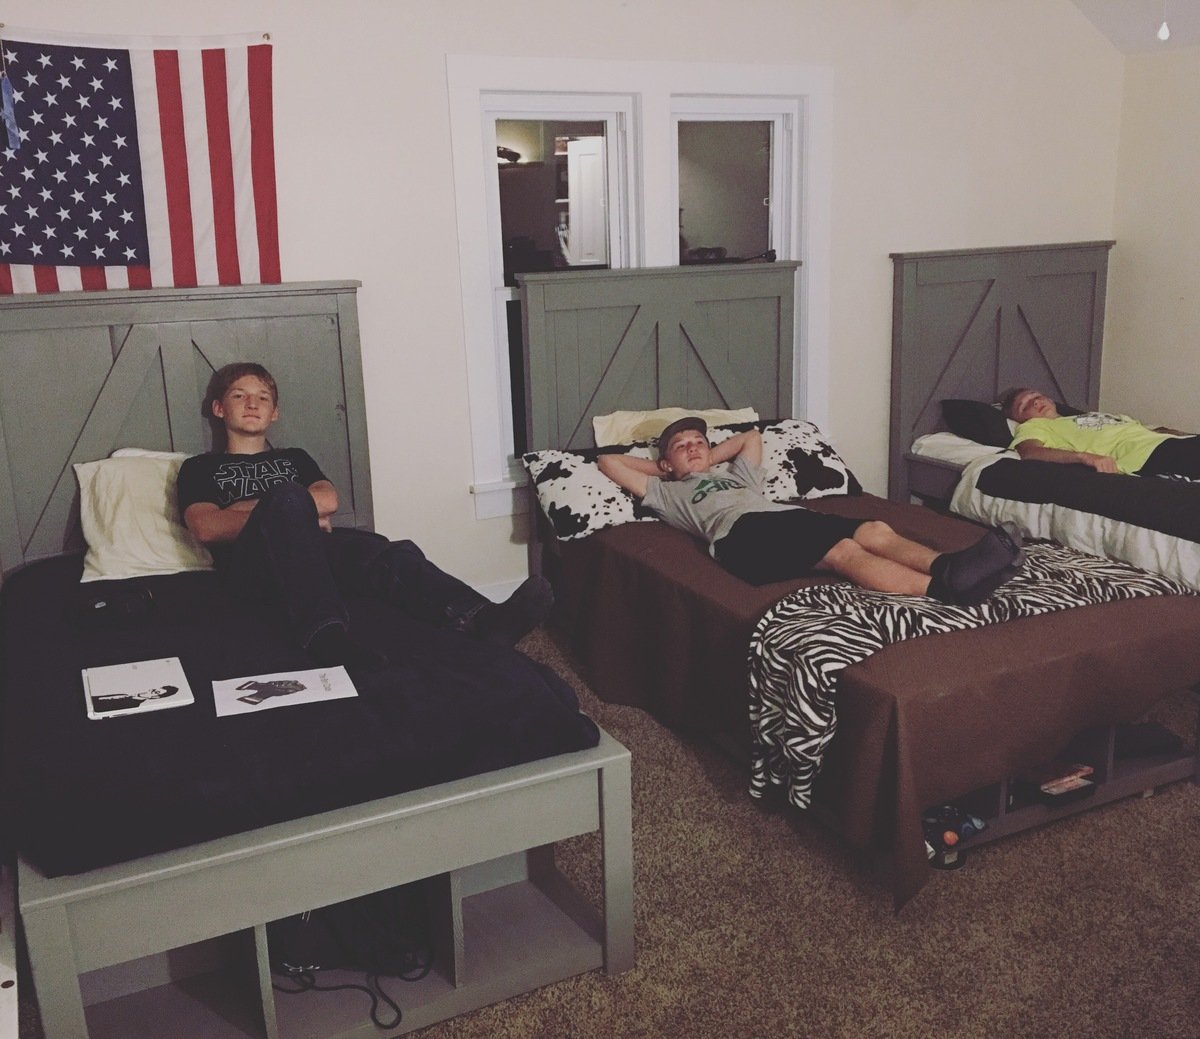
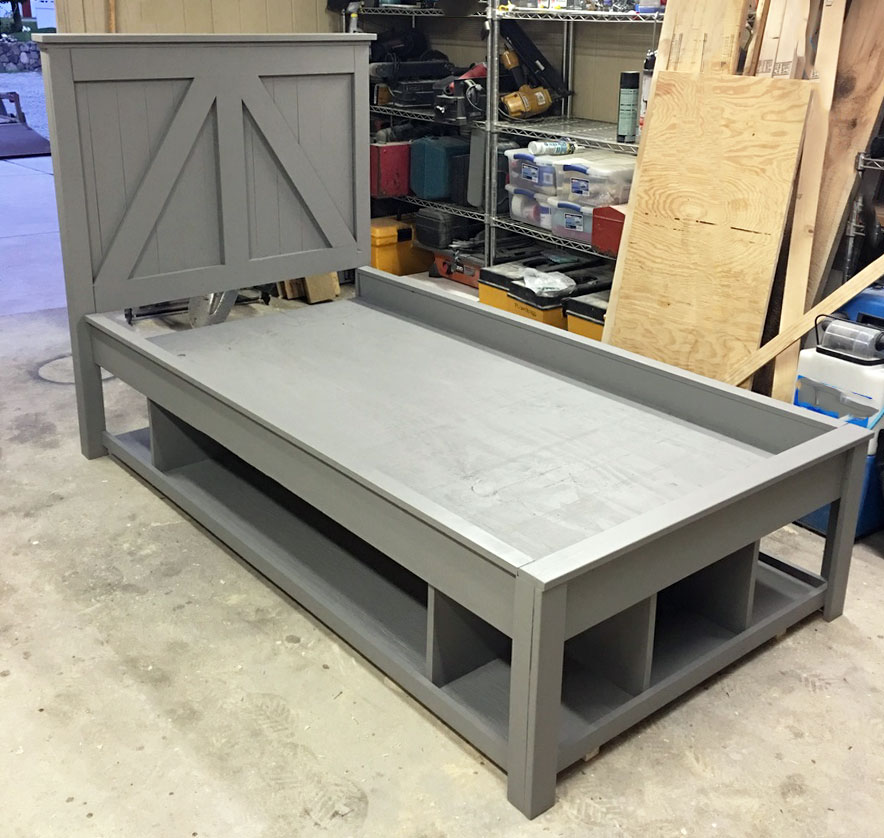
We have 3 (almost) teenage boys and needed the storage of the Brookstone bed for their sport gear, etc. I built 2 of them and my 15 year old built his. I can't get over how easy they were to build! This was the first building project I ever made and they turned out beautifully! The headboard took about 2 hours to build and the bed about 5 hours. I was pretty slow though, checking and double checking measurements, glueing and clamping like crazy, being careful not to rush. Still, 7 hours to make the bed and a couple hours to paint, not a bad days work! The lumber cost $144/each so we were happy with the cost of the beds. I would highly recommend furniture movers underneath them. I used 4 huge ones under the ends of the 2x2 supports and small squares under the legs/headboard. They move so easily with them! Thanks, Ana, for a great plan!! We are so thankful and love our new beds!!

Estimated Cost
$144 for lumber
Estimated Time Investment
Day Project (6-9 Hours)
Finish Used
Grey paint. Wanted a grayish stain but couldn't get the pine to take it the way I wanted it to.
Recommended Skill Level
Beginner

Comments

anita1977

Tue, 12/06/2016 - 07:56

I have 4 boys, but 3 are married and gone now and I bought my youngest a new bed last year, but I would have loved to have been able to make these for the older ones when they were growing up!  Great job to you and your son!

Toy Box

Submitted by Sgeisinger on Sun, 06/07/2020 - 08:16

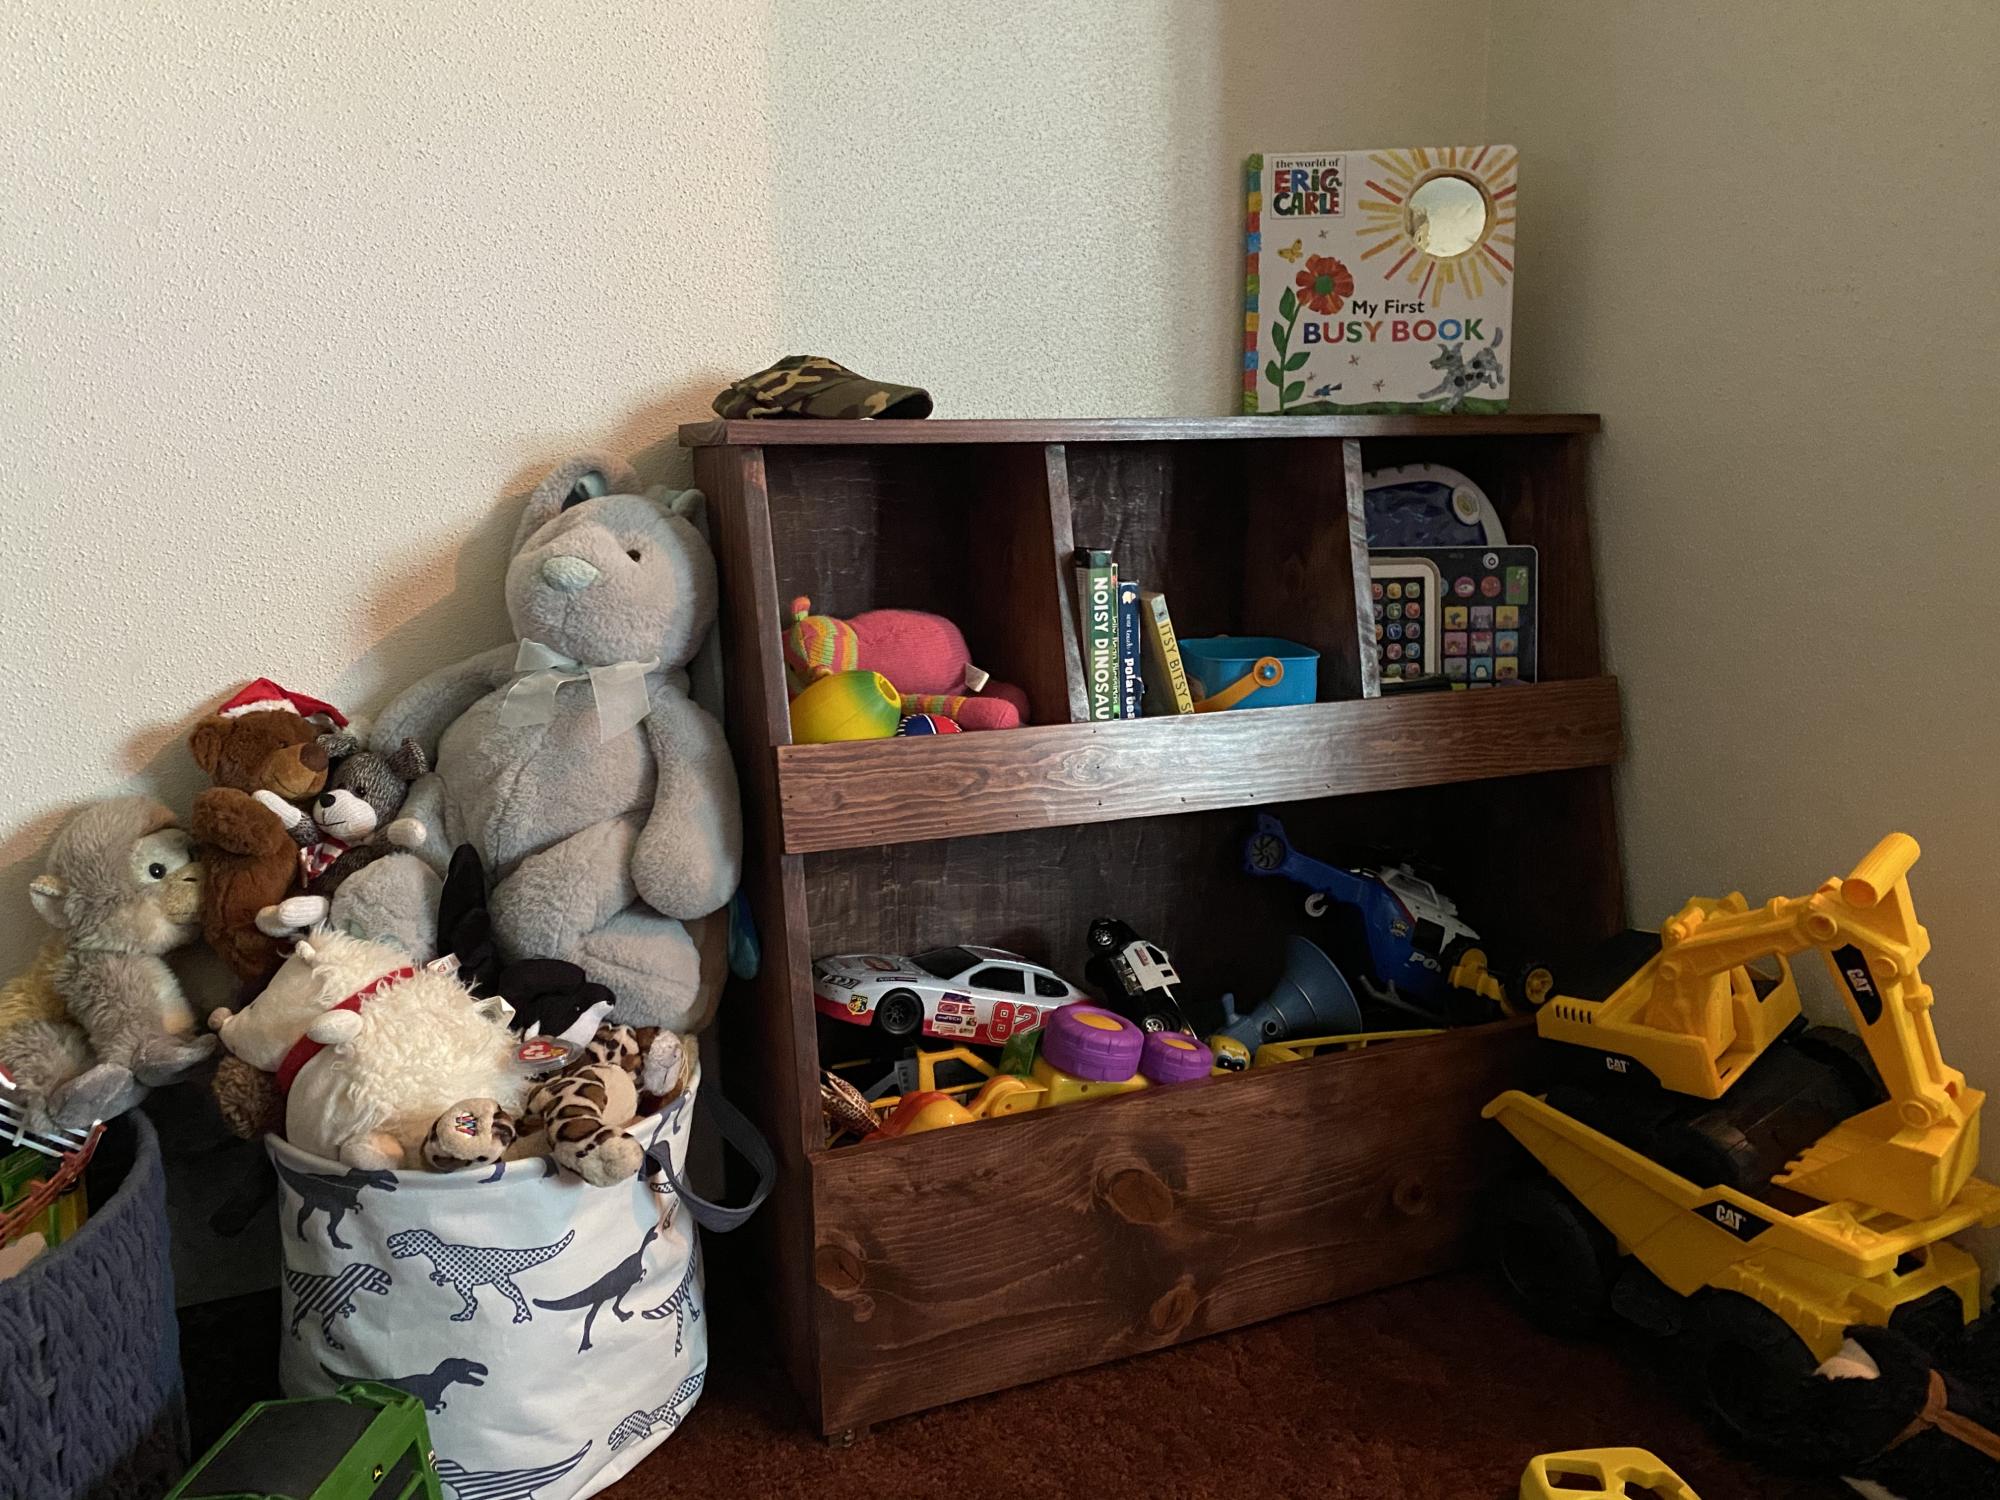
This design turned out to be perfect! It was super simple and easy to build! Easy to follow plans! Great beginner project!

Estimated Cost
Around $40 in lumber
Estimated Time Investment
Day Project (6-9 Hours)
Finish Used
Varathane Premium Wood Stain in Red Mahogany
Recommended Skill Level
Beginner

Comments

New Bed for my 3 year old!

Submitted by red98dawg on Thu, 08/02/2012 - 13:49

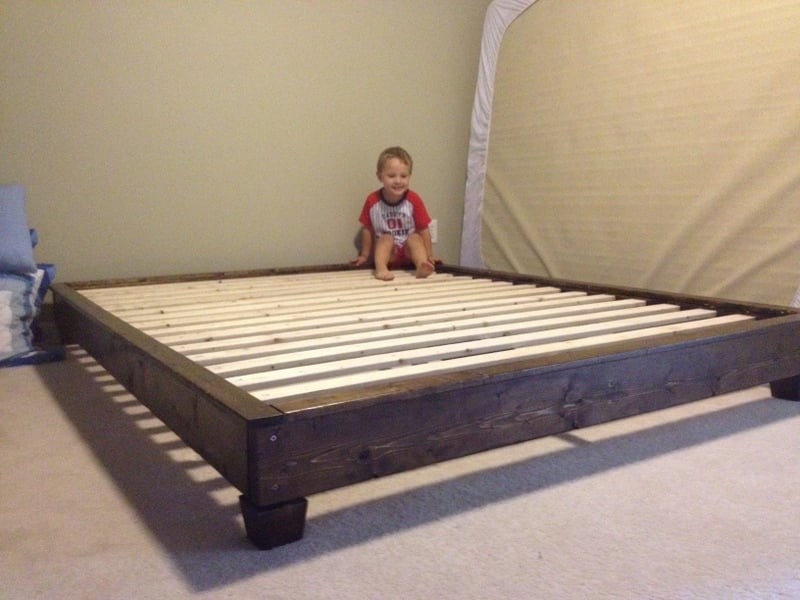
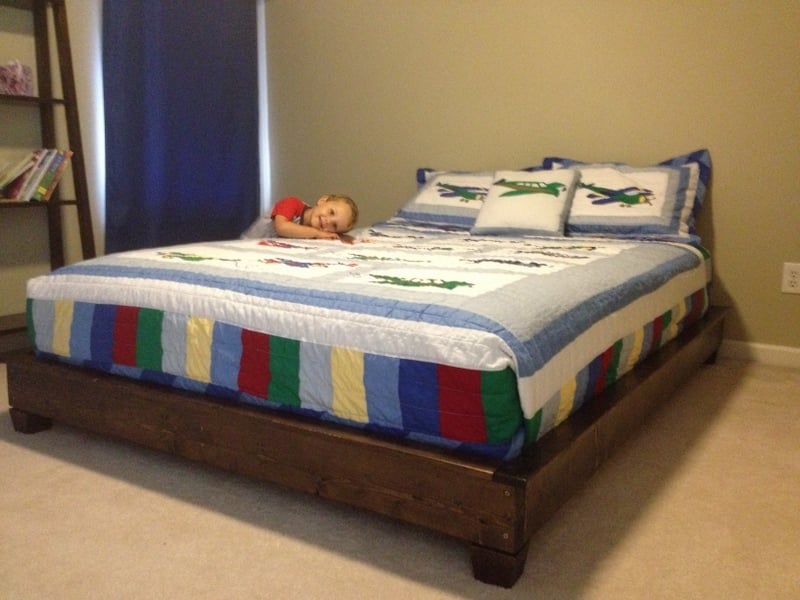
I had been on a search for a while for new furniture for my son’s new big boy bed room but couldn’t justify the money for new furniture and couldn’t find anything remotely nice on craigslist. I ran across this plan on Ana’s site and just had to have it so it became my first large furniture project.
It was fun to build and very rewarding when my son told me he loved his new bed!

I did have some issues with using the kreg jig on the platform so I did use wood screws on the outside frame. I had better success with the kreg jig on the headboard, guess I just needed practice.

There were a few things I did to make it easier to move the bed if needed:
I did not attach the slats but I did lay them on a non skid grip (like you put under rugs on wood floors).
I attached the headboard to the platform using carriage bolts so it could be taken apart easily.

The plans were really easy to follow.

Estimated Cost
$170
Estimated Time Investment
Weekend Project (10-20 Hours)
Finish Used
Minwax - Jacobean, 1 coat
Minwax - Fast-Drying Polyurethane, 2 coats
Recommended Skill Level
Beginner

Neighbors

Submitted by Pebcat on Tue, 05/27/2014 - 20:22

I found Ana's website in my search for the desk plans, and in the process found many other wonderful plans I want to try. My goal is to make a sawhorse desk for my new home office. I need to learn all proper woodworking skills, however.

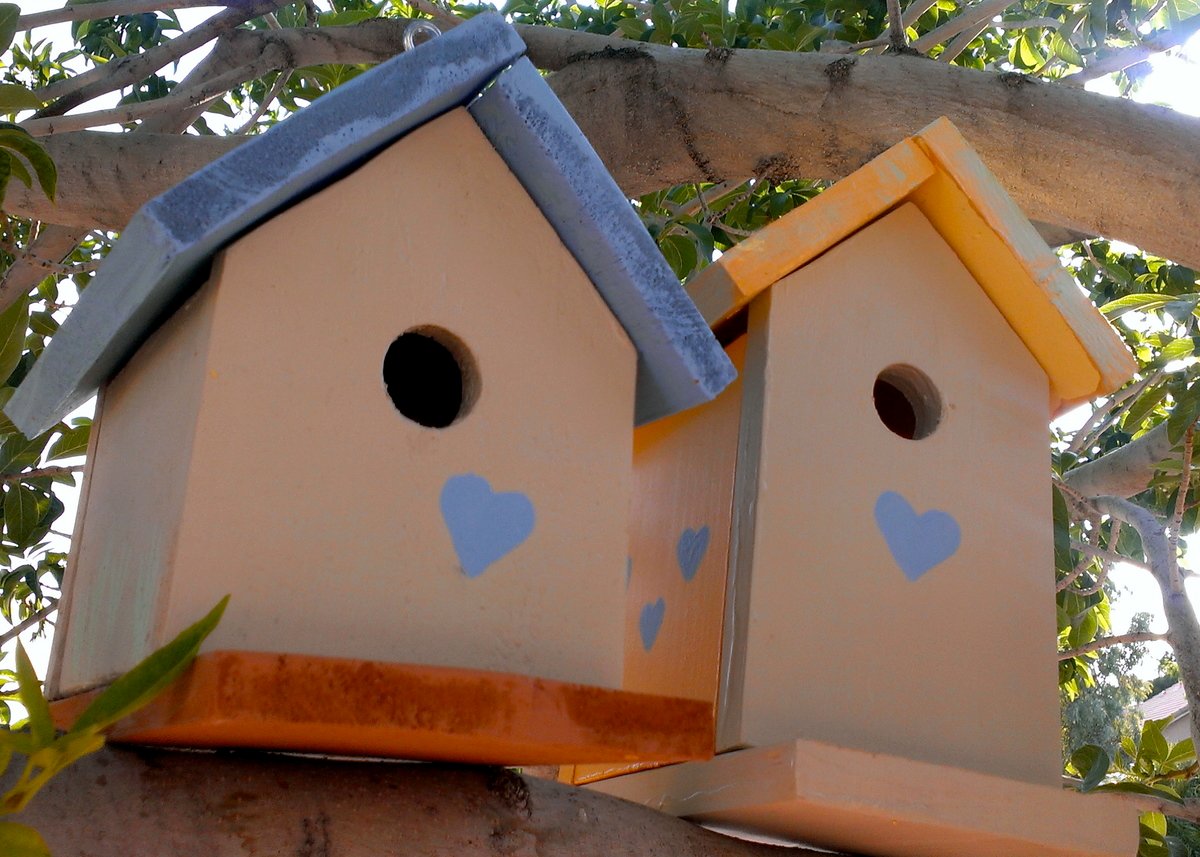
Therefore, I decided to start with this birdhouse project, which was a joy for me since I have a fascination with photographing birdhouses wherever I go. I also have fond memories of making birdhouses with my mother when I was a little girl. She did all the cutting and nailing, and I sanded and painted.

This project brought back happy memories, and my mom got a kick out of seeing photos of the finished results.

In addition, today I had the wonderful opportunity to photograph my own birdhouses!

Estimated Cost
$3 per house for the wood
Estimated Time Investment
Afternoon Project (3-6 Hours)
Finish Used
I used a combination of paint I had on-hand, all Valspar. Most of the paints were Valspar Ultra Paint & Primer.

Paint colors for the birdhouse on the left are called: Country Heather (blue), Bittersweet Stem (beige), brandywine (terracotta), and Pistachio Ice (green) for accents.

The colors of the house on the right also included Country Heather, Bittersweet Stem, and Pistachio Ice (again for accents). In addition, Buttered Hazelnut was used for the walls and roof.

I completed most of the painting prior to assembly, adding only accents such as hearts and windows post-assembly.
Recommended Skill Level
Starter Project

Surf Shack Bunk Bed (Using Club House Bed Plans)

Submitted by Anonymous (not verified) on Sun, 08/28/2016 - 21:39

We decided to follow the Club House bed plans, but we added another bunk below. We did this by adding a foot to the height and duplicating the slats and ends etc. My boys absolutely love this bed! We actually enjoyed building it. I can't wait to try more Ana White plans - they were so easy to follow and it's so satisfying having made something cool from scratch.

Built from Plan(s)
Estimated Cost
$200
Estimated Time Investment
Weekend Project (10-20 Hours)
Finish Used
One part water to two parts white paint
Recommended Skill Level
Intermediate

Willy Bookcase Library

Submitted by JLW on Mon, 08/06/2012 - 18:50

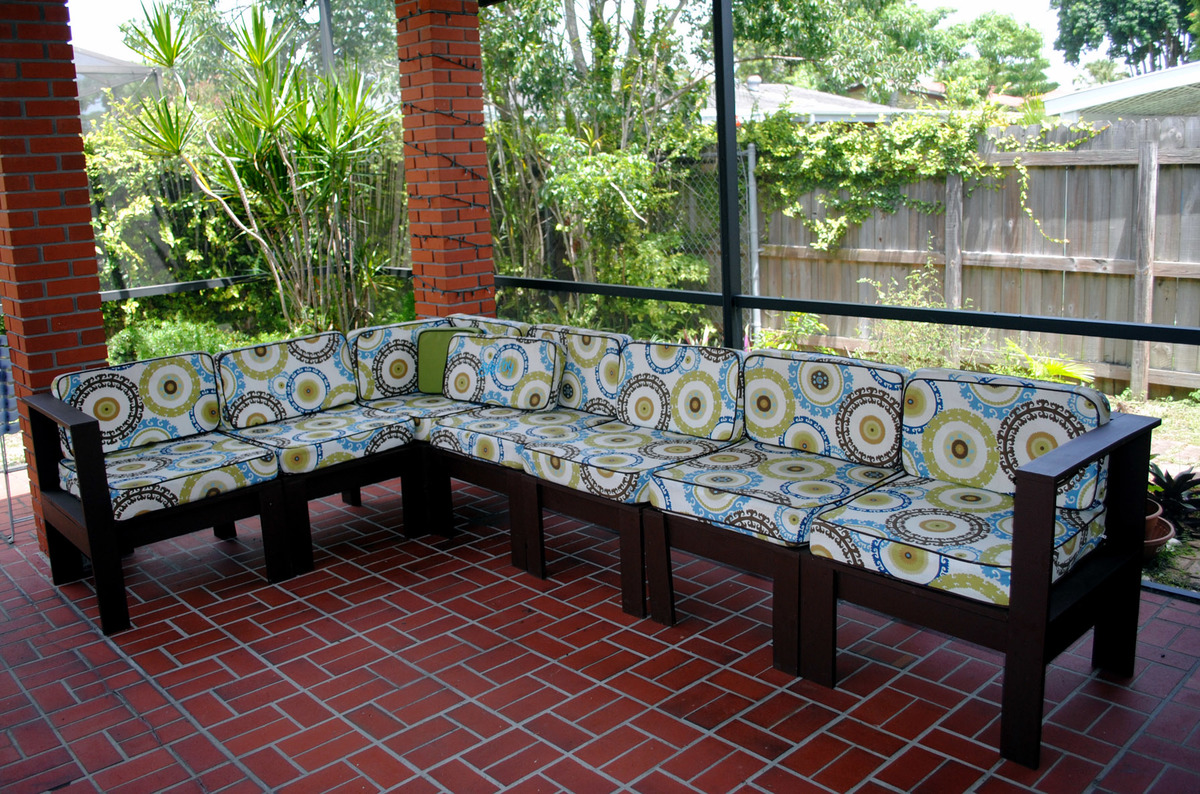
My wife wanted matching bookcases for our library rather than the hodgepodge collection we had assembled over the years. We looked at several different options but the trick was getting them to our house in a cost and time effective manner. We came across the Willy Bookcase plans here and, after pricing the wood vs. pre-built options, decided to strike out to build our own bookcases.

The library took 5 McMansions, 1 Highrise, and 1 3-Bed/2Bath bookcase. We liked Ikea's Billy corner bookcase set, so we purchased a corner bookcase bracket from them to create the effect and stabilize the Highrise between two McMansions.

We decided to do the entire length of the bookcase sides with shelf holes to allow for maximum flexibility in spacing of the shelves. We fixed the middle shelves across all units to match the top of the short 3-Bed/2Bath.

The simple design made the project simple overall - a single bookcase is an easy weekend project. Since we decided to use stain with wipe on poly, finishing took the vast majority of the time (four hours to cut, sand, and build, 44 hours to finish...) Purchasing a good shelf pin jig and making consistent measurements is a necessity for mass producing shelves with consistent spacing on the shelves.
Built from Plan(s)
Estimated Cost
$800
Estimated Time Investment
Weekend Project (10-20 Hours)
Finish Used
Two coats of Minwax Dark Walnut with two coats of Minwax satin wipe on poly.
Recommended Skill Level
Starter Project

Farmhouse Table

Submitted by normansm on Fri, 05/30/2014 - 07:17

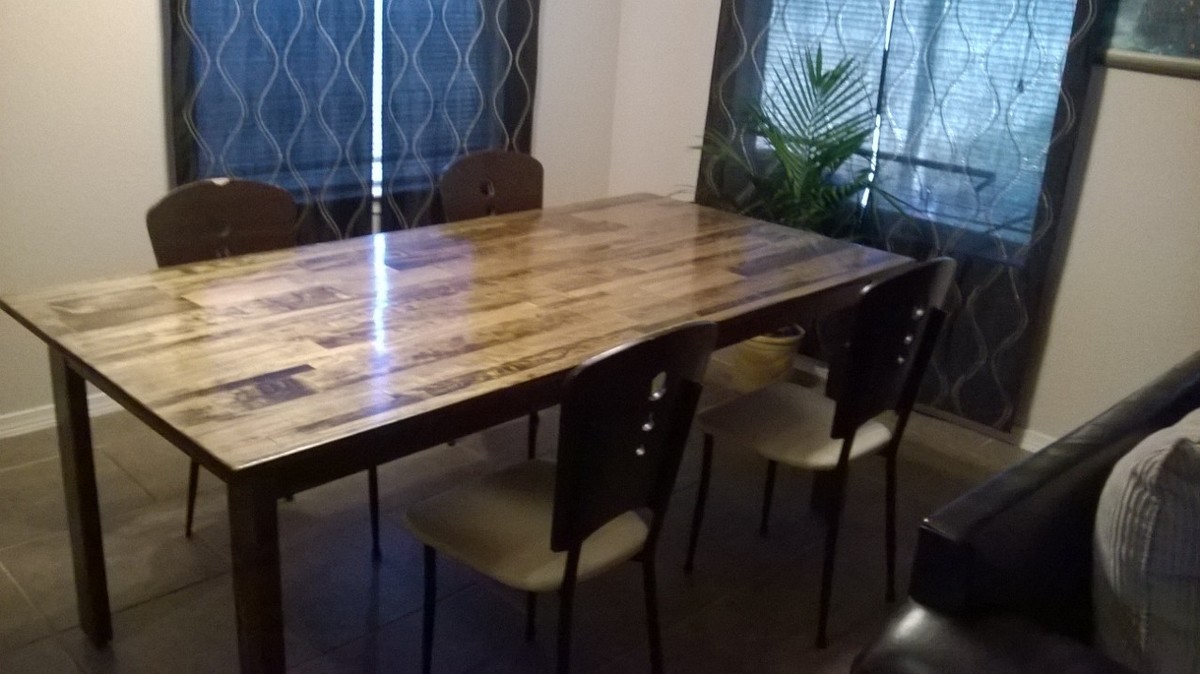
This build was done with all pocket holes. I used some pre-made project boards for the top and joined them with pocket holes and glue. Also I used all pine for this project. The chairs are just old chairs from my previous table. Stained with special walnut and finished with semi-gloss poly and finishing wax. I rubbed and buffed the finish to get the nice shine. This project took a while because I decided to let the poly cure for about a week before finishing and placing in my dining area.
Estimated Time Investment
Weekend Project (10-20 Hours)
Finish Used
Minwax Special Walnut and Minwax Polyurethan (Both of them were Oil based)
Recommended Skill Level
Beginner
Back