Community Brag Posts

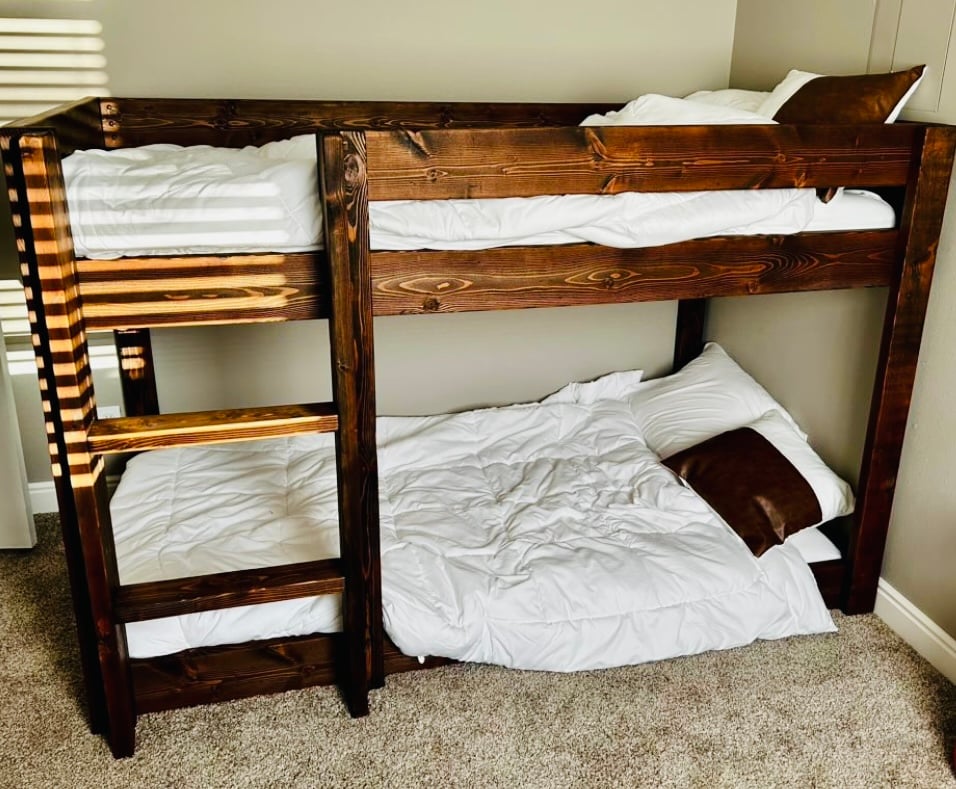
Modern Bedroom Furniture Build

Submitted by Anonymous (not verified) on Tue, 11/16/2021 - 12:29

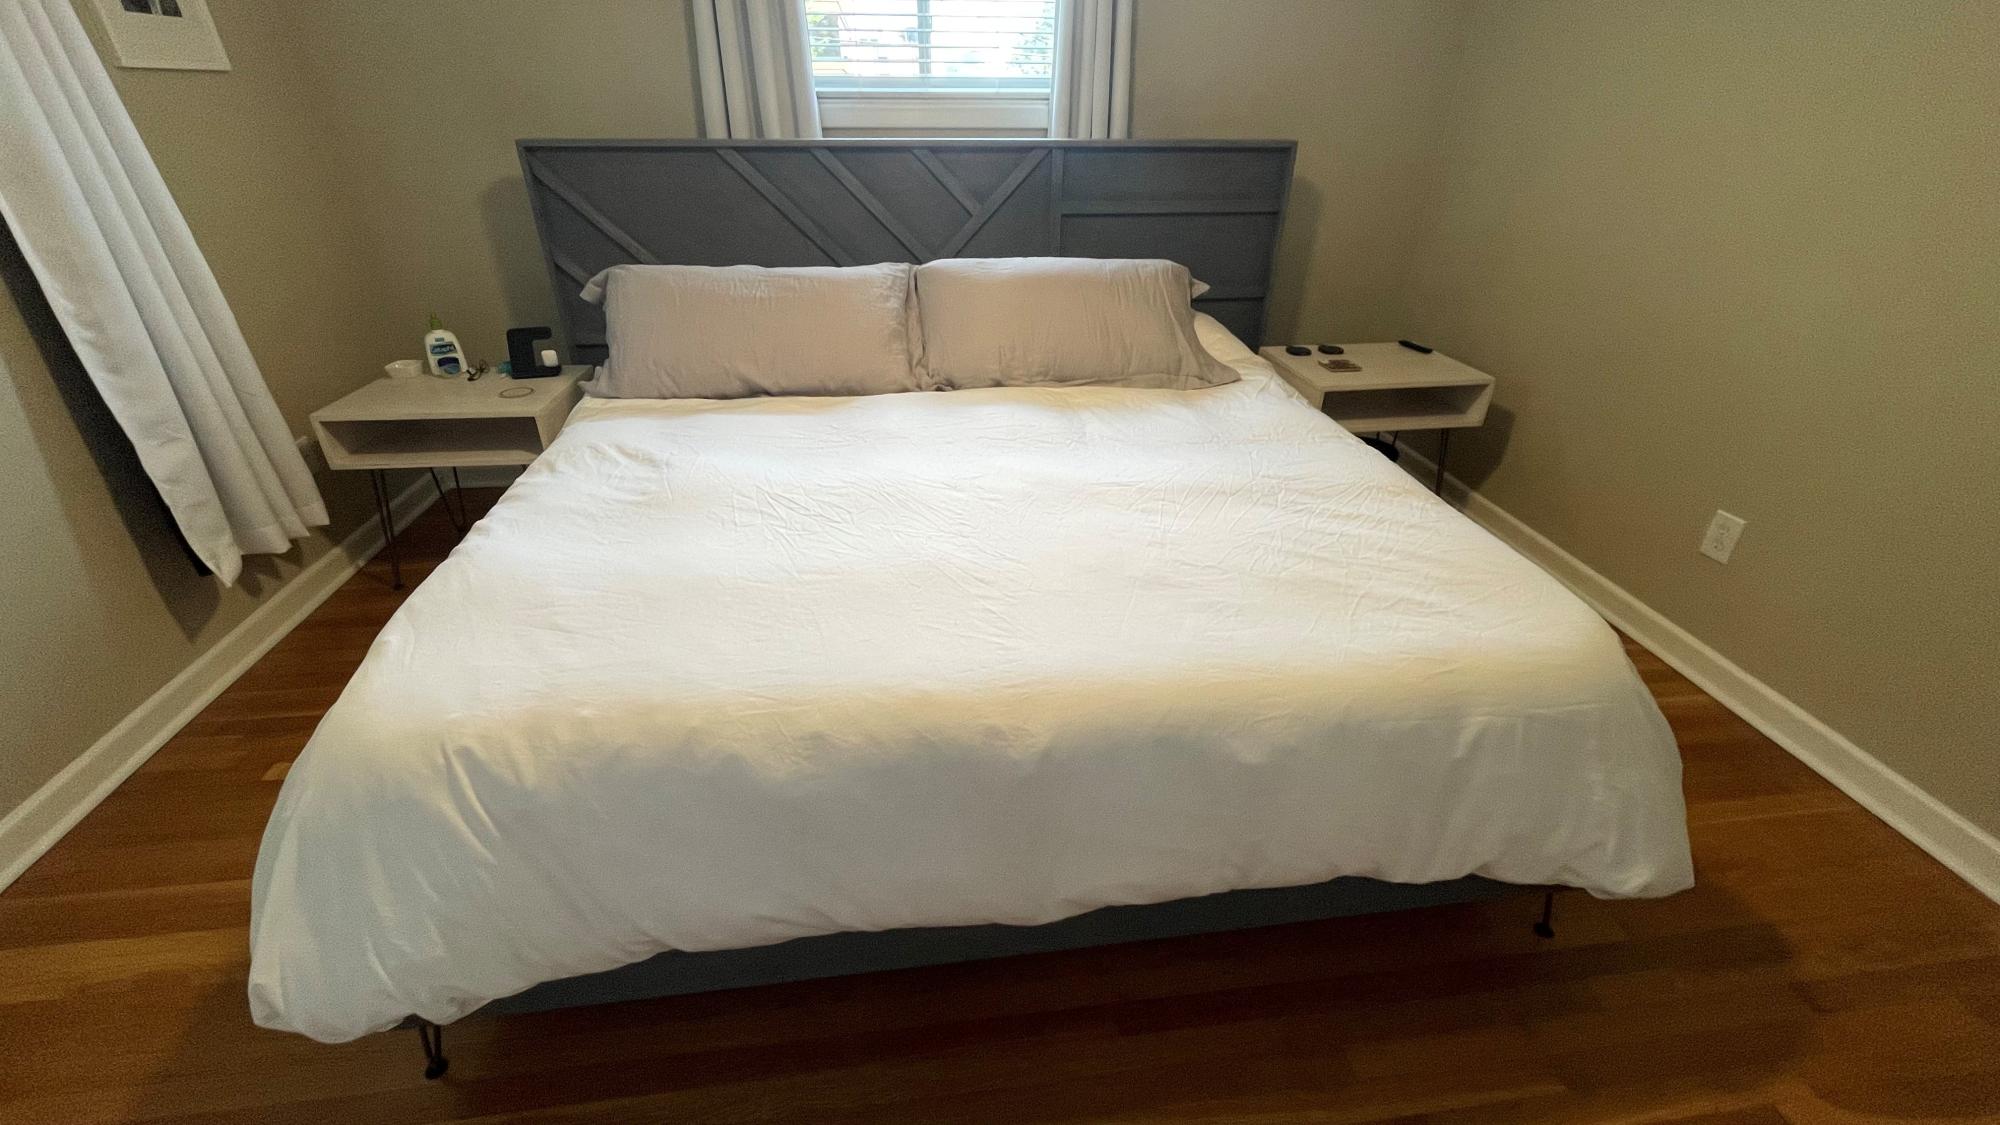
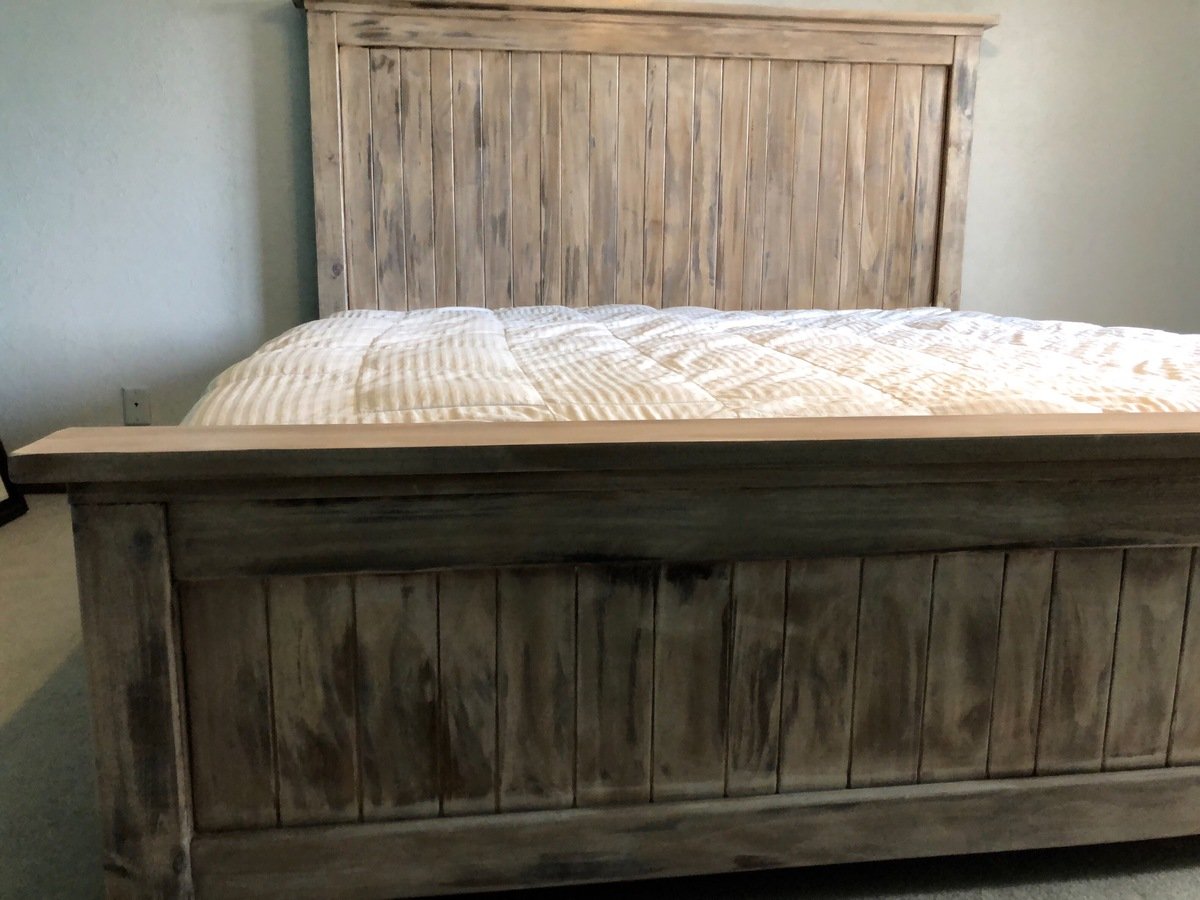
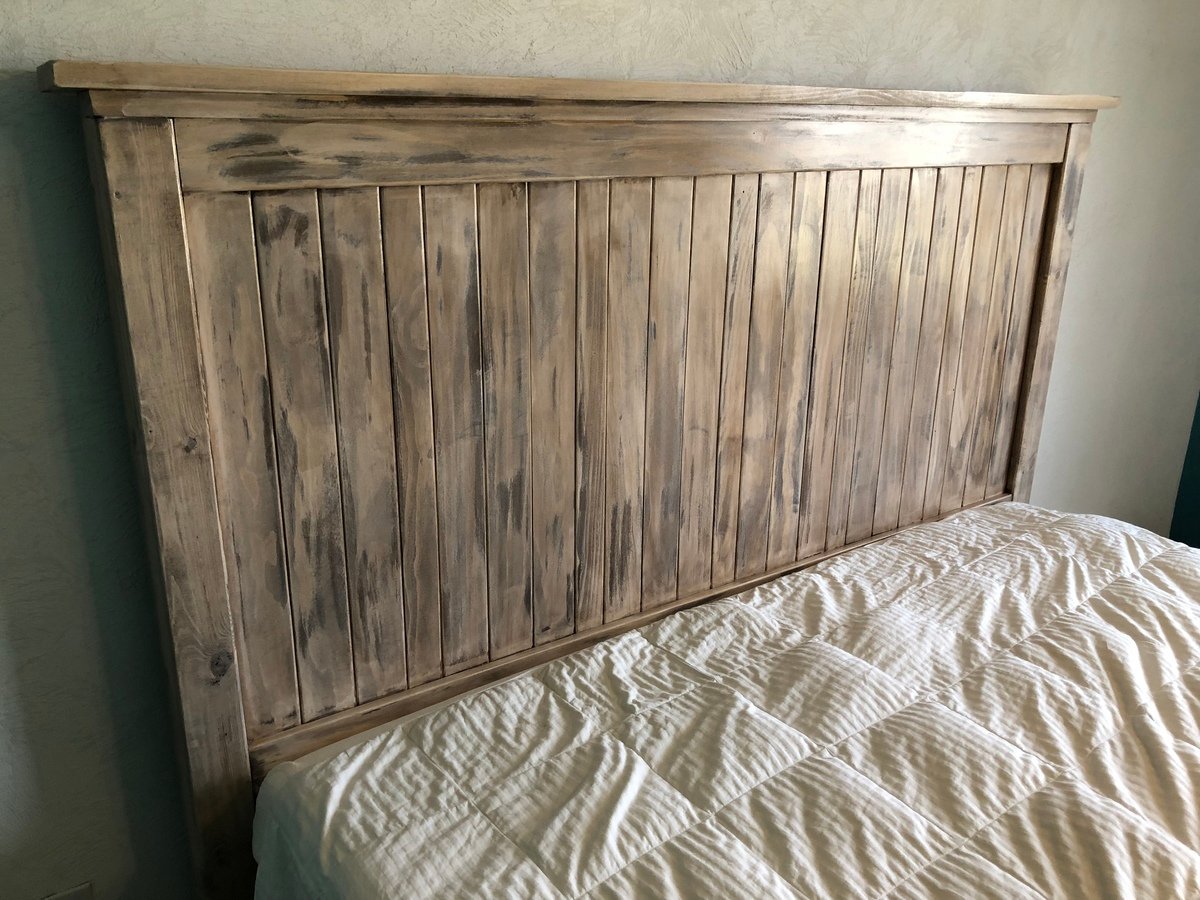
Bed Frame and Headboard made from Ana's plans. Frame is very simple. Headboard is fairly simple but a lot more cuts, measuring and attaching. I stained both with Varathane Weathered Gray. I also attached sideboards and internal support 2x4s with bed-frame brackets rather than screwing directly in to allow for easier deconstruction and reconstruction. Used an insert nut on the sideboards to attach hairpin legs (screwed directly into top/bottom boards).

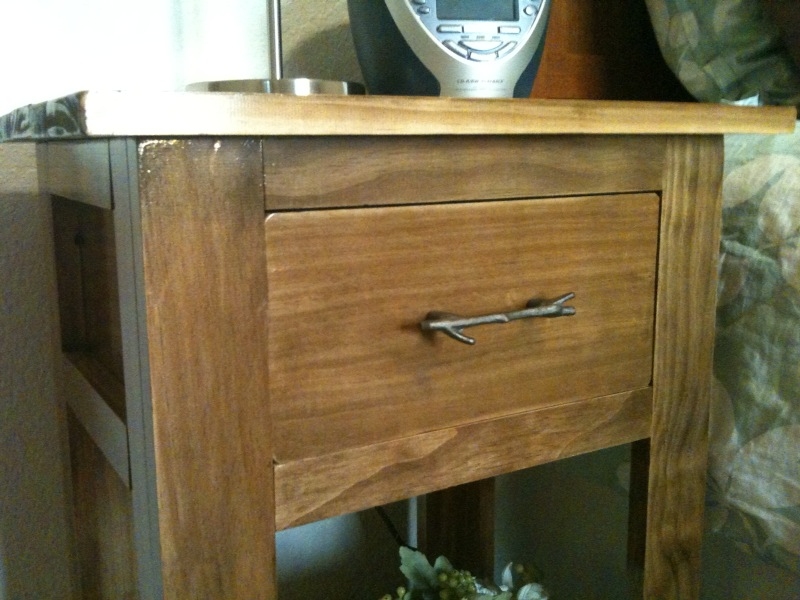
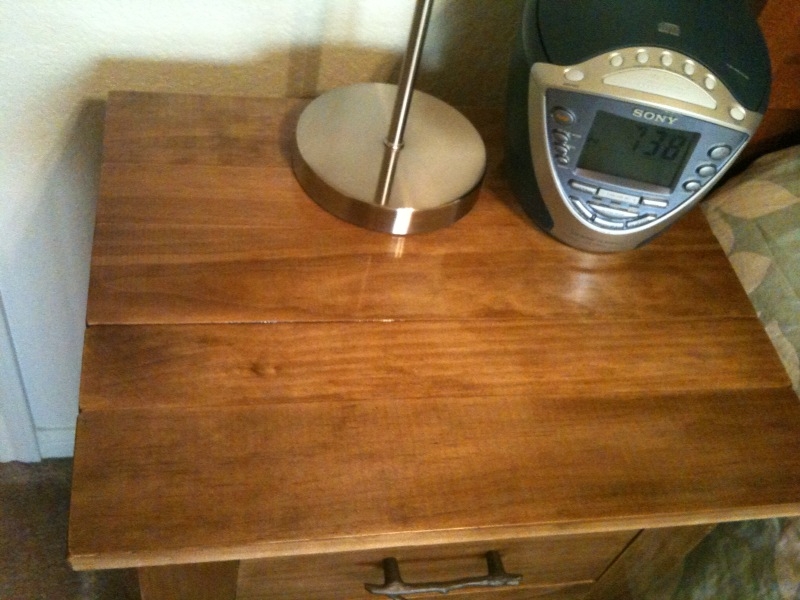
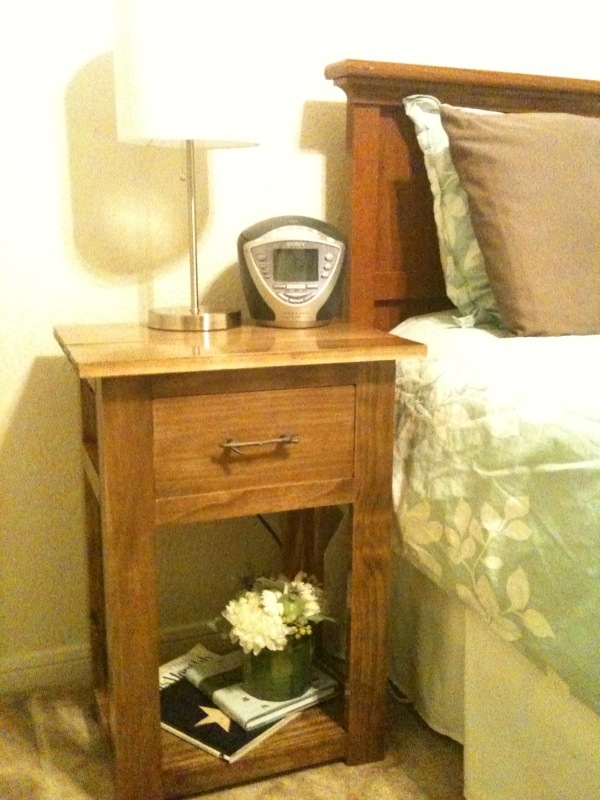
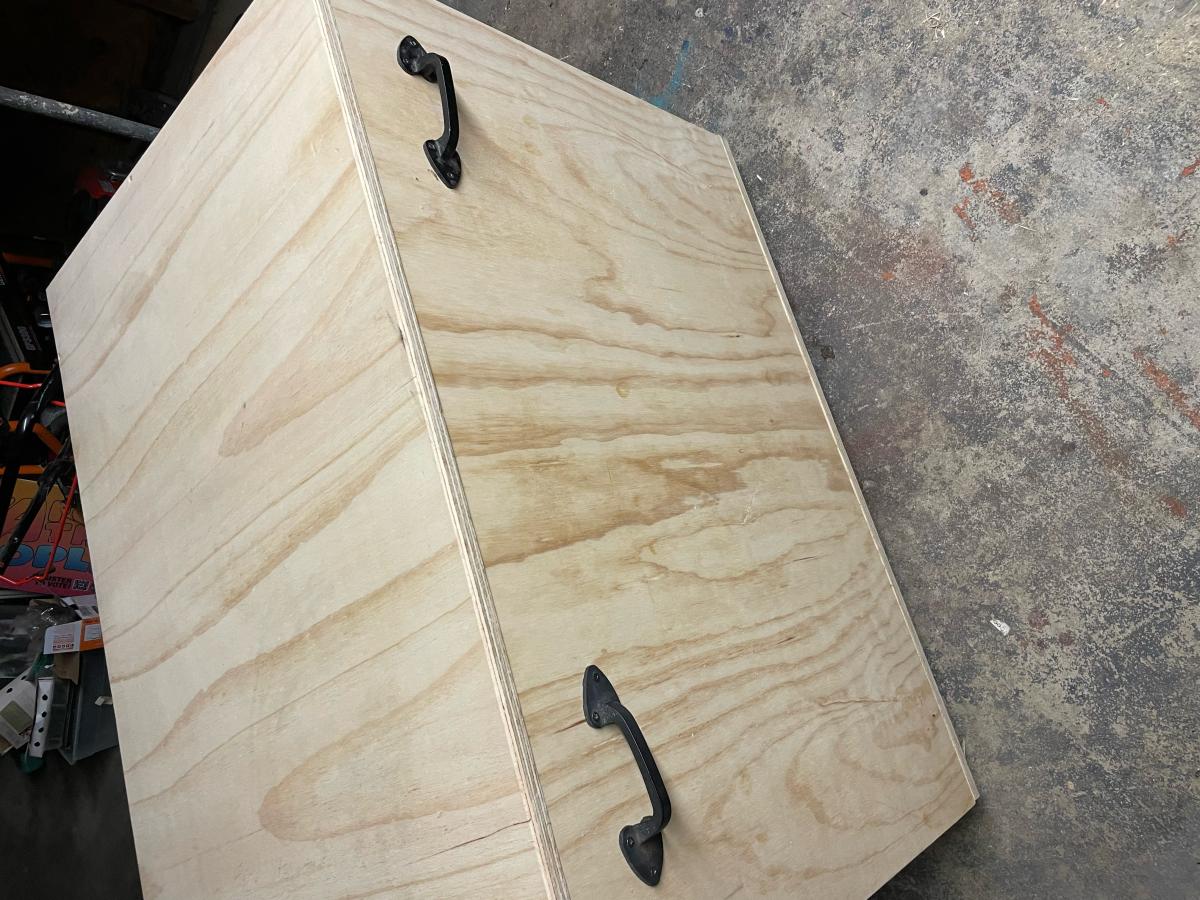
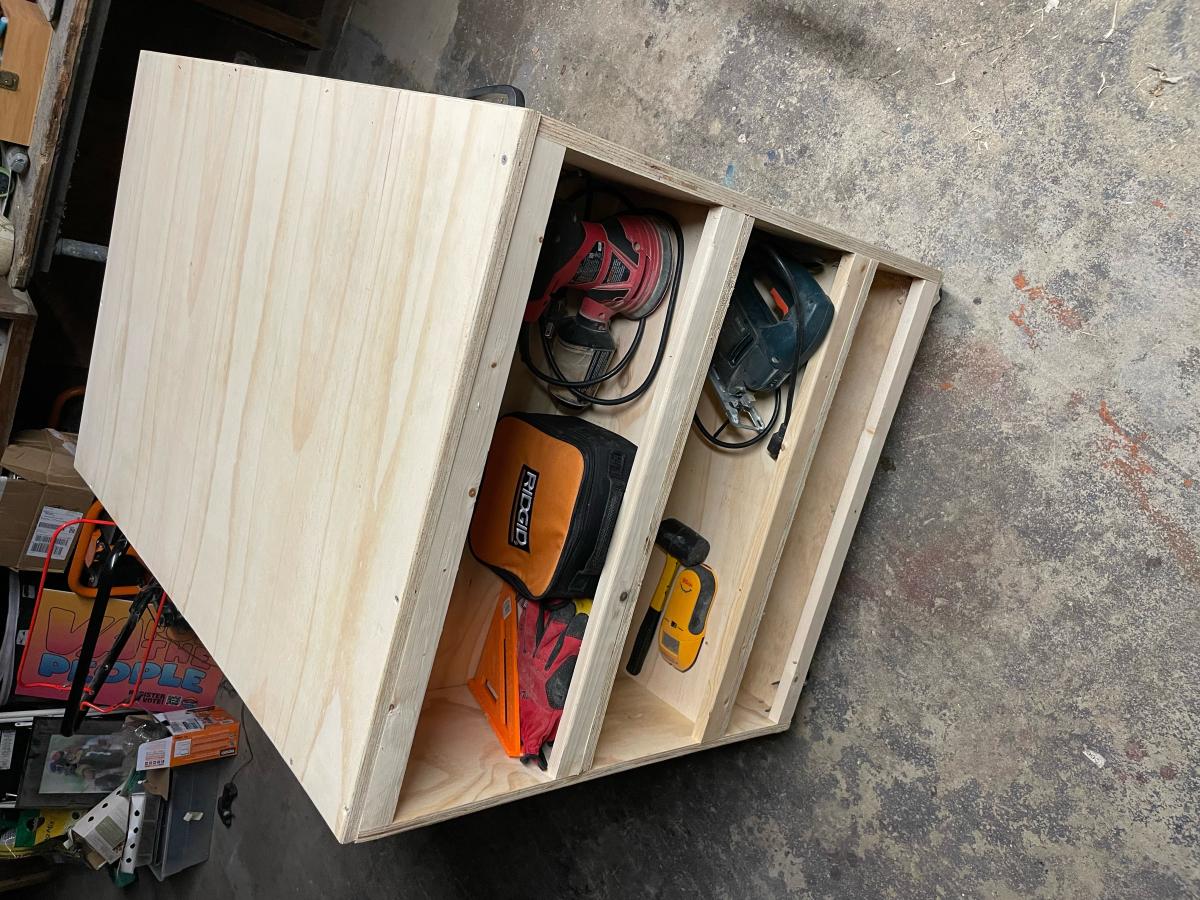
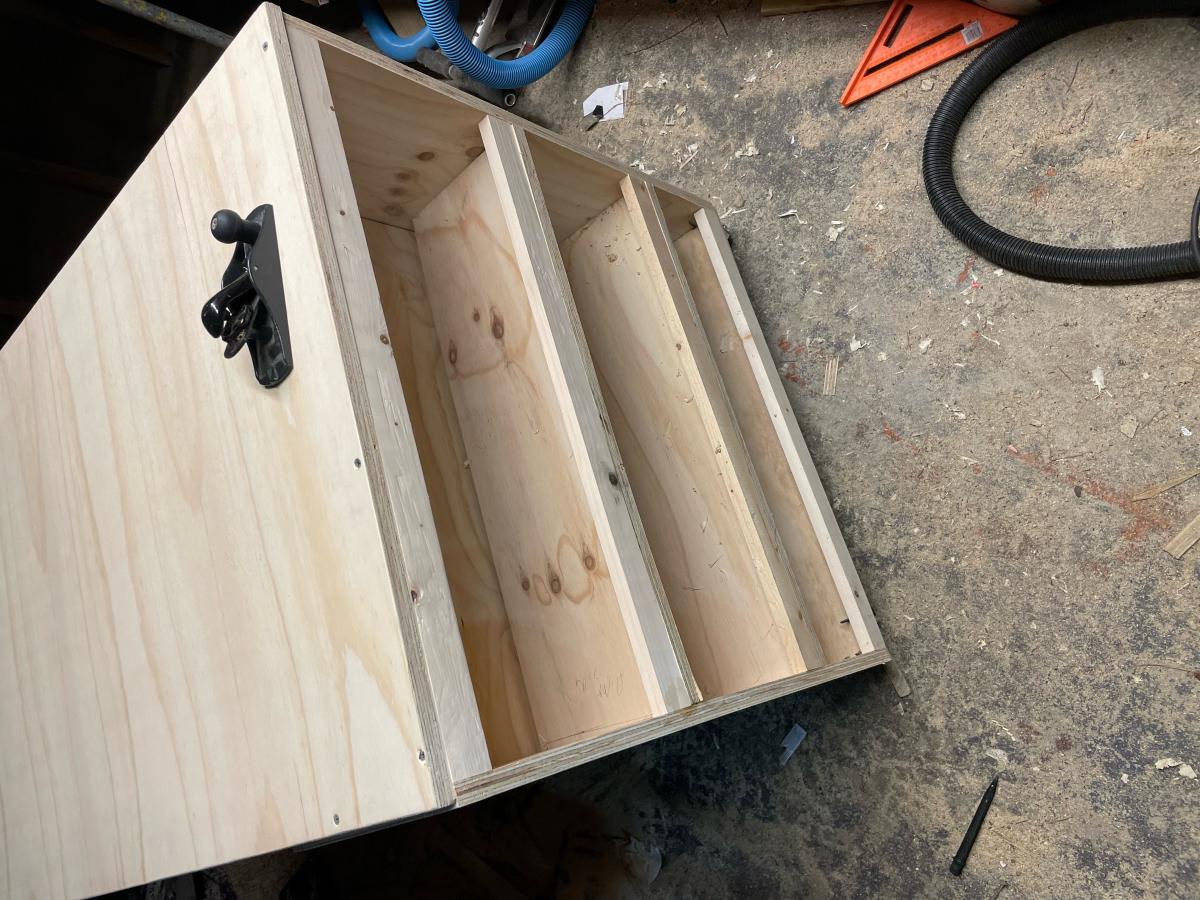
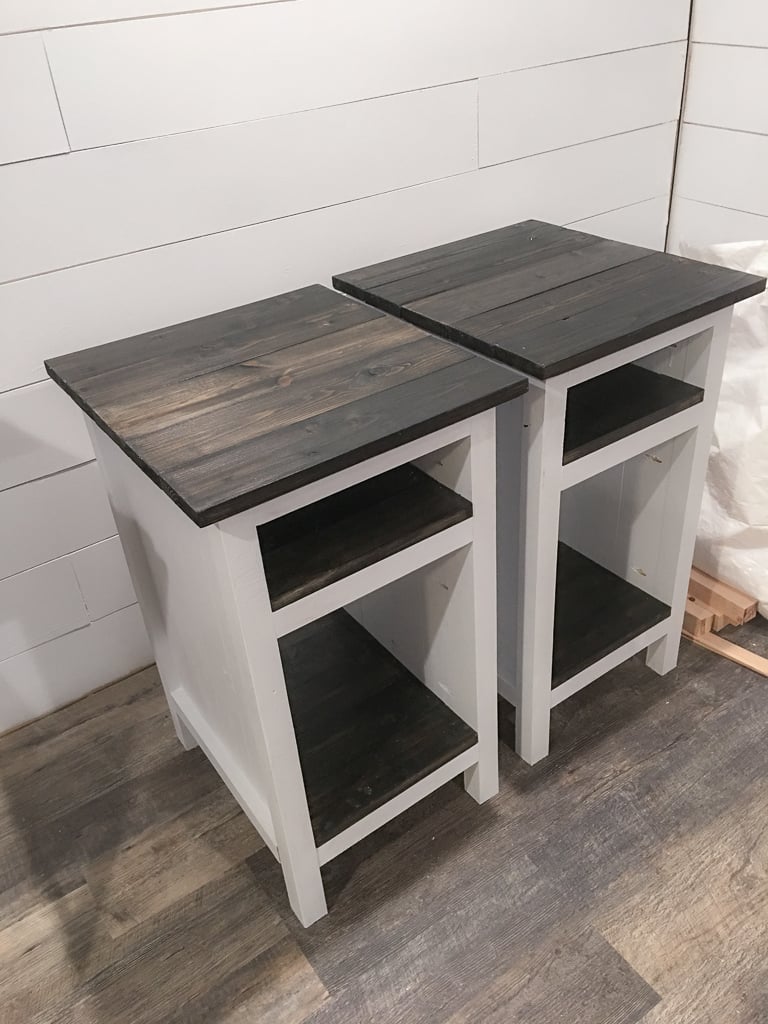
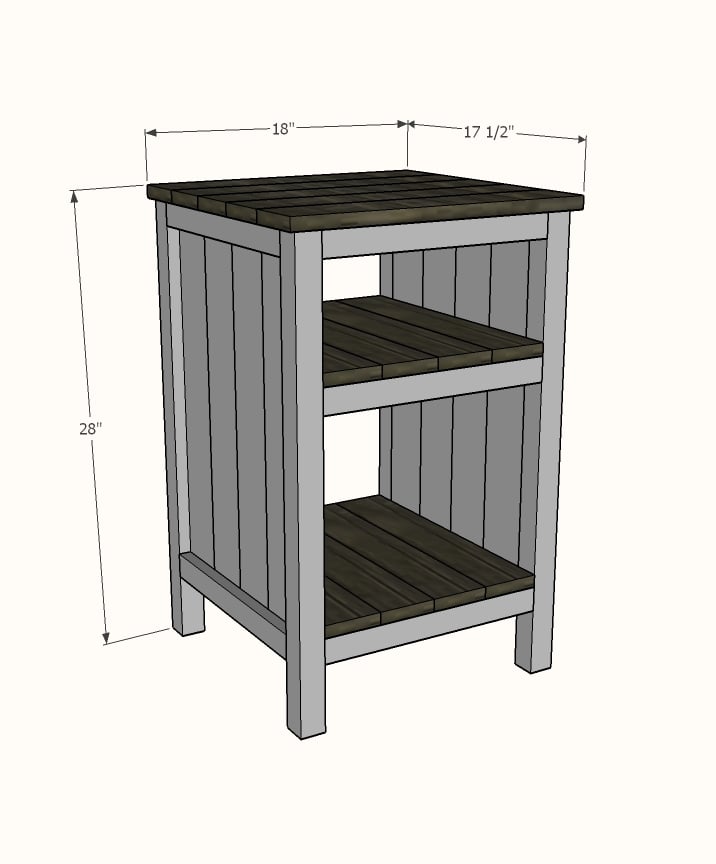
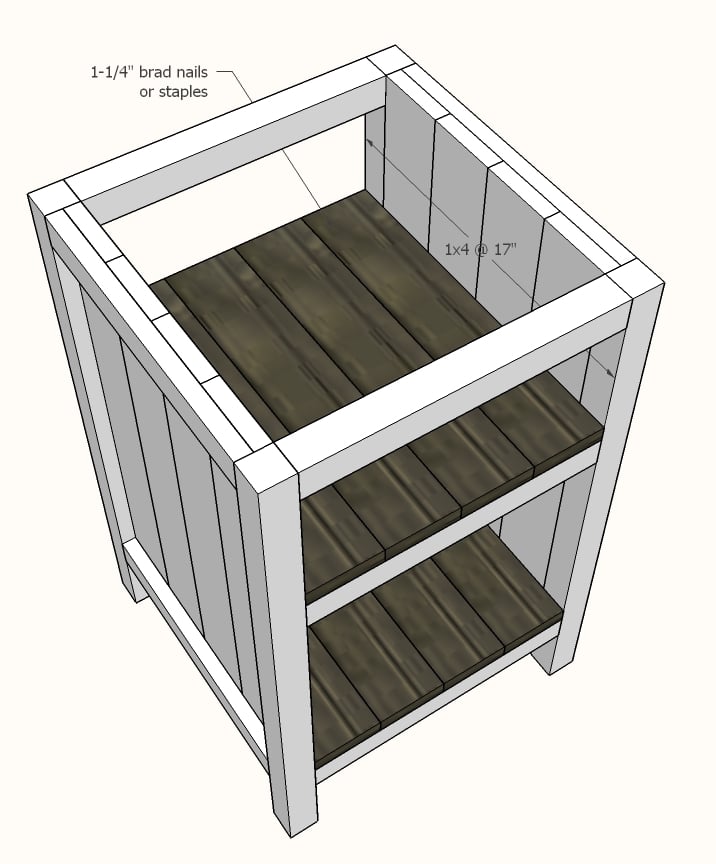
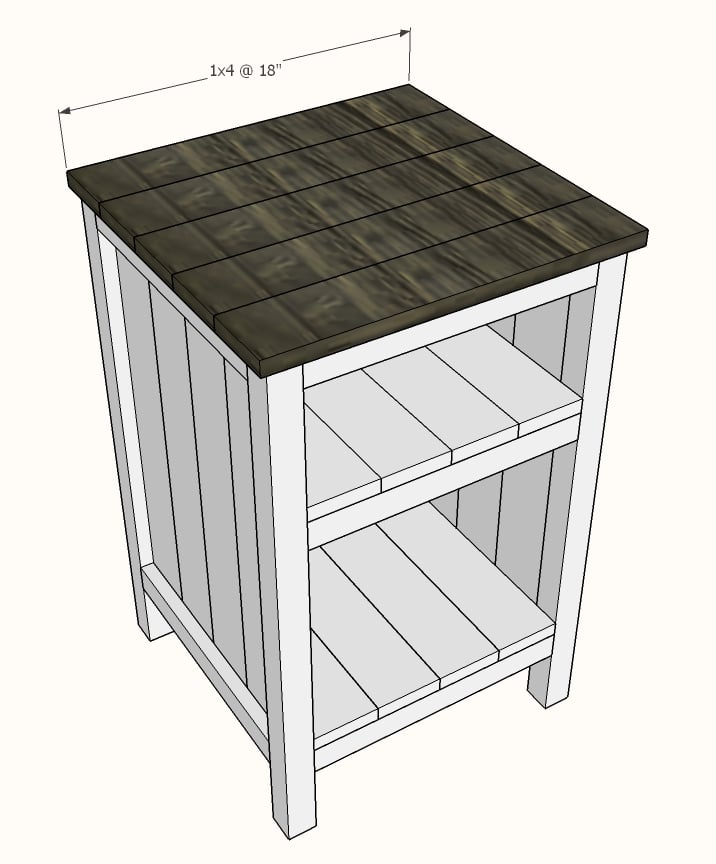
Side tables are just 3/4 birch plywood glued and nailed into a rectangular box. 24x18" Top/Bottom and 18 x 6" sides. Hairpin legs are longer versions (16") of Ana's Amazon suggestions for bed frame. Stained with Varathane Antique White.. turned out ok, but would use a different white stain or just paint them white if I had to do it again, and paint the insides before you build!

Comments

Simple Nightstands

I absolutely love the way these turned out! I drew up an example in Sketch-up using Ana's plans for the Simple Nightstand as a starting point. 

The top is made from 5 boards, 19 inches in length, joined together underneath with a kreg jig. I made two of these, identical. Each nightstand took exactly 50 kreg screws, not intentional, it just worked out that way. I used a brad nailer to attach the trim along the bottom shelf (which I could have avoided with a a little more planning in the beginning), also to attach the side panels that you see on the sides and back, and to assemble the majority of the drawer, using kreg screws to attach the front.
I'm in love with the drawer pulls, a metal twig shape bought at blue! I'm debating whether or not I want to paint them with some brown paint and distress them a little bit, but not sure if it would just end up looking hokey since they are obviously not real twigs.
It took me several hours to build these, mostly because I had to kind of work out a few details as I went, but I'm confident I could do it quicker if I had to do it again. The finishing is what takes the longest!
Built from Plan(s)
Estimated Cost
$110 includes enough Select Pine, kreg jig screws, and drawer pulls to make two nightstands
Estimated Time Investment
Day Project (6-9 Hours)
Finish Used
Two coats of Cabot stain, Pecan color. Three coats of satin polyurethane, with a light sanding between each coat.
Recommended Skill Level
Intermediate

Modified King Farmhouse Bed - Taller headboard.

Submitted by Ijc2000 on Thu, 12/28/2017 - 10:09

Modified the standard farmhouse king plan a bit. Made the headboard 4" taller and utilized 1x4's and 1x3's to fill in the headboard instead of 1x8's. I used 2x8 from front to back for the runners and horizonal 2x6's just under the lip of the 2x8 for the matress to sit on. It turned out great and we get lots of compliments. 

Estimated Cost
$350
Estimated Time Investment
Weekend Project (10-20 Hours)
Finish Used
Picture included. Used the whitewash before using the restoration hardware technique.
Recommended Skill Level
Intermediate

Bottle Cap Tray

Submitted by Jann Antos on Wed, 07/03/2013 - 18:29

How to build a Bottle Cap Tray AND what NOT to do.

These Bottle Cap Trays are sold for 45+ Bucks online. I spend maybe 15$ on it.

You need a lot of Friends drinking a lot of different Beers... For this tray i needed 88 Caps. I also asked Bartenders and Co-Workers to collect Caps. As more colorfull you get as better. Twist off Caps are the best behause they do not have dents.

I bought the Tray at Hobby Lobby for 3.99$ (you can also build one from a Plan from this Side) and after sanding with 220Grid i stained it to fit my Home Bar. After lay out the "Design" i removed them all and lay them in the back of the now empty tray.

2 Ways to glue the Caps to the Board:

1. Hot Glue (be carefull the Caps get very Hot)
2. I poured just a small amount of the Epoxy in there and pushed the Caps into the Ressin...

How to mix Ressin...

Read the Manuall!!! The first 2 Trays i poured to much and then it gets very very hot and ruin everything (see second last Picture). 2nd Glue the board to the Walls, if the Ressin runs out of the Tablet it is also a great mess!

I Used 2 small cups messured it and Mixed it in the Red Solo Cup...

Put the Tablet on an even surface (protect it) and pour a small amount into the tray... Level it and then put the Caps in there and use a torch to get rid of the Air Bubbles. I needed 3 layers to Cover all Caps. Keep it Dustfree during curing - very important .

I let it cure for 12 Hours bevor the next layer was applied. Total Curie after 72 Hours...

Sorry for Bad English - i am German...

Hope that helps to build your own Bottle Cap Tray...

And made it as colorfull as possible. I aranged them to face One Side but you also can turn them happy around.

Thanks for comments and Reading

Jann

Estimated Cost
15$
Estimated Time Investment
Weekend Project (10-20 Hours)
Finish Used
Minwax Espresso Stain
Polyurethane
Shellac
Recommended Skill Level
Starter Project

Not the Full Miter table design

Submitted by Hjmoore420 on Wed, 01/05/2022 - 12:50

while this is a great design I only needed the extra storage and work space so I just made one of the storage roll away from this plan. I had to alter slightly making them a bit smaller as the space I was making this to occupy had a width of 44 inches but it is an amazing amount of space provided. I will put a clear coat on but sanded, edged and its wokring great. the clearance all around is about .5 inch t fits in beautifully and decluttered my overly cluttered workspace. thanks so much for your Ideas Ana, they are always amazing.

Comments

Bedside End Tables

Submitted by Grace734 on Mon, 02/05/2018 - 07:38

These are made from the three drawer plans but modified the size to meet our needs and used planks for shelves instead of drawers. Painted white and black gel stain. 


UPDATE FROM ANA - We have received MANY requests for this plan and have created a plan inspired by this post here.

Shopping List (for ONE bedside table) + Tools

  • 1 - 1x2 @ 6 feet long
  • 5 - 1x4 @ 8 feet long
  • 2 - 2x2 @ 8 feet long
  • 1-1/4" and 2-1/2" pocket hole screws
  • 1-1/4" brad nails
  • wood glue
  • Kreg Jig
  • Compound Miter saw
  • Drill
  • Brad Nailer (18 guage)

Cut List (for ONE bedside table)

  • 4 - 1x2 @ 14" - Side panel trim
  • 8 - 1x4 @ 23-1/4" - Side panels
  • 4 - 2x2 @ 27-1/4" - Legs
  • 6 - 2x2 @ 14" - Shelf support
  • 8 - 1x4 @ 17" - Shelves
  • 5 - 1x4 @ 18" - Top

Cut 1x4s and 1x2s with miter saw. Layout side panel 1x4s as shown above.  Measure and cut 1x2 to length.  Nail the 1x2 to the 1x4s, two nails per overlap with glue.  Make sure your side panels are square.  Build two.

Drill 3/4" pocket holes on inside edge of 1x4 ends as shown above.  Cut 2x2s with compound miter saw. Attach to the 2x2 legs with 1-1/4" pocket hole screws.

Set Kreg Jig to 1-1/2" setting.  Drill 1-1/2" pocket holes on end of each 2x2, one per end.  Attach to 2x2s with wood glue as shown above.

Cut 1x4 shelf boards with compound miter saw.  Nail and glue to the inside of the project as shown above.

Cut 1x4 top boards with compound miter saw.  Nail and glue to top with 1-1/4" nails and wood glue.

If you wish to add a back, measure and cut from 1/4" plywood and attach with 3/4" brad nails.

Estimated Cost
100.00 for both.
Estimated Time Investment
Weekend Project (10-20 Hours)
Finish Used
One coat of eggshell white PPG
Two coats of ebony gel stain
Recommended Skill Level
Beginner

Comments

Whiskey/ Wine Bar

Submitted by Dan Dodd on Fri, 03/18/2022 - 13:43

Whiskey on the left, Wine rack & glass holders on the right with storage in the middle. Frame built mostly with Pine, painted with Peppercorn Grey. Cherry tabletop with live edge. Finished with boiled linseed oil and semi-gloss polyurethane. A whiskey Bar should be fun! Stick on lights in each bay battery powered, comes with remote with many color options.

Built from Plan(s)

Comments

Ana White Admin

Fri, 03/18/2022 - 17:41

It looks great and serves it purpose, love the added lights for fun! Thanks for sharing:)

Outdoor Sofa

Submitted by dionneds on Sun, 04/10/2022 - 07:16

This was our first big project with our Kreg Jig. We adapted the plans to make the sofa 8' long. On Friday night, my husband did all the cuts and I pre-painted everything. With the help of our son, we had the whole sofa built in a few hours on Saturday morning. I puttied the visible holes, did a second coat of paint, and made custom cushions. The plans were very easy to follow. I followed the others' advice about pre-painting and assembling the back on a perfectly level surface. It came out better than I expected and it's super comfortable!

Built from Plan(s)

Comments

kdykes08

Mon, 04/11/2022 - 07:44

I want the plans for this one! I like this style a lot better. I really like how the bottom cushions are at a slant. I suck at modifying plans.

Seasonal And Holiday

Using Ana White’s Garage Cabinet Plans

Submitted by Anonymous (not verified) on Wed, 04/20/2022 - 09:23

Thank you so much for the two videos we watched of you and your husband explaining and demonstrating how to build garage shelves. We used your plans as a guide. We chose to add shaker style doors to create cabinet shelves. We absolutely love them. We are not handy as you can see we had a living room lamp for a work light and a lifetime table as a work bench. Thank you!
The Paulsons

Comments

Storage Bin

I love this storage bin from plans at morelikehome.net, and it was easy to build, too! It's nice and big, about 21"W x 21"D x 18"H. I selected 3-6 hours as the time spent, but to say closer to six would be about right. I need a large work surface in my sewing room (I'll be building the storage table as well),and a place to store my "stuff".This should be a pretty good start!

Estimated Cost
About $20
Estimated Time Investment
Afternoon Project (3-6 Hours)
Finish Used
Two coats of Early American by Minwax, and one of Varathane's Diamond Finish topcoat, all applied with a rag.
Recommended Skill Level
Beginner

Coffee Mug Rack

Submitted by KSOlene01 on Sun, 04/24/2022 - 09:52

We had too many disorganized coffee mugs and needed a better storage solution. I took a couple of old cassette (remember those?) storage crates, did a chevron style back from old pallet wood, added shelves from the former dividers, and added a lot of clear coat. It functions well for us and was completely upcycled materials.

by Kevin

Library Book Cart!

Submitted by vpihoney on Mon, 06/27/2011 - 07:14

I built the library book cart to organize all my toddler and preschooler's books. What we were using just wasn't cutting it; the books end up being scattered everywhere. I love the idea of a pretend library cart (I used to work in one...), and the kids can feel like they have the library in their room! They're playing "library" as I type!

This was an easy build. I used 1 1/4" screws for the 2-in castor wheels for 3 out of 4 screws per castor where I had enough depth. I also used wood glue. For the 4th screw per castor, I used 1/2" screws. This was mainly due to being all I had on hand...not sure if it was correct. We'll see if the wheels hold up with the weight of all the books! Other than those changes, I followed Ana's plans.

Oh, and I managed to create handles without really knowing what I was doing! They turned out OK. I tried two different methods for each handle, but basically used a drill, chisel, and jigsaw and then sanded, sanded, sanded after I made the cut. I think I can do better next time!

Built from Plan(s)
Estimated Cost
30
Estimated Time Investment
Afternoon Project (3-6 Hours)
Finish Used
I used a spray primer in white and then painted a leftover semi-gloss finish in an eggshell color using a roller and paint brush.
Recommended Skill Level
Starter Project

Comments

tonjacoy101

Mon, 06/27/2011 - 09:13

Your library cart looks great! Good Job. My daughter loves playing with hers too, and the best part is how easy they are to put away :)

Laundry bins

Submitted by wy2ak on Mon, 05/07/2018 - 19:57

This was a build from a picture and made to fit into a space we have in the laundry room. Used the Kreg jig for much of it. 

Estimated Time Investment
Week Long Project (20 Hours or More)
Finish Used
Will be painted and distressed
Recommended Skill Level
Intermediate

Comments

DIY Modern Box Joint Dining Table

Hi friends!

Jen Woodhouse from The House of Wood here. 

After sharing my new dining room, I got a lot of requests for plans for my dining table, so I’m thrilled to finally deliver. The box joints on the legs add just the right amount of detail to this dining table, don’t you think?

Be sure to tag me @jenwoodhouse if you share photos of your build on social media. I'd love to see it!

You can get all the details for this build on my website jenwoodhouse.com 

Estimated Time Investment
Afternoon Project (3-6 Hours)
Recommended Skill Level
Intermediate

Rustic Farmhouse Table

Using Ana White's Rustic Table plans, I recreated her design by modifying the measurements to fit my dining space. I did not use wood glue, as the plans call for, and simply left the wood screws visible which I felt added a rustic touch. The top is stained with Minwax Special Walnut #224, and the bottom is painted Simply White by Benjamin Moore. The table measures 72"x42" and is 30" high. It can comfortably seat six chairs.

Built from Plan(s)
Estimated Time Investment
Afternoon Project (3-6 Hours)
Finish Used
Minwax Special Walnut #224
Polycrylic
Benjamin Moore Simply White
Recommended Skill Level
Beginner

Comments

snomii

Sat, 09/07/2013 - 12:22

I love your choice of colour! It's the perfect backdrop to a nice dinner full of colour! I'm getting inspired to try this now!

Wood Crate Coffee Table

Submitted by TMW on Thu, 10/08/2015 - 06:44

A buddy of mine showed me a picture of a coffee table his wife wanted that he found online. It appeared to be several crates attached together. I came up with this design. I added a base to raise it off the floor a few inches to make cleaning around it easier. Was made using all scrap. It was a very easy project and took about 2hrs. This picture was taken before any finish was applied.

Estimated Cost
$25
Estimated Time Investment
An Hour or Two (0-2 Hours)
Recommended Skill Level
Beginner

Comments

Audrey Wright

Thu, 10/22/2015 - 05:06

I glanced at the picture for two minutes straight, wondering how the heck you designed this layout, before I realised it was premade crates.. Silly me.. Great job !

Double Loft Bed

I saw the idea for this bed on Pinterest originally. It linked to a blog that had the step by step plan (http://www.thehandmadehome.net/2011/08/how-to-build-a-loft/). However, I would have never even approached the idea or project without a few of Ana's plans under my belt first. I have gained so much confidence in my building on this site, and will always be a HUGE fan here :) Thank you Ana for all the fantastic plans you continue to share!

I still want to finish out and make the under bed area more fun and creative with curtains and such, but we LOVE having the full floor in the room for our play area. My boys absolutely love their bed!!

Estimated Cost
Less than $150 (a little higher than usual because of where I live)
Estimated Time Investment
Afternoon Project (3-6 Hours)
Finish Used
The hardest part about this project was lifting the bed platform up onto the legs in order to secure them in place. We built it with very little room to spare against the wall, and it made it very tricky to get up into place with some of the window frames and such. Be sure to have friendly neighbors or friends helping out when you get to that part, and lift with your legs...not your back ;)
Recommended Skill Level
Intermediate

Comments

sgilly

Wed, 10/02/2013 - 13:07

I'll bet the boys are thrilled with this. It's great to have that extra play room!
I am curious, though, how the center of the loft bed is supported.

In reply to by sgilly

exuma_momma

Wed, 10/02/2013 - 18:38

Hey Sue, I went and found the old link to the plans for this and added it to the brag post. Or here it is also: http://www.thehandmadehome.net/2011/08/how-to-build-a-loft/ Underneath is a bunch of 2x4's spaced to support the platform, but the big 2x8's are the main strength. They are monsters! We've had a bunch of kids and adults up there for story time, and never once has it felt unstable or wobbly. Hopefully the link will help. It has way more photos that I have here.

bhoppy

Thu, 10/03/2013 - 16:24

Reminds me of the bed my dad made for my sis and I when we were little:-) SO sweet!

Ramholmes

Thu, 07/28/2016 - 15:47

I am going to attempt to make this bed in a couple of weeks for my daughters. The handmade home directions only show the rope ladder. We want to make the ladder similar to your pictures above. Could you tell me how you made yours please and thank you?

Modern Farmhouse railing on a deck

Submitted by Anonymous (not verified) on Fri, 01/13/2023 - 09:07

Inspired by the modern farmhouse railing we decided to install the same style on our deck. Our old railing was aged an deteriorated. The project took about two weekends, one to treat the metal with black magic, another to build the actual railing. We love how it looks!

Comments